If you love that crisp, colorful look of flat clay beads (heishi discs), bracelets are the quickest way to turn a handful of discs into instant style. Here are my go-to flat clay bead bracelet ideas—from classic stacks to a few studio-favorite twists that still feel totally wearable.
Classic Rainbow Order Stack

Capture the warm, glowing hues of twilight with this sophisticated flat bead bracelet. By blending deep purples into fiery reds with subtle metallic accents, you create a seamless gradient that feels both modern and timeless.
Step-by-Step
Materials
- Polymer clay heishi beads (flat disc beads) in the following colors: deep purple, violet, magenta, berry pink, bright red
- Flat gold or brass spacer beads (disc shape, similar size to clay beads)
- Strong elastic bead cord (0.8mm recommended)
- Super glue or jewelry cement
- Scissors
- Bead stopper or simply a piece of tape
- Beading needle (optional, for easier threading)
Step 1: Preparation & Planning
-
Measure your wrist:
Wrap a flexible measuring tape around your wrist to find your exact size. Add about half an inch to this measurement to ensure a comfortable fit that isn’t too tight. -
Cut the cord:
Cut a piece of elastic cord about 10-12 inches long. Having this extra length makes tying the final knot much easier than struggling with short ends. -
Secure the end:
Place a bead stopper on one end of your cord, or fold a piece of tape over the end, to prevent your beads from sliding off while you work. I always double-check this hold before starting my pattern. -
Sort your gradient:
Lay out your bead colors in order on your workspace: Deep Purple > Violet > Berry Pink > Magenta > Bright Red. Visualizing the transition before threading helps ensure a smooth fade.
Seamless Transitions
To make the color fade even smoother, mix the beads at the transition points. Alternate 1 old color / 1 new color for a few beads before switching completely.
Step 2: Creating the Ombré Pattern
-
Start with purple:
Begin threading your deep purple beads. Add approximately 5-6 beads to start the darkest section of your gradient. -
Add a gold accent:
Slide on one gold spacer bead. These muted metallic accents break up the color blocks and add a touch of elegance. -
Transition to violet:
Thread on about 5-6 beads of the next shade lighter—your violet or lighter purple tone. -
Repeat the gold spacer:
Add another gold spacer bead. Try to keep the number of colored beads between spacers consistent for a uniform look, or vary them slightly for an organic feel. -
Move to pinks:
Switch to your berry pink beads. Thread a segment of these, followed by a gold spacer. -
Brighten with magenta:
Continue the pattern with your magenta beads. You’ll see the bracelet starting to ‘warm up’ as you move through the colors. -
Finish with red:
Add your bright red segment, capped with a gold spacer. This completes one full run of your gradient. -
Mirror or repeat:
At this point, you can either reverse the order to go back to purple (Red > Pink > Purple) or start over with purple for a repeating linear gradient. The example shows blocks of color, so continue adding sections until the bracelet reaches your desired length.
Step 3: Finishing Touches
-
Check the fit:
Wrap the beaded cord around your wrist to check the size. There should be no gaps, and it should sit comfortably without digging in. -
Pre-stretch the elastic:
Gently pull on both ends of the cord to stretch the elastic slightly. This pre-stretching prevents the bracelet from loosening up securely after you wear it the first time. -
Tie the knot:
Remove the tape or bead stopper. Tie a surgeon’s knot (right over left, left over right and loop through twice) to secure the bracelet. -
Secure with glue:
Apply a tiny dab of jewelry cement or super glue directly onto the knot. Let it dry completely before moving to the next step to ensure it doesn’t slip. -
Hide the knot:
Trim the excess elastic cord close to the knot. If possible, gently tug the knot so it slides inside one of the adjacent beads to hide it from view.
Add a Focal Point
Create a distinct center by stringing a single larger gold bead or a charm in the middle of the red section to anchor the gradient design.
Slip on your new creation and enjoy the warmth of those colors against your wrist

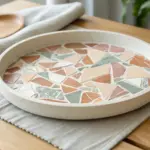


Happy Confetti Mix Bracelet
Bring a splash of joy to your wrist with this vibrant, multi-colored accessory that embraces a playful, carefree aesthetic. This project combines flat Heishi beads in a seemingly random yet balanced pattern, evoking the feeling of a festive confetti toss captured in jewelry form.
Step-by-Step Guide
Materials
- 6mm flat polymer clay Heishi beads (assorted colors: bright pink, turquoise, yellow, white, beige, light brown, purple)
- Small gold spacer beads (optional)
- Elastic beading cord (0.8mm clear)
- Gold-plated lobster clasp
- Gold-plated jump ring
- Gold knot covers or crimp beads
- Jewelry pliers (flat nose)
- Scissors
- Bead design board or masking tape
Step 1: Preparation and Planning
-
Measure your wrist:
Using a soft measuring tape, wrap it loosely around your wrist to find your size. Add about 1/2 inch to this measurement to ensure the bracelet fits comfortably without pinching. -
Cut the cord:
Cut a piece of elastic cord roughly 10-12 inches long. Is gives you plenty of extra room for tying knots later without struggling with short ends. -
Secure the end:
Place a piece of masking tape over one end of the cord or attach a bead stopper. This prevents your colorful beads from sliding right off while you work. -
Organize your palette:
Pour small piles of your different colored beads onto your workspace. Having them visibly separated makes it easier to ‘randomly’ pick colors without accidentally creating unintentional stripes.
Step 2: Stringing the Pattern
-
Start the sequence:
Begin threading your beads onto the elastic. Aim for a mix of 3-5 vivid colors followed by 2-3 neutral tones (like the beige or light brown shown in the photo) to ground the design. -
Create small color blocks:
Unlike a strict pattern, try grouping 2 to 3 beads of the exact same color together occasionally. For example, add three bright pinks, then a single white, then two blues. -
Incorporate neutrals:
Check the photo reference notice how the taupe and light brown beads break up the brightness. Insert these neutral sections every inch or so to keep the design from looking too chaotic. -
Maintain variety:
As you string, rotate through your entire color palette. If you just placed a yellow bead, reach for a purple or teal one next to maximize contrast. -
Check the length:
Periodically wrap the strung beads around your wrist to check the fit. Stop adding beads when the beaded section matches your wrist measurement minus the length of your clasp. -
Add gold accents:
If you wish to add a touch of shimmer, you can slip in a tiny gold spacer bead or washer bead between the color changes, though the reference image keeps it purely clay for a matte look.
Randomness Rule
To make a ‘random’ pattern look professional, avoid repeating the same color sequence twice. If you have a blue-pink-yellow section, follow it with white-orange-purple next.
Step 3: Finishing Touches
-
Prepare for closure:
Thread your jump ring onto one end of the cord and the lobster clasp onto the other end. Alternatively, thread both cord ends through the clasp loop if tying directly. -
Tie the knot:
Remove the tape and bring the ends together. Tie a surgeon’s knot: cross right over left, wrap it twice, pull tight, then cross left over right and pull tight again. -
Secure the knot:
I like to add a tiny dab of jewelry glue or clear nail polish to the knot for extra security. Let it dry for a minute before proceeding. -
Hide the knot:
If possible, gently tug the elastic so the knot slides inside the hole of the adjacent bead or inside a knot cover if you chose to use one. -
Trim the excess:
Using your scissors, carefully trim the excess elastic cord close to the knot, being extremely careful not to snip the main cord holding the bracelet together. -
Final stretch test:
Give the bracelet a gentle tug in all directions to ensure the knot holds and the beads settle comfortably into place.
Loose Elastic?
Pre-stretch your elastic cord before stringing anything! pull tightly on the cord a few times to stretch it out. This prevents the bracelet from sagging after you wear it.
Slide on your new confetti bracelet and enjoy the pop of color it brings to your day


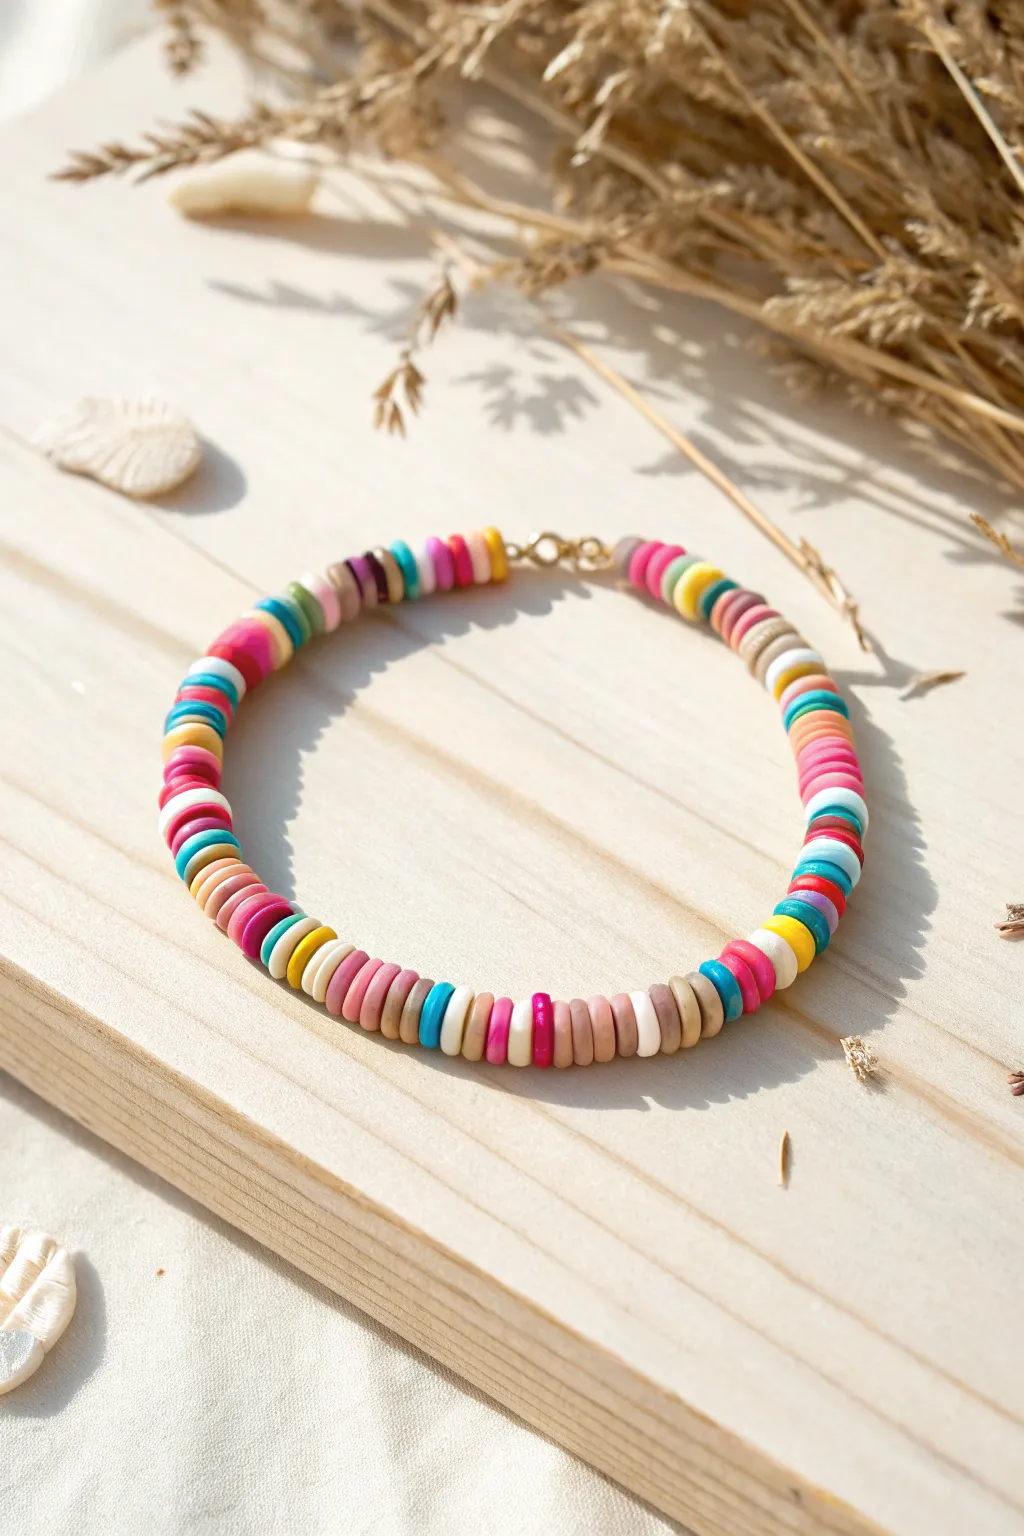
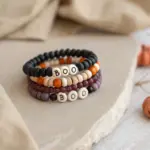
All-Black With Metallic Pops
Elevate the classic flat clay bead bracelet trend with this sophisticated all-black version featuring luxurious metallic accents. The matte finish of the black discs contrasts beautifully with the shine of gold and silver spacer beads, creating a stack that feels both casual and dressy.
Step-by-Step Tutorial
Materials
- Matte black polymer clay heishi beads (6mm)
- Gold faceted rondelle spacer beads (4-6mm)
- Gold textured/ribbed tube beads or spacer beads (6mm)
- Silver or platinum metallic ball bead (6mm)
- Strong elastic bead cord (0.7mm or 0.8mm)
- Jewelry glue (e.g., G-S Hypo Cement)
- Scissors
Step 1: Preparation
-
Measure your wrist:
Wrap a piece of string around your wrist to find your size, then add about half an inch for a comfortable fit. Cut two lengths of elastic cord comfortably longer than this measurement to ensure you have plenty of room for tying knots later. -
Pre-stretch the cord:
Hold a piece of elastic cord firmly in both hands and give it several gentle tugs. This pre-stretching step helps prevent the bracelet from sagging or loosening immediately after you wear it. -
Secure the end:
Place a piece of tape on one end of your first cord or attach a binder clip. This acts as a stopper so your beads don’t slide right off while you are working.
Knot Hiding Trick
If the knot won’t fit inside a flat clay bead, try to plan your design so the knot lands next to a metallic bead, which usually has a larger hole to hide inside.
Step 2: Beading the First Bracelet (Gold Accents)
-
Start the base:
Begin threading the matte black heishi beads onto the elastic. Thread about 1.5 to 2 inches of solid black beads to start. -
Add first gold accent:
Slide on one gold completely smooth or slightly faceted rondelle bead. This breaks up the matte texture. -
Continue the pattern:
Add another section of black clay beads, roughly equal in length to the first section. -
Add textured accent:
Now, add a textured gold spacer bead. In the example, this looks like a ribbed or multi-grooved metallic bead that catches the light differently than the first one. -
Finish the strand:
Continue adding sections of black clay beads, occasionally interspersing another gold accent until the strand reaches your desired length.
Step 3: Beading the Second Bracelet (Mixed Metal)
-
Start the second strand:
Secure your second piece of elastic and begin threading black heishi beads, aiming for a similar length section as your first bracelet. -
Add mixed metal accents:
For this bracelet, you’ll mix metals. Thread on a silver or platinum-toned ball bead as your first focal point. -
Create spacing:
Add a long segment of black beads. I usually like to make the spacing between metallic accents irregular for an organic, curated look. -
Add large gold accent:
Thread on a larger gold textured bead, perhaps one with horizontal ridges or a barrel shape. -
Fill in the rest:
Complete the strand with the remaining black clay beads until it matches the length of the first bracelet.
Gap Prevention
If you see gaps between beads when wearing it, the knot wasn’t tied tight enough. Compress the beads tightly together before making that final knot.
Step 4: Finishing Touches
-
Test the fit:
Wrap the unfinished strands around your wrist to check the size. They should sit comfortably without pinching skin or sliding over your hand too easily. -
Tie the surgeon’s knot:
Remove the tape or clip. Cross the two ends of the elastic, loop one under, and pull tight. Cross them again, but this time loop the end through the circle twice before pulling tight. -
Secure with glue:
Apply a tiny dot of jewelry glue directly onto the knot. This is crucial for longevity with stretchy bracelets. -
Hide the knot:
While the glue is still slightly tacky, try to slide the knot inside the hole of a neighboring bead if possible. -
Trim excess cord:
Once the glue is fully dried, trim the excess elastic tails close to the bead, being careful not to cut the main knot.
Stack these two beauties together or mix them with your favorite gold watch for an effortlessly chic look


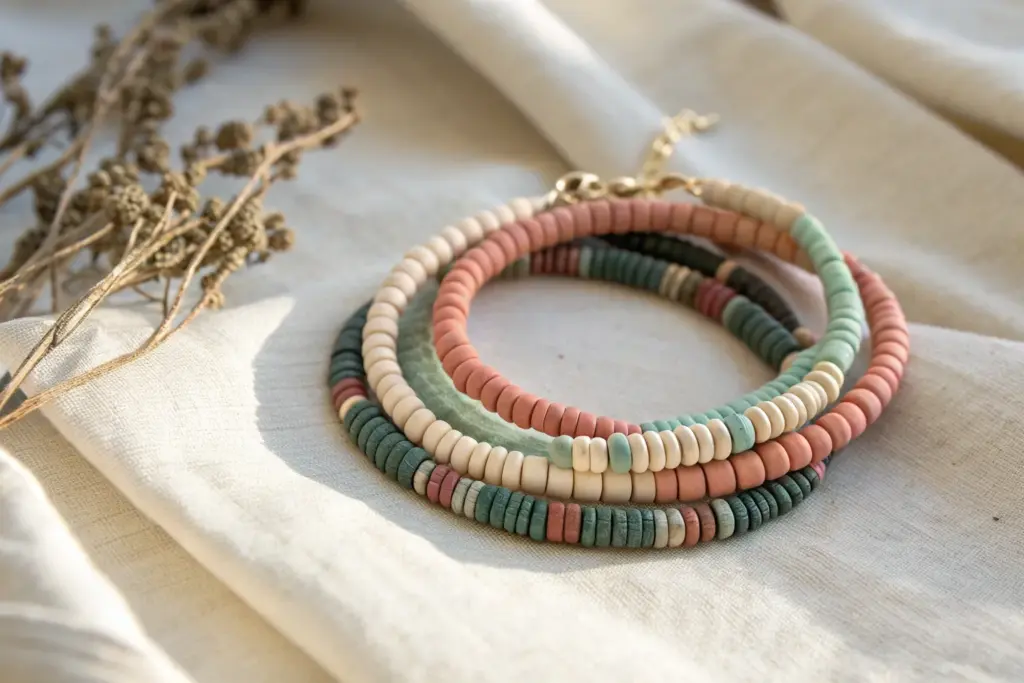
Sunset Sorbet Gradient
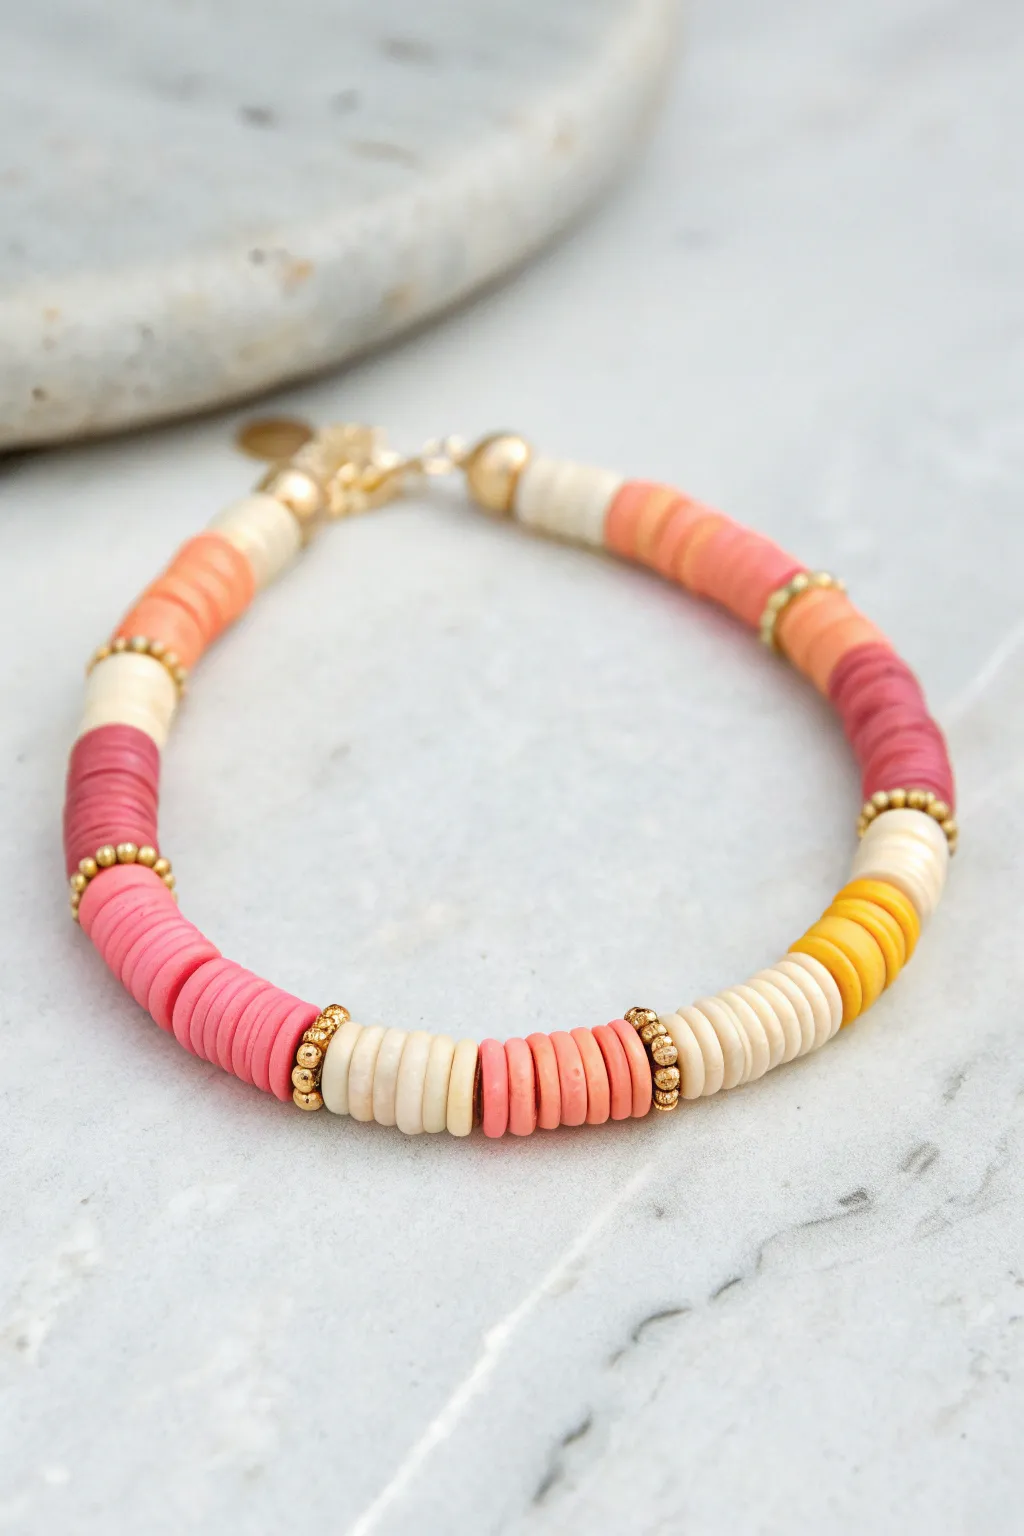
Capture the warmth of a summer evening with this stunning gradient bracelet featuring flat clay heishi beads. The mix of coral, pink, cream, and mustard yellow tones, punctuated by gold accents, creates a polished accessory perfect for stacking or wearing solo.
Step-by-Step Tutorial
Materials
- Polymer clay heishi beads (flat disc beads) in: cream/off-white, light coral/salmon, hot pink/magenta, pastel pink, and mustard yellow
- Gold tone metallic spacer beads (textured or smooth rondelles)
- Gold crimp beads (2mm)
- Gold jump rings (4mm or 5mm)
- Gold lobster clasp
- Gold wire guards (optional but recommended for durability)
- Beading wire (flexible, 0.38mm or 0.45mm thick)
- Wire cutters
- Flat nose pliers
- Measurement tape or ruler
Step 1: Planning and Preparation
-
Measure your wrist:
Before cutting any wire, measure your wrist circumference with a flexible tape measure. Add about 0.5 to 1 inch to this measurement depending on how loose you want the fit to be. -
Cut the wire:
Cut a piece of beading wire that is at least 3-4 inches longer than your final desired bracelet length to give yourself plenty of room to work with the clasp. -
Sort your palette:
Lay out your bead colors. For this specific ‘Sunset Sorbet’ look, you will need sections of cream, light coral, mustard yellow, hot pink, and a softer bubblegum pink.
Uneven gaps?
If your bracelet is stiff or kinks, you pulled the wire too tight before crimping. Leave a tiny bit of slack (1mm) so beads can rotate comfortably.
Step 2: Starting the Clasp
-
Secure the first end:
Thread a crimp bead onto one end of the beading wire, followed by a wire guard. If you aren’t using a guard, just loop the wire back through. -
Attach the jump ring:
Loop the wire through the guard and hook a jump ring onto it. Thread the tail end of the wire back down through the crimp bead. -
Crimp properly:
Use your flat nose pliers to squeeze the crimp bead tight, securing the wire. Give it a gentle tug to ensure it holds firm. -
Cover the tail:
Leave a small tail of wire (about 1 inch) to tuck into the first few beads as you string them.
Level Up: Texture
Mix materials by swapping one color block (like the cream) with real shell or pearl beads for an elevated, beachy texture contrast.
Step 3: Stringing the Pattern
-
Start with cream and coral:
Begin by stringing a small brass bead (3-4mm) near the clasp. Follow this with a section of cream heishi beads (approx. 8-10 beads) and then a section of light coral beads. -
Add a gold accent:
Slide on a textured gold spacer bead. These gold accents serve as dividers between your major color blocks. -
Introduce the pinks:
String a section of cream beads (approx. 8), followed by a block of hot pink/magenta beads. This high-contrast section adds the ‘sunset’ depth. -
The gradient transition:
Add another gold spacer. Follow this with a block of bubblegum pink beads, then the light coral color again. -
Mustard yellow pop:
After the next gold spacer, create a smaller visual pop. Use cream beads again, followed by a short stack of mustard yellow beads (about 5-6 beads). -
Repeat the pattern:
Continue this alternating block pattern—Cream/Color/Gold Spacer—until you reach your desired length. Try to keep the cream sections consistent in size while varying the colored sections slightly for an organic feel. -
Check the fit:
Wrap the unfinished strand around your wrist to check the size. Remember the clasp will add a tiny bit of length.
Step 4: Finishing the Bracelet
-
Thread the final crimp:
Once you are happy with the length, thread a crimp bead onto the end of the wire, followed by a wire guard. -
Attach the clasp:
Loop the wire through the guard and attach the lobster clasp directly (or use a jump ring if preferred). Thread the wire back down through the crimp bead and into the last few heishi beads on your strand. -
Pull and secure:
Pull the wire taut so there are no gaps between the beads, but not so tight that the bracelet becomes stiff. It needs to remain flexible. -
Final crimp:
Flatten the crimp bead with your pliers to lock everything in place. -
Trim excess wire:
I prefer to use flush cutters to trim the excess wire tail as close to the beads as possible so it doesn’t scratch your skin.
Enjoy wearing your vibrant new accessory that brings a touch of golden hour to any outfit

The Complete Guide to Pottery Troubleshooting
Uncover the most common ceramic mistakes—from cracking clay to failed glazes—and learn how to fix them fast.
Smiley Face Pop Centerpiece
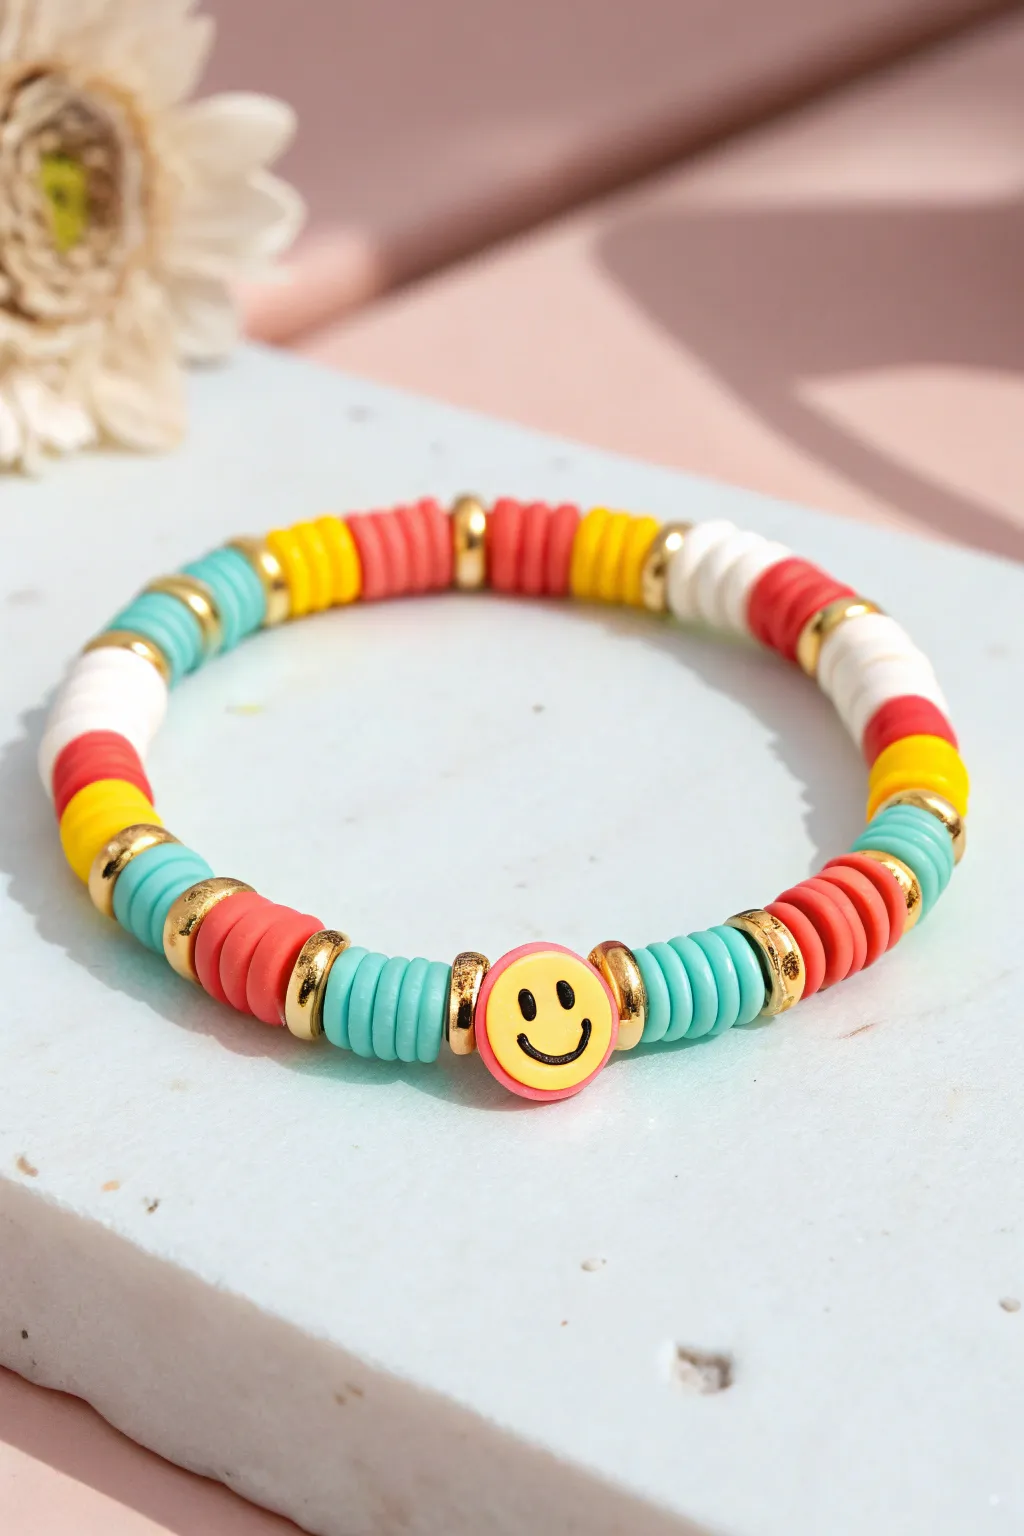
Bring a burst of positivity to your wrist with this vibrant Heishi bead bracelet featuring a classic yellow smiley face charm. The playful combination of teal, coral, yellow, and white clay discs creates a cheerful accessory perfect for stacking or wearing solo.
Step-by-Step Tutorial
Materials
- Teal/Turquoise flat clay (Heishi) beads (6mm)
- Coral/Red flat clay (Heishi) beads (6mm)
- Yellow flat clay (Heishi) beads (6mm)
- White flat clay (Heishi) beads (6mm)
- Small gold rondelle spacer beads (approx. 4-6mm)
- 1 Yellow smiley face bead (flat round disc style)
- Elastic stretch cord (0.8mm recommended)
- Scissors
- Super glue or jewelry cement (optional)
- Bead stopper or tape
Step 1: Preparation & Centerpiece
-
Measure your wrist:
Cut a piece of elastic cord about 10-12 inches long. This extra length makes tying the knot much easier at the end. -
Secure the end:
Place a bead stopper or a piece of tape on one end of your cord to prevent beads from sliding off while you design. -
Start the center:
Thread on the yellow smiley face bead first. Slide it to the middle of your cord length so you can build symmetrically outwards. -
Add gold accents:
Immediately flank the smiley face with one gold spacer bead on the left side and one on the right side. -
Begin the teal sections:
On the right side of the smiley face, thread on approximately 5-6 teal clay beads. -
Mirror the teal:
Repeat this on the left side, adding the same number of teal beads so the design stays balanced.
Sticky Situation?
If the knot keeps slipping while you try to glue it, ask a friend to hold a finger on the first loop of the knot while you tie the second part.
Step 2: Building the Pattern
-
Add spacers:
After the teal sections, add a single gold spacer bead to both the left and right sides. -
Coral section:
Add a block of coral red beads (about 5-6 beads) to the right side of your bracelet. -
Mirror the coral:
Do the same on the left side, adding your block of coral beads followed by a gold spacer. -
Introduce yellow:
Create the next color block using yellow clay beads. I usually stick to the same count 5-6 beads per section to keep it uniform. -
Finish with white and teal:
Continue the pattern (gold spacer, then color block) moving through white beads, then back to teal. -
Check the fit:
Wrap the strand around your wrist. If it meets comfortably without stretching, you have enough beads. If there’s a gap, continue the pattern until it fits snugly.
Glam It Up
Swap the plain gold spacers for rhinestone-encrusted rondelle beads to add serious sparkle to your smiley face design.
Step 3: Finishing Up
-
Pre-stretch the cord:
Before tying, give the elastic a few gentle tugs. This prevents the bracelet from loosening up permanently after the first time you wear it. -
The surgeon’s knot:
Cross the ends, loop one under twice, and pull tight. Make a second knot on top to secure it. -
Secure the knot:
Place a tiny drop of super glue or jewelry cement on the knot. Let it dry completely before trimming. -
Trim the ends:
Cut off the excess elastic cord close to the knot. If possible, gently tug the knot inside one of the adjacent clay beads to hide it.
Now you have a cheerful handmade accessory ready to brighten up any outfit
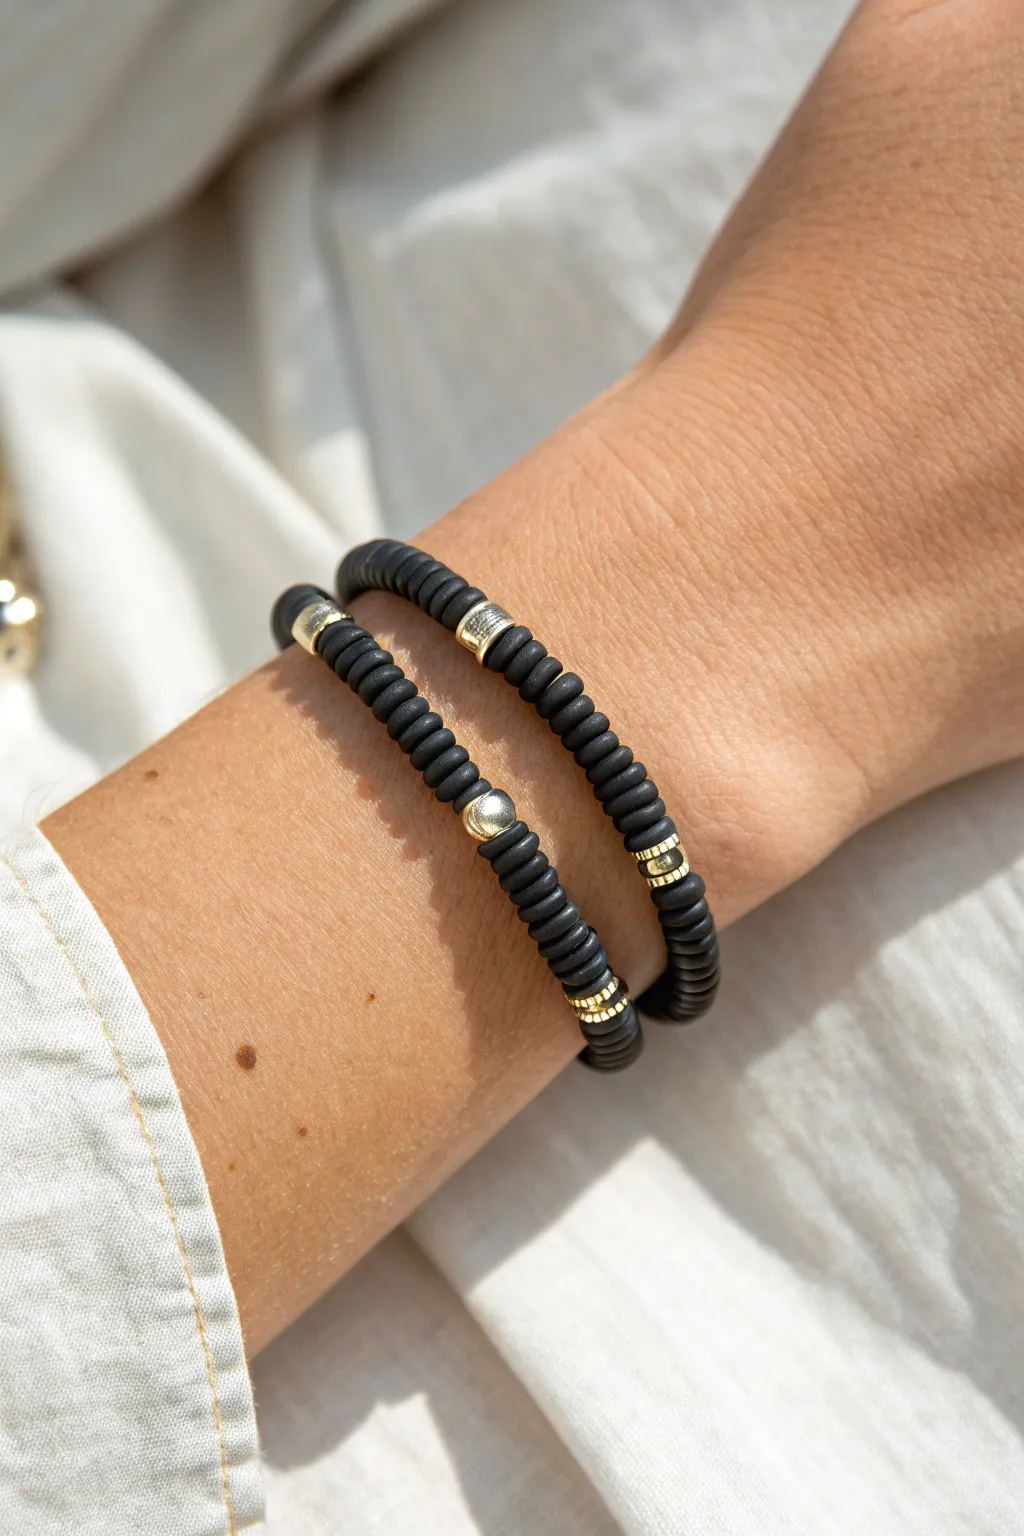
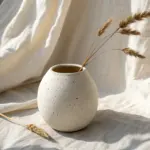
Beachy Shell and Sand Neutrals
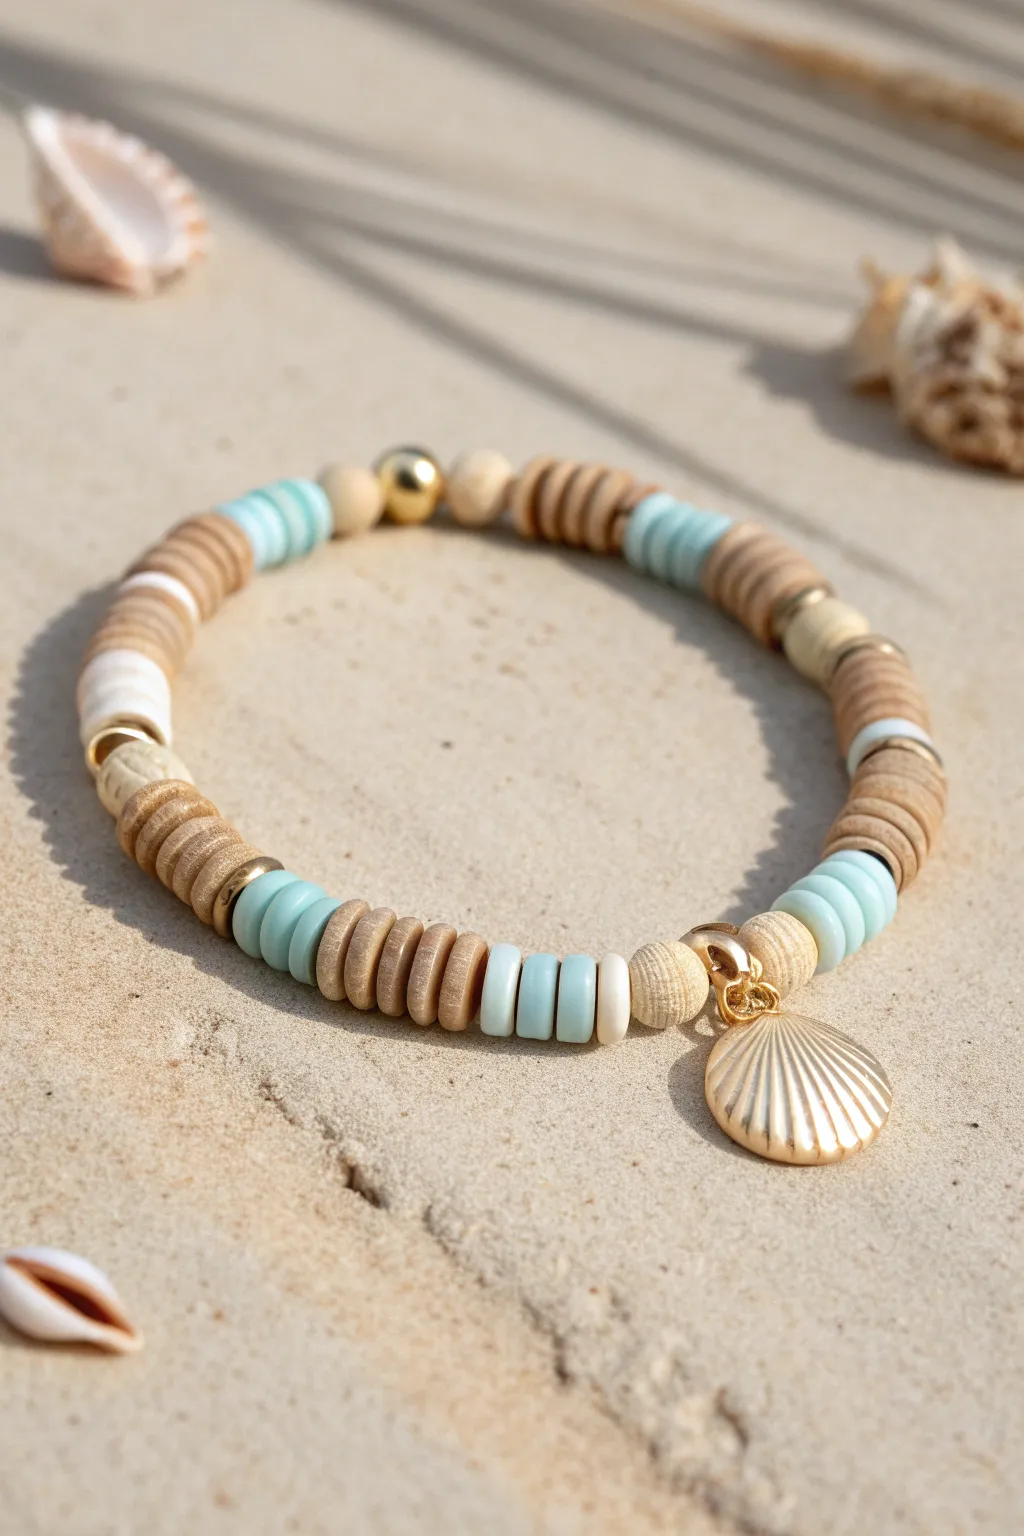
Capture the calm of the coastline with this beach-inspired bracelet, blending soft sand tones with splashes of oceanic blue. Featuring organic textures and a striking gold shell pendant, it’s a wearable piece of summer you can keep all year round.
Step-by-Step Guide
Materials
- Elastic stretch cord (0.8mm or 1mm)
- Beige/tan Heishi beads (flat clay or wood)
- Light blue/teal Heishi beads (flat clay)
- White or cream Heishi beads
- Gold tone metallic spacer beads (round)
- Gold tone metallic spacer discs (flat)
- Large wooden round beads (approx 6-8mm)
- Gold seashell charm
- Jump ring (gold tone)
- Jewelry glue or clear nail polish
- Scissors
Step 1: Preparation
-
Measure your wrist:
Wrap a piece of string around your wrist to find your comfortable size, then cut your elastic cord about 4-5 inches longer than that measurement to allow plenty of room for tying knots later. -
Pre-stretch the cord:
Give your elastic cord a few gentle tugs before you start beading. This pre-stretching helps prevent the bracelet from sagging or loosening up immediately after you finish making it. -
Attach the charm:
Open a jump ring using pliers (or your fingers if it’s soft enough) and slide on the gold seashell charm. Close the jump ring securely so it’s ready to be threaded onto the bracelet.
Step 2: Creating the Pattern
-
Start the center feature:
Begin threading by sliding on the jump ring holding your seashell charm. Follow this immediately with one large round wooden bead on the right side of the charm. -
Add contrast:
Next to the wooden bead, slide on one single white heishi bead to act as a bright highlight against the natural wood tone. -
Build the blue section:
Thread on three light blue heishi beads. I like to check that these sit flat against each other to create a solid block of color. -
Introduce wood textures:
Add a sequence of five beige/tan wooden-style disc beads. These should be rougher in texture than the blue clay beads for that driftwood feel. -
Insert a metallic accent:
Slide on a flat gold spacer disc here to break up the matte textures with a little shine. -
Repeat the sequence:
Continue the pattern: five beige wooden discs, followed by three blue heishi beads. This creates a rhythmic ‘wave and sand’ pattern. -
Transition segment:
After the next block of beige beads, add a round gold spacer bead instead of a flat disc for variety, followed by a single white heishi bead. -
Mirror the design:
Now, go back to the other side of your central charm (the left side) and repeat the exact same sequence in reverse order so the charm sits perfectly in the center of the design. -
Fill the length:
Continue adding alternating sections of beige wood discs and blue clay beads until the strand reaches your desired wrist length. Incorporate the occasional white bead or gold spacer to keep it interesting. -
Check the fit:
Wrap the unfinished strand around your wrist to ensure the ends meet comfortably without stretching the gaps between beads too much.
Knot Slipping?
If your elastic knot feels insecure, try tying a second knot on top of the surgeon’s knot. Pull all four strands (two tails, two bracelet sides) firmly to lock it.
Step 3: Finishing Touches
-
Prepare the knot:
Bring the two ends of the elastic cord together. Remove any extra slack so the beads are touching, but not so tight that the bracelet buckles. -
Tie the surgeon’s knot:
Make a standard overhand knot, but loop the end through the circle a second time before pulling tight. This extra loop adds significant friction to hold the elastic. -
Secure with glue:
Dab a tiny drop of jewelry glue or clear nail polish directly onto the knot. This is crucial for elastic bracelets to prevent them from unraveling over time. -
Hide the knot:
If one of your beads has a large enough hole (like the round wooden ones), gently tug the elastic so the knotted section slides inside the bead, hiding it from view. -
Trim the excess:
Once the glue is dry, use your scissors to snip off the excess elastic tail, getting as close to the knot (or the bead hiding it) as possible.
Make It a stack
Make two matching bracelets without the charm using all beige beads on one and all blue on the other. Wear them together for a chunky, layered beach look.
Slip on your new creation and enjoy the summery vibe right on your wrist


What Really Happens Inside the Kiln
Learn how time and temperature work together inside the kiln to transform clay into durable ceramic.
Pearl Alternating Elevation
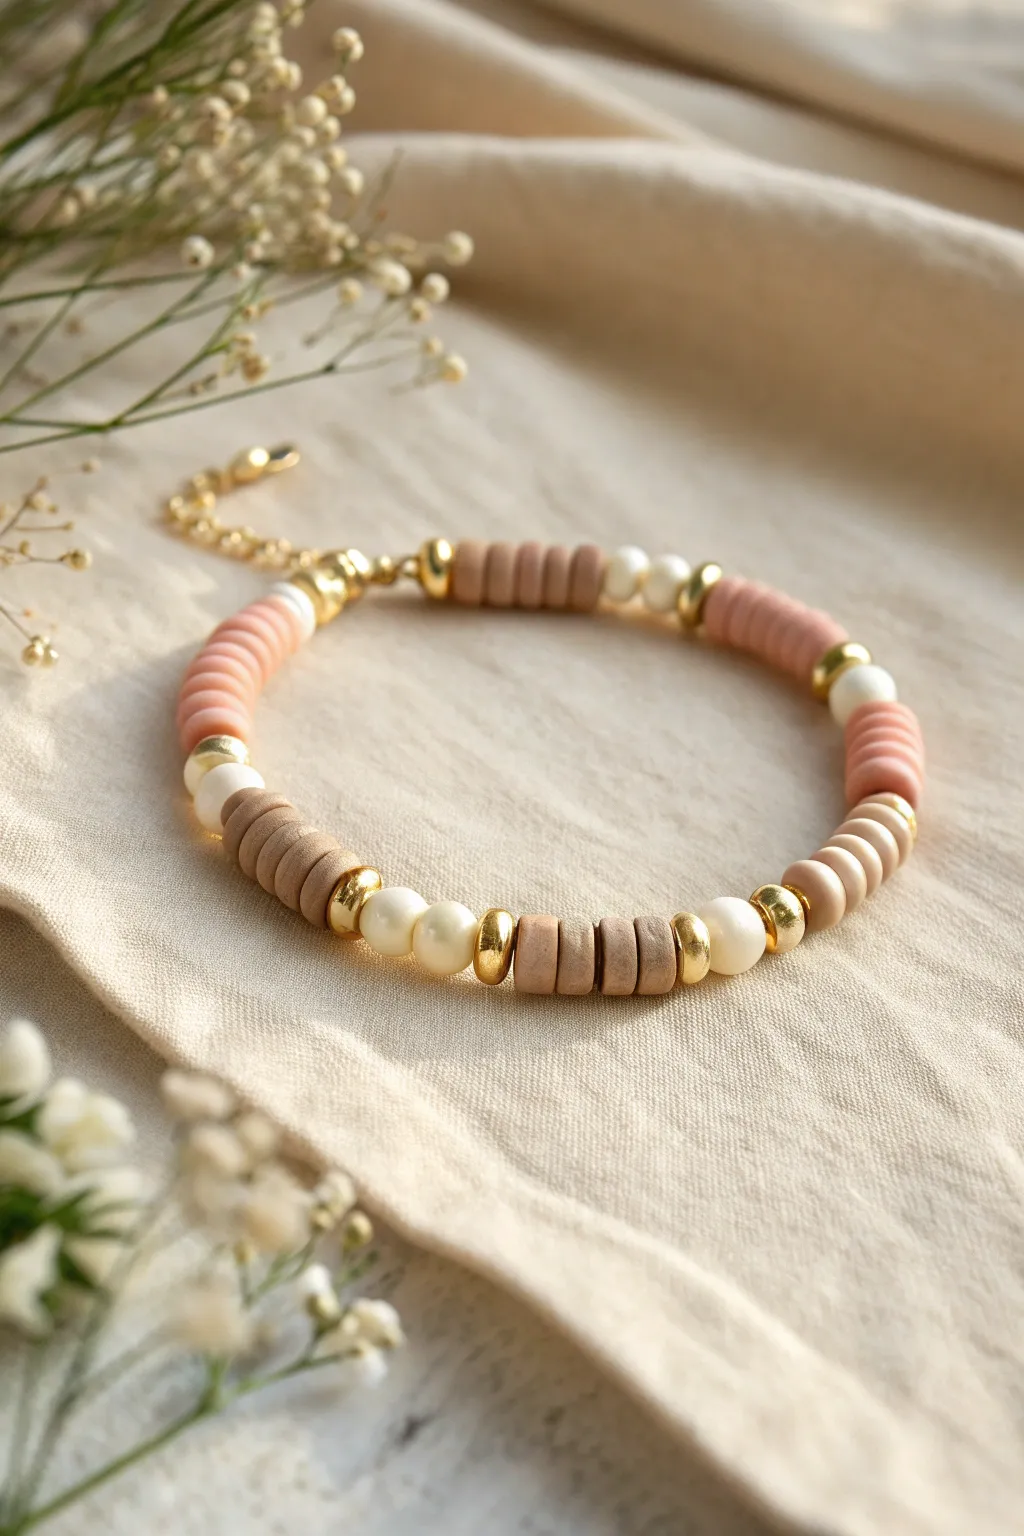
Elevate the casual charm of flat clay beads by introducing lustrous pearls and gleaming gold accents in this sophisticated design. The interplay of matte clay textures with the shine of metal and pearl creates a piece that feels both earthy and luxurious, perfect for stacking or wearing solo.
Step-by-Step
Materials
- Flat polymer clay beads (heishi beads) in muted rose pink
- Flat polymer clay beads (heishi beads) in beige or sand color
- Small faux pearl beads (approx. 4-6mm)
- Small gold disc spacer beads or nuggets
- Elastic beading cord (0.8mm recommended)
- Gold tone crimp covers or knot covers (optional)
- Gold tone jump rings and lobster clasp
- Scissors
- Jewelry glue or clear nail polish
- Beading needle (optional, for easier threading)
Step 1: Preparation
-
Measure your wrist:
Wrap a piece of string or a flexible measuring tape around your wrist to find your size. Add about half an inch to this measurement to ensure the bracelet isn’t too tight. -
Cut the cord:
Cut a length of elastic cord about 10-12 inches long. Having extra length makes it much easier to tie the final knot securely without fumbling. -
Pre-stretch the elastic:
Hold both ends of your cut elastic and give it a few gentle tugs. This pre-stretching prevents the bracelet from loosening up and sagging after you’ve worn it a few times. -
Secure the end:
Place a piece of tape over one end of the cord or attach a binder clip. This acts as a stopper so your beads don’t slide off while you work.
Knot Slipping?
If your elastic knot refuses to stay tight, try tying it while the cord is under tension. A second pair of hands helps, or clamp one end down while pulling.
Step 2: Creating the Pattern
-
Start with gold:
Begin your threading sequence with a single gold spacer bead. This will act as a nice bookend for your pattern repeats. -
Add the first clay section:
Thread on approximately 4 to 5 of the beige clay beads. You want a small stack that is roughly the same width as your pearl, creating visual balance. -
Insert the metallic accent:
Slide on another gold spacer bead. This metallic flash separates the matte clay from the glossy pearl coming next. -
Add the pearl element:
Thread one faux pearl bead followed immediately by another gold spacer bead. The gold acts like a frame, highlighting the pearl. -
Switch colors:
Thread on a stack of 4 to 5 rose pink clay beads. I find alternating the clay colors between beige and pink keeps the design dynamic but soft. -
Repeat the gold frame:
Add a gold spacer, followed by a pearl, and another gold spacer. You are essentially creating a ‘bead sandwich’ with gold as the bread and pearls or clay stacks as the filling. -
Continue the sequence:
Repeat this pattern—Gold Spacer, Beige Stack, Gold Spacer, Pearl, Gold Spacer, Pink Stack—until you reach your desired length. Check the fit against your wrist occasionally.
Make it Luxe
Swap the faux pearls for genuine freshwater pearls. Their irregular, organic shapes contrast beautifully with the uniform flatness of the clay discs.
Step 3: Finishing Touches
-
Check symmetry:
Try to end your pattern so that it connects seamlessly with the beginning. Ideally, you want to finish right before a gold spacer so the pattern looks continuous when tied. -
Tie the knot:
Remove the tape or clip. Bring the two ends together and tie a surgeon’s knot (loop the cord through twice before pulling tight). Pull the cords firmly to secure. -
Add durability:
Dab a tiny drop of jewelry glue or clear nail polish onto the knot. Let it dry completely to ensure it won’t slip undone. -
Attach hardware (Optional):
If you prefer a clasp over a stretchy slip-on, instead of tying a knot, use crimp beads to attach a jump ring to one end and a lobster clasp to the other. -
Conceal the knot:
If possible, slide one of the beads (preferably a larger hole clay bead or spacer) over the knot to hide it. Trim any excess string close to the knot.
Slip on your new creation and enjoy the sophisticated mix of textures on your wrist
Two-Color Checkerboard Rhythm
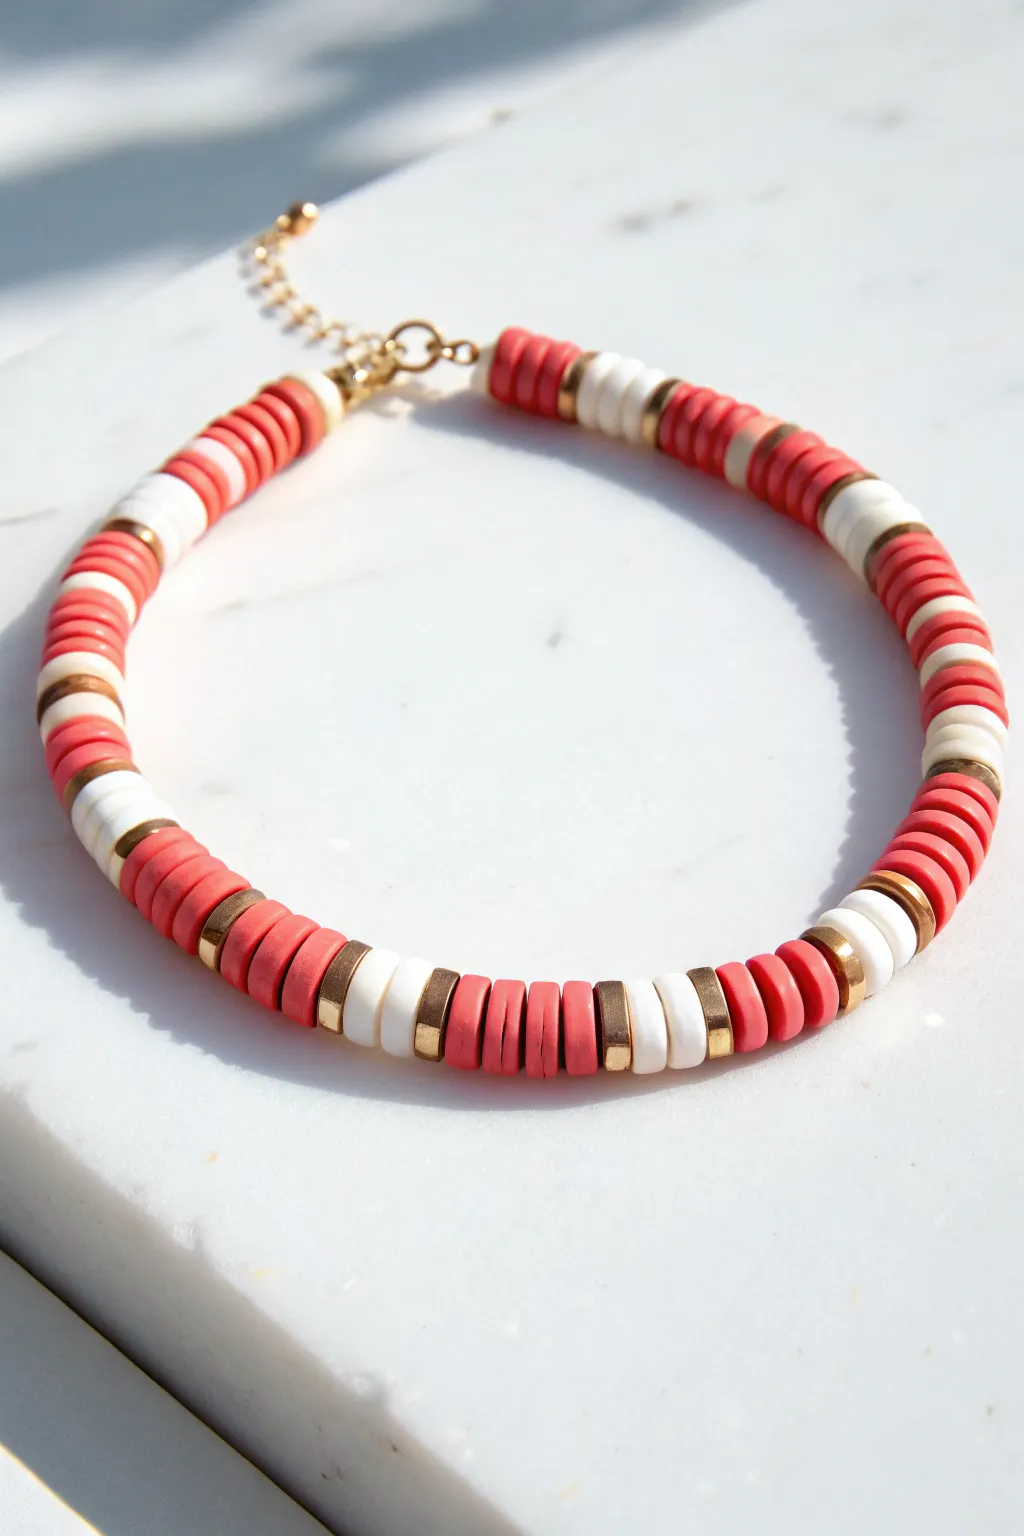
This trendy design plays with rhythm and balance, alternating segments of vibrant coral red with creamy white heishi beads, punctuated by metallic gold accents. The resulting piece features a sophisticated, repeating pattern that feels both modern and timeless.
Step-by-Step Guide
Materials
- 6mm flat disc beads (heishi) in coral red
- 6mm flat disc beads (heishi) in cream or off-white
- 6mm gold spacer beads (flat disc or square metallic beads)
- Stretch cord (0.8mm or size appropriate for bead holes)
- Beading needle (optional but helpful)
- Scissors or wire cutters
- Jewelry glue (e.g., G-S Hypo Cement)
- Measuring tape
- Bead stopper or tape
- Gold tone clasp (lobster claw) and extension chain (optional: jump rings and crimp beads if not using elastic)
Step 1: Planning and Prep
-
Measure your wrist:
Wrap a measuring tape comfortably around your wrist to determine your size. Add about 0.5 inches to this measurement to account for the thickness of the beads. -
Prepare the cord:
Cut a length of stretch cord about 3-4 inches longer than your final measurement. This extra length ensures you have enough room to tie the knot securely later. -
Secure the end:
Place a bead stopper or a piece of masking tape on one end of the cord to prevent beads from sliding off while you work. I always double-check this hold, because chasing spilled beads is no fun.
Step 2: Creating the Pattern
-
Start with the main color block:
Thread on 5 coral red heishi beads. This establishes the primary color in the sequence. -
Add separation:
Slide on one gold spacer bead. This metallic accent acts as a frame for the colorful sections. -
Create the contrast block:
Thread on 3 cream-colored heishi beads. This shorter block creates a pleasing asymmetry compared to the longer red sections. -
Close the segment:
Finish this specific pattern unit by adding another single gold spacer bead.
Stay Golden
To keep your metallic accents shining bright, coat the gold spacer beads with a thin layer of clear nail polish before stringing. This prevents tarnishing.
Step 3: Building the Bracelet
-
Repeat the sequence:
Continue repeating the pattern: 5 coral beads, 1 gold bead, 3 cream beads, 1 gold bead. Maintain this exact rhythm for a polished look. -
Check the length:
Periodically wrap the strand around your wrist. Stop beading when the ends just barely meet around your wrist without stretching the cord. -
Inspect the symmetry:
Ideally, try to end your pattern so that it connects seamlessly with the beginning. For example, if you started with red beads, try to end after a cream and gold section.
Level Up: Gemstone Swap
Replace the cream heishi beads with real freshwater pearls or white turquoise chips to elevate the design from casual beachwear to evening elegance.
Step 4: Finishing Touches
-
Prepare for closure:
If you are making a simple stretch bracelet, you can tie a surgeon’s knot now. However, to match the image which has a clasp, we will attach hardware. -
Attach the first crimp:
Slide a crimp bead onto the end, followed by a jump ring attached to your lobster clasp. Loop the wire back through the crimp bead. -
Secure the clasp side:
Use pliers to flatten the crimp bead firmly. I like to tug it gently to ensure it won’t slip. -
Attach the extension chain:
On the other end of the bracelet, slide on a crimp bead, followed by the extension chain. Loop the wire back through the crimp bead. -
Tighten the slack:
Pull the wire so the beads are snug but not stiff—they need a little room to curve around your wrist. Flatten the crimp bead. -
Trim and hide:
Trim the excess wire close to the crimp beads. If possible, tuck the tiny tail of wire back into the first few beads for a clean finish.
Enjoy styling your new bracelet solo or stacked with gold chains for a layered effect