If you’ve been itching to make something cute and low-stress, foam clay is my favorite grab-and-go material because it’s light, air-drying, and super forgiving. These ideas lean hard into that signature bubbly texture (or smooth, frosting-like finishes) so your projects look playful and totally doable.
Mini Faux Sushi and Onigiri Charms
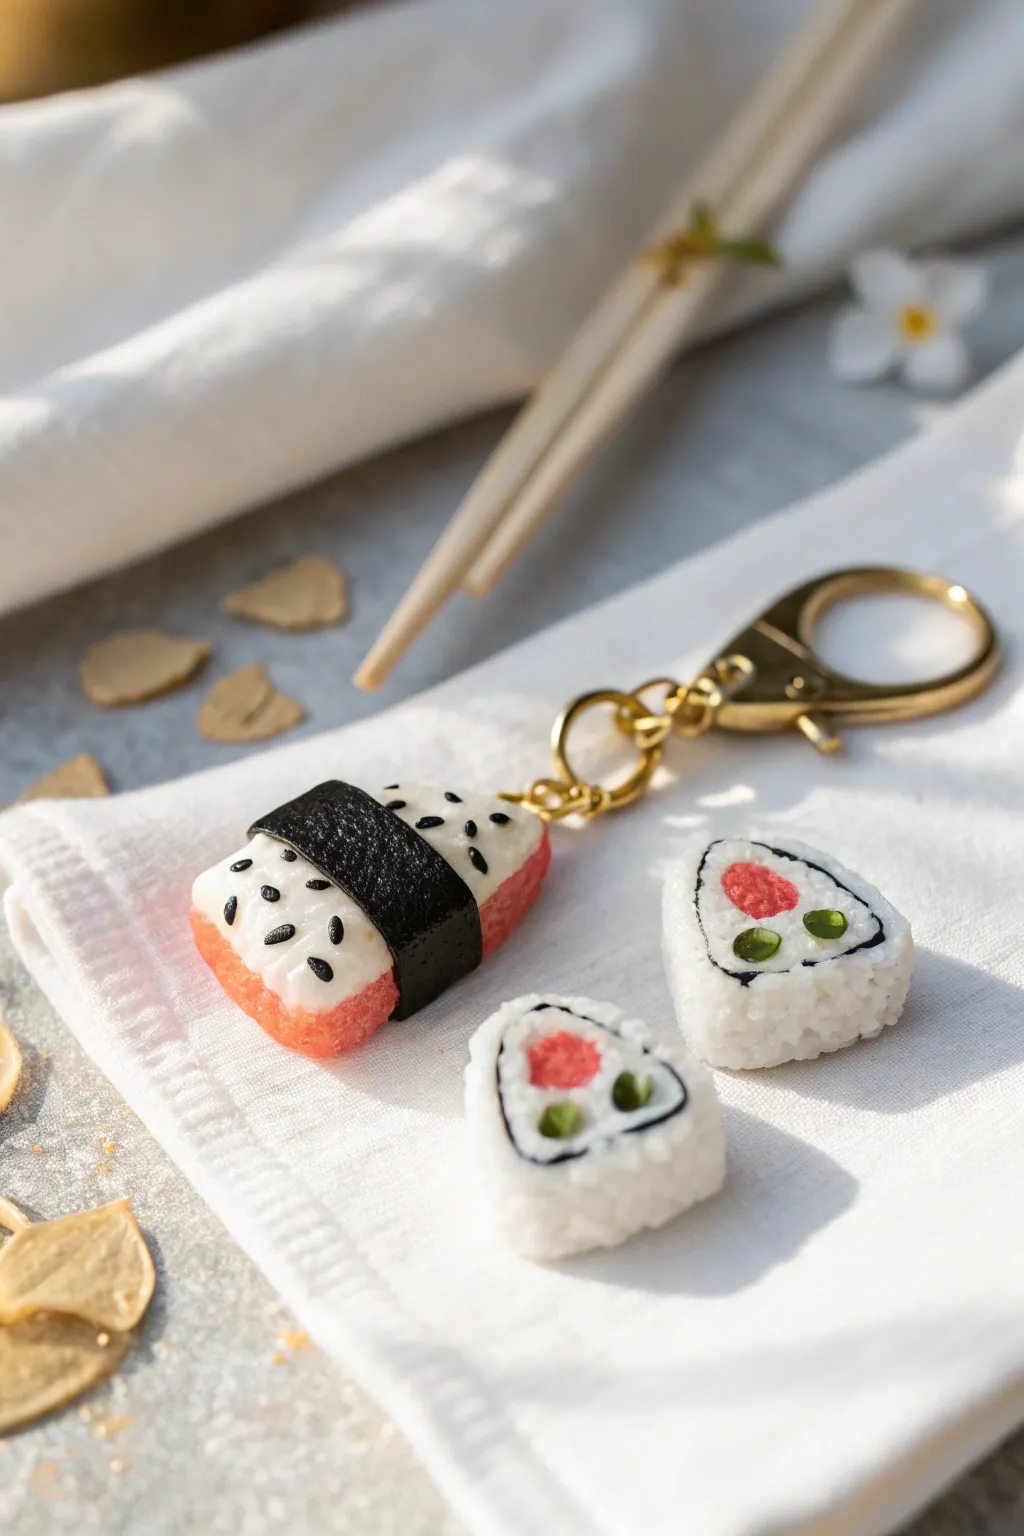
These adorable faux food charms are a delightful way to carry your favorite snacks everywhere you go without the mess. Using foam clay creates a realistic rice texture while keeping the finished pieces light enough to hang on your keys or bag.
Step-by-Step Tutorial
Materials
- White foam clay
- Pink or light red foam clay (for filling/bottom)
- Black foam clay
- Small eye screws (gold or silver)
- Keyring hardware with jump rings
- Needle tool or toothpick
- Old toothbrush or small stiff bristle brush
- Clear glaze or glossy varnish (optional)
- Small pliers
Step 1: Shaping the Musubi
-
Form the base:
Start by taking a small amount of pinkish-red foam clay (for the spam or filling) and shaping it into a small, rounded rectangle roughly 2cm long. -
Add the rice:
Take a slightly larger amount of white foam clay and shape it into a matching rectangle to place on top of your pink base. Gently press them together so they adhere without smashing the shape. -
Texture the rice:
Using an old toothbrush or a stiff bristle brush, gently tap all over the white surface of the clay. This stippling motion mimics the distinct grain texture of cooked rice.
Sticky Situation?
If the foam clay is sticking to your fingers too much, let it sit out for 2-3 minutes to air dry slightly before shaping, or lightly dust your hands with a tiny bit of cornstarch.
Step 2: Crafting the Onigiri
-
Create the triangle shape:
Roll a ball of white foam clay, then gently pinch three corners to form a soft triangle shape with rounded edges. -
Texture the surface:
Just like with the musubi, use your texturing tool to stipple the entire surface of the triangle, giving it that fluffy rice appearance. -
Add filling details:
Using a tiny dotting tool or the back of a paintbrush, make slight indentations in the center face of the triangle where fillings will go. -
Insert fillings:
Take tiny crushed bits of pink or green foam clay and press them into the indentations you just made to represent pickled plum (umeboshi) or veggies.
Level It Up
Make it a shaker charm! Create a tiny bento box out of resin and place these mini foam clay pieces inside before sealing it with a clear acetate sheet.
Step 3: Applying Seaweed Accents
-
Roll out the nori:
Take a small amount of black foam clay and roll it out flat and very thin. It needs to be flexible enough to wrap around your shapes. -
Wrap the musubi:
Cut a strip of the black clay and wrap it around the center of your musubi charm, connecting the pink bottom to the white top. Press gently to secure. -
Add sesame seeds:
For the finishing touch on the musubi, roll incredibly tiny specks of black clay between your fingers and gently press them onto the top of the white ‘rice’ to simulate sesame seeds. -
Outline the onigiri:
Roll a very thin snake of black clay. Outline the triangular edge of the onigiri face to create a defined seaweed border. -
Detail the fillings:
If you want extra detail, add tiny black circles or outlines around your filling colors using the thinnest snakes of black clay possible.
Step 4: Assembly
-
Insert hardware:
While the clay is still wet, carefully screw the eye screw into the top corner or center of your charm. If the clay pulls up, gently pat it back down. -
Allow to dry:
Let your charms dry completely for at least 24 to 48 hours. Foam clay needs air circulation to cure fully through the center. -
Secure the pin:
Once fully dry, if the eye pin feels loose, remove it, add a tiny drop of super glue or craft glue to the threads, and screw it back in. -
Optional glaze:
For a bit of shine, especially on the ‘fillings’ or seaweed, brush on a thin layer of satin or gloss varnish. -
Attach keyring:
Use your small pliers to open a jump ring, slide it through the eye screw and your keychain hardware, and close the ring securely.
Your charming sushi set is now ready to add a touch of cuteness to your daily routine


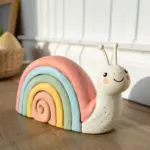
Cute Animal Desk Buddy Figures
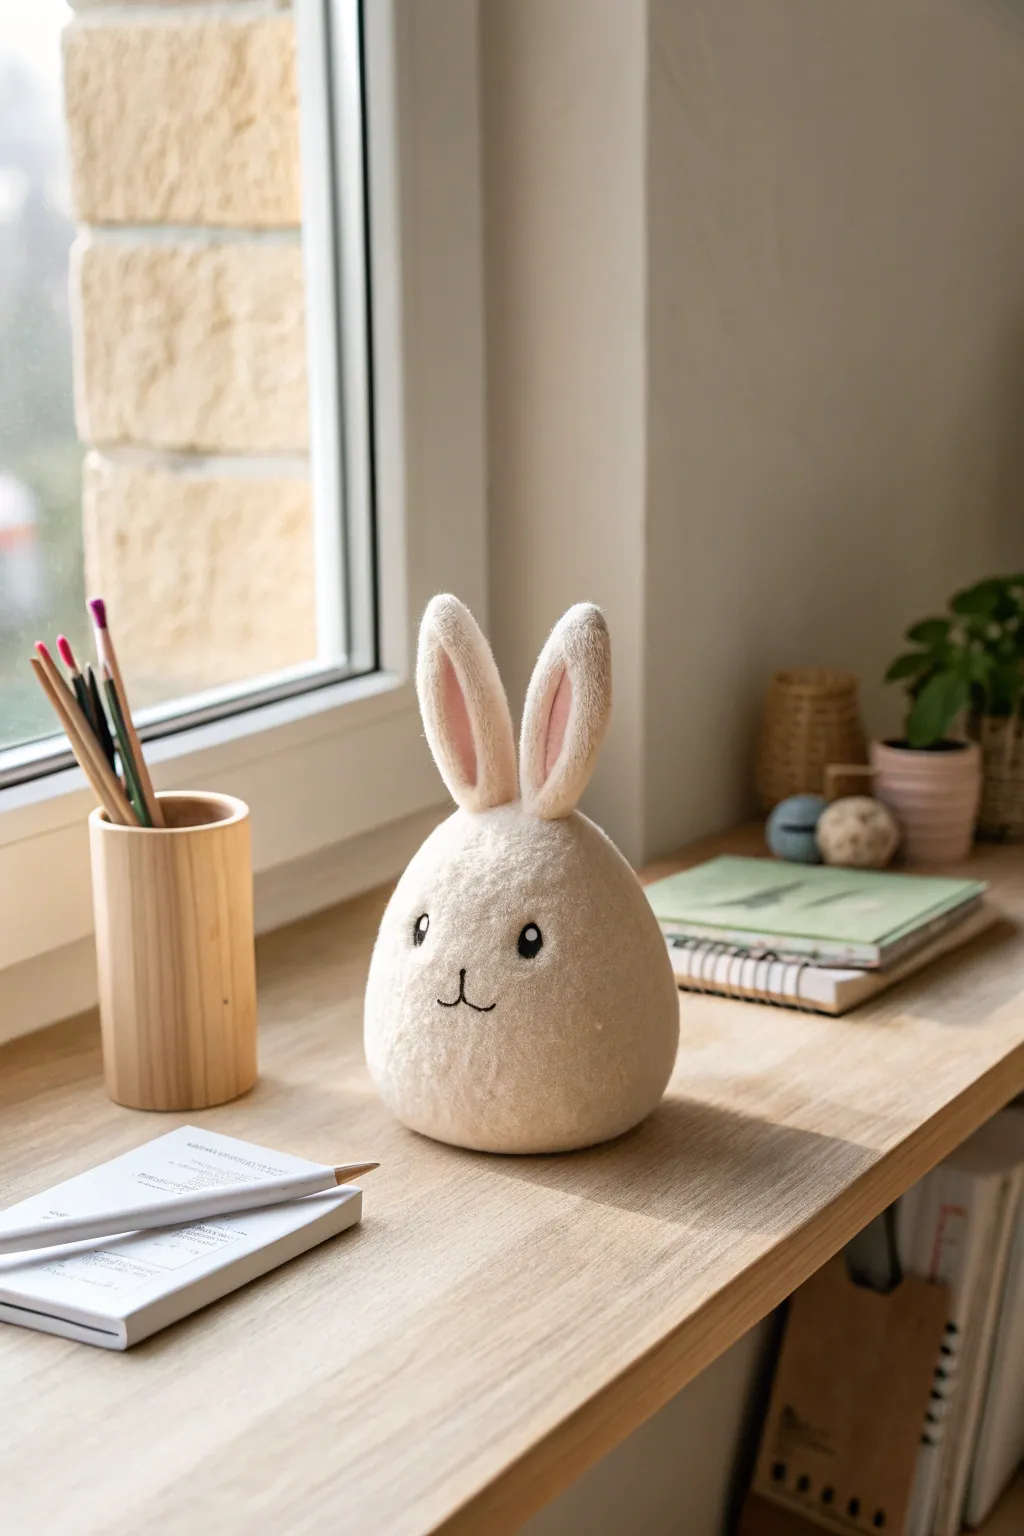
Bring a little woodland charm to your workspace with this adorable egg-shaped bunny figure. Its smooth, rounded form and sweet expression make it the perfect calming companion for study sessions or work days.
Step-by-Step
Materials
- White or cream foam clay
- Pink foam clay (small amount)
- Black foam clay (small amount)
- Styrofoam egg base (approx. 4-5 inches tall)
- Texturing tool (old toothbrush or stiff bristle brush)
- Modeling tool (ball end)
- Plastic rolling pin
- Wire or toothpicks (for ear support)
Step 1: Forming the Body
-
Prepare the base:
Start with your Styrofoam egg. If the bottom isn’t flat, gently press it against a hard surface to flatten it slightly so your bunny will sit stable without wobbling. -
Condition the clay:
knead a large handful of the cream-colored foam clay until it becomes warm and pliable. This helps remove air bubbles and makes it easier to drape. -
Cover the egg:
Flatten the clay into a large pancake and drape it over the Styrofoam egg. Smooth it down the sides, pushing out any trapped air as you work toward the bottom. -
Smooth the seams:
Work the clay all the way around until the Styrofoam is completely hidden. Spending extra time here smoothing out fingerprints with a little water on your fingertip makes a huge difference in the final look. -
Add texture:
To mimic the soft, fuzzy look in the example, gently tap a clean, stiff toothbrush or bristle brush over the entire surface of the wet clay. Use a light stippling motion.
Pro Texture Tip
If the clay starts drying while texturing, mist it lightly with water. The toothbrush method works best when the clay is tacky, creating that soft ‘felted’ appearance.
Step 2: Creating the Ears
-
Shape the ears:
Roll two equal-sized logs of cream clay, roughly 2 inches long. Taper one end of each log into a point and leave the other end slightly wider for attachmment. -
Flatten and hollow:
Gently press the logs flat. Use a modeling tool or your thumb to create a shallow indentation running down the center of each ear. -
Add the inner ear:
Take a tiny amount of pink clay and roll it into thin teardrops. Press these into the indentations you just made, smoothing the edges so they blend seamlessly with the cream clay. -
Texture the ears:
Don’t forget to texture the back and sides of the ears with your brush tool to match the body, being careful not to mess up the smooth pink centers. -
Attach the ears:
Insert a toothpick or small piece of wire halfway into the base of each ear. Push the other end into the top of the body. Blend the clay at the seam to secure them.
Make it Functional
Before the clay dries, embed strong magnets inside the bunny’s back to turn it into a cute paperclip holder, or leave a gap in the ears to hold a photo.
Step 3: Adding the Face
-
Create eye sockets:
Use a ball tool or your pinky finger to press two small, shallow indents about halfway down the face where you want the eyes to go. -
Insert the eyes:
Roll two small balls of black foam clay. Press them into the sockets. I prefer to flatten them just slightly so they don’t bulge out too much. -
Add catchlights:
For that spark of life, take the tiniest speck of white clay and press it into the upper right corner of each black eye. -
Make the nose and mouth:
Roll a very thin ‘snake’ of black clay. Cut a tiny piece for the nose bridge and two small curves for the mouth. -
Assemble the expression:
Place the nose piece centrally below the eyes, creating a vertical line. Attach the two curved pieces at the bottom of the line to form the classic bunny ‘W’ mouth shape. -
Final drying:
Allow the figure to air dry completely for 24-48 hours. Foam clay shrinks slightly as it dries, tightening around the base form.
Now you have a sweet, silent companion to keep you company while you work.


Simple Monster Characters with Bubbly Skin
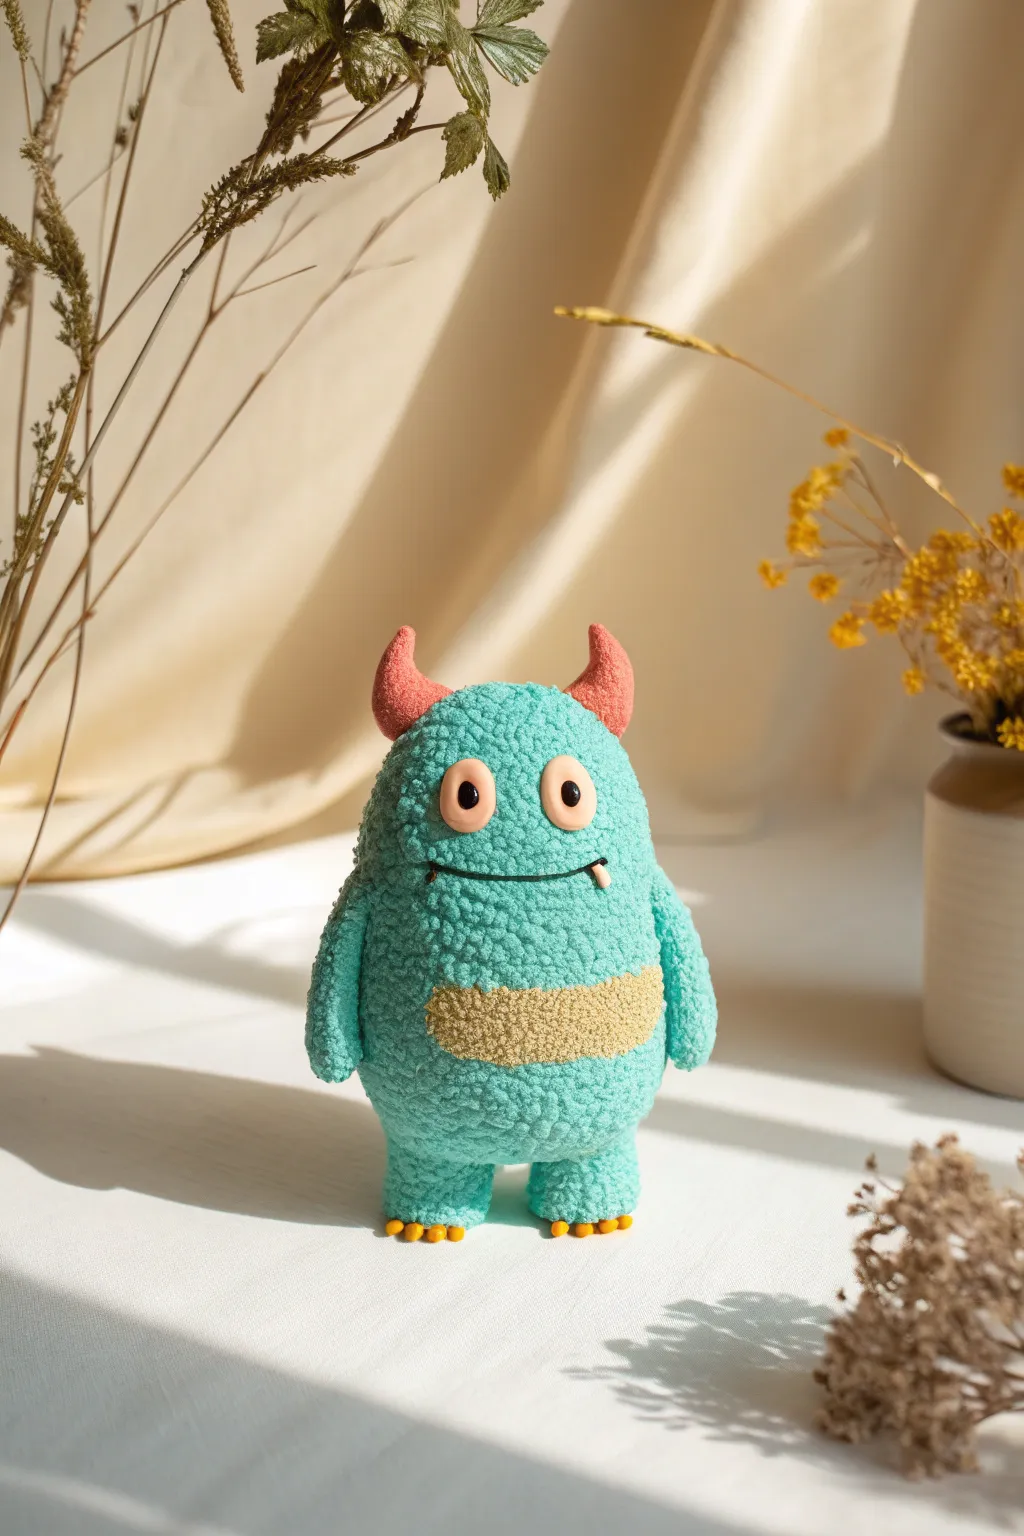
Bring a friendly little creature to life using the distinct texture of foam clay. This adorable monster features a vibrant turquoise bubbly skin, contrasting peachy horns, and a goofy expression that adds instant charm to any desk or shelf.
Step-by-Step Tutorial
Materials
- Light turquoise foam clay (bubbly/bead type)
- Peach or light orange foam clay
- Beige or oatmeal foam clay
- Pre-made plastic safety eyes (medium size)
- Black wire or thin clay snake for the mouth
- White polymer or foam clay (tiny amount for the tooth)
- Yellow foam clay (for the toes)
- Small aluminum foil ball (for the core)
- Sculpting tool or toothpick
Step 1: Forming the Base Body
-
Core construction:
Begin by scrunching a piece of aluminum foil into an elongated egg shape. This saves clay and keeps the figure lightweight. It should be slightly wider at the bottom than the top. -
Base layer application:
Cover the entire foil core with a layer of turquoise foam clay. I like to press firmly to ensure the clay adheres to the foil without air pockets. -
Adding texture:
Since foam clay already has microbeads, the texture is largely built-in. However, gently dab the surface with your fingers or a texturing tool to fluff up the beads and hide any smoothing marks. -
Shaping the arms:
Roll two sausage shapes of turquoise clay. Attach them to the sides of the body, blending the clay at the shoulder connection point so they look integrated rather than stuck on. -
Creating the feet:
Form two short, stout cylinders of turquoise clay for the legs. Attach these to the bottom of the body. Press the figure down gently onto your work surface to flatten the feet, ensuring it stands upright on its own.
Sticky Situation
If the foam clay isn’t sticking to itself, dampen your finger with just a tiny drop of water and rub the connection point to reactivate the adhesive properties.
Step 2: Adding the Belly and Horns
-
Belly patch prep:
Take a small amount of beige or oatmeal-colored foam clay and flatten it into an oval shape. -
Applying the belly:
Press this oval onto the lower front of the monster’s torso. Gently push the edges so they meet the turquoise clay seamlessly. -
Horn shaping:
Roll two small cones using the peach-colored clay. Curve the tips slightly inward to give them a classic monster look. -
Horn attachment:
Place the horns on the top of the head, spacing them evenly apart. Press down firmly to bond the foam clay pieces together.
Make it Shine
Once fully dry, brush a thin layer of gloss varnish over just the plastic eyes and the horns to make them pop against the matte texture of the body.
Step 3: Face and Details
-
Eye socket preparation:
Use your thumb to make two shallow indentations on the upper half of the face where the eyes will go. -
Eye placement:
Take two small balls of peach clay (flattened slightly) as a backing, then press the plastic safety eyes into them. Attach these combined eye unities into the sockets you created. -
Smiling mouth:
Roll a very thin snake of black clay or use a small piece of black crafting wire. Curve it into a smile and press it horizontally across the face, just under the eyes. -
The single tooth:
Shape a tiny triangle of white clay. Attach it to the right side of the mouth so it points downward for a goofy effect. -
Adding toes:
Roll tiny balls of yellow foam clay—three for each foot. Attach them to the front bottom edge of the legs to create little claws. -
Final drying:
Check the balance one last time. Let the figure sit undisturbed for 24 to 48 hours to allow the foam clay to harden completely.
Enjoy your new bubbly companion and try making a whole family of monsters in different colors


Foam Clay Fridge Magnets You’ll Actually Use
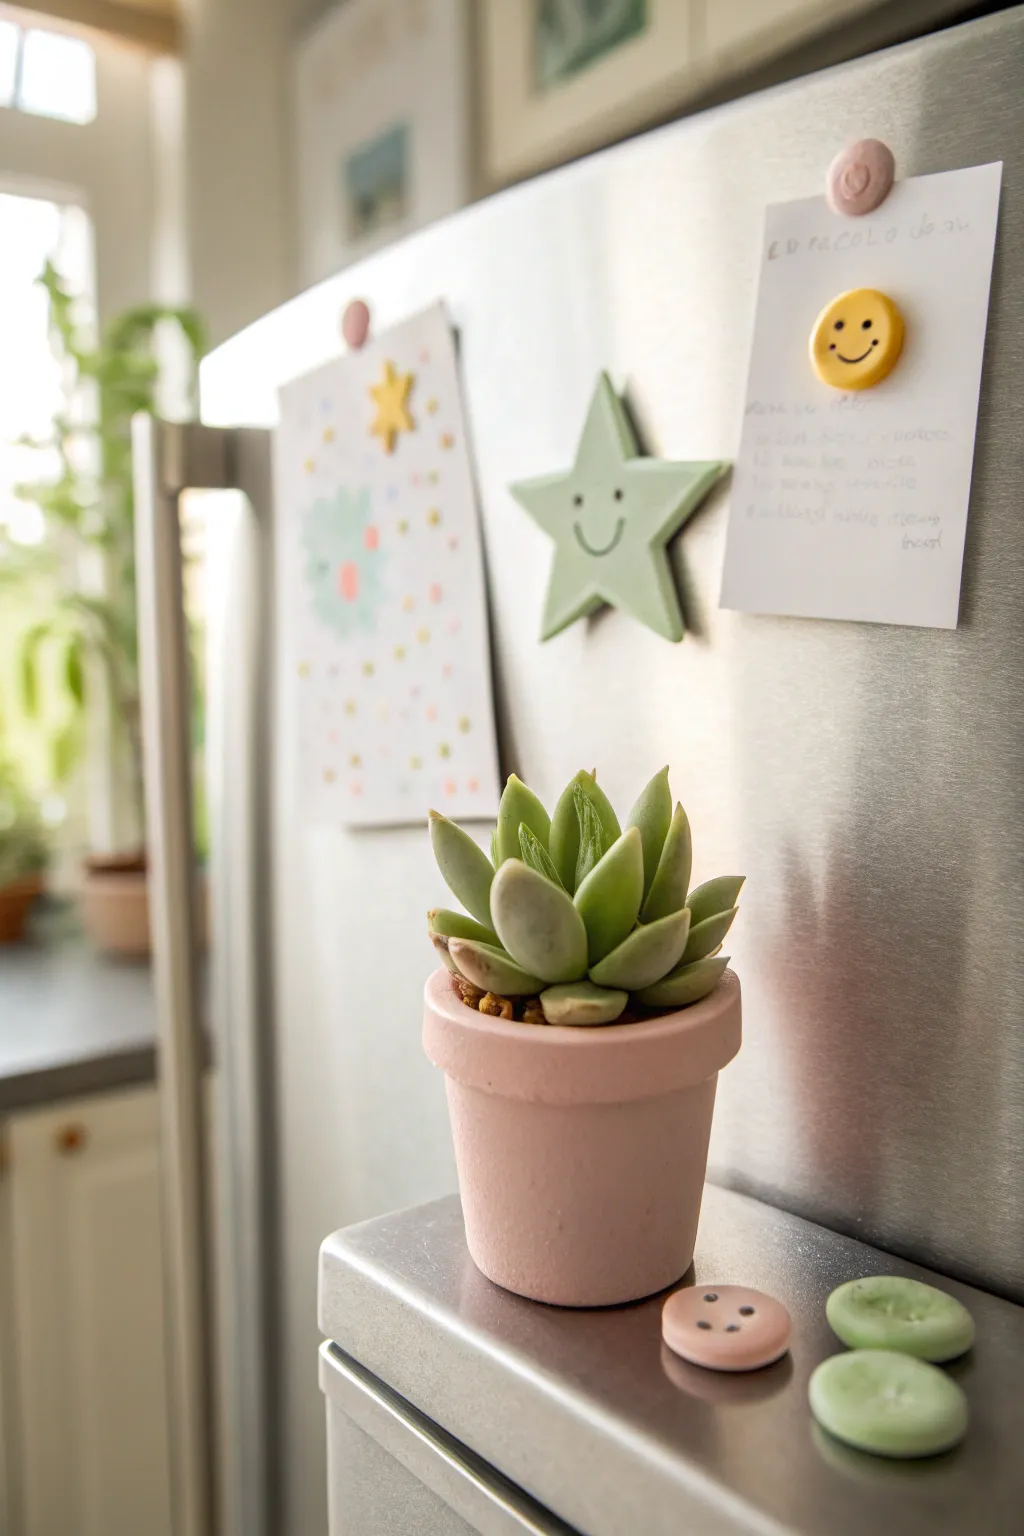
Brighten up your appliance doors with these charming, minimalist magnets that seem to smile right back at you. Using lightweight foam clay, you’ll create a set of simple shapes—like stars, smiley faces, and buttons—that are as practical as they are adorable.
How-To Guide
Materials
- Foam clay in pastel green, yellow, and soft pink
- Small rolling pin or smooth cylinder
- Cookie cutters (small star, small circle)
- Black fine-point permanent marker or acrylic paint pen
- Strong craft magnets (neodymium recommended)
- Super glue or strong craft adhesive
- Toothpick or modeling tool
- Parchment paper or non-stick craft mat
Step 1: Prepping the Clay
-
Condition the clay:
Begin by taking a small amount of your green foam clay out of its container. Knead it thoroughly in your hands for about a minute. The warmth and movement will active the polymers, making it pliable and removing any cracks. -
Roll it out:
Place the ball of clay onto your non-stick surface. Using a small rolling pin, flatten the clay until it is approximately 1/4 inch (6mm) thick. You want it substantial enough to hold a magnet but not too bulky.
Step 2: Shaping the Star
-
Cut the star shape:
Press your small star-shaped cookie cutter firmly into the green clay sheet. Give it a tiny wiggle to ensure it cuts all the way through, then lift the cutter. Gently pop the clay star out. -
Smooth the edges:
Foam clay often leaves slightly jagged edges after cutting. Dip your finger in a tiny bit of water and gently run it along the perimeter of the star to round off and smooth the sides. -
Add character:
While the clay is still wet, you can use a toothpick to gently make indentations for the eyes if you want a 3D effect, or leave it smooth for drawing later. I prefer to let the surface stay flat for a cleaner look.
Smooth Operator
If your foam clay is slightly dry or cracking while rolling, work in a single drop of water. Don’t add too much or it becomes sticky.
Step 3: Circle Makers
-
Roll yellow clay:
Repeat the conditioning and rolling process with the yellow foam clay. Aim for the same 1/4 inch thickness so your magnet set looks cohesive. -
Cut circles:
Use a small circle cutter to punch out a round shape. If you don’t have a cutter small enough, you can roll a ball of clay and flatten it evenly with the bottom of a glass. -
Create the button shapes:
Take your pink and remaining green clay to create small ‘button’ magnets. Roll small balls, flatten them into discs, and use a toothpick to poke two or four holes in the center to mimic a sewing button.
Textured Touch
Before the clay dries, gently press a piece of fabric or sandpaper onto the surface to give your magnets a cool, tactile matte finish.
Step 4: Drying and Details
-
Let them cure:
Place all your shaped clay pieces on a sheet of parchment paper. Let them air dry completely. This usually takes 24 to 48 hours depending on humidity; flip them over halfway through to ensure the bottom dries too. -
Check for hardness:
The clay should feel like dense stylistic foam when dry—slightly squishy but firm, and not cool to the touch. -
Draw the faces:
Once fully dry, take your black fine-point marker. On the green star and yellow circle, draw two small dots for eyes and a wide, simple ‘U’ shape for a smile.
Step 5: Assembly
-
Position the magnets:
Flip your foam shapes over so the back side is facing up. Place a small dot of super glue in the exact center of each shape. -
Attach the hardware:
Press a strong magnet into the glue dot. Hold it there for 10-15 seconds to let the bond initiate. -
Final cure:
Let the glue cure according to the manufacturer’s instructions before sticking them to your fridge.
Now your fridge is ready to hold important notes with a cheerful smile

The Complete Guide to Pottery Troubleshooting
Uncover the most common ceramic mistakes—from cracking clay to failed glazes—and learn how to fix them fast.
Sweet Treat Keychains That Stay Lightweight
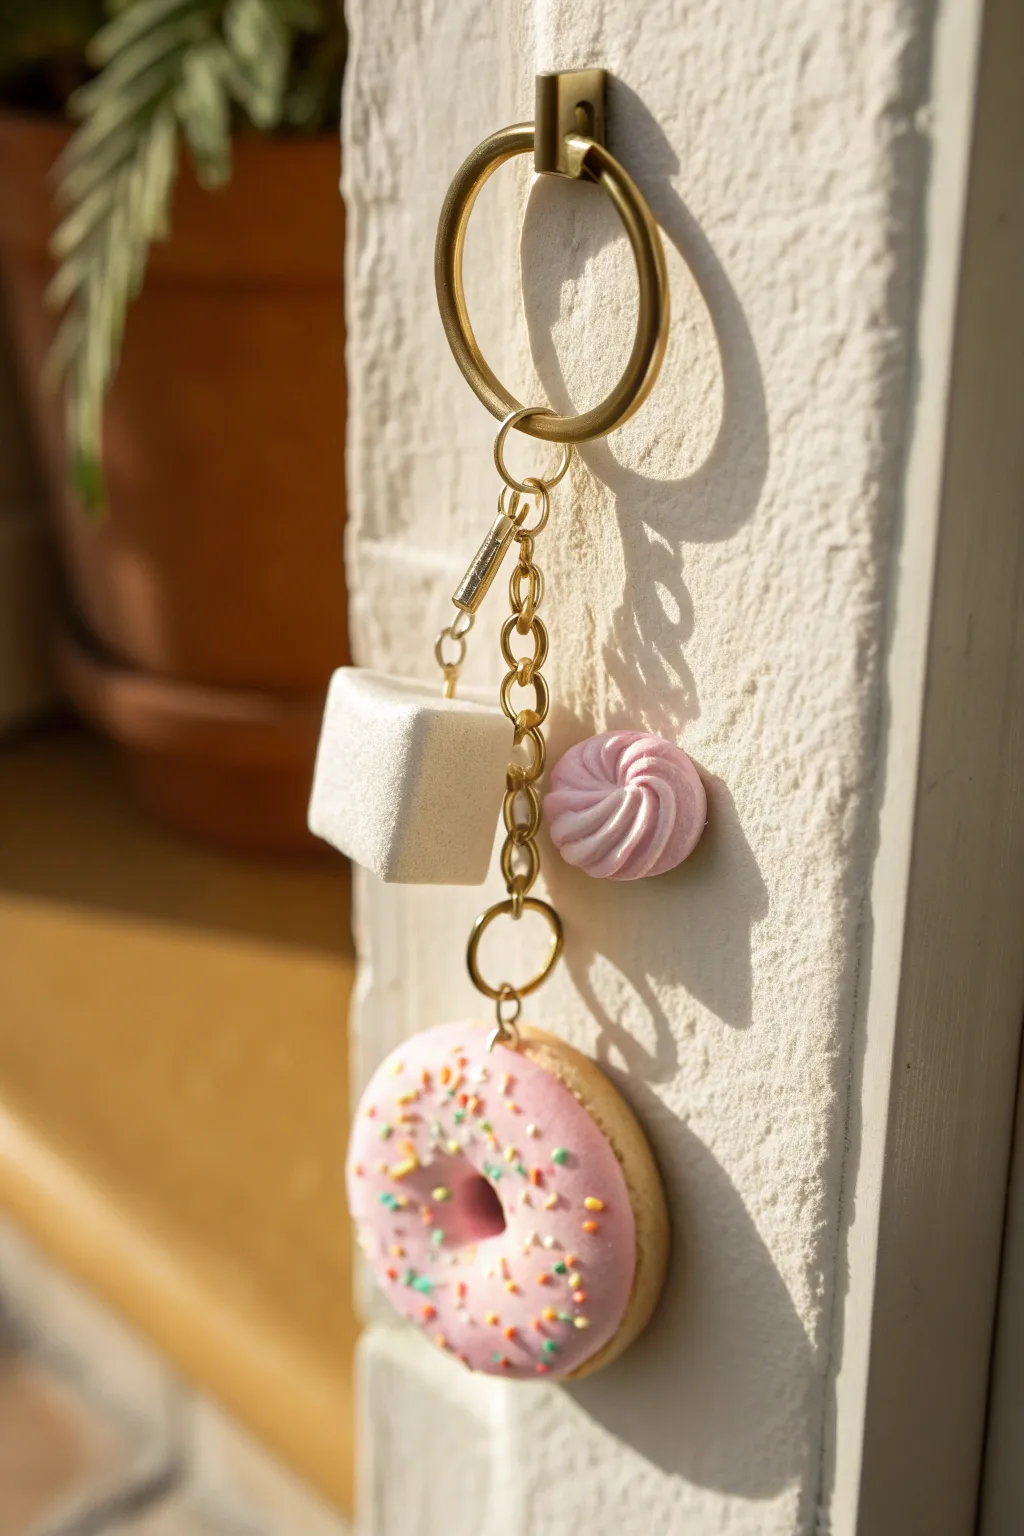
Carry a little sweetness wherever you go with these surprisingly lightweight foam clay charms involved in a delightful keychain stack. This project features a classic pink frosted donut, a pristine sugar cube, and a tiny meringue dollop, all perfectly preserved without the calories.
Step-by-Step Tutorial
Materials
- White foam clay
- Pink foam clay (soft pastel shade)
- Polymer clay sprinkles or tiny cut pieces of colored foam clay
- Large gold keyring loop
- Gold chain link segments
- Gold screw eye pins (3 small)
- Needle nose pliers
- Clay sculpting tools (or a toothpick)
- A smooth rolling surface
- Clear gloss glaze (optional)
Step 1: Sculpting the Donut base
-
Mix the dough color:
Start by mixing white foam clay with a tiny speck of yellow or brown to create a realistic ‘baked dough’ beige color. Knead it thoroughly until the color is uniform. -
Shape the ring:
Roll a ping-pong ball sized amount of your beige clay into a smooth sphere, then gently flatten it into a thick disc. -
Create the hole:
Use the handle of a paintbrush or your finger to punch a hole through the center of the disc. Widen the hole by gently rotating your tool, smoothing the inner edges so they look rounded and baked rather than torn. -
Texture the sides:
For added realism, you can lightly tap a toothbrush bristles against the sides of the donut to mimic a cake-like texture.
Smooth Operator
To erase fingerprints before drying, lightly wet your finger with water and glide it over the clay. Foam clay responds beautifully to a tiny bit of moisture.
Step 2: Frosting & Sprinkles
-
Prepare the glaze:
Take a smaller portion of pink foam clay. Flatten it into a thin, irregular shape that is slightly larger than the donut hole but smaller than the donut’s outer edge. -
Apply the frosting:
Lay the pink clay on top of your beige donut base. Gentle stretch the edges down the sides to look like poured glaze, smoothing it against the base. -
Poke the center:
Re-pierce the center hole through the pink layer, ensuring the ‘frosting’ wraps neatly inside the hole without blocking it. -
Add the sprinkles:
While the pink clay is still tacky, press your polymer clay sprinkles into the surface. If you don’t have premade sprinkles, I like to cut tiny slivers of cured colored clay and press those in for a custom look. -
Insert hardware:
Dip the screw end of a gold eye pin into a tiny bit of white clue (or just use water if the clay is very fresh) and screw it securely into the top of the donut.
Step 3: Crafting the Accents
-
Shape the sugar cube:
Take a chunk of pure white foam clay and roll it into a ball. Then, press it against your table surface on six sides to form a sharp, clean cube. -
Texture the cube:
To make it look like sugar or a marshmallow, gently tap the flat surfaces with a piece of sandpaper or a stiff brush to remove fingerprints and add matte texture. -
Add the cube hardware:
Insert a gold eye pin into the corner or center of one face of the cube. -
Create the meringue:
Roll a small pea-sized ball of pink clay. Use a star-tipped piping tool to press a pattern into it, or use a needle tool to drag spiraling lines from the center outwards to mimic a piped swirl. -
Dry completely:
Let all three charms dry for at least 24-48 hours. Foam clay shrinks slightly and hardens as it dries, becoming durable and lightweight.
Glossy Polish
Brush a coat of UV resin or high-gloss varnish over just the pink ‘frosting’ area of the donut creating a permanent wet-look glaze that contrasts with the matte dough.
Step 4: Assembly
-
Prepare the chain:
Cut a length of gold chain (about 2-3 inches). Attach one end to your large main keyring using pliers. -
Attach the donut:
Using a jump ring, connect the donut’s eye pin to the very bottom of the chain. -
Attach the accents:
Use smaller lengths of chain or jump rings to attach the sugar cube and meringue swirl higher up on the main chain, creating a staggered cluster effect.
Clip your new handmade treat onto your bag or keys and enjoy the sweet compliments coming your way
Name Tag Pins with Puffy Lettering
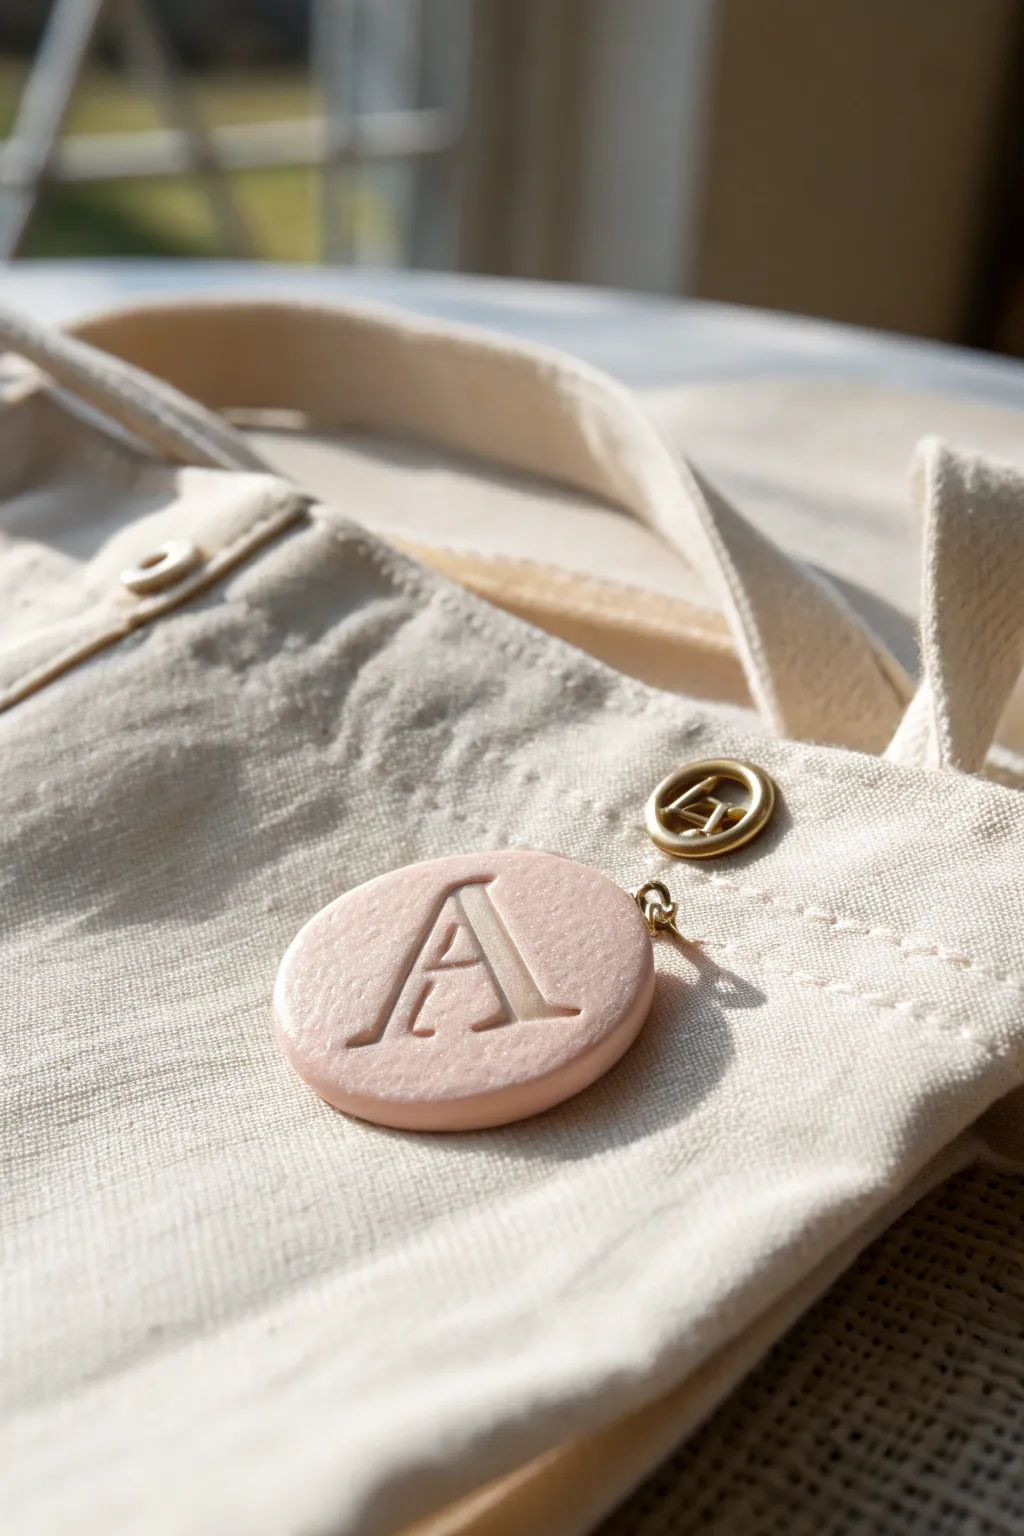
These charming, stone-like tags add a bespoke touch to any bag or jacket with their soft matte finish and elegant typography. Using foam clay creates a surprisingly lightweight accessory that mimics the look of ceramic without the fragility.
How-To Guide
Materials
- Pink or peach foam clay
- Rolling pin or smooth round marker
- Oval cookie cutter (approx. 2 inches wide)
- Letter stamp or alphabet mold (serif font)
- Small gold jump ring
- Gold safety pin or brooch pin back
- Needle tool or toothpick
- Fine grit sandpaper (optional)
- Gloss varnish (optional for the letter well)
Step 1: Shaping the Base
-
Condition the Clay:
Begin by taking a golf-ball-sized amount of foam clay and kneading it thoroughly in your hands until it feels warm and completely pliable which prevents cracking later. -
Roll it Out:
Place the clay on a smooth, non-stick surface and use your rolling pin to flatten it into an even sheet, aiming for a thickness of about 1/4 inch so it feels substantial but not chunky. -
Cut the Shape:
Press your oval cookie cutter firnly into the clay. Give it a tiny shimmy before lifting to ensure a clean cut. -
Soften the Edges:
Remove the excess clay. Gently run your fingertip labeled with a drop of water around the cut rim of the oval to round off the sharp 90-degree edges, giving it that worn stone look. -
Create the Attachment Point:
Using a needle tool, pierce a small hole near the top edge of the oval, ensuring there is roughly 1/8 inch of clay above the hole for strength.
Step 2: Detailing and Drying
-
Position the Stamp:
Ideally, locate the center of your oval by hovering your letter stamp over the clay before committing to the impression. -
Impress the Letter:
Press the letter stamp straight down into the center of the soft clay. Push deep enough to create a distinct shadow well, but not so hard that you distort the oval shape. -
Refine the Impression:
If the clay bulges slightly around the letter, gently tap it back down flat with a flat tool or your finger to keep the surface level. -
Initial Drying:
Set the piece aside on a piece of parchment paper to air dry. I usually flip the piece over after the first hour to ensure the bottom dries evenly. -
Full Cure:
Let the piece cure completely for 24-48 hours. It should feel firm and slightly squishy like high-density foam when done.
Smooth Operator
To eliminate fingerprints on the surface, lightly dip your finger in water and glide it over the clay just before stamping the letter.
Step 3: Assembly
-
Smooth Imperfections:
Once fully dry, if you notice any rough spots on the edges, you can very gently buff them away with fine-grit sandpaper. -
Open the Jump Ring:
Using two pairs of pliers (or your fingers if the metal is soft), twist the gold jump ring open sideways—never pull it apart outwards. -
Attach the Hardware:
Slide the open jump ring through the hole you created in the clay tag. -
Connect the Pin:
Before closing the ring, loop the bottom of your decorative safety pin or brooch finding onto the jump ring. -
Secure the Ring:
Twist the jump ring closed again, ensuring the two ends meet perfectly flush so the tag doesn’t slip off. -
Final Polish:
For a subtle contrast, you can brush a tiny amount of gloss varnish just inside the impressed letter well to make it catch the light.
Gilded Touch
Mix a tiny bit of gold mica powder or gold acrylic paint into the letter indentation to make the monogram pop and match the gold hardware.
Pin your finished monogram to your favorite tote bag or denim jacket for an instant custom upgrade


What Really Happens Inside the Kiln
Learn how time and temperature work together inside the kiln to transform clay into durable ceramic.
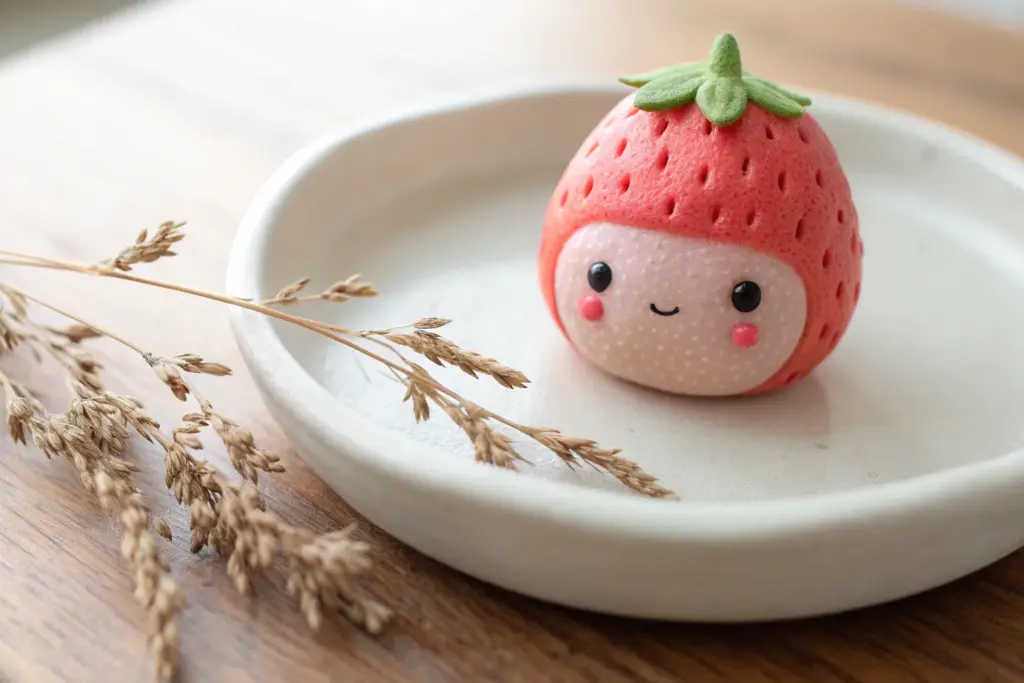
Chunky Bookmarks with Mini Characters
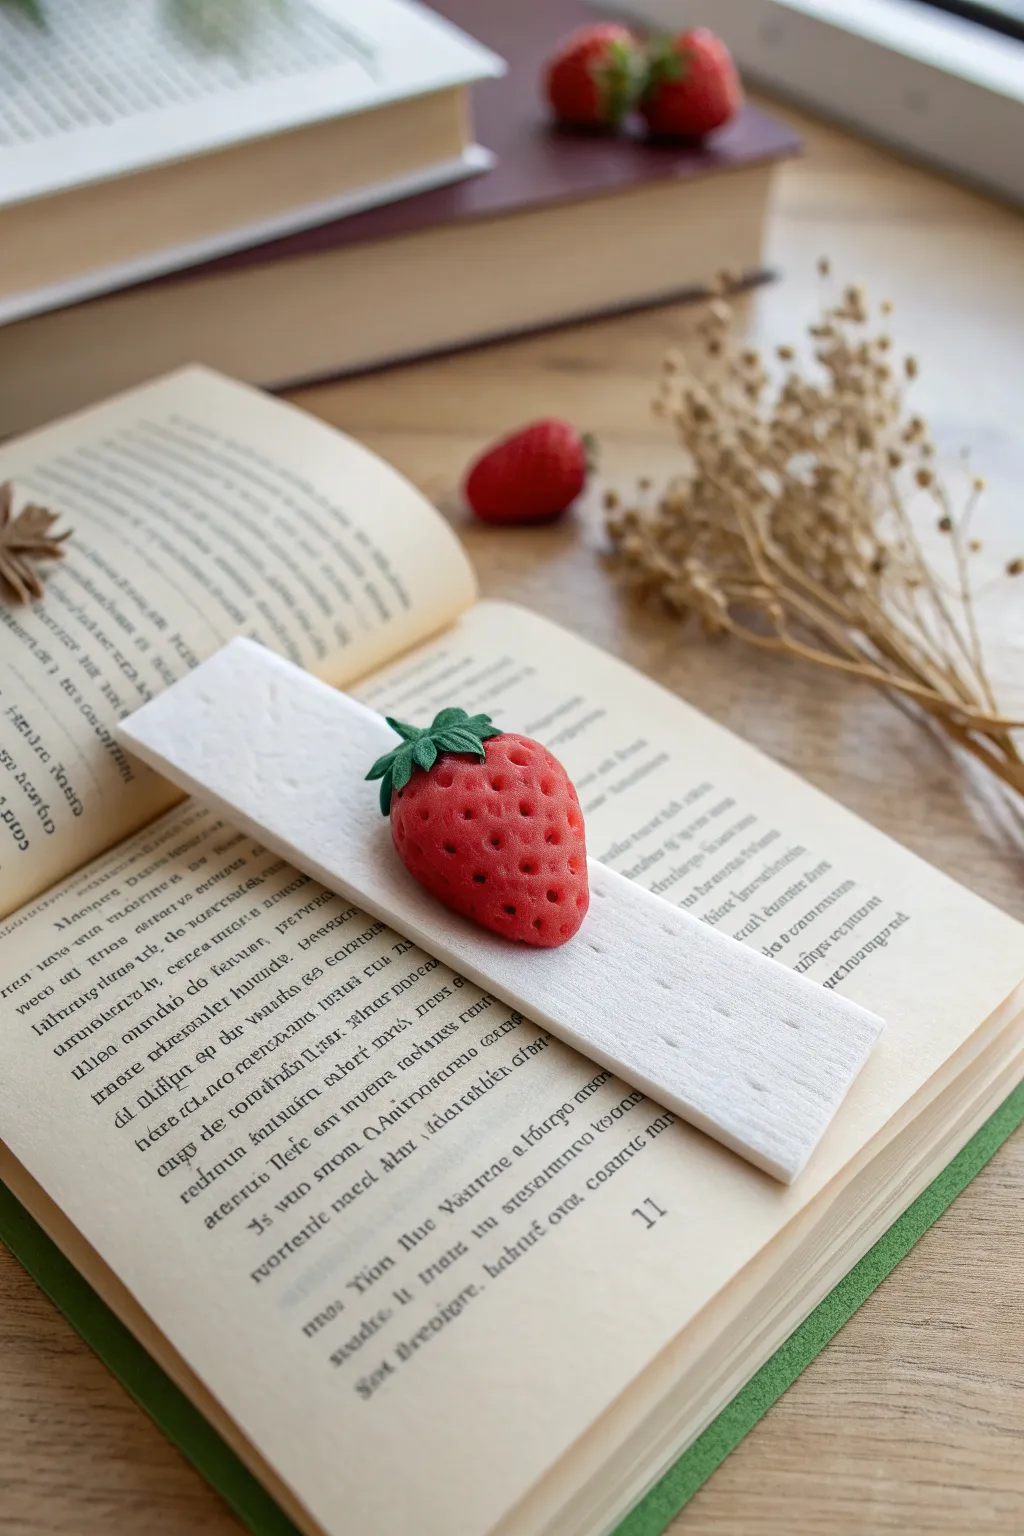
This whimsical bookmark pairs a realistic faux strawberry with a textured base that mimics a crisp cracker or wafer. It creates a charming “snack” for your reading adventures that looks almost good enough to eat.
Step-by-Step
Materials
- White or cream air-dry foam clay
- Red air-dry foam clay
- Green air-dry foam clay
- Rolling pin or smooth round object
- Craft knife or ruler for cutting
- Needle tool or toothpick
- Dark brown or black acrylic paint (tiny amount)
- Fine-grit sandpaper (optional)
- Matte mod podge or varnish
Step 1: Shaping the Cracker Base
-
Condition the white clay:
Start by taking a generous amount of white or cream foam clay. Knead and stretch it in your hands until it becomes warm, pliable, and free of any cracks. -
Roll out the slab:
Place the clay on a smooth, non-stick surface. Using a rolling pin, flatten the clay into a long, even slab. Aim for a thickness of about 3-4mm—sturdy enough to hold its shape but thin enough to sit between book pages. -
Cut the rectangle:
Using a craft knife and a straight edge (or a ruler), cut out a clean rectangle. Dimensions of approximately 1.5 inches by 5 inches work well for standard paperbacks. -
Add texture:
To mimic the look of a cracker or wafer, I like to gently press a piece of fine-grit sandpaper or a textured fabric against the wet clay surface. This gives it a subtle, baked appearance. -
Create the dimples:
Use a blunt tool, like the end of a paintbrush or a specialized ball tool, to press small, shallow indentations into the surface. Space them irregularly for a rustic look or in a grid for a more industrial cracker style. -
Let the base dry:
Set the rectangular base aside on a flat surface to dry completely. This usually takes 24 hours depending on humidity; turn it over halfway through to prevent curling.
Sticky Situation
If your foam clay is too dry to stick together while modeling, lightly mist it with water or knead in a tiny drop of water to reactivate the stickiness.
Step 2: Sculpting the Strawberry
-
Form the berry core:
Take a ball of red foam clay about the size of a walnut. Roll it into a smooth sphere, then gently taper one end to create a classic strawberry teardrop shape. -
Create seed indentations:
While the red clay is still soft, use a needle tool or toothpick to press tiny holes all over the surface. These will be the strawberry seeds. -
Make the leaves:
Take a small pinch of green clay. Flatten it into a thin disk, then use your craft knife to cut out a star shape, or simply mold individual teardrop shapes and press them flat. -
Texture the leaves:
Use the needle tool to gently score a central vein down the middle of each green leaf for added realism. -
Assemble the fruit:
Press the green leaves onto the wider (top) end of the red berry. Arrange them so they slightly drape down the sides. -
Add the stem:
Roll a tiny sausage of green clay and attach it to the center of the leaves to act as the cut stem.
Step 3: Assembly and Details
-
Join the pieces:
Once the cracker base is semi-dry (firm but slightly tacky) and the strawberry is freshly formed, press the strawberry firmly onto the center of the cracker. The fresh foam clay should adhere to the base, but a dab of white glue can ensure a permanent bond. -
Refine the shape:
If pressing the strawberry distorted its shape, use your fingers to gently reshape it back into a plump cone. -
Let it cure:
Allow the entire assembly to dry for another 24 to 48 hours. Foam clay shrinks slightly as it dries, which will help lock the pieces together. -
Paint the seeds:
Dip the very tip of a toothpick into dark brown or black acrylic paint. Carefully touch it into each indentation on the strawberry to color the seeds darkest at the bottom of the pits. -
Seal the project:
For durability, apply a coat of matte mod podge or varnish over the dried bookmark. This protects the foam from dirt and moisture during reading sessions.
Scented Surprise
Knead a drop of strawberry essential oil or fragrance oil into the red clay before sculpting. Your bookmark will release a sweet scent every time you open your book.
Now you have a sweet literary companion to mark your place in your favorite story
Mini Planter Wraps with Succulent Textures

Transform a plain, inexpensive pot into a boutique-style home for your succulents using the magic of foam clay. This project features a soothing mint green base with delicate embossed arches and textural dot accents for a modern, tactile finish.
Step-by-Step Tutorial
Materials
- Small ceramic or plastic planter pot (clean and dry)
- White foam clay
- Mint green acrylic paint
- Pale pink acrylic paint
- Gloss or matte varnish (optional)
- Rolling pin or smooth round marker
- Clay sculpting tools (or a toothpick)
- Plastic baggie (for mixing clay)
- Small paintbrush
Step 1: Preparing the Base
-
Mix your base color:
Take a large ball of white foam clay, slightly larger than what you think you’ll need to cover the pot. Add a small drop of mint green acrylic paint into the center of the ball. Fold the clay over the paint and knead it thoroughly until the color is an even, pastel mint throughout. -
Roll out the sheet:
On a clean, non-stick surface, roll your mint clay into a long, rectangular strip. You want it to be about 1/4 inch thick and long enough to wrap entirely around the circumference of your selected pot. -
Wrap the pot:
Gently lift the clay strip and wrap it around the exterior of your pot. Press it firmly against the surface to ensure adhesion. Smooth out the seam where the ends meet by rubbing your finger back and forth until the join disappears. -
Trim the edges:
If there is excess clay hanging over the top rim or the bottom base, use a sculpting tool or scissors to trim it flush. Smooth the cut edges with a damp finger for a professional finish.
Smooth Operator
If your foam clay is slightly dry or cracking while you work, add a tiny drop of water to your fingers and knead it back into the clay to restore elasticity.
Step 2: Creating the Arches
-
Outline the design:
Use a needle tool or toothpick to lightly sketch arch shapes around the body of the pot. Aim for 4-5 evenly spaced arches depending on the size of your planter. Don’t press too hard; you just need a guide. -
Define the boundaries:
Using a blunt sculpting tool, press firmly along your sketched lines to create a deep groove. This incised line separates the arch from the background and adds dimension to the piece. -
Texturize the border:
To enhance the arch definition, gently push the clay from the outside of the arch slightly inward, creating a subtle ridge along the groove you just made.
Step 3: Adding the Details
-
Mix the accent color:
Take a very small nugget of white foam clay and mix in a tiny dot of pale pink paint. Knead until smooth. This will be for the upper rim details. -
Create the rim dots:
Pinch off tiny pieces of the pink clay and roll them into uniform spheres. Press these gently onto the upper rim of the pot, spacing them evenly around the circumference. Flatten them slightly as you attach them. -
Prepare the texture dots:
For the texture inside the arches, you can use plain white clay or mix a lighter shade of your mint green. Roll dozens of tiny, varying-sized balls. I find it helpful to make a big pile of these before starting to attach them. -
Fill the arches:
Press the tiny balls into the clay inside the arch shapes. Cluster them somewhat randomly, mixing larger and smaller dots to create an organic, bubbly texture. Fill the arch space completely. -
Blend the dots:
Once all dots are placed, use your finger to gently tap them down. You want them to adhere securely to the base layer without losing their round shape completely.
Sagging Clay
If the clay sheet slides down the pot while wrapping, the surface is too slick. Rough up the plastic pot with sandpaper first for better grip.
Step 4: Finishing Touches
-
Dry time:
Let the pot sit undisturbed for 24 to 48 hours. Foam clay needs ample time to cure completely, especially in thicker areas. -
Add a wash (optional):
If you want to highlight the textures, mix a tiny bit of darker green paint with water to create a thin wash. Brush it over the textured arches and quickly wipe the surface with a paper towel, leaving pigment only in the crevices. -
Seal the deal:
Apply a coat of varnish if you plan to keep real plants in the pot, as this will help protect the foam clay from incidental water splashes during watering.
Place your favorite succulent inside and enjoy the soft pastel vibes on your windowsill

TRACK YOUR CERAMIC JOURNEY
Capture glaze tests, firing details, and creative progress—all in one simple printable. Make your projects easier to repeat and improve.
Simple Flower Sprigs and Mini Bouquets
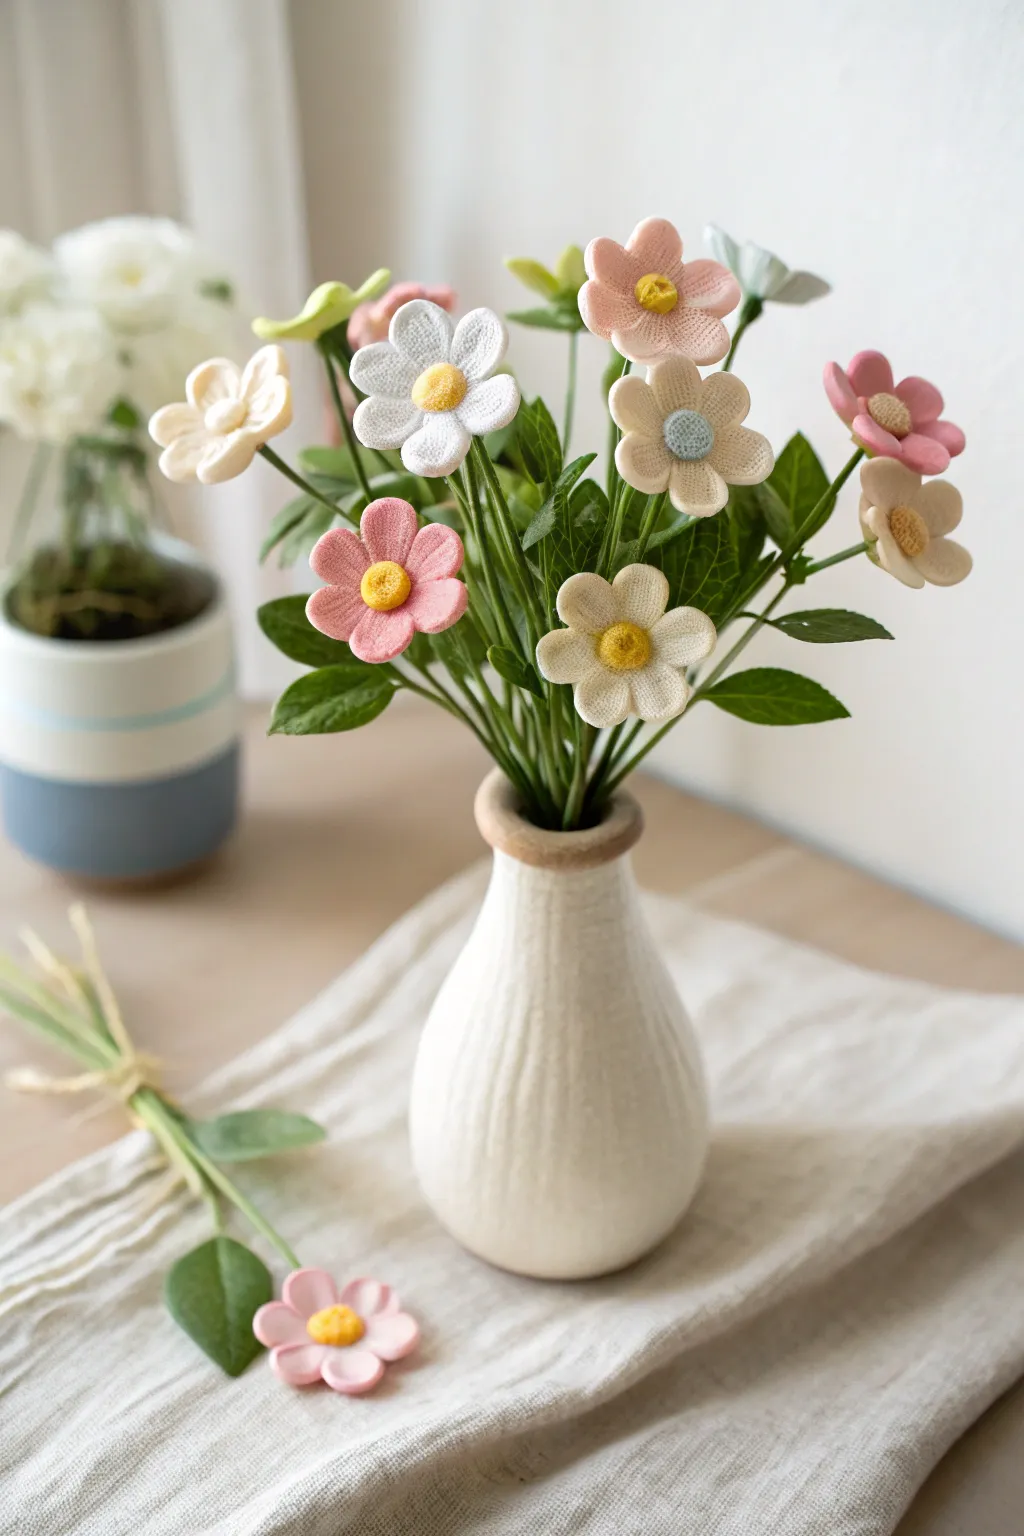
These charming, everlasting blooms bring a touch of softness to any room with their unique, fabric-like texture created entirely from foam clay. By mimicking a simple knit or woven pattern, you can craft a delicate bouquet that looks cozy without a single stitch of thread.
Detailed Instructions
Materials
- Air-dry foam clay (white, soft pink, beige/cream, yellow/mustard)
- Floral wire (18-20 gauge for stems)
- Floral tape (dark green)
- Texture tool: A piece of stiff tulle, burlap, or a dedicated clay texture mat
- Small round cutter (approx. 1 inch) or a bottle cap
- Artificial leaves (fabric or plastic) or green foam clay for handmade leaves
- Ball stylus tool
- Craft glue or tacky glue
- Needle tool or toothpick
Step 1: Preparing the Stems
-
Cut the wire:
Begin by cutting your floral wire into various lengths, ranging from 6 to 10 inches, to give your bouquet a natural, staggered height. -
Wrap the stems:
Secure the top of a wire with floral tape and wrap diagonally down the entire length. Stretch the tape slightly as you go to active the adhesive. -
Add foliage:
If using pre-made artificial leaves, attach them to the stem with floral tape about halfway down. If making foam clay leaves, shape small teardrops of green clay, press them flat, and attach them to the wire later.
Pro Texture Tip
For a knitted look, press a real piece of coarse knit fabric into the clay. Dust the fabric with cornstarch first so the clay doesn’t stick to the fibers.
Step 2: Creating the Textured Petals
-
Mix your colors:
Knead your foam clay well. Create soft pastel shades by mixing small amounts of pink or beige into distinct balls of white clay to get that gentle, variegated look. -
Roll out the clay:
Flatten a ball of clay to about 3mm thickness. You want it sturdy enough to hold shape but thin enough to look delicate. -
Apply the texture:
This is the secret sauce: press your piece of tulle, burlap, or texture mat firmly into the flat clay. When you peel it back, you should see a cross-hatch pattern that mimics fabric. -
Cut the petals:
Use your small round cutter to punch out circles from the textured clay. You will need five circles for each flower head. -
Shape the petals:
Gently pinch one side of a textured circle to form a teardrop shape. This pinched end will attach to the flower center.
Step 3: Assembling the Flower Heads
-
Form the base:
Take a very small ball of scrap clay and push it onto the tip of your prepared wire stem to act as an anchor. -
Attach the petals:
Apply a tiny dot of glue to the pinched end of your petals. Press the five petals onto the clay anchor, arranging them in a star shape so they touch in the center. -
Secure the bond:
Use your thumb to gently press the petals together where they meet the stem, ensuring they are securely bonded to the anchor point. -
Open the bloom:
Gently curve the outer edges of the petals backward slightly. I like to do this while the clay is still fresh to give the flower a natural, open appearance.
Scented Blooms
Add sophistication by mixing a drop of essential oil into the clay while kneading. Lavender or rose oil works beautifully and scents the room as it dries.
Step 4: Adding the Center Details
-
Create the center disk:
Roll a small ball of contrasting clay (yellow, mustard, or light blue). Flatten it slightly into a thick button shape. -
Texture the center:
Use a toothbrush or a ball of crumpled foil to tap the surface of the center disk, creating a fuzzy, pollen-like texture. -
Attach the center:
Place a dab of glue in the very middle of your petal arrangement and press the textured center button firmly on top. -
Refine the shape:
Once assembled, check the silhouette. You can gently push the petals upward or flatten them out depending on how ‘open’ you want that specific flower to look. -
Final drying:
Place the finished stems upright in a jar or styrofoam block to dry completely for at least 24 hours before arranging them in a vase.
Arranging these soft, textured blooms in a ceramic vase creates a peaceful and permanent display of spring
Marbled Beads for Playful Jewelry
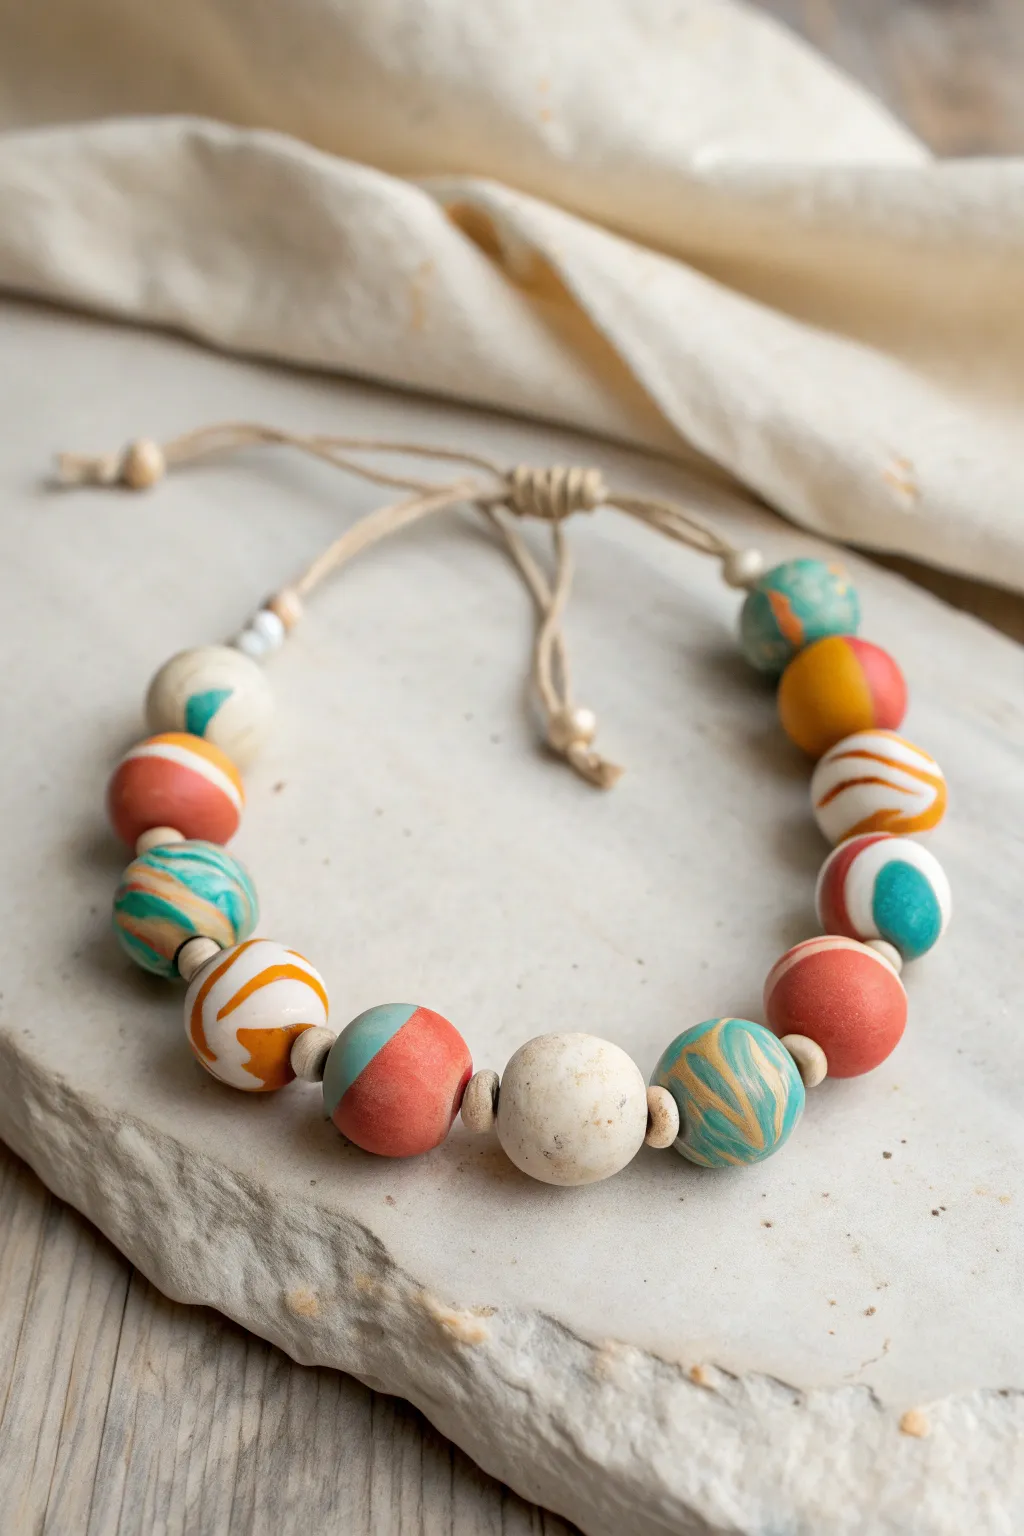
Create a statement piece of jewelry that combines earthy elegance with playful color using lightweight foam clay. These marbled beads feature swirls of teal, rust, and mustard, strung on a simple cord for a natural, bohemian look.
Step-by-Step Tutorial
Materials
- White air-dry foam clay
- Teal air-dry foam clay
- Rust/terracotta air-dry foam clay
- Mustard yellow air-dry foam clay
- Tan or beige waxed cotton cord (approx. 2mm)
- Small wooden spacer beads (natural finish)
- Bamboo skewer or toothpick
- Scissors
- Smooth work surface (silicone mat recommended)
Step 1: Creating the Marbled Beads
-
Prepare the clay base:
Start by taking a generous amount of white foam clay. You’ll need enough to form about 10–12 large beads, roughly the size of a large gum ball or small walnut. Keep the white clay in a single large lump for now. -
Create color ropes:
Roll out thin ‘snakes’ or ropes of your teal, rust, and mustard colored clays. These should be much thinner than your white base—think spaghetti noodle thickness. -
Combine colors:
Lay the colored ropes randomly across your large lump of white clay. Gently press them onto the surface so they stick well. -
Twist and fold:
Twist the large clay lump into a spiral, then fold it in half. Repeat this twisting and folding motion 3–4 times. Be careful not to over-mix; you want defined streaks of color, not a muddy brown blend. -
Portion the beads:
Pinch off chunks of the marbled clay mixture to form your individual beads. Aim for slightly varied sizes for a more organic look, but keep them roughly 2–3 cm in diameter. -
Roll into spheres:
Roll each chunk between your palms using a gentle circular motion. Apply light pressure to smooth out any seams and create a perfect sphere. Check each bead to ensure the swirling pattern is visible and pleasing. -
Create bead holes:
While the clay is still wet, carefully push a bamboo skewer through the center of each bead. Rotate the skewer as you push to prevent flattening the bead’s shape. -
Refine the holes:
Once the skewer pierces through the other side, gently wiggle it to widen the hole slightly. This ensures your cord will pass through easily later. -
Dry the beads:
Leave the beads on the skewer or slide them off onto a non-stick surface to dry completely. Foam clay typically needs 24–48 hours to fully harden, depending on humidity.
Step 2: Assembling the Necklace
-
Prepare the cord:
Cut a length of waxed cotton cord, approximately 80cm long. This allows enough length for the necklace to sit comfortably and for the adjustable sliding knot mechanism. -
Plan your layout:
Arrange your dried marbled beads and the small wooden spacer beads on your work surface. I like to alternate between a large clay bead and a small wooden spacer to create visual rhythm. -
String the beads:
Thread the beads onto the cord according to your layout. Center the arrangement on the cord. -
Secure the ends:
Once your beads are centered, tie a simple overhand knot on either side of the bead section to keep them in place, if desired, or leave them loose for movement. -
Create a sliding knot:
Bring the two loose ends of the necklace cord together, overlapping them by about 10cm. Cut a separate, shorter piece of cord (about 20cm). -
Tie the square knots:
Use the short cord to tie a series of square knots (macramé style) around the overlapped necklace cords. Tie about 4–5 knots to create a sturdy sliding mechanism. -
Finish the slider:
Trim the excess ends of the short knotting cord close to the knots. You can add a tiny dab of glue to the cut ends to prevent fraying, being careful not to glue the slider to the main cords. -
Detail the cord ends:
Tie a small knot at the very end of each main necklace cord to prevent them from slipping through the slider. You can add a tiny wooden bead here for extra detail.
Smooth Surface Secret
To get ultra-smooth beads without fingerprints, lightly moisten your palms with a tiny drop of water before rolling the final shape. It polishes the clay surface instantly.
Make It Glossy
Once fully dry, coat your foam clay beads with a layer of clear gloss varnish or Mod Podge. This mimics the shine of real ceramic or glass beads and protects the colors.
Now you have a lightweight, custom-colored accessory ready to brighten up any outfit
Cute Critter Phone Stand Sculptures
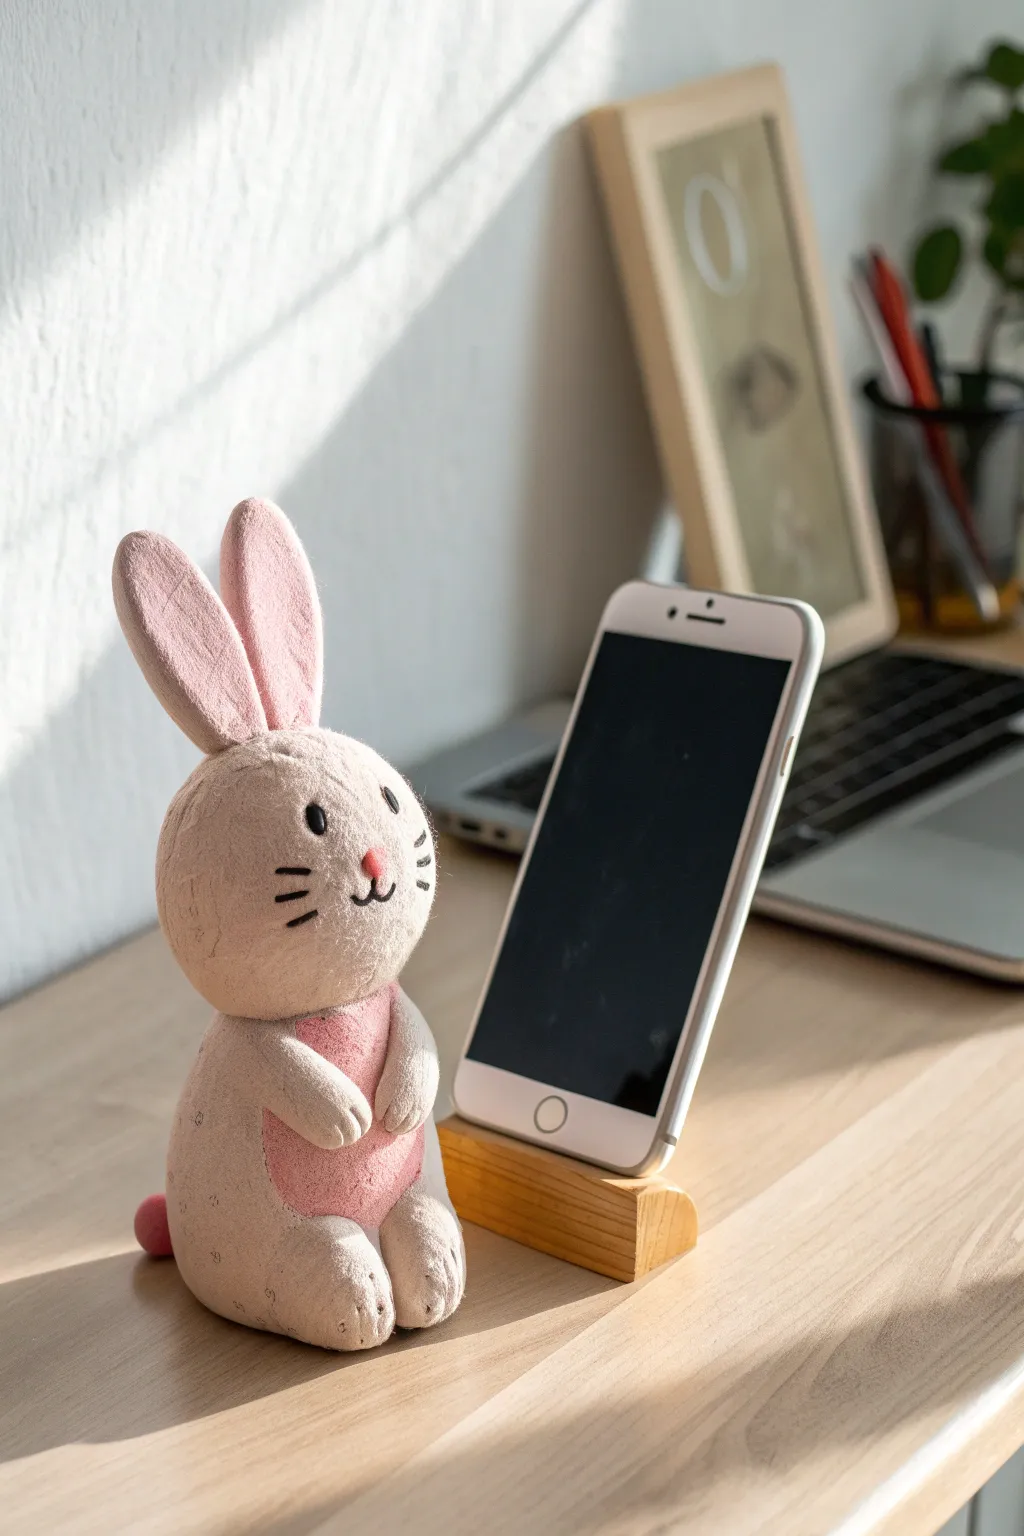
Transform simple foam clay into an adorable desk companion that keeps your phone propped up and ready to view. This beige and pink rabbit features a soft, matte texture and sits snugly against a wooden base to create a functional piece of sculpted art.
How-To Guide
Materials
- Beige foam clay
- Pink foam clay
- Black foam clay (tiny amount)
- Small wooden rectangular block (approx. 3″ x 1.5″)
- Strong craft glue or hot glue
- Modeling tools (ball tool, needle tool)
- Aluminum foil (for armature)
- Toothpicks
- Texturing brush or old toothbrush
Step 1: Sculpting the Base Form
-
Prepare the core:
Ball up a piece of aluminum foil into a pear shape to serve as the core for the bunny’s body. This saves clay and keeps the figure lightweight but sturdy. -
Cover with clay:
Knead a large chunk of beige foam clay until pliable, then flatten it into a pancake. Wrap this entirely around your foil core, smoothing out all seams until you have a flawless pear-shaped body. -
Create the texture:
While the clay is still wet, gently tap the entire surface with an old toothbrush or a stippling brush. This creates the soft, felt-like texture characteristic of this project. -
Add the feet:
Roll two medium-sized balls of beige clay. Flatten them slightly into ovals and press them onto the bottom front of the body for feet. Texture these to match the body. -
Define the toes:
Use a needle tool or the edge of a ruler to press two vertical indentations into the front of each foot to simulate toes.
Clay Shrinking?
Foam clay shrinks slightly as it dries. If gaps appear between pieces, fill them with a tiny amount of fresh clay mixed with a drop of water to make a paste.
Step 2: Character Details
-
Make the tummy:
Roll a small ball of pink foam clay and flatten it extremely thin. Press this onto the center of the bunny’s belly. Gently stipple the edges so it blends seamlessly into the beige body. -
Form the arms:
Roll two sausage shapes from beige clay. Attach them to the upper sides of the body, curving them inward so the ‘hands’ rest on the top of the pink tummy. Texture the arms gently. -
Sculpt the head:
Create a slightly flattened sphere for the head using beige clay (you can use a small foil core here too if desired). Press it firmly onto the top of the body. Insert a toothpick between the head and body for extra stability if the clay is heavy. -
Shape the ears:
Roll two long teardrop shapes of beige clay. Flatten them considerably. Create smaller, matching pink flattened teardrops and press them into the center of the beige ears for the inner ear detail. -
Attach the ears:
Press the ears onto the top of the head. I find it helpful to pinch the base of the ears slightly before attaching to give them a natural curve.
Weighted Base
For holding heavier tablets, embed a small sculpted rock or heavy washer inside the bottom of the bunny’s body before sealing it up to prevent tipping.
Step 3: Face and Assembly
-
Add the nose:
Roll a tiny, triangular piece of pink clay and place it in the center of the face for the nose. -
Create the eyes:
Roll two miniscule balls of black clay. Flatten them into ovals and press them into the face above the nose. Add tiny white clay highlights if you want extra sparkle. -
Draw the details:
Roll impossibly thin threads of black clay for the whiskers and mouth. Carefully press three whiskers onto each cheek and a small anchor shape below the nose for the mouth. -
Add the tail:
Don’t forget the back! Roll a small pink ball and attach it to the lower back of the bunny for a cotton-tail effect. -
Prepare the wood base:
Take your wooden block sandpaper it smooth if needed. This block acts as the ‘stop’ for the phone. -
Final assembly:
Apply strong glue to the bottom of the bunny and attach it directly behind the wooden block. Look at your phone’s thickness to judge the spacing to ensure the phone can lean back comfortably against the bunny’s belly.
Let your new desk buddy dry for at least 24 hours before trusting it with your phone
Tiny Foam Clay Houses for Mini Dioramas
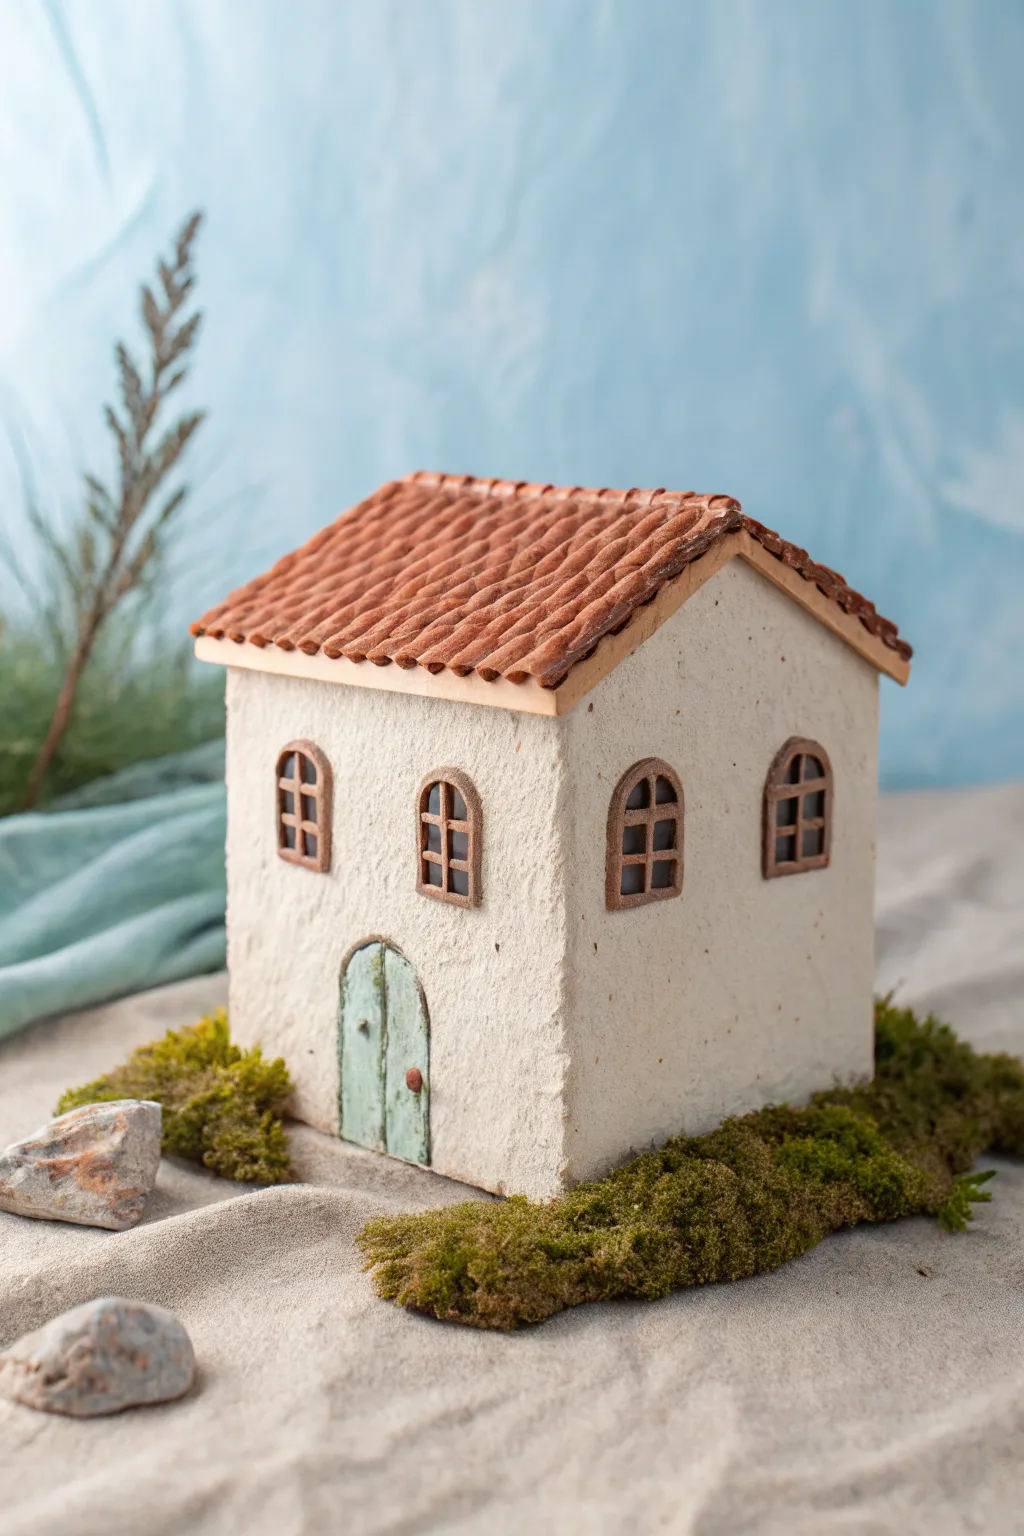
Transport yourself to a tiny seaside village with this charming foam clay house. Featuring textured stucco-style walls and an individually tiled terracotta roof, this project is perfect for building your first miniature diorama scene.
Step-by-Step Guide
Materials
- White or cream air-dry foam clay
- Terracotta or rust-colored foam clay
- Dark brown foam clay
- Cardboard or foam core (for structure)
- Foil (optional, for bulking)
- Clay sculpting tools (knife, needle tool)
- Turquoise and brown acrylic paint
- Fine grit sandpaper
- Texture sponge or toothbrush
- Craft glue
- Decorative moss and small stones
Step 1: Building the Structure
-
Cut the base walls:
Cut four pieces of cardboard or foam core to create the house’s basic box shape. You’ll need two rectangles for the sides and two pentagons (rectangles with a triangle on top) for the front and back gables. -
Assemble the core:
Glue the four wall pieces together to form a sturdy shell. Let the glue dry completely to ensure the structure doesn’t wobble while you apply the clay. -
Add the roof base:
Cut two rectangles of cardboard that are slightly wider and longer than the house footprint. Glue them to the gable peaks to form the pitched roof base.
Keep it Clean
Foam clay picks up dust easily. Keep a pack of baby wipes nearby to clean your hands when switching between the dark brown window frames and the white plaster walls.
Step 2: Creating the Walls
-
Condition the clay:
Take a large chunk of white foam clay and knead it in your hands until it’s warm and pliable, which helps prevent cracks later. -
Cover the exterior:
Roll the white clay into thin sheets, about 3mm thick. Carefully drape and press these sheets onto the cardboard walls, smoothing the seams where the corners meet. -
Texture the stucco:
Immediately after applying the clay, take a texture sponge or an old toothbrush and dab it gently all over the wet clay surfaces. This mimics the rough look of Mediterranean plaster.
Add a Glow
Cut a hole in the bottom cardboard piece before you start. Once finished, you can place a battery-operated tea light underneath to make the windows glow warmly at night.
Step 3: Windows and Doors
-
Carve the openings:
Using a clay knife, gently press arched outlines into the soft wall clay where you want your door and windows to sit. You don’t need to cut all the way through to the cardboard; just create a recessed impression. -
Form the window frames:
Roll thin snakes of brown foam clay. Outline the recessed window arches with these snakes to create the frames, and add a cross shape inside for the panes. -
Sculpt the door:
Mix a tiny amount of white clay into the brown (or use painting later) to create a wooden door slab. Fit this into the arched door recess. -
Add door details:
Use a needle tool to score vertical lines onto the door to resemble wood planks. Add a tiny ball of brown clay for the doorknob.
Step 4: The Tiled Roof
-
Prep the roof tiles:
Roll out rust-colored foam clay into a long, thin strip. Cut this strip into many small, identical rectangles, roughly 1cm wide. -
Shape the tiles:
Curve each small rectangle slightly over a pencil or round tool to give them that classic barrel-tile shape. -
Lay the first row:
Start at the bottom edge of the roof (the eaves). Apply a thin line of glue or water if the clay is dry, and press a row of curved tiles side-by-side along the edge. -
Layer the tiles:
Work your way up towards the peak, overlapping each new row slightly over the one below it. I find staggered placement looks the most realistic. -
Cap the ridge:
Once both sides form a peak, lay a final row of curved tiles horizontally across the very top ridge line to seal the gap.
Step 5: Finishing Touches
-
Paint the door:
Once the clay is dry (usually 24 hours), mix a watery turquoise acrylic paint. brush it over the door, then quickly wipe most of it away with a paper towel for a weathered, vintage look. -
Dry brush the roof:
Dip a dry brush into a tiny amount of light orange or tan paint. Lightly whisk it over the roof ridges to highlight the texture and make the tiles look sun-baked. -
Set the scene:
Arrange the house on a bed of fine sand. Glue small tufts of preserved moss around the base and corner to simulate overgrown vegetation.
Now you have a quaint little coastal home ready to be the centerpiece of your miniature world
Faux Iced Donut Coasters with Texture

Transform simple coasters into a stack of sweet treats that look good enough to eat but are sturdy enough for your morning coffee. These faux donut coasters combine the durability of cork or wood with the smooth, satisfying texture of foam clay icing to create a playful home accessory.
Step-by-Step
Materials
- Round wooden or cork coasters (approx. 3.5-4 inches diameter)
- White foam clay
- Acrylic paints (light pink, baby blue, warm beige/ochre)
- Drill with a large spade bit or hole saw attachment
- Sandpaper (fine grit)
- Small rolling pin or smooth jar
- X-acto knife or clay sculpting tool
- Glossy varnish or clear resin (optional for shine)
- Matte Mod Podge (for sealing the ‘cookie’ base)
- Plastic baggie or clay extruder (for sprinkles)
Step 1: Prepping the Cookie Base
-
Create the donut hole:
Since most standard coasters are solid disks, you’ll need to create that classic donut void. Mark the exact center of your wooden or cork coaster. -
Drill the center:
Using a drill with a large spade bit or a hole saw attachment (about 1-inch diameter is perfect), carefully drill out the center hole. Clamp the coaster down first to prevent spinning. -
Sand the edges:
The drilling might leave rough edges. Take fine-grit sandpaper and smooth the inside of the new hole and the outer rim of the coaster until it feels soft to the touch. -
Mix the dough color:
To mimic a baked cookie look, mix a warm beige or ochre acrylic paint. You want a golden-brown tone, perhaps slightly lighter in the center and darker at the edges. -
Paint the base:
Paint the entire coaster, including the new inner rim and the outer edge. This ‘dough’ layer needs to dry completely before we add our toppings.
Clay Shrinkage
Foam clay shrinks as it dries! If your icing pulls back too much from the edges, gently stretch it outward periodically during the first hour of drying.
Step 2: Icing with Foam Clay
-
Color the clay:
Take a handful of white foam clay. If you want pink or blue icing, knead a tiny drop of acrylic paint into the clay until the color is uniform and pastel. -
Roll out the icing:
On a non-stick surface, roll your colored foam clay into a flat sheet, about 1/4 inch thick. It should be slightly wider than your coaster. -
Apply the icing layer:
Gently lift the clay sheet and drape it over the painted coaster. Press it down lightly so it adheres to the surface. -
Cut the center hole:
Locate the center hole with your finger. Use an X-acto knife to slice an ‘X’ in the middle, then trim away the excess clay, smoothing the edges down inside the hole. -
Create the drip effect:
Using your knife or a sculpting tool, trim the outer edge of the clay in a wavy, uneven pattern. It shouldn’t reach the very edge of the coaster—leave a rim of ‘cookie’ visible. -
Smooth the edges:
Dip your finger in a tiny bit of water and run it along the cut edges of the foam clay to round them off, making the icing look poured rather than cut.
Scented Coasters
Mix a drop of vanilla or sugar cookie fragrance oil into your foam clay during the kneading stage for coasters that smell as sweet as they look.
Step 3: Adding the Sprinkles Details
-
Make the sprinkles:
Take tiny pinches of leftover foam clay and color them in contrasting shades like bright pink, teal, or white. Roll these into extremely thin snakes. -
Cut to size:
Allow the thin snakes to dry for about 10 minutes so they are easier to handle, then snip them into tiny segments with scissors. -
Apply sprinkles:
While the main icing layer is still slightly tacky, press the mini foam sprinkles gently into the surface. If the base has dried too much, a dot of white glue works perfectly. -
Detail geometric lines:
For the pink donut style, roll extremely thin strings of white foam clay and lay them across the surface in a zigzag pattern, outlining the donut hole. -
Dry completely:
Let the foam clay cure for at least 24-48 hours. It will shrink slightly as it dries, tightening around the coaster form. -
Seal for protection:
Since these are coasters, protection is key. Apply a coat of glossy varnish or clear resin over the ‘icing’ part to make it look wet and sweet, while protecting it from moisture.
Enjoy your stack of guilt-free donuts that add a whimsical touch to your coffee table
Texture Sampler Tiles for Color and Finish Tests
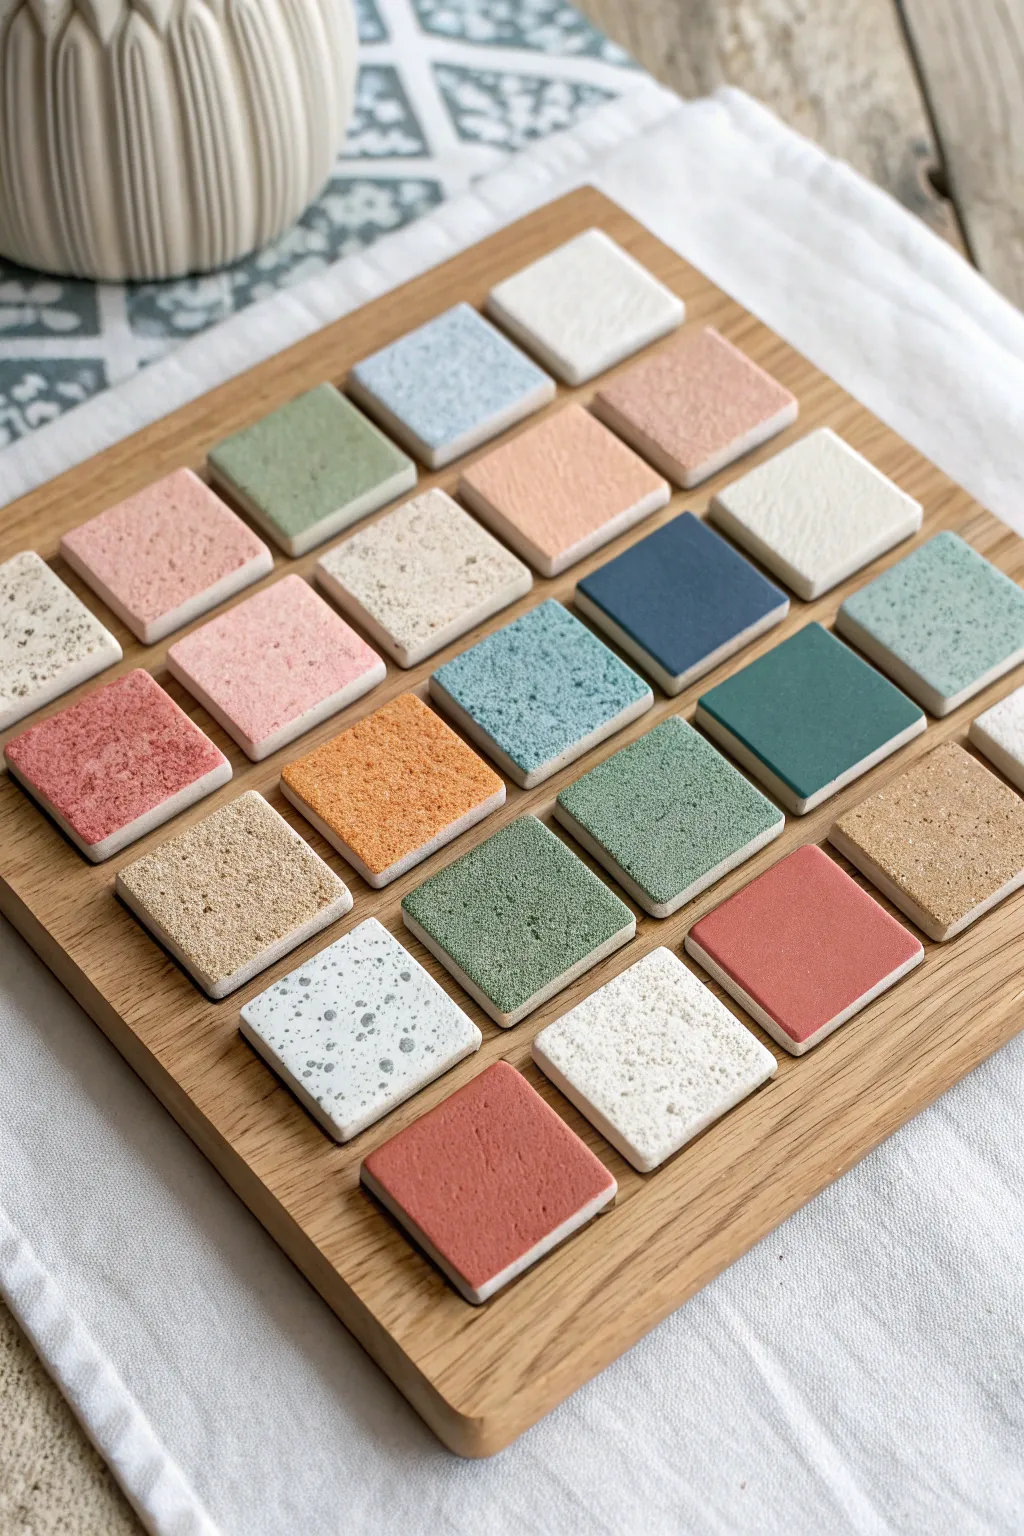
Create a stunning tactile library of colors and textures with this organized sampler board. Perfect for testing foam clay mixes, these miniature tiles showcase everything from sandy grits to smooth matte finishes in a cohesive, earthy palette.
How-To Guide
Materials
- White foam clay (large tub)
- Acrylic paints (terracotta, sage, dusty blue, cream, ochre, soft pink)
- Square cookie cutter (approx. 1.5 inches)
- Rolling pin or acrylic roller
- Texturing tools (stiff brush, sandpaper, toothbrush, plastic wrap)
- Fine grit additives (optional: sand, coffee grounds, black pepper)
- Flat wooden serving board or tray
- Craft glue
- Parchment paper
Step 1: Preparing the Base Clays
-
Divide the clay:
Start by separating your white foam clay into roughly 20 small, walnut-sized balls. Keep them covered or in an airtight container as you work, since foam clay begins to dry quickly when exposed to air. -
Mix base colors:
Knead small drops of acrylic paint into each clay ball. Aim for a palette of muted earth tones: mix terracotta, sage green, slate blue, blush pink, and cream. Leave some balls pure white for contrast. -
Create speckled effects:
To mimic stone or terrazzo, knead a pinch of ground black pepper or dried coffee grounds into the white or cream clay. For a sandy look, mix real sand or salt into the ochre-tinted clay until evenly distributed. -
Marbling technique:
For a subtle varied finish, stop kneading just before the paint is fully blended. This leaves faint streaks of white or concentrated color, adding visual depth to flat tones.
Step 2: Shaping and Texturing
-
Roll out the slab:
Take your first colored ball and roll it out on parchment paper to an even thickness of about 1/4 inch. If the clay is sticky, let it sit for a minute before rolling. -
Cut the tiles:
Use your square cutter to stamp out a clean shape. Make sure to press straight down so the edges remain sharp and vertical rather than beveled. -
Pitted texture:
For a volcanic or porous stone look, gently press the bristles of a stiff toothbrush or a stippling brush into the wet clay surface. Vary the pressure to create natural irregularity. -
Rough stone texture:
Crumple a piece of aluminum foil into a ball and roll it lightly over the surface of a wet tile. This creates deeper ridges and valleys resembling quarried rock. -
Smooth matte finish:
For the smooth tiles, dip your finger in a tiny bit of water and buff the surface of the wet clay circles until completely flawless. I find this creates the best contrast against the rougher textures. -
Gritty texture application:
If you want surface grit rather than mixed-in grit, press the wet tile face-down into a shallow dish of fine sand, then gently tap off the excess. -
Repeat the process:
Continue rolling, cutting, and texturing each color variant until you have enough tiles to fill your wooden board (around 20-25 tiles depending on board size).
Warped Tiles?
If tile corners curl up while drying, place a sheet of parchment paper over them and weigh them down with a heavy book for the final few hours of drying.
Step 3: Drying and Assembly
-
Initial drying:
Transfer all cutout tiles to a flat piece of parchment paper. Let them air dry for at least 24 hours. Flip them over halfway through to ensure the bottom dries evenly and prevents warping. -
Check for shrinkage:
Foam clay shrinks slightly as it dries. Once fully cured, arrange them loosely on your board to check the spacing. This is the time to make extra tiles if your gaps are too wide. -
Plan the layout:
Arrange the dried tiles on the wooden board. Try to balance the colors and textures—place a smooth blue next to a rough terracotta, for example, to keep the eye moving across the piece. -
Glue the first row:
Start gluing from the top edge. Apply a small dot of craft glue to the back of each tile and press firmly onto the wood. Use a ruler to ensure the first row is perfectly straight. -
Complete the grid:
gluing remaining rows, using the first row as your guide. Keep the spacing consistent between tiles, aiming for a small gap (about 1/8 inch) to let the wood grain show through. -
Final cure:
Allow the glue to set completely overnight before displaying the board upright.
Magnetic Swap
Instead of gluing tiles permanently, attach small adhesive magnets to the tile backs and use a metal sheet on the board. This lets you reorganize your palette whenever you like.
Now you have a beautiful reference board that doubles as a unique piece of modern art for your studio
Mixed-Media Wand or Hair Clip Toppers
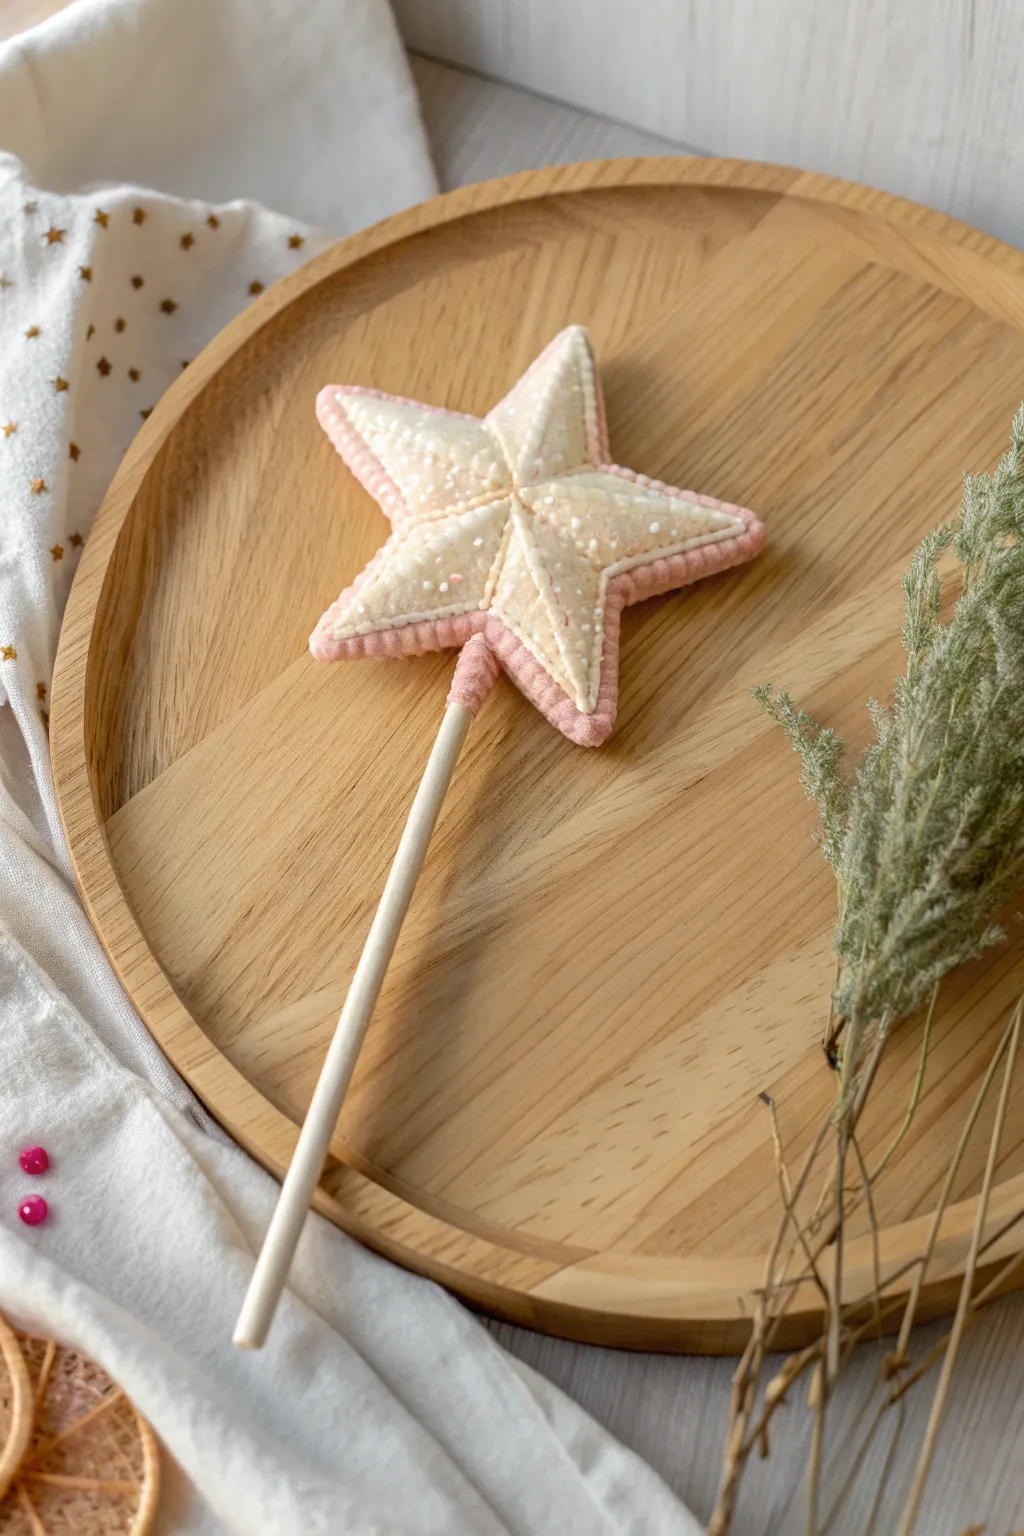
This enchanting star wand combines the softness of felt with the structure of lightweight crafting materials for a magical accessory. The finished piece features a layered, dimensional star in soft pink and cream tones, embellished with delicate embroidery and mounted on a sturdy wooden dowel.
Step-by-Step
Materials
- Soft pink felt sheet
- Cream or off-white felt sheet
- Foam clay (white or cream) or polyester fiberfill stuffing
- Cardstock or thin cardboard (for template)
- Wooden dowel (approx. 5-7mm diameter)
- White embroidery floss
- Pink embroidery floss (matching the felt)
- Embroidery needle
- Hot glue gun and glue sticks
- Scissors
Step 1: Preparing the Base
-
Create the Templates:
Draw or trace a sturdy five-pointed star shape onto cardstock. Create a second, slightly smaller star (about 5mm smaller on all sides) to serve as the inner cream layer. -
Cut the Felt:
Using your larger template, cut two identical star shapes from the pink felt. Using the smaller template, cut five individual diamond (kite) shapes from the cream felt that will fit together to form the inner star face. -
Prep the Dowel:
Wrap the top inch of your wooden dowel with a small strip of pink felt or coat it thinly with pink foam clay to ensure the attachment point blends seamlessly with the final wand.
Step 2: Constructing the Star Face
-
Position Inner Segments:
Arrange the five cream diamond shapes onto one of the pink felt stars. Leave a consistent pink border visible around the edges. -
Stitch the Center Lines:
Using white embroidery floss and a simple running stitch, sew down the center line of each cream diamond, stitching through the pink backing simultaneously to anchor them. -
Detail the Edges:
Switch to a whip stitch or small running stitch around the perimeter of each cream segment to secure them fully to the pink background. -
Add French Knots:
Scatter tiny French knots made with white floss across the cream segments. Creating these little texture bumps mimics the look of magical dust or sugar sprinkles.
Uneven Points?
If your star points look twisting or uneven, use a chopstick or knitting needle to gently push the stuffing completely into the tight corners before sealing the final seam.
Step 3: Assembly & Finishing
-
Attach the Dowel:
Place the plain pink backing star on your work surface. Apply a generous dab of hot glue to the top of your dowel and press it firmly onto the center of the bottom point of the star. -
Join the Halves:
Place the decorated front star on top, aligning the points with the backing star. -
Begin Blanket Stitching:
Thread your needle with matching pink floss. Starting near the handle, begin blanket stitching the two pink layers together around the outside edge. -
Stuff the Star:
Pause stitching before you close the final point. Here I like to use small bits of foam clay pushed into the tips for firm structure, or standard fiberfill for a softer plush feel. Ensure the points are well-filled. -
Close the Seam:
Continue your blanket stitch until you reach the wooden dowel again. Secure the thread with a knot tucked inside the felt layers. -
Reinforce the Neck:
Cut a thin strip of pink felt (about 0.5cm wide). Wrap this tightly around the joint where the star meets the dowel, securing with hot glue to hide any gaps.
Magical Addiphys
Add ribbons trailing from the neck of the wand or glue tiny seed beads onto the French knots for extra sparkle and texture.
Now you have a charming, handcrafted wand ready for imaginative play or as a sweet nursery decoration