If you want a craft that feels instantly doable, foam clay is my go-to for kids because it’s soft, colorful, and lightweight from the start. Here are my favorite foam clay ideas for kids—the kind that turn into cute little keepsakes without needing fancy tools or perfect skills.
Easy Foam Clay Animal Face Coins
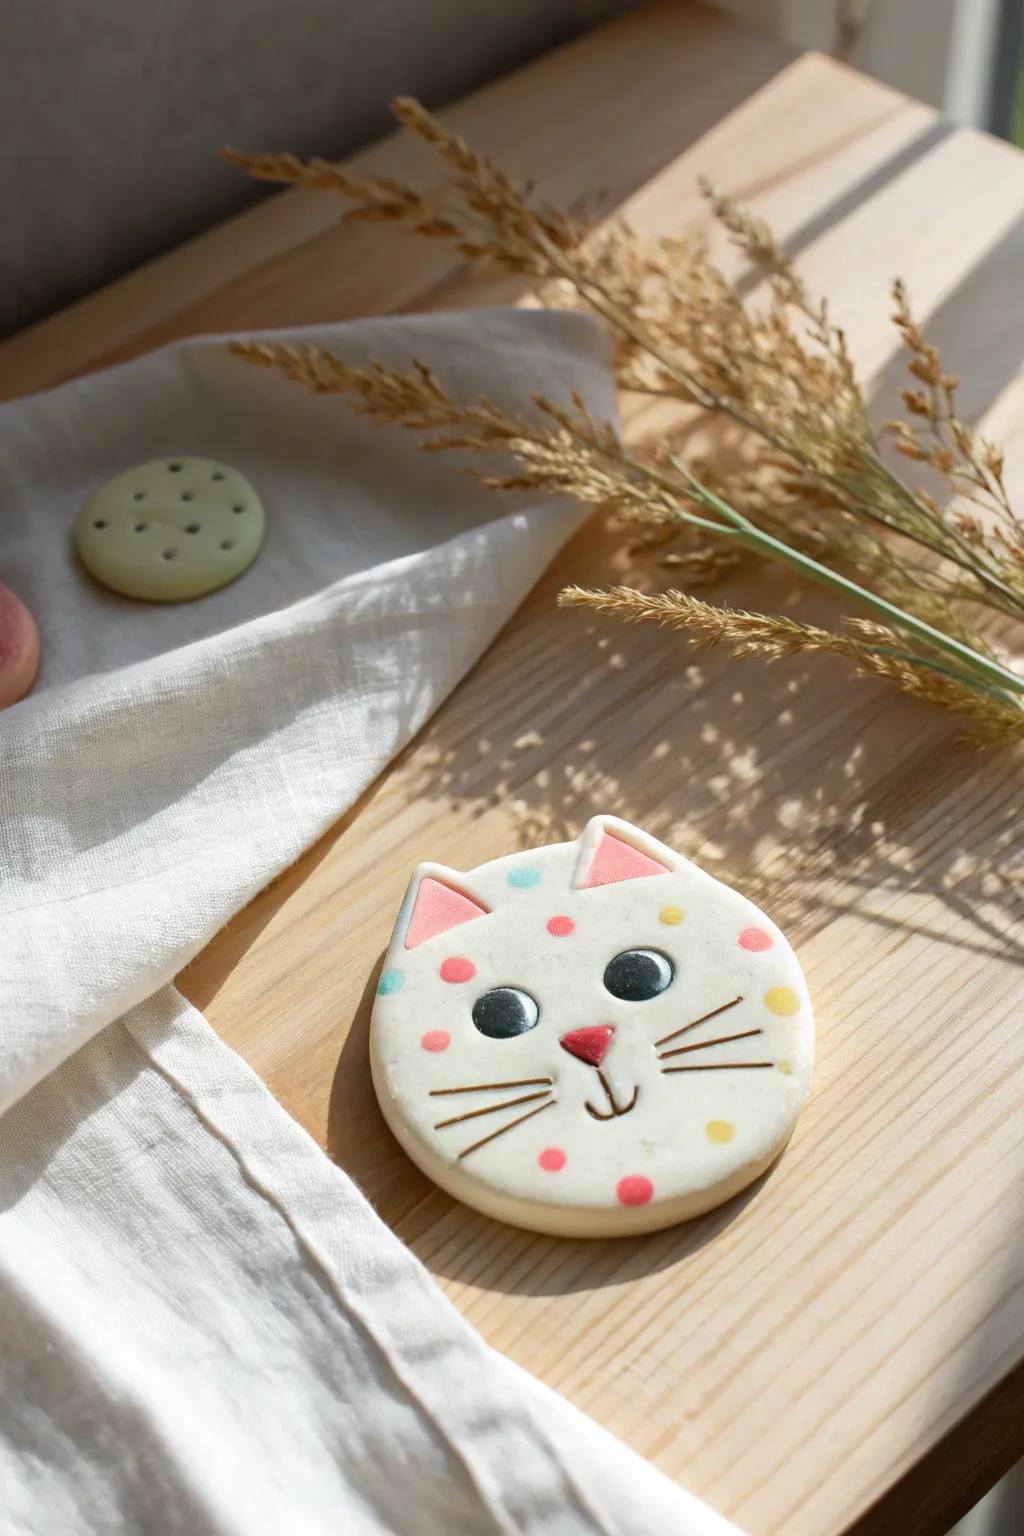
This adorable cat face coin is a perfect starter project for foam clay, featuring a smooth white base dotted with playful pastel spots. It creates a satisfyingly squishy, lightweight token that can be used for play, magnets, or decoration.
Step-by-Step Guide
Materials
- White foam clay (air-dry)
- Pink foam clay
- Yellow foam clay
- Blue foam clay
- Black foam clay
- Rolling pin or smooth jar
- Round cookie cutter (approx. 2-3 inches)
- Clay sculpting tool or dull knife
- Needle tool or toothpick
Step 1: Shaping the Base
-
Condition the Clay:
Take a generous handful of white foam clay and knead it in your hands until it feels warm and pliable. This helps prevent cracks later on. -
Roll it Out:
Place the clay on a non-stick surface and use your rolling pin to flatten it. Aim for a thickness of about 1/4 inch (6mm) so the coin feels substantial. -
Cut the Circle:
Press your round cookie cutter firmly into the clay. Give it a little wiggle before lifting to ensure a clean cut. -
Smooth the Edges:
Gently run your finger around the circumference of the circle to soften any sharp cutting ridges. -
Create Ear Triangles:
Pinch off two very small balls of white clay. Flatten them slightly and shape them into rounded triangles. -
Attach the Ears:
Press the base of each triangle onto the top edge of your circle. Blend the seam on the back side with your finger so they stick securely.
Smooth Seams
To attach pieces like ears without glue, simply rub the clay together where they join until the line disappears. A tiny drop of water can help blend stubborn seams.
Step 2: Adding the Face Details
-
Make the Inner Ears:
Take a tiny amount of pink clay and shape two smaller triangles. Press these into the center of the white ear shapes. -
Position the Eyes:
Roll two small balls of black foam clay. Flatten them slightly into ovals and press them onto the face, spacing them evenly apart. -
Add Eye Highlights:
For that spark of life, take the tiniest speck of white clay and press it onto the upper right curve of each black eye. -
Create the Nose:
Shape a tiny piece of pink clay into a rounded, inverted triangle. Place this centered below the eyes. -
Carve the Mouth:
Use a needle tool or the tip of a toothpick to gently press just below the nose, creating a vertical line. Then, curve outwards to the left and right to make the ‘J’ shapes of the cat’s smile. -
Indicate Whiskers:
Using the same tool, gently press three horizontal lines into the cheeks on both sides. Don’t drag the tool; instead, press down to emboss the lines.
Turn it into a Magnet
Once your cat face is fully dry, hot glue a small round magnet to the back side to create an adorable custom fridge decoration.
Step 3: Polka Dot Pattern
-
Prepare Colored Accents:
Roll very tiny balls of pink, yellow, and blue clay. You will need about 10-15 dots in total. -
Apply the Spots:
Scatter these colored balls randomly across the white face. I like to purposefully place a few near the edges so the pattern looks natural. -
Flatten the Design:
Once all dots are placed, very gently roll your rolling pin over the entire face one last time. This embeds the dots into the surface so everything is flush and smooth. -
Final Surface Check:
If the rolling blurred your mouth or whisker lines, gently re-trace them with your tool to make them crisp again. -
Dry Completely:
Let your kitty coin sit on a flat surface for 24-48 hours until the foam clay hardens completely.
Give your new little feline friend a gentle squeeze once dry to enjoy that unique foam texture


Ladybugs and Snails Kids Can Shape
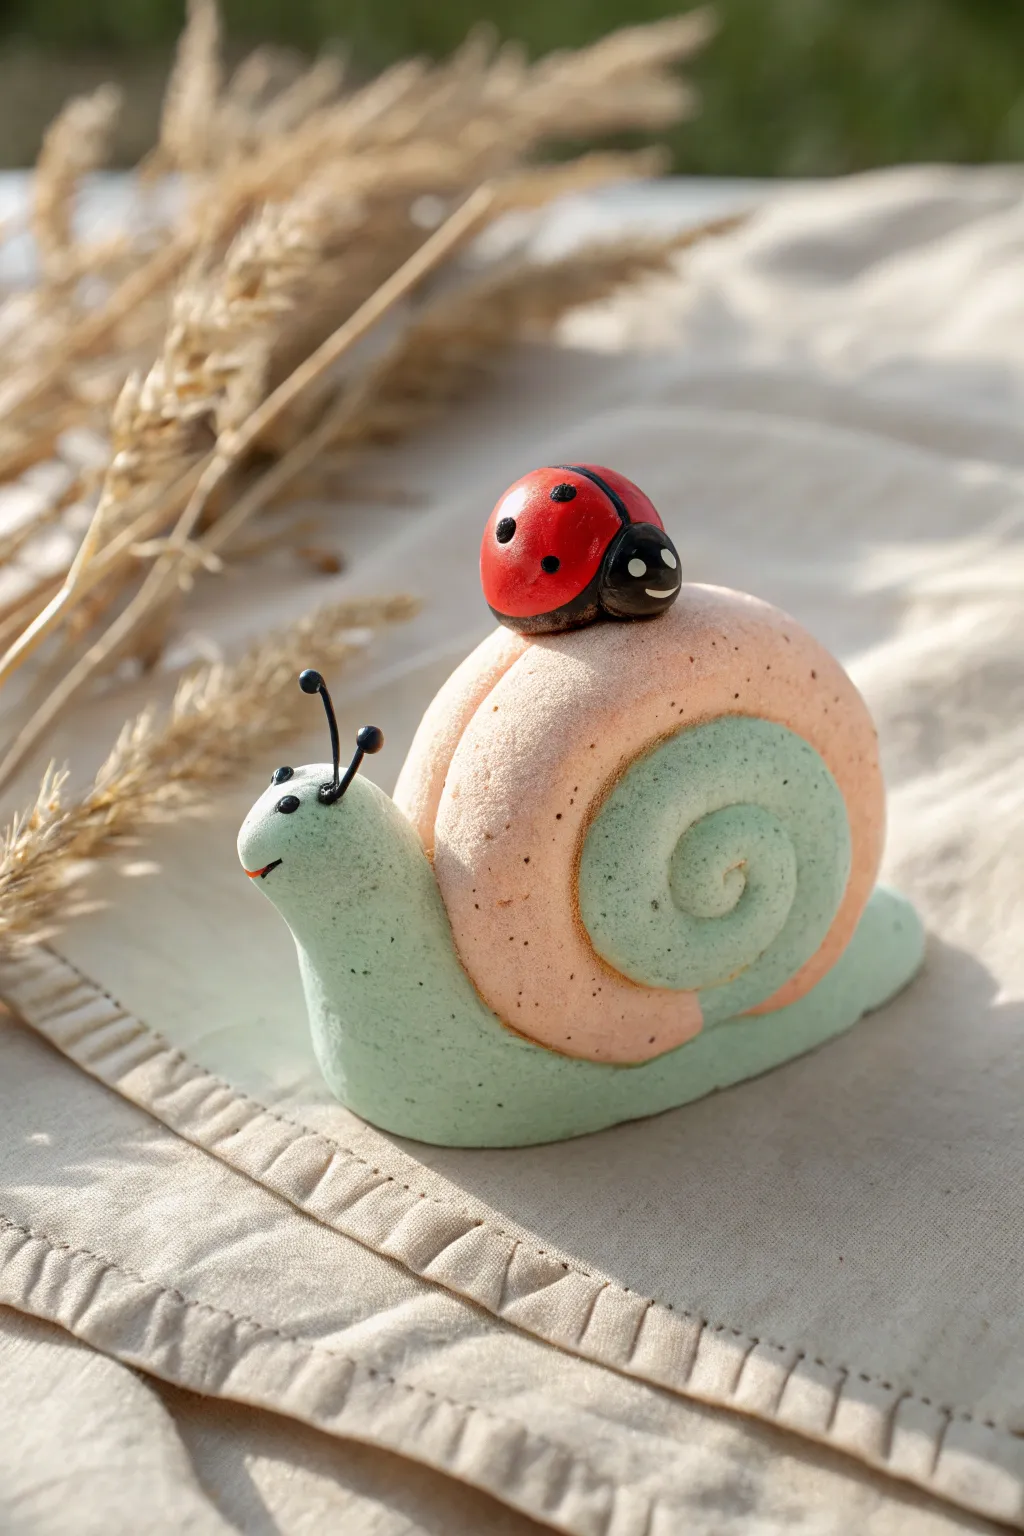
This adorable duo brings a touch of the garden indoors, featuring soft pastel tones and a playful design. With its mesmerizing spiral shell and tiny hitchhiker, this foam clay snail is as fun to squish and shape as it is to display.
Step-by-Step Tutorial
Materials
- Foam clay in pastel green, peach/pink, red, and black
- Small amount of white foam clay
- Modeling tools (or a toothpick)
- Black wire (thin gauge) for antennae
- Wire cutters
- Scissors
Step 1: Sculpting the Snail Body
-
Form the Base:
Start by grabbing a generous amount of pastel green foam clay. Roll it into a thick sausage shape, approximately 3-4 inches long. -
Shape the Head:
Gently pinch and bend one end upward to create the snail’s neck and head. Smooth out the transition so it curves naturally rather than looking like a sharp angle. -
Flatten the Tail:
Taper the other end slightly to form the tail, then gently press the entire bottom of the body onto your work surface to give it a flat, stable base. -
Add the Smile:
Use a modeling tool or the edge of a spoon to press a small, curved indentation into the side of the head for a cheerful mouth. I like to fill this tiny slit with a speck of black or red clay for extra definition.
Clay Won’t Stick?
If the shell keeps falling off the body, dab a tiny amount of water on the connection point. Foam clay becomes sticky when slightly damp, acting like glue.
Step 2: Creating the Spiral Shell
-
Roll the Coils:
Roll out two long ropes of clay: one in pastel green and one in peach. They should be roughly the same thickness. -
Connect the Colors:
Lay the two ropes side-by-side and gently press them together so they adhere without blending the colors completely. -
Start the Spiral:
Starting from one end, tightly roll the joined ropes inward like a cinnamon bun to create the shell shape. -
Secure the Shell:
Press the finished spiral firmly onto the back of the green body. Gently smooth the bottom edges of the shell into the body clay to ensure it sticks well.
Step 3: Adding the Face Details
-
Prepare the Wire:
Cut two small pieces of black wire, about an inch long each. These will be the eye stalks. -
Create the Eyestalks:
Take two tiny balls of black clay and push them onto the tips of the wires. Insert the other ends of the wires into the top of the snail’s head. -
Add Eye Highlights:
Press miniscule dots of white clay onto the black balls on the antennae to give the snail a lively expression.
Textured Shell
Before rolling your spiral, gently roll the clay ropes over a textured fabric or mesh. This imitates the rough, earthy look seen in the photo.
Step 4: Crafting the Ladybug
-
Make the Body:
Roll a small ball of red clay and flatten the bottom slightly so it sits well. This will be the ladybug’s main body. -
Form the Head:
Attach a smaller semi-circle of black clay to the front of the red body. -
Add the Spots:
Roll tiny specks of black clay between your fingers and press them gently onto the red back. -
Detail the Face:
Add tiny white dots for eyes on the black head section and use a tool to scratch a tiny smile. -
Assemble the Scene:
Place the finished ladybug on top of the snail’s shell. Press down gently to secure it without squishing the shapes.
Allow your new garden friends to air dry completely for 24 hours before moving them to a shelf display


Foam Clay Fridge Magnets That Pop
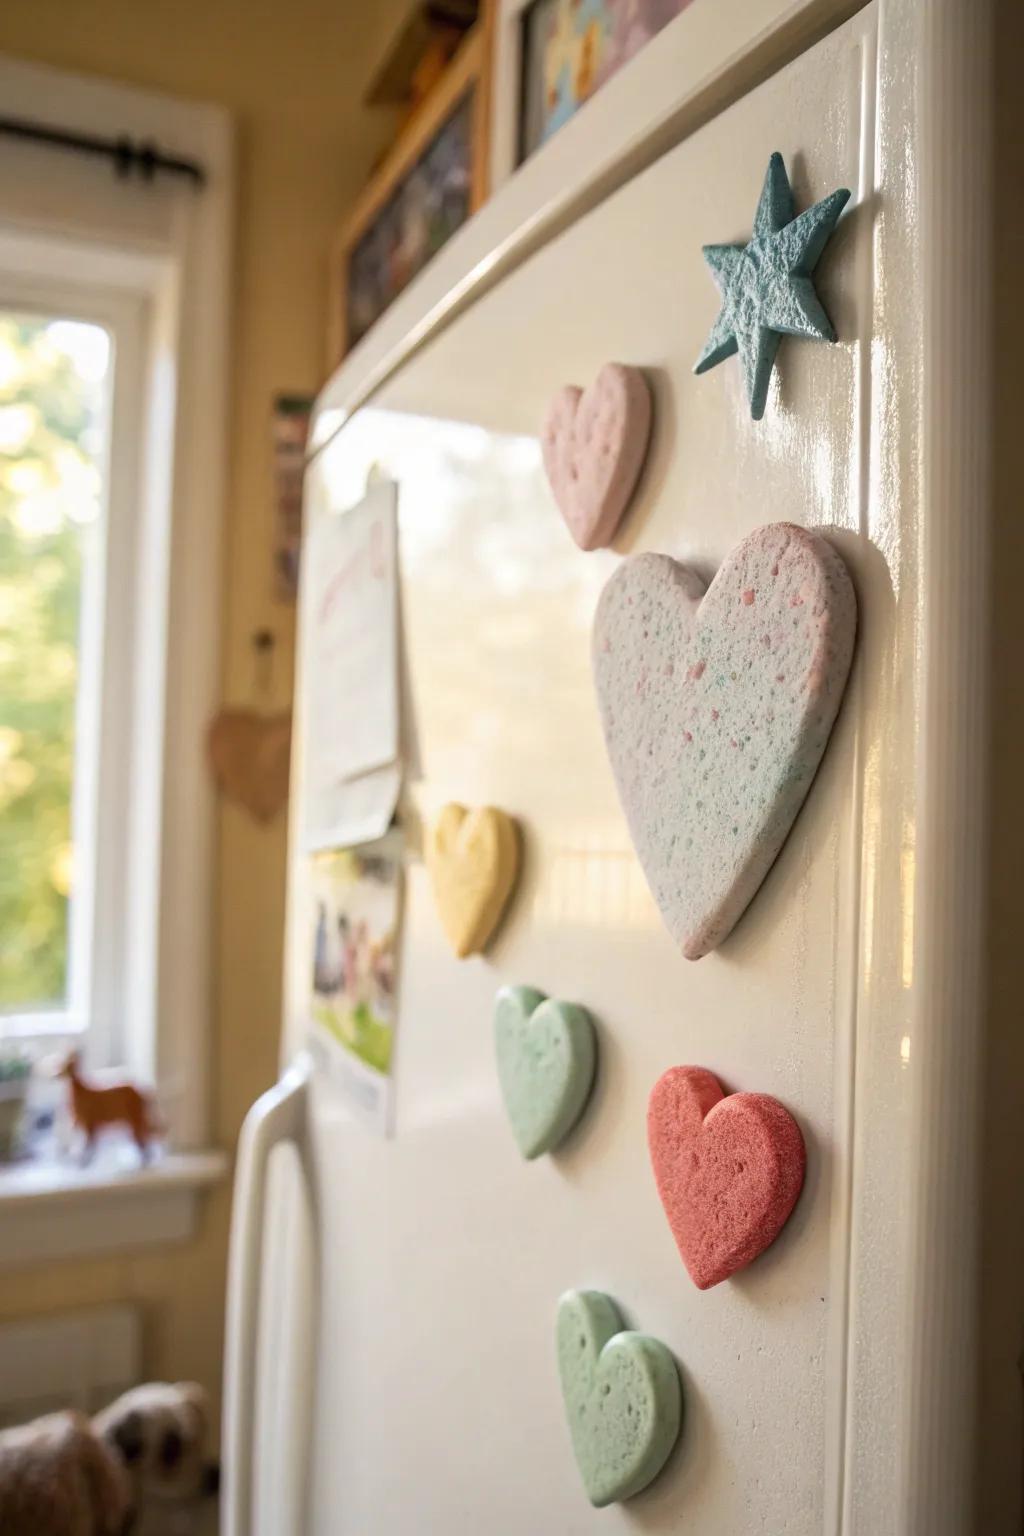
Brighten up your kitchen with these wonderfully tactile, chunky magnets that look almost good enough to eat. Using foam clay allows you to create lightweight, textured shapes in soft pastel colors that stick securely to any magnetic surface without sliding.
How-To Guide
Materials
- Foam clay (assorted pastel colors: pink, blue, yellow, mint green)
- White foam clay (for mixing/lightening)
- Heart-shaped cookie cutters (various sizes)
- Star-shaped cookie cutter
- Rolling pin or smooth round jar
- Parchment paper or non-stick craft mat
- Strong round magnets (ceramic or neodymium)
- Craft glue or hot glue gun
- Optional: Glitter or sprinkles for texture
Step 1: Color Mixing and Preparation
-
Prepare your workspace:
Lay down parchment paper or a non-stick craft mat to protect your table and ensure the foam clay doesn’t stick while you work. -
Create custom pastels:
Take a small ball of colored foam clay and a slightly larger ball of white foam clay. Knead them together thoroughly until the color is uniform and soft. -
Make the speckled mix:
For the large speckled heart, take a large portion of white clay and very tiny pinch-sized bits of pink, blue, and green clay. Gently fold them in but don’t over-mix; you want distinct specks of color visible.
Pro Tip: Seamless Edges
If the clay sticks to the cutter, dip the cutter in a tiny bit of cornstarch before pressing down. This helps the shape release cleanly without dragging the edges.
Step 2: Shaping the Magnets
-
Flatten the clay:
Place a ball of your prepared clay on the mat. Using a rolling pin, flatten it out until it is approximately 1/2 inch thick. -
Thicken carefully:
Don’t roll it too thin; part of the charm of these magnets is their chunky, puffy three-dimensional look. -
Cut the shapes:
Press a cookie cutter firmly into the rolled clay. Wiggle it slightly to ensure a clean cut all the way through. -
Release the shape:
Gently push the clay shape out of the cutter. If the edges are rough, smooth them lightly with your finger to round them off. -
Create variety:
Repeat this process with different colors and cutter sizes. Try making a small yellow heart, a mint green heart, and a sharp blue star. -
Add surface texture:
If your foam clay has smoothed out too much during rolling, lightly tap the surface with a stiff brush or a textured sponge to bring back that signature bubbly look.
Level Up: Scented Magnets
Knead a drop of essential oil, like lavender or vanilla, into the clay before shaping. Your fridge will smell amazing every time you walk by.
Step 3: Assembly and Finish
-
Initial drying phase:
Let the shapes sit undisturbed for about 24 hours. I like to flip them over halfway through so the bottom dries evenly as well. -
Check firmness:
Ensure the shapes are fully hardened and lightweight before attaching anything to the back. -
Prepare the magnets:
Select a magnet strong enough to hold the shape but not so heavy that it drags down. -
Apply adhesive:
Place a dab of strong craft glue or hot glue on the center of the back of each shape. -
Attach the magnet:
Press the magnet firmly into the glue. If using hot glue, hold it for a few seconds until it sets. -
Final cure:
Allow the glue to cure completely according to the manufacturer’s instructions to ensure a lasting bond.
Once fully dry, these charming puffy shapes are ready to hold up your grocery lists and favorite photos


Foam Clay Pencil Toppers With Personality
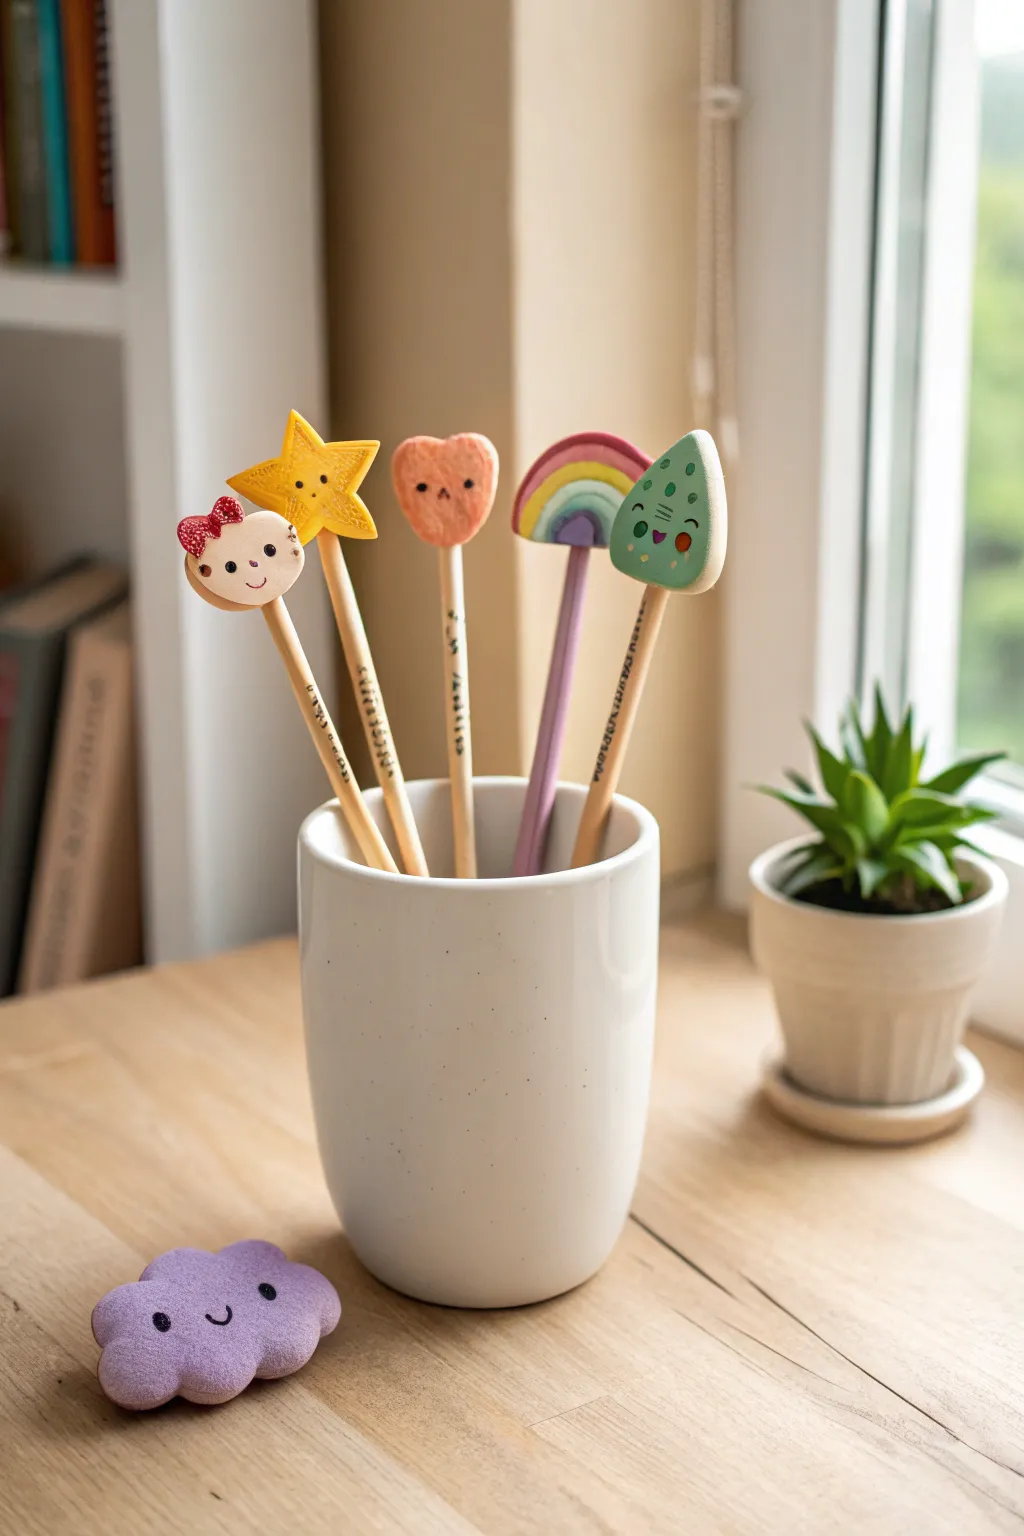
Transform boring stationery into a cast of quirky characters with these adorable foam clay pencil toppers. From a smiling star to a cheerful cloud, these lightweight accessories add personality to every sketch and homework assignment.
Step-by-Step Guide
Materials
- Foam clay in various colors (white, yellow, peach/pink, purple, green, blue, red)
- Wooden pencils (unsharpened works best for crafting)
- Black fine-point marker or black acrylic paint pen
- Clay modeling tools (or a toothpick)
- Small rolling pin (optional)
- Clear drying craft glue
Step 1: Preparation & Base Shapes
-
Prep the pencils:
Before starting with the clay, ensure the tops of your pencils are clean and free of erasers if possible, or decide whether you want to cover the existing eraser. A small dab of craft glue on the pencil end will help the clay stick securely later. -
Mix your colors:
Decide on your palette. For the girl’s face, mix a tiny bit of orange or pink into white clay to get a skin tone. For the pastel rainbow and cloud, soften your primary colors by kneading in some white foam clay. -
Form the girl face:
Roll a ball of the skin-tone clay about the size of a large grape. Flatten it slightly into a thick disc shape. Gently press the pencil into the bottom edge to create an indentation, remove it, add a drop of glue, and re-insert the pencil. -
Shape the star:
Take yellow clay and flatten it into a thick pancake. Use a small star cookie cutter or shape five points by hand by pinching and pulling gently. Attach it to a pencil just like the face shape. -
Create the heart:
Roll peach or light pink clay into a ball, then pinch the bottom to form a point. Press an indentation into the top center to create the heart lobes. Smooth the edges and mount it onto its pencil. -
Make the rainbow base:
Create a semi-circle shape using a base color (like white or light blue). This will act as the backing for your rainbow stripes later. Attach this firmly to the top of a pencil. -
Mold the green drop:
Shape green clay into a flat teardrop or guitar-pick shape. This will become the cute creature on the far right. Secure it onto a pencil.
Smooth Operator
If your foam clay has cracks, dip your finger in a tiny amount of water and gently rub the surface to smooth them out before drying.
Step 2: Adding Details & Personality
-
Detail the rainbow:
Roll very thin snakes of purple, blue, green, yellow, and red clay. Lay them in arches over your semi-circle base, pressing gently so they adhere to each other without squishing the shape. -
Dress up the girl:
For the girl topper, shape two tiny balls of red clay into triangles to form a bow. Place them on the upper left of her head. Add a tiny dot of red in the center of the bow for the knot. -
Add texture to the star:
I like to use a texturing tool or an old toothbrush to gently dab the surface of the star topper, giving it a slightly rough, sparkly look before the clay dries. -
Decorate the green drop:
Take tiny bits of darker green or blue clay and press them into the green drop shape to create spots or texture, making it look like a little monster or alien. -
Shape the purple cloud:
Separately from the pencils, create the purple cloud shown on the table. Form a flat oval and attach several small balls of clay around the edge to create the fluffy bumps. Smooth the seams with your finger. -
Let them cure:
Allow all the pencil toppers to air dry completely. Foam clay can take anywhere from 24 to 48 hours to fully harden depending on thickness. Stand the pencils upright in a jar or mug while they dry.
Step 3: Bringing Them to Life
-
Draw the faces:
Once the clay is fully hardened, use a black fine-point marker or paint pen to draw the faces. Keep it simple: two dots for eyes and a small curve for a smile. -
Add joyful expressions:
Give the star wide-set eyes. For the heart, try a tiny sad/confused mouth for variety. Give the green drop happy, closed eyes (inverted ‘U’ shapes) and a wide smile. -
Add rosy cheeks:
Use a pink marker or a tiny dab of pink paint to add blush marks to the cheeks of the girl, the star, and the green drop character. -
Highlight the eyes:
For an extra spark of life, use a white gel pen or a pin dipped in white paint to add a tiny catchlight reflection dot to the black eyes of the girl and the cloud.
Bonus Features
Make matching eraser covers using same shapes but keep the bottom open to slide over standard erasers instead of gluing them permanently.
Now you have a set of friendly writing companions to brighten up your desk space

The Complete Guide to Pottery Troubleshooting
Uncover the most common ceramic mistakes—from cracking clay to failed glazes—and learn how to fix them fast.
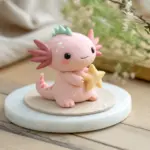
Silly Foam Clay Monsters With Big Eyes
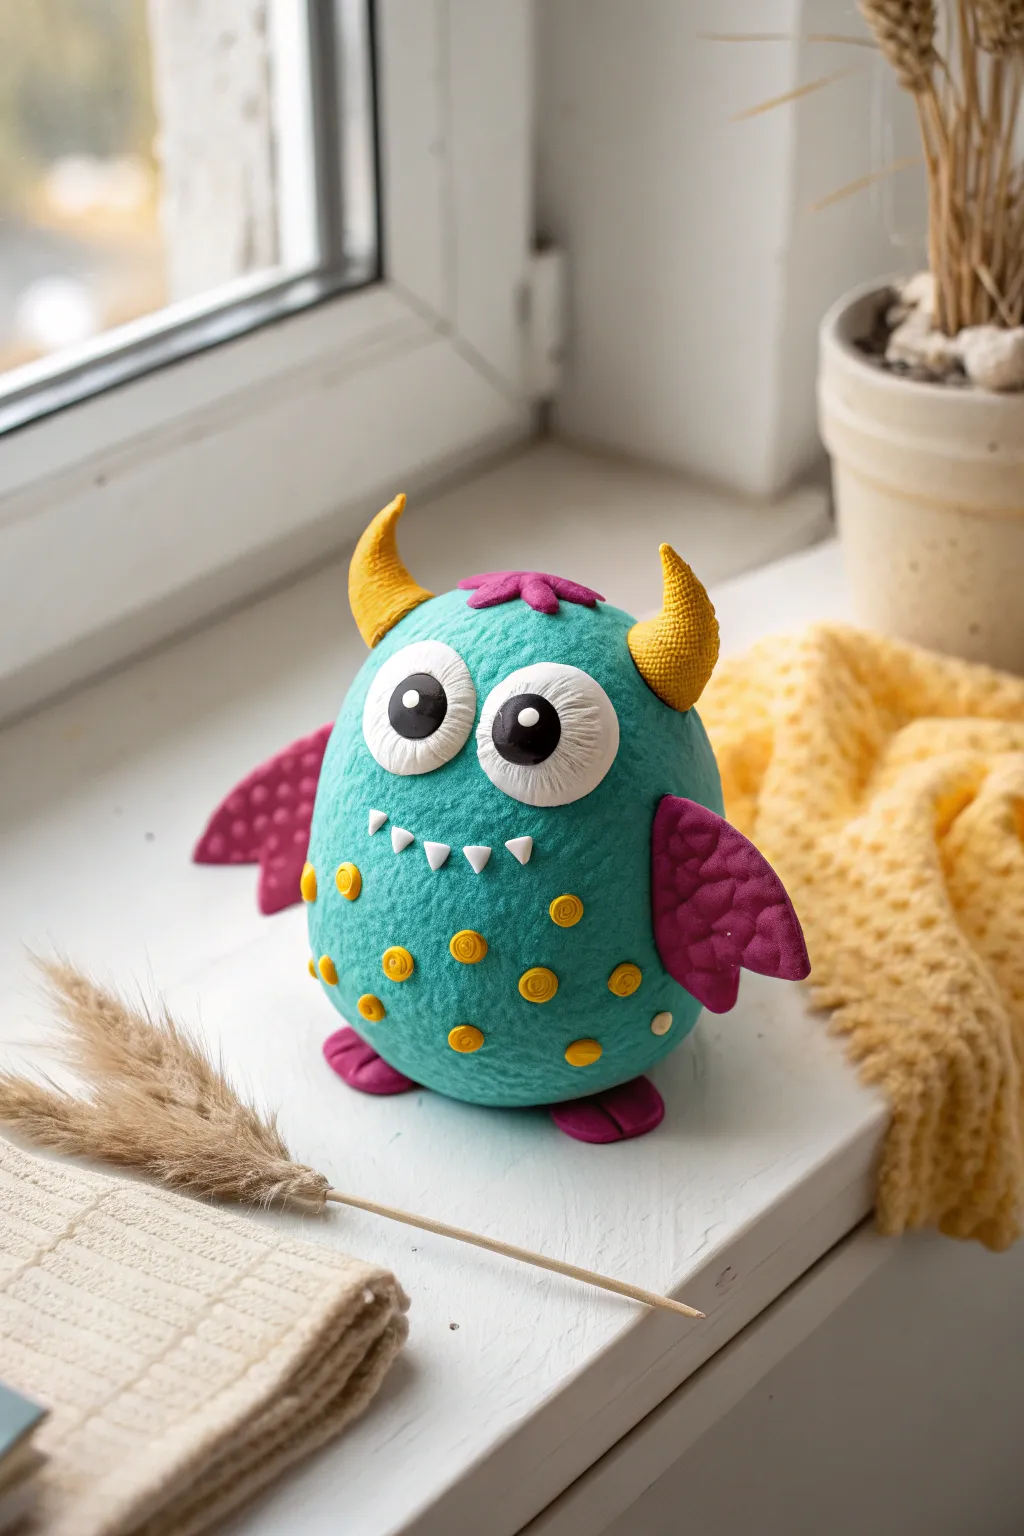
This adorable teal creature is full of personality, featuring oversized eyes, funky horns, and lots of polka dots. The textured look of foam clay makes it extra squishy and fun to display on a sunny windowsill.
Detailed Instructions
Materials
- Teal or turquoise foam clay
- Magenta or dark pink foam clay
- Yellow or mustard foam clay
- White foam clay
- Black foam clay
- Large foam egg or Styrofoam ball (optional core)
- Modeling tools (or a toothpick)
- Clean work surface
Step 1: Shaping the Monster’s Body
-
Form the Base:
Start with a large ball of teal foam clay. If you want to save clay, cover a styrofoam egg with a layer of teal clay instead. Shape it into a slightly squat egg shape, wider at the bottom. -
Smooth the Surface:
Gently roll the egg shape in your hands or against the table to smooth out any seams. The texture of the foam beads gives it a natural ‘furry’ look, so don’t worry about it being perfectly glass-smooth. -
Add Texture:
Use a texturing tool or just the tips of your fingers to gently pockmark the surface a little, enhancing that bubbly foam clay appearance.
Parts Won’t Stick?
If the clay has started drying while you worked, dab a tiny drop of water on the connection point to make it sticky again.
Step 2: Creating the Big Eyes
-
Make Eye Sockets:
Press your thumbs gently into the upper half of the teal body to create two shallow indentations where the eyes will sit. -
Form the Whites:
Roll two balls of white foam clay. Press these flat into thick discs and place them into the indentations you made. They should look oversized! -
Add Texture to the Whites:
Take a modeling tool or a toothpick and gently press lines radiating from the center of the white eye to the outer edge, creating an iris-like texture. -
Place the Pupils:
Roll two smaller balls of black clay. Press them firmly onto the center of the white discs. Add a tiny dot of white clay to each pupil for a sparkling reflection.
Step 3: Adding Bright Appendages
-
Shape the Wings:
take the magenta clay and shape two flattened triangles for the wings. These should be fairly thick. -
Texture the Wings:
Use the side of a toothpick or tool to press indentations into the wings, making them look like bat wings or feathers. -
Attach the Wings:
Press the wings firmly onto the sides of the teal body. Foam clay stick to itself easily while wet, so just hold it for a few seconds. -
Make the Feet:
Create two small, flat ovals from the magenta clay. I usually make a small indentation in the middle of each to suggest toes. -
Attach the Feet:
Place the monster body on top of the magenta feet so they peek out from underneath.
Level Up: Dynamic Poses
Before the clay dries, turn the head slightly or position one wing waving high to give your monster an action pose.
Step 4: Horns and Details
-
Form the Horns:
Roll two cones of yellow clay. Curve the tips slightly so they point inward or backward. -
Spiral the Horns:
Using a tool, gently press a spiral groove around each horn from base to tip to give it a twisted texture. -
Attach Horns and Hair:
Stick the horns onto the top sides of the head. Add a small patch of magenta clay between them for a tuft of hair. -
Create the Smile:
Roll extremely tiny triangles of white clay for teeth. Press them in a curved line directly onto the teal body below the eyes.
Step 5: The Polka Dot Finish
-
Roll Yellow Dots:
Make many tiny balls of yellow clay. These will be the spots. -
Decorate the Body:
Press the yellow balls all over the teal body, flattening them slightly so they stick well. Variation in placement makes it look more organic. -
Final Check:
Look over your monster. If any parts seem loose, press them gently together again. Let the creature sit undisturbed for 24-48 hours to fully cure and harden.
Once dry, your new teal friend is ready to guard your desk or bookshelf with those big, watchful eyes
Foam Clay Story Stones for Pretend Play
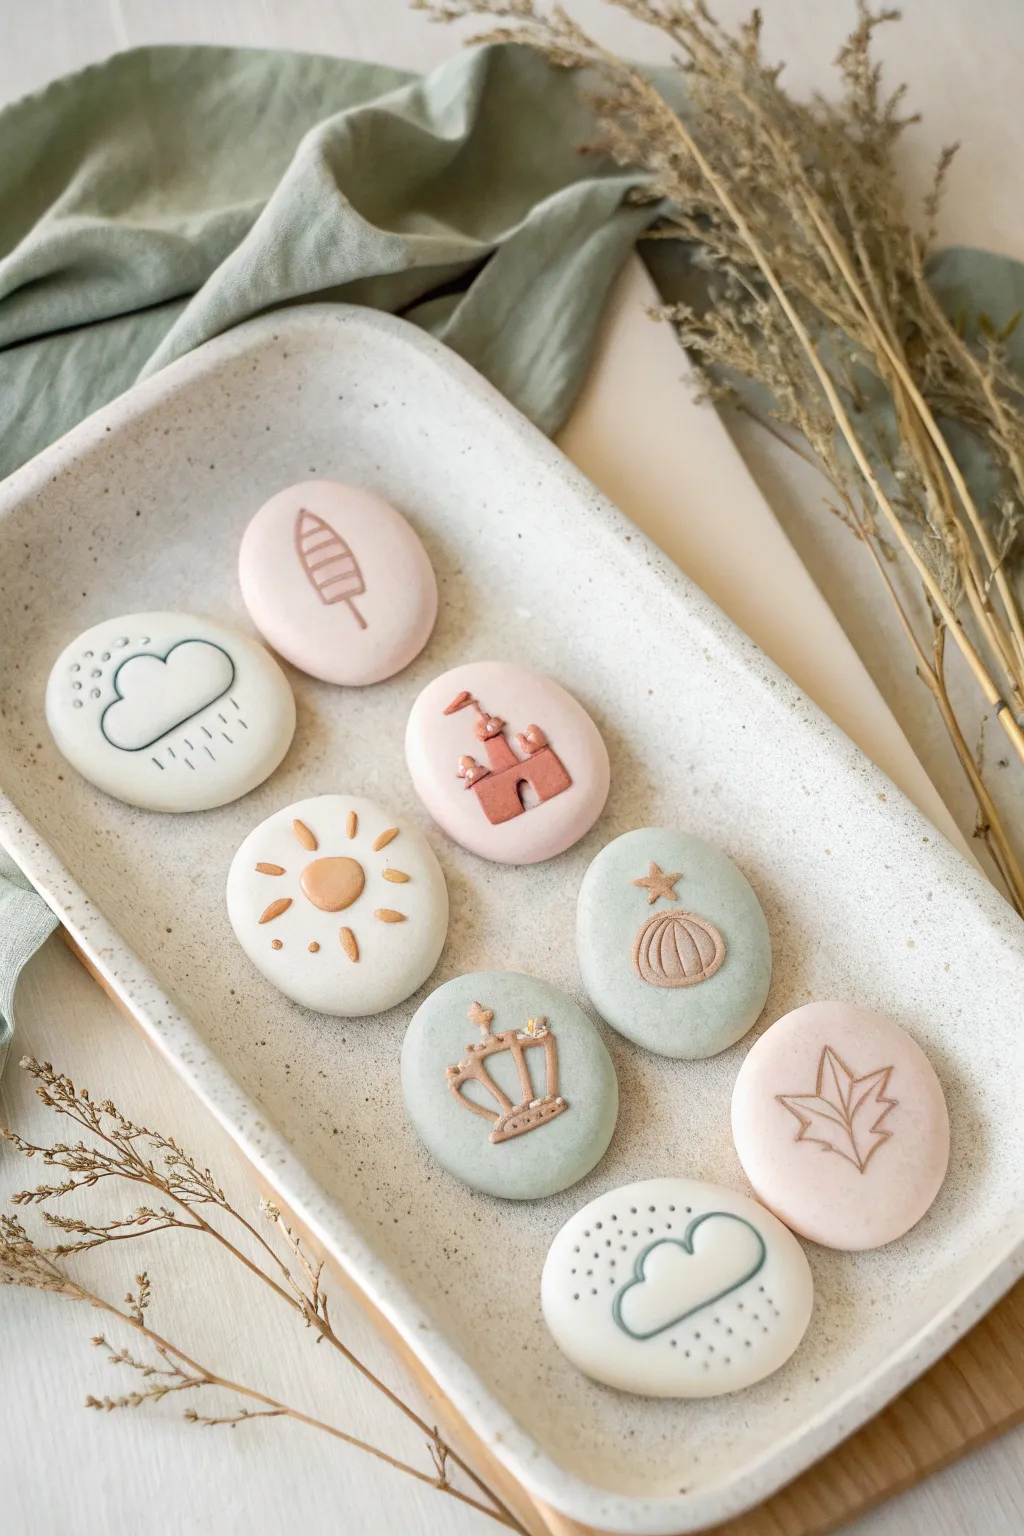
Transform simple foam clay into a treasury of tactile story prompts with this elegant, pastel-hued project. These smooth, stone-like discs feature raised relief designs in soft sage, blush, and cream tones, perfect for sparking imaginative tales.
Step-by-Step Guide
Materials
- White, air-dry roam clay
- Acrylic paints (muted sage green, blush pink, terracotta, warm cream)
- Clean, smooth river stones (optional base)
- Rolling pin or smooth jar
- Clay sculpting tools (needle tool, small ball stylus)
- Small circle cutter (optional, for uniform shapes)
- Fineliner tool or very thin clay extruder (optional)
- Matte sealant spray
Step 1: Shaping the Base Stones
-
Prepare your palette:
Begin by removing three portions of white foam clay. Leave one white, and knead small drops of acrylic paint into the other two to create a very pale sage green and a soft blush pink. -
Form the stones:
Take a walnut-sized ball of clay and roll it between your palms until it is perfectly smooth and free of cracks. -
Flatten the shape:
Gently press the ball down against your work surface with your palm to create a flattened oval or ‘skipping stone’ shape. You want them about 1/2 inch thick. -
Smooth the edges:
Run your finger wet with a tiny bit of water around the perimeter to soften any sharp angles, mimicking the look of eroded river rocks. -
Create the set:
Repeat this process until you have a mix of cream, pink, and green stones. Aim for 8-10 stones for a good storytelling variety. -
Initial drying:
Let these base shapes sit for about 15-20 minutes. Creating a slightly firm ‘skin’ makes adding the details easier without deforming the stone.
Sticky Situation?
If the clay is sticking to your fingers while rolling tiny details, apply a tiny amount of hand lotion or baby oil to your fingertips.
Step 2: Sculpting the Motifs
-
Mix the accent color:
Prepare a small amount of clay colored with terracotta or warm brown paint. This will be used for details like the castle turret, sun rays, and stems. -
Cloud design:
On a white stone, roll a very thin snake of sage green clay. Gently press it into a cloud outline shape on the surface. -
Adding texture:
Use a needle tool or toothpick to poke small holes around the cloud outline, creating a decorative dotted texture. -
Sun design:
For the sun stone, flatten a small ball of terracotta clay into the center. Roll tiny tapered logs for rays and press them radially around the center. -
Castle construction:
On a pink stone, cut a small square and two rectangles from your terracotta clay. Arrange them to look like a fortress. Use a needle tool to impress lines for the brickwork. -
Crown details:
For the crown, lay down thin strips of terracotta clay in a U-shape. Add vertical bars and top them with tiny balls of clay to mimic jewels. -
Leaf impressions:
On a pink stone, you can either sculpt a leaf with thin clay coils or simply press a real leaf into the drying foam to create an imprint, then trace it with a brown marker later. -
The second cloud:
Create a variation of the cloud stone using a black or dark grey thin coil for the outline. Add tiny vertical dashes below it to represent rain. -
Organic touches:
For the tree design, press a vertical brown coil into a pink stone. Add horizontal ribs to create a stylized pine tree or feather look. -
Refining the relief:
Go back over your designs with a smoothing tool to ensure the added clay pieces are firmly bonded to the base stone. I always check side angles to make sure nothing is peeling up.
Step 3: Finishing Touches
-
Final cure:
Allow the entire set to dry completely. Foam clay can take 24-48 hours to fully harden depending on thickness and humidity. -
Sealing the work:
Once fully dry, spray the stones with a matte sealant. This protects the foam from dirt and moisture during play without making them slippery. -
Presentation:
Arrange your finished story stones on a tray or in a small drawstring bag, ready for their first adventure.
Cracking Up
If you see cracks forming as the clay dries, smooth a tiny bit of fresh, wet clay into the fissure with a sculpting tool to patch it instantly.
Your beautiful set of story stones is now ready to inspire hours of creative narration and play


What Really Happens Inside the Kiln
Learn how time and temperature work together inside the kiln to transform clay into durable ceramic.
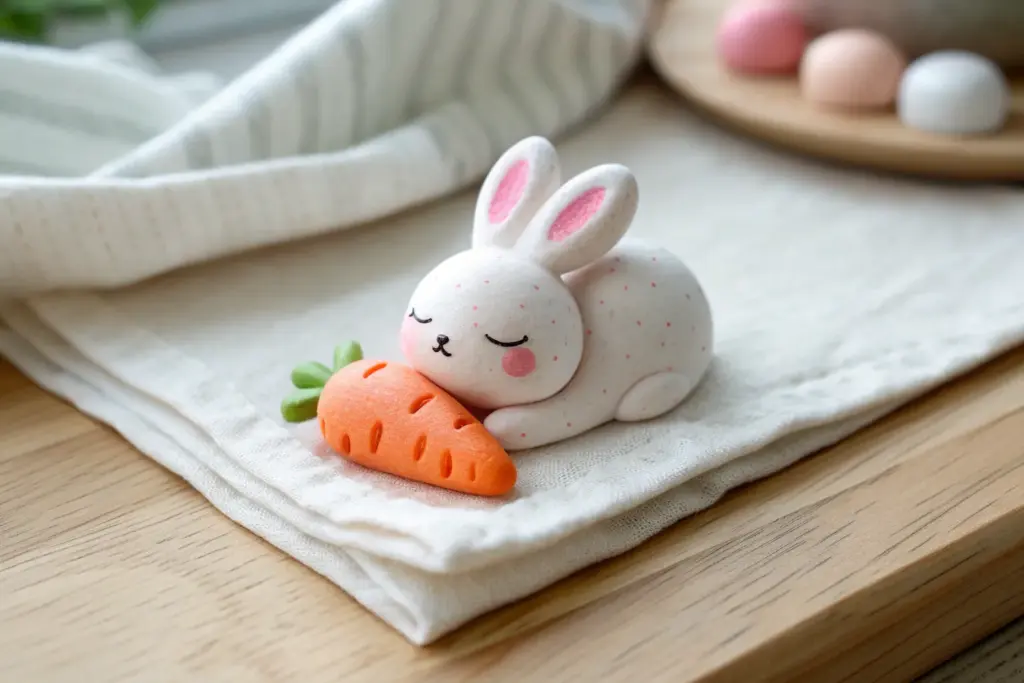
Foam Clay Egg Characters
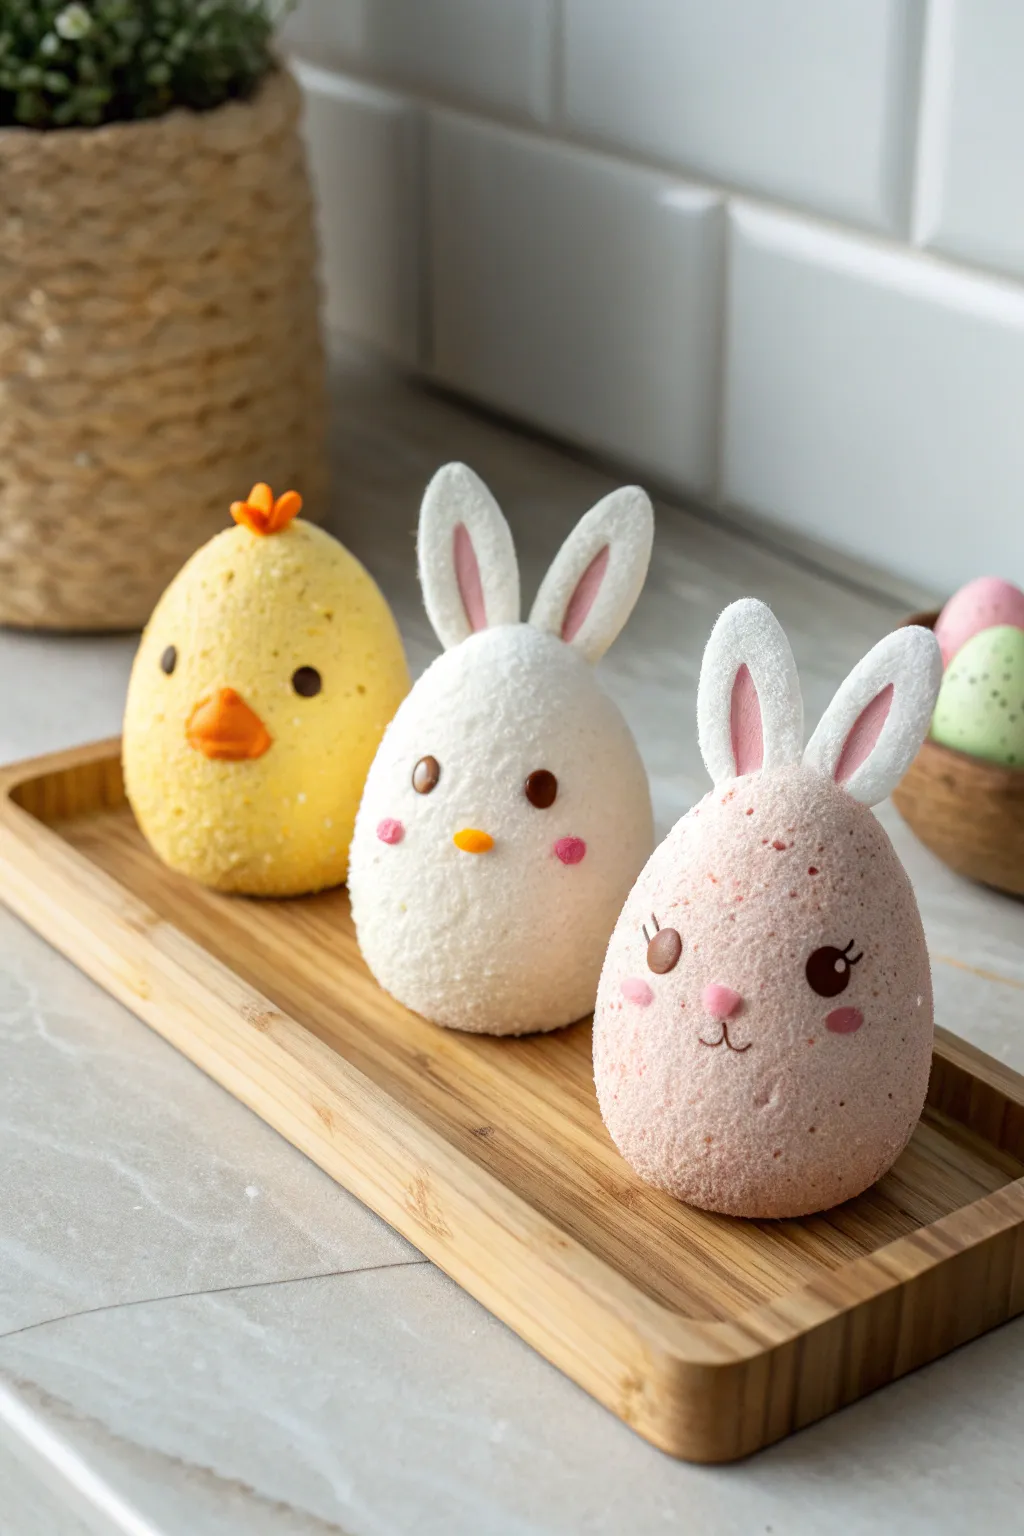
Transform plain styrofoam eggs into this adorable cast of springtime characters using textured foam clay. These sweet bunny and chick figures feature a delightful fuzzy finish that makes them perfect for Easter baskets or seasonal shelf décor.
Step-by-Step Guide
Materials
- 3 Styrofoam eggs (medium size, approx. 3-4 inches)
- Foam clay (pale yellow, bright white, soft pink)
- Small amount of orange foam clay (for chick beak)
- Small black beads or black foam clay (for eyes/details)
- Tiny pink pompoms or pink foam clay (for cheeks/noses)
- Flexible craft wire or toothpicks (for ear support)
- Sculpting tool or plastic knife
- Wooden tray (optional, for display)
Step 1: Base Egg Coating
-
Prep the yellow chick:
Take your first styrofoam egg and a generous handful of pale yellow foam clay. Knead the clay slightly to warm it up, then flatten pieces and press them firmly onto the egg surface. -
Smooth the seams:
Continue adding yellow clay until the entire egg is covered. Use your thumbs to gently rub the seams together until the surface looks uniform and seamless. -
Texture the surface:
To get that distinct fuzzy look seen in the photo, gently tap the surface of the clay with a stiff bristle brush or a crumpled ball of aluminum foil before it dries. -
Coat the white bunnies:
Repeat the coating process for the next two eggs using bright white foam clay. Ensure an even, thick layer so the styrofoam texture underneath doesn’t show through. -
Create the pink bunny base:
For the third character, mix a tiny bit of pink clay into white clay to create a speckled or very pale pink effect, then coat the final egg completely.
Step 2: Sculpting the Ears
-
Shape the ear forms:
Roll four sausages of white clay for the bunny ears. Flatten them slightly into long oval shapes with tapered tops. -
Add inner ear details:
Take small amounts of pink clay and press them into the center of two ear shapes for the middle bunny. For the pink bunny on the right, use white or deeper pink for the inner ear contrast. -
Insert supports:
Push a toothpick or short piece of wire halfway into the bottom of each ear structure. This step is crucial to keep them upright. -
Attach the ears:
Press the exposed end of the toothpicks into the top of the bunny eggs. Use a sculpting tool to smooth the clay at the join point so the ears look like they are growing out of the head.
Fixing Dry Clay
If your foam clay starts feeling stiff or cracked while you work, knead in a single drop of water. This revives the elasticity instantly and helps seams blend better.
Step 3: Face & Details
-
Chick features:
Roll a small orange cone for the beak and press it into the center of the yellow egg. Add a tiny tuft of orange clay on top for the feathers. -
Embedded eyes:
Press small black beads firmly into the soft clay for the eyes on the chick and the white bunny. If you don’t have beads, roll tiny balls of black clay. -
Middle bunny face:
Add a tiny yellow triangle nose and two small balls of pink clay for the cheeks. Gently flatten the cheek circles. -
Pink bunny expression:
For the pink bunny, use very thin strings of dark brown or black clay to create the eyelashes and the small smiling mouth. -
Final drying:
Let your characters sit undisturbed for 24-48 hours. I find that proping them up against a heavy book helps prevent flat spots while the bottom dries.
Make It Sparkle
Mix a pinch of fine iridescent glitter into the white clay before covering the eggs. This gives the bunnies a magical, frosty texture perfect for spring.
Arrange your completed trio on a tray or nestle them into some shredded paper grass for a festive display
Mini Foam Clay Mushrooms for Fairy Worlds
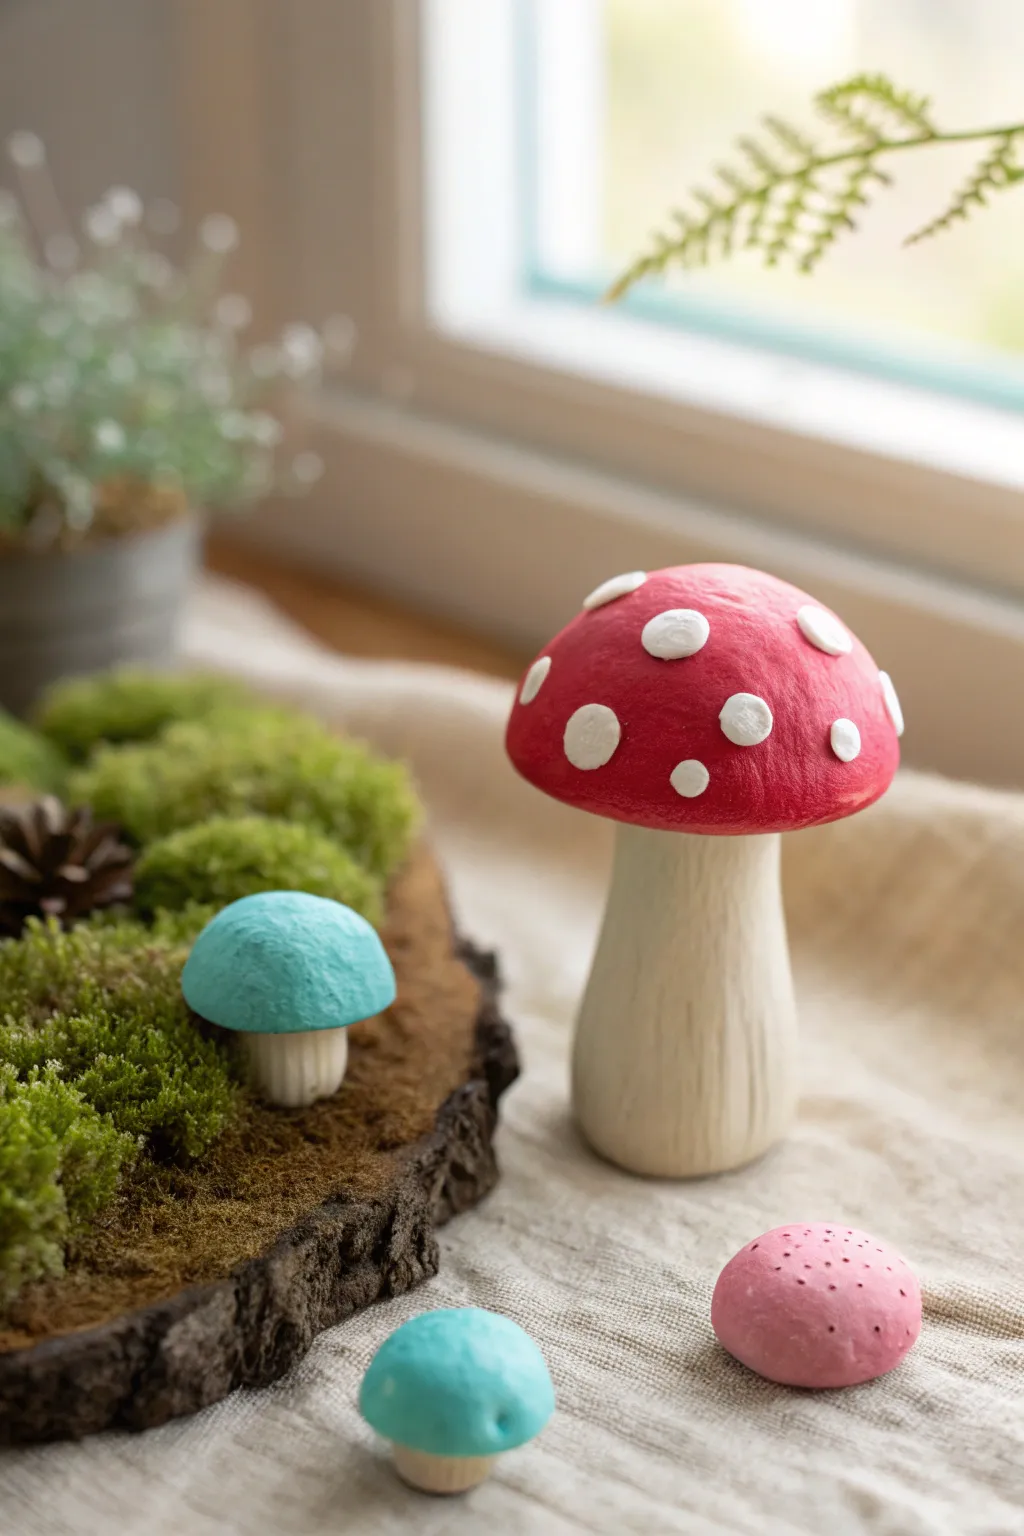
These enchanting little mushrooms bring a touch of woodland magic to any fairy garden or display shelf. With their smooth, matte finish and charming imperfections, they look like they’ve just sprouted from a storybook forest floor.
Step-by-Step
Materials
- Red foam clay (or air-dry clay)
- White foam clay
- Light beige or cream foam clay
- Teal or light blue foam clay
- Pink foam clay
- Small clay modeling tools (or toothpicks)
- Aluminum foil (for armature)
- Small wood slice or coaster (optional)
- Preserved moss (optional display)
Step 1: Shaping the Stems
-
Core Preparation:
For the largest mushroom, start by scrunching a small piece of aluminum foil into a thick, slightly tapered cylinder. This saves clay and keeps the mushroom lightweight. -
Stem Base:
Take a generous ball of beige foam clay and flatten it slightly. Wrap it completely around your foil core, ensuring no metal shows through. -
Rolling and Smoothing:
Roll the clay-covered stem on your work surface to smooth it out. Aim for a shape that is wider at the bottom and slightly narrower at the top where the cap will sit. -
Adding Texture:
Using a needle tool, a toothpick, or just your fingernail, gently drag vertical lines from the bottom of the stem up toward the top. These striations mimic the natural texture of mushroom stalks. -
Smaller Stems:
For the tiny blue mushrooms, you won’t need a foil core. Simply roll small logs of beige clay, making them stout enough to support the caps.
Clay Won’t Stick?
If your foam clay has started to dry while you work, the pieces might not bond. Use a tiny drop of water or clear PVA glue to join the cap to the stem securely.
Step 2: Crafting the Caps
-
Red Cap Formation:
Roll a large ball of red foam clay. Press your thumb into the center to create a hollow indentation, shaping the clay into a dome or bowl shape. -
Refining the Dome:
Smooth the outside of the red dome with your fingers. I like to keep the edge slightly rounded and thick rather than sharp. -
Blue and Pink Caps:
Repeat the process with smaller amounts of teal and pink clay for the tinier mushrooms. The pink one can be made more button-like and round. -
Attaching Cap to Stem:
Place the red cap onto the large beige stem. Press down gently but firmly to bond the two pieces of foam clay; they usually stick well on their own if the clay is fresh. -
Securing Small Caps:
Attach the teal cap to its smaller stem. If the pieces feel dry, a tiny dab of water or white glue can help them bond securely.
Glow in the Dark
Mix a pinch of glow-in-the-dark pigment powder into your white clay before making the spots. Your fairy mushrooms will magically light up at night
Step 3: Detailing and Finishing
-
Creating Spots:
Roll tiny, varied sizes of white foam clay into little balls. Flatten them between your fingers to create thin discs. -
Applying Spots:
Press the white discs randomly onto the red mushroom cap. Don’t make them perfectly round; slightly irregular shapes look more organic. -
Texture Integration:
Gently pat the white spots so they merge slightly with the red surface, looking like part of the skin rather than sitting on top. -
Gill Details (Optional):
If you want extra detail underneath, use your tool to score lines radiating from the stem to the edge of the cap on the underside. -
Pink Cap Texture:
For the loose pink cap sitting on the table, use a needle tool to poke small, random holes across the surface for a porous, spongy look. -
Drying Time:
Let your mushrooms sit undisturbed for 24-48 hours. Foam clay shrinks slightly as it dries, which will tighten the textures. -
Creating the Scene:
Once fully dry, you can glue the blue mushroom onto a wood slice covered in moss, or simply arrange them freely on a shelf.
Enjoy arranging your new little fungal friends in their own miniature world

TRACK YOUR CERAMIC JOURNEY
Capture glaze tests, firing details, and creative progress—all in one simple printable. Make your projects easier to repeat and improve.
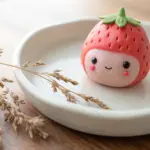
Squishy Foam Clay Stress Stars

Bring a little celestial cheer to your day with this adorable, squishy star made from coral-colored foam clay. With its gentle smile and subtle sparkle, this textured sensory toy is as fun to make as it is to squeeze.
How-To Guide
Materials
- Coral or salmon-pink foam clay
- Fine iridescent glitter (white or silver)
- Star-shaped cookie cutter (medium size)
- Small dotting tool or a rounded toothpick
- Curved modeling tool or a small spoon edge
- Non-stick rolling mat or parchment paper
- Rolling pin (acrylic or smooth plastic)
Step 1: Prepping and Shaping
-
Condition the clay:
Start by taking a handful of your coral foam clay and kneading it thoroughly in your hands. You want it warm and pliable to ensure a crack-free finish. -
Add some sparkle:
If your clay isn’t pre-glittered, sprinkle a generous pinch of fine iridescent glitter into the clay now. Fold and knead the clay repeatedly until the sparkles are evenly distributed throughout the mass. -
Roll it out:
Place the ball of clay onto your non-stick mat. Using the rolling pin, flatten it into a thick slab, aiming for a consistent thickness of about 1.5 to 2 centimeters so the final star feels substantial and pillowy. -
Cut the shape:
Position your star-shaped cookie cutter over the smoothest part of the slab. Press down firmly and evenly to cut through the foam clay. -
Release carefully:
Gently wiggle the cutter to separate the shape from the excess clay, then push the star out. If the edges are a bit sharp or jagged from the cutter, gently tap them with your finger to soften the silhouette.
Smooth Moves
If your foam clay is sticking to the cutter, lightly dust the inside of the cutter with cornstarch before pressing it into the clay.
Step 2: Adding Personality
-
Smooth the surface:
Inspect the face of your star. If there are any fingerprints, lightly buff them out with a circular motion of your thumb. I like to make sure the center is slightly puffier for a cuter look. -
Mark eye placement:
Visualize where the face should go—aim for the center mass of the star, slightly lower than the middle point. Use your dotting tool to mark two tiny guide points for the eyes. -
Create the eyes:
Press the medium-sized ball end of your dotting tool straight down into the guide points. Go deep enough to create distinct shadows, but don’t push all the way through to the back. -
Draft the smile:
Using a curved modeling tool or the very edge of a small spoon, gentling press a simple ‘U’ shape below the eyes. -
Deepen the expression:
Go over the smile line once more, pressing slightly deeper in the center to give it a happy, indented curve that will hold its shape as the foam dries. -
Check symmetry:
Take a moment to look at the face from a distance. If the smile looks crooked, you can gently nudge the foam back into place while it’s still wet and re-press the line.
Step 3: Texturing and Finishing
-
Add surface texture:
To mimic the sugary look in the photo, take a stiff-bristled brush or a textured sponge and very lightly tap the surface of the star. This creates that lovely organic, matte finish. -
Optional sugar dust:
For extra realism, you can sprinkle a tiny bit more of the fine glitter right on top of the ‘cheeks’ and press it in gently with your finger so it catches the light. -
Refine the edges:
Check the five points of the star. Ensure they are slightly rounded rather than sharp tips, which makes the final toy more durable for squeezing. -
Initial drying:
Place the star on a clean sheet of parchment paper. Let it sit undisturbed for about 24 hours. Don’t touch it too much yet, or you might dent the surface. -
Flip and finish:
After the first day, gently flip the star over to allow the bottom side to air out and dry completely. This usually takes another 24 to 48 hours depending on humidity.
Scented Stars
Knead a drop of essential oil or vanilla extract into the foam clay before shaping. Your squishy star will smell as sweet as it looks.
Once fully cured, your cheerful star is ready to be squeezed, displayed, or gifted to a friend who needs a smile