If you’ve ever wanted your clay to look good enough to eat, food ceramics are where the real fun starts. I love these projects because you can play with texture, color, and glossy glaze in a way that instantly tells a tasty little story.
Donut Trinket Dish With Glaze Drips
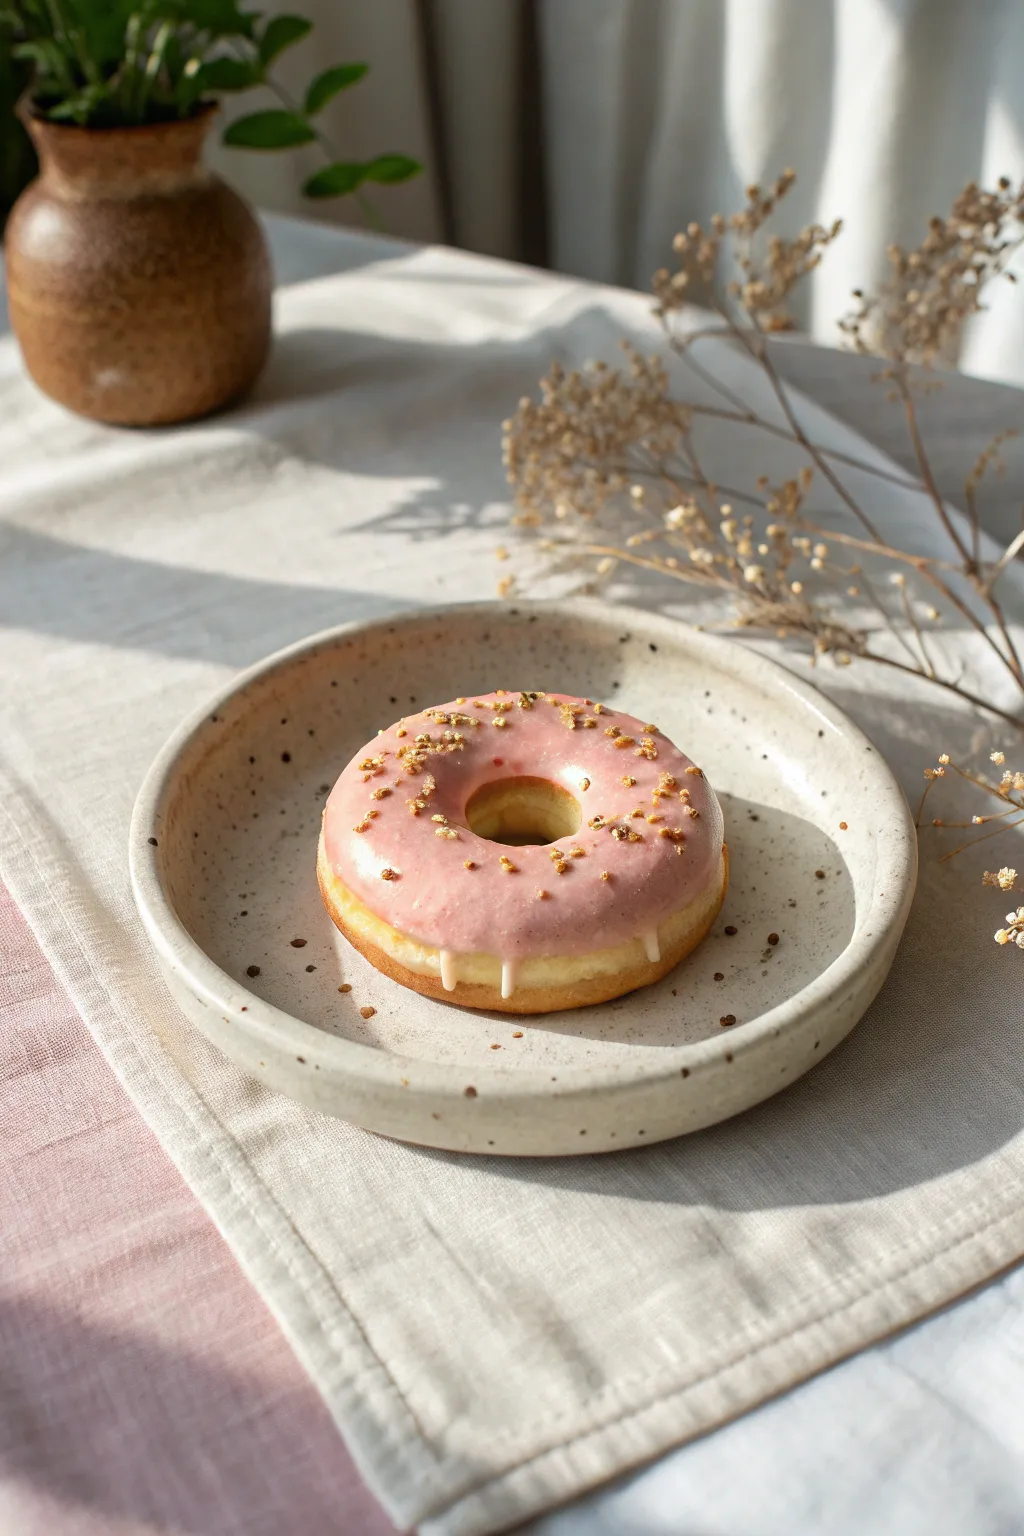
This whimsical ceramic project transforms a simple wheel-thrown doughnut toroid into a hyper-realistic trinket dish perfect for holding rings or small jewelry. With its glossy pink icing and gentle drips, it’s a sweet piece of trompe-l’œil art that looks good enough to eat.
How-To Guide
Materials
- White stoneware clay
- Pottery wheel
- Trimming tools
- Rib tool
- Needle tool
- Sponge
- Underglaze (Golden Brown, Biscuit)
- Thick slip (made from your clay body)
- Pink ceramic stain or underglaze
- Clear glossy glaze
- Gold luster (optional)
- Fine paintbrush
Step 1: Forming the Doughnut
-
Center and open:
Begin with a small ball of clay, about 1 lb, on the wheel. Center it low and wide rather than tall. Open the clay all the way down to the bat, creating a ring rather than a floor. -
Pull the walls:
Gently pull the clay upward and inward to form a closed tube. You are essentially throwing a hollow ring. Curve the walls over until they meet in the center to close the toroidal shape. -
Refine the curve:
Use a flexible rib tool to smooth the outside curve, ensuring it has that distinct, puffy doughnut roundness. The connection point should be seamless. -
Dry to leather hard:
Cut the piece from the bat with a wire tool but leave it in place to dry until it reaches a leather-hard state. -
Trim the base:
Flip the doughnut over and trim the bottom slightly to create a stable foot or simply to round off the harsh edge from the bat, maintaining the illusion of a fried pastry.
Making Real Sprinkles
Make actual clay ‘sprinkles’ by extruding tiny coils through a garlic press. Bisque fire them separately, then drop them onto the wet glaze for 3D texture.
Step 2: Painting the “Fried” Base
-
Bisque fire:
Once bone dry, bisque fire the piece to cone 04. -
Apply base color:
Paint the entire doughnut with a golden-brown underglaze. I find that layering a diluted wash of a slightly lighter ‘biscuit’ color over the top adds realistic depth. -
Create the bake line:
Wipe away a thin horizontal strip of the underglaze around the center equator of the doughnut using a damp sponge. This mimics the lighter ‘proof line’ seen on real fried doughnuts.
Scented Ceramics
After firing, add a few drops of vanilla or strawberry essential oil to the unglazed bottom of the doughnut. The porous clay will hold the scent for weeks.
Step 3: Glazing and Frosting
-
Mix the icing:
Create a very thick slip using your clay body or a heavy glaze base. Mix in a pink ceramic stain or underglaze until you achieve a strawberry frosting color. -
Apply the frosting:
Spoon or pipe the thick pink mixture onto the top half of the doughnut. Don’t brush it on; let it sit thick and prominent to look like poured fondant. -
Sculpt the drips:
Encourage the pink mixture to run down the sides in specific spots. Use a tool to nudge a few ‘drips’ further down so they hang convincingly over the golden-brown base. -
Add texture:
If your icing looks too smooth, stipple the surface very lightly with a dry brush to give it a sugary texture. -
Sprinkle application:
Crush small bits of dry clay or grog and sprinkle them over the wet pink glaze to act as nuts or crumbs. Alternatively, paint small dash marks with a gold or brown underglaze. -
Final clear glaze:
Carefully apply a clear glossy glaze only over the pink icing area to make it shine like sugar. Leave the brown dough part matte or semi-matte for contrast. -
Glaze fire:
Fire the piece to cone 6 (or your clay’s maturity temperature). -
Clean up:
Once cooled, check the bottom for any sharp bits and sand them down if necessary.
Place this delightful ceramic sweet on your bedside table to keep your favorite rings safe


Waffle Coasters With Syrup Shine
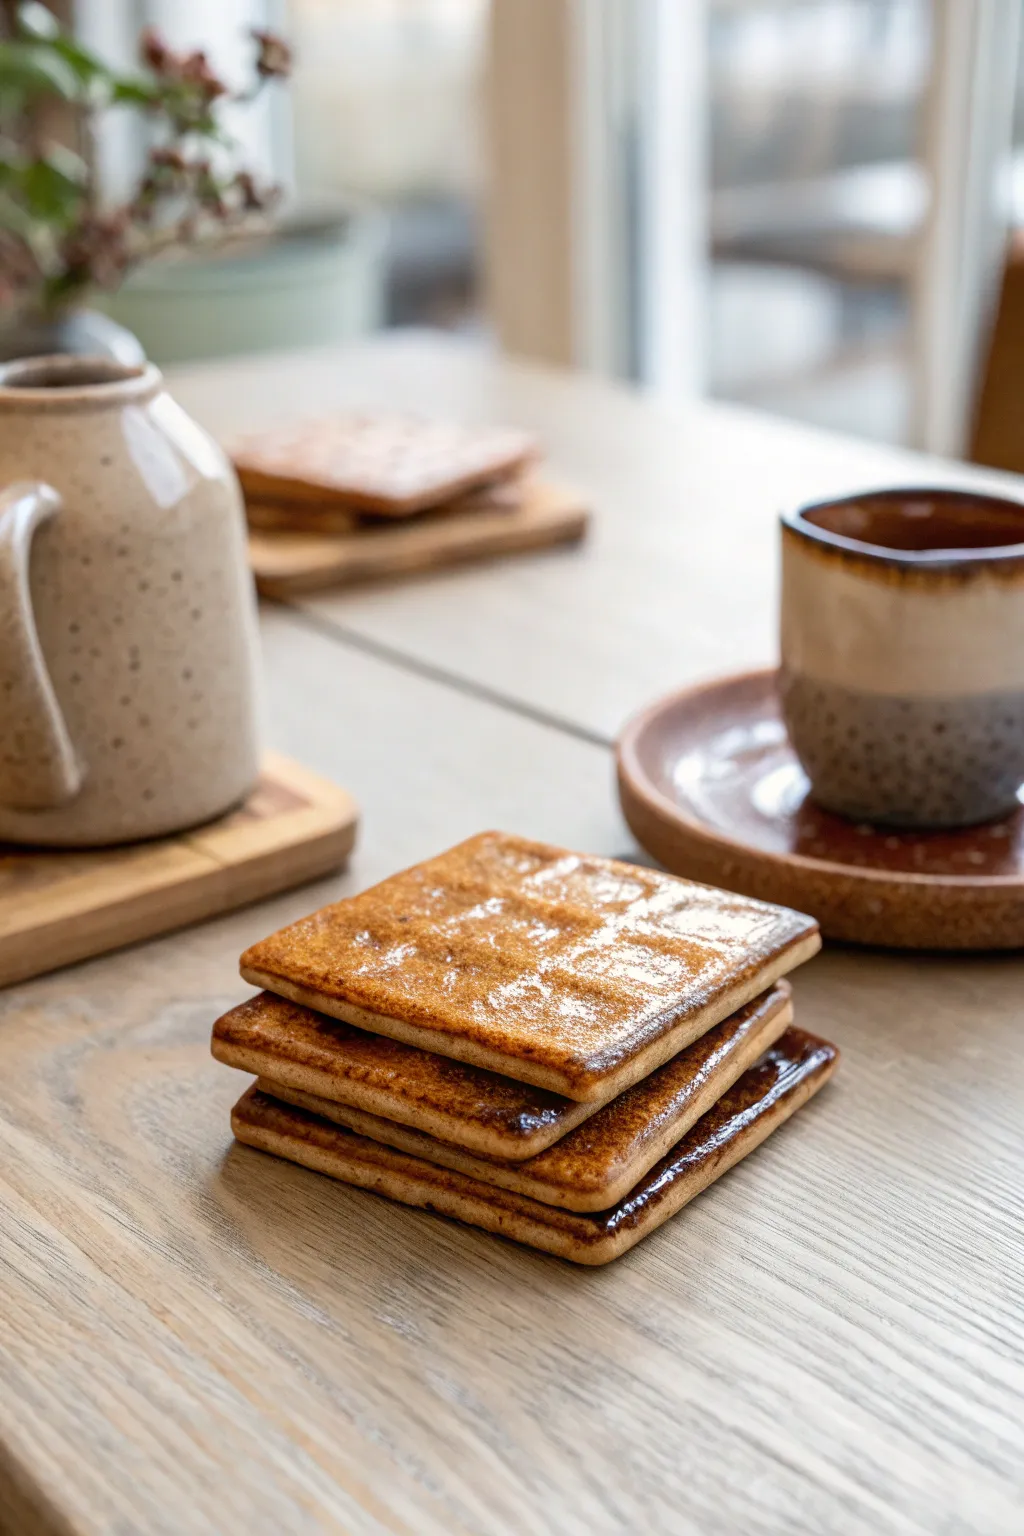
These delightful ceramic coasters mimic the warm, golden texture of a freshly baked waffle, complete with a high-gloss finish that looks just like sticky syrup. They bring a playful touch to your coffee table while protecting surfaces with their sturdy stoneware build.
Step-by-Step
Materials
- Light-colored stoneware clay (smooth or speckled)
- Square cookie cutter (approx. 4 inches) or fettling knife
- Ruler
- Wooden modeling tool with a square or rectangular flat end
- Rolling pin with 1/4 inch depth guides
- Canvas work surface
- Sponge
- Wax resist
- Golden-brown semi-transparent glaze (honey or caramel tones)
- Clear high-gloss glaze
- Small soft fan brush
- Kiln
Step 1: Shaping the Waffles
-
Roll the Slabs:
Begin by wedging your stoneware clay thoroughly to remove air bubbles. Roll out a slab on your canvas using the rolling pin and 1/4 inch depth guides to ensure an even thickness for all your coasters. -
Cut the Base Shapes:
Using a 4-inch square cookie cutter, punch out your coaster shapes. If you don’t have a cutter, measure 4-inch squares with a ruler and cut carefully with a fettling knife for clean edges. -
Smooth the Edges:
Gently run a damp sponge along the cut edges of each square to soften them. You want them to look slightly baked and organic, not razor-sharp. -
Mark the Grid:
Lightly sketch a grid on the surface of the clay using a needle tool or very light pressure with a ruler. A standard 3×3 or 4×4 grid usually looks best for this size. -
Press the Indentations:
Take your wooden modeling tool with the flat square end. Press firmly into the spaces between your grid lines to create the classic waffle pockets. -
Refine the Pockets:
I like to wiggle the tool slightly as I press down to ensure the walls of the waffle grid stand up clearly. Don’t press all the way through; stop about halfway into the slab. -
Clean Up Burrs:
Let the clay stiffen slightly to a leather-hard state. Once firm, use a soft, damp sponge to smooth away any little crumbs or sharp burrs created during the pressing process.
Step 2: Drying and Bisque Firing
-
Slow Drying:
Place your waffles on a ware board covered with plastic, leaving it slightly open for air. Dry them slowly over several days to prevent warping, which is common with flat slabs. -
Bisque Fire:
Load the bone-dry coasters into the kiln. Fire to Cone 04 (or your clay body’s specific bisque temperature) to prepare them for glazing.
Warping Worries?
If your coasters are curling up during drying, flip them over daily and gently weight them down with a small sandbag or board to keep them perfectly flat.
Step 3: Glazing the Golden Crust
-
Wash and Wax:
Wipe the bisque-fired coasters with a damp sponge to remove dust. Apply wax resist to the bottom of each coaster and slightly up the side edge to prevent sticking to the kiln shelf. -
Apply Base Color:
Stir your golden-brown glaze well. Using a soft fan brush, apply two coats to the top and sides. Let the first coat dry completely before adding the second. -
Highlight the High Points:
Take a damp sponge and very lightly wipe the tops of the waffle grid walls. This thins the glaze on the ridges, allowing the clay color to show through slightly for that ‘toasted’ look. -
The Syrup Effect:
Once the base glaze is dry, dip your brush into the clear high-gloss glaze. Dab it generously into the deep pockets of the waffle pattern, letting it pool slightly just like real syrup would. -
Final Glaze Fire:
Load the coasters into the kiln, ensuring they aren’t touching. Fire to Cone 6 (or your glaze’s maturing temperature). The clear glaze will melt and pool, creating a glassy, wet look in the recesses.
Add a Pat of Butter
Sculpt a small slab of yellow-tinted porcelain or slip. Attach it to the center of the leather-hard coaster for a permanent, adorable melting butter pat detail.
Stack your finished warm-toned coasters on the coffee table and enjoy the cozy breakfast vibe they add to your decor


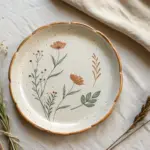
Cookie Plate With Stamped Dough Texture
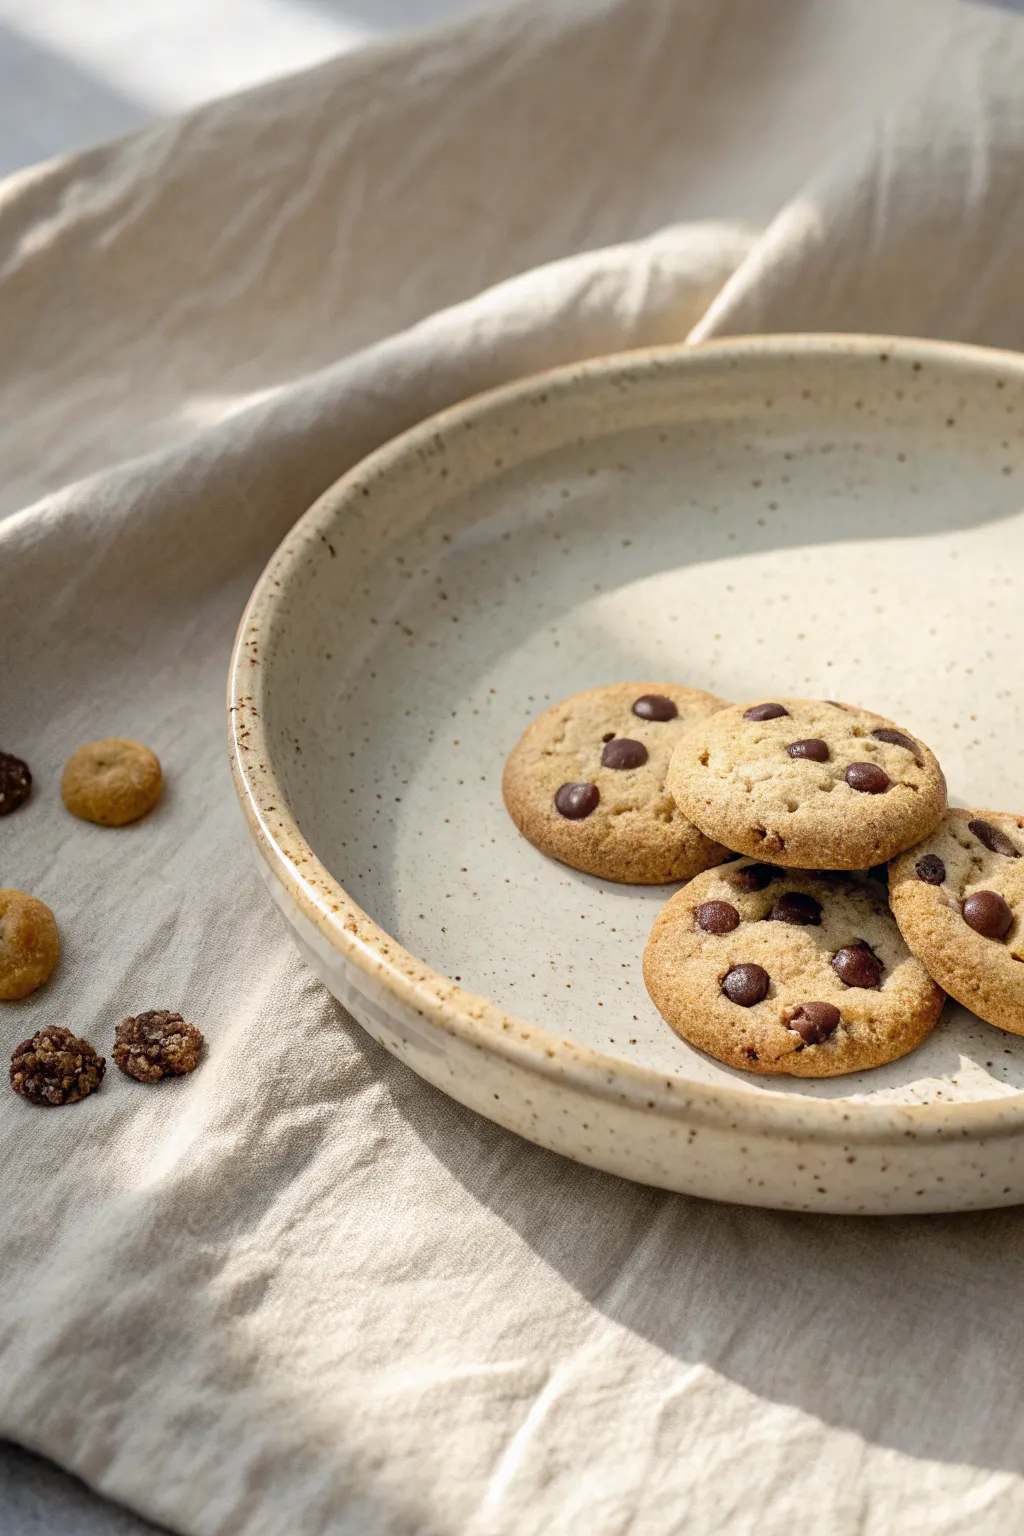
This project guides you through creating a charmingly rustic ceramic plate, perfect for serving your favorite homemade cookies. Using speckled clay and a milky glaze, you’ll achieve a warm, bakery-inspired aesthetic that beautifully highlights the natural texture of the stoneware.
Step-by-Step Guide
Materials
- Speckled buff stoneware clay
- Rolling pin
- Canvas mat or slab roller
- Pottery rib tool (rubber or wood)
- Needle tool or fettling knife
- Circular template or plate mold (approx. 8-9 inches)
- Sponge
- Milky white or cream semi-opaque glaze
- Kiln
- Trim tool (if wheel throwing)
Step 1: Forming the Plate Base
-
Prepare the Clay:
Begin by wedging your speckled buff stoneware clay thoroughly to remove any air bubbles and ensure an even consistency. -
Roll out a Slab:
Roll the clay out onto a canvas mat until it is an even slab, approximately 1/4 inch thick. I like to rotate the clay periodically to ensure it doesn’t stick to the canvas. -
Smooth the Surface:
Use a rubber rib tool to compress the clay slab on both sides. This aligns the clay particles, reducing warping later, and creates a perfectly smooth canvas for your glaze. -
Cut the Circle:
Place your circular template onto the slab. Using a needle tool, cut cleanly around the edge to create your plate’s base shape.
Step 2: Shaping and Refining
-
Slump or Hump Mold:
Gently drape your clay circle over a hump mold or into a slump mold to create the gentle curve seen in the image. If you don’t have a mold, you can use a shallow bowl lined with plastic wrap. -
Define the Rim:
Press gently around the edges to ensure the rim lifts slightly, creating a shallow basin that will hold the cookies securely. -
Smooth the Rim:
While the clay is still leather-hard, run a damp sponge along the cut edge of the rim to round it off. A sharp edge can be uncomfortable to hold and prone to chipping. -
Dry Slowly:
Cover the plate loosely with plastic to allow it to dry slowly. This is crucial for flat pieces to prevent warping. Once bone dry, bisque fire the piece to Cone 04 (or your clay’s specific bisque temperature).
Warped Plate?
Flat plates often warp during drying. To fix this, weight the center of the plate with a small sandbag while it dries slowly under plastic.
Step 3: Glazing and Finishing
-
Clean the Bisque:
Wipe the bisque-fired plate with a damp sponge to remove any dust, which can prevent the glaze from adhering properly. -
Prepare the Glaze:
Mix your milky white semi-opaque glaze thoroughly. You want a consistency similar to heavy cream. -
Apply Glaze:
Pour the glaze into the center of the plate and tilt it in a circular motion to coat the interior evenly, pouring the excess back into your bucket. Alternatively, you can dip the entire plate if you have a large enough container. -
Review Thickness:
Ensure the glaze isn’t too thick on the rim. The beauty of this piece comes from the iron speckles burning through the glaze, which happens best with a slightly thinner application. -
Clean the Foot:
Wipe the bottom of the plate (the foot ring or flat base) completely clean of glaze with a wet sponge to prevent it from fusing to the kiln shelf. -
Glaze Fire:
Fire the plate in the kiln to the maturity temperature of your clay and glaze (typically Cone 5 or 6 for stoneware). Allow the kiln to cool completely before opening.
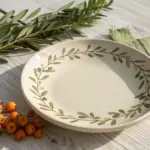
Add Texture
Before shaping, gently press a piece of lace or linen into the clay slab. The glaze will break beautifully over the subtle fabric texture.
Now you have a beautiful, custom ceramic plate ready to showcase your next batch of baking

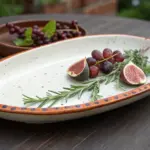
Dumpling Trio With Crimped Edges
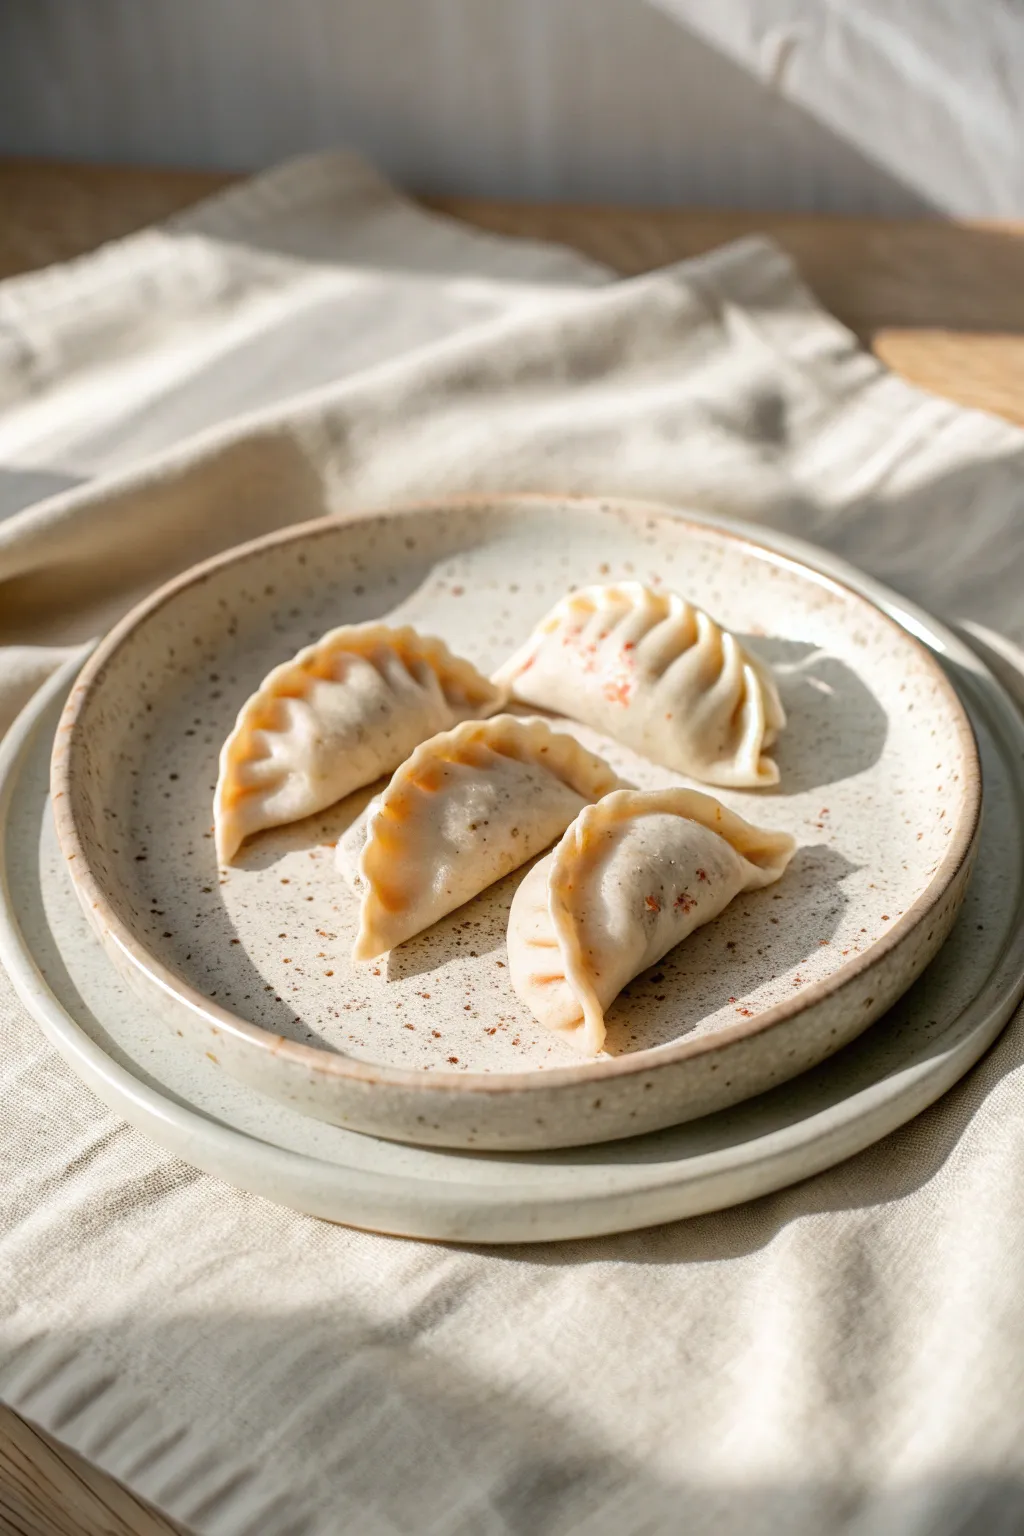
Create a feast for the eyes with these hyper-realistic ceramic dumplings that capture the delicate translucency of dough and savory filling. This project focuses on subtle texturing and shading to mimic the look of perfectly pleated steam-fried gyoza.
How-To Guide
Materials
- White stoneware or porcelain clay
- Rolling pin
- Circular cookie cutter (3-4 inches)
- Small sponge
- Needle tool
- Slip (clay slurry)
- Underglazes: Pale peach, warm brown, terracota
- Clear matte glaze
- Small soft paintbrush
- Scoring tool or serrated rib
Step 1: Forming the Wrappers
-
Prepare the Clay:
Begin by wedging your white clay thoroughly to remove air bubbles. Porcelain works beautifully here for its smooth finish, but a fine white stoneware is more forgiving. -
Roll the Dough:
Roll your clay out into a thin, even slab. You want this to be quite thin, similar to actual pasta dough—aim for about 1/8th of an inch thick. -
Cut Circles:
Using your circular cookie cutter, punch out four rounds of clay. I like to smooth the edges of each circle with a damp finger to remove any sharp cutting marks. -
Make the Filling:
Roll four balls of scrap clay into small logs, slightly tapered at the ends. These will act as the ‘meat’ filling to give the dumplings their plump shape.
Cracking Seams?
If pleats split while drying, your clay was likely too dry when folding. Use a moist brush to re-hydrate the seams and compress them firmly with a modeling tool.
Step 2: Folding and Pleating
-
Position the Filling:
Place a clay log in the center of one wrapper circle. Ensure there is enough space around the perimeter to seal the edges. -
Score and Slip:
Lightly score the edges of the circle and dab a small amount of slip along the perimeter. This glue is crucial so your dumpling doesn’t pop open in the kiln. -
First Fold:
Fold the wrapper over the filling like a taco, bringing the edges together at the top center point first. Press gently to secure just that center spot. -
Create Pleats:
Starting from the center and working outward to the right, create small folds or pleats on the front side of the wrapper, pressing each one firmly against the flat back side. -
Finish Sealing:
Repeat the pleating process on the left side. You should aim for about 3-4 distinct pleats on each side for that classic gyoza look. Pinch the final corners tightly. -
Shape the Curve:
Gently curve the entire dumpling into a crescent shape. Set it down on your board and press lightly to flatten the bottom, ensuring it will sit stably.
Make it a Set
Sculpt a small ceramic dipping dish and fill it with dark amber resin after firing to simulate soy sauce alongside your dumplings.
Step 3: Texturing and Coloring
-
Refine the Surface:
Use a barely damp sponge to smooth out any fingerprints. The surface should look like soft, steamed dough. -
Add Filling Hints:
To suggest the filling showing through thin dough, dilute a tiny bit of terracotta or brown underglaze with water. Just barely tint the center bulge of the dumpling where the ‘meat’ is. -
Detail the Pleats:
Use a needle tool or the back of a brush to gently deepen the shadows between the pleats if they got squashed during shaping. -
Bisque Fire:
Allow the dumplings to dry slowly under plastic to prevent warping, then bisque fire to cone 04. -
Color the Edges:
Mix a wash of pale peach and warm brown underglaze. lightly stipple this onto the crimped edges and the bottom ‘fried’ area to mimic browning marks. -
Speckling:
For added realism, flick a stiff toothbrush with brown underglaze or iron oxide wash over the pieces to create tiny imperfections and spice specks. -
Glaze Application:
Dip or brush the dumplings with a clear matte glaze. A glossy glaze often looks too wet; a matte or satin finish best resembles cooked dough. -
Final Fire:
Glaze fire the pieces according to your clay body’s temperature, usually cone 5 or 6 for stoneware.
Now you have a trompe-l’œil appetizer set that will fool hungry guests and look delightful on display

The Complete Guide to Pottery Troubleshooting
Uncover the most common ceramic mistakes—from cracking clay to failed glazes—and learn how to fix them fast.
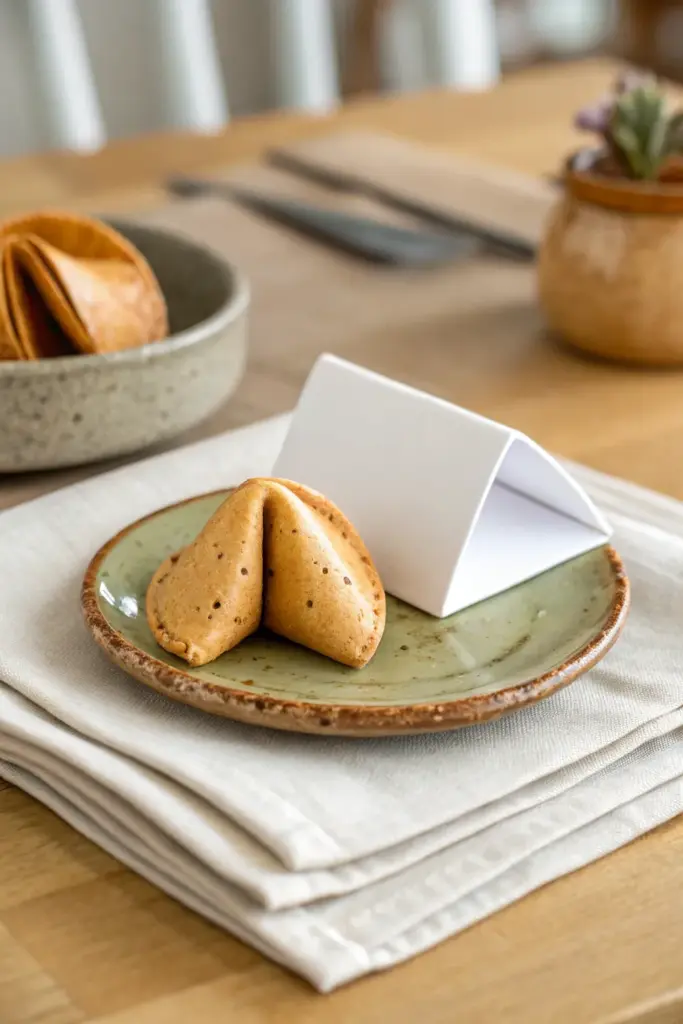
Fortune Cookie Place Card Holders

Add a playful twist to your table setting with these hyper-realistic ceramic fortune cookie place card holders. With their golden-brown toasted edges and classic folded shape, they look good enough to eat but are designed to last forever.
How-To Guide
Materials
- Stoneware clay (smooth, tan or buff body)
- Canvas or slab roller
- Rolling pin
- Round cookie cutter (approx. 4 inches)
- Small cup with water
- Sponge
- Pottery needle tool
- Ceramic stains (yellow ochre, brown)
- Brush for staining
- Transparent matte glaze
- Kiln
- White cardstock paper
- Ruler and craft knife
Step 1: Shaping the Clay Cookie
-
Prepare the slab:
Begin by wedging your stoneware clay thoroughly to remove any air bubbles. Roll it out into a smooth, even slab that is roughly 1/8 to 1/4 inch thick; keeping it thin helps mimic the delicate nature of real dough. -
Cut the circles:
Use your round cookie cutter to punch out clean circles from the slab. If the edges are sharp or ragged, gently smooth them with a slightly damp sponge or your fingertip. -
Create the first fold:
Take one clay circle and gently fold it in half, but do not crease the fold completely flat. You want a soft, taco-like curve rather than a sharp paper crease. -
Form the fortune shape:
Hold the semicircle with the curved side facing up. Use your index finger to press gently into the center of the fold while pulling the two pointed corners downward and toward each other. -
Secure the shape:
Once the two ends meet or overlap slightly, check the fold. It should puff out in the middle. I like to pinch the corners just enough so the clay holds its shape without collapsing. -
Check the resting point:
Set the cookie down on a flat surface to ensure it sits stably. Adjust the legs/corners if needed so it doesn’t rock or tip over. -
Refine the texture:
Fortune cookies often have tiny imperfections. You can lightly tap the surface with a sponge or a dry brush to give it a baked texture, rather than leaving it perfectly smooth. -
Slow drying:
Cover the cookies loosely with plastic and let them dry slowly to the leather-hard stage. This prevents the delicate folds from cracking as they shrink.
Realism Trick
Use a slightly darker clay body or a wash of iron oxide before firing. This creates that authentic ‘golden baked’ color naturally without needing heavy glazes.
Step 2: Coloring and Firing
-
Add toasted accents:
Once bone dry, mix a diluted wash of brown ceramic stain or underglaze. Use a brush to gently stipple color onto the tips and the outer ridge of the fold to simulate uneven baking. -
The speckled look:
For added realism, you can flick a stiff toothbrush loaded with stain to create tiny darker speckles across the surface. -
Bisque fire:
Load the kiln carefully and bisque fire the pieces according to your clay body’s specifications (usually Cone 04). -
Glazing:
After the bisque fire, apply a thin coat of transparent matte glaze. Avoid glossy glazes, as you want the finish to look like dry pastry, not wet candy. -
Final wipe:
Wipe the bottom contact points clean with a sponge so they don’t stick to the kiln shelf. -
Glaze fire:
Fire the kiln again to your glaze temperature (e.g., Cone 5 or 6). Let the kiln cool completely before removing your fresh batch of cookies.
Step 3: Creating the Place Card
-
Measure the card:
Cut a strip of white cardstock approximately 2 inches wide and 5 inches long. The size should complement your ceramic cookie without overshadowing it. -
Fold the prism:
Mark three equal sections along the length of the strip. Score these lines lightly with a craft knife or bone folder. -
Assemble the tent:
Fold along the scored lines to create a triangular prism shape. Tuck the loose end underneath or secure it with a tiny piece of double-sided tape inside. -
Final arrangement:
Place the ceramic cookie on a small plate and set the blank triangular card next to it, ready for a guest’s name to be written.
Preveting Cracks
If the clay creates hairline cracks at the sharp fold, gently compress the clay at the fold line with a rib tool while it’s still damp to strengthen the tension point.
Your guests will be delighted by these charming, inedible treats that double as memorable keepsakes.