If you’ve got kids who love squishing, rolling, and making little characters, you’re in the right place. These easy cute clay ideas are all about simple shapes that turn into something adorable fast—no fancy skills required.
Tiny Clay Snails With Swirly Shells
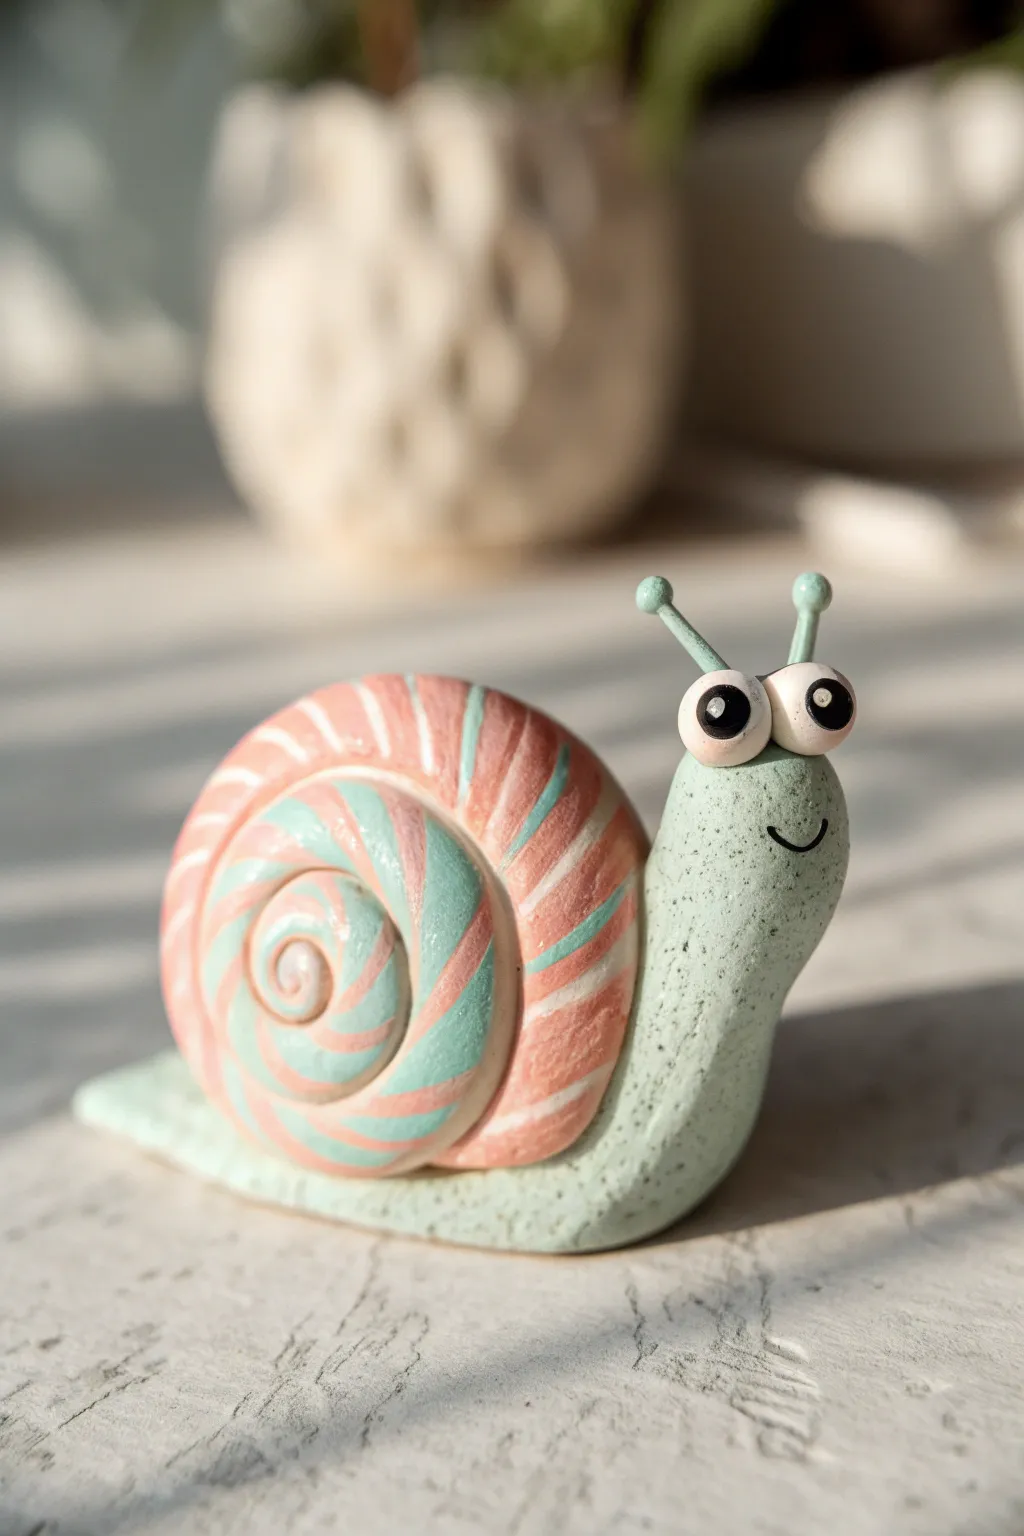
This adorable mint-green snail features a mesmerizing candy-striped shell and big, expressive eyes that are sure to make you smile. Its textured, stone-like finish gives it a charming handcrafted feel perfect for decorating a windowsill or planter.
Step-by-Step Tutorial
Materials
- Light mint green polymer clay (for the body)
- Peachy pink polymer clay (for the shell)
- Solid white polymer clay (for eyes/shell stripes)
- Teal or light blue polymer clay (for shell stripes)
- Black polymer clay or acrylic paint
- Basic sculpting tools (needle tool, ball stylus)
- Toothbrush or stiff bristle brush for texturing
- Liquid clay (Bake and Bond) or craft glue
- Gloss glaze (optional)
Step 1: Shaping the Snail Body
-
Prepare the Base Clay:
Start with a generous ball of light mint green polymer clay. Knead it well until it is soft and pliable. -
Form the Slug Shape:
Roll the clay into a thick log. Gently taper one end to create a tail and leave the other end thicker and rounded for the head. -
Bend the Neck:
Lift the thicker end of your clay log and bend it upwards to form the snail’s neck and head. Flatten the bottom gently against your work surface so it stands upright on its own. -
Add Texture:
To achieve that lovely stone-like finish, take an old toothbrush or a stiff stipple brush and gently tap it all over the surface of the green clay. This gives it a natural, organic look. -
Smile Time:
Use a needle tool or a small carving tool to press a simple U-shaped smile into the side of the head.
Floppy Stalks?
If the eye stalks keep drooping, insert a small piece of toothpick or wire inside each stalk to act as hidden armature and provide internal support.
Step 2: Creating the Swirly Shell
-
Mix Shell Colors:
Take your peachy pink clay and roll it into a long, even snake that is roughly 6 inches long. -
Prepare Stripes:
Roll very thin snakes of white and teal clay. These should act as the stripes for your shell. -
Attach the Stripes:
Lay the thin white and teal snakes along the length of the pink snake. Gently roll the entire log on your table to embed the stripes into the pink clay until the surface is smooth. -
Twist for Effect:
Hold both ends of your striped log and gently twist them in opposite directions. This creates the beautiful swirling candy-cane pattern. -
Coil the Shell:
Starting from one end, tightly roll the twisted snake into a spiral coil. Keep the flat side of the coil even so it sits nicely on the snail’s back. -
Attach the Shell:
Apply a tiny drop of liquid clay or utilize the clay’s stickiness to press the shell firmly onto the flat back area of your green snail body.
Step 3: The Big Eyes
-
Make Eye Stalks:
Roll two small, thin cylinders from the mint green clay. Attach these to the top of the head as stalks. -
Form Eyeballs:
Roll two medium-sized balls of white clay. Press them gently onto the tops of the stalks. You might need a dab of liquid clay here for security. -
Add Pupils:
Roll two tiny balls of black clay and flatten them onto the center of the white eyeballs. Alternatively, you can paint these on after baking. -
Highlight the Eyes:
For extra sparkle, add a microscopic dot of white clay or white paint to each black pupil.
Make it Sparkle
Mix a tiny amount of glitter into the pink clay for the shell to give it a magical, iridescent shimmer that catches the sunlight beautifully.
Step 4: Finishing Touches
-
Smooth Connections:
Use a blending tool to gently smooth the seams where the eye stalks meet the head, ensuring they are sturdy. -
Final Shape Check:
Look at your snail from all angles. Make sure the shell is centered and the head isn’t drooping. Adjust the posture if needed. -
Bake:
Bake your creation according to your specific polymer clay package instructions. I usually tent foil over mine to prevent scorching the light colors. -
Paint the Mouth:
Once cool, use a fine detail brush and black acrylic paint to carefully fill in the indented smile line. -
Glaze (Optional):
If you want a wet, slimy look for the shell or eyes, apply a coat of gloss glaze to those specific areas.
Place your charming new snail friend near a plant pot where he can keep watch over your garden


Chubby Clay Penguins With Dot Eyes

These adorable, round penguins look just like smooth river stones brought to life with personality. The simple, egg-like shapes make them incredibly easy to sculpt, while their painted details give them a sweet, curious expression that perfect for a shelf display.
How-To Guide
Materials
- Air-dry clay or polymer clay (white)
- Acrylic paints (black, white, orange)
- Fine-grit sandpaper (optional)
- Paintbrushes (small detail brush and medium flat brush)
- Matte varnish or sealant
- Ball stylus tool or toothpick
- Small cup of water (for smoothing)
Step 1: Sculpting the Bodies
-
Form the base shapes:
Start by dividing your clay into three distinct portions to create a family: a large chunk for the parent, a medium piece for the older sibling, and a small bit for the baby. -
Roll into eggs:
Take the largest piece of clay and roll it between your palms until it forms a smooth ball. Gently taper the top slightly so it resembles a smooth, upright egg or a river stone. -
Flatten the base:
Tap the bottom of the egg shape firmly against your table. This creates a flat surface so your penguin will stand stable without wobbling. -
Repeat for the family:
Do the same rolling and flattening process for the medium and small clay pieces. I always check to make sure they look like a cohesive set when placed next to each other. -
Smooth the surface:
Dip your finger in a tiny bit of water and rub it over the clay to remove any fingerprints or cracks. The smoother the clay now, the cleaner the paint job will look later. -
Attach the wings:
Pinch off two small, teardrop-shaped pieces of clay for the wings. Attach them to the sides of the body, blending the top seam into the body so they lay flat against the sides. -
Let it dry:
Allow the clay figures to dry completely according to the package instructions. This usually takes 24 hours for air-dry clay.
Stone Effect Secret
Don’t aim for perfect white on the belly. Mix a tiny drop of grey or beige into your white paint for a natural, organic stone look.
Step 2: Painting and Details
-
Sand imperfections:
Once fully dry, check for any rough spots. Gently sand them down with fine-grit sandpaper until the ‘stone’ feels perfectly smooth. -
Paint the black coat:
Using black acrylic paint, cover the back, sides, and top of the head. Leave a large, arched oval shape on the front unpainted for the white belly and face. -
Refine the belly shape:
Paint the front oval area with white paint. At the top of this white area, shape the hairline into a ‘heart’ shape or two rounded arches to define the face, just like in the photo. -
Add the beak:
For the beak, you can either sculpt a tiny orange triangle of clay and glue it on, or simply paint a crisp orange triangle right in the center of the face line. -
Dot the eyes:
Dip the back end of a paintbrush or a ball stylus tool into black paint. Gently press two dots onto the white face area for the eyes. Spacing them widely apart gives a cuter look. -
Blush the cheeks:
Mix a tiny bit of orange with white to make a soft peach color. Paint two tiny dashes or dots under the eyes for cheeky blush marks. -
Create the feet:
Roll small balls of leftover clay (or orange clay), flatten them slightly, and use a toothpick to press two indentations into each to make toes. Glue these under the front of the body. -
Paint the feet:
If you used white clay for the feet, paint them bright orange now to match the beak. -
Speckle effect:
To mimic the stone texture seen in the photo, you can flick a tiny amount of watered-down black paint onto the white belly using a stiff brush or toothbrush. -
Seal the work:
Finish by applying a coat of matte varnish. This protects the paint and unifies the sheen so the penguins look like polished stones.
Wobbly Penguin?
If your penguin tips over, glue a small metal washer or a coin to the flat bottom base to add weight and stability.
Arranging your finished trio together creates a heartwarming scene that captures the bond of a little penguin family


Easy Clay Cats With Whisker Lines
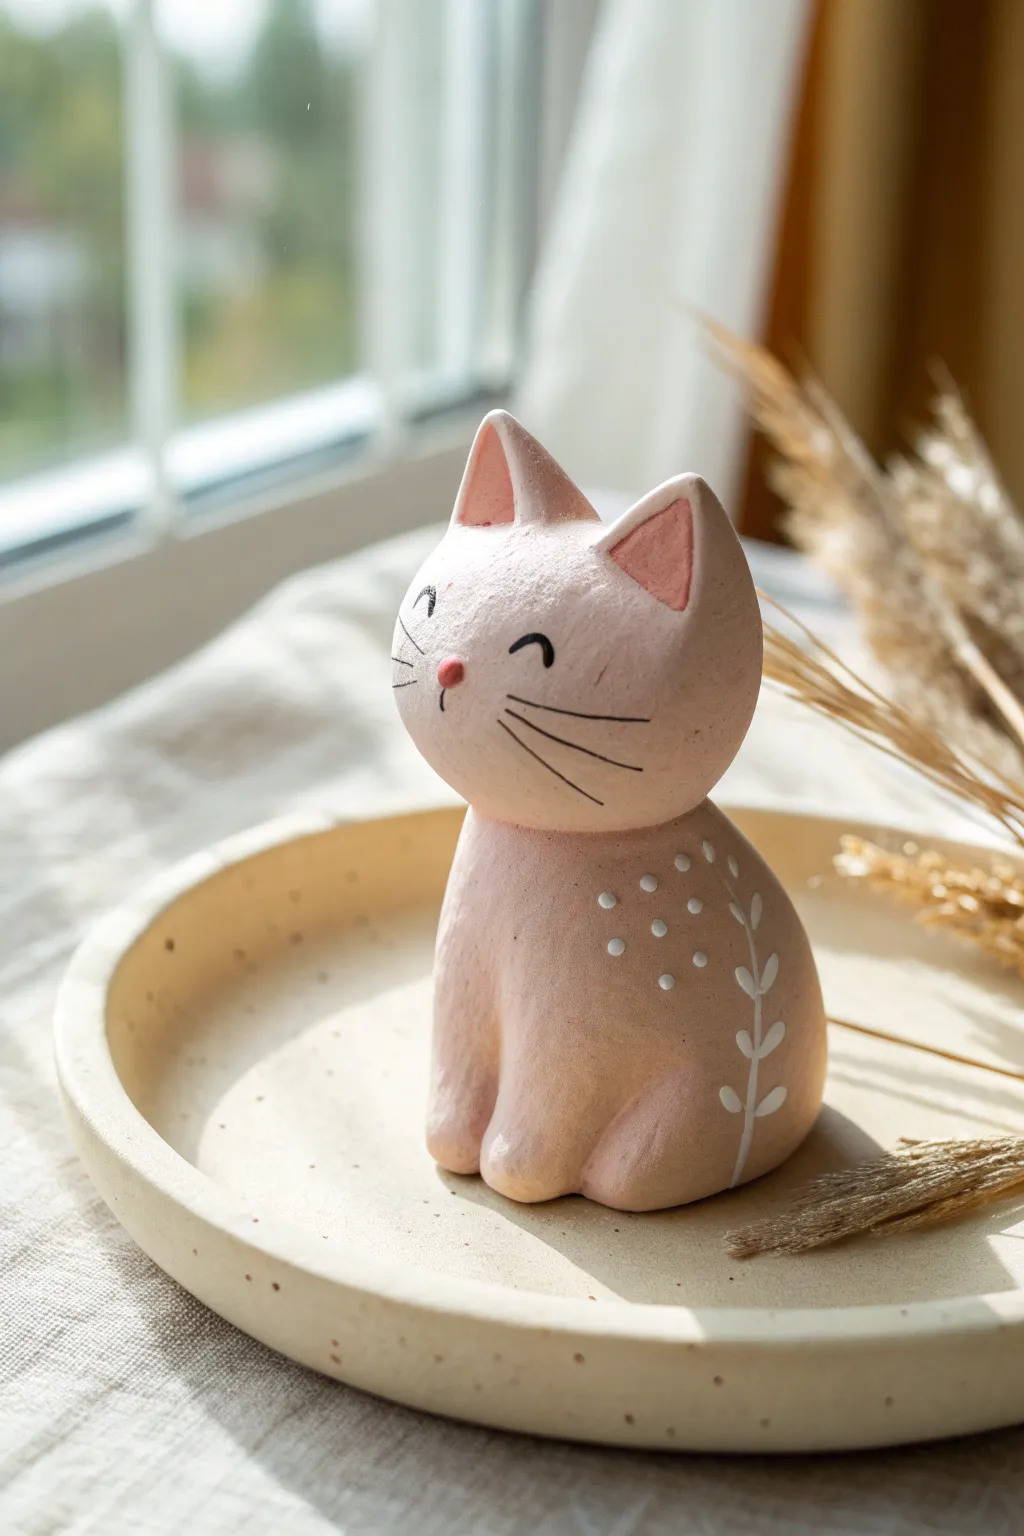
Sculpt a serene feline sitting pretty with this adorable clay project. The smooth curves, painted botanical details, and happy expression make this pale pink cat a perfect decorative piece for a sunny windowsill.
Step-by-Step
Materials
- White air-dry clay or polymer clay
- Acrylic paints (pale pink, white, black, dark pink)
- Fine-grit sandpaper
- Small paintbrush
- Fine-point black permanent marker or detail brush
- Water cup (for smoothing)
- Clay sculpting tools or a toothpick
Step 1: Shaping the Base
-
Prepare the Body:
Start with a ball of clay roughly the size of a tangerine. Roll it until it is smooth and free of cracks. -
Form the Pear Shape:
Gently shape the ball into a tall, rounded pear or teardrop shape. This will be the cat’s body. -
Flatten the Bottom:
Tap the wider bottom part of the pear shape onto your work surface to create a flat base so the cat sits sturdily. -
Create the Head:
Roll a second, slightly smaller ball for the head. It should be proportional to the body but slightly flattened into an oval. -
Attach Head to Body:
Place the head on top of the narrow point of the body. If using water-based clay, score (scratch) both touching surfaces and add a dab of water to glue them together firmly. Blend the seam at the neck just a little bit for stability.
Use Water Sparingly
When smoothing clay, easy does it with water. Too much can make air-dry clay turn into sludge or crack as it dries.
Step 2: Sculpting Details
-
Make the Ears:
Pinch two small triangles of clay. Gently curve them slightly to give them a natural ear shape. -
Attach the Ears:
Score and attach the ears to the top of the head. Use your finger or a smoothing tool to seamless blend the back of the ears into the head. -
Create Inner Ear Indents:
Use a rounded tool or the back of a small paintbrush to press gently into the front of each ear, creating a shallow triangular depression. -
Define the Front Legs:
For the legs, I like to simply roll two small, elongated logs of clay and attach them vertically to the front of the body. Smooth the top edge into the chest so they look merged. -
Shape the Paws:
Round off the bottom of the leg logs to look like little paws resting on the ground. -
Smooth Everything Out:
Dip your finger in a tiny bit of water and rub it over the entire sculpture to remove fingerprints and bumps. Let the clay dry completely according to package instructions (usually 24-48 hours).
Step 3: Painting and Finishing
-
Pre-Paint Sanding:
Once bone dry, use fine-grit sandpaper to buff away any rough spots, especially around the seams. -
Base Coat:
Paint the entire figure with a soft, pale pink acrylic paint. You may need two coats for opaque coverage. -
Paint Inner Ears:
Mix a slightly darker, warmer pink and carefully paint inside the ear indentations. -
Add Polka Dots:
Using the tip of a toothpick or a dotting tool dipped in white paint, create a pattern of small dots on the rear flank of the cat. -
Draw the Branch:
Paint a thin curved white line vertically through the dots to make a stem. Add tiny ‘V’ shapes along the line to create leaves. -
Draw the Face:
Using a fine-point black marker or a very thin brush with black paint, draw two upward-curving arches for happy, closed eyes. -
Add Whiskers and Nose:
Draw three straight lines on each cheek for whiskers. Finally, add a tiny pink dot or triangle right between the eyes for the nose.
Cracks While Drying?
Mix a tiny bit of fresh clay with water to make a paste (slip). Fill any cracks, smooth it over, and let it dry again.
Place your finished cat on a small tray or shelf to enjoy its peaceful presence


Happy Clay Frogs With Big Cheeks
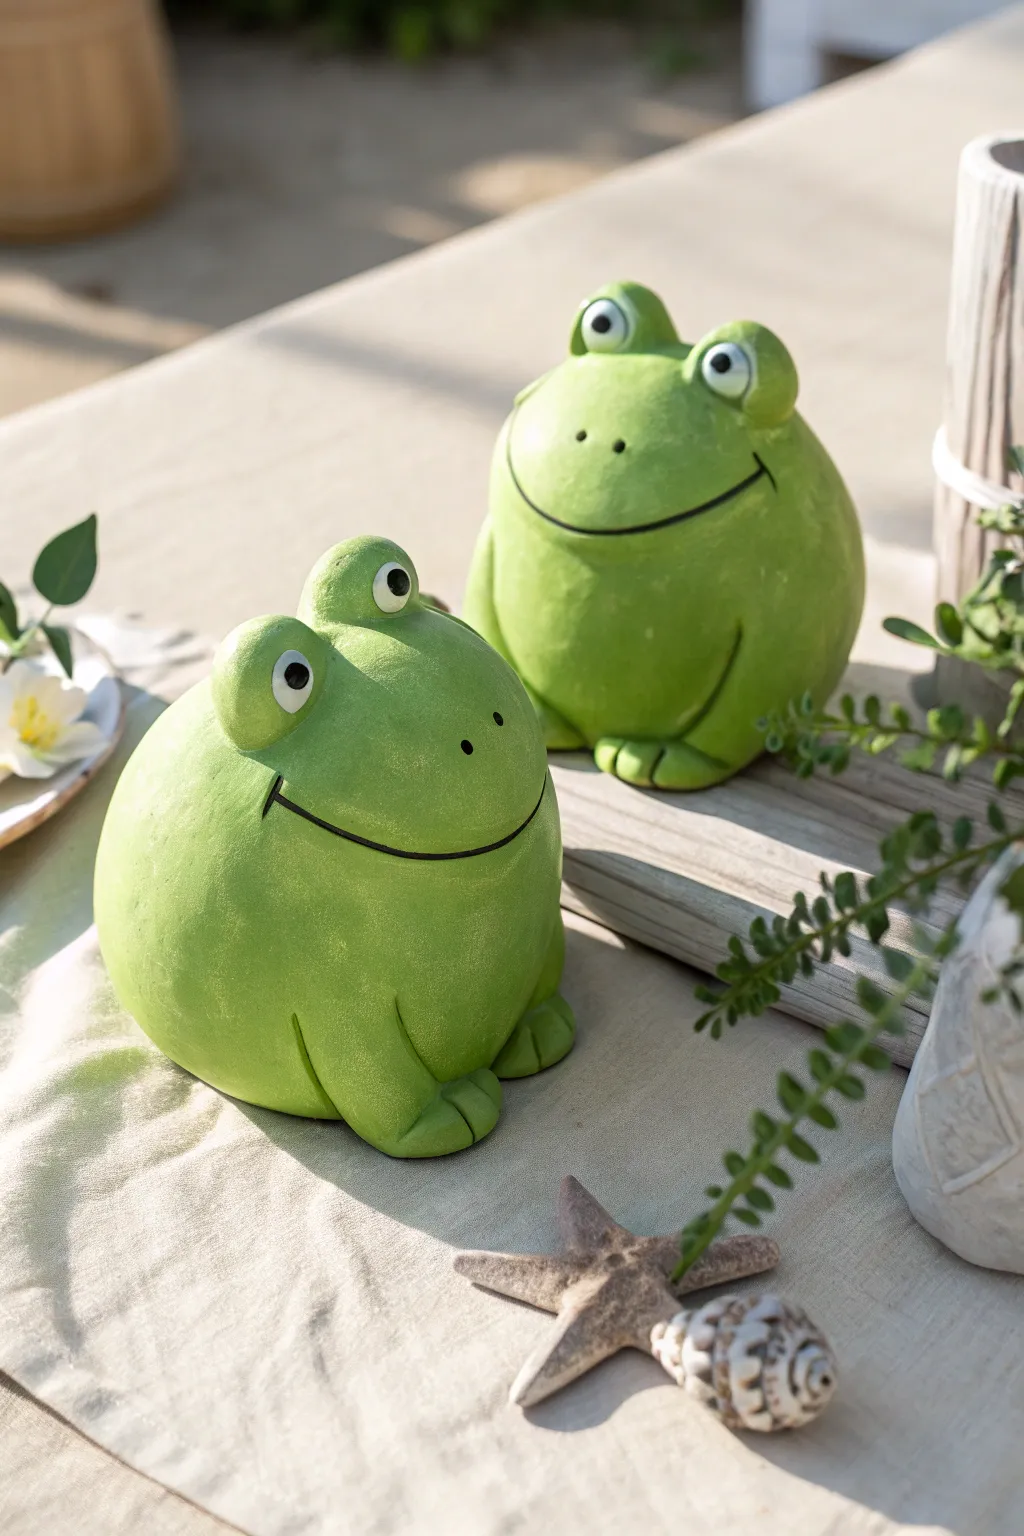
These delightfully round frogs are guaranteed to bring a smile to your face with their oversized bodies and cheerful expressions. This project focuses on simple, spherical shapes and smooth textures to create a pair of friendly amphibians perfect for a garden shelf.
Step-by-Step Guide
Materials
- Air-dry clay (white or terracotta)
- Acrylic paints: Bright lime green, darker forest green, black, and white
- Paintbrushes: Large flat brush for the body, fine detail brush for the face
- Sculpting tool with a curved edge (or a plastic spoon)
- Aluminum foil (for armature)
- Small cup of water
- Matte spray varnish (optional)
Step 1: Shaping the Body Base
-
Create the core:
Start by scrunching a piece of aluminum foil into a tight ball. This saves clay and makes the finished frog lighter. Aim for an egg shape that is slightly wider at the bottom. -
Cover with clay:
Roll out a slab of your air-dry clay to about a quarter-inch thickness. Wrap this slab entirely around your foil ball, smoothing the seams together with a bit of water. -
Smooth the surface:
Wet your fingers slightly and continuously rub the surface of the clay until it is perfectly smooth and round. You want the body to look like a plump, heavy teardrop sitting on the table. -
Flatten the base:
Gently tap the bottom of your sphere against your work surface. This creates a flat base so your frog sits stably without rolling away.
Smooth Operator
Keep a small sponge damp with water nearby. Lightly wiping the clay before it dries removes fingerprints for a professional finish.
Step 2: Adding Froggy Features
-
Form the eyes:
Roll two medium-sized balls of clay, about the size of large grapes. Place them on top of the head, spaced slightly apart, but not too far to the sides. -
Blend the eyes:
Use your thumb or a modeling tool to smudge the bottom edge of the eye balls down onto the main body. This ensures they don’t fall off later. Keep the tops nice and round. -
Create the smile:
Using a curved sculpting tool (or the edge of a spoon), press a long, deep smile into the face. Start from below one eye and curve all the way up to just below the other eye to create that happy, big-cheeked look. -
Add nose holes:
Take a small dotting tool or a toothpick and poke two tiny nostrils right in the middle of the face, above the smile line. -
Shape the feet:
Roll two smaller balls of clay for the feet. Flatten them slightly and use a knife tool to press two indentations into each, creating three little toes. -
Attach the feet:
Score (scratch) the bottom front of the body and the back of the feet. Add a drop of water and press the feet firmly onto the base of the frog so they peek out from under the belly.
Garden Glow Up
Use outdoor-safe acrylic paint and a heavy-duty waterproof sealer if you plan to let these little guys live in your actual garden.
Step 3: Painting and Finishing
-
Dry completely:
Let your frog sit for at least 24 to 48 hours. The clay needs to be bone dry and hard before any paint touches it. -
Base coat:
Paint the entire frog with a bright lime green acrylic. You might need two layers to get solid coverage, especially if you used terracotta clay. -
Add texture:
While the green is dry, mix a tiny bit of yellow or white into your green. Use a dry sponge or stiff brush to dab this lighter color gently on the belly and cheeks for a subtle, textured look. -
Paint the mouth:
Using your finest brush and black paint, carefully trace the indented smile line. A steady hand helps here, but don’t worry if the line varies in thickness; it adds character. -
Detail the eyes:
Paint the round eye bumps white. Once dry, add a small black circle in the center of each white mound for the pupil. -
Add a lively spark:
I always add a tiny white dot inside the black pupil. This simple ‘catchlight’ makes the frog look awake and friendly. -
Seal the work:
Once all paint is cured, spray the frog with a matte varnish to protect the paint from chipping and to give it a finished, professional ceramic look.
Now you have an adorable green companion ready to sit on your desk or brighten up a windowsill

The Complete Guide to Pottery Troubleshooting
Uncover the most common ceramic mistakes—from cracking clay to failed glazes—and learn how to fix them fast.
Mini Clay Turtles With Simple Shell Patterns
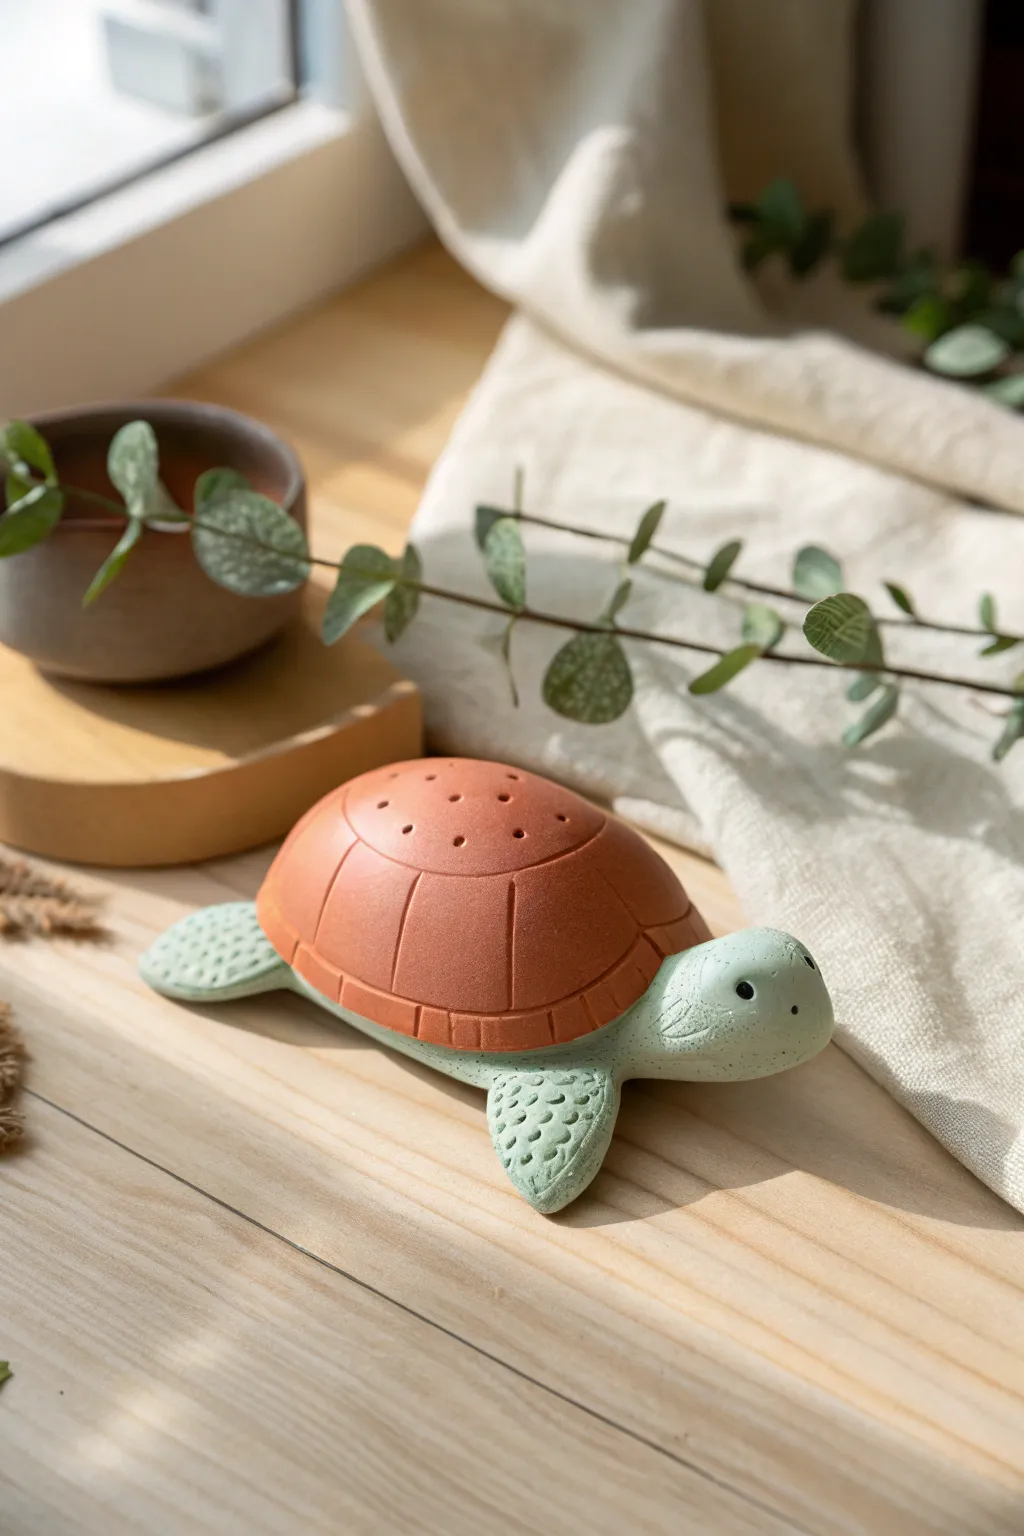
This charming little turtle features a warm, reddish-brown shell that contrasts beautifully with a pale sage green body, mimicking the look of traditional pottery. Its minimalist design relies on simple geometric patterns and textures that are easy for small hands to create.
Step-by-Step Tutorial
Materials
- Polymer clay or air-dry clay (Terracotta/Red-Brown color)
- Polymer clay or air-dry clay (Pale Sage/Green or White mixed with a tiny bit of Green)
- Clay carving tool or a butter knife
- Toothpick or a small dotting tool
- Small black beads or black clay for eyes
- Rolling pin
- Smooth work surface
Step 1: Sculpting the Body
-
Mix the body color:
Start by preparing your green clay. If you don’t have a pre-mixed sage color, take a large ball of white clay and knead in a tiny pinch of green and a speck of brown to get that earthy, pale stone hue. -
Form the main body:
Roll a medium-sized ball of the green clay and then gently flatten it into an oval shape. This will be the base that sits under the shell. -
Create the head:
Roll a smaller ball of green clay for the head. Shape it slightly like a rounded teardrop. -
Attach the head:
Press the wider part of the teardrop onto the front of the body oval. Smooth the seam with your finger or a tool so the head and body become one solid piece. -
Make the flippers:
Roll four equal-sized small balls of green clay. Flatten them into tear shapes to create the flippers. -
Attach the limbs:
Position two flippers near the front (shoulders) and two near the back. Press them firmly onto the underside of the body so they stick out naturally. -
Create the tail:
Roll a tiny cone for the tail and attach it to the rear center of the body.
Step 2: Crafting the Shell
-
Shape the shell dome:
Take your terracotta-colored clay and roll it into a large ball. Flatten the bottom against your table while keeping the top essentially round to form a perfect dome shape. -
Fit the shell:
Place the terracotta dome onto the green body base. Press it down gently to ensure it adheres, but be careful not to squish the height of the shell. -
Add shell details:
Using a clay knife or carving tool, gently press a circle shape onto the top center of the shell. You don’t need to cut through, just make an indentation. -
Carve the segments:
Draw vertical lines radiating down from that central circle to the bottom edge of the shell. These lines create the classic turtle scute pattern. -
Add texture dots:
Use a toothpick or a small dotting tool to poke a series of small holes inside the top center circle of the shell for a decorative, colander-like look.
Clean Seams
When attaching the shell to the body, I like to scratch up firmly deeply score both surfaces first. This ‘scoring’ acts like Velcro and keeps pieces from falling off later.
Step 3: Texture and Finishing
-
Texturize the flippers:
Take your toothpick again and press rows of small indents into the top of each flipper. This creates a pebbled skin texture. -
Add facial texturing:
Add a few texture dots to the side of the head and the neck area to match the limbs. -
Make the eyes:
Press two small black beads into the sides of the head for eyes. If using clay, roll two tiny black specs and press them in securely. -
Create the mouth:
Use the edge of your tool or a fingernail to make a small, horizontal slit under the nose area for a mouth. -
Final smoothing:
Check the connection points. Gently rub any fingerprints away with a tiny bit of water (if using air-dry) or baby oil (if using polymer). -
Bake or Dry:
Follow the instructions on your specific package of clay. If baking polymer clay, create a foil tent to prevent scorching the light colors.
Garden buddy
Make this turtle waterproof by using polymer clay and sealing it with outdoor varnish. It makes an adorable hidden decoration for a small potted plant.
Once dry, place your new little friend on a sunny windowsill where its earthy colors can really shine
Ladybug Pebble Bugs With Clay Faces

Transform a simple garden stone into a cheerful, smiling insect friend with just a few coats of paint. This adorable ladybug features big, expressive eyes and a classic spotted shell, perfect for brightening up a windowsill or potted plant.
How-To Guide
Materials
- Smooth, oval-shaped river rock (approximately palm-sized)
- Red acrylic paint
- Black acrylic paint
- White acrylic paint
- Flat paintbrush (medium size)
- Small round detail brush
- Pencil
- Mod Podge or clear acrylic sealer (optional)
- Water cup and paper towels
Step 1: Base Coat and Preparation
-
Clean the stone:
Before starting, scrub your rock with warm soapy water to remove any dirt or oily residue. Let it dry completely in the sun or with a cloth. -
Sketch the outline:
Using a pencil, lightly draw a curved line across the front third of the rock to separate the head from the body. You can also sketch a straight line down the center of the body for the wings. -
Paint the body red:
Load your flat brush with bright red acrylic paint. Apply an even coat over the larger section of the rock, stopping carefully at the line intended for the face. -
Apply a second coat:
Red paint can be translucent on dark stones. Once the first layer is dry to the touch, add a second layer of red to ensure the color pops vibrant and solid.
Clean Lines
If your black lines feel shaky, try using a black permanent marker or paint pen instead of a brush for the outlines and smile. It offers much better control.
Step 2: Face Features
-
Paint the face base:
For this particular style, the face remains the natural red color of the body rather than being black. Ensure the front area is painted red just like the body. -
Draw the wing divider:
Switch to your small detail brush and black paint. Carefully paint a thin line down the center of the ladybug’s back, starting from the neck line and going all the way to the rear. -
Outline the head:
Using the same small brush, paint a thin black arch separating the head area from the body. This line should connect to the top of your center wing line. -
Paint the eye whites:
Dip a clean small round brush into white paint. Make two large oval shapes on the face area. I find that dabbing the paint on rather than stroking it creates a smoother circle. -
Refine the eyes:
Let the white paint dry fully. If the stone color shows through, add a second dab of white to make the eyes opaque.
Step 3: Details and Finishing
-
Add the spots:
Using black paint and a round brush, paint several medium-sized circles on the ladybug’s red back. Try to keep them somewhat symmetrical on either side of the center line. -
Paint side spots:
Don’t forget to add a few spots lower down on the sides of the rock so the design looks complete from all angles. -
Add the pupils:
Once the white eye ovals are completely dry, use the tip of your smallest brush (or the handle end of a paintbrush) to dot black pupils inside the white areas. -
Outline the eyes:
With a very steady hand and your finest brush, paint a thin black outline around the white part of the eyes to make them stand out. -
Create the smile:
Paint a small, simple curved line below the eyes using black paint to give your ladybug a happy expression. -
Seal the rock:
After all paint has cured for at least an hour, brush on a coat of Mod Podge or clear sealer. This protects the paint from chipping and gives it a nice finished sheen.
Make it Shine
For a ‘wet’ glossy look, use high-gloss varnish or clear nail polish on just the eyes. This makes the character look alive and catches the light beautifully.
Place your new friendly bug near a sunny window to enjoy its cheerful company


What Really Happens Inside the Kiln
Learn how time and temperature work together inside the kiln to transform clay into durable ceramic.
Octopus Cuties With Curly Tentacles
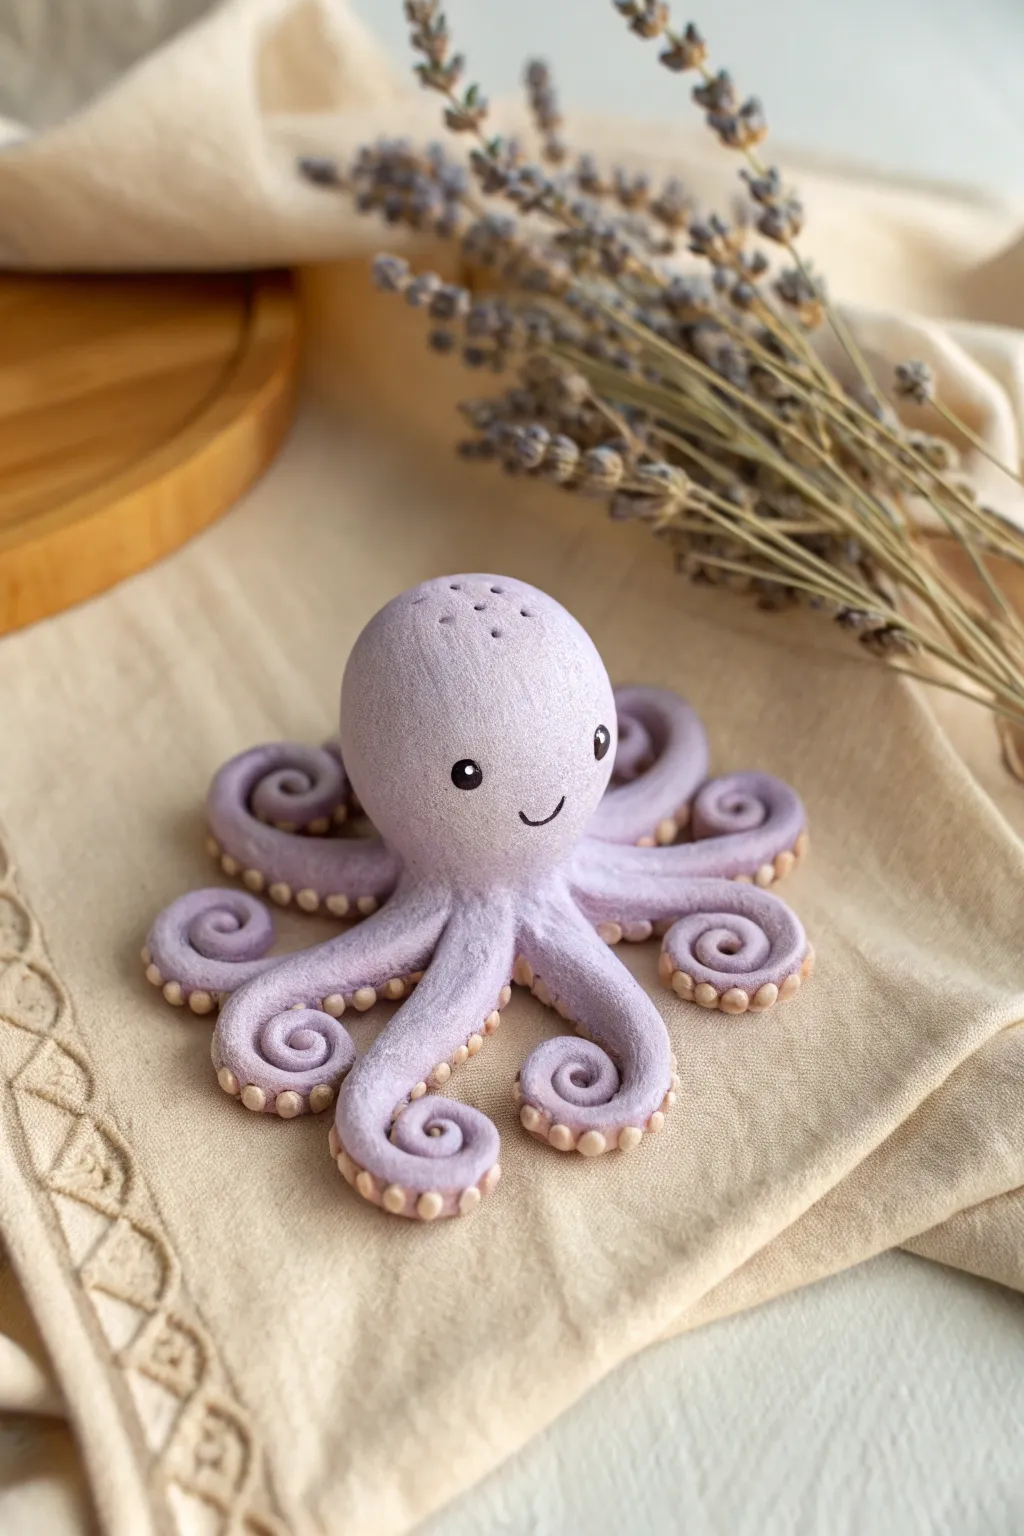
This adorable purple octopus is a joy to sculpt, featuring bubbly curly tentacles and a sweet, simple face. It makes a perfect desk companion or a cute gift, especially with those meticulously placed little suckers underneath each arm.
Detailed Instructions
Materials
- Light purple air-dry clay (or polymer clay)
- Beige or tan clay (for the suckers)
- Black acrylic paint or clay (for eyes/mouth)
- White acrylic paint (for eye highlights)
- Clay sculpting tools (needle tool, ball tool)
- Small paintbrush
- Rolling pin
- Water (for smoothing)
Step 1: Sculpting the Base
-
Form the head:
Start by rolling a ball of the light purple clay. Smooth it out until it’s seamless, aiming for a size slightly larger than a golf ball. Shape it gently into an egg-like form, slightly wider at the bottom. -
Create the tentacle base:
Take a separate chunk of purple clay and flatten it into a thick disc. This will serve as the connection point for all the legs and sit underneath the head. -
Roll the tentacles:
Roll out eight long, tapered snake shapes from the purple clay. They should be thicker at one end and taper to a point at the other, each about 3-4 inches long. -
Curl the ends:
Take the tapered tip of each tentacle and tightly curl it inward, creating a snail-shell spiral at the end of each arm.
Sucker Stickiness
If the beige suckers aren’t sticking well to the purple clay, dab a tiny dot of water or liquid clay (if using polymer) on the tentacle before pressing the sucker down.
Step 2: Assembling the Octopus
-
Attach the legs:
Arrange the eight tentacles in a starburst pattern on your work surface. Press the thicker ends together in the center. I find it helpful to blend the clay where they meet so the joints disappear. -
Position the legs:
Lift the curling ends slightly to give the octopus a dynamic, ‘floating’ look. -
Attach the head:
Place the head firmly onto the center of the joined tentacles. Use a sculpting tool or your thumb to smooth the clay from the neck down onto the legs to secure the bond. -
Smooth the seams:
Dip your finger in a little water and gently rub over the neck area to ensure the transition from head to tentacles is completely smooth and seamless.
Give It Texture!
Before the clay dries, gently press a piece of coarse fabric or a clean textured sponge against the head’s surface to give it a realistic, skin-like matte finish.
Step 3: Adding Details
-
Prepare the suckers:
Roll tiny, tiny balls of the beige or tan clay. You will need quite a few of these—at least 5-6 for each tentacle. -
Apply the suckers:
Press the tiny beige balls gently onto the underside of each tentacle, running from the curled tip back toward the body. Flatten them slightly as you attach them. -
Create the face:
Using a small ball tool or the end of a paintbrush, make two small indentations for the eyes on the front of the head. -
Add the eyes:
Roll two small balls of black clay (or paint them later) and press them into the sockets. Add a tiny dot of white paint to each eye for a sparkle. -
Draw the smile:
Use a needle tool or a very thin piece of black clay to create a simple, curved U-shape smile right between the eyes. -
Texture the head:
For a subtle texture, you can gently tap the top of the head with a dry sponge or lightly poke a few holes near the top with a needle tool, giving it distinct character. -
Final smooth:
Check over the entire piece for fingerprints. Lightly brush with water or baby oil to smooth them away before setting it aside to dry.
Once fully dry, your little sea creature is ready to bring a splash of ocean fun to your shelf
Sleepy Clay Sloths Hugging Tiny Branches
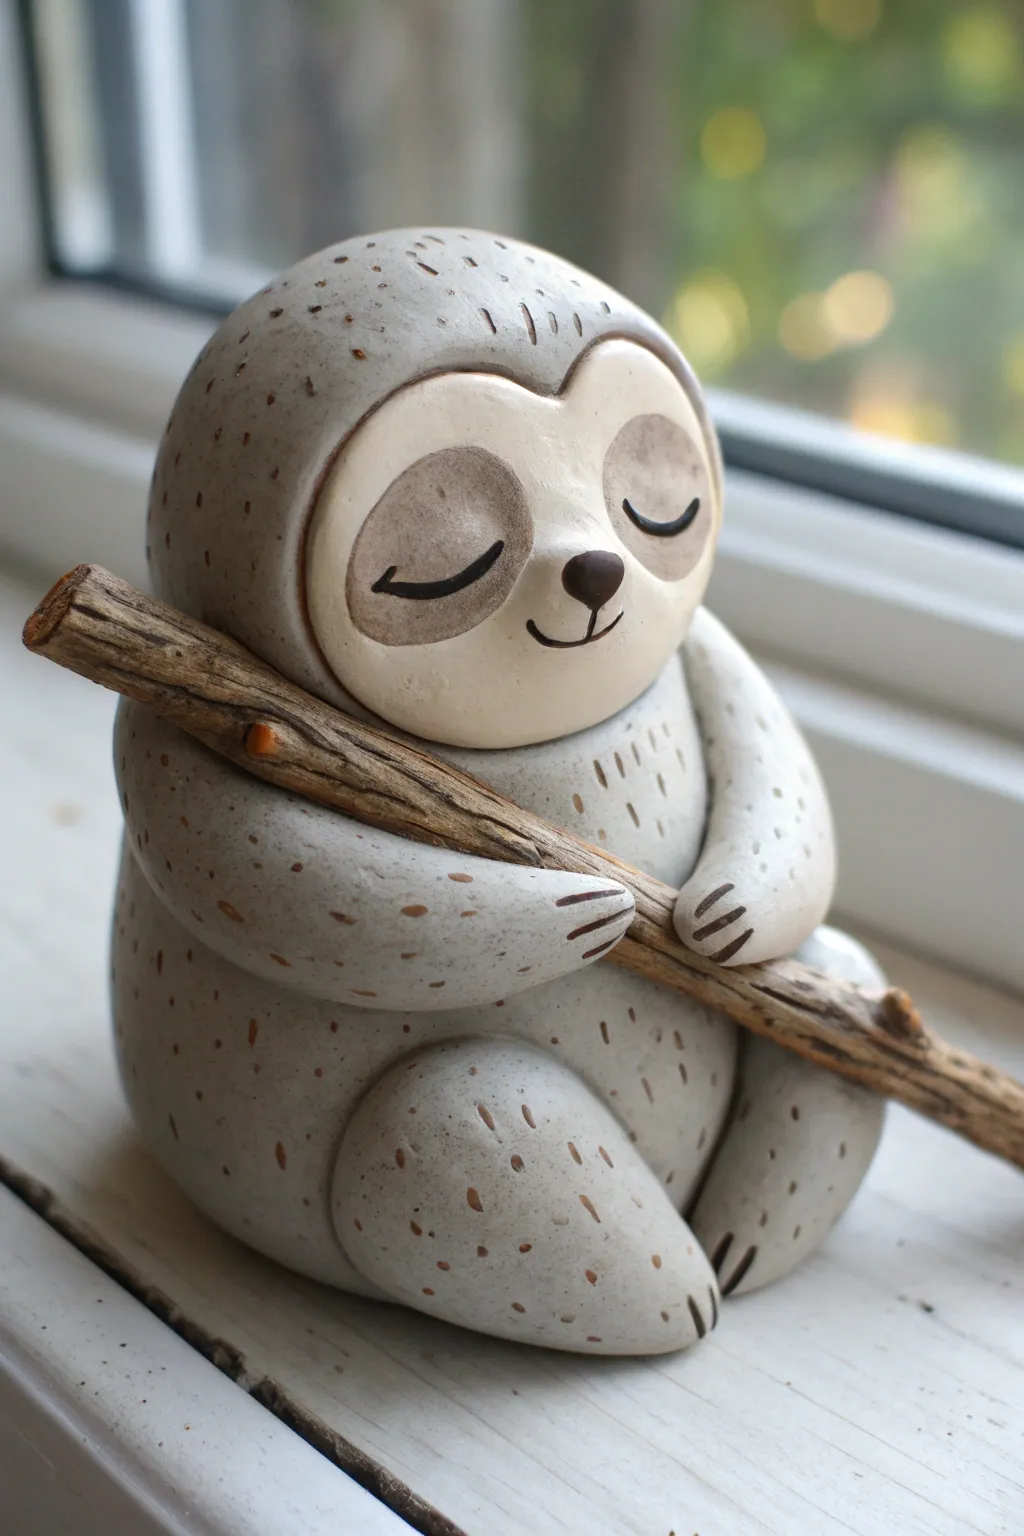
Create your own peaceful little friend with this adorable clay project that captures a sloth in its favorite activity: napping. The smooth, speckled finish gives it a polished ceramic look without needing a kiln, making it perfect for a windowsill companion.
Detailed Instructions
Materials
- White air-dry clay (or polymer clay)
- Small real twig/branch (dry and clean)
- Acrylic paints: Beige/Tan, Dark Brown, White, Black
- Fine-grit sandpaper
- Water and sponge for smoothing
- Fine detail paintbrush
- Old toothbrush (for speckling)
- Sculpting tool or toothpick
- Matte varnish or sealant
Step 1: Shaping the Sloth Body
-
Form the base:
Start with a large ball of white clay about the size of a tangerine. Roll it firmly between your palms until it is perfectly smooth and round. -
Create the egg shape:
Gently gently roll the ball on your table while applying slight pressure to the top half to taper it slightly, creating a chubby egg shape. This will be the combined head and body. -
Define the head:
Use your thumb to gently press an indentation about 1/3 of the way down from the top. While smoothing this area, you define where the neck would naturally be without making it too thin; sloths have very sturdy necks. -
Flatten the base:
Tap the bottom of your egg shape on the table so the sloth sits flat and stable. I like to wobble it a bit to make sure it won’t tip over once dried.
Smooth Operator
To get that super-smooth ceramic look without a kiln, use a damp sponge to smooth the raw clay, then sand the dry piece before painting.
Step 2: Adding Limbs and Details
-
Make the legs:
Roll two medium-sized teardrop shapes for the back legs. Flatten them slightly and press them onto the bottom sides of the body, wrapping them forward so they look like the sloth is sitting comfortably. -
Position the branch:
Take your real twig and press it gently against the sloth’s tummy to mark where it will go. You need to do this now to ensure the arms will fit around it perfectly. -
Sculpt the arms:
Roll two longer sausage shapes for the arms. Attach them at the shoulder area and curve them forward to embrace the twig mark you just made. -
Finalize the hug:
Press the twig back into place and gently wrap the clay hands over it. Use a sculpting tool to carve three small lines into the ends of the hands and feet to create claws. -
Smooth everything out:
Dip your finger or a sponge in a little water and rub away any fingerprints or seams where you attached the limbs. The goal is a seamless, single-piece look. -
Dry the clay:
Let the sculpture dry completely according to your clay package instructions. Remove the stick gently if possible to paint separately, or leave it if it’s stuck fast.
Step 3: Painting and Finishing
-
Base sanding:
Once fully dry, lightly sand the surface with fine-grit sandpaper to remove any bumps and achieve that ceramic-smooth finish. -
Face mask:
Mix a light beige/tan paint color. Paint a heart-shaped mask on the face area, keeping the edges soft and rounded. -
Eye patches:
Using a slightly darker brown mixed with plenty of water (for a watercolor effect), paint two oval patches inside the face mask for the eye areas. -
Facial features:
With your finest brush and dark brown paint, carefully draw two curved lines for sleeping eyelids. Add a small oval nose and a tiny curved smile. -
Speckling technique:
Dilute some brown paint with water. Dip your old toothbrush into it, and using your thumb, flick the bristles to spray tiny speckles all over the body (avoiding the face mask). -
Claw details:
Use the dark brown paint to carefully fill in the engraved claw lines on the hands and feet. -
Reattach the branch:
If you removed the twig earlier, add a drop of glue and slide it back into the sloth’s hug. -
Seal the work:
Apply a coat of matte varnish to protect your paint and give the clay a finished, professional appearance.
Cracking Up?
If you see cracks forming as the clay dries, mix a tiny bit of fresh clay with water to make a paste and fill the cracks immediately.
Place your sleepy sloth near a plant or on a shelf where its peaceful vibe can be enjoyed every day

TRACK YOUR CERAMIC JOURNEY
Capture glaze tests, firing details, and creative progress—all in one simple printable. Make your projects easier to repeat and improve.
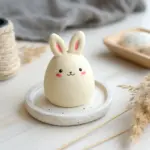
Pinch Pot Bunny Bowls
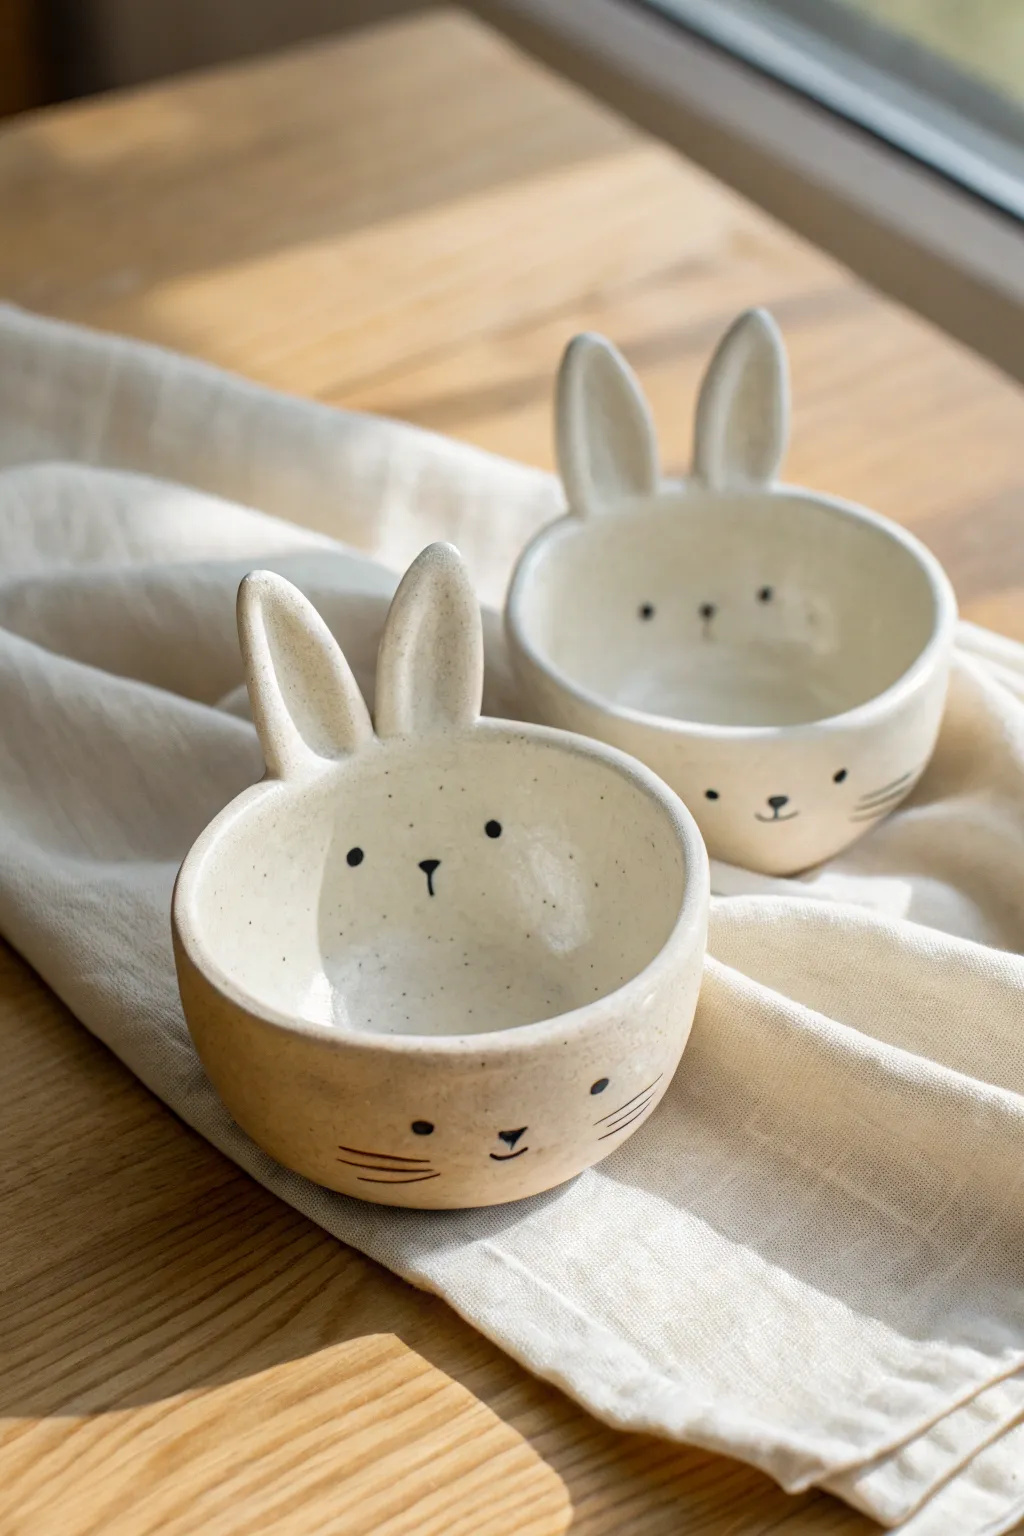
These adorable bunny bowls bring a touch of woodland charm to your table with their sweet expressions and perky ears. Using the classic pinch pot method, they are wonderfully simple to shape and feature a beautiful speckled finish that looks like professional pottery.
Step-by-Step Guide
Materials
- Speckled stoneware clay (or polymer clay with granite effect)
- Clay scoring tool or fork
- Small sponge
- Water in a small cup
- Rolling pin
- Knife or clay cutting tool
- Fine-point black underglaze pencil or food-safe paint
- Glossy clear food-safe glaze (if using ceramic clay)
- Kiln access (unless using air-dry/oven-bake alternatives)
Step 1: Forming the Bowl Base
-
Prepare the clay:
Start with a ball of clay roughly the size of a tennis ball. Knead it briefly to remove air bubbles and ensure it feels smooth and pliable in your hands. -
Start the pinch pot:
Hold the ball in your non-dominant hand. Press your thumb gently into the very center of the sphere, stopping about a half-inch from the bottom. -
Pinch the walls:
Using your thumb on the inside and fingers on the outside, gently pinch and rotate the clay. Work your way from the bottom up to the rim. -
Establish the shape:
Aim for an even wall thickness of about a quarter-inch all around. Keep the sides fairly upright rather than flaring them out too wide, creating a cozy cup shape. -
Tap the bottom:
Gently tap the pot’s bottom against your work surface to flatten it slightly. This ensures your bunny bowl won’t wobble when it’s finished. -
Smooth the surfaces:
Dip your sponge lightly in water and run it over the interior and exterior. I like to spend extra time here to erase any fingerprints and create a silky-smooth finish.
Smooth Operator
To get perfectly rounded rims without cracks, run a small strip of chamois leather or a very damp sponge over the lip of the bowl right after you finish shaping it.
Step 2: Adding the Ears
-
Roll a slab:
Take a leftover chunk of clay and roll it out until it’s about the same thickness as your bowl walls. -
Cut ear shapes:
Use your knife to cut out two elongated ovals. They should be slightly rounded at the top and flatter at the bottom attachment point. -
Score the clay:
On the back rim of your bowl, scratch up two small areas where the ears will sit. Do the same to the bottom edge of your clay ears. -
Apply slip and attach:
Dab a little water or clay slip (clay mixed with water) onto the scratched areas. Press the ears firmly onto the rim. -
Blend the seams:
Use your thumb or a modeling tool to smooth the clay from the ear down onto the bowl, blending the seam until it disappears completely on both the inside and outside. -
Shape the ears:
Once attached, you can gently curve the ears slightly forward or create a little indentation down the center to make them look more realistic.
Step 3: Decorating and Finishing
-
Allow to dry:
Let the clay dry to a ‘leather hard’ stage. This means it is firm to the touch and no longer tacky, but not bone dry. -
Draw the face inside:
Using a fine-point underglaze pencil or a very small brush, paint two tiny dots for eyes partially down the inside wall, near the rim. -
Add nose and mouth:
Draw a tiny ‘Y’ shape just below the eyes to create the nose and mouth. Add three delicate whiskers on each side. -
Draw the exterior face:
Repeat the face drawing on the outside of the bowl. Place the features lower down on the exterior wall so the bunny looks polite and sweet. -
Bisque fire:
If using ceramic clay, fire the piece in the kiln for the first time (bisque firing). -
Glaze:
Dip the entire piece in a clear, glossy glaze. Make sure the glaze is food-safe if you plan to eat out of these bowls. -
Final firing:
Fire the bowl a second time according to your clay’s specific temperature instructions to set the glaze and reveal the beautiful speckles.
Make it a Set
Create a whole family by varying the sizes of your pinch pots. Make a tiny one for a dip bowl and a large one for cereal, giving each a slightly different ear position.
Enjoy using your charming handmade bunny bowls for snacks or as sweet trinket dishes
Animal Pencil Cup With A Simple Snout
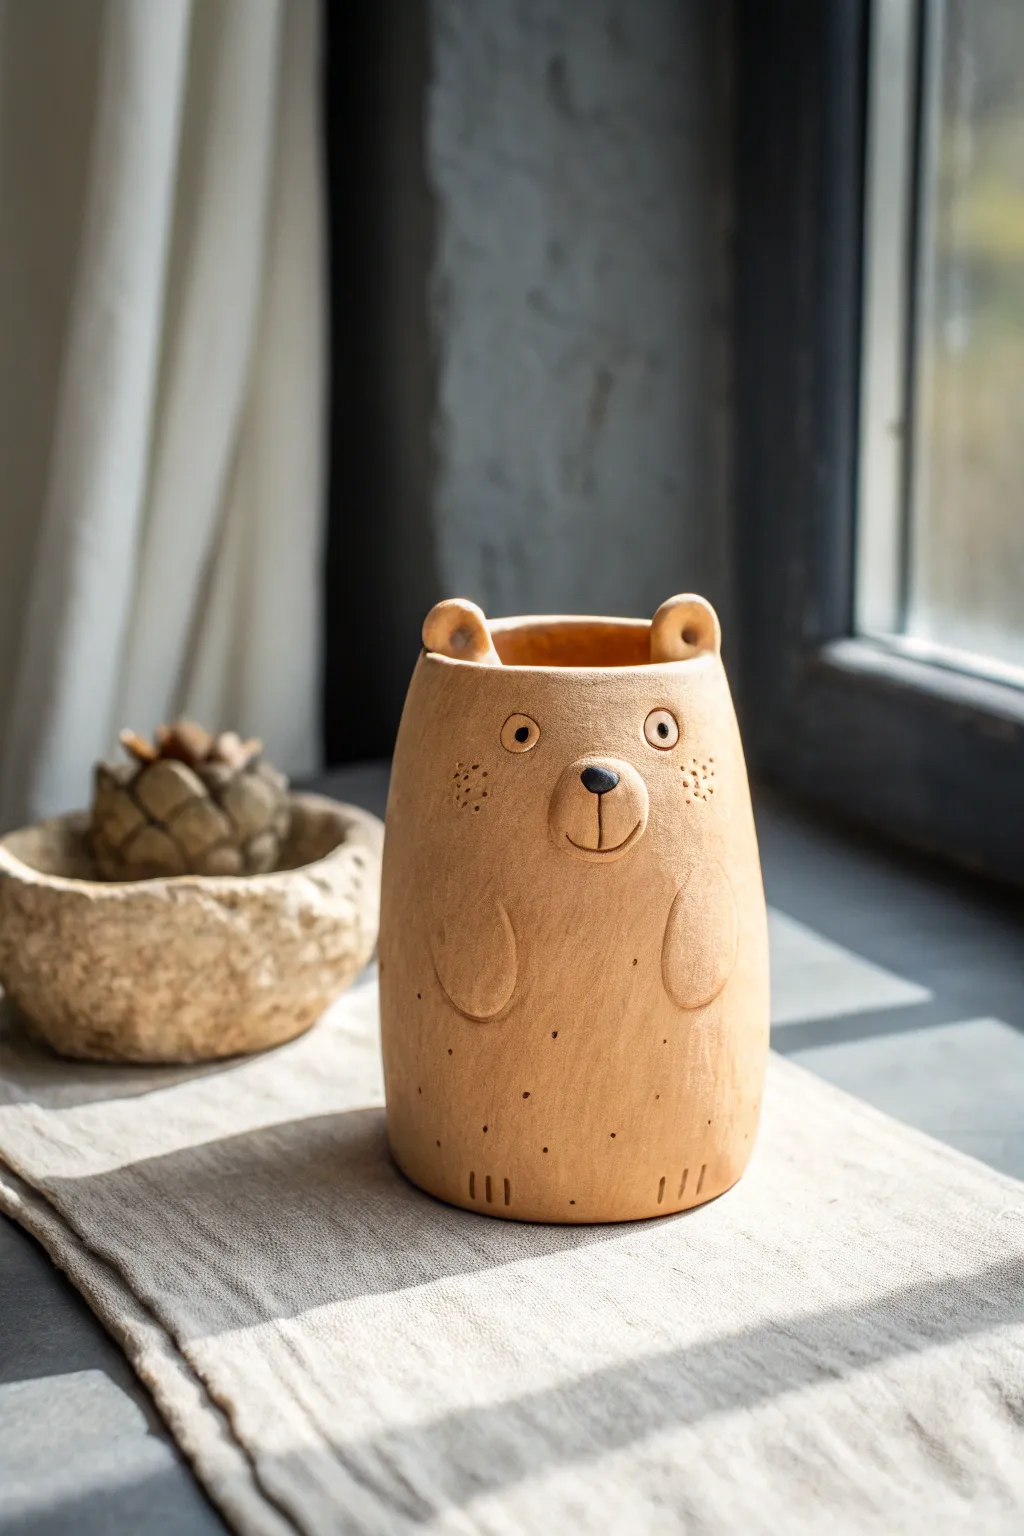
This charming, earthy pencil cup brings a friendly face to any desk with its warm terracotta tone and sweet expression. Modeled as a simple bear with raised arms and subtle carving, it’s a sturdy and functional piece of art.
Step-by-Step
Materials
- Terracotta air-dry clay or kiln-fire clay
- Rolling pin
- Clay knife or fettling knife
- Scoring tool (or a fork)
- Slip (clay mixed with water)
- Small sponge
- Needle tool or toothpick
- Black acrylic paint or underglaze
- Small detail paintbrush
- Cylindrical mold (like a soda can wrapped in paper)
Step 1: Forming the Cylinder Body
-
Establish the base:
Roll out a slab of clay to about a 1/4 inch thickness. Use a round cookie cutter or a cup to cut out a circle for the base of your pencil holder. -
Create the walls:
Roll out a larger rectangular slab of clay. Measure the circumference of your base circle to ensure the rectangle is long enough to wrap all the way around it, plus a little extra for overlapping. -
Prepare the joinery:
Score the outer edge of your circular base and the bottom edge of your rectangular slab. Apply a generous amount of slip to these rough areas. -
Assemble the cylinder:
Wrap the rectangular slab around the base circle. You can use a paper-wrapped soda can inside as a temporary support structure to keep it perfectly round. -
Seal the seam:
Where the two ends of the wall meet, score and slip the vertical edges. Press them together firmly and use your thumb to smooth the clay downward, blending the seam until it disappears completely. -
Smooth the surface:
Run a slightly damp sponge over the entire outside of the cylinder to remove fingerprints and ensure a nice, even texture like the photo.
Step 2: Adding Bear Characteristics
-
Shape the rim:
Gently taper the top rim of the cup inward slightly with your fingers to give the bear a softer, less mechanical silhouette. -
Attach the ears:
Roll two small balls of clay and flatten them slightly. Indent the center of each with your thumb to create the inner ear. -
Secure the ears:
Score and slip the top rim of the cup and the bottom of the ears. Press the ears firmly onto the rim, blending the clay at the back for a strong hold. -
Form the snout:
Create a small, flat oval of clay. Score the center of the cylinder face and the back of the oval, then attach it using slip to make the raised muzzle area. -
Add the arms:
Roll two teardrop shapes of clay. Flatten them slightly and attach them to the sides of the body using the score-and-slip method, positioning them so they look like little paws resting on a tummy.
Smooth Moves
Keep a small bowl of water nearby. Dip your finger in occasionally to smooth out crumbles, but don’t soak the clay too much or it will collapse.
Step 3: Detailing and Finishing
-
Refine the seams:
I like to take a moment here to go back over the arm and snout attachments with a damp finger to ensure the transitions are smooth and seamless. -
Carve the face:
Using a needle tool, gently press into the clay above the snout to create two circular outlines for eyes. Poke a pupil in the center of each. -
Add texture and whiskers:
Use the needle tool to poke small clusters of dots on the cheeks for whisker spots. Add scattered random dots around the lower body for texture. -
Incise the paws:
At the very bottom of the cup, gently carve three short vertical lines on the left and right sides to suggest little foot claws. -
Create the nose:
Roll a tiny triangle or oval of clay for the nose and attach it to the top of the snout. Carve a vertical line down from the nose and a curved line for the mouth. -
Paint the nose:
Once the clay is fully dry (air-dry) or bisque fired (ceramic), paint just the nose tip black for that classic bear look. Leave the rest unpainted to show off the clay’s natural beauty.
Forest Friends
Change the ear shape and snout length to create a whole woodland set: pointy ears for a fox, long ears for a rabbit, or round flat ears for a mouse.
Now you have a sturdy little friend to keep your pencils organized and your desk looking cozy
Fairy Garden Mushrooms With Polka Dots
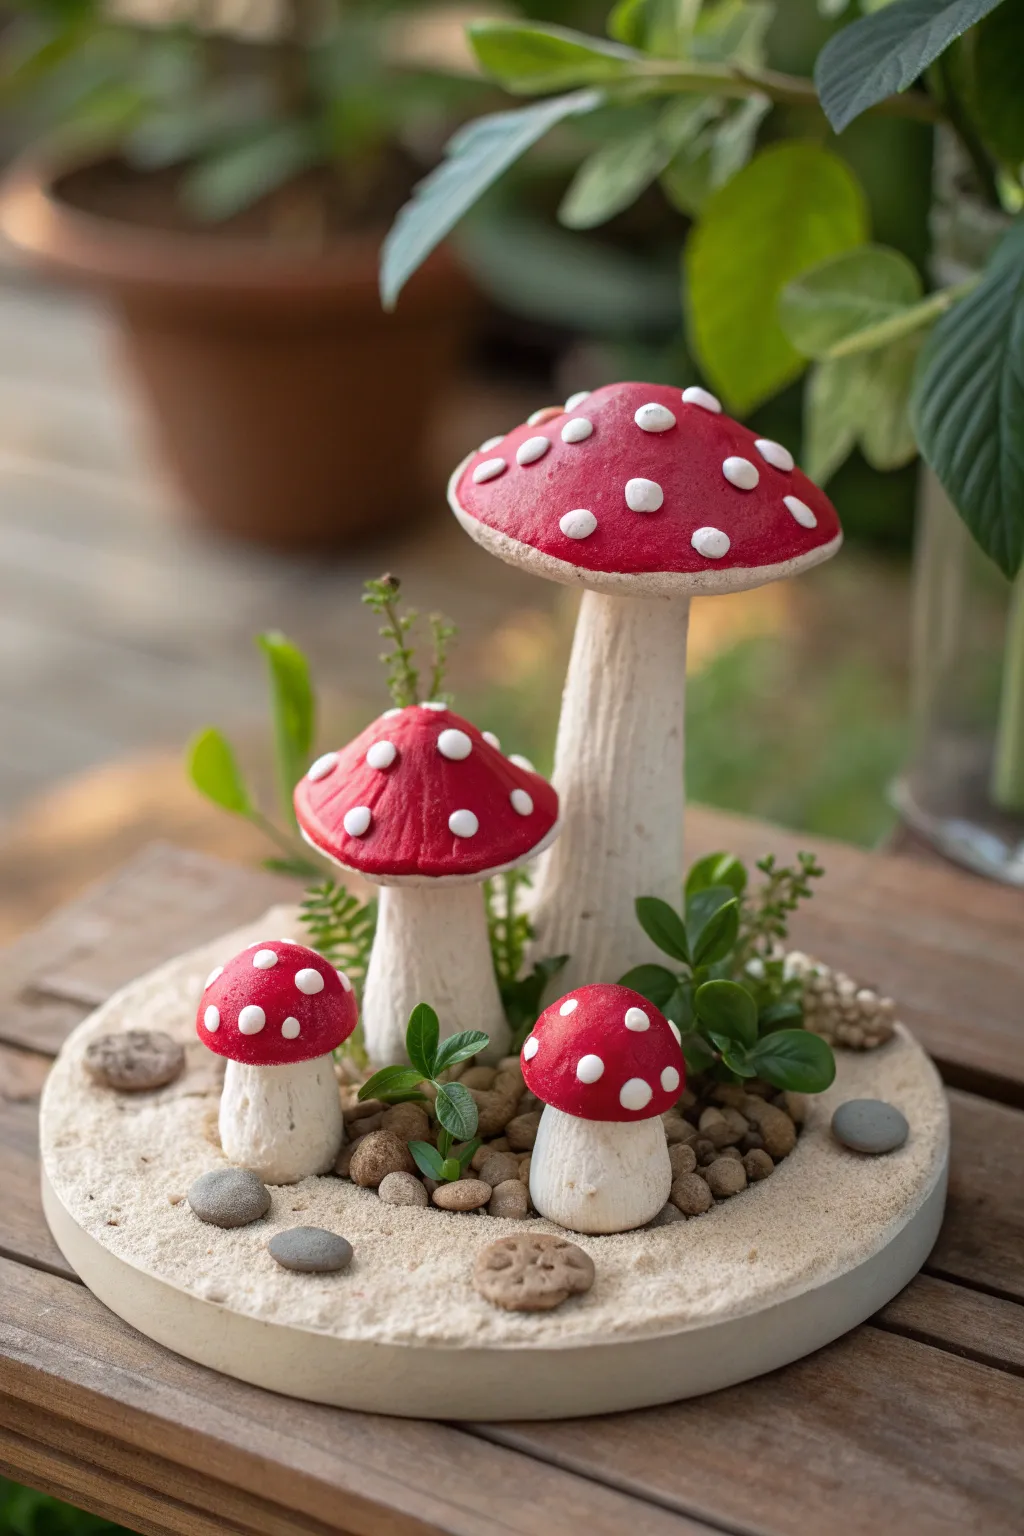
Bring a touch of woodland magic indoors with this charming clay mushroom garden scene. Featuring four sturdy toadstools with classic red caps and white spots, this project sits perfectly in a sandy base adorned with river rocks and faux greenery.
How-To Guide
Materials
- Air-dry clay or polymer clay (White)
- Acrylic paints (Red, White)
- Paintbrushes (small detail brush and medium flat brush)
- Round wooden base or coaster (approx. 4-6 inches)
- Fine sand (light beige or white)
- Small pebbles or smooth river rocks
- Faux greenery sprigs (small leaves, mossy bits)
- Strong craft glue or hot glue gun
- Sculpting tool or toothpick
- Aluminum foil (optional, for armature)
Step 1: Sculpting the Mushrooms
-
Create the Stems:
Start by rolling four cylinders of white clay in varying sizes. Make one quite tall and thick for the main mushroom, a medium one, and two short, chubby ones for the smallest mushrooms. -
Shape the Bases:
Gently widen the bottom of each stem so they stand up on their own, pressing them slightly onto your work surface to flatten the base. -
Create the Caps:
Roll four balls of clay corresponding to the stem sizes. Use your thumb to press into the center of each ball, pinching and rotating the edges to create a domed cap shape. -
Attach Caps to Stems:
Score the top of each stem and the underside of each cap with a toothpick to create a rough texture. Apply a dab of water (for air-dry clay) and press the caps firmly onto the stems. -
Refine the Connection:
Use a sculpting tool or your finger to smooth the seam where the cap meets the stem underneath, ensuring a strong bond. -
Add Texture:
Ideally, run a toothpick or sculpting tool vertically up the stems to create faint lines that mimic natural mushroom fibers. -
Dry the Clay:
Set your four mushrooms aside to dry completely according to your clay package instructions. This usually takes 24 hours for air-dry clay.
Droopy Caps?
If your large mushroom cap is too heavy and won’t stay up, insert a toothpick or a crumple of foil into the stem while wet to act as an internal skeleton for support.
Step 2: Painting and Detailing
-
Base Coat the Stems:
Once dry, paint the stems with a creamy off-white color. I like to dirty up the very bottom of the stems with a tiny bit of brown paint to look like soil stains. -
Paint the Caps Red:
Carefully paint the tops of the mushroom caps with bright red acrylic paint. You may need two coats for a solid, vibrant color. -
Add the Polka Dots:
Using a small detail brush or the back end of a paintbrush handle, dot white paint onto the red caps. Vary the sizes of the dots for a more natural look. -
Paint the Rim:
Paint a very thin white line along the bottom rim of the red caps to define the edge clearly.
Step 3: Assembling the Garden
-
Prepare the Base:
Take your round wooden base and cover the top surface with a generous layer of craft glue. -
Create the Sandy Ground:
Pour fine sand over the wet glue until the base is completely covered. Shake off the excess gently once the glue tacks up. -
Position the Mushrooms:
Determine where your mushrooms will sit. Glue the tallest one slightly off-center, then arrange the smaller ones around it in a cluster. -
Add Pebbles:
Glue small river rocks and pebbles around the base of the mushrooms to hide any gaps and add weight to the scene. -
Plant the Greenery:
Snip small sprigs of faux greenery. Dip the stems in glue and tuck them into the sand or between the rocks, focusing on the area around the tall mushroom. -
Final Touches:
Add a few tiny stray pebbles on the outer rim of the sand for a realistic scatter effect.
Add a Visitor
Sculpt a tiny snail or ladybug using leftover clay and glue it to one of the mushroom caps or a rock to bring a little life to your static garden scene.
Place your finished fairy circle on a bookshelf or windowsill to enjoy a little piece of the forest floor every day
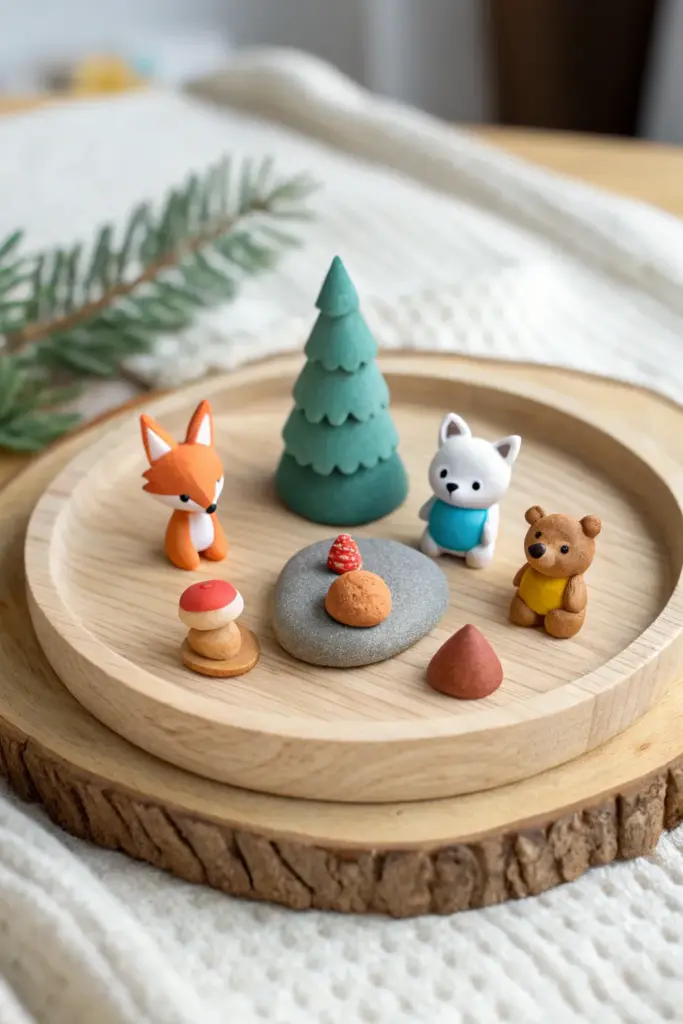
Small World Mini Characters For Imaginative Play

Create a charming miniature world featuring a fox, wolf, and bear gathered around a tiny campfire feast. Modeled from polymer or air-dry clay, these simple yet expressive characters are perfect for open-ended imaginative play or a sweet seasonal display.
Step-by-Step Guide
Materials
- Polymer clay or air-dry clay (orange, white, brown, green, grey, red, tan, blue, yellow)
- Clay sculpting tools (dotting tool, craft knife)
- Small wooden display tray or coaster
- Baking sheet and oven (if using polymer clay)
- Acrylic glaze (optional)
- Super glue (optional)
Step 1: Sculpting the Forest Friends
-
Form the fox body:
Start with a small ball of orange clay about the size of a marble. Gently pinch and pull the top into a teardrop shape for the body, flattening the bottom so it sits upright comfortably. -
Add the fox head and details:
Roll a slightly larger orange ball for the head. Pinch two triangles for ears and attach them to the top. Carefully shape a white patch of clay onto the lower face and chest area, blending the edges smooth. -
Finish the fox features:
Use a tiny bit of black clay for the nose tip and two microscopic black dots for eyes. Attach the head to the body, pressing gently to secure it. -
Create the white wolf:
Roll a white ball for the head and add two small triangular white ears. Mold a simple white body shape, but dress it up by wrapping a thin strip of blue clay around the torso to create a little sweater or shirt. -
Assemble the wolf:
Attach the head to the body. Add black dot eyes and a nose. Create tiny white arms and attach them to the sides of the blue shirt area. -
Sculpt the brown bear:
Roll a brown ball for the head with two tiny round ears. Make a body shape and wrap a strip of yellow clay around the middle for its shirt. Add simple brown arms and legs—small balls or sausages—attached to the body. -
Complete the trio:
Give the bear a black nose and eyes. Arrange all three figures on your workspace to ensure they are roughly the same scale.
Sticky Situation?
Polymer clay getting too soft or sticky? Pop it in the fridge for 10 minutes. Cooling firmly helps intricate details like ears hold their shape.
Step 2: Setting the Scene
-
Build the evergreen tree:
Form a cone shape from green clay. Using a craft knife or a sculpting tool, gently press indentations or scallop shapes starting from the bottom and working upward to mimic layered branches. -
Shape the campfire stone:
Take a larger chunk of grey clay and flatten it into an irregular oval, smoothing the edges to look like a river stone. This serves as the picnic table. -
Create miniature food:
Roll a tiny tan ball and texture it with a toothbrush or foil to look like a bread bun. Make a microscopic red cone with white speckles for a tiny strawberry or berry. -
Make the mushroom seat:
Sculpt a tan cylinder for the stem and a rounded red cap for the top. Join these pieces securely. You can add a flat tan disk at the bottom for stability. -
Form the chocolate drop:
Roll a small amount of reddish-brown clay into a smooth cone shape to represent a chocolate treat or another forest element.
Forest Floor Texture
Before baking, use an old toothbrush to gently tap the ‘ground’ pieces or the buns. This stippling effect creates realistic fuzzy or bready textures.
Step 3: Finishing Touches
-
Bake or dry:
If using polymer clay, arrange all pieces on a baking sheet and bake according to package directions (usually 275°F/135°C for 15-30 minutes). If using air-dry clay, leave them undisturbed for 24-48 hours. -
Cool and inspect:
Allow the pieces to cool completely. Check for any loose parts; a drop of super glue can reattach any limbs or ears that didn’t bond perfectly during baking. -
Arrange the diorama:
Place your grey stone in the center of the wooden tray. Set the food items on top of the stone. -
Position the characters:
Place the tree near the back and arrange the fox, wolf, and bear around the stone ‘table’ as if they are conversing. -
Final display:
Optionally, use a tiny bit of poster putty or glue to secure the figures to the wooden tray if you want a permanent display, or leave them loose for play.
Now you have an adorable forest gathering ready for storytelling adventures