If you’ve been itching to add a little pond personality to your shelf or garden, frog pottery is such a fun direction to go. I love how frog shapes can be sweet and simple or totally quirky—while still becoming real, usable functional ceramics.
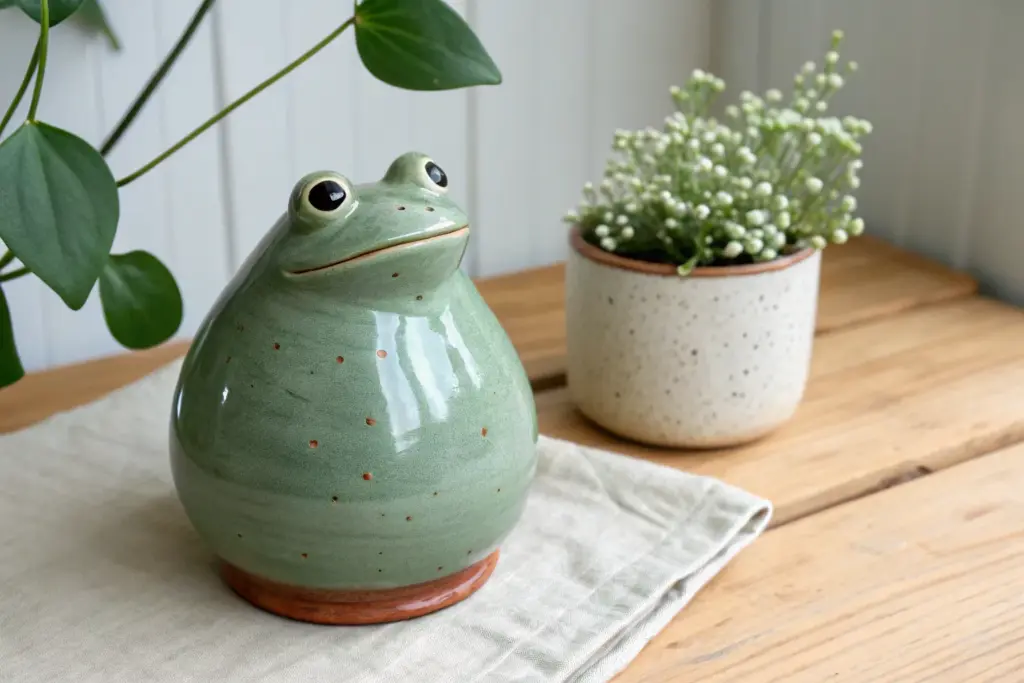
Frog Planter With Dangly Legs
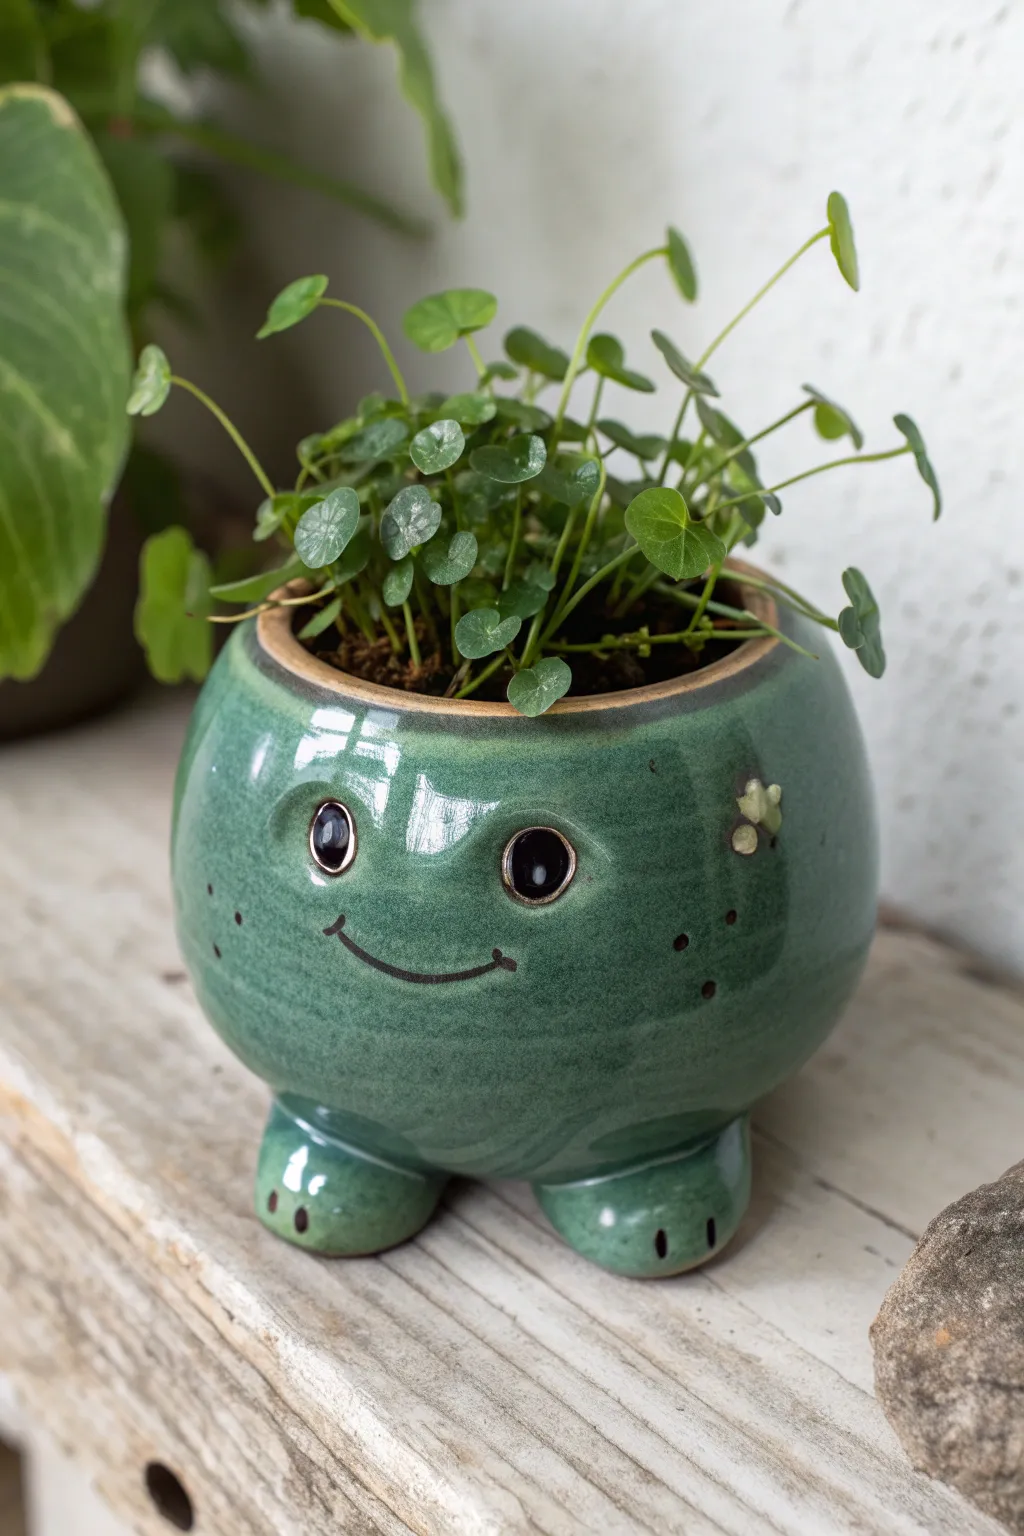
This adorable ceramic planter features a round, glossy body and stubby little feet that give it undeniable personality. Perfect for small trailing plants like Pilea or string of turtles, its cheerful face makes it a delightful addition to any windowsill.
Step-by-Step Guide
Materials
- Earthenware or stoneware clay (white or buff)
- Pottery wheel (optional, can be hand-built)
- Small sponge
- Pin tool or needle tool
- Loop tool for trimming
- Modeling tool (wooden/rib)
- Slip and scoring tool
- Green celadon or Oribe glaze (glossy)
- Black underglaze
- Small detail brush
- Clear glaze (if not using glossy green)
- Kiln
Step 1: Creating the Body Shape
-
Form the base:
Start with a ball of clay roughly the size of a grapefruit. If throwing on the wheel, center your clay and open it up, keeping the floor about a half-inch thick to support the feet later. -
Belly it out:
Pull the walls up, gently applying pressure from the inside to bulge the form outward. You want a very spherical, rotund shape that curves back inward at the rim. -
Refine the rim:
Collar the neck in slightly, leaving an opening wide enough for your plant but narrower than the belly. Smooth the rim with a chamois or wet sponge for a professional finish. -
Trim the bottom:
Once the pot is leather hard, trim away excess weight from the bottom using a loop tool. Instead of a traditional foot ring, trim the bottom round so it continues the spherical curve.
Celadon Secret
Use a translucent glaze that ‘breaks’ over edges. It will naturally appear lighter on the high points (eyebrows) and darker in the carved lines (mouth), saving you painting time.
Step 2: Adding Feet and Features
-
Model the feet:
Roll two small balls of clay and flatten them slightly into oval shapes. These will be the stubby feet. Gently press the front of each oval to create a subtle slope. -
Add toe details:
Use a small modeling tool or the edge of a credit card to impress two or three vertical lines into the front of each foot to suggest toes. -
Attached the feet:
Score the bottom of the pot and the top of the feet thoroughly. Apply slip and press the feet firmly onto the base, spacing them slightly apart so the frog sits stable. -
Create the eyes:
Traditionally, frog eyes bulge out. Press your thumb gently into the clay where the eye sockets will go to create slight depressions. Roll two small balls of clay, flatten them into discs, and slip-and-score them into these depressions. -
Refine the eyes:
Take a small loop tool and carve a shallow ring around the clay discs you just attached. This defines the eyeball from the eyelid and gives it that surprised, alert look. -
Sculpt the smile:
Using a needle tool, lightly sketch a wide, U-shaped mouth. Once you are happy with the placement, go over it with a carving tool to deepen the line. Add tiny perpendicular tick marks at the corners for dimples. -
Add texture:
For the freckles seen on the cheeks, use the dull ti of a tool to gently press random divots into the clay surface. Don’t puncture through; just leave impressions.
Step 3: Glazing and Finishing
-
Bisque fire:
Allow the piece to dry slowly and completely before loading it into the kiln for the bisque firing (usually cone 04 or 06). -
Paint the details:
Using a fine brush and black underglaze, carefully paint inside the carved smile line. Paint the pupils of the eyes solid black, leaving a tiny dot of unpainted clay for a highlight if you want extra sparkle. -
Wax parts (optional):
If you want the unglazed accent rim seen in the photo, careful apply wax resist to the very top lip of the pot. -
Apply the green glaze:
Dip or brush your main green glaze over the entire exterior and interior. A translucent celadon works beautifully here because it pools in the texture of the smile and eye sockets, highlighting your carving. -
Clean the eyes:
I like to carefully wipe the glaze off the black pupils with a damp sponge so the black remains distinct, or ensure your glaze is transparent enough that the black shows through clearly. -
Final wipe:
Wipe the bottom of the feet completely clean of glaze so they don’t stick to the kiln shelf. -
Glaze fire:
Fire the piece again to the maturation temperature of your specific clay and glaze combination.
Wobbly Frog?
If your frog rocks back and forth after attaching the feet, gently tap the whole piece (feet down) on a flat board while the clay is still soft to level the bottom.
Pop in your favorite moisture-loving plant and enjoy your new ceramic friend


Perched Frog Rim Bowl
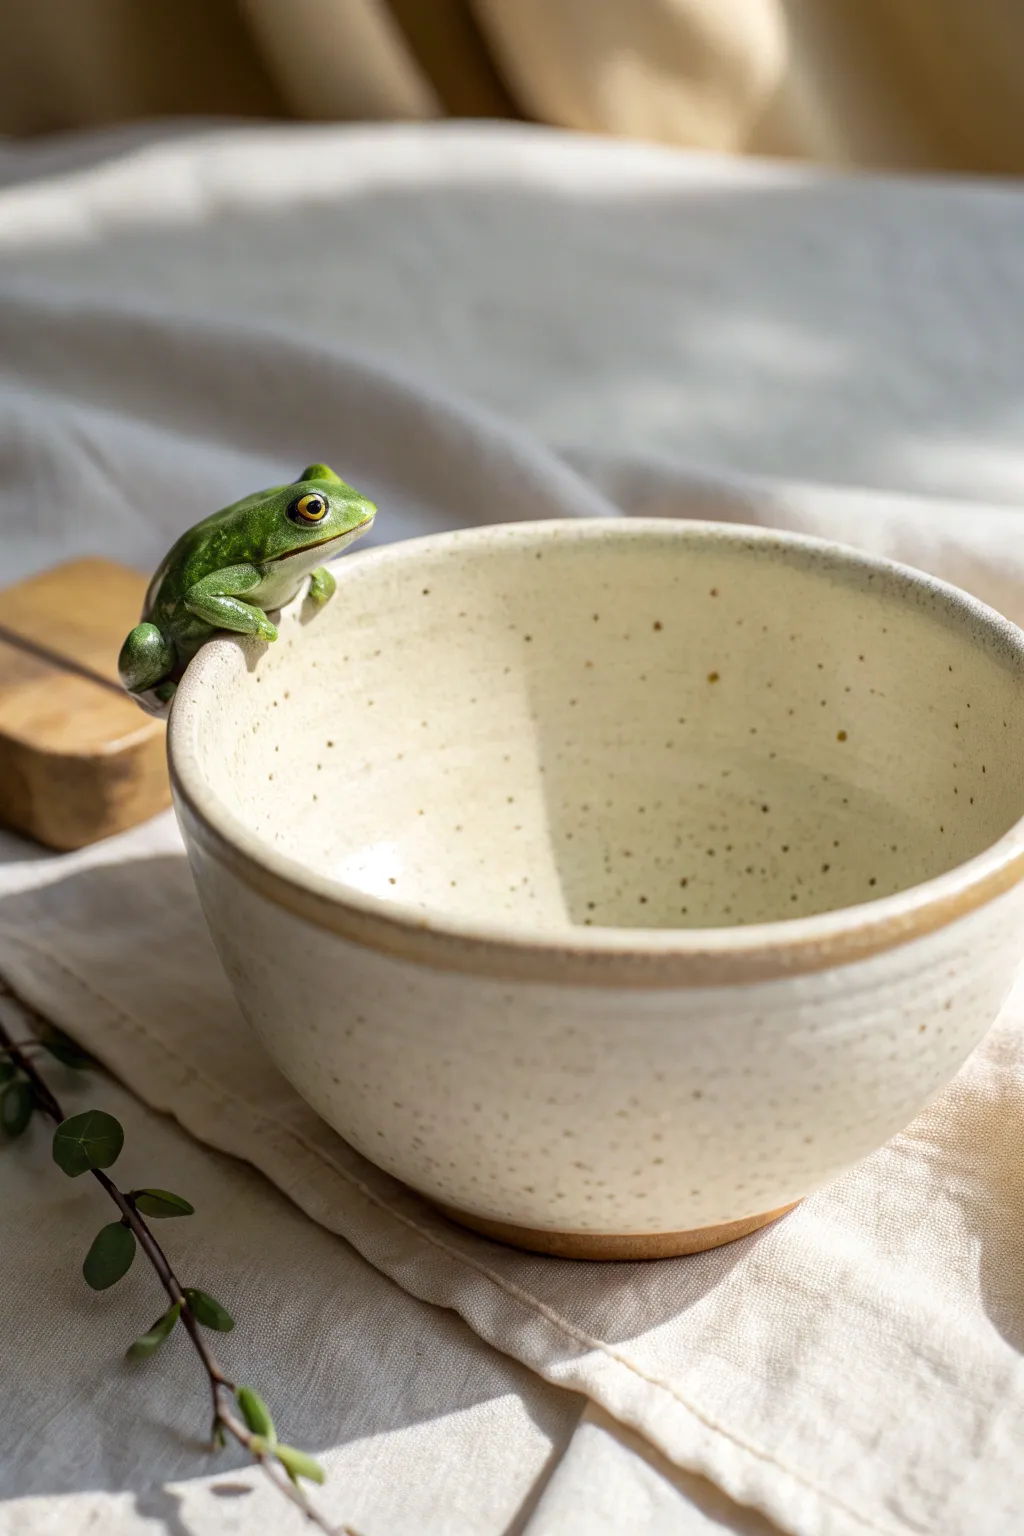
This delightful ceramic project features a simple, speckled stoneware bowl with a charming, lifelike frog perched precariously on the rim. The contrast between the smooth, creamy glaze of the bowl and the vibrant, glossy green of the frog creates a playful interaction that brings a smile to any table setting.
Step-by-Step Tutorial
Materials
- Speckled stoneware clay (approx. 2 lbs)
- Pottery wheel
- Throwing tools (sponge, needle tool, rib, wire cutter)
- Trimming tools
- Small amount of additional clay for sculpting
- Sculpting tools (needle tool, small modeling tool)
- Slip and scoring tool
- Bisque firing kiln
- Warm white speckled glaze (food safe)
- Underglazes: Leaf green, forest green, yellow, black, white
- Clear gloss glaze
- Small detail brushes
Step 1: Throwing the Bowl
-
Center the Clay:
Begin by wedging your speckled stoneware clay to remove air bubbles. Place it firmly on the wheel head and center it using water and steady pressure. -
Open and Pull:
Open the mound to your desired floor width, leaving a slight curve at the bottom. Pull the walls up gently, aiming for a classic U-shape bowl profile. -
Shape the Rim:
Clean up the rim using a chamois or sponge. It needs to be slightly rounded but sturdy enough to support the future frog sculpture. -
Refine the Interior:
Use a rib tool to smooth the interior curve of the bowl, compressing the clay to remove throwing lines for that clean, modern look. -
Wire Off:
Cut the bowl from the bat with a wire tool and set it aside to dry until it reaches a leather-hard state.
Frog Falling Off?
If the frog slides during attachment, the clay might be too wet. Let the frog body stiffen for 10 minutes before scoring and slipping it onto the rim.
Step 2: Sculpting the Frog
-
Trim the Bowl:
Once leather-hard, center the bowl upside down on the wheel and trim the foot. I prefer a simple, clean foot ring that mirrors the rim’s thickness. -
Form the Frog Body:
Take a small ball of clay (about the size of a walnut) and shape it into an oval for the frog’s main body. Gently flatten the underside to match the curve of the bowl’s rim. -
Attach the Body:
Score the chosen spot on the rim and the underside of the body. Apply slip and press the body firmly onto the rim, blending the seams on the inside so the frog looks like it is fused to the bowl. -
Create the Legs:
Roll four small coils for legs. For the back legs, fold the coil into a ‘Z’ shape to mimic the crouching thigh. Attach these to the sides of the body. -
Sculpt Feet and Toes:
Flatten the tips of the legs slightly to form feet. Use a needle tool to separate delicate toes, draping the front hands over the interior edge and the back feet gripping the exterior. -
Add Facial Features:
Add two tiny balls of clay for the eyes, positioned high on the head. Use a small tool to press a line for the mouth and shape the brow ridges. -
Slow Dry:
Cover the bowl loosely with plastic. Because the frog is thicker than the rim, slow drying is crucial to prevent cracking at the attachment point. -
Bisque Fire:
Once fully bone dry, fire the piece to cone 04 (or your clay’s specific bisque temperature).
Lil’ Lily Pads
Create small clay lily pads and attach them flat to the inner floor of the bowl before firing. Glaze them green for a hidden surprise at the bottom.
Step 3: Glazing and Finishing
-
Wax Resist:
Apply wax resist carefully over the entire frog sculpture. This prevents the dipping glaze from covering your detailed work. -
Dip Glaze:
Dip the entire bowl into your warm white speckled glaze. Shake off excess and wipe away any droplets that beaded up on the waxed frog. -
Underglaze Base Coat:
Paint the frog’s body with a solid coat of leaf green underglaze. Let it dry completely. -
Add Depth:
Stipple forest green underglaze on the back and head to create texture and shadow. Leave the belly and throat lighter. -
Detail the Eyes:
Carefully paint the eye balls yellow. Once dry, add a black pupil and a tiny dot of white for a lifelike reflection catchlight. -
Clear Coat the Frog:
If your white glaze is matte, carefully brush a clear gloss glaze ONLY over the frog to make it look wet and amphibious. -
Final Fire:
Load into the kiln avoiding contact with other pots and fire to cone 6 (or your clay body’s maturity temperature).
Enjoy your whimsical bowl, perfect for serving snacks or simply displaying as a piece of functional art


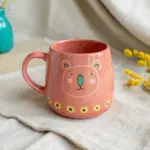
Frog Mug With Big Eyes
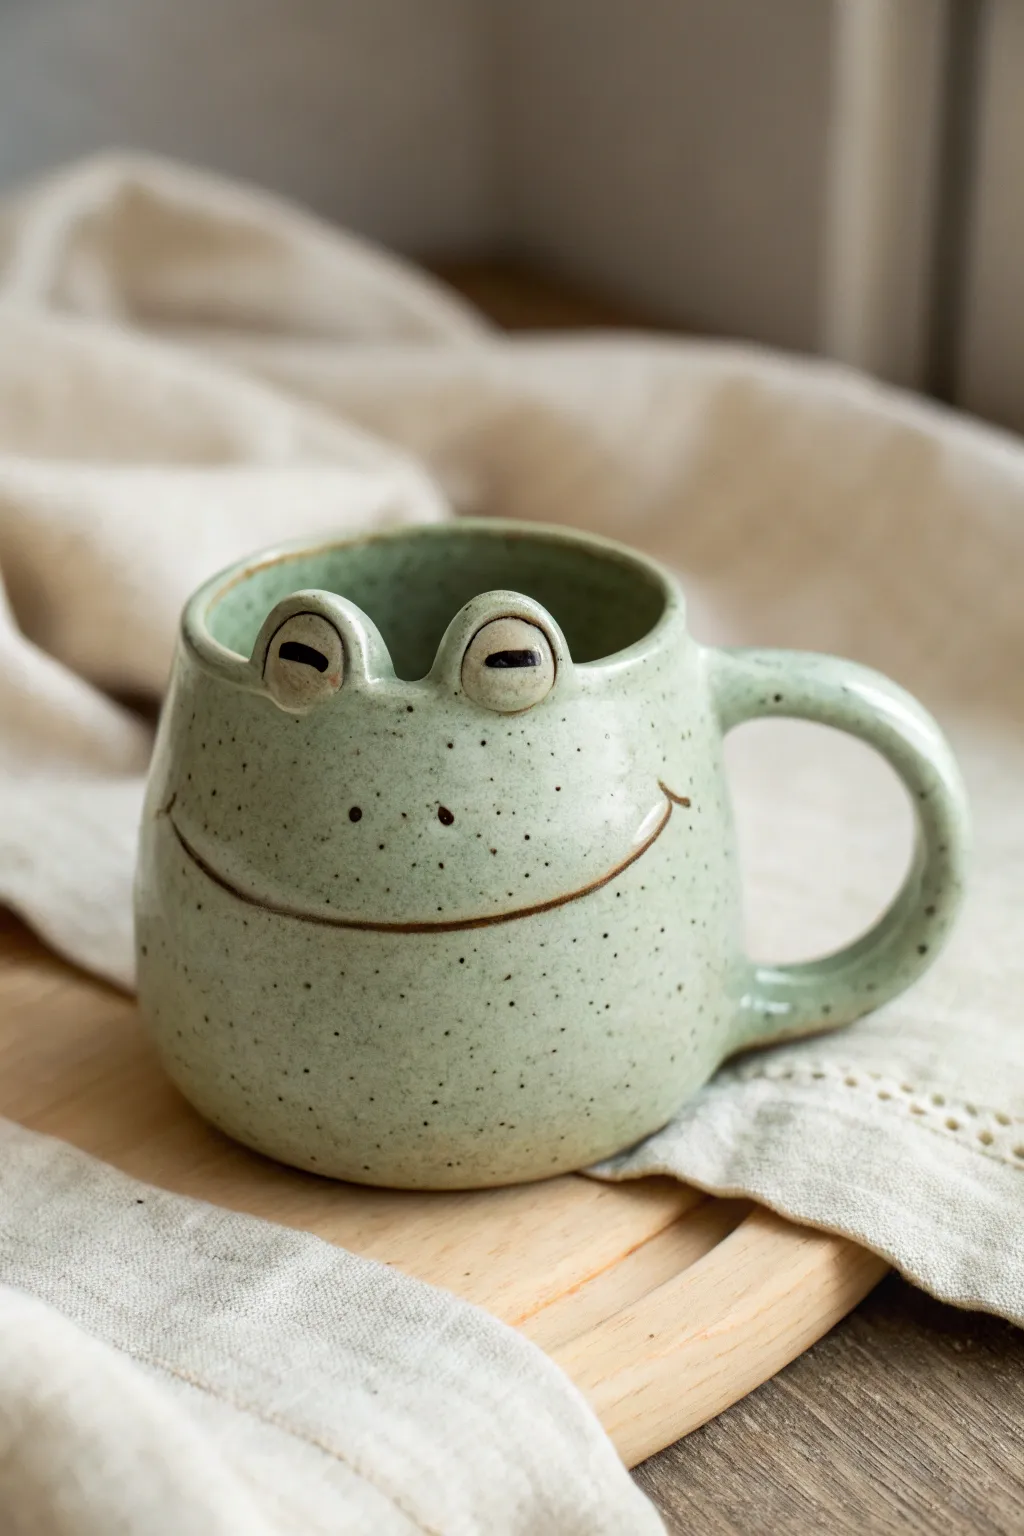
This charming ceramic mug features a rounded, friendly frog face with distinct raised eyes on the rim and a gentle, sweeping smile. The speckled green glaze gives it an organic, swamp-inspired look that feels cozy and perfectly handmade.
How-To Guide
Materials
- Stoneware clay body (speckled clay recommended)
- Pottery wheel
- Throwing tools (sponge, wire cutter, rib)
- Needle tool
- Fettling knife
- Trimming tools
- Scoring tool or serrated rib
- Slip (made from your clay body)
- Underglaze (dark brown or black)
- Soft green speckled glaze
- Clear glaze (optional, depending on your green glaze)
- Small paintbrush
Step 1: Throwing and Shaping
-
Center and open:
Start with a ball of clay on your wheel—about 1 to 1.5 lbs is usually right for a standard mug. Center it well, then open the clay and pull up your walls to create a cylinder. -
Shape the belly:
Using a rib tool on the inside and gentle pressure from the outside, push the belly of the mug outwards. You want a nice, rotund shape to mimic a frog’s round face. -
Refine the rim:
Collar the rim in slightly so it is narrower than the belly. Compress the lip with a sponge or chamois to make it smooth for drinking. -
Dry to leather hard:
Wire the mug off the bat and let it dry slowly until it reaches a leather-hard state. It should be firm enough to handle without deforming but soft enough to carve and attach additions.
Keep Eyes Even
When attaching the eyes, look at the mug from above (the bird’s-eye view) to ensure they are spaced symmetrically relative to where the handle will go.
Step 2: Sculpting the Frog Features
-
Sculpt the eye mounds:
Roll two small balls of fresh clay, roughly the size of large marbles. Flatten the bottoms slightly so they sit securely. -
Attach the eyes:
Score the top rim of the mug where you want the eyes to sit and score the bottom of your eye balls. Apply slip to both surfaces and press the eyes firmly onto the rim. Smooth the clay down onto the mug body so they are fully integrated and won’t pop off during firing. -
Define the eyelids:
Using a needle tool or a small modeling tool, gently press into the clay balls to define the eyelids. You can carve a small arch to separate the eyeball from the lid. -
Carve the mouth:
With a needle tool, sketch a long, wide, upward-curving smile across the belly of the mug. Once you’re happy with the placement, go over the line firmly to create a shallow groove. -
Add nostrils:
Make two small indentations between the eyes and the mouth for the nostrils using the dull end of a drill bit or a small loop tool. -
Trim the foot:
Flip the mug over (using a chuck or foam bat so you don’t crush the eyes) and trim the bottom to create a neat foot ring.
Change expression
Alter the frog’s mood by changing the eyelids—angling them down makes him look sleepy or chill, while wide arches make him look surprised.
Step 3: Handle and Final Details
-
Pull a handle:
Pull a strap of clay for the handle. A simple C-shape works best here to balance the round body. -
Attach the handle:
Score and slip the attachment points on the mug (opposite the face) and the handle ends. Press the handle on firmly, blending the clay seams until invisible. Make sure the alignment is straight relative to the eyes. -
Bisque fire:
Let the mug dry completely before loading it into the kiln for a bisque fire (usually Cone 04 or 06).
Step 4: Glazing
-
Underglaze the details:
Using a fine brush and dark brown or black underglaze, carefully paint inside the carved smile line, the nostril dots, and the pupils/outline of the eyes. Wipe away any excess that spills onto the high points with a damp sponge so the line stays crisp. -
Wax resist (optional):
I sometimes apply wax resist over the painted eyes if I want them to remain unglazed or matte, but for this glossy look, you can skip this. -
Apply the main glaze:
Dip the entire mug into a soft green speckled glaze. If your glaze is translucent enough, the dark underglaze details will show through perfectly. If it’s an opaque glaze, you may need to wipe the glaze off the eyes and smile, then re-apply clear glaze over those spots. -
Check the bottom:
Wipe the foot ring completely clean of glaze to prevent sticking to the kiln shelf. -
Final firing:
Fire the mug to the maturity temperature of your clay and glaze (commonly Cone 5 or 6 for stoneware). Let the kiln cool naturally before unloading.
Enjoy your morning coffee with a little swampy companion staring back at you


Lily Pad Plate With Frog Motif
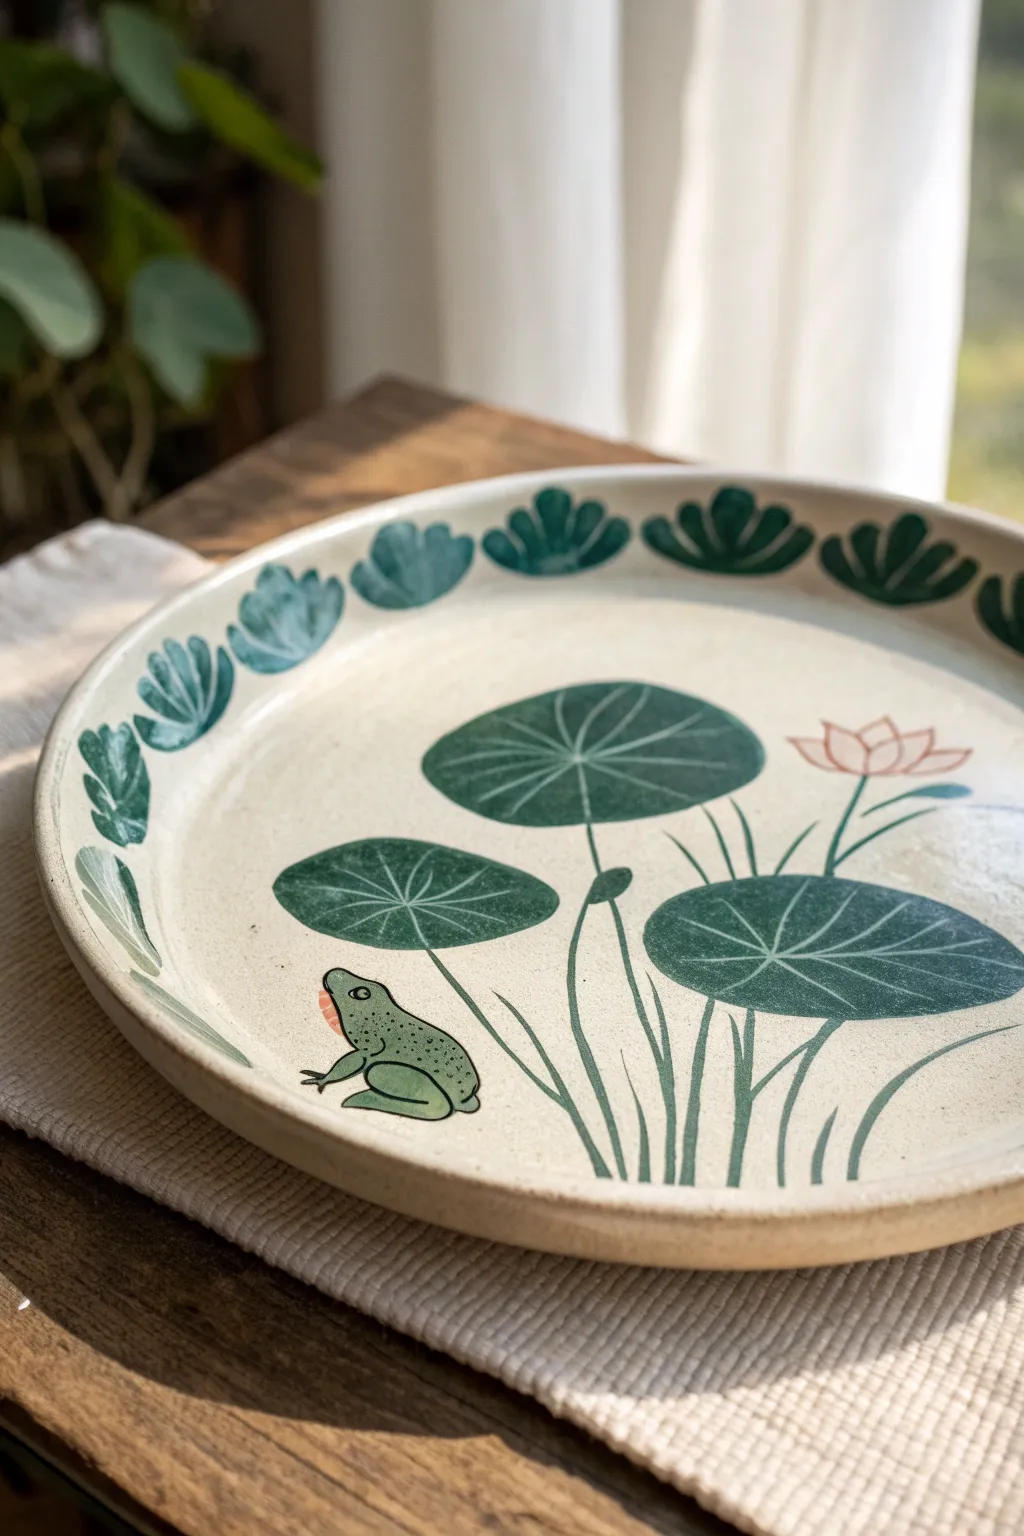
Capture the serene beauty of a quiet pond with this shallow ceramic platter featuring a charming frog and lily pads. The creamy stoneware base provides a perfect canvas for deep green underglaze illustrations and a delicate scalloped rim pattern.
Step-by-Step Guide
Materials
- Light cream stoneware clay (approx. 2-3 lbs)
- Pottery wheel or rolling pin and slab mold
- Rib tool (metal and rubber)
- Sponge
- Needle tool
- Underglaze (Dark Green, Light Green, Black, Pink)
- Fine liner brush (size 0 or 00)
- Small round brush (size 2 or 4)
- Clear transparent glaze
- Loop trimming tool
Step 1: Forming the Plate
-
Prepare the clay:
Begin by wedging your cream stoneware clay thoroughly to remove air bubbles. Center the clay on the wheel if throwing, or roll out a smooth, even slab about 1/4 inch thick if hand-building. -
Shape the form:
Form a wide, shallow platter shape. Establish a distinct rim that flares slightly upwards from the flat base. If using a slab, drape it over a plaster mold or slump it into a shallow bowl to get the curve right. -
Refine the surface:
Smooth the interior surface with a rubber rib to compress the clay particles and create a flawless ‘canvas’ for your painting later. Remove any throwing lines or canvas texture. -
Create the foot:
Once leather hard, trim a neat foot ring on the underside. This lifts the plate slightly and gives it a professional finish.
Step 2: Painting the Design
-
Sketch the layout:
Lightly trace your design onto the leather-hard clay using a needle tool or a dull pencil. Mark out three large lily pads, a few vertical reed lines, the frog positioned on the left, and a blossom on the right. -
Block in the lily pads:
Using the dark green underglaze and a round brush, fill in the large oval shapes of the lily pads. Paint solid, opaque layers, allowing each coat to dry slightly before adding the next for rich color. -
Paint the reeds:
Switch to a finer brush and fluid dark green underglaze. Draw long, sweeping lines curving upward from the bottom of the plate to represent the underwater stems and grass. -
Add lily pad veins:
For the veins on the lily pads, you can either create sgraffito lines by scratching through the green paint to reveal the clay, or paint thin lines in a lighter green shade on top of the dry dark green pads. -
Illustrate the frog:
Paint the frog’s body using a lighter, mossy green underglaze. Shape the rounded back and bent legs carefully. -
Frog details:
Use a very fine liner brush and black underglaze to outline the frog, draw the eye, and add the spotted texture on its back. Add a tiny dab of pink for the throat or mouth area. -
Paint the lotus flower:
On the right side, paint the lotus lower using a soft pink outline. Keep the lines delicate to contrast with the heavy green pads.
Sgraffito Tip
For crisp white veins on the lily pads, apply the green underglaze while the clay is leather hard, then scratch through firmly with a needle tool.
Step 3: Border and Finishing
-
Create the border motif:
Along the inner rim, paint a repeating pattern of stylized half-circles or fan shapes using the dark green underglaze. I like to space these evenly by marking cardinal points first (12, 3, 6, and 9 o’clock) before filling in the gaps. -
Bisque fire:
Let the plate dry completely. It must be bone dry before you load it into the kiln for a bisque firing to roughly cone 04. -
Glaze application:
Wipe the bisqued plate with a damp sponge to remove dust. Pour or dip the plate in a clear, transparent glaze. Ensure the coat is even so it doesn’t cloud your illustration. -
Final firing:
Clean the foot ring completely of glaze. Fire the plate to the maturation temperature of your clay body (likely cone 5 or 6 for stoneware).
Smudged Lines?
If your black outlines bleed into the green, the underglaze was too wet. Ensure base layers are fully dry to the touch before adding fine detail work on top.
Now you have a serene, custom piece of pottery perfect for serving or display

The Complete Guide to Pottery Troubleshooting
Uncover the most common ceramic mistakes—from cracking clay to failed glazes—and learn how to fix them fast.
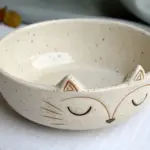
Frog Ring Dish
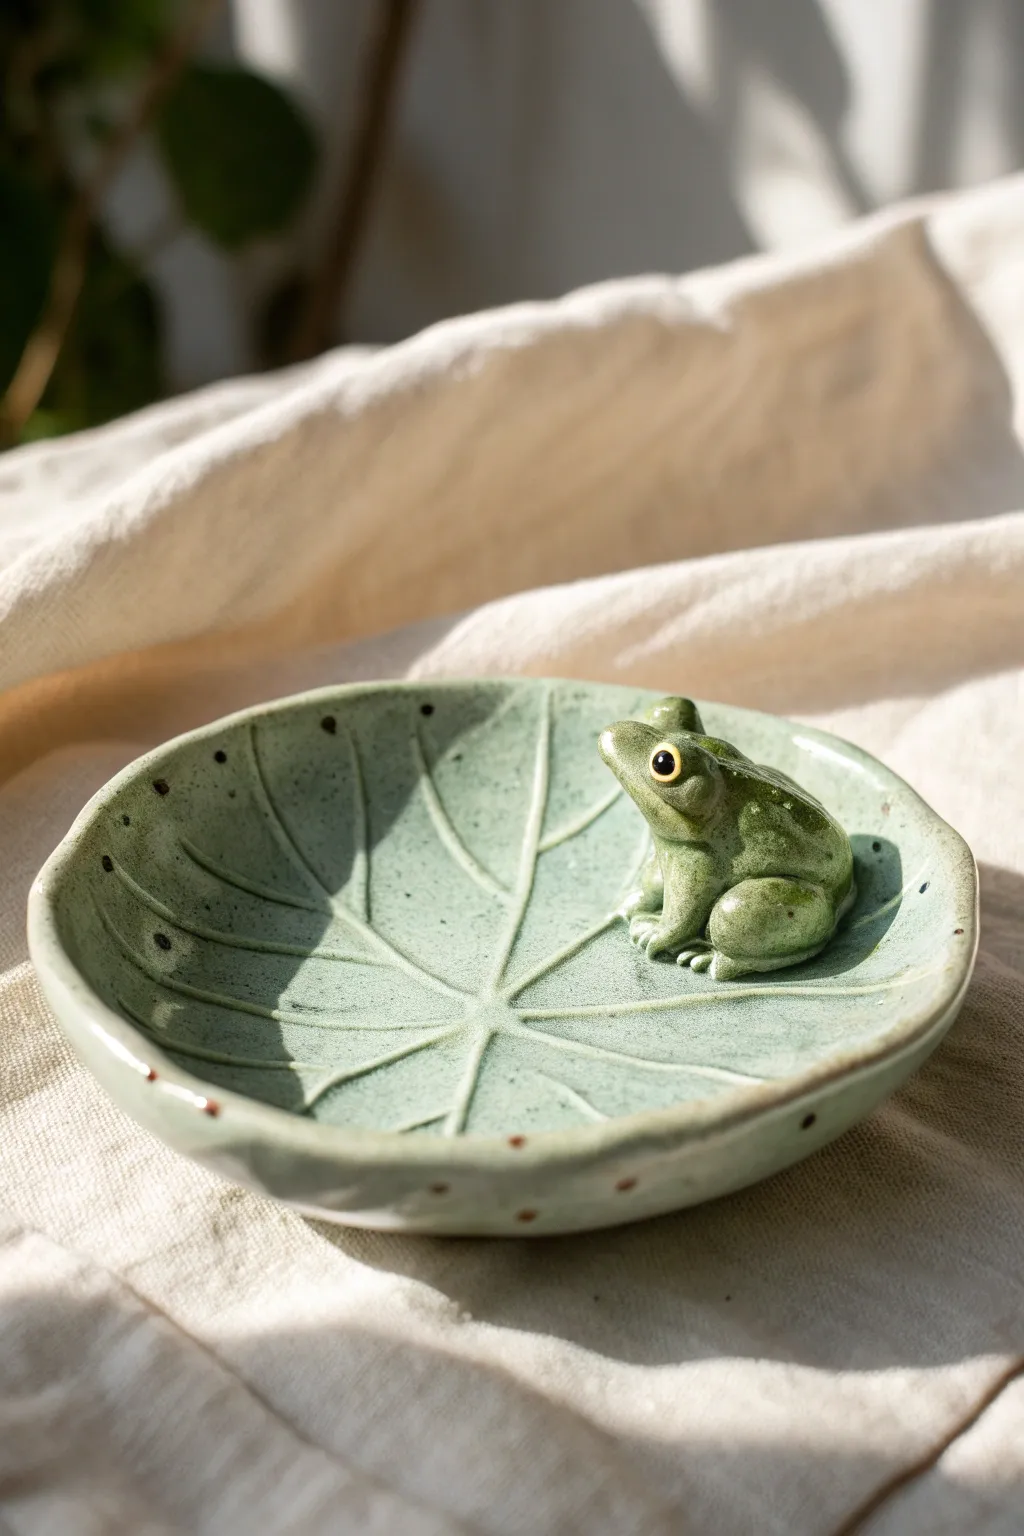
This charming ceramic piece combines function and whimsy, featuring a gentle, speckled green lily pad dish with a tiny, observant frog guardian perched on the rim. Perfect for holding rings or small trinkets, the organic shape and glossy glaze make it a delightful addition to any vanity.
Step-by-Step
Materials
- Low-fire white clay body (earthenware or stoneware)
- Rolling pin
- Canvas mat or slab roller
- Needle tool
- Rib tool (kidney)
- Small sponge
- Slip (clay slurry)
- Scoring tool or serrated rib
- Modeling tools (wooden or plastic)
- Celadon or light green glossy glaze
- Dark green underglaze
- Black underglaze
- Small fine-point brush
- Kiln access
Step 1: Forming the Lily Pad Dish
-
Roll the slab:
Begin by wedging your clay to remove air bubbles, then roll it out into an even slab approximately 1/4 inch thick. A canvas mat helps prevent sticking. -
Cut the circle:
Use a needle tool to cut a freehand circle, about 4-5 inches in diameter. Don’t worry about making it perfectly round; a slight irregularity adds to the organic leaf look. -
Shape the rim:
Gently lift the edges of the circle with your fingers, pinching and curving them upward to create a shallow bowl shape. Smooth the rim with a damp sponge to soften any sharp angles. -
Texture the leaf:
Using a blunt modeling tool or the back of a needle tool, lightly incise veins into the clay. Start from a central point and draw lines radiating outward to the rim to mimic a lily pad’s structure. -
Refine the veins:
I like to go back over the vein lines with a damp finger to soften the grooves so glaze won’t pool too thickly in them later.
Pro Tip: Hollow Out
If your frog body is thicker than 1/2 inch, use a needle tool to poke a hidden hole underneath before attaching. This lets steam escape and prevents explosions in the kiln.
Step 2: Sculpting the Frog
-
Form the body:
Roll a small ball of clay, roughly the size of a large marble, and shape it into a tear-drop for the frog’s main body. -
Create the legs:
Roll two tiny coils for the back legs. Fold them into a ‘V’ shape to create the thigh and calf, then attach them to the sides of the body so the ‘knees’ stick up. -
Add front legs:
Roll two smaller, shorter coils for the front arms. Attach them vertically to the front of the chest, splaying the ends slightly to suggest feet. -
Attach the eyes:
Roll two tiny spheres for eyes and press them gently onto the top of the head. Use a small tool to blend the clay at the base of the eyes so they don’t pop off. -
Add facial details:
Use a needle tool or small knife to carefully slice a horizontal line for the mouth just below the eyes.
Step 3: Assembly & Finishing
-
Score and slip:
Choose a spot on the rim of the dish for your frog. Score (scratch) both the bottom of the frog and the chosen spot on the dish, then apply a dab of slip. -
Attach the frog:
Press the frog firmly onto the rim. Use a modeling tool to blend the clay where the frog meets the leaf to ensure a strong bond. -
Dot details:
Using the tip of a tool, press small indentations around the rim of the bowl and lightly on the frog’s back for added texture. -
Bisque fire:
Allow the piece to dry slowly and completely under loose plastic before loading it into the kiln for a bisque fire (usually Cone 04). -
Glaze the leaf:
Once bisqued, apply two to three coats of a light green celadon glaze to the entire dish and frog. -
Underglaze accents:
Using a fine brush, carefully paint small dark green dots on the frog’s back and around the rim of the plate. -
Paint the eyes:
Use a tiny dot of black underglaze for the pupils, and outline the eye with a ring of white or yellow underglaze if desired to make them pop. -
Wipe the foot:
Clean off any glaze from the very bottom of the dish with a wet sponge to prevent it from sticking to the kiln shelf. -
Glaze fire:
Fire the piece again to the temperature required by your specific glaze (typically Cone 5 or 6 for stoneware).
Level Up: Water Ripples
Before the clay dries, gently press your thumb into the center of the leaf and smooth outward to create subtle undulations, making the ‘water’ surface look more dynamic.
Once cooled, your little ceramic amphibian will be ready to guard your jewelry on a bathroom counter or bedside table
Wall Frog Tile Plaque
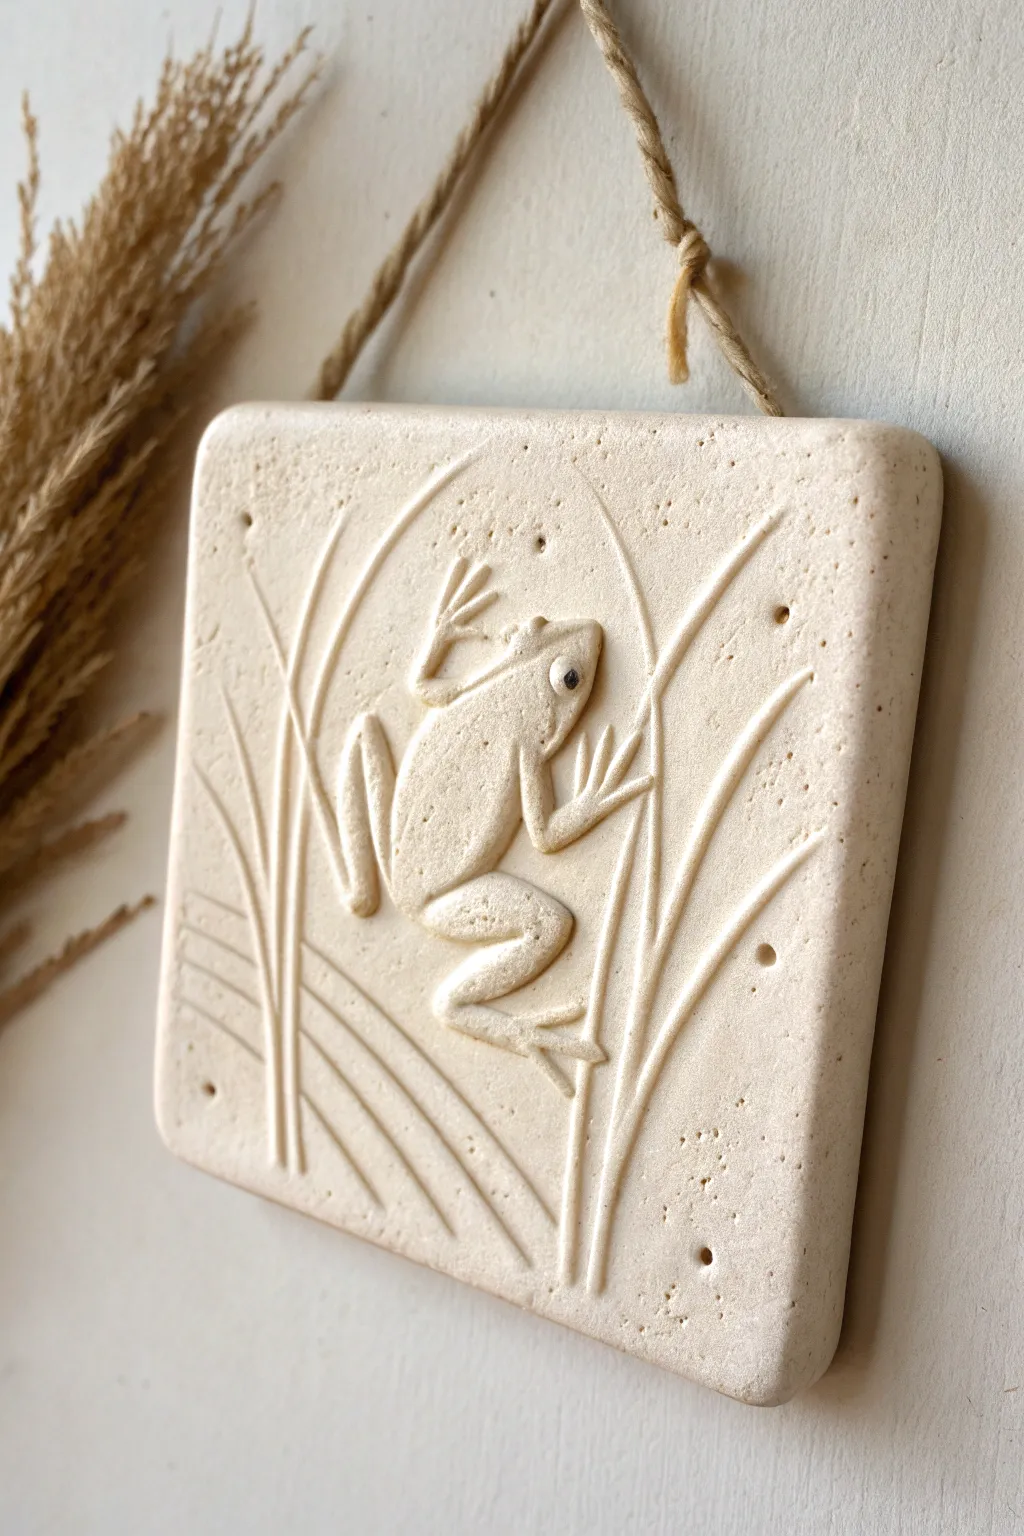
Capture the quiet beauty of a pond ecosystem with this elegant, textured wall plaque. The piece features a stylized frog amidst swaying reeds, rendered in a creamy, stoneware finish that emphasizes the subtle shadows of relief work.
Step-by-Step
Materials
- Mid-fire stoneware clay (cream or buff color)
- Small rolling pin
- Wooden guide strips (1/4 inch thick)
- Square tile cutter or fettling knife
- Needle tool
- Small loop carving tools (wire end)
- Modeling tool (spoon end and flat end)
- Rubber rib
- Sponge
- Black underglaze (tiny amount)
- Clear matte glaze (optional)
- Twine or jute cord
- Canvas work surface
Step 1: Preparing the Slab
-
Roll the foundation:
Begin by wedging your stoneware clay thoroughly to remove air pockets. Place it on your canvas and roll it out into an even slab using the wooden guide strips to maintain a consistent 1/4 inch thickness. -
Cut the shape:
Measure and cut a perfect square, roughly 6×6 inches, using your fettling knife or a tile cutter. Don’t worry about sharp corners yet; we will soften them later. -
Smooth the surface:
Compress the clay surface gently with a rubber rib. This aligns the clay particles to prevent warping and creates that smooth, stone-like canvas we need for carving. -
Round the edges:
Using a slightly damp sponge or your fingers, gently round off the sharp 90-degree edges of the square to give the piece a softened, tumbled stone look. -
Pierce the holes:
Use a straw or a hole punch tool to create two clean holes near the top corners for the hanging twine. Ensure they are evenly spaced and not too close to the edge.
Warping Woes?
If your tile curls up while drying, flip it over immediately and weigh down the corners. Drying slowly under weighted boards is the best prevention.
Step 2: Sculpting the Frog
-
Outline the design:
Lightly sketch the frog’s outline and the reed placement onto the leather-hard clay using a needle tool. Keep the pressure very light so you can smooth out mistakes. -
Add volume:
For a true relief effect, take small bits of fresh clay, shape them into the frog’s body, legs, and head, and score and slip them onto your sketched outline. This builds the frog ‘up’ from the surface. -
Blend the seams:
Use a modeling tool to firmly blend the edges of the added clay into the background slab. There should be no visible seam where the frog meets the tile. -
Define the anatomy:
Sculpt the frog’s features. Use a small loop tool to carve away excess bulk and refine the legs, ensuring the back legs looked coiled and ready to jump. -
Create the eye:
Roll a tiny ball of clay for the eye and press it onto the head. Use a small tool to create the eyelid ridge around it.
Step 3: Carving the Habitat
-
Carve the reeds:
Using a small U-shaped loop tool, carve the negative space around the reeds. You aren’t adding clay here; you are digging channels to make the reeds stand out in relief. -
Refine the stems:
Go back over the reed lines with a damp brush or a smooth modeling tool to round off the sharp carved edges. The reeds should look organic and swaying, not mechanical. -
Add atmospheric texture:
To mimic the porous look of limestone or sandstone, gently stipple the background area (avoiding the frog and reeds) with a stiff-bristled brush or a textured sponge. -
Poke subtle details:
Use a needle tool to add random, tiny pinholes around the background for extra organic texture, as seen in the reference image.
Go for Granite
Mix a small amount of sand or grog into your clay body before rolling. This adds a speckled, gritty texture that looks incredible unglazed.
Step 4: Finishing and Firing
-
Dry slowly:
This is crucial for tiles. Sandwich your tile between pieces of drywall or place it under plastic, turning it daily to ensure it dries evenly and stays flat. -
Bisque fire:
Once bone dry, fire the piece to bisque temperature (usually cone 04). -
Detail the eye:
Apply a tiny dot of black underglaze to the pupil of the frog’s eye to bring it to life. -
Glaze application:
Dip the entire tile in a clear matte glaze, or wipe on a wash of watered-down oxide if you prefer a more rustic look. If you love the raw clay texture, you can leave the background unglazed and just glaze the frog. -
Final assembly:
After the final glaze firing, thread a length of rustic jute twine through the top holes and knot it securely.
Hang your new plaque in a sunny spot where the light can play across the relief carving


What Really Happens Inside the Kiln
Learn how time and temperature work together inside the kiln to transform clay into durable ceramic.
Frog Spoon Rest
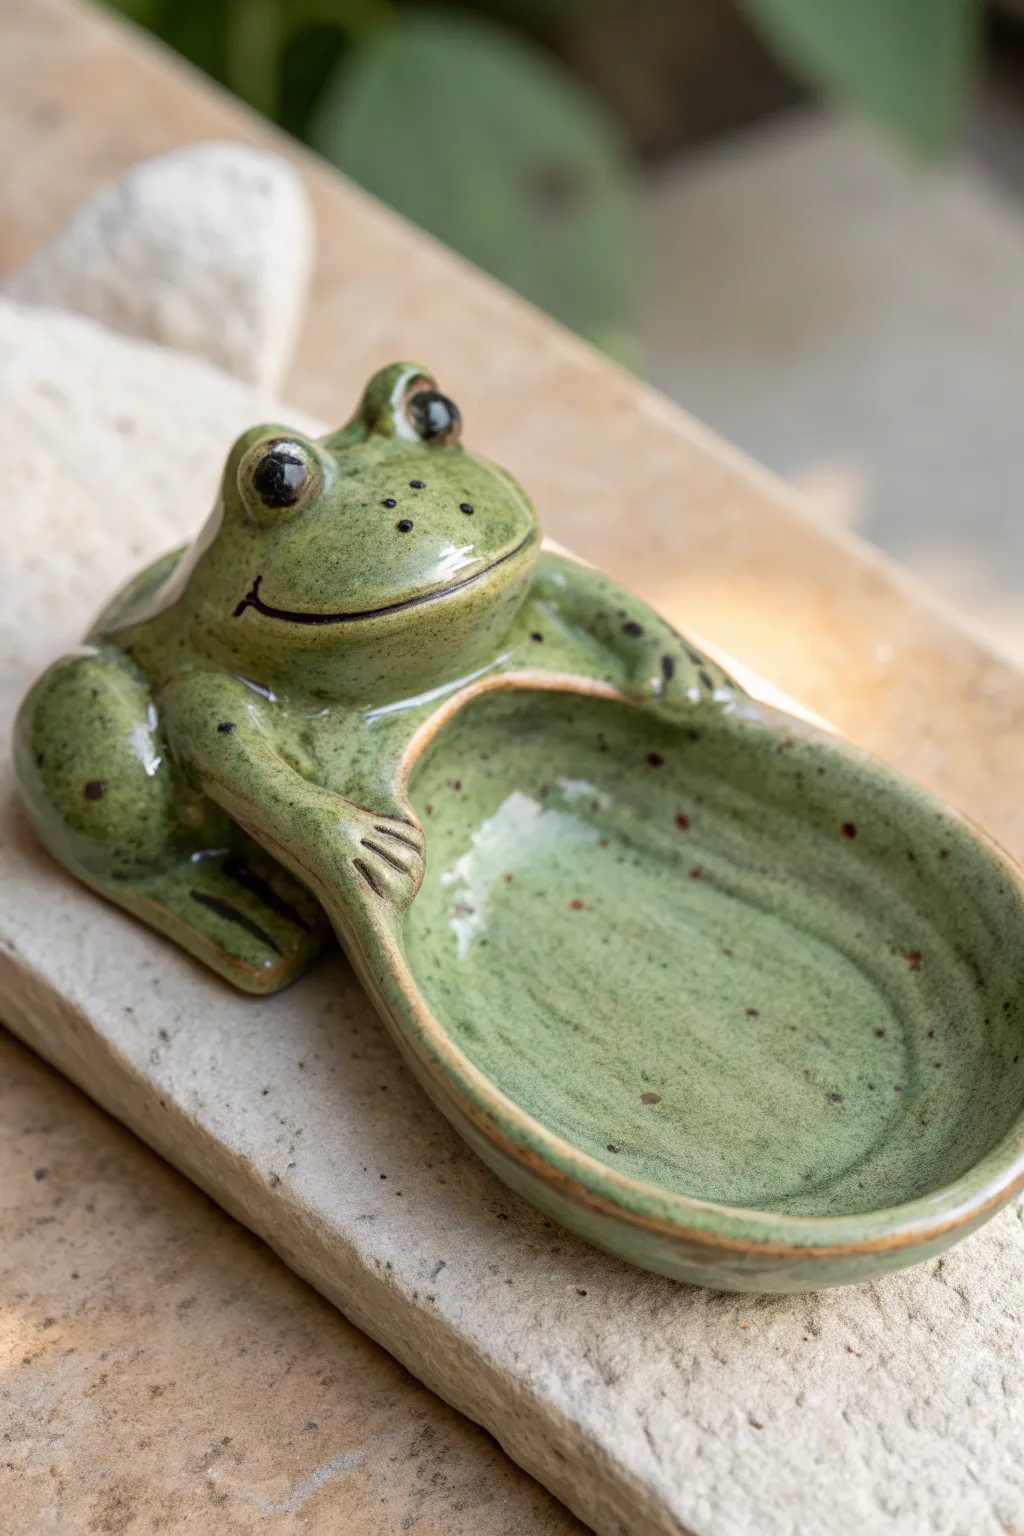
Keep your kitchen counters clean with this charming ceramic companion that doubles as functional art. This spoon rest features a glossy, speckled green frog holding a shallow dish, perfect for cradling your saucy LADLES and messy mixing spoons.
How-To Guide
Materials
- White or light stoneware clay (approx. 1-1.5 lbs)
- Pottery wheel (optional, can be hand-built)
- Sponge
- Pin tool or needle tool
- Rib tool (kidney)
- Scoring tool or serrated rib
- Slip (clay slurry)
- Modeling tools (wooden or rubber)
- Small paintbrush
- Speckled green glaze (cone 5/6 recommended)
- Black underglaze
- Clear glaze (optional)
Step 1: Sculpting the Base Form
-
Prepare the clay:
Begin by wedging your clay thoroughly to remove any air bubbles. Separate a small portion (about the size of a golf ball) for the legs and eyes, and keep the main lump for the body and dish. -
Form the dish:
You can throw a small, shallow oval plate on the wheel, or hand-build it by rolling a slab and cutting an oval shape. If hand-building, gently curve up the edges to create a shallow rim to contain liquids. -
Create the body block:
Form a rounded, slightly flattened mound of clay for the frog’s main body. This will sit at one end of your oval dish. Ensure the bottom is flat so it sits flush on the table. -
Join body to dish:
Score the connection points on both the oval dish and the frog body heavily. Apply a generous amount of slip and press them firmly together. Use a modeling tool to smooth the seam so it looks seamless, like one continuous piece of clay.
Step 2: Adding Froggy Features
-
Shape the legs:
Roll two coils of clay that are thicker at one end. Flatten the thick ends to make the thighs and bend them into a ‘V’ shape to mimic frog legs. -
Attach the legs:
Score and slip the legs onto the sides of the frog’s body. The ‘feet’ should rest near the base, while the knees poke outwards. Blend the clay well to ensure they don’t pop off during firing. -
Form the arms:
Roll two smaller coils for the arms. Attach them extending from the frog’s shoulders, wrapping around the rim of the dish as if the frog is holding a bowl. Flatten the ends slightly to create hands. -
Carve the toes:
Use a needle tool or small knife to carefully cut notches into the hands and feet to define the toes. Smooth any sharp edges with a damp sponge. -
Make the eyes:
Roll two small spheres of clay. Score the top of the frog’s head and attach the spheres using slip. Gently press them down so they adhere well but stay prominent.
Clean Seams
Use a barely damp paintbrush to smooth the tight crevices where the arms meet the bowl. This prevents glaze from crawling or pooling too thickly in the corners.
Step 3: Refining and Decorating
-
Carve the smile:
Using a thin tool or pin tool, carve a wide, sweeping smile across the frog’s face. Make the line deep enough so it will hold glaze later without disappearing. -
Smooth the surface:
Once the clay is leather hard, take a damp sponge and go over the entire piece to remove fingerprints and rough textures. I find a soft rib works best for really compressing the surface of the spoon resting area. -
Bisque fire:
Allow the piece to bone dry completely, which may take several days depending on humidity. Fire the piece in the kiln to cone 04 (or your clay’s specific bisque temperature). -
Outline details:
After the bisque firing, use a fine brush to apply black underglaze into the carved smile line and paint pupils onto the eyes. Wipe away any excess underglaze that spills outside the lines.
Lily Pad Twist
Instead of a simple oval dish, cut the slab into a ‘Pac-Man’ shape and curl the edges up to make the spoon resting area look like a giant lily pad.
Step 4: Glazing and Finishing
-
Apply the green glaze:
Dip or brush your speckled green glaze over the entire piece. Be careful not to smudge the black underglaze on the eyes. Use a wax resist on the eyes beforehand if you’re worried about smearing. -
Clean the foot:
Wipe the entire bottom surface of the spoon rest clean of glaze with a wet sponge. Any glaze left on the bottom will fuse the frog to your kiln shelf. -
Glaze fire:
Fire the piece again to the maturation temperature of your glaze and clay body (typically cone 5 or 6 for stoneware). This will vitrify the clay and turn the glaze into that durable, glassy finish. -
Check fit:
Once cooled, check the bottom for any sharp burrs and sand them down if necessary to ensure it won’t scratch your countertop.
Now you have a delightful, functional piece of pottery ready to lend a helping hand in the kitchen
Frog Soap Dish With Drain Holes
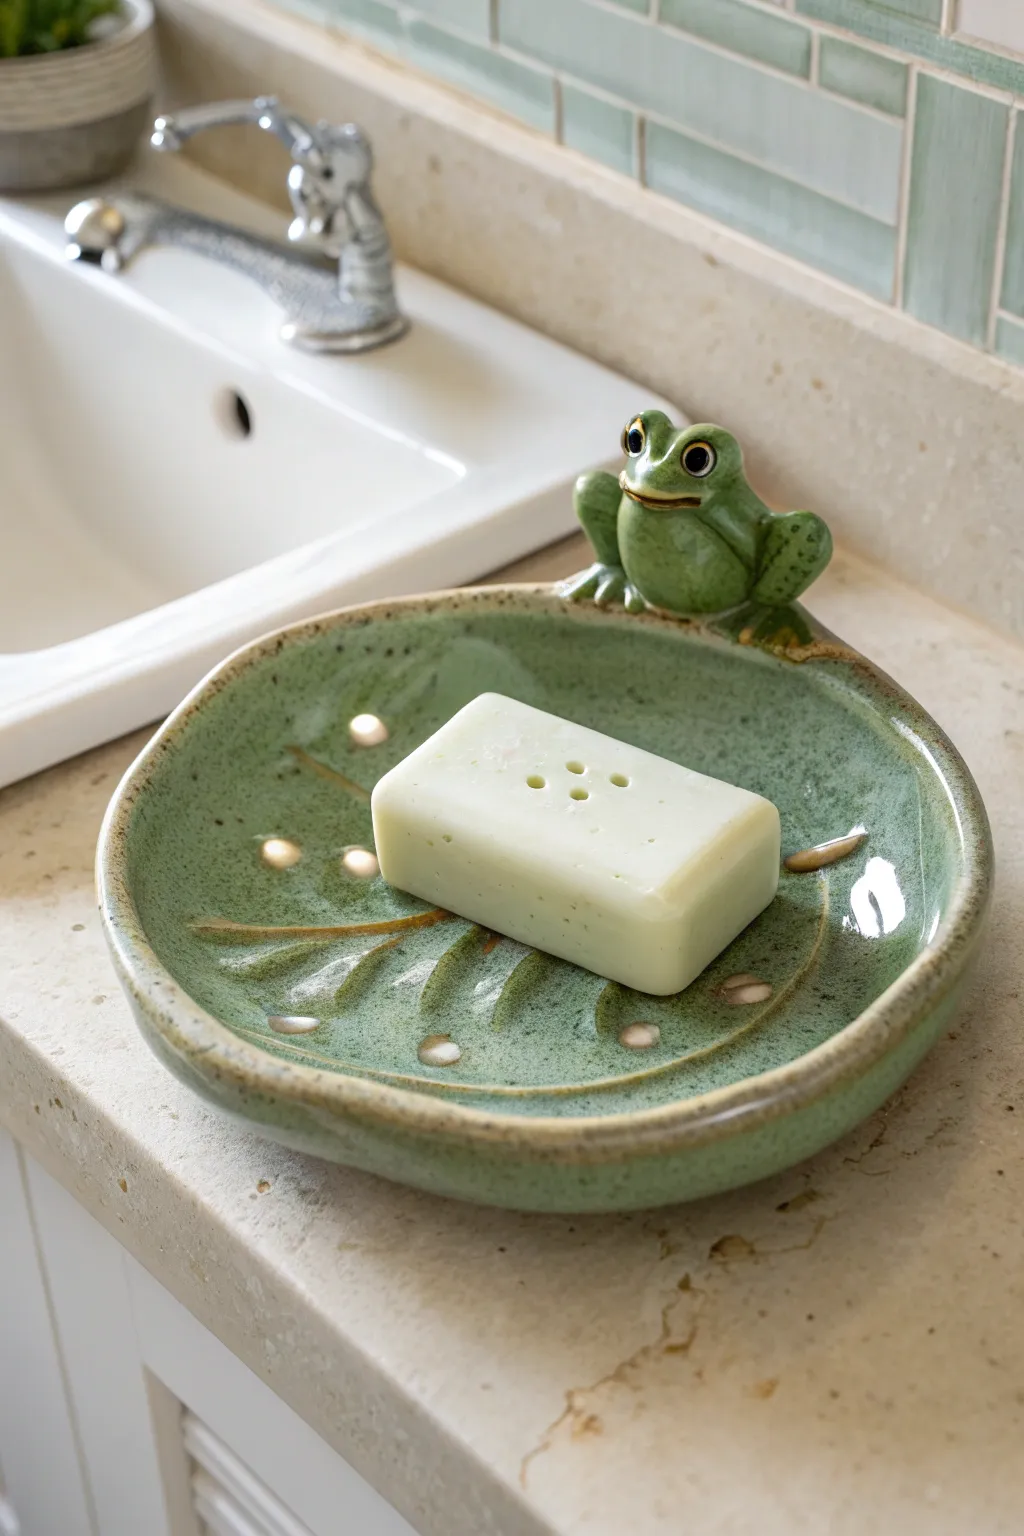
Brighten up your bathroom sink with this charming ceramic soap dish featuring a friendly frog guardian perched on the rim. With its organic leaf texture and functional drainage holes, this piece is as practical as it is adorable.
Step-by-Step
Materials
- Stoneware clay (smooth or fine grog)
- Leaf for texture (real or stamp)
- Small sponge
- Needle tool
- Scoring tool (serrated rib)
- Slip (clay mixed with water)
- Modeling tools (wooden and rubber)
- Hole cutter or straw
- Green celadon glaze
- Underglazes (black, gold/yellow)
- Clear glaze (optional)
- Kiln
Step 1: Forming the Leaf Base
-
Roll the slab:
Begin by rolling out a slab of stoneware clay to a uniform thickness, roughly 1/4 inch thick. Compress the clay on both sides with a rib to prevent warping. -
Impress texture:
Place a large, veined leaf or a texture mat onto the clay slab. Go over it firmly with a rolling pin to transfer the pattern deep into the surface. -
Cut the shape:
Using a needle tool, cut out a loose, organic oval or circle shape around your texture. Smooth the cut edges with a damp sponge to remove any sharp burrs. -
Form the curve:
Gently lift the edges of the slab and place it into a shallow slump mold or a bowl lined with plastic. Press it down gently so it takes on a concave, dish-like shape.
Step 2: Adding Details and Drainage
-
Refine the rim:
While the clay is still in the mold, use your fingers or a damp chamois to round over the rim, giving it a soft, finished look similar to the reference image. -
Create drainage holes:
Use a small circular hole cutter or a plastic straw to punch several holes in the bottom of the dish. I prefer arranging them near the lowest points of the texture to ensure water drains effectively. -
Clean up the bottom:
Once the clay is leather hard, flip the dish over and trim or smooth the bottom area where the holes exit. You can add a small foot ring if desired, but a flat bottom works well for this low profile.
Sticky Situation
Use a straw to punch holes? Keep the little clay plug inside the straw until you are done. It stops the subsequent plugs from gettings stuck in the tube.
Step 3: Sculpting the Frog
-
Shape the body:
Roll a small ball of clay into a rounded teardrop shape for the frog’s body. It should be proportional to the rim of your dish. -
Form the legs:
Create two smaller coils for the hind legs. Bend them into a V-shape to mimic folded frog legs and attach them to the sides of the body. -
Add front arms:
Roll two small cylinders for the front arms. Attach them so they look like the frog is gripping the edge of the soap dish. -
Sculpt the face:
Add two tiny balls of clay for the eyes on top of the head. Use a modeling tool to carve a wide, slight smile. -
Attach to the rim:
Score the rim of the dish and the bottom of your frog thoroughly. Apply slip and press the frog firmly onto the edge. Smooth the connection points with a modeling tool so it looks like one solid piece.
Frog Falling Off?
If the frog detaches during drying, your slip wasn’t wet enough. Re-attach at the leather-hard stage with vinegar-based slip or ‘magic water’ for a stronger bond.
Step 4: Glazing and Finishing
-
Bisque fire:
Allow the piece to dry slowly to prevent cracking, especially where the frog attaches. Fire to cone 04 (or your clay’s bisque temperature) once fully dry. -
Paint the eyes:
Apply black underglaze to the pupils and a touch of gold or yellow to the irises and eyelids for that detailed pop. -
Apply base glaze:
Dip or brush a translucent green celadon glaze over the entire piece. I find celadon works best because it pools in the leaf veins and frog details, highlighting the texture nicely. -
Check the holes:
Before the glaze dries completely, check the drainage holes. Clear out any glaze clogging them with a needle tool. -
Wipe the foot:
Use a damp sponge to wipe any glaze off the very bottom of the dish so it doesn’t stick to the kiln shelf. -
Final firing:
Fire the piece to cone 6 (or your glaze’s recommended temperature) to vitrify the clay and melt the glaze into a glossy finish.
Now you have a delightful handmade accent ready to keep your soap dry and your sink stylish

TRACK YOUR CERAMIC JOURNEY
Capture glaze tests, firing details, and creative progress—all in one simple printable. Make your projects easier to repeat and improve.
Frog Toothbrush Holder Cup
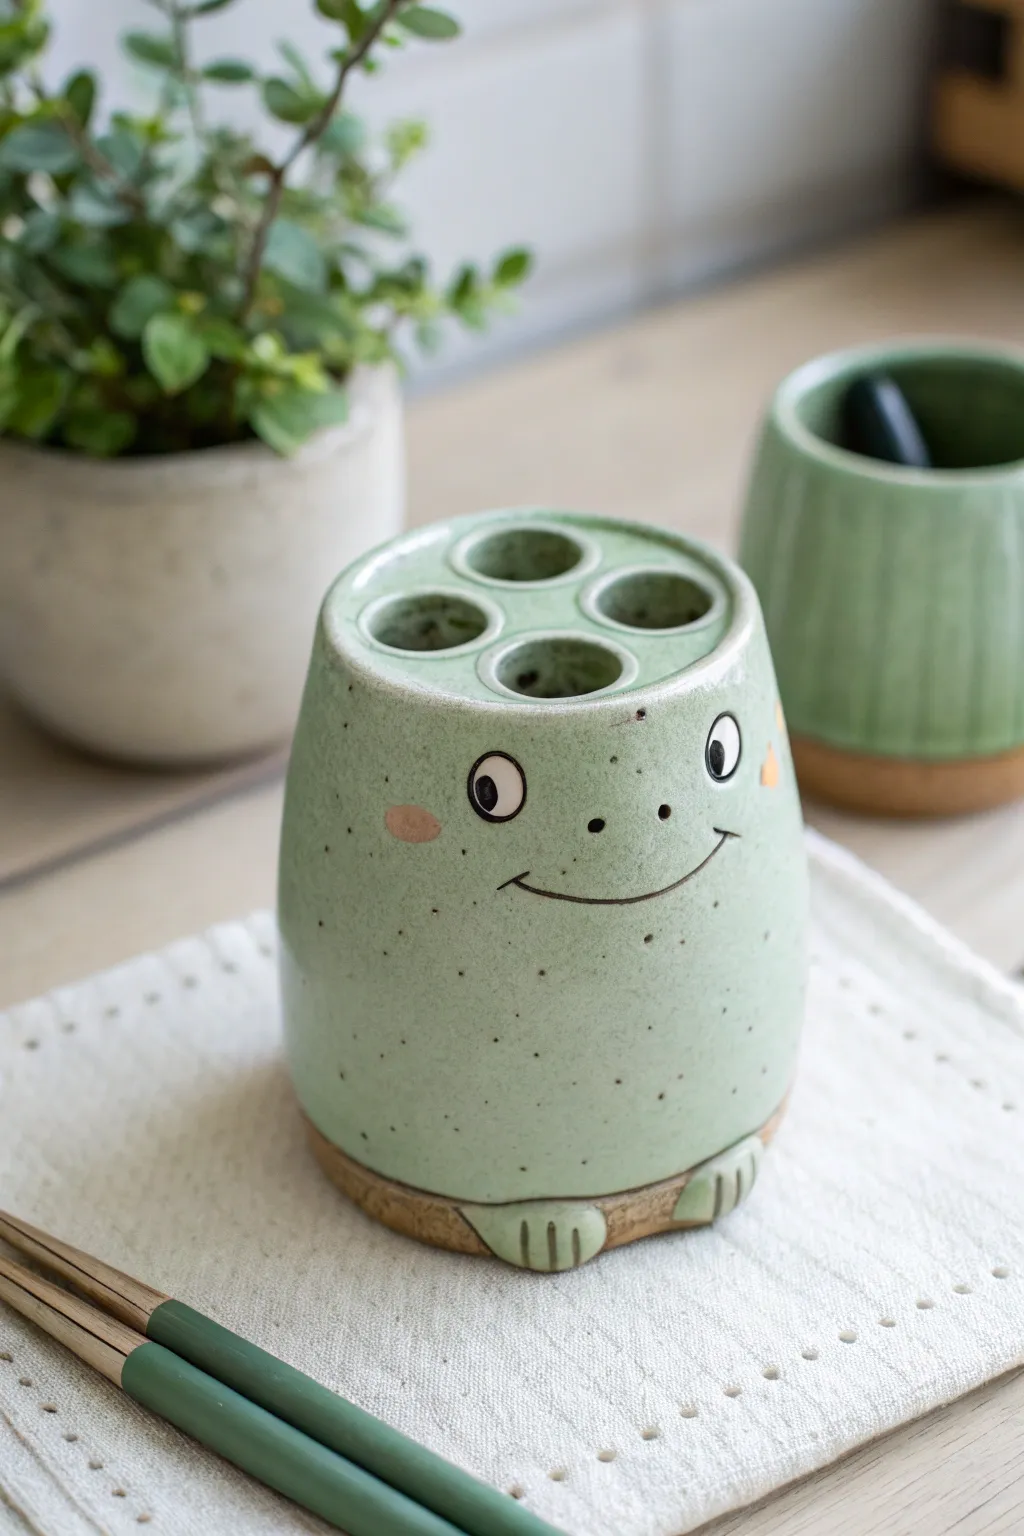
Brighten up your bathroom routine with this charming, functional frog friend who’s ready to organize your dental gear. With its speckled green glaze, sweet smile, and sturdy weighted base, this wheel-thrown and hand-altered piece brings a touch of whimsy to the sink.
Step-by-Step Guide
Materials
- Stoneware clay (smooth body recommended)
- Pottery wheel
- Throwing tools (sponge, rib, wire cutter)
- Needle tool
- Circle cutter or hole punch tool (approx. 1 inch)
- Small loop tool or carving tool
- Scoring tool and slip
- Underglaze (black, pink/blush, white)
- Speckled green glaze (cone 5/6 or suitable for your clay)
- Clear glaze
- Paintbrushes (fine detail and glazing brush)
- Kiln
Step 1: Throwing the Base Form
-
Center and open:
Begin with about 1.5 to 2 lbs of wedged clay. Center it firmly on the wheel bat. Open the clay, leaving the floor slightly thicker than a standard mug (about 1/2 inch) to provide weight and stability. -
Pull the cylinder:
Pull the walls up into a stout cylinder shape. You want the height to be roughly 4-5 inches. Keep the walls even but sturdy. -
Shape the taper:
Collar the rim inward significantly to create a tapered, conical shape. Using a rib on the outside, smooth the profile so it curves gently from a wider base to a narrower top. -
Define the top surface:
Instead of a thin rim, you need a flat top surface for the holes. Use a wooden rib or your fingers to flatten the rim inward, effectively closing the top slightly until you have a flat ledge about the width of the final holder. -
Close the form (optional technique):
I prefer to throw this as a closed form for better structural integrity. Collar the clay completely shut at the top, creating a dome, then use a rib to flatten that dome into a table-top surface. Compress the top well to prevent cracking.
Slumping Top?
If the flat top sags while drying, the clay was likely too wet. Support the inside with a gently placed wad of newspaper before closing firmly, or let the cylinder stiffen before flattening the top.
Step 2: Sculpting Features
-
Refine the shape:
Once leather hard, trim away excess clay from the bottom to create a slight undercut or ‘foot’ aesthetic, though a flat bottom works best for stability. -
Cut the brush holes:
Using a circle cutter or hole punch tool, carefully cut four evenly spaced holes into the flat top surface. Clean up any rough burrs with a damp sponge. -
Form the feet:
Roll out two small coils of fresh clay. Flatten them slightly and attach them to the bottom front edge of the pot using the scratch-and-slip method. -
Detail the toes:
Use a needle tool or a small wood knife to press three indentations into each foot, creating the look of frog toes. -
Smooth connections:
Ensure the feet are firmly attached and the seams are invisible. Run a damp finger over the toes to soften hard edges.
Make it a Set
Create a matching soap dish shaped like a lily pad to sit completely under the frog, catching any dripping water and protecting your countertop while completing the pond theme.
Step 3: Decoration and Glazing
-
Bisque fire:
Let the piece dry completely (bone dry) and fire it to bisque temperature (usually cone 04). -
Paint the face:
On the bisque ware, use underglazes to draw the face. Paint two small white ovals for eyes, adding black pupils and outlines. Use black for a wide, thin smile and small nostrils. -
Add blush cheeks:
Dab two small ovals of pink or orange-tinted underglaze just below the eyes for rosy cheeks. -
Apply wax resist:
Carefully apply wax resist over the painted facial features (eyes, mouth, cheeks) and the unglazed foot ring at the bottom. -
Glaze the body:
Dip the entire piece into a speckled green glaze. The wax will protect your painted face details. Alternatively, brush on 3 coats of glaze, carefully painting around the features. -
Glaze the interior:
Don’t forget the inside! Pour glaze into the holes, swirl to coat the interior, and pour out the excess. This ensures the holder is waterproof and easy to clean. -
Clean up:
Use a damp sponge to wipe off any glaze beadlets that are sitting on top of the waxed facial features. -
Final fire:
Load the kiln and fire to the maturity of your clay and glaze (typically cone 5 or 6). Once cooled, check the bottom for any sharp bits and sand if necessary.
Now you have a durable, adorable bathroom companion that makes brushing teeth a little more joyful
Frog Yarn Bowl With Mouth Guide
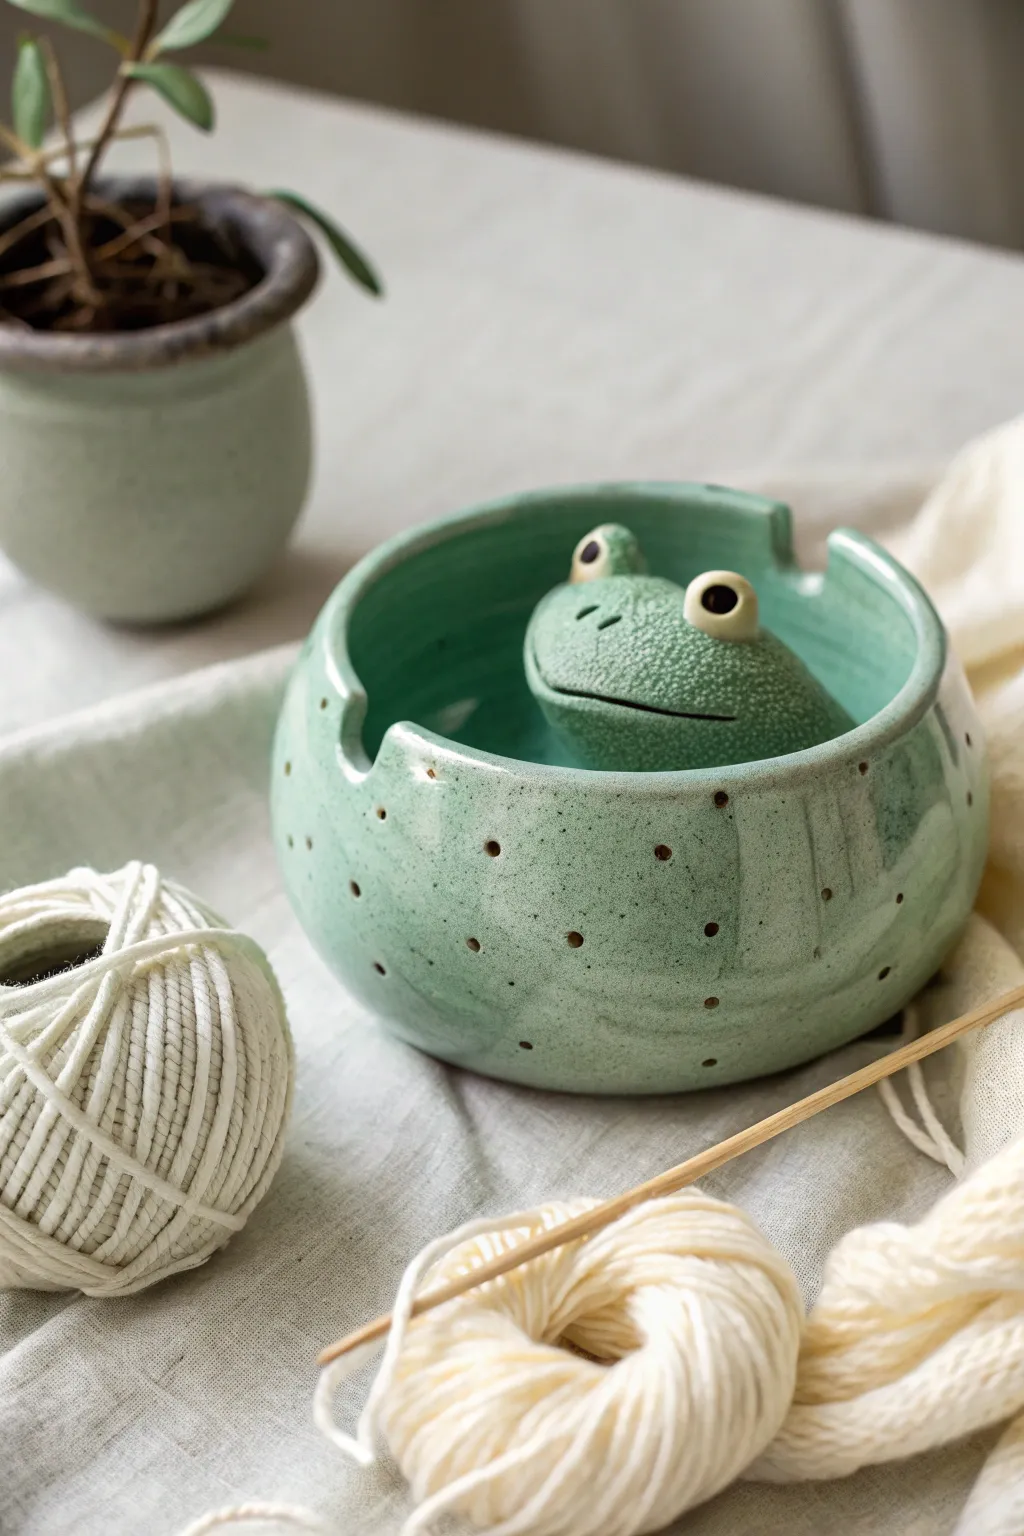
This charming ceramic yarn bowl features a friendly frog peeking out from a pool of green glaze, ready to keep your yarn tangle-free. With its speckled finish and clever rim cutouts, it is both a functional tool for knitters and a delightful piece of decor.
Step-by-Step Tutorial
Materials
- Stoneware clay (smooth or speckled)
- Pottery wheel (or slab roller for hand-building)
- Throwing tools (sponge, wire cutter, ribs)
- Needle tool
- Loop trimming tools
- Slip and scoring tool
- Celadon or glossy green glaze (speckled)
- Underglaze (black and white for eyes)
- Small drill bit or hole cutter (optional)
Step 1: Throwing the Bowl Base
-
Center the clay:
Start with about 2-3 pounds of wedged clay. Center it firmly on the wheel head, ensuring a wide, stable base that won’t tip over when you pull the yarn. -
Open and pull:
Open the clay, leaving the floor slightly thicker than a standard bowl to accommodate the frog attachment later. Pull the walls up to form a rounded, enclosed shape, curving the rim slightly inward. -
Refine the shape:
Use a metal rib to smooth the exterior and remove throwing lines. The shape should be globular, like a fishbowl, to keep the yarn ball contained. -
Dry to leather hard:
Wire the bowl off the bat and let it dry slowly until it reaches a leather-hard state, where it is firm enough to carve but still retains moisture.
Step 2: Sculpting the Frog
-
Form the frog head:
While the bowl dries, hand-build the frog component. Roll a ball of clay and shape it into a wide, flat oval for the head. -
Add the eyes:
Roll two small spheres for eyes. Attach them to the top of the head using slip and scoring. Press down gently to merge them, then use a small tool or finger to smooth the seams. -
Create the mouth:
Using a needle tool or fettling knife, slice a long, slightly curved line across the front of the face for the mouth. Gently widen it just a hair so glaze doesn’t seal it shut. -
Create texture:
I like to use a coarse sponge or a stippling brush to tap texture onto the frog’s ‘skin’ area, avoiding the smooth eyeballs. This mimics the bumpy texture seen in the reference.
Smooth Operator
Take extra time sanding the yarn notches after the bisque fire but before glazing. Nylons or tights are great for testing snag-free smoothness.
Step 3: Assembly and Carving
-
Attach the frog:
Score the bottom of the frog and the interior center of the leather-hard bowl. Apply slip and press the frog firmly into the bottom of the bowl. Use a long tool or brush handle to smooth the connection point inside. -
Carve the rim cutouts:
Identify two spots on the rim for the yarn guides. Cut out rectangular or U-shaped notches using a fettling knife; these allow the yarn to feed out smoothly. -
Add decorative holes:
Use a small hole cutter or drill bit to create a random pattern of small dots around the exterior of the bowl. Clean up any burrs on the inside so they don’t snag the yarn. -
Smooth everything:
Go over every cut edge with a damp sponge. Yarn bowls must be incredibly smooth so fibers don’t catch.
Creative Twist
Sculpt the frog with an open mouth that acts as the yarn guide itself, feeding the yarn through the frog instead of the rim notches.
Step 4: Glazing and Firing
-
Bisque fire:
Fire the piece to cone 04 (or your clay’s specific bisque temperature). -
Detail the eyes:
Paint the pupils black and the whites of the eyes using underglaze. Apply a tiny dot of wax resist over the underglaze if you want them to remain unglazed, or plan to use clear glaze over them. -
Apply the main glaze:
Dip or brush the entire piece in a speckled green celadon glaze. This semi-translucent type of glaze pools beautifully in the textures of the frog skin and the holes. -
Clean the foot:
Wipe the glaze off the bottom of the bowl completely with a sponge. -
Glaze fire:
Fire to cone 6 (or your glaze’s maturity temperature). Once cool, double-check the rim notches for smoothness one last time.
Now you have a delightful studio companion ready to hold your next knitting project
Stacked Frog Garden Totem
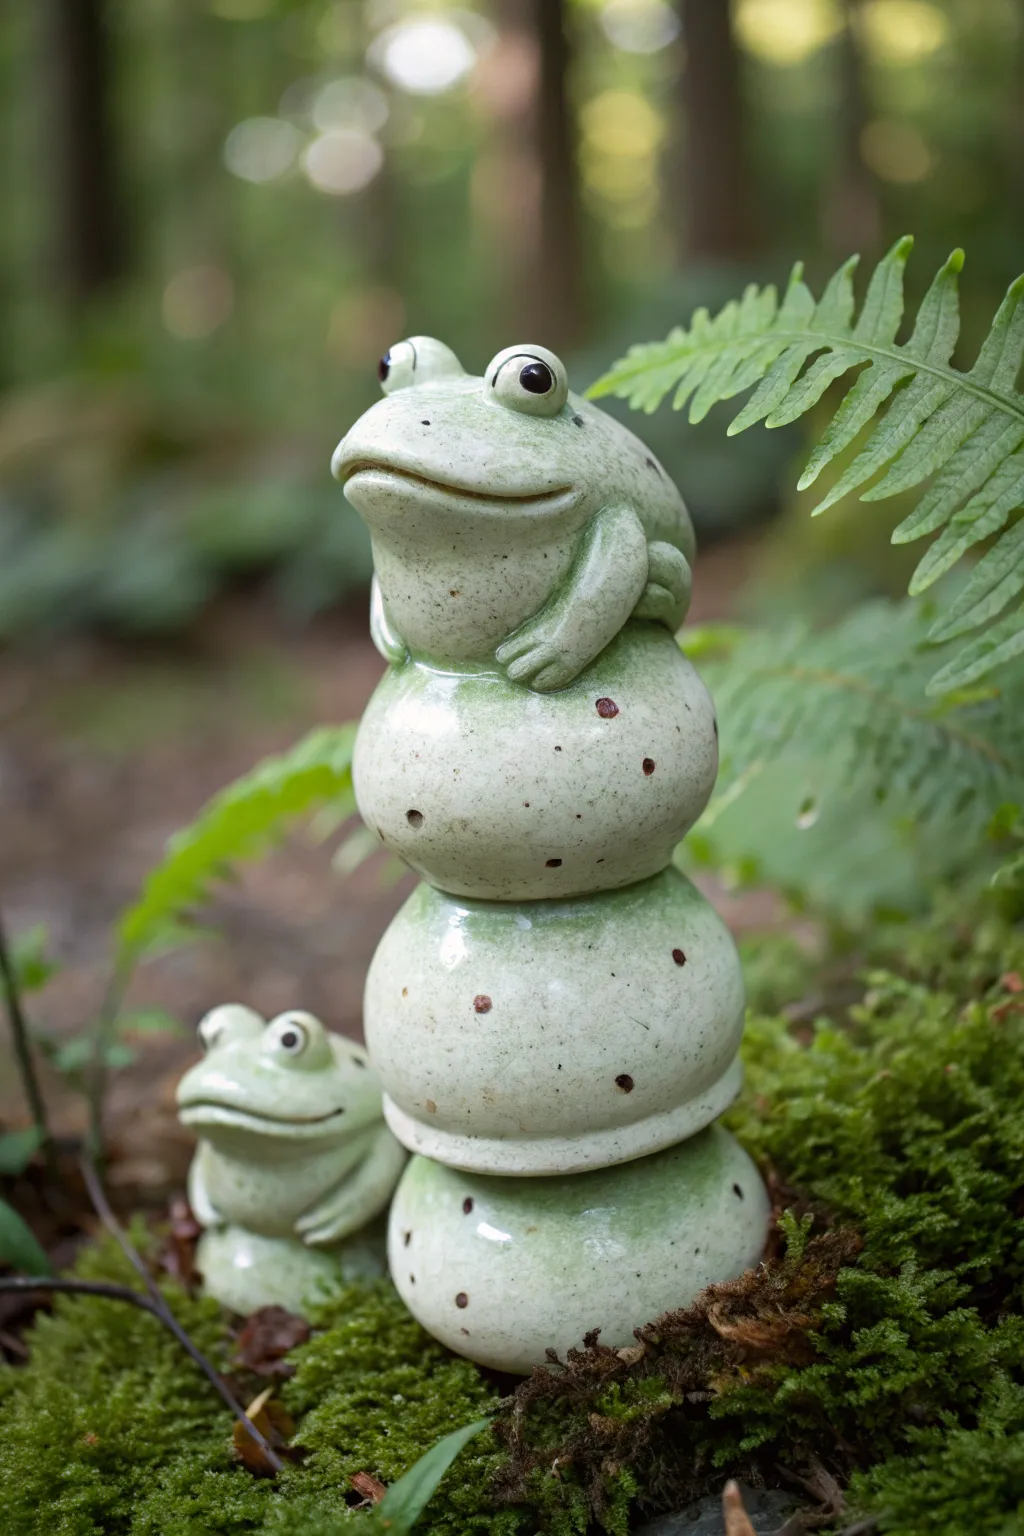
Bring a touch of charm to your garden with this delightful ceramic totem, featuring a happy frog perched atop a stack of speckled, moss-green stones. This project combines wheel-throwing or hand-building techniques to create a sturdy, weather-resistant sculpture that looks right at home among the ferns.
Step-by-Step Guide
Materials
- Stoneware clay (buff or white)
- Pottery wheel (optional, for the spheres)
- Scoring tool and slip
- Modeling tools (wooden knife, needle tool)
- Underglazes (light green, dark green, black, white)
- Clear or transparent green glaze
- Sponge and bucket of water
- Kiln
- Metal rib
Step 1: Forming the Base Stones
-
Throw or pinch the spheres:
Creating the three base ‘stones’ is your first task. You can either throw three closed forms on the wheel or create three hollow pinch pots and join them together. Aim for slightly flattened spheres rather than perfect circles to look more like natural river rocks. -
Size graduation:
Make the bottom stone the largest for stability, the middle one slightly smaller, and the top one (which will support the frog) the smallest. This tapering creates a pleasing visual balance. -
Refine the surface:
Once the spheres are leather hard, use a metal rib to smooth out the joins or throwing lines. You want a smooth canvas, but distinct imperfections or slight lumpiness adds to the organic, stone-like aesthetic. -
Create connection points:
Gently press the top of the bottom sphere and the bottom of the middle sphere to create flat spots where they will sit. Do the same for the top sphere. This ensures your totem won’t wobble. -
Venting hole:
Crucial step: Pierce a small hole in the bottom of each sphere to allow air to escape during firing. A needle tool works perfectly for this.
Stone Texture Tip
Before the clay dries, gently roll a real rock or piece of coral over the surface of your spheres. This imprints natural, irregular textures that glaze loves to break over.
Step 2: Sculpting the Frog
-
Form the body:
Start with a lump of clay roughly the size of your top stone. Shape it into a dome that blends seamlessly into the shape of a frog’s back. The frog isn’t a separate perched object; sculpt it as if it’s hunching down. -
Add the legs:
Roll four coils for the legs. Attached the rear legs folded against the body sides, highlighting the large thigh muscle. For the front legs, have them resting casually over the curve of the body or the stone beneath. -
Detailing the face:
Add extra clay to the front of the dome to build up the head area. Carve a wide, sweeping smile line that curves up at the corners for that contented look. -
Eyes and expression:
Roll two small balls of clay and attach them high on the head. Use a small modeling tool to push in pupils or sculpt eyelids. I like to tilt them slightly outward to give the frog a curious expression. -
Attach to the stack:
Score and slip the bottom of your frog sculpture and the top of the smallest stone. Press them firmly together, blending the clay at the seam so the frog appears to be resting heavily.
Wobble Worries?
If the stack feels unstable while wet, insert a wooden dowel through holes in the center of the stones to keep them aligned. Remove the dowel before the clay shrinks!
Step 3: Assembly and Finishing
-
Stack and join:
Now, score and slip the contact points between all the stones. Check the vertical alignment from all angles to ensure the tower doesn’t lean uncontrollably. -
Drying:
Cover the entire sculpture loosely with plastic to dry very slowly. Because the connection points vary in thickness, rushing this stage can caus cracks at the seams. -
Bisque fire:
Once bone dry, fire the piece to bisque temperature (usually cone 04 or 06) according to your clay body’s specifications.
Step 4: Glazing
-
Base color application:
Apply a pale, milky green glaze to the entire piece. You want this base layer to be somewhat translucent to let the clay texture show through. -
Adding texture:
Using a stiff brush or a toothbrush, splatter dark brown or iron oxide wash across the stones and the frog’s back. This mimics the speckled look of wild granite or bird’s egg patterns. -
Highlighting the frog:
Paint the eyes white with black pupils using underglaze. You might want to brush a slightly deeper green glaze into the crevices of the legs and the smile line to add depth. -
Wiping back:
Gently sponge off a bit of the glaze on the high points of the stones and the frog’s nose. This creates a weathered look where the ‘mossy’ color appears to have naturally worn away. -
Final fire:
Glaze fire the piece to maturity. Ensure the bottom of the lowest stone is wiped completely clean of glaze so it doesn’t fuse to your kiln shelf.
Place your finished totem in a shady fern patch and enjoy the smile it brings to your garden visitors
Frog Downspout Guardian
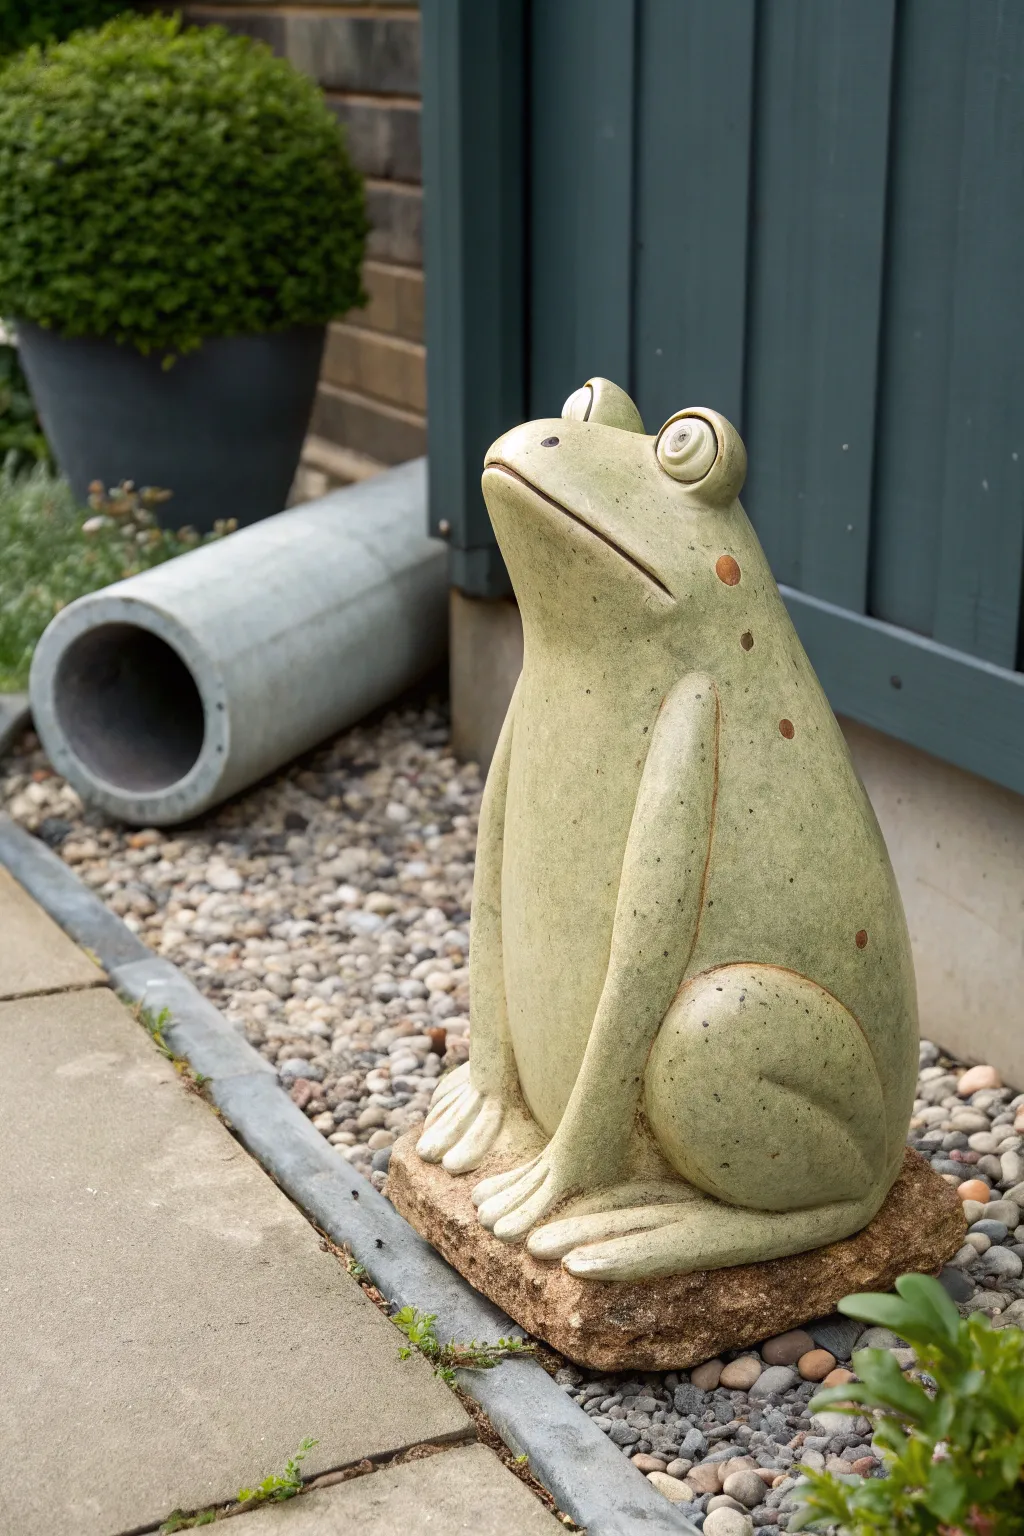
This charming ceramic frog adds a watchful presence to your garden, specifically designed to perch near downspouts or drainage areas. With its upright posture, bulging eyes, and speckled green glaze, it captures a whimsical yet grounded character perfect for outdoor decor.
Step-by-Step
Materials
- High-fire stoneware clay (grogged for strength)
- Pottery wheel (optional, for body base)
- Wooden modeling tools
- Serrated metal rib (kidney)
- Needle tool
- Slip and scoring tool
- Sponge
- Underglazes: earthy green, light beige/cream, rust-red
- Clear matte or satin outdoor glaze
- Kiln
- Newspaper or paper towels
Step 1: Forming the Body
-
Establish the base:
Start with a substantial lump of clay (about 3-4 lbs). You can either throw a tall, closed cylinder on the wheel as a base or build a hollow coil form by hand. Aim for a teardrop shape that is wider at the bottom and tapers slightly toward the neck. -
Shape the torso:
If wheel-thrown, alter the form while the clay is soft by pushing gently from the inside to create a distinct belly curve. If coil-building, paddle the exterior to smooth the coils and refine that pear-shaped silhouette. -
Close the form:
Ensure the top of your form is completely closed and rounded off. Trap air inside to help the sculpture hold its shape while you work on the details. -
Sculpt the head connection:
Unlike a realistic frog, this stylized guardian has a head that merges seamlessly into the body. Use a wooden rib to smooth the transition area so there is no distinct neck, just a continuous upward slope.
Step 2: Adding Features
-
Create the mouth:
Identify the front face of your sculpture. Use a needle tool or fettling knife to slice a deep, wide ‘V’ shape for the mouth. It should angle downwards slightly at the corners to give that classic grumpy frog expression. -
Refine the lips:
Gently press a rounded tool along the cut line of the mouth to soften the sharp edges. I like to push the lower jaw slightly inward to give the upper lip a subtle overhang. -
Form the eyes:
Roll two medium-sized balls of clay for the eyes. Score and slip them securely onto the top of the head. Position them slightly apart and high up to achieve that attentive, gazing-upwards look. -
Detail the eyes:
Add small clay coils around the base of the eyeballs to create heavy eyelids. Use a small loop tool to carve a shallow pupil in the center of each protruding eye.
Slumping Issues?
If the belly sags while sculpting, stuff the hollow form with crumpled newspaper through the bottom hole. It burns out later but provides internal support now.
Step 3: Limbs and Extremities
-
Attach the legs:
Roll out two thick, long coils for the rear legs. Flatten them slightly and attach them to the sides of the body, creating a ‘haunch’ shape that suggests the frog is sitting on its back legs. -
Sculpt the front arms:
Create two straight, pillar-like coils for the front arms. Score and slip them vertically down the front of the chest, merging the clay at the shoulders so they look integrated into the body. -
Form the feet:
At the base of the arms and haunches, flatten balls of clay into wide pads. Cut distinct toes using a fettling knife—three or four per foot—and round off the tips. -
Vent the piece:
Since the body is a hollow trapped-air form, you must create a vent hole. Hide this discreetly underneath the frog’s bottom. This prevents explosion in the kiln.
Natural Texture
Before the clay hardens, tap the entire surface gently with a coarse sponge or a stiff-bristled brush. This removes tool marks and mimics toad skin.
Step 4: Surface and Glazing
-
Bisque fire:
Allow the piece to dry slowly to the bone-dry stage, which may take up to two weeks for a sculpture this thick. Fire to bisque temperature (usually roughly Cone 04). -
Apply base color:
Sponge on a wash of diluted iron oxide or a dark clay stain, then wipe it back. This accentuates the textures and crevices, giving the piece an aged stone look. -
Layer the green:
Apply your earthy green glaze. For the look in the photo, avoid a solid, thick coat. Apply it somewhat unevenly so the clay body or under-wash peeks through in areas, creating depth. -
Add the spots:
Using a rust-red or terracotta underglaze, dab small circular spots randomly along the frog’s back and sides. Vary the sizes for a natural appearance. -
Final firing:
Glaze fire the piece to the maturity temperature of your clay (likely Cone 5/6 or Cone 10 for stoneware). Ensure the bottom is wiped clean of glaze to prevent sticking to the kiln shelf.
Once fired, place your stoic guardian on a flat stone near your garden path to watch over the plants rain or shine
Frog Creamer With a Spout Smile
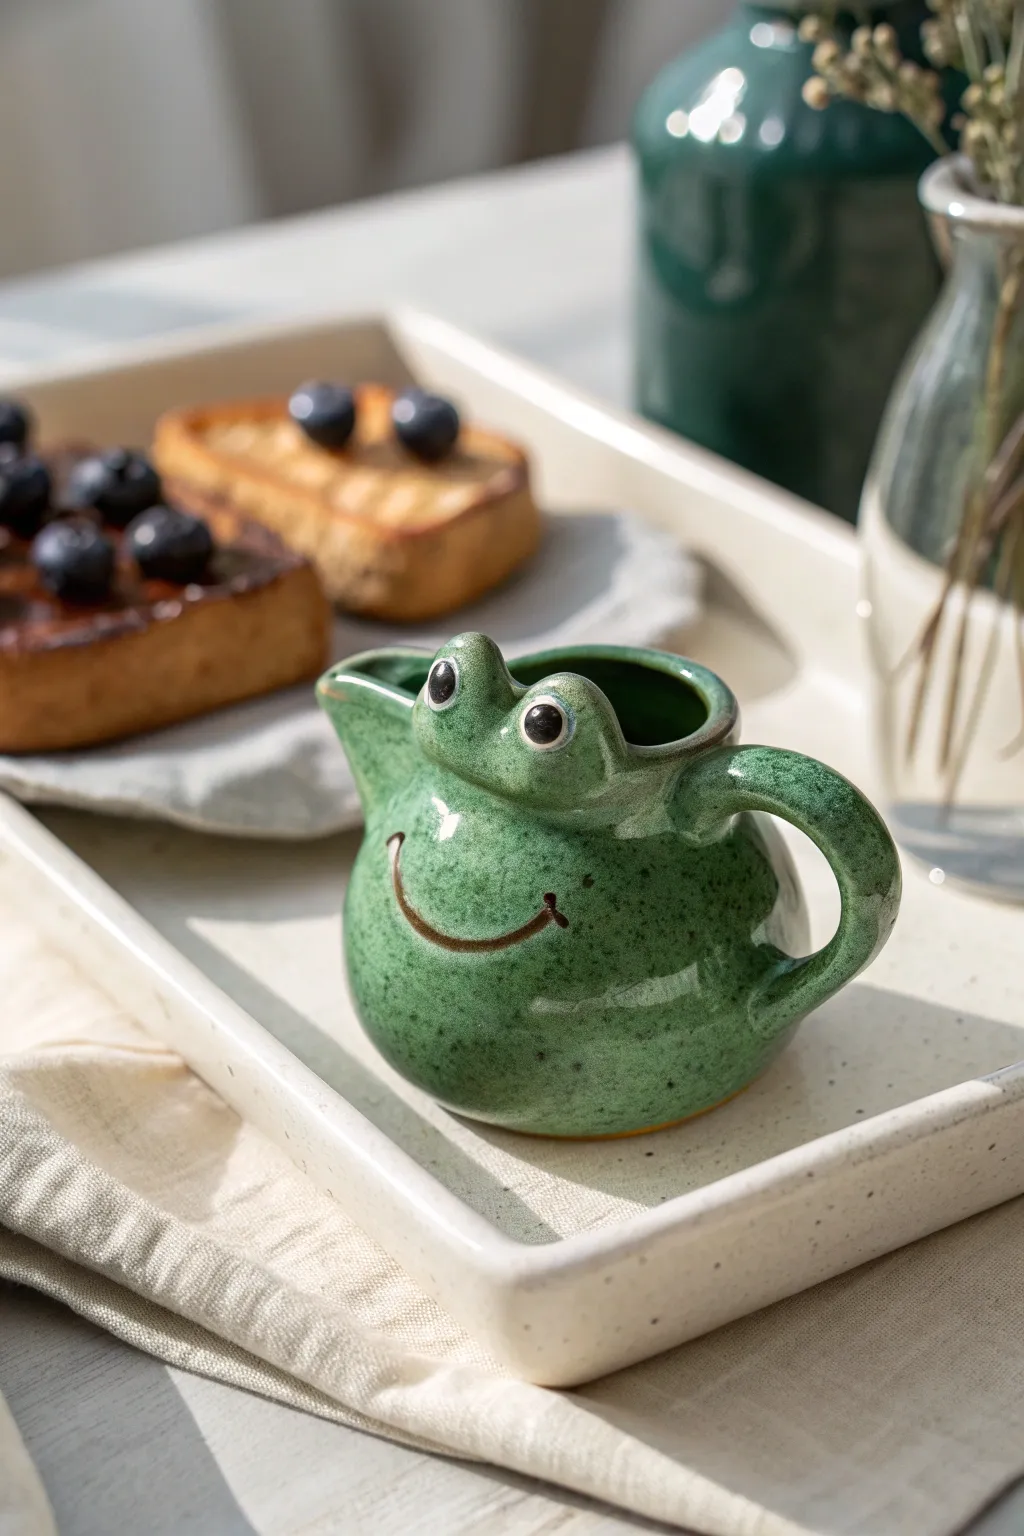
Bring a dash of whimsy to your morning coffee routine with this adorable frog-shaped creamer. Featuring a classic rounded belly, protruding eye bumps, and a cleverly integrated spout, this wheel-thrown (or hand-built) piece is finished in a charming speckled green gloss.
Step-by-Step
Materials
- Stoneware clay (smooth or lightly groggy)
- Pottery wheel (optional, can be pinched/coiled)
- Throwing tools (sponge, rib, needle tool)
- Fettling knife
- Scoring tool
- Slip
- Loop tool for trimming
- Small carving tool for the smile
- Speckled green glaze (cone 5/6 suggested)
- Black underglaze
- White underglaze
- Small detail brush
Step 1: Forming the Body
-
Center and throw:
Start with a ball of clay about the size of a large orange. Center it on the wheel and open up the form, keeping the base somewhat narrow to create that bulbous belly shape. -
Collar the neck:
As you pull the walls up and curve them outward to form the round body, begin to collar the neck in at the top. You want a distinct transition where the frog’s ‘head’ begins, leaving the opening wide enough for pouring. -
Shape the rim:
Smooth the rim with a chamois or sponge. While the clay is still wet, gently pull one side of the rim outward to create a generous pouring spout. This will be the front of your frog’s face.
Spout Drip Check
To prevent drips, ensure the spout has a sharp edge at the very tip rather than a rounded one. This ‘cuts’ the flow of liquid cleanly.
Step 2: Sculpting Features
-
Trim the foot:
Once leather hard, trim the bottom to create a neat foot ring. The roundness of the body should curve gently into this foot. -
Make the eye bumps:
Roll two small balls of clay, roughly the size of large marbles. Flatten the bottoms slightly so they sit flush against the pot. -
Attach the eyes:
Score and slip the area of the rim directly behind the spout. Attach the eye bumps firmly, blending the clay downwards into the body so they look like natural extensions of the form, not just stuck on. -
Pull the handle:
Pull a small strap handle from a lug of clay. It should be proportionate to the small creamer body—thick enough to grip but delicate enough to match the frog aesthetic. -
Attach the handle:
Attach the handle opposite the spout. Secure the top attachment near the rim and the bottom attachment at the widest part of the belly, creating a nice C-curve loop. -
Carve the smile:
Using a small carving tool or needle tool, incise a wide, U-shaped smile just below the spout. I find making the smile slightly asymmetrical adds a bit of quirky character. -
Smooth the surface:
Go over the entire piece with a damp sponge or soft rib to remove any finger marks, especially around the handle joints and eye attachments.
Step 3: Glazing and Firing
-
Bisque fire:
Place your bone-dry greenware into the kiln for a bisque firing (usually Cone 04 or 06). This prepares the piece for glazing. -
Apply the green glaze:
Dip the entire piece into a speckled green glaze. If brushing, apply 2-3 even coats, ensuring you get into the crevices of the smile but don’t let it pool too thick. -
Detail the eyes:
Once the green glaze is dry to the touch, carefully wipe the glaze off the very tops of the eye bumps with a damp sponge. -
Paint the pupils:
Using a fine detail brush, paint a circle of black underglaze on the exposed clay of the eyes. Add a tiny dot of white underglaze on top of the black for a ‘shine’ highlight. -
Highlight the smile:
Depending on your glaze’s translucency, the carved smile might pool nicely on its own. If you want it darker like the photo, carefully paint a thin line of brown or oxide wash into the groove before the main glaze firing. -
Glaze fire:
Fire the piece to the maturity temperature of your clay and glaze (likely Cone 5 or 6). Allow the kiln to cool completely before removing your new little friend.
Pro Tip: Eye Placement
Place the eyes slightly closer together than you think they should be. Wide-set eyes can make the frog look more like a lizard or snake.
Enjoy using your cheerful companion for your next breakfast pour
Frog Bookends With Chunky Bodies
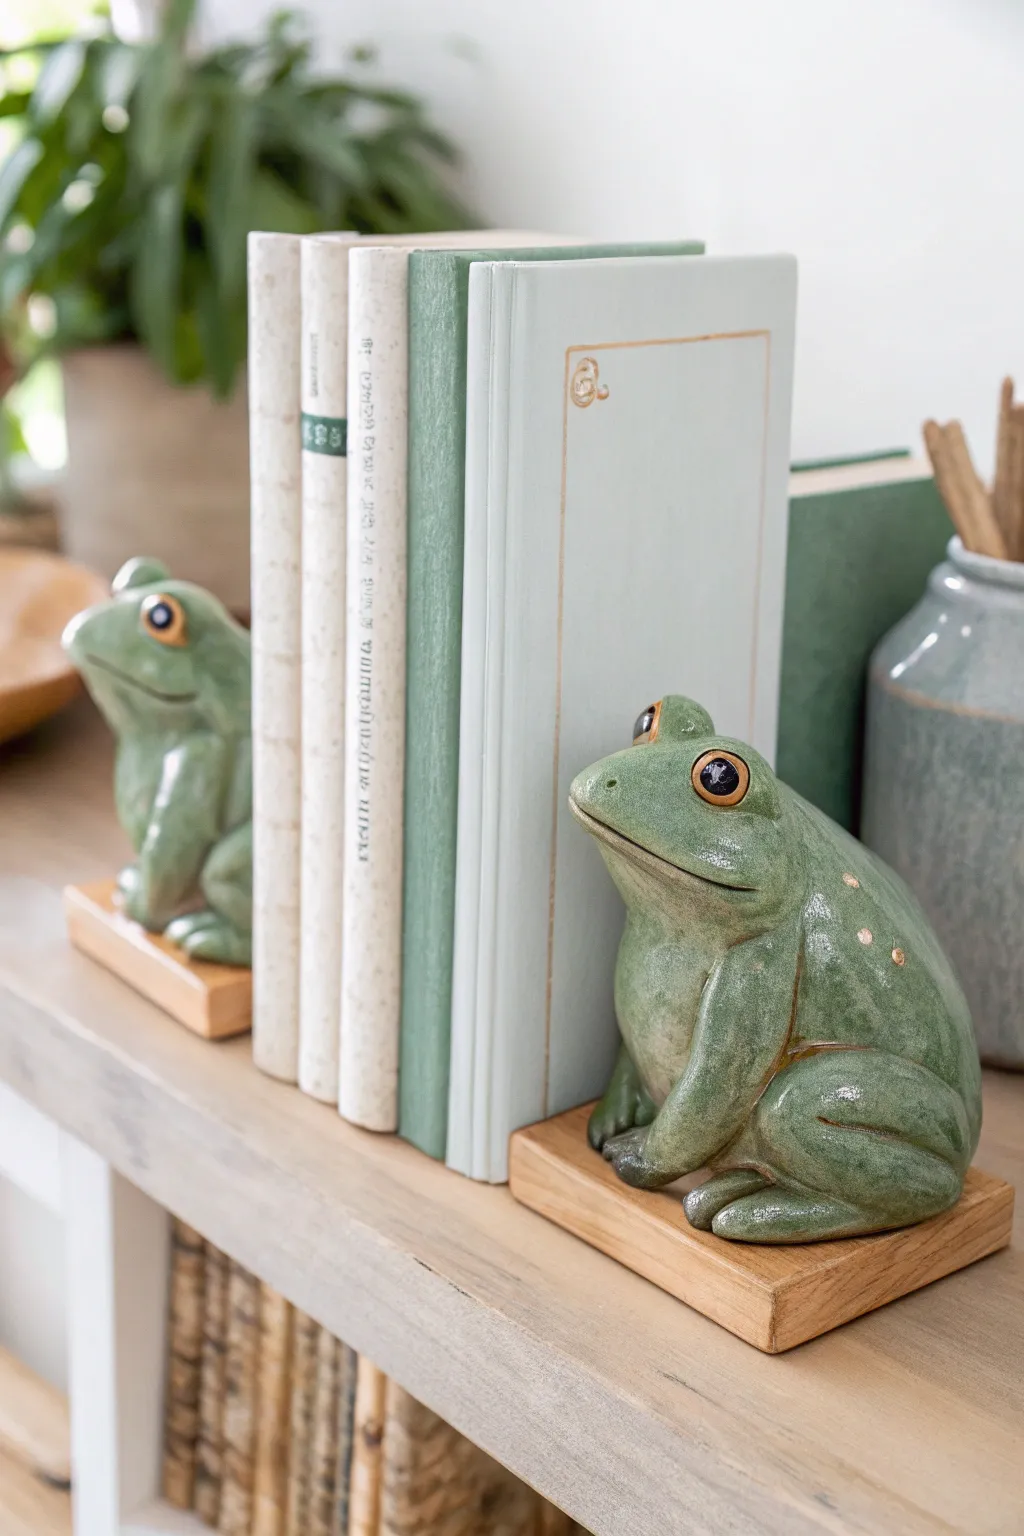
These delightful ceramic frog bookends feature sturdy, rounded bodies and expressive faces that add a touch of whimsy to any bookshelf. The project combines hand-building sculptural techniques with a subtle, earthy glaze to achieve a classic, timeless look that supports your favorite reads.
How-To Guide
Materials
- Stoneware clay (buff or white)
- Wooden sculpting tools
- Pin tool
- Scoring tool (serrated rib)
- Slip (clay mixed with water)
- Sponge
- Loop tool for hollowing
- Underglazes (orange/gold for eyes)
- Celadon or translucent green glaze
- Clear glaze (optional)
- Two flat wooden blocks (for mounting)
- Heavy-duty ceramic glue or epoxy
Step 1: Sculpting the Form
-
Wedging and Shaping:
Begin with a substantial ball of wedged clay, roughly the size of a grapefruit. Use your palms to shape it into a pear-like form, creating a wide, satisfyingly chunky base for the body and tapering slightly for the head. -
Hollowing Out:
Carefully slice the form in half vertically with a wire cutter if the solid clay is too thick, or use a loop tool from the bottom to hollow out the interior. Leave the walls about half an inch thick to ensure stability. If you sliced it, score, slip, and reattach the halves securely. -
Defining the Legs:
Roll two thick coils of clay for the rear legs. Shape them into bent ‘V’ shapes and attach them to the sides of the body using the score and slip method. Blend the seams thoroughly so the legs look like they are naturally emerging from the body. -
Adding Front Legs:
Create two smaller, straighter coils for the front arms. Attach them vertically under the chest area, ensuring the ‘hands’ rest flat on the surface. Smooth the transitions to maintain that continuous, organic look. -
Shaping the Head:
Using your thumbs, gently press into the tapered top section to define the eye sockets. I like to build up the brow ridge slightly with small added coils to give the frog a more contemplative expression. -
Creating the Mouth:
Use a wooden knife tool or a wire tool to slice a wide, horizontal line for the mouth. Curve the corners slightly upward for a subtle smile, or keep it straight for a more serious book-guardian look.
Step 2: Detailing and Refining
-
Sculpting the Eyes:
Roll two small spheres of clay for the eyeballs and place them into the sockets you created earlier. Add thin eyelids over the top half of the spheres to integrate them into the head. -
Adding Texture:
While the frog is meant to be smooth, adding subtle bumps along the back/spine area creates realism. Press small pellets of clay onto the back and smooth their edges just enough so they look like natural warts. -
Refining the Surface:
Wait until the clay is leather-hard. Use a damp sponge to smooth away any harsh tool marks or fingerprints, ensuring the curves of the chunky body flow seamlessly. -
Creating the Flat Base:
Tap the bottom of the frog firmly on a flat board to ensure it sits perfectly level. This step is crucial for later stability when it acts as a bookend. -
Initial Drying:
Allow the piece to dry slowly under plastic for a few days to prevent cracking, then uncover it to become bone dry before the bisque fire.
Uneven Seating?
If the ceramic bottom is wobbly after firing, use sandpaper or a grinding stone on the base before gluing. A perfectly flat bottom ensures a strong bond with the wood.
Step 3: Glazing and Finishing
-
Bisque Firing:
Fire the bone-dry frog to cone 04 (or your clay’s specific bisque temperature). Once cool, wipe it down with a damp sponge to remove any kiln dust. -
Painting the Eyes:
Apply a golden-orange underglaze carefully to the iris of the eyes. Once dry, add a small dot of black underglaze for the pupil. -
Wax Resist:
Apply a coat of wax resist over the painted eyes. This will prevent the green glaze from covering your detailed work during the dipping or brushing process. -
Green Glaze Application:
Dip the frog into a translucent or celadon green glaze. This type of glaze breaks beautifully over texture, highlighting the ‘warts’ and the muscle definition of the legs. -
Glaze Firing:
Fire the piece to the maturity temperature of your glaze and clay body (typically cone 5 or 6 for stoneware). Let the kiln cool completely before opening. -
Mounting:
Once the ceramic piece is finished, take your flat wooden block and sand it smooth. Apply a strong two-part epoxy to the bottom of the ceramic frog and press it firmly onto the center of the wood. -
Final Cure:
Let the adhesive cure for at least 24 hours without disturbing it. This ensures your heavy frog won’t detach when holding up heavy hardcovers.
Weighted Bases
For holding very heavy books, hollow out the underside of the wooden base and glue in lead fishing weights or large washers to add extra heft and stability.
Place your finished amphibians on the shelf and let them guard your library with their charming, stony gazes