Whenever you’ve got a little clay and a big urge to make something cute, these good clay ideas are exactly the kind of projects I reach for in my studio. They’re small, satisfying, and totally doable—plus most of them are either useful or irresistibly collectable.
Pinch-Pot Trinket Dish
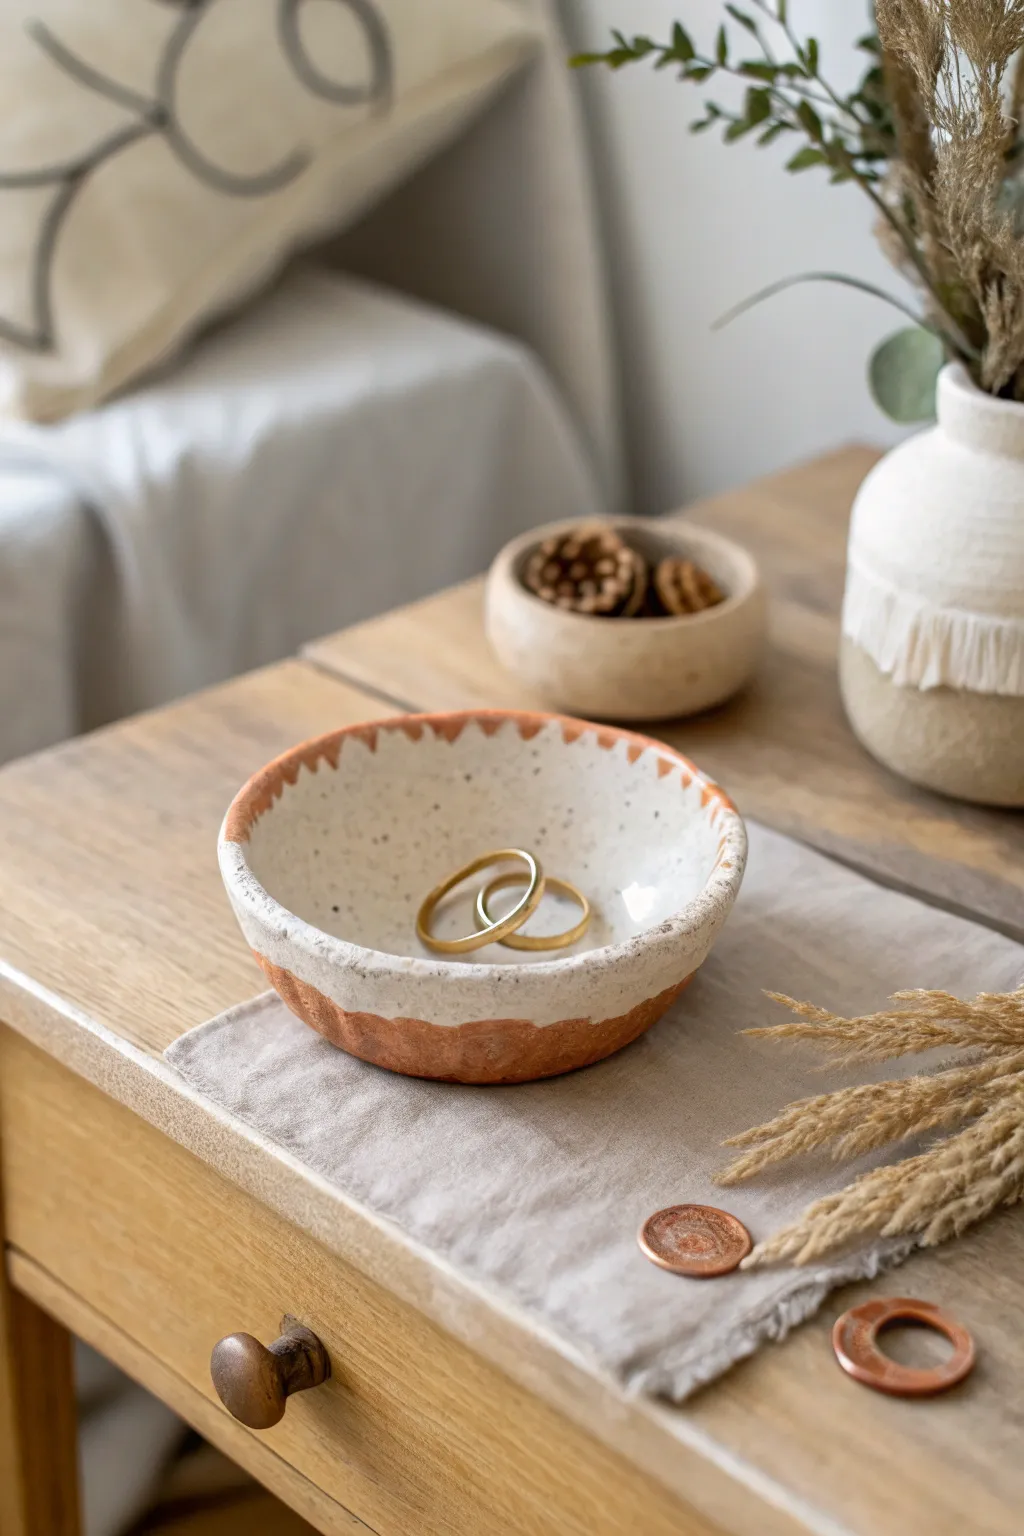
This charming little trinket dish combines the raw warmth of terracotta with a speckled white finish for a lovely rustic-chic look. Perfect for holding rings or earrings, it features a hand-pinched texture and a simple decorative rim that feels organic and grounding.
How-To Guide
Materials
- Air-dry clay (terracotta color)
- White acrylic paint or white ceramic glaze (if firing)
- Small round paintbrush
- Clear sealant or varnish (matte or satin)
- Small bowl of water
- Sponge or paper towel
- Toothpick or sculpting tool (optional)
- Fine grit sandpaper
Step 1: Forming the Pinch Pot
-
Prepare the clay ball:
Start by taking a lump of terracotta air-dry clay about the size of a tangerine. Roll it firmly between your palms until you have a smooth, tight sphere without any major cracks. -
Open the center:
Hold the ball in your non-dominant hand. Press your thumb gently into the center of the ball, pushing down about three-quarters of the way through, leaving a thick enough base at the bottom. -
Pinch the walls:
Begin pinching the clay between your thumb (inside) and fingers (outside). Rotate the ball slowly as you pinch, working from the bottom up to the rim. -
Refine the thickness:
Continue this pinching motion to thin out the walls. Aim for a consistent thickness of about 1/4 inch all around. Don’t worry about it being perfectly smooth; the finger marks add to the handmade charm. -
Flatten the base:
Gently tap the bottom of your pot against your work surface to create a flat, stable base so the dish won’t wobble.
Step 2: Texturing and Drying
-
Create the scalloped rim:
Using your index finger, press gently down onto the rim at regular intervals to create a subtle wavy or scalloped edge. -
Detail the exterior:
I like to take a sculpting tool or just the side of a toothpick and press vertical indentations into the exterior clay, matching the rhythm of the scallops on the rim. -
Check surface texture:
Inspect the inside of the bowl. If there are large cracks, smooth them over with a slightly damp finger. Leave small imperfections for character. -
Let it dry:
Place your finished form in a dry area away from direct sunlight. Allow it to air dry for 24-48 hours until the clay lightens in color and feels hard. -
Sand imperfections:
Once fully dry, use fine-grit sandpaper to briefly smooth any very sharp or jagged edges on the rim, but keep the overall rough texture.
Cracking Up?
If you see large cracks forming while drying, mix a tiny bit of fresh clay with water to make a paste (slip) and fill the cracks, then smooth over.
Step 3: Decoration and Finish
-
Mix your paint:
Prepare your white acrylic paint. If you want a speckled look like the original, mix a tiny amount of brown or black paint or even sand into the white paint. -
Paint the interior:
Generously paint the entire inside of the bowl white. Don’t press too hard; let the paint sit on top of the texture. -
Paint the rim:
Extend the white paint over the top edge of the rim and slightly down the outside. Use a ‘dab’ motion rather than a smooth stroke to create an organic, dripping effect along the scallops. -
Add detail:
If you want that defined orange sawtooth pattern on the rim, dip a small brush in watered-down terracotta paint (or leave the clay bare) and carefully paint small V-shapes between the white sections on the rim. -
Speckle effect:
If you didn’t mix specks into the paint earlier, load an old toothbrush with diluted black or brown paint and flick the bristles to spray tiny dots inside the white area. -
Seal the piece:
Allow the paint to fully dry. Finish by applying a coat of matte or satin clear varnish over the entire piece to protect the clay and give it a finished sheen.
Glaze Illusion
For a glossy ceramic look without a kiln, use a high-gloss varnish or ‘Mod Podge Dimensional Magic’ specifically on the white painted areas.
Now you have a beautiful, earthy dish ready to hold your favorite jewelry pieces


Ring Cone or Ring Holder
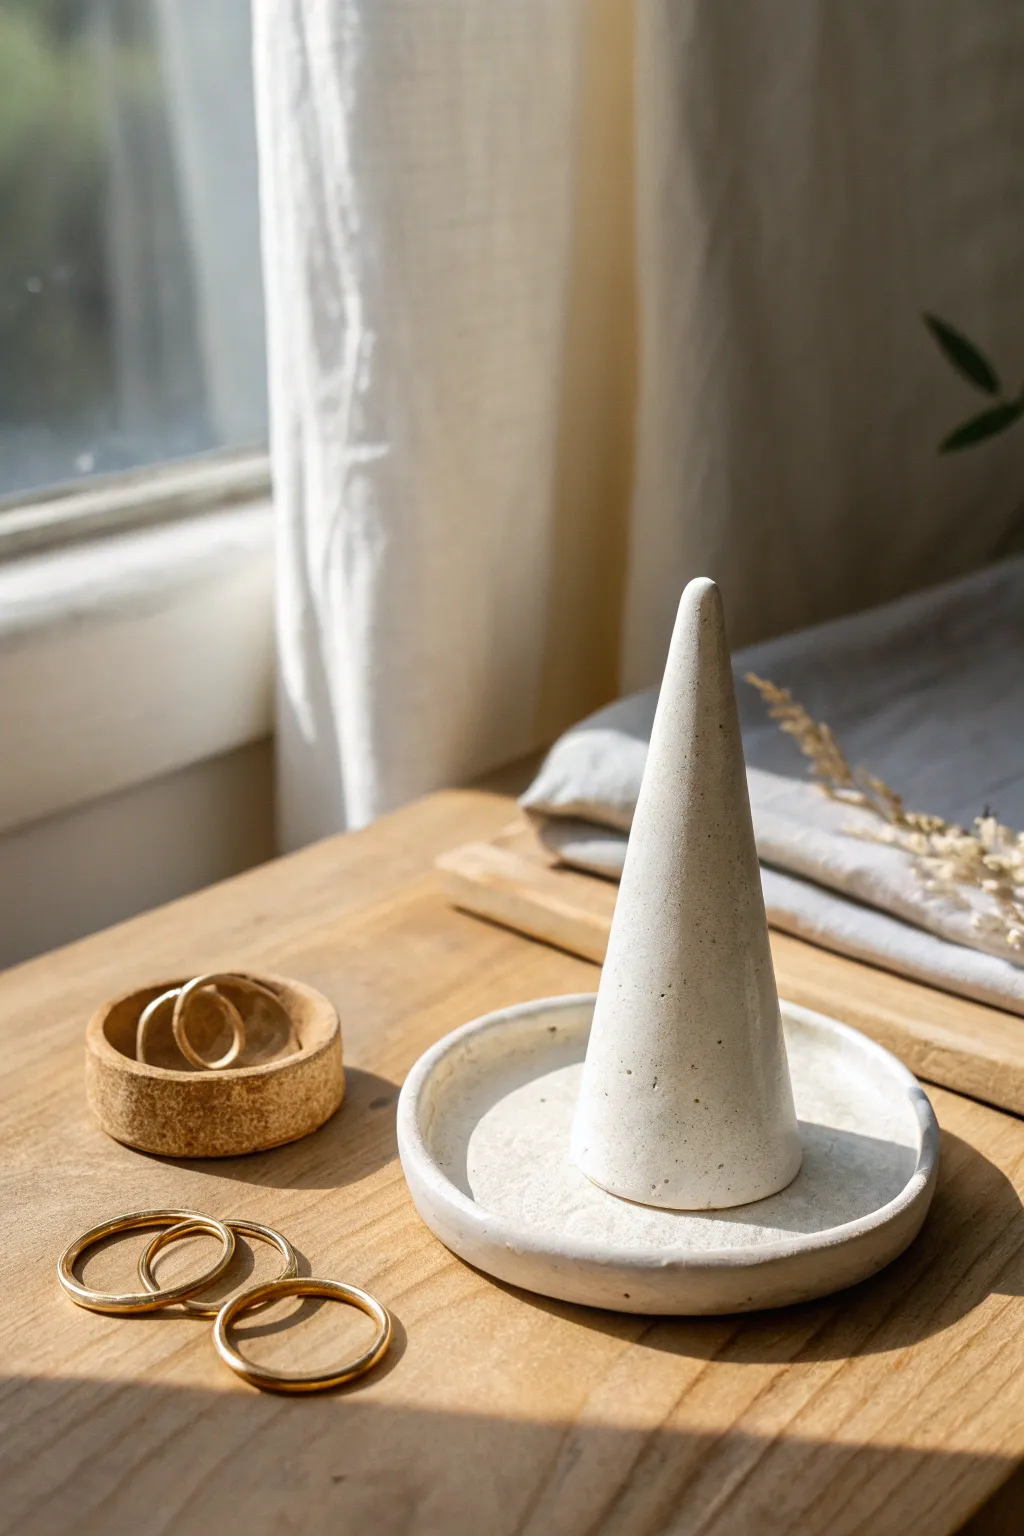
Create a sleek and functional jewelry display with this minimalist ring cone and matching catchall dish. The speckled white clay adds a wonderful organic texture that looks beautifully modern next to gold jewelry.
Step-by-Step Tutorial
Materials
- Speckled air-dry clay or polymer clay (white or cream base)
- Rolling pin
- Non-stick workspace or parchment paper
- Sharp blade or clay knife
- Small bowl or circle cutter (approx. 4 inches)
- Sponge and water bowl
- Fine grit sandpaper (after drying)
- Clear matte varnish (optional)
Step 1: Forming the Cone
-
Prepare the clay:
Begin by conditioning a golf-ball-sized piece of speckled clay in your hands until it is pliable and warm. If you are using air-dry clay, ensure it isn’t too dry; add a drop of water if needed to prevent cracking. -
Roll a basic cylinder:
Roll the clay ball between your palms to form a thick, short cylinder or log shape. -
Shape the taper:
Place the cylinder on your work surface. Using the flat of your hand, roll the clay back and forth while applying more pressure to one end. This will naturally start to form a cone shape. -
Refine the height:
Stand the cone upright. Gently stroke the clay upward from base to tip with your fingers to elongate it. Aim for a height of about 3 to 4 inches, keeping the base stable. -
Flatten the base:
Pick up the cone and tap the bottom firmly against the table to ensure it is perfectly flat and sits without wobbling. -
Smooth the surface:
Dip your finger slightly in water (or use baby oil for polymer clay) and run it over the cone to smooth out any fingerprints or uneven ridges. The tip should be rounded, not dangerously sharp.
Cracks Appearing?
If you see tiny hairline cracks while air-drying, mix a small amount of fresh clay with water to make a paste (slip) and fill them in, then smooth over.
Step 2: Crafting the Catchall Dish
-
Roll out the slab:
Take a larger ball of the remaining clay and roll it out with your rolling pin until it is an even slab, approximately 1/4 inch thick. -
Cut the circle:
Place your small bowl upside down on the slab or use a large circle cutter to cut out a perfect round shape. I find a 4-inch diameter works best for this set. -
Create the lip:
With the circle flat on the table, gently pinch the outer edge upward to create a small rim. Work your way around the circumference twice to make it even. -
Smooth the edges:
Use a damp sponge to round off the rim of the dish so it looks soft and organic rather than sharp and cut. -
Check the fit:
Before drying, gently place your finished cone into the center of the dish just to ensure the proportions look balanced. Remove the cone before the drying phase.
Step 3: Finishing Touches
-
Dry the pieces:
Let both the cone and the dish dry completely. For air-dry clay, this usually takes 24-48 hours. Turn the dish over halfway through to help the bottom dry evenly. -
Sand for perfection:
Once bone dry (or baked and cooled if using polymer), take fine-grit sandpaper and gently sand away any remaining bumps or rough texture on the surface. -
Dust off:
Wipe both pieces with a slightly damp cloth to remove all clay dust. -
Seal the deal:
Apply a thin coat of clear matte varnish to seal the clay. This protects the pristine white surface from oils or tarnishing from the jewelry over time.
Add Some Weight
For a sturdier feel, hollow out just the bottom of the cone slightly and pack in a small foil ball before sealing the bottom back up.
Now you have a chic, handmade home for your favorite rings that looks like it came from a boutique


Textured Clay Coasters

Bring a touch of organic warmth to your table with these rustic terra cotta coasters, featuring intricate botanical and sunburst patterns pressed directly into the surface. Their unglazed, matte finish and natural clay tones create a cozy, grounded aesthetic perfect for your morning coffee ritual.
How-To Guide
Materials
- Terra cotta air-dry clay (or oven-bake polymer clay in terra cotta)
- Rolling pin
- Circle cookie cutter (approx. 3.5 – 4 inches diameter)
- Textured stamps or found objects (leave stamps, lace, or rubber stamps)
- Wooden guide strips or slats (1/4 inch thick)
- Canvas mat or parchment paper
- Fine-grit sandpaper (400 grit)
- Small sponge
- Water bowl
- Pottery needle tool or toothpick
- Clear matte acrylic sealer (optional)
Step 1: Preparing the Base
-
Condition the Clay:
Begin by taking a handful of terra cotta clay and kneading it in your hands to warm it up. Condition it until it is pliable and smooth, ensuring there are no air bubbles trapped inside. -
Set Up Your Workspace:
Lay down a piece of canvas or parchment paper on your work surface to prevent sticking. Place your two wooden guide strips on either side of the working area to ensure an even thickness. -
Roll the Slab:
Place the ball of clay between the guide strips. Using your rolling pin, roll the clay out into a smooth, even slab. If the clay sticks to the roller, you can lightly mist it with water or dust with a tiny bit of cornstarch. -
Check for Imperfections:
Inspect the surface of your slab. If you see any small cracks or wrinkles, smooth them out gently with a slightly damp finger or the back of a spoon.
Prevent Warp
If your coasters curl while drying, try placing a lightweight board or book on top of them (sandwiched between paper towels) once they are semi-dry to keep them perfectly flat.
Step 2: Creating the Textures
-
Plan Your Designs:
Decide on your patterns before cutting. For the leaf design, you might use a large rubber stamp or actually press fresh leaves into the clay. For the radial bursts, look for stamps with geometric line work. -
Apply the Texture:
Press your chosen texturing tool firmly into the rolled clay slab. Apply even pressure to ensure the design transfers deeply and clearly without pushing all the way through the slab. -
Cut the Shape:
Position your circle cutter over the textured area, framing the design exactly how you want it centered. Press the cutter straight down firmly, then give it a little wiggle before lifting it up. -
Release the Coaster:
Gently remove the excess clay from around the circle. If the coaster is stuck inside the cutter, gently push it out from the top edges, being careful not to warp the circle shape. -
Refine the Edges:
Dip your finger in a little water and run it along the cut edge of the coaster to smooth away any sharpness or burrs left by the cutter. I find this creates a much more professional finish than sanding later. -
Add Decorative Borders (Optional):
For designs like the simple sunburst, you can use the needle tool to press small indentations or divots around the rim for extra detail.
Step 3: Drying and Finishing
-
Initial Drying:
Transfer the coasters to a flat, clean board or a wire rack covered with paper. Let them air dry slowly away from direct heat sources to prevent cracking. -
Flip for Evenness:
After about 12 hours, flip the coasters over. This helps them dry evenly on both sides and prevents the edges from curling upward. -
Full Cure:
Allow the clay to dry completely according to the package instructions—usually 24 to 48 hours for air-dry clay. The color will lighten noticeably as moisture evaporates. -
Sand the Imperfections:
Once fully bone dry, take your fine-grit sandpaper and lightly buff the edges and the flat back of the coaster. Avoid sanding the textured top heavily or you’ll lose the crisp details. -
Dust Off residue:
Wipe the coasters down with a slightly damp sponge to remove all clay dust generated from sanding. -
Seal the Surface:
To protect the coasters from coffee drips and moisture, apply a thin coat of clear matte acrylic sealer. This will darken the clay slightly, bringing back that rich terra cotta tone seen in the image.
Stamp Release Trick
If your stamp or texture tool keeps sticking to the moist clay, lightly dust the surface of the clay with cornstarch or baby powder before pressing your design.
Stack your finished set on the coffee table as a testament to the simple beauty found in natural textures.


Tiny Catch-All Tray
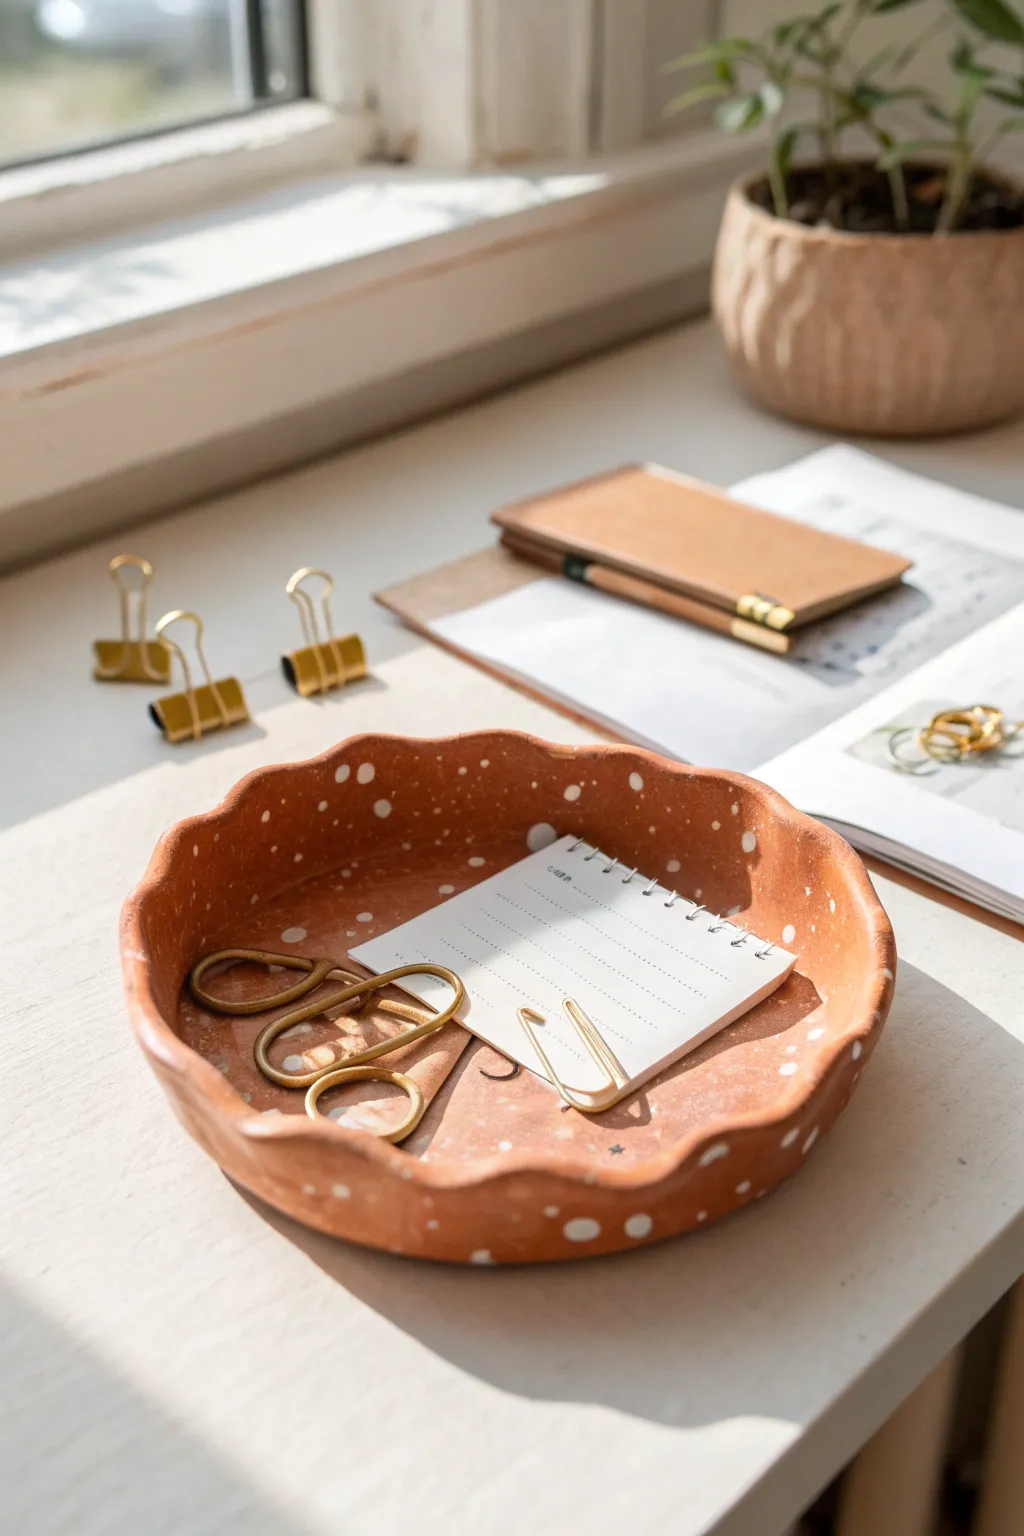
Embrace the imperfect beauty of hand-built pottery with this rustic catch-all tray. Featuring a warm terracotta tone, playful white speckles, and gently waved edges, it’s the perfect home for your desk essentials or jewelry.
Step-by-Step
Materials
- Terracotta-colored air-dry clay (or polymer clay)
- White acrylic paint
- Rolling pin
- Round cookie cutter or bowl (approx. 5-6 inches)
- Craft knife or needle tool
- Small bowl (for shaping)
- Sponge or paintbrush
- Gloss or matte varnish (optional)
- Smoothing tool or water
- Sandpaper (fine grit)
Step 1: Shaping the Base
-
Prepare your workspace:
Begin by laying down a non-stick surface, such as parchment paper or a silicone mat, to prevent your clay from sticking while you work. Take a fist-sized ball of terracotta air-dry clay and knead it well to warm it up and remove air bubbles. -
Roll out the slab:
Using your rolling pin, flatten the clay ball into a smooth, even slab. Aim for a thickness of about 1/4 inch (approx. 5-6mm). Try to keep the pressure consistent so one side isn’t thinner than the other. -
Cut the circle:
Place your round cookie cutter or an inverted bowl onto the clay slab to use as a template. Press down firmly or trace around the edge with a craft knife to cut out a perfect circle, then peel away the excess clay. -
Smooth the edges:
Dip your finger or a sponge in a tiny bit of water and run it along the cut edge of the circle. This rounds off the sharp 90-degree angle left by the cutter, giving the piece a softer, more finished look.
Step 2: Forming the Curves
-
Create the walls:
Gently lift the edges of your clay circle. Instead of using a coil, we are going to shape the slub itself. Pinch the edges upward slightly to create a shallow rim, making the dish concave. -
Scallop the rim:
To create the wavy, ruffled effect seen in the photo, place one finger on the inside of the rim and two fingers on the outside. Gently press inward and outward simultaneously to curve the clay. Repeat this spacing around the entire circumference. -
Supports for drying:
If the clay is too soft to hold its shape, place the clay circle inside a slightly larger shallow bowl. This acts as a mold, supporting the curved walls while gravity helps them settle. -
Initial drying:
Allow the clay to dry in the bowl for at least 24 hours. I usually flip it over halfway through the process so the bottom gets air exposure too. It should turn a lighter, chalky color when fully dry. -
Sand for smoothness:
Once bone dry, take fine-grit sandpaper and gently buff the rim and surface. Focus on any fingerprints or uneven bumps from the pinching phase. Wipe away the dust with a barely damp cloth.
Splatter Control
Before flicking paint on your final piece, practice on a piece of paper to gauge spray radius. Place the dish in a cardboard box during splattering to keep your table clean.
Step 3: Decorating and Sealing
-
Prepare the speckle paint:
Squeeze a dollop of white acrylic paint onto a palette or scrap paper. Depending on the thickness of your paint, mix in a tiny drop of water to make it fluid enough to splatter. -
Apply the speckles:
Load a stiff-bristled brush (an old toothbrush works wonderfully here) with the white paint. Hold the brush over the dish and run your thumb across the bristles to flick tiny droplets of paint onto the clay surface. -
Control the pattern:
Vary the distance of your flicker. Do some close up for dense clusters and some higher up for spread-out dots. Add a few larger manual dots using the back end of a paintbrush if you want more variety. -
Let the paint set:
Allow the white acrylic speckles to dry completely. This usually takes only 15-20 minutes since the dots are small. -
Apply varnish:
To protect your dish and deepen the terracotta color, apply a coat of clear varnish. Use a matte finish for a natural stone look or gloss for a glazed ceramic appearance. -
Seal the bottom:
Don’t forget to flip the dish over and seal the bottom as well. This prevents moisture from seeping into the clay if it sits on a humid windowsill.
Gilded Edges
For a luxe upgrade, paint just the very top edge of the scalloped rim with liquid gold leaf or metallic gold paint after the speckles have dried.
Once fully cured, your new speckled tray is ready to organize your life with simpler, grounded style

The Complete Guide to Pottery Troubleshooting
Uncover the most common ceramic mistakes—from cracking clay to failed glazes—and learn how to fix them fast.
Mini Bud Vase
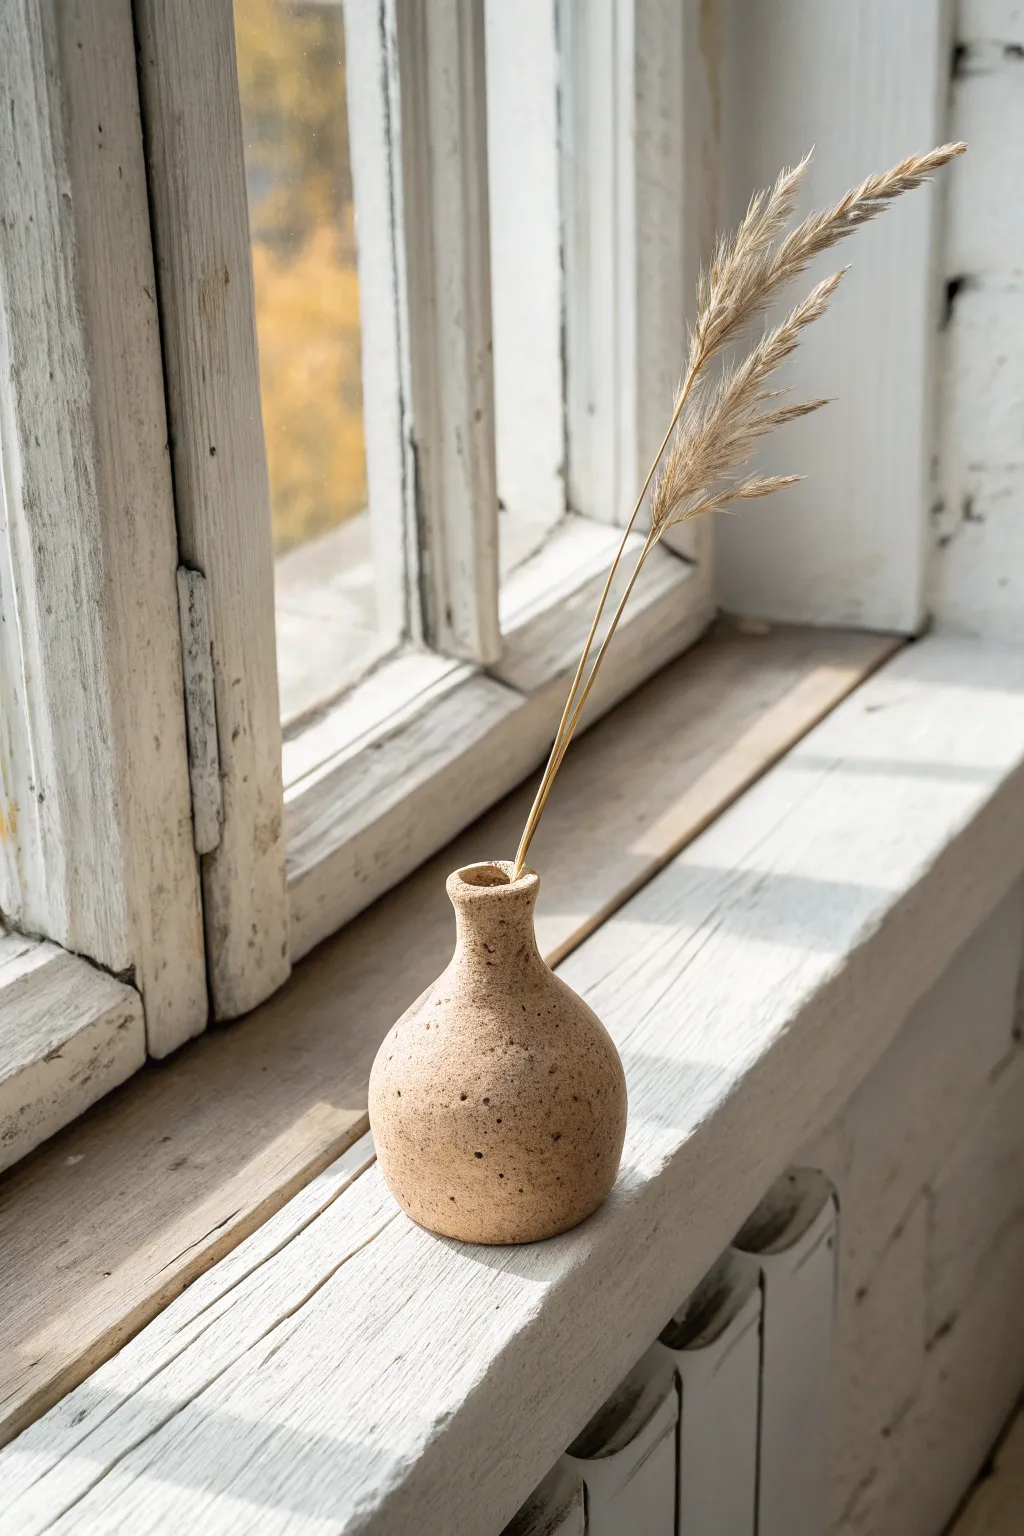
Embrace simplicity with this charming, rustic bud vase that highlights the natural beauty of speckled clay. Its petite, bulbous form and narrow neck are perfect for displaying a single stem of dried grass or a tiny wildflower.
How-To Guide
Materials
- Speckled stoneware clay (approx. 1 lb)
- Needle tool or toothpick
- Small sponge
- Wooden modeling tool or popsicle stick
- Rib tool (optional)
- Water in a small cup
- Canvas or cloth-covered work surface
Step 1: Forming the Base
-
Prepare the Clay:
Start by wedging a ball of speckled clay about the size of a tangerine to remove any air bubbles. Pat it into a smooth, round sphere using your palms. -
Begin the Pinch Pot:
Hold the clay ball in your non-dominant hand. Gently press your thumb into the center, stopping about a half-inch from the bottom to ensure a sturdy base. -
Pinch the Walls:
Using a rhythmic pinching motion between your thumb and fingers, slowly rotate the ball. Gently squeeze the clay to thin out the walls, working from the bottom up. Aim for an even thickness of about 1/4 inch. -
Shape the Belly:
As you pinch, encourage the clay to balloon outward to create the round ‘belly’ of the vase. Use your fingers inside to push the walls out gently while your other hand supports the outside.
Collaring Success
Work collaring stages gradually. If you squeeze the neck too fast, the clay will buckle. Do a little, rotate, and repeat.
Step 2: Refining the Neck
-
Collar the Top:
Place the pot on your work surface. Create an ‘OK’ sign with your thumb and forefinger and gently encircle the top rim. Squeeze lightly while rotating the pot to bring the opening inward. -
Extend the Neck:
Continue collaring the clay inward until the opening is quite narrow, roughly the width of a finger. If the clay feels dry or starts to crack, lightly moisten your fingers with water, but avoid soaking it. -
Smooth the Transition:
Use a wooden modeling tool or your finger to smooth the transition area where the round belly meets the neck. I like to blend the clay vertically here to ensure structural integrity. -
Form the Rim:
Refine the very top edge. You can gently flare it out slightly or keep it straight. Use a damp sponge or a piece of chamois leather to compress and smooth the rim so it isn’t sharp.
Step 3: Finishing Touches
-
Surface Texture:
Once the shape is finalized, you can enhance the speckled, sandy look. Gently wipe the exterior with a damp sponge to expose the grog or speckles in the clay body. -
Flatten the Bottom:
Tap the vase gently on the table to create a stable, flat bottom. If necessary, use your thumb to slightly concave the center of the base so only the outer ring touches the table. -
Final Smoothing:
Check the vase for any accidental fingernail marks or uneven lumps. Smooth these out with a rib tool or your thumb for a clean, minimalist silhouette. -
Slow Drying:
Loosely cover the vase with plastic and let it dry slowly for a day or two. This gradual drying helps prevent cracks, especially at the neck where the clay was stressed. -
Bisque Fire:
Once bone dry, fire the piece in a kiln to bisque temperature (usually cone 04 or 06 depending on your clay). -
Glazing (Optional):
To match the reference image’s raw look, you can leave the exterior unglazed or apply a transparent matte glaze. If you want it to hold water, pour a clear liner glaze inside the vase. -
Final Firing:
Fire the vase a second time to the maturation temperature of your specific clay body (e.g., Cone 5/6 for mid-range stoneware).
Textured Duo
Make a sister vase in a slightly different size but scratch vertical lines into the surface for a complementary textured set.
Now you have a serene little vessel ready to hold a bit of nature on your windowsill
Photo and Card Holder
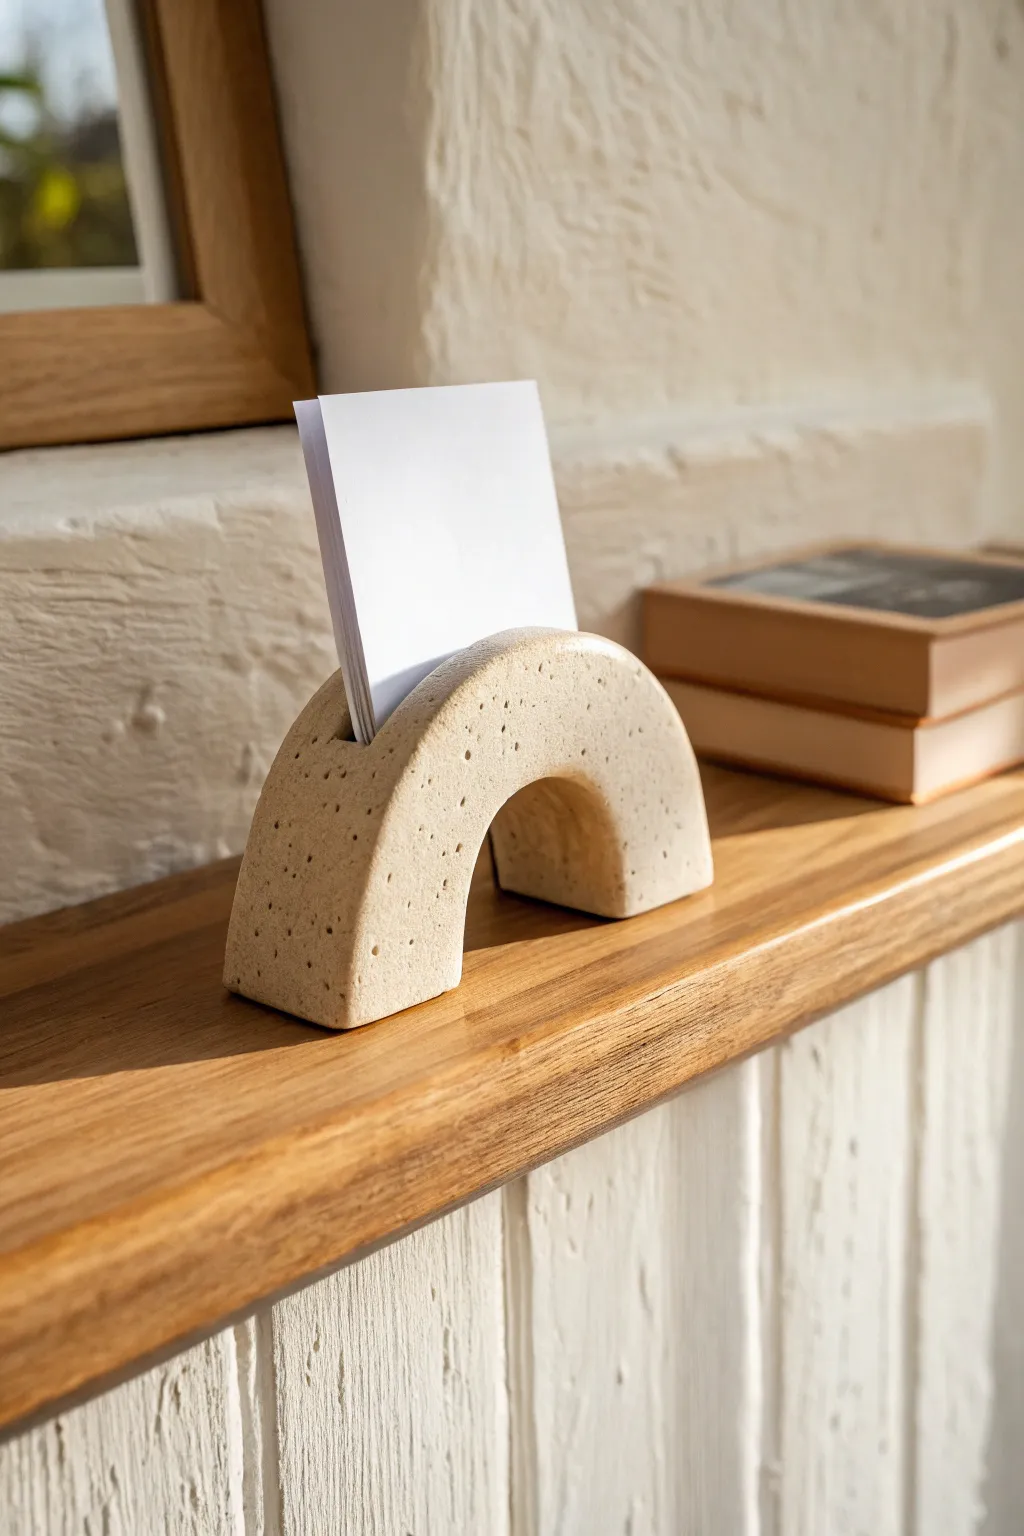
This minimalist, arch-shaped card holder adds a touch of modern stoneware aesthetic to any desk or shelf. With its gentle curve and subtle speckling, it serves as both a functional organizer and a sculptural piece of decor.
Step-by-Step Guide
Materials
- Polymer clay (beige or sand color)
- Black pepper or dried coffee grounds (for speckles)
- Blade or X-Acto knife
- Rolling pin or acrylic roller
- Round cookie cutter or drinking glass (approx. 3-4 inch diameter)
- Scrap cardboard or stiff cardstock
- Sandpaper (fine grit)
- Oven (if using polymer clay)
Step 1: Preparing the Clay
-
Condition the clay:
Begin by warming up your beige polymer clay in your hands, kneading it until it becomes soft and pliable. This prevents cracks later on. -
Create the speckles:
To achieve that natural, stony look without buying specialty clay, sprinkle a small amount of coarse black pepper or dried coffee grounds onto your flattened clay. -
Fold and mix:
Fold the clay over the speckles and knead thoroughly again. I like to keep kneading until the particles are evenly distributed throughout the block. -
Form a block:
Shape the conditioned clay into a thick, rectangular log roughly the width you want your final arch to be.
Clean Cuts
If your clay drags or deforms when slicing the card slot, put the shaped arch in the fridge for 15 minutes first. Cold clay cuts much cleaner.
Step 2: Shaping the Arch
-
Curve the log:
Gently bend your clay log into a U-shape to form the basic arch structure. Place it on your work surface standing up. -
Flatten the faces:
Using your acrylic roller or a flat object, gently press against the front and back faces of the arch to make them flat and uniform rather than round. -
refine the shape:
Use your fingers to smooth out the curve, ensuring the arch is symmetrical. The top should be rounded, while the bottom legs should sit flat on the table. -
Trim the base:
Use your blade to slice the bottom of each leg cleanly. This ensures the holder will stand perfectly straight without wobbling. -
Check thickness:
Make sure your arch is thick enough (about 1 inch) to be stable and to hold the card slot effectively.
Step 3: Creating the Slot
-
Mark the center:
Lightly mark the very top center of your arch where the card will sit. -
Insert the spacer:
Take a piece of thick cardstock or folded scrap cardboard. Press it firmly into the top of the clay arch to create a deep groove. -
Widen gently:
Wiggle the cardstock slightly front-to-back to widen the slot just enough so it isn’t too tight, but keep it snug. -
Clean the edges:
As you press the slot, the clay might bulge out on the sides. Smoothing these bulging edges back down with your thumb is crucial for a clean look. -
Leave the spacer:
If baking, you can leave a piece of oven-safe cardstock in the slot to prevent it from closing up, or remove it carefully if you trust the clay’s stiffness.
Color blocked Arch
Try marbling two different colors of clay together before shaping, or paint the inside curve of the arch a contrasting color after baking for a bold pop.
Step 4: Finishing Touches
-
Texture the surface:
For a more organic, stone-like feel, gently tap the surface with a stiff toothbrush or a ball of aluminum foil. -
Bake the project:
Place the arch on a baking sheet lined with parchment paper. Bake according to your specific clay package instructions (usually 275°F for 15-30 minutes). -
Cool down:
Let the piece cool completely in the oven with the door cracked open. This gradual cooling makes the clay stronger. -
Sand for smoothness:
Once fully cool, use fine-grit sandpaper to buff away any fingerprints or sharp edges on the bottom, giving it a professional finish. -
Final wipe:
Wipe the piece with a damp cloth to remove any sanding dust or residue, revealing your beautiful speckled pattern.
Now you have a stylish spot to display your favorite photos or important reminders


What Really Happens Inside the Kiln
Learn how time and temperature work together inside the kiln to transform clay into durable ceramic.
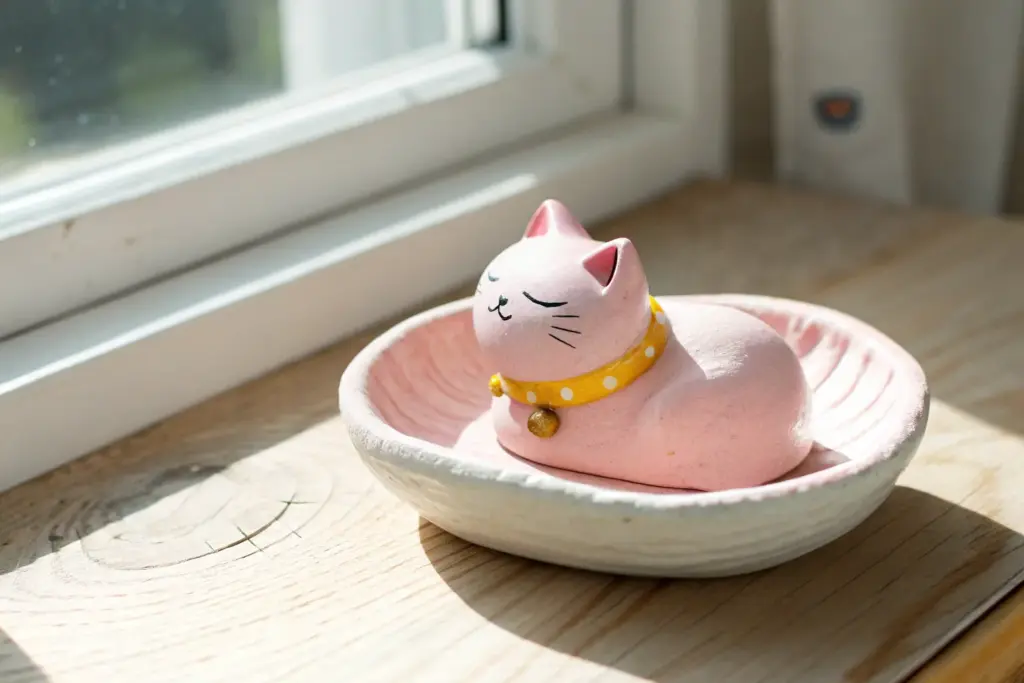
Toothbrush Stand With Personality
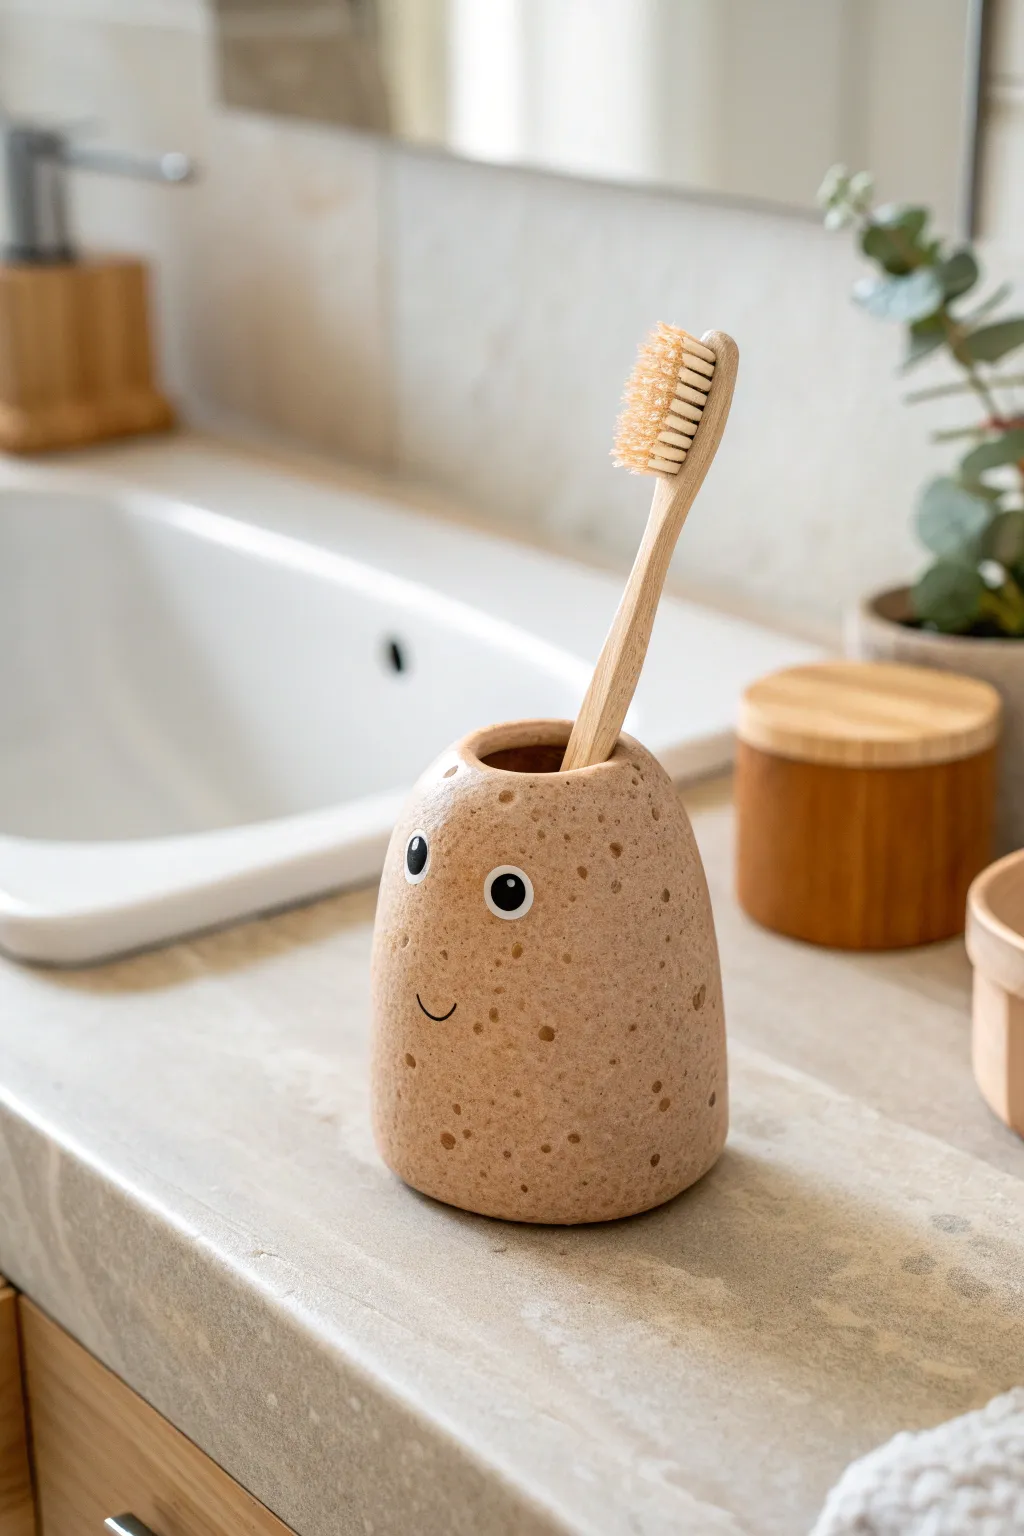
This whimsical little ceramic buddy brings a smile to your morning routine with its organic shape and friendly expression. Modeled to look like a speckled potato, this toothbrush stand is a perfect beginner-friendly project that combines simple hand-building with charming surface decoration.
Step-by-Step Tutorial
Materials
- Speckled buff stoneware clay (or beige polymer clay with faux speckles)
- Pottery wheel (optional, can be hand-built)
- Wooden sculpting tools
- Pin tool or needle tool
- Sponge
- Clear variation glaze (if using ceramic)
- Underglaze in black and white (for the eyes/mouth)
- Fine detail brush
- Kiln (if using stoneware)
- Toothbrush (for sizing)
Step 1: Forming the Body
-
Prepare the Clay:
Start with a ball of speckled stoneware clay roughly the size of a large orange. Wedge it thoroughly to remove air bubbles, ensuring the consistency is uniform. -
Shape the Base:
If hand-building, pinch the ball into a tall, rounded cylinder form. Aim for an organic, slightly asymmetrical shape—potatoes aren’t perfect cylinders, and neither should this be. If throwing on the wheel, pull a cylinder that tapers inward significantly at the top. -
Create the Opening:
Use your thumb or a thick dowel to create a deep vertical hole in the center. I like to keep a toothbrush handy to test fit; the opening needs to be wide enough to hold the handle loosely, around 3/4 of an inch wide. -
Smooth the Edges:
Use a damp sponge to soften the lip of the opening. You want a rounded, comfortable edge rather than a sharp rim. -
Add Texture:
Potatoes have lumps and bumps. Gently press your thumbs into the sides of the clay at random intervals to create subtle indentations, giving it that natural tuber look. -
Refine the Bottom:
Tap the bottom of the holder on your work surface to flatten it slightly so it stands stability. You can also carve a slight concave depression underneath to help it sit flat.
Glaze Smudging?
If your black underglaze lines smear when applying the clear overglaze, try dabbing the clear glaze gently over the face area first with a sponge instead of brushing or dipping immediately.
Step 2: Adding the Personality
-
Dry to Leather Hard:
Let the piece dry until it is leather hard—firm enough to handle without deforming, but still cool to the touch. This makes painting clean lines much easier. -
Sketch the Face:
Lightly trace the position of the eyes and mouth with a pencil. The pencil lead will burn off in the kiln, so don’t worry about marks remaining. -
Paint the Whites:
Using white underglaze, paint two small, slightly oval circles for the eyes. Apply 2-3 coats to ensure opacity, letting each coat dry briefly in between. -
Add the Pupils:
Once the white is dry, use a very fine detail paintbrush and black underglaze to add the pupils. Placing them slightly off-center or looking sideways adds a lot of character. -
Draw the Smile:
With the same fine brush and black underglaze, paint a small, thin curve for the smile. Keep the line weight delicate to match the image. -
Enhance the Speckles:
If your clay body isn’t naturally speckled enough, you can flick iron oxide or a darker brown underglaze onto the surface using an old toothbrush for that potato-skin texture.
Clay Choice Matters
Use a clay body labeled “speckled buff” or “peppered stoneware.” The iron flecks in these clays bloom through the glaze during firing, creating organic skin spots automatically.
Step 3: Firing and Finishing
-
Bisque Fire:
Load your fully dry piece into the kiln for a bisque firing (usually Cone 04). This hardens the clay and prepares it for the final glaze. -
Wipe Down:
After the bisque fire, wipe the piece with a damp sponge to remove any kiln dust ensuring the glaze adheres properly. -
Apply Clear Glaze:
Dip the entire piece into a clear, glossy or satin glaze. A clear glaze is crucial here as it allows the natural speckles of the clay body and your underglaze painting to show through. -
Instruction:
Ensure the bottom is wiped clean of glaze so it doesn’t fuse to the kiln shelf. -
Glaze Fire:
Fire the piece again to the maturation temperature of your specific clay and glaze (typically Cone 5 or 6 for stoneware). This will melt the glaze into a durable, waterproof finish. -
Final Check:
Once cool, check the bottom for any sharp burrs and sand them down if necessary. Your potato friend is now ready for duty.
Your bathroom counter now has a friendly face to greet you every morning and evening
Simple Tea Light Candle Holder
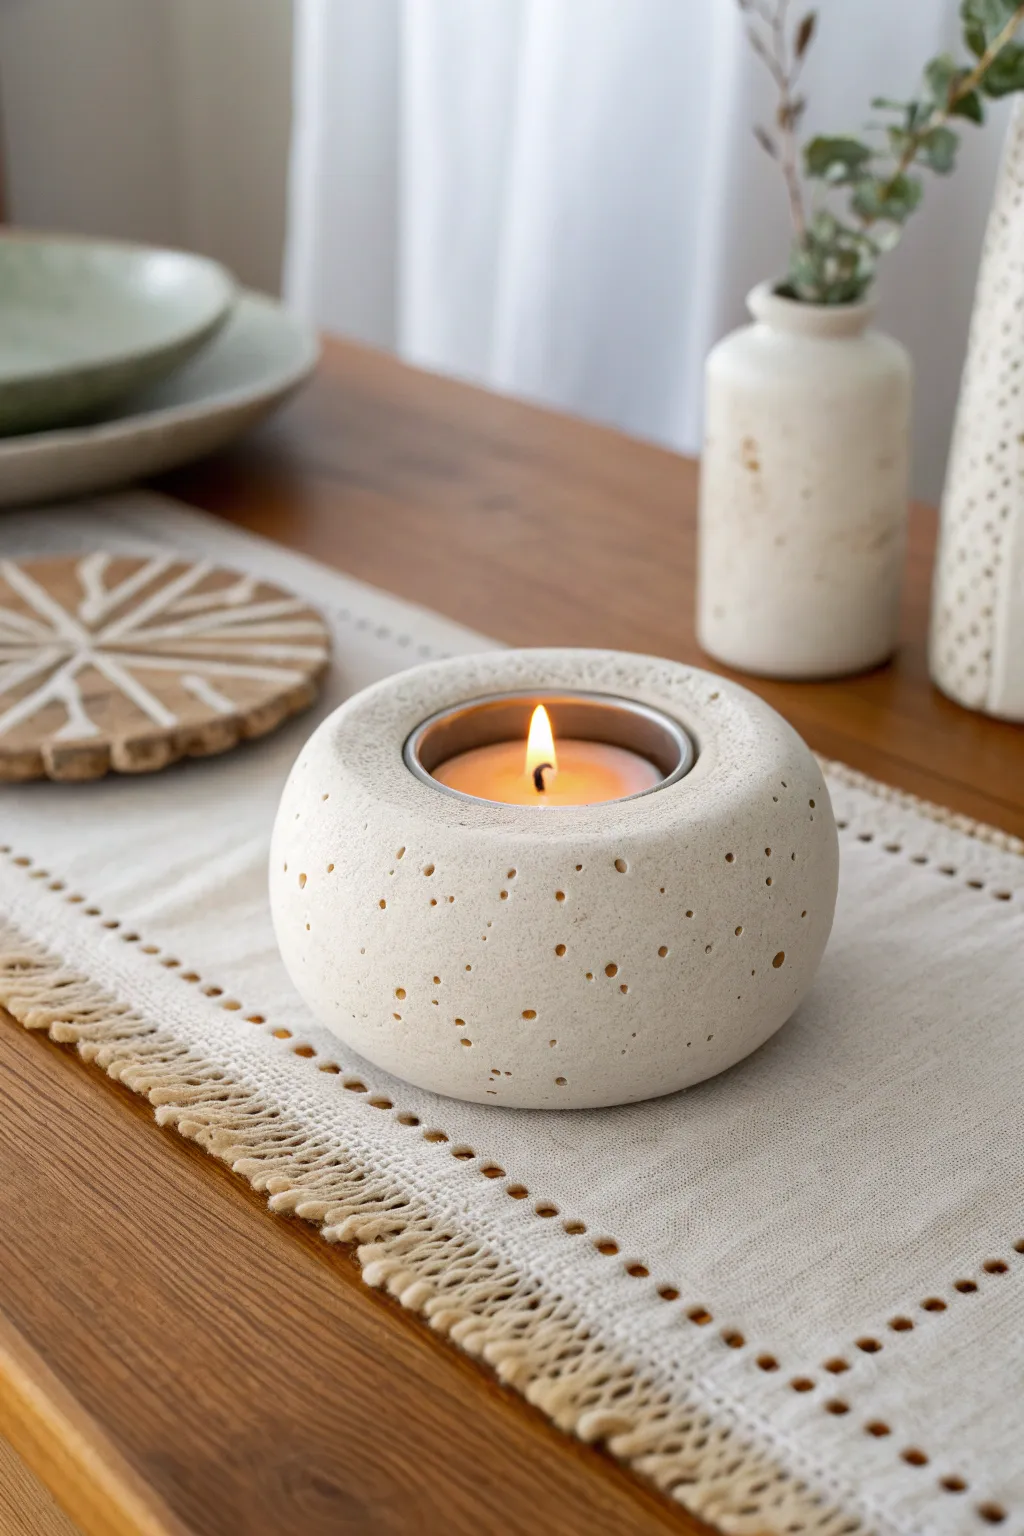
Bring a touch of organic serenity to your table with this deceptively simple clay project. Mimicking the smooth, weathered feel of a river stone, this tea light holder features a charmingly pitted surface that glows warmly when lit.
Step-by-Step Guide
Materials
- White air-dry clay or stoneware clay
- Tea light candle (metal cup type)
- Wooden rolling pin
- Clay needle tool or toothpick
- Sponge
- Small bowl of water
- Fine-grit sandpaper
- Clear matte varnish (optional)
Step 1: Shaping the Base
-
Prepare the clay:
Start with a ball of clay roughly the size of a tennis ball. Knead it in your hands until it is warm and pliable to prevent cracking later. -
Form a sphere:
Roll the clay between your palms or on your work surface to create a smooth, tight sphere. -
Flatten into a pebble:
Gently press the sphere down onto your table to flatten the bottom so it sits stably. Then, use your palm to slightly flatten the top, creating a thick, rounded disk shape that resembles a large river stone. -
Smooth the perimeter:
Run your wet finger around the curved sides to smooth out any distinct edges. You want a continuous, organic curve from the top surface down to the base.
Natural Texture Hack
Instead of a needle tool, gently roll a textured rock or a piece of coral over the damp clay surface to create instant, authentic organic dimples.
Step 2: Creating the Candle Well
-
Mark the opening:
Take your metal tea light cup (without the wax if possible) and center it on top of your clay pebble. Lightly press it down to leave a circular impression as a guide. -
Carve the recess:
Using a loop tool or a small spoon, carefully scoop out the clay from within your marked circle. I find it helpful to test the fit frequently with the actual tea light. -
Refine the depth:
Continue scooping until the top rim of the metal tea light cup sits flush with or just slightly below the surface of the clay stone. -
Smooth the inner rim:
Dip your finger in water and run it along the inner edge of the hole to smooth out any carving marks, ensuring the candle sits snugly but isn’t stuck.
Make it a Set
Create two additional holders in varying sizes—one slightly smaller and one larger—to display as a cohesive, staggered centerpiece trio.
Step 3: Texturing and Finishing
-
Add the speckles:
Take a needle tool or toothpick and begin poking the surface of the clay. Create a random scattering of small holes. -
Vary the texture:
Don’t make the holes uniform. Press the tool in at slightly different angles and depths, and group some holes closer together while leaving other areas sparse. -
Soften the texture:
Once you are happy with the speckling, take a slightly damp sponge and gently wipe over the surface. This softens the sharp edges of the holes, making them look like natural erosion rather than mechanical punctures. -
Final smooth:
Do one last inspection of the overall shape, using wet fingers to perfect the roundness. -
Dry completely:
Let the piece dry for at least 24-48 hours. If using air-dry clay, turn it over halfway through to ensure the bottom dries evenly. -
Sand the surface:
Once bone dry, use fine-grit sandpaper to gently sand the exterior. This removes any lingering fingerprints and gives it that ultra-smooth, stone-like tactile quality. -
Dust off:
Wipe away any clay dust with a dry cloth or soft brush. -
Seal (Optional):
If you want to protect the finish, apply a coat of clear matte varnish. This will keep the natural look while preventing stains from wax drips.
Place your creation on a linen runner and enjoy the peaceful ambiance of your handmade stone candle holder

TRACK YOUR CERAMIC JOURNEY
Capture glaze tests, firing details, and creative progress—all in one simple printable. Make your projects easier to repeat and improve.
Polymer Clay Geometric Earrings
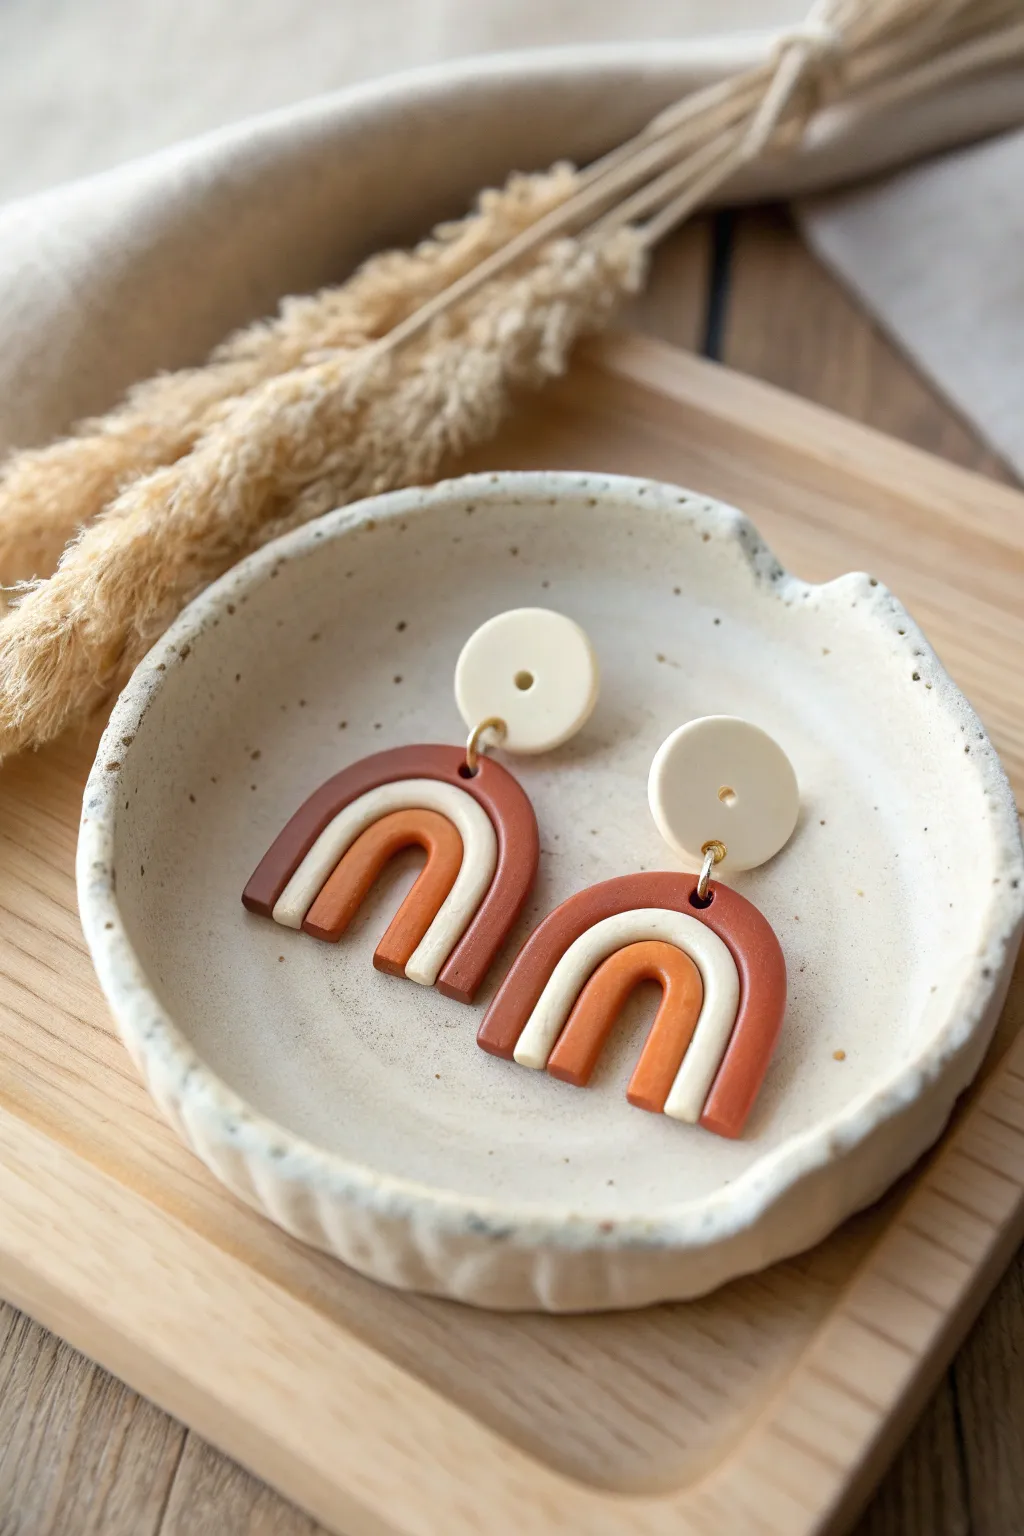
These warm-toned, U-shaped clay earrings mimic the beauty of a desert sunset with their layered terracotta, cream, and burnt orange hues. The simple geometric design paired with a smooth, matte finish creates a sophisticated accessory that is surprisingly lightweight and easy to wear.
Step-by-Step
Materials
- Polymer clay in three colors: Dark Terracotta, Cream, Burnt Orange
- Acrylic roller or pasta machine
- Tissue blade or X-Acto knife
- Small circular clay cutter (approx. 1 cm) for stud tops
- Clay extruder (optional but helpful for uniform ropes)
- Needle tool or toothpick
- Earring posts and backs
- Jump rings (gold)
- Jewelry pliers
- Super glue or liquid clay
- Baking sheet and parchment paper
- Fine grit sandpaper (optional)
Step 1: Creating the Clay Colors
-
Condition the clay:
Start by warming up each of your three clay colors in your hands. Knead them thoroughly until they are soft, pliable, and free of cracks. -
Mix custom shades:
If you don’t have the exact colors shown, mix a little brown into red for the outer arch, and yellow into red for the inner orange arch to achieve those warm, earthy tones.
Step 2: Forming the Arches
-
Roll out the ropes:
Roll each color into a long, even snake or rope. For the most uniform look, I find using a clay extruder works best here, but hand-rolling on a flat surface works too. -
Check thickness:
Aim for each rope to be approximately 4-5mm thick. Ensure all three ropes are the same diameter so the arches nest together perfectly. -
Cut to length:
Cut two segments of the dark terracotta (longest), two segments of cream (medium), and two of burnt orange (shortest). -
Form the inner U:
Take the burnt orange segment and gently bend it into a tight U-shape. Place this on your work surface or a ceramic tile. -
Layer the middle:
Curve the cream rope directly over the orange one, pressing them gently together so they bond without flattening the round profile. -
Add the outer layer:
Finally, wrap the dark terracotta rope over the cream layer to complete the rainbow stack. Repeat this entire process for the second earring. -
Trim the bottoms:
Use your sharp tissue blade to make a clean, straight cut across the bottom of the arches so all three layers end at the same flat line.
Use Liquid Clay
Apply a tiny amount of liquid clay between the rope layers before pressing them together. This acts as a superb glue to keep your arches from separating after baking.
Step 3: Making the Studs
-
Roll a flat slab:
Take some of your remaining cream clay and roll it into a flat sheet, about 3mm thick. -
Cut the circles:
Use your small circular cutter to punch out two circles. These will be the top post section of the earring. -
Smooth the edges:
Gently run your finger around the cut edge of the circles to soften any sharp ridges left by the cutter.
Add Texture
Before baking, gently roll a piece of sandpaper or a toothbrush over the surface of the clay. This creates a stone-like texture that hides fingerprints perfectly.
Step 4: Assembly and Baking
-
Add holes:
Use a needle tool to poke a hole near the top center of the main arch piece (through the terracotta layer) and near the bottom edge of the circular stud. -
Bake the pieces:
Arrange all four pieces on a parchment-lined baking sheet. Bake according to your polymer clay package instructions (usually 275°F/135°C for 15-30 minutes). -
Cool and sand:
Let the pieces cool completely. If there are fingerprints, I like to lightly sand them away with fine-grit sandpaper for a professional matte finish. -
Attach posts:
On the back of the cream circles, glue an earring post using strong super glue or bake-and-bond liquid clay (re-baking if necessary). -
Connect the parts:
Use your jewelry pliers to open a jump ring, thread it through the hole in the arch and the hole in the stud, and close it securely.
Enjoy wearing your handcrafted earthy arches with your favorite outfit
Terrazzo-Style Jewelry Tray
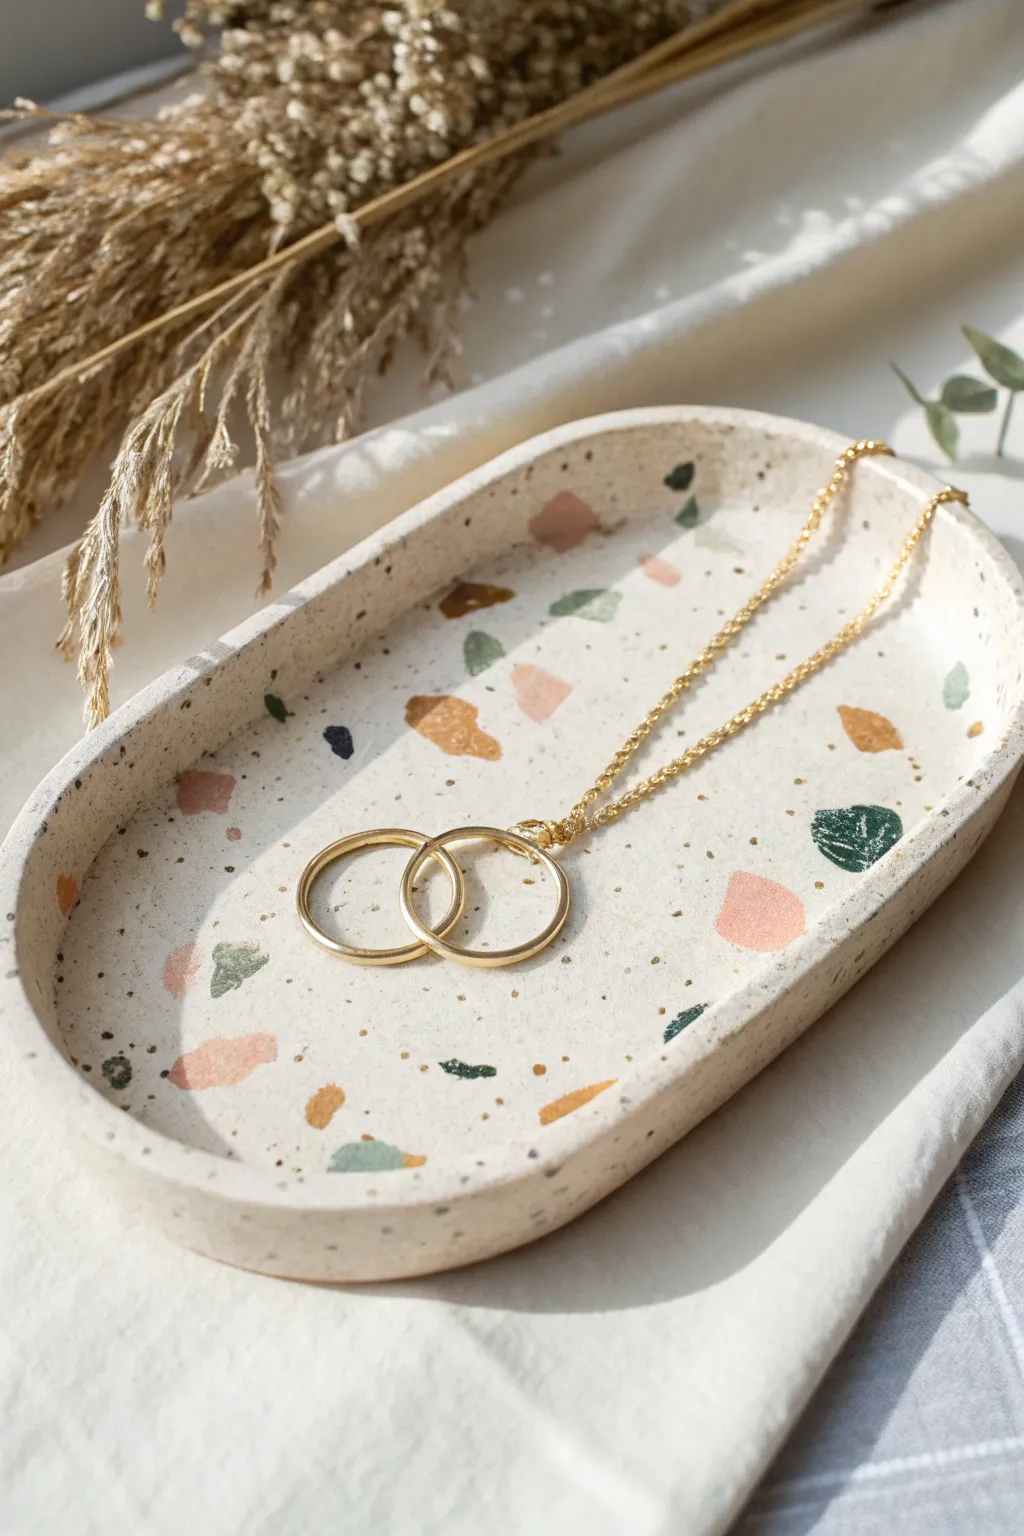
This elegant oval tray captures the timeless beauty of terrazzo stone in a lightweight, modern form. With its creamy base speckled with terracotta, sage, and deep green chips, it’s the perfect resting place for your favorite gold jewelry.
How-To Guide
Materials
- White or cream polymer clay (1 block)
- Small amounts of colored polymer clay (terracotta, sage green, dark forest green, black)
- Acrylic roller or rolling pin
- Oval clay cutter (or a paper template and craft knife)
- Craft knife or tissue blade
- Parchment paper
- Sandpaper (various grits: 400, 600, 1000)
- Gloss or satin polyurethane varnish (optional)
- Soft paintbrush
Step 1: Creating the Terrazzo Chips
-
Prepare the colors:
Start by conditioning your colored clays—terracotta, sage green, dark green, and black—until they are soft and pliable. You only need a very small amount of each for this technique. -
Roll out thin sheets:
Roll each colored piece into a very thin sheet, roughly 1-2mm thick. The thinner they are, the more delicate your final pattern will look. -
Bake the sheets:
Place your thin colored sheets on a baking tray lined with parchment paper. Bake them for about 10–15 minutes at the manufacturer’s recommended temperature. Let them cool completely so they become hard. -
Chop into fragments:
Once cool, use your craft knife or tissue blade to chop the baked sheets into irregular fragments. Aim for a mix of sizes—some tiny specks and some slightly larger geometric chunks—to create an authentic stone look.
Step 2: Forming the Tray Base
-
Condition the base clay:
Take your large block of white or cream clay and condition it thoroughly. It needs to be warm and soft to accept the chips. -
Roll the slab:
Roll the white clay into a thick slab, approximately 5-6mm thick. This will be the main body of your tray. -
Scatter the chips:
Generously sprinkle your chopped baked chips over the surface of the white slab. Don’t be afraid to overlap them slightly or create clusters. -
Embed the pattern:
Use your acrylic roller to firmly press the chips into the white clay. Roll over the surface repeatedly in different directions until the surface is completely smooth and the chips are flush with the base. -
Cut the shape:
Place your oval cutter (or paper template) onto the patterned slab. Press down firmly to cut your tray shape. If using a template, carefully trace around it with a sharp craft knife. -
Create the rim:
To give the tray a raised edge, gently curve the outer perimeter of your oval upwards. You can support the edges with cornstarch or bent cardstock if needed to keep them upright. -
Smooth the edges:
Dip your finger in a little bit of baby oil or water and run it along the cut edge to smooth out any harsh lines or fingerprints.
Clean Cuts Matter
Keep baby wipes nearby to clean your blade and roller between colors. White clay picks up everything, so clean tools ensure a crisp, professional background.
Step 3: Finishing Touches
-
Final bake:
Bake your formed tray according to the package instructions (usually 275°F/130°C for about 30 minutes). I usually tent foil over the top to prevent the white clay from yellowing. -
Cool down:
Allow the tray to cool completely before handling. It will be slightly flexible when warm but hardens as it reaches room temperature. -
Sand for clarity:
This is the secret step. Wet-sand the surface under running water, starting with 400 grit and moving to 1000 grit. This reveals the sharp edges of the chips and removes the hazy film of white clay. -
Buff and clean:
Dry the piece thoroughly with a lint-free cloth. The surface should feel incredibly smooth to the touch. -
Seal:
Applying a thin coat of varnish is optional, but it helps deepen the colors. Brush on a light layer of satin or gloss varnish and let it dry fully.
Add Some Sparkle
Mix small flakes of gold leaf into the background clay before rolling it out for a luxurious, high-end finish that catches the light beautifully.
Now you have a chic, handmade vessel to display your daily treasures
Mini Planter for a Succulent
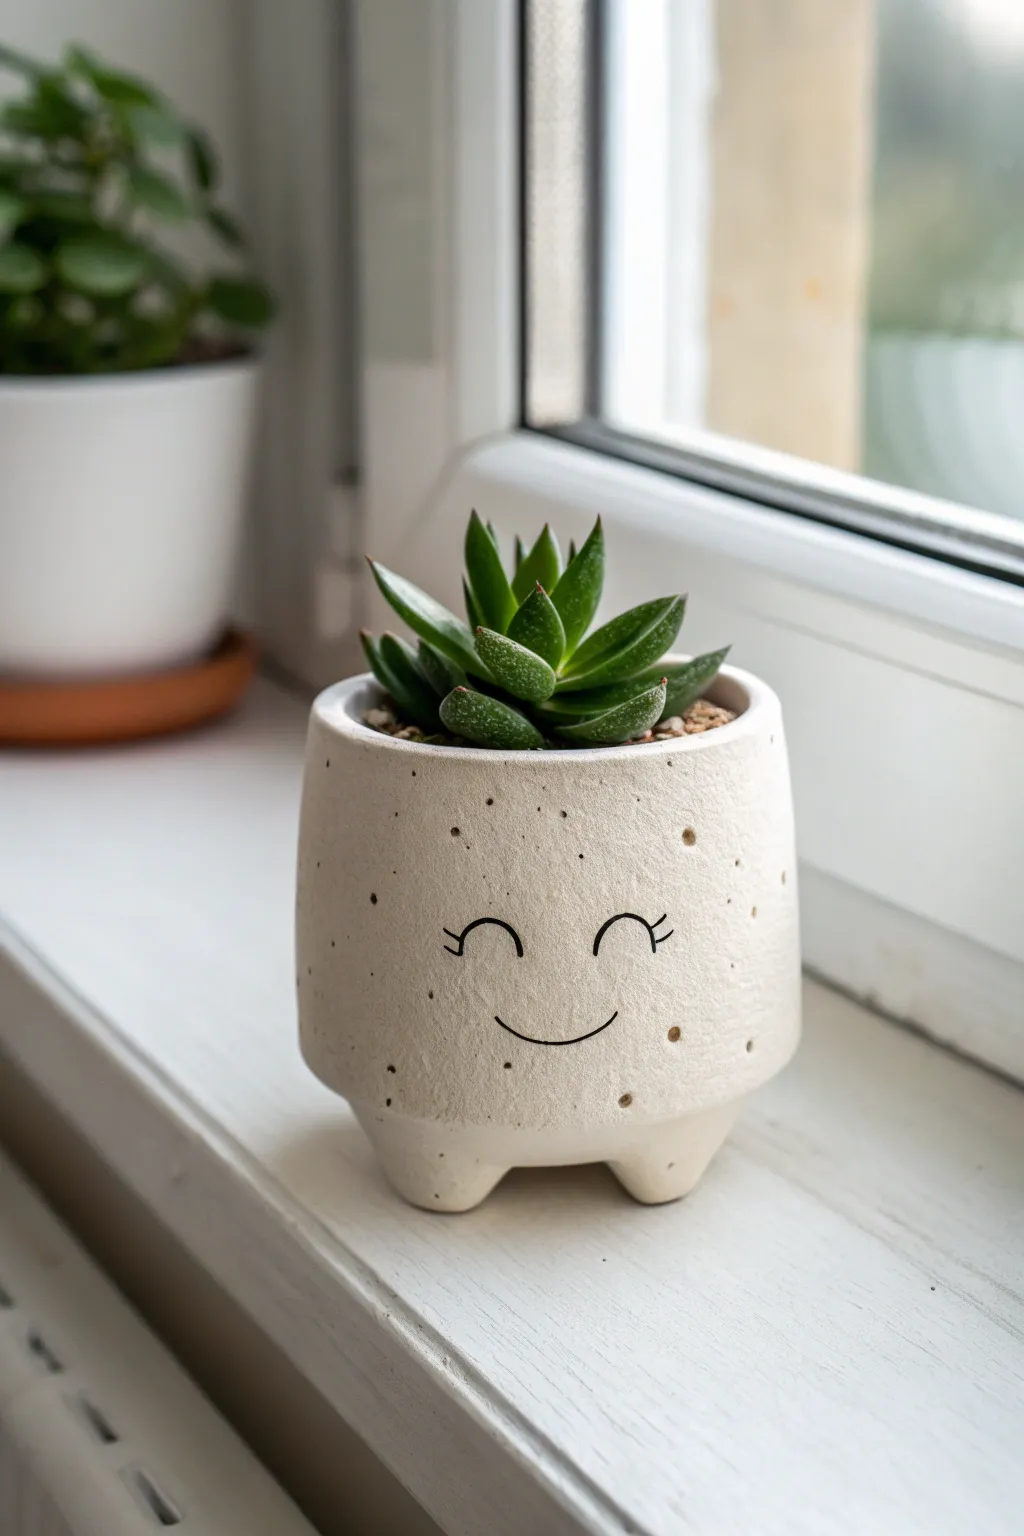
Brighten up your windowsill with this adorable, minimalist mini planter that’s sure to bring a smile to your face. Featuring a naturally speckled clay finish and a sweet, hand-drawn expression, it’s the perfect cozy home for your favorite small succulent.
Step-by-Step Guide
Materials
- White polymer clay or air-dry clay (approx. 200g)
- Speckled clay addition (like ‘Granitex’ or black pepper/sand)
- Small rolling pin
- Circle cookie cutter (approx. 3-4 inches diameter) or a jar lid
- Craft knife
- Slip (clay and water mixture) or liquid clay adhesive
- Smoothing tool or sponge
- Fine-grit sandpaper
- Black waterproof fine-tip marker or acrylic paint pen
- Clear matte varnish or sealant
- Small succulent for planting
Step 1: Preparing and Shaping the Clay
-
Mix the clay:
Start by conditioning your white clay until it is soft and pliable. To achieve the speckled look shown in the photo, kneed in a small amount of specialty granite-effect clay. Alternatively, for a DIY hack, I like to knead in a pinch of coarse black pepper or black sand to create organic-looking spots. -
Roll the base:
Roll out a slab of your speckled clay to about 1/4 inch thickness. Use your circle cutter to punch out the base of the pot. -
Create the walls:
Roll out a long, rectangular strip of clay. This needs to be long enough to wrap around the circumference of your base circle and slightly taller than you want the final pot to be. -
Attach the wall:
Score the edges of your base circle and the bottom edge of your rectangular strip. Apply a little slip or liquid clay adhesive to the scored areas. -
Wrap and seal:
Carefully wrap the strip around the base. Cut off any excess length where the ends meet, creating a butt joint rather than an overlap. -
Blend the seams:
Use your finger or a smoothing tool to blend the vertical seam where the wall ends meet, and the horizontal seam where the wall meets the base. Smooth gently until the joins are invisible. -
Shape the belly:
To get that slightly rounded, chubby look, gently push the walls outward from the inside using your thumb while supporting the outside with your palm. Don’t make the walls too thin.
Step 2: Adding Feet and Details
-
Form the feet:
Roll three small balls of clay, roughly the size of large marbles. Flatten them slightly on the top and bottom to create sturdy little legs. -
Attach the feet:
Flip your pot upside down. Score and slip the bottom of the pot and the tops of the three feet. Arrange them in a triangle formation for stability and press them firmly into place. -
Blend the legs:
Smooth the clay from the legs onto the base of the pot so they look integrated rather than just stuck on. This is crucial for long-term durability. -
Refine the rim:
Turn the pot right-side up. Check the top rim; if it’s uneven, you can slice it carefully with a craft knife or just smooth it with a damp sponge for a softer, organic edge. -
Add texture:
If your specks aren’t showing enough, you can take a stiff paintbrush or toothbrush and gently stipple the surface to reveal more texture.
Clean Lines Pro Tip
Before drawing the face, pencil the design lightly onto the clay. This lets you erase mistakes and ensures the smile is perfectly centered before committing to ink.
Step 3: Finishing Touches
-
Allow to dry or bake:
Follow the instructions for your specific clay type. If using air-dry clay, let it sit for 24-48 hours. If using polymer clay, bake according to the package directions (usually around 275°F/135°C). -
Sand for smoothness:
Once fully cured or dry, use fine-grit sandpaper to gently smooth out any fingerprints or rough bumps, paying special attention to the rim. -
Draw the face:
Find the smoothest side of your pot to be the front. Using a fine-tip black marker or paint pen, draw a wide ‘U’ shape for the smile. Add two smaller curved arches above for the happy, closed eyes. -
Add eyelashes:
Carefully add two tiny ticks to the outer corner of each eye arch to create cute eyelashes. -
Seal the piece:
Apply a coat of matte varnish or sealant to protect the clay and the drawing. This is especially important for the inside if you plan to put soil directly in, though using a nursery pot liner is safer for the clay.
Make It Blush
Before sealing, dry-brush a tiny amount of pink pastel powder or real blush makeup onto the cheeks for a rosy, kawaii effect alongside the smile.
Pop your succulent inside and find a sunny spot for your cheerful new friend to live
Clay Bead Wall Hanging
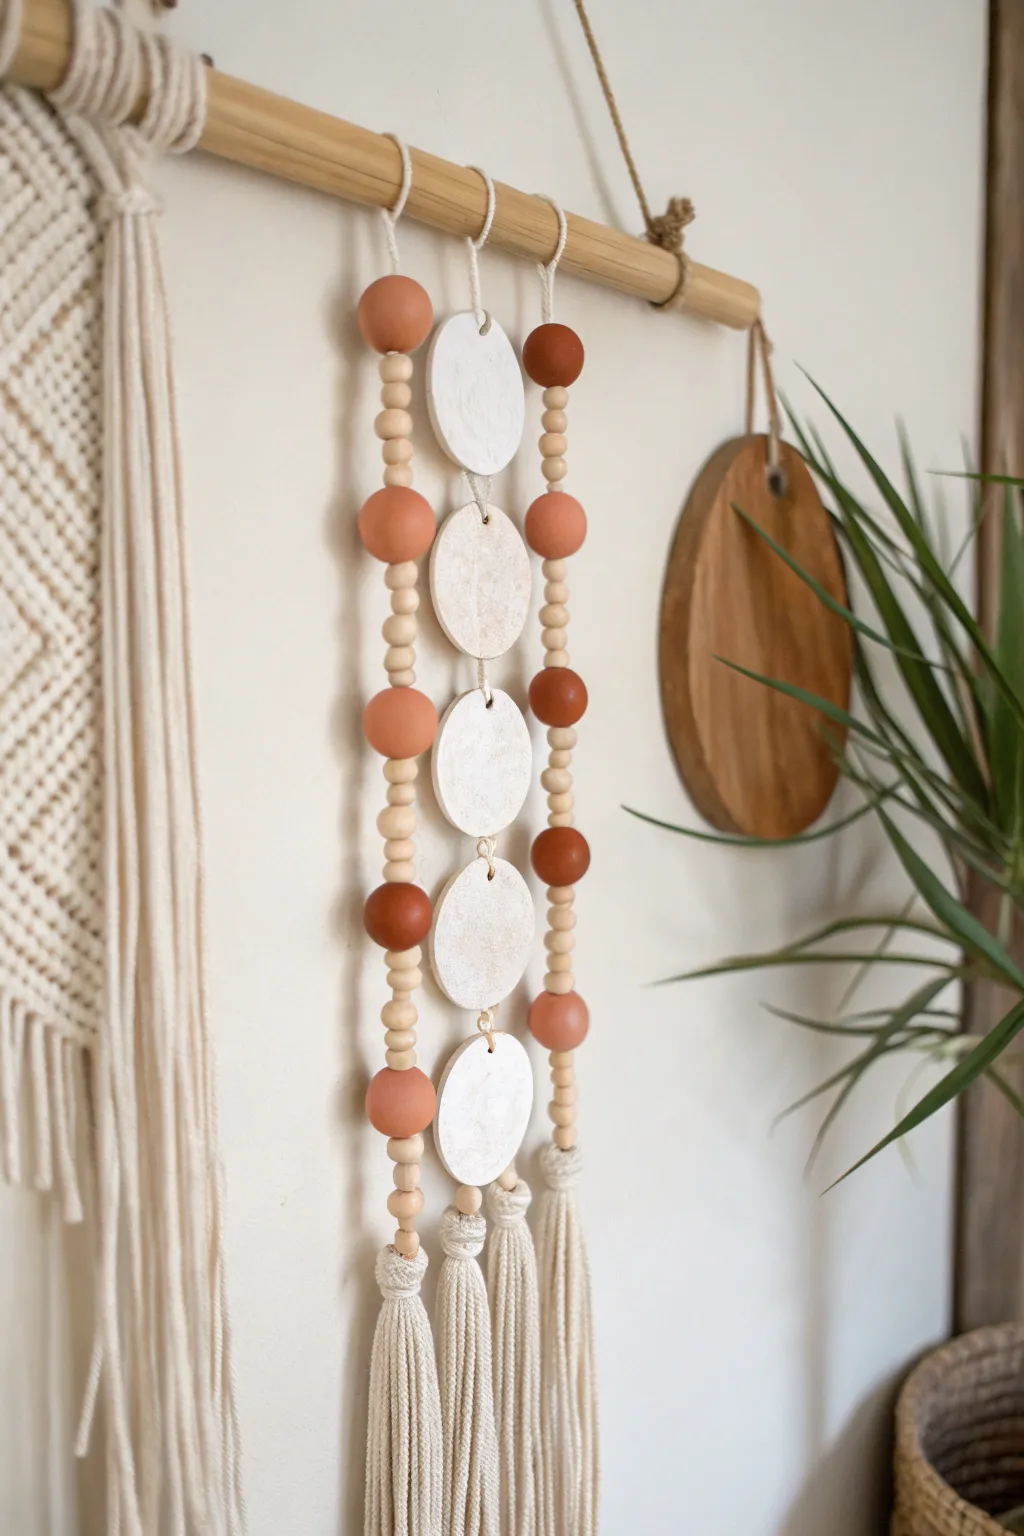
Bring earthy textures and warm tones to your wall with this striking mixed-media hanging. Combining air-dry clay discs, hand-rolled terracotta beads, and macramé tassels creates a balanced piece that feels both modern and organic.
Step-by-Step Tutorial
Materials
- Air-dry clay (white and terracotta/terracotta-colored)
- Wooden dowel (approx. 12-16 inches)
- Natural cotton macramé cord (3mm or 4mm)
- Small wooden spacer beads (unfinished, approx. 8-10mm)
- Rolling pin
- Circle cookie cutter or glass (approx. 2.5 inches)
- Straw or skewer (for poking holes)
- Sandpaper (fine grit)
- Scissors
Step 1: Creating the Clay Elements
-
Roll out the white clay:
Begin with your white air-dry clay. Roll it out on a smooth surface until it is about 1/4 inch thick. Aim for an even thickness so all your discs look uniform. -
Cut the discs:
Using a circle cutter or the rim of a small glass, cut out five distinct circles. Smooth the edges gently with a wet finger to remove any jagged bits. -
Pierce the discs:
With a skewer or straw, poke two holes in each white disc—one at the very top and one at the very bottom. Make sure the holes are large enough for your cord to pass through easily. -
Form the terracotta beads:
Take your terracotta-colored clay and break off chunks to roll into spheres. You will need about eight to ten large beads (roughly 1 inch in diameter). -
Pierce the beads:
Carefully push your skewer through the center of each sphere to create a bead channel. Rotate the skewer slightly as you push to prevent the bead from squishing out of shape. -
Dry and sand:
Let all clay pieces dry completely according to package instructions, which usually takes 24-48 hours. Once dry, use fine-grit sandpaper to smooth out any rough spots or fingerprints.
Smooth Operator
To get perfectly smooth clay discs without fingerprints, gently roll over the surface with a slightly damp sponge right after cutting them out.
Step 2: Assembling the Strands
-
Cut the cords:
Cut three long lengths of macramé cord. You want them long enough to fold over the dowel and hang down comfortably, plus extra for knots and tassels. About 4-5 feet per cord is a safe bet. -
Attach first cord to dowel:
For the left strand, attach a cord to the wooden dowel using a lark’s head knot. This loop will serve as the anchor for your beading. -
Start the left pattern:
Thread a large terracotta bead onto the cord, followed by a stack of about six small wooden spacer beads. I find wrapping a bit of tape around the cord end acts like a needle to make this easier. -
Add more beads:
Continue the pattern: add another large terracotta bead, another stack of small wooden spacers, a third terracotta bead, and finish with a final stack of wooden spacers. -
Create the center strand:
Attach the second cord to the middle of the dowel. Thread two small wooden beads, then thread your cord through the top hole of a white clay disc. -
Link the discs:
Tie a small knot or add a hidden bead behind the disc if needed to secure it, then continue adding the remaining white discs in a vertical chain, connecting them with short segments of cord. -
Finish the right strand:
Attach the third cord to the right side of the dowel. Create a pattern similar to the left but alternating: start with a small wooden spacer stack, a large terracotta bead, more spacers, another terracotta bead, and end with spacers and a terracotta bead.
Texture Play
Before the white discs dry, press a piece of lace or a textured fabric into the wet clay to imprint a subtle, detailed pattern on the surface.
Step 3: Finishing Touches
-
Tie off the strands:
Once your beading patterns are complete, tie a sturdy overhand knot at the bottom of each strand to keep everything in place. -
Make the tassels:
Cut several 10-inch pieces of cord. Group them together and fold them in half over the bottom knot of one of your beaded strands. -
Secure the tassels:
Using a separate piece of cord, wrap a gathering knot around the neck of the tassel bundle to secure it tightly beneath the beads. -
Trim and comb:
Repeat the tassel process for all three strands. Comb out the fringe with a fine-tooth comb and trim the ends straight across for a polished look. -
Add the hanger:
Tie a length of cord to both ends of the wooden dowel to create a hanger for your artwork.
Now step back and admire how the warm clay tones perfectly complement the natural wood textures on your wall