If you’ve been daydreaming about making clay at home, the good news is you don’t need a huge space to create a studio that actually works. I’ve pulled together my favorite home pottery studio ideas that keep things practical, cleanable, and still totally inspiring to walk into.
Plan Simple Studio Zones
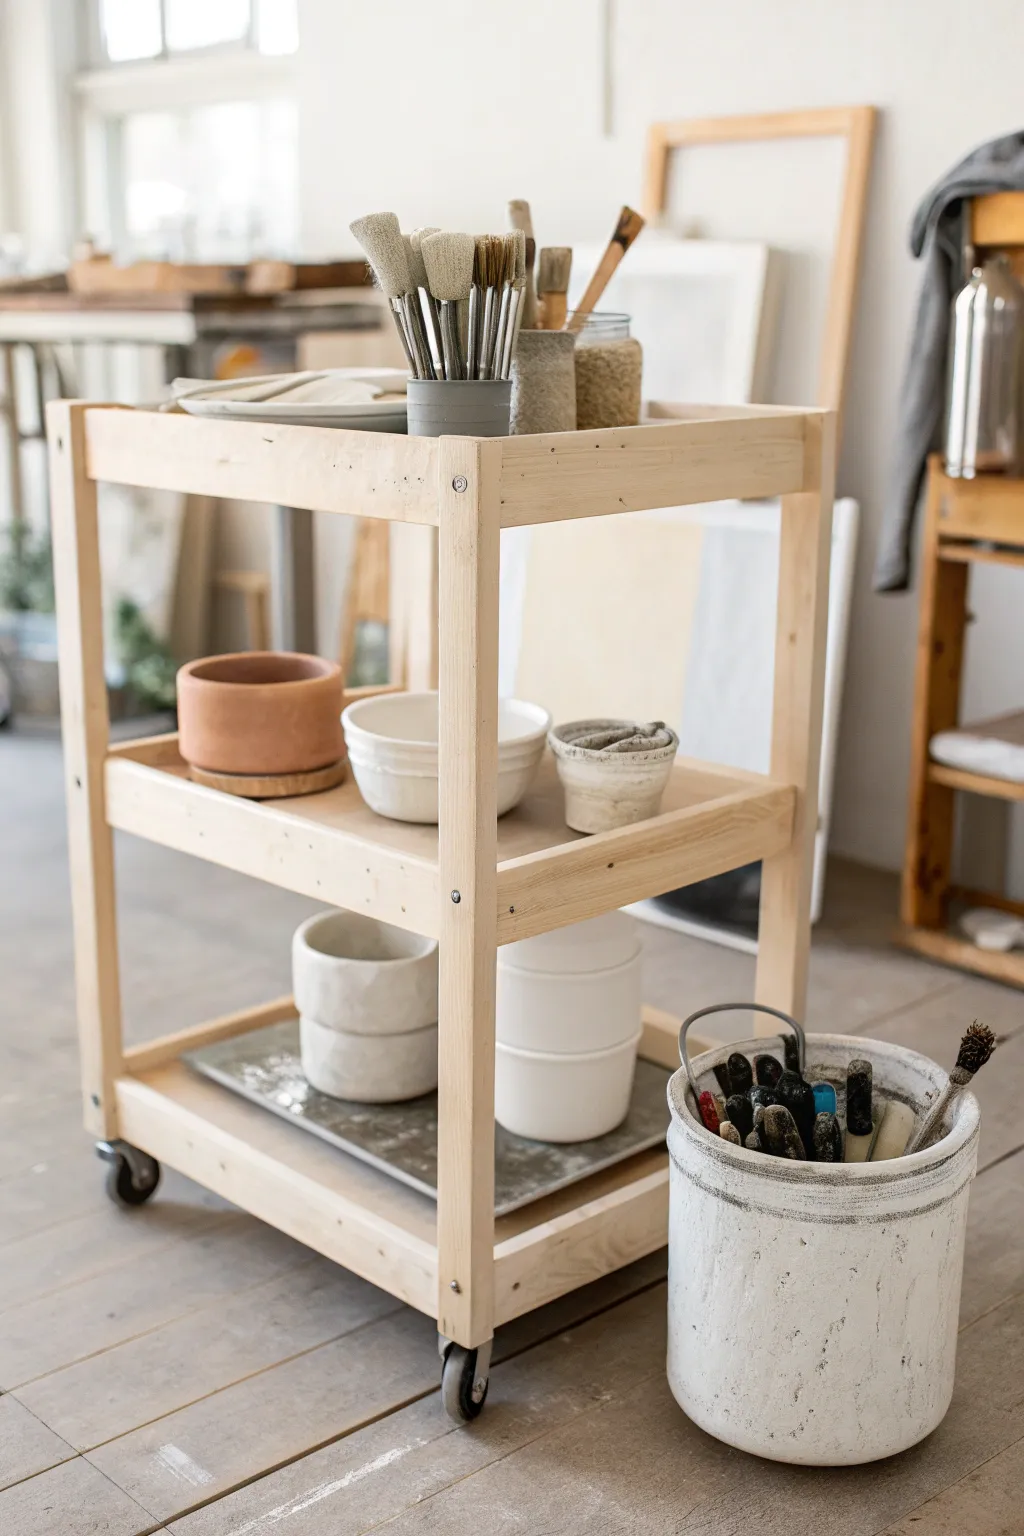
Keep your pottery zone adaptable and organized with this simple yet sturdy three-tier rolling cart. Its raw wood finish brings a natural, airy aesthetic to your studio while offering essential mobile storage for drying pots and tools.
Step-by-Step Tutorial
Materials
- Four 1×2-inch lumber boards (36 inches long) for legs
- Six 1×4-inch lumber boards (24 inches long) for side frames
- Six 1×4-inch lumber boards (18 inches long) for end frames
- Three pre-cut plywood sheets (18×24 inches) for shelves
- Wood glue
- 1.5-inch wood screws
- Drill and drill bits
- Four caster wheels (two locking)
- Sandpaper (120 and 220 grit)
- Measuring tape and pencil
- Clamps
Step 1: Building the Frame Structure
-
Prep the legs:
Begin by sanding your four 36-inch leg pieces smooth. Lay them out side-by-side to mark the positions for your three shelf tiers. A good standard spacing is at 4 inches, 18 inches, and 32 inches from the bottom. -
Construct side frames:
Take two legs and three of the 18-inch end frame boards. Lay them flat on your work surface to form a ladder shape, aligning the boards with your marked lines. -
Initial assembly:
Apply a dab of wood glue to the ends of the 18-inch boards before positioning them between the legs. This glue layer is crucial for long-term stability against wobbling. -
Secure the sides:
Drill pilot holes through the outside of the legs into the 18-inch boards to prevent splitting. Secure each joint with two wood screws. Repeat this entire process to build the second ladder-like side frame. -
Connect the sides:
Stand your two completed side frames upright. Ideally, ask a friend to hold them or clamp them lightly to a workbench. -
Attach long rails:
Position the 24-inch side frame boards between the two ladder structures, aligning them with the existing cross-braces to create a rectangular box frame at each level. -
Finalize the skeleton:
Drill pilot holes and screw through the legs into these longer boards, just as you did before. Ensure the corners are square before driving the screws home.
Clean Edges
Use edge-banding tape on the exposed plywood edges of your shelves before installation. It irons on easily and makes the cart look much more professional.
Step 2: Adding Shelves and Mobility
-
Insert bottom shelf:
Slide your first plywood sheet onto the bottom supports. It should fit snugly inside the frame edges. -
Secure the plywood:
Screw the plywood down into the frame rails from the top, placing a screw every 6-8 inches along the perimeter. Countersink these slightly so they don’t snag your pottery tools later. -
Middle and top shelves:
Repeat the process for the middle and top tiers. I find inserting the middle shelf can be tricky, so angling it in carefully helps avoid scratching the legs. -
Flip and prep:
Carefully turn the entire cart upside down to access the bottom of the legs. -
Mark wheel placement:
Position your caster wheels in the center of each leg bottom. Mark the screw holes with a pencil. -
Install casters:
Drill small pilot holes for the caster screws. Securely attach all four wheels, ensuring the locking mechanisms are accessible on the front pair. -
Test the roll:
Flip the cart back onto its wheels. push it gently across your floor to check for any wobble or unevenness. -
Final sanding:
Give the entire cart a final pass with 220-grit sandpaper, paying special attention to the top corners and screw holes to remove any sharp splinters. -
Optional sealing:
Since this is for a pottery studio, consider applying a clear matte polyurethane or wax to protect the raw wood from clay dust and water splashes.
Wobbly Cart?
If the cart rocks on a flat floor, add thin washers between the wood and the caster plate on the shortest leg to level it out perfectly.
Now you have a dedicated, mobile home for your drying greenware and favorite tools that moves wherever inspiration strikes


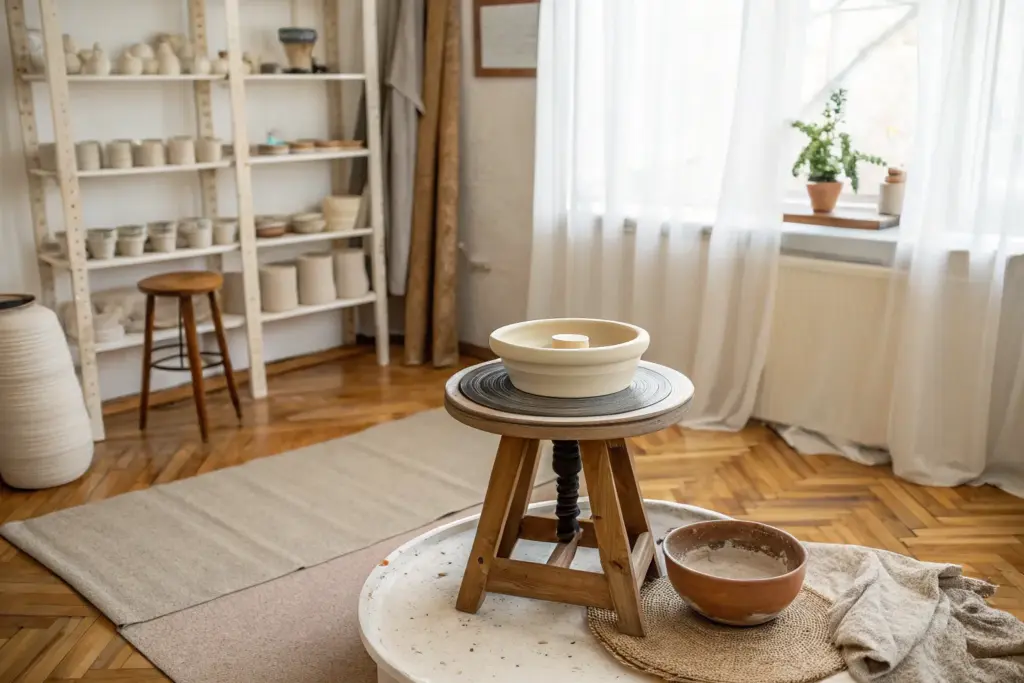
Place the Wheel by Natural Light
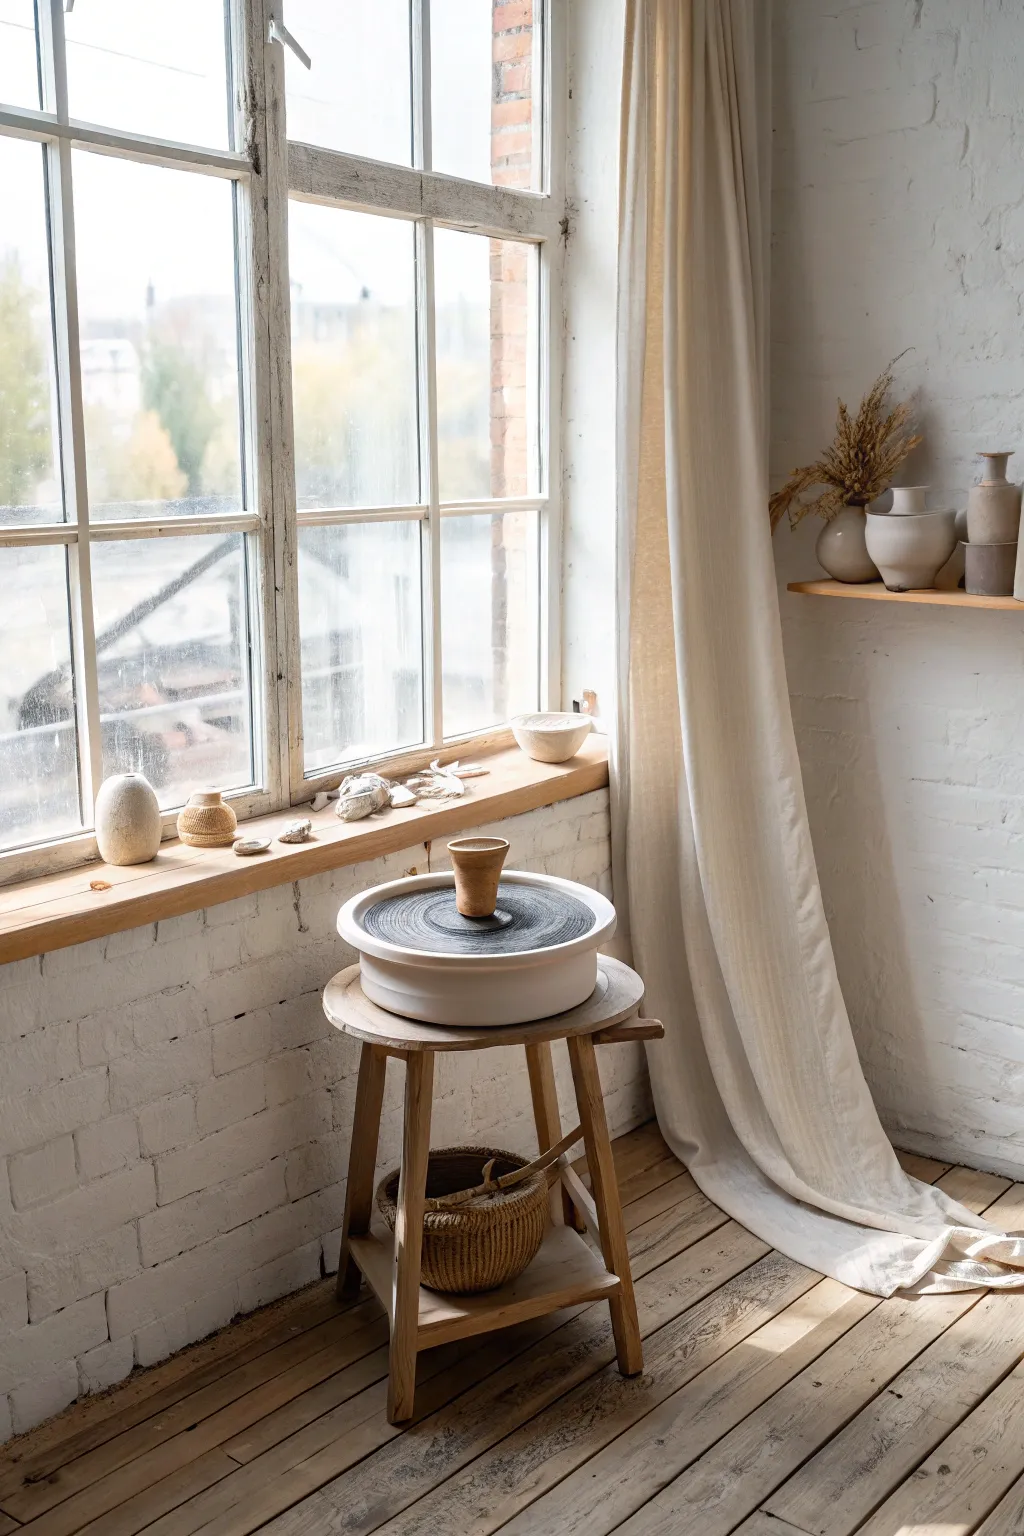
Create a serene and inspiring workspace by positioning your pottery wheel directly in front of a large window to maximize natural light. This setup not only provides excellent visibility for detailed work but also connects your creative process with the calming rhythms of the outside world.
Step-by-Step Guide
Materials
- Pottery wheel (electric or kick wheel)
- Sturdy wooden stool or small table
- Natural wood shelving or window sill
- Ceramic vases and pots for decoration
- Dried flowers or grasses
- Woven basket for storage
- Clay tools (sponges, ribs, wire cutter)
- Throwing bat
- Floor protection (optional)
- Sheer linen curtains
Step 1: Preparing the Space
-
Assess the Lighting:
Choose a corner of your room that features a large window, ideally north-facing for consistent, soft light throughout the day, or east-facing for bright morning sun. -
Clear and Clean:
Remove any existing furniture or clutter from the area. Sweep the wooden floor thoroughly to ensure a level surface for your equipment. -
Install Window Curtains:
Hang long, neutral-colored linen curtains. These will diffuse harsh sunlight without blocking it completely, creating a soft glow that eliminates harsh shadows on your work.
Use Mirrors
Prop a small mirror against the window frame. This lets you see the profile of your pot from the other side without leaning over the wheel, saving your back.
Step 2: Positioning the Core Equipment
-
Place the Stool Base:
Position a sturdy wooden stool or low table directly in front of the window. Ensure it is stable and won’t wobble during throwing. I like to leave about two feet of clearance from the window glass. -
Set Up the Wheel:
Place your portable pottery wheel on top of the stool or table. Ensure the height is comfortable for your seated throwing position; your elbows should be able to rest near your hips. -
Orient the Bat:
Secure a throwing bat onto the wheel head. In this setup, a black or dark-colored bat creates a striking visual contrast against white clay, helping you see the profile of your pot more clearly. -
Add Under-Table Storage:
Utilize the lower shelf of your stool or table by placing a woven basket underneath. This is perfect for storing bags of clay, keeping them accessible but out of the way.
Step 3: Styling and Functionality
-
Utilize the Window Sill:
Treat the deep window sill as a functional display area. Arrange a collection of small ceramic vessels, sea stones, or driftwood along the ledge. -
Create a Drying Zone:
The window ledge also serves as a perfect spot for drying greenware. The gentle warmth of the sun and air circulation near the window will help pieces dry evenly. -
Install a Side Shelf:
If space allows, mount a simple floating wooden shelf on the adjacent wall. This keeps finished pieces safe and off the floor. -
Decorate with Ceramics:
Populate the shelf with finished vases in neutral tones—whites, creams, and greys—to maintain a cohesive, calming aesthetic. -
Add Natural Textures:
Place a ceramic vase filled with dried grasses or wheat on the shelf. The organic textures complement the raw clay and wood, enhancing the studio’s earthy vibe.
Add a Water Station
Keep a large ceramic bowl or bucket of water on the floor nearby for easy cleanup and wheel lubrication, styling it to match your studio pottery.
Step 4: Final Touches
-
Arrange Tools:
Keep your most-used tools within arm’s reach on the window sill or a small side tray. This minimizes movement and keeps your focus on the wheel. -
Check the View:
Sit at the wheel and look out. Ensure your line of sight is clear so you can rest your eyes on the landscape periodically while throwing. -
Test the Light:
Place a ball of clay or a small pot on the wheel head to test how the light hits it. Adjust the curtains or wheel position slightly to minimize glare.
Now you have a tranquil, light-filled sanctuary ready for hours of creative throwing


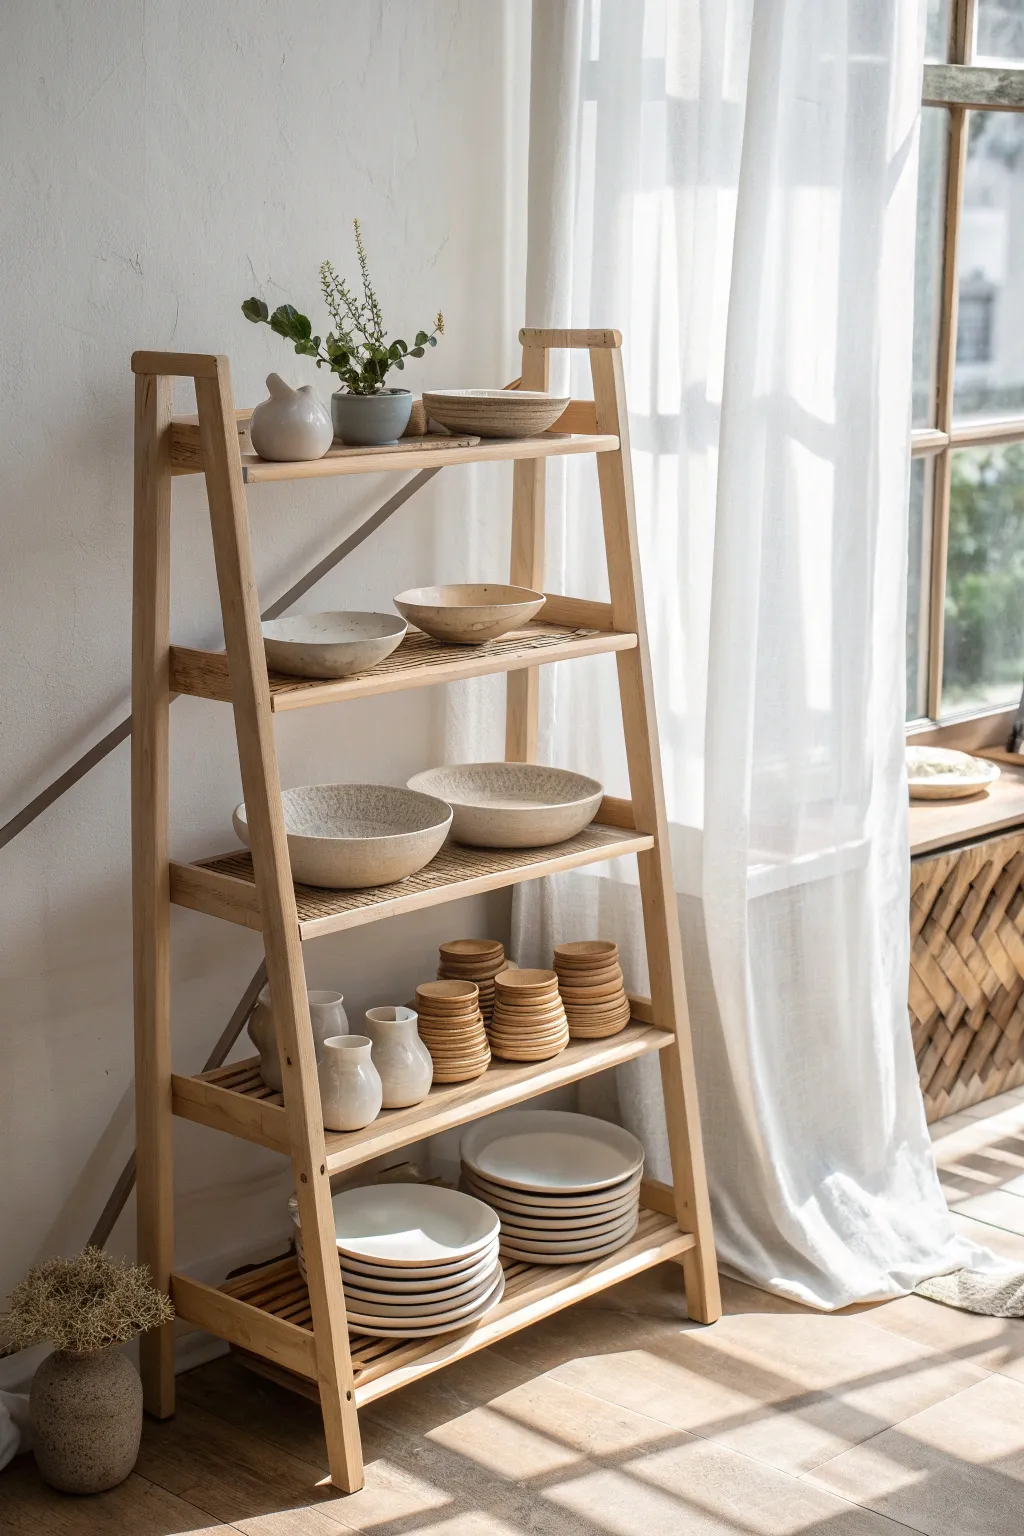
Go Big on Vertical Open Shelving

Transform your pottery studio or dining space with this stunning, architectural shelving unit that turns storage into a display feature. Crafted from solid oak with a clean, open structure, these towering shelves provide ample room for your entire wheel-thrown collection while maintaining an airy, modern aesthetic.
Step-by-Step
Materials
- Solid oak boards (2×10 lumber for verticals, 1×10 for shelves)
- Pocket hole screws (1.5 inch)
- Wood glue
- Clear matte polyurethane finish
- Orbital sander with 120, 180, and 220 grit discs
- Table saw or circular saw
- Pocket hole jig
- Clamps (long bar clamps recommended)
- Drill and impact driver
- Wall anchors or L-brackets for safety
- Measuring tape and square
Step 1: Planning and Cutting
-
Measure your space:
Begin by measuring the full height of your room. Subtract about 1 inch from the total ceiling height to allow room to tilt the unit up during installation without scraping the ceiling. -
Cut vertical supports:
Rip your 2×10 oak lumber into strips for the vertical uprights. The image shows sturdy supports, roughly 1.5 to 2 inches square. Cut four of these long posts for the two main end units, plus two for the central divider. -
Prepare shelf boards:
Cut your 1×10 oak boards to length for the horizontal shelves. Based on the image, you’ll need two distinct lengths: longer ones for the wider left section and slightly shorter ones for the narrower right section. -
Create support cleats:
Instead of visible brackets, this unit relies on subtle cleats or internal joinery. Cut narrow strips of oak (approx. 1×1 inch) to act as cleats underneath each shelf if you prefer extra strength, or prepare for pocket joinery. -
Sand everything flat:
Before assembly, I always sand all individual pieces first. Start with 120 grit to remove saw marks, move to 180, and finish with 220 for a furniture-grade smoothness.
Clean Joinery Tip
For invisible joinery without pocket holes, use a biscuit joiner or dowel jig. It takes longer but leaves the wood surface completely uninterrupted.
Step 2: Assembly and Structure
-
Drill pocket holes:
If using pocket hole joinery for a clean look, drill holes on the underside of each shelf board at both ends. This hides the screws from view, especially on lower shelves. -
Mark shelf spacing:
Lay your vertical posts side-by-side on a large flat floor. Mark the exact height for every shelf, ensuring they are perfectly aligned across all three uprights. The image shows varied spacing, with larger gaps at the bottom for big bowls. -
Assemble the outer ladders:
Build the unit in ‘ladder’ sections. Attach the shelves to the far-left upright first using wood glue and pocket screws. Use clamps to hold the shelf square while driving the screws. -
Attach the center divider:
Attach the other end of the left-side shelves to the central vertical post. This completes the first, wider shelving tower. -
Build the second tower:
Repeat the process for the narrower right-hand section, attaching shelves between the remaining vertical post and the now-central post assembly. -
Check for square:
Measure diagonally from corner to corner on your assembled frames. If the measurements match, your unit is square. Adjust slightly with clamps if needed while the glue is still wet.
Level Up: Lighting
Router a small channel into the underside of the shelves to hide LED strip lights. This adds a warm glow that highlights the glaze on your pottery collection.
Step 3: Finishing and Installation
-
Apply the finish:
Wipe away all dust with a tack cloth. Apply a coat of clear matte polyurethane to seal the wood without darkening it too much. The matte finish complements the earthy pottery tones perfectly. -
Sand between coats:
Once the first coat is dry, lightly hand-sand with 320-grit sandpaper to knock down any raised grain. Apply two more coats for durability, especially since rough pottery bottoms can scratch soft finishes. -
Position the unit:
With help, carefully lift the shelving unit upright. If you built it in sections, move them into place against the wall. -
Anchor to the wall:
This is a tall, heavy unit. It is critical to anchor the top of the vertical posts to the wall studs using L-brackets or heavy-duty furniture straps to prevent tipping. -
Fill with pottery:
Arrange your ceramics by weight and visual balance. Place heavy stacks of plates and large mixing bowls on the lower shelves, and reserve the delicate upper shelves for lighter cups and decorative vases.
Enjoy the organized beauty of your new studio wall, perfect for keeping your creations safe and visible


Layer Bright and Cozy Lighting
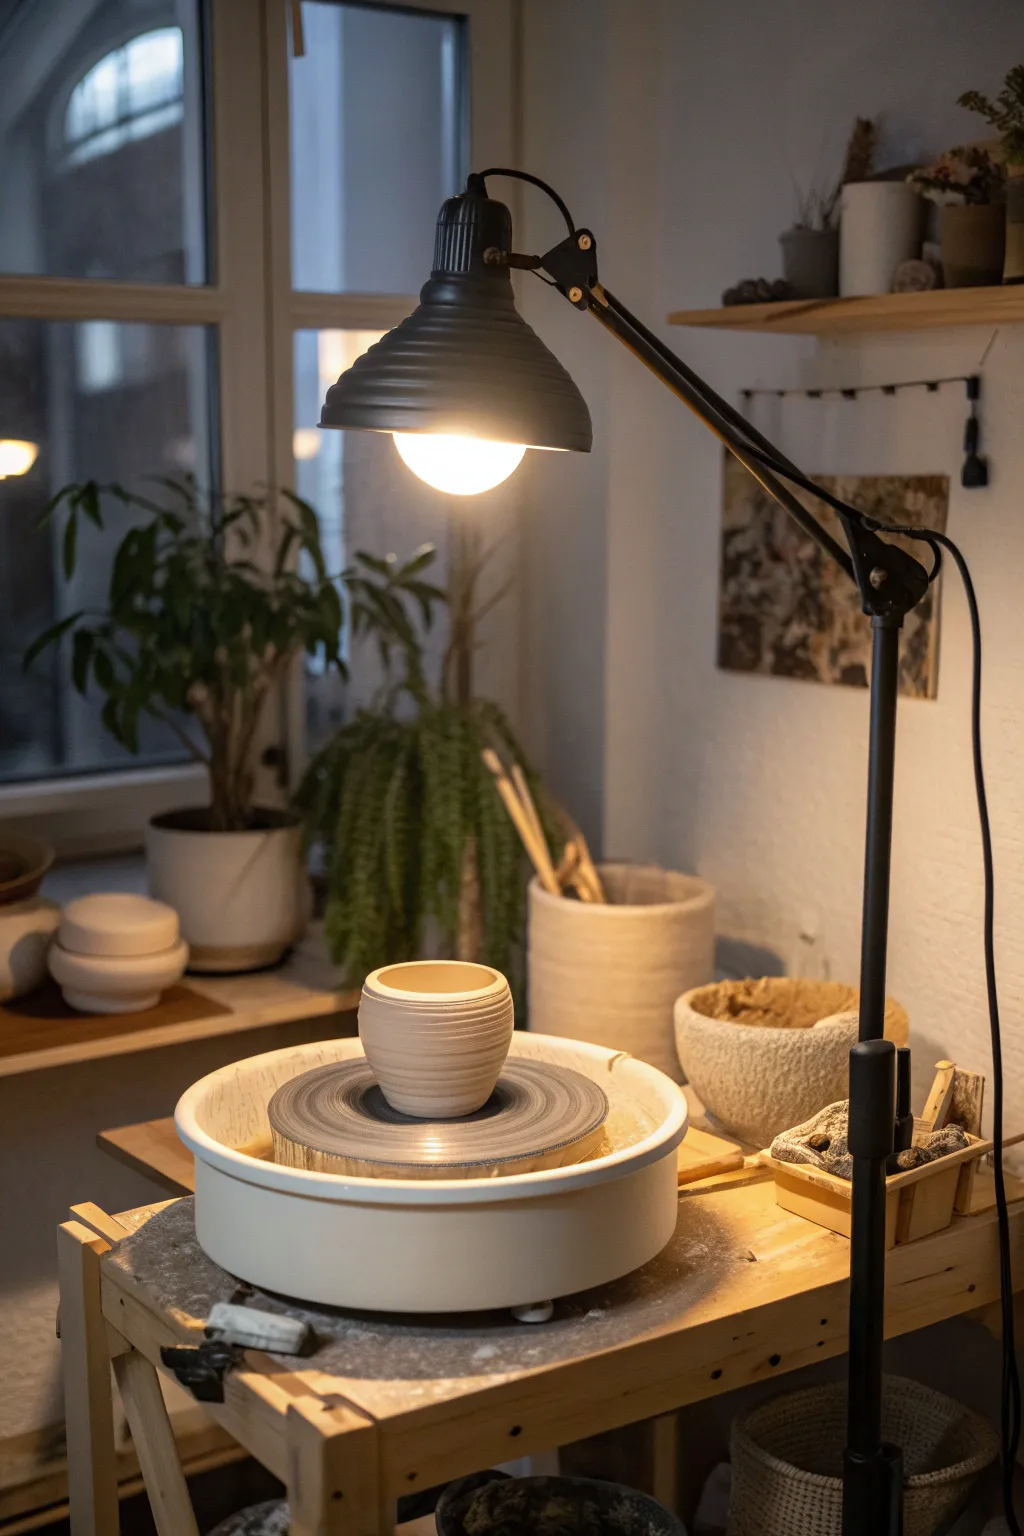
This project centers on creating a small, delicately ribbed vessel using a pottery wheel, perfect for a cozy home studio setup. The finished piece features a subtle texture and a classic, rounded form that catches light beautifully.
Detailed Instructions
Materials
- Stoneware or porcelain throwing clay (approx. 1-1.5 lbs)
- Pottery wheel
- Bucket of water
- Sponge
- Wire cutter
- Needle tool
- Wooden or metal rib tool (serrated or smooth depending on desired finish)
- Wooden throwing stick or trimming tool
- Bat (to attach to wheel head)
Step 1: Preparation & Centering
-
Wedge the clay:
Begin by thoroughly wedging your clay to remove any air bubbles. Form it into a smooth, round ball roughly the size of a grapefruit. -
Attach to wheel:
Throw the clay ball firmly onto the center of a clean, dry bat attached to your wheel head. Pat it into a cone shape to ensure it’s secure. -
Start the wheel:
Get your wheel spinning at a medium-fast speed. Wet your hands and the clay generously with water from your bucket. -
Cone up:
Apply pressure with both palms to squeeze the clay upward into a cone shape. This helps align the clay particles. -
Press down:
Using the heel of your left hand, press the clay back down while your right hand stabilizes it, bringing it into a low, centered puck shape.
Clean Hands
Keep a dry towel over your lap. Before the final shaping steps, wipe the slurry off your hands so you don’t accidentally soften the walls too much.
Step 2: Opening & Pulling
-
Open the center:
Find the center of the spinning puck with your thumbs. Press straight down to create a well, stopping about a half-inch from the bottom. -
Establish the floor:
Pull your thumbs outward horizontally to widen the opening and create a flat interior floor. -
Compress the bottom:
Use a sponge or your fingertips to gently compress the floor of the pot, moving from the center out to the wall to prevent cracking later. -
First pull:
Slow the wheel down slightly. With one hand inside and one outside, pinch the clay wall gently at the bottom and lift your hands together, pulling the clay upward. -
Refine the cylinder:
Perform two or three more pulls to thin the walls and gain height. Aim for a simple cylinder shape initially.
Spiral Effect
After texturing, slowly drag a finger from the bottom to the top while the wheel spins to create a subtle spiral intervention in the horizontal grooves.
Step 3: Shaping & Texturing
-
Belly out the form:
Apply slight pressure from the inside hand while supporting the outside to gently push the walls outward, creating a rounded belly shape. -
Collar the rim:
Gently compress the rim inward with both hands to keep the opening slightly narrower than the body, giving it that cozy cupped shape. -
Rib the exterior:
I like to take a wooden or metal rib now and hold it against the spinning exterior. This smooths the surface and removes excess slip. -
Add texture:
To get the specific look in the photo, use the edge of your rib or a serrated tool. Hold it steady against the side while the wheel turns to create horizontal grooves. -
Refine the rim:
Use a small piece of chamois or a wet sponge to compress and smooth the drinking lip, making sure it’s pleasant to the touch.
Step 4: Finishing
-
Undercut the base:
Use a wooden knife tool to trim away the excess skirt of clay at the very bottom where the pot meets the bat. -
Cut off:
Stop the wheel or slow it to a crawl. Slide your wire cutter firmly underneath the pot to separate it from the bat. -
Drying:
Carefully remove the bat with the pot on it and set it aside to dry to a leather-hard state before trimming the foot.
Once fired and glazed, this ribbed vessel will be a beautiful addition to your shelf

The Complete Guide to Pottery Troubleshooting
Uncover the most common ceramic mistakes—from cracking clay to failed glazes—and learn how to fix them fast.
Create a Dedicated Drying Shelf
Maximize your vertical space and give your greenware a safe, airy home with this beautiful ladder-style drying shelf. Its open-slat design promotes even airflow around your pieces, while the natural wood finish adds a warm, studio-ready aesthetic to your creative corner.
Step-by-Step
Materials
- 2x pine lumber (1×3 inch boards for legs)
- 2x pine lumber (1×2 inch boards for shelf frames)
- Wooden dowels or square slats (approx. 1/2 inch) for shelf surfaces
- Wood glue
- Pocket hole jig and screws (1 1/4 inch)
- Electric drill and bits
- Miter saw or hand saw
- Measuring tape and pencil
- Orbital sander with 120 and 220 grit sandpaper
- Clear matte polyurethane or tung oil
- Clamps
- Level
Step 1: Cutting and Preparing the Frame
-
Measure and cut the legs:
Begin by cutting your 1×3 boards to create the four legs. You will need two long back legs (approx. 72 inches) and two slightly shorter front legs if you want a leaned look, or four equal legs for a standalone A-frame. Angle the bottom of the legs at 15 degrees so they sit flush against the floor. -
Cut the shelf supports:
Cut horizontal supports from the 1×2 lumber. Since this is a tapered ladder shelf, the bottom supports will be the widest (around 24 inches) and the top supports the narrowest (around 14 inches). Cut side runners to connect the front and back legs at each shelf level. -
Sand all components:
Before assembly, give every piece of wood a thorough sanding. Start with 120 grit to remove saw marks and finish with 220 grit for a silky smooth feel that won’t snag your drying clay.
Step 2: Assembling the Ladder Structure
-
Build the side frames:
Lay out one front leg and one back leg on a flat surface. Position your side runners between them at your desired shelf heights. I find 12-14 inches between shelves works best for most pottery. -
Secure the side frames:
Using a pocket hole jig, drill holes on the inside faces of the side runners. Apply wood glue to the ends and screw them into the legs. Repeat this process for the second side frame, ensuring it’s a mirror image of the first. -
Connect the two sides:
Stand the two side frames up (you might need a helper here). Connect them using the back horizontal supports you cut earlier. Use glue and screws, checking frequently with a level to ensure the structure isn’t twisting.
Wobbly Legs?
If the shelf rocks, place it on a perfectly flat surface, loosen the structural screws slightly, press the unit down firmly to level it out, and then re-tighten everything while maintaining pressure.
Step 3: Creating the Slatted Shelves
-
Cut the slats:
Cut your wooden dowels or square slats to fit the width of each shelf level. You’ll need enough to cover the depth of the shelf while leaving small gaps for airflow. -
Space the slats:
Arrange the slats on the shelf supports. Use a small scrap of wood or a pencil as a spacer between each slat to keep the gaps consistent. This open design is critical for letting the bottom of your pots dry evenly. -
Attach the slats:
Apply a dab of wood glue to the underside of each slat where it touches the frame. Secure them with small brad nails or finish screws. Wipe away any excess glue immediately with a damp cloth.
Airflow Upgrade
For maximum drying efficiency, use a router to round over the top edges of your shelf slats. This reduces the surface area touching the clay bottom, aiding significantly in even drying.
Step 4: Finishing Touches
-
Final sanding:
Once the glue is dry, do a final light sanding over the joints and screw holes to ensure everything is flush and smooth. -
Seal the wood:
Pottery studios can be humid, so protection is key. Apply a coat of clear matte polyurethane or tung oil. This prevents the wood from warping due to moisture from the drying clay. -
Let it cure:
Allow the finish to cure completely according to the manufacturer’s instructions before placing any heavy greenware on the shelves. A full 24-48 hours usually does the trick. -
Position in the light:
Move your new drying rack to a spot with good airflow, ideally near a window but out of direct, harsh sunlight to prevent uneven drying.
Now you have a professional-grade drying station ready to support your next batch of ceramic creations
Hide a Micro Studio in a Closet
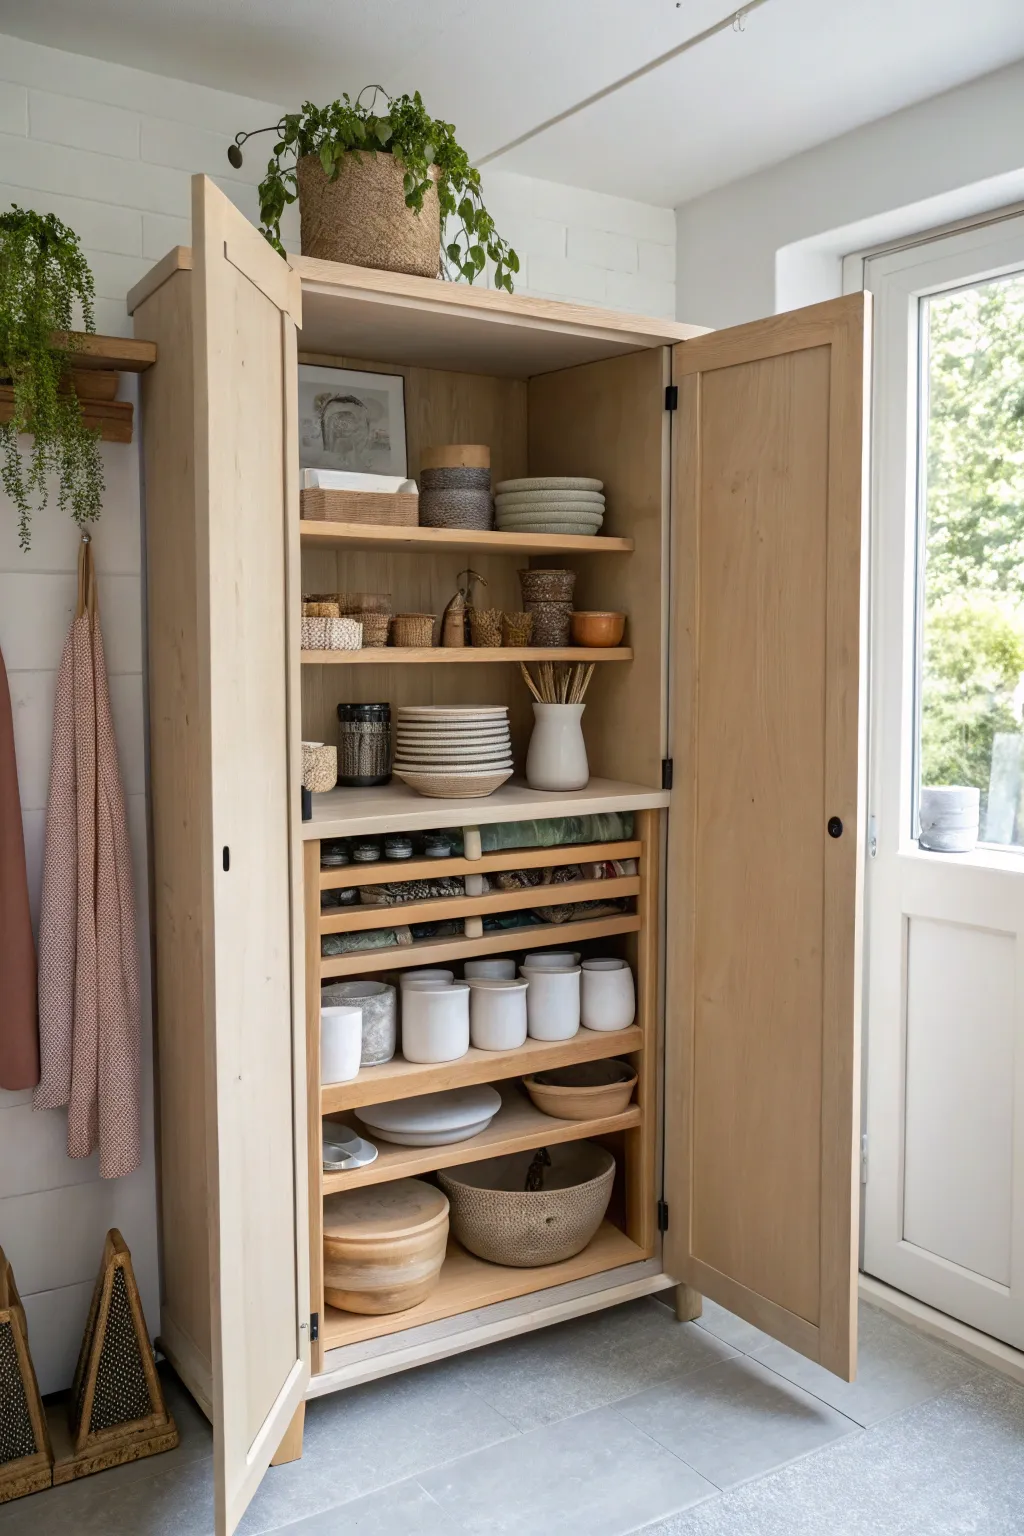
Transform a standard wooden wardrobe into a discreet and organized micro pottery studio that blends seamlessly into your living space. This project focuses on clever internal organization and aesthetic unity, allowing you to close the doors on your creative chaos when the day is done.
Step-by-Step
Materials
- Tall freestanding wooden wardrobe or armoire (unfinished oak or pine works well)
- Plywood sheets (birch or oak veneer)
- Wooden dowels (1-inch diameter)
- Natural beeswax wood finish or matte clear coat
- Shelf pins and drill bit
- Various natural fiber baskets (seagrass, woven)
- White or cream ceramic containers
- Sandpaper (120 and 220 grit)
- Measuring tape and pencil
- Circular saw or jigsaw
- Linen or cotton tea towels (earth tones)
- Clear plastic storage bins (small)
- Houseplants (trailing varieties like Pothos or String of pearls)
Step 1: Preparing the Shell
-
Assess and prep surface:
Begin by inspecting your chosen armoire. If it’s unfinished wood like the one in our inspiration, give the entire exterior and interior a light sanding with 220-grit sandpaper to remove any rough patches or splinters. -
Apply finish:
Rub in a natural beeswax finish or a matte clear coat using a lint-free cloth. This protects the wood from clay dust and moisture without altering its lovely raw appearance. Let it cure fully before loading shelves. -
Measure interior dimensions:
Measure the internal width and depth of the cabinet precisely. You will need these measurements to customize your shelving layout.
Moisture Control
Line the bottom shelf with a rubber mat or plastic tray to catch any clay dust or water drips, protecting the wood floor of your cabinet.
Step 2: Creating the Drying & Storage System
-
Determine shelf spacing:
Decide on your shelf heights based on what you plan to store. Leave a large gap at the bottom for heavy items and tighter gaps in the middle for low bowls or plates. -
Drill shelf pin holes:
If your cabinet doesn’t have adjustable shelving holes, create a template and drill holes along the side panels at your desired heights to accept shelf pins. -
Install main work surface:
Install the sturdiest shelf just below waist height. This will act as your primary sorting station or ‘wedging board’ storage area. -
Construct the damp box zone:
For the section immediately below the main surface, we want specialized storage for drying tiles or detailed tools. Cut thin plywood strips to create narrow horizontal dividers. -
Install wooden dowel stops:
Add small, vertical wooden dowels or dividers between these narrow shelves. This creates specific ‘pigeon holes’ perfect for sliding in bats, tiles, or rolling pins without them rolling around.
Light it Up
Install rechargeable, motion-sensor LED strips under the shelves. This illuminates your workspace without needing complex wiring.
Step 3: Curating the Contents
-
Select a color palette:
To achieve the serene look of the photo, stick to natural materials. Choose storage containers in ivories, creams, light greys, and natural wood tones. -
Organize tools in verticals:
Place tall tools like brushes, modeling tools, and rolling pins into tall ceramic vases or sturdy jars. Group them by function to keep your workflow smooth. -
Stack flatware:
Stack finished plates, drying bats, or textured molds horizontally. Grouping similar shapes together creates a pleasing visual rhythm. -
Contain the small chaos:
Use woven seagrass baskets or small lidded boxes to corral unsightly items like sponges, wires, or messy clay scraps. Place these on upper shelves. -
Add texture with textiles:
Hang a few linen aprons or tea towels on hooks inside the door or on a nearby peg rail. Choose muted clay or blush tones to complement the wood. -
Incorporate greenery:
Place a trailing plant on top of the cabinet. The cascading leaves soften the hard lines of the furniture and bring life to the studio corner. -
Final arrangement check:
Step back and assess the balance. I often like to leave a little negative space on shelves so the cabinet doesn’t feel cluttered when opened. Adjust heights if necessary.
Now you have a fully functional studio that disappears quietly when guests arrive