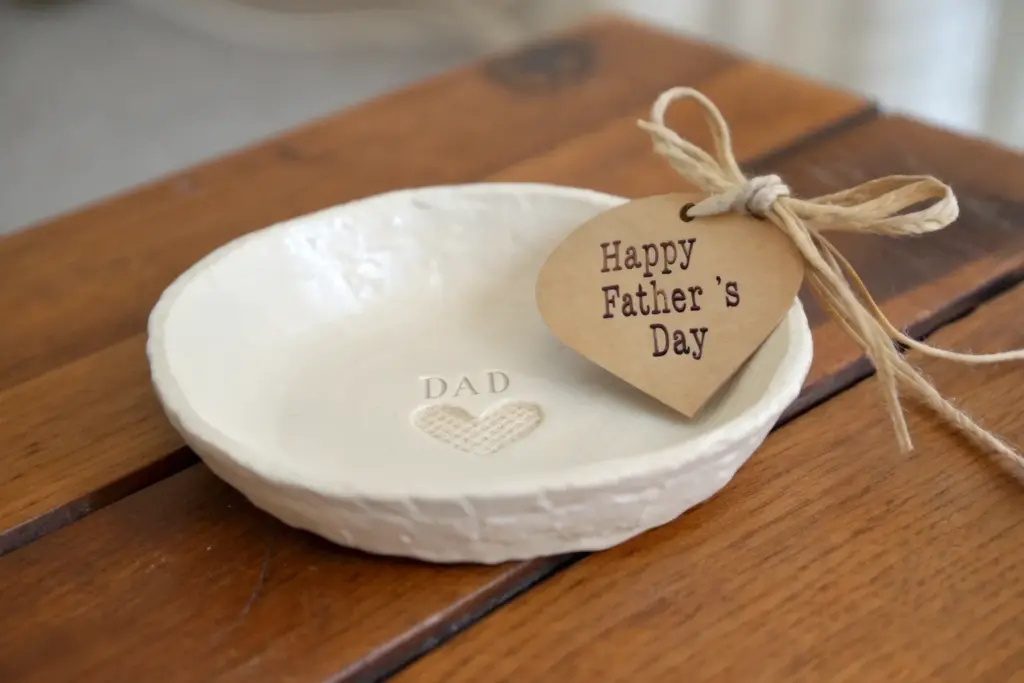
Whenever I need a gift that feels truly personal, I reach for clay—it holds fingerprints, little quirks, and all that sweet handmade energy. These homemade Father’s Day ideas are a mix of sentimental keepsakes and actually-useful pieces your dad will want to keep out year-round.
Fingerprint Change Dish for Dad
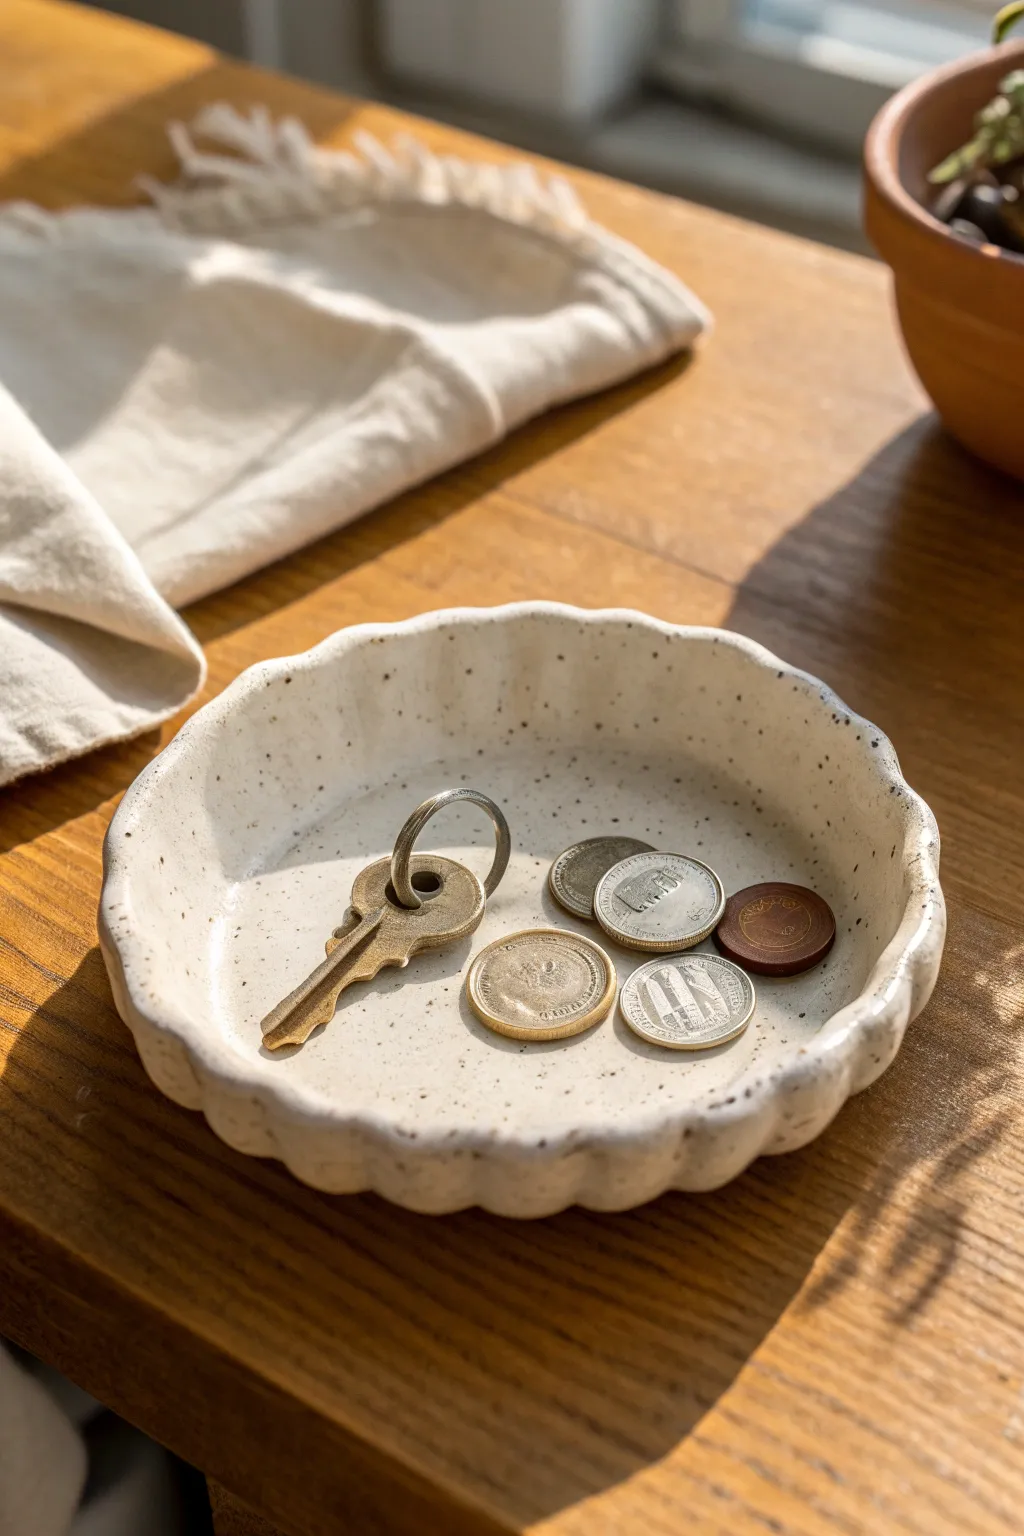
This charming, handmade catch-all dish features a lovely scalloped edge and a natural speckled finish that looks professionally thrown, yet requires no wheel. It’s the perfect bedside accessory for Dad to toss his keys and loose change into at the end of the day.
Step-by-Step
Materials
- White air-dry clay (or polymer clay)
- Acrylic rolling pin
- Small round bowl or cookie cutter (approx. 4-5 inches)
- Modeling tool or butter knife
- Small sponge
- Fine grit sandpaper
- Black acrylic paint
- Old toothbrush
- Gloss varnish or sealant
- Paintbrush
Step 1: Preparation & Shaping
-
Prepare the clay:
Start by taking a generous handful of white air-dry clay. Knead it in your hands for a minute or two to warm it up and make it pliable, removing any air bubbles. -
Roll the slab:
Place your clay on a flat, clean surface. Using your acrylic rolling pin, roll the clay out evenly until it is about 1/4 inch thick. Try to keep the thickness consistent across the entire slab. -
Cut the circle:
Lay your round template (a small bowl works perfectly for this size) onto the clay. Trace around it with a modeling tool or knife to cut out a perfect circle, then peel away the excess clay. -
Smooth the edges:
Dip your finger in a little bit of water and run it along the cut edge of the circle. This softens the sharp cut lines and prevents future cracking. -
Form the rim:
Gently lift the edges of the circle upwards to create a shallow bowl shape. Use your thumbs to press the center down slightly while cupping the sides. -
Create the scallops:
To make the scalloped design, place your thumb on the inside of the rim and your index finger on the outside. Gently pinch the clay at regular intervals all around the edge. -
Refine the fluting:
Go back around the rim and use the side of your finger to press into the ‘valleys’ of your scallops, making the waves more pronounced and uniform. -
Smooth the surfaces:
Using a slightly damp sponge, wipe the entire surface of the dish. This erases your fingerprints and ensures a professional, smooth finish. -
Initial drying:
Set the dish aside in a safe, dry place. Let it air dry for 24 to 48 hours. I find flipping it over halfway through helps the bottom dry evenly.
Step 2: Finishing Touches
-
Sand imperfections:
Once the clay is bone dry and hard, take your fine-grit sandpaper and gently sand the rim and any rough spots on the surface. Wipe away the dust with a dry cloth. -
Prepare the speckle:
Squeeze a very small amount of black acrylic paint onto a palette and dilute it slightly with water until it has an inky consistency. -
Flick the paint:
Dip an old toothbrush into the watered-down black paint. Hold the brush over the dish and run your thumb across the bristles to flick tiny specks of paint onto the white clay. -
Control the density:
Continue flicking until you have a nice, random distribution of specks. Aim for varied sizes—mostly tiny dots with the occasional slightly larger spot for a natural ceramic look. -
Dry the paint:
Let the paint speckles dry completely. Since the dots are small, this should only take about 10-15 minutes. -
Apply varnish:
Using a clean soft brush, apply a coat of gloss varnish or sealant over the entire dish. This seals the clay and gives it that shiny, glazed appearance. -
Final cure:
Allow the varnish to cure fully according to the bottle’s instructions before wrapping it up for Dad.
Cracked Edges?
If you see hairline cracks forming while the clay dries, make a ‘slip’ paste of clay and water. Rub it into the cracks with your finger and let dry again.
Personalize It
Before the clay dries, stamp Dad’s initials or the year into the center bottom of the dish for a custom, memorable touch.
Now you have a stylish and functional gift that Dad will use every day


Handprint “Best Dad” Plaque
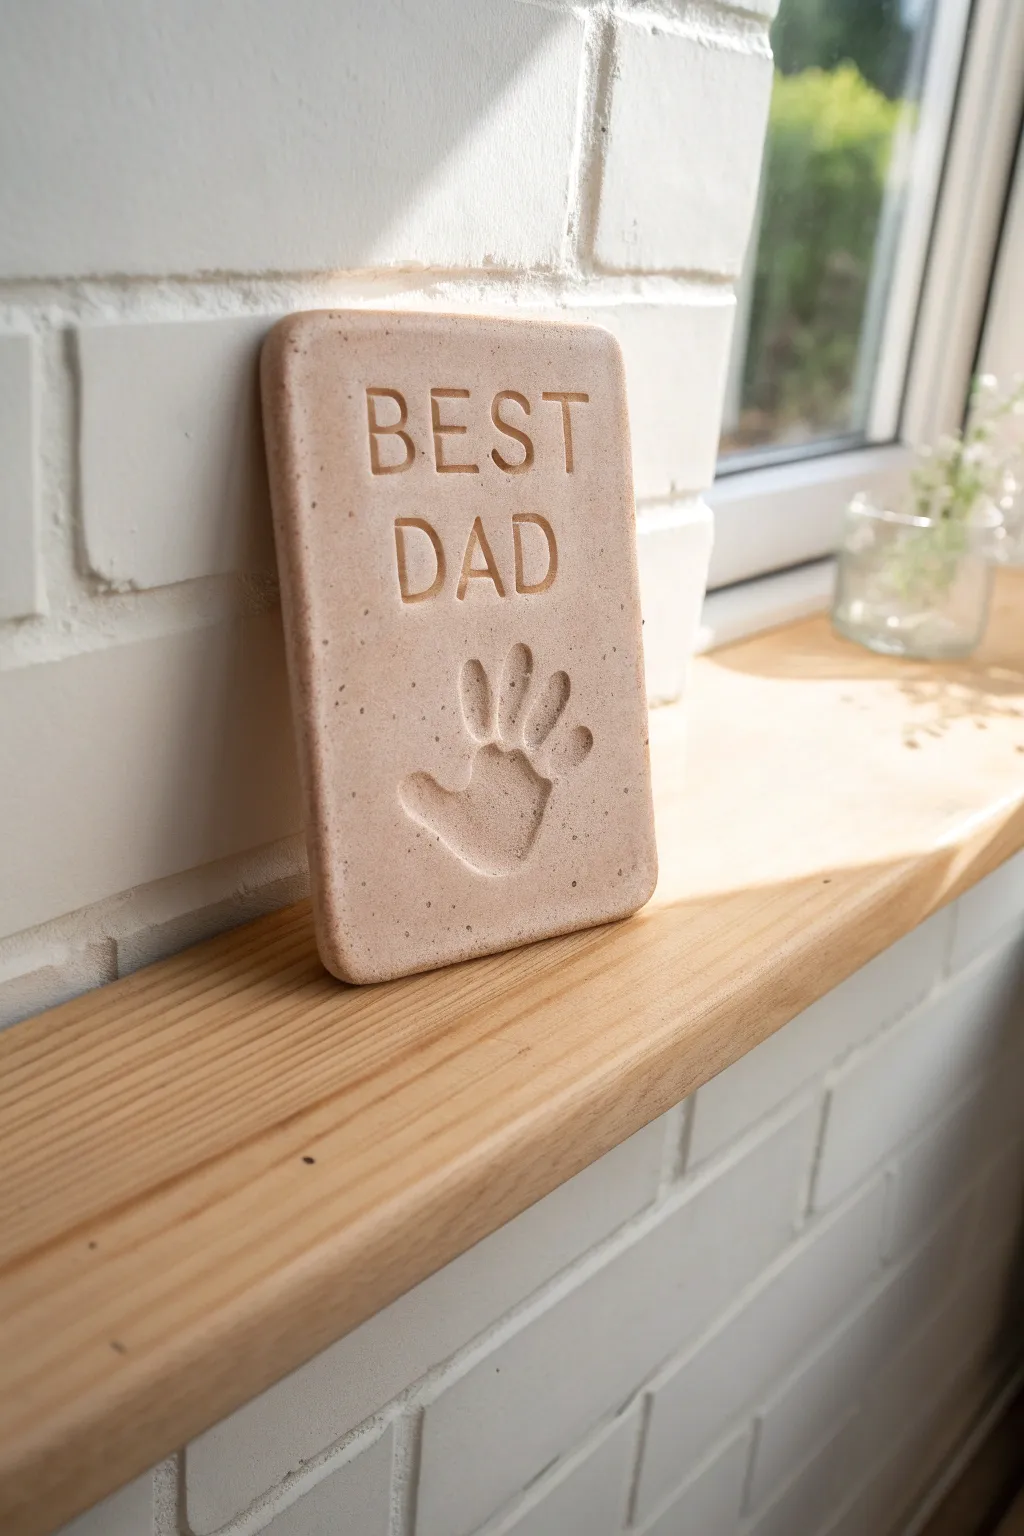
Capture a sweet moment in time with this simple yet sophisticated clay plaque. The smooth, sandy-toned finish and clean stamped lettering give this homemade gift a polished look that’s perfect for displaying on a desk or windowsill.
How-To Guide
Materials
- Air-dry clay (terracotta or stone color)
- Rolling pin
- Parchment paper or craft mat
- Ruler
- Knife or clay cutting tool
- Letter stamp set (individual letters)
- Small bowl of water
- Fine-grit sandpaper (optional)
- Matte sealant spray or Mod Podge (optional)
Step 1: Preparing the Clay Base
-
Prepare your workspace:
Lay down parchment paper on a flat, stable surface. This prevents the clay from sticking and makes it easier to move later without distorting the shape. -
Condition the clay:
Take a large chunk of air-dry clay and knead it in your hands for a minute or two until it is warm and pliable. This helps prevent cracking later on. -
Roll it out:
Place the clay on your parchment paper. Using a rolling pin, roll the clay out evenly. Aim for a thickness of about 1/2 inch to ensure the plaque is sturdy enough to stand on its own. -
Measure the rectangle:
Use a ruler to lightly mark out a rectangle shape. A size of roughly 5×7 inches works well, but adjust based on the size of the child’s hand. -
Cut the shape:
Using a sharp knife or clay tool, cut along your ruler marks to create clean, straight edges. Remove the excess clay. -
Smooth the edges:
Dip your finger in a little bit of water and run it along the cut edges to soften the sharp corners and smooth out any roughness.
Step 2: Adding the Personal Touches
-
Plan the layout:
Before stamping, visualize where the text and handprint will go. Leave the top third empty for the text and center the lower two-thirds for the handprint. -
Stamp the first word:
Press your ‘B’, ‘E’, ‘S’, ‘T’ letter stamps firmly into the top area of the clay. Try to keep them evenly spaced and level. I find it helpful to gently rest a ruler below the line I’m stamping as a guide. -
Stamp the second word:
Directly below ‘BEST’, stamp the word ‘DAD’, centering it beneath the first word for a balanced look. -
Position the hand:
Make sure the child’s hand is clean and dry. Gently guide their hand to the center of the open space below the text. -
Create the impression:
Press down firmly on the palm and each individual finger. You need enough pressure to leave a clear indentation but not so much that you push through the clay. -
Release:
Carefully lift the hand straight up to avoid smudging the impression. -
Clean up imperfections:
If the print has any jagged edges or tiny clay crumbs inside, smooth them very gently with a damp fingertip or a soft brush.
Fixing Cracks
If small hairline cracks appear while drying, mix a tiny amount of fresh clay with water to make a paste (slip). Rub this into the crack and smooth it over.
Step 3: Finishing Up
-
Initial drying:
Let the plaque dry flat in a cool, dry place. Do not place it in direct sunlight or heat, as drying too fast can cause curling or cracking. -
Flip for even drying:
After about 24 hours, carefully flip the plaque over so the bottom side is exposed to air. This ensures even drying throughout the slab. -
Wait for full cure:
Follow the package instructions for full drying time, which can take 2-3 days depending on humidity and thickness. -
Sand for smoothness:
Once fully bone dry, feel the edges. If they are sharp or rough, very lightly sand them with fine-grit sandpaper. -
Seal (optional):
To protect the piece from moisture and give it a finished sheen, spray it with a matte clear coat or brush on a thin layer of matte Mod Podge.
Level Up: Color Wash
Mix acrylic paint with water (1:1 ratio) and brush over the letters and handprint, then wipe the surface with a paper towel. The color will stay in the grooves.
This charming handmade plaque is ready to be wrapped up and gifted to the best dad in the world


Pocket-Dump Tray for Dad Stuff
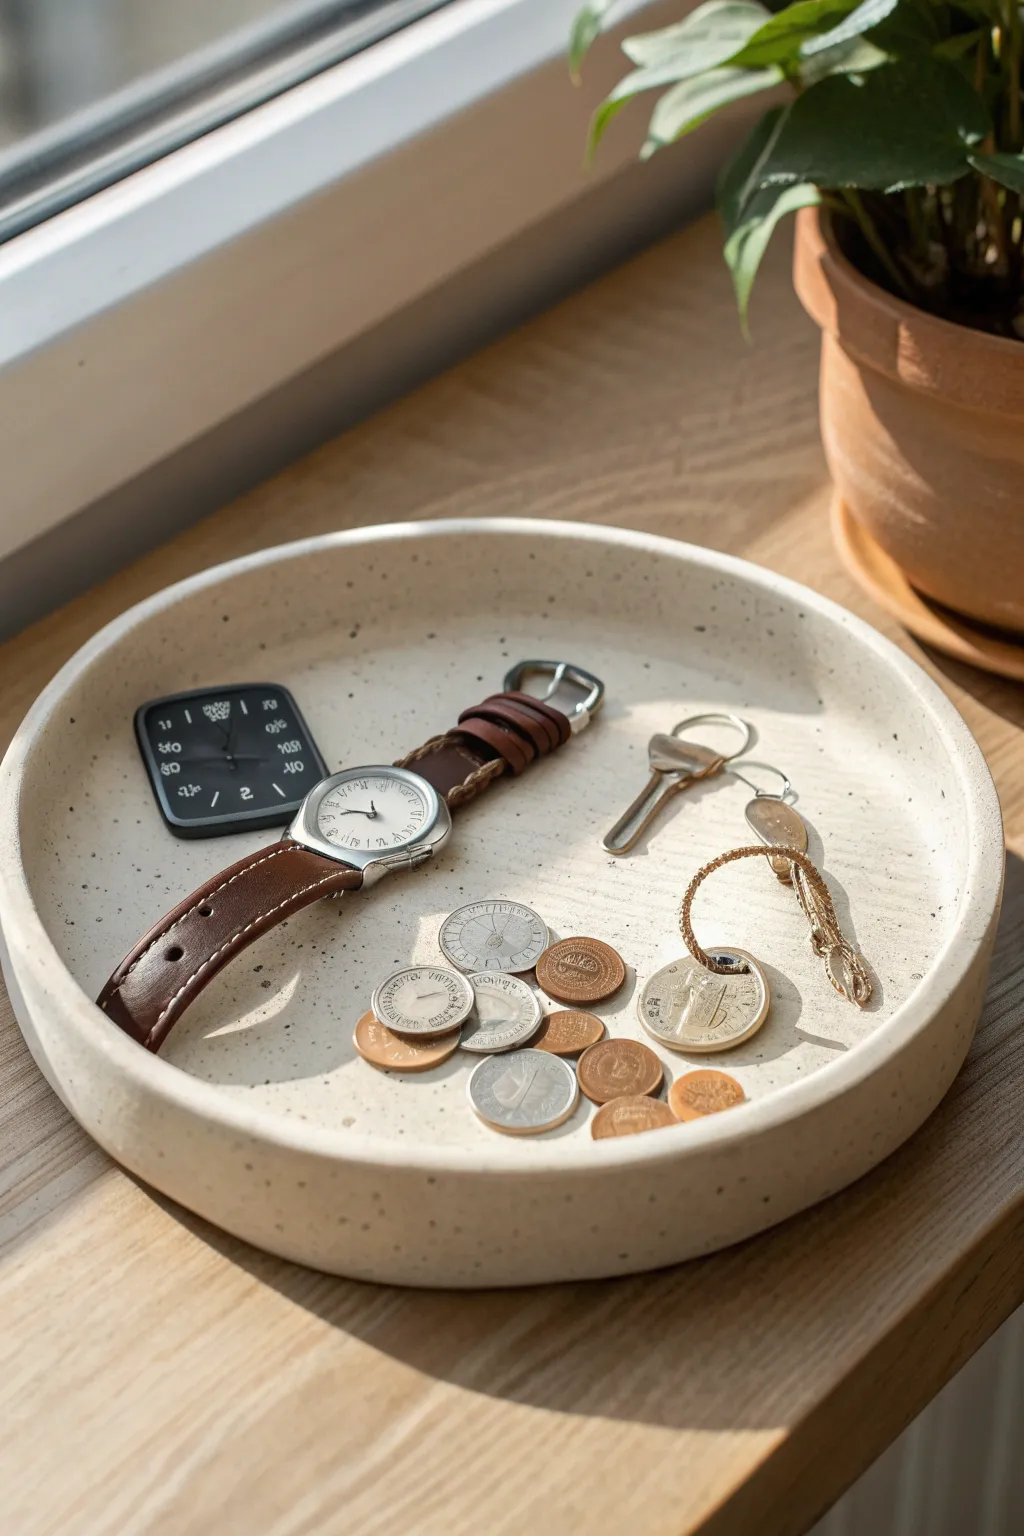
Give Dad a dedicated landing zone for his daily essentials with this minimalist catch-all dish. Its sophisticated speckled finish mimics natural stone, making it a stylish addition to any entryway table or nightstand.
Step-by-Step Guide
Materials
- White air-dry clay (approx. 500g)
- Acrylic rolling pin
- Circle template or bowl (approx. 7-8 inches diameter)
- Craft knife
- Sandpaper (fine grit)
- Black acrylic paint
- Old toothbrush
- Matte finish varnish or sealant
- Small bowl or sponge for water
Step 1: Shaping the Base
-
Prep the Clay:
Begin by kneading your white air-dry clay thoroughly on a clean, smooth surface until it is warm and pliable. This conditioning helps prevent cracking later on. -
Roll it Out:
Using an acrylic rolling pin, flatten the clay into a smooth slab. Aim for an even thickness of about 1/4 inch (6mm) to ensure the tray feels substantial and durable. -
Cut the Circle:
Place your circular template or an overturned bowl onto the slab. Using a sharp craft knife, trace around the edge to cut out a perfect circle, keeping the blade vertical for a clean edge. -
Smooth the Edges:
Dip your finger in a little water and run it along the cut edge of the circle. This smooths out any harsh cutting marks and prepares the clay for the rim.
Crack Control
If small cracks appear while drying, don’t panic. Create a paste of clay and water (slip) and fill the cracks, then sand smooth once dry.
Step 2: Building the Walls
-
Create a Coil:
Roll a long snake or coil of clay, keeping it consistent in thickness (about 1/2 inch thick). It needs to be long enough to wrap around the entire circumference of your base. -
Score and Slip:
Score (scratch) the outer top edge of your base and one side of your coil. Apply a tiny bit of water or slip (clay mixed with water) to the scratched areas to act as glue. -
Attach the Rim:
Press the coil onto the edge of the base circle firmly. Trim off any excess coil and blend the two ends together seamlessly so you can’t tell where the join is. -
Blend the Seams:
Using a modeling tool or your thumb, drag the clay from the coil down onto the base on the inside of the tray. Repeat this on the outside, dragging the clay down to merge the wall with the floor. -
Refine the Shape:
Working slowly, pinch and smooth the wall to get it vertical and straight. I usually spend extra time here using a slightly damp sponge to ensure the transition from wall to floor is a smooth, gentle curve rather than a sharp angle. -
Level the Rim:
Check the top of the rim. If it’s uneven, you can carefully slice off the excess with a wire tool or craft knife, then smooth it flat with a wet finger.
Step 3: Finishing and Speckling
-
Initial Drying:
Set the tray aside to dry completely. This usually takes 24-48 hours depending on humidity. Rotate it occasionally so the bottom dries evenly. -
Sanding:
Once fully dry and hard, take your fine-grit sandpaper and gently buff the entire surface. Focus on the rim and the outside walls to remove any fingerprints or bumps. -
Clean Up:
Wipe away all the sanding dust with a slightly damp cloth or paper towel. The surface needs to be dust-free for the paint effect to adhere properly. -
Prepare the Splatter:
Dilute a small amount of black acrylic paint with water until it has an inky, fluid consistency. It needs to flow easily off a brush. -
The Speckle Effect:
Dip an old toothbrush into the watered-down paint. Hold it over the tray and run your thumb across the bristles to flick tiny droplets onto the clay. Test on paper first to control the spray. -
Layering the Look:
Apply the speckles lightly at first. You can always add more density, but it’s hard to remove them. Aim for a random, organic distribution to mimic stone. -
Sealing:
Allow the paint speckles to dry completely. Finally, apply 1-2 thin coats of a matte varnish or sealant to protect the clay from moisture and wear.
Make it Personal
Before drying, stamp a small message or initials into the bottom center of the tray for a hidden sentimental touch.
Once the sealant cures, wrap it up for a handmade gift that Dad will actually use every day


BBQ Dad Grill-Tool Rest
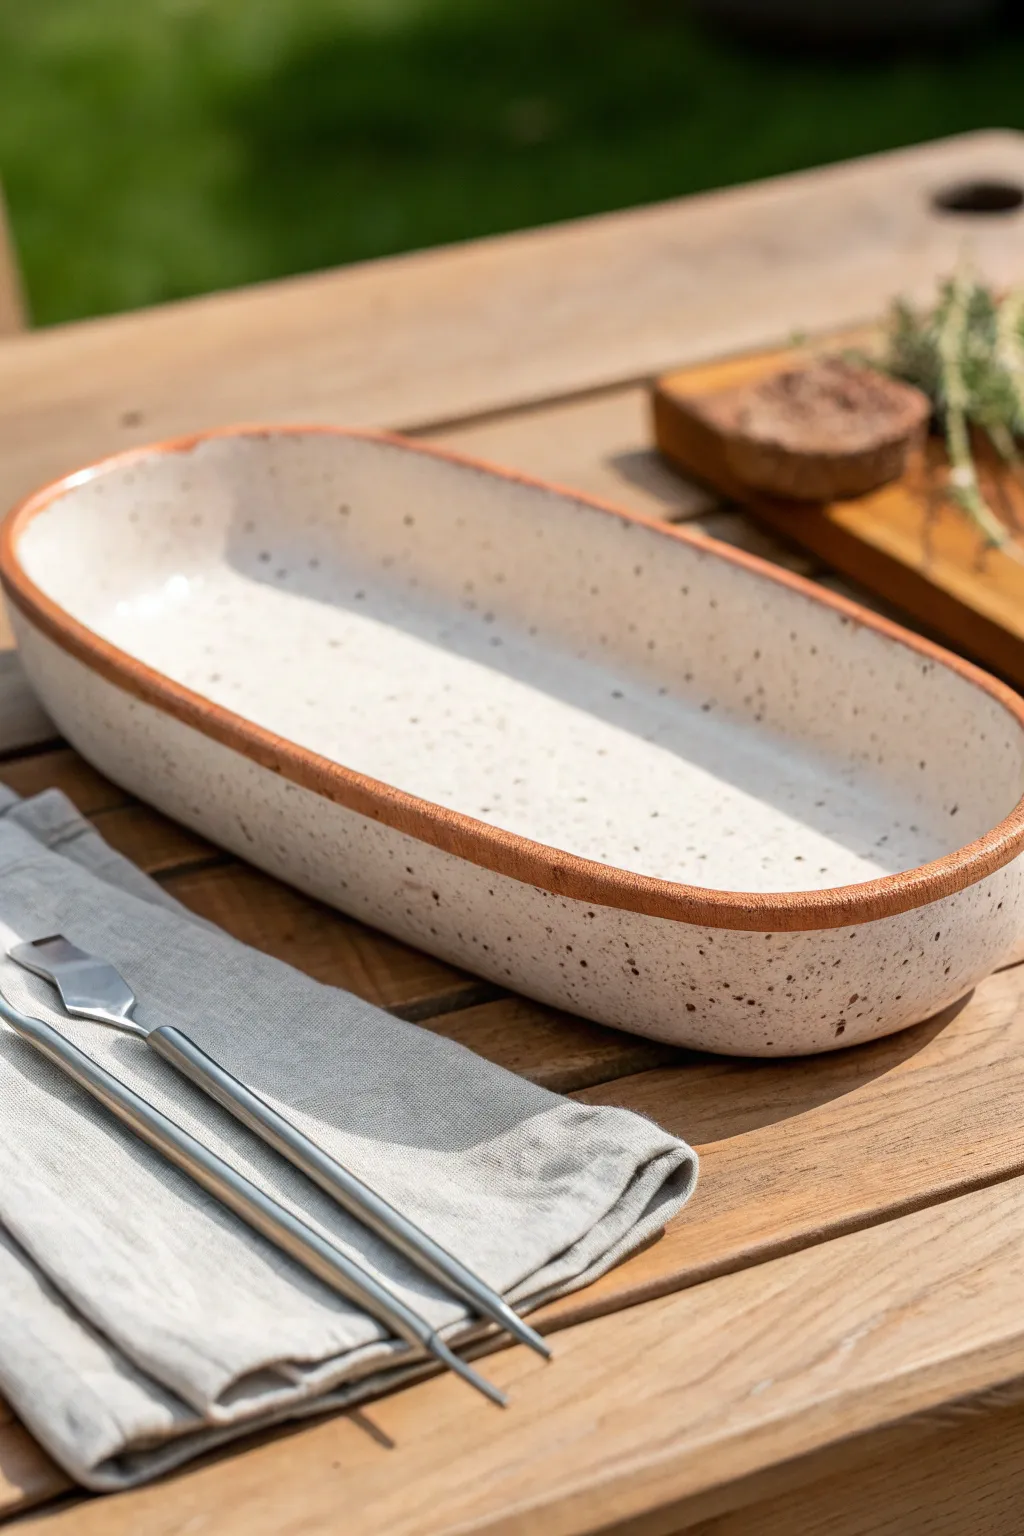
Upgrade Dad’s grilling setup with this custom ceramic tool rest, perfect for keeping tongs and spatulas off dirty surfaces. The speckled white glaze contrasts beautifully with the raw terracotta rim for a rustic, modern look that fits right in next to the barbecue.
Step-by-Step Tutorial
Materials
- Terracotta or Speckled Stoneware clay
- Rolling pin
- Canvas mat or cloth
- Oval template (paper or cardstock)
- Fettling knife or needle tool
- Rib tool (smooth wood or silicone)
- White or cream speckled glaze
- Glaze brush
- Sponge
- Kiln access (or air-dry clay alternatives)
Step 1: Shaping the Form
-
Prepare the slab:
Begin by wedging your clay to remove air bubbles, then roll it out into an even slab about 1/4 inch thick on your canvas mat. -
Cut the base:
Place your oval template onto the slab and trace around it with a needle tool to create the base of your dish. -
Create the walls:
Roll out a long coil or cut a long strip from the remaining slab to serve as the wall; aim for about 1.5 inches in height. -
Score and slip:
Rough up the outer edge of the oval base and the bottom edge of your wall strip, then apply a little water or slip to join them securely. -
Attach the wall:
Gently press the wall onto the base, working your way around the oval shape until the ends meet. -
Smooth the seams:
Use your thumb or a wooden modeling tool to blend the clay where the wall meets the base, both on the inside and outside, ensuring a seamless connection. -
Refine the rim:
I like to take a damp sponge and run it along the top rim to round it off slightly, removing any sharp edges or burrs.
Step 2: Finishing and Firing
-
Dry slowly:
Cover the piece loosely with plastic so it dries slowly over a few days; this prevents warping, especially with oval shapes. -
Bisque fire:
Once bone dry, fire the piece in a kiln to the appropriate cone for your specific clay body. -
Wax the rim:
Apply wax resist carefully to the top rim of the dish; this ensures the glaze won’t stick there, creating that beautiful raw clay accent. -
Apply glaze:
Pour a speckled white glaze into the interior of the dish, swirling it to coat the bottom and sides evenly. -
Glaze the exterior:
Brush the exterior walls with the same glaze, stopping just below the waxed rim. -
Clean up:
Use a damp sponge to wipe away any stray glaze droplets that might have landed on the waxed rim or the very bottom of the piece. -
Glaze fire:
Place the piece back in the kiln for the final glaze firing to seal the surface and bring out the speckles. -
Final inspection:
Check for any sharp spots on the bottom once cooled and sand them down if necessary to protect outdoor table surfaces.
Rim Perfection
If you don’t have wax resist, use automotive masking tape to cover the rim before glazing. Peel it off immediately after painting for a crisp, clean line.
Warping Woes
If your oval turns into a wobble, drying too fast is the likely culprit. Let it dry under a plastic bag for 2-3 days, turning it over occasionally.
This sturdy, stylish rest is now ready to catch messy BBQ tools and make Dad’s grilling sessions a little cleaner

The Complete Guide to Pottery Troubleshooting
Uncover the most common ceramic mistakes—from cracking clay to failed glazes—and learn how to fix them fast.
Sports Dad Handprint Keepsake Ornament
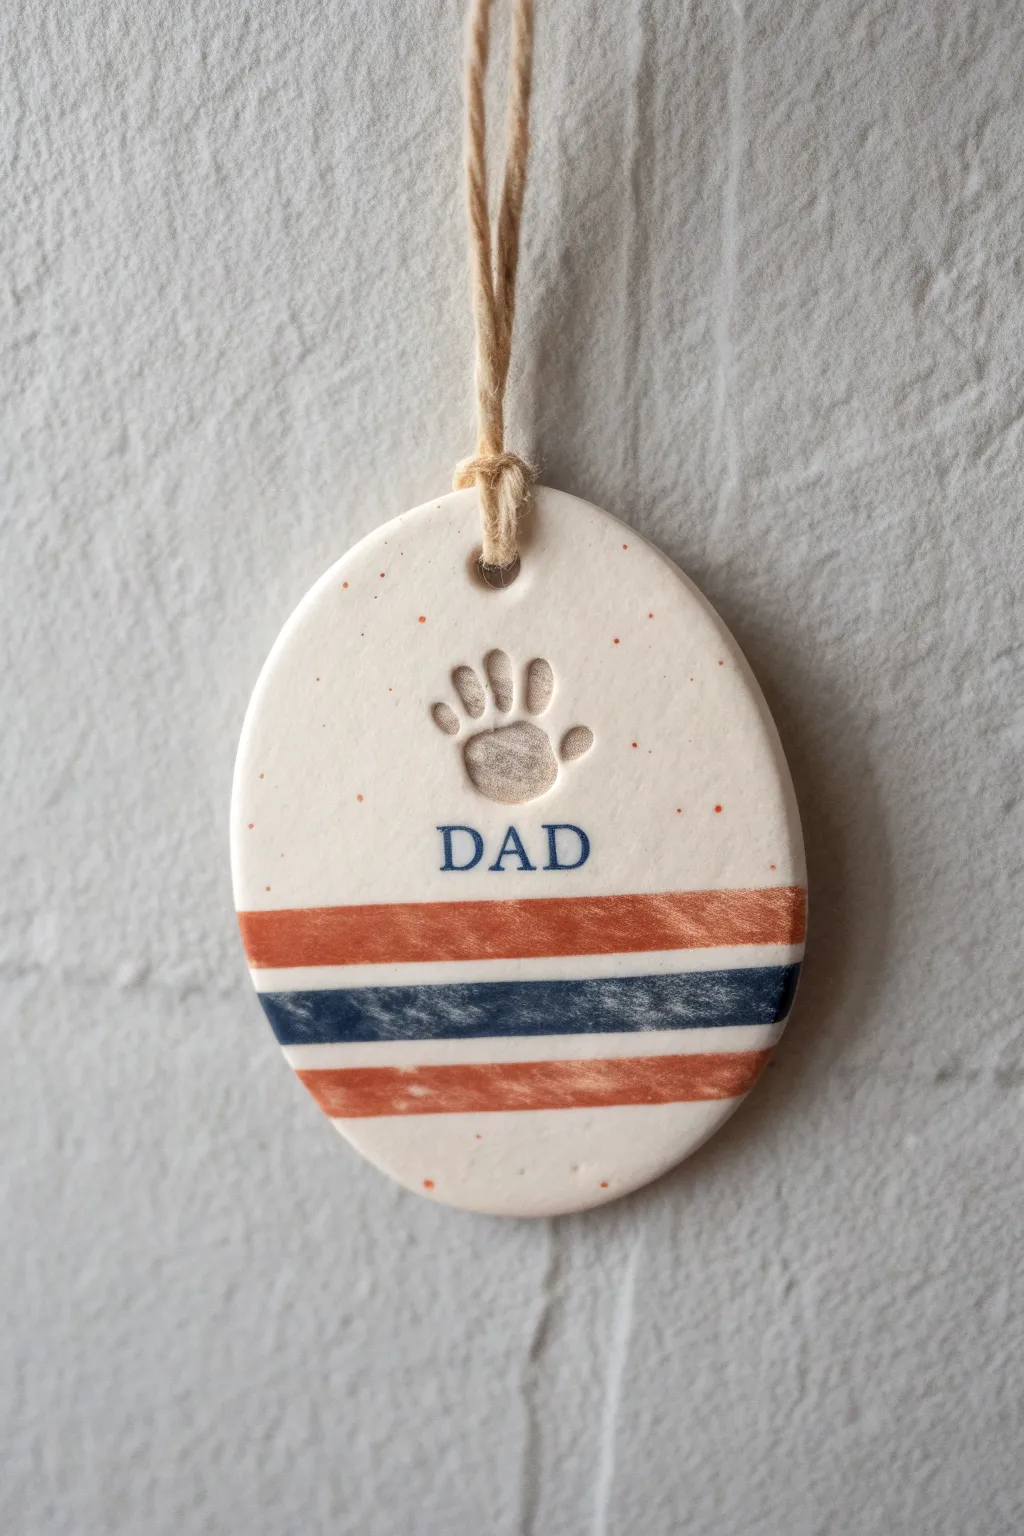
Create a timeless keepsake that celebrates Dad with a sporty, vintage vibe. This simple oval clay ornament features a stamped handprint and classic stripes, making it a sophisticated addition to his office or car mirror.
How-To Guide
Materials
- White polymer clay or air-dry clay (Speckled variety preferred)
- Small oval cookie cutter (approx 3-4 inches)
- Acrylic paint (Rust orange and Navy blue)
- Small flat paintbrush
- Painter’s tape or Washi tape
- Letter stamps
- Small handprint stamp or a real child’s hand (if size permits)
- Jute twine
- Straw or skewer (for the hole)
- Rolling pin
- Sandpaper (fine grit)
- Sealant or varnish (optional)
Step 1: Shaping the Base
-
Condition the clay:
Begin by kneading your white clay until it is soft and pliable. If you want that speckled pottery look shown in the image but only have plain white clay, mix in a tiny pinch of black pepper or dark glitter before rolling. -
Roll it out:
Roll the clay onto a smooth surface to an even thickness of about 1/4 inch. You want it thick enough to be sturdy but not so heavy it weighs down a branch. -
Cut the shape:
Press your oval cookie cutter firmly into the clay. If you don’t have an oval cutter, you can trace an oval shape onto paper, cut it out, place it on the clay, and carefully cut around it with a craft knife. -
Smooth the edges:
Dip your finger in a little water (for air-dry clay) or baby oil (for polymer) and run it gently around the cut edges to remove any sharpness or burrs.
Bleeding Lines?
If paint bleeds under your tape, wait for it to dry completely. Then, use a small craft knife to gently scrape away the excess paint, or touch it up with white paint for a clean edge.
Step 2: Adding Impressions
-
Create the hole:
Using a straw or a skewer, poke a hole near the top center of the oval. Make sure it’s large enough to thread your jute twine through later. -
Make the handprint:
Press a small handprint stamp into the upper center of the oval. If you are using a real child’s finger or thumb to create a ‘print’ shape, press gently but firmly to get a clear impression. -
Stamp the name:
Align your letter stamps directly below the handprint to spell ‘DAD’. Press them into the clay evenly. I find it helpful to start with the middle letter ‘A’ first to ensure it’s perfectly centered. -
Dry or Bake:
Follow the instructions for your specific clay. Bake polymer clay in the oven as directed, or let air-dry clay sit for 24-48 hours until completely hard and white.
Step 3: Painting and Finishing
-
Sand imperfections:
Once fully cured, gently sand the edges with fine-grit sandpaper if there are any rough spots remaining. -
Paint the text:
Using a very fine brush, fill in the stamped ‘DAD’ letters with navy blue acrylic paint. Wipe away any excess on the surface immediately with a damp cloth. -
Tape the stripes:
Apply strips of painter’s tape across the bottom third of the ornament to create clean lines. You’ll need to mask off areas to create three distinct bands. -
Paint the rust stripes:
Paint the top and bottom stripe area with a rust-orange acrylic paint. Apply thin layers to avoid paint bleeding under the tape. -
Paint the navy stripe:
Paint the middle stripe with the navy blue paint. Let the paint dry to the touch before carefully peeling off the tape to reveal your crisp lines. -
Seal the piece:
Coat the entire front of the ornament with a matte or satin varnish to protect the paint and give it a finished ceramic feel. -
Add the hanger:
Cut a length of jute twine, fold it in half, pass the loop through the hole, and pull the ends through the loop to secure it. Tie a knot at the top to finish.
Add a Date
Use a fine-point permanent marker or tiny number stamps to add the year on the back of the ornament. It turns a simple craft into a time-capsule distinct to this specific Father’s Day.
Now you have a charming, rustic keepsake ready to be wrapped up for Dad
“Best Dad” Mini Trophy Paperweight
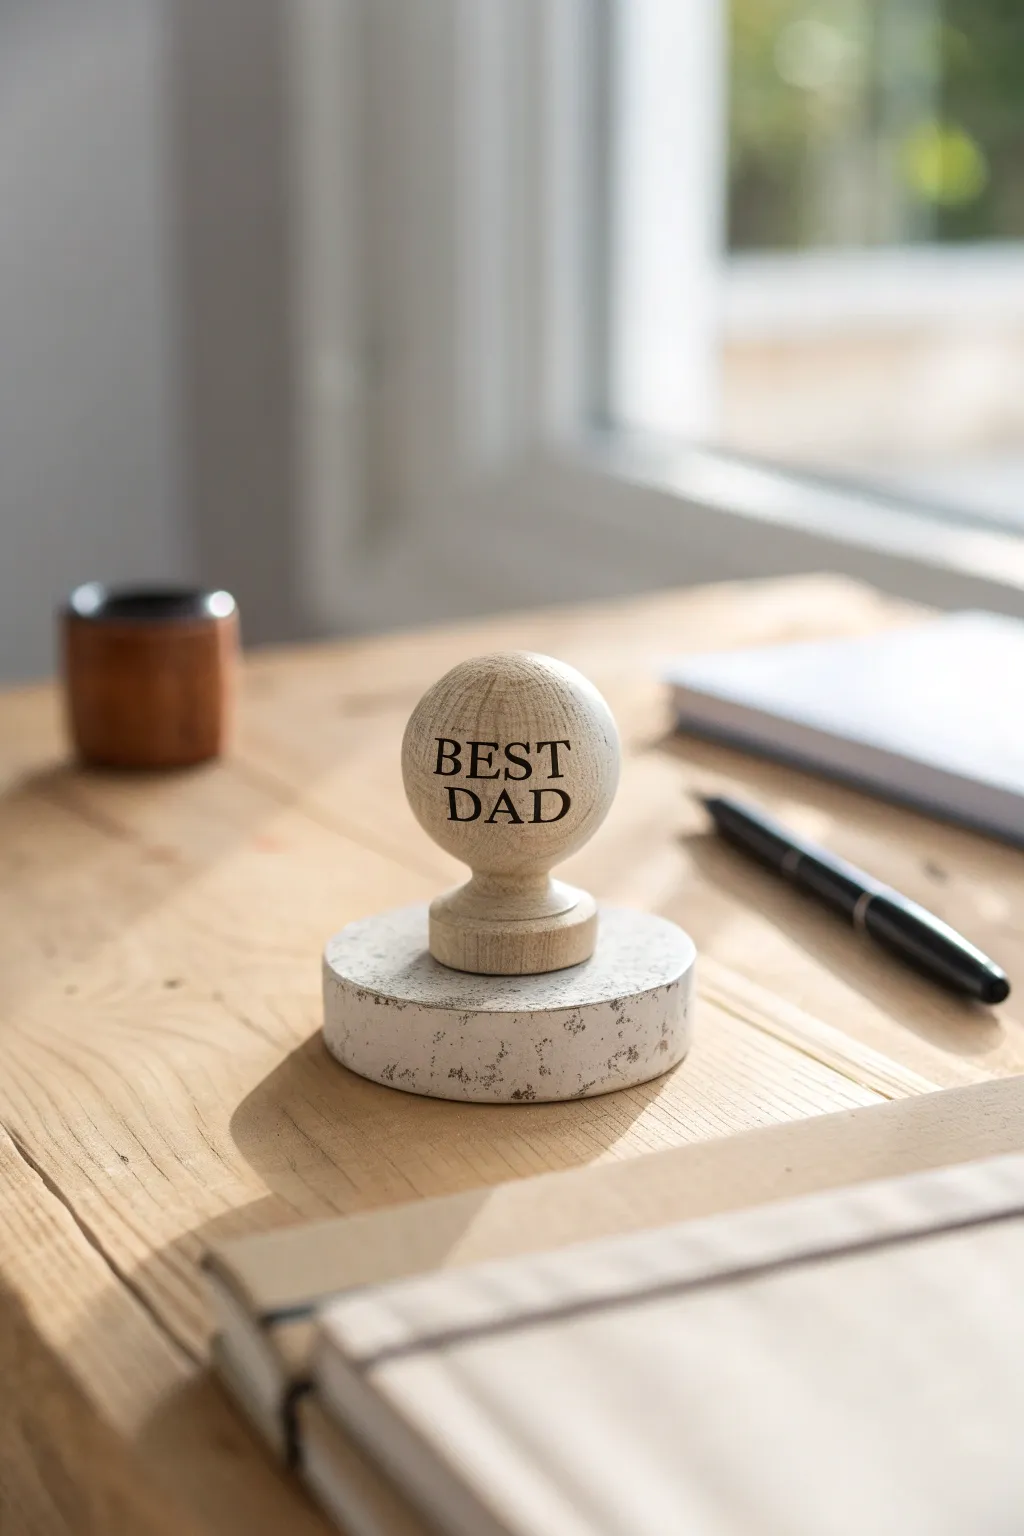
Create a sophisticated, minimalist paperweight that looks deceptively like turned wood and heavy stone but is actually crafted entirely from clay. This handsome desktop accessory features a classic spherical finial design stamped with a heartfelt message.
Step-by-Step
Materials
- Air-dry clay (white or natural)
- Small polystyrene ball (optional, for armature)
- Wooden rolling pin
- Clay sculpting tools
- Circle cutter or cookie cutter (approx. 3-inch)
- Alphabet rubber stamps
- Acrylic paints: Cream/Beige, Metallic Gold/Bronze, Gray, White, Brown
- Fine-grit sandpaper
- Small sponge
- Fine detail paintbrush
- Matte varnish or sealant
Step 1: Sculpting the Components
-
Form the base cylinder:
Start by conditioning a large chunk of air-dry clay. Roll it into a thick slab, roughly 0.75-inch high. Use your circle cutter to punch out a perfect disc for the weighted base. -
Smooth the edges:
Dip your finger in a little water and run it along the cut edge of the clay disc to smooth away any roughness or loose bits from the cutter. -
Create the sphere:
Roll a second ball of clay into a smooth sphere. If you want to save weight or clay, you can wrap a thin layer of clay around a small polystyrene ball instead. -
Refine the shape:
Roll the clay sphere gently on your work surface to ensure it is perfectly round with no lumps. -
Sculpt the pedestal neck:
Form a small, thick coil or ‘snake’ of clay and create a ring. Attach this to the bottom of your sphere to create the tiered neck that connects the ball to the base. -
Blend the seams:
Using a modeling tool, carefully blend the clay of the neck upward into the sphere so they become one solid unit. -
Assemble the trophy:
Score the top of the base and the bottom of the neck. Apply a dab of water or clay slip, then press the sphere firmly onto the center of the base. -
Add the inscription:
While the clay is still receptive, gently press your alphabet stamps into the center of the sphere to spell ‘BEST’ and ‘DAD’ below it. Don’t press too deep; a surface impression is perfect. -
Dry thoroughly:
Set the piece aside in a cool, dry place. Allow it to cure for at least 24-48 hours until completely hard and white.
Cracking Up?
If small cracks appear as the clay dries, create a paste by mixing a bit of fresh clay with water. Smear this ‘slip’ into the cracks, let dry, and sand smooth.
Step 2: Faux Finishes
-
Sand for smoothness:
Once fully dry, use fine-grit sandpaper to buff the surface. Focus on the sphere to give it that polished, turned-wood feel. -
Base coat the sphere:
Paint the sphere and the neck with a cream or pale beige acrylic paint. I find two thin coats work better than one thick one here. -
Create wood grain:
Mix a tiny amount of brown paint with water to create a wash. Use a stiff brush to drag very faint vertical lines down the sphere to mimic wood grain. -
Highlight the text:
Using a very fine brush and black or dark brown paint, carefully fill in the stamped ‘BEST DAD’ letters to make them pop. -
Base coat the stand:
Paint the cylindrical base with a mix of white and a touch of light gray to start the stone effect. -
Sponge on texture:
Dip a small piece of sponge into a darker gray paint. Dab it off on paper first, then lightly stipple over the base to create a mottled stone look. -
Add speckles:
Load an old toothbrush with thinned black or dark brown paint. Run your thumb over the bristles to flick tiny speckles onto the stone base for realism. -
Seal the piece:
Apply a coat of matte varnish over the entire project to protect the paint and unify the sheen.
Stamp Clarity Tip
Dust your rubber stamps lightly with cornstarch or baby powder before pressing them into the clay. This prevents the rubber from sticking and pulling up the clay.
This sophisticated little trophy will serve as a constant reminder of how much he is appreciated every time he sits at his desk


What Really Happens Inside the Kiln
Learn how time and temperature work together inside the kiln to transform clay into durable ceramic.
Dad and Me Simple Clay Figurine
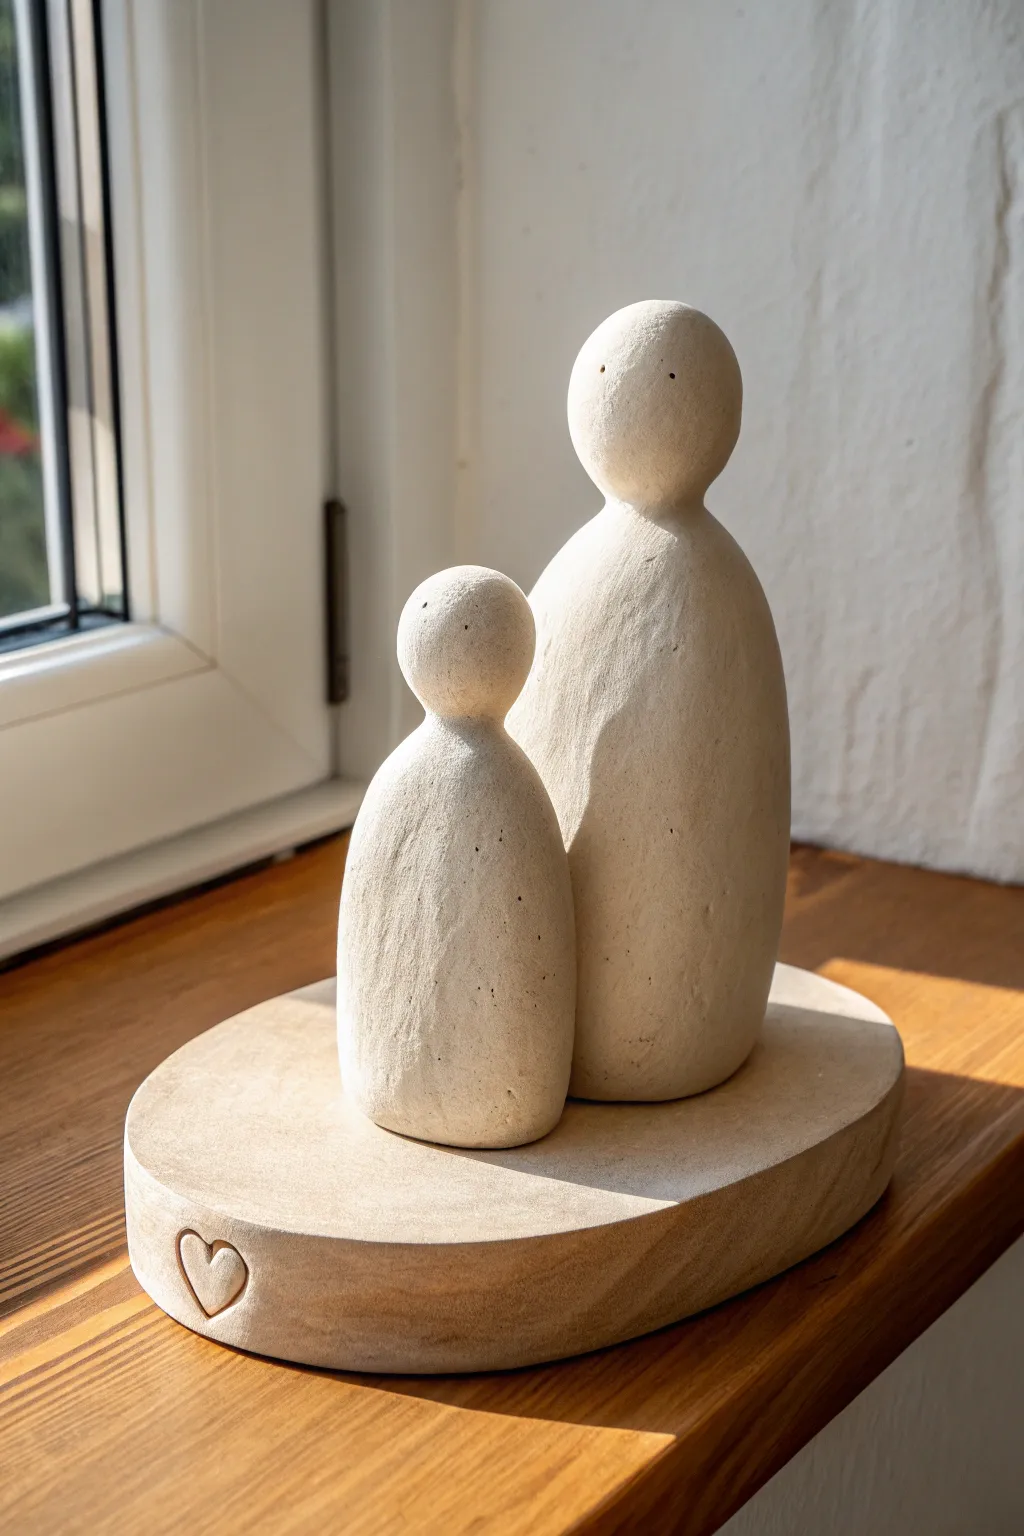
This heartwarming project captures the bond between father and child in a modern, abstract style that looks beautifully high-end. Using stone-effect air dry clay or a clever painting technique, you’ll sculpt two smooth, rounded figures standing together on a shared base featuring a sweet, carved heart detail.
How-To Guide
Materials
- Air dry clay (preferably stone effect or grey/beige)
- Small rolling pin
- Modeling tools (or a butter knife and toothpick)
- Small bowl of water
- Fine grit sandpaper (220 grit)
- Acrylic paint (optional: beige, cream, speckled grey)
- Matte sealant or varnish
- Old toothbrush (for texture, optional)
Step 1: Sculpting the Figures
-
Form the large body:
Start with a generous handful of clay for the father figure. Roll it into a smooth ball first to remove air bubbles, then elongate it into a teardrop shape. Flatten the bottom so it stands independently, ensuring it’s roughly 4-5 inches tall with a wider base that tapers gently upward. -
Create the large head:
Roll a smaller ball of clay for the head. It shouldn’t be perfectly round; a slightly organic, pebble shape works best for this style. Score the top of the body and the bottom of the head with a toothpick (hatching marks) and wet both areas slightly. -
attach the large head:
Press the head firmly onto the body. Using your thumb or a modeling tool, smooth the clay at the neck joint until the seam completely disappears and the two pieces look like one continuous stone form. -
Sculpt the child figure:
Repeat the previous process with a smaller amount of clay to create the child figure. Aim for a height that reaches roughly the chest or shoulder area of the larger figure. Keep the same tapered teardrop shape for harmony. -
Check the proportions:
Place the two figures side-by-side. The smaller figure should nestle slightly against the larger one. Adjust the contours by gently squeezing or smoothing the clay so their sides complement each other. -
Add minimal features:
Take a needle tool or toothpick and poke two very tiny holes for eyes on each face. Keep them high on the head and widely spaced for that signature cute, abstract look seen in the photo.
Stone Effect Secret
Mix dried tea leaves or used coffee grounds directly into your white clay before sculpting. This creates instant, natural-looking speckles and texture without needing paint.
Step 2: Creating the Base
-
Roll the base:
Roll out a slab of clay to about half an inch thickness. You want a substantial, heavy look, so don’t go too thin. Cut out a smooth oval shape large enough to comfortably hold both figures with room to spare. -
Smooth the edges:
Dip your finger in water and run it along the cut edge of the oval to round it off. We want to avoid sharp, mechanical angles; it should look like a river stone. -
Position the figures:
Score and slip (scratch and wet) the bottom of both figures and the spots on the base where they will stand. Press them down firmly onto the base, slightly off-center to leave room for the heart detail. -
Blend the bottom seams:
Use a small tool to blend the clay from the bottom of the figures onto the base. This ensures they won’t pop off when dry. Smooth this area carefully so the transition looks seamless. -
Carve the heart:
On the front edge of the base, use a small loop tool or toothpicks to carve a recessed heart. Don’t just draw the outline; actually scoop out a little clay to create a debossed, 3D effect.
Step 3: Finishing Touches
-
Texturizing:
If your clay is too smooth, gently tap the surface with an old toothbrush or a crumpled ball of foil. This adds a subtle, porous stone texture. -
Long drying time:
Let the sculpture dry slowly away from direct heat or sunlight to prevent cracking. This thick project may take 48-72 hours to fully cure. -
Sanding:
Once bone dry, use fine-grit sandpaper to buff away any fingerprints or rough tool marks. I find this step crucial for getting that professional, soft-touch finish. -
Painting (Optional):
If you didn’t use stone-effect clay, mix a warm beige acrylic paint. Apply a base coat. Once dry, flick tiny specks of watered-down brown or grey paint onto the surface using a toothbrush to mimic granite or sandstone. -
Seal the work:
Finish with a coat of matte spray varnish. Avoid glossy finishes, as the matte look is essential to the natural, stone-like aesthetic.
Make it Personal
Before the clay dries, gently stamp the year or a short message like “Dad 2024” into the underside of the oval base for a hidden memory.
Place this timeless sculpture on a windowsill or desk to remind Dad he is your rock