When you’re just getting into beginner clay models, the sweet spot is making tiny projects from simple shapes—balls, coils, and slabs—so you can actually finish what you start. Here are my favorite easy clay ideas that look adorable, feel doable, and teach you the basics without the stress.
Pinch-Pot Trinket Dish
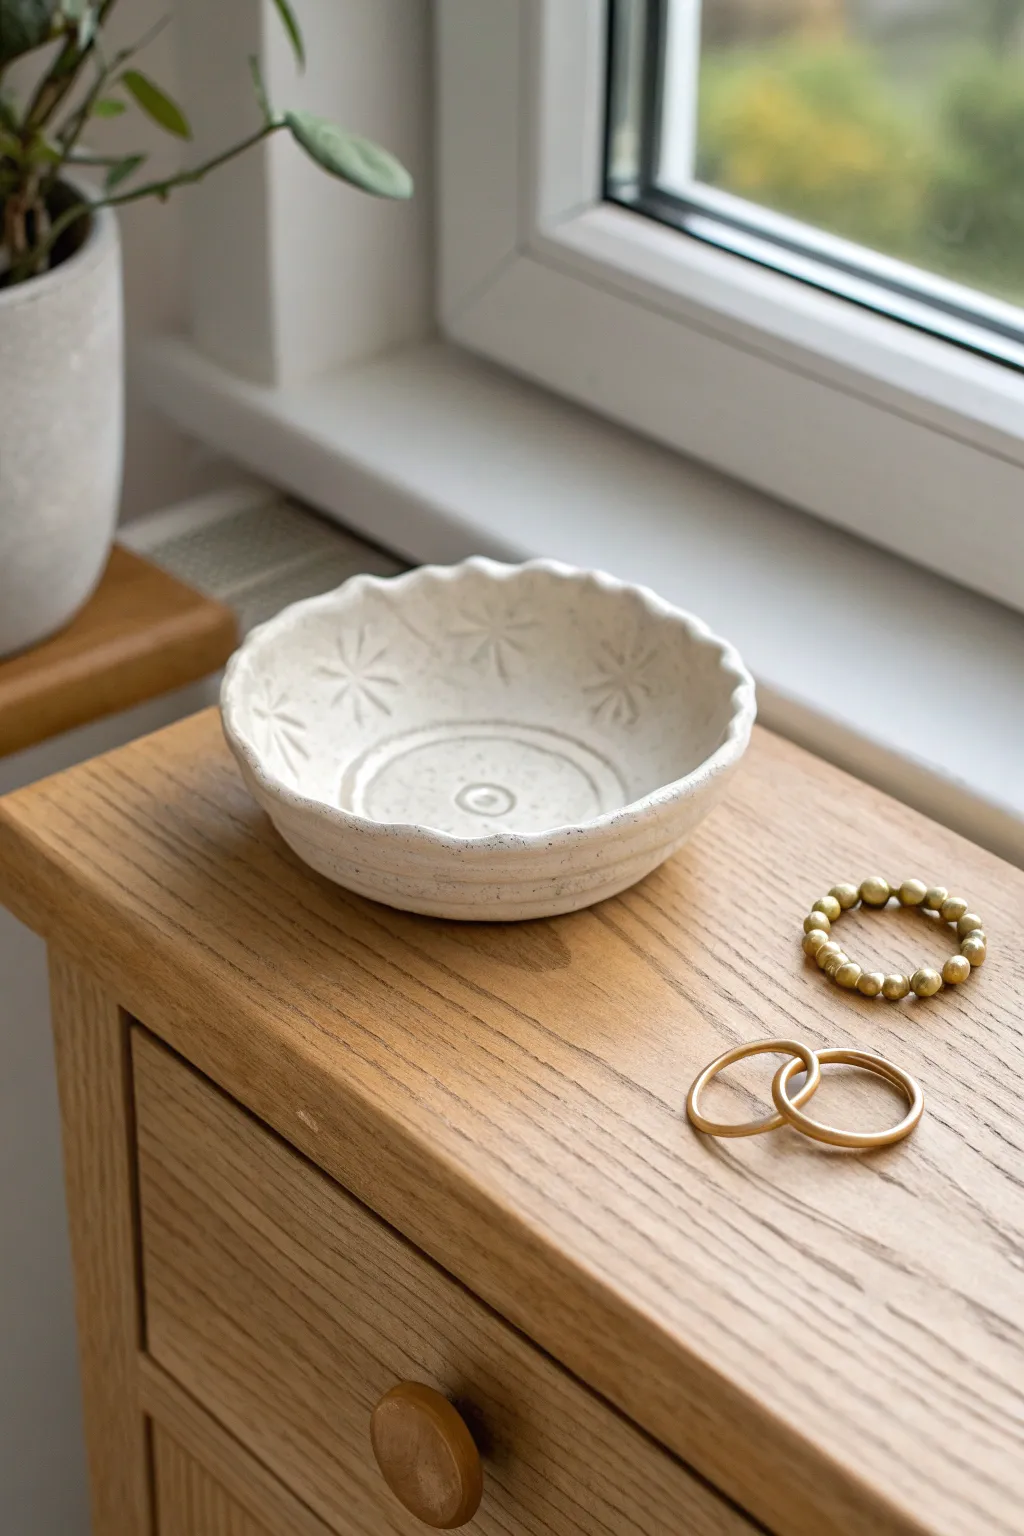
Transform a simple lump of clay into this charming, vintage-inspired jewelry dish featuring delicate stamped details and a soft, wavy rim. Its speckled cream finish and organic shape make it the perfect everyday home for your favorite rings and bracelets.
How-To Guide
Materials
- Air-dry clay (white or cream)
- Small bowl representing water
- Sponge or smoothing tool
- Pottery needle tool or toothpick
- Small star or snowflake rubber stamp
- Small circular object (like a marker cap)
- Acrylic paints (cream/off-white and brown)
- Paintbrushes
- Fine-grit sandpaper
- Matte spray varnish or sealant
Step 1: Forming the Pinch Pot
-
Prepare your clay:
Start by taking a handful of air-dry clay, about the size of a tennis ball. Knead it in your hands for a minute to warm it up and ensure it is free of air bubbles. -
Roll a sphere:
Roll the clay between your palms or on a table until you have a smooth, round ball. Try to smooth out any major cracks at this stage. -
Open the pot:
Hold the ball in one hand and gently press your thumb into the center, stopping about a half-inch from the bottom. This establishes your base thickness. -
Pinch the walls:
Begin pinching the clay between your thumb and fingers, rotating the ball as you go. Work your way from the bottom up to the rim, aiming for an even wall thickness of about a quarter-inch.
Stamp Alternative
Don’t have a stamp? You can create the snowflake pattern manually by pressing the side of a toothpick into the clay in a radiating star pattern.
Step 2: Adding Texture and Detail
-
Refine the shape:
Once you have a basic bowl shape, gently tap the bottom against your table to flatten it slightly so it sits stable without wobbling. -
Smooth the surface:
I like to dampen a sponge slightly and run it over the entire surface to erase fingerprints and smooth out any small cracks that formed during pinching. -
Create the center detail:
Use a needle tool or toothpick to lightly carve two concentric circles in the very bottom center of the bowl. -
Add the center stamp:
Press a small circular object, like the open end of a marker cap, into the very center of your carved circles to create a small bullseye effect. -
Stamp the pattern:
Take your star or snowflake stamp and press it gently into the inner walls of the bowl. Space them evenly around the circumference, about halfway up the side. -
Scallop the rim:
Using your thumb and forefinger, gently pinch the rim at intervals to create a wavy, scalloped edge. Soften the peaks with a wet finger so they aren’t sharp. -
Carve the exterior grooves:
On the outside of the bowl, just below the rim, use your needle tool to carve two horizontal lines that follow the circumference of the pot.
Step 3: Finishing Touches
-
Let it dry:
Set your dish aside to dry completely. This usually takes 24-48 hours depending on humidity. Flip it over halfway through directly onto a porous surface to help the bottom dry. -
Sand imperfections:
Once bone dry, use fine-grit sandpaper to gently smooth the rim or any rough patches. Wipe away the dust with a barely damp cloth or dry brush. -
Apply base coat:
Paint the entire bowl with a creamy off-white acrylic paint. You may need two coats for full opacity. -
Create speckles:
Dilute a small amount of brown paint with water. Load a toothbrush or stiff brush, and flick the bristles to spray tiny specks over the dried cream paint for a stoneware look. -
Dry and seal:
Allow the paint to dry fully, then finish with a coat of matte spray varnish to protect your jewelry dish from moisture and scratches.
Make it Luxe
After the sealant dries, paint just the very edge of the scalloped rim with gold liquid leaf or metallic acrylic paint for an elegant gilded finish.
Place your new dish on your nightstand to keep your treasures safe and organized


Mini Coil Pencil Cup
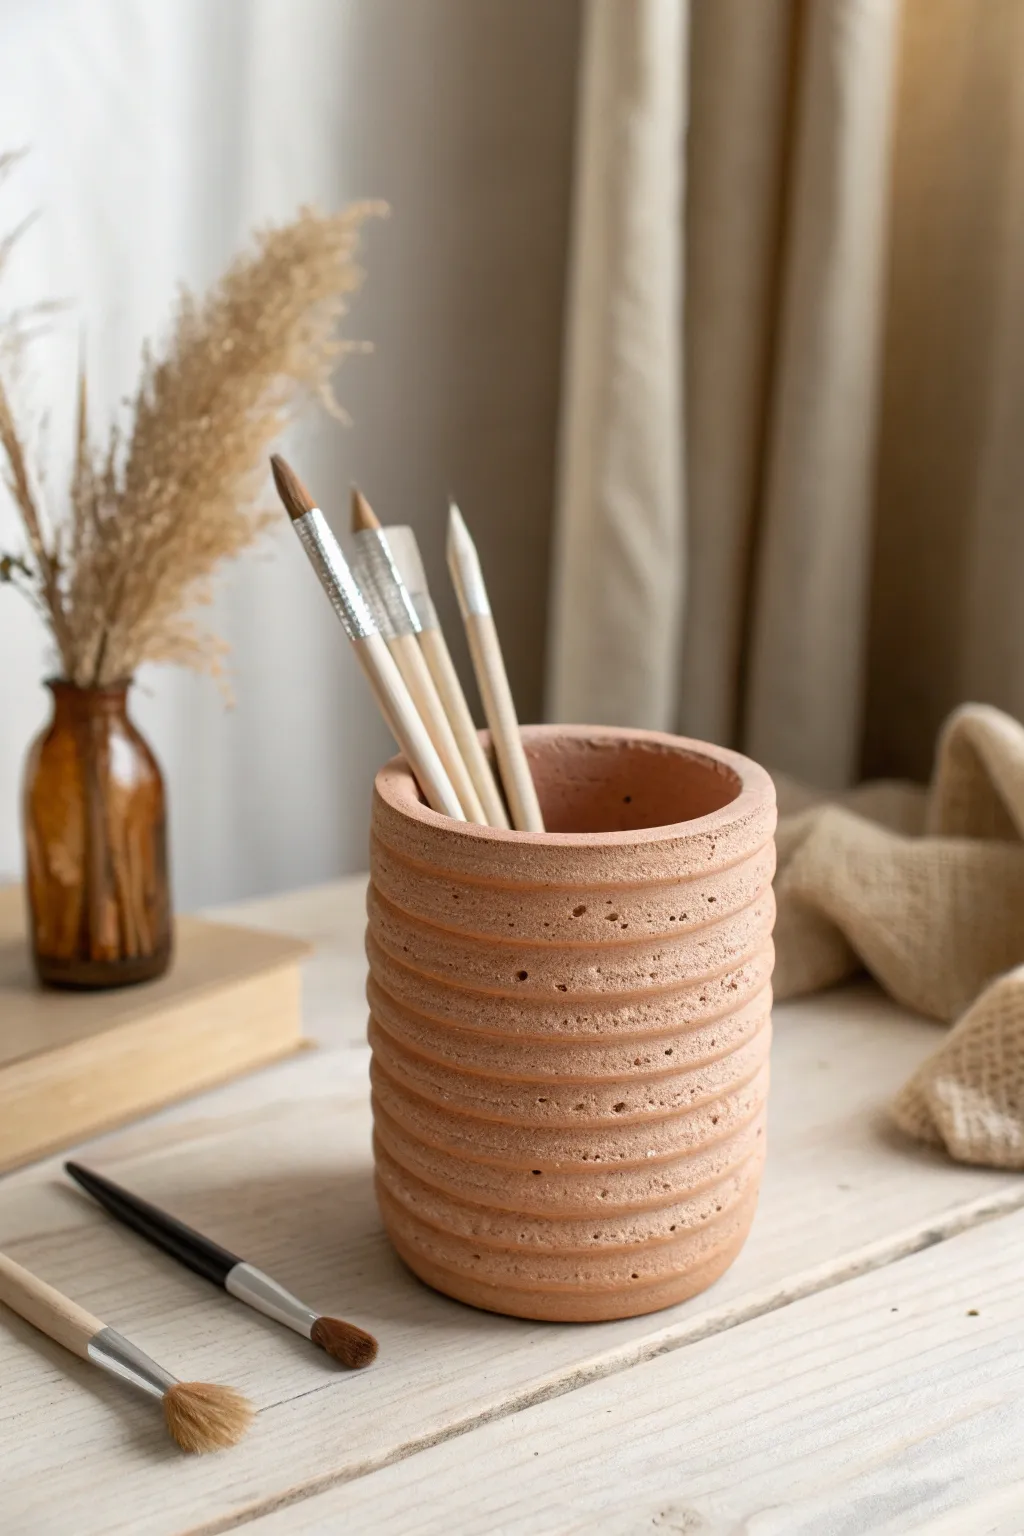
This rustic, textured pencil cup features warm terracotta tones and a satisfying ribbed surface that feels earthy and distinct. It is a deceptively simple project that uses a clever coil stacking technique to achieve its consistent, ridged design.
Step-by-Step Tutorial
Materials
- Terracotta-colored air-dry clay (or polymer clay)
- Wide PVC pipe or cylindrical jar (as a mold)
- Parchment paper or plastic wrap
- Rolling pin
- Clay knife or craft blade
- Small bowl of water (for joining)
- Old toothbrush or bristle brush
- Sponge
Step 1: Preparation & Base
-
Prepare the Mold:
Begin by selecting a cylindrical object to use as your form, such as a piece of wide PVC pipe or a glass jar. Wrap this form completely in parchment paper or plastic wrap to ensure your clay won’t stick to it during the sculpting process. -
Roll the Base:
Take a handful of clay and knead it until soft. Roll it out into a flat slab about 1/4 inch thick. Place your wrapped cylinder on top of the slab. -
Cut the Circle:
Use your craft knife to trace around the base of the cylinder, cutting out a perfect circle of clay. This will serve as the bottom of your pencil cup. -
Score the Edge:
Gently scratch the outer rim of your circle base with a toothbrush or scoring tool. Dab a tiny amount of water on the scratched area to create a sticky ‘slip’ that will help the walls adhere.
Secret to Uniformity
Use a clay extruder tool instead of hand-rolling your coils. This guarantees that every single ridge is exactly the same thickness, giving your cup a much more professional finish.
Step 2: Creating the Ribbed Walls
-
Roll Long Coils:
Roll several generous pieces of clay into long, even snakes or ‘coils’. Aim for a thickness of about 1/2 inch per coil. Consistency is key here, so try to keep the pressure even as you roll. -
First Ring:
Take your first coil and wrap it around the base of the mold, directly on top of the scored edge of your bottom circle. Cut the excess length and smooth the two ends together so the join is invisible. -
Blend the Inside:
This is a crucial step for stability: use your finger or a modeling tool to smear clay from the *inside* of the first coil down onto the base. Do not smooth the outside; we want to keep that ridge definition. -
Stacking Up:
Score the top of your first coil. Place a second coil directly on top. Press it down firmly but gently to ensure contact without flattening the rounded shape too much. -
Repeat and Build:
Continue stacking coils one by one. For each layer, join the ends seamlessly and smudge the clay together on the *interior* side of the cup only. I find it helpful to stand up occasionally to check that the walls are rising straight. -
Check height:
Keep stacking until the cup reaches your desired height. The example shown has about 8-10 distinct ridges. -
Finish the Rim:
Once you reach the top, you can either leave the final coil rounded for a natural look or gently flatten it with your rolling pin for a more modern, flush rim.
Faux-Concrete Finish
Mix a small amount of coarse sand or used coffee grounds directly into your clay before rolling. This embedded grit enhances the rustic, stone-like texture once dried.
Step 3: Texturing & Drying
-
Add Surface Texture:
To mimic the stone-like porous look in the photo, take a stiff-bristled brush or an old toothbrush and firmly tap it against the outside of your coils. This adds tiny pockmarks and an organic feel. -
Refine the Grooves:
If the definition between your coils got a bit messy, run a rounded modeling tool or the back of a paintbrush gently along the horizontal grooves to deepen them again. -
Initial Drying:
Let the piece sit with the mold inside for about 1-2 hours until the clay stiffens slightly and can hold its own weight. -
Remove Mold:
Carefully slide the cylinder mold out. Peel away the parchment paper or plastic wrap from the inside of your new cup. -
Final Polish:
Check the interior seams. If they look rough, smooth them out now with a slightly damp sponge while the clay is still workable. -
Complete Drying:
Place the cup in a cool, dry spot away from direct sunlight. Let it dry completely for 24-48 hours. If using polymer clay, bake according to the package instructions instead.
Once fully dry, your new pencil holder will bring a lovely touch of artisanal warmth to your desk.
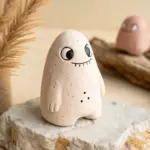


Tiny Mushroom Buddy
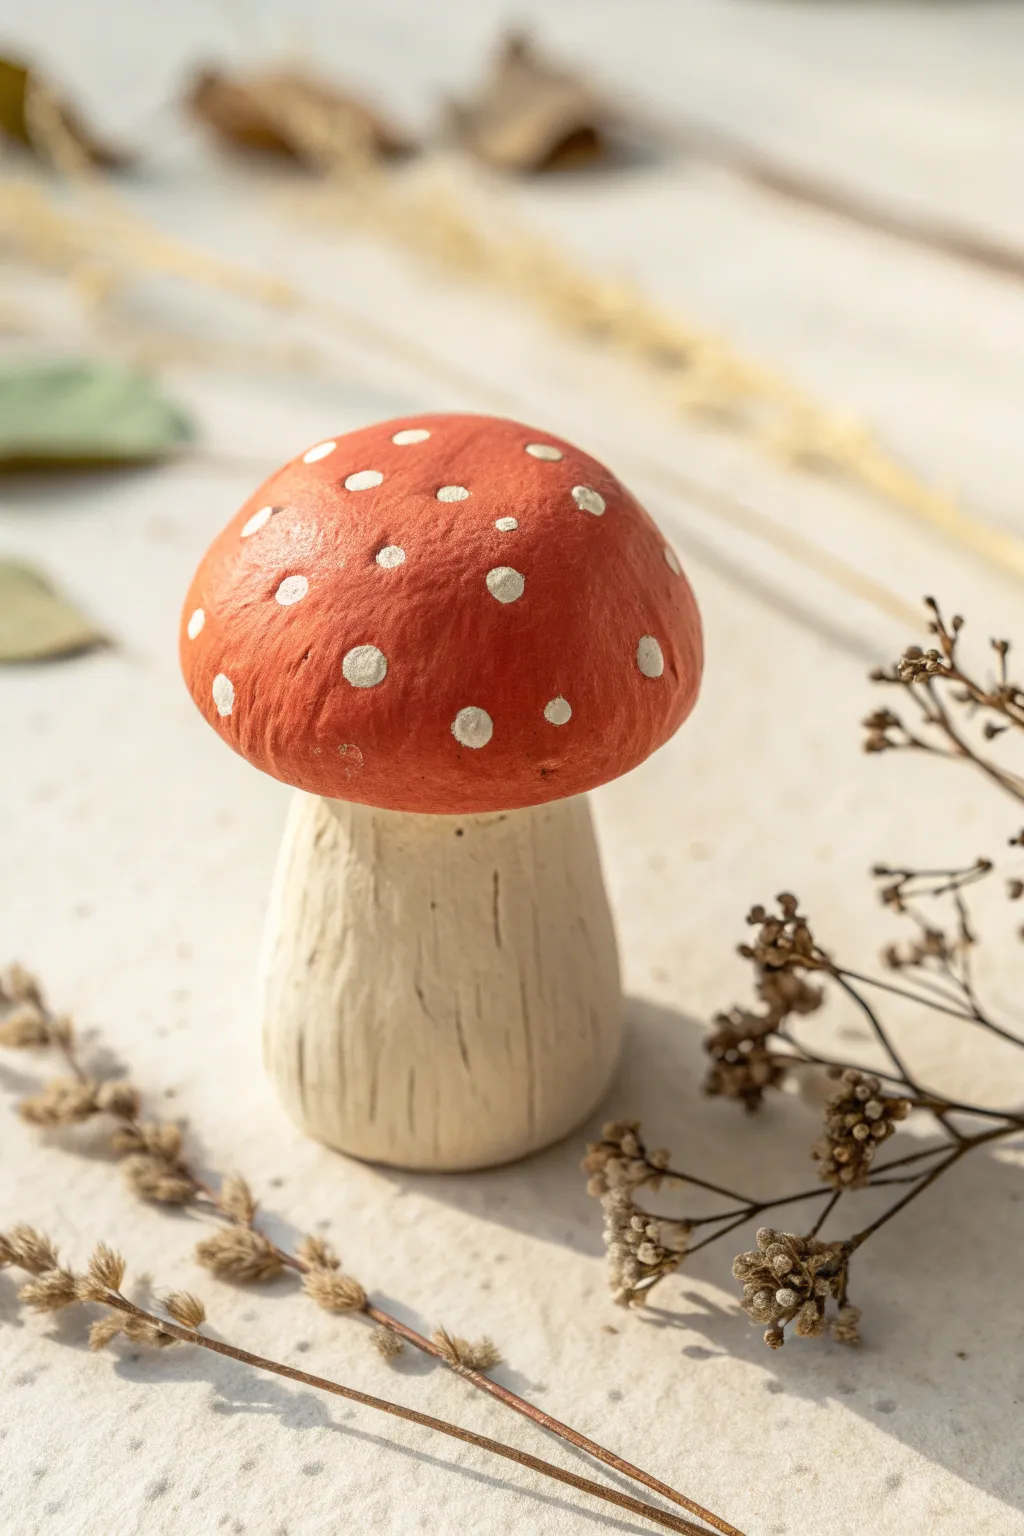
Bring a touch of forest magic to your desk with this charming clay toadstool, featuring a textured stem and a bright, spotted cap. The rustic, handcrafted finish gives it a cozy, organic feel perfect for beginner sculptors.
Step-by-Step Tutorial
Materials
- White air-dry clay or polymer clay
- Aluminum foil
- Acrylic paints: warm white, burnt umber, bright red
- Fine detail paintbrush
- Medium flat paintbrush
- Needle tool or toothpick
- Old toothbrush (optional for texturing)
- Matte varnish (optional)
Step 1: Sculpting the Base Form
-
Create the core:
Begin by crumpling a small piece of aluminum foil into a squat cylinder shape. This saves clay and keeps the sculpture lightweight while providing a solid armature. -
Form the stem:
Roll a ball of white clay and flatten it slightly. Wrap it around your foil cylinder, smoothing the seams until the foil is completely hidden and you have a thick, sturdy stalk. -
Shape the cap:
Roll a second, slightly larger ball of clay. Gently flatten the bottom and round the top to create a classic mushroom cap dome shape. -
Check the fit:
Place the cap onto the stem to see if the proportions look right. The cap should slightly overhang the stem, like an umbrella. -
Join the pieces:
Score the top of the stem and the underside of the cap with your needle tool (scratching hash marks). Apply a tiny dab of water or liquid clay as ‘glue’ and press them firmly together. -
Smooth the connection:
Use your finger or a clay tool to smooth the clay where the underside of the cap meets the stem, ensuring a strong bond so the head doesn’t pop off later.
Step 2: Adding Texture and Detail
-
Texture the cap:
Take an old toothbrush or a stiff bristle brush and gently tap it all over the red cap area. This creates a subtle, porous texture rather than a perfectly smooth, plastic look. -
Add stem grooves:
Using your needle tool or a toothpick, vertically drag lines down the stem. Vary the pressure to make some lines deeper than others, mimicking the fibrous look of a real mushroom stalk. -
Refine the shape:
Give the mushroom a final check. I like to gently press the bottom against the table to ensure it stands flat without wobbling. -
Dry completely:
Let your mushroom sit undisturbed. If using air-dry clay, wait 24-48 hours; for polymer clay, bake according to the package instructions.
Cracked Clay?
If you see cracks forming as air-dry clay shrinks, mix a tiny bit of fresh clay with water to make a paste and fill in the gaps, then smooth over.
Step 3: Painting and Finishing
-
Base coat the stem:
Mix a tiny dot of burnt umber into your warm white paint to create a creamy, off-white bone color. Paint the entire stem, getting into those vertical grooves. -
Weather the stem:
While the stem is still slightly tacky, wipe a very lightly damp paper towel over the raised areas. This leaves the darker paint in the crevices for instant depth. -
Paint the cap:
Apply two coats of bright red acrylic paint to the cap, letting the first coat dry before adding the second for solid coverage. -
Paint the spots:
Dip the handle end of your paintbrush or a toothpick into warm white paint. Dot it onto the red cap randomly, varying the sizes for a natural appearance. -
Add gentle highlights:
Once the red dry, you can dry-brush a tiny bit of lighter orange-red on the very top of the dome to mimic sun hitting the surface. -
Seal the work:
Protect your tiny friend with a coat of matte varnish to prevent the acrylic paint from chipping over time.
Make a Trio
Create a whole family by making two more mushrooms at different heights—one tall and skinny, one tiny button—and glue them to a wooden slice base.
Place your finished mushroom near a potted plant or on a shelf to add a little spot of woodland wonder to your room


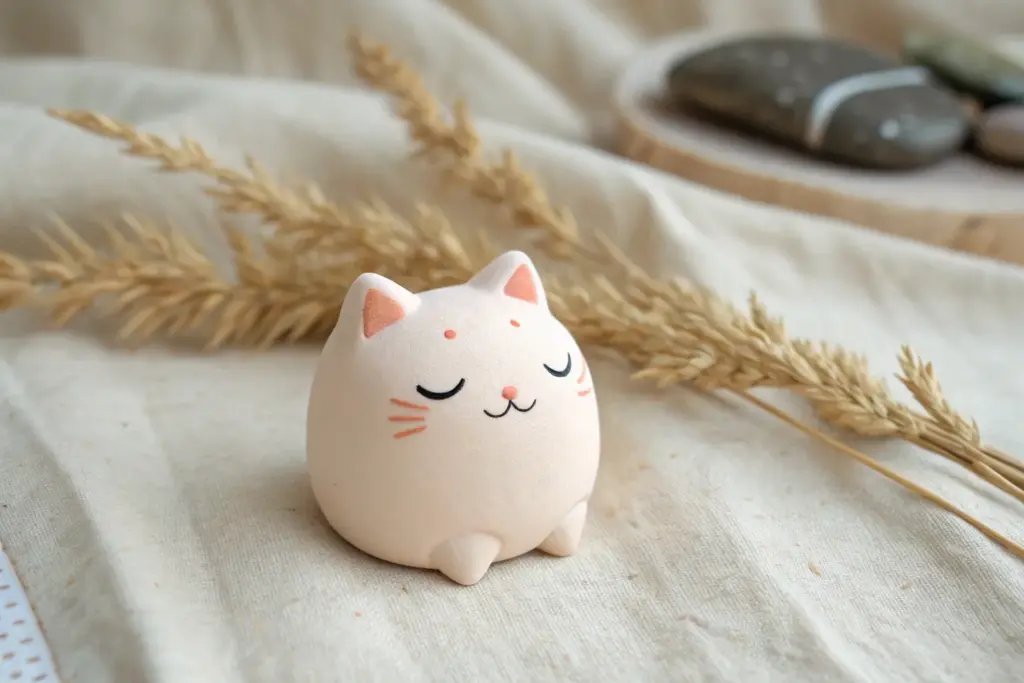
Round Penguin Figure
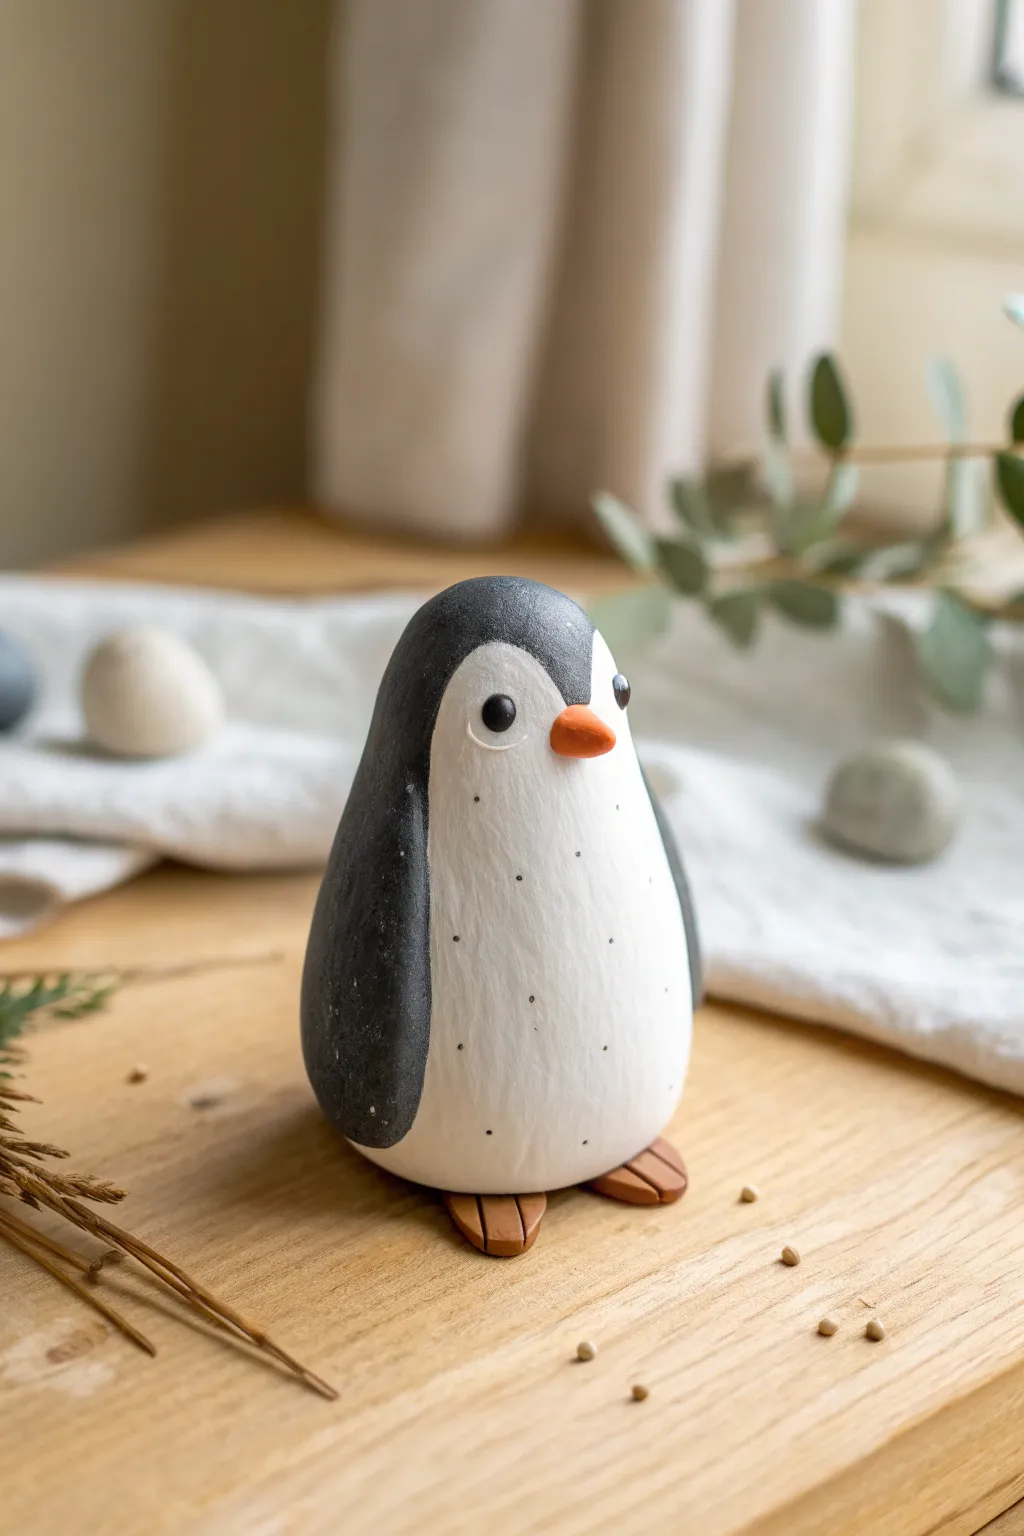
Transform a simple lump of clay into this adorable, smooth-shaped penguin friend. With its minimalist design and speckled belly, this charming little figure makes a perfect desk companion or a sweet handmade gift.
Detailed Instructions
Materials
- White polymer clay (or air-dry clay)
- Acrylic paints (Black, White, Orange)
- Fine-point paintbrush
- Detailing tool or toothpick
- Clear matte varnish
- Aluminum foil (optional, for core)
- Super glue (optional)
Step 1: Shaping the Body
-
Create the core:
Start by conditioning your clay until it is soft and pliable. If you want to save clay or make the figure lighter, you can scrunch a small ball of aluminum foil into a tight egg shape to use as a core. -
Form the main shape:
Roll your white clay into a smooth ball, then gently elongate it into a teardrop or egg shape. It should be wider at the bottom (for stability) and slightly narrower at the top for the head. -
Smooth the surface:
Take time to smooth out any fingerprints or bumps. I find that lightly rolling the clay against a clean work surface helps create that polished ‘pebble’ look. -
Add the wings:
Roll two small, equal-sized sausages of clay. Flatten them gently to create long ovals for the wings. Press them flush against the sides of the body, curving slightly to follow the penguin’s round shape. Blend the seams carefully if you want them to look integrated, or leave them slightly raised for definition.
Step 2: Adding Details
-
Sculpt the beak:
Pinch off a tiny amount of clay and roll it into a small cone. Attach this to the center of the face area, pointing slightly downward. -
Create the feet:
Make two small, flat triangles or semi-circles for the feet. Use a knife tool or a credit card edge to press two lines into each foot to simulate toes. -
Attach the feet:
Position the feet at the very bottom of the penguin body, slightly splayed outward. Press the body down gently onto them to ensure a good bond and that the figure stands upright. -
Bake or dry:
If using polymer clay, bake according to the manufacturer’s instructions (usually around 275°F/130°C for 15-30 minutes). If using air-dry clay, allow it to dry completely for 24-48 hours.
Smooth Moves
Before baking, brush a tiny amount of baby oil or clay softener over the surface. It removes fingerprints and creates a flawlessly smooth finish like a river stone.
Step 3: Painting and Finishing
-
Paint the black coat:
Once fully cured and cool, paint the back, wings, and top of the head with black acrylic paint. Create a curved ‘widow’s peak’ shape on the forehead to frame the face. -
First coat drying:
Let the black paint dry completely before moving on to avoid smudging. -
Define the white belly:
If your base clay wasn’t pure white, paint the belly area white now. Ensure the line between the black and white sections is crisp and clean. -
Color the beak and feet:
Using a vibrant orange paint, carefully color the beak and the feet. -
Add the eyes:
Dip the non-brush end of a paintbrush into black paint to dot on the eyes. Place them fairly wide apart for a cuter look. -
Highlight the eyes:
Once the black eye dots are dry, add a tiny speck of white to each pupil to bring the character to life. -
Add belly speckles:
Dilute a tiny bit of black or dark grey paint. Use your finest brush or a toothpick to add very delicate, random speckles to the white belly area for texture. -
Seal the work:
Finish with a coat of clear matte varnish to protect the paint and give the penguin a unified, soft finish.
Arctic Wardrobe
Give your penguin personality by sculpting a tiny scarf or earmuffs using colored clay, or paint a little red bow tie on the chest.
Now you have a charming little desk buddy tailored exactly to your liking

The Complete Guide to Pottery Troubleshooting
Uncover the most common ceramic mistakes—from cracking clay to failed glazes—and learn how to fix them fast.
Easy Panda Head Magnet
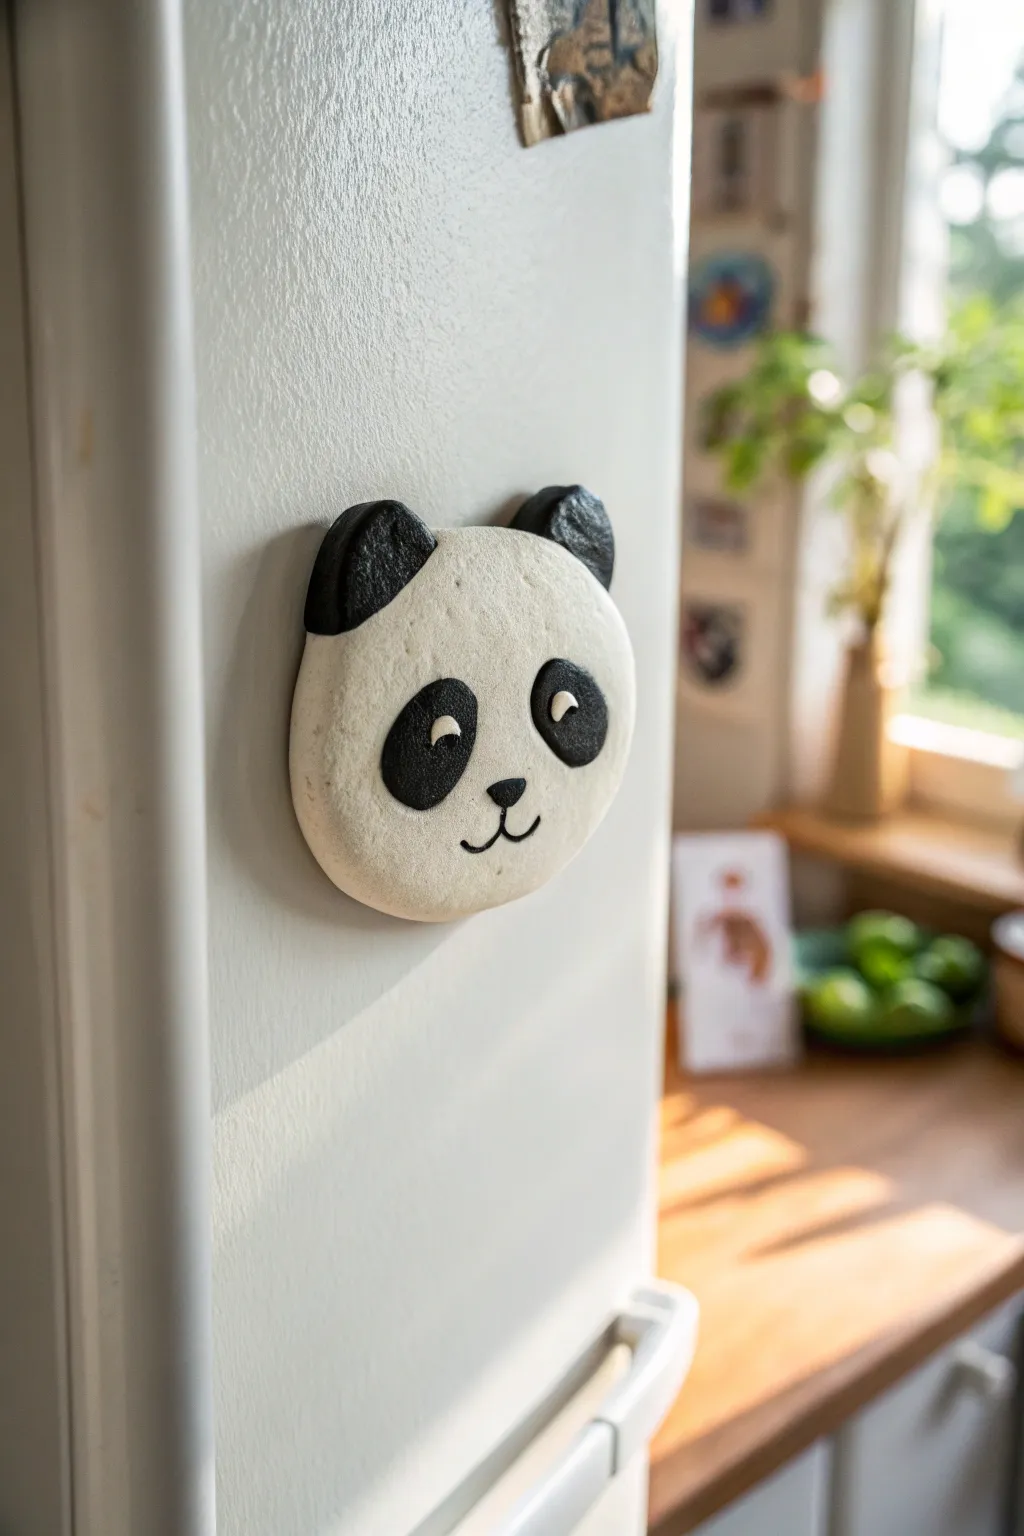
Brighten up your refrigerator door with this adorable, minimalistic panda face magnet. This beginner-friendly project uses simple shapes and basic clay techniques to create a charming, durable piece of functional art.
How-To Guide
Materials
- White polymer clay or air-dry clay
- Black polymer clay or air-dry clay
- Small rolling pin or acrylic roller
- Round cookie cutter (approx. 2-3 inches)
- Small dotting tool or toothpick
- Strong craft glue or E6000
- Round ceramic magnet or magnetic strip
- Modeling tool (plastic knife or blade)
- Optional: Gloss varnish for finishing
Step 1: Shaping the Base
-
Condition the white clay:
Begin by taking a generous amount of white clay. Knead it thoroughly in your hands until it becomes soft, pliable, and free of cracks. -
Roll out the slab:
Using your rolling pin, roll the white clay into a slab. You want it to be fairly thick—about a quarter of an inch—to give the magnet a nice, sturdy feel. -
Cut the primary shape:
Use your round cookie cutter to punch out a perfect circle from the slab. Alternatively, form a ball and flatten it gently with your palm for a more organic, stone-like shape. -
Smooth the edges:
Dip your finger in a tiny bit of water (for air-dry clay) or baby oil (for polymer) and gently run it around the perimeter to smooth out any sharp edges or cutting marks.
Clay cracking?
If your air-dry clay develops tiny cracks while drying, mix a small amount of fresh clay with water to make a paste and fill them in.
Step 2: Adding the Features
-
Form the ears:
Take two small balls of black clay, roughly the size of peas. Flatten them slightly into thick discs. -
Attach the ears:
Press the black discs firmly onto the top left and top right curves of the white head. If using air-dry clay, score the joining surfaces with a toothpick and add a dab of water first to ensure a strong bond. -
Create the eye patches:
Roll two slightly larger balls of black clay. Flatten them into ovals this time, rather than circles, to create the classic slanted panda eye patches. -
Position the patches:
Place the black ovals onto the face, angling them slightly downward towards the center nose area. Press them flat so they merge smoothly with the white base. -
Add the nose:
Roll a tiny speck of black clay into a triangle with rounded corners. Press this right in the center, between the bottom edges of the eye patches. -
Sculpt the mouth:
For the mouth, roll an extremely thin ‘snake’ or thread of black clay. Cut two tiny pieces and curve them to form a ‘w’ shape beneath the nose. -
Detail the eyes:
To give the panda life, roll two tiny white balls of clay. Press these onto the upper part of the black eye patches to create the pupils. -
Add the eye shine:
For that extra cute factor, add an even tinier speck of white clay inside the pupils as a highlight, or create an indented crescent shape using your fingernail or a tool, as seen in the photo.
Customize it
Make a red panda version by using terracotta colored clay for the base and adding white cheek patches before applying the eyes.
Step 3: Finishing and Assembly
-
Final smoothing:
Give the entire piece a once-over. Gently tap down any raised clay bits to ensure the surface is relatively uniform. -
Dry or bake:
If using polymer clay, bake according to the package instructions (usually around 275°F for 15-30 minutes). If using air-dry clay, let it sit in a cool, dry place for 24-48 hours. -
Sand uneven spots:
Once fully cured or dried, check the back of the panda. If it’s not perfectly flat, use a piece of fine-grit sandpaper to level it out so the magnet will sit flush. -
Seal the surface:
I prefer to brush on a thin layer of matte or satin varnish at this stage to protect the clay from fingerprints and kitchen grease. -
Attach the magnet:
Apply a strong dab of E6000 or super glue to the center of the back of the panda head. Press your round magnet firmly into the glue. -
Let it cure:
Allow the glue to cure completely undisturbed for several hours before testing it on your fridge.
Your new panda friend is ready to hold up your grocery lists and favorite photos
Mini Octopus With Dot Eyes
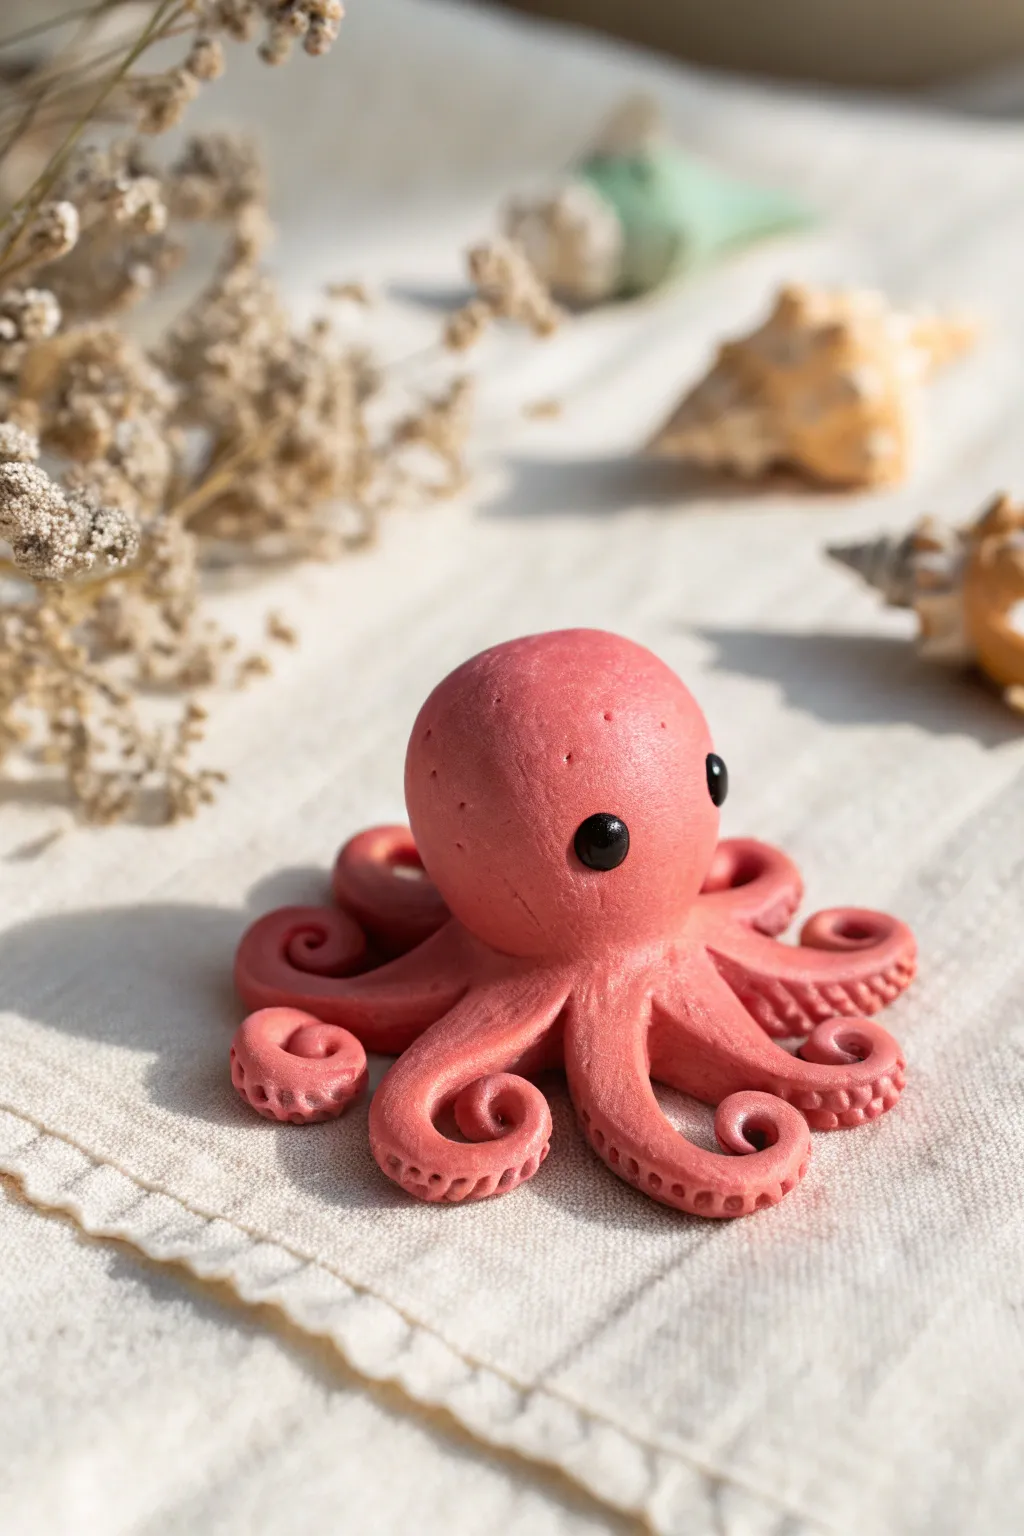
Create a charming little sea creature that fits right in the palm of your hand. This coral pink octopus features delicately curled tentacles with suction cup details and innocent wide-set eyes, making it a perfect beginner sculpture project.
Step-by-Step Guide
Materials
- Polymer clay (coral or salmon pink)
- Polymer clay (black)
- Clay sculpting tools (needle tool and ball tool)
- Clean work surface (tile or glass mat)
- Oven for baking
Step 1: Sculpting the Head
-
Condition the Clay:
Start by taking a chunk of your coral pink clay and kneading it in your hands until it becomes soft, warm, and pliable. This conditioning step prevents cracks later on. -
Form the Base Shape:
Roll the clay into a smooth, perfect sphere about the size of a walnut to create the octopus’s head. -
Refine the Head:
Gently press the sphere onto your work surface just enough to flatten the bottom slightly so it doesn’t roll away, while keeping the top nice and round.
Fixing Cracks
If you see tiny cracks while curling the tentacles, rub a drop of baby oil or clay softener over the area and smooth it with your finger.
Step 2: Creating Tentacles
-
Prepare Tentacle Clay:
Take another portion of coral clay and divide it into eight equal-sized small pieces. -
Roll the Legs:
Roll each small piece into a tapered log or cone shape, thicker at one end and pointy at the tip. -
Attach the Tentacles:
Press the thicker end of each tentacle under the base of the head you made earlier. Arrange them so they radiate outward like a star. -
Blend the Seams:
I like to use a silicone smoothing tool or my finger to gently blend the clay where the tentacles meet the head, ensuring a seamless connection. -
Curl the Tips:
Take the tip of each tentacle and gently curl it inward or outward. Vary the curls slightly to give the octopus a natural, organic movement.
Step 3: Adding Details
-
Create Suction Cups:
Using a small needle tool or a very fine ball tool, press a row of tiny indentations along the underside or side of each curled tentacle. -
Texture the Skin:
For a bit of realism, lightly tap the surface of the head with a toothbrush or textured sponge to give it a skin-like matte finish rather than shiny smoothness. -
Make Eye Sockets:
Use a medium-sized ball tool to press two indentations into the front of the face where you want the eyes to go. Space them widely for a cute look. -
Form the Eyes:
Roll two very tiny balls of black clay. Make sure they are identical in size. -
Insert the Eyes:
Place the black clay balls into the sockets you created and press them in gently so they are secure but slightly protruding. -
Add Highlights (Optional):
If you want extra sparkle, you can add microscopic dots of white clay to the black eyes, though the solid black look is classic.
Make it a Keychain
Insert a screw eye pin into the top of the head before baking. Once baked and cooled, add a dab of superglue to the pin’s base to secure it forever.
Step 4: Finishing Up
-
Final Check:
Inspect your octopus from all angles. Smooth out any accidental fingerprints or smudges. -
Bake:
Bake the clay according to the manufacturer’s instructions on your package (usually 275°F/135°C for 15-30 minutes depending on thickness). -
Cool Down:
Let the sculpture cool completely in the oven before handling it to ensure maximum durability.
Now you have an adorable aquatic friend ready to display on your desk or shelf


What Really Happens Inside the Kiln
Learn how time and temperature work together inside the kiln to transform clay into durable ceramic.
Cute Dino With Back Spikes
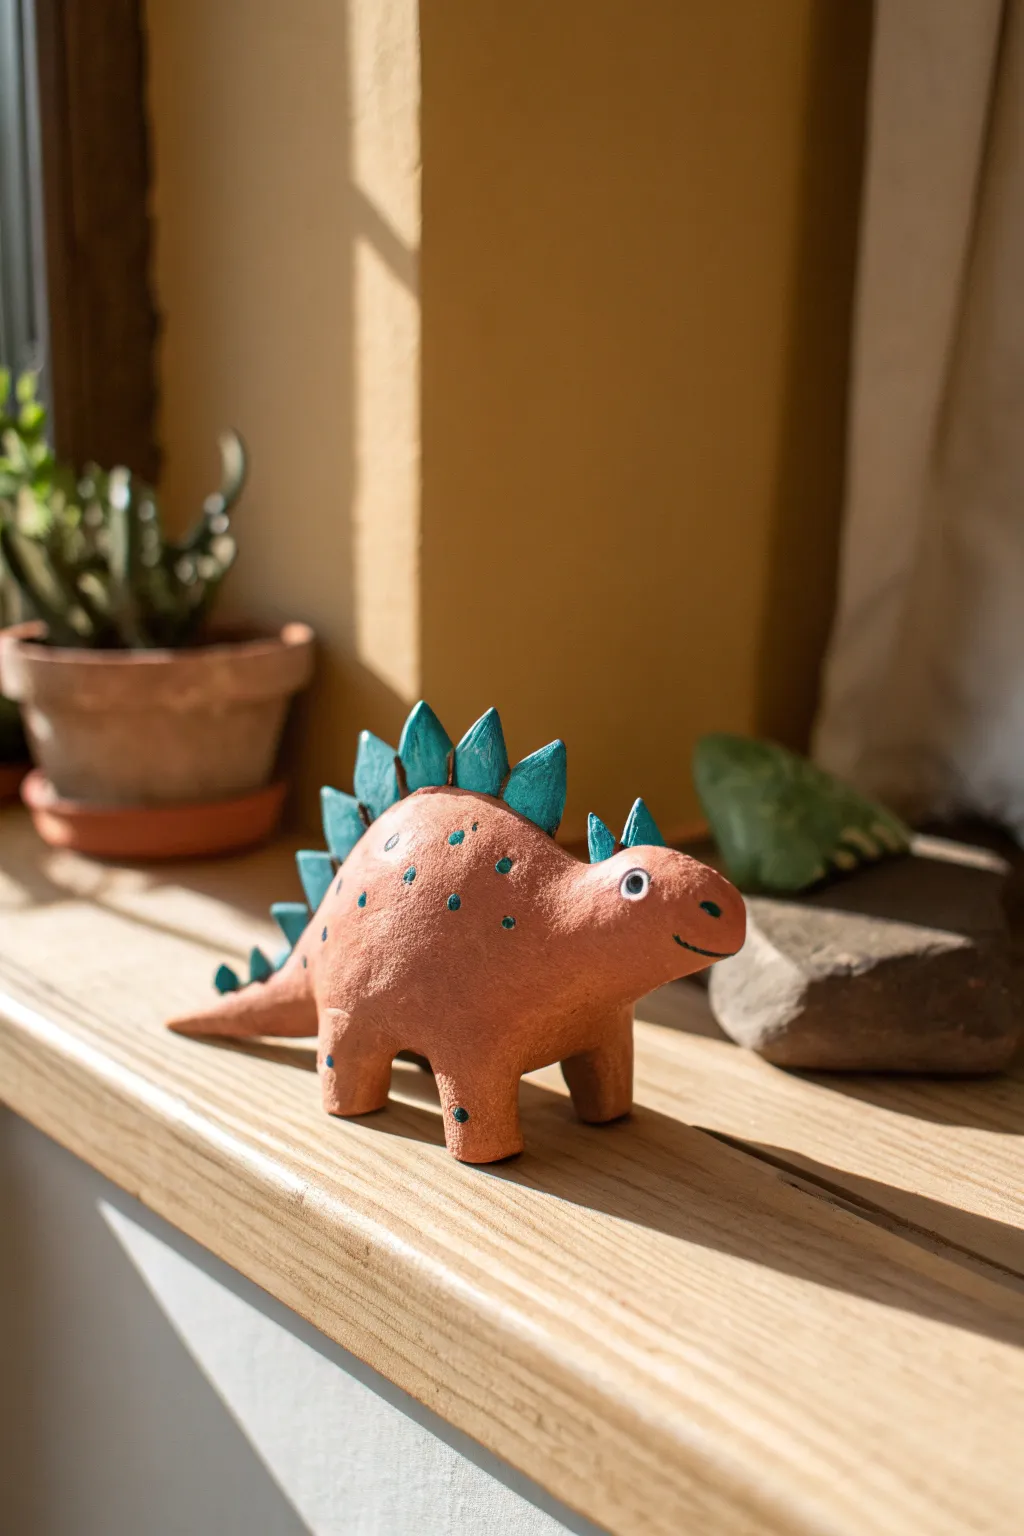
This charming little dinosaur brings a prehistoric touch to any windowsill with its warm terracotta hue and striking turquoise spikes. The simplified, rounded shape makes it a perfect beginner project, utilizing basic pinching and joining techniques to create a friendly desk companion.
Step-by-Step Tutorial
Materials
- Terracotta-colored air-dry clay (or polymer clay)
- Acrylic paints (Teal/Turquoise, White, Black)
- Small paintbrush
- Cup of water and slip (clay and water mix)
- Modeling tool or toothpick
- Fine-grit sandpaper (optional)
- Matte varnish
Step 1: Shaping the Body
-
Create the main form:
Start with a fist-sized ball of terracotta clay. Knead it until it’s soft and pliable, then roll it into a smooth, thick sausage shape. -
Define the head:
Gently pinch one end of the cylinder to narrow it slightly, pulling it upwards to form the neck and head area. Keep the snout rounded and blunt rather than sharp. -
Form the tail:
On the opposite end, roll the clay between your palms to taper it into a pointy tail. I like to curve it slightly to one side to give the dino a bit of movement. -
Make the legs:
Roll four small, equal-sized balls of clay. Flatten the tops slightly to create little cylinders that will serve as sturdy legs. -
Attach the legs:
Score the bottom of the body and the tops of the leg cylinders with a toothpick (hatching criss-cross lines). Apply a dab of water or clay slip to the scored areas. -
Blend the seams:
Press the legs firmly onto the body. Use your thumb or a modeling tool to smooth the clay from the legs onto the belly so there are no visible seams and the connection is strong. -
Check balance:
Set the dinosaur down on a flat surface and gently press down to flatten the bottom of the feet, ensuring it stands up straight without wobbling.
Spikes Falling Off?
If spikes keep tipping over, prop them up with small crumpled pieces of paper towel or foam while the clay dries. This acts as scaffolding until the clay hardens.
Step 2: Adding the Spikes
-
Prepare the spikes:
Roll out a small slab of clay, about 1/4 inch thick. Use a knife or modeling tool to cut out roughly 6-8 triangle shapes. Make the ones for the middle of the back larger and the ones for the neck and tail smaller. -
Shape the triangles:
Soften the sharp cut edges of each triangle with your wet finger so they look more organic and stone-like. -
Score the back:
Run a line of scoring down the center of the dinosaur’s spine where you want the plates to go. -
Attach the plates:
One by one, score the bottom of each triangle, dip it in a little water or slip, and press it onto the spine. Start with the largest in the middle and work your way out. -
Smooth the connections:
Use a small tool to blend the base of each spike into the back, ensuring they don’t flop over while drying.
Step 3: Finishing Details
-
Dry the model:
Allow the sculpture to dry completely. For air-dry clay, this usually takes 24-48 hours depending on thickness. It will turn a lighter color when fully dry. -
Sand imperfections:
Once bone dry, you can lightly sand any rough fingerprints or sharp edges with fine-grit sandpaper for a smoother look. -
Paint the spikes:
Using a small brush, carefully paint the triangular plates with a bright turquoise or teal acrylic paint. You might need two coats for solid coverage. -
Add texture spots:
Dip the back end of your paintbrush or a toothpick into the same teal paint and dot random spots over the dinosaur’s back and sides. -
Paint the face:
Paint two small white circles for eyes. Once dry, add a tiny black dot in the center of each. Use a thin brush or marker to draw a simple curved smile line. -
Seal the work:
Finish by applying a coat of matte varnish to protect the paint and give the clay a unified sheen.
Natural Texture
Before drying, gently dab the dino’s skin with an old toothbrush or a crumpled ball of foil. This creates a realistic, bumpy skin texture that catches the paint beautifully.
Now find a sunny spot for your prehistoric friend to bask in the warmth
Simple Fruit Slice Coasters
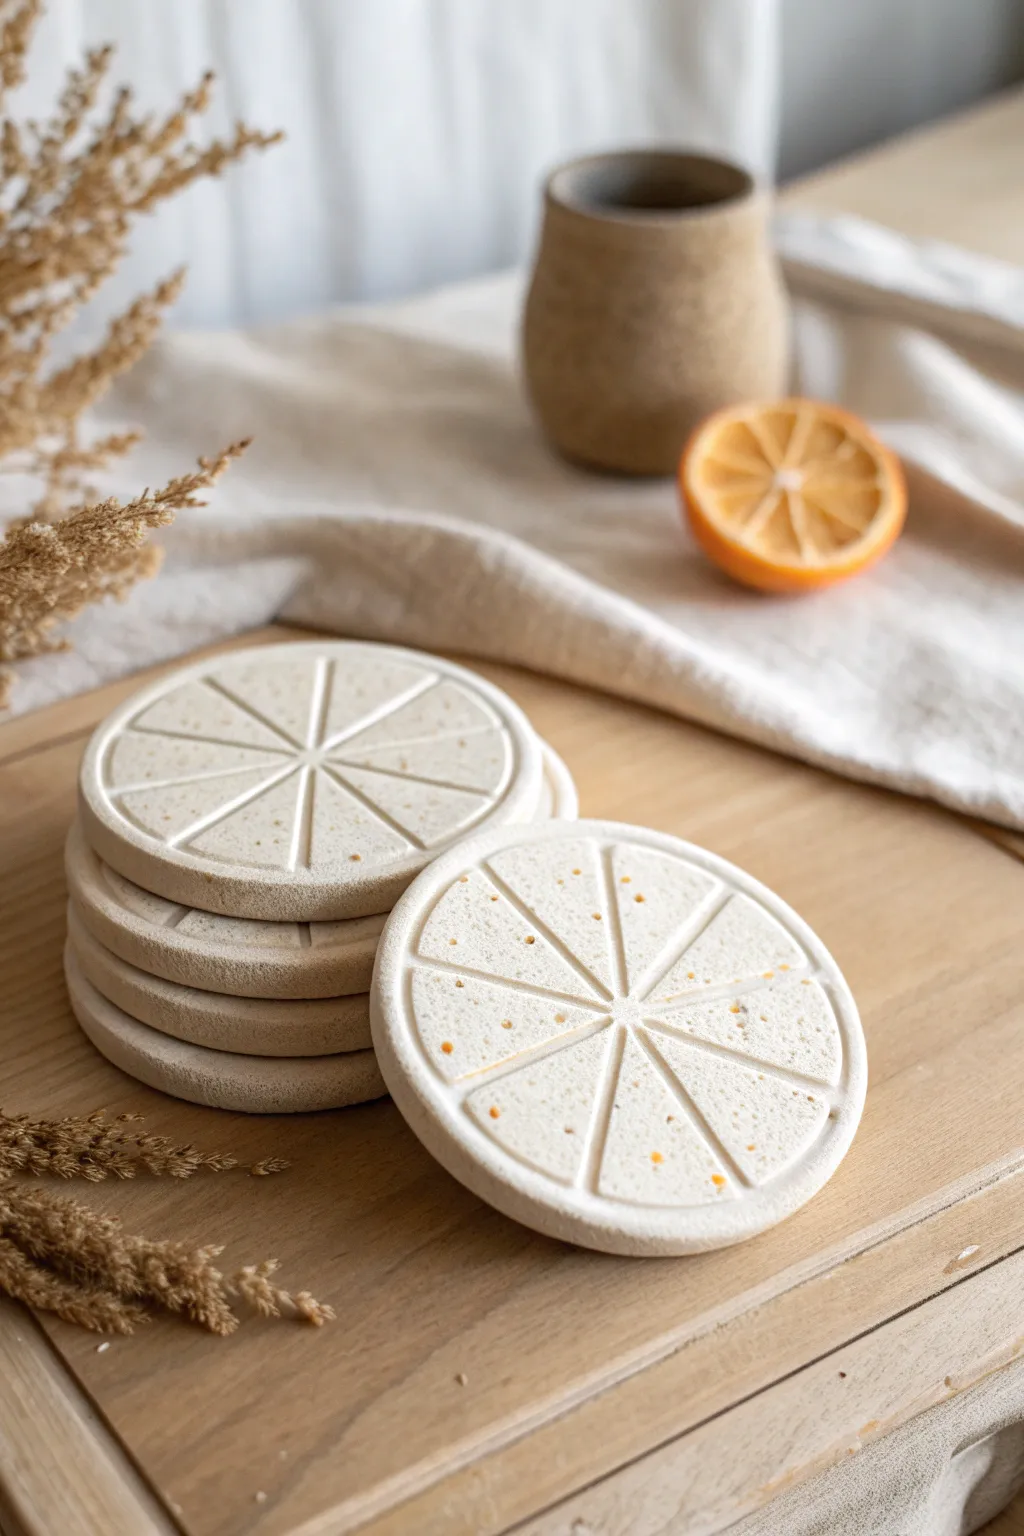
Brighten up your table setting with these charming, textured citrus slice coasters. They capture the fresh look of lemons or oranges using simple clay techniques and subtle speckling for an organic, handmade feel.
How-To Guide
Materials
- Air-dry clay (white or off-white)
- Dough roller or rolling pin
- Round cookie cutter (approx. 4 inches)
- Ruler or straight edge
- Clay carving tool or butter knife
- Fine grit sandpaper
- Dried herbs or used coffee grounds (for speckling)
- Small bowl of water
- Sponge
- Acrylic sealant (matte)
Step 1: Preparing the Clay Base
-
Condition the clay:
Begin by kneading a large ball of air-dry clay until it feels warm and pliable. This helps prevent cracking later on. -
Add texture:
To achieve that natural, speckled look seen in the photo, sprinkle a tiny pinch of dried herbs or used coffee grounds into the clay and knead it until the specks are evenly distributed. -
Roll it out:
Roll the clay onto a smooth surface to a thickness of about 1/4 inch. Try to keep the thickness consistent so your mugs will sit flat. -
Cut the circles:
Use your large round cookie cutter to punch out your coaster shapes. If you don’t have a cutter, trace around a wide mug or bowl and cut with a craft knife. -
Smooth the edges:
Dip your finger in a little water and run it along the cut edge of each circle to smooth out any roughness or loose bits.
Fixing Cracks
If tiny cracks appear while drying, mix a small amount of clay with water to make a paste (slip) and fill the cracks, then sand smooth once dry.
Step 2: Creating the Citrus Design
-
Mark the center:
Find the rough center of your circle and make a tiny, shallow indentation. This will be your guide for the segments. -
Create the outer rim:
I like to use a slightly smaller bowl or circular object to lightly impress a ring about 1/4 inch from the outer edge, creating the ‘rind’ zone. -
Score the main lines:
Using a ruler and your carving tool, press four straight lines that cross through the center point, creating eight equal pie wedges. -
Widen the gaps:
Go back over your straight lines, pressing slightly wider to create distinct separation between the fruit segments. -
Round the corners:
At the outer edge of each wedge (near the rind line), gently curve the corners using your tool so the segments look rounded and juicy rather than sharp triangles. -
Add surface texture:
Take an old toothbrush or a stiff bristle brush and gently tap the inside of each triangular segment to mimic the texture of fruit pulp.
Step 3: Finishing Touches
-
Initial drying phase:
Place your coasters on a wire rack or a piece of parchment paper. Let them dry for about 24 hours away from direct heat. -
Check for flatness:
Partway through drying, flip the coasters over. If they start curling up at the edges, place a heavy book on top creating a ‘sandwich’ with parchment paper to flatten them. -
Sand the flaws:
Once fully bone dry (usually 48-72 hours), take a piece of fine-grit sandpaper and gently buff the edges and surface to remove any sharp burrs. -
Clean up dust:
Wipe the coasters down with a barely damp sponge or cloth to remove all sanding dust. -
Seal the surface:
Apply two thin coats of matte acrylic sealant. This is crucial for coasters, as it protects the clay from moisture and stains from your drinks.
Colorful Twist
Mix yellow or orange acrylic paint directly into your white clay before rolling for a solid pastel color throughout the coaster.
Now you have a refreshing set of handmade coasters ready to protect your tabletops with style

TRACK YOUR CERAMIC JOURNEY
Capture glaze tests, firing details, and creative progress—all in one simple printable. Make your projects easier to repeat and improve.
Toothbrush Holder Cylinder
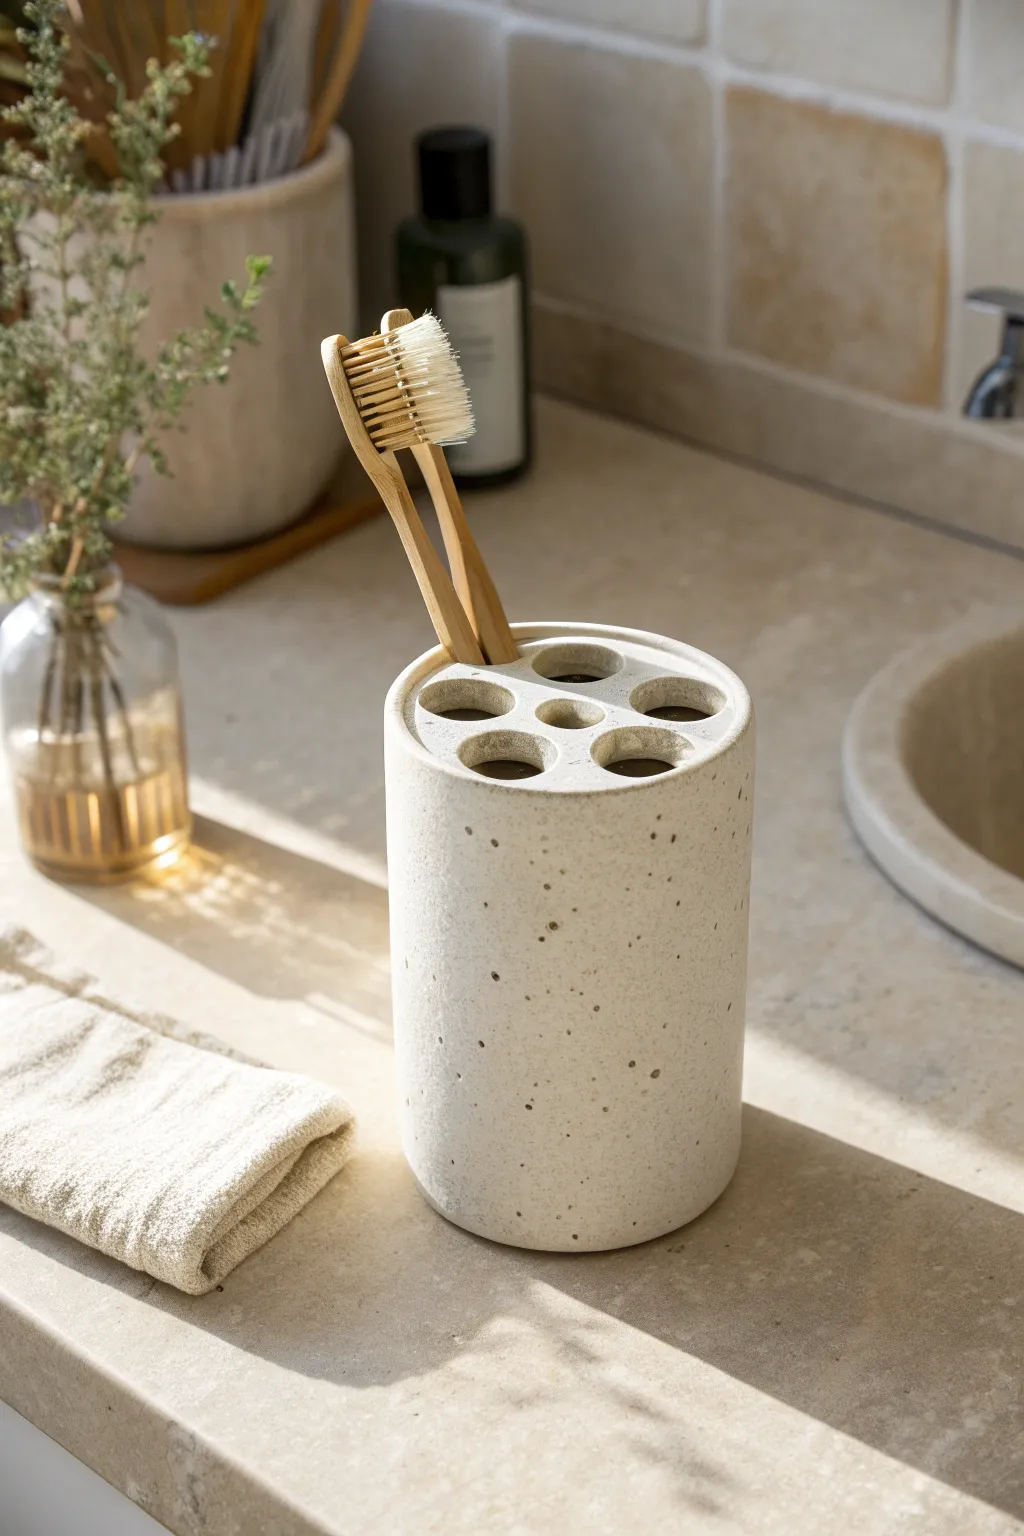
Keep your bathroom organized with this sleek, cylindrical toothbrush holder that mimics the look of natural stone. Its minimalist design features a specialized top partition to separate brushes, finished with a lovely speckled glaze for an earthy, modern touch.
Step-by-Step Tutorial
Materials
- Air-dry clay or polymer clay (white or cream)
- Rolling pin
- Circle cutter (approx. 3-4 inches diameter)
- Ruler
- Craft knife or clay slicer
- Slip (clay and water mixture) or liquid clay adhesive
- Small circle cutter or straw (for drainage holes)
- Medium circle cutter (approx. 0.5-0.75 inch for top holes)
- Sandpaper (medium and fine grit)
- Acrylic sealant or glaze (matte or satin)
- Brown and black acrylic paint (for speckling)
- Old toothbrush (for splatter technique)
- Canvas or silicone mat to work on
Step 1: Forming the Cylinder Body
-
Prepare the clay:
Begin by conditioning your clay until it is soft and pliable. If using air-dry clay, ensure your workspace is clean to avoid picking up unwanted dust. -
Roll the slab:
Roll out a substantial slab of clay to an even thickness of about 1/4 inch (6mm). Using depth guides or rulers on either side of the rolling pin can help maintain consistency. -
Cut the rectangle:
Using a ruler and craft knife, cut a clean rectangle. The length should be the circumference of your desired cylinder plus a tiny bit for joining, and the height should be tall enough to hold toothbrush handles comfortably (around 4-5 inches). -
Cut the base and top:
From the remaining rolled clay, cut two identical circles using your large circle cutter. One will serve as the solid base, and the other will become the perforated top. -
Bevel the edges:
On your rectangular slab, cut the short ends at a 45-degree angle (beveling) so they will overlap seamlessly when rolled into a tube. -
Form the tube:
Carefully stand the rectangle up and curve it into a cylinder. Apply score marks and slip (or liquid clay) to the beveled edges, then press them together firmly. -
Smooth the seam:
Use a modeling tool or your finger to smooth the vertical seam both inside and outside. I like to really take my time here to make sure the join is invisible.
Clean Cuts Tip
When cutting the holes in the top circle, let the clay dry for about 15 minutes first. Since it will be slightly firmer, the cutter won’t drag or warp the circle’s shape.
Step 2: Creating the Top & Assembly
-
Design the top holes:
Take one of your clay circles (the top piece) and plan your hole arrangement. A standard pattern, like the one shown, has one central hole surrounded by five or six others. -
Cut the openings:
Use your medium circle cutter to punch out the brush holes cleanly. Remove the small clay discs and set them aside for other projects. -
Attach the base:
Score and slip the bottom edge of your cylinder and the outer edge of your solid base circle. Press the cylinder onto the base. -
Blend the bottom:
Smooth the clay from the cylinder down onto the base to create a watertight seal. A small coil of clay placed inside the bottom seam can reinforce this joint. -
Add the perforated top:
Score and slip the top rim of the cylinder. Place your perforated circle on top, ensuring it sits flush with the walls. -
Smooth top edges:
Blend the seam between the top circle and the cylinder walls until the transition is smooth and rounded. You want it to look like a solid block rather than assembled pieces. -
Final shaping:
Check the cylinder for symmetry. If it has warped during handling, gently gently reshape it into a perfect circle. -
Dry thoroughly:
Allow the piece to dry completely. For air-dry clay, this may take 24-48 hours. Turn it occasionally to ensure even drying.
Step 3: Finishing Touches
-
Sand until smooth:
Once fully dry (or cured, if baking), sand the entire surface. Start with medium grit to remove bumps, then finish with fine grit for a stone-smooth feel. -
Create the speckle mix:
Dilute a small amount of brown and black acrylic paint with water until it is quite runny. -
Apply the splatter:
Dip an old toothbrush into the paint mixture. Hold it near the cylinder and run your thumb across the bristles to flick tiny specks onto the clay surface. -
Let paint dry:
Wait for the paint speckles to dry completely. Avoid touching the surface to prevent smearing the tiny dots. -
Seal the piece:
Apply 2-3 coats of a waterproof varnish or sealant. This is crucial for a bathroom item to protect it from moisture and water splashes.
Level Up: Drip Tray
Instead of sealing the bottom completely, create a removable base or leave the bottom open and place it on a matching clay saucer. This makes cleaning much easier.
Now you have a stylish and functional piece of decor that keeps your vanity tidy.
Wavy Soap Dish Slab
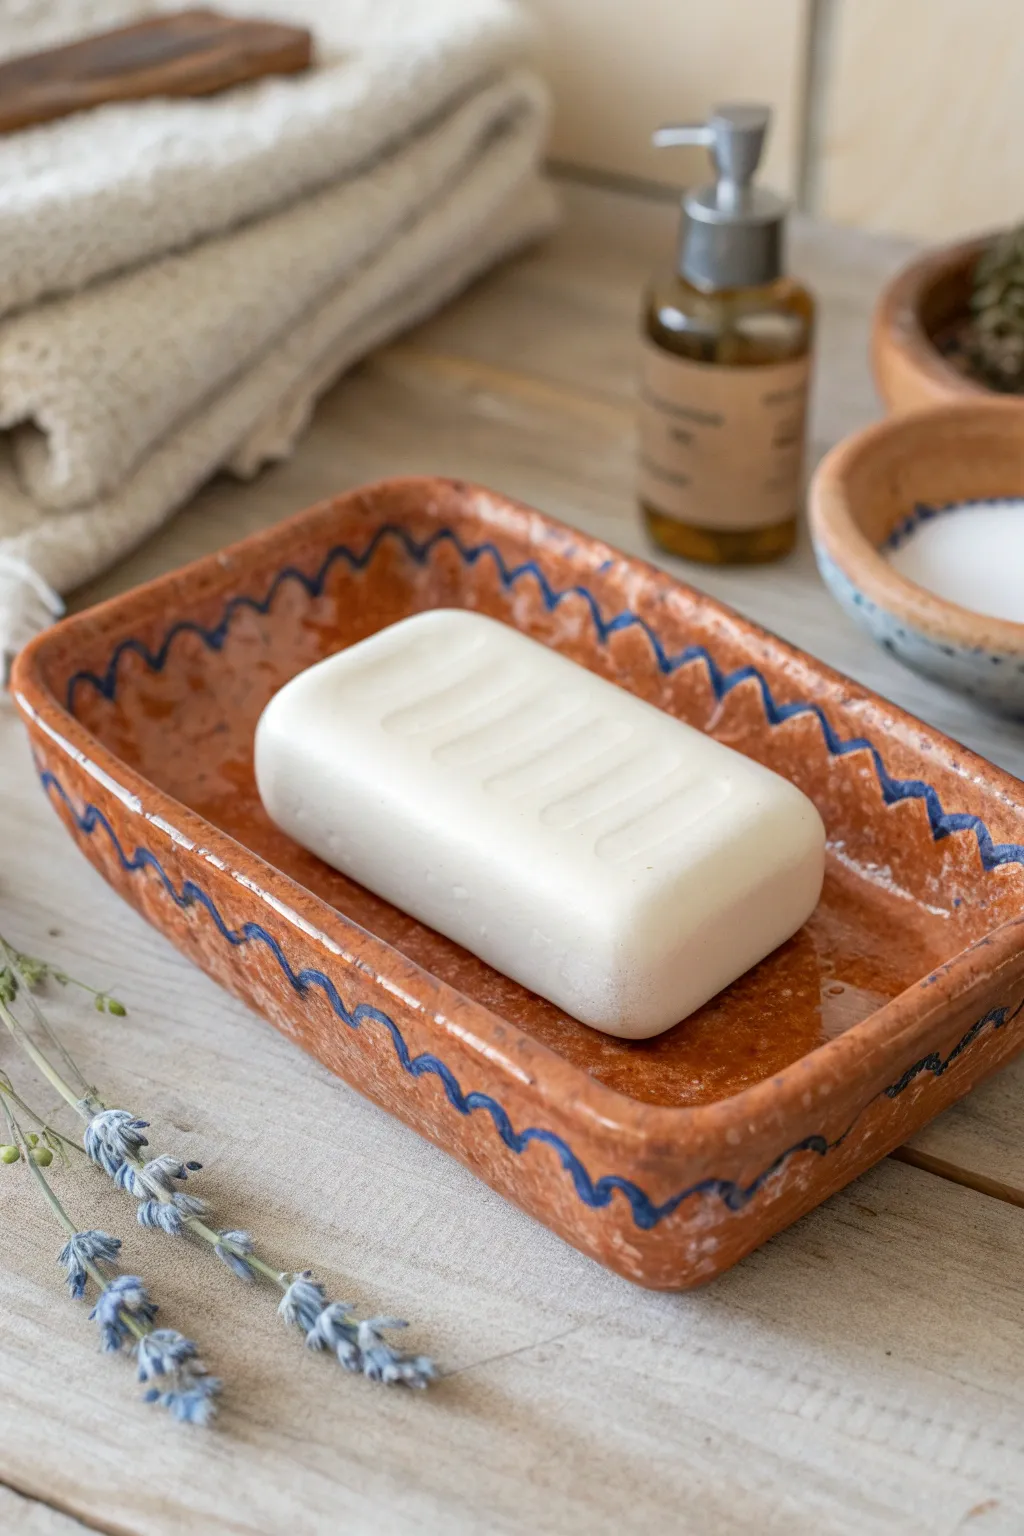
Embrace the rustic charm of terracotta with this simple slab-built soap dish, perfect for beginners looking to practice their hand-building skills. The finished piece features a warm, glossy glaze and a whimsical blue wavy line pattern that adds a touch of folk art character to any bathroom.
Step-by-Step Guide
Materials
- Red earthenware clay (terracotta)
- Rolling pin
- Two wooden guide strips (approx. 1/4 inch thick)
- Needle tool or fettling knife
- Small sponge
- Paintbrush (small round tip for detailing)
- Blue underglaze
- Clear transparent glaze (low fire)
- Kiln access (or suitable air-dry clay alternatives if not firing)
Step 1: Slab Construction
-
Prepare the slab:
Start with a ball of red earthenware clay. Place your wooden guide strips on either side of the clay and use your rolling pin to flatten it into an even slab. The guides ensure a consistent thickness, which is crucial for even drying. -
Cut the rectangle:
Using a needle tool or fettling knife, cut a clean rectangle from your slab. A size of about 4×6 inches works well for a standard bar of soap, but you can adjust this based on preference. -
Smooth the edges:
Dip your finger or a small sponge in a little water and gently run it along the sharp cut edges of the rectangle. This softens the clay and prevents sharp points after firing. -
Create the walls:
Gently lift the edges of the slab upwards to form a shallow wall. You can pinch the corners slightly to create a rounded, organic transition rather than a sharp box corner. -
Shape the rim:
Use your thumb and forefinger to pinch and refine the rim, ensuring it stands up about half an inch. I like to smooth the top edge one last time with a damp sponge for a professional finish. -
Add drainage (optional):
If you want drainage holes, use a small straw or hole cutter to poke a few holes in the center of the dish base now, while the clay is still plastic.
Uneven Drying?
If the base warps while drying, place a small weighted bag of sand or rice in the center of the dish while it dries to keep it flat.
Step 2: Decoration & Glazing
-
Form the wavy pattern:
Once the clay is leather-hard (stiff but cool to the touch), use a small carving tool or the back of a paintbrush to lightly incise a wavy line that undulates along the inner and outer rim. This creates a guide for your underglaze. -
Bisque fire:
Allow the piece to dry completely until bone dry. Fire it in the kiln to bisque temperature (usually cone 04) to prepare it for glazing. -
Apply underglaze:
Using a small round brush, carefully paint the incised wavy line with blue underglaze. The indentation helps keep your brush stroke steady. -
Clear glaze application:
Once the underglaze is dry, apply two to three even coats of clear transparent glaze over the entire piece. This will make the red clay rich and shiny while sealing the dish against water. -
Optional aging effect:
If you want the white speckling seen in the image, you can lightly flick a stiff toothbrush loaded with white underglaze over the piece before the final clear glaze application. -
Final wipe:
Wipe the bottom of the dish clean with a sponge to ensure no glaze sticks to the kiln shelf. -
Glaze fire:
Fire the piece a second time to the temperature required for your clear glaze. Let the kiln cool naturally before removing your finished soap dish.
Textured Base
Before rolling your slab, lay a piece of lace or burlap under the clay. This creates a textured bottom that helps grip smooth countertops.
Enjoy using your handcrafted soap dish, knowing it brings a personal touch to your daily routine
Heart Ring Cone Holder
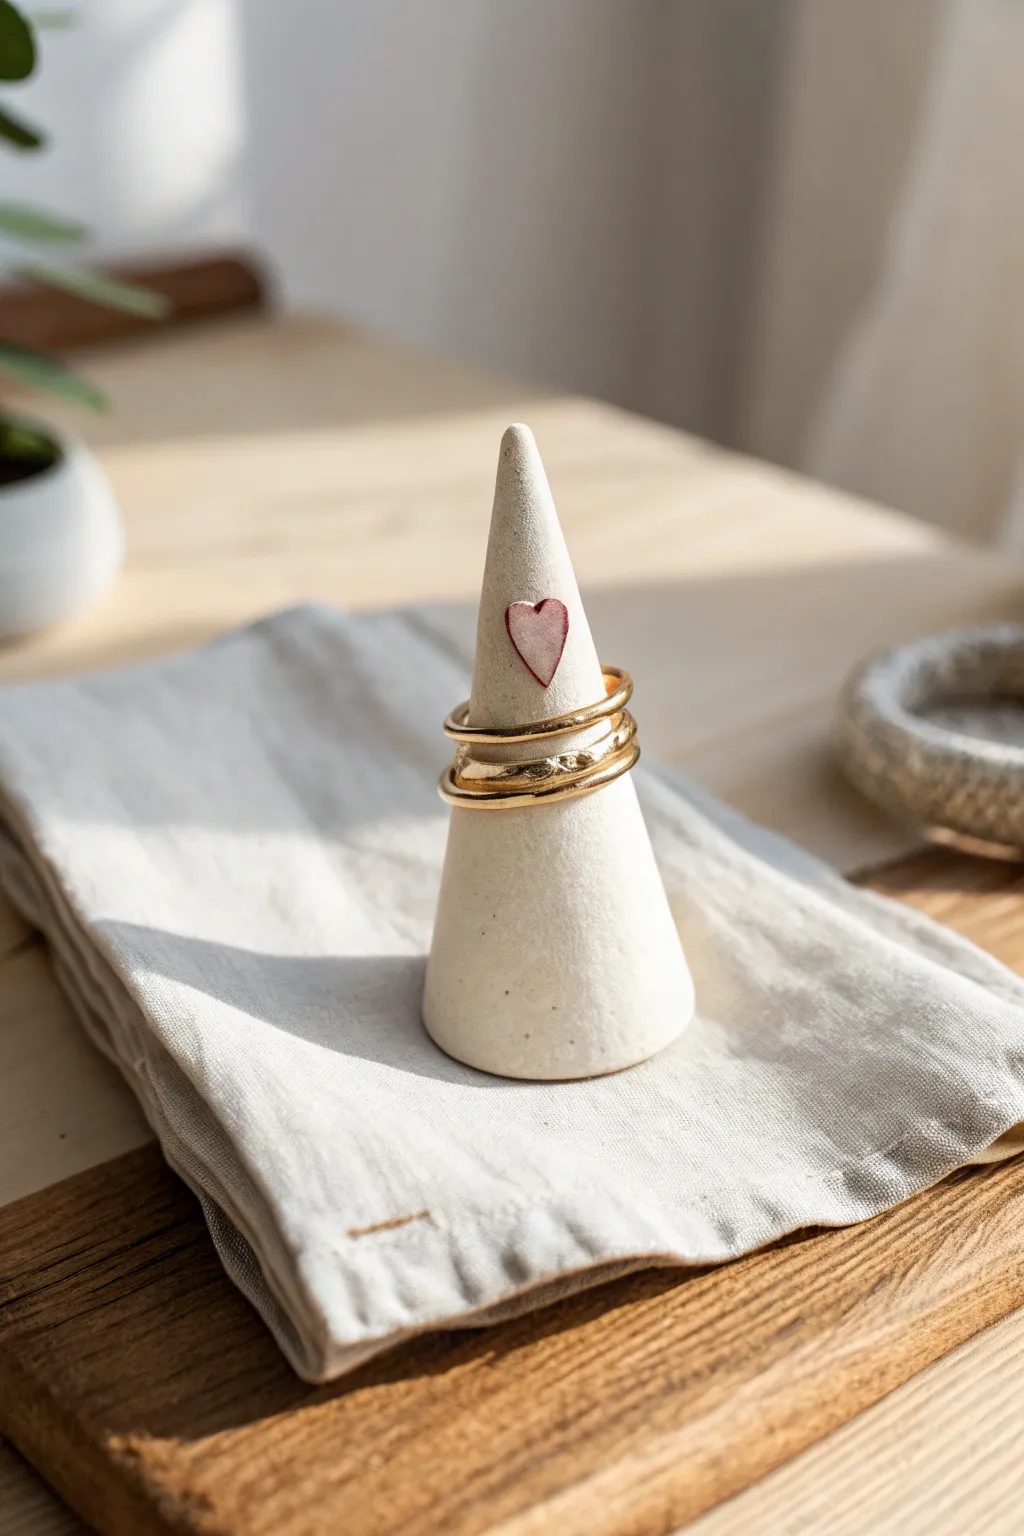
Keep your favorite rings organized and beautifully displayed with this sweet and simple handmade cone. The smooth, creamy finish and delicate stamped heart detail give it a lovely rustic-chic vibe that fits perfectly on any vanity.
How-To Guide
Materials
- White air-dry clay or polymer clay (white or beige)
- Rolling pin or smooth glass bottle
- Cutting tool (clay knife, X-acto, or plastic knife)
- Small heart stamp or sculpting tool
- Red acrylic paint
- Fine-grit sandpaper (optional)
- Small paint brush
- Clear matte varnish (optional)
- Water (for smoothing)
Step 1: Shaping the Cone
-
Condition the Clay:
Start by taking a chunk of your clay—about the size of a golf ball is usually perfect for a single holder. Knead it in your hands until it becomes warm, pliable, and free of cracks. -
Roll a Ball:
Roll the conditioned clay between your palms to form a smooth, round sphere. Try to eliminate any major lines or seams at this stage. -
Create a Cone Shape:
Place the ball on your work surface. Place the side of your hand against the ball at an angle and roll it back and forth gently. Apply more pressure on one side to encourage it to taper into a point. -
Flatten the Base:
Once you have a rough cone shape, pick it up and gently tap the wider bottom against your table to create a flat, stable base. Check that it stands up straight without wobbling. -
Refine the Form:
Use your fingers to smooth out the sides of the cone. You want a tall, slender shape that tapers evenly to a slightly rounded point at the top. I like to continuously rotate the piece while smoothing to keep it symmetrical. -
Smooth Imperfections:
Dip your finger in a tiny bit of water and rub it gently over the surface to erase fingerprints or small cracks. If you are using polymer clay, use a little baby oil instead.
Cracking Up?
If you see tiny cracks forming while air-dry clay is drying, mix a small amount of fresh clay with water to make a paste (slip) and fill them in, then sand smooth once dry.
Step 2: Adding the Heart Detail
-
Mark the Spot:
Decide where you want your heart to sit. Positioning it about two-thirds of the way up the cone generally looks balanced and leaves room for rings at the bottom. -
Impress the Heart:
If you have a small heart stamp, press it gently into the clay at your chosen spot. If not, use a small sculpting tool or even the tip of a pencil to carefully carve a shallow heart outline. -
Check the Depth:
Ensure the indentation is deep enough to hold a little bit of paint later, but not so deep that it distorts the cone’s shape. Reshape the surrounding area if the pressure caused any bulging.
Step 3: Drying and Finishing
-
Dry the Piece:
Let the cone dry completely. For air-dry clay, leave it in a cool, dry place for 24-48 hours, rotating it occasionally for even drying. If using polymer clay, bake it according to the manufacturer’s instructions on the package. -
Sand for Smoothness:
Once fully cured and cool, examine the surface. If there are any rough spots, use fine-grit sandpaper to gently buff them away until the cone feels silky smooth. -
Paint the Heart:
Using a very fine brush, carefully fill in the heart impression with red acrylic paint. You don’t need much paint; a thin layer often looks best to keep that stained, handcrafted look. -
Clean Up Edges:
If any paint got outside the lines, quickly wipe it away with a damp cloth or wait for it to dry and gently scrape it off with your nail. -
Seal the Cone:
To protect your jewelry and the clay, apply a coat of clear matte varnish over the entire piece. This is especially helpful for air-dry clay to prevent moisture damage over time.
Make it a Set
Create a trio of cones in varying heights (tall, medium, short). Paint the hearts in different monochromatic shades like blush pink, terracotta, and deep red for an ombre effect.
Place your new ring holder on your bedside table and enjoy the sweet, handmade touch it adds to your room
Mini Cactus In a Pot
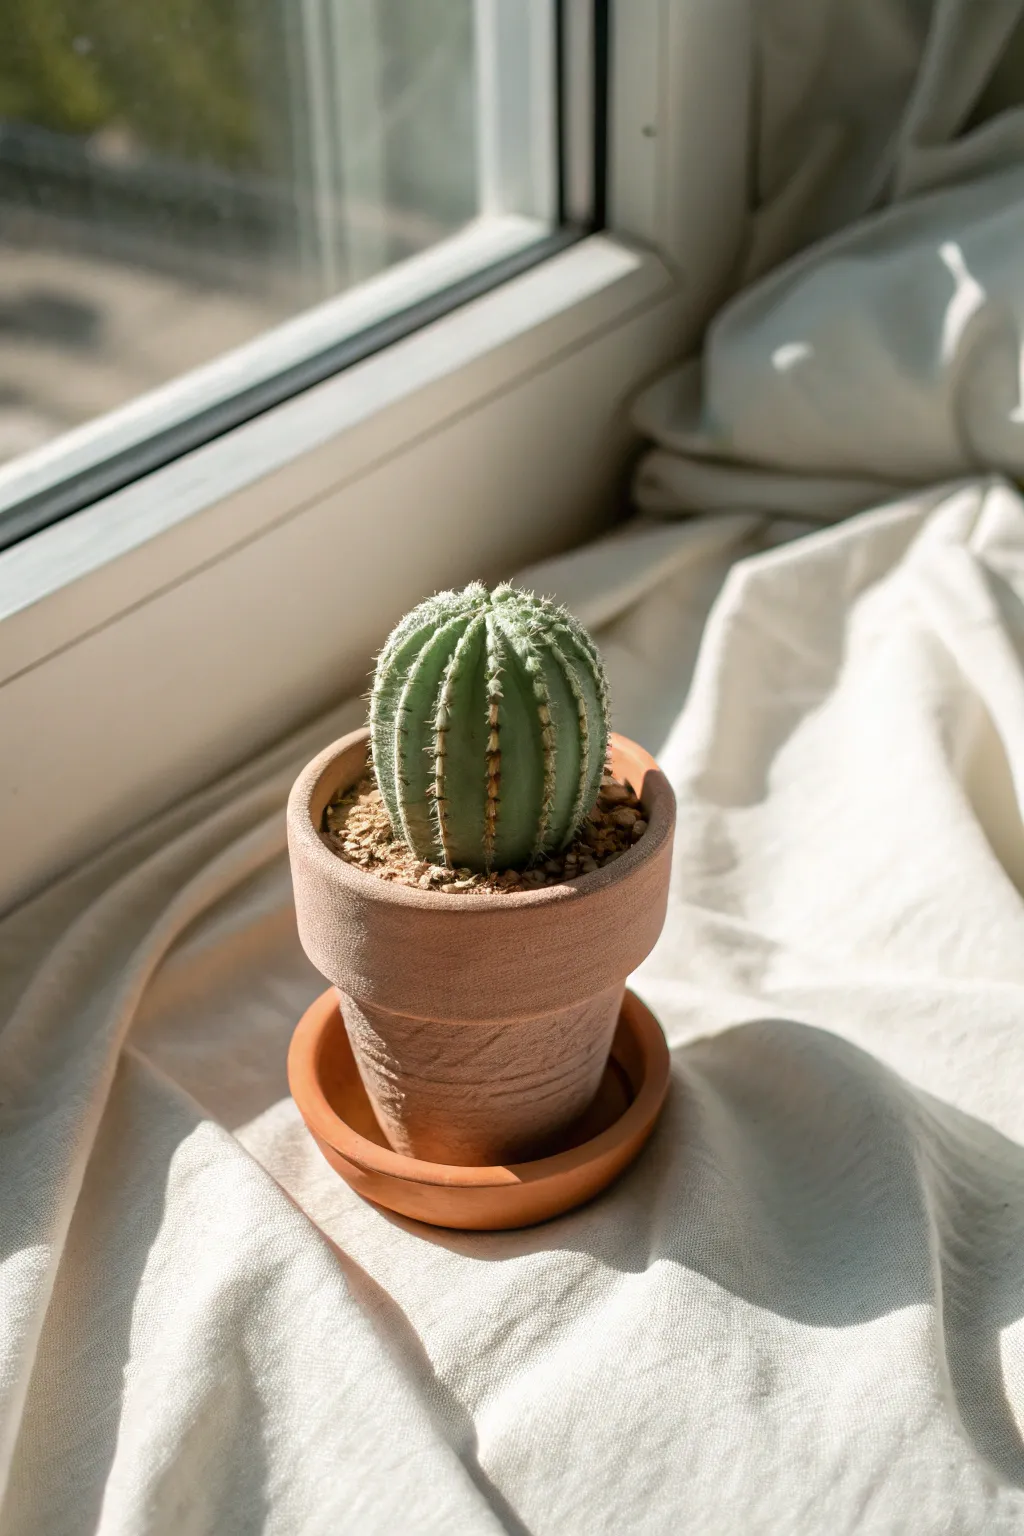
Bring the serene beauty of the desert indoors without any of the prickles. This project involves sculpting a realistic, ribbed cactus nestled in a charming terracotta-style pot, perfect for a sunny windowsill display.
Step-by-Step
Materials
- Polymer clay (terracotta color, green, off-white)
- Acrylic paints (dark brown, light green, white)
- Textured sandpaper or an old toothbrush
- Define sculpting tools (needle tool, ball stylus)
- Small disk or circle cutter
- Liquid polymer clay or strong craft glue
- Coarse sand or beige clay crumbs for ‘soil’
- Fine paintbrush
Step 1: Sculpting the Pot
-
Form the base:
Start with a ball of terracotta-colored clay about the size of a walnut. Flatten it slightly to create a thick disk for the bottom of your pot. -
Build the walls:
Roll a thick snake of terracotta clay and wrap it around the edge of your base disk. Smooth the seams on both the inside and outside using your fingers or a modeling tool to create a solid cup shape. -
Create the rim:
Roll a slightly flattened strip of the same clay and attach it around the top edge of your cup form. This mimics the classic folded rim of a garden pot. Ensure it overhangs slightly for realism. -
Add texture:
Gently press textured sandpaper or an old toothbrush against the outside of the pot. This removes the plastic-like sheen and gives it that porous, earthenware look. -
Make the saucer:
Create a flat disk slightly wider than the bottom of your pot. Add a very low rim around the edge, then texture it to match your main vessel.
A Textured Touch
Roll a ball of aluminum foil over the raw green clay before adding ribs. This creates realistic plant skin texture instantly.
Step 2: Creating the Cactus
-
Shape the body:
Roll a ball of green clay that fits snugly inside your pot, allowing just a little room around the edges. I like to slightly flatten the top so it isn’t a perfect sphere. -
Mark the ribs:
Use a needle tool or the back of a knife to gently press vertical lines from the center top down to the base. Space them evenly to create the cactus’s ribs. -
Deepen the details:
Go back over your vertical lines, pressing a bit deeper to make the sections between them puff out, resembling the segments of a barrel cactus. -
Add the spines:
Roll incredibly tiny, thin snakes of off-white clay. Cut them into microscopic bits and gently press them in rows along the ridges of your green ribs. You can use a needle tool to help place them precisely. -
Dusting the apex:
For the fuzzy top center where new growth happens, create a small textured patch of lighter green or white clay and gently blend it onto the very top point.
Step 3: Assembly and Finishing
-
Pre-bake shading:
Brush a very light dusting of white pastel or chalk powder over the cactus body to give it a dusty, matte finish before baking. -
Bake everything:
Place your pot pieces and the cactus on a baking sheet. Follow the temperature and time instructions on your specific brand of clay packaging. -
Fill the pot:
Once cool, crumble some leftover beige or brown baked clay into tiny debris, or use coarse sand. Mix this with a little liquid clay or glue to create your ‘soil.’ -
Plant the cactus:
Place a dab of glue inside the pot, insert your cactus, and then pack your soil mixture around the gap between the cactus and the pot rim. -
Highlight the pot:
Dry brush a tiny amount of diluted white acrylic paint onto the textured surface of the terracotta pot. This simulates mineral deposits and age. -
Final assembly:
Glue the finished pot securely onto the saucer to complete the look.
Bloom Where You’re Planted
Add a tiny pop of color by sculpting a small yellow or pink flower and attaching it to the top center of the cactus.
Place your eternal succulent in a sunny spot and enjoy the greenery that never needs watering
Mini House Shelf Ornament
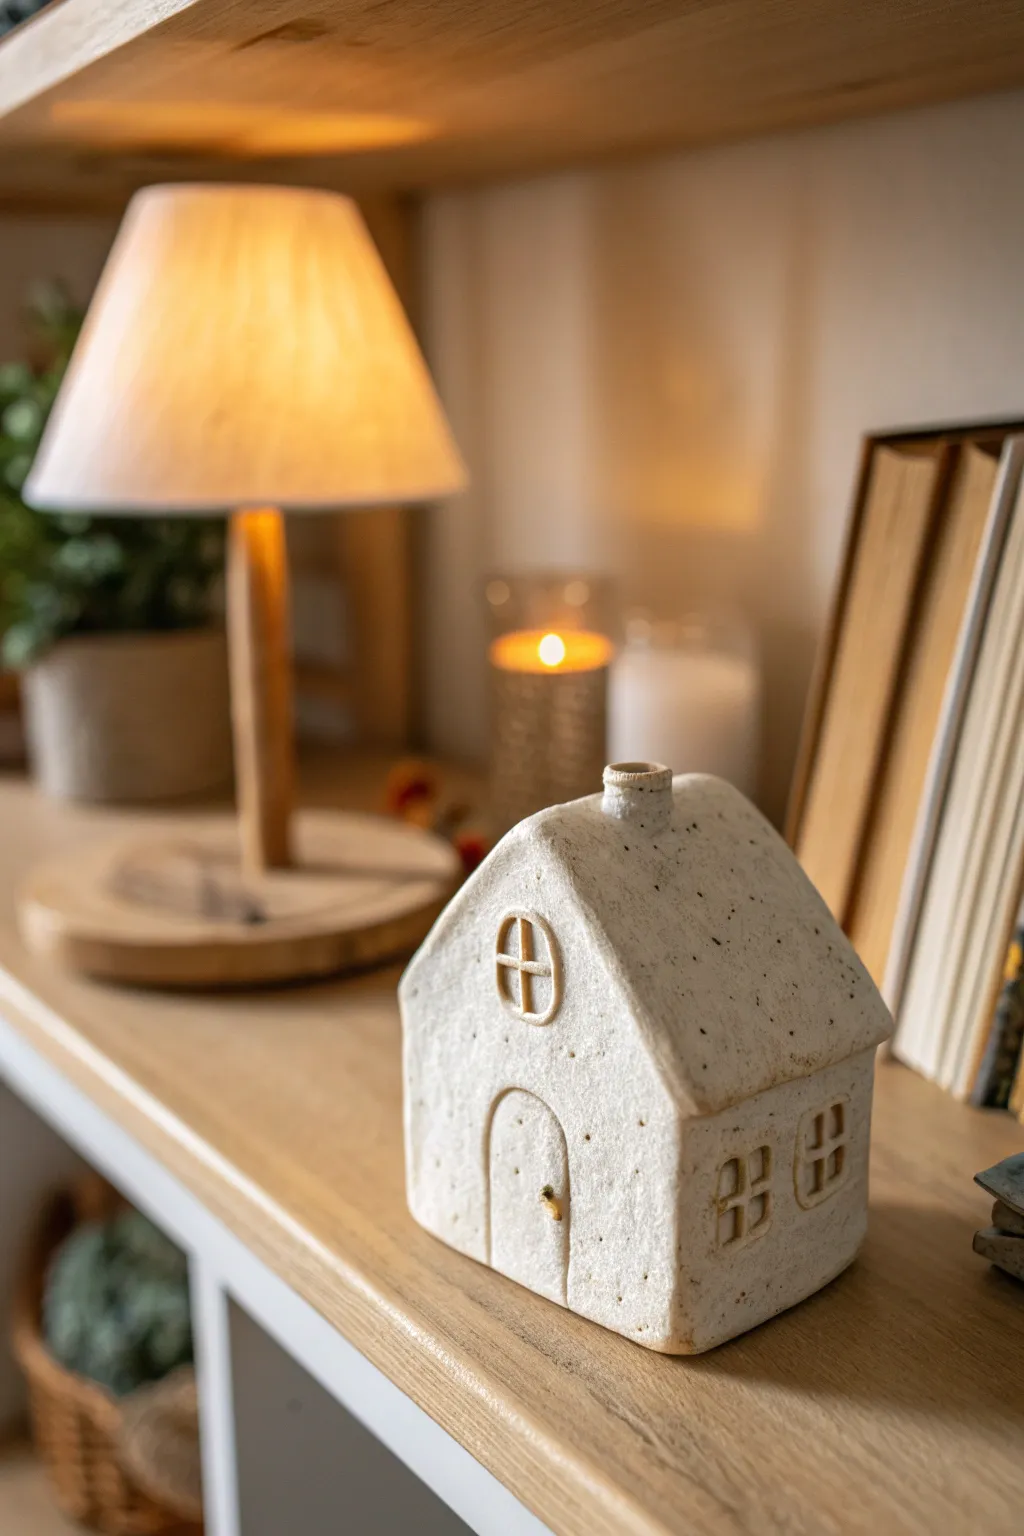
Create a cozy, rustic shelf ornament that mimics the look of speckled stoneware pottery without needing a kiln. This charming mini house features an arched door, paned windows, and a delightful matte texture that warms up any nook.
Step-by-Step Tutorial
Materials
- Air-dry clay (white or light grey)
- Rolling pin
- Craft knife or clay tool set
- Ruler
- Small bowl of water
- Slip (clay mixed with water)
- Acrylic paint (cream/off-white)
- Acrylic paint (brown or black for speckling)
- Old toothbrush
- Matte sealant or varnish
- Fine grit sandpaper
Step 1: Shaping the Base Structure
-
Roll out the slab:
Begin by kneading your air-dry clay to remove air bubbles, then roll it out to a uniform thickness of about 1/4 inch. If you want a perfectly even finish, place two guide strips of wood on either side of your clay while rolling. -
Cut the walls:
Using a ruler and craft knife, cut out two pentagon shapes for the front and back walls (a square with a triangle on top). Mine are typically 3 inches wide and 4 inches tall at the peak. -
Cut side walls and roof:
Cut two rectangles for the side walls (same height as the square part of your front wall) and two longer rectangles for the roof panels. Ensure the roof panels are slightly wider than the house depth to allow for an overhang. -
Detail the front:
Before assembling, create the door. Either lightly carve an arch outline into the front wall or attach a thin, flattened snake of clay to outline the arch shape. Use a needle tool to scratch a vertical line for the door seam and add a tiny clay ball for the doorknob. -
Add the front window:
Roll a small coil of clay into a circle and press it onto the peak area. Add two tiny, crossing strips of clay inside to create the windowpanes. Smooth the edges gently with a wet finger. -
Create side windows:
On one of the side walls, score the clay lightly to mark where two rectangular windows will go. Roll very thin snakes of clay to build the window frames and the cross-shaped panes, pressing them firmly onto the surface.
Keep it Straight
Use a square household object, like a small box or block, as an internal support while you assemble the walls to ensure 90-degree angles.
Step 2: Assembly and Refining
-
Score and slip:
To join the walls, create cross-hatch scratches (scoring) on the edges that will touch. Apply a dab of clay-water mix (slip) to these edges to act as glue. -
Build the box:
Stand up the walls and press the corners together. Use a modeling tool to smooth the seams on the inside and outside so the join becomes invisible. Checking the corners with a set square helps keep the house upright. -
Attach the roof:
Score and slip the top edges of the walls and the underside of your roof panels. Press the roof pieces into place, meeting at the peak. Fill the top seam with a thin coil of clay and smooth it down. -
Chimney time:
Form a small cylinder or cube of clay. Cut the bottom at an angle that matches your roof’s slope. Attach it to the roof using the score and slip method, blending the clay at the base for a seamless look. -
Smoothing texture:
Take a slightly damp sponge and gently wipe over the entire house. This softens any sharp tool marks and gives the piece that organic, handmade pottery feel. -
Dry completely:
Let the house dry slowly away from direct heat for 24-48 hours. I find turning it occasionally helps it dry evenly without warping.
Step 3: The Faux-Ceramic Finish
-
Sand imperfections:
Once fully dry and hard, use fine-grit sandpaper to remove any rough burrs or uneven edges. -
Base coat:
Paint the entire house with a matte cream or off-white acrylic paint. You may need two coats for opaque coverage. Let this dry completely. -
Create the speckles:
Dilute a small amount of dark brown or black acrylic paint with water until it’s inky. Dip an old toothbrush into this mixture. -
Apply the effect:
Hold the toothbrush a few inches from the house and run your thumb across the bristles to flick tiny specks of paint onto the surface. Practice on paper first to control the density. -
Seal the piece:
Protect your work with a matte varnish or sealant spray. This locks in the paint and gives it that finished stoneware sheen.
Make it a Luminary
Cut the windows completely out instead of just framing them, and leave the bottom open. Place an LED tea light underneath to make the house glow.
Place your finished cottage on a shelf near a warm light to enjoy its cozy, handcrafted charm