If you can roll a ball and pinch a little face, you can make the cutest beginner air dry clay animals. These ideas keep things simple on purpose—easy shapes, minimal details, and results that still look totally recognizable and adorable.
Classic Round Pig
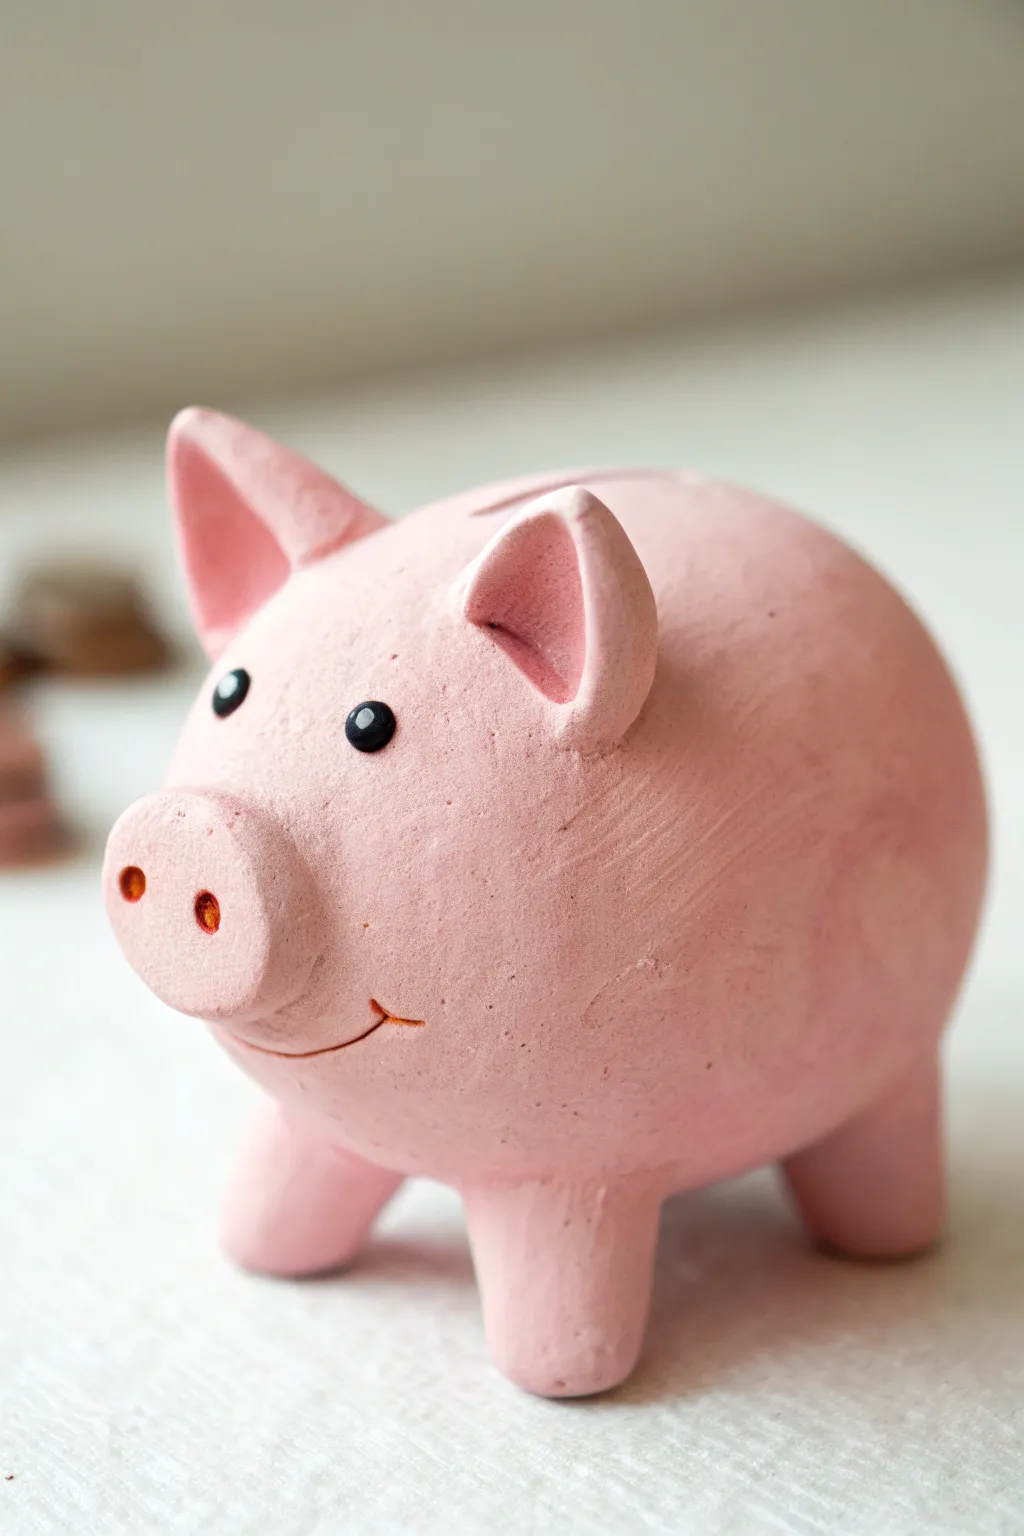
This friendly little pig has a classic, rounded shape and a sweet expression that is perfect for beginners working with air-dry clay. The smooth pink finish and minimal painted details give it a charming, almost cartoon-like quality that looks great on any shelf.
How-To Guide
Materials
- Air-dry clay (white or terracotta)
- Acrylic paint (light pink, black, dark orange/red)
- Paintbrushes (medium flat, small round, fine detail)
- Cup of water
- Aluminum foil
- Clay tools (needle tool, blending tool)
- Water spray bottle (optional)
Step 1: Sculpting the Body
-
Core creation:
Crumple a piece of aluminum foil into a tight ball, slightly elongated into an egg shape. This saves clay and helps the sculpture dry evenly. -
Covering the core:
Roll out a slab of air-dry clay about 1/4 inch thick. Wrap this around your foil core, pressing firmly to remove any trapped air pockets. -
Smoothing the surface:
Dip your fingers in a tiny bit of water and smooth out all seams and wrinkles until you have a perfect, seamless egg shape.
Step 2: Adding Features
-
Creating legs:
Roll four equal-sized balls of clay. Gently tap them onto your work surface to flatten the tops and bottoms, creating short, sturdy cylinders. -
Attaching legs:
Score (scratch) the bottom of the body and the tops of the legs. Add a dab of water or slip (clay mixed with water) and press the legs firmly onto the body. I find it helpful to wiggle them slightly to create suction. -
Blending seams:
Use a blending tool or your finger to smooth the clay from the legs onto the body so they look like one continuous piece, not just stuck on. -
Making the snout:
Roll a smaller ball of clay and flatten it slightly into a thick disc. Attach this to the front of the face, slightly lower than center. -
Snout details:
Use the rounded end of a paintbrush handle to press two nostrils into the snout. -
Shaping ears:
Form two small triangles of clay. Gently pinch them to curve slightly, creating a cup shape that mimics a real pig ear. -
Attaching ears:
Score and slip the base of the ears and attach them high on the head. Blend the back seam into the head, but leave the front edge sharp. -
Adding the slot:
Even if this isn’t a functional bank, adding the coin slot detail on the back is a classic touch. Use a needle tool or fettling knife to carve a shallow slit on the very top of the back. -
Final smoothing:
Give the entire piece one last smooth-over with slightly damp fingers to remove fingerprints. Let the pig dry completely for 24-48 hours.
Cracks happen
If small cracks appear as the clay dries, don’t panic. Mix a small amount of fresh clay with water to make a paste and fill the cracks, then sand smooth when dry.
Step 3: Painting
-
Base coat:
Once fully dry, paint the entire pig with a coat of light pink acrylic paint. You may need two coats for opaque coverage. -
Inner ear shading:
Mix a tiny drop of red into your pink to make a slightly darker shade. Paint the inside triangle of the ears with this darker pink to add depth. -
Nostril definition:
Dip a small brush into dark orange or reddish-brown paint and carefully fill inside the two nostril indentations. -
Painting eyes:
Using the handle end of a brush or a dotting tool, dab two solid black circles just above the snout for the eyes. -
Eye highlights:
Once the black is dry, add a tiny white dot to the upper right corner of each eye to bring the character to life. -
Smile line:
Use your finest detail brush and thin black or dark brown paint to draw a simple curved smile line under the snout, adding a tiny tick mark at the cheek.
Curly tail time
Roll a very thin snake of clay and coil it around a pencil. Gently slide it off and attach it to the rear of the pig for an adorable 3D curly tail.
Now you have a charming little pig that brings a sense of whimsy to your desk


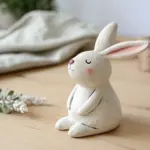
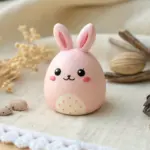
Chubby Bunny With Carrot
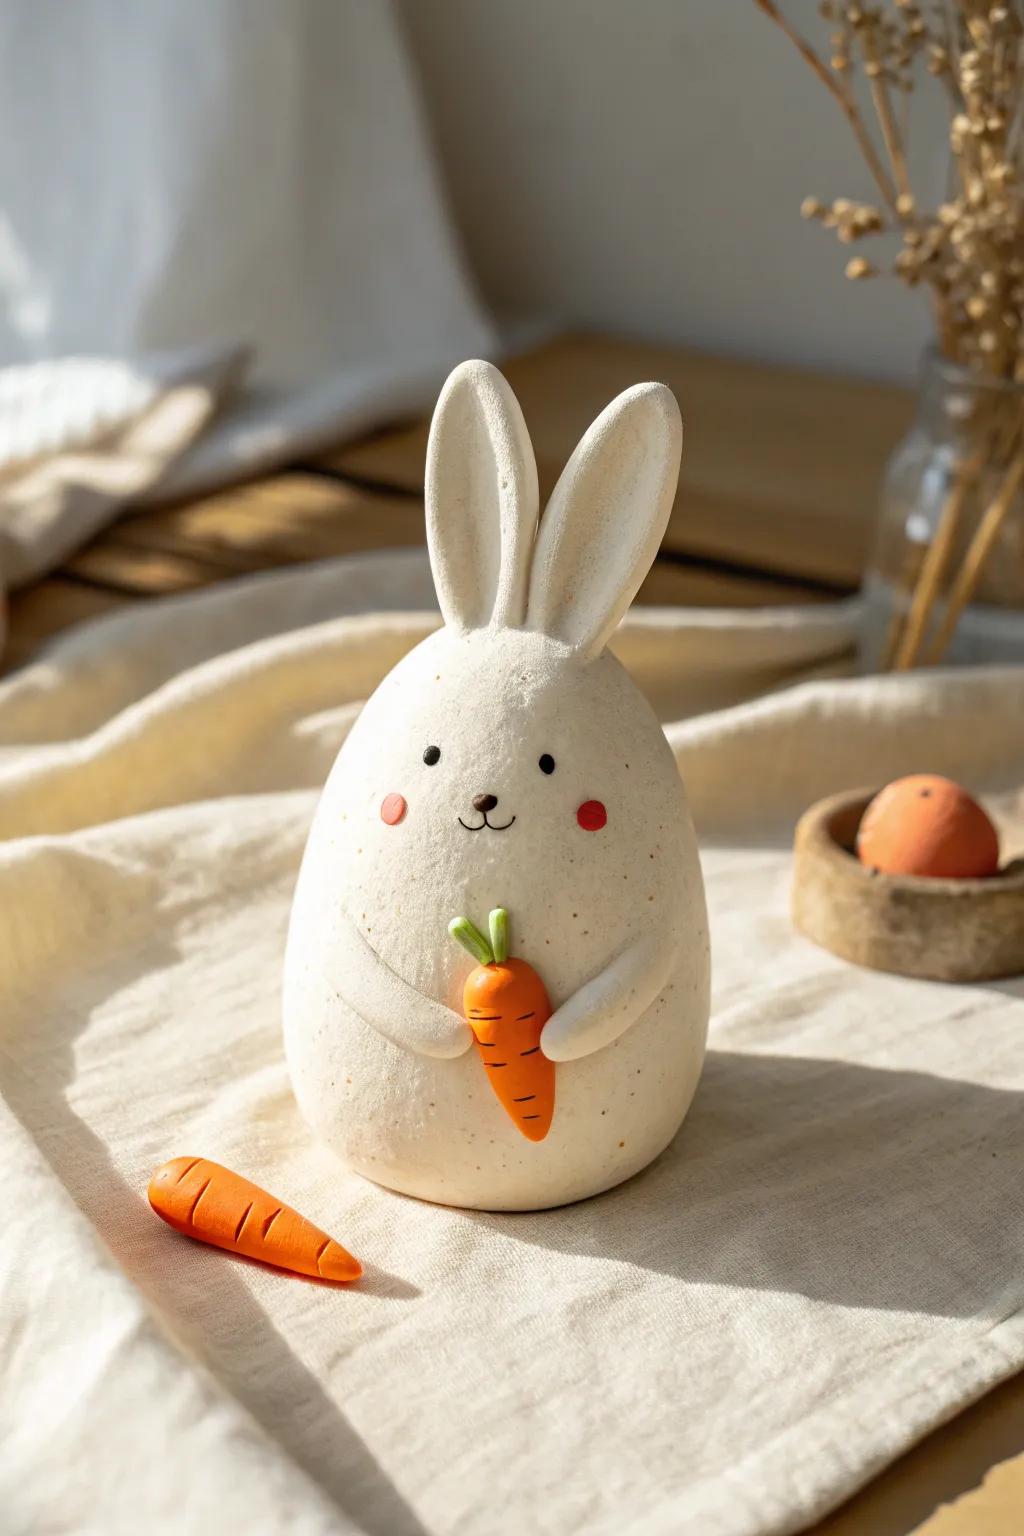
This adorable, minimalist bunny is the perfect introduction to air-dry clay, featuring a satisfyingly stout body and tall, expressive ears. The finished piece has a lovely matte texture and holds a tiny, vibrant carrot that adds a delightful pop of color.
Step-by-Step Tutorial
Materials
- White beginner air-dry clay
- Orange and green acrylic paint (or pre-colored clay)
- Black and pink acrylic paint (for details)
- Fine-grit sandpaper
- Small detail paintbrush
- Toothpick or needle tool
- Cup of water
- Clay roller or smooth bottle
Step 1: Shaping the Base
-
Prepare the main body:
Start by grabbing a generous handful of white clay. Knead it in your hands until it feels warm and pliable, removing any air bubbles. -
Form the oval shape:
Roll the clay into a smooth ball first, then gently taper the top half to create a large, egg-like oval. The bottom should be wide and flat so your bunny sits securely without wobbling. -
Smooth the surface:
Dip your finger in a tiny bit of water and rub it over the surface of the clay egg to erase any fingerprints or cracks. You want a very clean, smooth finish for this minimalist look.
Bunny Ear Droop?
If the ears are too heavy and flop over while wet, insert a toothpick halfway into the head and slide the ear onto it for internal support while drying.
Step 2: Adding Features
-
Create the ears:
Roll two equal-sized logs of clay, roughly the length of your thumb. Flatten them slightly to create long, distinct oval shapes for the ears. -
Attach the ears:
Score the bottom of the ears and the top of the head with your toothpick (making tiny scratch marks). Add a dab of water to the scored areas and press the ears firmly onto the head. -
Blend the seams:
Using a clay tool or just your thumb, drag the clay from the base of the ears down onto the head to seamless blend the connection. I find smoothing this join is crucial for durability. -
Make the arms:
Roll two small, thin logs for the arms. They should curve gently around the belly. -
Attach the arms:
Preserve a gap in the center of the belly for the carrot. Attach the arms on either side, curving inward, using the score-and-slip method (scratching and wetting the surfaces) to secure them.
Step 3: The Carrot Accessory
-
Shape the carrot:
Take a small nugget of clay and roll it into a cone shape. It should be sized to fit snugly between the bunny’s arms. -
Add carrot texture:
Use your needle tool or a dull knife to press horizontal lines across the carrot cone to mimic the vegetable’s natural ridges. -
Create the greens:
Form two or three tiny teardrop shapes for the carrot tops. Press them onto the wide end of the carrot. -
Secure the carrot:
Place the carrot into the bunny’s embrace. Use a little water to adhere it to the belly and the tips of the paws so it looks like it’s being held tight. -
Make a spare carrot:
If you have extra clay, repeat the process to make a loose carrot to display next to your figure.
Rustic Texture Tip
For a speckled, stone-like ceramic effect, lightly flick a toothbrush loaded with watered-down brown paint over the dried white clay before painting the face.
Step 4: Finishing Touches
-
Let it dry:
Set your bunny aside in a dry, room-temperature spot. Allow it to cure completely for 24-48 hours until it is hard and lighter in color. -
Sand imperfections:
Once fully dry, take your fine-grit sandpaper and very gently buff away any rough bumps or fingerprints, especially around the ear joins. -
Paint the carrot:
Using a small brush, paint the carrot body bright orange and the tops a fresh green. Let the paint dry completely. -
Add facial details:
Dip the back end of a paintbrush handle into black paint to dot the eyes. Use a fine brush to paint a tiny nose and mouth. -
Apply blush:
Mix a tiny amount of pink paint (or water down red paint) and softly dab small circles on the cheeks for that rosy, chubby look. -
Seal (optional):
To protect your work, you can brush on a layer of matte varnish, though leaving it raw preserves the rustic stone-like texture.
Place your finished bunny near a window or plant to show off its charming new home


Easy Cat Blob
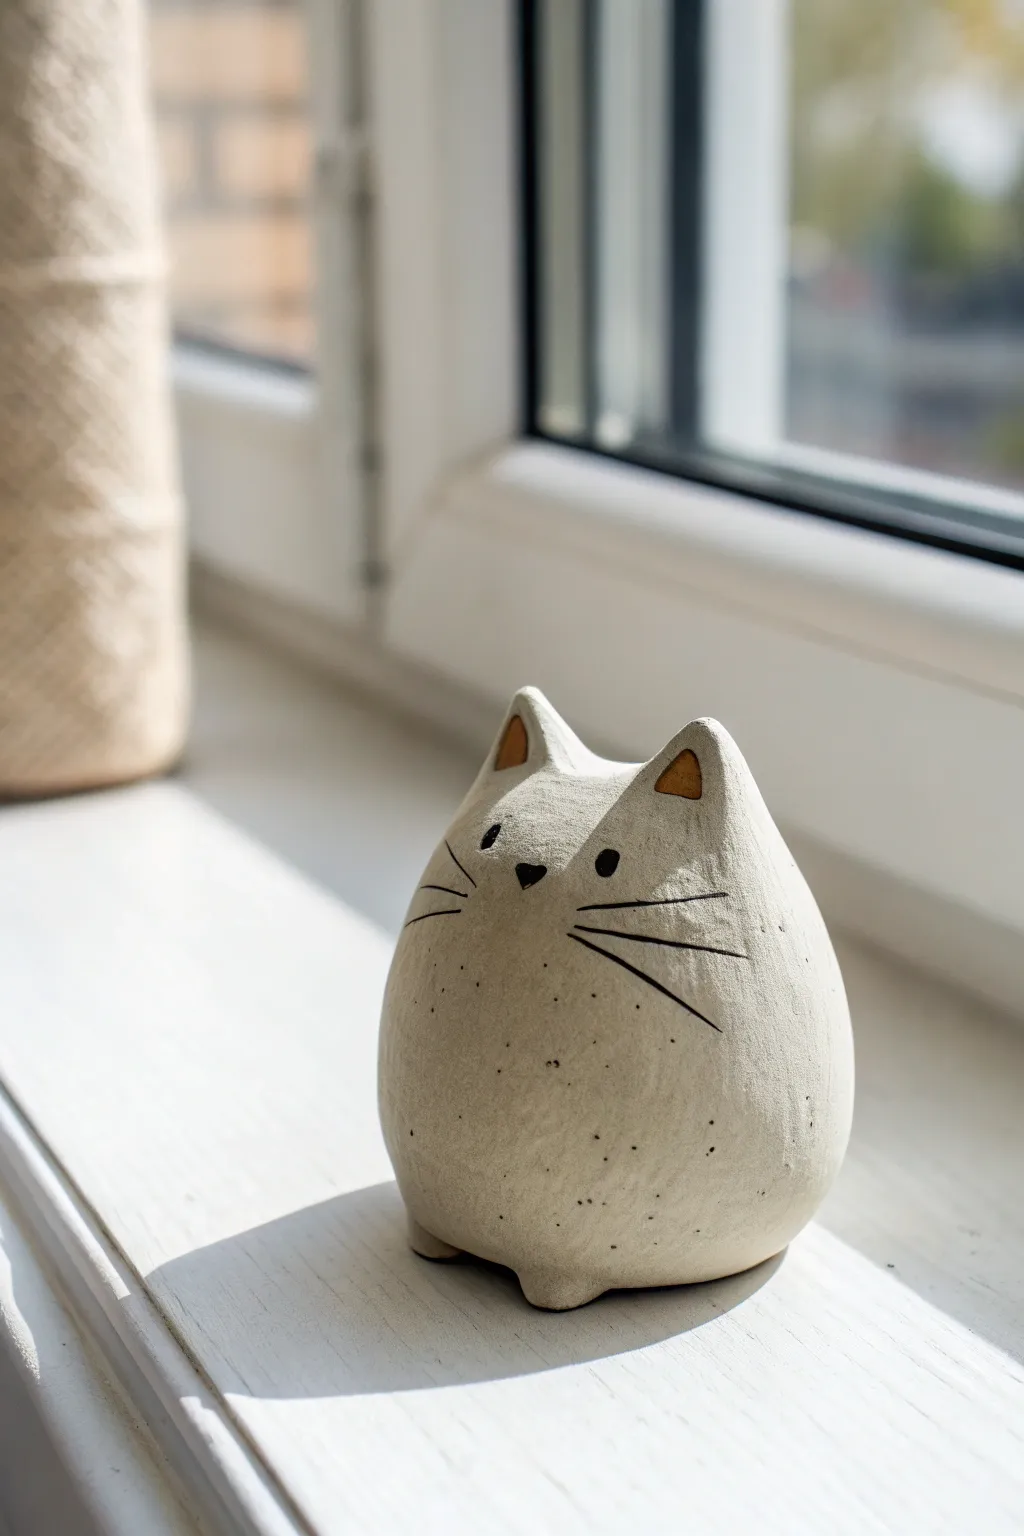
This charmingly minimal cat sculpture is the perfect introductory project for air dry clay because it relies on simple, organic shapes rather than complex anatomy. The result is a smooth, egg-shaped feline with sweet painted details and a lovely speckled texture that mimics artisanal pottery.
Step-by-Step
Materials
- White smooth air dry clay
- Small cup of water
- Sponge or smoothing tool
- Needle tool or toothpick
- Fine grit sandpaper
- Acrylic paints (Black and Ochre/Gold)
- Small round paintbrush
- Old toothbrush (for speckling)
- Matte or satin varnish
Step 1: Shaping the Base
-
Form the body:
Start with a ball of clay roughly the size of a tangerine or tennis ball. Roll it between your palms until it is smooth and free of major cracks. -
Create the taper:
Gently roll the ball on your work surface, applying slightly more pressure to the top half to create an egg-like or teardrop shape. The bottom should remain wide and heavy for stability. -
Flatten the base:
Tap the wider bottom end firmly against your table to create a flat surface so the cat sits upright without wobbling. -
Smooth the surface:
Dip your finger in a little water and run it over the clay to smooth out any fingerprints or uneven textures. Air dry clay loves to crack, so keeping the surface slick helps seal it.
Fixing Cracks
If cracks appear while drying, mix a tiny bit of fresh clay with water to make a paste (slip) and fill the cracks. Smooth over and let dry again before painting.
Step 2: Adding Features
-
Pinch the ears:
At the narrower top of your shape, use your thumb and forefinger to gently pinch up two small triangles for ears. Try to pull the clay up from the main body rather than attaching separate pieces for a seamless look. -
Shape the ears:
Refine the triangular shapes, smoothing the transition between the ear and the head. Use the back of a paintbrush or your finger to make a tiny indentation on the front face of each ear. -
Create little feet:
At the very bottom front edge, pinch out two very small, subtle nubs to suggest paws. These should hardly protrude; they are just tiny bumps to break up the round silhouette. -
Final smooth and dry:
Do a final check for lumps and smooth them away with a damp sponge. Set the cat aside to dry completely for at least 24-48 hours. Turn it occasionally so the bottom dries evenly.
Ceramic Look
To make it look like glazed pottery, use a high-gloss varnish instead of matte. The speckles paired with a glossy finish will mimic stoneware clay beautifully.
Step 3: Decoration
-
Sand imperfections:
Once fully dry and hard, take your fine grit sandpaper and gently buff away any rough spots or fingerprints to get that porcelain-smooth finish. -
Paint the ear interiors:
Using a small brush, paint the indented triangle inside each ear with an ochre or gold acrylic paint. This adds a warm pop of color. -
Paint the face:
Switch to black acrylic paint for the face. Paint two small dots for eyes, widely spaced apart. Add a small inverted heart or triangle for the nose right between them. -
Add whiskers:
With a very fine liner brush or a black fine-tip marker, draw three long, sweeping whiskers on each cheek. Keep the lines thin and confident. -
Create the speckles:
Dilute a small amount of black or dark grey paint with water until it’s quite runny. Dip an old toothbrush into this mixture. -
Apply the texture:
Run your thumb across the bristles of the toothbrush to flick tiny droplets of paint onto the cat’s body. I suggest practicing on a scrap piece first to control the density of the spray. -
Seal the piece:
Allow all paint to dry completely, then apply a coat of matte or satin varnish to protect the clay and give it a finished, ceramic-like sheen.
Place your little clay friend on a bright windowsill to keep you company


Round Panda Face
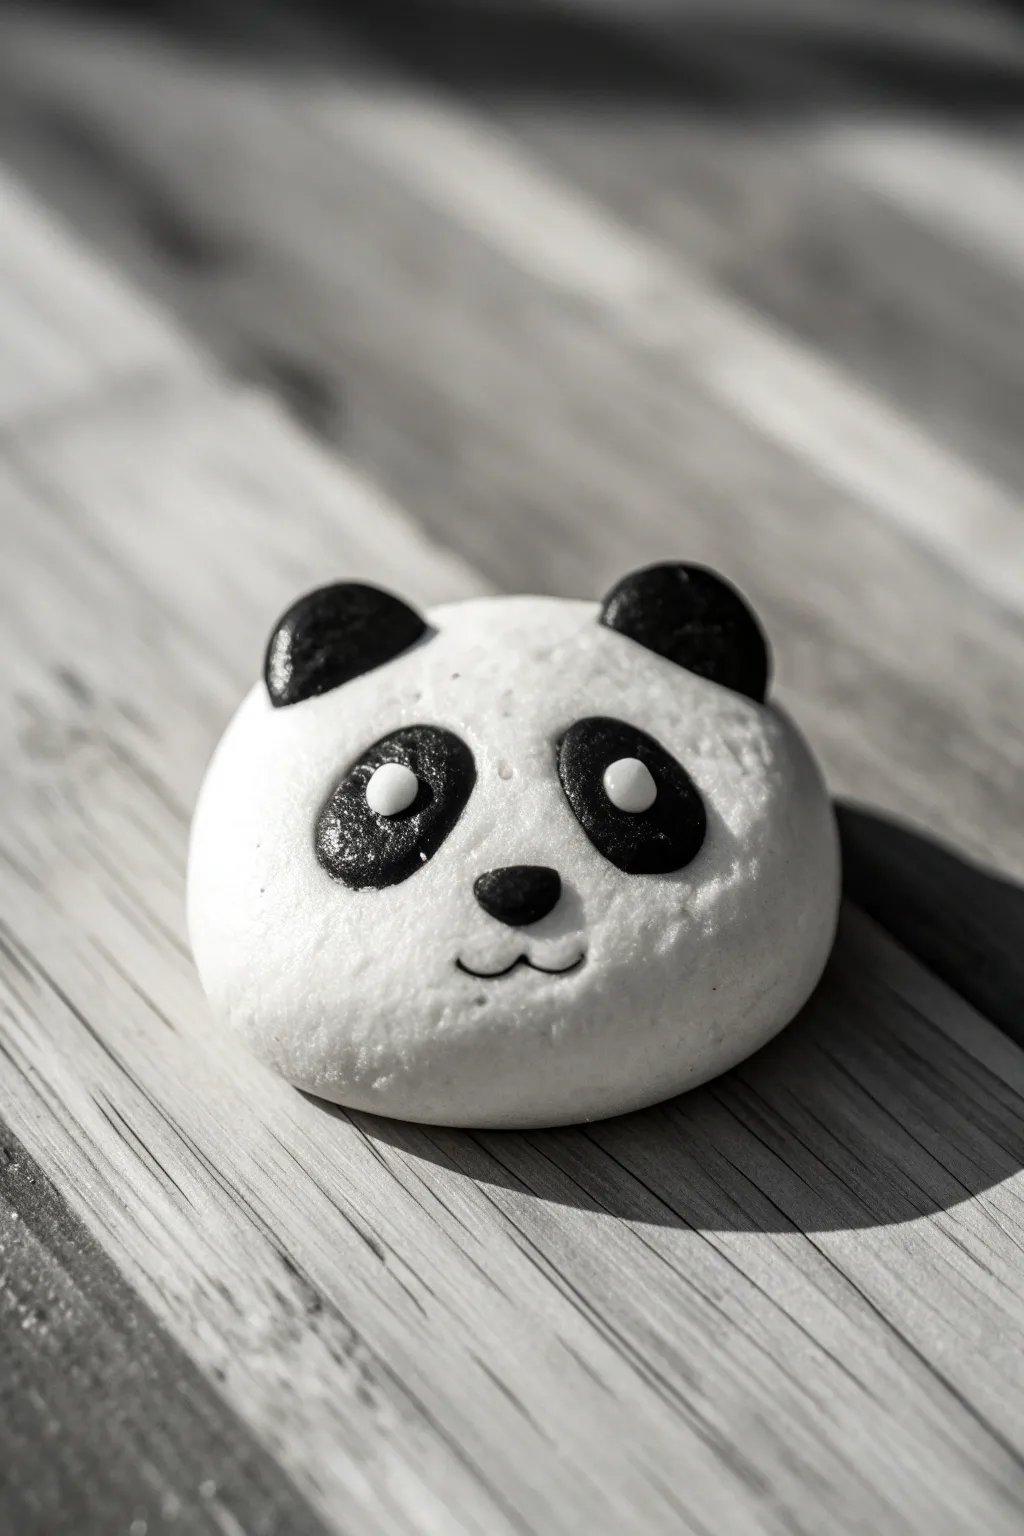
This adorable, monochromatic charm captures the essence of a panda with simple shapes and clean lines. Its smooth, rounded form and expressive eyes make it a perfect beginner project for mastering basic clay modeling techniques.
Step-by-Step Tutorial
Materials
- White air-dry clay
- Black air-dry clay (or black acrylic paint)
- Small rolling pin or smooth jar
- Modeling tools (or a toothpick)
- Water in a small cup
- Fine-grit sandpaper (optional)
- Gloss varnish (optional)
Step 1: Shaping the Base
-
Prepare the main body:
Start by taking a chunk of white air-dry clay about the size of a golf ball. Knead it in your hands for a minute to warm it up and make it pliable. -
Roll a smooth sphere:
Using your palms, roll the clay into a tight, smooth ball. Try to eliminate any major cracks or seams at this stage, as they are harder to fix later. -
Create the flattened shape:
Gently press the ball down onto your work surface using the palm of your hand. You want a flattened bun shape, not a pancake, so keep some thickness to give the panda volume. -
Smooth the edges:
Dip your finger in a tiny bit of water and run it along the perimeter of the circle to round off any sharp edges created by flattening it.
Clean Clay Tip
Use baby wipes to clean your hands thoroughly between handling black and white clay. Black clay residue can easily smudge and stain the pristine white face.
Step 2: Adding the Ears
-
Form the ears:
Pinch off two very small pieces of black clay, roughly the size of peas. Roll each piece into a small ball between your fingers. -
Attach the ears:
Press the black balls gently onto the top edge of your white head shape. Position them slightly wide apart to get that classic panda look. -
Blend the seams:
Using a modeling tool or the back of your fingernail, gently drag a tiny bit of the black clay downwards onto the back of the white head to secure the bond. Keep the front seam distinct for a clean look. -
Flatten deeply:
Gently press the ears down so they aren’t perfect spheres but look more like rounded nubs integrated into the head.
Magnetize It
Glue a strong ceramic magnet to the back once it’s fully dry. It’s the perfect size for a fridge magnet and makes a sweet handmade gift.
Step 3: Creating the Face
-
Make the eye patches:
Take two slightly larger pieces of black clay. Roll them into balls, then press them flat into oval shapes. -
Position the eyes:
Place these black ovals onto the white face. Position them angled slightly downward toward the center, like a drooping letter ‘V’, to give a gentle expression. -
Press into place:
Evenly press the black patches into the white clay so they sit flush with the surface rather than sticking out too much. -
Add the nose:
Roll a tiny speck of black clay into a small horizontal oval or soft triangle. Press this right in the center, just below the level of the eyes. -
Sculpt the mouth:
The mouth is drawn or indented rather than added on. Use a needle tool or a sharp toothpick to gently press a small ‘w’ shape directly into the white clay below the nose. -
Deepen the lines:
Go over the mouth lines a second time to ensure they are visible and clean. Be careful not to engage the clay too deeply or create jagged edges.
Step 4: Finishing Touches
-
Add the sparkle:
Roll two miniscule balls of white clay. These need to be tiny! Place one on the upper right side of each black eye patch to create a highlight. -
Secure the highlights:
Press these white dots down gently. I like to use the flat end of a matchstick to tamp them down without distorting their round shape. -
Final smoothing:
Look over your panda for any fingerprints. A damp brush lightly swept over the white areas can remove these marks before drying. -
Drying time:
Let your panda face dry for at least 24-48 hours. Turn it over halfway through the drying process to ensure the bottom dries evenly.
Once dry, this little panda makes a charming desk companion or a sweet handmade gift for a friend

The Complete Guide to Pottery Troubleshooting
Uncover the most common ceramic mistakes—from cracking clay to failed glazes—and learn how to fix them fast.
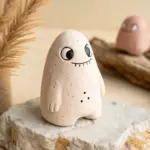
Tiny Chick Ball
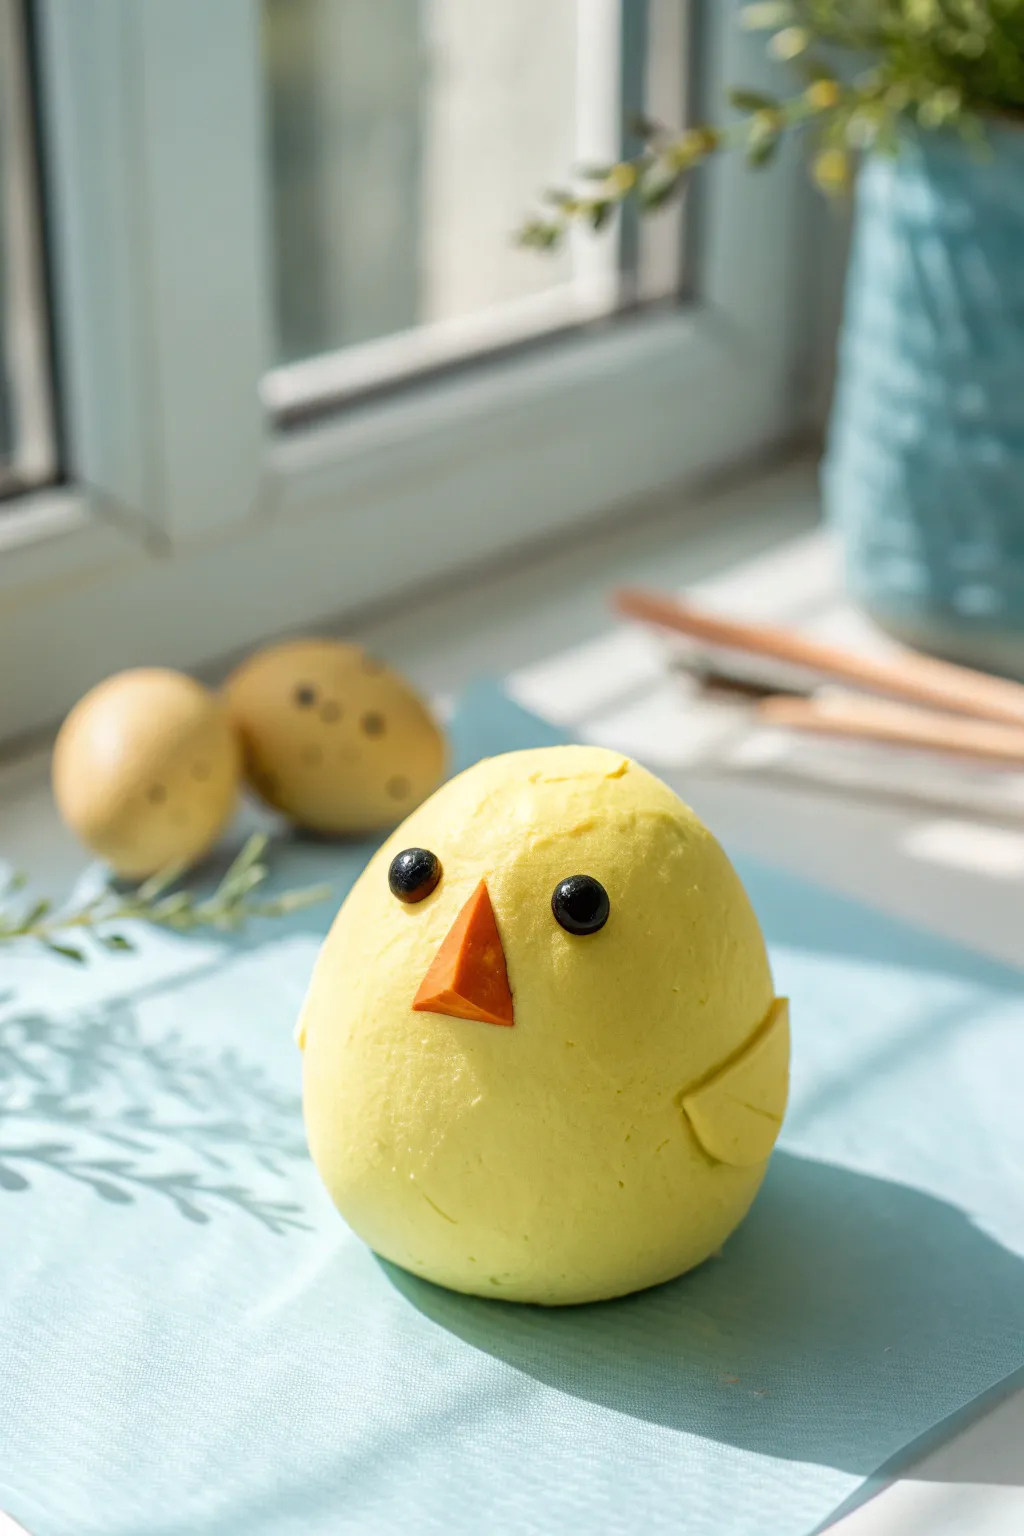
This adorable yellow chick is the perfect beginner project, transforming a simple sphere of clay into a tiny friend with minimal shaping. Its smooth, matte finish and bead-like eyes give it a sweet, minimalist charm that brightens up any windowsill.
Step-by-Step Guide
Materials
- Yellow air-dry clay (or polymer clay)
- Small amount of orange clay
- Two small black beads (or black clay)
- Clay smoothing tool or spoon back
- Plastic knife or clay blade
- Clean work surface
Step 1: Shaping the Base
-
Condition the clay:
Start by kneading your yellow clay until it is soft, pliable, and free of any cracks. Warm clay is much easier to smooth later on. -
Form the sphere:
Roll the yellow clay between your palms to create a smooth, even ball about the size of a tangerine or a large egg. -
Refine the shape:
Gently tap the bottom of the ball against your work surface to create a slightly flat base so the chick stands upright without rolling away. -
Smooth imperfections:
Dip your finger in a tiny bit of water and gently rub away any fingerprints or seams on the surface of the ball.
Cracks showing up?
If small cracks appear while the clay dries, mix a tiny bit of fresh clay with water to make a paste and fill them in gently.
Step 2: Adding the Face
-
Position the eyes:
Decide where the face will be; aim for slightly above the vertical center line for a cute look. -
Insert the eyes:
Press your two small black beads firmly into the clay. If you don’t have beads, roll tiny balls of black clay and press them flat against the yellow surface. -
Secure the eyes:
Push the beads deep enough that they look embedded rather than just stuck on the surface, which helps them stay put as the clay dries. -
Shape the beak:
Take a tiny piece of orange clay and roll it into a small cone or pyramid shape. -
Flatten the beak sides:
Pinch the sides of the orange cone to give it sharp, defined edges, resembling a small triangular prism. -
Attach the beak:
Place the orange beak exactly between and slightly below the eyes. Press it gently to adhere it to the main yellow body.
Step 3: Creating the Wings
-
Prepare wing clay:
Pinch off two small pieces of yellow clay, roughly the size of peas. -
Shape flat tears:
Roll these pieces into balls, then flatten them into teardrop shapes with your thumb. -
Detail the wing:
Use a clay tool or the back of a knife to make a very faint indentation or curve on the wings if desired, though keeping them plain works well too. -
Attach first wing:
Press one teardrop shape onto the side of the chick’s body, about halfway down. Smooth the top edge into the body so it looks seamless. -
Lift the tip:
I like to gently curl the pointed tip of the wing slightly outward to give the chick a bit of movement and character. -
Attach second wing:
Repeat the process on the other side, ensuring the wings are symmetrical in height and placement. -
Final smoothing:
Do a final check for stray fingerprints, smoothing them out lightly with a damp finger before setting the piece aside.
Make a Nest
Create a textured nest base using brown clay extruded through a garlic press to look like twigs and straw for your chick to sit in.
Enjoy your new little desk companion as it dries to a lovely matte finish
Gumdrop Frog
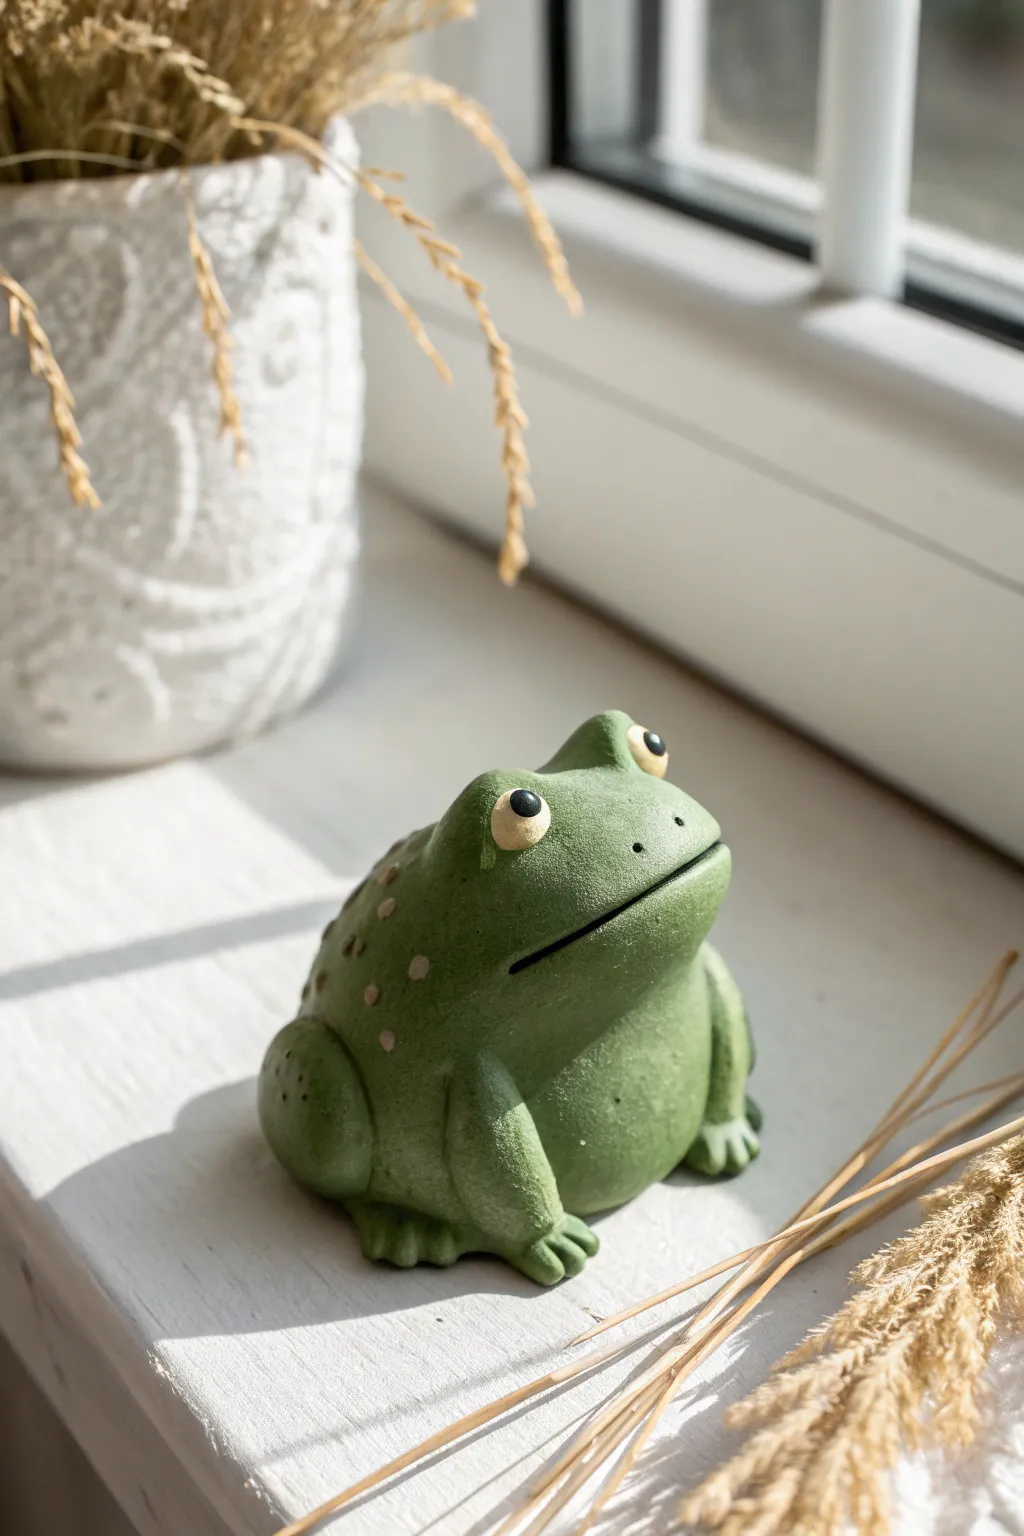
This charming, wide-set frog brings a touch of serenity to any windowsill with its smooth green finish and contemplative expression. Its rounded, gumdrop-like shape makes it a forgiving and delightful project for beginners just getting acquainted with clay sculpting.
Detailed Instructions
Materials
- White air-dry clay (approximately 8oz)
- Acrylic paints: Olive green, lighter spring green, white, black, and beige
- Small cup of water
- Clay sculpting tools (needle tool and smoothing tool)
- Small paintbrush (flat and detail)
- Aluminum foil (for the core)
- Fine-grit sandpaper (optional)
- Matte varnish or sealant
Step 1: Forming the Body
-
Prepare the core:
To save clay and reduce weight, crumple a piece of aluminum foil into a squat, rounded pyramid shape about the size of a tangerine. -
Cover the core:
Roll out a slab of clay about 1/4 inch thick. Wrap this entirely around your foil core, pressing the seams together firmly. -
Shape the gumdrop:
Roll the covered form on your work surface to smooth it out. You want a heavy bottom that tapers slightly toward the top, like a very chubby cone or a gumdrop candy. -
Smooth imperfections:
Dip your finger in a little water and run it over the clay to erase any fingerprints or cracks. Ensure the surface is as unified as possible before adding details.
Cracks Appearing?
If small cracks appear while drying, don’t panic. Mix a tiny bit of fresh clay with water to make a paste (slip) and fill the cracks, then smooth it over.
Step 2: Adding Features
-
Create the eye sockets:
Using your thumbs, gently press into the upper sides of the ‘head’ area to create subtle indentations where the eyes will sit. -
Form the eye mounds:
Roll two small balls of clay. Place them on top of the head at the highest point, spacing them slightly apart so he looks like he’s gazing upward. -
Blend the eyes:
Use a modeling tool or your finger to smooth the bottom of the eye balls into the main body so they look attached, not just stuck on. I find a little water helps bind the clay here. -
Sculpt the hind legs:
Roll two large sausage shapes for the back legs. Bend them into a ‘C’ shape and attach them to the lower sides of the body, blending the upper seam into the torso. -
Add the front legs:
Create two shorter, thicker logs for the front arms. Attach them vertically under the chin area, blending the shoulders into the body mass. -
Detail the feet:
Flatten the ends of all four legs slightly. Use a needle tool or knife to press indentations that separate the toes—three or four per foot usually looks best. -
Carve the mouth:
Take a needle tool or a thin blade and slice a wide, confident arc across the face for the mouth. Curve it slightly downward at the ends for that serious, peaceful expression. -
Final texture check:
Look over your frog for any rough spots. Smooth them out with water. If you want a textured skin look, you can gently tap the surface with a stiff bristle brush now. -
Dry thoroughly:
Let the frog sit in a cool, dry place for 24-48 hours. Turn it over occasionally so the bottom dries evenly.
Step 3: Painting and Finishing
-
Base coat:
Once fully dry, paint the entire frog with a solid coat of olive green acrylic. You may need two coats for full opacity. -
Add depth:
While the green is still slightly tacky, dab a little lighter spring green on the belly and the tops of the legs to create a natural highlight. -
Paint the eyes:
Carefully paint the protruding eye mounds. Use beige or off-white for the sclera (the white part) to keep the look earthy. -
Pupil details:
Using your smallest detail brush, paint black circles in the center of the eyes. Add a tiny white dot in each pupil for a lively ‘catchlight’ reflection. -
Add spots:
Mix a light beige-green color. Dip the non-brush end of a paintbrush into it and stamp small dots gently onto the frog’s back and sides for a speckled pattern. -
Seal the work:
Once the paint is completely dry, apply a coat of matte varnish. This protects the clay and gives it that finished ceramic look.
Smoother Blending
When attaching legs or eyes, score (scratch) both surfaces with a needle tool before adding water. This creates a focused ‘velcro’ effect for a stronger bond.
Place your new green friend near a plant or window to enjoy his calm presence


What Really Happens Inside the Kiln
Learn how time and temperature work together inside the kiln to transform clay into durable ceramic.
Simple Turtle With Shell Lines
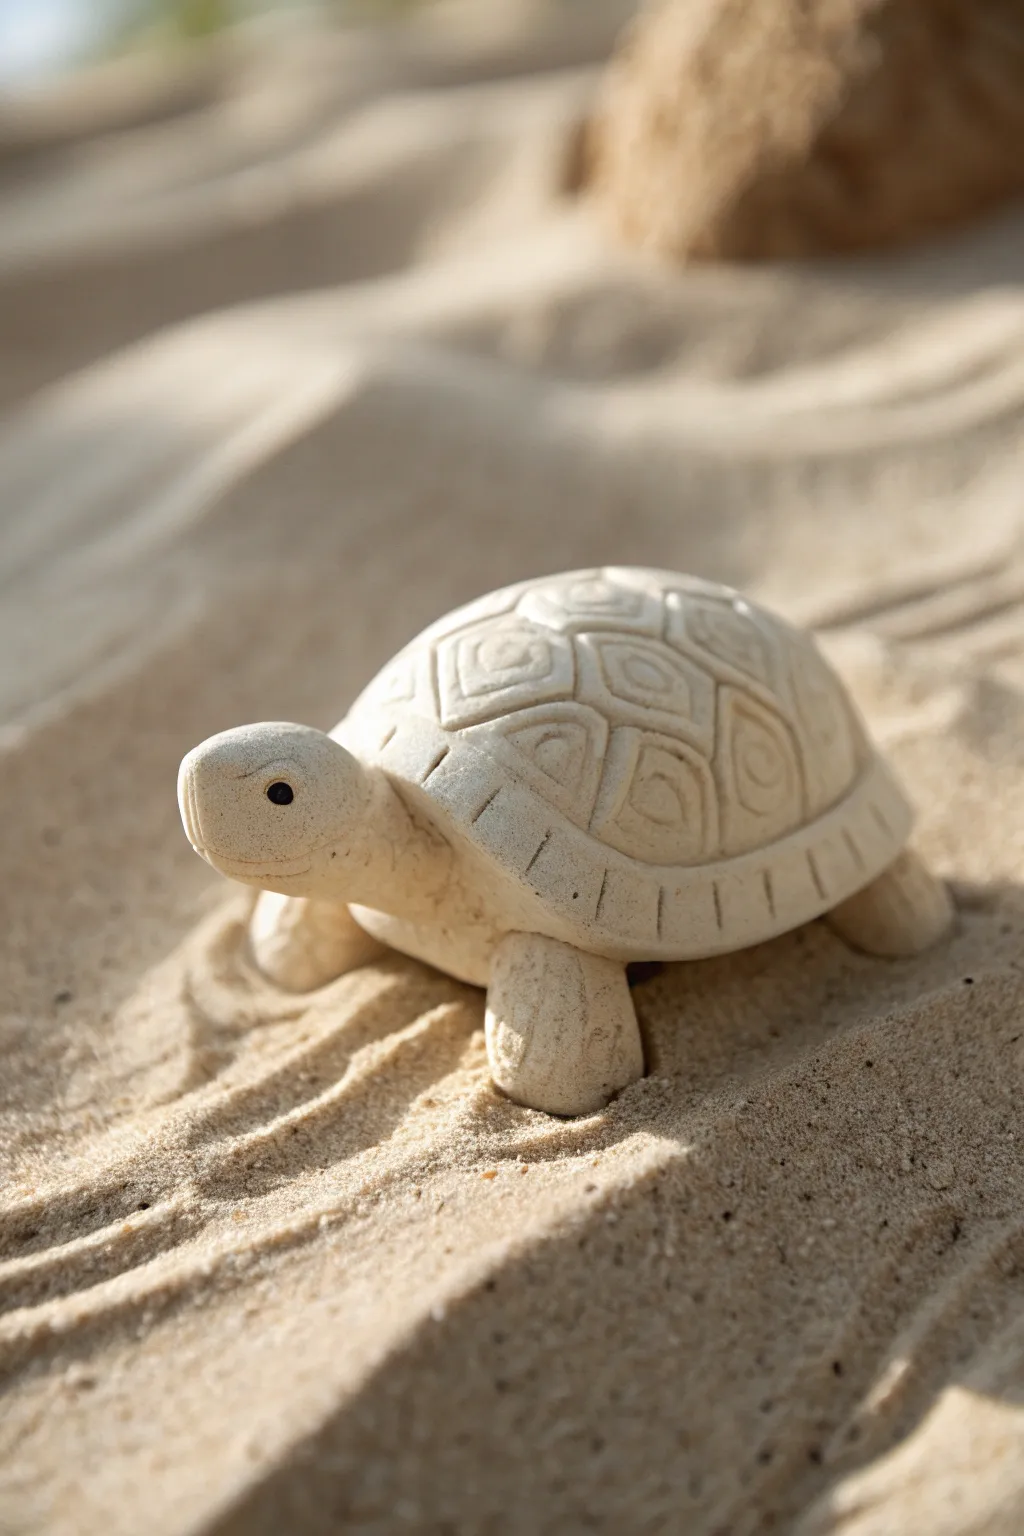
This charming little turtle project captures the look of carved sandstone with simple air dry clay techniques. It features a geometrically patterned shell and a smooth, minimalist face that gives it a peaceful personality.
Step-by-Step Guide
Materials
- White or cream air dry clay
- Rolling pin
- Small bowl relative to shell size (optional)
- Needle tool or toothpick
- Clay carving tool or small knife
- Small ball tool
- Water and sponge for smoothing
- Black acrylic paint or fine-tip marker
Step 1: Shaping the Body
-
Form the shell base:
Start with a ball of clay roughly the size of a tangerine. Gently press it onto your work surface to flatten the bottom while keeping a high, rounded dome shape on top for the shell. -
Shape the head:
Take a smaller piece of clay, rolling it into a slightly elongated oval. Smooth one end to be rounded for the nose, and taper the neck end slightly where it will attach to the body. -
Attach the head:
Score the clay (make little scratches) on both the underside of the neck and the front of the shell. Add a dab of water, press them firmly together, and blend the seam thoroughly with your finger so it looks like one solid piece. -
Create the flippers:
Roll four equal-sized small balls of clay. Flatten them slightly into thick tabs or rounded rectangles to serve as the legs. -
Attach the flippers:
Position the four legs under the shell’s edge. Like the head, score and slip these joints, blending the clay upwards into the underside of the shell so the turtle stands securely.
Uneven Drying?
If cracks appear while drying, mix a tiny bit of fresh clay with water to make a paste (slip) and fill the crack. Smooth it out with a finger.
Step 2: Carving the Details
-
Outline the shell border:
Using your needle tool, lightly draw a rim around the bottom edge of the shell, about a quarter-inch from the bottom. This creates the distinct skirt of the shell. -
Mark the skirt segments:
Along that bottom rim you just created, press vertical lines every few millimeters to create a segmented, ridge-like texture all the way around the turtle. -
Draw the central scutes:
Lightly sketch out the hexagonal plates on the main dome. Start with a central row down the spine, then add the side panels. Don’t carve deep yet; just get the placement right. -
Carve the relief:
Once you are happy with the pattern, use your carving tool to deepen the lines between the shell plates. I like to bevel the edges of each plate slightly to make them look raised and three-dimensional. -
Add internal patterns:
Inside each large shell plate, carefully carve a smaller, concentric shape (like a smaller hexagon or diamond) to mimic the growth rings seen on real tortoises. -
Detail the head:
Use the needle tool to gently impress a curved line for the mouth. Keep it simple and subtle. -
Make the eye sockets:
Press a small ball tool or the end of a paintbrush into the side of the head to create a tiny, clean indentation for the eye.
Stone Effect
For a realistic faux-stone finish, mix a tiny amount of sand or coffee grounds into your white clay before sculpting to create natural speckles.
Step 3: Finishing Touches
-
Refine the texture:
Before the clay dries, use a slightly damp sponge to wipe over the sharpest carved edges. This softens the look and gives it that weathered, stone-carving aesthetic. -
Add texture (optional):
If you want a sandy texture, you can gently tap the surface with a stiff toothbrush or a ball of aluminum foil. -
Dry completely:
Let your turtle sit in a dry, safe place for 24-48 hours. Turn it over halfway through if the bottom feels cool or damp. -
Paint the eyes:
Once fully dry, use a tiny dot of black acrylic paint or a fine marker to color inside the eye indentation. This brings the character to life instantly.
Now you have a timeless little turtle sculpture that looks great on a desk or bookshelf
Coil Snail With Swirl Shell
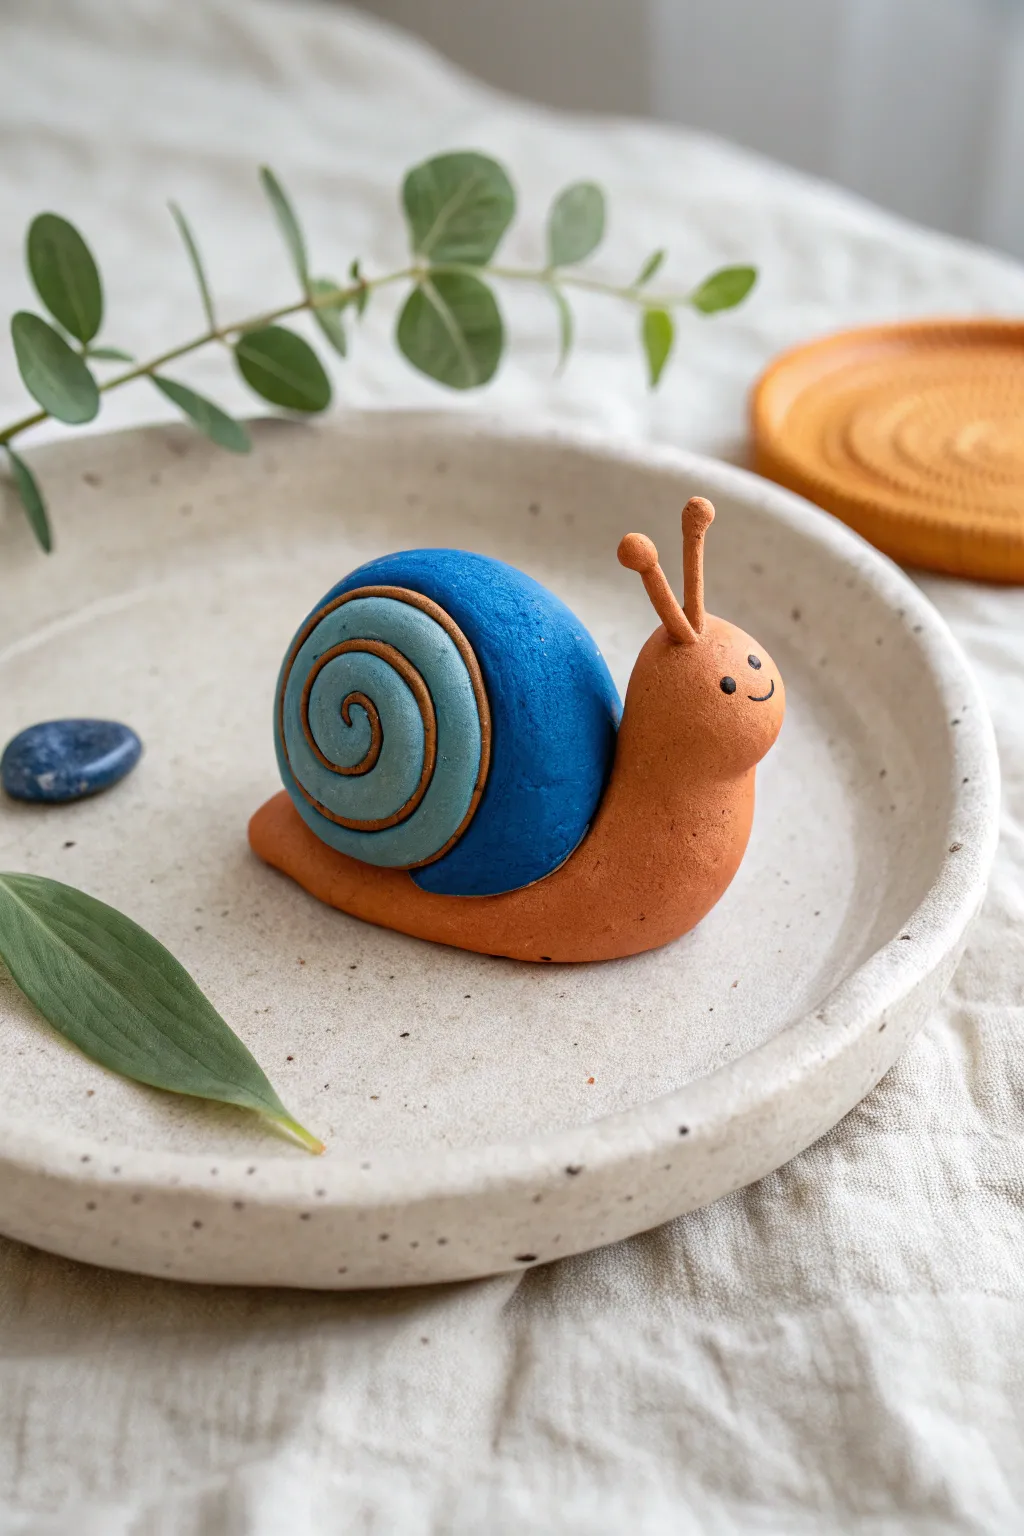
This adorable snail features a bold, blue spiraled shell resting on an earthy, terracotta-look body. With its friendly smile and simple shapes, it makes a perfect introduction to hand-sculpting animals.
How-To Guide
Materials
- Air dry clay (terracotta color)
- Air dry clay (white or grey for the shell)
- Acrylic paint (cobalt blue, light blue/teal, black)
- Clay sculpting tools (needle tool, smoother)
- Small paintbrush
- Water cup (for smoothing)
- Wire armature (optional, for eyestalks)
- Clear matte varnish (optional)
Step 1: Sculpting the Body
-
Form the base:
Begin with a golf-ball-sized piece of terracotta-colored clay. Roll it into a smooth log shape, slightly tapered at one end for the tail. -
Flatten the bottom:
Gently press the log onto your work surface to create a flat bottom. This ensures your snail will sit stably without rolling over. -
Shape the head:
At the thicker end of the log, gently push and mold the clay upwards to create a raised, rounded head section that flows seamlessly into the body. -
Smooth the transition:
Use a wet finger to smooth out any bumps between the raised head and the flat tail section, creating a gentle curve where the shell will eventually rest. -
Create eyestalks:
Roll two very small, thin coils of terracotta clay. Attach a tiny ball to the tip of each coil to form the eyes. -
Attach the stalks:
Score the top of the head slightly with a needle tool, add a dab of water, and gently press the eyestalks into place. I like to blend the clay at the base of the stalks with a tool to secure them firmly.
Wire Wisdom
For sturdier eyestalks that won’t droop, insert a short piece of floral wire or a clipped paperclip into the stalk as an internal armature before attaching.
Step 2: Shell Construction
-
Prepare the shell base:
Take a lump of white or grey clay (about two-thirds the size of the body) and roll it into a neat ball. Gently flatten opposite sides so it becomes a thick disk rather than a sphere. -
Create the spiral:
Roll a long, thin snake of clay. Starting from the center of your flattened disk, press this snake into the clay in a spiral pattern. -
Refine the coil:
Alternatively, you can carve a spiral groove directly into the disk using a needle tool if you prefer a smoother look over a raised coil. -
Join body and shell:
Score the back of the snail body and the bottom edge of the shell disk. Apply slip (water mixed with clay) and press the shell firmly onto the back. -
Reinforce the seam:
Run a sculpting tool along the seam where the shell meets the body, blending the clay slightly underneath to ensure a strong bond.
Step 3: Painting & Details
-
Initial Drying:
Let the sculpture dry completely. This usually takes 24-48 hours depending on humidity; the clay will lighten in color when fully dry. -
Base coat the shell:
Paint the entire surface of the shell with a deep cobalt blue acrylic paint. You may need two coats for opaque coverage. -
Highlight the swirl:
Using a lighter blue or teal paint and a steady hand, carefully paint the raised coil (or the area between the grooves) to accentuate the spiral pattern. -
Add earthy separation:
To mimic the look in the image, paint a very thin line of terracotta color (or leave the raw clay visible if you carved it) between the blue spiral sections. -
Draw the face:
Use a fine-tip paintbrush or a black paint marker to add two tiny dots for eyes and a simple curved line for a smile. -
Protect the piece:
Once the paint is fully dry, apply a coat of clear matte varnish to seal the clay and protect your paint job.
Cracking Up?
If you see hairline cracks forming as the clay dries, mix a tiny bit of fresh clay with water to make a paste and fill them in immediately while damp.
Now you have a charming little desk companion ready to slowly brighten up your day

TRACK YOUR CERAMIC JOURNEY
Capture glaze tests, firing details, and creative progress—all in one simple printable. Make your projects easier to repeat and improve.
Mini Goldfish Shape
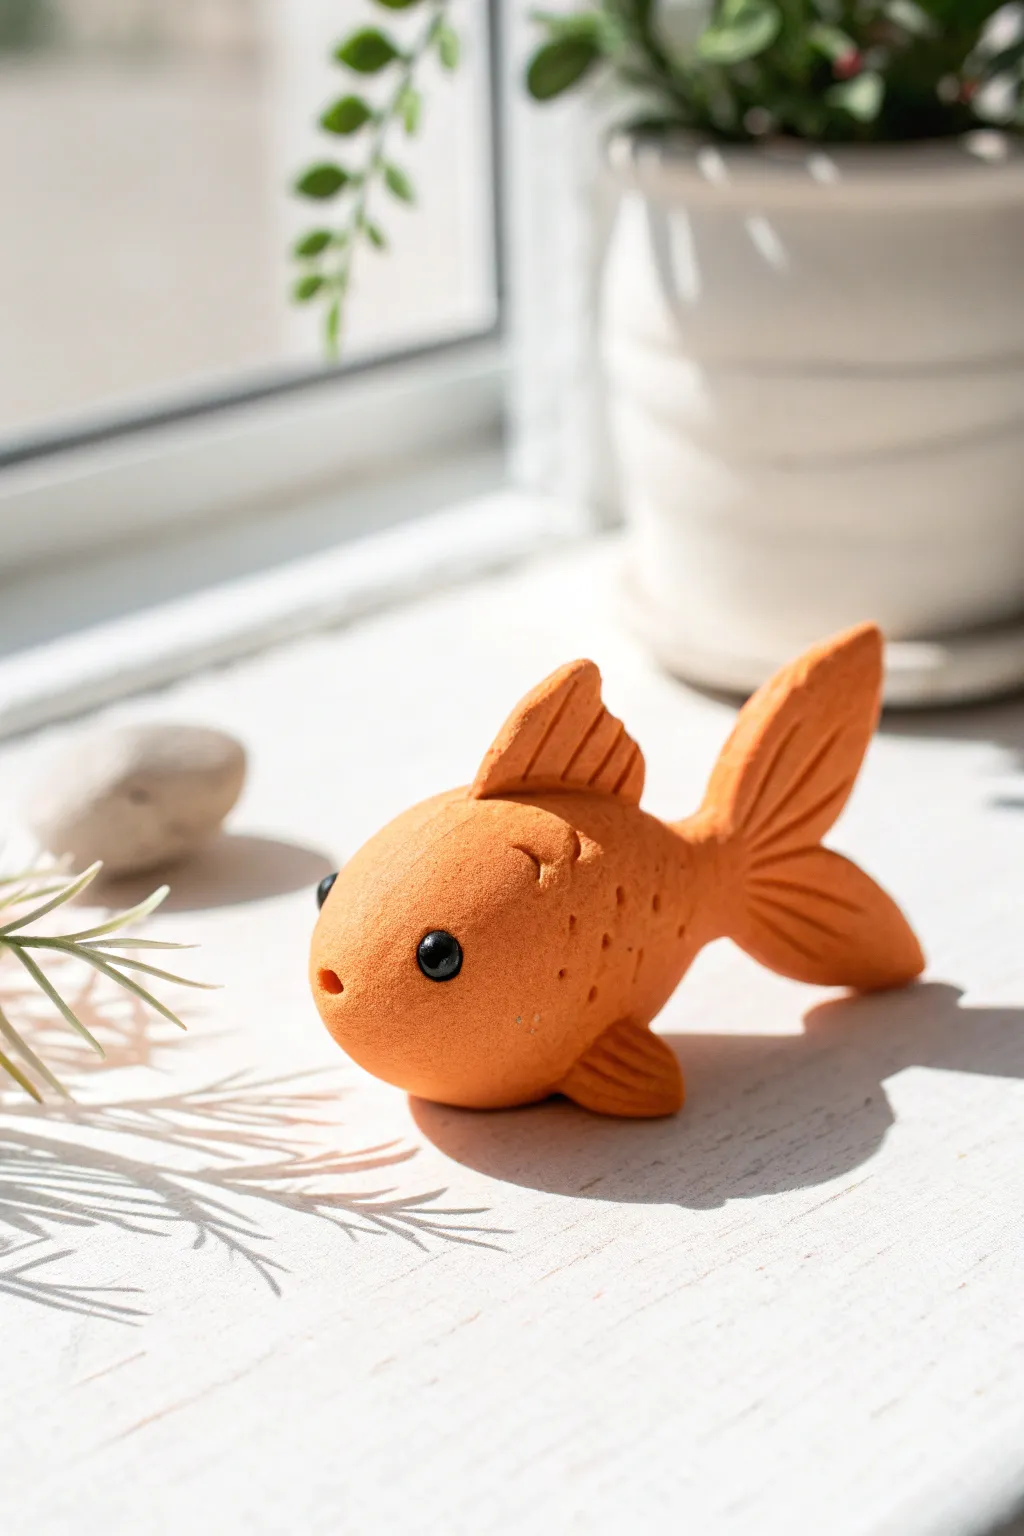
This charming little goldfish captures the warmth of terracotta with a simple, playful shape that’s perfect for beginners. Its smooth, rounded body and textured fins make it a delightful desk companion or a sweet addition to a potted plant shelf.
Step-by-Step Guide
Materials
- Air dry clay (terracotta or orange colored)
- Two small black beads (approx. 3-4mm)
- Small rolling pin
- Modeling tool (knife or needle tool)
- Toothpick or small dotting tool
- Water in a small cup
- Fine-grit sandpaper (optional)
- Clear matte varnish (optional)
Step 1: Shaping the Base
-
Prepare the Clay:
Start by taking a chunk of air dry clay about the size of a golf ball. Knead it thoroughly until it is warm, pliable, and free of any air bubbles. -
Form the Body:
Roll the clay into a smooth sphere first, then gently elongate it into a teardrop or egg shape. This will be the main body of your goldfish. -
Refine the Shape:
Gently tap the wider end of the egg shape on your work surface to blunt the nose slightly, giving the fish a cute, chubby face rather than a pointy snout. -
Create the Mouth:
Using a toothpick or a small dotting tool, press a small, single hole into the center of the blunt nose area to create a puckered fish mouth.
Smooth Seams Secret
Use a soft, slightly damp paintbrush to blend seams where fins attach. It reaches tight crevices better than fingers and leaves no prints.
Step 2: Creating the Fins
-
Flatten Clay for Fins:
Pinch off a smaller piece of fresh clay and flatten it onto your work surface using your thumb or a small rolling pin until it is about 3-4mm thick. -
Cut Out the Tail:
Use your knife tool to cut out a heart shape or a bifurcated triangle shape for the tail fin. It should be proportional to the body but slightly oversized for a whimsical look. -
Texture the Tail:
Before attaching, use the knife tool to gently press lines into the tail fin, fanning out from the tapered end to the tips to mimic fin rays. -
Attach the Tail:
Score (scratch) the back of the fish body and the attachment point on the tail. Dab a little water on both spots, press them together firmly, and smooth the seam with your finger. -
Make the Dorsal Fin:
Cut a smaller, curved triangle shapes from your flattened clay sheet for the top dorsal fin. Texture it with vertical lines just like you did for the tail. -
Attach Dorsal Fin:
Score vertically along the top center of the fish’s back. Apply a drop of water and press the dorsal fin into place, blending the clay at the base so it stands upright. -
Add Side Fins:
Create two small teardrop shapes for the pectoral fins. Texture them with lines, then attach one to each side of the lower body, angling them slightly backward.
Cracking Fins?
If fins crack while drying, apply a ‘slip’ made of clay mixed with water into the crack and smooth it over. Let it dry slowly away from direct heat.
Step 3: Details & Finishing
-
Add Eye Sockets:
Use a small ball tool or the end of a paintbrush to press two shallow indentations on either side of the head where the eyes will go. -
Insert the Eyes:
Press one black bead firmly into each indentation. I like to push them in deep enough so they look embedded, not just stuck on the surface. -
Create Scale Texture:
Using a needle tool or toothpick, gently poke shallow dots along the sides of the body, behind the gills area. Don’t cover the whole fish; a small cluster adds nice contrast. -
Define the Gills:
Carve a gentle, curved line behind the head area (before the side fins start) to suggest the gill slit. -
Smoothing Check:
Dip your finger in a tiny bit of water and gently run it over any rough seams or fingerprints to smooth the skin of the fish. -
Initial Drying:
Set your fish on a piece of parchment paper to dry. Rotate it occasionally if possible to prevent the bottom from staying flat. -
Optional Sanding:
Once fully dry (usually 24-48 hours), you can lightly sand any unintended rough spots with fine-grit sandpaper.
Place your finished fish on a sunny windowsill and enjoy your handmade aquatic friend
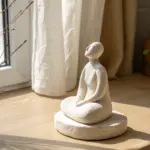
Sleepy Bear With Tiny Ears
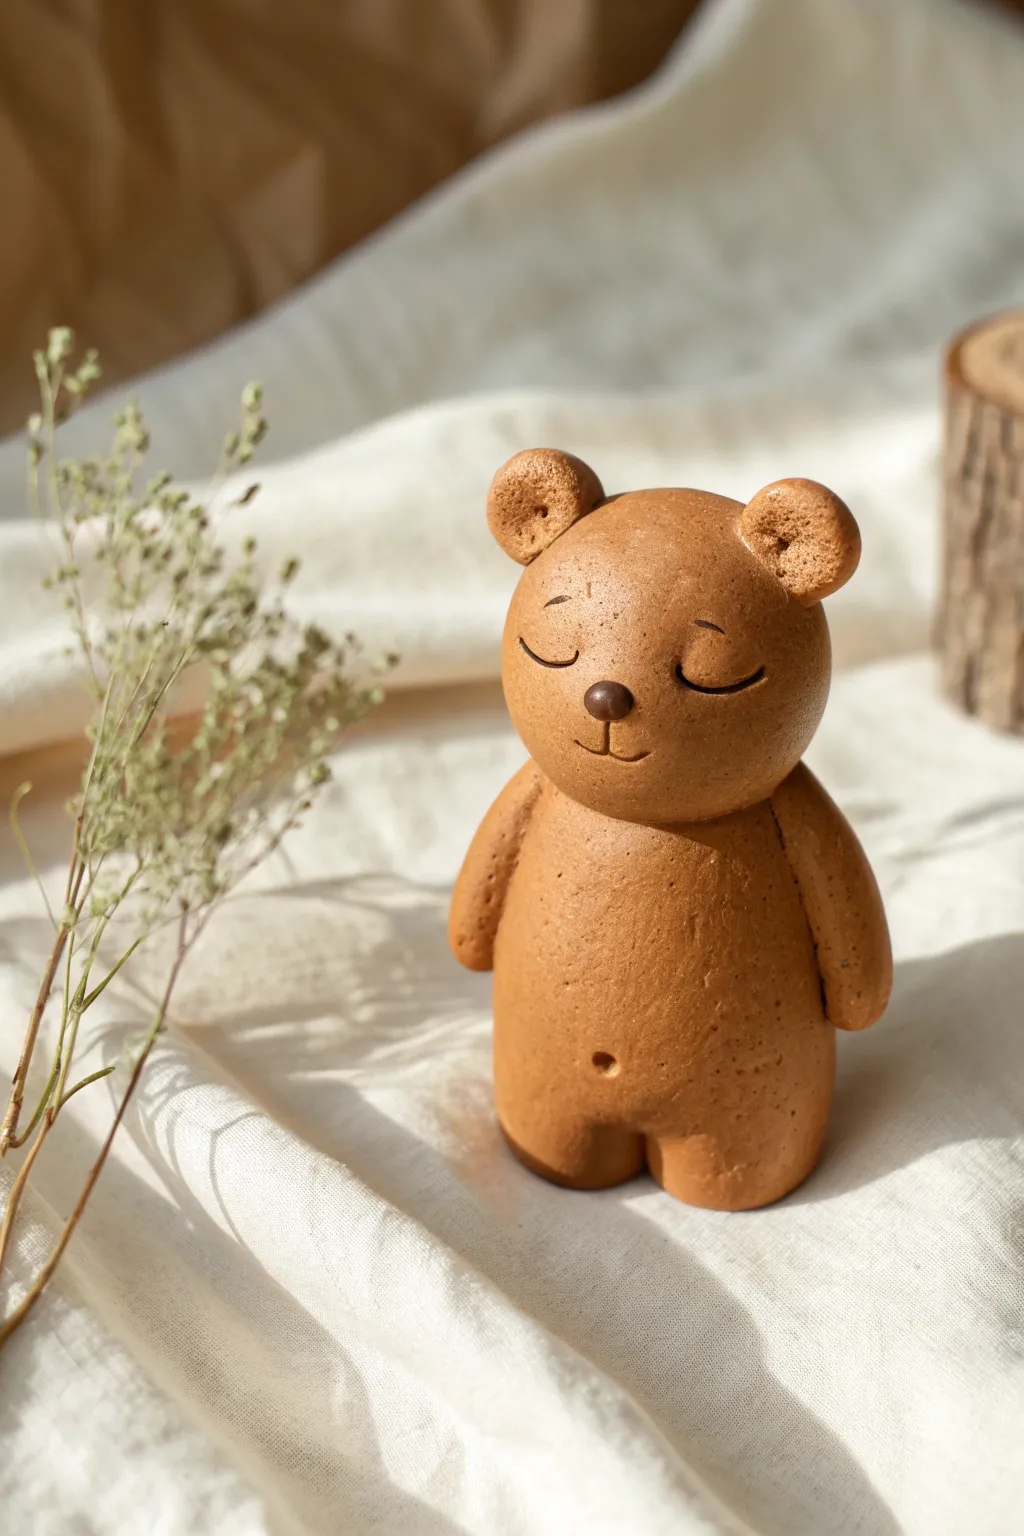
Create a sense of calm with this adorable, minimalist bear figurine, perfect for displaying on a desk or shelf. Its smooth, rounded features and gently closed eyes give it a serene expression that’s surprisingly easy to sculpt.
Step-by-Step Tutorial
Materials
- Air dry clay (terracotta or white)
- Brown acrylic paint (if using white clay)
- Small round sculpting tool or toothpick
- Fine grit sandpaper
- Water in a small cup
- Black acrylic paint or fine-tip marker
- Dark brown clay or paint for nose
Step 1: Shaping the Core
-
Prepare the clay:
Begin by conditioning a medium-sized ball of air dry clay in your warm hands until it is pliable and smooth. If you are using white clay, you can either paint it later or knead brown paint directly into the raw clay now for a consistent base color. -
Roll the body:
Divide your clay into two main portions: a larger one for the body and a slightly smaller one for the head. Roll the larger portion into a smooth cylinder shape that is slightly wider at the bottom. -
Form the head:
Roll the second portion into a seamless sphere. Gently press it onto your work surface just once to create a small flat spot where it will join the neck. -
Attach head to body:
Score the top of the body cylinder and the bottom of the head sphere with a needle tool or toothpick. Apply a dab of water or clay slip to the scored areas and press them firmly together. -
Blend the seam:
Using your thumb or a modeling tool, gently smooth the clay across the neck seam so the head and body become one solid unit. I like to leave a little definition at the neck, but ensure it’s securely attached.
Seamless Smoothness
Keep a small bowl of water nearby. Dip your finger and gently rub the clay surface periodically while sculpting to instantly erase fingerprints.
Step 2: Adding Features
-
Shape the arms:
Roll two small sausage shapes for the arms. They should be simple and rounded at the ends, reminiscent of teardrops but longer. -
Attach the arms:
Score and slip the sides of the body. Press the arms flat against the torso so they point downwards, blending the top shoulder area into the main body for a seamless look. -
Create the legs:
The legs are subtle stubs. You can either attach two small balls to the bottom or, for a cleaner look, use a modeling tool to press an indentation into the bottom center of the body trunk, separating the mass into two rounded legs that stand flat. -
Make the ears:
Roll two tiny spheres for the ears. Press your pinky finger or a small ball tool into the center of each to create a cup shape. -
Attach the ears:
Attach the ears to the top sides of the head using the score and slip method. Tilt them slightly forward for a sweeter expression. -
Refine the texture:
Before the clay hardens, you might want to gently tap the surface with a stiff brush or a crumpled ball of foil to give it a subtle skin-like texture, or smooth it completely with water for a polished look.
Step 3: Finishing Touches
-
Add a belly button:
Use a small dotting tool or the blunt end of a skewer to press a tiny indention in the center of the tummy for a belly button. -
Dry properly:
Let your bear dry completely for 24-48 hours. Turn it occasionally so the bottom dries as evenly as the top. -
Sand imperfections:
Once fully cured, use fine-grit sandpaper to buff away any fingerprints or rough seams, particularly around the neck and base. -
Sculpt the nose:
Roll a minuscule grain of dark brown clay (or use a bead of paint later) and attach it to the center of the face as a small, protruding button nose. -
Paint the face:
If you didn’t color your clay initially, paint the entire bear an earthy brown. Use a very fine brush with black paint to draw two curved, sleeping eyelids and a gentle smile line connected to the nose.
Cracking Clay?
If small cracks appear while drying, mix a tiny bit of fresh clay with water to make a paste and fill the cracks, then sand smooth once dry.
Place your little sleepy bear near some dried flowers or a candle for a cozy vignette.
Baby Penguin With White Belly
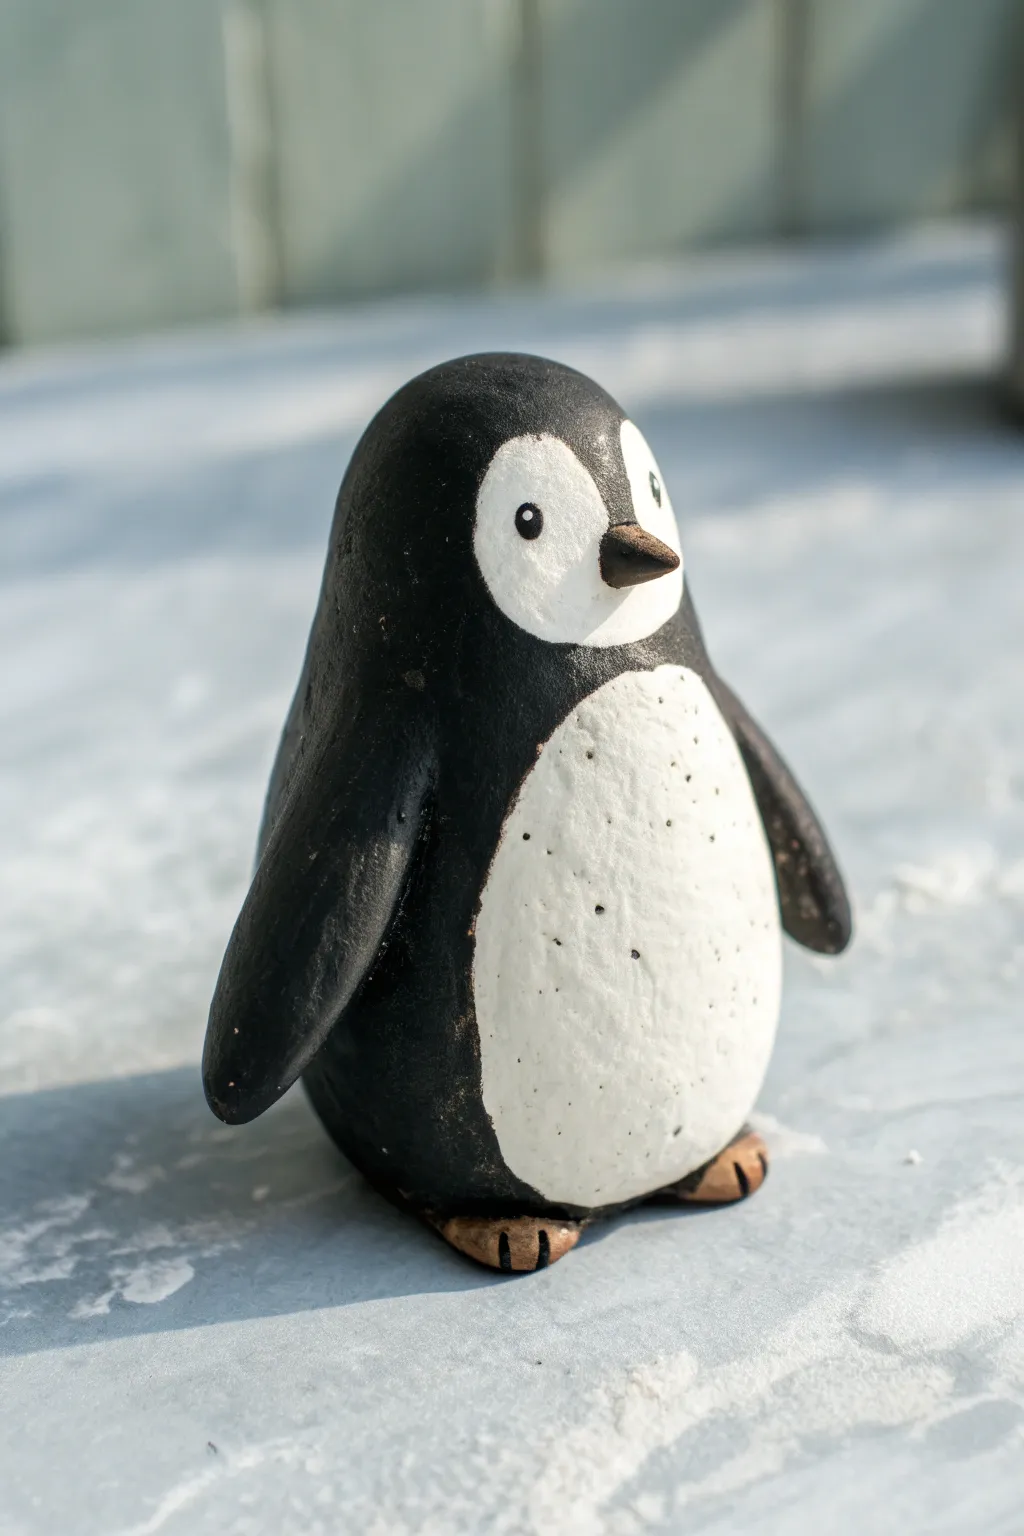
Sculpt your own adorable baby penguin with a classic black and white design and a speckled belly. This simple, upright bird is perfect for beginners looking to practice smooth shapes and clean paint lines.
Step-by-Step
Materials
- White Air Dry Clay
- Water in a small cup
- Acrylic paints (Black, White, Brown)
- Small flat paintbrush
- Fine detail paintbrush
- Clay sculpting tool or toothpick
- Aluminum foil (optional, for core)
Step 1: Sculpting the Body
-
Create the core shape:
Start by rolling a ball of air dry clay in your palms until it is smooth and free of cracks. If you want to save clay or reduce drying time, you can ball up a piece of aluminum foil first and wrap the clay around it. -
Form the teardrop:
Gently roll the ball between your hands, applying slightly more pressure at the top to create a teardrop or egg shape. The wider bottom will be the belly, and the narrower top will be the head. -
Flatten the base:
Tap the wider bottom of your teardrop gently onto your work surface. This creates a flat base so your penguin stands upright without wobbling. -
Smooth the surface:
Dip your finger in a tiny bit of water and rub it over the clay to smooth out any fingerprints or uneven textures. Don’t use too much water, or the clay might get slimy.
Smooth Operator
Before the clay dries, gently brush the entire sculpture with a slightly damp soft paintbrush. This smooths out micro-bumps better than a finger can.
Step 2: Adding Details
-
Shape the wings:
Take two small pieces of clay, roughly the size of dried beans. Roll them into small balls, then flatten them into elongated raindrop shapes. -
Attach the wings:
Press the rounded end of each wing onto the shoulders of your penguin body. If the clay is dry, score the attachment points with a toothpick and add a dab of water to help them stick. -
Blend the seams:
Use a sculpting tool or your finger to smooth the clay from the top of the wing into the body, making the transition seamless. Leave the bottom tip of the wing unattached so it hangs naturally. -
Make the beak:
Roll a very tiny cone of clay for the beak. Gently press it onto the center of the face area. -
Create the feet:
Form two small, flat ovals for the feet. Slide them slightly under the front of the body so just the tips stick out. -
Score the toes:
Use your toothpick or a knife tool to press two small indents into each foot, creating three simple toes. -
Dry completely:
Let your penguin sit undisturbed for 24 to 48 hours. Air dry clay needs to be completely hard and white before painting.
Step 3: Painting
-
Draft the white patches:
Using a pencil very lightly, draw the outline of the white face mark (which looks like a heart shape without the bottom point) and the large oval for the belly. -
Paint the black coat:
Using black acrylic paint and a small flat brush, paint the entire back, the wings, and the top of the head. Carefully paint around the pencil lines you drew for the face and belly. -
Fill the white areas:
Use clean white paint to fill in the belly and the face patch. You might need two coats here to make it bright and opaque against the dried clay. -
Speckle the belly:
Dilute a tiny drop of black paint with water. Dip an old stiff brush or a toothbrush into it and gently flick or tap it to create tiny speckles on the white belly. Alternatively, just dot them on with a fine brush. -
Paint the beak:
Switch to a brown or dark orange paint for the beak. A fine detail brush is best here to avoid getting paint on the white face. -
Paint the feet:
Paint the little feet sticking out at the bottom with the same brown color used for the beak. -
Add the eyes:
Dip the back end of your paintbrush (the handle) into black paint and dot two eyes onto the white face patch. -
Add the eye glint:
Once the black eye dots are dry, I like to use a toothpick dipped in white paint to add a tiny white dot to each eye. It brings the character to life instantly.
Scarf it Up
Before the clay dries, sculpt a tiny scarf and wrap it around the penguin’s neck. Paint it red or green later for a festive holiday decoration.
Place your finished penguin on a shelf or desk for a cute winter companion that won’t melt away
Easy Owl With Big Eyes

Create a charming, folk-art style owl with expressive oversized eyes and a beautifully textured body. This project focuses on simple shapes and carving techniques to achieve a professional, ceramic-like finish without needing a kiln.
Step-by-Step Tutorial
Materials
- Air dry clay (white or grey)
- Acrylic paints (slate blue, burnt orange, black, white, brown)
- Clay carving tools or a toothpick/needle tool
- Small rolling pin
- Water and sponge for smoothing
- Two sizes of small circle cutters (or bottle caps)
- Fine grit sandpaper
- Matte varnish or sealant
Step 1: Basic Form Sculpting
-
Shape the body:
Start with a large ball of clay roughly the size of a tennis ball. Roll it until smooth, then gently flatten the bottom so it sits upright, slightly tapering the top to form a rounded egg shape. -
Create the ears:
Pinch the top left and right corners of the head to form subtle, pointed ear tufts. Keep the area between them slightly curved downwards to suggest the forehead. -
Define the wings:
Roll out a small slab of clay and cut two elongated teardrop shapes. Attach these to the sides of the body using a little water and scoring (scratching up the surfaces) to ensure a strong bond. -
Smooth the seams:
Use a damp finger to blend the edges of the wings into the body, leaving the back curve of the wing distinct so it looks layered on top. -
Form the eye sockets:
Roll two medium-sized balls of clay and flatten them into discs. Press these firmly onto the face area. They should act as large, flat frames for the actual eyes.
Clean Lines
For the crispest feather carvings, let the clay dry for about an hour until it is ‘leather hard’ before using your needle tool. The clay won’t drag as much.
Step 2: Adding Details
-
Insert the eyes:
Roll two smaller balls of clay for the eyeballs. Place them into the centers of the flattened discs you just made, pressing them down gently so they look embedded rather than just stuck on. -
Add the beak:
Shape a small, sharp cone of clay. Attach it right between the eye discs, pointing downward, enabling it to bridge the gap between the eyes. -
Sculpt the feet:
Create two small, flat oval shapes and score three lines into each to represent toes. Tuck these underneath the front of the body so just the toes peek out. -
Carve the chest feathers:
Using a needle tool or a V-shaped carving tool, gently carve rows of ‘V’ shapes into the chest area. I like to stagger the rows to make the plumage look natural. -
Detail the eye rings:
Use a needle tool to etch radial lines around the flat eye discs, creating a sunburst pattern that draws attention to the center. -
Dry the piece:
Allow the owl to dry completely. This usually takes 24-48 hours depending on thickness. Rotate it occasionally so the bottom dries too.
Step 3: Painting and Finishing
-
Base coat:
Paint the entire body (except the eyes and beak) with a slate blue acrylic paint. You might need two coats for opaque coverage. -
Paint the eyes:
Fill the inner eyeballs with a vibrant burnt orange. Paint the beak a soft brown. Keep the outer eye discs a lighter variation of the body color (mix blue with white). -
Add pupils and highlights:
Paint large black circles in the center of the orange eyes. Once dry, add a tiny white dot to each black pupil for a lifelike reflection. -
Antique the texture:
Mix a very watery dark grey or black paint. Brush it over the carved ‘V’ feathers and wing lines, then immediately wipe the surface with a paper towel. The dark paint will stay in the grooves, highlighting the carving. -
Dry brush the wings:
Dip a dry brush into a slightly darker blue and lightly sweep it over the wings to add depth and separation from the body. -
Seal the work:
Finish with a coat of matte varnish to protect the paint and give the clay a sealed, finished look.
Cracked While Drying?
If small cracks appear during drying, mix a tiny amount of fresh clay with water to make a paste (slip) and fill the crack, then smooth over.
Place your little guardian on a shelf or windowsill to enjoy its watchful gaze
Tiny Axolotl With Frills
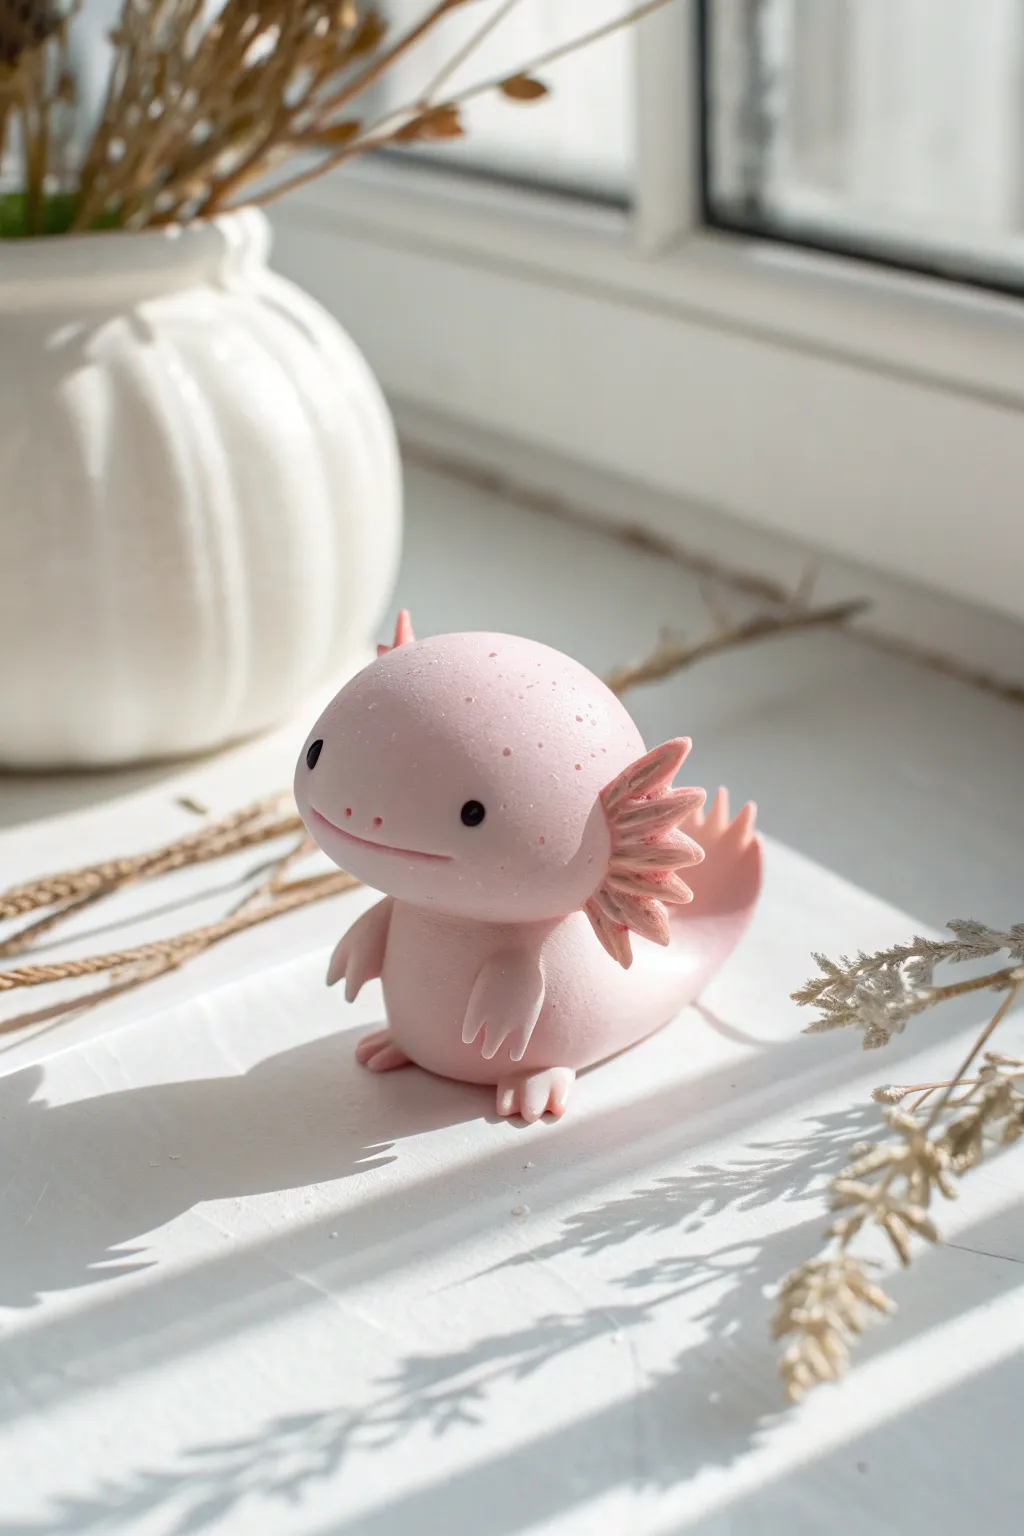
Detailed and delicate, this adorable axolotl figurine captures the gentle nature of the popular amphibian. With its rounded head, feathery frills, and soft pink hue, this air-dry clay project makes for a charming desk companion or a sweet handmade gift.
Step-by-Step
Materials
- White air-dry clay
- Pink acrylic paint (light pink and slightly darker rose)
- Black acrylic paint
- Ball stylus tool
- Needle tool or toothpick
- Small paintbrush
- Water (for smoothing)
- Matte or satin varnish (optional)
Step 1: Shaping the Head
-
Mix the Base Color:
Start by tinting a golf-ball-sized amount of white clay with a small drop of light pink acrylic paint. Knead it thoroughly until the color is uniform and pale pink. If the clay gets sticky, let it sit for a minute. -
Form the Head Shape:
Roll half of your clay into a smooth sphere. Gently press it down onto your work surface to flatten the bottom slightly, then press very gently on the top to create a rounded, bun-like shape for the head. -
Smooth the Surface:
Dip your finger in a tiny bit of water and run it over the clay to remove any fingerprints or cracks. The surface should be perfectly smooth before moving on.
Wet Finger Trick
Keep a small bowl of water nearby. Frequently dipping your finger and smoothing the clay prevents cracking lines, especially where you join the head to the body.
Step 2: Forming the Body and Tail
-
Create the Body Base:
Take a slightly smaller portion of pink clay and roll it into a short, fat teardrop shape. This will be the body and tail. -
Attach Head to Body:
Score the bottom of the head and the wide end of the teardrop body with your needle tool. Apply a tiny dab of water or slip, then press the head firmly onto the body. Blend the seam at the neck with a modeling tool or your finger so it looks like one piece. -
Curve the Tail:
Gently curve the tail end slightly to one side to give the axolotl a dynamic, swimming pose. Flatten the tip of the tail vertically just a little to mimic a fin.
Step 3: Adding Limbs
-
Make the Arms:
Roll two small pea-sized balls of pink clay into tiny logs. Flatten one end of each log to attach to the body later. -
Detail the Fingers:
On the other end of the arm logs, use your needle tool or a small knife to cut tiny slits, creating three or four little fingers. Gently separate them. -
Attach the Limbs:
Attach the arms to the sides of the body, just below the head. Add two smaller logs for the back legs near the tail base. Blend the attachment points smooth.
Head Keep Drooping?
If the head is too heavy for the wet clay body, insert a short piece of toothpick or wire into the neck to act as an internal armature while it dries.
Step 4: Creating the Frills
-
Prepare the Gills:
Roll six equal, tiny cone shapes from your pink clay. These need to be quite small—about the size of a grain of rice. -
Flatten and Texture:
Gently flatten each cone. Using your needle tool, press lines or indentations radiating from the center to the edges to simulate the feathery texture of the gills. -
Painting the Gradient:
Before attaching, I like to lightly dry-brush the tips of these frills with a slightly darker rose pink paint to add depth and realism. -
Attaching the Frills:
Attach three frills to each side of the head, behind the cheek area. Arrange them to fan out beautifully. Use a small tool to blend the base of each frill into the head.
Step 5: Facial Features
-
Indent Eye Sockets:
Use a ball stylus to press two shallow indentations where the eyes will go. Spacing them widely makes the face look cuter. -
Insert Eyes:
Roll two tiny specks of black clay (or paint them later) and press them into the sockets. If painting, wait until the clay is dry to add two black dots. -
Carve the Smile:
Use a needle tool held at an angle to press a wide, gentle smile into the clay. Smooth the edges of the cut so the smile looks soft. -
Add Speckles:
Dip a toothbrush or stiff brush into diluted darker pink paint. Run your thumb over the bristles to flick tiny speckles onto the top of the head and back.
Step 6: Finishing Touches
-
Final Smoothing:
Give the entire piece one last check. Smooth any accidental marks with a damp brush. -
Drying:
Let the figure dry completely for 24-48 hours in a dry, cool place away from direct sunlight. -
Varnish:
Once fully dry, apply a coat of matte or satin varnish to protect the clay and give it a finished, ceramic-like look.
Now you have a charming little amphibious friend to brighten up your shelf
Stingray Pancake Pal
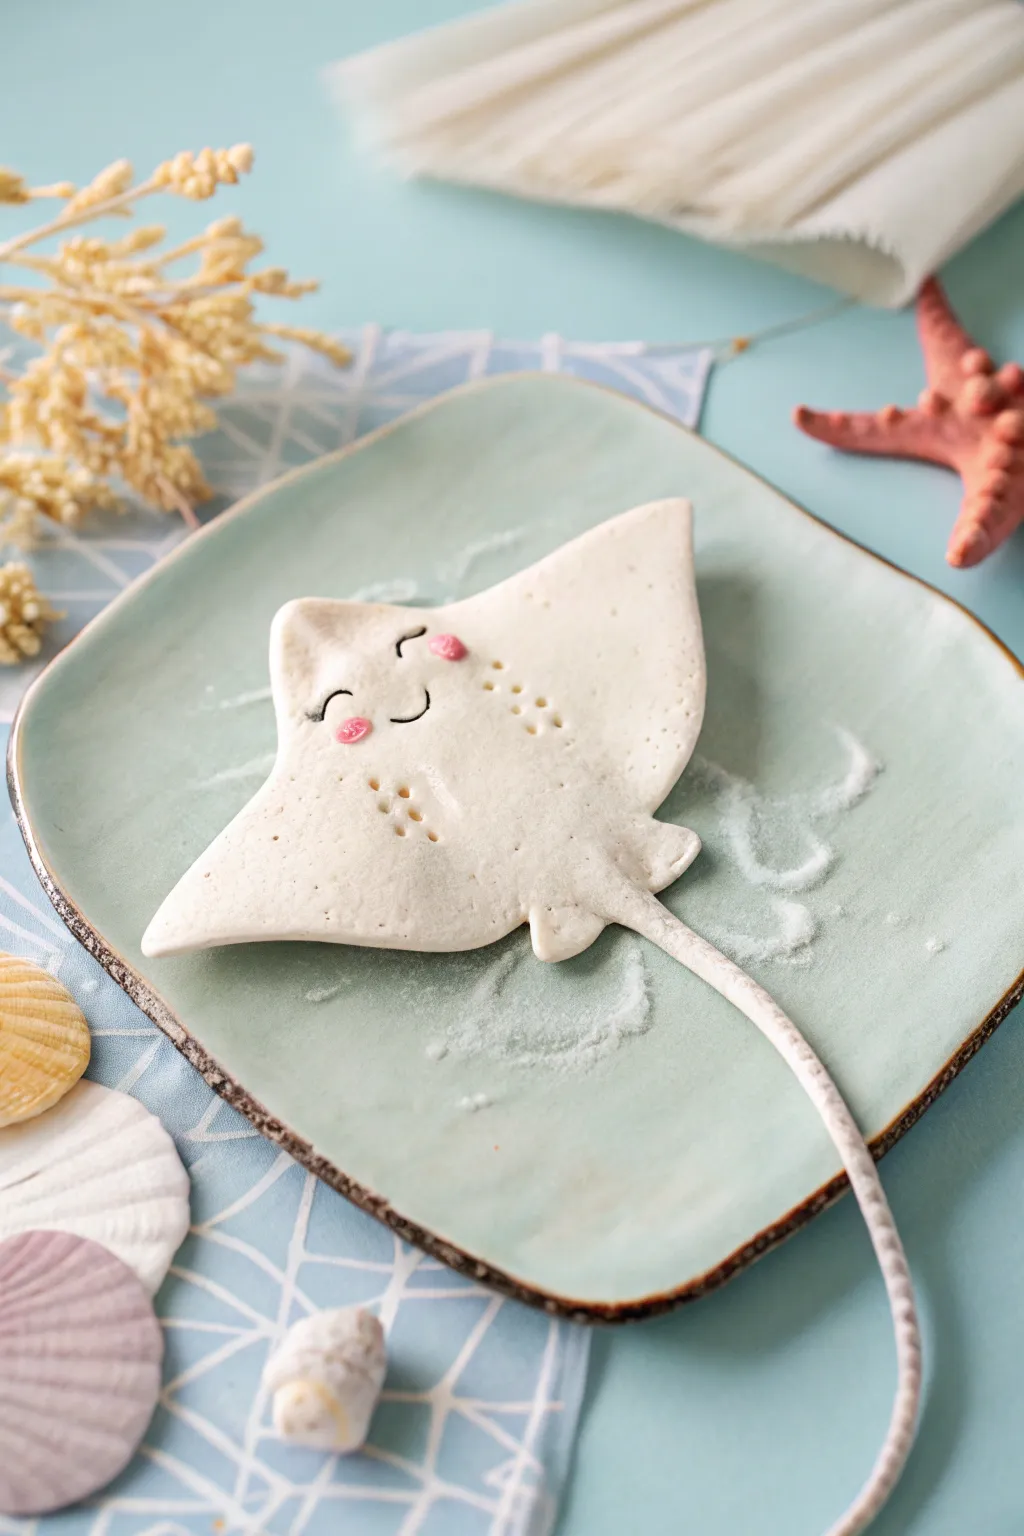
This adorable stingray looks almost soft enough to eat, mimicking the fluffy texture of a pancake with its matte white finish and sweet expression. It features a gently curved body, tiny poked details for texture, and a long, wandering tail that adds a dynamic touch to this sea creature friend.
How-To Guide
Materials
- White air-dry clay (or cold porcelain)
- Non-stick rolling pin
- Clay knife or craft knife
- Needle tool or toothpick
- Ball tool (small)
- Water in a small cup
- Black fine-tip marker or acrylic paint
- Soft pink chalk pastel or blush
- Small paintbrush
- Smooth work surface (silicone mat recommended)
Step 1: Shaping the Ray
-
Prepare the clay block:
Start by conditioning a golf-ball-sized amount of white air-dry clay. Knead it in your hands until it stretches without cracking, ensuring it is warm and pliable. -
Roll the base slab:
Flatten the clay ball onto your work surface. Use a rolling pin to create a slab that is about 1/4 inch thick. You want it substantial enough to hold its shape but not too chunky. -
Cut the diamond shape:
Using your clay knife, cut a soft diamond shape. The front ‘nose’ area should be slightly rounded, and the two side wings should taper out gently rather than being sharp triangles. -
Refine the edges:
Dip your finger in a tiny bit of water and run it along the cut edges of the clay. Smooth them down so they look rounded and organic, erasing any sharp cut marks. -
Lift and curve:
Carefully lift the clay shape. Gently pinch and lift the side ‘wings’ upward just a tiny bit to give the ray a sense of movement, like it’s gliding through water.
Step 2: Adding Details
-
Create the eye ridges:
Near the front center of the face, use your thumb or a large ball tool to press two very shallow indents where the eyes will go. This adds subtle dimension to the face. -
Add breathing holes:
Take your needle tool or a toothpick. Behind the eye area in the center of the back, poke two lines of small holes. Create about four or five small dots per line. -
Form the pelvic fins:
Roll two very small balls of clay and flatten them into teardrops. Attach these to the back bottom edge of the body, one on each side of where the tail will go. Blend the seams with a little water. -
Roll the tail:
Take a fresh piece of clay and roll a long, thin snake. Taper it so it gets thinner toward the end. It should be quite long—longer than the body itself. -
Attach the tail:
Join the thicker end of the tail to the back point of the body. Use a modelling tool to drag clay across the seam to blend it seamlessly. Arrange the tail in a curvy, wandering line on your drying surface.
Cracking Wings?
If the clay starts to crack while you are bending the wings upward, your clay might be too dry. Smooth a drop of water over the crack immediately to seal it back up.
Step 3: Face & Finish
-
Texture the surface:
To give it that slightly porous, ‘pancake-like’ texture seen in the photo, gently tap the surface of the clay with a stiff bristle brush or a crumpled ball of aluminum foil. Keep the pressure very light. -
Let it dry:
Allow the clay to dry completely. This usually takes 24-48 hours depending on humidity. Flip it over halfway through if possible to ensure the bottom dries evenly. -
Add the smile:
Once fully hard, use a fine-tip black marker to draw a small, U-shaped mouth in the center of the face. -
Draw the eyes:
Draw two U-shaped closed eyes above the mouth. Adding a tiny eyelash flick to the outer corners makes the expression extra sweet. -
Apply rosy cheeks:
Scrape a little bit of pink pigment from a chalk pastel or use powder blush. Dip a dry brush into the powder and gently dab two pink circles right under the eyes. -
Highlight the cheeks:
I like to add a tiny white dot of acrylic paint or a white gel pen inside the pink cheek area for a bubbly highlight.
Tail Security
Because the tail is long and thin, insert a small piece of decorative wire inside the clay snake before attaching it. This acts as an armature and prevents it from snapping.
Place your happy stingray on a shelf or adhere a magnet to the back to brighten up your fridge
Octopus With Stubby Tentacles
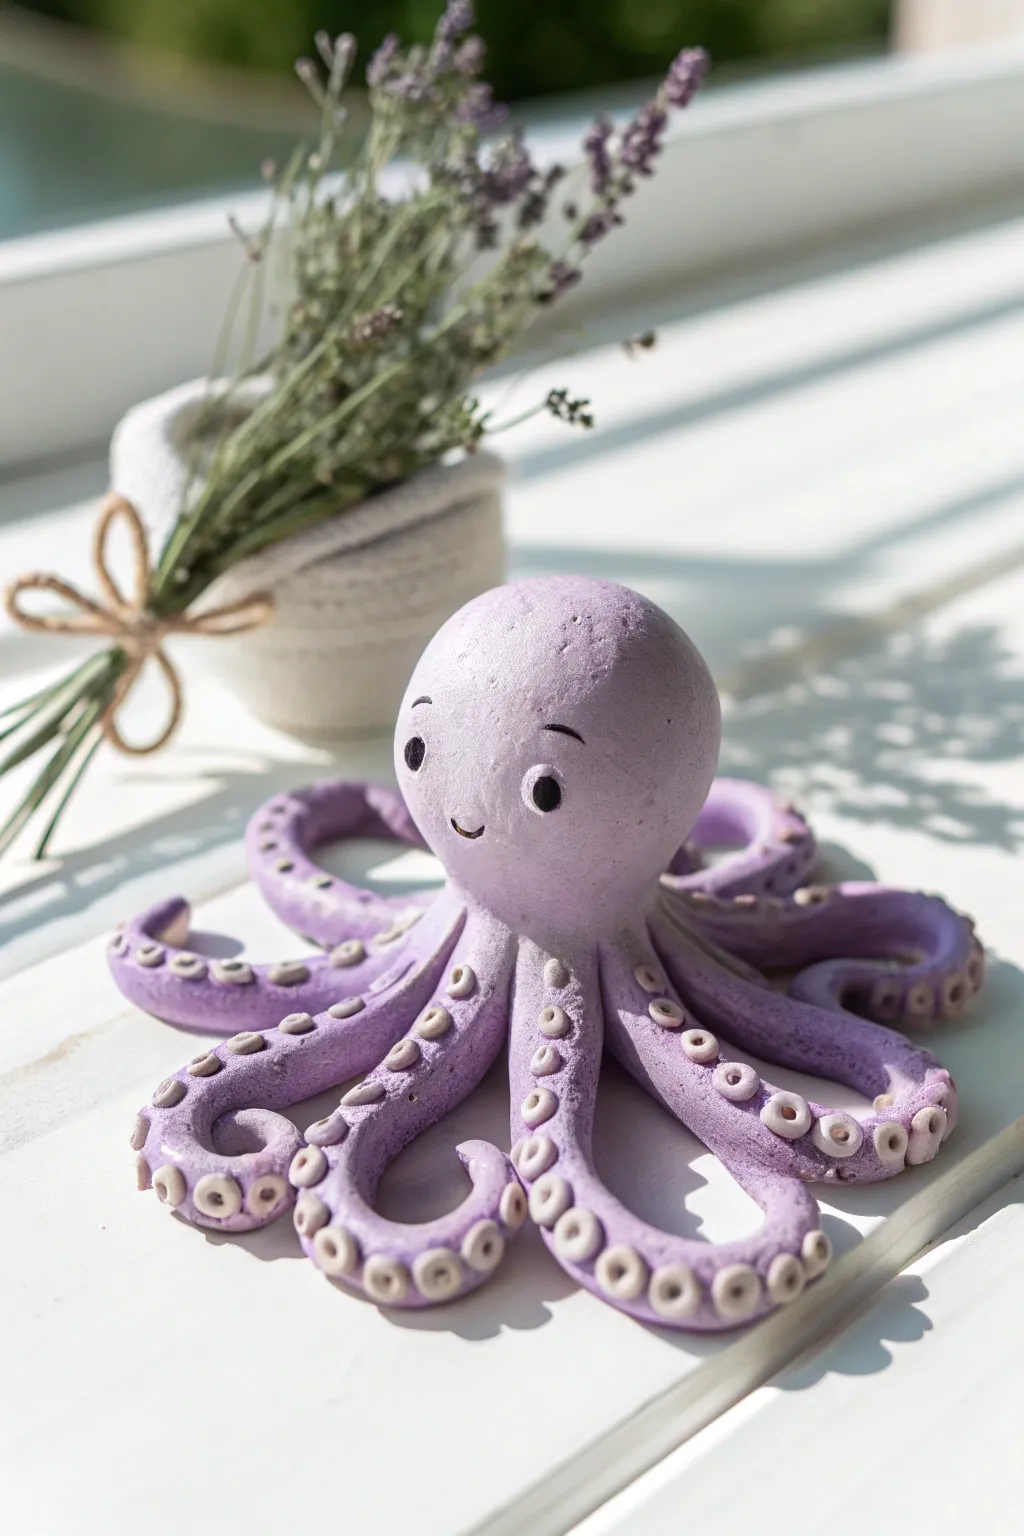
This charming little sea creature features a smooth, round head and eight playfully curled tentacles adorned with tiny suckers. The soft purple hue gives it a gentle, calming personality perfect for a desk companion or shelf decoration.
Step-by-Step Tutorial
Materials
- White air dry clay
- Acrylic paint (lavender or purple and white)
- Small paintbrush
- Needle tool or toothpick
- Ball stylus tool (small)
- Small cup of water
- Black fine-tip marker or black acrylic paint
- Smooth work surface
Step 1: Pre-coloring the Clay
-
Mix the color:
Start by taking a fist-sized ball of white air dry clay. Add a drop of purple acrylic paint into the center. Knead the clay thoroughly until the color is an even, pale lavender tone throughout. Add more paint sparingly if you want a deeper shade. -
Separate the parts:
Divide your colored clay into two portions. Use about one-third for the head and two-thirds for the tentacles. Wrap the head portion in plastic wrap temporarily to keep it from drying out.
Cracking Up?
If you see hairline cracks while drying, mix a tiny bit of fresh clay with water to make a paste (slip). Paint this into the cracks and smooth with a finger.
Step 2: Forming the Tentacles
-
Divide the clay:
Take the larger portion of clay and divide it into eight equal little balls. These will become the legs. -
Roll coils:
Roll each ball into a tapered coil or ‘snake’ shape. One end should be slightly thicker (to attach to the body) and the other end should taper to a gentle point. -
Arrange the base:
Place the eight coils in a starburst pattern on your work surface, with all the thick ends meeting in the center. Press the center points together firmly to create a single base unit. -
Add movement:
Gently curl the tips of the tentacles. I like to twist some clockwise and others counter-clockwise to give the octopus a natural, swimming motion.
Make it Sparkle
Once the paint is fully dry, brush on a coat of pearl-finish acrylic medium or a glossy varnish to make your octopus look wet and fresh from the ocean.
Step 3: Sculpting the Head
-
Shape the head:
Unwrap the remaining clay and roll it into a smooth, seamless ball. Check for any cracks and smooth them out with a tiny bit of water on your finger. -
Join body parts:
Score the bottom of the head and the center of the tentacle base with your needle tool. Dab a little water or slip on the scored areas. -
Attach firmly:
Press the head firmly onto the center of the tentacles. Use your finger or a modeling tool to blend the clay at the seam where the head meets the legs so it looks like one solid piece.
Step 4: Detailing
-
Create suckers:
Roll tiny, lentil-sized balls of lighter purple or white clay. You will need quite a few—at least 5-6 for each tentacle. -
Attach suckers:
Press the tiny balls onto the top surface of the tentacles in a single row. Gently flatten them slightly as you attach them. -
Indent centers:
Using a small ball stylus tool, press into the center of each tiny sucker ball. This creates the classic donut-shape of an octopus suction cup. -
Create the face:
Use a larger ball tool to make two small indentations for the eye sockets on the face. Keep them relatively wide apart for a cuter look. -
Add the mouth:
Use the edge of your needle tool or a small spoon tool to impress a tiny, U-shaped smile between the eyes.
Step 5: Finishing Touches
-
Dry completely:
Allow your octopus to dry fully. This usually takes 24-48 hours depending on humidity. Flip it over halfway through if possible to let the bottom dry. -
Paint the eyes:
Once dry, use black paint or a marker to fill in the eye indentations. Add tiny curved eyebrows above them for extra expression. -
Add highlights:
Add a tiny dot of white paint to the top corner of each black eye to bring the character to life. -
Texturize:
For a stone-like finish similar to the image, you can lightly stipple a slightly darker purple paint over the head using a dry sponge, then wipe most of it away.
Place your new purple friend on a sunny windowsill near some plants and enjoy the view
Kawaii Dino With Plate Spikes
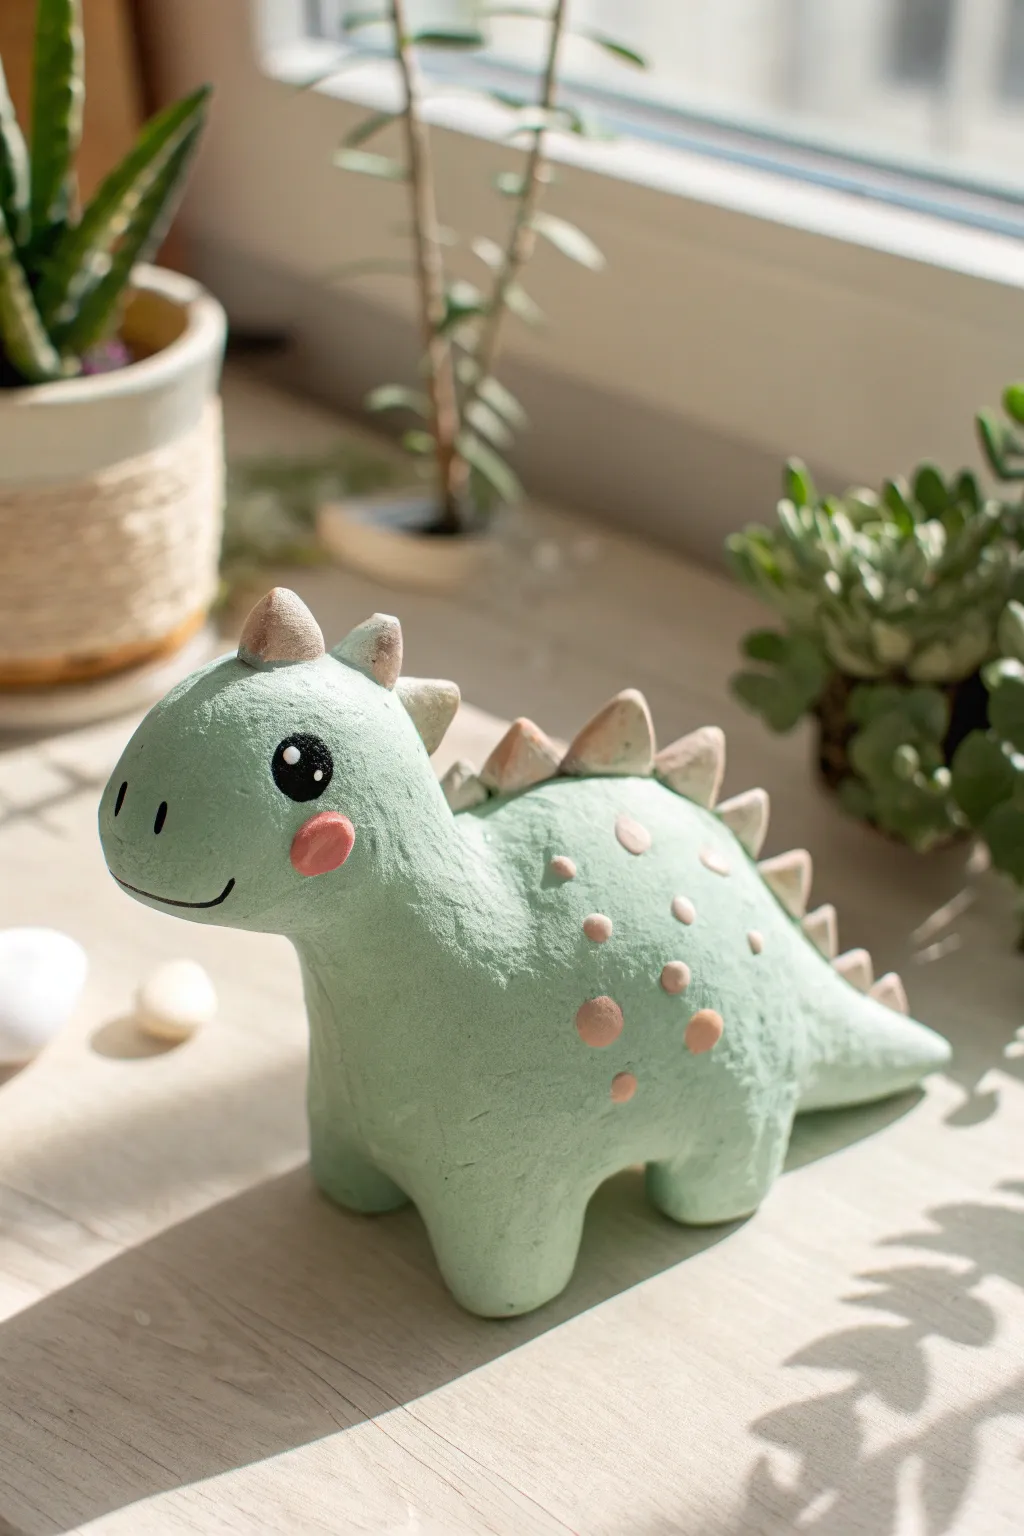
This adorable dinosaur brings a touch of Jurassic joy to your desk with its soft mint green body and rose-colored accents. The chunky shape makes it incredibly stable and sturdy, perfect for air-dry clay beginners looking for a cute, low-stress project.
How-To Guide
Materials
- Air-dry clay (white)
- Acrylic paints (mint green, soft pink/beige, black, white)
- Clay sculpting tools (or a toothpick)
- Water in a small cup
- Small paintbrush
- Smooth work surface
Step 1: Forming the Dinosaur Body
-
Prepare the Base:
Start with a large ball of clay about the size of a tangerine. Knead it well until it feels pliable and warm to prevent cracking later. -
Shape the Torso:
Roll the clay into a smooth oval shape. Gently tap one end against your table to flatten the bottom so the dinosaur will stand securely. -
Pull the Neck:
Pinch the front end of the oval and gently pull upwards and forwards to create a thick neck. Smooth the transition area with a little water on your finger so there are no seams. -
Create the Head:
Refine the top of the neck into a rounded head shape. It should look bulbous and friendly, blending seamlessly into the neck. -
Pull the Tail:
At the opposite end of the body, pinch and pull the clay outward to form a short, tapered tail. Curve it slightly downward so it rests near the ground. -
Add Legs:
Instead of attaching separate legs, use your thumb to push up into the bottom of the body at four points, creating four chunky, stump-like legs. Smooth out the clay between them so the dinosaur stands level.
Smoother Surfaces
Before the clay dries, dip your finger in water and gently rub the entire surface in circular motions. This erases fingerprints and gives that professional porcelain finish.
Step 2: Adding Details
-
Form the Spikes:
Roll tiny balls of clay, then pinch them into small triangles. You will need roughly 8 to 10 spikes, graduating in size from small to medium and back to small. -
Attach the Spikes:
Score the back of the dinosaur and the bottom of each spike with a tool. Apply a tiny dab of water (slip) and press the spikes in a row from the top of the head down to the tail. -
Blend the Seams:
Using a small tool or your fingernail, gently drag a tiny bit of clay from the base of each spike onto the body to lock it in place, then smooth it over with water. -
Dry the Figure:
Let your dinosaur sit in a dry, room-temperature spot for 24-48 hours. I find turning it over halfway through helps the bottom dry completely.
Make it a Planter
Before drying, use a large marker cap to press a deep hole into the dinosaur’s back. Once dry and sealed, you can pop a tiny air plant inside!
Step 3: Painting
-
Base Coat:
Once fully dry, paint the entire body (except the spikes) with a soft mint green acrylic paint. You may need two coats for full opacity. -
Paint the Spikes:
Carefully paint the triangular spikes in a soft beige or muted dusty pink color. -
Add Polka Dots:
Using the back of your paintbrush handle dipped in the spike color, stamp varied sizes of dots onto the dinosaur’s back and sides. -
Rosy Cheeks:
Paint a small, soft pink circle on the cheek area just below where the eye will go. -
Paint the Eyes:
Use a detail brush to paint a solid black circle for the eye. Add a tiny white dot near the top of the black circle for a kawaii highlight. -
Final Expressions:
Paint a thin, small curved line for the smile and two tiny vertical dashes on the snout for nostrils.
Place your new dino friend near a window or succulent garden to enjoy its cheerful company
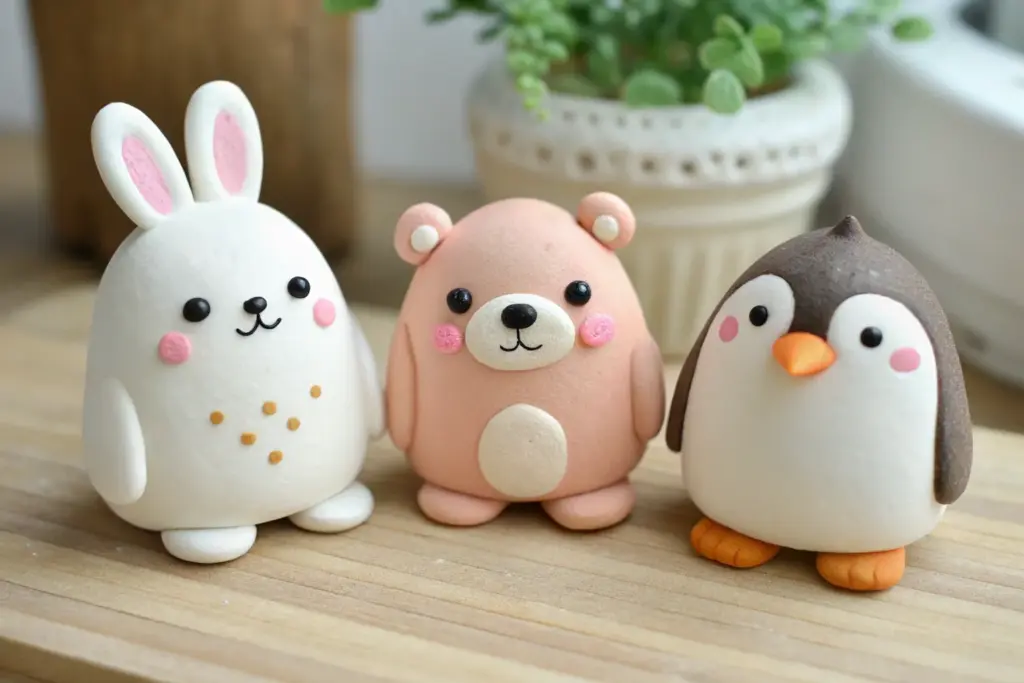
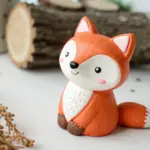
Pocket Zoo Animal Set
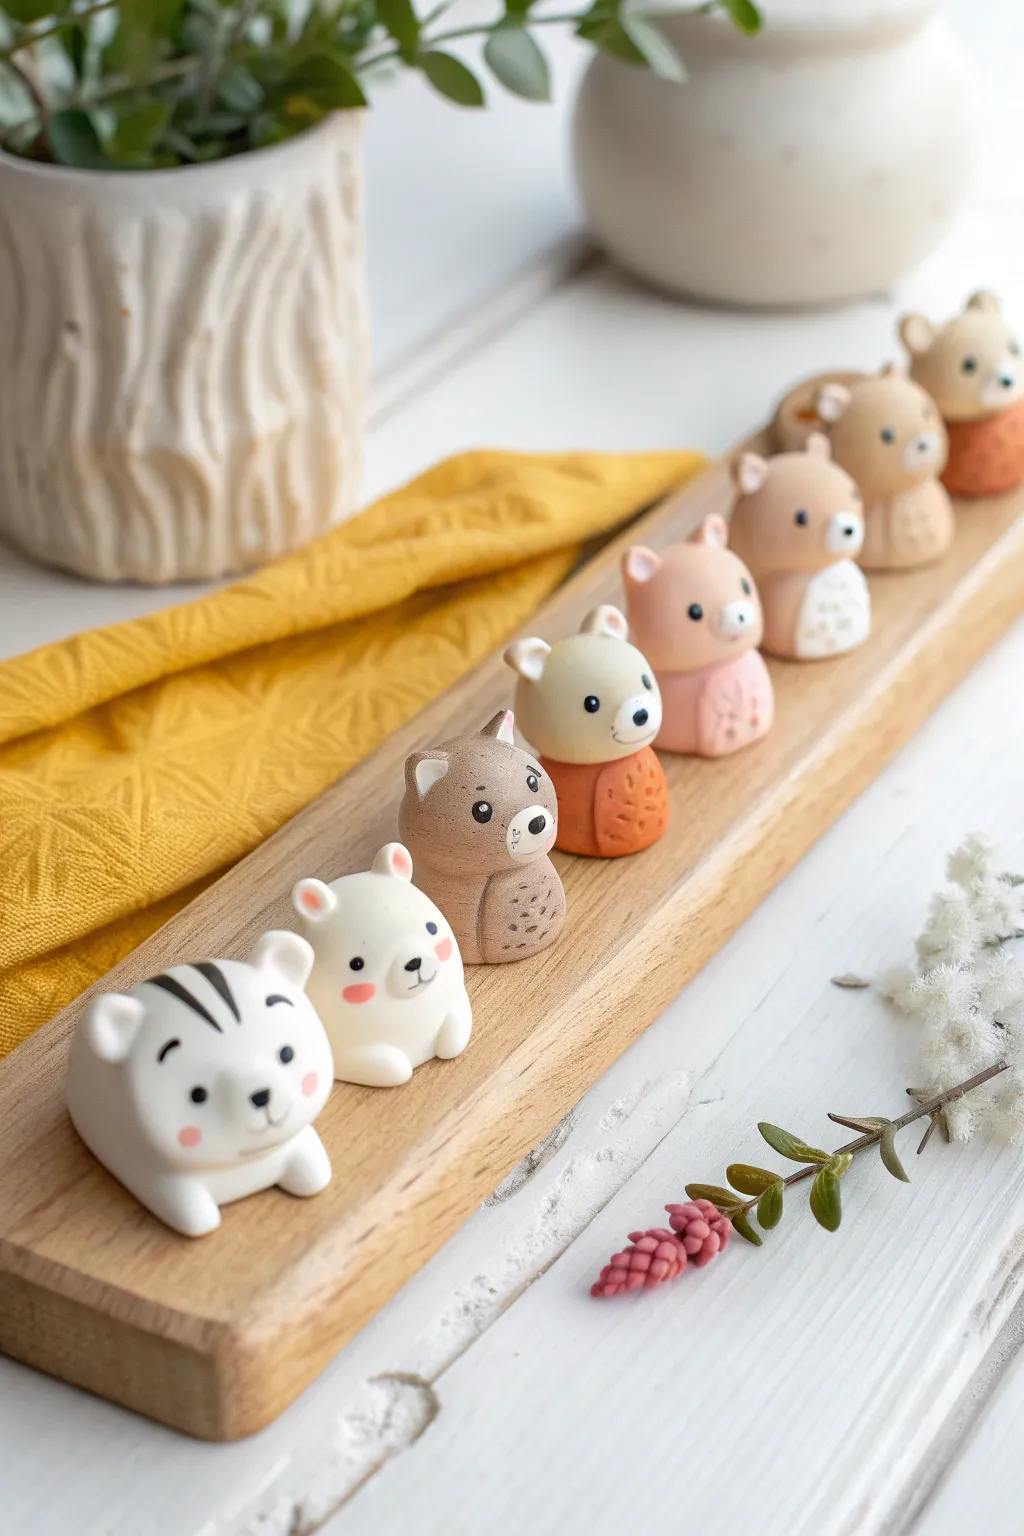
Create this adorable lineup of miniature animal friends to brighten up your desk or shelf. These smooth, rounded figurines feature simple shapes and sweet expressions, making them perfect for beginners to practice basic clay modeling techniques.
Step-by-Step
Materials
- White air-dry clay (or polymer clay)
- Acrylic paints (white, black, brown, pink, orange, beige)
- Fine detail paintbrush (size 0 or 00)
- Ball tool or rounded sculpting tool
- Water bonding cup
- Sandpaper (fine grit)
- Matte varnish or sealant
Step 1: Basic Body Shaping
-
Prepare your clay:
Start by conditioning your clay until it’s smooth and pliable. Divide it into small portions, roughly the size of a walnut, for each animal figure. -
Form the base shapes:
For the upright animals (bears, fox), roll a ball and gently taper the top slightly to form a rounded pear shape. Press the bottom against your work surface so it sits flat. -
Create the lying tiger:
For the front-most white tiger, roll an oval shape instead. Flatten the bottom and gently pull two small stubs at the front for paws. -
Add the ears:
Pinch off tiny amounts of clay for ears. Roll them into tiny spheres. For the bears, press them gently onto the head. For the pointed ears (fox/cat), reshape the spheres into tiny triangles before attaching. -
Smooth the seams:
Dip your finger or a tool in a tiny bit of water and gently blend the clay where the ears join the head. You want a seamless transition so they don’t pop off later. -
Add limbs and tails:
For the sitting figures, roll tiny sausages for arms and press them against the sides of the body. Add small balls for tails on the back if desired.
Cracks Appearing?
If small cracks appear while drying, mix a tiny bit of fresh clay with water to make a paste (slip). Fill the cracks, smooth over, and let dry again.
Step 2: Refining and Drying
-
Refine the surface:
Look over each figure. Smooth out any fingerprints or cracks with a damp finger or soft brush. Smoothness is key for that polished, ceramic look. -
Let them dry:
Allow the figures to dry completely. This usually takes 24-48 hours depending on humidity. Rotate them occasionally so the bottoms dry evenly. -
Sanding:
Once fully dry, use fine-grit sandpaper to gently buff away any remaining roughness or lint, leaving a porcelain-like finish.
Step 3: Painting and Details
-
Base coats:
If you used white clay, the white animals are ready. For the colored ones (brown bear, orange fox), paint the bodies with smooth, even coats of acrylic paint. Let dry between layers. -
Paint the tummies:
For animals with lighter bellies or clothes (like the orange fox), paint a contrasting patch on the lower half of the body. -
Add facial features:
Using your smallest brush or a dotting tool, paint two small black dots for eyes. Place them relatively wide apart for a cuter look. -
Nose and mouth:
Paint a tiny black or brown oval for the nose between the eyes. For the mouth, a simple inverted ‘Y’ shape or a tiny line works best. -
Cheeky details:
Dip a cotton swab or dry brush into a tiny bit of pink paint. Dab off the excess, then gently blush the cheeks of each animal. -
Character specifics:
Add the tiger’s stripes with thin black lines on the head. Add white tummy dots or texture marks on the colored animals if you want extra detail. -
Seal the deal:
Finish by coating each figure with a matte varnish to protect the paint and give them a professional, unified finish.
Turn Them Into Magnets
Before the clay dries, press a strong neodymium magnet into the back of each animal. Secure it with a dab of superglue after the painting phase.
Arrange your finished zoo parade on a wooden board or scatter them amongst your houseplants for a delightful surprise