
If you want a clay date that’s cute, low-pressure, and actually doable in one sitting, I’ve got you. These ideas are all about matching sets, tiny keepsakes, and simple shapes that feel relaxing to make together.
Matching Trinket Dishes
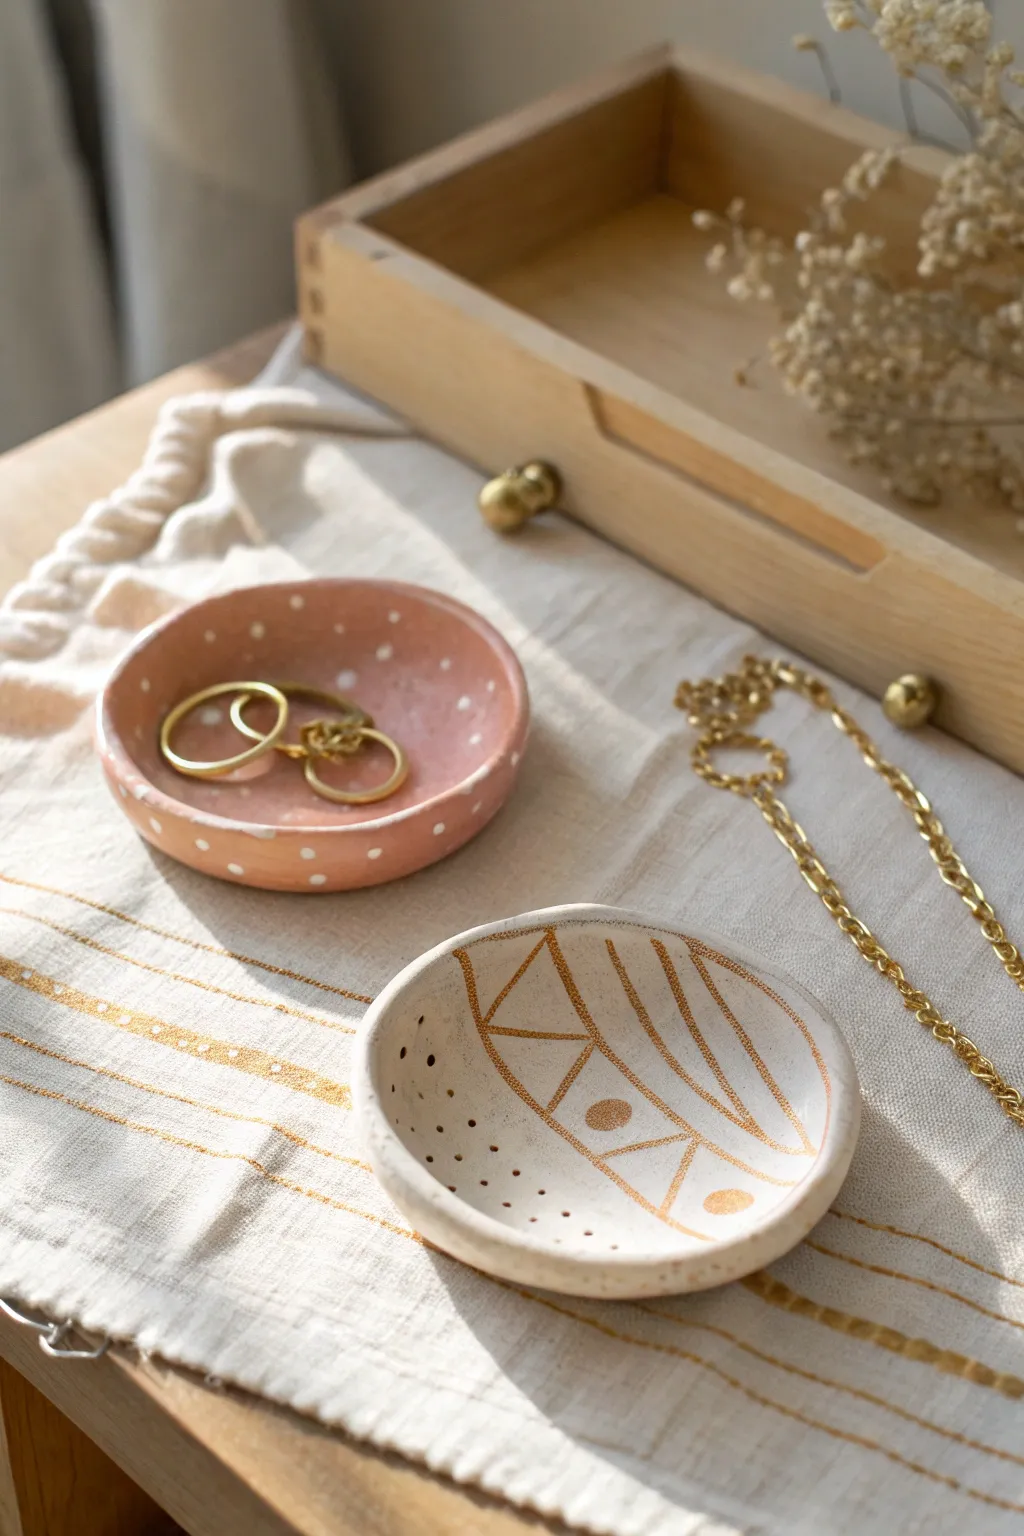
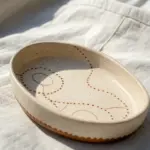
Create a charming set of handmade ceramic dishes perfect for holding rings or delicate chains. This project combines a soft, earthy aesthetic with simple hand-building techniques, resulting in pieces that look beautifully mismatched yet cohesive.
Step-by-Step
Materials
- Air-dry clay (white or light grey)
- Acrylic paints (terracotta/dusty rose, white, gold metallic)
- Small rolling pin
- Rolling mat or canvas sheet
- Small bowl or round cookie cutter (approx. 3-4 inches diameter)
- Sponge
- Fine grit sandpaper
- Fine-tipped paintbrush (for detailing)
- Medium flat paintbrush
- Varnish or sealant (matte or satin finish)
- Toothpick or needle tool
Step 1: Shaping the Dishes
-
Condition the Clay:
Begin by taking a handful of air-dry clay and kneading it in your hands to warm it up. This conditioning process helps prevent cracking later on and makes the clay easier to work with. -
Roll Out the Slab:
Place your clay on a mat or canvas to prevent sticking. Use your rolling pin to roll the clay out to an even thickness, aiming for about 1/4 inch thick so the dish feels substantial but not chunky. -
Cut the Circles:
Use a round cookie cutter or place a small bowl upside down on the flattened clay as a template. Carefully cut around it with a needle tool or knife to create your perfect circle base. -
Form the Lip:
Gently pinch the edges of the clay circle upwards to create a raised rim. I like to use my thumb on the inside and forefinger on the outside, rotating the dish as I pinch to keep the wall height consistent. -
Smooth the Edges:
Dip your finger or a small sponge into a little water and run it along the rim and inside surface. Smooth out any fingerprints, cracks, or sharp edges to give the piece a refined finish. -
Add Texture (Optional):
For the white geometric dish, if you want indentation details for the dots, use the blunt end of a toothpick to press small divots into the wet clay where you plan to paint later. -
Allow to Cure:
Set your dishes aside in a dry spot away from direct sunlight. Let them dry completely for 24-48 hours. Flip them over halfway through to ensure the bottom dries evenly.
Water Control
Use water sparingly when smoothing edges! Too much water can weaken air-dry clay and cause it to crack or warp as it dries. A merely damp sponge is safer than a wet finger.
Step 2: Refining and Painting
-
Sand for Smoothness:
Once fully dry, the clay will turn white and hard. Take a piece of fine-grit sandpaper and gently sand the rim and any rough spots on the surface to create a professional, smooth canvas for your paint. -
Base Color – Pink Dish:
For the first dish, mix a dusty rose or terracotta acrylic paint. Apply two thin coats to the entire interior and exterior, letting the first coat dry before adding the second for opacity. -
Base Color – Geo Dish:
For the second dish, leave it natural or apply a wash of creamy off-white paint if your clay dried a bit gray. This neutral base will make the gold pop. -
Paint the Speckles:
Dip the very tip of a fine brush or a toothpick into white paint. Gently dab small, random dots all over the pink dish to create that classic speckled pottery look. -
Draft the Gold Design:
For the white dish, visualize your geometric pattern. It helps to lightly sketch the triangles and lines with a pencil first if you are nervous about freehanding with paint. -
Apply Gold Linework:
Using a fine detail brush and metallic gold paint, carefully trace your geometric lines. Create a mix of parallel lines, triangles, and solid circles to mimic the tribal-inspired pattern shown. -
Add Gold Accents:
Add a few tiny dots of gold near the bottom of the white dish to balance the design. You can also paint the very rim of the dish with a thin gold line for an extra touch of elegance. -
Dry the Paint:
Let all paint dry completely. Metallic paints sometimes take a little longer to set than standard acrylics, so give it an extra hour to be safe. -
Seal the Project:
Apply a coat of satin or matte varnish over the entire dish. This protects the paint from chipping and gives the clay a lovely finished sheen akin to fired ceramic.
Custom Ring Holder
Before drying, form a small cone of clay and attach it to the center of the dish using ‘slip’ (water and clay mush). This creates a central post perfect for stacking rings securely.
Place your new creations on your dresser or vanity to add a touch of handmade warmth to your daily routine


His-and-Hers Mini Pinch Pots
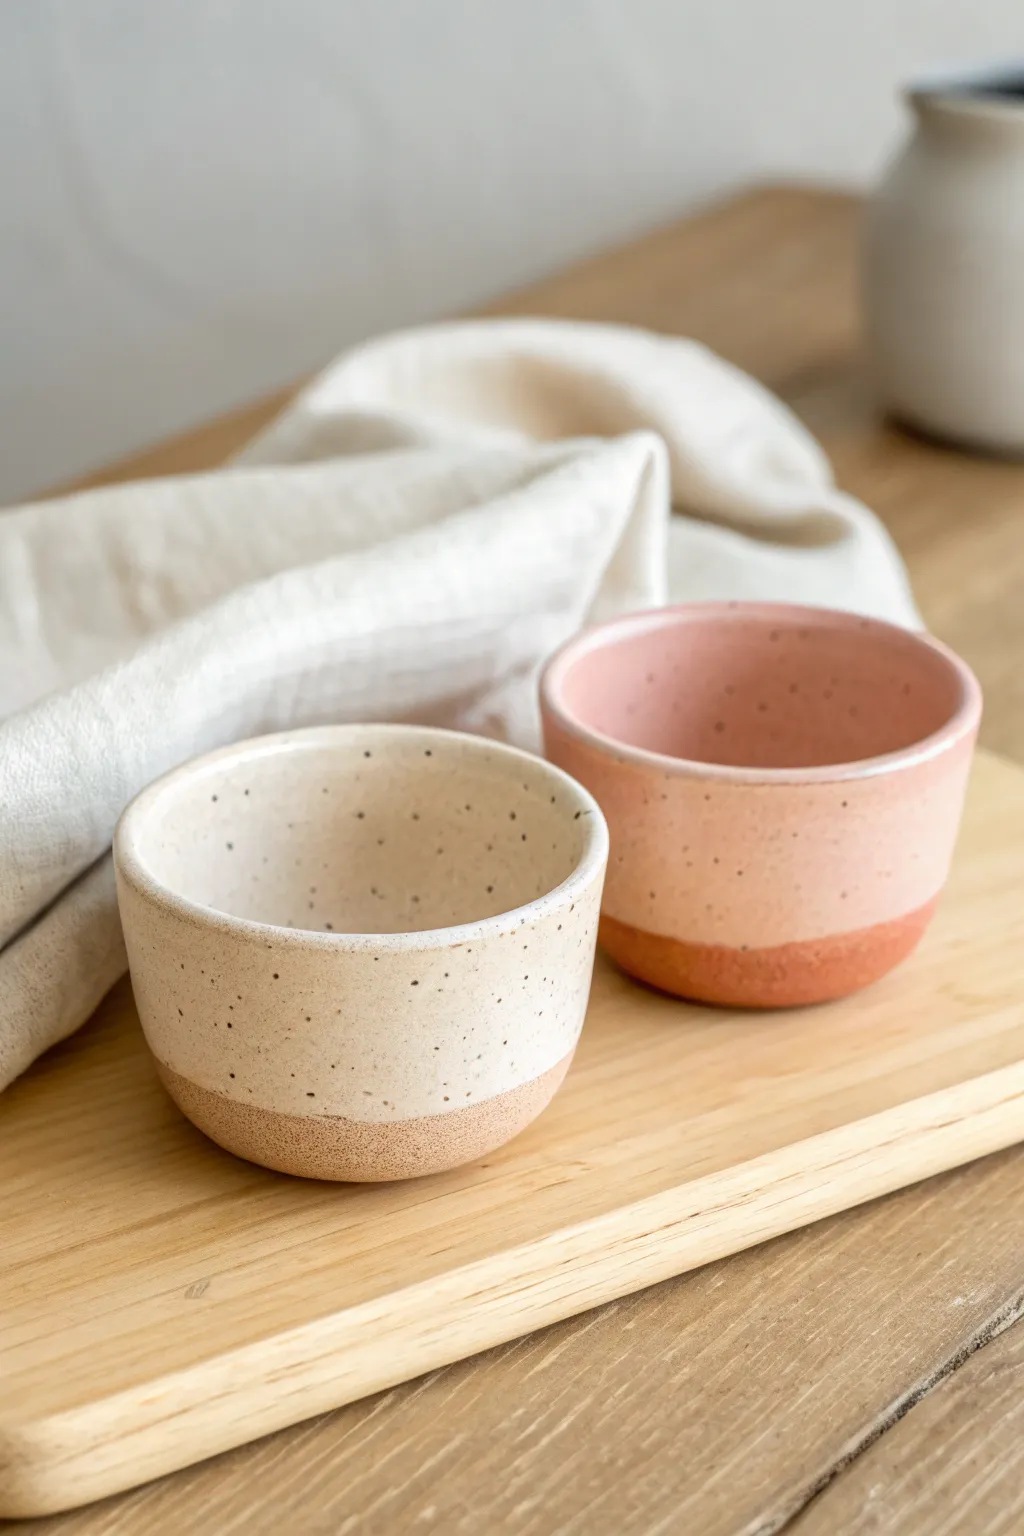
These charming, minimalist pinch pots bring a touch of earthy elegance to your morning espresso or jewelry storage. Featuring a beautiful speckled clay body with a raw, unglazed base, the contrast between the smooth glaze and textured bottom creates a modern, artisanal feel.
Step-by-Step Tutorial
Materials
- Speckled stoneware clay (mid-fire)
- Small bowl of water
- Sponge
- Pottery wire cutter
- Wooden modeling tool or rib
- Dip glazing tongs (optional)
- Creamy white dipping glaze
- Dusty pink dipping glaze
- Wax resist
- Kiln access
Step 1: Shaping the Clay
-
Prepare your clay:
Cut two equal pieces of speckled stoneware clay, roughly the size of a tangerine or a tennis ball depending on your desired final size. Pat them into smooth, round spheres to eliminate any air bubbles. -
Open the form:
Hold the clay ball in your non-dominant hand. With your other thumb, press gently into the center of the ball, stopping about a half-inch from the bottom to leave enough thickness for the base. -
Pinch the walls:
Begin rotating the ball while rhythmically pinching the clay between your thumb (inside) and fingers (outside). Work your way from the bottom up to the rim. -
Even out the thickness:
Continue pinching until the walls are an even thickness of about 1/4 inch. Aim for a slightly tapered cylinder shape rather than a wide bowl; keep the rim vertical. -
Smooth the surface:
Once you have the basic cup shape, use a damp sponge or a flexible rib tool to smooth out the fingerprint marks on both the interior and exterior walls. -
Define the rim:
Gently compress the rim with a damp piece of chamois or your finger to make it smooth and rounded, which is crucial for comfortable sipping. -
Flatten the base:
Tap the pot gently onto your work surface to create a flat, stable bottom. I like to check at this stage that the pot doesn’t wobble.
Uneven Walls?
If one side feels thicker, don’t restart. Use a serrated metal rib to scrape away excess clay from the thick side when the pot is leather hard, then smooth it back down.
Step 2: Drying and Bisque Firing
-
Refine the foot:
Allow the pots to dry to a ‘leather hard’ state. If the heavy bottom feels uneven, you can trim a little excess clay off with a loop tool to create a clean line where the glaze will eventually stop. -
Slow drying process:
Cover the pots loosely with plastic and let them dry slowly over several days until they are bone dry and chalky to the touch. This prevents cracking. -
Bisque fire:
Load the bone-dry pots into the kiln for a bisque firing (usually around Cone 04 or 06). This prepares the clay to accept glaze without disintegrating.
Speckle Magic
For prominent speckles, choose a clay body specifically labeled ‘speckled buff’ or ‘stoneware with iron.’ The iron pyrite spots will bleed through light glazes beautifully.
Step 3: Glazing and Final Fire
-
Clean the bisque:
Wipe the bisque-fired pots with a damp sponge to remove any dust that might prevent the glaze from adhering properly. -
Apply wax resist:
Carefully paint liquid wax resist onto the bottom 1/4 of the exterior and the entire underside base. This ensures the clean, raw clay line shown in the photo. -
Let the wax dry:
Wait 15-20 minutes for the wax to fully dry. Any glaze that touches this area will bead up and can be wiped away easily. -
Dip the first pot:
Using glazing tongs or your hand (if wearing gloves), dip one pot into the cream white glaze. Submerge it fully for 3 seconds, then lift it out and shake off excess drips. -
Dip the second pot:
Repeat the process for the second pot using the dusty pink glaze. Make sure the glaze coat is even and not too thick. -
Clean the foot:
Use a damp sponge to wipe any stray beads of glaze off the waxed bottom section. The line where the glaze meets the raw clay should be crisp and straight. -
Final firing:
Place the pots back into the kiln for the designated glaze firing (often Cone 5 or 6 for stoneware). Ensure they don’t touch each other.
Enjoy your morning routine with these lovely handcrafted vessels tailored just for you


Cute Duo Animal Desk Buddies
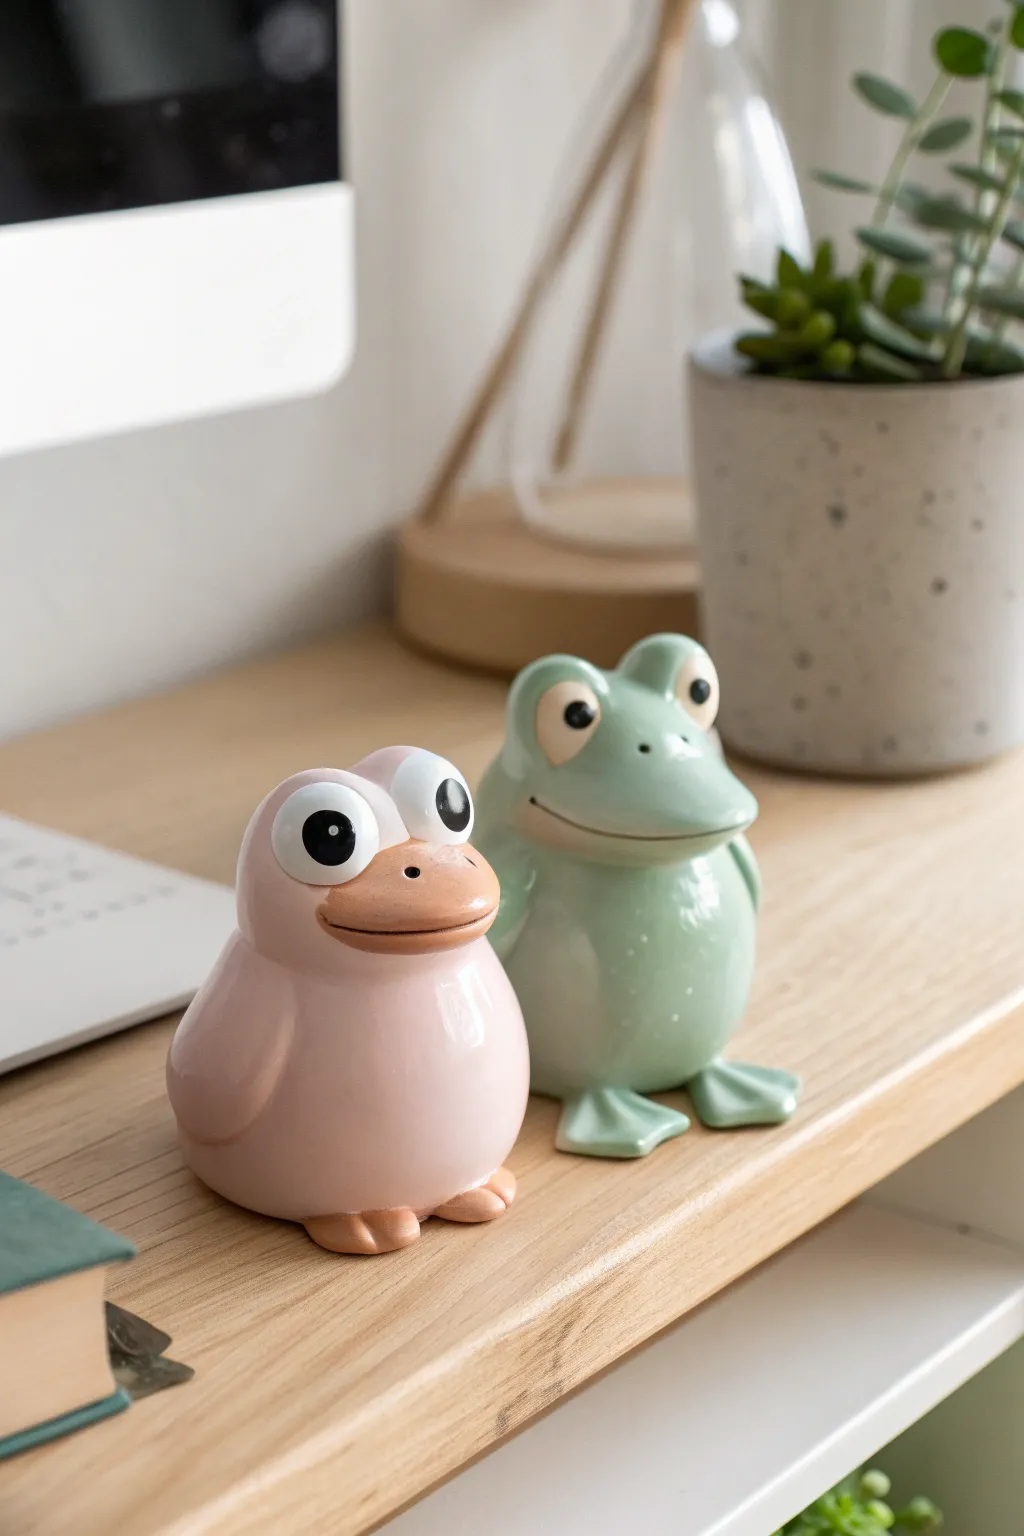
Create these adorable desk companions that look like high-end ceramic pieces using air-dry or polymer clay. The charm lies in their smooth, rounded shapes and that distinctive ultra-glossy finish that brings their cartoonish eyes to life.
Detailed Instructions
Materials
- White air-dry clay or polymer clay
- Acrylic paints (pale pink, sage green, white, black, orange/terracotta)
- High-gloss varnish or UV resin
- Clay sculpting tools (needles, ball stylus)
- Small bowl of water (for smoothing)
- Fine grit sandpaper
- Soft synthetic paintbrushes
- Aluminum foil (optional for armatures)
Step 1: Sculpting the Pink Birdie
-
Form the Base Body:
Start by rolling a ball of clay roughly the size of a tangerine. Gently taper the top slightly to create a continuous head-and-body shape that mimics a nesting doll silhouette, keeping the bottom flat for stability. -
Shape the Wings:
Create two small, flat teardrop shapes for the wings. Attach them flush against the sides of the body, blending the edges seamlessly with a little water or clay softener so they look like slight reliefs rather than separate additions. -
Add the Beak:
Roll a small oval of clay and flatten it slightly. Press this onto the center of the ‘face’ area to form a wide, duck-like bill. Use a sculpting tool to carve a subtle smile line horizontally across the beak. -
Create the Eyes:
Roll two medium-sized spheres for the eyes—they should cover a significant portion of the head for that cartoon look. Place them directly above the beak, touching each other slightly for a goofy, endearing expression. -
Sculpt the Feet:
Form two small, flat discs and press three indentations into the front of each to suggest toes. Place the body on top of these feet so just the toes peek out from underneath.
Cracks while drying?
Mix a tiny bit of fresh clay with water to create a ‘slip’ paste. Fill the cracks with this paste, let it dry, and sandpaper it smooth before painting.
Step 2: Sculpting the Green Frog
-
Shape the Frog Body:
Roll a similar-sized ball of clay for the frog, but shape it slightly more pear-like, with the weight settling at the bottom. -
Form the Mouth and Jaw:
Instead of a beak, pinch the clay gently horizontally across the face area to create a wide mouth ridge. Use a needle tool to drag a long smile line underneath this ridge. -
Add Eye Sockets:
Create two raised mounds on top of the head for the eye sockets. Roll two small balls for the actual eyeballs and press them gently into these raised mounds. -
Attach Frog Legs:
Roll two thick sausages of clay for the legs. Bend them into ‘V’ shapes and attach them to the sides of the body. Flatten the ends into webbed feet, using a knife tool to cut distinct toe separations. -
Smooth and Dry:
Dip your finger in water and run it over both figures to eliminate fingerprints. The goal is a porcelain-smooth surface. Let them dry completely (24-48 hours usually) before sanding away any remaining rough spots.
Pro Tip: Weighted Base
Crumple a small ball of aluminum foil and wrap the clay around it. This saves material and prevents the thickest parts of the body from cracking during drying.
Step 3: Painting and Glazing
-
Base Coat – Bird:
Paint the bird’s body with a soft, pastel pink. You may need 2-3 thin coats to get weird of streaks. Leave the eyes and beak unpainted for now. -
Base Coat – Frog:
Mix a sage or mint green acrylic and cover the entire frog body, leaving the belly slightly lighter if desired, though a solid color works great for this modern look. -
Detailing Features:
Paint the bird’s beak and feet with a warm terracotta or orange. For both figures, paint the large eyeballs pure white. Let this dry fully before the next step. -
Adding Pupils:
Using a dotting tool or the back of a paintbrush, place large black circles in the center of the white eyes. -
The Sparkle:
This is crucial for the cute factor: add a tiny white dot strictly in the upper right corner of each pupil to create a ‘shiny’ eye reflection. -
The Ceramic Finish:
Once the paint is bone dry, apply a thick coat of high-gloss varnish. I find that UV resin works best here for that glass-like, commercially made appearance, but a triple-thick glaze also works wonders.
Place your new glossy friends near a plant or monitor for an instant mood boost while you work.


Tiny Food Charms You Split
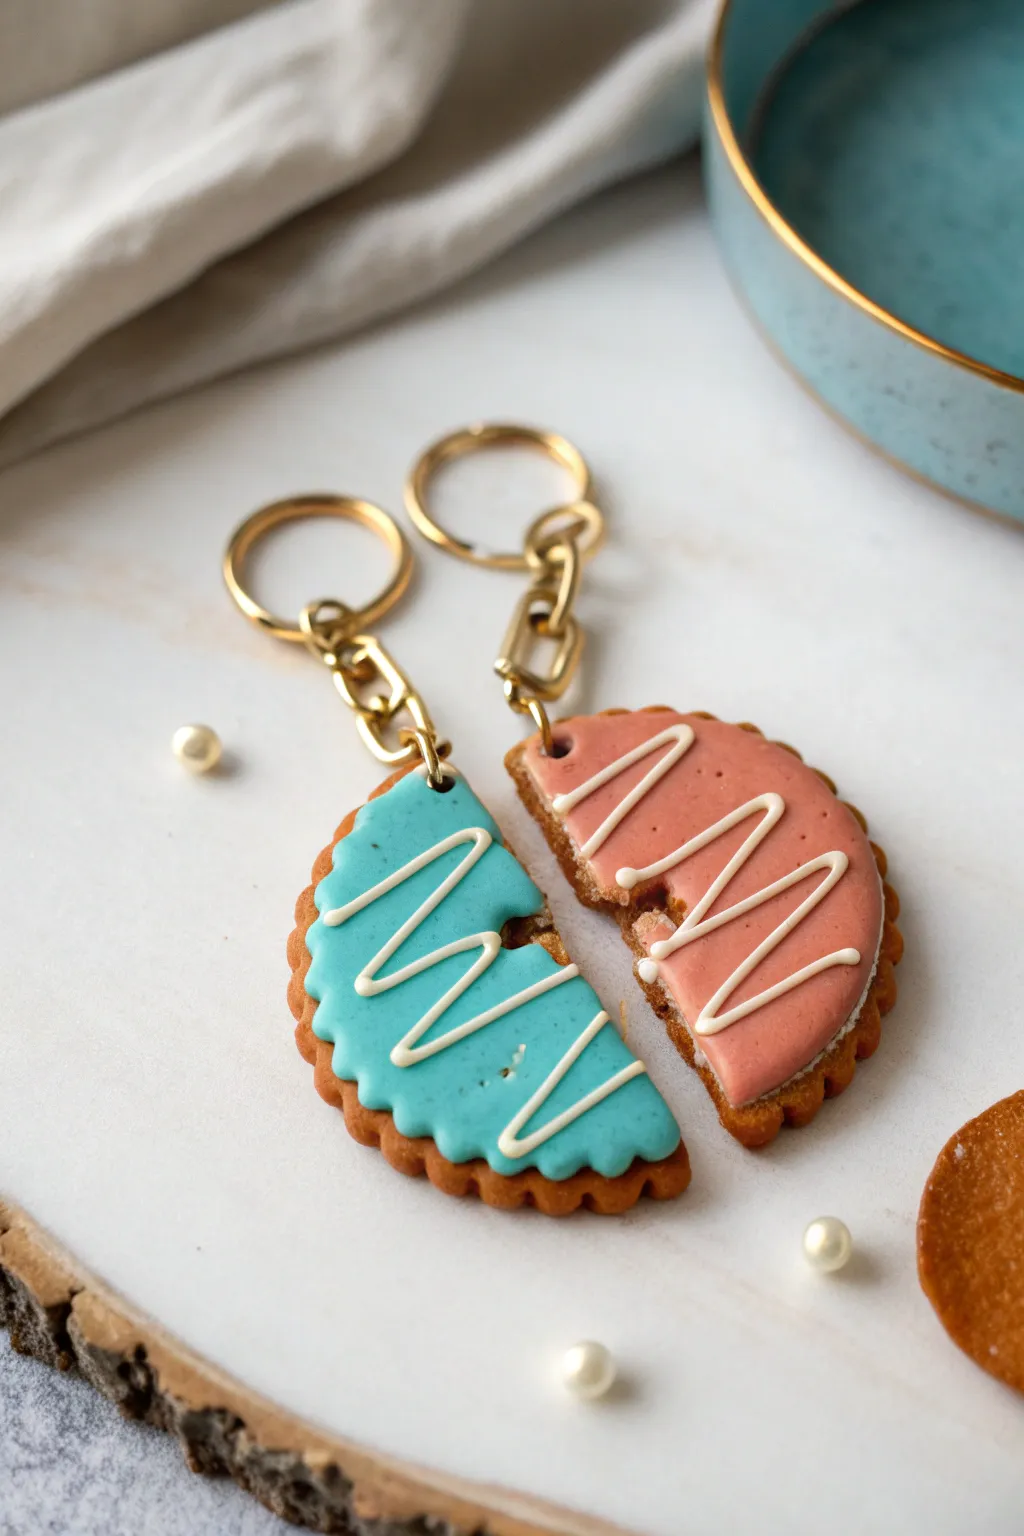
Celebrate a special bond with these adorable polymer clay keychains designed to look like a shared treat. These split cookie charms feature realistic biscuit textures, pastel icing, and a clever ‘bitten’ effect that connects perfectly when placed together.
Step-by-Step Guide
Materials
- Polymer clay (tan/biscuit color, white, soft pink, light blue)
- Round clay cutter (approx. 2 inch diameter)
- Scalloped edge clay cutter (same size as round cutter, optional)
- Texture tools (toothbrush, needle tool, or ball tool)
- Liquid polymer clay (translucent)
- Soft pastel chalks (brown/ochre)
- Paintbrush (soft bristles)
- Eyepins (gold tone)
- Jump rings and keychain hardware (gold tone)
- Jewelry pliers
- Rolling pin or pasta machine
- Baking tile or parchment paper
- Oven
Step 1: Shaping the Cookie Base
-
Condition the Clay:
Start by thoroughly conditioning your tan or biscuit-colored clay until it is soft and pliable. Roll it out into a slab that is approximately 1/4 inch thick to ensure the final keychain is sturdy. -
Cut the Shape:
Using your scalloped round cutter, punch out a circle. If you don’t have a scalloped cutter, use a plain circle and manually create indentations around the edge using a needle tool or the back of a paintbrush to mimic a classic tea biscuit edge. -
Separate the Halves:
Use a flexible blade or a craft knife to cut the circle in half. Instead of a straight line, create a zigzag or wavy organic cut down the center to represent a ‘break’ rather than a slice. -
Create the Bitten Texture:
On the cut edges of both halves, use a needle tool to pick at the clay, pulling small bits outward to create a crumbly texture. This makes the cookie look properly baked and snapped. -
Shade the Biscuit:
Scrape some brown and ochre pastel chalk into a fine powder. Using a soft, dry brush, gently dust the scalloped edges and the textured ‘broken’ center to give it that golden-brown baked appearance.
Realistic Crumb Tip
Mix tiny bits of darker brown clay shavings into the broken edge texture before baking to mimic chocolate chips or burnt crumbs inside the cookie.
Step 2: Icing and Decoration
-
Prepare the Colors:
Condition your light blue and soft pink clay separately. Roll these out very thinly, much thinner than your cookie base. -
Cut the Icing:
Use the same scalloped cutter on the colored sheets. Cut these circles in half using the same jagged line you used for the base, ensuring they match the underlying cookie shapes. You may need to trim them slightly smaller so a bit of the ‘biscuit’ pokes out around the rim. -
Attach the Icing:
Apply a very thin layer of liquid polymer clay to the top of the tan bases as an adhesive. Gently press the pink layer onto one half and the blue layer onto the other, smoothing out any trapped air bubbles. -
Create White Drizzle:
To make the white zigzag decoration, soften white clay with a drops of liquid clay or baby oil until it’s a pipeable consistency, or extrude solid white clay into a very thin snake. -
Apply the Drizzle:
Lay the thin white clay snake across the surface in a zigzag pattern. If using the paste method, pipe it carefully. I like to let the white lines extend slightly over the cut edge to look like messy, delicious icing.
Step 3: Assembly and Baking
-
Insert Hardware:
Insert a gold eyepin into the top curve of each cookie half. To secure it better, you can put a slight bend in the pin’s stem before pushing it into the clay. -
Final Texturing:
Check your fingerprints. Use a toothbrush to gently tap the surface of the colored icing if you want a matte, sugary texture, or leave it smooth for a glazed look. -
Bake:
Place the charms on a ceramic tile or parchment paper. Bake according to your brand of clay’s instructions (usually 275°F/135°C for 15-30 minutes). Let them cool completely before handling. -
Varnish (Optional):
If desired, seal the icing part with a gloss glaze to make it look wet and sugary, while leaving the biscuit part matte. -
Attach Keychains:
Use pliers to open a jump ring. Loop it through the eyepin and the chain of your keyring hardware, then close the jump ring securely.
Make it Magnetic
Embed small neodymium magnets into the cut edges before baking. Ensure the polarities face the right way so the cookie ‘snaps’ together invisibly.
Clip these to your bags and enjoy showing off your unbreakable bond with your favorite person

The Complete Guide to Pottery Troubleshooting
Uncover the most common ceramic mistakes—from cracking clay to failed glazes—and learn how to fix them fast.
Fridge Magnet Miniatures
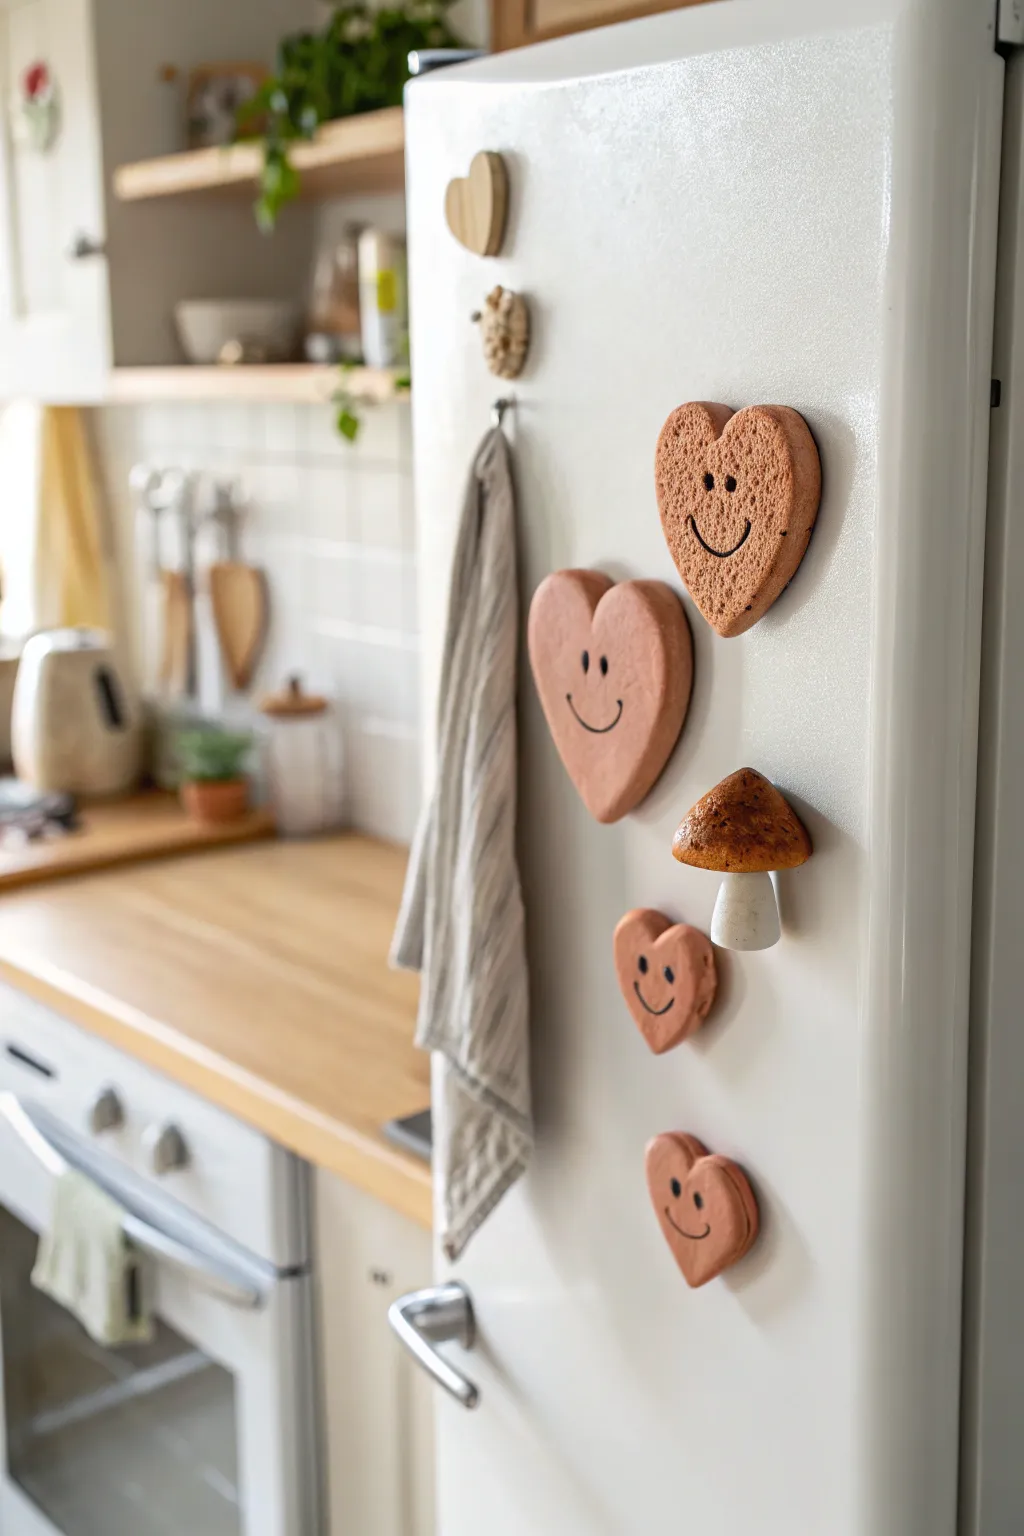
Brighten up your kitchen with these impossibly cute terracotta-style magnets featuring cheerful smiley hearts and a tiny mushroom. Their rustic texture and simple painted expressions give them a cozy, handmade charm that feels welcoming and sweet.
Step-by-Step
Materials
- Air-dry clay (terracotta or skin-tone color)
- Air-dry clay (white)
- Rolling pin
- Heart-shaped cookie cutters (various sizes)
- Texturing tool (old toothbrush or sponge)
- Small round magnets
- Superglue or heavy-duty craft glue
- Black acrylic paint or fine-point permanent marker
- Brown acrylic paint
- Small paintbrush
- Needle tool or toothpick
- Gloss varnish or Mod Podge (optional)
Step 1: Shaping the Hearts
-
Condition the clay:
Start by taking a chunk of your terracotta-colored air-dry clay and kneading it in your hands until it becomes soft, pliable, and free of cracks. -
Roll it out:
Using a rolling pin, flatten the clay to a uniform thickness of about 1/4 inch (6mm). If you want them chunkier like the photo, aim for slightly thicker. -
Cut the shapes:
Press your heart-shaped cookie cutters firmly into the clay. Create a variety of sizes for visual interest when arranged on the fridge. -
Soften the edges:
After removing the excess clay, dip your finger in a little water and gently run it along the cut edges of the hearts. This rounds them off so they look puffy and soft rather than having sharp, factory-cut angles. -
Add texture:
Take an old toothbrush or a coarse sponge and gently tap the surface of the wet clay hearts to give them that porous, stone-like texture visible in the photo.
Cracking Up?
If you see small cracks forming as the clay dries, don’t panic. Mix a tiny bit of fresh clay with water to make a paste and fill the cracks, then smooth it over with a finger.
Step 2: Crafting the Mushroom
-
Form the stem:
Take a small piece of white clay and roll it into a thick variety of a cylinder. Pinch the top slightly so it can fit into the cap later, and flatten the bottom so it stands straight. -
Shape the cap:
Use the terracotta clay again to make a small ball, then flatten the bottom and gently pull the edges down to create a dome shape. -
Connect the pieces:
Score (scratch) the top of the stem and the underside of the cap with a needle tool. Add a dab of water or slip, and press the two parts together firmly. -
Adding cap details:
While the clay is still wet, you can gently poke small indentations into the mushroom cap for extra character.
Step 3: Drying and Decorating
-
Let them dry:
Place all your pieces on a flat surface lined with parchment paper. Let them air dry completely for 24-48 hours, flipping them halfway through to ensure the backs dry evenly. -
Paint the mushroom cap:
Once dry, dilute a little brown acrylic paint with water to create a wash. Dab this irregularly over the mushroom cap to give it a toasted, organic look. -
Draw the faces:
For the hearts, use a fine paintbrush with black acrylic paint or a reliable permanent marker. Draw two small oval eyes vertically, and a simple, wide U-shape for the smile. -
Seal the work:
This step is optional, but applying a coat of matte or gloss varnish will protect the clay from kitchen humidity and make the colors pop. -
Attach magnets:
Flip your creations over. Apply a strong dot of superglue to the back of each piece and press a round magnet firmly into place. -
Final cure:
Allow the glue to set according to the manufacturer’s instructions before sticking your new friends onto the refrigerator.
Sponge Technique
To get that specific porous look shown in the larger heart, create the texture *after* smoothing the edges. Use a dry natural sea sponge for the best organic pitting.
Arrange your cheerful little clay community on the fridge door to greet you every snacking session
Coaster Pair With Pressed Texture
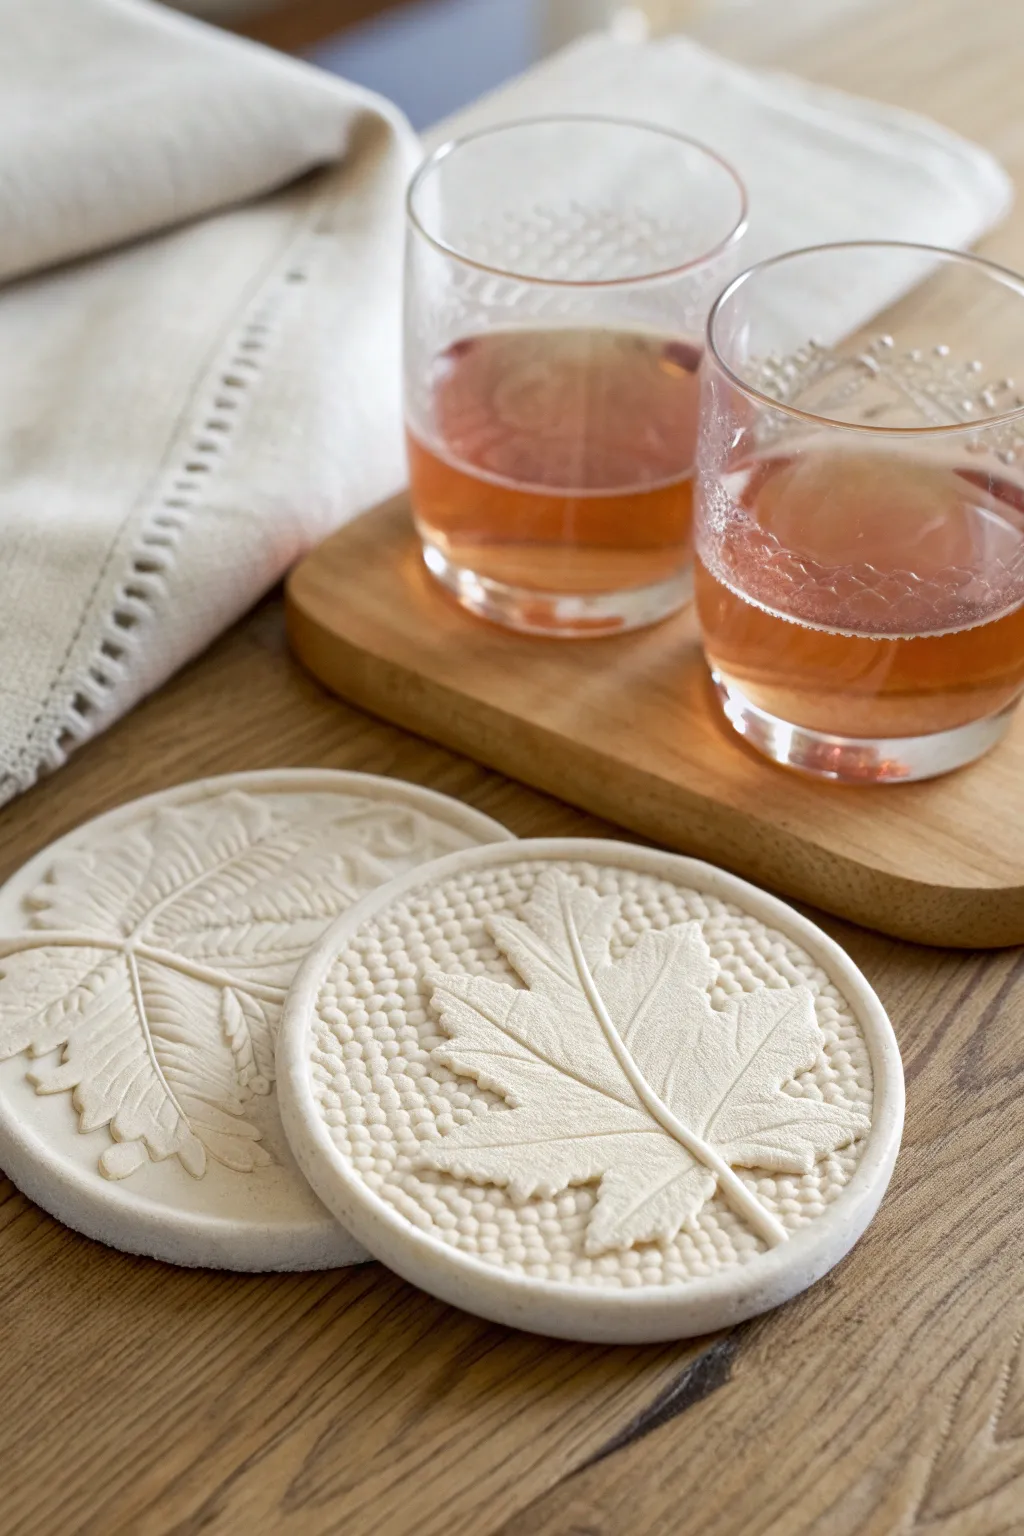
These elegant coasters combine the organic beauty of nature with the refined touch of white clay. Featuring a clever reverse-relief technique, they showcase raised leaf motifs against intricate textured backgrounds.
Step-by-Step Tutorial
Materials
- Air-dry clay (white or porcelain finish)
- Fresh leaves with prominent veins (maple, fern, etc.)
- Rolling pin
- Round cookie cutter (approx. 4 inches)
- Clay modeling tools or a dull knife
- Small ball stylus tool or textured fabric/lace
- Fine grit sandpaper
- Clear matte varnish or sealant
- Water and sponge
- Parchment paper or canvas mat
Step 1: Preparation & Base Creation
-
Condition the Clay:
Begin by kneading a generous chunk of air-dry clay until it is warm, pliable, and free of air bubbles. If it feels too dry, dip your fingers in water and work the moisture in. -
Roll the Slab:
Place the clay between two sheets of parchment paper or on a canvas mat. Use your rolling pin to create an even slab that is roughly 1/4 to 1/3 inch thick. Consistency is key here to prevent warping later. -
Cut the Circles:
Using your large round cookie cutter, press firmly into the slab to cut out two perfect circles. Remove the excess clay from around the edges, but don’t lift the circles yet to avoid distorting their shape. -
Smooth the Edges:
Dip your finger in a little water and gently run it along the cut edges of your circles to round them off and remove any sharpness or burrs left by the cutter.
Pro Tip: Release Agent
Before pressing your fresh leaf into the clay, dust it very lightly with cornstarch. This acts as a release agent and ensures the leaf peels off cleanly without sticking or tearing the clay.
Step 2: Designing the Relief
-
Position the Botanical:
Select a fresh leaf that fits nicely within your circle. Place it vein-side down onto the center of the clay disc. This will ensure the most detailed impression. -
Secure the Leaf:
Gently roll over the leaf with the rolling pin using light pressure. You want to embed it slightly into the surface without flattening the coaster significantly. -
Trace the Outline:
This is the trick for the raised look: With the leaf still in place, use a needle tool or fine knife to trace the exact outline of the leaf. -
Define the Background:
Now, carefully press down the clay *surrounding* the leaf outline. You are essentially lowering the background level while keeping the leaf area at the original height. -
Remove the Leaf:
Using tweezers or a pin, carefully lift the leaf away. Since you pressed the background down, you should now have a raised leaf shape that possesses the realistic vein texture from the pressing.
Step 3: Texturing & Detailing
-
Refine the Leaf Shape:
Use a modeling tool to clean up the edges of your raised leaf, smoothing the transition where the background dips down. -
Create the Stippled Texture:
For the maple coaster look, take a small ball stylus or a blunt point tool. Press thousands of tiny dots into the background area surrounding the leaf. I find this repetitive motion quite meditative. -
Alternative Texture Method:
For the second coaster (the fern style), you can press a piece of coarse linen or lace into the background clay instead of stippling to create a woven fabric texture. -
Detail the Veins:
If the original leaf impression was faint, use a fine needle tool to gently re-carve and accentuate the main veins of your botanical design.
Level Up: Antique Wash
Mix a tiny drop of brown acrylic paint with water. Brush it over the textured background and wipe it off immediately with a damp cloth. The dark pigment will stick in the dots, adding depth.
Step 4: Finishing Touches
-
Slow Drying:
Transfer the coasters to a drying rack. To prevent curling, you can place a light book on top of them (with parchment in between) once the clay is leather-hard, usually after about 2-3 hours. -
Full Cure:
Allow the clay to dry completely for 24-48 hours. The clay will turn a lighter matte white when fully dry. -
Sand and Polish:
Take your fine-grit sandpaper and lightly buff the edges and surface. Be very gentle over the textured leaf area to avoid erasing the fine veins. -
Apply Sealant:
Brush on a coat of clear matte varnish or acrylic sealer. This is crucial for coasters, as it protects the clay from moisture and stains during use.
Now you have a stunning set of nature-inspired coasters ready to grace your coffee table


What Really Happens Inside the Kiln
Learn how time and temperature work together inside the kiln to transform clay into durable ceramic.
Stacking Ring Cones as a Set

These charming ring cones capture a minimalist holiday vibe with scattered gold accents and subtle speckles. The set features a matching catch-all dish, making it a cohesive and practical addition to any vanity.
Step-by-Step
Materials
- Air-dry clay or polymer clay (white and beige/granite effect)
- Small rolling pin
- Rolling guides or wooden slats (approx. 5mm thickness)
- Clay knife or craft scalpel
- Cone-shaped mold, fondant tool, or thick cardstock to create a template
- Small heart-shaped cookie cutter
- Gold leaf pen or fine-tip gold acrylic paint
- Gold star stud or charm (for pressing into clay)
- Small bowl or sandpaper (for smoothing)
- Sponge and water
- Matte varnish or sealant
Step 1: Shaping the Cones
-
Prepare the clay:
Begin with a ball of smooth white clay. Knead it well until it is pliable and warm. If you are using polymer clay, ensure it’s conditioned thoroughly to prevent cracking. -
Roll the base sheet:
Roll your clay out to a uniform thickness, about 4mm to 5mm. Using rolling guides helps keep the slab perfectly even. -
Cut the clay:
Cut a semi-circle or a wide wedge shape from the slab. This shape will be rolled up to form the cone. -
Form the cone:
Gently curl the wedge into a cone shape, bringing the straight edges together. You can wrap it around a paper cone template for support if needed. -
Blend the seam:
Where the edges meet, use your fingers or a clay tool to smooth the seam completely so it becomes invisible. I find a little bit of water helps blend air-dry clay seamlessly. -
Level the base:
Stand the cone upright and slice off any excess clay at the bottom to ensure it sits perfectly flat and stable. -
Create the second cone:
Repeat the process with the beige or granite-effect clay for the second cone. Keep this one slightly shorter or wider for visual variety. -
Add the star impression:
While the beige cone is still soft, gently press a small gold star charm or stud into the center. Leave it embedded or remove it just to leave an impression, depending on your preference.
Cracked Seams?
If the seam on your cone splits while drying, mix a tiny bit of clay with water (for air-dry) or liquid clay (for polymer) to create a paste. Fill the crack, let dry, and sand smooth.
Step 2: Crafting the Tray & Heart
-
Form the tray base:
Roll out a larger slab of the speckled or beige clay. Place a small bowl upside down on the clay and cut around it to create a perfect circle. -
Build the rim:
Roll a long, thin snake of clay. Lay this coil around the outer edge of your circular base. -
Blend the tray:
Blend the coil downwards onto the base on the inside and outside until the transition is smooth and the rim stands upright. -
Make the heart:
Roll a very thin snake of clay. Shape it into a small open heart outline, joining the ends neatly at the bottom point.
Step 3: Finishing Touches
-
Dry or bake:
Allow all pieces to air dry completely for 24-48 hours, or bake according to your polymer clay package instructions. -
Sand for smoothness:
Once hardened, use fine-grit sandpaper to smooth any rough edges on the cones or the rim of the tray. -
Apply speckles:
Dip a stiff toothbrush into varying shades of beige or grey acrylic paint. Flick the bristles to spatter tiny speckles over the white cone and tray. -
Paint gold details:
Using a gold leaf pen, add random dots and specks to the white cone. Start dense at the bottom and scatter them more sparsely toward the tip. -
Gild the heart:
Paint the small clay heart entirely in gold to make it look like a jewelry piece. -
Seal everything:
Protect your work with a coat of matte varnish. This will keep the clay clean and prevent the gold paint from tarnishing.
Make it Marble
Before rolling your cone slabs, twist two colors of clay together—like white and pale grey—then roll them out partially to create a soft, marbled stone effect.
Arrange your new jewelry station and enjoy the elegant organization it brings to your space
Mini Vase Buddies for Tiny Flowers
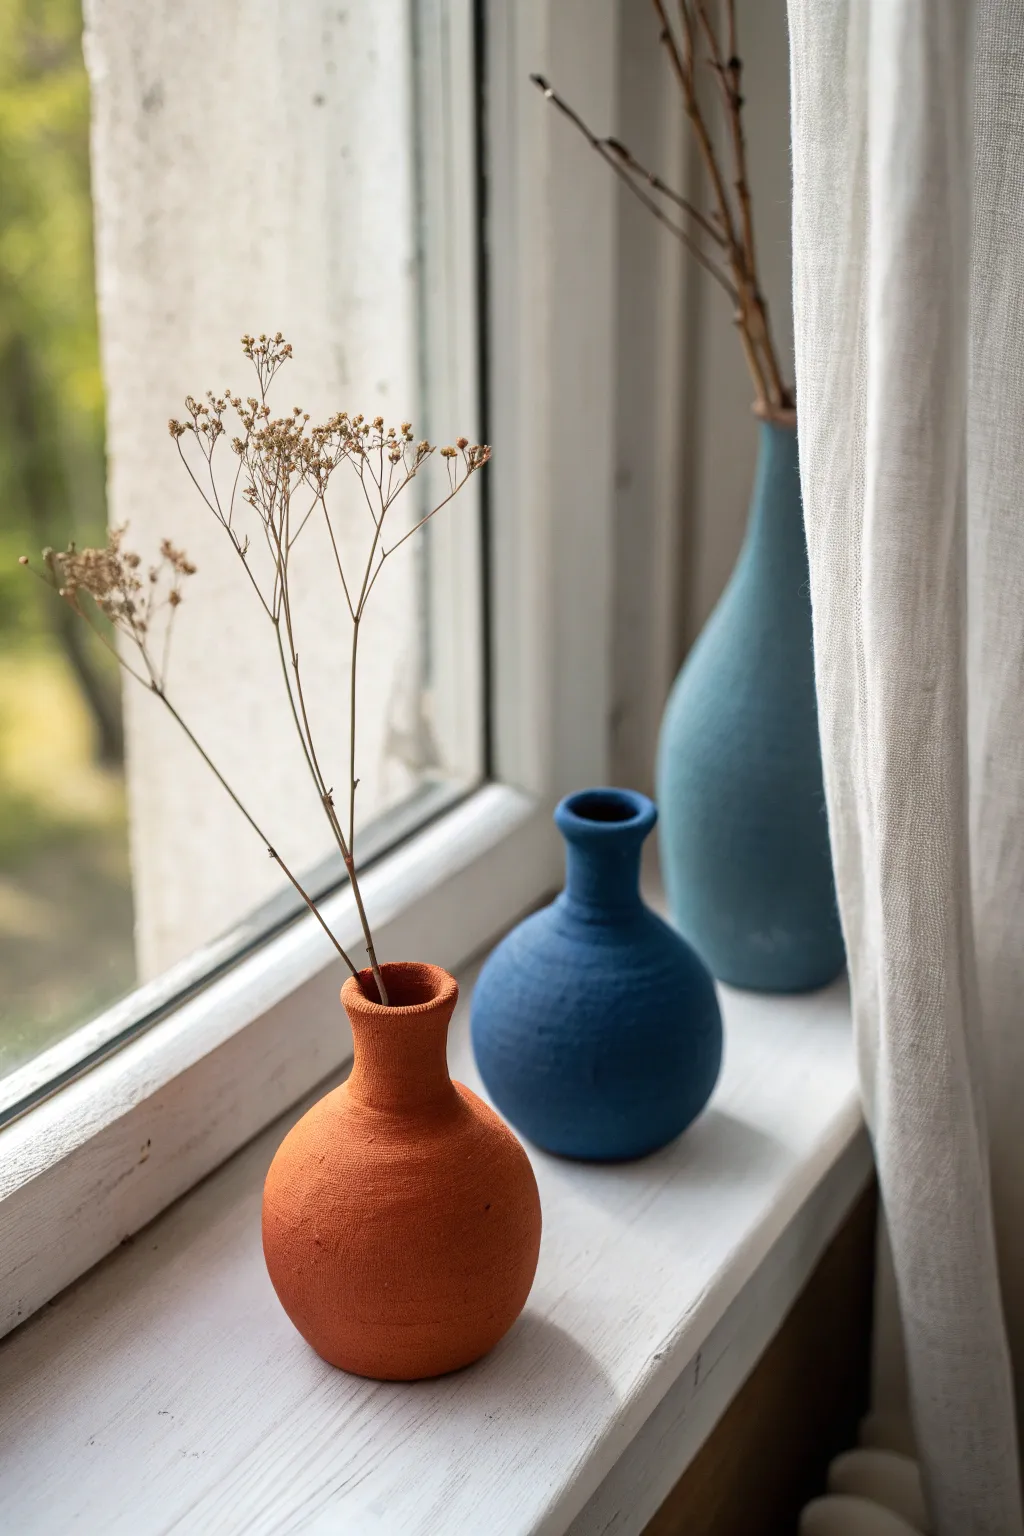
These charming miniature vases bring a touch of earthy elegance to any windowsill with their matte, textured finish and complementary silhouettes. Perfect for holding dried botanicals, this trio combines a squat terracotta vessel, a sturdy navy round, and a slender teal bottleneck vase.
Step-by-Step Guide
Materials
- Air-dry clay (white or terra cotta)
- Acrylic paints (terracotta/rust, navy blue, teal)
- Baking soda (to add texture)
- Small cup of water
- Clay tools or a butter knife
- Rolling pin
- Fine-grit sandpaper
- Paintbrushes (medium flat and small detail)
- Dried baby’s breath or twigs for styling
Step 1: Shaping the Base Forms
-
Prepare the clay portions:
Cut your clay block into three pieces. You will need a medium amount for the tall teal vase and slightly smaller amounts for the two round vases. Knead each piece in your hands until it becomes warm, pliable, and free of cracks. -
Roll the spheres:
For the two round vases (the rust and navy ones), roll the clay between your palms to create smooth, tight spheres. Tap the bottom of each sphere gently against your table to create a flat base so they won’t wobble. -
Form the tall cylinder:
For the tall teal vase, roll your third piece of clay into a thick sausage shape. This one needs a wider base that tapers gradually as it goes up, creating a taller, elongated teardrop form. -
Create the openings:
Using your thumb or the handle of a paintbrush, gently press into the top center of each form to start the opening. Don’t go all the way through; aim for about three-quarters of the depth. -
Pinch pot technique:
For the two round vases, insert your thumb into the hole and gently pinch against your fingers on the outside, rotating the clay as you go. Expand the belly of the vase while keeping the opening relatively narrow.
Step 2: Sculpting the Necks
-
Pull the necks upward:
Gently squeeze the clay around the opening of each vase, pulling it upward to form the neck. The rust vase needs a short, slightly flared neck, while the navy one has a thicker, sturdy collar. -
Refine the tall vase:
For the tall vase, focus on smoothing the transition from the base to the neck. It should be a long, continuous slope rather than a distinct separation between body and neck. -
Smooth the surfaces:
Dip your finger in a little bit of water and rub it over the clay to erase any fingerprints or small cracks. The goal is a uniform surface, though a little handmade irregularity adds character. -
Rim detailing:
Pay attention to the rims. On the rust vase, slightly flare the lip outward. On the navy and teal vases, keep the rims slightly thicker and rounded for a soft look.
Cracking Clay?
If small cracks appear while the clay dries, mix a tiny bit of fresh clay with water to make a paste (slip) and fill them in with a brush.
Step 3: Drying and Texturing
-
Allow to dry:
Set the vases aside in a safe, dry place. Depending on the thickness of your clay and humidity, this usually takes 24 to 48 hours. Rotate them occasionally so the bottoms dry evenly. -
Sand imperfections:
Once fully dry and hard, use fine-grit sandpaper to gently smooth out any sharp ridges or bumps. Wipe away the dust with a slightly damp cloth or dry brush. -
Mix the texture paint:
To achieve that beautiful, stone-like matte finish seen in the photo, mix your acrylic paints with a teaspoon of baking soda. Start with the rust color. The mixture should be thick and slightly fluffy. -
Apply the rust coat:
Paint the smallest round vase with the rust/baking soda mixture. Use a dabbing motion rather than long strokes to enhance the gritty texture. I find two thin coats work better than one thick glob. -
Paint the navy vase:
Mix navy blue paint with baking soda and apply it to the medium round vase. Ensure you get coverage inside the rim so no white clay shows through the opening. -
Paint the teal vase:
Finally, mix a muted teal shade with baking soda for the tall vase. Paint carefully, ensuring the long neck is fully coated and the texture is consistent with the others. -
Final drying and styling:
Let the paint dry completely, which should happen quickly due to the baking soda. Once dry, arrange some delicate dried twigs or baby’s breath in the vases to complete the scene.
Faux Stone Look
For extra depth, lightly dry-brush a slightly lighter shade over the textured paint once it’s dry to highlight the ‘stone’ bumps.
Now you have a trio of handcrafted beauties ready to brighten up your favorite corner

TRACK YOUR CERAMIC JOURNEY
Capture glaze tests, firing details, and creative progress—all in one simple printable. Make your projects easier to repeat and improve.
Couple Keychain Totems
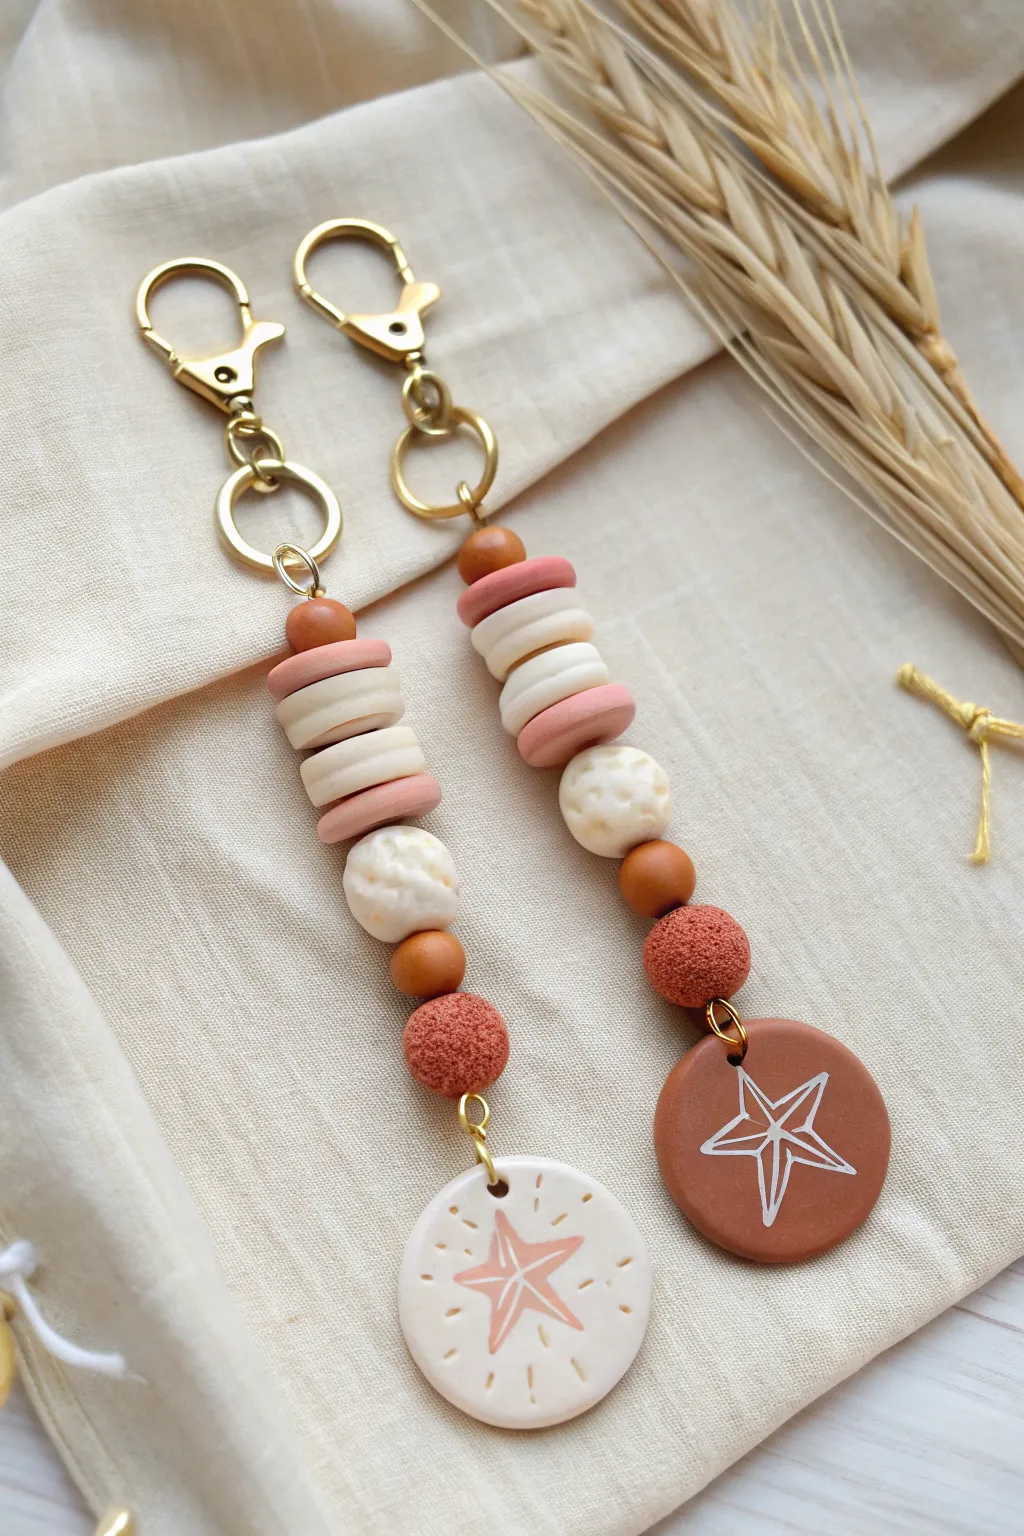
These earthy, coordinated keychains are the perfect clay date project, blending textures and warm terracotta tones into a functional keepsake. The design features a playful stack of disc beads, textured spheres, and a striking star-embossed pendant at the bottom.
Step-by-Step
Materials
- Polymer clay (white/cream, terracotta, dusty rose)
- Acrylic paint (white and terracotta)
- Fine detail paintbrush
- Gold rolling pin or acrylic roller
- Circle cutters (various small sizes)
- Needle tool or toothpick
- Gold keychain lobster clasps
- Gold jump rings (10mm and 6mm)
- Pliers (round nose and flat nose)
- Eye pins (gold)
- Texture tools (sponge, sandpaper, or crumpled foil)
- Baking sheet and parchment paper
- Glaze or varnish (optional)
Step 1: Preparing the Clay Pendants
-
Condition and Roll:
Start by conditioning your terracotta and cream clay separately until soft and pliable. Roll each color out into a sheet about 1/4 inch thick. -
Cut the Bases:
Using a medium-sized circle cutter (approx. 1.5 inches), cut one circle from the terracotta sheet and one from the cream sheet. These will be your main bottom pendants. -
Pierce the Holes:
Use a needle tool or toothpick to carefully create a hole at the very top of each circle pendant. Ensure the hole is large enough for your jump rings to slide through after baking. -
Add Star Details:
For the cream pendant, gently etch varied starburst lines radiating from the center. For the terracotta one, keep the surface smooth for now, as we will paint the star design later.
Clean Lines Pro-Tip
To get super crisp etched lines on the cream pendant, dip your needle tool in cornstarch before carving. It prevents the clay from dragging and creates smoother grooves.
Step 2: Creating the Bead Stack
-
Make Disc Beads:
Roll out snakes of cream, pink, and terracotta clay. Slice equal segments and flatten them slightly with your thumb to create imperfect, organic disc shapes. You’ll need about 4-5 per keychain. -
Form the Spheres:
Roll small balls of clay in terracotta and cream. Aim for sizes ranging from 8mm to 12mm. -
Texture the Spheres:
To get that rustic look on specific beads (like the white one and the bottom terracotta one), roll the raw clay ball gently over a piece of coarse sandpaper or dab it with a stiff brush. -
Pierce the Beads:
Carefully pierce a hole through the center of every bead using your needle tool. Use a gentle twisting motion to avoid squashing the shape. -
Bake:
Arrange all pendants and beads on a parchment-lined baking sheet. Bake according to your brand’s instructions (usually 275°F/135°C for 15-30 minutes). Let them cool completely.
Step 3: Painting and Assembly
-
Paint the Stars:
Once cool, use a fine detail brush to paint a white 5-point star on the terracotta pendant. For the cream pendant, paint a terracotta star in the center. -
Drill Check:
Double-check that your bead holes fit the eye pin. If any holes shrank during baking, gently ream them out with a small hand drill or twisting tool. -
Stack the Beads:
Take a long gold eye pin. Thread your beads onto it: start with the textured sphere, then the smaller sphere, and finally the stack of disc beads. -
Close the Loop:
Using round nose pliers, create a loop at the top of the beaded eye pin to secure the stack. Trim excess wire if necessary. -
Attach the Pendant:
Open the loop at the bottom of your eye pin (or use a jump ring) to attach the large star pendant. -
Final Assembly:
Using a larger jump ring, connect the top loop of your bead stack to the gold keychain clasp. I always double-check that the jump rings are closed tightly so nothing slips off.
Level Up: Glossy Finish
Make the painted stars pop by adding a drop of UV resin or glossy varnish just over the star design itself, leaving the rest of the clay matte for contrast.
Clip these to your keys or bags for a personalized touch of boho chic that travels with you.
Paint-Only Date: Same Sculpt, Two Styles
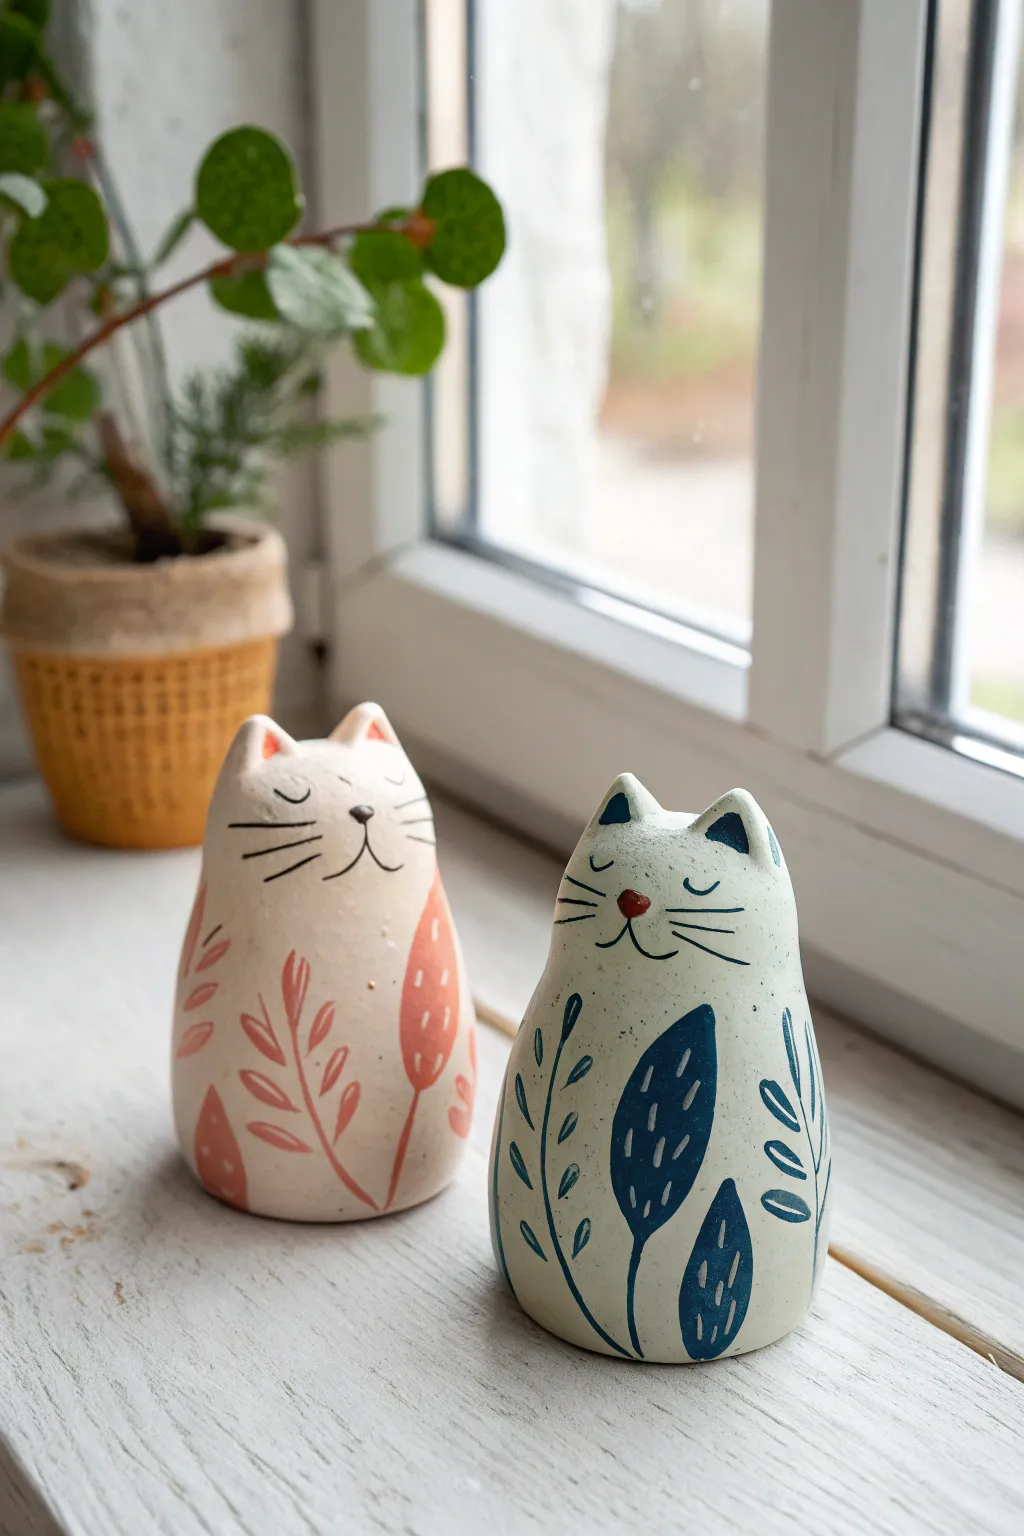
Create a charming duo of ceramic cat figurines that share the same calm silhouette but feature distinct personalities through color. These minimalist felines combine gentle curves with simplified botanical motifs for a modern, Scandinavian-inspired look.
Step-by-Step Tutorial
Materials
- White or light-colored air-dry clay (or polymer clay)
- Small cup of water
- Modeling tools or a smooth butter knife
- Fine-grit sandpaper
- Acrylic paints (Cream, Terra Cotta, Navy Blue, Sage Green)
- Fine detail paintbrushes (size 0 and 00)
- Matte varnish or sealant
- Pencil for sketching
- Black fine-tip acrylic marker or pen
Step 1: Sculpting the Base Form
-
Shape the Body:
Start by rolling a fist-sized ball of clay until it is smooth and crack-free. Gently roll it on your work surface to create a rounded cone shape, slightly wider at the bottom for stability and tapering gently toward the top. -
Refine the Silhouette:
Stand the cone up and smooth the sides with wet fingers. The form should feel organic and fluid, like a smooth river stone, without sharp defined neck lines. -
Form the Ears:
Instead of adding separate pieces, pinch the top of the cone gently to pull up two small, triangular ear shapes. Keep them subtle and close to the head for that streamlined look. -
Smooth the Surface:
Dip your finger in a little water and run it over the entire sculpture to erase fingerprints. I find spending extra time here saves a lot of sanding later. Repeat this whole process for the second cat. -
Dry Completely:
Let your cats dry for 24-48 hours depending on your clay type. They must be bone dry before painting. -
Sand for smoothness:
Once dry, use fine-grit sandpaper to gently buff away any remaining bumps or rough textures, wiping away dust with a damp cloth afterward.
Step 2: Painting the Motifs
-
Apply Base Coat:
Paint the first cat with a warm cream or off-white acrylic. For the second cat, mix a tiny drop of green into your white to create a very pale, almost-white sage tone. Apply two coats if necessary for opacity. -
Sketch the Design:
Lightly pencil in your branch designs. Draw long, curved stems starting from the bottom and reaching upward, mimicking the curve of the cat’s body. -
Paint the Pink Cat’s Leaves:
Using the terra cotta or muted pink paint, fill in the large, teardrop-shaped leaves on the cream cat. Keep the brush strokes loose but neat. -
Add Texture Details:
Once the pink leaves are dry, use a very fine brush with a lighter shade (or white) to add tiny dash marks inside the larger leaves for visual interest. -
Paint the Blue Cat’s Leaves:
Switch to your navy blue or deep teal paint for the second cat. Paint similar large, organic leaf shapes, varying the size and orientation. -
Detail the Blue Leaves:
Like before, use a fine brush with white or light blue paint to add small ticking or line details inside the dark blue leaves. -
Add Small Accent Leaves:
On both cats, paint delicate, thinner line-work stems and smaller leaves around the main motifs to fill empty space without overcrowding.
Cracks Appearing?
If small cracks form while drying, create a ‘slip’ by mixing a little clay with water into a paste. Rub this into the cracks and smooth it over, then let dry again.
Step 3: Face and Finishing
-
Draw the Face Guidelines:
Very lightly mark the center of the face area. Place the nose slightly lower than you think it should be to enhance the ‘cute’ factor. -
Paint the Noses:
Paint a small, inverted triangle for the nose. Use the terra cotta color for the blue cat and a dark grey or black for the cream cat. -
Add Whiskers and Mouth:
Using a fine-tip black marker or your thinnest brush with black paint, draw a simple ‘w’ shape for the mouth attached to the nose, and three long, straight whiskers on each cheek. -
Create the Eyes:
Draw two curved arcs for sleepy, closed eyes. Ensure they are level with the top of the nose. -
Final Varnish:
Allow all paint to dry completely, then apply a coat of matte varnish to protect your work and give it a finished, ceramic feel.
Steady Hands
For the fine whisker lines, rest your pinky finger on the table or the dry part of the sculpture to stabilize your hand while painting.
Set these darling figures on a windowsill where the light can catch their sweet expressions
Inside-Joke Nameplate Tokens
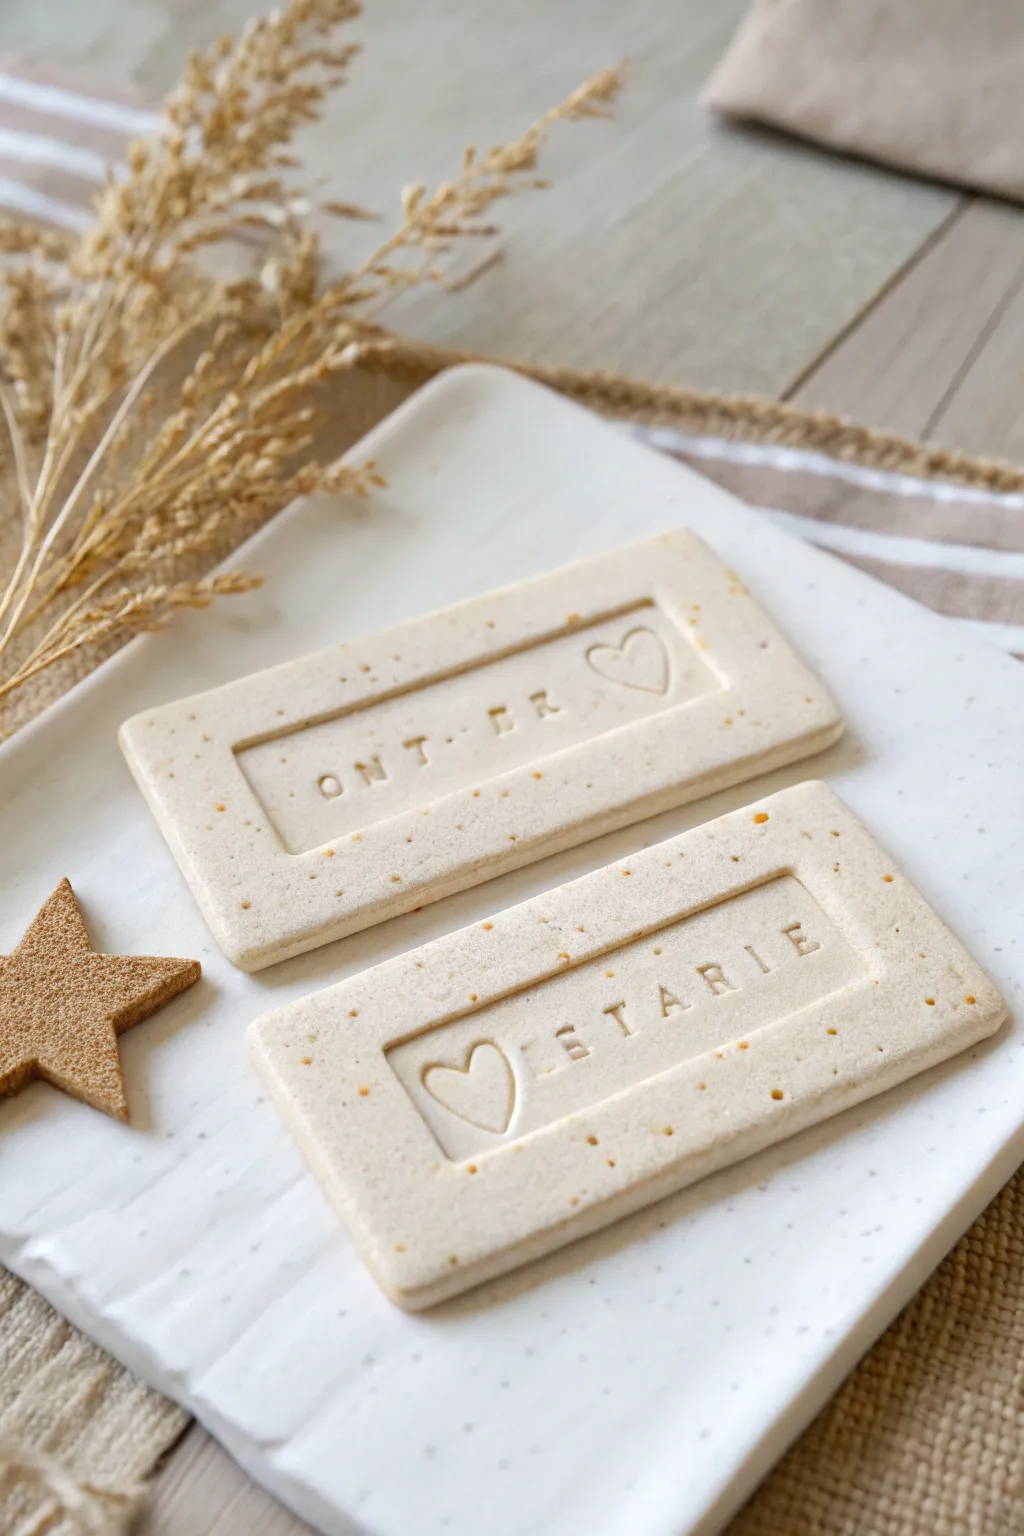
Immortalize your favorite inside jokes or pet names with these charming, biscuit-style nameplates. Their speckled, natural finish and clean embossed lettering give them a sophisticated yet handmade feel perfect for gifting or keeping.
How-To Guide
Materials
- Polymer clay (white or translucent)
- Speckled clay inclusions (e.g., ground pepper, dried tea leaves, or pre-speckled clay)
- Rolling pin
- Parchment paper
- Sharp crafting blade or x-acto knife
- Alphabet stamp set (small)
- Small heart-shaped stamp or tool
- Rectangular cookie cutter (optional)
- Ruler
- Sandpaper (fine grit)
- Gloss or matte varnish (optional)
Step 1: Preparing the Speckled Clay
-
Condition the base:
Begin by warming up your white or translucent polymer clay in your hands. Knead it thoroughly until it is soft, pliable, and free of any air bubbles. -
Add texture:
To achieve that organic, cookie-dough aesthetic, mix in your speckling agent. You can use a pinch of ground black pepper, dried tea leaves, or actual craft sand. Fold the clay over repeatedly to distribute the specks evenly. -
Roll it out:
Place your conditioned clay between two sheets of parchment paper to prevent sticking. Roll it out to a uniform thickness, aiming for about 1/4 inch (6mm) so the token feels substantial.
Stamp Stuck?
If your stamps are sticking to the raw clay and ruining the impression, lightly dust the stamp face with cornstarch or dip it in water before pressing down.
Step 2: Shaping the Tokens
-
Cut the rectangles:
Using a rectangular cookie cutter or a ruler and a sharp blade, cut out your main token shapes. A size of 3 inches by 1 inch works well for short words. -
Create the inner frame:
This step requires a steady hand. Use a slightly smaller rectangular cutter or your blade to gently press an indentation inside the perimeter. Don’t cut all the way through; imply a frame about 1/8 inch from the edge. -
Smooth the edges:
Gently tap the sides of your rectangle with your finger or a flat tool to soften the sharp cut lines. I find this gives the finished piece a more polished, ceramic look.
Make it a Magnet
Turn these into functional decor by gluing a strong rare-earth magnet to the back after baking. They make adorable fridge magnets for holding photos.
Step 3: Stamping and Embossing
-
Plan your spacing:
Before stamping, lay your letter stamps lightly on top of the clay without pressing to ensure your word fits and is centered. -
Stamp the text:
Press the alphabet stamps firmly into the center of the framed area. Apply even pressure so the impression depth is consistent for every letter. -
Add the heart:
Place your heart stamp at the beginning or end of the word. If you don’t have a stamp, you can hand-carve a simple heart outline using a needle tool. -
Create extra charms:
Use any leftover scraps of your speckled clay to cut out small companion shapes, like the little star shown in the inspiration photo.
Step 4: Baking and Finishing
-
Bake carefully:
Transfer the parchment paper with the clay items onto a baking sheet. Bake according to your specific brand of clay’s instructions, usually around 275°F (130°C) for 15-30 minutes. -
Cool down:
Allow the pieces to cool completely in the oven with the door cracked open. This gradual cooling helps prevent cracks. -
Sand edges:
Once hard and cool, use fine-grit sandpaper to buff away any rough spots on the edges or corners. -
Optional sealing:
If you want to protect the surface, apply a very thin layer of matte varnish. However, leaving the clay raw preserves the beautiful stone-like texture best.
Display your personalized tokens on a desk or shelf as a sweet reminder of shared memories
Split-a-Scene Mini Diorama
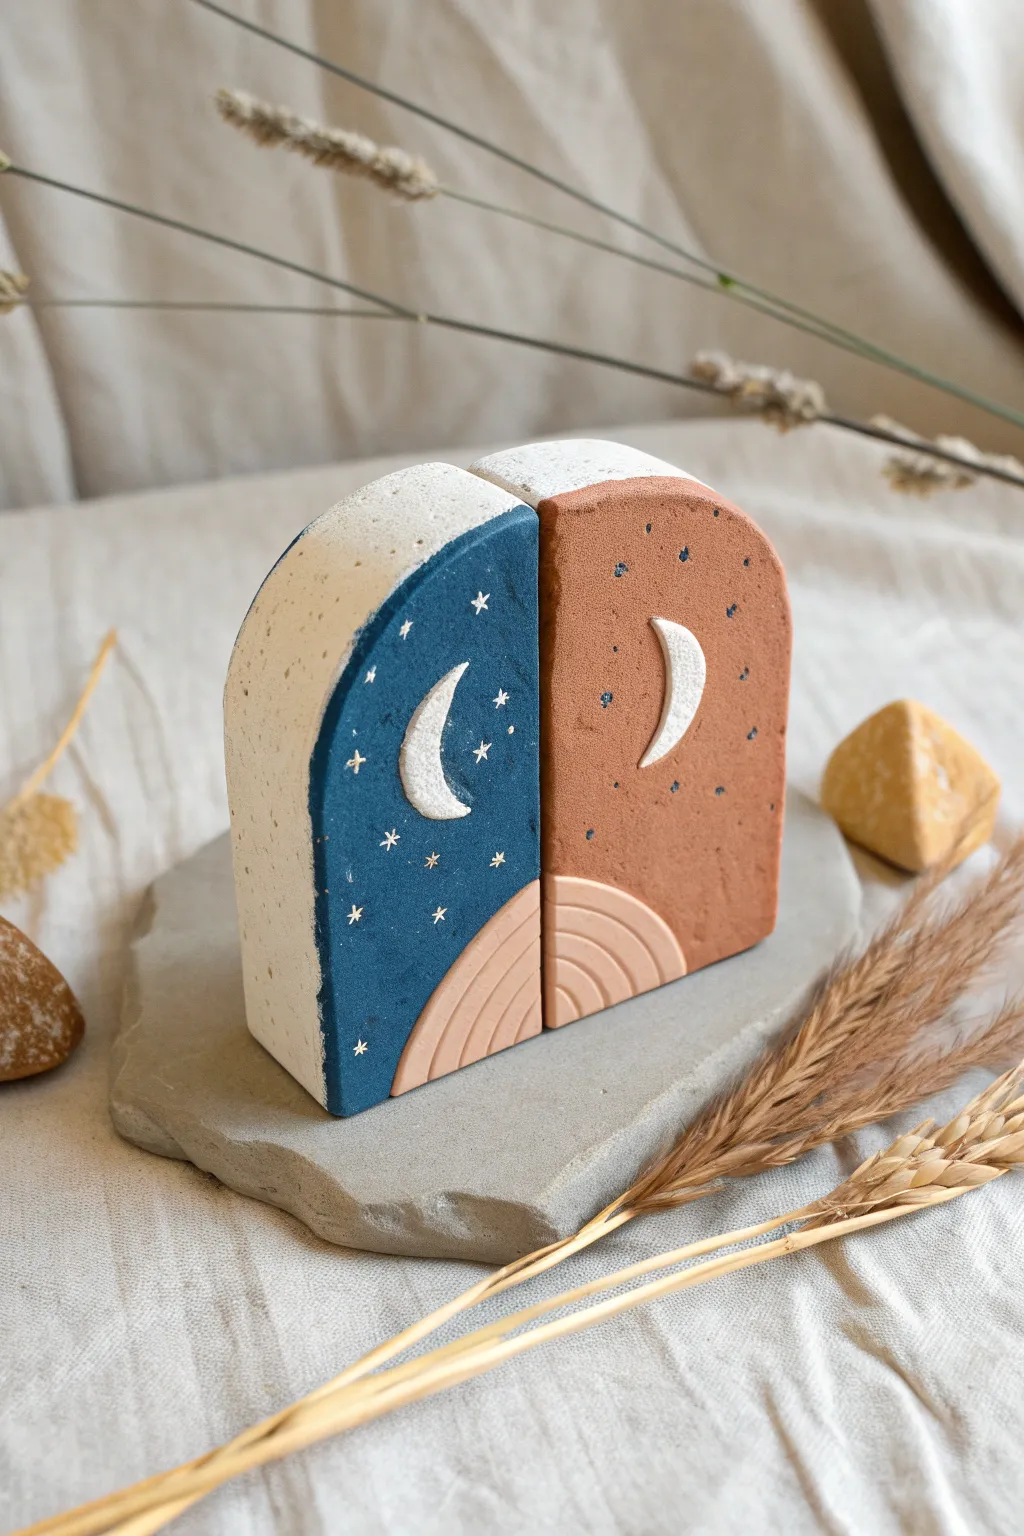
Create a dreamy night-and-day scene with this split-arch sculpture. Featuring a midnight blue side adorned with stars and a terracotta side capturing the warmth of dusk, this piece brings celestial balance to any shelf.
Step-by-Step Tutorial
Materials
- Air-dry clay (white or light grey)
- Acrylic paints (navy blue, terracotta, white, gold)
- Fine detail paintbrushes (size 0 and 2)
- Rolling pin
- Craft knife or clay slicer
- Sandpaper (fine grit)
- Matte sealant or varnish
- Small moon-shaped cutter or sculpting tool
- Cardstock for template
Step 1: Shaping the Form
-
Create a Template:
Sketch an arch shape on a piece of cardstock, roughly 4 inches high and 3 inches wide. Cut this out to use as your guide. -
Condition the Clay:
Knead a large block of air-dry clay until it is pliable and smooth. Rolling it in your hands warms it up and prevents cracks later. -
Form the Base Block:
Roll or press the clay into a thick slab, approximately 1.5 to 2 inches deep. You want this sculpture to be free-standing, so thickness is key. -
Cut the Arch:
Place your cardstock template onto the clay slab. Use a sharp craft knife or clay slicer to cut vertically around the template, ensuring the sides are straight and perpendicular to the table. -
Split the Scene:
Find the precise center vertical line of your arch. Carefully slice straight down to separate the piece into two identical halves. -
Add Relief Details:
Take small scraps of leftover clay to form two crescent moons. Attach one to the center of each arch half using a dab of water or slip (clay mixed with water). -
Sculpt the Horizon:
Roll a small coil and flatten it slightly to create the rising sun/moon arches at the bottom. Attach these quarter-circles to the bottom inner corner of each piece, pressing gently to blend the edges. -
Smooth and Dry:
Dip your finger in water to smooth out any fingerprints or rough edges. Let the pieces dry completely for 24-48 hours, flipping them occasionally to ensure even drying.
Fixing Cracks
If small hairline cracks appear during drying, mix a small amount of fresh clay with water to make a paste. Fill the cracks, let dry, and sand smooth.
Step 2: Painting the celestial scene
-
Initial Sanding:
Once fully dry, lightly sand the surfaces. Pay special attention to the edges and the split line where the two halves meet to ensure they still sit flush. -
Base Coat – Left Side:
Paint the front face of the left half with a deep navy blue. I like to use two thin coats rather than one thick one to avoid brush strokes. -
Base Coat – Right Side:
Paint the front face of the right half with a warm terracotta or rust orange color. Keep the sides and back, as well as the top curve, natural or paint them a creamy white. -
Detailing the Moons:
Paint the raised crescent moons on both sides with white acrylic. You might need a steady hand here to keep the edges crisp against the dark backgrounds. -
Painting the Horizon Arches:
Paint the quarter-circle reliefs at the bottom in a soft peach or beige tone. Once dry, use a very diluted terracotta paint to add fine curved lines mimicking a rainbow pattern. -
Adding Stars:
On the blue side, use a size 0 brush or a toothpick dipped in gold or white paint to add tiny stars. Draw small crosses for larger stars and single dots for distant ones. -
Adding Texture Dots:
On the terracotta side, add tiny dots of navy blue scattered randomly. This creates a subtle visual connection between the two halves. -
Sealing:
Finish both pieces with a coat of matte varnish. This removes the glossy shine of the acrylics for a modern stoneware look and protects your paint job.
Make them Bookends
To turn these into functional bookends, embed heavy washers or fishing weights into the bottom of the clay while it’s wet to add necessary weight and stability.
Place your halves slightly apart on a shelf to let the negative space complete the arch shape
Mystery Sculpt Swap Challenge
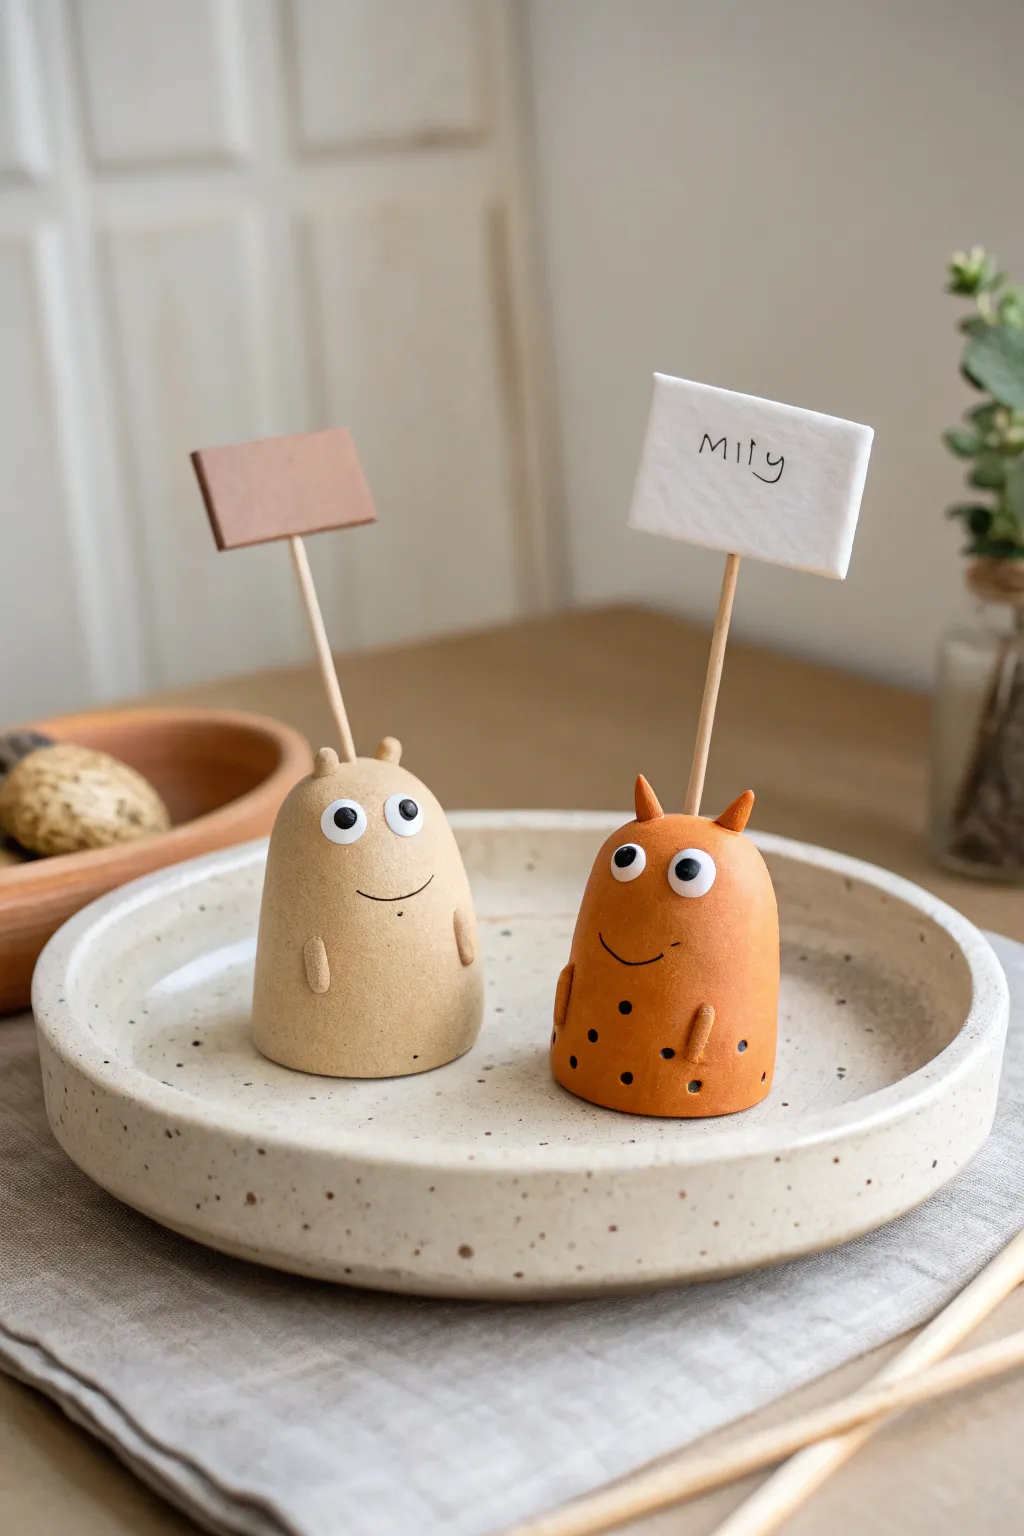
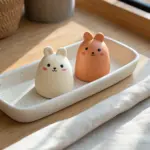
These adorable, rounded blob creatures serve as charming place card holders for your next gathering or just cute desk companions. With their simple shapes and expressive googly eyes, they are a perfect beginner project that brings a ton of personality to the table.
Step-by-Step Guide
Materials
- Polymer clay or air-dry clay (beige and terracotta colors)
- White clay (for eyes and sign)
- Black acrylic paint or black clay marker
- Wooden toothpicks or skewers
- Googly eyes (optional, or make clay eyes)
- Small rolling pin
- Clay sculpting tools (needle tool, smoothing tool)
- Sandpaper (fine grit)
- Clear matte varnish (optional)
Step 1: Shaping the Bodies
-
Form the base shape:
Start by taking a golf-ball-sized amount of your beige or terracotta clay. Roll it into a smooth ball in your palms to remove any cracks. -
Create the cylinder:
Gently roll the ball into a short, thick cylinder shape. The bottom should be wider than the top, creating a stable, slightly tapered look. -
Flatten the base:
Tap the bottom of your cylinder firmly against your work surface. You want a completely flat bottom so the creature stands up straight without wobbling. -
Round the top:
Smooth the top of the cylinder with your thumb to create a gentle dome shape, erasing any hard edges.
Step 2: Adding Features
-
Attach the ears:
Pinch off two tiny pieces of matching clay. Roll them into small triangles or cones and press them onto the top of the head. Blend the seams at the base of the ears using a smoothing tool so they don’t fall off. -
Create the arms:
Roll two very small, thin sausage shapes for the arms. Press these vertically against the sides of the body, about halfway down. I like to curve them slightly inward to make the creature look shy. -
Make the eyes:
Roll two small balls of white clay and flatten them into discs. Press these onto the upper face area. If you prefer, you can leave this blank and glue on plastic googly eyes after baking/drying. -
Detail the pupils:
If making clay eyes, add tiny dots of black clay to the centers, or use black paint after the clay has hardened. -
Add the mouth:
Use a needle tool or a clay knife to gently carve a simple, curved smile into the clay below the eyes. -
Create texture (Orange Figure):
For the terracotta figure, use the tip of a needle tool or a toothpick to poke small, random holes or dots around the lower body for added texture. You can fill these with black paint later for contrast.
Smooth Operator Tip
Before baking, lightly brush your raw clay with a tiny amount of baby oil or cornstarch. This helps remove fingerprints and creates a flawless, silky finish.
Step 3: Making the Sign Holder
-
Insert the post:
Take a wooden toothpick or skewer. Carefully insert it into the top of the creature’s head, right between the ears. Push it in deep enough to be stable, but leave about 2-3 inches sticking out. -
Form the sign plaque:
Roll out a small rectangle of white or contrasting clay. It should be thick enough to hold its shape but not too heavy. -
Attach the sign:
Gently push the top end of the toothpick into the bottom edge of your clay rectangle. Be careful not to distort the rectangle’s shape. -
Add a name:
If using polymer clay, you can bake it now and write the name later with a marker. If you want the name carved, use a needle tool to lightly etch ‘Lily’ or any name into the soft clay sign.
Accessories Upgrade
Give your creatures tiny accessories like a clay bow tie, a miniature hat, or hold a tiny clay flower in their hands to customize them for specific holidays.
Step 4: Finishing Touches
-
Bake or dry:
Follow the manufacturer’s instructions for your specific clay. For polymer clay, bake on a baking sheet at the recommended filled temperature. For air-dry, let them sit undisturbed for 24-48 hours. -
Sanding:
Once hardened, use fine-grit sandpaper to gently smooth out any fingerprints or rough spots on the body. -
Painting details:
Use a fine paintbrush and black acrylic paint to darken the mouth line and fill in the texture dots on the orange figure. -
Seal the piece:
Apply a thin coat of matte varnish to protect your new friends and give them a finished, professional look. -
Final assembly:
If you baked the creature and sign separately, use a dab of super glue to secure the toothpick into the holes now.
Place these delightful little characters on your table and watch them spark conversations immediately
Tiny “Army” of Mini Icons
Create a charming collection of tiny clay icons, featuring delicate stars and rustic buttons in a soft, earthy color palette. These miniature pieces are perfect for scattering as table decor, filling trinket dishes, or using as sweet embellishments for gift wrapping.
Detailed Instructions
Materials
- Polymer clay or air-dry clay (white, beige, terracotta, brown)
- Small rolling pin
- Parchment paper or silicone mat
- Miniature star cookie cutters (various sizes)
- Small round piping tips or bottle caps (for circles)
- Toothpicks or a needle tool
- Clean toothbrush or sandpaper (for texture)
- Fine-grit sandpaper
- Matte spray varnish (optional)
Step 1: Preparing the Clay Palette
-
Condition the clay:
Begin by kneading your clay until it is soft and malleable. If using polymer clay, the warmth of your hands is essential to prevent cracking later. -
Mix custom shades:
To achieve the muted earth tones seen in the photo, mix your base colors. Combine white with tiny amounts of terracotta to make a soft blush, or mix brown with white for a sandy beige. Aim for a cohesive palette of 4-5 shades ranging from cream to deep rust. -
Marble tailored colors:
For a more organic look, stop mixing just before the color is fully uniform. This leaves subtle swirls that mimic natural stone or ceramic.
Step 2: Shaping the Icons
-
Roll out the slab:
Place your clay on parchment paper and roll it out to a thickness of about 1/4 inch (6mm). You want them thick enough to look like chunky ceramic beads, not thin wafers. -
Cut the stars:
Use your miniature cutters to punch out varied star shapes. Twist the cutter slightly before lifting to ensure clean edges. -
Create the rounds:
Use the open end of a small piping tip or a small circular cutter to create the button shapes. Once cut, gently tap the edges with your finger to round them off, softening the sharp cut lines. -
Form spheres by hand:
For the more spherical bead-like shapes, pinch off a small amount of clay and roll it between your palms until smooth. Press down very gently to flatten the bottom so they sit still.
Cracking Clay?
If edges crack while rolling, your clay is too dry. Add a drop of water (air-dry) or baby oil (polymer) and knead longer. Smooth cracks with a damp finger before cutting.
Step 3: Adding texture and Detail
-
Poke button holes:
Using a toothpick or needle tool, press either two or four holes into the center of your round discs to mimic buttons. Keep the holes centered and evenly spaced. -
Add face details:
For the spherical ‘beads’ that look like little characters, use the needle tool to poke two eyes and a tiny mouth. I find a light touch works best here to avoid distorting the sphere. -
Texturize the surface:
Select a few stars or rounds to have a rougher finish. Gently tap a clean toothbrush bristles or a piece of coarse sandpaper against the wet clay to create a stony, speckled texture. -
Smooth imperfections:
Dip your fingertip in a tiny bit of water (for air-dry clay) or baby oil (for polymer) and gently rub away any fingerprints or rough burrs on the edges.
Make Them Wearable
Before baking, insert a small metal eye pin into the top of a star or button. Once cured, you can thread a chain through it for an instant charm necklace.
Step 4: Finishing Touches
-
Bake or dry:
If using polymer clay, bake according to the package instructions (usually 275°F/135°C for 15-30 minutes). If using air-dry clay, let them sit in a cool, dry place for 24-48 hours, flipping them halfway through. -
Sand the edges:
Once fully cured and cooled, take a piece of fine-grit sandpaper and lightly buff the edges of the stars and buttons to give them a worn, tumbled appearance. -
Seal the pieces:
Finish with a light mist of matte spray varnish to protect the surface while maintaining that natural, unglazed pottery look.
Arranging these little treasures in a dish brings a sense of playful calm to any space
Two-Part Lucky Charm Creatures
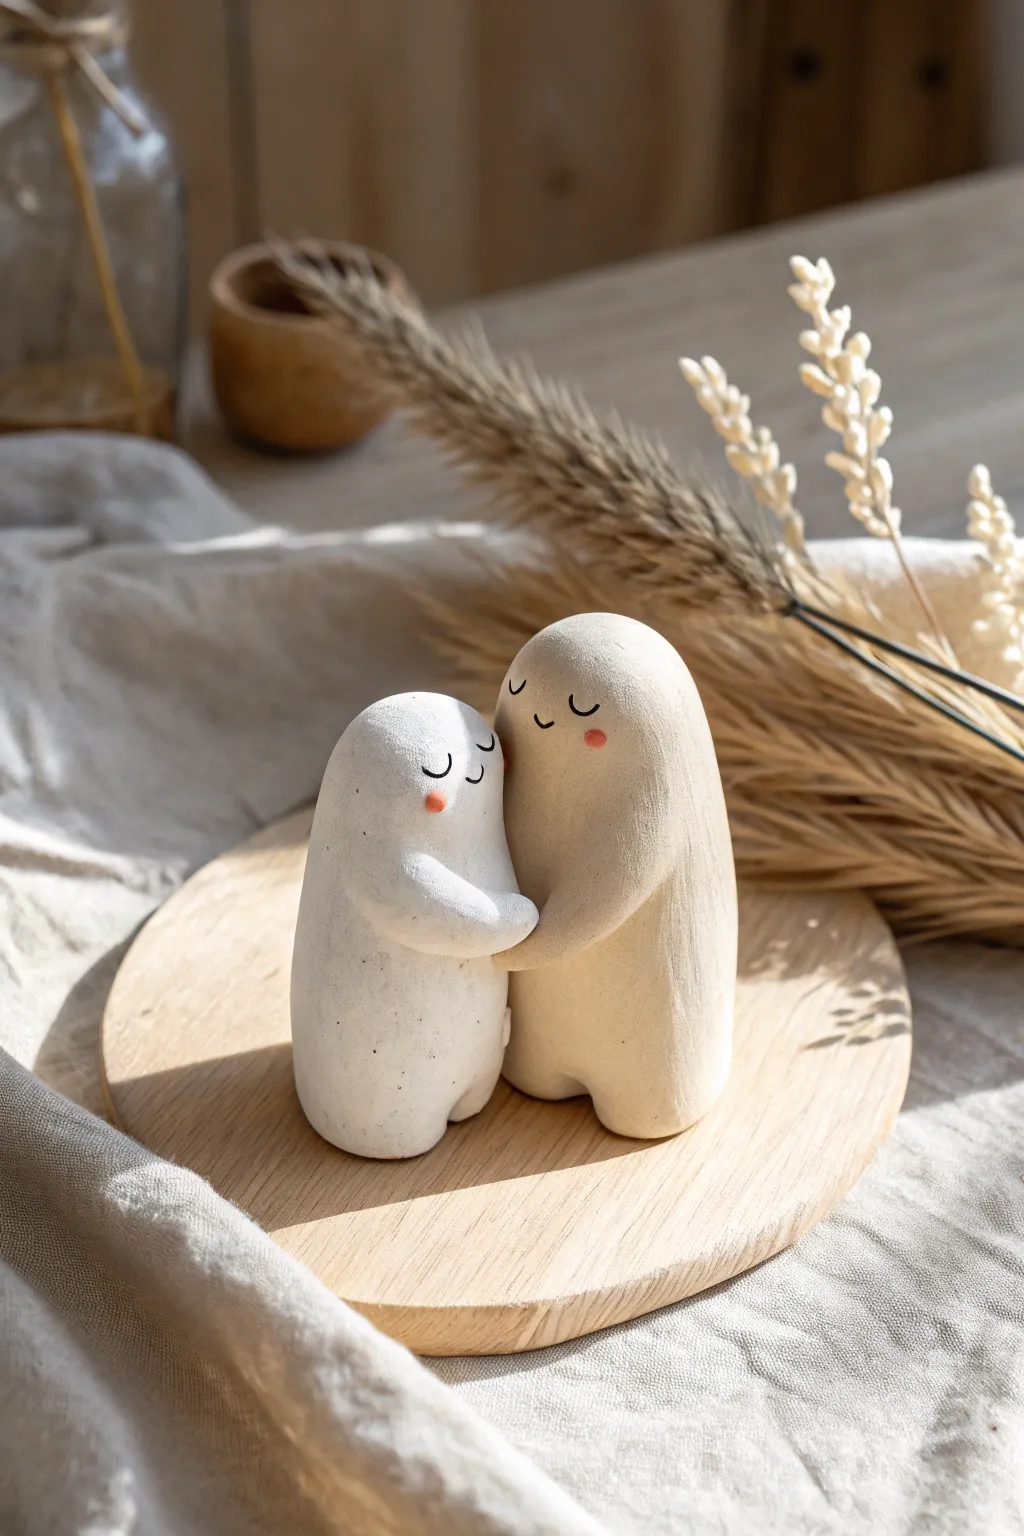
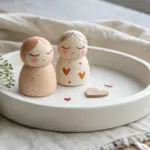
These endearing little creatures, sculpted from contrasting clay colors and locked in a perpetual embrace, make the perfect charm for partners or best friends. Their minimalist shape and sweet, simple faces capture a gentle warmth that fits seamlessly into modern home decor.
Step-by-Step Guide
Materials
- Air-dry or polymer clay (white and beige/tan)
- Acrylic rolling pin (or smooth glass jar)
- Needle tool or toothpick
- Small bowl of water (for smoothing)
- Fine-grit sandpaper (400-600 grit)
- Fine-tip black marker or black acrylic paint with 000 brush
- Pink soft pastel or pink blush
- Small soft paintbrush (for the cheeks)
- Matte sealant or varnish
Step 1: Shaping the Bodies
-
Condition the clay:
Begin by kneading your white clay and your tan clay separately until they are soft, pliable, and free of cracks. Warm clay is much easier to smooth later on. -
Form the base shapes:
Roll each color into a smooth ball about the size of a golf ball or slightly smaller. Then, gently roll the balls against your work surface to elongate them into thick, rounded cylinders. -
Create the taper:
Refine the cylinders so they are slightly wider at the bottom and gently tapered toward the rounded top, creating a classic ‘ghost’ or ‘blob’ silhouette. The tan figure should be just slightly taller than the white one. -
Form the legs:
At the very bottom of each figure, use your thumb or a modeling tool to make a small indentation in the center. Gently pinch the clay on either side of this dent to suggest two stubby little legs, creating a stable base for them to stand.
Fixing Cracks
If cracks appear while air-drying, mix a tiny bit of fresh clay with water to make a paste (slip). Fill the cracks, let dry, and sand smooth.
Step 2: Creating the Embrace
-
Position the pair:
Stand the figures next to each other on your work surface. Angle them slightly inward so their sides touch, checking that they look cozy together. -
Form the arms:
Roll two small snakes of clay for each figure (matching their respective colors). These should be quite short and chubby, tapered slightly at the ‘hand’ end. -
Attach the white arms:
Score the surface of the white figure where the arms will go. Attach the arms so they reach around the front of the tan figure. Blend the shoulder connection seamlessly into the body using a little water or liquid clay. -
Attach the tan arms:
Repeat the process for the tan figure, positioning its arms to wrap around the white figure’s back or side. The goal is to make them look interlocked. -
Smooth the connections:
Take your time smoothing the clay where the arms meet the bodies. I prefer to use a rubber-tipped tool here, but a wet fingertip works well too. Ensure there are no harsh seams.
Step 3: Finishing Touches
-
Dry or bake:
If using polymer clay, bake according to package instructions (usually 275°F/135°C for 15-30 mins). If using air-dry clay, let them sit in a dry, cool place for 24-48 hours until fully hardened. -
Sand for smoothness:
Once fully cured, use fine-grit sandpaper to gently buff away any fingerprints or lint. Focus on the rounded tops of the heads to get that stone-like texture. -
Draw the faces:
Using a very fine black marker or a tiny brush with black paint, draw two small ‘U’ shapes for closed eyes on each figure. Add a tiny curve for a smiling mouth. -
Add rosy cheeks:
Scrape a little pink pastel into a powder (or use real blush). Dip a soft, dry brush into the powder and gently dab it onto the cheeks to create soft, flushed circles. -
Seal the work:
Finish by applying a thin coat of matte varnish. This protects the painted details and gives the clay a unified, professional finish without making it too shiny.
Make it Magnetic
Embed small round magnets into the sides of figures before drying. They can ‘snap’ together for a hug or be separated.
Set your charming duo on a shelf where their permanent hug can bring a little warmth to your day
Time-Capsule Keepsake Box Duo

Create a charming set of matching treasure boxes perfect for holding tiny notes, jewelry, or date-night memories. This project features a smooth, matte finish with simple embossed and raised details that give these handmade pieces a professional, boutique feel.
Step-by-Step Tutorial
Materials
- Air-dry clay (white or terracotta)
- Acrylic paints (deep navy blue, terracotta/burnt orange)
- Matte varnish or sealant
- Rolling pin
- Circle cookie cutters (two sizes: one for the base, slightly larger for the lid)
- Clay sculpting tools (needle tool, smoothing tool)
- Small star stamps or star-shaped cutters
- Sandpaper (fine grit)
- Small bowl of water
- Paintbrushes (flat and fine tip)
Step 1: Shaping the Base
-
Prepare the clay:
Start by kneading a generous amount of air-dry clay until it is warm and pliable. Divide it into two equal portions for your two boxes. -
Roll out the slab:
Roll the first portion of clay out on a smooth surface to a thickness of about 1/4 inch. Ensure the thickness is even throughout to prevent cracking later. -
Cut the base circles:
Using your smaller circle cutter, punch out two circles. These will form the bottom of your boxes. Set aside the excess clay for the walls. -
Create the walls:
Roll out long rectangular strips of clay, keeping the same 1/4 inch thickness. Measure the circumference of your base circles and cut the strips to match this length exactly. -
Assemble the box body:
Score the edges of the base circle and the bottom edge of your clay strip. Apply a little water or slip, then wrap the strip around the base to form a cylinder. -
Blend the seams:
Where the strip ends meet, and where the wall meets the base, use a modeling tool to smooth the clay together until the seam disappears. I find using a slightly damp finger helps achieve a seamless finish here.
Fixing Cracks
If hairline cracks appear while drying, mix a tiny bit of fresh clay with water to make a paste (slip). Fill the crack, smooth it over, and let it dry again.
Step 2: Crafting the Lids
-
Cut the lid tops:
Roll out more clay and use the slightly larger circle cutter to create the tops of your lids. They need to be just a fraction wider than the box base to fit comfortably. -
Add the lid rim:
Create a thinner, shorter strip of clay. Attach this to the *underside* of your lid circle, slightly inset from the edge. This inner rim keeps the lid from sliding off. -
Test the fit:
Gently place the lid onto the base to ensure the inner rim fits inside the box walls. Adjust the shape while the clay is still workable if it feels too tight.
Step 3: Adding Designs
-
Emboss the heart:
For the blue box, use a stylus or dull pencil to gently press a heart outline into the center of the lid. Don’t drag the tool; instead, press repeatedly to create a clean, indented line. -
Create the raised star:
For the terracotta box, use a small star cutter on a scrap piece of clay. Score the back of the star and the center of the lid, apply water, and press the star firmly onto the lid. -
Stamp details:
Use small star stamps or the tip of a detailing tool to press tiny star patterns around the main motifs on both lids. Vary the pressure for visual interest. -
Smooth and dry:
Do a final check for rough fingerprints, smoothing them with water. Let the pieces dry completely for 24-48 hours, turning them occasionally.
Level Up: Galaxy Effect
Make the blue box twinkle by flicking a toothbrush loaded with diluted white paint over the lid for a subtle starry night spray.
Step 4: Finishing Touches
-
Sand for smoothness:
Once fully cured, gently sand any rough edges or uneven rims with fine-grit sandpaper until the surface feels stone-smooth. -
Paint the base colors:
Apply two coats of deep navy blue acrylic to the heart box and a warm terracotta orange to the star box. Let the paint dry fully between coats. -
Seal the work:
Finish by applying a clear matte varnish. This brings out the richness of the acrylics and protects your keepsake boxes from moisture and wear.
Place these on your desk or nightstand for a custom touch of organization