If you’re craving projects that are tiny, sweet, and impossible not to smile at, kawaii polymer clay is the happiest little rabbit hole. I’m sharing my favorite kawaii polymer clay ideas that stay beginner-friendly while still giving you that polished, collectible look.
Classic Kawaii Animal Charms
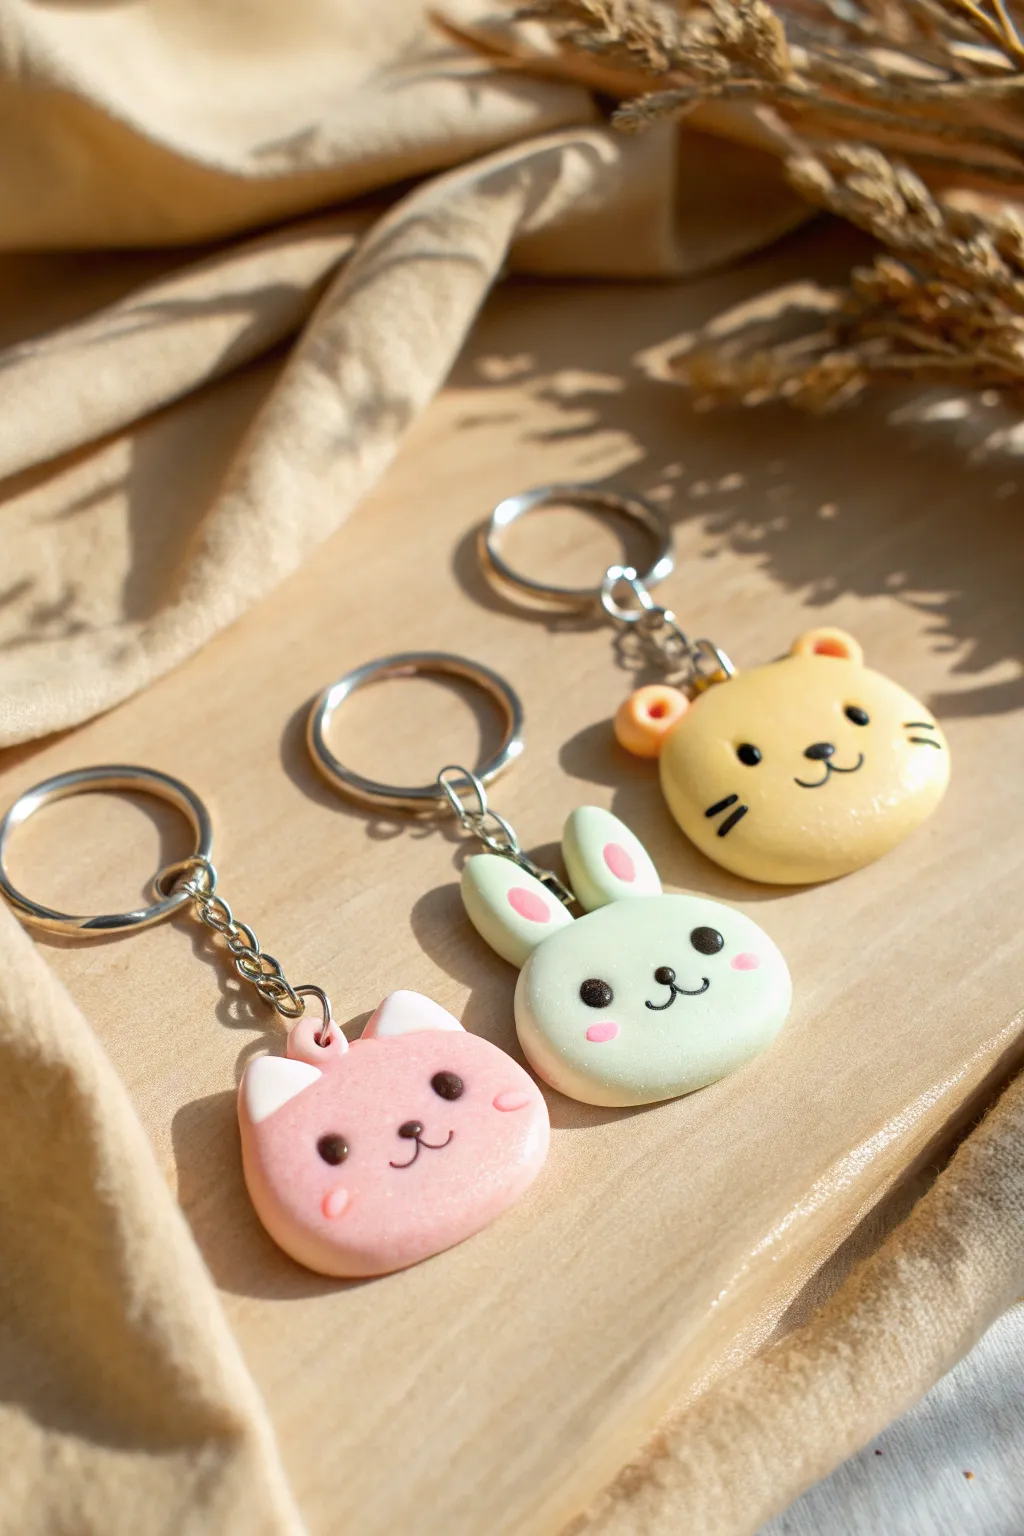
These delightfully chubby animal keychains feature soft pastel tones and simple, adorable expressions that define the classic kawaii aesthetic. Their smooth, rounded forms make them perfect beginner projects that result in durable, functional accessories.
How-To Guide
Materials
- Polymer clay in pastel pink, mint green, and light yellow
- Polymer clay in black and white for details
- Polymer clay tools (acrylic roller, ball tool, needle tool)
- Round cutters (approx. 1.5 inches)
- Eye pins (silver tone)
- Keychain hardware with jump rings
- Soft pastel chalks (pink) and a small brush for cheeks
- Gloss glaze (optional, for eyes/nose)
- Oven for baking
Step 1: Shaping the Bases
-
Condition the Clay:
Begin by thoroughly kneading your pink, mint green, and yellow clay separately until they are soft and pliable. This prevents cracking later on. -
Roll and Cut:
Roll each color into a thick, even slab about 1/4 inch thick. Use your round cutter to stamp out three perfect circles. -
Smooth the Edges:
Gently rub the edges of the circles with your finger to remove any harsh cut lines, creating a soft, bun-like shape for the heads. -
Insert Hardware:
Carefully push an eye pin into the top center of each circle. I find twisting it slightly as I push helps it grip the clay better without distorting the shape.
Fixing Fingerprints
Before baking, lightly brush your unbaked clay with a little baby oil or cornstarch. This smooths out accidental fingerprints or dust.
Step 2: Adding Ears and Features
-
Forming Rabbit Ears:
For the green bunny, roll two small logs of mint clay. Flatten them slightly and attach them to the top of the head using a blending tool to seamless join the clay at the base. -
Inner Ears (Rabbit):
Take tiny bits of pink clay, flatten them into teardrops, and press them into the center of the green ears for the inner detail. -
Cat or Bear Ears:
For the pink and yellow charms, roll small balls of matching clay. Pinch them slightly to form triangles (for the pink cat) or keep them round (for the yellow bear) and attach to the heads. -
Ear Details:
Add small triangles of white clay to the pink ears, and tiny balls of orange/pink clay to the yellow ears to add depth.
Level Up: Texture
Before adding faces, gently press a clean toothbrush over the clay surface to give the charms a fuzzy, flocked texture like a stuffed animal.
Step 3: Creating the Faces
-
Placement Guide:
Use a needle tool or dotting tool to very lightly mark where you want the eyes and mouth to go before committing with clay. -
Adding Eyes:
Roll extremely tiny balls of black clay. Press them gently onto the faces. Ensure they are spaced widely apart to achieve that signature kawaii look. -
Mouth and Nose Details:
Roll thin snakes of black clay for the mouths and whiskers. For the noses, use tiny balls of black or dark brown clay. Use a needle tool to gently curve the mouth lines into a ‘w’ or ‘u’ shape. -
Blushing Cheeks:
Scrape a little pink pastel chalk into dust. Use a soft, dry brush to gently dab pink circles on the cheeks of the bunny and bear. For the pink cat, add tiny flattened ovals of darker pink clay instead.
Step 4: Finishing Up
-
Baking:
Place your charms on a ceramic tile or baking sheet covered with parchment. Bake according to your clay package instructions (usually 275°F/135°C for 15-30 minutes). -
Cooling:
Let the charms cool completely in the oven or on a wire rack. Do not handle them while hot as the clay is still fragile. -
Securing the Pin:
Once cool, gently tug the eye pin. If it’s loose, pull it out, add a dab of superglue, and reinsert it. -
Assembly:
Use pliers to open the jump ring on your keychain hardware, thread it through the eye pin loop, and close it securely.
Enjoy carrying your new little friends around on your keys or bag


Cubed Critters for Easy Shaping
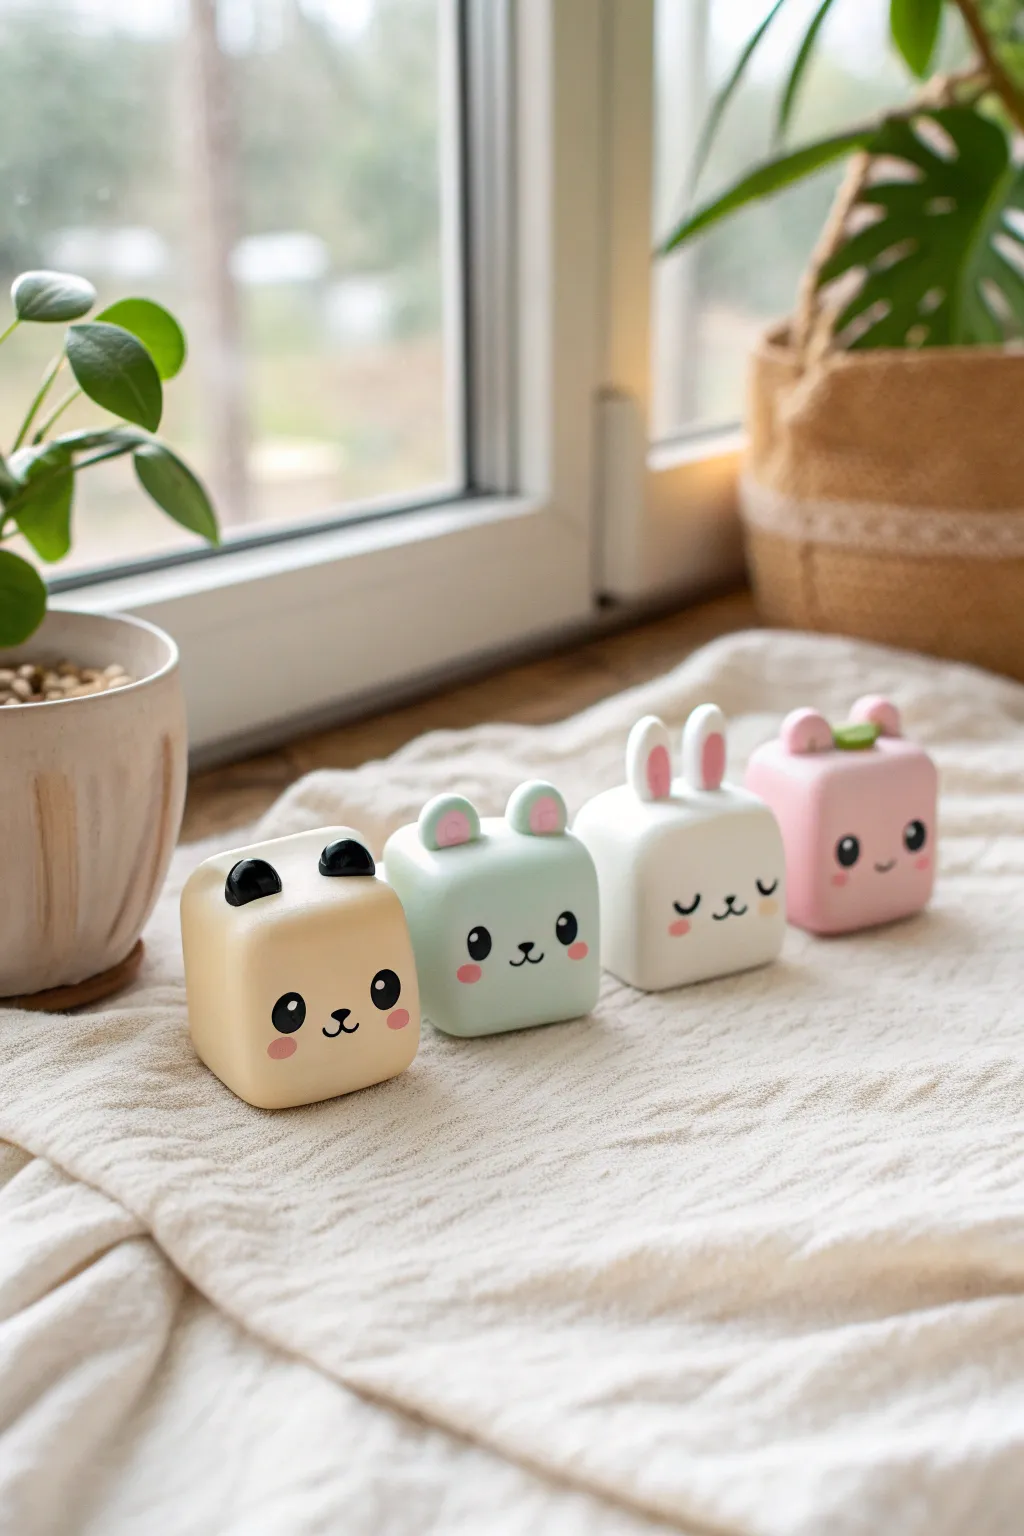
Transform simple squares into an adorable menagerie with these cube-shaped critters. Their uniform blocky bodies make them incredibly distinct, easy to stack, and perfect for beginners mastering clay shaping.
Step-by-Step
Materials
- Polymer clay (cream, pastel blue/mint, white, soft pink)
- Black polymer clay (small amount for panda ears/details)
- Acrylic paint (black and pink) or clay details for faces
- Dotting tools or small ball stylus
- Blade or craft knife
- Acrylic roller or pasta machine
- Baking tile or oven-safe surface
- Gloss glaze (optional)
Step 1: Forming the Base Cubes
-
Condition the Clay:
Begin by thoroughly conditioning your main body colors—cream, mint green, white, and pink—until they are soft and pliable. This prevents cracks during shaping. -
Roll Smooth Balls:
Roll four equal-sized portions of clay (about the size of a large walnut) into smooth spheres, ensuring there are no seams or air bubbles trapped inside. -
Shape into Cubes:
Gently press each sphere against your work surface to flatten the bottom. Rotate and flatten the remaining five sides, pressing them against the table or between your fingers to create crisp edges and soft, rounded corners. -
Refine the Shape:
Tap each side of your cubes lightly on the table to ensure they are uniform in size. They should look like soft, puffy marshmallows rather than sharp dice.
Use a Template
Cut a square of paper to the desired face size and hold it against the clay while shaping. This helps ensure all your cubes end up exactly the same size.
Step 2: Adding Animal Features
-
Create Panda Ears:
For the cream cube (panda), roll two tiny balls of black clay. Flatten them slightly and press them firmly onto the top corners of the cube. -
Create Mint Bear Ears:
For the mint green cube, roll two small mint balls, flatten them into semicircles, and add tiny pink clay inserts to the centers. Attach these to the top of the head. -
Sculpt Bunny Ears:
For the white cube, roll two small white logs of clay into teardrop shapes. Flatten them, add a pink strip down the middle of each, and press them vertically onto the top of the cube. -
Detail the Pink Cube:
For the pink figure, add two small rounded lumps for ears. I like to add a tiny green leaf accent between the ears to give it a whimsical fruit-hybrid look.
Make Them Magnetic
Before baking, press a strong neodymium magnet into the back of each cube, then bake (magnets are oven safe!). Now your cuties act as fridge magnets.
Step 3: Faces and Finishing
-
Pre-Bake Check:
Smooth out any fingerprints using a drop of baby oil or a soft brush. Ensure all ears are securely attached by blending the seams gently at the back. -
Bake the Figures:
Place your cubes on a baking tile. Bake according to your customized clay package instructions (usually 275°F/135°C for 15-30 minutes). Let them cool completely before handling. -
Paint the Eyes:
Using a small dotting tool dipped in black acrylic paint, create two wide-set eyes on each face. For the white bunny, paint curved lines for sleeping eyes instead. -
Add Mouths and Noses:
With a very fine detail brush or a needle tool tip, paint tiny noses and mouths. A simple ‘w’ shape works perfectly for the cat and bear smiles. -
Apply Blush:
Dip a Q-tip or dry brush into pink pastel chalk (shaved into powder) or diluted pink paint. Dab gentle rosy cheeks onto each character. -
Add Highlights:
Once the black eye paint is dry, use a toothpick to add a tiny white dot in the upper corner of each open eye to bring them to life. -
Optional Glaze:
For extra durability, you can coat the finished pieces, specifically the eyes and noses, with a thin layer of gloss varnish.
Line up your finished squad on a windowsill or desk for an instant mood booster


Smiling Fruit and Veggie Minis
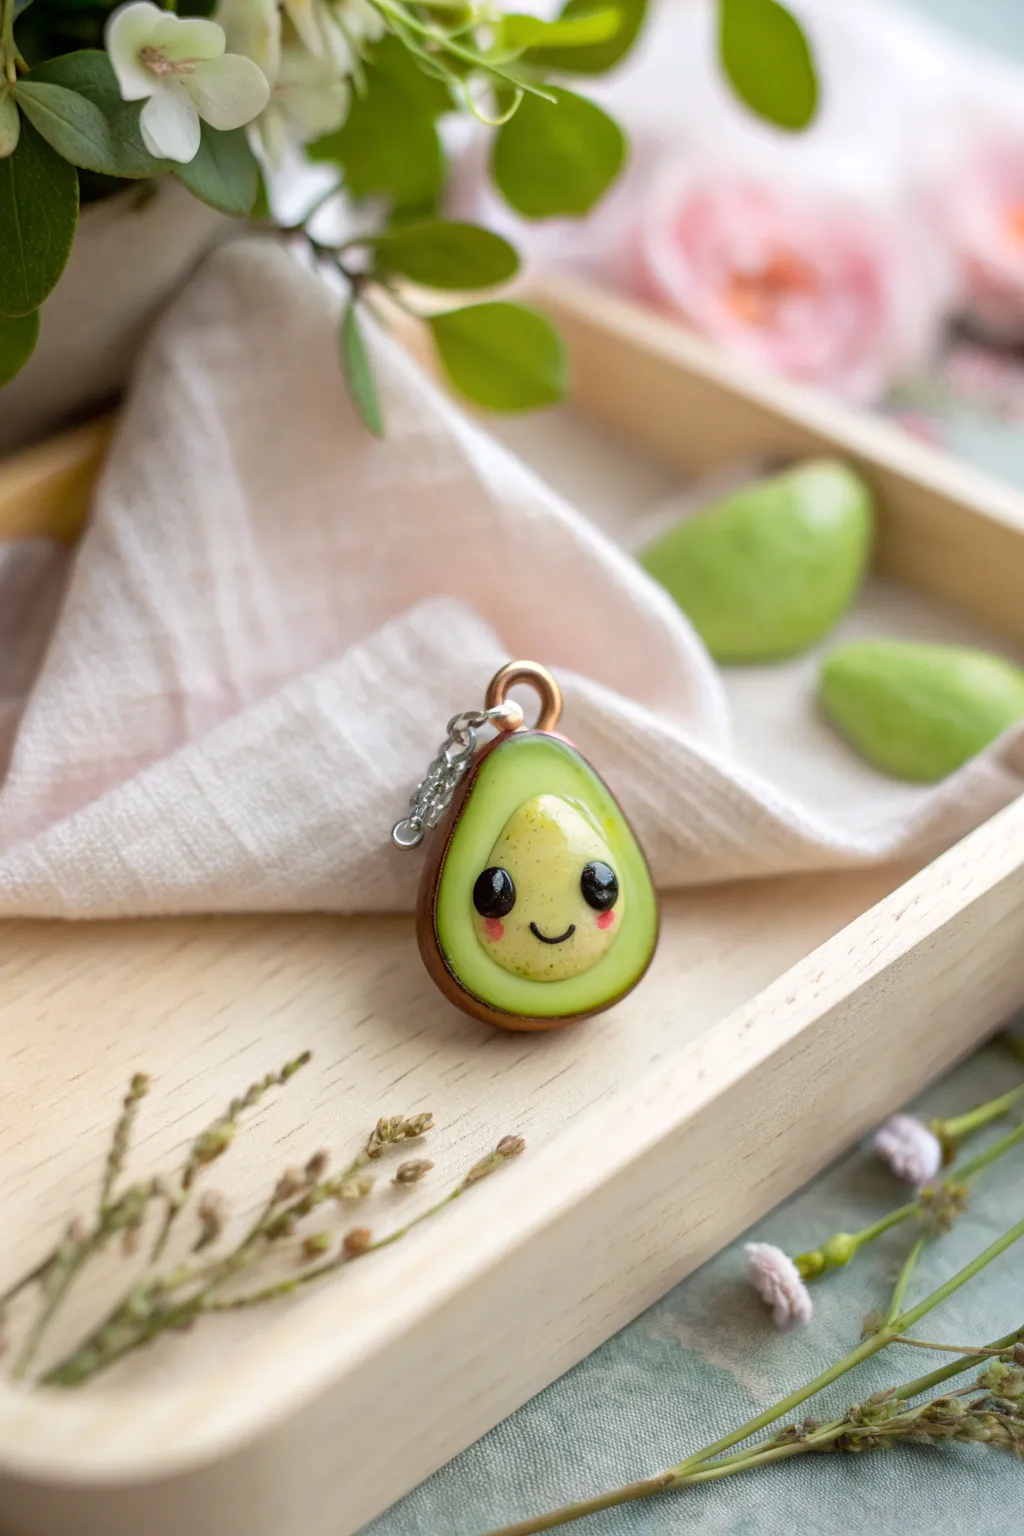
This adorable avocado half isn’t for eating, but it certainly adds a sweet touch to any keychain or necklace. With its gentle gradient flesh and happy little pit, this mini sculpture captures the essence of kawaii charm perfectly.
How-To Guide
Materials
- Polymer clay: Dark brown, avocado green, pale yellow/cream, black, and pink
- Liquid polymer clay (translucent)
- Gloss glaze or UV resin
- Soft pastel chalks (greens and yellows)
- Needle tool or toothpick
- Small ball tool
- Eye pin or screw eye
- Jump rings and keychain hardware
- Craft knife
- Paintbrush
Step 1: Forming the Avocado Base
-
Mix the colors:
Begin by conditioning your green clays. You want a distinct ‘avocado green’ for the outer flesh and a very pale yellow-green for the inner center. If you don’t have the perfect shade, mix a little yellow and white into your green clay. -
Shape the body:
Take a marble-sized ball of the main avocado-green clay and roll it into a smooth teardrop shape. Flatten it slightly so it looks like a sliced avocado half, keeping the back rounded and the front flat. -
Create the gradient:
To achieve that realistic ripe look, I like to use a small brush to dust some yellow soft pastel chalk onto the center of the green flat side. Blend it outwards gently so the transition is soft. -
Add the skin:
Roll out a very thin sheet of dark brown clay. Wrap this carefully around the curved back and sides of your green teardrop to form the avocado skin. Trim any excess with a craft knife so the edge is flush with the flat front face. -
Texture the skin:
Using a needle tool or an old toothbrush, gently tap the dark brown exterior to give it that bumpy, realistic avocado skin texture.
Clean Clay Tip
Work from lightest to darkest colors (yellow pit -> green flesh -> brown skin) to avoid transferring dark lint or pigment onto your clean, pale clay sections.
Step 2: Creating the Kawaii Pit
-
Form the pit:
Roll a ball of light yellow-tan clay. Press it gently onto the lower, wider part of the avocado face. It should protrude slightly, looking like it’s resting inside the fruit. -
Indent eye sockets:
Use a small ball tool to make two tiny indents on the pit where you want the eyes to go. This helps secure the clay eyes so they don’t pop off later. -
Add the eyes:
Roll two minuscule balls of black clay. Place them into the indents you just made and press them down gently to flatten them slightly. -
Create the smile:
Roll an incredibly thin snake of black clay. Cut a tiny U-shape segment with your craft knife and carefully position it between and slightly below the eyes. -
Add blush:
Take two tiny specks of pink clay and press them onto the cheeks, just outside the smile. You can also dust a tiny bit of pink pastel here for a softer look.
BFF Necklace Idea
Make a second avocado half without the pit, but with a matching indented space. When put together, the pit fits into the empty hole for a perfect friendship set.
Step 3: Finishing Touches
-
Insert hardware:
Trim an eye pin to the right length and insert it into the top of the avocado. twisting it slightly as you push down to help the clay grip the metal. -
Texturing the flesh:
Use your needle tool to add very subtle texture to the green flesh area, radiating outward from the pit, mimicking the natural fibers of the fruit. -
Bake carefully:
Bake the piece according to your clay manufacturer’s instructions. Usually, this is around 275°F (130°C) for 15-20 minutes depending on thickness. Let it cool completely. -
Apply finish:
Coat the front face (green flesh and pit) with a gloss glaze or UV resin. This makes the avocado look fresh and juicy and protects the tiny details. -
Add highlights:
Once the glaze is wet, you can add a tiny dot of white paint to the eyes for a ‘sparkle,’ or just let the glossy reflection do the work. -
Assemble:
Open a jump ring with pliers, loop it through the eye pin at the top of the charm, and attach your keychain or necklace chain.
Now you have a happy little pocket companion to keep your keys company


Kawaii Stars, Moons, and Clouds
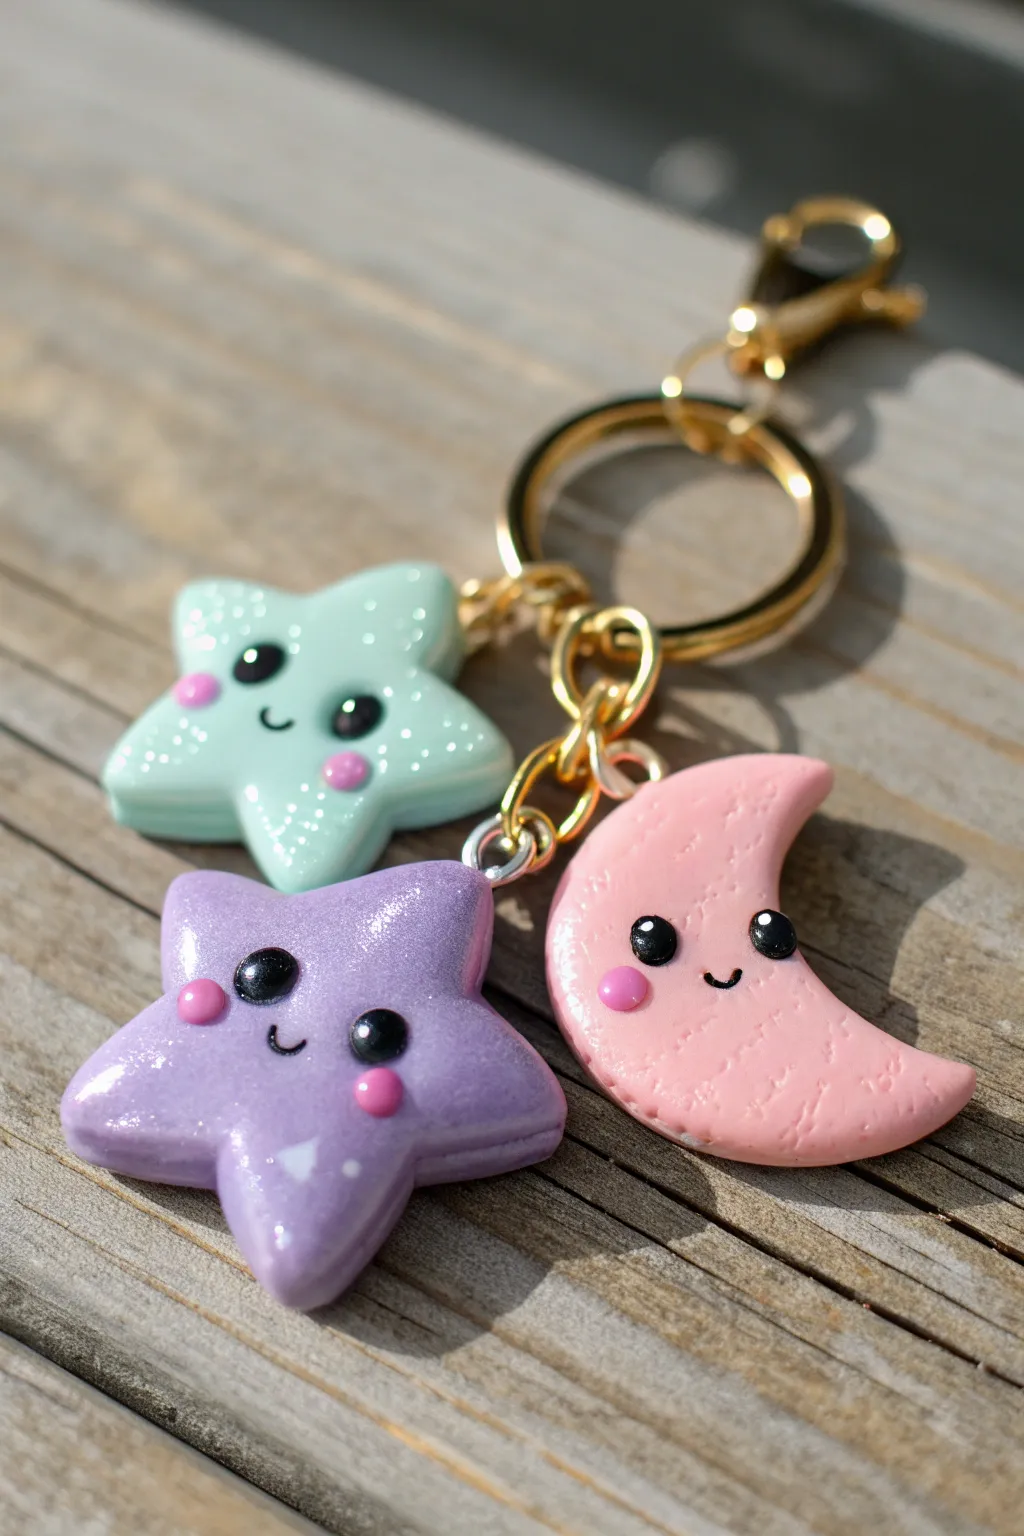
Bring a little piece of the night sky with you everywhere using these adorable pastel charms. With their sweet smiling faces and subtle sparkle, this moon and star trio makes for a dreamy addition to any set of keys or backpack zipper.
Step-by-Step
Materials
- Polymer clay (light blue, light purple, light pink, black)
- Fine glitter (pearl or iridescent)
- Glossy polymer clay glaze
- Soft pastel chalk (pink) or pink acrylic paint
- Gold screw eye pins (3)
- Gold jump rings (6mm)
- Gold keychain ring with clasp
- Small star cookie cutter (approx. 1 inch)
- Round cutter or moon cutter (approx. 1.5 inch)
- Needle tool or toothpick
- Dotting tools (various sizes)
- Rolling pin or pasta machine
- Sandpaper or nail buffer (optional)
- Pliers (round nose and flat nose)
- Small paintbrush
Step 1: Prepping the Celestial Shapes
-
Mix the sparkle:
Condition your light blue, purple, and pink clays separately. To achieve that magical shimmer seen in the photo, kneed a generous pinch of fine iridescent or pearl glitter directly into each color until evenly distributed. -
Roll out the slab:
Roll your clay out to a nice, thick slab—aim for about 4mm to 5mm thickness. You want these chunky enough to be durable charms but not too heavy. -
Cut the stars:
Using your small star cutter, press firmly into the blue and purple clay. If the clay sticks, you can use a piece of plastic wrap over the clay before cutting to give the edges a soft, rounded finish. -
Shape the moon:
For the pink moon, use a moon-shaped cutter. If you don’t have one, use a round circle cutter, then use the same circle cutter to take a ‘bite’ out of the side to create a crescent shape. -
Soften the edges:
Gently tap down any sharp ridges along the edges of your cutouts with your finger tip to give them that smooth, puffy look. -
Add texture (optional):
The pink moon in the image has a slight surface texture. You can achieve this by lightly tapping the surface with a coarse sponge or a crumpled piece of aluminum foil, being careful not to distort the shape.
Step 2: Adding the Kawaii Faces
-
Make the eye sockets:
Use a medium-sized dotting tool to make two shallow indentations where you want the eyes to sit. This helps the black clay sit flush rather than bulging out suspiciously. -
Insert the eyes:
Roll tiny balls of black polymer clay. Place them into the indentations and press gently to flatten them slightly. -
Create the smile:
Using a needle tool or a very thin piece of wire, press a small curve between the eyes to create a simple smiling mouth. -
Add blushing cheeks:
Roll tiny, flat discs of pink clay (lighter than the moon, darker than the stars) and press them just below the eyes. Alternatively, I like to use a dry brush and pink pastel chalk dust for a softer, airbrushed look after baking, but applying clay dots now is more durable. -
Add the sparkle highlights:
Roll minuscule specks of white clay (or use white paint after baking) and place one dot in the upper corner of each black eye. This ‘catchlight’ is crucial for bringing the character to life. -
Secure the hardware:
Insert a gold screw eye pin into the top center of each charm. To ensure it stays put, you can add a tiny dab of liquid clay or bake-and-bond to the screw threads before inserting.
Uneven Glitter?
If glitter gets stuck on the surface in clumps, try mixing it into a small ball of translucent clay first, then blending that mixture into your colored clay for smoother dispersal.
Step 3: Baking and Assembly
-
Bake the charms:
Bake your clay pieces according to the manufacturer’s instructions (usually 275°F/135°C for 15-30 minutes depending on thickness). Use an oven thermometer to prevent scorching. -
Cool and inspect:
Let the pieces cool completely. If there are any fingerprints, gently buff them away with a fine-grit sandpaper or nail buffer. -
Glaze for shine:
Apply a coat of glossy polymer clay glaze to the front and sides of each charm to protect the face details and make that mixed-in glitter really pop. -
Connect the jump rings:
Using two pairs of pliers, twist open a 6mm gold jump ring efficiently (twist front-to-back, strictly never pull apart!). Loop it specifically through the eye pin of the blue star. -
Attach to chain:
Connect the jump ring to the main keychain loop. Repeat this process for the purple star and the pink moon, clustering them together on the chain.
Make it Cloudier
Add a white cloud charm to the cluster! Form three balls of white clay into a triangle shape and smooth the seams together to create a fluffy cumulus shape.
Now your celestial trio is ready to sparkle on your bag or keep your keys company

What Really Happens Inside the Kiln
Learn how time and temperature work together inside the kiln to transform clay into durable ceramic.
Cute Ice Cream With a Melty Friend
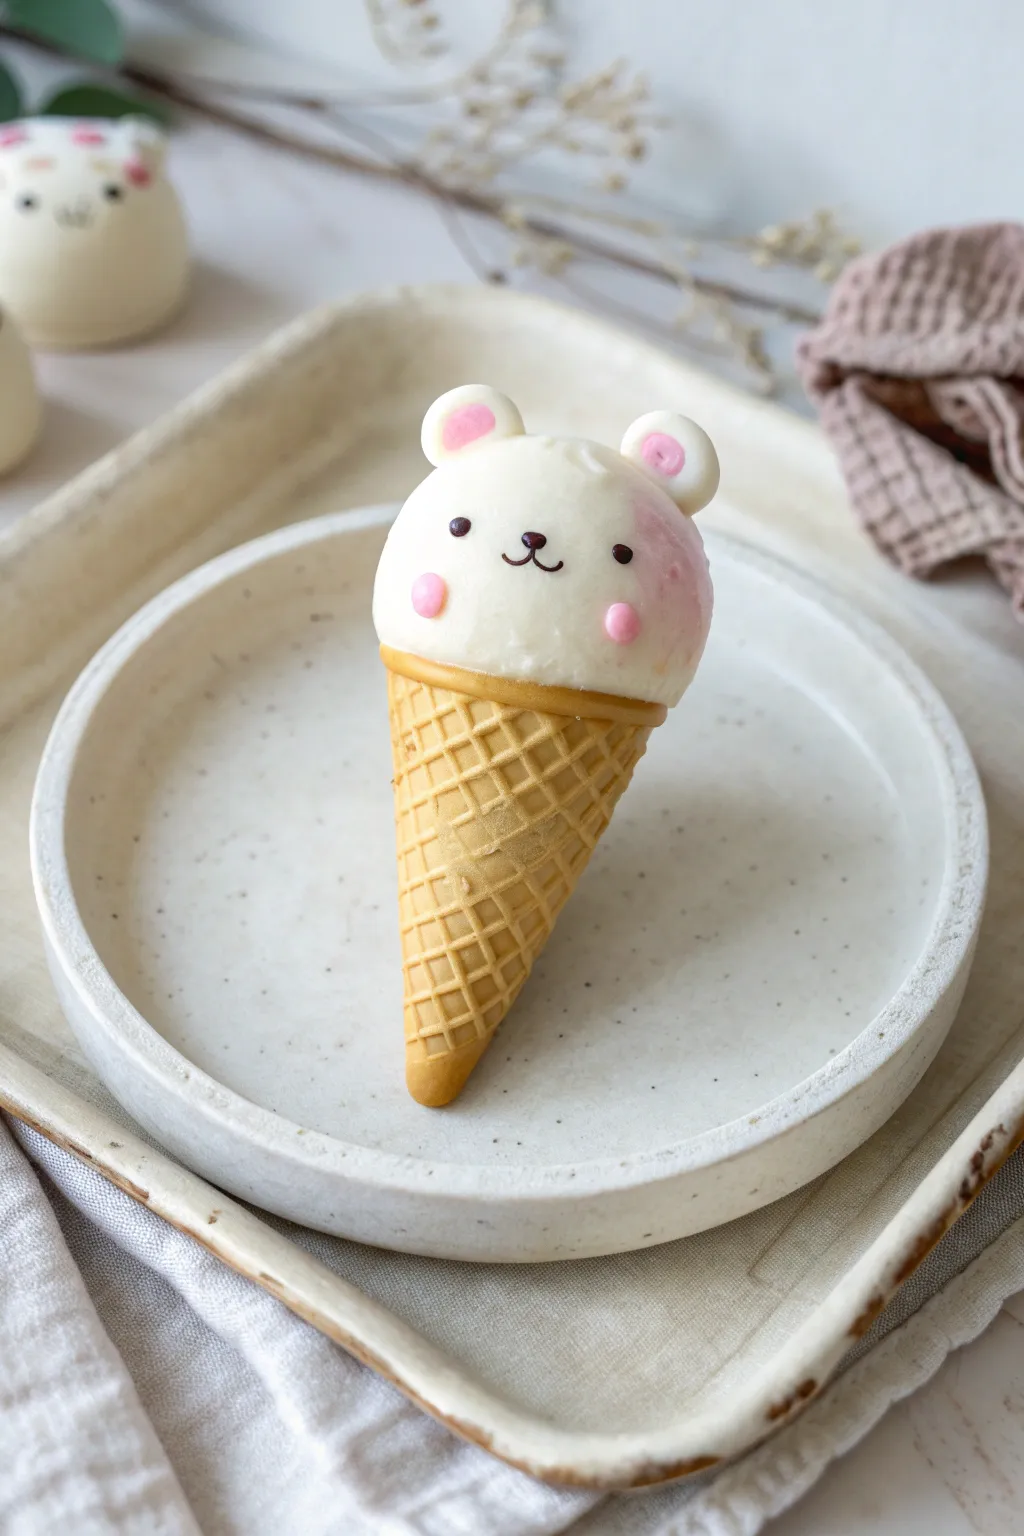
Transform a simple scoop of clay into an adorable polar bear ice cream treat, complete with a realistically textured waffle cone. This sweet little sculpture combines kawaii character design with realistic food texturing for a project that looks good enough to eat.
Step-by-Step Tutorial
Materials
- White polymer clay
- Tan/beige polymer clay (waffle color)
- Pink polymer clay (pastel shade)
- Black polymer clay or black acrylic paint
- Aluminum foil
- Needle tool or toothpick
- Ball stylus tool
- Rolling pin
- X-acto knife or craft blade
- Blush chalk pastel
- Small soft paintbrush
- Translucent liquid clay (optional)
- Gloss glaze (optional)
Step 1: Sculpting the Waffle Cone
-
Prepare the cone base:
Start by creating a small cone shape out of compressed aluminum foil. This saves clay and keeps the charm lightweight. Cover the foil core with a thin layer of tan polymer clay, smoothing out any seams with your fingers until uniform. -
Create the waffle grid:
To achieve the realistic waffle texture, use the back of a craft knife blade or a thin ruler. Gently press diagonal parallel lines into the clay all around the cone. -
Cross-hatch the pattern:
Rotate the cone and press a second set of diagonal lines in the opposite direction, creating a diamond grid pattern. Be careful not to press too hard, or you might distort the cone’s overall shape. -
Detail the rim:
Roll a slightly thicker snake of tan clay and wrap it around the top edge of the cone to form a rim. Blend the bottom edge of this rim onto the cone, but leave the top edge rounded and defined. -
Texturing the rim:
Using a needle tool, add tiny vertical indentations or scratches along the rim you just added to give it a baked, crispy texture.
Step 2: Forming the Bear Scoop
-
Create the head:
Roll a ball of white polymer clay into a smooth sphere. It should be sized just right to sit on top of your cone rim without looking tippy. -
Add the scoop texture:
Before attaching it fully, gently press the bottom of the white sphere onto the cone to create an indentation. You can use a toothbrush or sandpaper to lightly texture the very bottom edge of the white clay where it meets the cone, mimicking melting ice cream foam. -
Make the ears:
Roll two huge tiny balls of white clay and two slightly smaller balls of pink clay. Flatten the white balls into small discs. -
Assemble ears:
Press the small pink balls onto the center of the white discs to create the inner ear. Attach these to the top of the bear’s head. I find using a dot of liquid clay here helps keep them secure during baking. -
Attach the head:
Place the head permanently onto the cone. Press down gently to ensure a good bond between the white clay and the tan rim.
Crispy Cone Tip
Before baking, lightly brush the tan waffle cone with dry brown chalk pastel or eyeshadow. Focus near the grid lines to make it look perfectly golden-baked.
Step 3: Kawaii Face Details
-
Indent eye sockets:
Use a medium-sized ball stylus to press two shallow divots where the eyes will go. This helps the eyes sit flush with the face rather than bulging out. -
Add the eyes:
Roll two microscopic balls of black clay and press them into the eye sockets. Alternatively, you can paint these on after baking if you prefer working with acrylics. -
Sculpt the snout:
For the nose and mouth, you can either paint fine lines or roll an unimaginably thin thread of black clay. Form a small ‘Y’ shape or a curved anchor shape for the classic animal smile and press it into the center of the face. -
Rosy cheeks:
Roll two small balls of pink clay and flatten them slightly. Press these onto the face right under the eyes. -
Pastel shading:
For an extra soft look, shave a little pink chalk pastel into a powder. Use a soft dry brush to gently dust the side of the bear head, making it look like strawberry syrup is starting to blend in. -
Bake carefully:
Bake the piece according to your specific brand of clay’s instructions. Usually, this is around 275°F (130°C) for 15-30 minutes. Tent with foil to prevent the white clay from yellowing. -
Finishing touches:
Once cool, you can add a tiny dot of white paint to the eyes as a highlight, and coat the eyes and nose with gloss glaze to make them look wet and shiny.
Make it a Keychain
Insert a metal eye screw into the top of the bear’s head before baking. Once baked, you can attach a chain and clip to take your sweet friend on the go.
Enjoy your sweet new desk companion or turn it into a charming necklace pendant
Cupcake Animals With Swirly Frosting
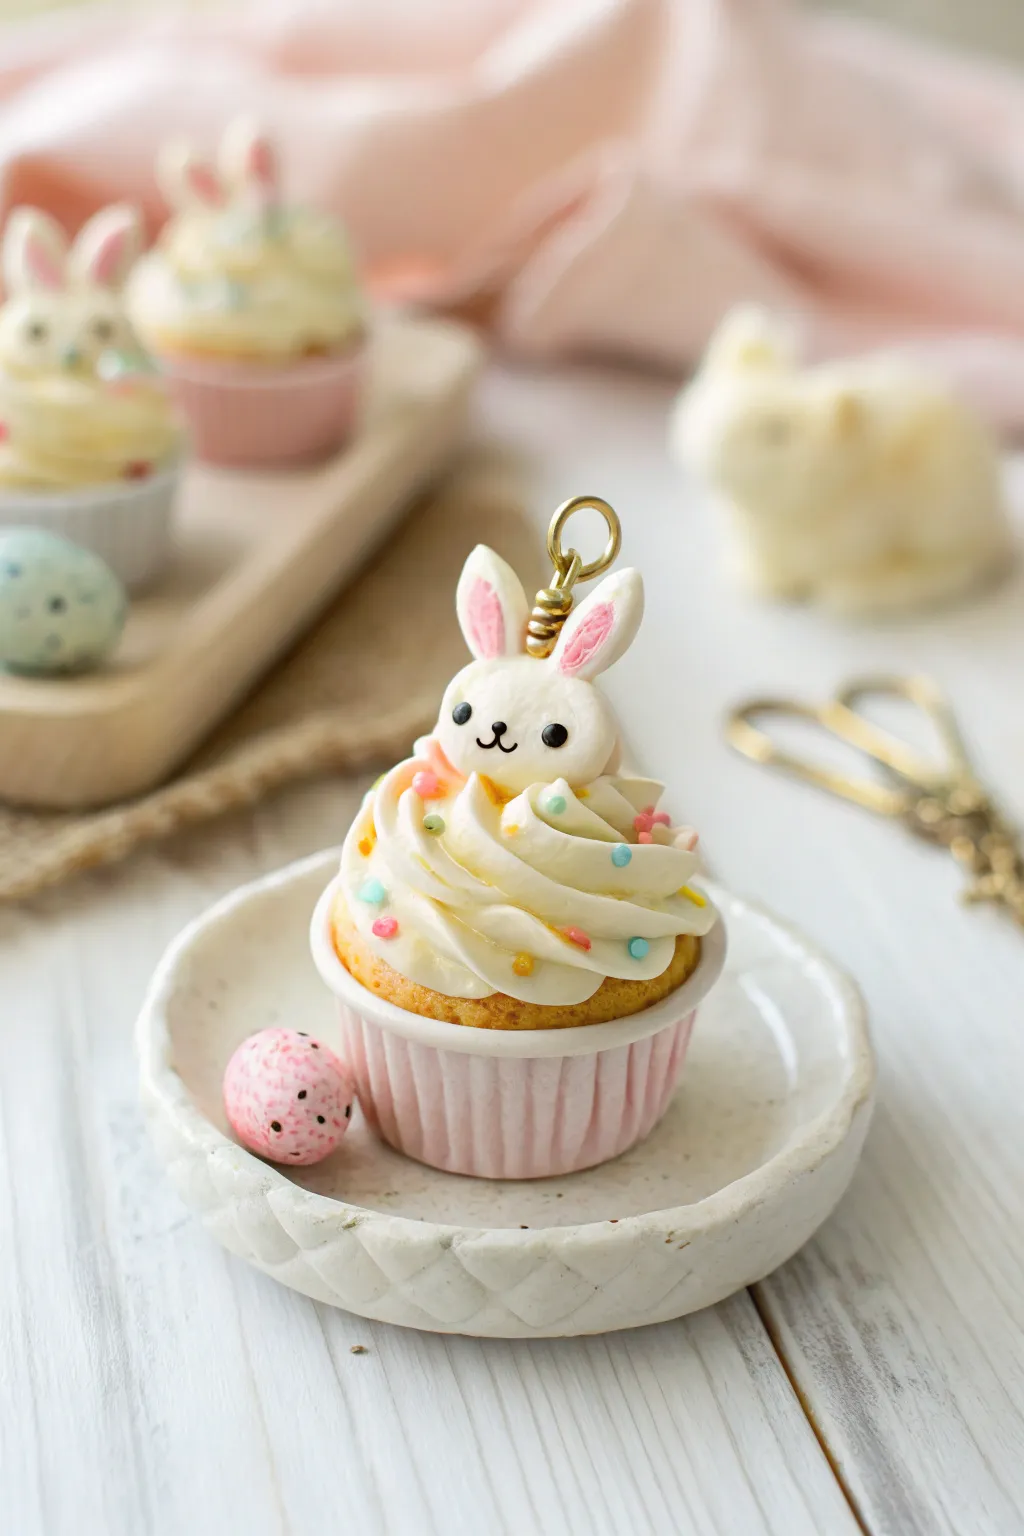
This adorable polymer clay charm captures the sweetness of Easter with a miniature cupcake topped by a friendly bunny. With its realistic swirled frosting and delicate pastel sprinkles, it creates a whimsical accessory perfect for jewelry or display.
Step-by-Step Guide
Materials
- Polymer clay (white, pink, golden yellow/ecru, black)
- Liquid polymer clay (Translucent and White)
- Miniature cupcake mold (flexible silicone)
- Small star piping tip
- Piping bag or small plastic baggie
- Ball tool and needle tool
- Eye pin or screw eye (gold)
- Soft pastel chalks (orange, golden brown)
- Paintbrush
- Gloss glaze (optional)
Step 1: Baking the Base
-
Mix the batter color:
Start by mixing translucent white clay with a small amount of yellow and a tiny touch of brown to create a realistic, semi-translucent cake batter color. -
Form the cupcake liner:
Roll a small ball of pale pink clay and press it into your silicone cupcake mold. Ensure it fills the ridges of the liner section completely, but keep the top hollow. -
Add the cake:
Take a ball of your prepared batter-colored clay and press it into the pink liner base. Mound it slightly in the center to mimic a rising cupcake. -
Texture the surface:
Use a needle tool or an old toothbrush to vigorously texture the exposed cake surface. This creates that fluffy, baked crumb appearance. -
Shade with pastels:
Shave some orange and golden-brown soft pastels into a powder. Dust the top of the unbaked cake heavily with this powder using a soft brush to simulate a golden-baked crust. -
First bake:
Bake this base piece according to your clay manufacturer’s instructions (usually 15-20 minutes). Let it cool completely before adding frosting.
Step 2: Frosting & Bunny Assembly
-
Prepare the frosting:
For the most realistic look, mix white polymer clay with liquid clay (and a drop of baby oil if needed) until it reaches a consistency similar to toothpaste or stiff buttercream. -
Pipe the swirl:
Transfer your clay cream into a piping bag fitted with a small star tip. Pipe a generous swirl onto the cooled cupcake base, finishing with a peak in the center. -
Shape the bunny head:
Roll a smooth, firm ball of white clay for the bunny’s head. It should be proportional to the frosting mount. -
Attach the ears:
Form two small teardrops of white clay and flatten them slightly. Add tiny pink centers to the inner ears. Press these firmly onto the top of the head. -
Face details:
Using the tiniest specks of black clay, roll two microscopic balls for eyes and a thin ‘Y’ shape for the nose and mouth. Place them gently on the face with a needle tool. -
Mount the bunny:
Gently nestle the bunny head directly into the wet frosting clay. The soft cream will act as an adhesive. -
Add sprinkles:
Pre-bake tiny snakes of pastel clay (pink, blue, yellow) and chop them into bits. Sprinkle these ‘jimmies’ and confetti onto the wet frosting. -
Insert hardware:
If you are making this into a charm, screw a gold eye pin into the top of the bunny’s head before baking. Adding a dab of liquid clay to the screw threads helps secure it. -
Final bake:
Bake the entire assembled piece again. Monitor the temperature closely to prevent the white frosting or bunny ears from scorching. -
Finishing touches:
Once cool, you can choose to brush a little gloss glaze on the eyes to make them shine, or on the ‘fruit’ sprinkles, leaving the frosting matte.
Cream Consistency Tip
If your clay frosting is too hard to pipe, keep adding liquid clay drops. If it’s too runny and won’t hold the star ridges, let it sit on cardboard for 10 mins to leach out oil.
Scorched Ears?
White clay burns easily. Tent a piece of aluminum foil over your baking tray to protect the delicate bunny ears from direct heat during the second bake.
Now you have a sweet little charm that looks good enough to eat, ready to be hung on a necklace or keychain


The Complete Guide to Pottery Troubleshooting
Uncover the most common ceramic mistakes—from cracking clay to failed glazes—and learn how to fix them fast.
Tiny Bees and Bug Buddies
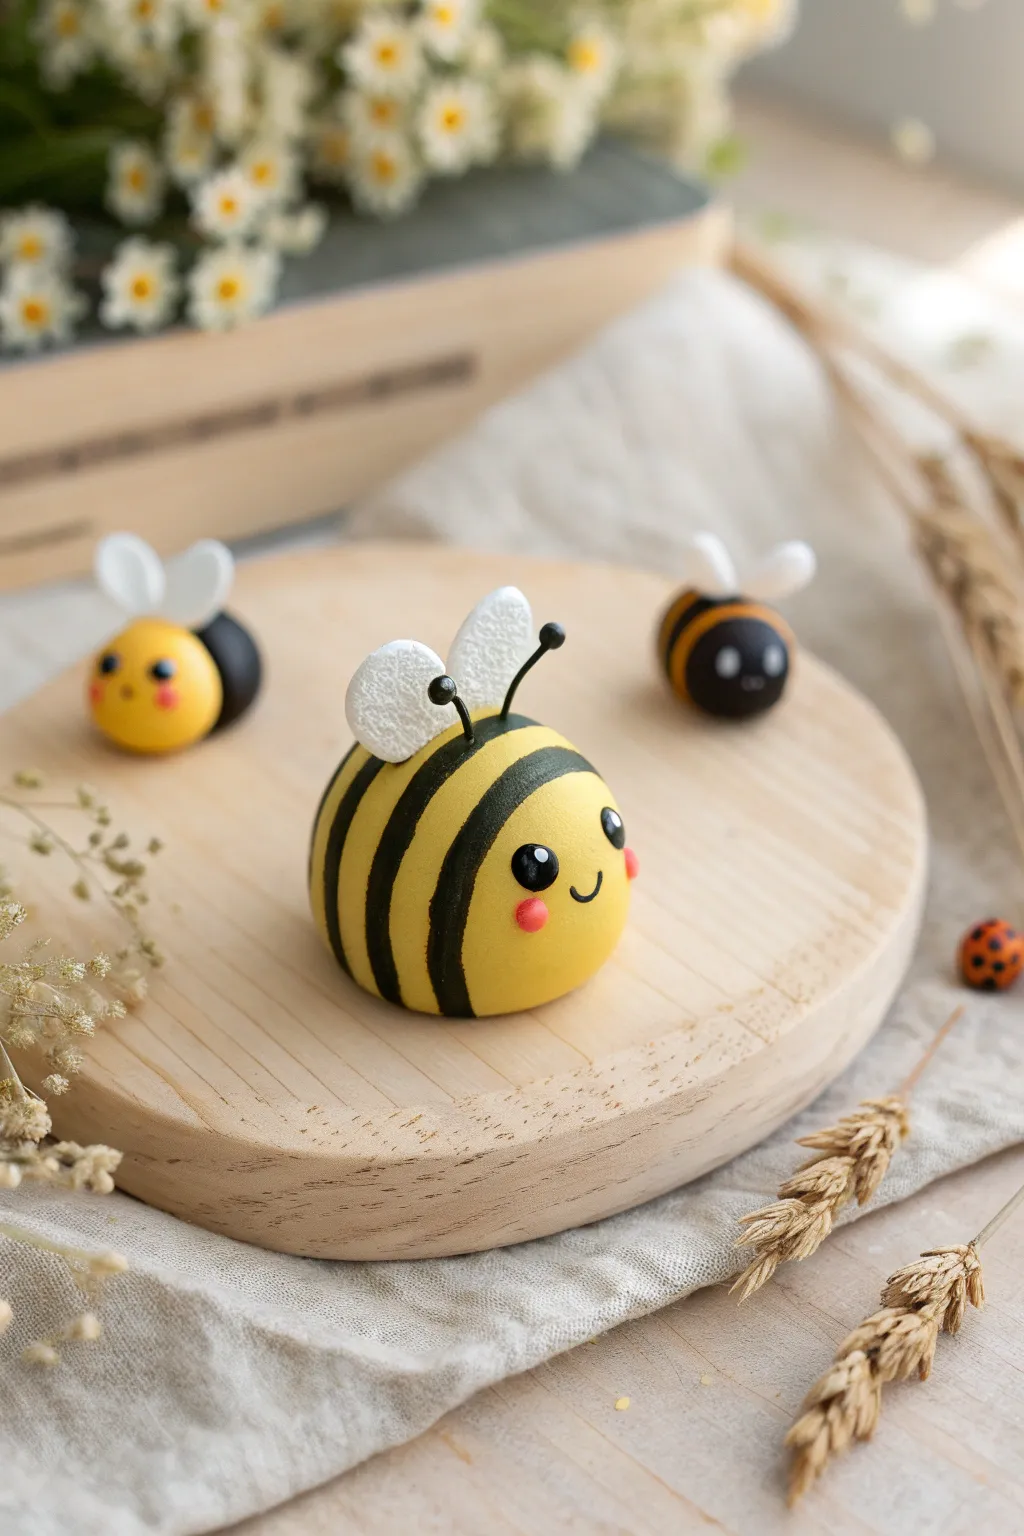
Create a cheerful hive of tiny, round bees with sweet, blushing faces and delicate wings. These kawaii figures feature a smooth, matte finish and rest perfectly on a wooden display or as desk buddies.
Detailed Instructions
Materials
- Polymer clay (yellow, black, white, and a tiny bit of pink)
- Black jewelry wire or thin headpins (for antennae)
- Needle tool or toothpick
- Ball stylus tool
- Small round cutter (optional, for wings)
- Acrylic paint (white and black)
- Fine detail paintbrush
- Wire cutters
- Superglue (optional)
Step 1: Shaping the Main Bee Body
-
Condition the Clay:
Start by kneading your yellow polymer clay until it is soft and pliable. This ensures you won’t have cracks in your finished piece. -
Create the Core:
Roll the yellow clay into a smooth ball, roughly the size of a walnut. Tap the bottom gently on your work surface to create a flat base so the bee sits upright without rolling. -
Prepare the Stripes:
Condition some black clay and roll it into a thin, even snake. Use an acrylic roller or pasta machine to flatten this snake into a long, thin ribbon. -
Apply the Stripes:
Carefully drape the black ribbons across the bee’s back. Place one near the rear and one across the middle, leaving the face area clear yellow. Trim the excess at the bottom and smooth the seams gently into the yellow base.
Clean Clay Tip
Keep baby wipes or hand sanitizer nearby. Clean your hands thoroughly when switching from black clay back to yellow or white to avoid smudging dark lint onto light colors.
Step 2: Adding Details and Wings
-
Make the Wings:
Flatten a piece of white clay. Use a small round cutter or shape two teardrops by hand. They should be slightly thick to hold their shape. -
Texture the Wings:
I like to use a clean toothbrush or a crumpled ball of aluminum foil to gently tap the surface of the wings, giving them a slightly porous, organic texture. -
Attach the Wings:
Press the narrow end of the wings onto the top of the bee, right behind the front black stripe. You can secure them with a touch of liquid clay if you have it. -
Create Antennae:
Cut two short pieces of black wire (about 1 cm each). Roll tiny balls of black clay and push them onto the tips of the wires. -
Insert Antennae:
Press the wire ends into the head area, just in front of the wings. Angle them outward slightly for a cute look.
Step 3: Creating the Face
-
Shape the Eyes:
Roll two small balls of black clay and flatten them into ovals. Press them onto the yellow face area, spacing them somewhat wide apart. -
Add the Sparkle:
Roll extremely tiny specks of white clay and place one in the upper corner of each black eye. This reflection brings the character to life. -
Add Cheeks:
Take two tiny amounts of pink clay, roll them into balls, and flatten them onto the face just below and outside the eyes. -
Sculpt the Mouth:
Roll a very thin whisper of black clay into a tiny ‘U’ shape. Press it gently between the cheeks using a needle tool to create a smile.
Droopy Antennae?
If the wire antennae won’t stay upright in soft clay, bake the clay body first. Then drill tiny holes, insert the wires with superglue, and touch up with paint.
Step 4: Making Miniature Buddies
-
Form Smaller Bodies:
For the background bees, create smaller marble-sized balls. One can be yellow like the main bee, and one can be primarily black with yellow stripes for variety. -
Simplify Details:
Give these smaller bees simpler round wings. For the ladybug, create a tiny red half-sphere and dot it with black clay spots. -
Bake:
Place all your bugs on a baking sheet lined with parchment paper. Bake according to your clay package instructions (usually 275°F/135°C for 15-30 minutes). -
Cool and Finish:
Let the pieces cool completely. If any parts feel loose, secure them with a tiny drop of superglue.
Arrange your buzzing family on a wooden slice or shelf to enjoy their charming company
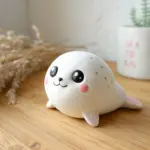
Under-the-Sea Kawaii Creatures
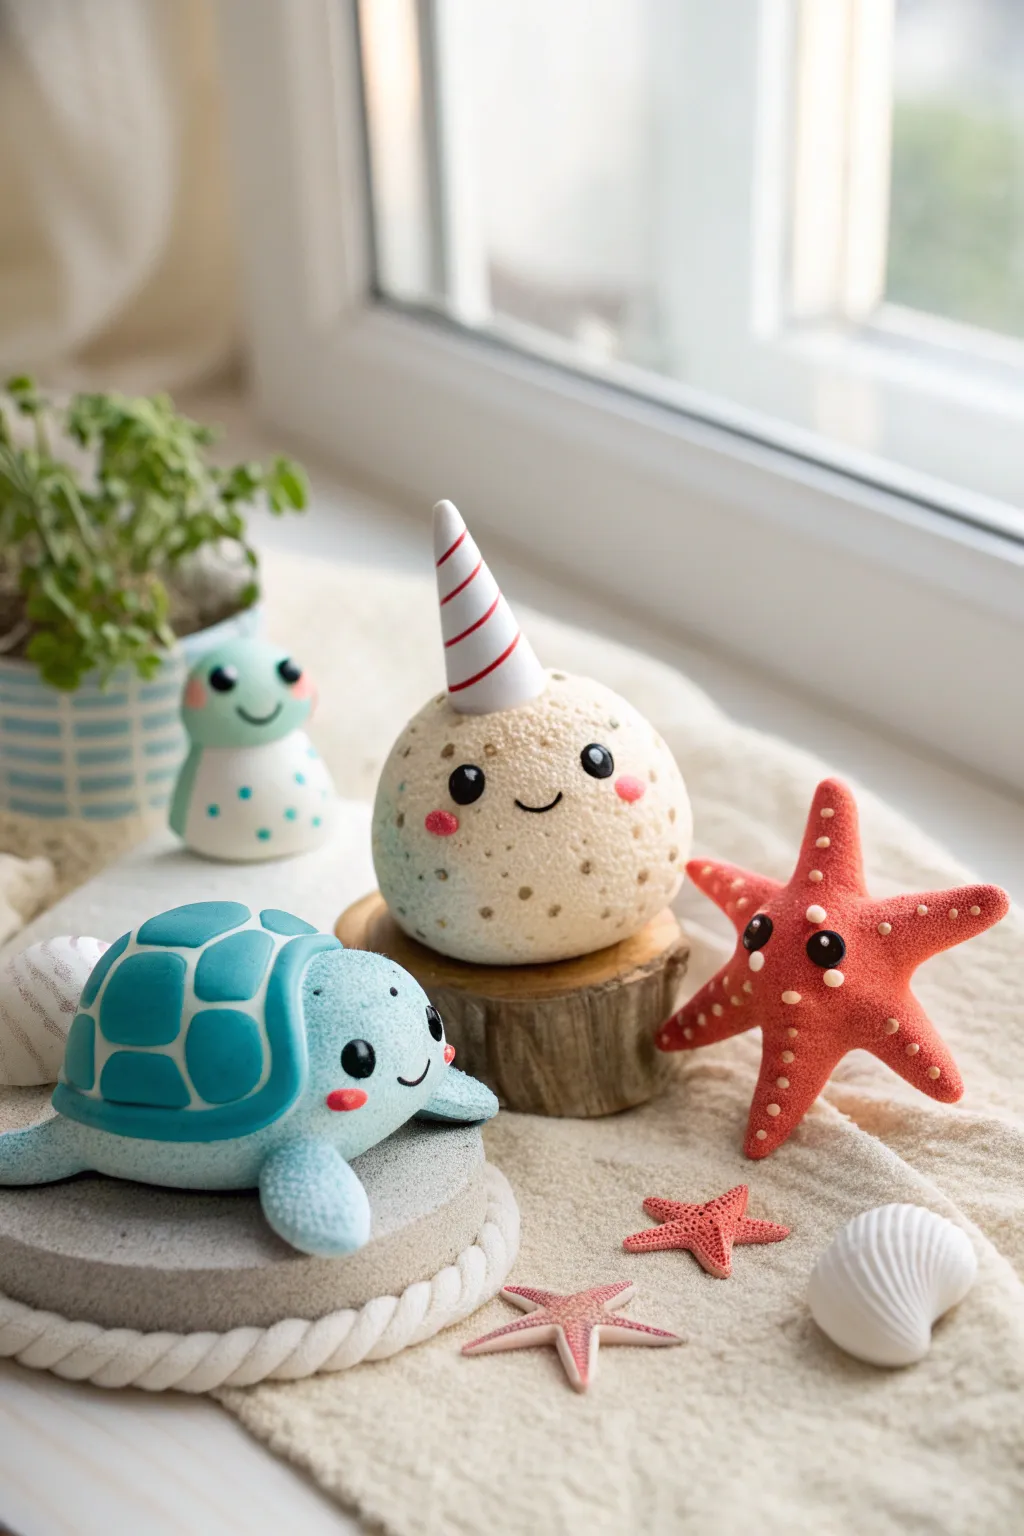
Dive into crafting with these three adorable ocean friends, featuring distinct textures and sweet, simple faces. This tutorial guides you through sculpting a sturdy sea turtle, a round bubbly narwhal, and a cheerful starfish, perfect for a summer window display.
Step-by-Step Guide
Materials
- Polymer clay (light blue, teal, cream/white, red/coral, black, pink)
- Ball stylus tools (various sizes)
- Needle tool or toothpick
- Old toothbrush or stiff bristle brush (for texturing)
- Small circle cutter (optional)
- Acrylic rolling pin
- Liquid polymer clay (Bake and Bond)
- Gloss glaze (optional for eyes)
- Baking sheet and parchment paper
- Soft pastel chalks (optional for shading)
Step 1: Sculpting the Narwhal
-
Create the Body:
Start with a large ball of cream or white clay mixed with a tiny speck of light blue for a cool undertone. Roll it into a smooth, slightly flattened sphere. -
Add Texture:
Gently tap the surface of the sphere with an old toothbrush or a stiff brush to create a pitted, stone-like texture. Avoid texturing the area where the face will go if you prefer it smooth, though the example shows texture all over. -
Form the Horn:
Roll a small cone of white clay. Twist a thin snake of red clay around it to create the spiral stripe pattern. Gently roll the cone on your work surface to embed the red stripe flush with the white clay. -
Attach the Horn:
Use a dab of liquid clay to secure the horn to the very top center of the narwhal’s head. -
Make the Face:
Press two small indentations for eye sockets using a ball tool. Insert small balls of black clay and press them flat. Add tiny white clay dots for highlights. -
Final Details:
Roll very small pink ovals for cheeks and press them under the eyes. Use a needle tool or small blade to impress a simple curved smile between the eyes.
Uneven Texture?
If the toothbrush texture isn’t deep enough, try pressing a crumpled ball of aluminum foil against the raw clay for a rougher, more stony surface.
Step 2: Crafting the Sea Turtle
-
Shape the Shell:
Form a dome shape using teal or dark turquoise clay. Smooth it out so there are no fingerprints. -
Create Shell Scutes:
Roll out a thin sheet of lighter blue or white clay. Cut out rounded geometric shapes (pentagons or soft squares) and gently press them onto the shell, leaving thin gaps of the dark clay showing between them to act as grout lines. -
Form the Head and Flippers:
Using light blue clay, shape a rounded teardrop for the head and four flattened teardrops for flippers. Texture these pieces with your toothbrush to match the narwhal’s finish. -
Assemble the Body:
Attach the head to the front of the shell and the flippers underneath. I like to blend the clay slightly on the underside to ensure a strong bond. -
Add Facial Features:
Just like the narwhal, create indentations for the eyes and insert black clay beads with white highlights. Add pink clay cheeks and use a needle tool to carve a small smile.
Step 3: Shaping the Starfish
-
Create the Star Shape:
Start with a ball of coral or reddish-orange clay. Flatten it slightly and pinch out five points to create a star shape. Soften the tips so they are rounded, not sharp. -
Apply Heavy Texture:
Use a toothbrush or a piece of sandstone to aggressively texture the surface, giving it a porous, organic look. -
Add Sucker Details:
Roll tiny balls of cream-colored clay and press them randomly over the arms of the starfish to mimic the texture found on real sea stars. -
Give it Personality:
Add the signature kawaii face: widely spaced black safety eyes (or clay eyes) and a tiny mouth. -
Bake the Set:
Arrange all three figures on a baking sheet lined with parchment paper. Bake according to your clay manufacturer’s instructions (usually 275°F/135°C for 15-30 minutes).
Level Up: Beach Scene
Display your finished trio on a wooden coaster covered with glue and real sand to create a permanent mini diorama for your shelf.
Enjoy your new collection of textured ocean friends as they brighten up your windowsill

TRACK YOUR CERAMIC JOURNEY
Capture glaze tests, firing details, and creative progress—all in one simple printable. Make your projects easier to repeat and improve.
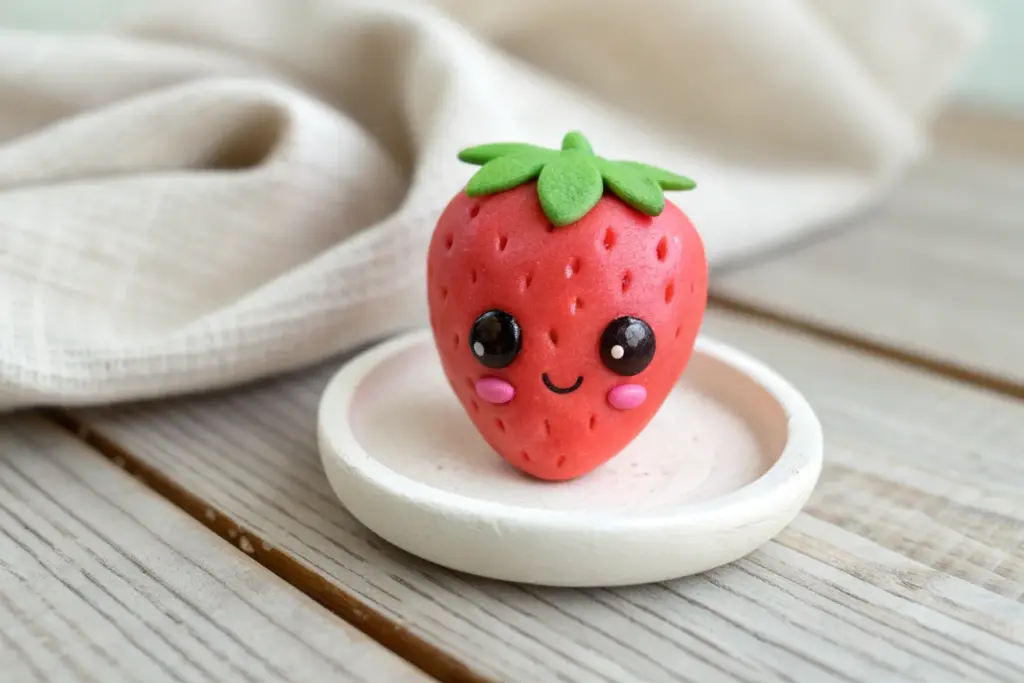
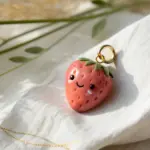
BFF Split Charms That Go Together
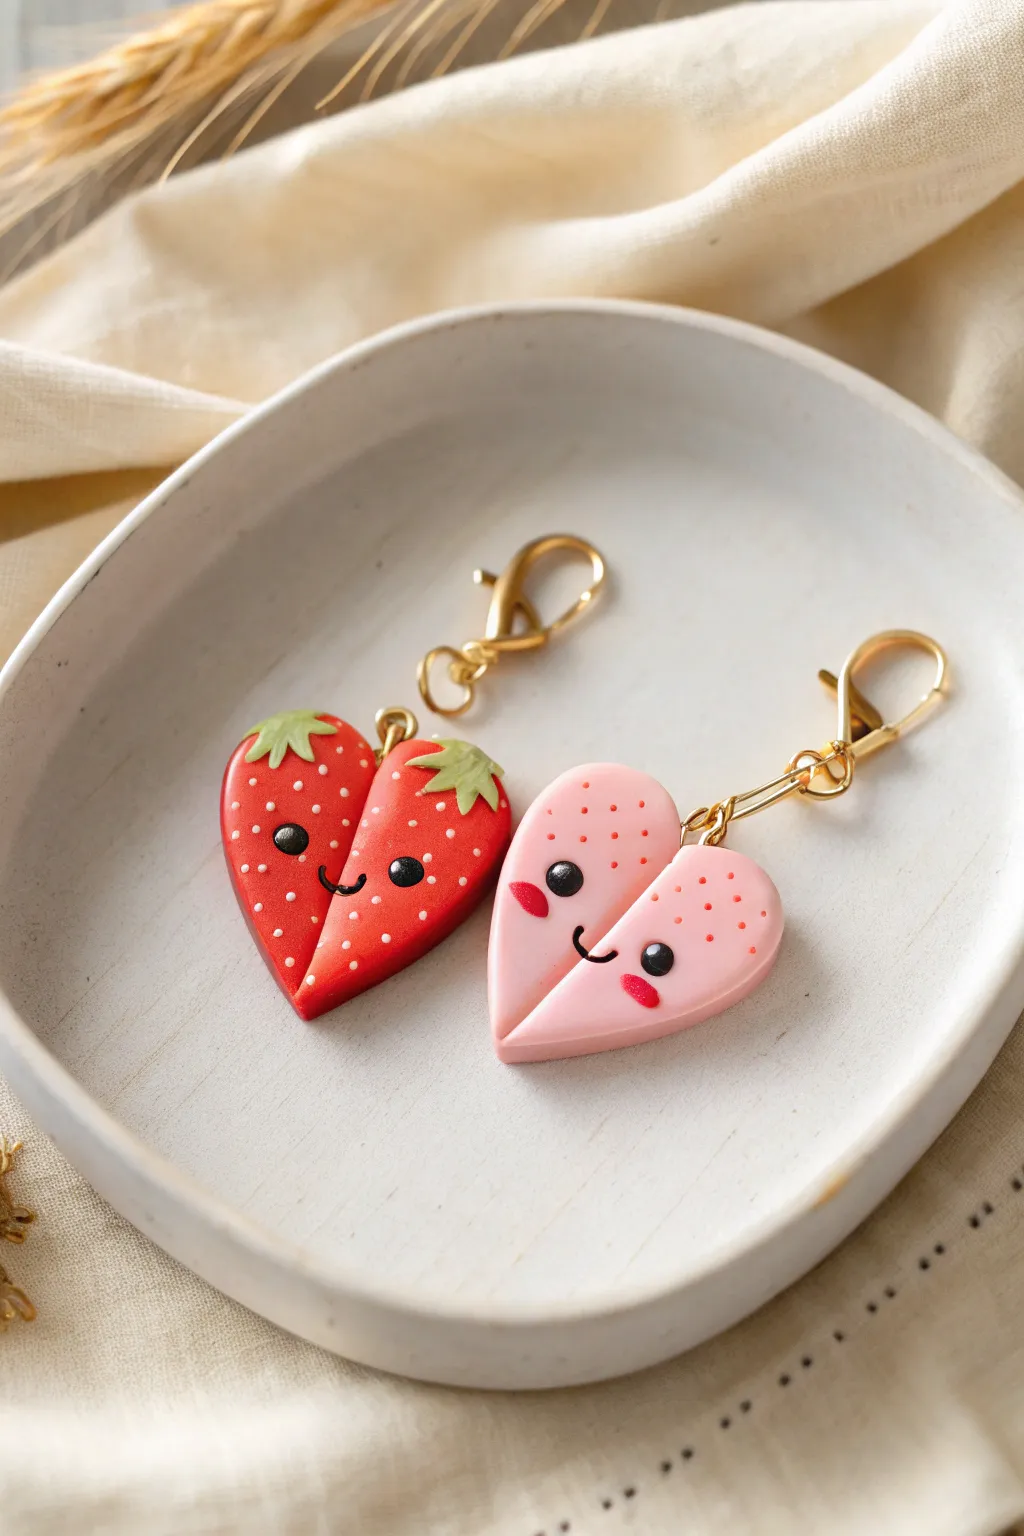
Celebrate friendship with these adorable matching heart charms, disguised as smiling strawberries. One side features a classic juicy red, while the other is a soft pastel pink, perfectly shaped to fit together like puzzle pieces.
Step-by-Step
Materials
- Polymer clay (Bright Red, Light Pink, Green, White, Black, Dark Pink)
- Clay roller or pasta machine
- Heart-shaped clay cutter (medium size)
- Exacto knife or flexible tissue blade
- Ball stylus tool (small)
- Needle tool
- Eye pins (gold or silver)
- Jump rings and lobster clasps
- Polymer clay glaze (optional)
- Liquid polymer clay (optional, for secure bonding)
Step 1: Shaping the Base Hearts
-
Conditioning the Clay:
Begin by thoroughly conditioning your bright red and light pink clay separately. Knead them until they are soft, pliable, and free of cracks. -
Rolling the Slabs:
Roll each color out into a slab that is approximately 4mm to 5mm thick. You want them to be chunky enough to hold the hardware securely. -
Cutting the Hearts:
Use your heart-shaped cutter to punch out one red heart and one pink heart. If the edges are rough, gently smooth them with your finger. -
Creating the Split:
This is the crucial matching step. Take your blade and make a zig-zag cut down the center of each heart. Try to make the cuts identical if possible, or use one cut heart as a template for the other so they nestle together perfectly.
Step 2: Adding Strawberry Details
-
Making the Leaves:
Condition a small amount of green clay. Flatten it into a thin sheet and use your needle tool or a tiny cutter to create small, distinct leaf shapes. -
Attaching the Leaves:
Press the green leaves gently onto the top rounded humps of the red heart. For the pink heart, you can choose to skip the leaves for a simpler look, or add them to match. -
Adding Texture:
Use a needle tool to gently impress tiny lines into the green leaves, giving them effortless realistic texture. -
Applying the Red Seeds:
For the red strawberry, roll tiny, microscopic snakes of white clay. Slice off tiny bits and press them onto the surface to act as seeds. -
Applying the Pink Seeds:
Repeat the process for the pink strawberry, but use darker pink clay for the seeds instead of white to keep the pastel theme soft.
Clean Cuts Pro-Tip
Chill your clay slabs in the fridge for 10 minutes before cutting the zig-zag split. Cold clay resists purposeful deformation, giving you much sharper edges.
Step 3: Bringing Them to Life
-
Socketing the Eyes:
Use a small ball tool to make two indentations on each charm where the eyes will go. Place them somewhat low on the heart for that classic kawaii proportion. -
Inserting the Eyes:
Roll tiny distinct balls of black clay and press them into the sockets. Flatten them just slightly so they don’t bulge out too much. -
Adding the Smile:
Roll an incredibly thin snake of black clay. Cut a tiny U-shape and gently press it into the clay between the eyes using your needle tool. -
Cheeky Details:
For the pink heart, add oval-shaped flattened disks of dark pink clay under the eyes for blush marks. The red strawberry is cute enough without them, keeping the face clean.
Dirty Clay Troubleshooting
Light pink clay picks up dust easily. Keep a pack of baby wipes nearby and clean your hands and tools thoroughly before switching from the red or black clay to the pink.
Step 4: Assembly and Baking
-
Trimming Eye Pins:
Trim your eye pins so the stems are about 1cm long. If the stem is too smooth, bend the end slightly so it anchors better inside the clay. -
Inserting Hardware:
Push the eye pin into the top center of each charm half. I usually dip the end in a tiny bit of liquid clay before inserting it to ensure it never pulls out. -
Baking:
Bake the charms according to your clay package instructions (usually 275°F or 130°C for 15-30 minutes). Tent them with foil to prevent the white or light pink from scorching. -
Final Touches:
Once cool, you can attach your jump rings and lobster clasps. Finish with a coat of polyurethane glaze if you want a shiny, candy-like finish.
Now you have a sweet set of charms ready to share with your favorite person
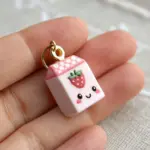
Mini Drink Cartons With Cute Faces
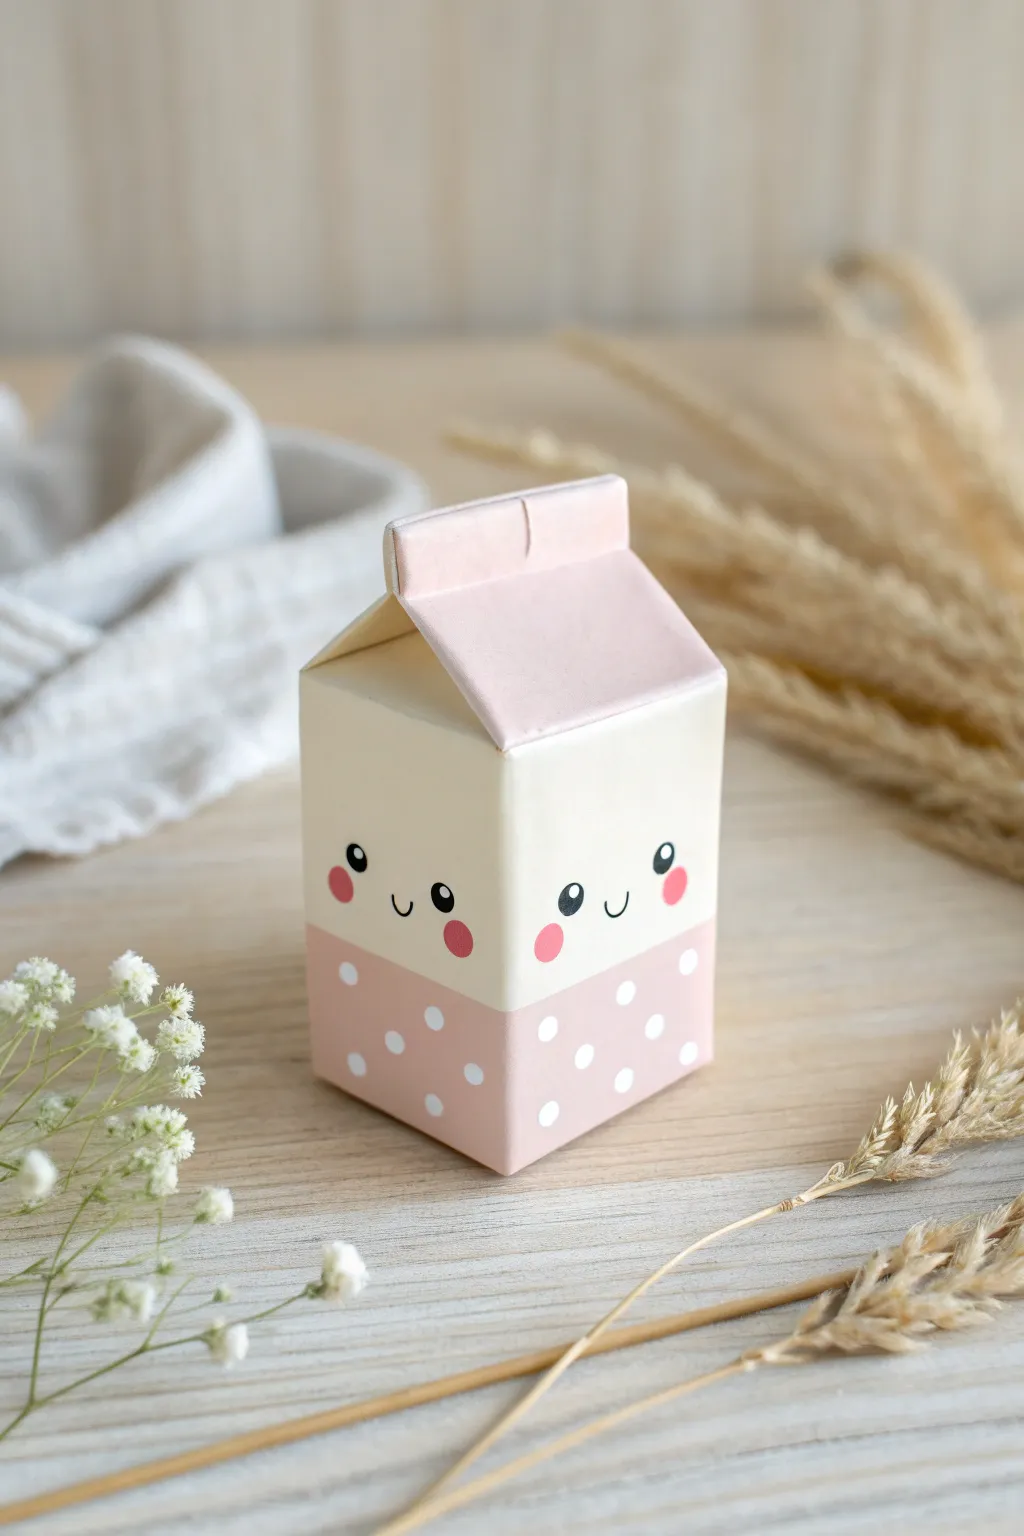
Craft an adorable miniature milk carton that brings a splash of kawaii charm to your desk or shelf. With its soft pastel colors, tiny polka dots, and sweet smiling face, this polymer clay project captures the essence of cute packaging without the expiration date.
Step-by-Step Guide
Materials
- White polymer clay
- Pastel pink polymer clay
- Black polymer clay (or black acrylic paint/fine liner)
- Blade or X-Acto knife
- Rolling pin or pasta machine
- Square clay cutter (approx. 1 inch)
- Small ball stylus tool
- Needle tool
- Liquid polymer clay (optional, for bonding)
- Matte varnish (optional)
Step 1: Creating the Carton Base
-
Prepare the Clay:
Condition your white and pink clay separately until they are soft and pliable. Roll out a thick slab of white clay, aiming for about 3/4 inch thickness to form a solid block base, or construct a hollow box if you prefer a lighter piece. -
Shape the Main Block:
Using a blade, trim the white clay into a neat rectangular prism. This will serve as the main body of the milk carton. Ensure the sides are flat and corners are crisp. -
Add the Pink Bottom:
Roll out a thin sheet of pastel pink clay. Cut a strip that is wide enough to cover the bottom third of your white block and long enough to wrap all the way around. -
Wrap the Base:
Carefully wrap the pink strip around the bottom of the white block. Gently press the seams together at the back and smooth them out with your finger or a clay shaper so the transition between white and pink is flush.
Keeping White Clay Clean
White clay picks up lint easily. Keep a pack of wet wipes or baby wipes nearby to clean your hands and tools often, and roll the clay on a clean surface.
Step 2: Forming the Carton Top
-
Create the Roof Triangle:
Shape a triangular prism from white clay that fits perfectly on top of your rectangular block. The width should match the block exactly. -
Make the Top Flap:
Roll out a thin sheet of pink clay. Cut a rectangular piece that will fold over the top of the triangular prism to create the sealed carton look. -
Assemble the Top:
Drape the pink sheet over the triangular prism. The edges should overhang slightly. Pinch the top center of the pink sheet vertically to mimic the sealed ridge of a real milk carton. -
Detail the Seal:
Use a needle tool or the back of your blade to press a vertical line down the center of the pinched ridge, creating the separation seen on folded carton tops. -
Attach Top to Body:
Place the roof section onto the main body. I like to use a tiny drop of liquid polymer clay here to ensure a strong bond before baking. Gently smooth the seams where the roof meets the walls.
Step 3: Adding Kawaii Details
-
Create the Polka Dots:
Roll out a tiny amount of white clay extremely thin. Use a very small round cutter or a straw to punch out miniature circles. -
Apply the Pattern:
Gently press the white dots onto the pink bottom section of the carton in a staggered pattern. Make sure they are flush with the surface. -
Add the Eyes:
Roll two tiny balls of black clay and flatten them slightly onto the white section of the carton to form the eyes. Place them wide apart for maximum cuteness. -
Add Sparkle:
Place a microscopic dot of white clay in the upper corner of each black eye to create a ‘sparkle’ reflection. -
Create Cheeks:
Roll two small circles of pink clay (slightly darker than the base pink if possible) and press them just below and outside the eyes. -
Form the Mouth:
Roll an incredibly thin snake of black clay. Cut a tiny U-shape and carefully press it between the eyes using a needle tool. -
Repeat the Face:
Since the carton has four sides, you can repeat the face on the opposite side, or even all four sides if you want it to be cute from every angle.
Turn it into a Charm
Before baking, insert a metal eye pin into the center of the top ridge. Once baked, you can attach it to a keychain, necklace, or distinct zipper pull.
Step 4: Finishing Touches
-
Final Smoothing:
Do a final check for fingerprints. Lightly brush with baby oil or use cornstarch on your finger to buff away any imperfections before baking. -
Baking:
Bake the piece according to your polymer clay brand’s instructions (usually 275°F/135°C for 15-30 minutes depending on thickness). Use an oven thermometer to prevent burning. -
Cool and Protect:
Let the carton cool completely inside the oven to prevent cracking. Once cool, you can apply a thin coat of matte varnish to protect the surface and keep it looking like paper.
Now you have a sweet little strawberry milk carton that brings a smile to any space it occupies
Balloon Animal Minis in Kawaii Style
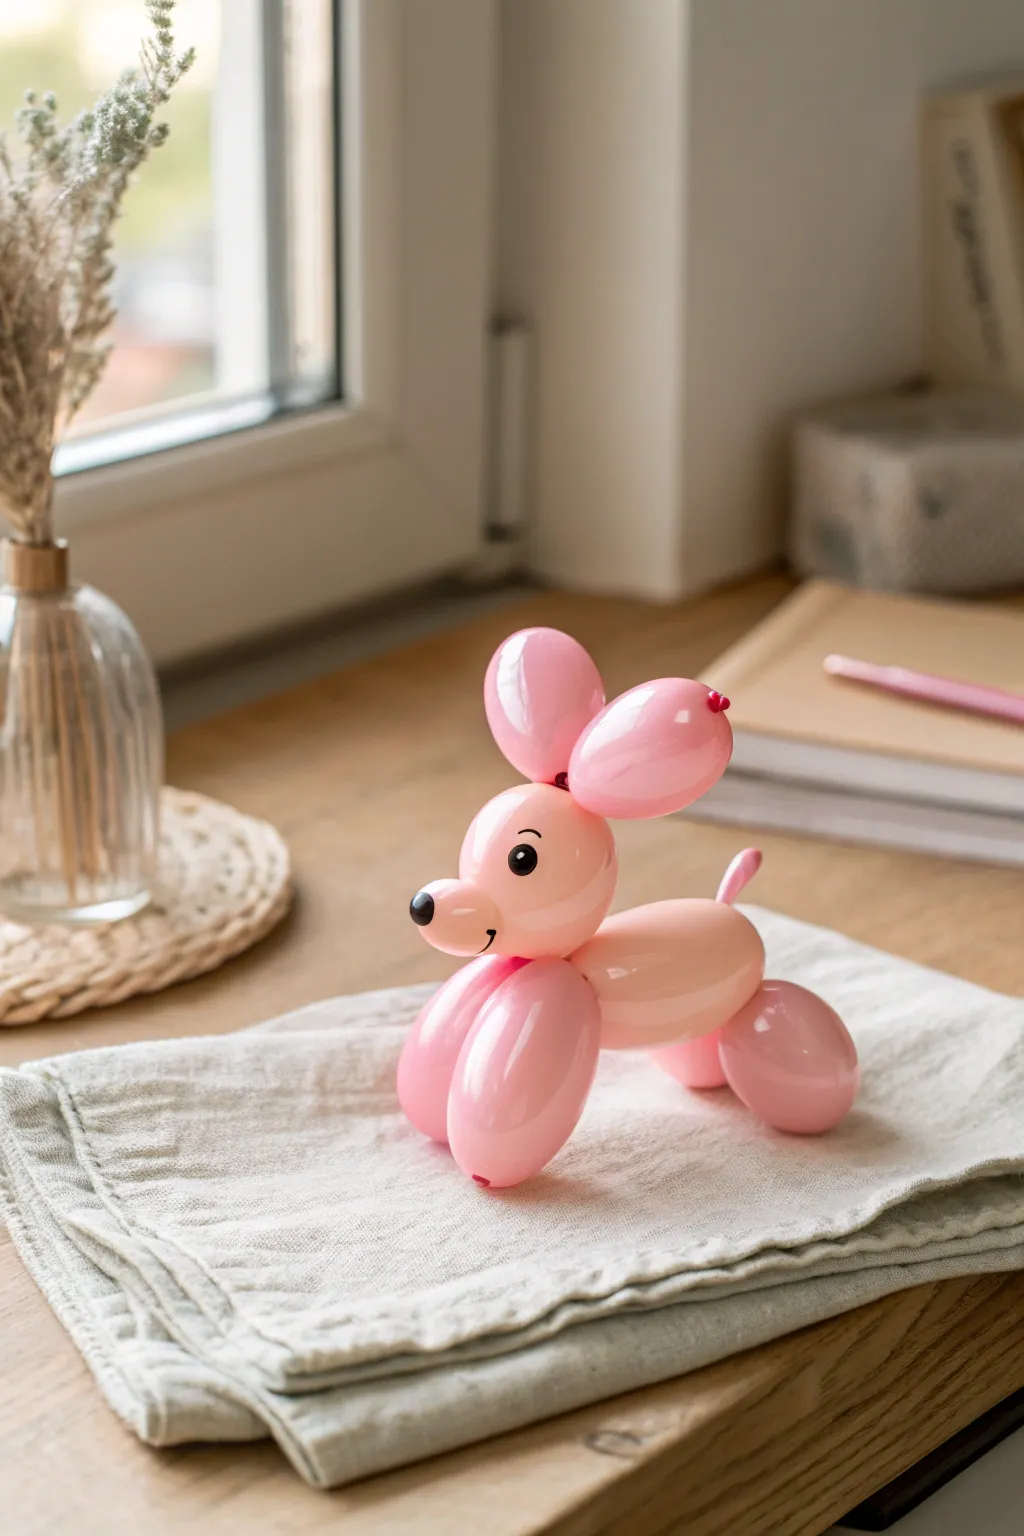
Capture the whimsical charm of a classic balloon animal without the risk of popping using this clever polymer clay technique. This adorable pink poodle features a high-gloss finish and sweet painted details that give it that authentic, squeaky-clean balloon look.
How-To Guide
Materials
- Polymer clay (baby pink or bubblegum pink)
- Gloss varnish or UV resin
- UV light (if using resin)
- Black acrylic paint
- Very fine detail paintbrush
- Ball stylus tool
- Needle tool
- Isopropanol (rubbing alcohol) and Q-tips
- Ceramic tile or glass work surface
Step 1: Prepping the ‘Balloons’
-
Conditioning:
Begin by thoroughly conditioning your pink clay until it is soft and pliable. Since we are mimicking smooth balloons, any cracks in the clay will be very visible, so take your time kneading. -
Creating the segments:
Roll a smooth, even log of clay about 1/2 inch thick. From this log, you will cut segments to form the different body parts. You’ll need four distinct capsule shapes: two shorter ones for the ears, one medium for the head/snout, and one larger one for the body. -
Rounding the edges:
Take each cut segment and gently roll the ends between your fingers to round them off completely. They should look like little sausages or medicinal capsules, not cylinders with flat ends.
Clean Slate Tip
Keep a pack of wet wipes or a cotton pad with rubbing alcohol nearby. Use them to wipe your hands and tools constantly to prevent dust from getting trapped in the pink clay.
Step 2: Assembling the Head
-
Forming the snout:
Take the medium-sized segment intended for the head. Gently pinch one end to be slightly narrower than the other, creating a definitive snout area versus the back of the head. -
Attaching the ears:
Take your two ear segments. Press them together at one end to form a V-shape. Place the back of the head segment securely into the crook of the ears. -
Blending mimicry:
Instead of smoothing the seams away completely like normal sculpture, you want to maintain the distinct ‘balloon’ separation. However, use a small dab of liquid clay or Score and Slip to ensure they stick. -
Adding the knot:
Roll a tiny, tiny ball of pink clay and flatten it slightly. Press this onto the gathered point between the ears to mimic the tied knot of a real balloon.
Step 3: Building the Body
-
Structuring the legs:
Create four identical, slightly smaller sausage shapes for the legs. Pair them up—two for front legs, two for back legs—pressing them side-by-side vertically. -
Connecting the torso:
Place your longest capsule shape horizontally across the tops of the two leg pairs. Ensure the front legs are positioned slightly forward for stability. -
Adding the tail:
Roll a very small, thin cone shape for the tail. attach it to the rear of the body segment, angling it upwards for a perky look.
Pastel Party
Make a whole litter! Try using translucent clay mixed with a tiny bit of alcohol ink to create a ‘jelly’ balloon animal look that lets light pass through slightly.
Step 4: Bringing it Together
-
Final assembly:
Attach the finished head assembly to the front of the body segment. If the neck area feels weak, you can insert a small piece of wire or a toothpick cut to size for internal support. -
Smoothing fingerprints:
Before baking, lightly brush the entire sculpture with a little baby oil or cornstarch to smooth out any fingerprints. The surface needs to be flawless. -
Baking:
Bake the clay according to the manufacturer’s instructions on your package. Let it cool completely before moving to the decoration phase.
Step 5: Details & Finish
-
Painting the face:
Using a fine detail brush and black acrylic paint, add a small oval on the snout for the nose. Paint two small circles for eyes, adding tiny eyelashes if desired for extra cuteness. -
Adding the smile:
Paint a tiny, curved line under the snout for a mouth. I find it helpful to brace my pinky finger against the table to steady my hand for these fine lines. -
Applying the gloss:
Once the paint is fully dry, apply a thick coat of UV resin or high-gloss varnish. This step is crucial—it transforms the clay from matte to the shiny texture of latex. -
Curing:
If using resin, cure under a UV light for 2-3 minutes until hard and tack-free. If using varnish, allow it to dry in a dust-free area for 24 hours.
Place your shiny new pup on a shelf where it can catch the light and show off that realistic balloon texture
Sunny Seasonal Icons With Faces
Brighten up any dreary day with this adorable, radiant sun charm that seems to be smiling right back at you. Its textured surface gives it a sweet, sugary appearance, making it perfect for a cute necklace pendant or a cheerful keychain.
Detailed Instructions
Materials
- Polymer clay (Bright Yellow, Light Pink, Black)
- Circle cutter (approx. 1 inch)
- Needle tool or toothpick
- Dotting tool (small and medium)
- X-Acto knife or clay blade
- Eye pin
- Toothbrush or sandpaper (for texturing)
- Gloss glaze or UV resin (optional)
- Oven
Step 1: Creating the Base
-
Condition the Clay:
Start by taking a chunk of bright yellow polymer clay. Warm it up in your hands by kneading it until it is soft, pliable, and free of cracks. -
Roll and Cut:
Roll the yellow clay into a sheet about 1/4 inch thick. Use your circle cutter to punch out the main face of the sun. Set this circle aside on your baking tile. -
Create Texture:
To achieve that sugary, stone-like texture seen in the photo, gently tap the surface of your yellow circle with a clean toothbrush or a piece of coarse sandpaper. Do this lightly so you don’t distort the shape.
Clean Clay Pro Tip
Yellow clay shows dirt easily! Keep a pack of baby wipes nearby to clean your hands and tools before handling the light colors to avoid lint.
Step 2: Forming the Rays
-
Roll a Snake:
Take the remaining yellow clay and roll it into a long snake. Try to keep the thickness consistent. -
Cut Triangles:
Flatten the snake slightly with your finger. Using your blade, cut small, equal-sized triangles. You will need about 10-12 triangles depending on the size of your circle. -
Attach the First Ray:
Pick up a triangle and gently press the wide base against the edge of your textured circle. You can use a dab of liquid clay or translucent sculpey as ‘glue’ if the clay is dry. -
Complete the Sunburst:
Continue attaching the triangles all the way around the circumference. Use your needle tool to blend the seams on the *back* of the charm to secure them, but keep the front distinct. -
Texturing the Rays:
Don’t forget to texture the triangles too! Gently tap them with your toothbrush so they match the central face.
Loose Rays?
If the sun rays fall off after baking, don’t panic. A tiny drop of superglue or E6000 adhesive will reattach them permanently.
Step 3: Adding the Kawaii Face
-
Eye Sockets:
Use a medium-sized dotting tool to make two small indents where the eyes will go. This helps the bead eyes sit securely. -
Insert Eyes:
Roll two tiny balls of black clay. Place them into the indents you just made. Gently press them down so they don’t look like they are bulging out too much. -
Draft the Smile:
Using a thin needle tool, lightly sketch the curve of the smile between the eyes. Once you are happy with the placement, press the tool deeper to form the mouth line. -
Make the Blush:
Take a tiny amount of light pink clay and divide it into two equal specks. Roll them into balls. -
Apply Cheeks:
Place the pink balls just below and to the outside of the eyes. Flatten them onto the sun’s face with your finger or a flat tool to create rosy cheeks. -
Final Texture Touch-up:
Lightly re-texture the pink cheeks and any areas you might have smoothed out while handling the face.
Step 4: Hardware and Baking
-
Insert Eye Pin:
Take a metal eye pin and trim it if the stem is too long. Insert it into the top ray of the sun, pushing it down carefully so it enters the main circle for stability. -
Secure the Pin:
I prefer to wiggle the clay around the pin slightly to close the hole tight. You can also add a drop of liquid clay on the pin before inserting. -
Bake:
Bake the charm according to your clay manufacturer’s instructions (usually 275°F or 130°C for 15-30 minutes). -
Cool Down:
Let the piece cool completely before touching it, as hot clay is fragile. -
Varnish (Optional):
For extra durability and a slight shine, coat the eyes and cheeks with a gloss glaze or UV resin.
Now you have a little pocket of sunshine to carry with you wherever you go
Magical Kawaii Creature Keychains
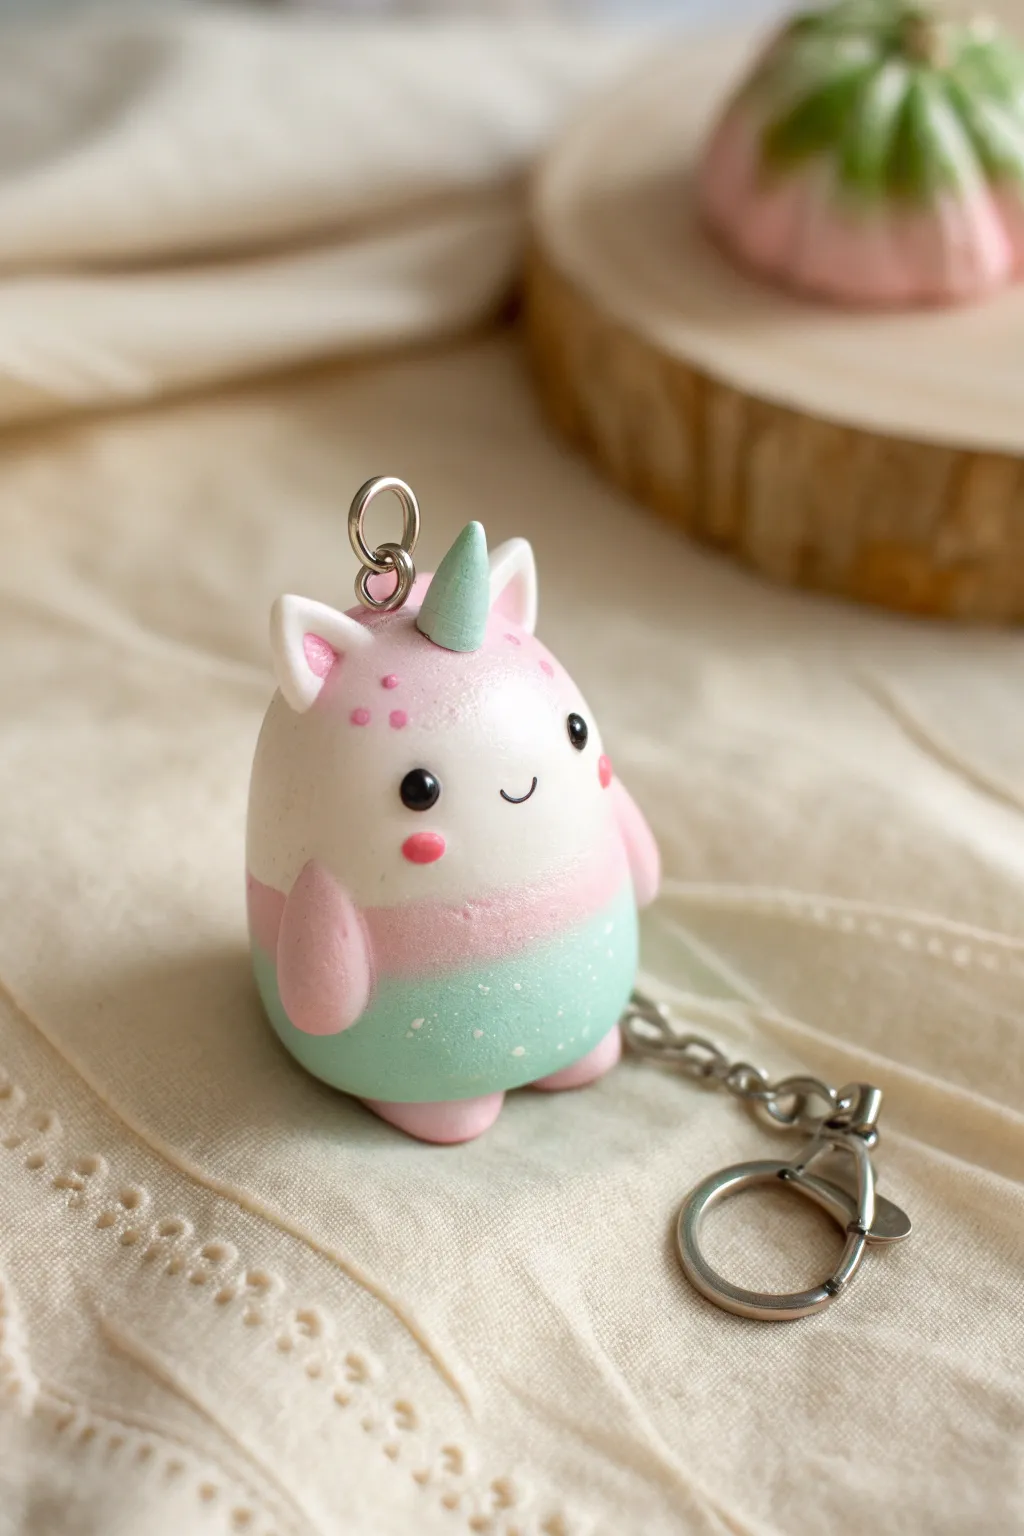
This pudgy little unicorn combines magical creature vibes with a refreshing watermelon color palette. With its rounded shape, soft gradients, and tiny horn, it makes for an irresistibly cute keychain that looks good enough to eat.
Step-by-Step
Materials
- Polymer clay (White, Pastel Pink, Mint Green)
- Black polymer clay or black acrylic paint (for eyes)
- Liquid polymer clay or translucent liquid sculpey (TLS)
- Eye pin or screw eye
- Keychain hardware (jump rings, chain, ring)
- Dotting tool or small ball stylus
- X-acto knife or clay blade
- Soft pastel chalks (Pink)
- Fine paintbrush
- Glaze (satin or matte)
Step 1: Forming the Body
-
Mix the Core:
Start by conditioning a large ball of white clay. This will form the main shape of the creature. Roll it into a smooth egg shape, slightly flatter on the bottom so it can stand. -
Add color sections:
To achieve the tri-color look, you don’t need to slice the whole egg. Instead, roll out a thin sheet of pastel pink clay and a thin sheet of mint green clay. -
Layer the green:
Cut a strip of the mint green clay and wrap it around the bottom third of your white egg shape. Smooth the seam at the back and gently blend the top edge into the white clay using your finger or a silicone tool. -
Layer the pink:
Cut a slightly narrower strip of pastel pink clay. Wrap this around the middle section, overlapping slightly with the green and the white. -
Blend the gradient:
Gently roll the entire shape between your palms to smooth out the transition lines between the teal, pink, and white layers. You want distinct bands, but smooth surface execution.
Smoother Blends
To fix fingerprints, lightly brush the unbaked clay with a little baby oil or clay softener before adding the tiny face details.
Step 2: Adding Features
-
Create the legs:
Roll two very small balls of pink clay for the feet. Flatten them slightly and attach them side-by-side to the bottom of the green section so the unicorn sits stably. -
Add arms:
Make two small teardrop shapes from pink clay. Press these vertically onto the sides of the body where the pink and green bands meet, creating little resting arms. -
Sculpt the ears:
For the ears, form two small white triangles. Indent the centers with a small ball tool and place a tiny dot of pink clay inside. Pinch perfectly. Attach these to the top of the head. -
Make the horn:
Take a tiny amount of mint green clay and roll it into a cone. Twist it gently to give it a spiral texture, then attach it to the center of the forehead, right between the ears. -
Insert hardware:
Before baking, carefully screw an eye pin into the very top of the head, behind the horn. You can secure it with a drop of liquid clay for extra hold.
Step 3: Details & Finishing
-
Add the face:
Roll two minuscule balls of black clay for the eyes and press them firmly onto the face area. I find placing them slightly wide apart increases the kawaii factor. -
Create the mouth:
Roll a microscopically thin snake of black clay and curve it into a ‘U’ shape for a smile. Alternatively, you can paint this on after baking if working this small is difficult. -
Blush and freckles:
Using a dotting tool, dab small pink cheeks below the eyes. For the forehead ‘freckles,’ use a toothpick to tap on tiny pink dots around the horn area. -
Texture:
If you want the subtle speckled texture seen on the green bottom, take a toothbrush or stiff brush and gently stipple the green clay area. -
Bake:
Bake the piece according to your clay manufacturer’s instructions (usually 275°F/135°C for 15-30 minutes). -
Assembly:
Once fully cooled, attach your chain and split ring to the eye pin using needle-nose pliers. Coat the piece in a matte varnish if desired to protect the surface.
Texture Twist
Mix tiny darker green flecks or glitter into the mint green clay before applying it to mimic real watermelon seeds or fruit texture.
Now you have a sweet little companion to keep your keys safe and your day bright
Mini Planters With Happy Succulents
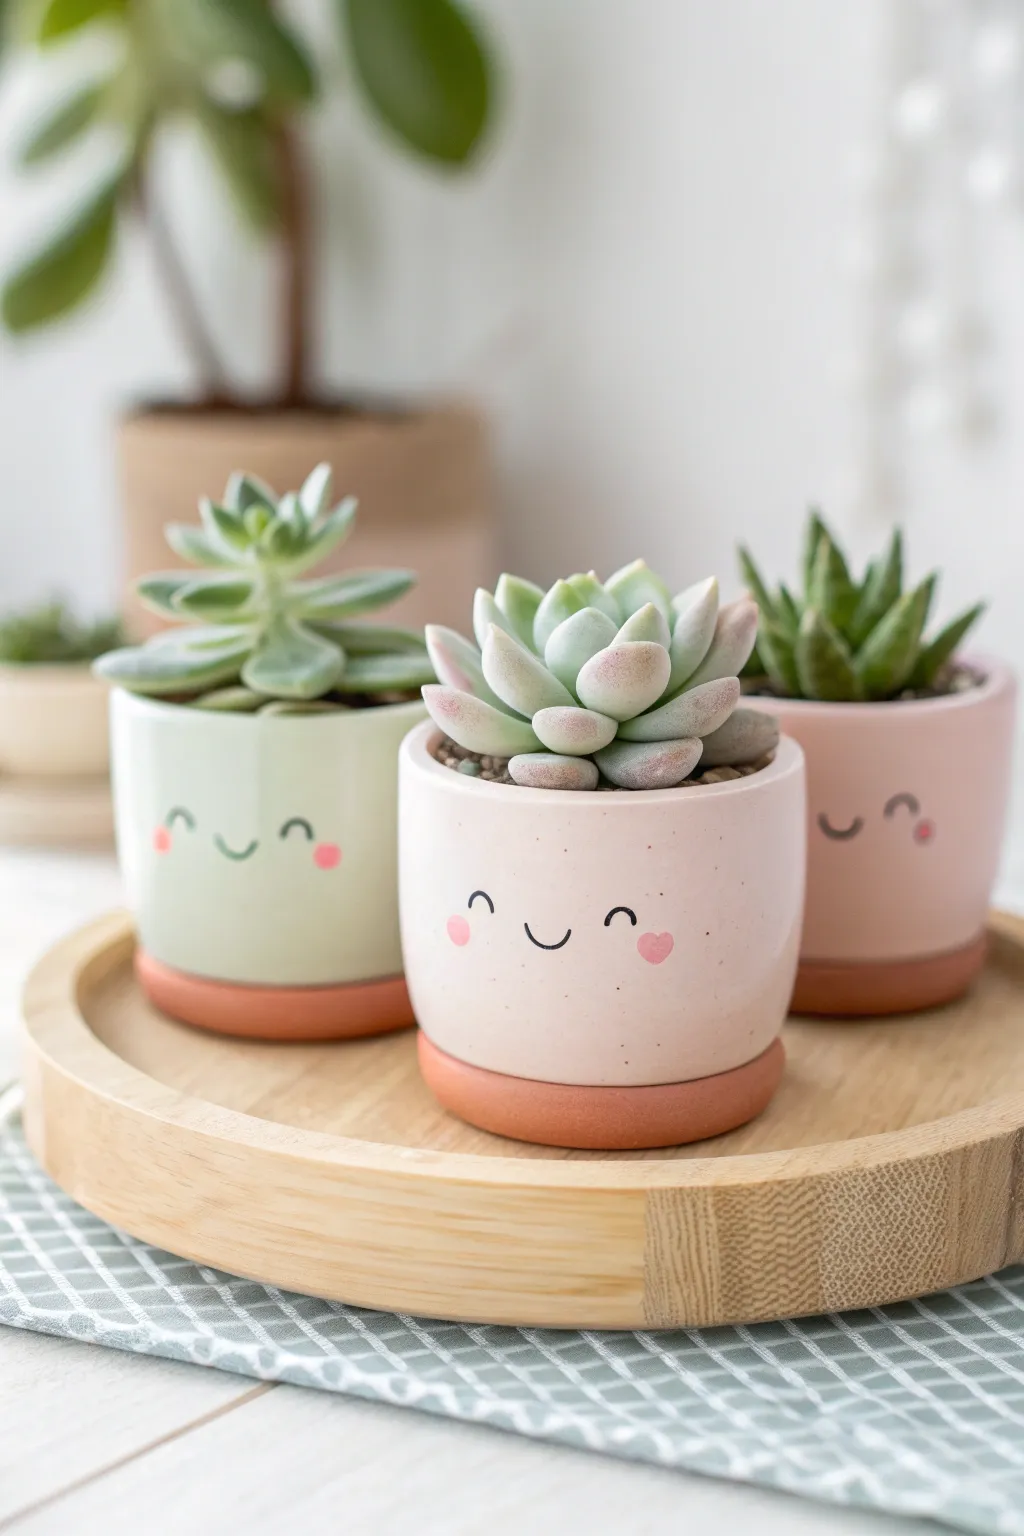
Brighten up your windowsill with these adorable mini planters that mimic the look of glazed ceramic but are crafted entirely from polymer clay. This project features soft pastel tones, charming hand-painted expressions, and a faux terracotta base for a realistic touch.
How-To Guide
Materials
- Polymer clay (white, terracotta/burnt orange, mint green, pastel pink)
- Acrylic rolling pin or pasta machine
- Small round cookie cutter or jar (approx. 2-3 inches diameter)
- Blade or craft knife
- Pottery sponge or smooth cloth
- Acrylic paints (black and pink)
- Fine detail paintbrush or dotting tool
- Matte or satin glaze (compatible with polymer clay)
- Small succulents and potting mix
Step 1: Forming the Base Pots
-
Condition the clay:
Start by conditioning your white, mint, or pink clay until it’s soft and pliable. You’ll need a ball about the size of a tangerine for each pot. -
Create a pinch pot:
Roll the clay into a smooth sphere. Gently press your thumb into the center, pinching and turning the clay to open up the shape into a small bowl. -
Refine the walls:
Aim for even walls about 1/4 inch thick. I like to smooth the sides upward to create a cylinder shape rather than a wide bowl, mimicking a classic planter profile. -
Smooth the surface:
Use your finger or a slightly damp sponge to buff out any fingerprints. The smoother the clay now, the more it will look like ceramic later. -
Prepare the terracotta bottoms:
Condition a smaller amount of terracotta-colored clay. Roll it into a thick sheet, about 1/4 inch thick. -
Cut the bases:
Using a round cutter slightly larger than the bottom of your pinch pots, cut out circles of the terracotta clay. -
Attach the bases:
Press the pastel pot onto the terracotta disk. You can gently smear the seam on the inside to secure it, but keep the distinct line on the outside to look like a saucer. -
Round the edges:
Use your finger to gently round the exposed edge of the terracotta base so it looks soft and finished, not sharp.
Seamless Finish Tip
Before baking, lightly brush the raw clay with a little baby oil or clay softener. This melts away fingerprints and gives a professional smooth finish.
Step 2: Baking and Decorating
-
Bake the pots:
Place your pots on a ceramic tile or baking sheet. Bake according to your clay manufacturer’s instructions (usually around 275°F/135°C for 30 minutes). -
Cool completely:
Let the pots cool down fully inside the oven before removing them to prevent thermal shock cracks. -
Draft the faces:
Lightly sketch the positioning of the eyes and mouth with a pencil if you’re nervous about freehanding the painted details. -
Paint the eyes and mouth:
Using a very fine brush and black acrylic paint, create two small curved arches for happy eyes. Add a small ‘u’ shape for a smiling mouth centered between them. -
Add rosy cheeks:
Dip a dotting tool or the back of a paintbrush into pink acrylic paint. Dab generous circles or small hearts next to the smile for blushing cheeks. -
Seal the work:
Once the paint is bone dry, verify there are no smudges. Apply a coat of satin or matte glaze over the entire pastel section of the pot for a fired ceramic look. -
Planting:
Since these don’t have drainage holes, add a layer of small pebbles to the bottom before adding soil and your chosen succulents.
Wobbly Pot Fix
If your pot rocks after baking, glue a piece of fine sandpaper to a table and gently rub the bottom of the pot in circles until it sits perfectly flat.
Group these cheerful little planters together on a tray for an instant dose of happiness in your room
Kawaii Face Cane Slices for Decor
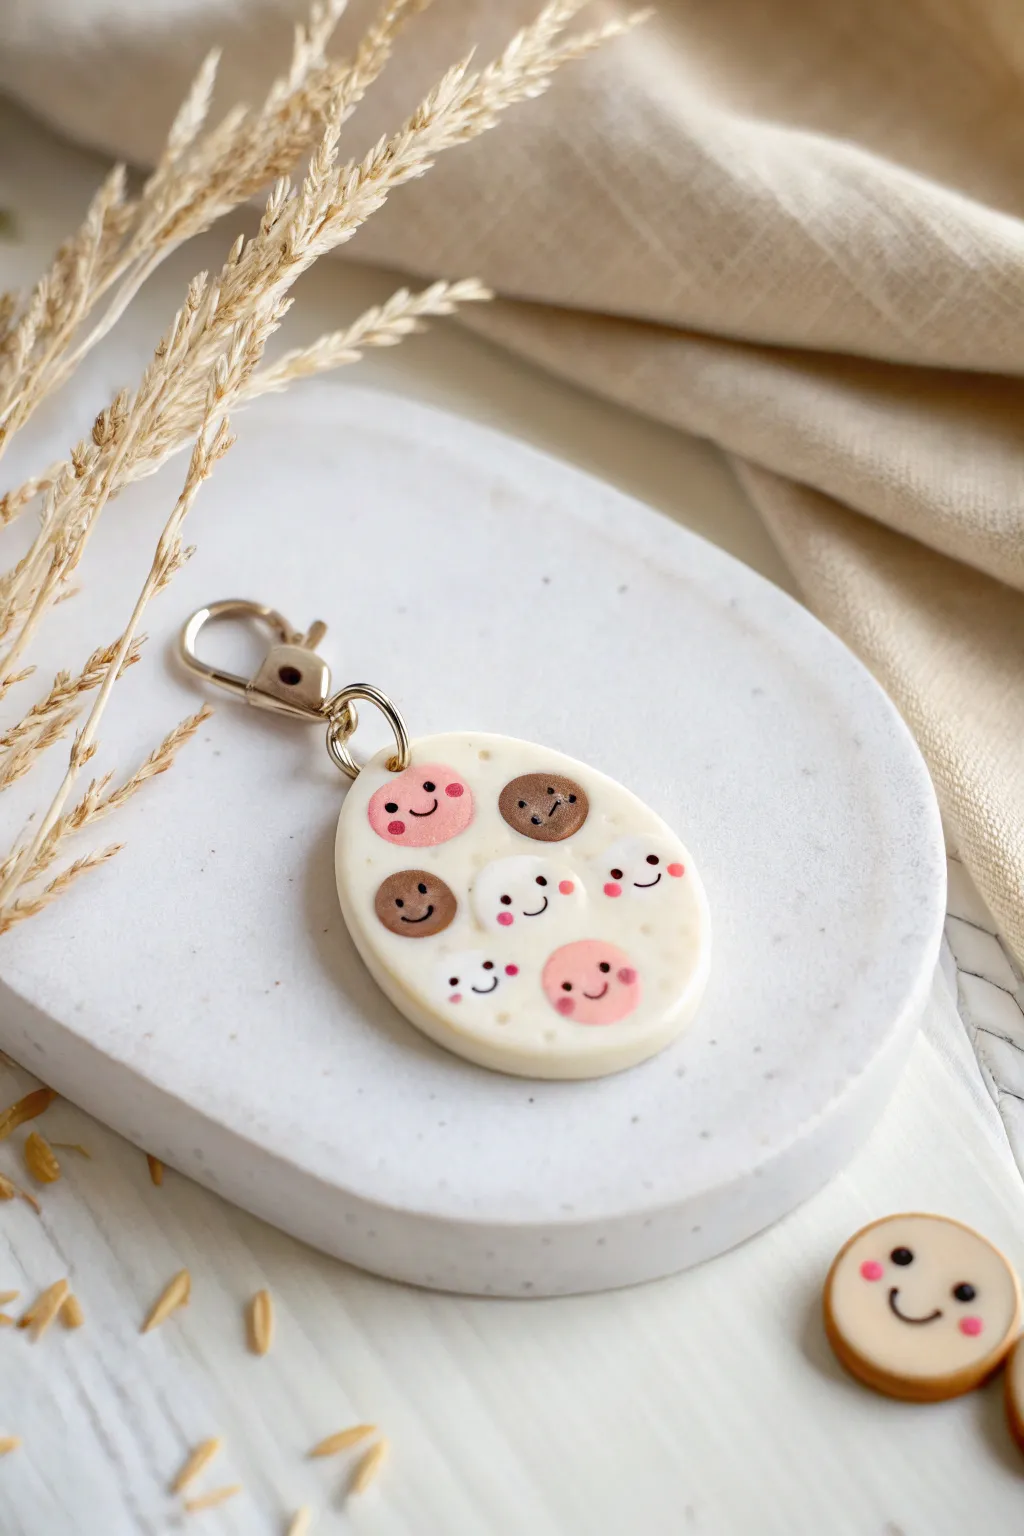
Create a heartwarming accessory that celebrates diversity with this speckled polymer clay charm featuring a collection of tiny, happy faces. This project uses mini face canes to create a smooth, embedded pattern that looks professionally crafted but is surprisingly achievable.
Detailed Instructions
Materials
- Polymer clay in cream/white (for base)
- Polymer clay in assorted skin tones (pinks, browns, beige, white)
- Black acrylic paint or polymer clay paint
- Fine detail dotting tool or toothpick
- Speckling medium (e.g., ground pepper, embossing powder, or pre-speckled clay)
- Small oval clay cutter
- Rolling pin or pasta machine
- UV resin and UV lamp (optional but recommended for shine)
- Jump ring and lobster clasp keychain hardware
- Hand drill or needle tool
- Needle tool
Step 1: Preparing the Speckled Base
-
Condition the base clay:
Start by thoroughly conditioning your cream or white polymer clay until it is soft and pliable. -
Add texture:
To achieve the organic speckled look shown in the photo, mix a very small amount of ground black pepper or brown embossing powder into your cream clay. Knead it until the specks are evenly distributed. -
Roll the slab:
Roll your speckled clay out into a slab that is approximately 4mm thick. It needs to be thick enough to hold the hardware securely.
Tip: Smooth Integration
When rolling the colored dots into the base, roll in multiple directions. This prevents the circles from distorting into ovals and keeps the surface perfectly flat.
Step 2: Creating the Face Discs
-
Mix skin tones:
Condition your various colors of clay—pinks, browns, and whites—to create a nice variety of hues. -
Cut small circles:
Use a very small circular cutter (like the end of a piping tip or a stiff straw) to cut out tiny circles from each color slab. Alternatively, roll tiny balls and flatten them gently. -
Arrange the pattern:
Lay your speckled base slab flat on your work surface. Place the colored discs onto the slab in a pleasing, random arrangement, leaving space between them. -
Embed the discs:
Cover the clay with parchment paper or wax paper. Use your acrylic roller to gently roll over the surface. This will press the colored discs into the base clay so they become flush with the surface rather than sitting on top.
Step 3: Shaping and Detailing
-
Cut the final shape:
Position your oval cutter over the area with the best arrangement of faces and press down firmly to cut your charm shape. -
Smooth the edges:
Lift the charm and gently use your fingertip or a silicone tool to soften the sharp cut edges. -
Adding hardware hole:
Before baking, use a needle tool to create a hole at the top of the oval for the jump ring. Ensure it’s not too close to the edge to prevent tearing. -
Bake the piece:
Bake the clay according to the manufacturer’s instructions for the specific brand you are using. Let it cool completely.
Level Up: Canes Instead of Paint
Instead of painting faces after baking, try creating a complex ‘face cane’ (a log of clay with a face pattern running through it). Slice thin layers and embed them for a permanent design.
Step 4: Painting the Faces
-
Prepare paint:
Squeeze a tiny dot of black acrylic paint onto a palette. -
Paint the eyes:
Dip a fine dotting tool or the tip of a toothpick into the black paint. Carefully place two dots for eyes on each colored circle. -
Draw the mouths:
Using a very fine detail brush or huge needle tip dipped in paint, draw a tiny ‘U’ shape for the smile between the eyes. -
Add rosy cheeks:
Mix a tiny bit of red or pink paint with white to make a soft pink. Use a dotting tool to add tiny blush marks on the cheeks of the lighter faces for extra cuteness.
Step 5: Finishing
-
Seal the charm:
Once the paint is completely dry, apply a layer of UV resin to the top surface. This protects the paint and gives it that glossy, professional finish seen in the image. -
Cure the resin:
Place the charm under a UV lamp for 1-2 minutes until the surface is hard and non-tacky. -
Assemble the keychain:
Open a jump ring with pliers, feed it through the hole in your charm, and attach the lobster clasp before closing the ring securely.
Attach your happy little charm to your keys or bag and enjoy the smiles it brings to your day
Shaker Charms With Floating Sprinkles
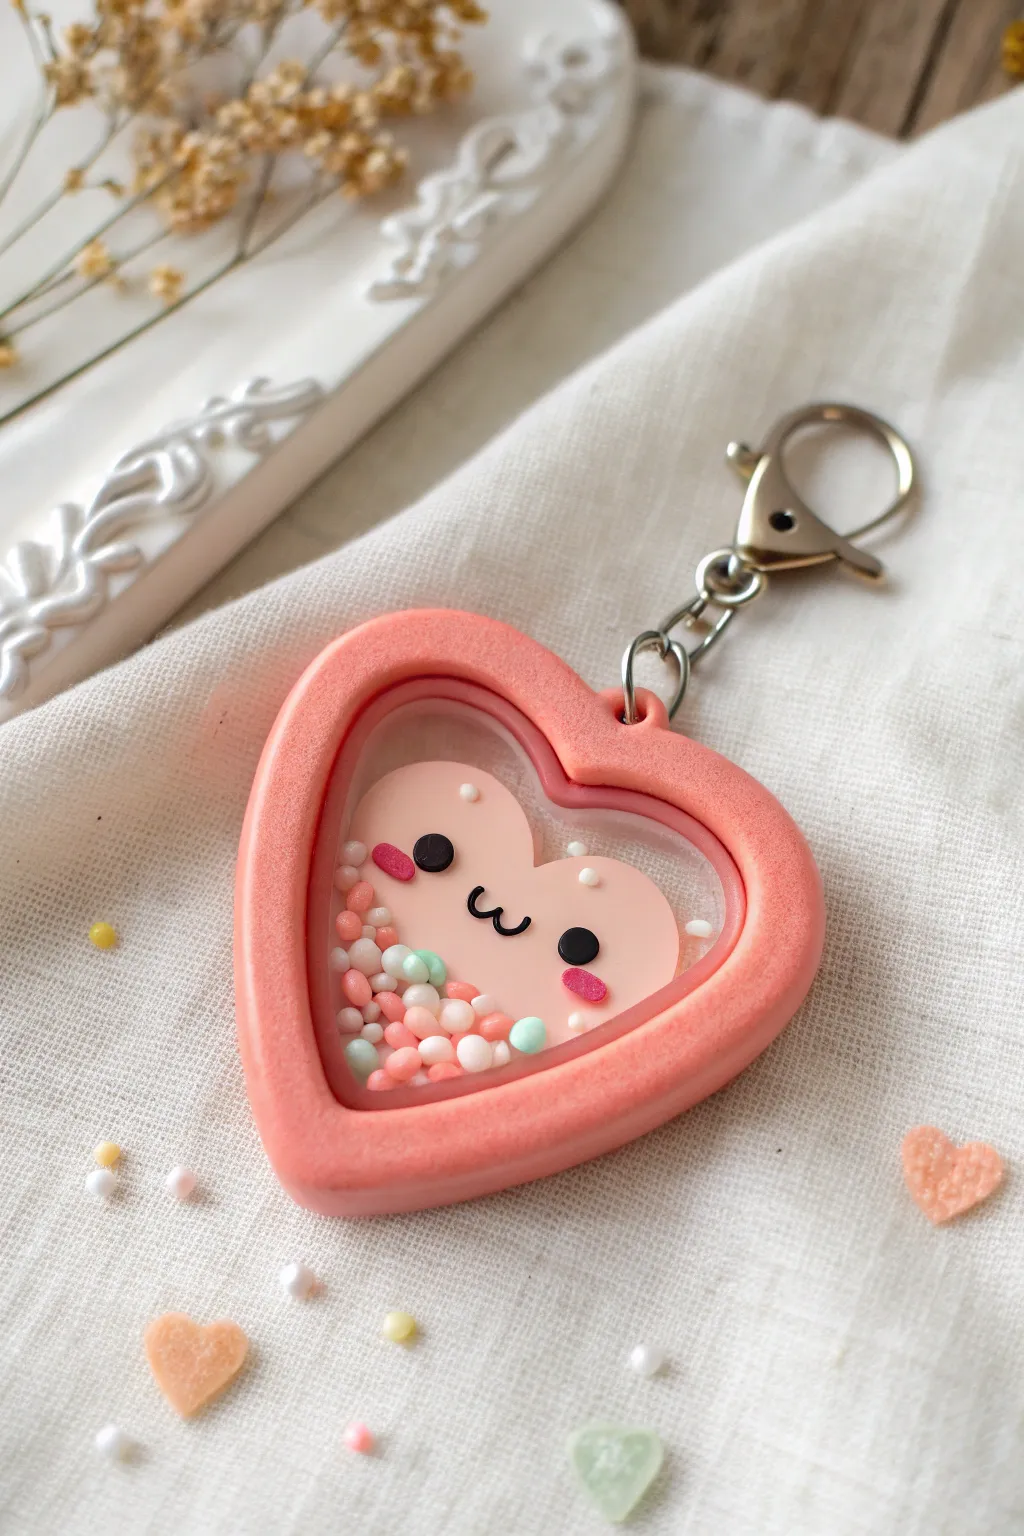
This adorable heart-shaped shaker charm captures the essence of kawaii crafting with its smiling face and dancing sprinkles. It combines the structure of polymer clay with the crystal-clear finish of UV resin for a durable, interactive accessory.
Step-by-Step Tutorial
Materials
- Pink polymer clay (matte or slightly pearlescent)
- Flesh-tone or light peach polymer clay
- Liquid polymer clay (translucent)
- UV resin (hard type)
- UV lamp
- Heart-shaped clay cutter (approx. 2 inches)
- Smaller heart cutter (to fit inside the frame)
- Clear acetate sheet or transparency film
- Black and pink acrylic paint or polymer clay scraps for details
- Dotting tools and fine paint brush
- Assorted polymer clay sprinkles (micro beads/fimo slices)
- Baby oil or shaker oil (clear)
- Eye screw pin and jump rings
- Keychain clasp
- Sandpaper (fine grit)
Step 1: Creating the Frame
-
Roll the Base:
Condition your pink polymer clay until soft and pliable, then roll it out into a thick slab, approximately 4-5mm thick. This needs to be sturdy enough to hold the oil later. -
Cut the Outer Heart:
Use your larger heart-shaped cutter to punch out the main shape. Keep the cutter straight to ensure even edges. -
Cut the Window:
Take the slightly smaller heart cutter and carefully press it into the center of your pink heart to remove the middle section, leaving a sturdy frame border. -
Smooth the Edges:
Gently smooth any rough edges with your finger or a silicone tool. If you want a rounded look like the photo, soften the top edges of the frame now. -
Pre-Bake the Frame:
Bake the pink frame according to your clay package instructions (usually 275°F/135°C for 15-30 minutes). Let it cool completely.
Step 2: Making the Background & Face
-
Cut the Backing:
Roll out a thinner sheet of the same pink clay or a translucent clay. Trace your frame onto this sheet and cut it out. This will be the back wall of your shaker. -
Create the Character:
Using light peach clay, cut a smaller heart shape that fits comfortably inside the window area. Flatten it slightly so it doesn’t block the sprinkles. -
Add Facial Features:
Use tiny balls of black clay for eyes and pink ovals for cheeks, pressing them gently onto the peach heart. Roll a tiny snake of black clay for the ‘w’ mouth. -
Initial Assembly and Bake:
Apply a thin layer of liquid polymer clay to the back of your baked frame and press it onto the raw backing sheet. Place the peach heart face in the center of the backing. Bake the entire assembly again.
Sticky Situation?
If your resin stays tacky after curing, wipe it with a lint-free cloth soaked in rubbing alcohol or place it in direct sunlight for 30 minutes to finish hardening.
Step 3: Assembling the Shaker
-
Seal the Interior:
Once cooled, coat the inside floor and walls of the heart with a thin layer of UV resin to seal any microscopic gaps. Cure under the UV lamp. -
Add the Sprinkles:
Pour a small amount of polymer clay sprinkles or micro beads into the cavity. Don’t overfill; leave room for them to move. -
Cut the Window Pane:
Place your heart cutter on a piece of clear acetate sheet and trace around it, cutting slightly inside the line so it fits perfectly over the frame opening. -
Attach the Acetate:
Apply a thin bead of UV resin to the top rim of the frame. Carefully place the acetate heart on top, ensuring a complete seal with no gaps. I like to use a toothpick to guide the resin to the very edge. Cure immediately. -
Drill Injection Hole:
Using a small hand drill or pin vise, carefully drill a tiny hole through the side or bottom of the resin/clay wall into the central cavity. -
Inject Oil:
Fill a syringe with baby oil or clear mineral oil. Inject the oil through the hole until the cavity is full, leaving just a tiny air bubble for movement. -
Seal the Hole:
Wipe away any excess oil with alcohol. Place a drop of UV resin over the drill hole and cure it to seal the liquid inside. -
Doming the Top:
Pour a generous amount of UV resin over the top of the acetate window and the pink frame. Spread it to the edges for a glossy, domed finish. Cure thoroughly. -
Add Hardware:
Drill a shallow hole at the top of the heart spread with superglue, and screw in an eye pin. Attach your jump rings and keychain clasp.
Pro Tip: No Leaks!
Test your acetate seal with water before adding oil. If water leaks out, patch the gap with more UV resin. Oil is much harder to clean up and reseal.
Now you have a charming, interactive keychain ready to brighten up any bag or set of keys