Whenever I pull out liquid polymer clay, my brain immediately shifts into “pour, swirl, drizzle” mode because it behaves like nothing else in the clay world. Here are my favorite liquid clay ideas—starting with the classics you’ll actually make, then moving into the delightfully weird stuff that gets everyone asking how you did it.
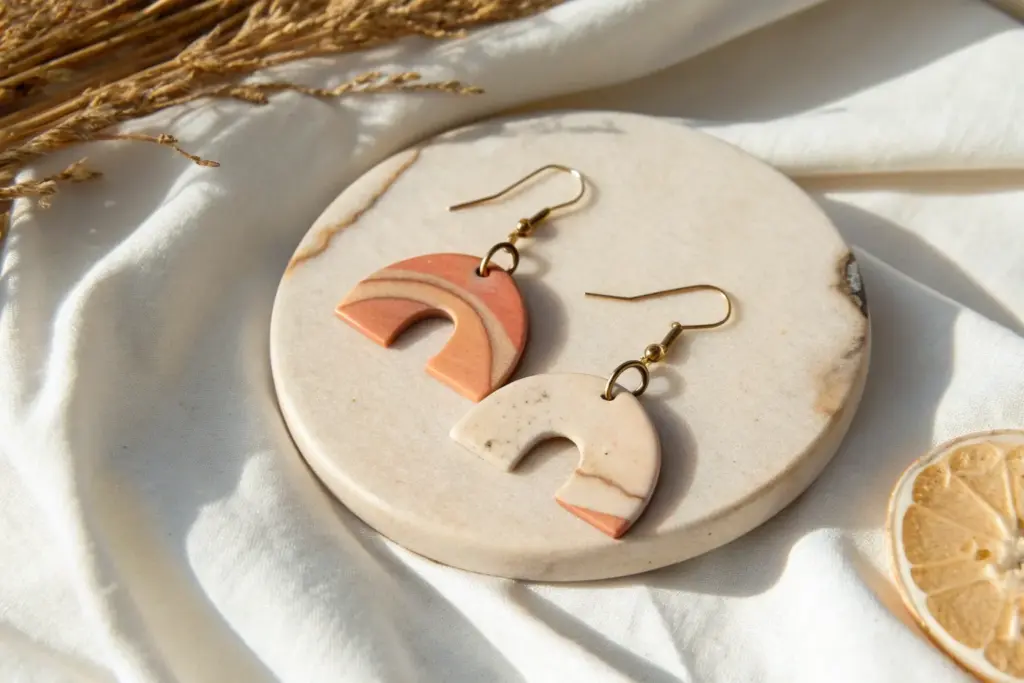
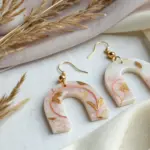
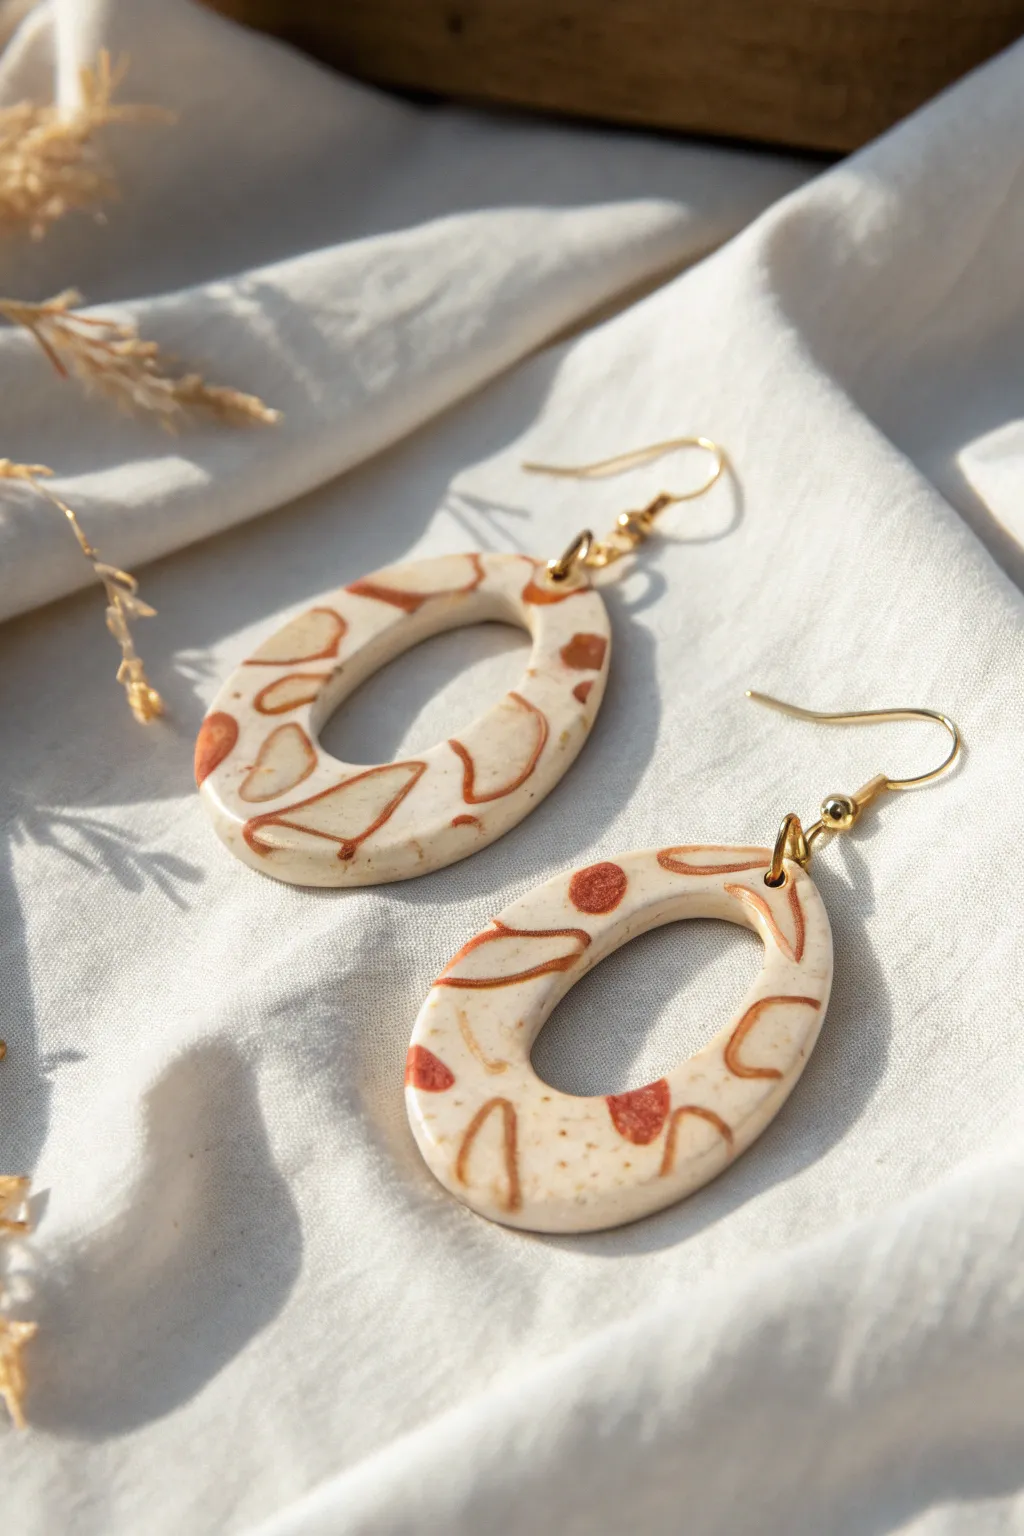
Mold-Poured Geometric Earrings
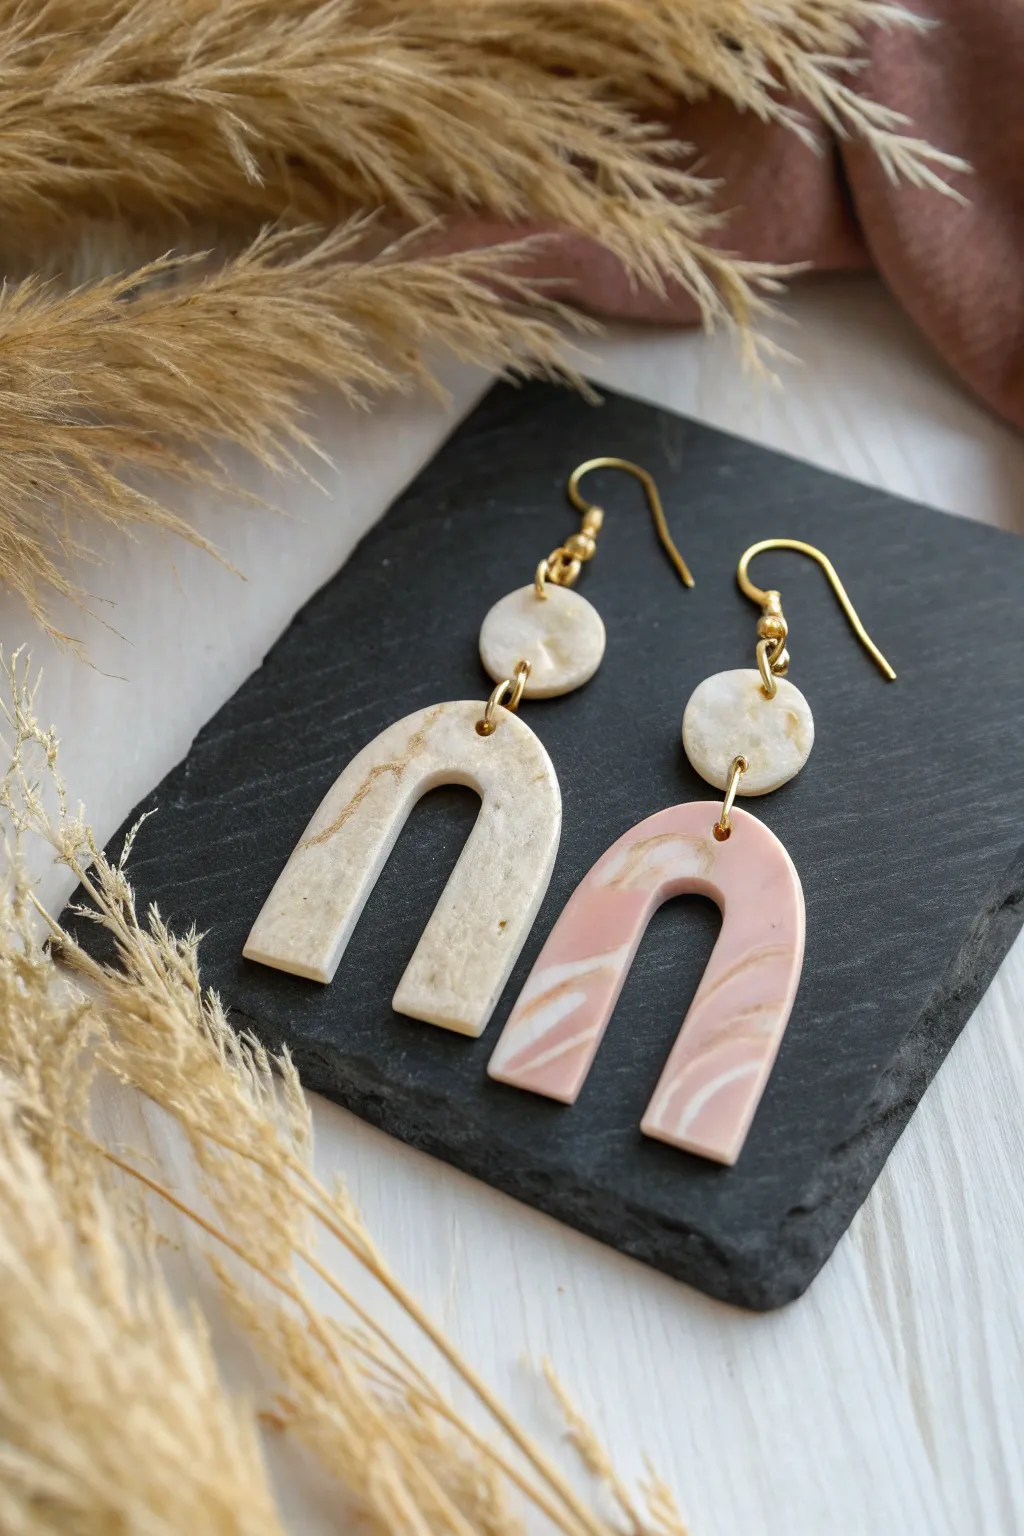
Create these elegant, lightweight earrings that perfectly mimic the look of natural stone and marble using liquid polymer clay. The combination of creamy neutrals and soft dusky pinks with gold leaf veining makes for a sophisticated accessory suitable for any occasion.
How-To Guide
Materials
- Liquid polymer clay (White, Translucent, and a clay softener/thinner)
- Alcohol inks (e.g., Latte, Peach, or Rose Gold)
- Gold foil flakes or gold metallic powder
- Silicone earring mold (arch and circle shapes)
- UV resin (optional, for a glossy finish)
- UV lamp (if using resin)
- Toothpicks or needle tool
- Mixing cups (small silicone or disposable cups)
- Isopropyl alcohol and cotton swabs (for cleanup)
- Jewelry pliers (round nose and flat nose)
- 4 Gold jump rings
- 2 Gold earring hooks (French hooks)
Step 1: Preparation & Mixing
-
Clean your workstation:
Before uncapping any bottles, ensure your work surface and silicone molds are free of dust or lint. A quick wipe with a bit of painter’s tape or a lint roller on the mold creates a pristine starting point. -
Prepare the base mixture:
Pour a small amount of white liquid clay into a mixing cup. If the clay feels too thick, adds a drop or two of clay softener to achieve a honey-like consistency that flows easily into the mold. -
Create the marble tint:
In a separate cup, mix white liquid clay with a tiny drop of brown alcohol ink to create a beige tone. In another cup, mix white clay with a drop of pink or rose ink for the dusty pink color seen in the right earring. -
Incorporate the gold:
Now for the sparkle. Take your gold foil flakes and shred them into smaller bits using a toothpick. Gently stir these flakes into your colored mixtures, or leave them aside to place strategically later.
Step 2: Pouring & Marbling
-
Fill the arch molds:
Start with the arch shapes. Pour your white base liquid clay into the mold, filling it about half to three-quarters of the way full. Don’t worry about perfection here; we need room for the accent colors. -
Add color swirls:
Using a toothpick or a small tool, drizzle drops of your beige mixture into one arch mold and the pink mixture into the other. Aim for random, organic lines rather than perfect dots. -
Create the veins:
This is my favorite part: drag a clean needle tool or toothpick through the wet clay to swirl the colors together. Use a light hand to create delicate veins rather than muddying the colors completely. -
Embed gold details:
If you didn’t mix the gold in earlier, use tweezers to place tiny flecks of gold foil into the wet clay, pushing them down slightly so they are submerged but visible. -
Fill the circle molds:
Repeat the pouring process for the two small circle studs. To keep the design cohesive, try to match the color palette of the circles to their corresponding arches (beige for one, white/gold for the other). -
Level the clay:
Top off the molds with a little more clear or white liquid clay if needed to ensure they are flush with the top of the silicone. Tap the mold gently against the table to bring air bubbles to the surface. -
Pop air bubbles:
Give the mold a minute to rest, then use a lighter or a heat gun quickly passed over the surface to pop any stubborn bubbles that have risen.
Pro Tip: Depth effect
Pour a thin layer of translucent liquid clay first, add gold leaf, bake briefly, then add the opaque colors behind it for a 3D stone effect.
Step 3: Baking & Assembly
-
Bake the pieces:
Place the silicone mold on a baking sheet and bake according to the liquid clay manufacturer’s instructions (usually around 275°F or 135°C for 15-30 minutes). Ensure good ventilation in your workspace. -
Cool and demold:
Allow the mold to cool completely before attempting to remove the clay pieces. Rushing this can warp the warm clay. Once cool, gently pop them out. -
Drill holes (if needed):
If your mold didn’t have built-in posts for holes, use a small hand drill or a twisting tool to create a hole at the top of the arches and the bottom and top of the circles. -
Sand the edges:
Check the edges of your pieces for any rough spots or over-spill. Use a fine-grit sanding sponge or wet-dry sandpaper to smooth them down for a professional finish. -
Attach jump rings:
Using two pairs of pliers, twist open a jump ring (don’t pull it apart). Thread it through the top of the arch and the bottom of the circle component, then twist it closed securely. -
Add earring hooks:
Open the loop on your earring hook or use a second jump ring to attach the top of the circle piece to the hook component. Ensure the orientation is correct so the earring hangs facing forward.
Troubleshooting: Cloudy finish
If your pieces look dull after baking, a quick coat of UV resin or a gloss varnish will instantly restore the shine and clarity of the marbling.
Wear your new geometric arches with pride, knowing you created a unique stone effect from scratch


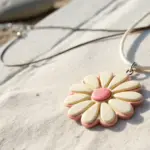
Crystal-Clear Botanical Pendants
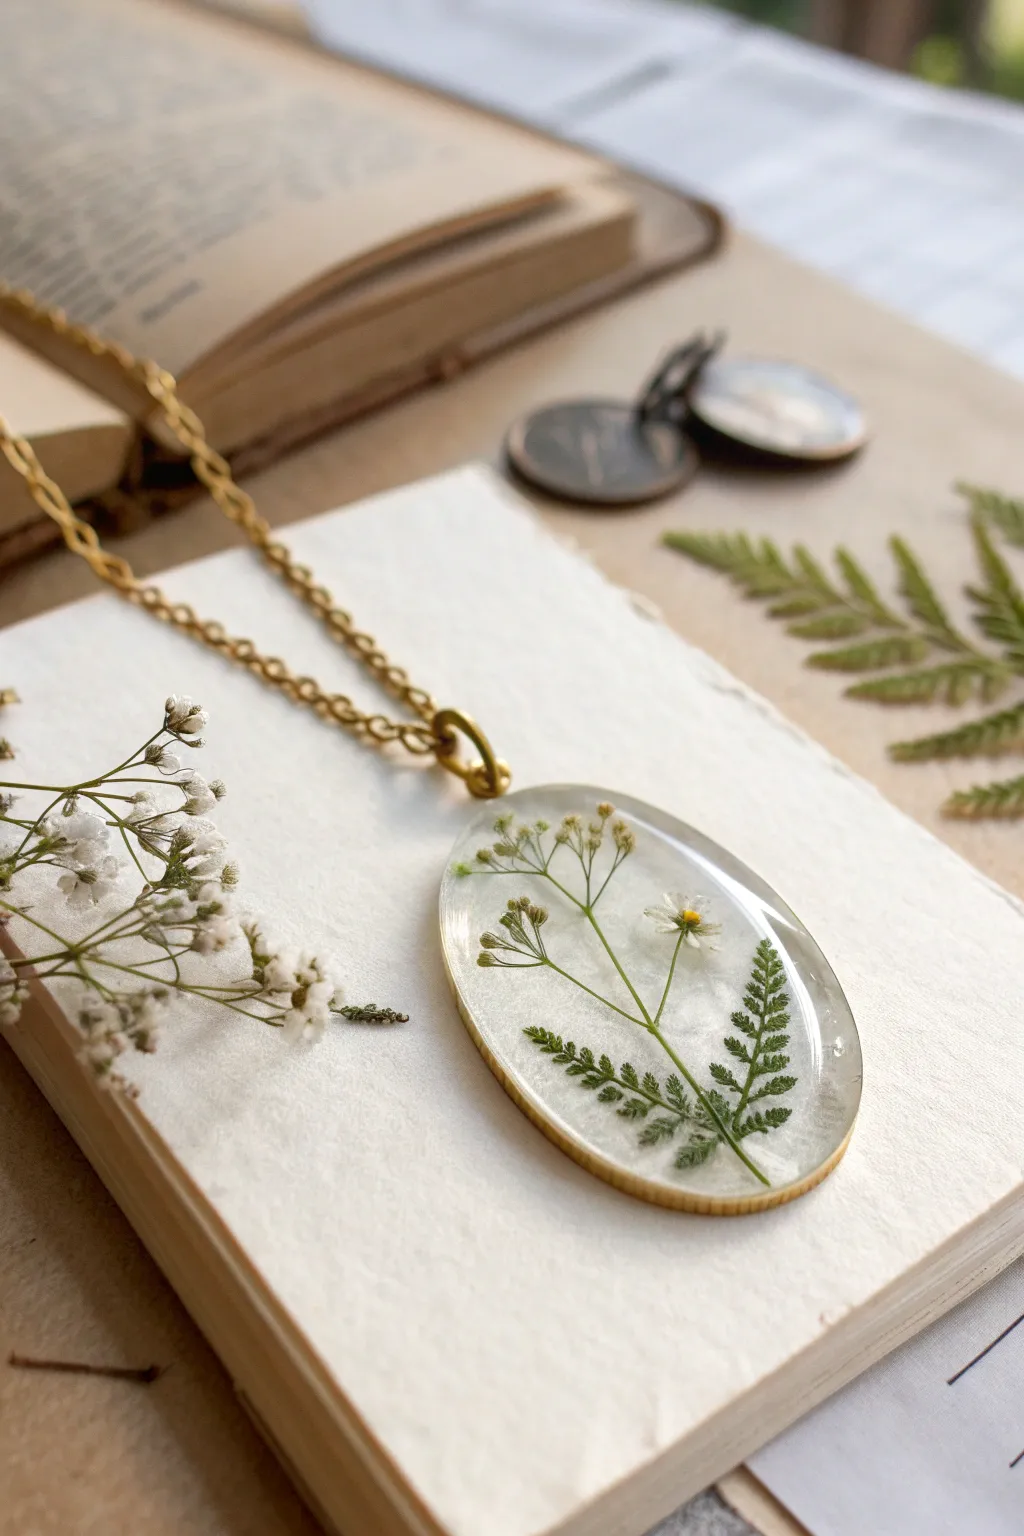
Capture the delicate beauty of a garden walk with this elegant pendant project, featuring pressed ferns and tiny blooms suspended in glass-like clarity. While it looks like high-end resin jewelry, this piece utilizes the unique translucent properties of liquid polymer clay for a softer, more flexible finish.
Detailed Instructions
Materials
- Translucent liquid polymer clay (clear)
- Small oval open-backed bezel (brass or gold-tone)
- Packing tape (clear)
- Dried pressed fern leaves
- Dried pressed baby’s breath or tiny wildflowers
- UV light or heat gun (depending on liquid clay brand)
- Needle tool or toothpick
- Heat-resistant work mat
- Jewelry chain with jump rings
- Small jewelry pliers
- Oven (if using bakeable liquid clay)
Step 1: Preparing the Frame
-
Tape the Base:
Cut a strip of wide clear packing tape and lay it sticky-side up on your work surface. Press the open-backed bezel firmly onto the tape to create a temporary seal. This forms the bottom of your mold. -
Check the Seal:
Run your fingernail or a tool around the inner edge where the metal meets the tape. A tight seal is crucial to prevent the liquid medium from leaking out during the filling process.
Step 2: Layering the Botanicals
-
Base Layer:
Pour a very thin layer of translucent clear liquid clay into the bezel. You just want enough to coat the sticky tape bottom, not fill the frame. -
First Cure:
Follow the manufacturer’s instructions to cure this thin base layer. If using bakeable liquid clay, I find a short bake (about 10 minutes) sets it enough to work on without fully curing it yet. -
Arranging Foliage:
Using tweezers, carefully place your dried fern leaf onto the base layer. Position it so the fronds fan out slightly to the right, following the curve of the oval. -
Adding Blooms:
Snip tiny stems of dried baby’s breath or wildflowers. Arrange them over and around the fern, ensuring the stems are thin enough to fit inside the bezel’s depth. -
Securing the Greenery:
Dab a tiny amount of fresh liquid clay onto the back of the flowers to help them stick to the cured base layer, preventing floating during the final pour.
Banish the Bubbles
Let your liquid clay sit in the bottle for an hour before pouring. Shaking introduces air; letting it rest allows micro-bubbles to rise and dissipate before you even start.
Step 3: Fining the Pour
-
Top Coat Application:
Slowly pour more clear liquid clay over the arrangement. Start from the center and let it flow outward to minimize trapped air bubbles. -
Surface Tension:
Fill the bezel until the liquid creates a slight dome effect, rising just above the metal rim. The surface tension will keep it from spilling over if you pour carefully. -
Bubble Watch:
Inspect the piece closely. If you see tiny air bubbles caught in the fern fronds, use a needle tool to gently guide them to the surface or pop them. -
Heat Application:
Briefly pass a heat gun or lighter flame quickly over the surface to pop any remaining microscopic surface bubbles. -
Final Cure:
Bake the piece according to the liquid clay instructions. High clarity usually requires higher temperatures, often around 275°F to 300°F (135°C-149°C), for about 15 to 30 minutes. -
Cooling Down:
Remove from the heat source and allow the pendant to cool completely. Do not touch the surface while it is hot, as it may still be soft and easily marked.
Cloudy Results?
If your liquid clay looks milky after baking, it likely wasn’t hot enough. Liquid clay needs sufficient heat to clarify. Pop it back in the oven at 300°F for another 5-10 minutes.
Step 4: Finishing Touches
-
Releasing the Back:
Once cool, peel the packing tape off the back of the bezel. If there is sticky residue, wipe it away with a little rubbing alcohol or Goo Gone. -
Sealing the Back (Optional):
If the back looks cloudy from the tape texture, you can brush on a very thin layer of gloss varnish or a thin coat of liquid clay and cure again for transparency. -
Attaching Hardware:
Use your pliers to open a jump ring. Loop it through the hanging mechanism of your bezel. -
Stringing the Chain:
Thread your gold chain through the jump ring and close the ring securely with the pliers.
Now you have a timeless piece of botanical art ready to wear or gift.


Marble-Drizzle Trinket Dishes
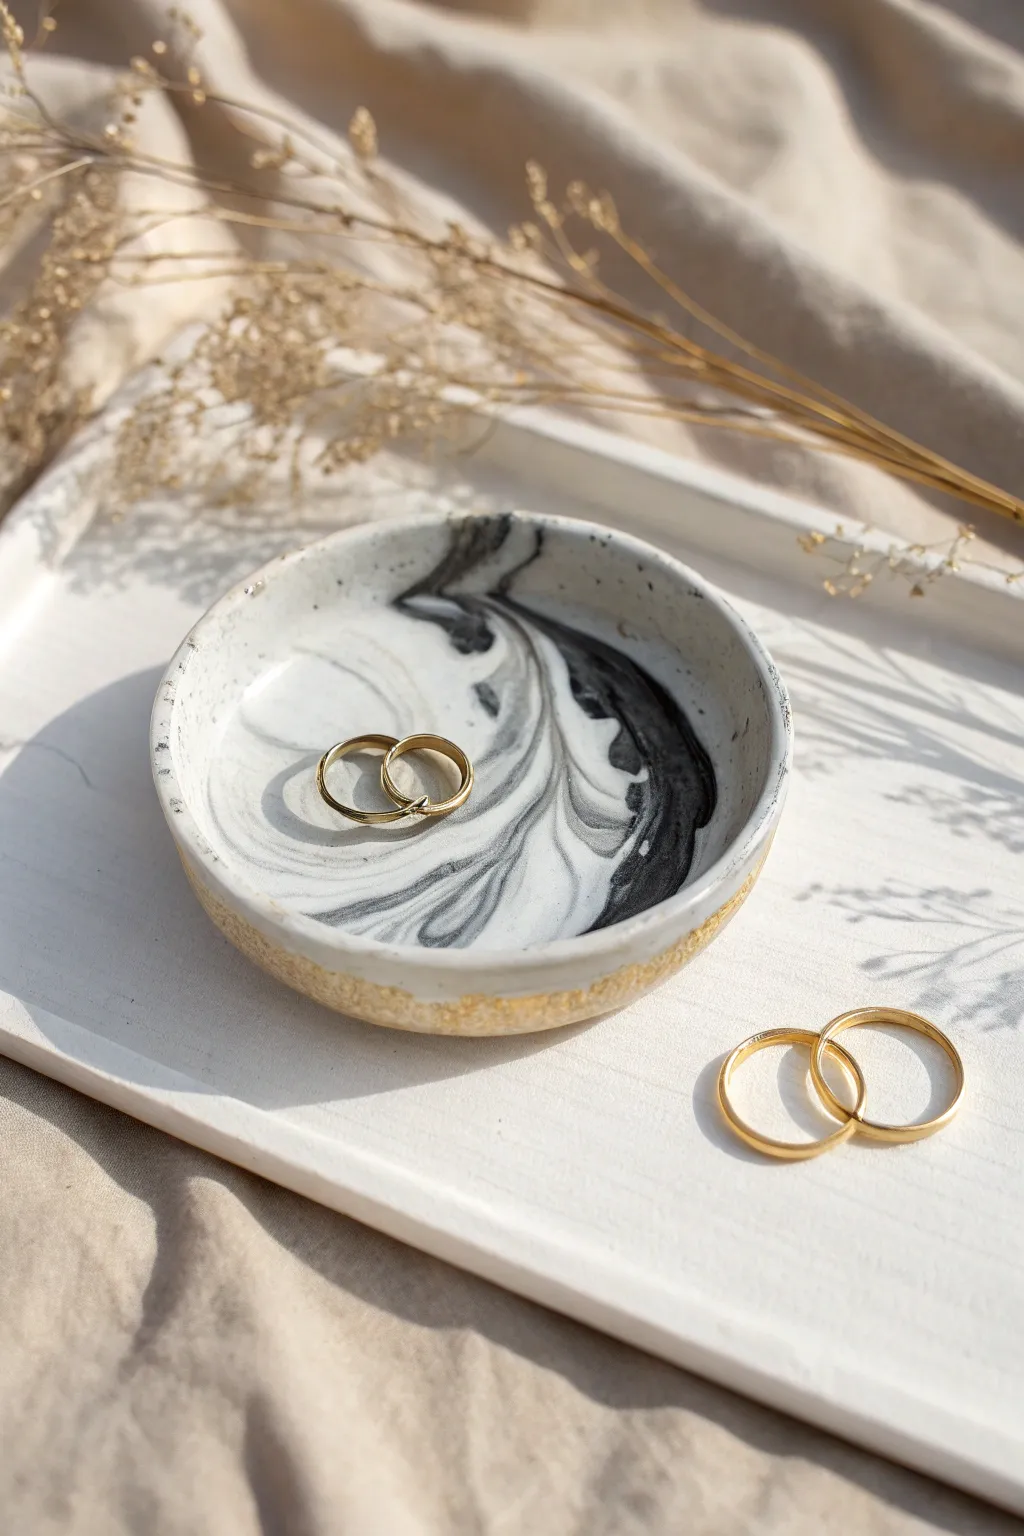
Create a sleek and sophisticated home for your rings with this dramatic black and white marble trinket dish. The swirling patterns give it a high-end stone look, while a touch of gold leaf on the rim adds just the right amount of organic luxury.
How-To Guide
Materials
- White polymer clay
- Liquid polymer clay (black)
- Small round bowl or silicone mold (for shaping)
- Gold leaf sheets
- Gold leaf adhesive size
- Small soft paintbrush
- Acrylic rolling pin
- Gloss varnish or resin (optional)
- Craft knife or circle cutter
- Smooth work surface or tile
Step 1: Creating the Marbled Base
-
Condition the clay:
Start by taking a block of white polymer clay and kneading it in your hands until it is soft, warm, and pliable. This conditioning step is crucial to prevent cracks later on. -
Roll it out:
Using your acrylic rolling pin, flatten the white clay into a sheet about 1/4 inch thick. Aim for an even thickness throughout. -
Apply liquid clay:
Carefully drizzle the black liquid polymer clay over the white sheet in random, sweeping lines. Don’t cover the whole surface; you want distinct veins of black. -
Fold and compress:
Fold the clay sheet in half, trapping the liquid clay inside. Gently compress it, then fold it once more if needed, but be careful not to over-mix or the colors will turn gray. -
Create the swirl:
Twist the folded clay into a log shape, then gently roll the log until it lengthens slightly. This helps stretch the liquid clay into natural-looking veins. -
Form the block:
Coil the twisted log into a snail shape and then flatten it back down into a ball. This reorganizes the internal pattern into a complex marble effect. -
Roll the final slab:
Roll the ball out into a flat sheet again. You should now see beautiful, organic black swirls appearing against the white background.
Step 2: Shaping and Finishing
-
Cut the circle:
Place a circle cutter or a bowl upside down on your marbled slab and cut out a perfect circle using your craft knife. -
Shape the dish:
Gently lift your clay circle and place it inside a curved, oven-safe bowl or silicone form to give it a concave dish shape. Press lightly so it takes on the curve without distorting the pattern. -
Smooth the edges:
Run your finger dipped in a tiny bit of water or baby oil along the rim of the dish to smooth out any rough cutting marks. -
Bake carefully:
Bake the dish (while still in its form) according to the manufacturer’s instructions for your specific brand of polymer clay. Usually, this is around 275°F (130°C) for 15-30 minutes. -
Cool down:
Let the dish cool completely inside the mold before attempting to remove it. Removing it while hot can cause warping.
Clean Cuts
Cover your clay sheet with a piece of cling film before cutting your circle. The cutter will push the plastic down into the clay, creating a beautifully rounded, soft edge instead of a sharp cut.
Step 3: Adding the Gold Rim
-
Apply adhesive:
Using a small paintbrush, apply a thin, uneven layer of gold leaf adhesive size along the very edge of the rim. I like to bring it down the outer side just a little bit for a rustic look. -
Wait for tackiness:
Allow the adhesive to dry until it feels tacky to the touch. This usually takes 5-10 minutes, but check your bottle’s instructions. -
Apply gold leaf:
Gently press a sheet of gold leaf onto the tacky rim. Use a dry, soft brush to pat it down into the texture of the clay. -
Remove excess:
Brush away the loose pieces of gold leaf with a stiff brush. The gold will only stick where you placed the adhesive, creating a beautiful raw edge. -
Seal the piece:
To protect the gold leaf and give the dish a ceramic-like shine, apply a coat of gloss varnish or a thin layer of UV resin over the entire dish.
Granite Texture
Before baking, gently press coarse sandpaper or a stiff toothbrush into the white areas of the clay. This adds a realistic stone texture that contrasts beautifully with the smooth liquid clay veins.
This elegant little dish is now ready to hold your favorite jewelry pieces on your nightstand


Ombre Liquid Clay Cabochons
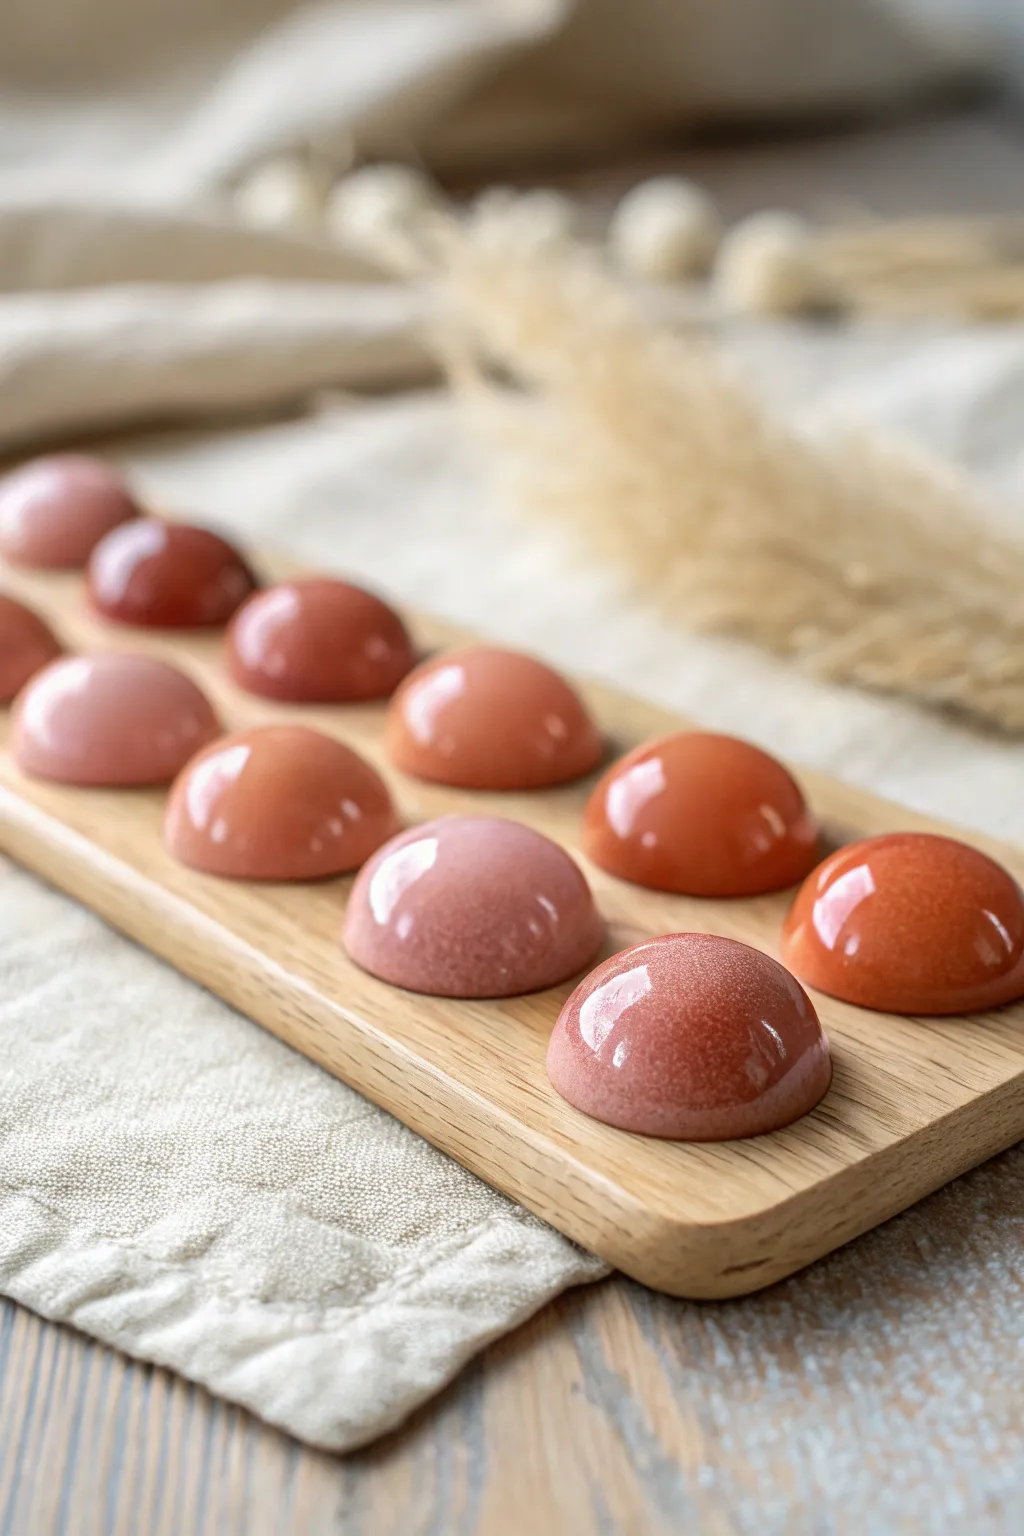
Capture the warmth of a desert sunset with these stunningly glossy liquid clay cabochons. Ranging from pale blush to deep terracotta, this gradient set is perfect for jewelry making or adding a polished touch to mixed media art.
Step-by-Step
Materials
- Translucent liquid polymer clay
- Alcohol inks (Rose, Terracotta, Peach, White)
- Mica powder (Rose Gold or Pearl)
- Silicone domed mold (approx. 1 inch diameter)
- Small disposable mixing cups
- Wooden stir sticks
- Heat gun or lighter
- Oven (dedicated to craft use)
- Ceramic tile or baking sheet
Step 1: Preparation
-
Clean the Mold:
Begin by ensuring your silicone mold is perfectly clean. Use a piece of masking tape to lift away any microscopic dust particles from the cavities, as these will show up in the final glossy finish. -
Prepare the Base Medium:
Pour a generous amount of translucent liquid clay into four separate small mixing cups. You want enough base in each cup to fill at least two or three mold cavities.
Clearer Colors
Use alcohol inks specifically made for polymer clay if possible. Water-based acrylic paints can cause liquid clay to bubble or become brittle during baking.
Step 2: Mixing the Gradient
-
Create the Lightest Shade:
In the first cup, add a single drop of white alcohol ink and a tiny amount of peach ink. Stir slowly to combine without whipping in air bubbles. This will be your softest blush tone. -
Mix the Mid-Tone Pink:
For the second cup, add rose alcohol ink. Use a toothpick to swirl the color in until you have a solid, medium pink opacity. -
Formulate the Deep Rose:
In the third cup, mix a combination of rose and a drop of terracotta. I like to add a pinch of pearl mica powder here to give it that subtle inner shimmer seen in the darker cabs. -
Create the Darkest Terracotta:
For the final and darkest shade, use primarily terracotta ink with a touch of rose. Add a slightly larger pinch of rose gold mica powder for depth and opacity. -
Rest the Mixture:
Let the cups sit for about 10-15 minutes. This resting period allows any air bubbles created during stirring to rise to the surface and pop naturally.
Glitter Galaxy
Mix chunky iridescent flakes into the darkest terracotta layer before pouring to create a ‘galaxy’ effect that looks incredible under the glossy dome.
Step 3: Pouring and Curing
-
Start Pouring:
Beginning with the lightest color, carefully pour the liquid clay into the silicone mold cavities. Fill them until the liquid forms a slight convex dome over the top edge—this surface tension creates that beautiful rounded shape. -
Continue the Gradient:
Move on to the mid-tone, then the deep rose, and finally the terracotta. Arrange them in the mold so you can visualize the color transition. -
Pop Surface Bubbles:
Inspect the filled molds closely. If you see tiny bubbles on the surface, quickly pass a heat gun or a lighter flame over the top (don’t touch the clay!) to pop them instantly. -
Pre-Bake Settling:
Place the filled mold on your ceramic tile or baking sheet. Let it sit for another 5 minutes to ensure the liquid clay has self-leveled completely. -
Bake the Cabochons:
Bake the mold according to the liquid clay manufacturer’s instructions—usually around 275°F (135°C) for 15 to 20 minutes. Ensure your oven is fully preheated to avoid temperature spikes.
Step 4: Finishing Touches
-
Cool Down:
Once the baking time is up, remove the tile from the oven. Let the mold cool completely to room temperature before attempting to demold. Removing them while hot can cause warping or fingerprints. -
Demolding:
Gently flex the silicone mold to release the suction, then pop the cabochons out. They should be hard and shiny. -
Check for Flashing:
Inspect the edges of each cabochon. If there’s any thin, jagged excess clay (flashing) around the bottom rim, carefully trim it away with small sharp scissors or a craft knife. -
Heat Gloss (Optional):
If the surface isn’t quite as glassy as you’d like, you can use a heat gun on the high setting to briefly blast the surface of the cured clay until it looks wet again, then let it cool. This enhances the shine dramatically.
Arrange your finished cabochons on a display board or bezel set them into pendants to show off that gorgeous color transition

The Complete Guide to Pottery Troubleshooting
Uncover the most common ceramic mistakes—from cracking clay to failed glazes—and learn how to fix them fast.
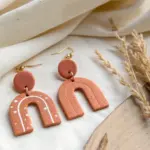
Stencil-Printed Liquid Clay Skins

These boho-chic earrings feature a striking geometric pattern created by screen printing onto liquid clay. The crisp white lines against a warm terracotta hue give them an earthy, artisanal feel that looks complicated but is surprisingly achievable.
Step-by-Step Guide
Materials
- White liquid polymer clay
- Terracotta or rust-colored polymer clay (solid block)
- Silk screen stencil with a geometric triangle pattern
- Acryclic paint (rust/terracotta color matching the solid clay)
- Old credit card or squeegee tool
- Glass tile or ceramic tile (for baking)
- Circle clay cutter (approx. 1.5 – 2 inches)
- Hand drill or pin drill
- 2 Gold jump rings
- 2 Gold earring hooks (French hooks)
- Jewelry pliers
- Gloss or matte varnish (optional)
- Oven thermometer
Step 1: Creating the Stenciled Skin
-
Prepare the liquid clay base:
Squeeze a generous amount of white liquid polymer clay onto your glass tile. You want enough to create a thin, even sheet. -
Level the liquid:
Use a needle tool or a toothpick to help spread the liquid clay to a consistent thickness, popping any air bubbles that appear. -
Bake the base layer:
Place the tile in a preheated oven following the manufacturer’s temperature instructions (usually around 275°F/130°C) for about 15-20 minutes. This creates a cured, flexible sheet. -
Cool down:
Let the white liquid clay sheet cool completely on the tile. It must be cool to the touch before stenciling, or the paint will dry too fast. -
Position the stencil:
Lay your geometric triangle silk screen stencil smoothly over the cured white sheet, shiny side down ensuring good contact. -
Apply the paint:
Squeeze a small line of rust-colored acrylic paint along the top edge of the stencil. -
Squeedgie the pattern:
Using an old credit card or a squeegee, drag the paint firmly across the stencil at a 45-degree angle. Ensure all the mesh openings are filled. -
Reveal the design:
Immediately lift the stencil straight up to reveal the crisp red pattern on the white background. Wash your stencil immediately in cool water. -
Dry the paint:
Allow the acrylic paint to dry completely on the clay sheet. This usually takes about 10-15 minutes.
Clean Lines Only
If paint bleeds under the stencil, your paint might be too runny or you pressed too hard. Use heavy body acrylics and a light, even hand when dragging.
Step 2: Assembly and Finishing
-
Condition backing clay:
Condition your block of terracotta polymer clay until it is soft and pliable, then roll it out into a sheet slightly thicker than your liquid clay skin. -
Apply the skin:
Peel the stenciled liquid clay skin off the glass tile and carefully lay it onto the raw terracotta clay sheet. Use an acrylic roller to press them firmly together, removing air pockets. -
Cut the shapes:
Position your circle cutter over the best part of the pattern. Press down firmly to cut through both layers, creating two identical circles. -
Smooth the edges:
Gently gently run your finger along the cut edges to smooth out any ragged bits or cutter seams. -
Final Cure:
Bake the cut circles on a clean tile for the full recommended duration (typically 30-45 minutes at 275°F/130°C) to ensure durability. -
Drill holes:
Once cooled, use a hand drill or pin drill to make a small hole at the top center of each circle, being careful not to crack the edge. -
Seal (Optional):
If you want extra protection for the paint, apply a very thin layer of varnish, though I often skip this to keep the matte texture. -
Attach hardware:
Using two pairs of pliers, twist open a jump ring laterally. Thread it through the hole in the clay and attach the earring hook. -
Close the rings:
Twist the jump ring back into a closed position, ensuring the ends meet perfectly so the hook doesn’t slip out.
Double Sided Magic
Instead of raw clay on the back, make a second sheet of stenciled liquid clay. Sandwich a thin layer of liquid clay between them for reversible earrings.
Now you have a lightweight, flexible pair of statement earrings ready to wear
Drizzled Scribble Statement Charms
Embrace organic textures with these sophisticated statement earrings, featuring a creamy speckled granite base topped with glossy, rust-colored abstract lines. This project perfectly utilizes liquid clay to create raised, defined patterns that feel both ancient and modern.
Step-by-Step Guide
Materials
- Polymer clay in ‘Granite’ or cream with speckles
- Liquid polymer clay (clear or translucent)
- Alcohol ink or clay pigment (Terracotta/Rust color)
- Small oval clay cutters
- Small round clay cutters (for the center cutout)
- Acrylic rolling pin or pasta machine
- Fine-tip squeeze bottle or needle tool
- Small mixing cup and stir stick
- Tissue blade
- Clay oven and baking tile
- Jump rings (gold)
- Earring hooks (gold)
- Pliers
- UV resin or gloss glaze (optional for extra shine)
- Sandpaper 400-1000 grit (optional)
Step 1: Creating the Granite Base
-
Condition the Clay:
Begin by thoroughly conditioning your granite or speckled cream clay until it is soft and pliable. This prevents air bubbles and ensures a smooth finish. -
Roll out a Slab:
Roll the clay out to a medium thickness, approximately 3mm to 4mm. You want it substantial enough to hold the liquid design but light enough for earrings. -
Cut the Shapes:
Use your oval cutter to punch out two matching shapes. Immediately after, use the smaller round cutter to remove the center, creating an open loop. -
Smooth the Edges:
Before baking, gently run your finger along the cut edges to soften any sharp corners left by the cutter. -
Punch Hardware Holes:
Using a needle tool or small punch, create a hole at the very top of each oval for the jump rings. -
Full Bake:
Place the pieces on a baking tile and bake according to the manufacturer’s instructions for the base clay (usually 275°F/130°C for 30 minutes). Let them cool completely.
Clean Lines Pro Tip
If your liquid clay lines smudge or go astray, use a silicone tipped tool or a cotton swab dipped in rubbing alcohol to wipe away the mistake before baking.
Step 2: Mixing and Drizzling the Design
-
Tint the Liquid Clay:
In a small cup, mix your clear liquid clay with a few drops of terracotta or rust alcohol ink. Stir slowly to avoid introducing bubbles until you reach an opaque, rich color. -
Prepare the Applicator:
Pour the tinted liquid mixture into a fine-tip squeeze bottle. I prefer testing the flow on scrap paper first to ensure the line isn’t too thick or runny. -
Apply the Abstract Lines:
Holding the bottle like a pen, gently squeeze to draw organic, wandering lines across the baked clay surface. Think of creating random islands and paths rather than specific shapes. -
Add Solid Accents:
In the negative spaces between your lines, squeeze a little extra liquid to form small solid pools or dots for visual variety. -
Settle the Clay:
Let the pieces sit undisturbed for about 10 minutes. This allows the liquid clay to self-level slightly while retaining that lovely raised texture. -
Second Bake:
Return the earrings to the oven. Bake again at the same temperature for approximately 15-20 minutes to cure the liquid clay design.
Level Up: Metallic Touch
Mix a small amount of mica powder or gold leaf flakes into your clear liquid clay before applying it for a subtle shimmer that catches the light.
Step 3: Finishing and Assembly
-
Cool and Inspect:
Allow the earrings to cool completely. Check the back of the earrings; if they are rough, lightly sand them with fine-grit sandpaper. -
Seal (Optional):
If you want a high-gloss finish on the raised lines, carefully paint a thin layer of gloss glaze or UV resin over just the terracotta details. -
Open Jump Rings:
Use two pairs of pliers to twist open your gold jump rings. Remember to twist sideways, not pull apart, to maintain the circle’s integrity. -
Attach Hooks:
Thread the jump ring through the hole in the clay, add the earring hook, and close the ring securely.
Now you have a stunning pair of wearable art pieces ready to showcase your steady hand and creative flair


What Really Happens Inside the Kiln
Learn how time and temperature work together inside the kiln to transform clay into durable ceramic.
Liquid Clay Paint-Pour Swirls
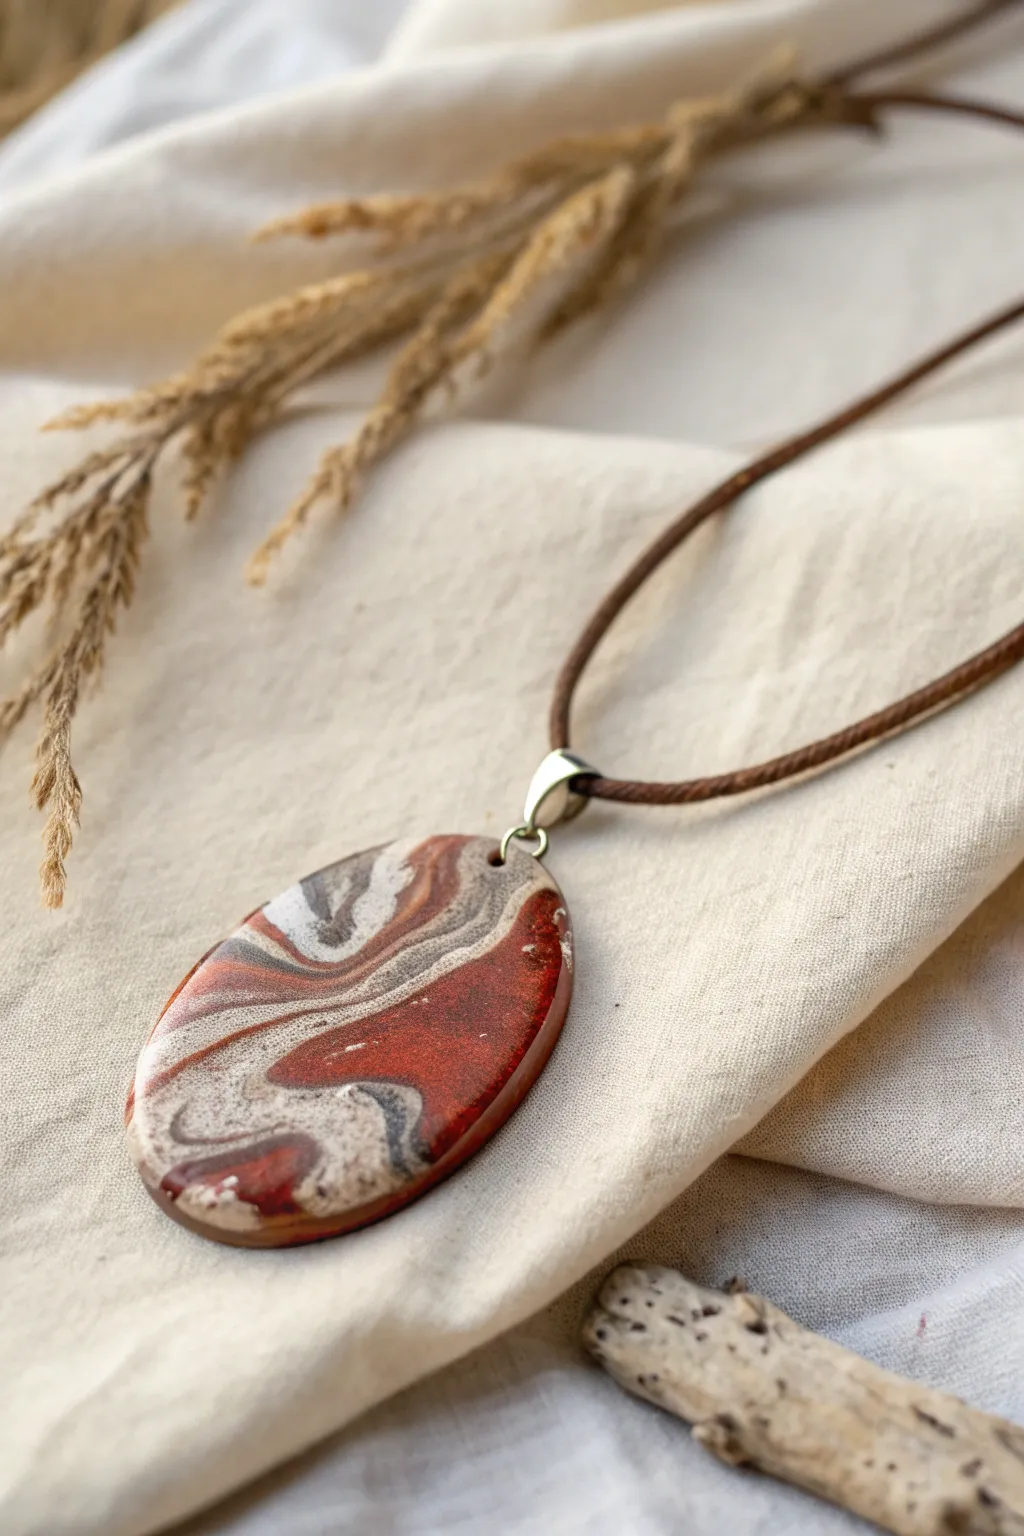
Capture the organic beauty of polished agate using liquid polymer clay to create dazzling, swirled jewelry. This technique mimics the fluid movement of paint pouring but results in a durable, lightweight wearable art piece featuring rich rusts, creamy whites, and stony greys.
How-To Guide
Materials
- Liquid polymer clay (Rust Red, White, Black/Grey, Translucent)
- Small oval silicone mold (pendant size)
- Small disposable mixing cups or palette
- Toothpick or needle tool
- UV resin or gloss varnish (optional for extra shine)
- Heat gun or lighter
- Oven (for curing)
- Pendant bail (glue-on or pinch style)
- E6000 jewelry glue
- Brown leather cord (2mm)
- Jewelry findings (clasp set)
Step 1: Preparing the Palette
-
Mix your colors:
Squeeze a small amount of Translucent liquid clay into your Rust Red and Grey hues in separate mixing cups. This adds depth and creates that semi-precious stone look rather than a flat, opaque color. -
Prepare the pour cup:
In a clean, small disposable cup, pour a base layer of clear or translucent liquid clay about the size of a dime. -
Layer the colors:
Gently drip your prepared colors (Rust, White, Grey) into the center of the cup, one on top of the other. Do not stir. Alternate the colors to build up a ‘bullseye’ of liquid clay layers.
Step 2: Creating the Swirl
-
Pour into mold:
Slowly pour the layered liquid clay mixture from your cup into the center of the oval silicone mold. Let it flow naturally to the edges to create organic lines. -
Guide the flow:
If the clay doesn’t reach the very edges, gently tilt the mold from side to side. You want the strata of colors to stretch and distort naturally. -
Enhance the pattern:
Take your needle tool or toothpick and drag it gently through the surface just once or twice in an ‘S’ shape. Be careful not to overmix, or the colors will turn muddy; you want distinct ribbons of color. -
Pop air bubbles:
Let the mold sit for 10 minutes so bubbles can rise. I like to quickly pass a heat gun or lighter flame over the surface to pop any stubborn bubbles.
Heat Control Pro-Tip
Liquid clay cures stronger at higher temps. Use an oven thermometer to ensure you reach the target temp exactly, preventing brittleness without burning the colors.
Step 3: Curing and Finishing
-
Bake the piece:
Place the mold on a baking sheet and bake according to the manufacturer’s instructions for the liquid clay (usually around 275°F/135°C for 15-30 minutes). -
Cool and demold:
Allow the mold to cool completely before removing the pendant. The clay will be flexible when hot and could warp if removed too early. -
Sand the edges:
Check the edges of your oval for any sharp lips or unevenness. Use fine-grit sandpaper (400 to 1000 grit) to smooth them down if necessary. -
Add a glossy finish:
For that high-shine ‘polished stone’ look visible in the photo, brush on a thin layer of gloss varnish or UV resin and cure it under a UV lamp.
Metallic Level Up
Mix a tiny pinch of mica powder (gold or copper) into the translucent clay layer. It creates shimmering veins within the ‘stone’ that catch the light.
Step 4: Assembly
-
Attach the bail:
Apply a small dot of E6000 glue to the back of a silver bail and press it firmly against the top back of your cured pendant. Let this dry for at least 24 hours. -
Prepare the cord:
Cut a length of brown leather cord to your desired necklace length (usually 18-20 inches). -
Thread the pendant:
Slide the leather cord through the bail loop. -
Add closures:
Attach cord ends and a clasp to the leather cord using pliers.
Enjoy wearing your unique faux-stone pendant that looks just like polished agate