
Whenever I’m craving something sweet and meaningful to make, I reach for clay and start playing with hearts, initials, and tiny symbols of connection. These love clay ideas are the kind of projects you can gift, keep, and smile at every time you walk by them.
Heart-Shaped Trinket Dishes
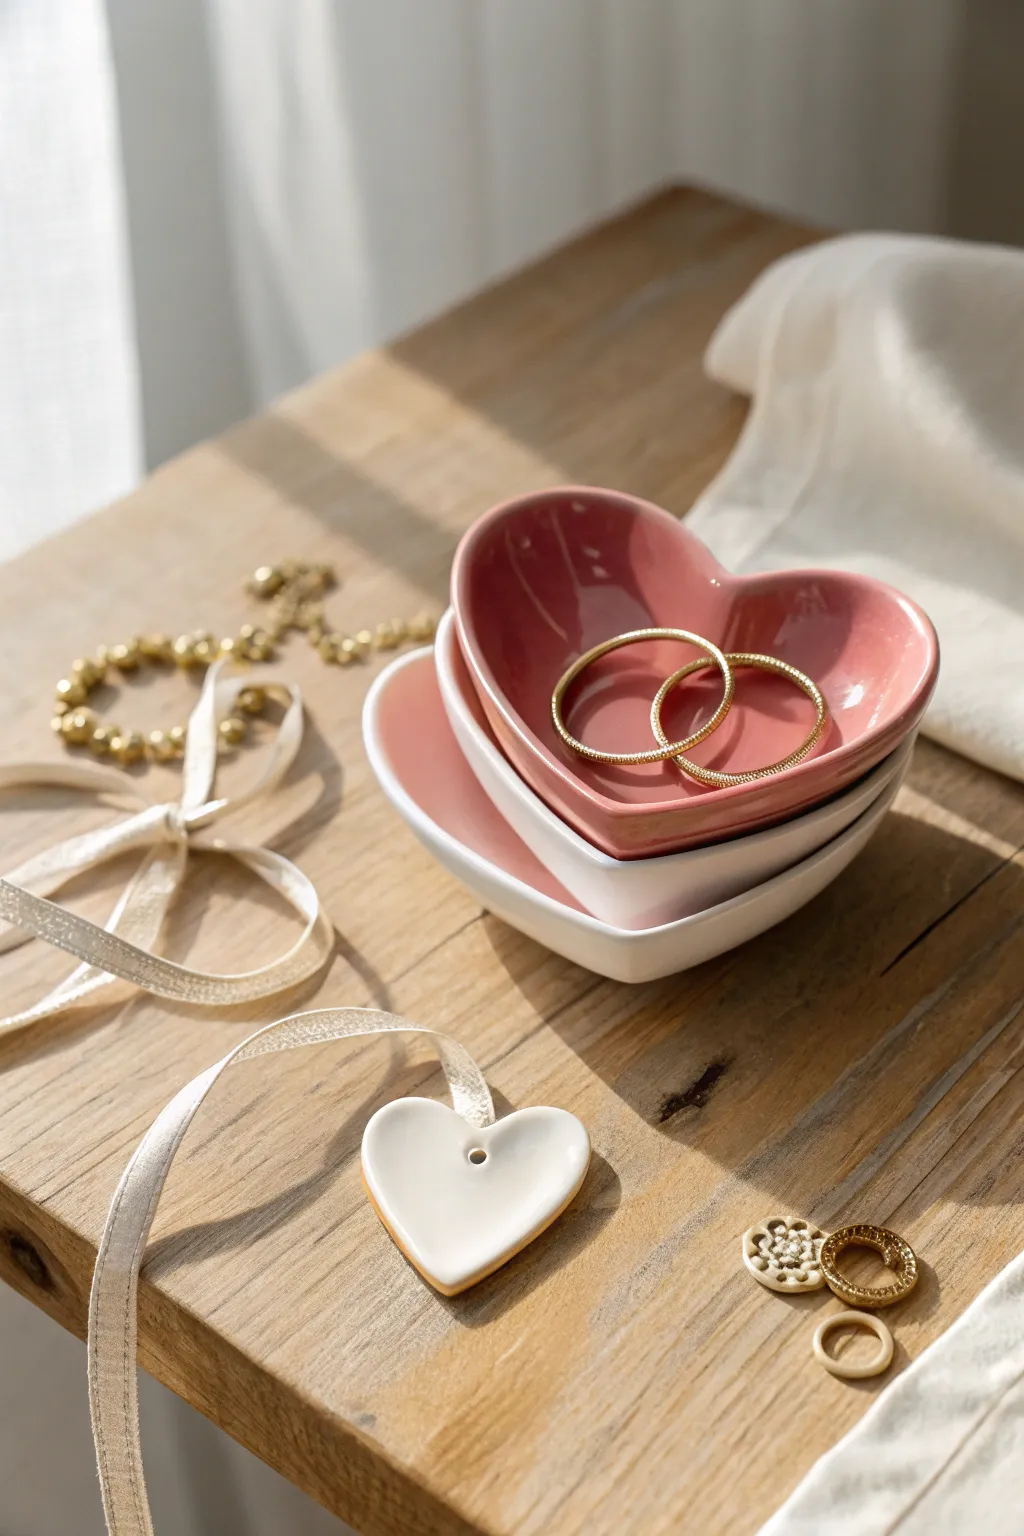
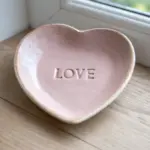
Create a charming set of nesting heart dishes that are perfect for holding rings, earrings, or simply adding a touch of romance to your vanity. With a glossy glazed finish and gentle gradients of pink, these handmade ceramics make for beautiful decor or heartfelt gifts.
Step-by-Step
Materials
- White air-dry clay or polymer clay
- Rolling pin
- Heart-shaped cookie cutters (at least 3 graduated sizes)
- Small bowl relative to cutter size (for shaping)
- Fine-grit sandpaper (400-600 grit)
- Acrylic paints (baby pink, deep rose, white)
- High-gloss varnish or clay glaze
- Glossy Mod Podge (optional)
- Paintbrushes (flat shader and soft round)
- Clay knife or craft blade
- Small sponge
- Water cup
Step 1: Shaping the Clay
-
Condition the clay:
Begin by kneading your white clay until it is soft, pliable, and free of air bubbles. If using air-dry clay, keep your hands slightly moist to prevent cracking. -
Roll it out:
Use your rolling pin to flatten the clay into an even slab, aiming for a consistent thickness of about 1/4 inch. If you want a smoother surface, roll the clay between two sheets of parchment paper or on a silicone mat. -
Cut the shapes:
Press your graduated heart-shaped cookie cutters firmly into the slab to create three distinct sizes. Lift the cutters straight up to ensure clean edges. -
Smooth the edges:
Dip your finger in a little water and gently run it along the cut edges of each heart to smooth out any roughness or sharp corners left by the cutter. -
Create the curvature:
To give the flat hearts their dish shape, carefully drape each clay heart into the curve of a small bowl or cup. I like to use the bottom of a muffin tin for the smaller ones, as it provides a perfect, gentle curve. -
Refine the form:
While in the mold, gently press the center down so the heart conforms to the curve, ensuring the edges curl upwards slightly to form a shallow rim. -
Dry properly:
Allow the clay to dry completely while sitting in the mold. For air-dry clay, this usually takes 24-48 hours depending on humidity; rotate them occasionally to let air reach the bottom.
Step 2: Finishing and Glazing
-
Sand for smoothness:
Once fully cured and hard, remove the dishes from their molds. Use fine-grit sandpaper to gently buff away any remaining fingerprints or uneven edges until the surface feels satin-smooth. -
Dust off:
Wipe the dishes down with a slightly damp sponge or cloth to remove all sanding dust before painting. -
Paint the first coat:
Apply a base coat of white acrylic paint to the interior and exterior of all dishes to prime the surface and ensure the top colors pop. -
Apply color gradients:
Paint the largest dish a deep rose pink, the medium dish a soft baby pink, and keep the smallest dish white (or a very pale blush). It often helps to mix your paints with a little white to get the exact tonal step-down effect. -
Paint the rims:
For a refined look, carefully paint the very top rim of each dish. You can match the body color or, if you’re feeling adventurous, add a metallic gold edge for contrast. -
Seal tightly:
Once the paint is thoroughly dry, apply a coat of high-gloss varnish or glaze. This is crucial for achieving that ceramic-like shine shown in the photo. -
Add a second coat:
Let the first layer of glaze dry, then apply a second coat for extra durability and a glass-like finish. This makes the dishes resistant to scratches from jewelry. -
Create the pendant (optional):
Use a scrap piece of clay to cut a small heart, poke a hole near the top with a toothpick, and finish it exactly like the white dish to create the matching pendant shown in the scene.
Smooth Moves
Use a barely damp sponge to smooth air-dry clay *before* it dries. It saves hours of sanding later and creates a professional porcelain look.
Gold Rim Upgrade
Use a gold leaf pen or liquid gilding on the rims after the clear glaze has dried for a luxurious, high-end jewelry store finish.
Now you have a stunning set of glossy dishes ready to cradle your favorite treasures or gift to someone special


Pastel Conversation Heart Keychains
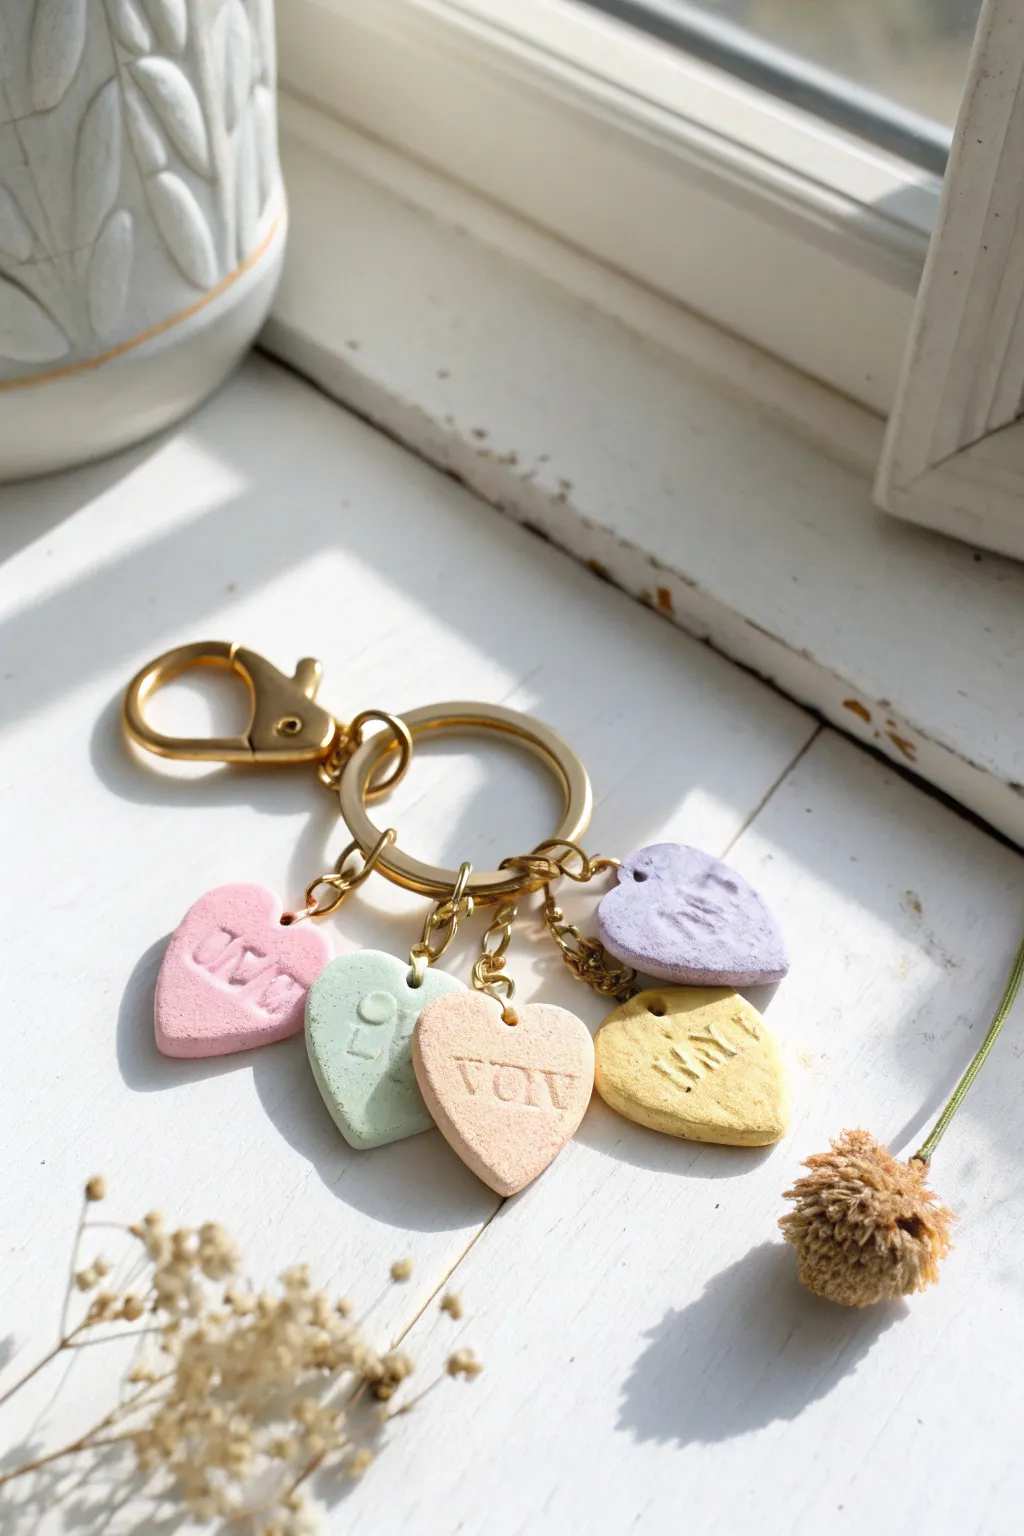
Carry a little love wherever you go with these adorable keychains inspired by classic conversation heart candies. The soft pastel colors and stamped messages make them a perfect customizable gift for Valentine’s Day or just because.
Step-by-Step Tutorial
Materials
- Polymer clay (white, pink, yellow, purple, light green, peach)
- Small heart-shaped clay cutter (approx. 1 inch)
- Small letter stamp set
- Rolling pin or acrylic roller
- Parchment paper or clay mat
- Toothpick or clay needle tool
- Gold jump rings (6-8mm)
- Gold keychain ring with lobster clasp
- Jewelry pliers (flat nose and round nose)
- Baking sheet
- Oven
Step 1: Prepping the Clay Hearts
-
Condition the polymer clay:
Begin by taking small amounts of your different colored clays. Knead each color in your hands until it becomes soft, pliable, and warm to the touch. -
Mix pastel shades:
If your colors are too vibrant, mix in a generous amount of white clay to achieve those soft, chalky pastel tones characteristic of the candy. -
Roll out the slab:
Place a ball of clay on your parchment paper. Using your roller, flatten it into a slab that is about 1/4 inch thick. You want them chunky enough to look like real candies. -
Cut the shapes:
Press your heart-shaped cutter firmly into the clay slab. Wiggle it slightly to ensure a clean cut, then lift the cutter. Repeat this for each color to get a variety of hearts. -
Smooth the edges:
Gently pick up each heart and use your fingertip to lightly smooth the sharp edges created by the cutter. This gives the clay a softer, rounded appearance similar to pressed sugar.
Fixing Clay Fingerprints
If you notice fingerprints on your raw clay hearts, lightly brush them with a tiny amount of cornstarch or baby oil before baking to smooth the surface perfectly.
Step 2: Adding Messages
-
Select your letters:
Choose short, sweet phrases for your hearts like ‘LUV’, ‘XOXO’, or ‘MINE’. Prepare the corresponding stamps from your letter set. -
Test the impression:
Before stamping your actual hearts, press the letters into a scrap piece of clay to ensure they are facing the right way and to gauge how hard you need to press. -
Stamp the hearts:
Carefully press the letters into the center of each heart. Apply even pressure so the impression is deep enough to read but doesn’t distort the heart shape. -
Create the hole:
Using a toothpick or needle tool, pierce a small hole near the top of one of the heart’s lobes. Wiggle the tool slightly to ensure the hole is large enough for a jump ring.
Make It Pop
After baking, brush a tiny bit of red or pink acrylic paint into the stamped letters, then wipe the surface clean. The paint stays in the grooves for readable text.
Step 3: Baking and Assembly
-
Bake the pieces:
Arrange your hearts on a parchment-lined baking sheet. Bake them according to the temperature and time instructions on your specific package of polymer clay. -
Cool down:
Once baked, remove the tray from the oven and let the hearts cool completely before handling. They are fragile while hot. -
Open the jump rings:
Using two pairs of pliers, twist a gold jump ring open. I always twist the ends away from each other (front to back) rather than pulling them apart, to keep the circle shape intact. -
Attach to chain:
Thread the open jump ring through the hole in one of your clay hearts. -
Secure the charm:
Loop the jump ring onto one of the small chain links attached to the main keyring hardware. -
Close the ring:
Use your pliers to twist the jump ring back into a closed position, ensuring the ends meet perfectly so the charm doesn’t slip off. -
Repeat for all charms:
Attaching the remaining hearts to the chain links, staggering their placement slightly so they cluster nicely when held up.
Now you have a charming accessory to keep your keys organized or to gift to a special friend

Cute Couple Figurines Holding a Heart
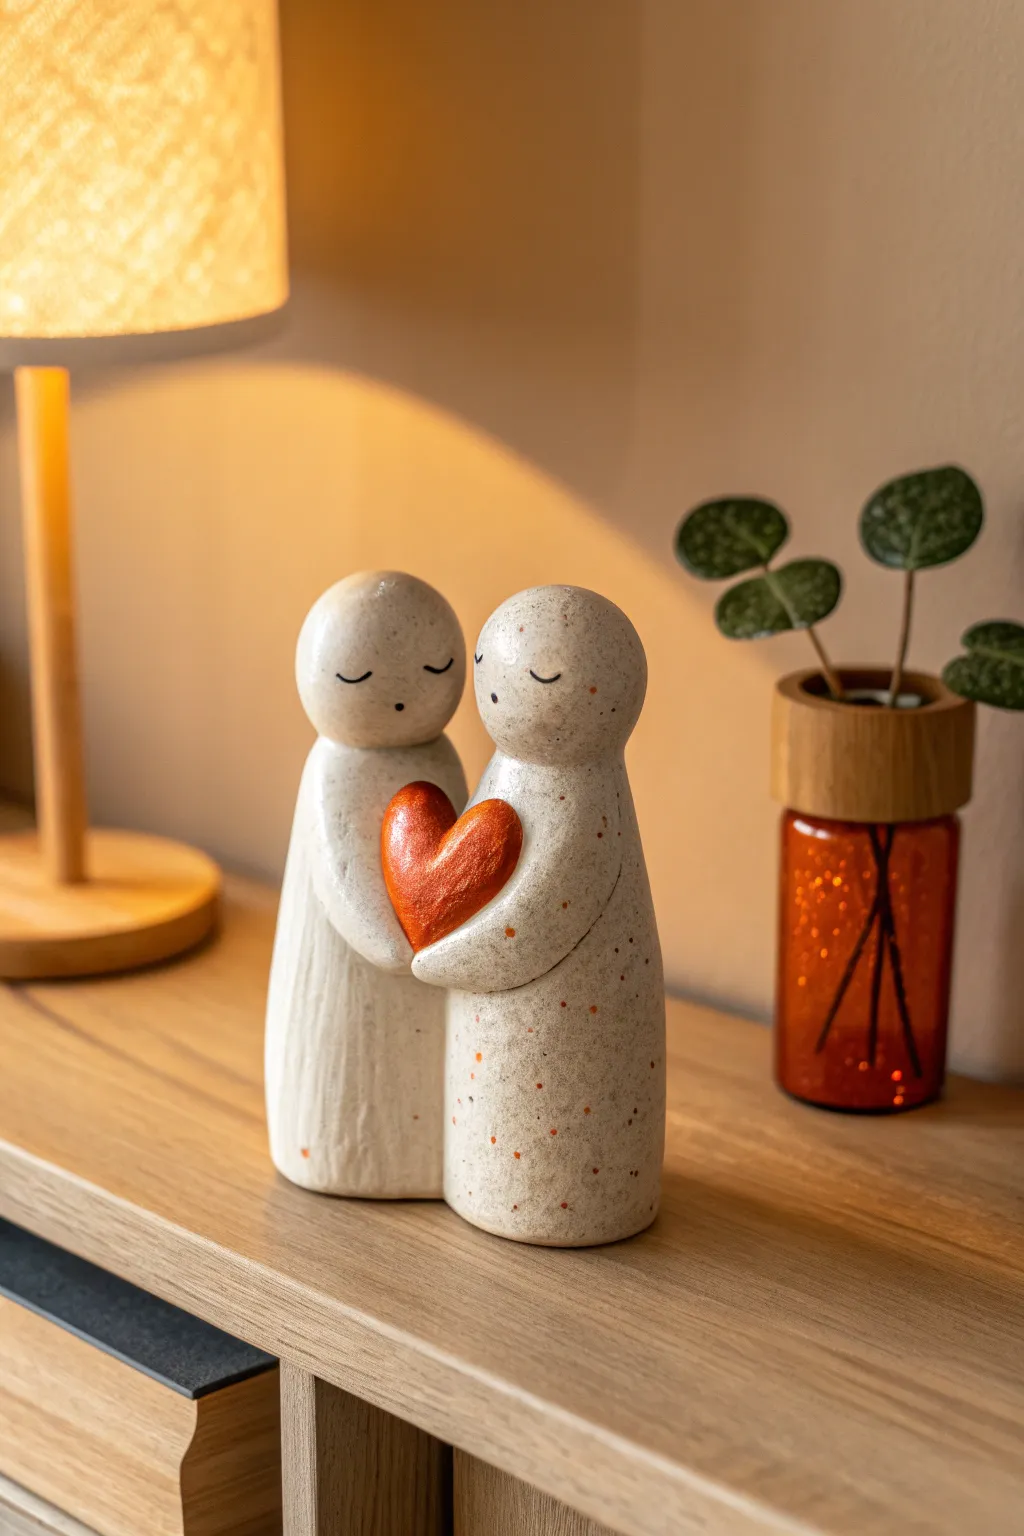
This heartwarming figurine features two minimalist characters embracing a vibrant red heart, symbolizing connection and unity. The speckled, stone-like finish gives it a grounded, rustic charm, while the simple facial expressions convey a deep sense of peace.
How-To Guide
Materials
- Polymer clay (stone or granite effect)
- Polymer clay (bright red or orange-red)
- Acrylic paint (black for details, optional terracotta for heart highlights)
- Fine detail paintbrush
- Modeling tools (smoothing tool, needle tool)
- Aluminum foil (for armature core)
- Oven or kiln (depending on clay type)
- Matte varnish or sealant
Step 1: Forming the Bodies
-
Prepare the Core:
Crumple two small pieces of aluminum foil into elongated cone shapes. These will act as the lightweight centers for your figures and save on clay. -
Condition the Clay:
Take your stone-effect polymer clay and knead it until it is soft and pliable. If the clay is too firm, warmth from your hands will help soften it. -
Wrap the Cores:
Roll out a sheet of the stone clay and wrap it fully around each foil cone. Smooth the seams completely so the foil is hidden and the surface is uniform. -
Shape the Torsos:
Gently roll the clay-covered cones on your work surface to create a subtle taper. The base should be wider than the top, creating a steady, gown-like silhouette for both figures. -
Create the Heads:
Roll two smooth spheres of the same stone clay. These should be proportional to the bodies—not too large, but substantial enough to look cute. -
Attach the Heads:
Press a head firmly onto the top of each tapered body. Because there are no distinct necks in this minimalist style, blend the clay slightly at the connection point or use a small piece of wire as an internal dowel for stability. -
Join the Figures:
Position the two figures side-by-side so they are leaning slightly toward each other. Press their sides together gently from the hip to the shoulder area so they fuse into a single unit.
Clean Stone Look
To keep lighter ‘stone’ clay pristine, keep a pack of baby wipes nearby. Wipe your hands and tools often, especially after handling the red heart clay, to prevent color transfer.
Step 2: Adding the Heart & Arms
-
Create the Heart:
Take your red clay and form a plump, symmetrical heart shape. It should be large enough to be the focal point but small enough for the figures to hold comfortably. -
Position the Heart:
Place the red heart directly in the center of the two figures, roughly at chest height. Press it gently so it adheres to both torsos. -
Shape the Arms:
Roll two thick, sausage-like logs of stone clay for the arms. These should be rounded at the ends to suggest hands without detailing individual fingers. -
Attach the First Arm:
Take the first arm and attach it to the left figure’s shoulder area. Curve it around the body so the rounded ‘hand’ rests securely on the front of the red heart. -
Attach the Second Arm:
Repeat with the right figure, draping the arm from the shoulder and curving it inward so the hand meets the other hand or rests on the other side of the heart. Blend the clay at the shoulders so the arms look seamless. -
Refine the Surface:
Use a smoothing tool or your finger to smooth out any fingerprints. If you want more texture, you can gently dab the surface with a stiff brush.
Step 3: Details & Finishing
-
Paint Facial Features:
Using a very fine detail brush and black acrylic paint, carefully paint two small curved lines for closed eyes on each face. Add a tiny dot for the mouth on the left figure and a tiny nose dot on the right figure. -
Speckle the Heart (Optional):
To mimic the texture in the photo, you can lightly stipple a bit of orange or metallic copper paint onto the red heart to give it dimension and a handmade feel. -
Final Inspection:
Check the figurine from all angles to ensure the connection points are strong and the figures are standing straight. -
Bake the Piece:
Bake the clay according to the manufacturer’s instructions. Usually, this is around 275°F (130°C) for 15-30 minutes per 1/4 inch of thickness. -
Seal the Work:
Once completely cool, apply a layer of matte varnish to the bodies to protect the paint and preserve the stone look. You might choose a satin varnish just for the red heart to make it pop.
Trouble Balancing?
If the figures tip over, the base isn’t flat enough. Before baking, firmly press the entire duo down onto a glass tile or baking sheet to flatten the bottom evenly.
Place your finished piece near a window or lamp to let the light highlight the sweet details you created


Whimsical Animal Pair With One Shared Heart
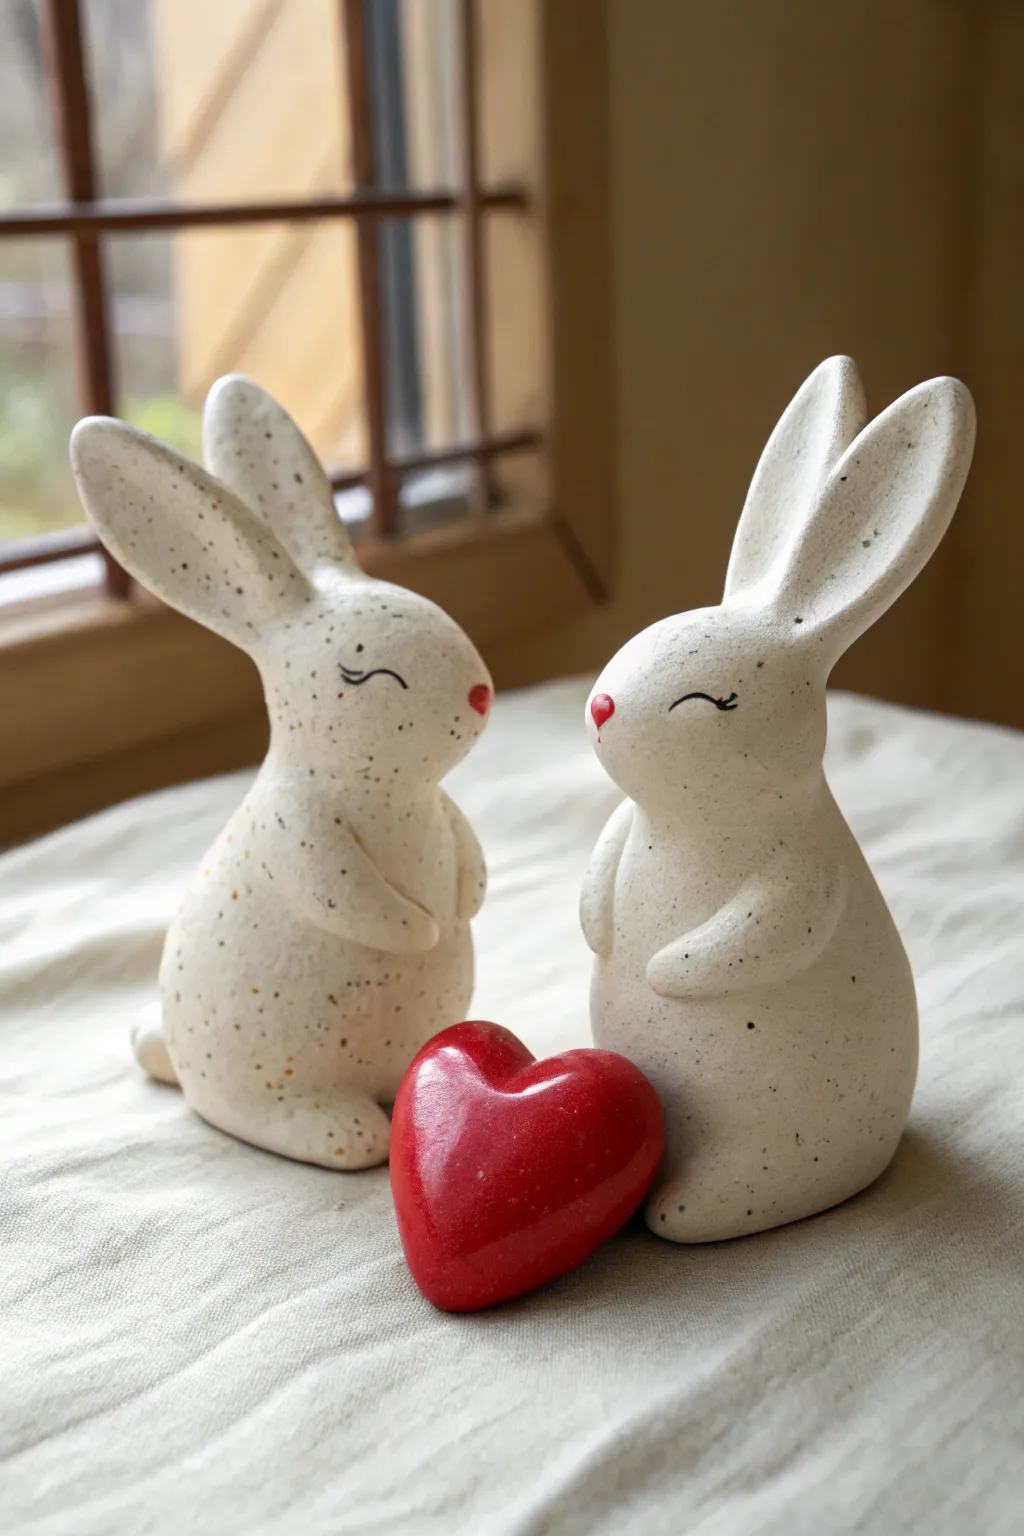
Celebrate love with this adorable duo of hand-sculpted rabbits sharing a vibrant red heart. With their speckled finish and sweet expressions, this pair makes for a charming Valentine’s Day display or a heartfelt handmade gift.
Detailed Instructions
Materials
- White polymer clay (approx. 4oz)
- Red polymer clay (small amount)
- Acrylic roller or rolling pin
- Modeling tools (needle tool, ball stylus)
- Black acrylic paint
- Toothbrush or stiffness brush (for speckling)
- Fine detail brush
- Gloss glaze (optional)
- Aluminum foil (for armature cores)
- Oven for baking
Step 1: Sculpting the Bodies
-
Create the core shape:
Start by crumpling two small balls of aluminum foil into egg shapes to serve as the core for the bodies. This saves clay and helps with baking, but ensure they are tightly packed. -
Cover with clay:
Condition your white polymer clay until pliable, then roll two sheets approximately 1/4 inch thick. Wrap each foil core completely, smoothing the seams with your thumb until you have two solid, smooth egg shapes. -
Define the base:
Gently tap the bottom of each egg shape on your work surface to flatten it slightly. This ensures your bunnies will sit upright without wobbling. -
Form the heads:
Roll two smaller balls of white clay for the heads. Attach them to the top of the bodies, blending the clay downward at the neck seam using a modeling tool to create a seamless connection. -
Shape the snouts:
Pinch the front of the head pieces gently to pull out a subtle snout shape, giving the rabbits their profile.
Step 2: Adding Details & Ears
-
Sculpt the ears:
Create four elongated teardrop shapes from white clay. Flatten them slightly and use a ball tool to create a shallow indentation running up the center of each ear. -
Attach the ears:
Press the ears onto the back of the heads. I like to position them angling slightly backward for a relaxed look. Blend the clay at the attachment point vigorously so they don’t break off later. -
Add the arms:
Roll four small logs of clay for the arms. Attach two to each bunny, positioning them so they curve inward as if they are resting on their bellies or reaching for the heart. -
Refine the tails:
Add a small, fluffy ball of clay to the lower back of each rabbit for a tail. Use a needle tool to texture it slightly for a furry appearance. -
Create the heart:
Take a piece of red clay and form a smooth, symmetrical heart shape. It should be large enough to sit comfortably between the two figures.
Clean Clay Tip
White clay picks up everything! Keep baby wipes handy and clean your hands and tools thoroughly between handling the red heart and the white bodies.
Step 3: Finishing Touches
-
Smooth the surfaces:
Before baking, use a drop of baby oil or clay softener on your finger to gently rub away any fingerprints or lint on the white clay. -
Nose details:
Add tiny triangles of red clay to the tips of the snouts for noses, pressing them firmly into place. -
Bake the project:
Place the bunnies and the heart on a baking sheet. Bake according to your clay manufacturer’s instructions (usually 275°F for 15-30 minutes). -
Cool and prepare for painting:
Let the pieces cool completely. Once cool, prepare a mixture of water and black acrylic paint. -
Speckle effect:
Dip a toothbrush into the watered-down black paint. Run your thumb over the bristles to flick tiny speckles onto the rabbits. Practice on paper first to control the spray. -
Draw the eyes:
Using a very fine detail brush or a fine-tip paint pen, draw closed, curved eyelids with tiny eyelashes on each bunny. -
Seal (optional):
If you want a ceramic look, coat the heart in a high-gloss glaze and leave the bunnies matte, or glaze the entire set for protection.
Personalize It
Before baking, clear a small space on the shared heart and stamp your initials or a special date into the clay for a custom commemorative piece.
Place the heart between your finished bunnies to complete this sweet scene of connection

The Complete Guide to Pottery Troubleshooting
Uncover the most common ceramic mistakes—from cracking clay to failed glazes—and learn how to fix them fast.
Wedding or Anniversary Cake Topper Duo
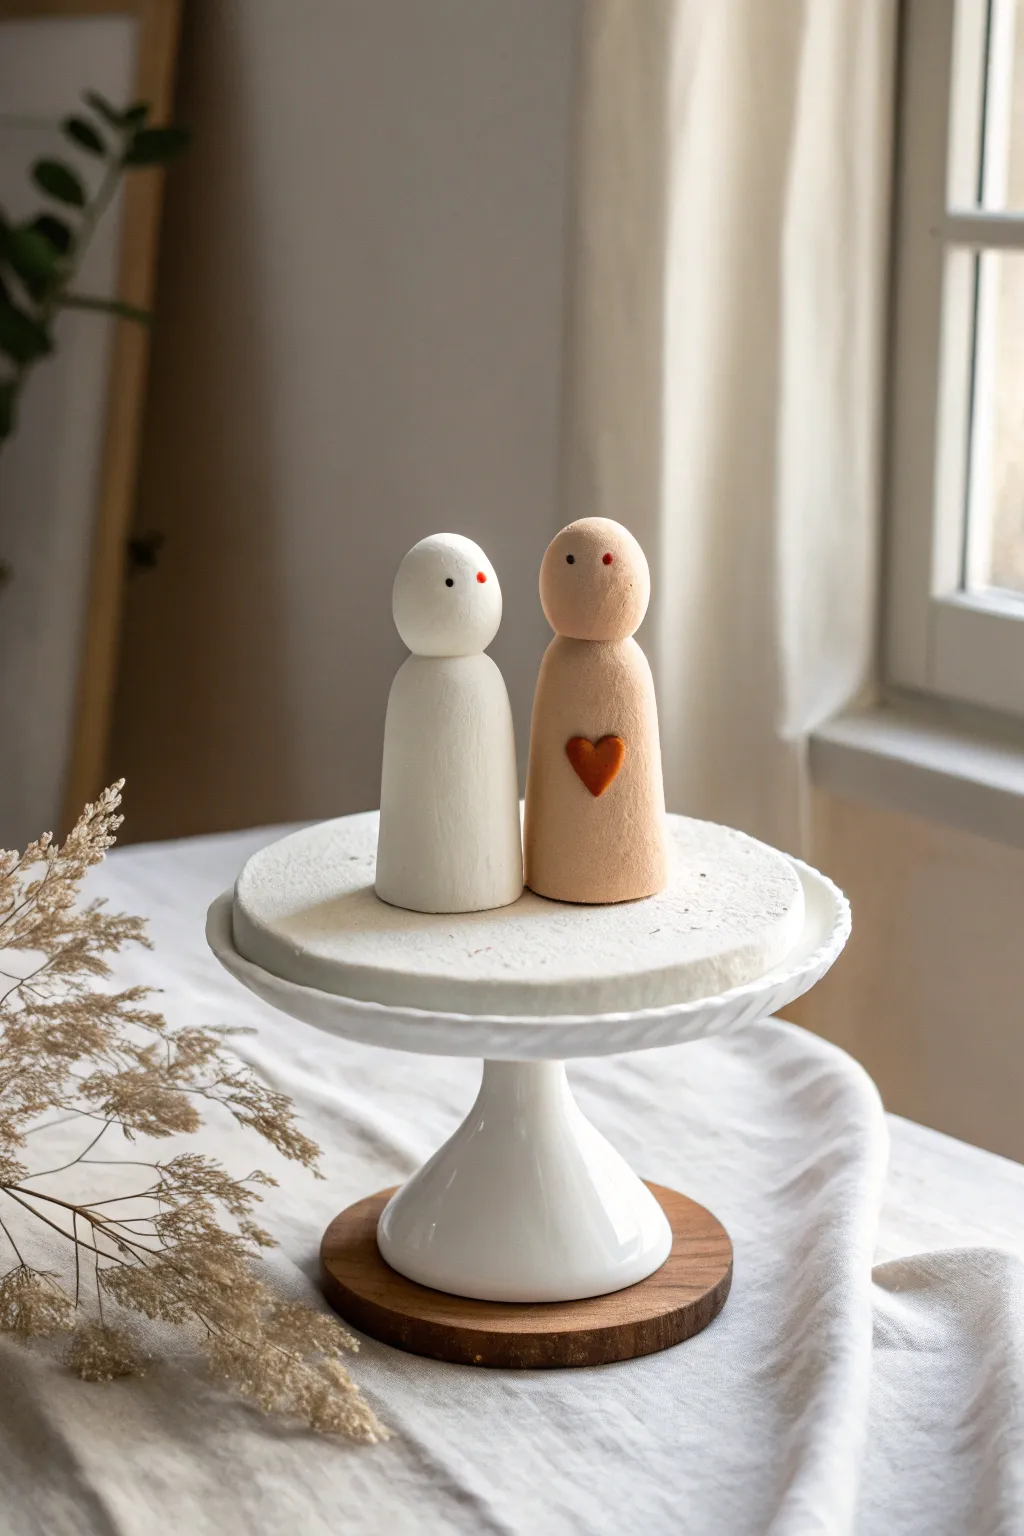
These charmingly simple wedding or anniversary cake toppers feature two stylized figures standing side-by-side in perfect harmony. Their minimalist design relies on clean lines, soft matte textures, and a single heart accent to convey a timeless sense of connection.
How-To Guide
Materials
- Air-dry clay (white and terracotta/beige)
- Small rolling pin
- Modeling tools or a dull knife
- Fine-grit sandpaper (220-400 grit)
- Small bowl of water
- Acrylic paints (black, red, optional white/beige for color correction)
- Fine detail paintbrush (size 000)
- Matte sealant spray or varnish
- toothpicks or wire (for internal armature, optional)
Step 1: Shaping the Bodies
-
Prepare the base clay:
Begin with two lumps of clay. For the white figure, use white air-dry clay. For the beige figure, either use pre-colored terracotta clay or knead a small amount of brown pigment into white clay until you achieve a soft, sandy hue. -
Form the cylinders:
Roll each lump into a smooth cylinder. The base needs to be slightly wider than the top to ensure stability, creating a very subtle conical shape. -
Flatten the bottoms:
Gently tap the bottom of each cylinder on your work surface to create a perfectly flat base so they stand upright without wobbling. -
Refine the torso shape:
With damp fingers, smooth the sides of the cylinders. Aim for a height of about 3 to 4 inches, keeping the surface free of fingerprints. -
Create the neckline:
Using your thumb and forefinger, gently pinch the clay about one inch from the top to create a slight indentation, distinguishing the head from the body.
Seamless Finish
To fix small cracks during drying, make a ‘slip’ by mixing a little clay with water into a paste. Paint this into cracks, let dry, and sand smooth.
Step 2: Sculpting Heads and Details
-
Round the heads:
Smooth the clay above the neck indentation into a perfect sphere. Keep the transition from neck to shoulders soft and sloping rather than sharp. -
Check proportions:
Place the two figures next to each other. Ensure the heads are roughly the same size, though you might want one figure slightly taller than the other for visual interest. -
Add the heart:
Roll a tiny pea-sized ball of darker terracotta or red clay. Flatten it slightly and use a modeling tool to indent the top center and taper the bottom, forming a small heart. -
Attach the heart:
Score the chest area of the beige figure slightly and dab a tiny bit of water on the back of the clay heart. Press it gently onto the center of the chest. -
Initial smoothing:
Give both figures a final pass with water-dampened fingers to erase any tool marks or stray clay bits. -
Drying phase:
Allow the figures to dry completely for 24-48 hours. I find that turning them upside down halfway through the process helps the bottoms dry evenly.
Step 3: Finishing Touches
-
Sand for smoothness:
Once fully dry, use fine-grit sandpaper to gently buff the surface. This is crucial for achieving that porcelain-like, minimalist finish. -
Dust off:
Wipe the figures down with a dry, soft cloth or a clean paintbrush to remove all sanding dust. -
Paint the eyes:
Using the smallest detail brush and black acrylic paint, dab two tiny dots for eyes on each face. Keep them wide-set and level for a sweet expression. -
Add cheek accents:
Dip the very tip of a toothpick into red paint and add a minuscule dot to the cheeks if desired, or keep it strictly to eyes for a cleaner look. -
Seal the work:
Spray the figures with a matte fixative or varnish. Avoid glossy finishes, as the matte texture mimics the organic look of natural pottery.
Base Upgrade
Create a unified look by gluing both dried figures onto a thin wooden or clay disc. This adds stability on top of the cake and makes them a keepsake.
Now you have a timeless, handcrafted keepsake to celebrate your special day
Stamped Love Notes Clay Tags
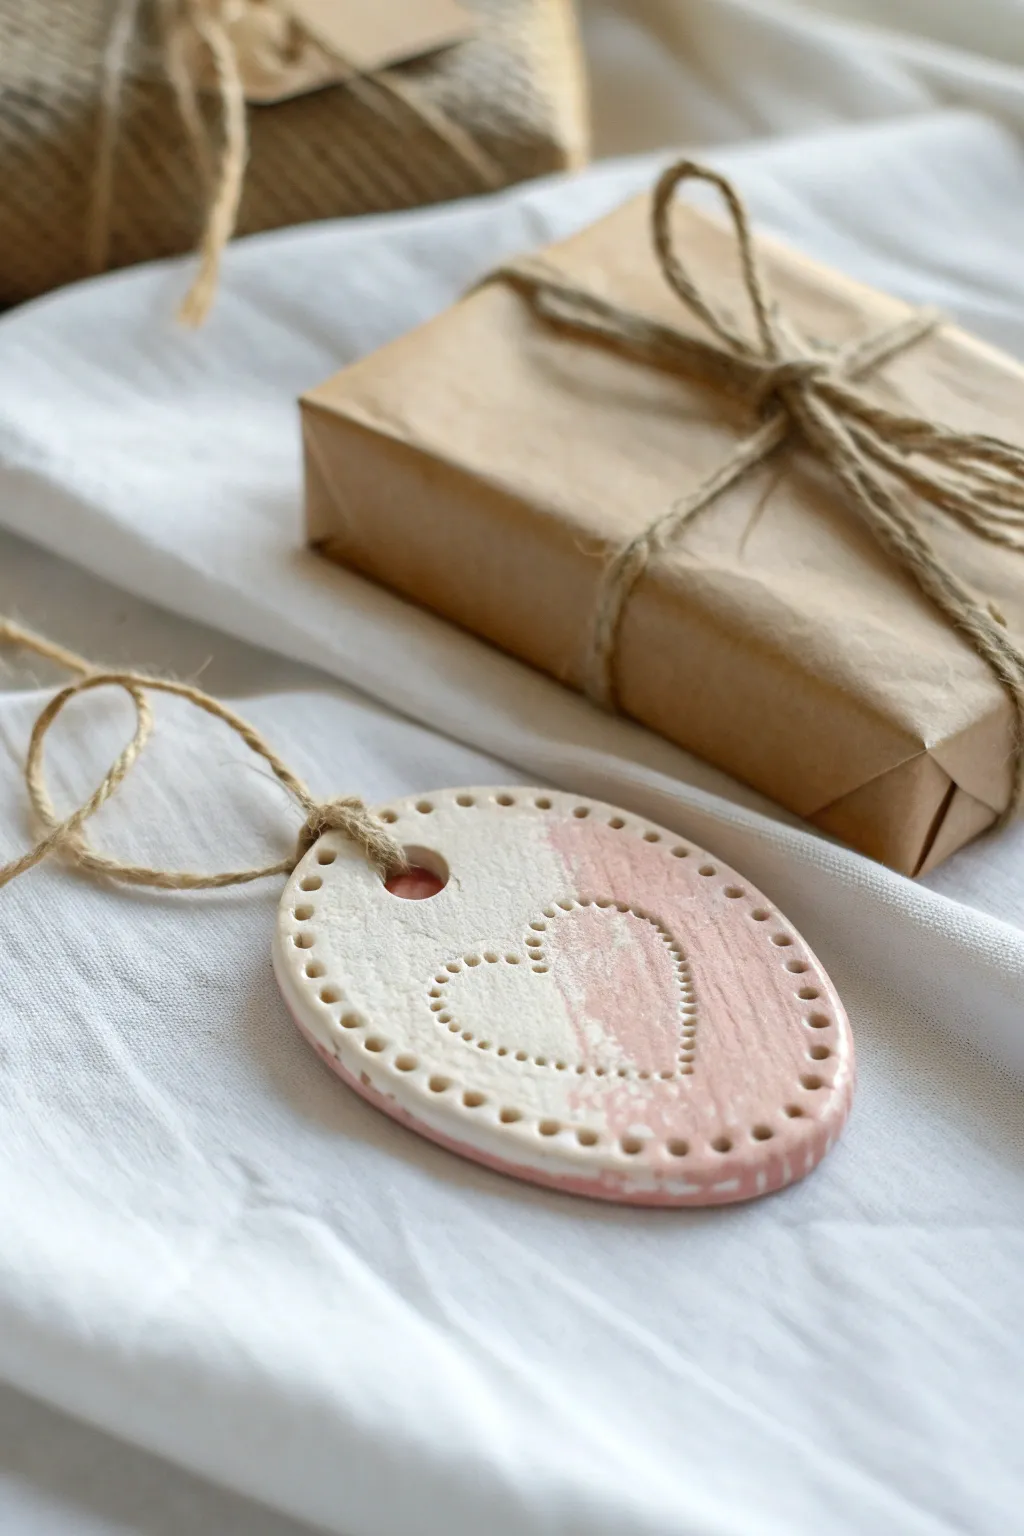
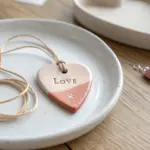
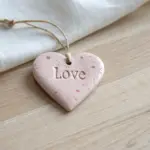
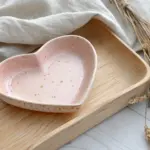
These charming oval tags add a handmade touch to any gift with their delicate dotted borders and soft, two-tone pink finish. Perfectly imperfect, the stamped heart center makes them a sweet keepsake long after the wrapping paper is gone.
Step-by-Step Guide
Materials
- Air-dry clay (white)
- Small rolling pin
- Oval cookie cutter (approx. 3 inches)
- Heart stamp or small heart cutter
- Wooden skewer or toothpick
- Drinking straw (for the hole)
- Acrylic paint (white and blush pink)
- Paintbrush (flat bristle)
- Jute twine or hemp cord
- Sandpaper (fine grit)
- Parchment paper or non-stick mat
Step 1: Shaping the Clay
-
Condition the clay:
Begin by taking a handful of air-dry clay and kneading it in your hands until it becomes warm and pliable. This prevents cracks from forming later. -
Roll it out:
Place the clay on parchment paper or a non-stick mat. Roll it out to an even thickness of about 1/4 inch; you want it sturdy but not too chunky. -
Cut the shape:
Press your oval cookie cutter firmly into the clay. Give it a tiny wiggle to ensure a clean cut, then lift the cutter and peel away the excess clay from the edges. -
Create the hanger hole:
Using a drinking straw, punch a hole near one distinct end of the oval. Twist the straw as you pull it out to remove the small clay plug cleanly.
Clean Cuts Every Time
If the clay sticks inside the straw when punching the hole, dip the tip of the straw in cornstarch or baby powder before pressing it into the wet clay.
Step 2: Adding Texture & Detail
-
Stamp the heart:
Position your heart stamp or cutter gently in the center of the oval. Press down lightly to create an impression without cutting all the way through the clay. -
Detail the heart outline:
To mimic the stitched look in the photo, take your toothpick or skewer and press small dots into the clay along the inner edge of your heart impression. -
Create the border:
Using the same blunt end of a skewer or a small dotting tool, press a repeating pattern of holes around the entire outer perimeter of the oval, keeping the spacing consistent. -
Smooth the edges:
Dip your finger in a tiny bit of water and run it along the cut edges of the oval to smooth out any roughness left by the cutter. -
Let it dry:
Set the tag aside on a flat surface to dry completely. Depending on your humidity, this usually takes 24 to 48 hours. Create a few extras just in case one warps.
Scented Tags
Add dropping essential oils onto the unpainted back of the dried clay tag. The porous material acts as a diffuser, making your gift smell as good as it looks.
Step 3: Painting & Finishing
-
Sand imperfections:
Once fully dry and opaque white, use fine-grit sandpaper to gently smooth any sharp burrs, especially around the punched hole. -
Apply the base coat:
Paint the entire front surface with a thin layer of white acrylic paint if your clay isn’t bright enough on its own. Let this dry for about 10 minutes. -
Paint the color block:
Dip your dry brush into the blush pink paint. Starting from the right side, brush horizontally across the tag, fading out as you reach the middle to create a soft, distressed edge. -
Highlight the texture:
While the paint is wet, dab a paper towel over the dotted areas. This removes paint from the high points but leaves it in the holes, emphasizing the texture. -
Dry brush detail:
I prefer to take a nearly dry brush with a tiny amount of white paint and lightly sweep it over the pink section to give it that weathered, rustic look shown in the image. -
Paint the rim:
Carefully paint the side edges of the oval pink to match the front section, giving the tag a finished appearance from all angles. -
Attach the string:
Cut a length of jute twine, fold it in half, and thread the loop through the hole. Pull the tails through the loop to secure it with a lark’s head knot.
Tie this onto a simply wrapped package for an instantly elevated presentation


What Really Happens Inside the Kiln
Learn how time and temperature work together inside the kiln to transform clay into durable ceramic.
Nested Heart Bowls in Ombré Colors
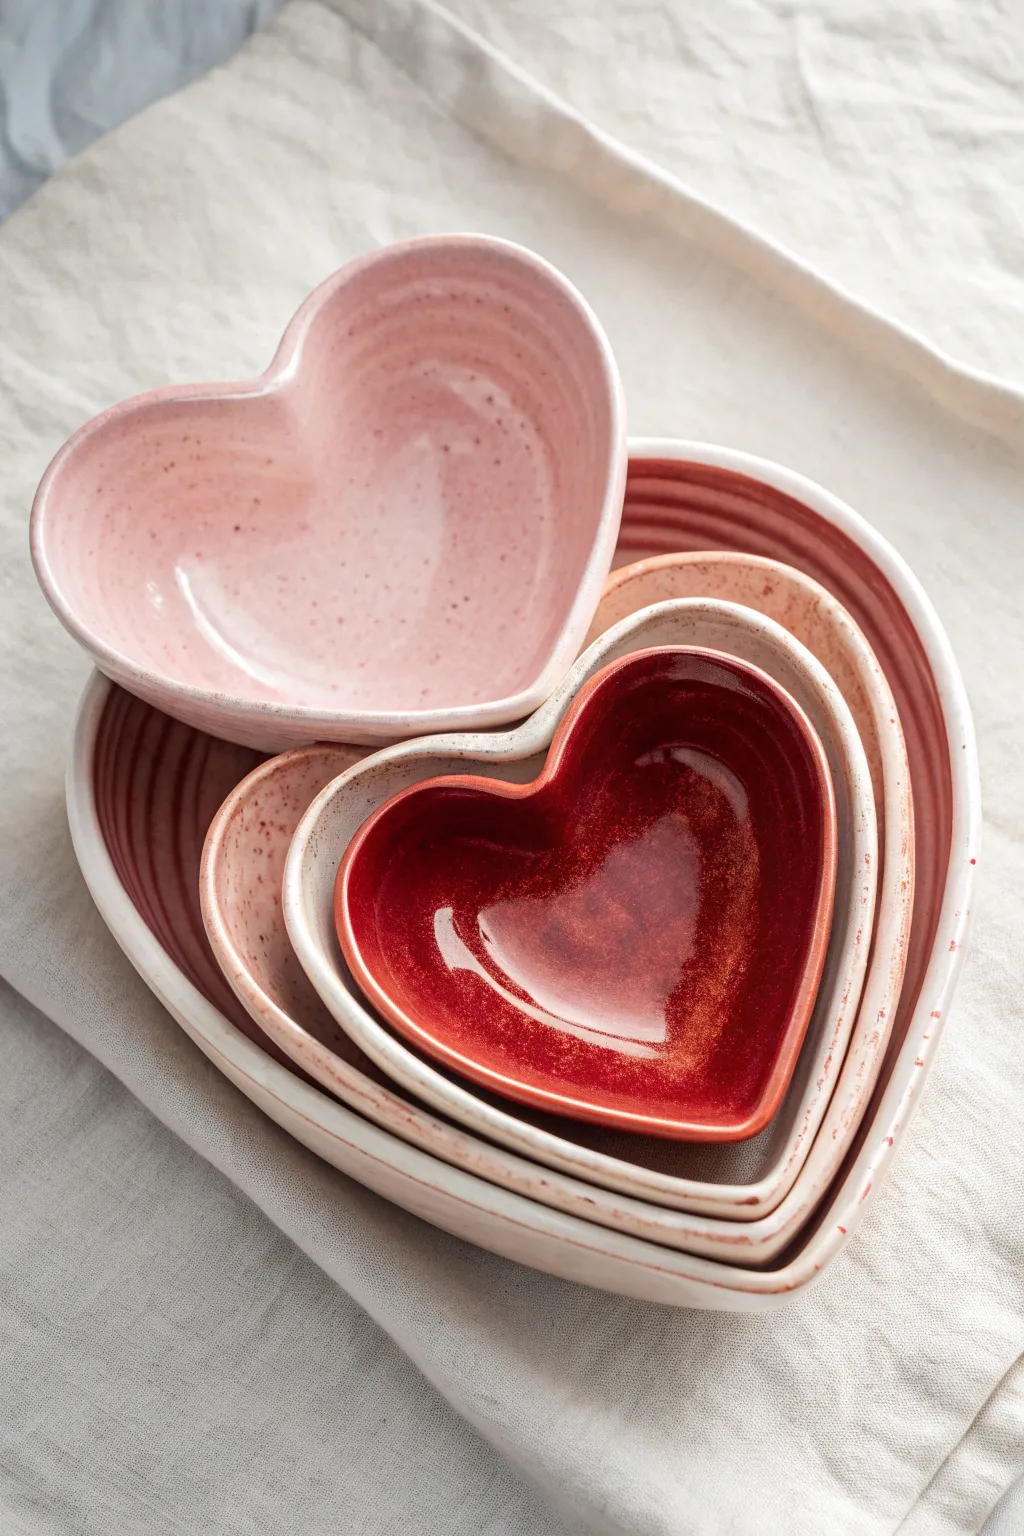
These charming nesting bowls combine a romantic shape with a sophisticated gradient of pinks and reds. Their slightly organic edges and speckled glaze give them a handcrafted warmth that feels professional yet personal.
Step-by-Step Tutorial
Materials
- Stoneware clay (white or light buff)
- Heart-shaped cookie cutters or paper templates (graded sizes)
- Rolling pin with guide rings (approx. 1/4 inch)
- Canvas or slab mat
- Fettling knife or needle tool
- Sponge
- Rib tool (flexible)
- Small bowls or foam slump molds (for shaping)
- Underglazes: Deep red, coral pink, light pink
- Clear glossy glaze
- Speckled glaze additive (optional, can also flick iron oxide)
- Kiln (or oven if adapting for polymer clay)
Step 1: Slab Preparation
-
Wedge the clay:
Begin by thoroughly wedging your clay to remove air bubbles and align the particles, ensuring a smooth, workable consistency. -
Roll the slab:
Place the clay on your canvas or slab mat. Using a rolling pin with 1/4 inch guide rings, roll out a large, even slab. Cross-roll in different directions to prevent warping later. -
Check consistency:
Run a flexible rib tool gently over the surface of the clay slab. This compresses the clay and removes any canvas texture.
Use Balloons for Custom Curves
Don’t have the right size slump molds? Partially inflated balloons set in tape rolls make perfect resting surfaces for drying specific heart sizes.
Step 2: Cutting and Shaping
-
Cut the hearts:
Arranging your heart cutters or templates on the slab to minimize waste, cut out hearts in descending sizes. You will need at least four sizes for a good nesting stack. -
Soften edges:
Before moving the hearts, use your finger or a slightly damp sponge to smooth the cut edges. Sharp edges can become brittle after firing. -
Form the curve:
Gently lift each clay heart and drape it into a corresponding slump mold or bowl. Gravity will do most of the work, but you can gently press the center down to ensure the shape holds. -
Refine the rim:
While the clay is in the mold, gently pinch the rim between your thumb and forefinger to create a slight upward lip. I like to give the top ‘V’ of the heart a little extra definition here. -
Dry slowly:
Let the bowls dry to leather-hard in their molds. This stage is crucial; rushing it can cause warping.
Step 3: Glazing and Finishing
-
Bisque fire:
Once the bowls are bone dry, fire them to bisque temperature (usually cone 04) to prepare them for glazing. -
Apply the ombré base:
Assign your colors to bowl sizes: deepest red for the smallest, transitioning to lighter pinks for the larger ones. Paint the interior of each bowl with 2-3 coats of its designated underglaze. -
Rim detailing:
Wipe a damp sponge around the immediate rim to expose the natural clay color, creating a subtle contrast band. -
Add speckles:
To achieve the speckled look seen in the photo, you can use a glaze with speckles built-in, or load a stiff toothbrush with iron oxide wash and flick it gently over the interiors. -
Clear glaze application:
Dip or brush a clear glossy glaze over the entire piece (except the foot/bottom). This makes the colors pop and makes the bowls food-safe. -
Final firing:
Fire the bowls again to your clay body’s recommended glaze temperature (often cone 5 or 6 for stoneware).
Preventing Warped Shapes
If your hearts lose their shape while drying, weigh down the center point gently with a small sandbag or rice-filled sock during the leather-hard phase.
Stack your finished set on a table to admire how the colors graduate from the center outward
Heart Ring Holder Cone or Dish
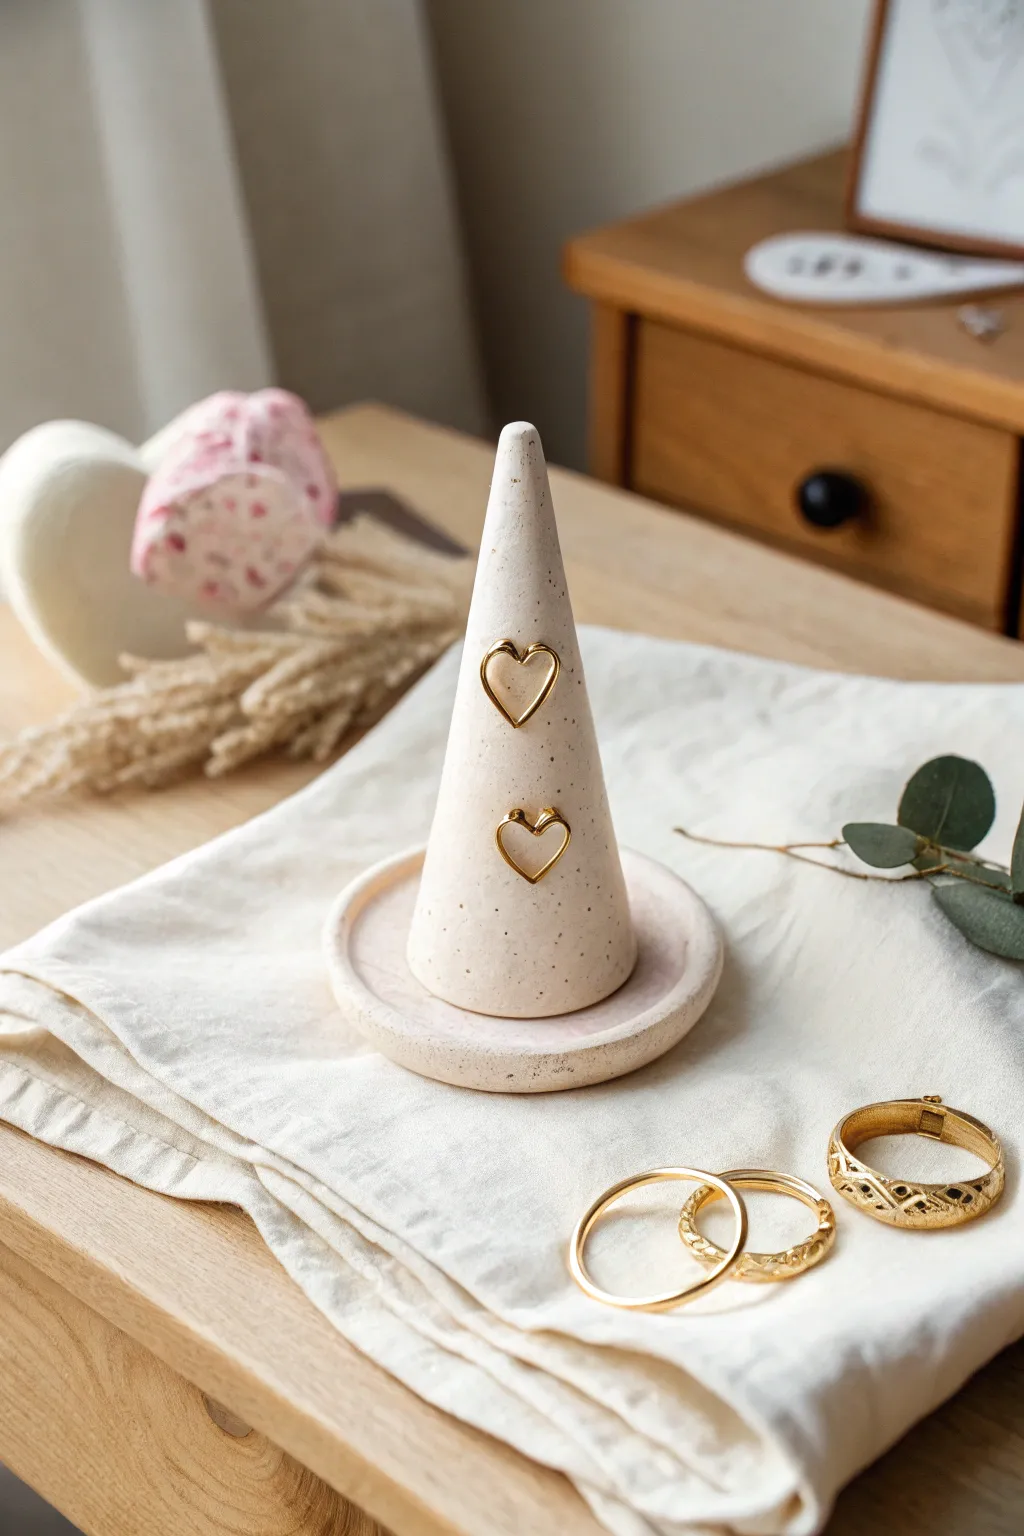
This elegant ring holder combines a classic cone shape with a shallow dish base, perfect for keeping your jewelry organized. The subtle speckled clay finish and delicate gold heart accents give it a modern, romantic touch that looks beautiful on any nightstand.
Step-by-Step
Materials
- White polymer clay (approx. 2oz)
- Speckled clay (or black pepper to mix in)
- Gold crafting wire (20-gauge)
- Needle nose pliers
- Rolling pin or acrylic roller
- Circle cutter (approx. 3-4 inches)
- Craft knife or scalpel
- Liquid polymer clay (Bake & Bond)
- Fine grit sandpaper
- Matte varnish (optional)
- Oven
Step 1: Preparing the Clay
-
Conditioning:
Start by warming up your white polymer clay in your hands until it is soft and malleable. This prevents cracks later on. -
Adding Texture:
If you don’t have pre-speckled clay, flatten your white clay and sprinkle a tiny pinch of ground black pepper or dried vanilla bean specks over it. Fold and knead until the specks are evenly distributed. -
Creating the Base:
Roll out about one-third of your clay to a thickness of 1/4 inch. Use your circle cutter to stamp out a perfect round disc for the dish base. -
Shaping the Rim:
Gently curve the edges of the circle upwards with your fingertips to create a shallow lip. Smooth out any fingerprints with a drop of baby oil if needed.
Leaning Tower?
If your cone starts to droop while forming, pop it in the fridge for 10 minutes to firm up before attaching it to the base plate.
Step 2: Forming the Cone
-
Initial Shape:
Take the remaining clay and roll it into a smooth ball. Slowly begin rolling it back and forth on your work surface, applying more pressure to one side to form a tapered cone shape. -
Refining the Cone:
Stand the cone up and check its height. I usually aim for about 3 to 4 inches tall. Roll it gently on the table to smooth the sides, ensuring the tip is slightly rounded, not dangerously sharp. -
Checking the Fit:
Place the cone in the center of your dish base to ensure the proportions look balanced. The base of the cone should sit flat. -
Attaching Components:
Score the bottom of the cone and the center of the dish with a needle tool. Apply a dab of liquid polymer clay to the scored areas and press the cone firmly onto the dish. -
Seamless Join:
Use a clay shaper or your finger to smooth the seam where the cone meets the dish so they look like one solid piece.
Step 3: Adding Gold Hearts
-
Wire Bending:
Cut two small pieces of gold wire, about 1 inch each. Using your needle nose pliers, bend each piece into a small, open heart shape. -
Placement Planning:
Decide where you want the hearts on the cone. In the example, they are stacked vertically with a bit of space between them. -
Embedding the Hearts:
Gently press the wire hearts into the soft clay cone. You want them to be flush with the surface but not buried too deep. If they don’t stick well, use a tiny dot of liquid clay behind the wire. -
Final Smoothing:
Check the entire piece for lint or fingerprints. A light brush with cornstarch can help smooth out imperfections before baking.
Marbled Magic
Twist a small amount of pale pink or grey clay into your white speckled mixture before rolling for a subtle, elegant marble effect.
Step 4: Finishing Touches
-
Baking:
Preheat your oven according to the clay manufacturer’s instructions (usually 275°F or 130°C). Bake the piece on a ceramic tile or baking sheet for 30 minutes. -
Cooling:
Let the piece cool completely in the oven with the door slightly open. This gradual cooling helps prevent thermal shock cracks. -
Sanding:
Once cool, use fine-grit sandpaper to buffer the bottom of the dish or any rough spots on the rim for a professional feel. -
Sealing:
If you want extra protection, apply a thin coat of matte varnish, avoiding the gold wire hearts to keep their metallic shine.
Now you have a chic display for your favorite rings that doubles as a lovely handmade gift

TRACK YOUR CERAMIC JOURNEY
Capture glaze tests, firing details, and creative progress—all in one simple printable. Make your projects easier to repeat and improve.
Matching Best Friends Charm Set
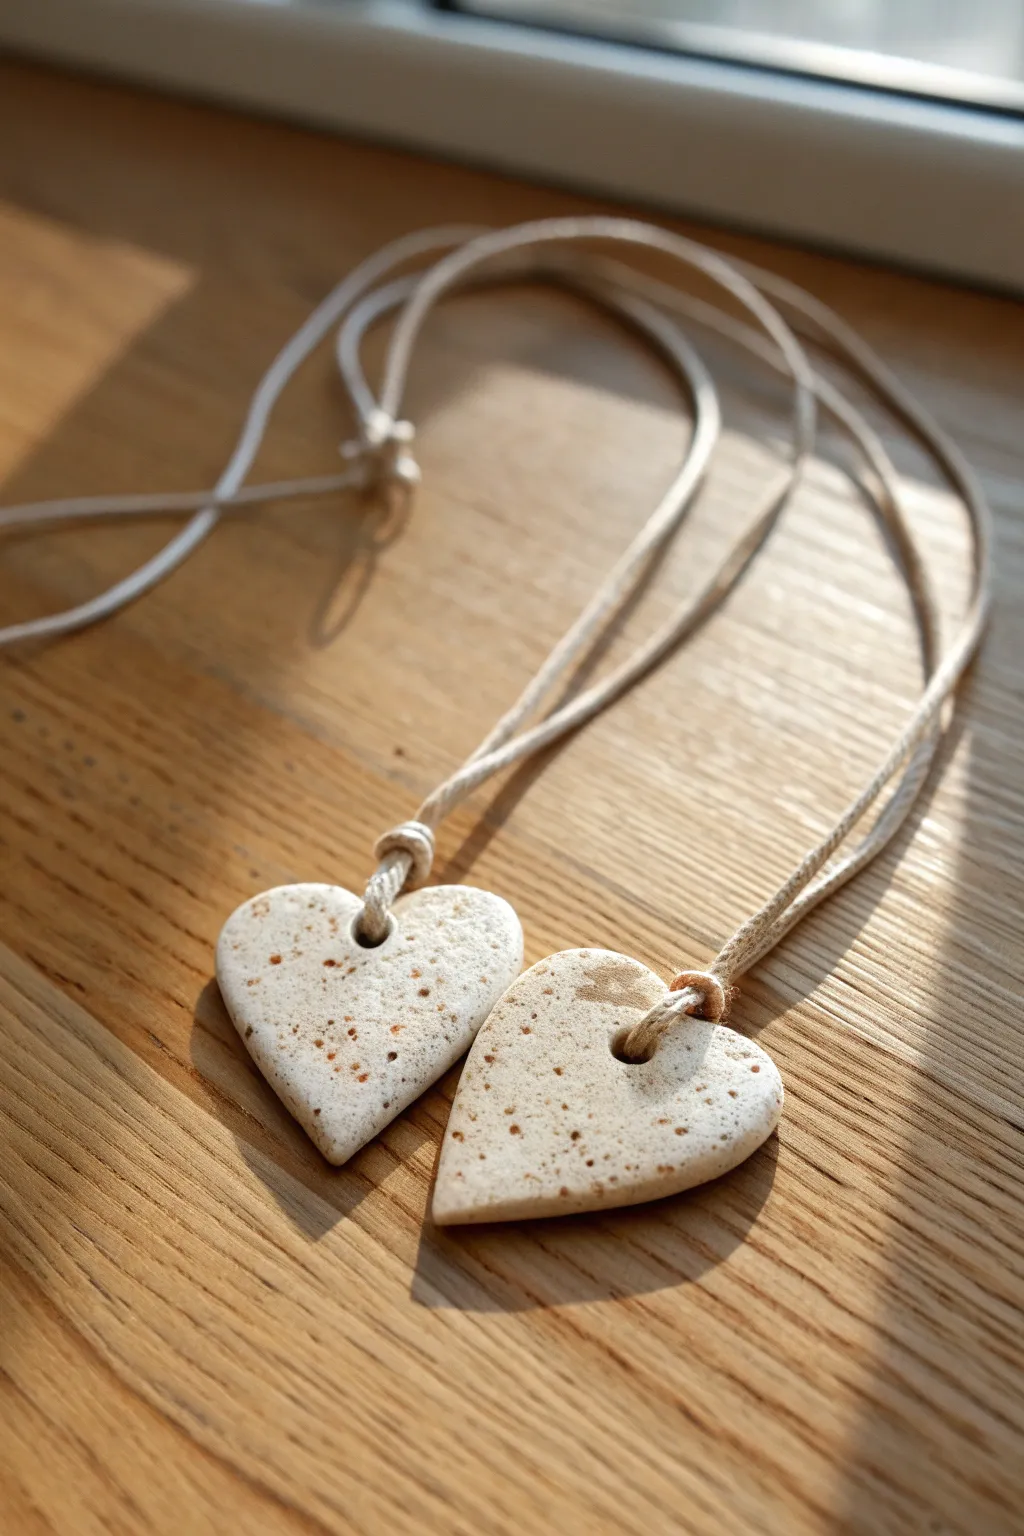
Celebrate friendship or romance with these rustic, handmade ceramic pendants that feature a beautiful natural speckled finish. The minimalist heart design, suspended on simple cord, creates a timeless keepsake that feels both grounded and special.
Step-by-Step Guide
Materials
- Speckled stoneware clay (or polymer clay with faux granite effect)
- Heart-shaped cookie cutter (approx. 1.5 – 2 inches)
- Rolling pin
- Canvas mat or parchment paper
- Wooden skewer or drinking straw
- Sponge
- Fine-grit sandpaper
- Clear matte glaze or sealant (optional)
- Beige or off-white macramé cord or leather cording
- Scissors
Step 1: Shaping the Clay Hearts
-
Prepare your workspace:
Lay down your canvas mat or parchment paper on a flat, stable surface to prevent the clay from sticking. This ensures a clean release later. -
Condition the clay:
If using polymer clay, knead it until it’s soft and pliable. For stoneware clay, wedge a small handful to remove any air bubbles which could cause cracking during firing. -
Roll the slab:
Using your rolling pin, flatten the clay into a smooth slab. Aim for a thickness of about 1/4 inch (6mm)—thick enough to be durable but light enough for a necklace. -
Cut the shapes:
Press your heart-shaped cutter firmly into the clay. Give it a tiny wiggle to ensure it cuts all the way through, then lift the cutter. Repeat for the second heart. -
Smooth the edges:
Dip your finger in a little water (for ceramic) or baby oil (for polymer) and gently run it along the cut edges of the hearts. This softens the sharp lines left by the cutter for a more finished look. -
Create the hole:
Determine where the cord will go. The hole needs to be fairly large to accommodate the thick cord shown. Use a drinking straw or a thick skewer to punch a hole near the top center (the ‘dip’) of the heart. -
Clean the hole:
Carefully remove any excess clay burrs from around the hole entrance and exit to ensure the cord will slide through smoothly without fraying.
Natural Speckles
No speckled clay? Mix black pepper or dried coffee grounds into white translucent polymer clay for that organic, stony look.
Step 2: Firing and Finishing
-
Dry or bake:
If using stoneware, allow the hearts to dry slowly under loose plastic until bone dry, then bisque fire. If using polymer clay, bake according to the package instructions (usually around 275°F/135°C for 15-30 minutes). -
Sand for smoothness:
Once fired or baked and cooled, use fine-grit sandpaper to buff the surface. I really focus on the edges here to make sure they feel soft against the skin. -
Wipe down:
Use a slightly damp sponge or cloth to remove all sanding dust. The speckled texture should really pop now. -
Apply finish (Optional):
For a raw look like the photo, leave the clay unglazed. However, if you want protection, apply a very thin layer of matte sealant or glaze and let it cure completely.
Step 3: Assembly
-
Measure the cord:
Cut two lengths of your beige cord. Each piece should be roughly 24-30 inches long, depending on how low you want the necklace to hang. -
Create a lark’s head knot base:
Fold one cord in half to find the center loop. Push this loop through the hole in the heart from front to back. -
Secure the pendant:
Take the two loose ends of the cord and pass them through the loop you just pushed through the hole. Pull tight so the cord cinches securely at the top of the heart. -
Tie the ends:
Bring the two loose ends together. You can simply tie them in a strong overhand knot at the desired length, or create adjustable sliding knots if you’re feeling adventurous. -
Trim excess:
Snip off any extra cord leaving a small tail, and repeat the assembly process for the second matching heart.
Cracking Around Holes
If clay cracks when punching the hole, let the clay firm up slightly (leather hard) before piercing, or twist the tool as you push.
Wear your matching hearts with pride or gift one to your favorite person as a symbol of your bond
Mini Heart Fridge Magnets With Initials
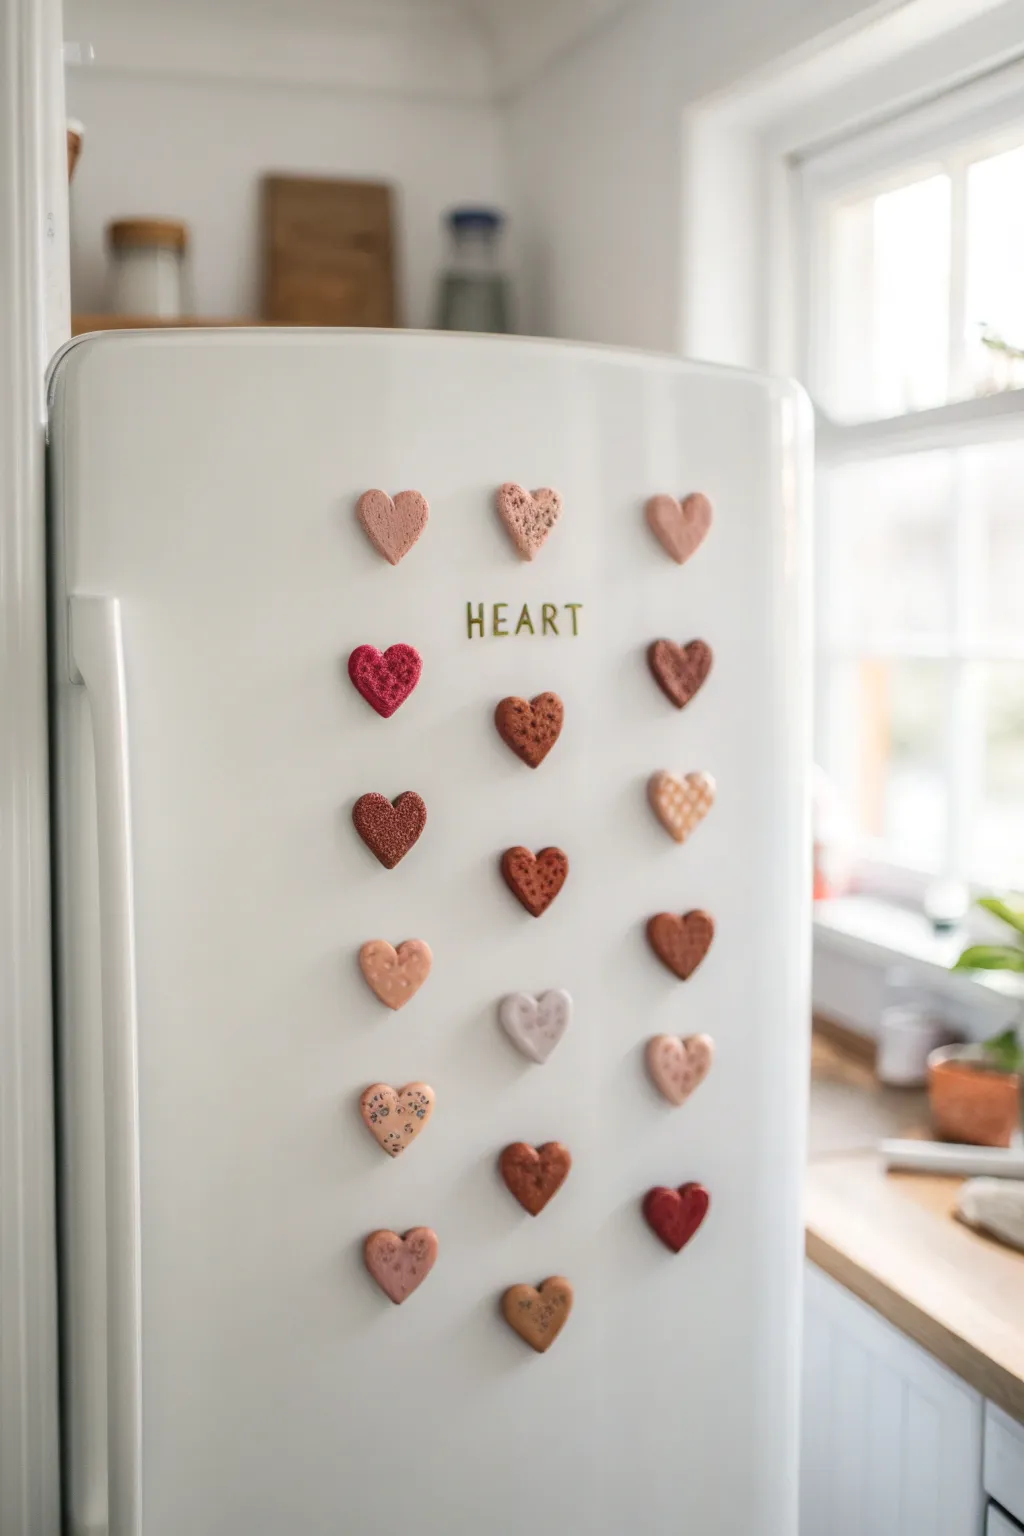
Transform simple clay into a charming collection of heart-shaped magnets that add a warm, artisanal touch to your kitchen. With earthy pinks, deep reds, and varied textures, these mini hearts create a stunning display perfect for holding photos or notes.
How-To Guide
Materials
- Polymer clay (shades of terracotta, blush pink, deep red, brown, glittered bronze)
- Mini heart-shaped cookie cutter (approx. 1 inch)
- Clay rolling pin or acrylic roller
- Parchment paper or baking mat
- Small round magnets (strong ceramic or neodymium)
- Strong craft adhesive (E6000 or super glue gel)
- Texturing tools (toothpick, old toothbrush, dotting tool, or sandpaper)
- Gloss glaze (optional for finish)
- Oven
Step 1: Preparing the Clay
-
Condition the clay:
Start by warming up your polymer clay in your hands. Knead each color individually until it is soft, pliable, and free of cracks. -
Mix custom shades:
Create a cohesive palette by mixing existing colors. Combine a bit of brown with pink for a ‘dusty rose’ look, or mix white into red for a softer pastel. Aim for 5-6 distinct but complementary shades. -
Roll out the slab:
Place your conditioned clay on parchment paper. Using your roller, flatten the clay to a consistent thickness of about 1/4 inch (6mm). Too thin, and the magnets might show through; too thick, and they get heavy.
Step 2: Cutting and Texturing
-
Cut the shapes:
Press your mini heart cutter firmly into the clay. Give it a tiny wiggle before lifting to ensure a clean cut. -
Refine the edges:
Once cut, if the edges look sharp or ragged, gently run your finger along the rim to smooth and round them off slightly. -
Create the ‘sponge’ texture:
For the porous, stone-like hearts (like the top center one), gently press a piece of coarse sandpaper or a clean, stiff toothbrush onto the surface of the raw clay. -
Add dimpled details:
To mimic the dotted hearts in the third row, use a small dotting tool or the blunt end of a toothpick. Press gently in a repeating pattern to create shallow indentations. -
Create speckled effects:
For a terrazzo look, take tiny crumbs of a darker clay color and press them into a lighter heart base, rolling over it gently to embed the flecks flush with the surface. -
Add initials (optional):
Although the image focuses on texture, this is the perfect time to stamp initials using a small letter kit if you want to personalize them as noted in the section title. -
Final shaping:
Handling the clay can sometimes distort the heart shape. Before baking, give each piece a final check to ensure the curves are symmetrical.
Uneven Edges?
If your clay cutter left rough bits, dip your finger in a tiny amount of baby oil or cornstarch and rub the raw clay edges gently. This smooths imperfections instantly without distorting the shape.
Step 3: Baking and Assembly
-
Arranging for bake:
Lay all your finished clay hearts on a parchment-lined baking sheet, spacing them out so they don’t touch. -
Baking process:
Bake according to your specific brand of polymer clay’s instructions—usually around 275°F (135°C) for 15-20 minutes. I usually place a foil tent over them to prevent scorching lighter colors. -
Cooling down:
Remove the tray from the oven and let the hearts cool completely. The clay hardens fully only as it cools, so don’t be alarmed if they feel slightly flexible when hot. -
Testing magnet placement:
Flip the cooled hearts over. Place a magnet on the back to check sizing. If your magnets are very small, you might need two for larger hearts. -
Applying adhesive:
Place a small dab of strong craft glue (E6000 is excellent for longevity) onto the center of the back of the heart. -
Attaching the magnet:
Press the magnet firmly into the glue. If using instant glue, hold for 30 seconds. For E6000, let them sit undisturbed for creating a secure bond. -
Full cure time:
Allow the glue to cure fully (usually 24 hours for heavy-duty glues) before sticking them to your fridge to ensure the magnet doesn’t detach under the pull force.
Level Up: Gold Leaf
Make them luxe! Before baking, press tiny flakes of gold leaf onto the surface of the pink hearts. The metallic sheen contrasts beautifully against the matte clay finish.
Arrange your beautiful new hearts in a grid or scatter them freely to bring a little love to your kitchen decor
Texture-Pressed Heart Ornaments
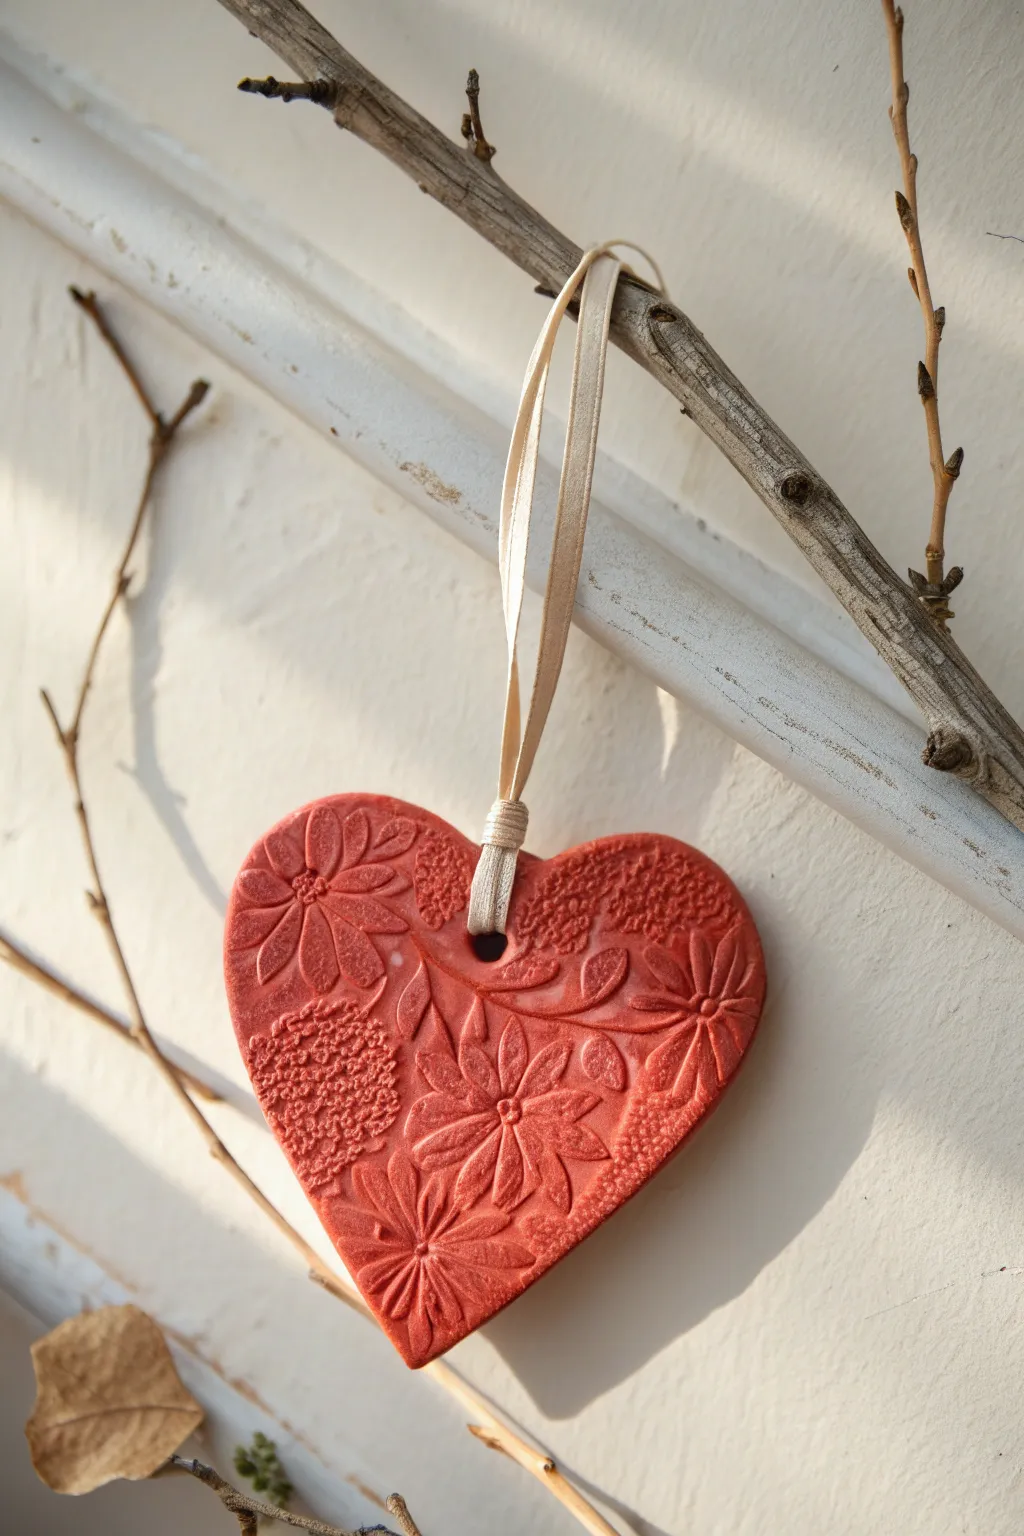
Capture the beauty of nature in deep crimson with these stunning textured heart ornaments. Using a simple textural impression technique, you can permanently preserve delicate floral patterns in a rich, rustic clay finish that is perfect for Valentine’s Day or year-round décor.
Step-by-Step
Materials
- Red-colored polymer clay (or air-dry clay tinted with red acrylic)
- Small heart-shaped cookie cutter (approx. 3-4 inches)
- Textured stamps or embossing mats (floral/botanical pattern)
- Acrylic rolling pin
- Parchment paper or non-stick work surface
- Straw or cocktail stick
- Cream or beige grosgrain ribbon (1/4 inch wide)
- Scissors
- Fine-grit sandpaper (optional)
Step 1: Preparing the Clay Canvas
-
Condition the clay:
Begin by warming the red clay in your hands. Knead it thoroughly until it is soft, pliable, and free of cracks. If the clay feels too stiff, adding a drop of clay softener or baby oil can help. -
Roll out the slab:
Place the conditioned clay onto a piece of parchment paper to prevent sticking. Use your acrylic rolling pin to roll the clay into an even slab. -
Check thickness:
Aim for a thickness of about 1/4 inch (6mm). This provides enough depth for the impression without making the ornament too heavy. -
Smooth the surface:
I always take a moment here to lightly run a finger or the roller over the surface one last time to ensure there are no fingerprints or air bubbles before texturing.
Release Agent Trick
Dust your texture stamp lightly with cornstarch or spritz with water before pressing. This ensures the clay doesn’t stick inside the intricate floral grooves.
Step 2: Texturing and Cutting
-
Select your texture:
Choose an embossing mat or a rubber stamp with a deep floral relief. The image shows a mix of daisies and textured greenery, so look for a dense botanical pattern. -
Apply the texture:
Place your stamp or texture mat firmly onto the rolled clay. Use the rolling pin to roll *over* the stamp with firm, even pressure to transfer the design deep into the clay. -
Reveal the pattern:
Carefully peel back the stamp or mat. Check that the impression is crisp and clear; if it’s too faint, you may need to re-roll and try again with more pressure. -
Cut the shape:
Position your heart-shaped cutter over the most attractive part of the pattern. Press down firmly to cut the shape. -
Release the shape:
Wiggle the cutter slightly to ensure a clean separation, then lift it away. Peel away the excess clay from around the heart. -
create the hanging hole:
Using a straw or a cocktail stick, poke a hole near the top center of the heart, right in the ‘V’ dip. Make sure the hole is large enough for your ribbon to pass through later. -
Smooth edges:
Dip your finger in a little water (or cornstarch for polymer) and gently run it along the cut edges of the heart to soften any sharp ridges left by the cutter.
Step 3: Baking and Finishing
-
Bake or dry:
If using polymer clay, bake according to the package instructions (usually around 275°F/135°C for 15-30 minutes). If using air-dry clay, let it sit in a cool, dry place for 24-48 hours. -
Cool down:
Allow the heart to cool completely before handling. This ensures the structure is set. -
Correct imperfections:
Once hardened, inspect the edges. If there are any burrs, use a piece of fine-grit sandpaper to buff them away gently. -
Cut the ribbon:
Cut a length of cream ribbon, approximately 8-10 inches long. -
Thread the ribbon:
Fold the ribbon in half. thread the folded loop through the hole in the heart from front to back. -
Secure the loop:
Take the loose ends of the ribbon and pass them through the loop you just pushed through the hole. Pull tight to create a lark’s head knot directly on the clay. -
Tie the ends:
Bring the two loose ends together at the top and tie a simple overhand knot to create the hanging loop. -
Add a finisher knot:
For the finishing touch shown in the image, tie a second small knot or wrap a piece of matching thread around the base of the ribbon (near the clay hole) to gather specifically the two strands together tightly.
Antique Finish
After baking, rub white acrylic paint into the crevices and wipe the surface clean with a damp cloth. This highlights the floral texture beautifully.
Now your botanical heart is ready to hang on a branch or be gifted to someone special
Sweetheart Photo Frame With Clay Hearts
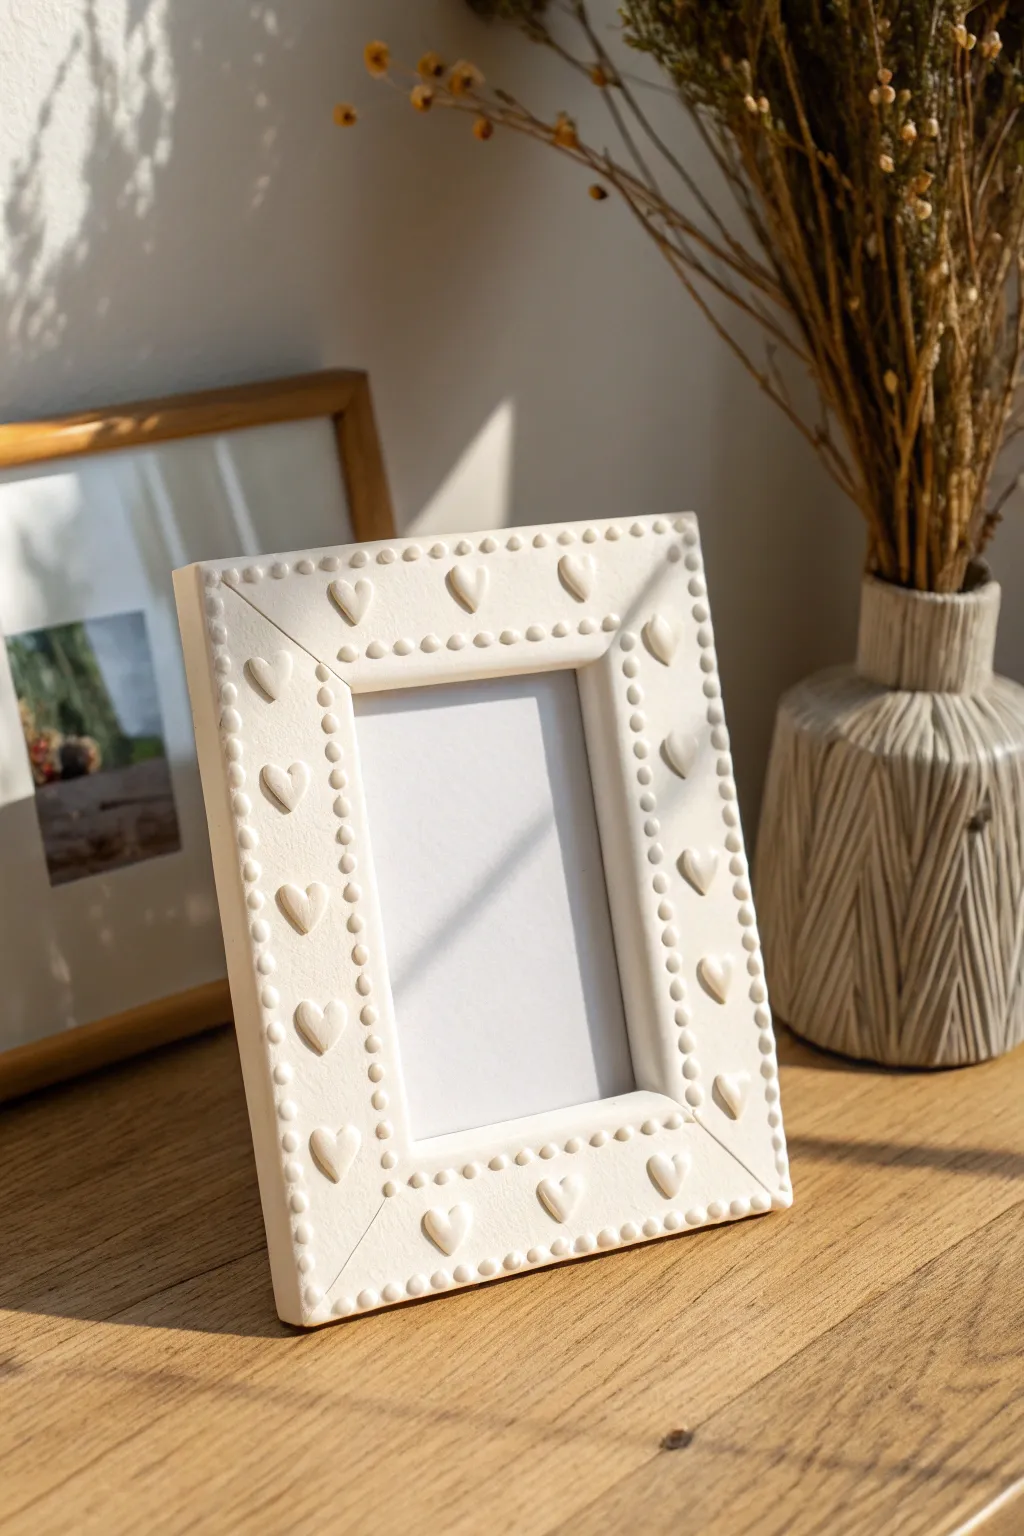
Give any plain, flat photo frame a charming romantic makeover using air-dry clay. This project features raised heart motifs bordered by delicate clay dots, all finished in a creamy, unified white for a sophisticated sculptural look.
Step-by-Step Tutorial
Materials
- Flat, wide wooden or plastic photo frame (cleaned)
- White smooth air-dry clay
- Rolling pin with guides (or two rulers)
- Small heart-shaped cookie cutter (approx. 1 cm)
- Small round piping tip or straw (for dots)
- Clay knife or craft blade
- Scenic glue or heavy-duty craft glue
- Sanding sponge (fine grit)
- White acrylic paint (matte or satin finish)
- Wide flat paintbrush
- Small round paintbrush for details
Step 1: Prepping the Clay Elements
-
Prepare the surface:
Remove the glass and backing from your base frame. Lightly sand the front of the frame to create a rougher texture, which helps the glue bond securely. -
Roll out the clay:
Knead your air-dry clay until it is warm and pliable. Using roller guides or rulers to ensure even thickness, roll the clay out to a slab about 3-4mm thick. -
Cut the heart shapes:
Using your small heart cutter, punch out approximately 12-16 hearts, depending on the size of your frame. Cut a few extras just in case some warp during drying. -
Smooth the edges:
Dip your finger in a little water and gently run it around the sharp cut edges of each heart to round them over slightly for a pillowy, soft look. -
Create the border dots:
Roll thin snakes of clay and pinch off tiny, equal-sized pieces. Roll these into small spheres about the size of a peppercorn. -
Dry fitting:
Before gluing, lay your hearts and dots onto the frame to plan the spacing. You want the hearts centered on the flat panels and the dots lining the inner and outer perimeters.
Step 2: Assembly and Sculpting
-
Cover the frame face:
Instead of gluing pieces directly to wood, I prefer to roll flat strips of clay the exact width of the frame sides. Glue these strips onto the frame face first to create a unified clay background. -
Trim the corners:
Where the clay strips meet at the corners, use your craft knife to cut a clean 45-degree miter joint. Blend the seam gently with a little water so the join attracts less attention. -
Attach the hearts:
Score the back of each heart and the spot on the clay-covered frame where it will sit. Apply a dab of clay slip or glue and press the heart firmly into place. -
Add the inner border:
Take your small clay spheres and press them along the inner edge of the frame opening. Space them evenly, flattening them slightly so they adhere well. -
Add the outer border:
Repeat the process along the outer perimeter of the frame. Ensure the dots sit flush against the edge without hanging over too much. -
Refine the details:
Check the corner joints again. Use a clay tool to ensure the diagonal lines are clean and that the dots don’t crowd the corners.
Smooth Operator
Keep baby wipes or a damp sponge nearby while working. Wiping your hands frequently keeps dust off the white clay and ensures your finished piece looks pristine before painting.
Step 3: Finishing Touches
-
Allow to dry:
Let the frame dry completely for at least 24-48 hours. Keep it away from direct heat sources to prevent cracking. -
Sand imperfections:
Once fully hard, gently run a fine-grit sanding sponge over the surface to remove any stray fingerprints or rough textures. -
Base coat:
Apply a coat of white acrylic paint. Use a smaller brush to get into the crevices around the hearts and dots. -
Final coat:
Apply a second coat of paint for an opaque, ceramic-like finish. A matte finish looks very elegant, but a satin varnish adds durability. -
Reassemble:
Once the paint is cured, place the glass and backing back into the frame.
Cracking Up?
If small hairline cracks appear as the clay dries against the rigid frame, mix a paste of fresh clay and water. Fill the cracks with this ‘slip’, let dry, and sand smooth.
This textured, dimensional frame makes for a beautiful handmade gift or a lovely addition to a wedding photo display
Tiny Love Potion Bud Vase
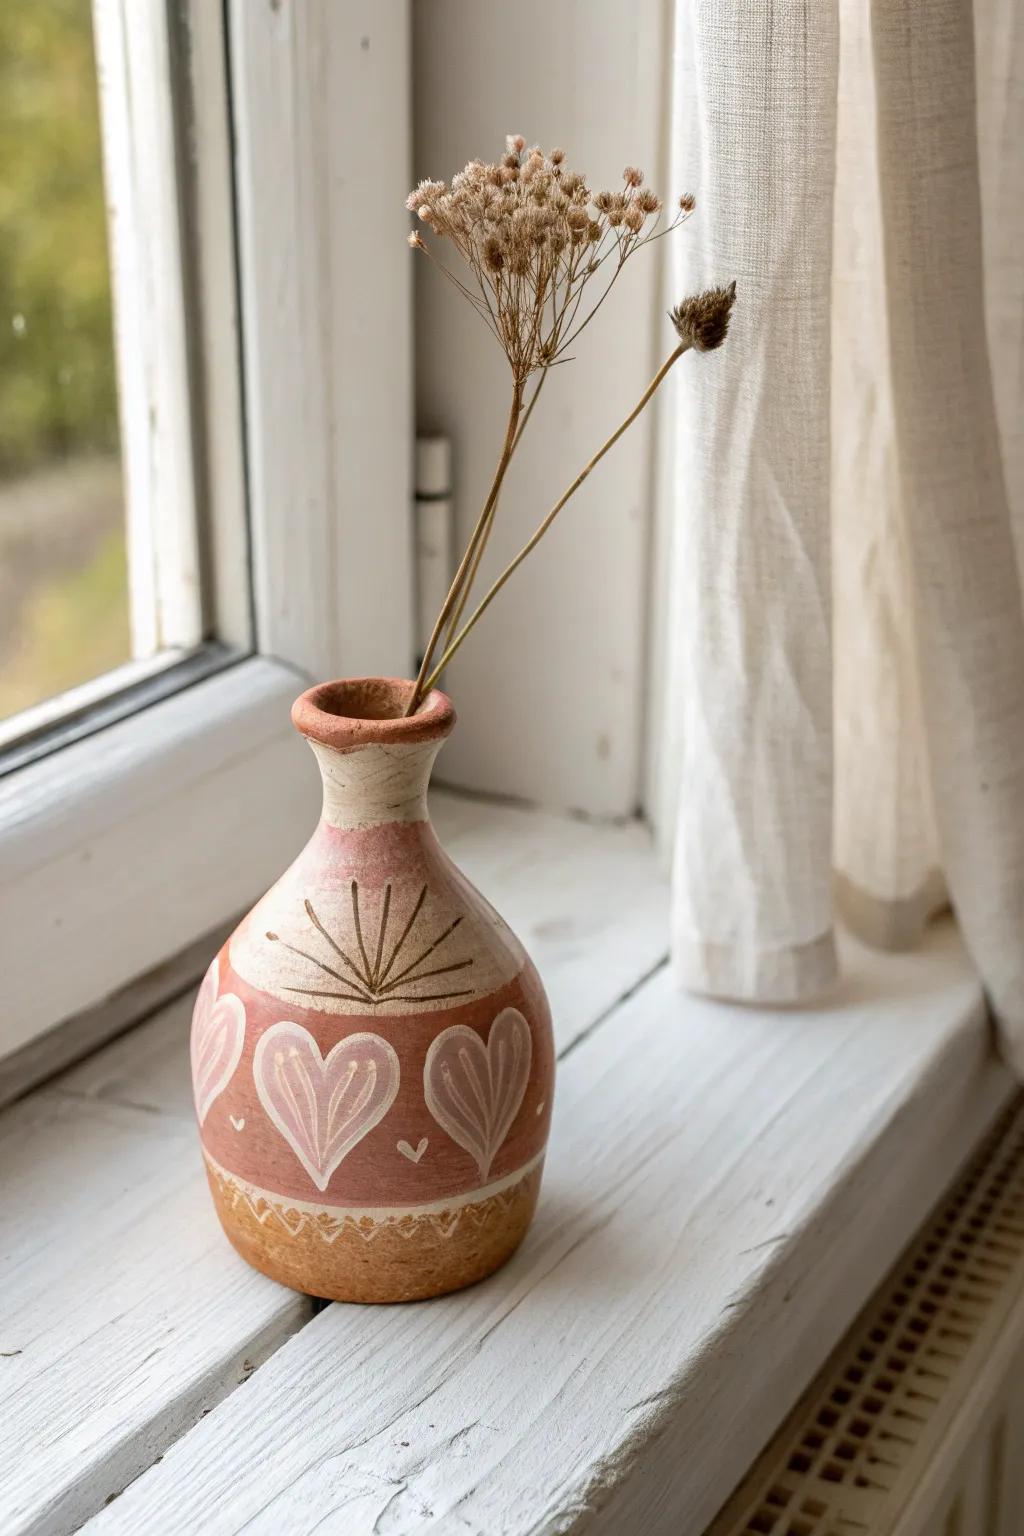
This charming, rustic bud vase captures the essence of romance with its delicate heart motifs and warm terracotta tones. It features a bulbous base, a narrow neck perfect for dried stems, and sgraffito-style detailing that reveals the natural clay beneath.
Detailed Instructions
Materials
- Air-dry clay or earthenware clay (terracotta color preferred)
- Small rolling pin
- Potter’s needle tool or toothpick
- Small sponge
- Water slip (clay mixed with water)
- Pinkish-red acrylic paint or underglaze
- White opacity acrylic paint or slip
- Fine detail paintbrush
- Clear matte varnish or sealant
- Sandpaper (fine grit)
Step 1: Forming the Body
-
Prepare the clay:
Start with a ball of clay roughly the size of a tennis ball. Knead it well to remove any air bubbles, ensuring the consistency is smooth and pliable. -
Pinch pot base:
Insert your thumb into the center of the ball, leaving about a half-inch of thickness at the bottom. Gently pinch and rotate the clay between your thumb and fingers to open up the pot, creating a rounded, bulbous hollow shape. -
Collar the neck:
As you move upward, gently squeeze the clay inward to narrow the opening. This ‘collaring’ technique creates the bottleneck shape. If the clay wrinkles, smooth it out immediately with a damp finger. -
Build the rim:
Once the neck is sufficiently narrow, gently flair the very top edge outward to create a distinct lip. This gives the vase a classic potion-bottle silhouette. -
Smooth the surface:
Use a slightly damp sponge to smooth out any fingerprints or uneven textures on the exterior. Let the piece dry until it is leather-hard (firm but still cool to the touch) before decorating.
Step 2: Painting & Decoration
-
Apply base color:
Paint a wide band around the central belly of the vase using your pinkish-red paint or underglaze. Leave the very bottom and the neck showing the raw clay color for a banded effect. -
Draft the hearts:
While the paint is still slightly tacky or just after drying, lightly scratch the outline of three or four large hearts around the painted belly using a needle tool. -
Sgraffito details:
Use your needle tool to firmly scratch through the pink paint inside the heart shapes, revealing the clay body underneath. Create a ‘double outline’ effect or simple lines to define the hearts. -
Add the sunburst:
On the raw clay section just above the pink band (the shoulder of the vase), scratch in a radiating line pattern. Draw a semi-circle base and extend straight lines upward like a rising sun. -
Add white accents:
Using a fine detail brush and white paint (or white slip), paint the interior of your scratched heart outlines to make them pop. Add small white dots or tiny hearts in the spaces between the large hearts. -
Paint thin borders:
Paint a very thin white line bordering the top and bottom of the main pink band. This makes the design look purposeful and framed. -
Detail the base:
At the very bottom raw clay section, paint a simple zig-zag or wave pattern in white to ground the design.
Uneven drying?
If your vase cracks while drying, you likely dried it too fast. Cover your next piece loosely with a plastic bag to slow the process down.
Step 3: Finishing Touches
-
Dry completely:
Allow the vase to dry fully. If you used air-dry clay, this might take 24-48 hours. If firing in a kiln, follow your specific clay’s firing schedule. -
Sand imperfections:
I like to gently run fine-grit sandpaper over the unpainted rim and base to ensure it sits flat and feels smooth to the touch. -
Seal:
Apply a coat of clear matte varnish to protect the paint and clay. This is especially important for air-dry clay to prevent moisture damage.
Level up: Texture
Before the clay dries, gently press a piece of lace or textured fabric into the raw clay sections for a subtle, vintage embossed effect.
Fill your new vessel with dried wildflowers or lagurus grass for a sweet, everlasting display
Pocket-Sized Heart Worry Stone
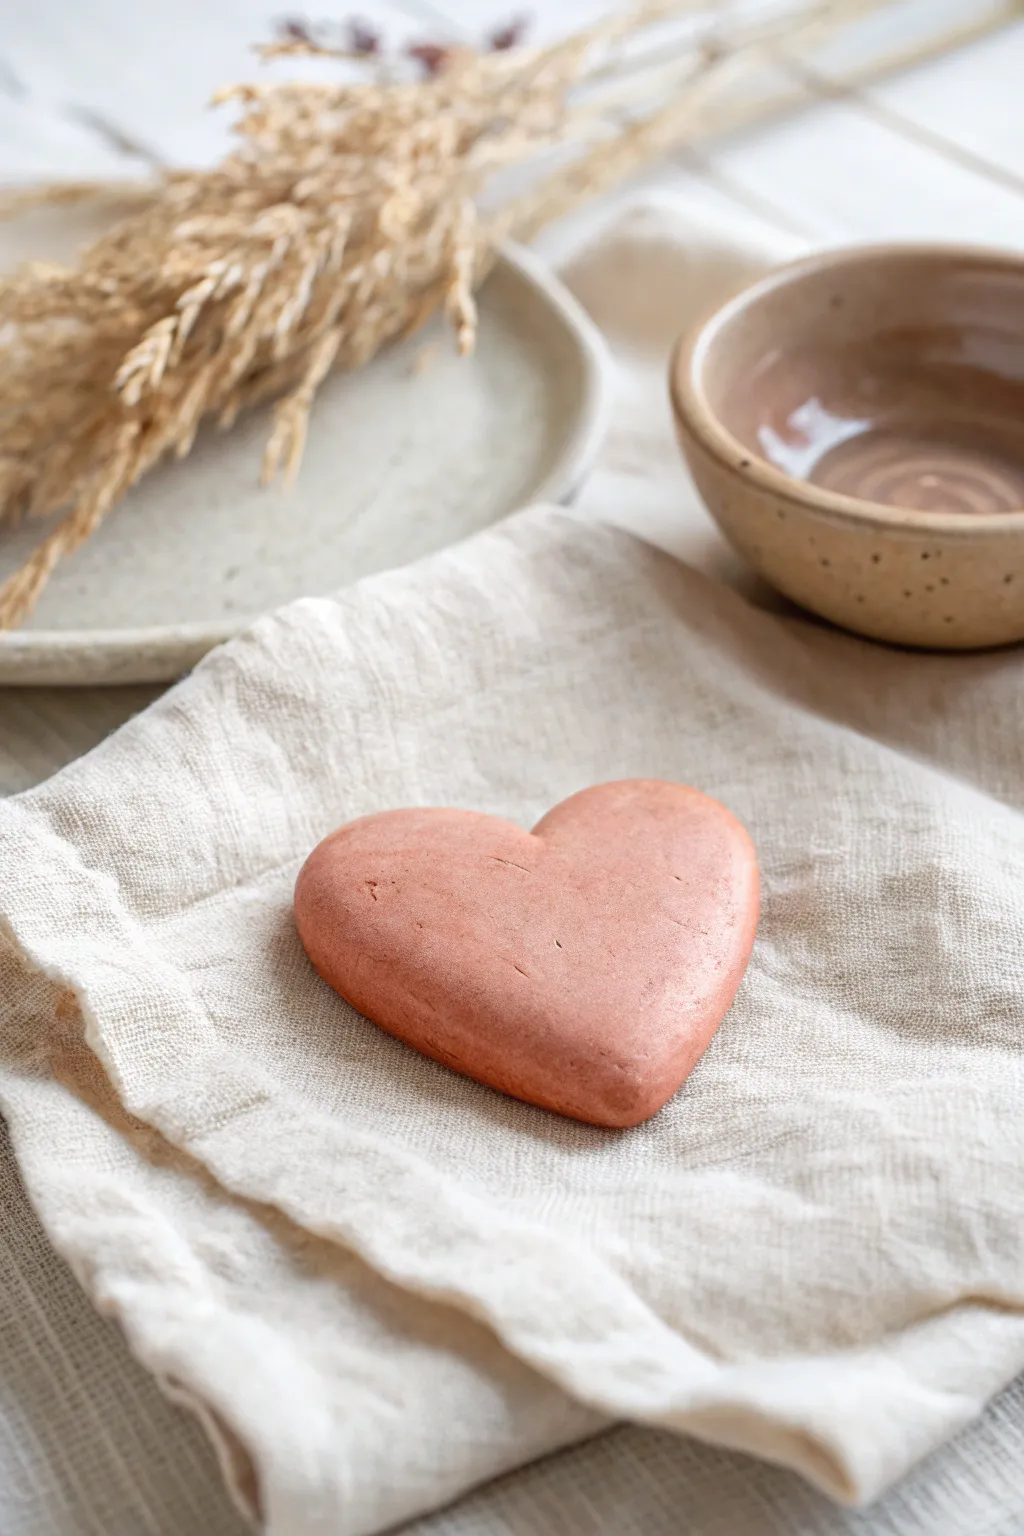
This terra cotta-hued worry stone fits perfectly in the palm of your hand, offering a smooth, grounding texture when you need a moment of calm. Its simple heart shape and matte finish give it a lovely, earthy aesthetic that feels timeless.
Step-by-Step Tutorial
Materials
- Polymer clay (terracotta or reddish-brown color)
- Small rolling pin or acrylic roller
- Heart-shaped clay cutter (medium size, approx. 2-3 inches)
- Fine-grit sandpaper (400 to 1000 grit)
- Parchment paper or baking tile
- Soft cloth (denim or linen)
- Oven
Step 1: Shaping the Form
-
Condition the clay:
Begin by warming the polymer clay in your hands. Knead it thoroughly for several minutes until it becomes soft, pliable, and free of cracks. -
Initial rolling:
Roll the clay into a smooth ball between your palms to ensure there are no air bubbles trapped inside. -
Flattening the sheet:
Place the ball on a clean work surface and use your roller to flatten it into a thick slab, aiming for about 1/2 inch to 3/4 inch thickness. We want substantial weight for a worry stone. -
Cut the heart:
Press your heart-shaped cutter firmly into the clay slab. Wiggle it slightly to ensure a clean cut all the way through, then remove the excess clay.
Weight Matters
For a more satisfying sensory experience, try wrapping a small stone or metal washer inside the clay core before shaping. The extra weight feels incredibly grounding.
Step 2: Sculpting Comfort
-
Soften the edges:
Unlike jewelry, a worry stone needs to be ultra-smooth. Using your thumbs, gently press and rub along the sharp edges left by the cutter to round them over completely. -
Refining the curve:
Work around the cleft of the heart and the bottom point, ensuring these areas are softly rounded rather than sharp. The goal is a pebble-like feel. -
creating the “worry” depression:
Holding the heart in your palm, use your thumb to rub the center of the heart repeatedly in a circular motion. -
Deepening the shape:
Continue rubbing until you form a subtle, shallow concave area or a general smoothness that feels satisfying to your own thumb. -
Adding texture (optional):
If you like the slightly rustic look in the photo, lightly scratch a few tiny marks or imperfections with a needle tool, or just let your fingerprints create a natural texture.
Scent Infusion
Since polymer clay isn’t porous, drill a tiny, hidden hole in the back after baking. Place a drop of essential oil on a small piece of felt and tuck it inside.
Step 3: Baking and Finishing
-
Prepare for baking:
Place the heart on a piece of parchment paper or a ceramic baking tile. Smooth out any last unwanted fingerprints with a drop of baby oil if you prefer a pristine look. -
Bake:
Bake the clay according to the manufacturer’s package instructions. Since this is a thicker piece, ensure you bake it for the full recommended time to cure the center. -
Cool down:
Allow the heart to cool completely in the oven with the door slightly ajar. Sudden temperature changes can sometimes cause cracking in thick pieces. -
Initial sanding:
Once cool, use fine-grit sandpaper (400 grit) to stroke away any remaining bumps or sharp spots on the edges. -
Polishing:
Move to a higher grit sandpaper (800 or 1000) under running water to create a silky-smooth tactile finish without adding shine. -
Buffing:
Vigorously rub the dry heart with a piece of heavy denim or linen cloth. This burnishing step creates a velvety matte glow rather than a glossy plastic look.
Slip this little heart into your pocket for a reassuring touch whenever you need it
Fingerprint Heart Keepsake Token
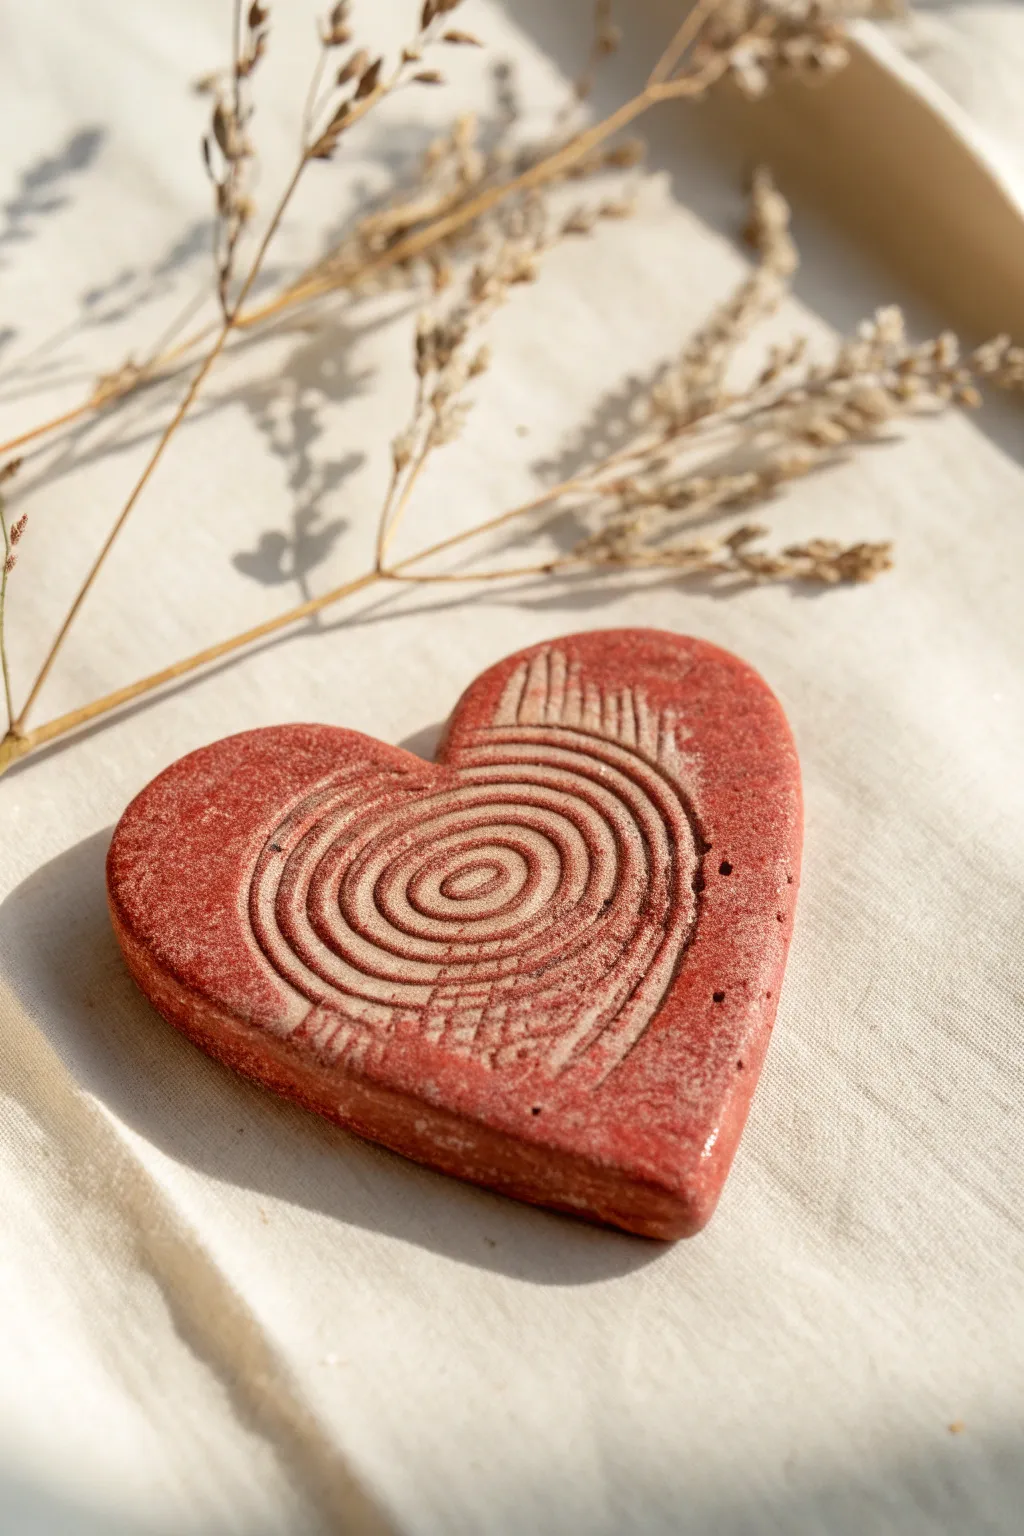
This rustic, sentimental keepsake captures a unique fingerprint in a durable, stone-like heart that feels ancient and modern all at once. The warm terracotta tones and tactile ridge details make it a perfect tactile token of affection.
Detailed Instructions
Materials
- Red-brown air-dry clay (terracotta color) or polymer clay
- Heart-shaped cookie cutter (approx. 2-3 inches)
- Parchment paper or smooth work mat
- Rolling pin
- Fine-grit sandpaper (optional)
- Matte sealant or varnish
- Small bowl of water (for smoothing)
- A clean thumb or finger for impression
Step 1: Shaping the Base
-
Condition the clay:
Begin by taking a chunk of your terracotta-colored clay. Knead it thoroughly in your hands until it becomes warm, pliable, and free of any stiffness or crumbly texture. This ensures a smooth impression later. -
Roll the slab:
Place the conditioned clay onto a piece of parchment paper to prevent sticking. Use your rolling pin to flatten the clay to an even thickness, aiming for about 1/4 inch to 1/3 inch. You want it substantial enough to hold the print without cracking. -
Cut the heart:
Position your heart-shaped cookie cutter over the smoothest section of the rolled slab. Press down firmly to cut out the shape, then gently wiggle the cutter to release the clay. -
Clean the edges:
Lift the heart gently. Dip your finger into a little water and run it along the cut edges of the heart to smooth down any rough ridges or burrs left by the cutter. I find this step crucial for a professional finish.
Clearer Prints
If your clay is sticky, lightly dust your finger with cornstarch before pressing. This acts as a release agent and ensures the tiny ridges of your fingerprint don’t pull up when you lift your hand.
Step 2: Capturing the Print
-
Prepare the surface:
Place the clay heart back on the parchment paper. Check the surface for any dust or lint and lightly smooth it out if necessary. -
Position the finger:
Choose the finger you want to use—usually a thumb for the clearest whirls. Center it over the middle of the heart, aligning the pad of the finger so the print will be symmetrical. -
Press firmly:
Press the finger straight down into the clay with steady, even pressure. Push deep enough to create distinct ridges, but be careful not to push all the way through the clay. -
Release carefully:
Lift the finger straight up—avoid dragging it sideways, which would smear the delicate ridge details of the fingerprint. -
Inspect the detail:
Look closely at the impression. If the ridges aren’t clear, ball up the clay, re-roll, and try again. The beauty of this piece relies entirely on the clarity of those concentric lines.
Step 3: Finishing Touches
-
Dry the piece:
Allow the clay to dry according to the package instructions. For air-dry clay, this usually takes 24-48 hours. Turn the heart over halfway through so the back dries evenly. -
Refine the edges:
Once fully cured and hard, check the edges again. If any sharp spots remain, gently buff them away with fine-grit sandpaper. -
Highlight the texture (Optional):
To make the fingerprint pop like the stone in the reference, you can dry-brush a tiny amount of lighter acrylic paint or white wax over the raised ridges, though the natural shadow of the texture often works well on its own. -
Seal the keepsake:
Apply a thin coat of matte sealant or varnish to the entire surface. This protects the clay from moisture and dirt while maintaining that natural, earthy stone look. -
Final cure:
Let the sealant dry completely before handling or gifting your new token.
Make it an Ornament
Before the clay dries, use a toothpick or straw to poke a small hole near the top dip of the heart. Thread twine or ribbon through after sealing to create a hanging decoration.
Your personalized stone heart is now ready to serve as a meaningful desk token or a cherished gift
Heart-Shaped Candle Holder for Date-Night Glow
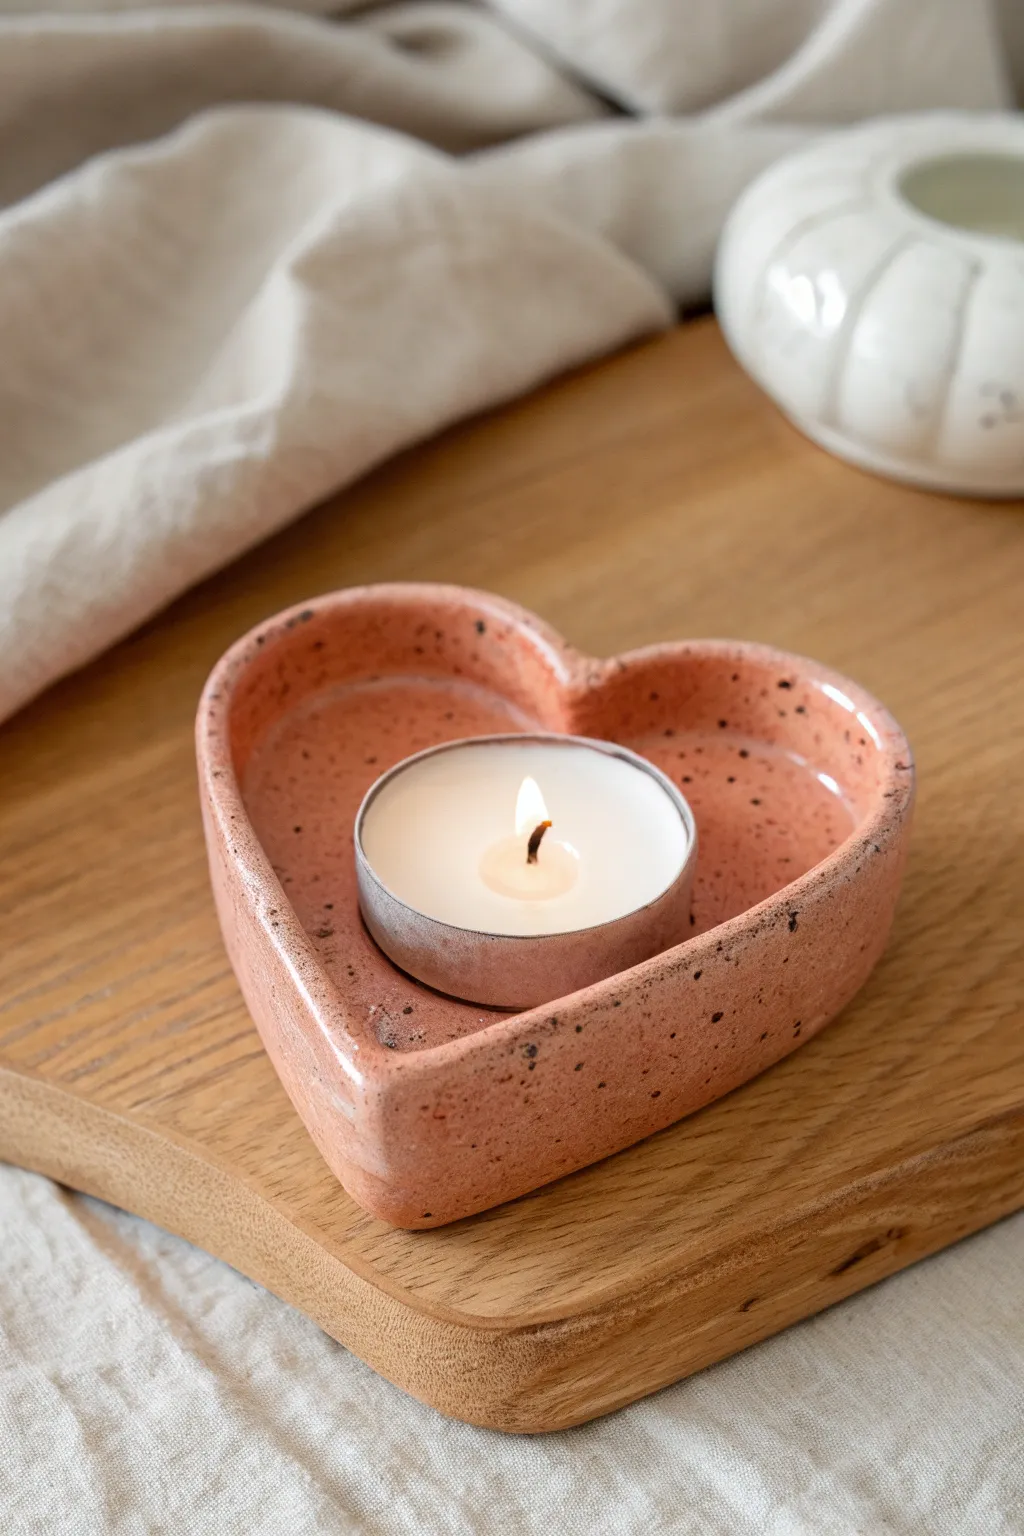
This charming, rustic candle holder adds a soft touch of romance to any setting with its warm terracotta hue and playful speckles. It is a perfect beginner project that results in a functional piece of decor ready for your next cozy evening in.
Detailed Instructions
Materials
- Air-dry clay or polymer clay (terracotta or reddish-brown color)
- Rolling pin
- Heart-shaped cookie cutter (large) or paper template
- Tea light candle (for sizing)
- Black acrylic paint
- Old toothbrush
- Glossy varnish or glaze
- Fine grit sandpaper
- Small bowl or water cup
- Modeling tools or a butter knife
Step 1: Shaping the Base
-
Condition the Clay:
Begin by kneading your clay until it is soft, pliable, and free of cracks. If you are using air-dry clay, keep your hands slightly moist to prevent it from drying out too quickly. -
Roll out the slab:
Roll the clay out on a flat surface to a thickness of about 1/4 to 1/2 inch. You want it thick enough to feel substantial but not so chunky that it takes forever to dry. -
Cut the heart shape:
Place your large heart-shaped cookie cutter onto the clay slab and press down firmly. If you don’t have a cutter, simply cut out a paper heart, lay it on the clay, and trace around it with a knife. -
Smooth the edges:
Dip your finger in a little water and run it along the cut edges of the heart to smooth out any sharpness or roughness left by the cutter.
Pro Choice
Test your splatter technique on a scrap piece of paper first. This helps you gauge how much water to add to get perfect tiny dots rather than big blobs.
Step 2: Building the Walls
-
Create a coil:
Roll a long snake or coil of clay roughly the thickness of a pencil. Ensure it is long enough to wrap around the entire perimeter of your heart base. -
Score and slip:
Take a needle tool or an old fork and scratch up the outer edge of the heart base and one side of your clay coil. Add a small amount of water or liquid clay (slip) to the scratched areas to act as glue. -
Attach the coil:
Place the coil on top of the scored edge of the heart base, pressing gently to secure it. Join the ends of the coil neatly, usually at the top dip of the heart or the bottom point. -
Blend the seams:
Using a modeling tool or your thumb, drag the clay from the coil down onto the base on both the inside and outside. This blending is crucial for structural integrity so the wall doesn’t pop off later. -
Check the fit:
I always like to grab a standard tea light candle at this stage and gently place it inside to make sure the walls are high enough to cup it nicely without hiding the flame entirely. -
Refine the shape:
Use your fingers to pinch and smooth the walls, ensuring they are an even height all the way around. Use a damp sponge to wipe away any fingerprints. -
Let it dry:
Allow the piece to dry completely according to your clay manufacturer’s instructions. For air-dry clay, this usually takes 24-48 hours. Turn it over halfway through to ensure the bottom dries evenly.
Step 3: Finishing Touches
-
Sand for smoothness:
Once fully dry (and cured if baked), use fine-grit sandpaper to buff away any remaining bumps or sharp edges on the rim. -
Prepare the speckle mix:
Squeeze a small amount of black acrylic paint onto a palette and dilute it slightly with water until it has an inky consistency. -
Apply the speckles:
Dip an old toothbrush into the watered-down black paint. Hold the brush over your heart dish and run your thumb across the bristles to flick tiny droplets of paint onto the surface. -
Dry the paint:
Wait for the paint speckles to dry completely. Since the dots are small, this usually only takes about 10-15 minutes. -
Seal with glaze:
Apply a coat of glossy varnish or glaze over the entire piece. This not only protects the clay but gives it that finished, ceramic-like shine seen in the photo.
Creative Twist
Mix a tiny amount of glitter into your final glossy glaze layer. It adds a hidden sparkle that mimics the flickering candlelight when in use.
Place a vanilla-scented tea light inside and enjoy the warm atmosphere you have created
Modern Abstract Love Sculpture
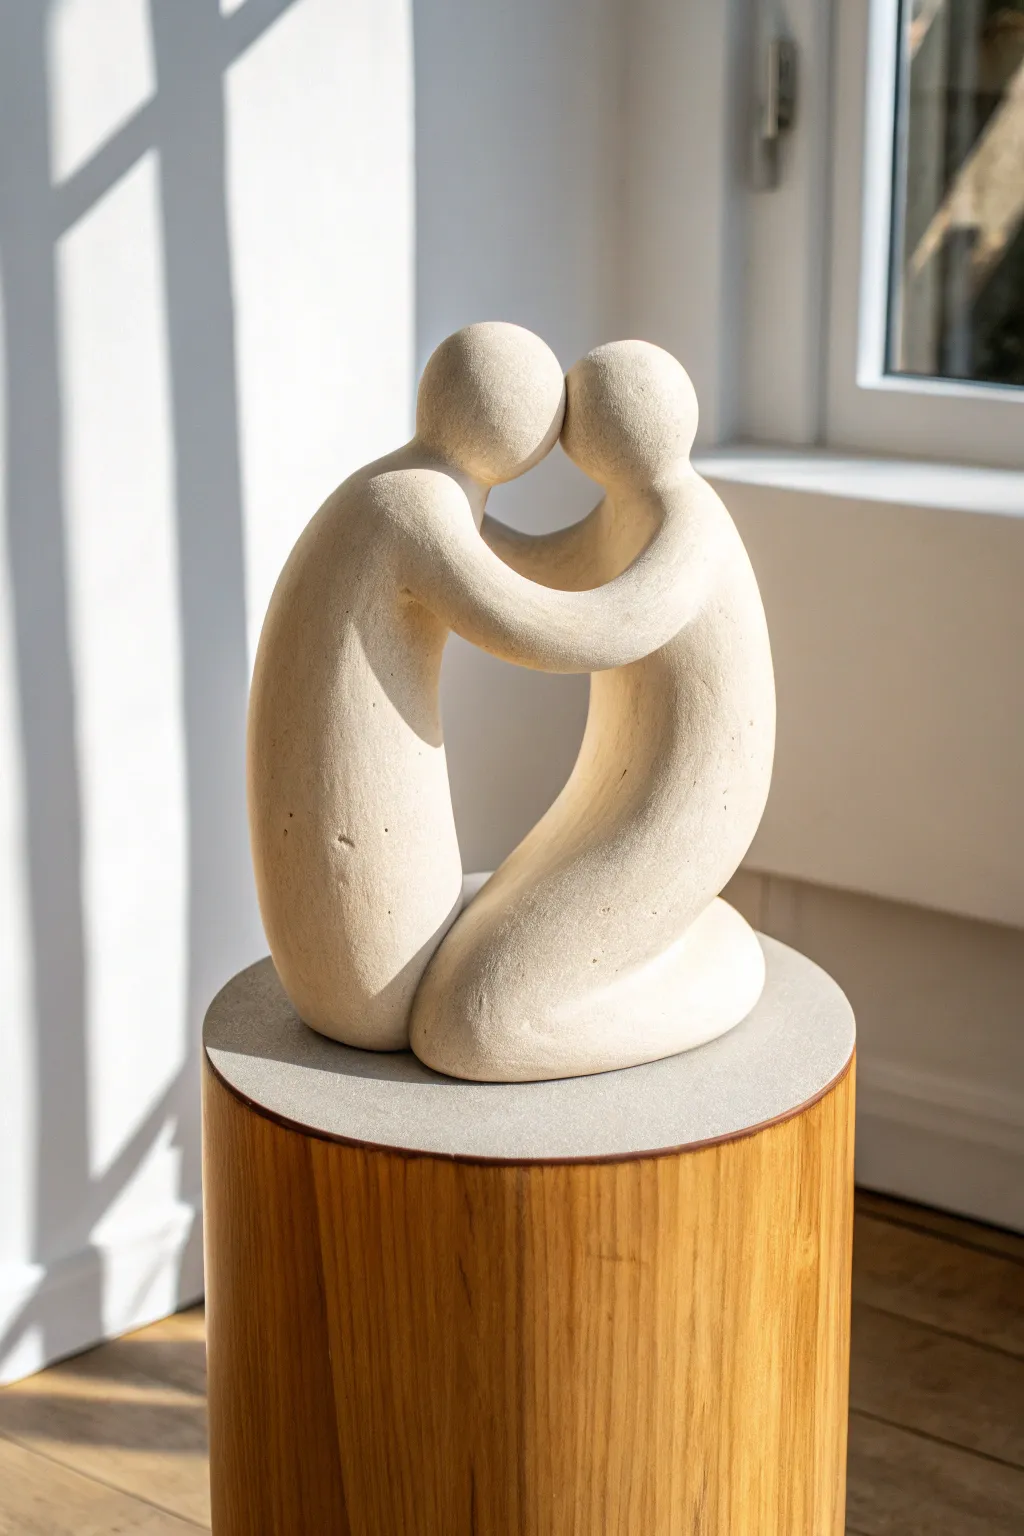
This minimalist sculpture captures a moment of intimacy with clean lines and abstract forms, making it a stunning centerpiece. The textured, stone-like finish gives the clay a high-end, gallery-worthy appearance that belies its simple construction.
Step-by-Step Guide
Materials
- White air-dry clay or polymer clay (approx. 2-3 lbs)
- Aluminum foil
- Masking tape
- Armature wire (12-14 gauge)
- Wire cutters
- Clay sculpting tools (loop tool, smoothing rib)
- Sponge and water
- Fine-grit sandpaper (220 and 400 grit)
- Stone texture spray paint or matte cream acrylic paint
- Clear matte sealant
Step 1: Building the Armature
-
Create the wire skeleton:
Cut two lengths of armature wire, approximately 12 inches each. Bend each wire into a simple loop shape to represent a torso and head, leaving straight wire at the bottom for anchoring. -
Shape the pose:
interlock the two wire structures so the ‘heads’ are close together and the ‘bodies’ curve toward each other. Twist the bottom wires together to create a stable base. -
Bulk up with foil:
Crumple aluminum foil tightly around the wire frame to build the core volume. Shape two distinct bulbous heads and two curved, elongated bodies. -
Secure the form:
Wrap the entire foil structure firmly with masking tape. This smooths out sharp foil edges and gives the clay something to grip onto.
Smooth Operator
Keep a small bowl of water nearby while sculpting. Dip your fingers lightly to re-hydrate the clay surface, making it much easier to ‘erase’ seams and joints.
Step 2: Sculpting the Figures
-
Apply the first layer:
Roll out sheets of clay about 1/4 inch thick. Completely cover the taped armature, pressing the clay firmly to remove air pockets. -
Merge the forms:
Add extra clay where the two figures connect—specifically at the foreheads and the arms. Smooth these seams down so the two figures look like they are melting into one another. -
Define the kneeling figure:
Build up the base of the right-hand figure to look like legs tucked underneath, creating a sloping, rounded bottom half. -
Refine the standing figure:
Elongate the left-hand figure’s torso, ensuring it curves gracefully over the kneeling partner. The back should differ slightly in arch to differentiate the two bodies. -
Sculpt the arms:
Roll graceful coils of clay for the arms. Position them so they wrap around each partner’s back, blending the clay seamlessly at the shoulders so there are no visible joints. -
Shape the heads:
Refine the heads into smooth, faceless ovals. Ensure the ‘kiss’ connection point is seamless, reinforcing the idea of unity.
Step 3: Refining and Finishing
-
Smooth the surface:
I like to use a slightly damp sponge to wipe down the entire sculpture while the clay is still leather-hard. This removes fingerprints and creates a uniform texture. -
Drying time:
Allow the sculpture to dry completely. For air-dry clay of this thickness, this may take 48 to 72 hours. Rotate it occasionally for even drying. -
Initial sanding:
Once bone dry, sand the surface with 220-grit sandpaper to remove any bumps or uneven patches. Wear a dust mask during this step. -
Fine sanding:
Follow up with 400-grit sandpaper for an ultra-smooth, professional finish, paying close attention to the tight curves between the arms. -
Create the stone look:
Spray the piece with a textured stone effect spray paint in a cream or off-white tone. If using acrylics, dab thick cream paint on with a sponge to mimic texture. -
Seal the art:
Finish with a coat of clear matte sealant to protect the textured surface and ensure longevity.
Make it Heavy
For a more substantial, expensive feel, embed a heavy stone or a fishing weight into the foil base of the sculpture before you start adding the clay layer.
Place your finished piece near a window where the natural light can highlight the gentle curves and texture