If you’ve been itching to build a tiny little world, mini clay houses are the sweetest place to start. I love how you can go super simple or pile on the details until your house feels like it has its own backstory.
Classic Cottage With Shingled Roof
This charming project captures the essence of a rustic country home with its heavily textured walls and meticulously applied roof shingles. The warm, earthy tone of the clay gives it a gingerbread-like appearance, perfect for a cozy shelf display.
Step-by-Step
Materials
- Air-dry clay (terra cotta or gingerbread color)
- Rolling pin
- Sharp crafting knife or scalpel
- Clay sculpting tools (needle tool, flat spatula)
- Texture sponge or stiff bristle brush
- Small circle cutter (or a straw)
- A makeshift cardboard template for walls/roof
- Slip (clay mixed with water) or scoring tool
- Water cup and brush
Step 1: Constructing the Base Structure
-
Roll slabs:
Begin by rolling out a large, even slab of clay, approximately 1/4 inch thick. Keep the thickness consistent to prevent cracking during drying. -
Cut walls:
Using cardboard templates you’ve prepared in advance, cut out two rectangular side walls and two peaked front/back walls. Save the excess clay for the roof and details. -
Add texture:
Before assembling, press a coarse texture sponge or a stiff brush firmly into the surface of all four wall pieces. This creates that lovely stucco or stone-effect finish. -
Open windows:
While the walls are flat, carefully cut out the rectangular openings for the windows. It’s much cleaner to do this now than when the house is standing. -
Assemble walls:
Score the edges of your walls and apply a little slip. Stand the walls up, pressing the corners together firmly to create a box. I like to reinforce the inside seams with a thin coil of clay for extra stability.
Step 2: Adding Architectural Details
-
Create frames:
Roll a very thin sheet of clay and cut narrow strips. Carefully adhere these around the window openings to create frames and mullions (the cross-bars). -
The door:
Cut an arched door shape from a separate piece of clay. Use your needle tool to etch vertical wood grain lines and a horizontal bar. Attach this over the door opening area, then add a tiny ball of clay for the doorknob. -
Attic window:
For the circular attic window, use a small cutter or the end of a large marker cap to punch a hole in the top peak. Fill it with a cross-shaped clay piece. -
Roof base:
Cut two large rectangular slabs for the roof. Attach them to the peaks of the house, ensuring they overhang slightly at the eaves. Support them from underneath with crumpled paper towel if they sag while wet.
Texturing Trick
If you don’t have a texture sponge, a crumpled ball of aluminum foil rolled gently over the wet clay creates a fantastic, realistic stone stucco texture.
Step 3: Roofing and Finishing
-
Prepare shingles:
Roll out more clay and use a small round cutter or a knife to create dozens of small, curved shingle shapes. They don’t need to be identical; slight variation adds character. -
Layer shingles:
Starting at the very bottom edge of the roof, attach a row of shingles using a dab of water. Overlap the next row slightly on top of the first, staggering the joints like real bricks. -
Reach the peak:
Continue tiling upward until you reach the roof ridge. Trim the final top row so it sits flush with the peak. -
Decorative trim:
Roll a thin snake of clay and indent it with a tool to create a patterned trim. Attach this just under the roof overhang on the front gable for a decorative fascia board. -
Chimney construction:
Form a small rectangular block for the chimney. Hollow it out slightly if desired, or leave it solid. Cut the bottom at an angle that matches the slope of your roof. -
Attach chimney:
Score and slip the angled bottom of the chimney and press it firmly onto the roof slope. Blend the seams slightly so it looks integrated. -
Final dry:
Let the house dry slowly away from direct heat or sunlight to prevent warping. This usually takes 24-48 hours depending on humidity.
Make it Glow
Cut a large hole in the bottom of the base before assembly. Once dry, you can place an LED tea light underneath to illuminate the windows warmly.
Once fully dry, your textured cottage is ready to be displayed on a mantle or shelf.


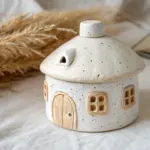
Tealight Luminary Mini House
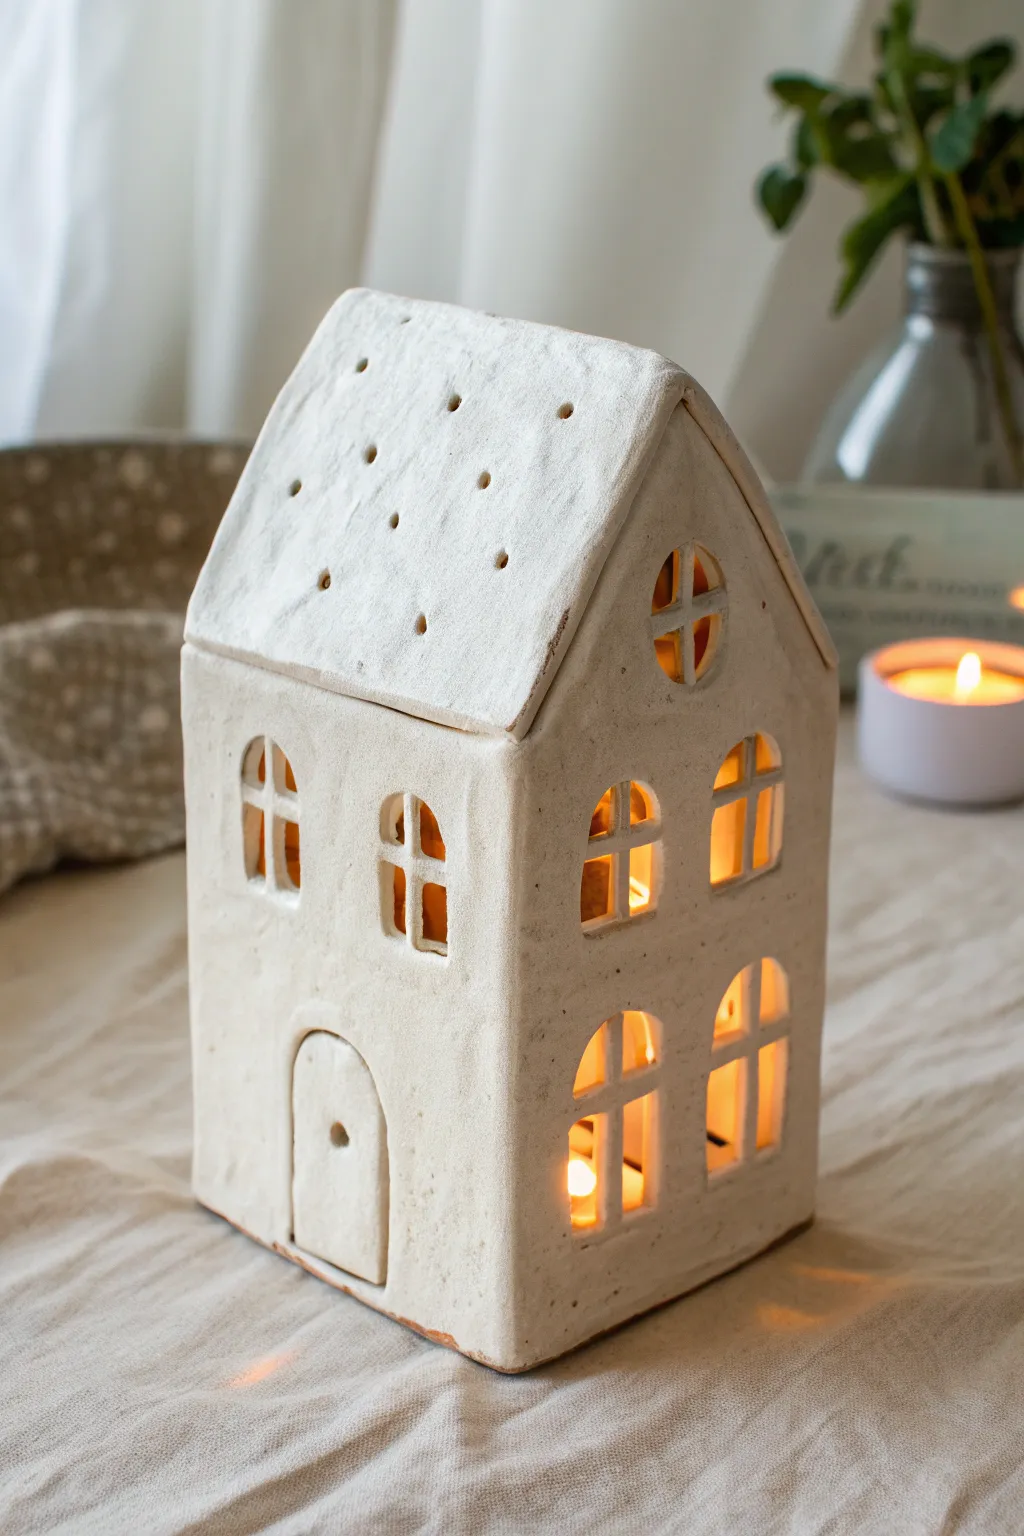
This rustic, handmade ceramic house casts a warm, inviting glow through its arched windows, perfect for creating a cozy atmosphere on a shelf or mantle. The piece features a textured, creamy white finish and a removable roof with delicate pinhole details that mimic twinkling stars.
Detailed Instructions
Materials
- White stoneware clay (also works with air-dry clay)
- Rolling pin with guide rings (approx 1/4 inch)
- Clay slab cutting tool or craft knife
- Paper template (walls and roof pieces)
- Small square or rectangular cookie cutters (optional)
- Needle tool
- Slip and scoring tool (if using ceramic clay)
- Sponge and water
- Matte white glaze or acrylic paint (depending on clay type)
- LED tealight or wax candle
Step 1: Planning and Slab Rolling
-
Template Creation:
Begin by sketching your house dimensions on cardstock. You will need a front and back panel with gable peaks, two rectangular side walls, and two roof rectangles that overhang slightly. Cut these templates out. -
Prepare the Clay:
Wedge your clay thoroughly to remove air bubbles. This is crucial for structural integrity, especially if you plan to fire the piece in a kiln. -
Roll the Slabs:
Roll out a large slab of clay to an even thickness of about 1/4 inch. Using guide rings on your rolling pin helps ensure the walls are uniform. -
Texture Application:
For that rustic, organic look shown in the image, lightly pat the surface of the slab with a piece of canvas or a rough sponge before cutting. I like to do this while the clay is still flat to avoid warping later. -
Cut the Components:
Place your paper templates onto the slab and carefully trace around them with a needle tool or craft knife. Cut out all four walls and the two roof panels.
Pro Tip: Clean Cuts
When cutting out windows, wait until the clay is stiffer. If it drags or deforms, the clay is too wet. Let it dry 20 more mins for sharper lines.
Step 2: Construction and Detail Work
-
Leather Hard Stage:
Let your clay slab pieces sit until they reach a ‘leather hard’ state. They should be firm enough to stand up without slumping but still soft enough to carve and join. -
Carve the Windows:
Using a needle tool or a small knife, carefully cut out the arched windows. On the side wall seen in the finished house, cut two rows of two windows. For the front, cut two smaller upper windows. Smooth the raw edges of the cuts with a damp finger. -
Score and Slip:
Score (scratch) the edges of the walls where they will join. Apply clay slip (a mixture of clay and water) to the scored areas to act as glue. -
Assemble the Walls:
Stand the walls up and press the scored edges together firmly. Use a small coil of clay on the inside corners to reinforce the seams, smoothing it out so it becomes invisible. -
Add the Door:
Instead of cutting the door completely out, cut an arch shape and press a separate, slightly smaller piece of clay into the opening to create a recessed door look. Poke a small indentation for the doorknob. -
Create Window Panes:
Roll tiny, thin coils of clay. Carefully place them inside the window openings in a cross shape to create the mullions. Use a dab of water or slip to secure them to the window frames. -
Roof Detailing:
Take your roof panels and use a needle tool to poke scattered holes through the clay. These pinholes will let light escape from the top.
Step 3: Finishing Touches
-
Assemble the Roof:
Join the two roof panels together at the peak using the score and slip method. You can choose to attach the roof permanently to the house walls or leave it removable to easily place a candle inside. -
Refine Edges:
Once assembled, go over the entire piece with a slightly damp sponge to soften any sharp corners and smooth messy joins, maintaining the handmade, slightly imperfect aesthetic. -
Drying:
Allow the house to dry slowly under loose plastic for the first day, then uncover it to dry completely. This prevents warping or cracking. -
Firing or Sealing:
If using ceramic clay, bisque fire the piece, then apply a matte white glaze and fire again. If using air-dry clay, wait until bone dry, paint with acrylics, and seal with a matte varnish.
Troubleshooting: Sagging Roof
If the roof peak sags while drying, convert a cardboard box into a tent shape and place it underneath the clay roof for support until it stiffens.
Place a flickering tealight inside your new ceramic cottage and enjoy the warm, comforting shadows it casts

Simple Scandinavian-Style White House
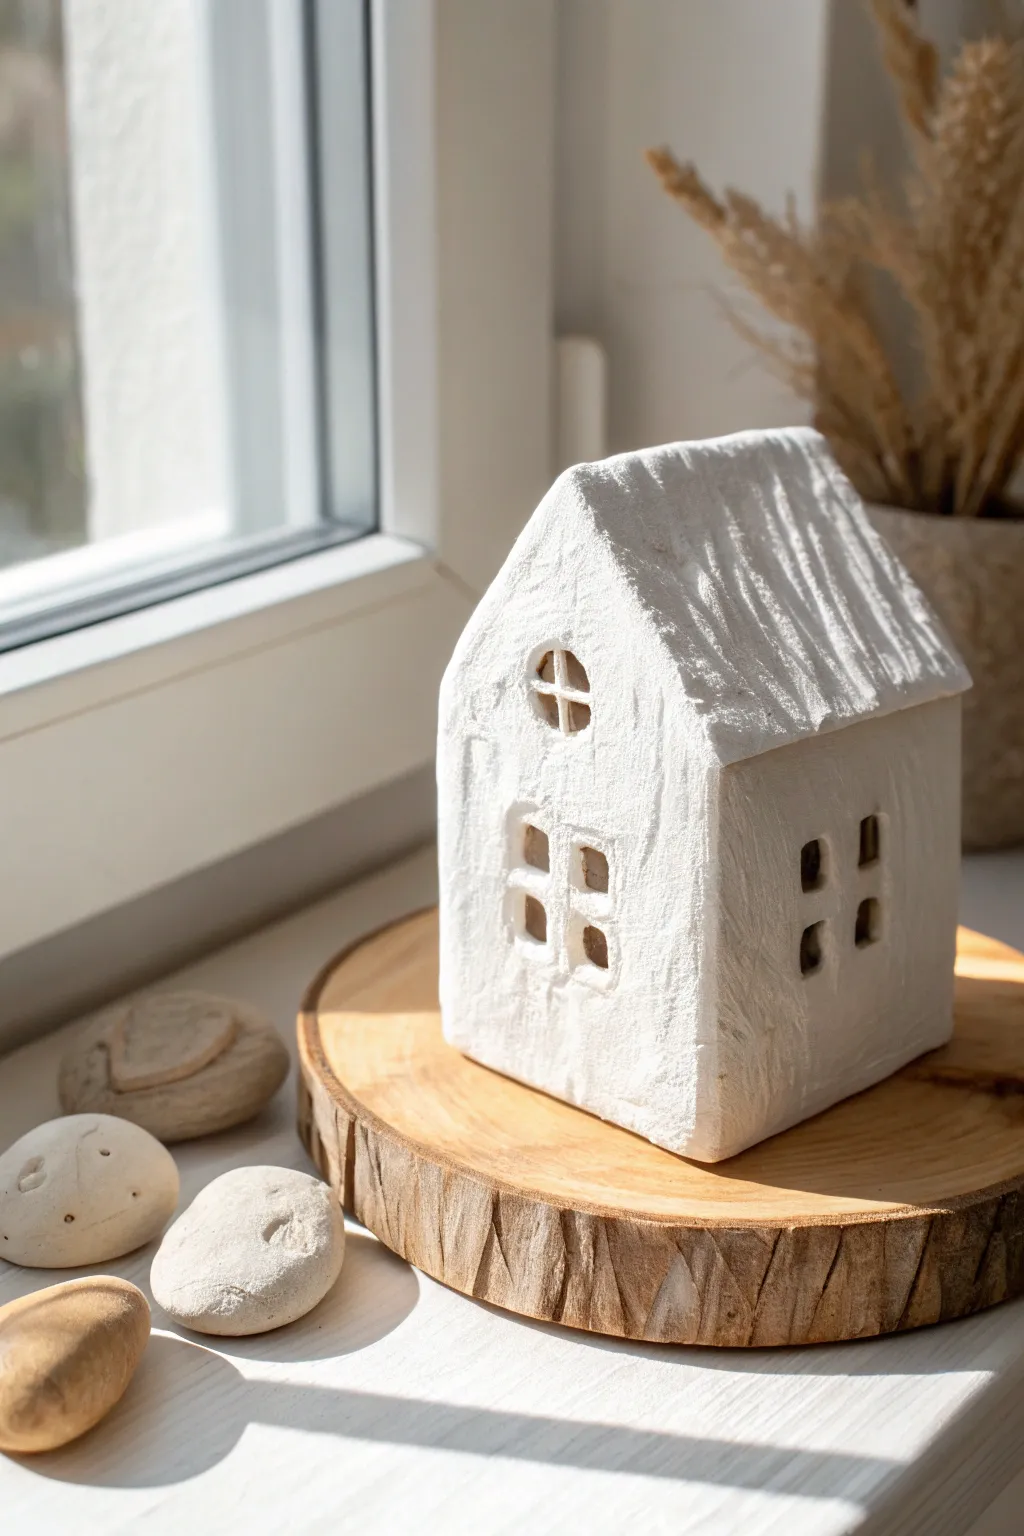
Capture the essence of hygge with this minimalist white clay house, featuring a lovely hand-sculpted texture and simple geometric windows. This Scandinavian-inspired piece makes for a serene windowsill decoration or a cozy addition to a winter village display.
Step-by-Step Guide
Materials
- Air-dry clay (white)
- Rolling pin
- Parchment paper or craft mat
- Craft knife or clay cutter
- Ruler
- Sculpting tool with a flat edge
- Needle tool or toothpick
- Small bowl of water
- White acrylic paint (optional, for finish)
- Matte varnish (optional)
- Sandpaper (fine grit)
Step 1: Preparing the Base Shapes
-
Roll the clay:
Begin by conditioning a large ball of white air-dry clay in your hands until it is pliable. Roll it out on parchment paper to a uniform thickness of about 1/4 inch (6mm). Using guide sticks on either side can help ensure the slab is completely even. -
Cut the facade walls:
Using a ruler and craft knife, measure and cut two identical pentagon shapes for the front and back walls. The base should be roughly 3 inches wide, rising to straight sides, and topped with a triangle for the roof pitch. -
Cut the side walls:
Cut two rectangular pieces for the side walls. These should match the height of the straight sides of your facade pieces and be the same depth you want your house to be, approximately 3 inches deep. -
Cut the roof slabs:
Measure and cut two rectangular slabs for the roof. They need to be slightly wider than the house structure to create a subtle overhang and long enough to cover the angled slopes. -
Texture the surfaces:
Before assembly, gently tap the flat side of a ruler or a stiff brush against the clay surfaces to create a rough, stucco-like texture. This gives the house its rustic, handmade charm rather than a perfectly smooth finish.
Structure Support
If the clay walls are sagging during assembly, temporarily place a small cardboard box or crumpled paper inside the house structure to hold the walls upright until the clay begins to firm up.
Step 2: Assembling the Structure
-
Score and slip:
To ensure strong joints, use a needle tool to scratch cross-hatched lines (scoring) on the edges where the walls will meet. Dab a little water (slip) onto these roughened areas. -
Join the walls:
Stand up the front facade and one side wall, pressing the scored edges together firmly. Use your finger or a sculpting tool to smooth the seam on the inside for stability. Repeat with the remaining walls until you have a standing box structure. -
Blend the outer seams:
On the exterior corners, gently blend the clay together so the seams disappear, maintaining the textured look you created earlier. -
Attach the roof:
Score and slip the top edges of your walls and the undersides of your roof pieces. Place the roof slabs on top, ensuring they meet at the peak. Pinch the peak gently to seal the two roof pieces together. -
Add roof texture:
Using a modeling tool or the back of a knife, drag vertical lines down the roof pieces to mimic the appearance of rustic thatch or timber beams. Make these lines uneven for a more organic feel.
Step 3: Creating Details
-
Carve the attic window:
On the front peak of the house, use a small circular cutter or freehand a circle with your needle tool. Carefully remove the clay. Construct a small cross from clay scraps and insert it into the circle to form window panes. -
Cut lower windows:
Carve out four small rectangular windows on the front facade—two lower and two upper. Keep the edges slightly soft and imperfect to match the rustic style. -
Carve side windows:
Repeat the window carving process on the side walls, spacing them evenly. You can push the cut clay inwards slightly before removing it to create a sense of depth in the sill. -
Smooth the openings:
Dip your finger or a small brush in water and smooth any sharp burrs or jagged crumbs created while cutting the windows. I find a damp paintbrush works best for these tight corners.
Cracks Happen
Make a ‘clay paste’ by mixing a small chunk of fresh clay with water until it’s like thick yogurt. Fill any cracks that appear during drying with this paste, let it dry, and then smooth it out.
Step 4: Finishing Touches
-
Final texture check:
Look over the entire piece. If you smoothed out too much texture while handling the house, re-apply the rough stucco effect by dabbing with a stiff brush or texture tool. -
Dry properly:
Let the house dry slowly in a cool, dry place away from direct sunlight to prevent warping or cracking. This usually takes 24-48 hours depending on humidity. -
Refine edges:
Once fully dry, you can lightly sand the bottom edge if it sits unevenly, but avoid sanding the textured walls. -
Paint (Optional):
If your clay isn’t bright white when dry, apply a coat of white acrylic paint. This helps unify the color and highlights the textural details. -
Seal:
Finish with a matte varnish to protect the surface while keeping the natural, stony appearance.
Place your finished house on a wood slice or near a window to enjoy the cozy atmosphere it creates

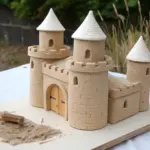
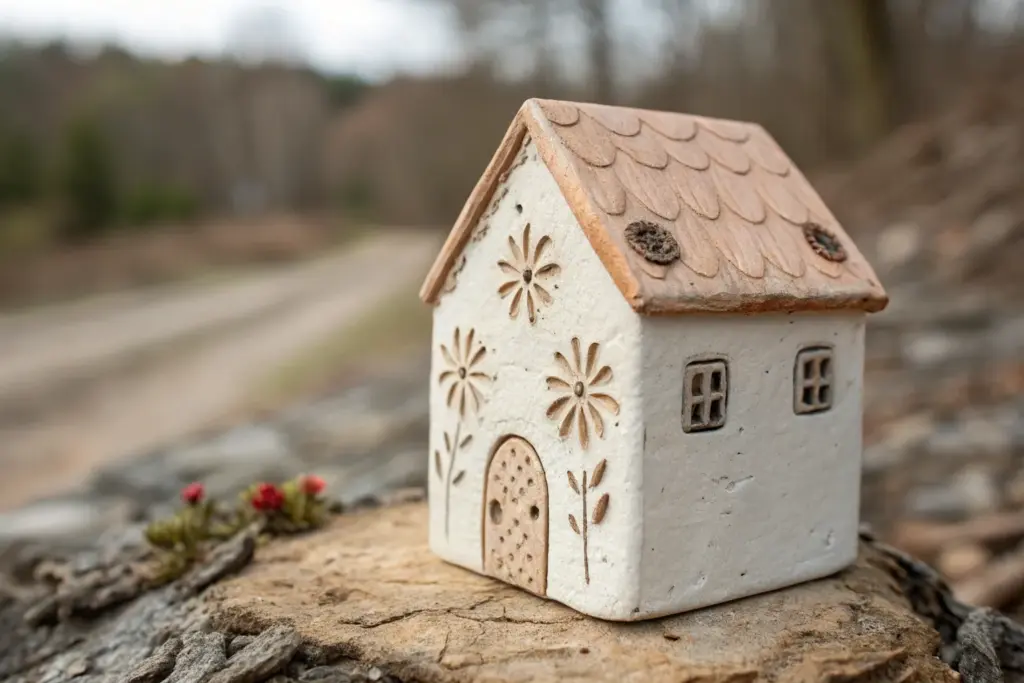
Stone-Wall Storybook Cottage
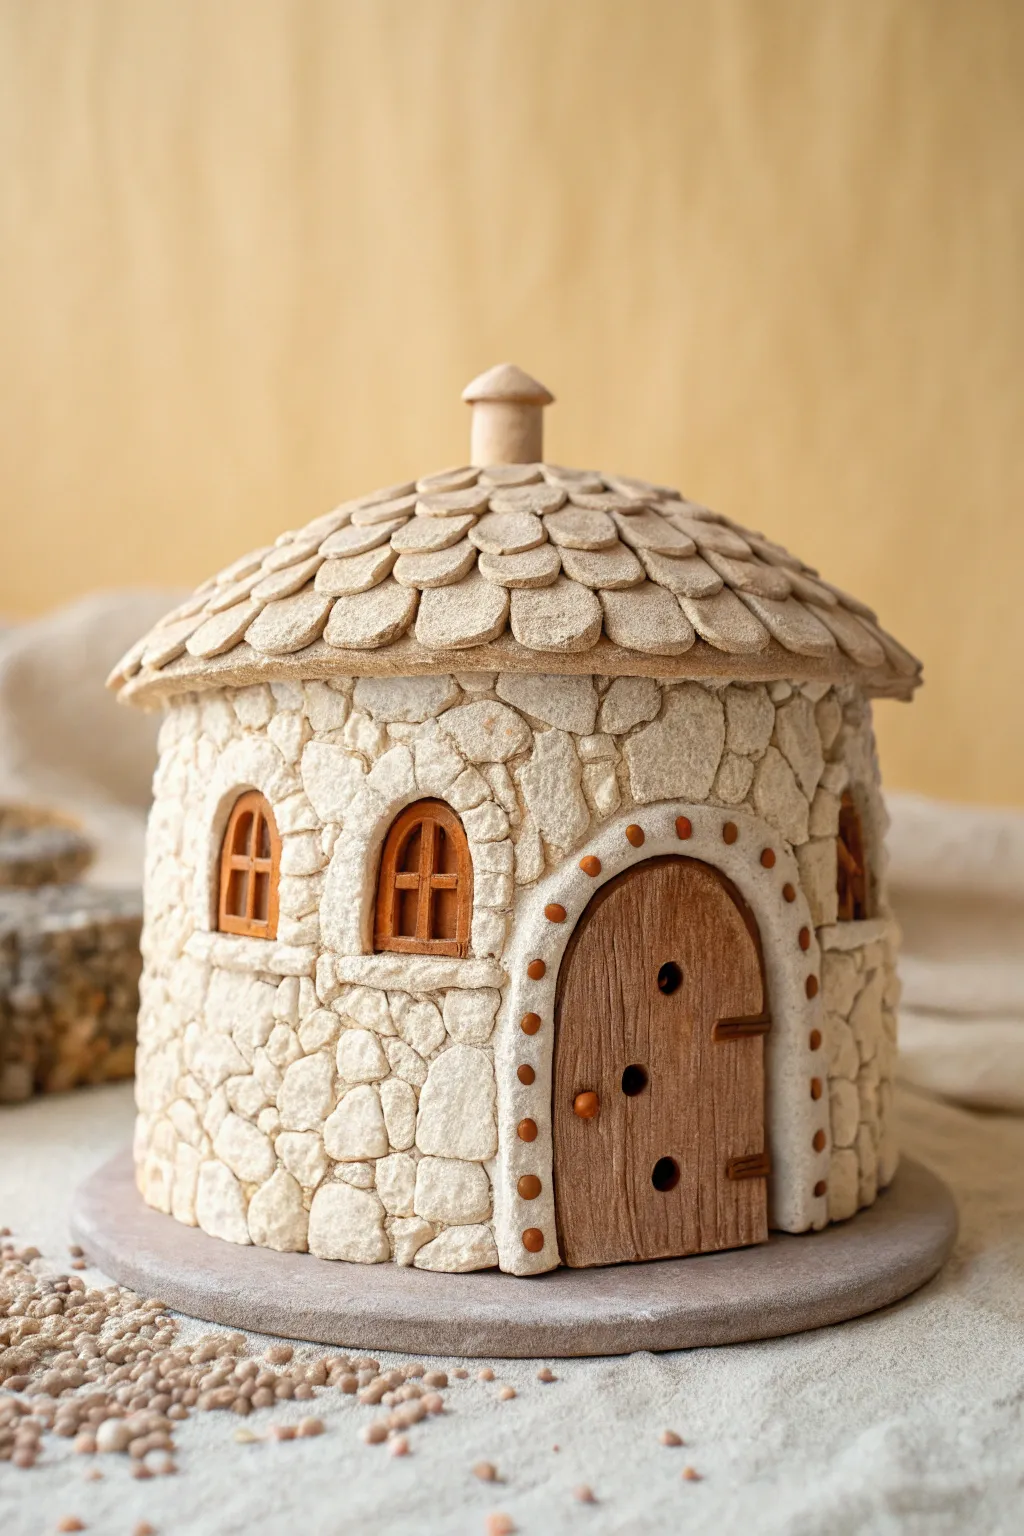
Transport yourself to a fairytale land by sculpting this charming miniature cottage, featuring deeply textured stonework and a scalloped tile roof. The rustic finish and arched wooden door give it a cozy, handcrafted appeal perfect for any shelf or terrarium.
How-To Guide
Materials
- White air-dry clay or polymer clay
- Wooden rolling pin
- Empty cylindrical container or cardboard tube (for armature)
- Small craft knife or scalpel
- Clay sculpting tools (needle tool, ball stylus)
- Textured stone or toothbrush (for surface texture)
- Brown acrylic paint (various shades: ochre, raw umber)
- Small flat paintbrush
- Strong craft glue or PVA
- Circular wooden base or coaster
- Small beads or lentils (for door frame accents)
Step 1: Building the Structure
-
Prepare the armature:
Begin by selecting an empty cylindrical container, like a cleaned spice jar or a section of a cardboard mailing tube, to serve as the core. Glue this securely to your circular wooden base to prevent it from shifting while you work. -
Roll the clay slab:
Roll out a large slab of white clay to an even thickness of about 4-5mm. You want it sturdy enough to hold the stone texture but flexible enough to wrap around your armature. -
Wrap the walls:
Cut the clay slab into a rectangle that matches the height and circumference of your tube. Gently wrap the clay around the armature, pressing the seam together and smoothing it out with a drop of water so it disappears. -
Create the roof cone:
Fashion a separate cone shape from cardboard or foil to sit on top of the cylinder. Roll out a circle of clay, drape it over this cone shape, and trim the edges so it overhangs the walls slightly like eaves.
Step 2: Stonework and Texture
-
Outline the stones:
Using a needle tool, lightly sketch irregular stone shapes all over the wall surface. Vary the sizes—some large and blocky, others small filler stones—to create a natural, organic look. -
Deepen the grout lines:
Go back over your sketched lines with a blunt sculpting tool, pressing deeper to create distinct separation between the stones. This ‘grout’ depth is crucial for realism. -
Add surface texture:
To make the stones look weathered, gently press a real rough stone, a ball of aluminum foil, or the bristles of a toothbrush against the individual clay stones. I find this creates a lovely pitted effect that catches shadows. -
Cut window openings:
Carefully cut out two arched window shapes from the wet clay walls. If you hit the armature underneath, you can either leave it if it’s opaque or paint it dark later to simulate depth. -
Sculpt window frames:
Roll thin snakes of clay and press them around the window arches to form sills. Use the knife edge to make tiny indentations for ‘wood grain’ on the sills.
Clay Cracking?
If small cracks appear during drying, make a ‘slurry’ paste by mixing a tiny bit of clay with water. Smear this into the cracks and smooth it out with a finger.
Step 3: The Roof and Details
-
Make roof tiles:
Roll out a thin sheet of clay and use a small round cutter (or a bottle cap) to punch out many small circles. Flatten them slightly to make them look like irregular slate tiles. -
Layer the roof:
Starting at the bottom edge of the roof cone, glue the clay circles in overlapping rows. Work your way upward in a spiral until you reach the peak, ensuring each row covers the seam of the one below it. -
Add the chimney:
Roll a small cylinder of clay and adhere it to the very center peak of the roof. Fashion a tiny conical cap for it to mimic the main roof shape. -
Sculpt the door:
Cut an arched door shape from a fresh slab of clay. Use a blade to score deep vertical lines to resemble wooden planks. Use a small tool to poke three distinct holes or indentations down the side for a rustic handle look. -
Create the door frame:
Roll a thicker snake of white clay and arch it over the door area. Press small beads, lentils, or tiny balls of clay into this frame at regular intervals to create rivet or decorative stone details. -
Final assembly:
Glue the wooden door into place within the arch. Attach narrow strips of clay inside the window openings to form a cross-hatch pane design.
Natural Texture Hack
Before painting, gently press a piece of coarse sandpaper against the wet clay stones. It adds a gritty, realistic granite texture instantly.
Step 4: Painting and Finishing
-
Base coat:
Once the clay is completely dry (24-48 hours), dilute some light brownish-grey paint and wash it over the stone walls. Wipe the surface immediately with a damp cloth, leaving the darker paint in the grout lines. -
dry brush the stones:
Take a dry brush with very little off-white or cream paint and lightly whisk it over the raised surfaces of the stones and roof tiles to highlight the texture. -
Paint wood details:
Paint the door and window frames with a warm brown acrylic. For the door rivets, use a tiny dot of copper or dark brown paint to make them pop.
Place your finished cottage in a sunny spot and enjoy the magical atmosphere it brings to your space

The Complete Guide to Pottery Troubleshooting
Uncover the most common ceramic mistakes—from cracking clay to failed glazes—and learn how to fix them fast.
Coastal Beach Hut Mini House
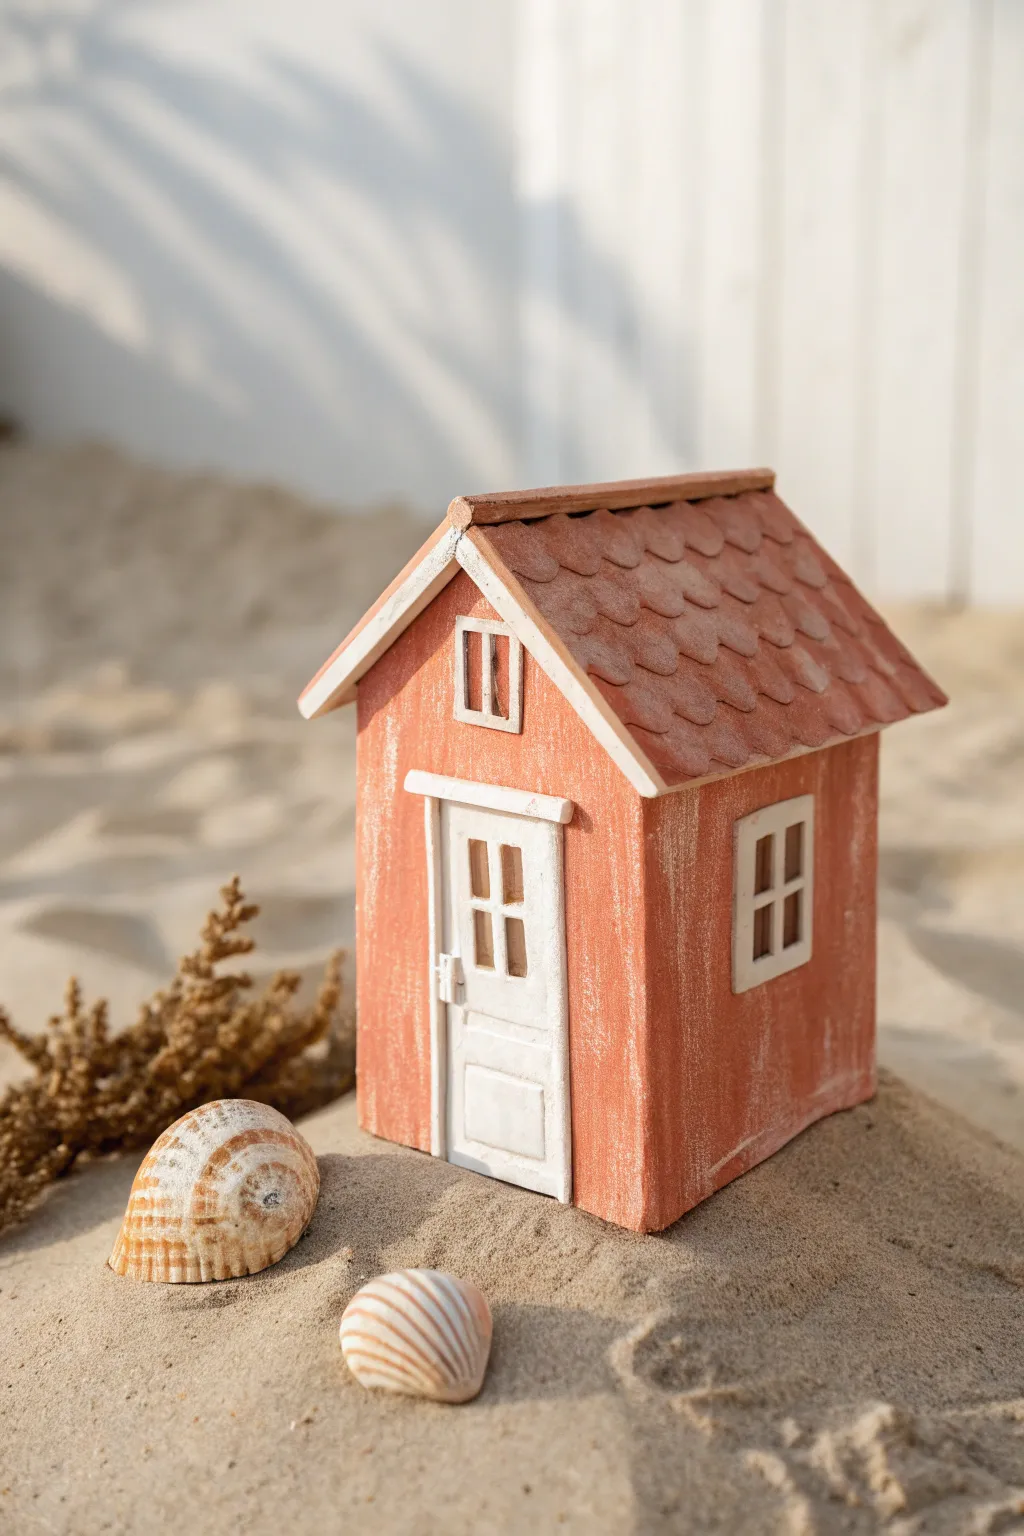
Capture the breezy charm of a summer holiday with this miniature coastal beach hut, featuring weathered coral-red siding and classic white trim. This simple slab-building project creates a rustic, textured piece that sits perfectly on a shelf or in a terrarium.
Detailed Instructions
Materials
- Air-dry clay (terra cotta color or plain white)
- Acrylic paints (coral/rusty orange, titanium white)
- Clay rolling pin
- Craft knife or scalpel blade
- Ruler
- Clay scoring tool or needle tool
- Slip (clay mixed with water)
- Small flat brush and fine liner brush
- Sandpaper (medium grit)
- Balsa wood (optional for roof tiles)
- White PVA glue
Step 1: Constructing the Base Structure
-
Roll out the slab:
Begin by rolling out your clay to an even thickness of about 1/4 inch. If you are using white clay, you can proceed as is, but if you start with terracotta-colored clay, the final distressed paint effect will be easier to achieve. -
Cut the walls:
Using your ruler and craft knife, cut out four pieces for the walls. You’ll need two rectangles for the sides (approx. 3×4 inches) and two peaked shapes for the front and back (3 inches wide at the base, rising to a peak of 5 inches). -
Create the openings:
Before assembling, decide where your door and windows will go. On the front peaked piece, carefully cut out a rectangular opening for the door and a smaller square above it for the attic window. Cut a square window on one side wall. -
Score and slip:
Score the edges of your clay pieces where they will join using your needle tool to create a rough texture. Apply a generous amount of clay slip to these scored areas. -
Assemble the walls:
Stand the walls up and press the scored edges together to form the house box. Smooth the seams on the inside with your finger or a modelling tool to ensure a strong bond.
Warped Walls?
If clay walls curve while drying, prop them up with soup cans or small boxes to hold them square until legally stiff.
Step 2: Roofing and Details
-
Cut roof panels:
Roll out another slab of clay and cut two rectangular panels for the roof. Ensure they are slightly wider and longer than the house footprint to create an overhang. -
Texture the roof:
To mimic the scalloped shingles shown in the image, use the rounded end of a popsicle stick or a specific clay tool to press a repeating scale pattern into the wet clay roof panels. -
Attach the roof:
Score the top peaks of your house walls and the underside of the roof panels. Slip and attach them, pressing gently at the ridge line to join. -
Add trim elements:
Roll very thin ‘snakes’ or flat strips of clay. Frame the door and windows with these strips to create the casing. Add a horizontal strip above the door for a lintel effect. -
Make the door:
Create a separate slab door that fits just inside your door frame (or slightly behind it). Gently press a tool into it to emboss four panels, then attach it to the house. -
Let it dry:
Allow the entire structure to dry completely. This usually takes 24-48 hours depending on humidity. Rotate it occasionally so the bottom dries evenly.
Sandy Scene
Glue the finished house to a wooden base, coat the base in PVA glue, and sprinkle real sand and tiny crushed shells around it.
Step 3: Painting and Distressing
-
Base coat:
Once dry, sand any rough edges lightly. Paint the roof and the exterior walls with a coral or rusty orange acrylic paint. Depending on your clay color, you might need two coats for opaque coverage. -
Paint the trim:
Using a fine brush, carefully paint the door, window frames, and the underside of the roof overhang in a creamy white. -
Distress the finish:
The charm of this hut is the weathered look. Once the orange paint is dry, take a tough, dry bristled brush with a tiny amount of white paint and ‘dry brush’ vertically over the orange walls. Focusing on the edges creates that sun-bleached driftwood effect. -
Define the roof:
Wash a little watered-down brown or grey acrylic over the roof tiles, then wipe it back with a paper towel. This leaves dark pigment in the crevices of the scalloped pattern. -
Final touches:
Paint the window mullions (the cross bars) with a very steady hand or a white paint marker. Add a tiny dot of silver or grey for the door handle.
Now you have a charming little beach escape that brings the coast to your bookshelf
Tiny Townhouse Row Set
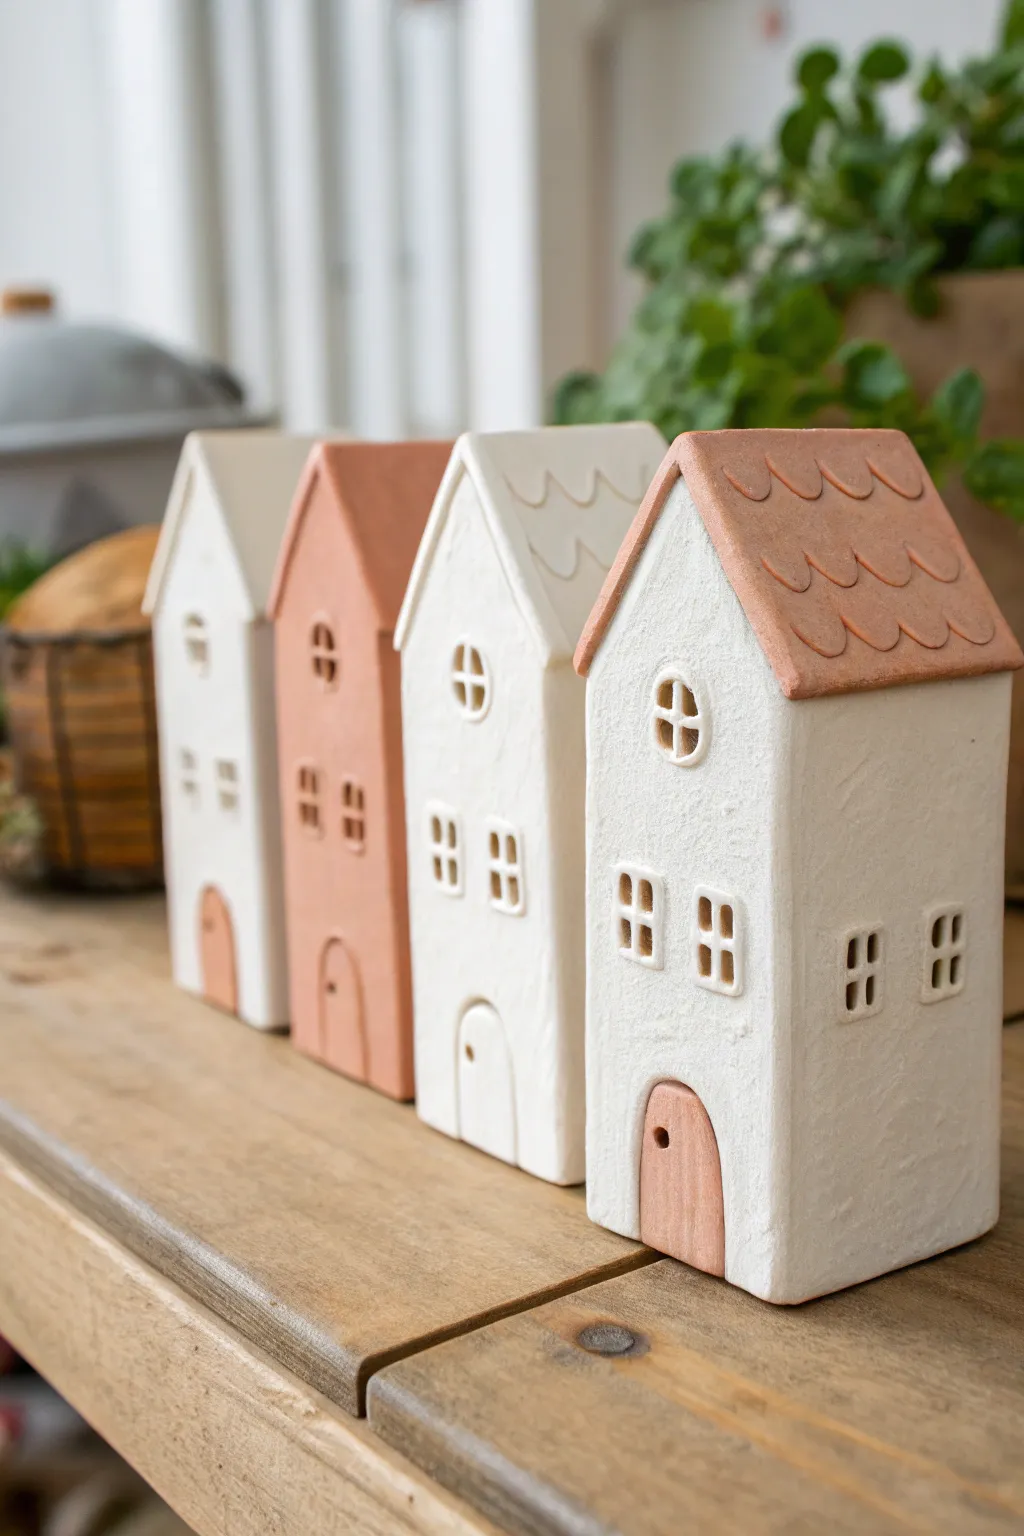
Create a charming streetscape with this set of four miniature houses, featuring a minimalist blend of creamy white walls and rustic terracotta accents. These clay dwellings boast textured surfaces and scalloped roof details that give them a cozy, handmade feel perfect for a bookshelf or mantel display.
Step-by-Step Guide
Materials
- Air-dry clay (white)
- Air-dry clay (terracotta/brick red)
- Rolling pin
- Sharp craft knife or clay blade
- Ruler
- Small square clay cutter (optional)
- Needle tool or toothpick
- Water in a small cup
- Fine-grit sandpaper
- Acrylic matte varnish (optional)
Step 1: Shaping the Base Structures
-
Prepare the templates:
Before touching clay, sketch out templates on cardstock for your four houses. You’ll need two tall, narrow side walls, a front wall with a peaked gable, and a matching back wall for each house. Vary the heights slightly for interest, but keep the width uniform. -
Roll the white clay:
Roll out a slab of white air-dry clay to a consistent thickness of about 1/4 inch. For the two houses that will be fully terracotta, roll out the terracotta clay instead. -
Cut the walls:
Place your templates onto the rolled clay and carefully cut out the four walls for each house using your craft knife. Repeat this for all four houses. -
Add surface texture:
Before assembling, gently press a crumpled ball of aluminum foil or a stiff-bristled brush against the exterior sides of the walls. This creates the stucco-like, organic texture seen in the photo. -
Cut the windows:
While the walls are flat, use a small square cutter or your knife to cut out window openings. Create two rectangular windows on the lower level and smaller square ones for the sides. For the attic window, you can use a small circular cutter or freehand a circle. -
Assemble the box:
Score the edges where the walls will meet with a needle tool and dab them with a little water (or slip). Press the walls together to form the standing structure, smoothing the seams on the inside for stability.
Step 2: Adding Details & Roofs
-
Create window mullions:
Roll tiny, thin snakes of clay. Carefully place them inside the window openings to create the cross-shaped mullions (panes). Use a tiny bit of water to secure them to the inner frame. -
Form the doors:
Cut arched door shapes from rolled clay. For the white houses, cut doors from terracotta clay; for terracotta houses, shape the door directly or outline an arch. Press a small indentation for a doorknob. -
Attach the doors:
Score the back of your arched door pieces and the spot on the house front. Press the contrasting door firmly onto the base of the white houses. -
Prepare the roofs:
Roll out a slab of clay for the roofs. For the white house with the terracotta roof, use terracotta clay. Cut rectangular slabs that are long enough to drape over the peak and overhang slightly on the sides. -
Apply roof texture:
For the scalloped roof design, use a small U-shaped tool or the end of a straw cut in half. Press rows of U-shapes into the wet roof slab, starting from the bottom edge and working upward to mimic shingles. -
Install the roofs:
Score the top sloping edges of the gable walls. Gently place the roof slab over the peak, pressing lightly to secure it without squashing your shingle texture. -
Detail the white roofs:
For the all-white or all-terracotta houses, instead of scallops, you can gently carve wavy lines horizontally across the roof slope using a needle tool for a subtle drawn effect.
Fixing Cracks
If hairline cracks appear while drying, mix a small amount of clay with water to make a paste (slip). Fill the crack, smooth it over with a finger, and let it dry again.
Step 3: Finishing Touches
-
Smooth edges:
Dip your finger in water and gently run it over any sharp corners or rough seams to soften the look, ensuring the house retains a handmade, pottery aesthetic. -
Drying:
Let the houses dry slowly away from direct heat or sunlight to prevent cracking. This usually takes 24-48 hours depending on humidity. -
Sanding:
Once bone dry, take fine-grit sandpaper and very lightly sand the bottom edges so the houses sit perfectly flat. You can also smooth any unintentional bumps on the walls. -
Sealing (Optional):
To protect your town, apply a coat of matte acrylic varnish. This preserves the chalky, natural look of the clay without adding an unwanted glossy shine.
Lit from Within
Cut a hole in the bottom or back of the houses before assembly. Once dry, place them over battery-operated tea lights to make the windows glow comfortably.
Arrange your little village on a wooden shelf and enjoy the peaceful simplicity of your hand-built structures


What Really Happens Inside the Kiln
Learn how time and temperature work together inside the kiln to transform clay into durable ceramic.
A-Frame Cabin Mini House
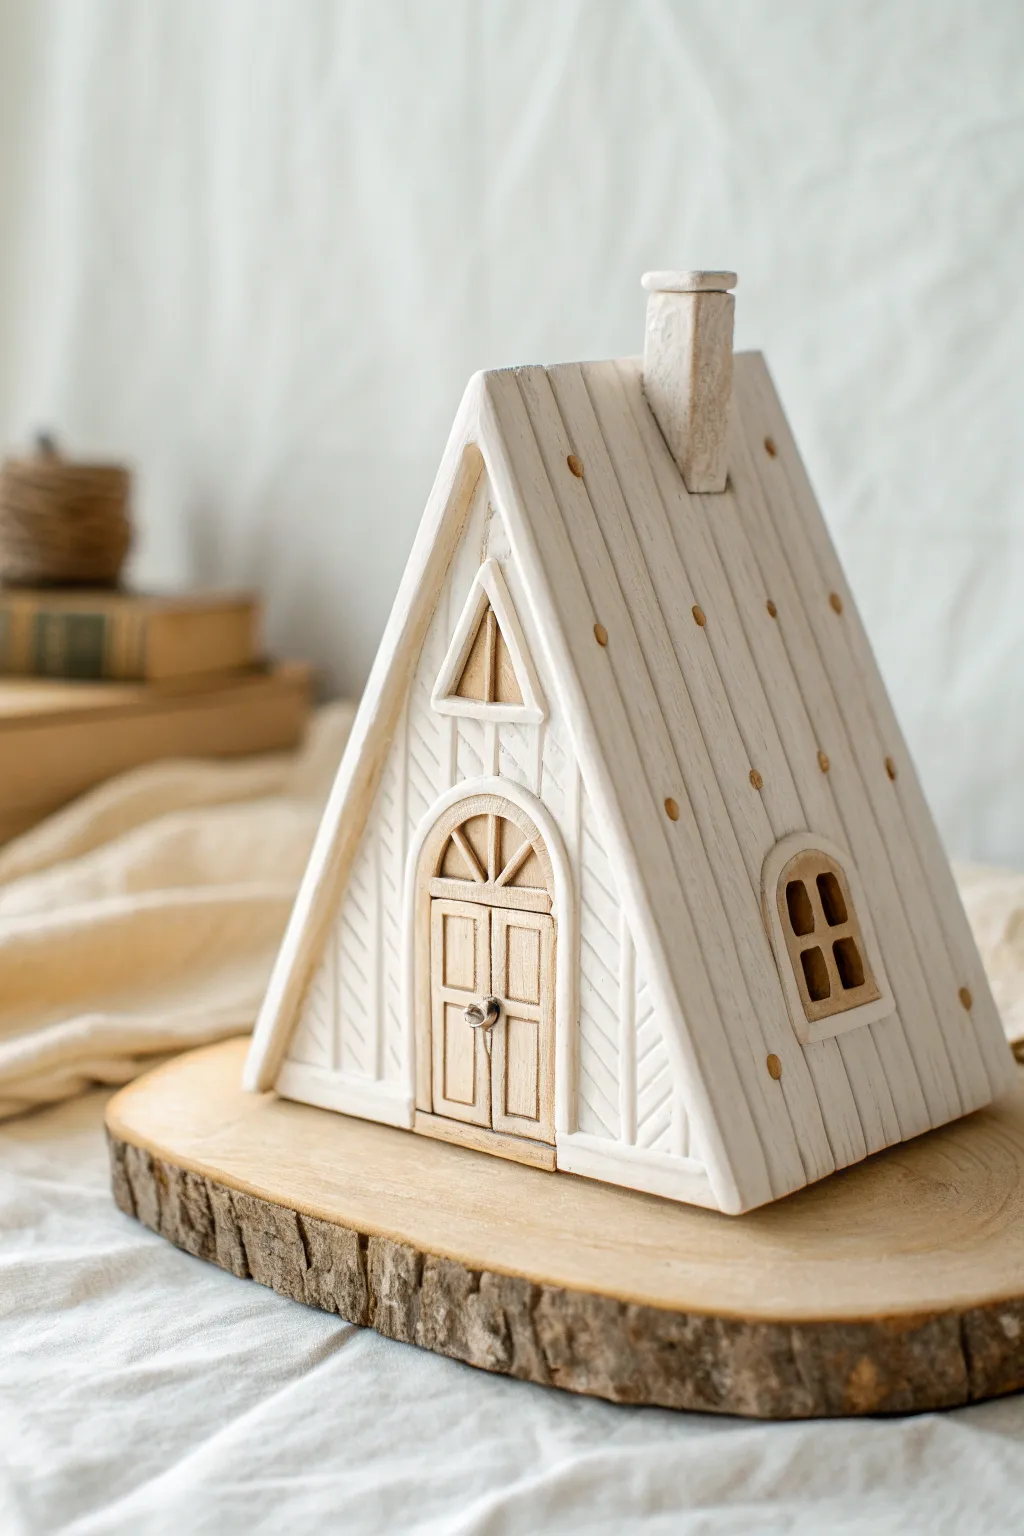
This charming A-frame cabin captures the cozy essence of woodland living with its steep rooflines and rustic textures in a minimal white palette. The finish mimics whitewashed wood, giving it a timeless, handcrafted appeal perfect for shelf decor.
How-To Guide
Materials
- Air-dry clay (white)
- Rolling pin with guide rings (approx 5mm)
- Sharp craft knife or scalpel
- Ruler
- Needle tool or toothpick
- Slip (clay mixed with water)
- Small paintbrush
- Acrylic paint (warm white/cream, soft brown)
- Matte sealant spray
- Sandpaper (fine grit)
Step 1: Preparation & Cutting
-
Roll the Slabs:
Start by conditioning your clay and rolling it out into an even slab using the 5mm guide rings. Ensure the surface is smooth and free of air bubbles. -
Cut the Roof Panels:
Measure and cut two tall rectangles for the roof. For an A-frame, these will be the dominant pieces, so make them roughly 4 inches wide by 7 inches tall. -
Create the Front and Back:
Cut two triangles that match the width of your roof panels when they are angled. An easy way to do this is to prop your roof panels up at your desired angle and measure the resulting triangular gap. -
Texture the Surfce:
Before assembly, use a ruler to gently press vertical lines into the roof panels and the front triangle to mimic wood planks. Don’t press too hard; just enough to create a groove.
Sagging Roof?
If the roof panels start to slide or sag during assembly, prop them up with cosmetic sponges or crumpled foil until the clay leather-hardens.
Step 2: Assembly
-
Score and Slip:
Score (scratch) the edges of the clay pieces where they will join, and apply a dab of slip. This acts as the glue. -
Construct the Frame:
Stand the front and back triangles up. Attach the roof panels to the sides, pressing the seams gently together. You may need to support the inside with a scrunched-up paper towel while it firms up. -
Seal the Exterior Seams:
Smooth over the top ridge where the roof panels meet using a small coil of clay blended into the joint for strength. -
Add the Chimney:
Cut a small block of clay for the chimney. Bevel the bottom edge so it sits flush against the slanted roof, score, slip, and attach it near the peak.
Step 3: Detailing
-
Carve the Door:
Roll a thinner slab of clay and cut out an arched door shape. Use your knife to scribe panel details and a door handle into it. -
Attach the Door:
Attach the door to the center of the front triangle using the score and slip method. I like to let the door protrude slightly for dimension. -
Add the Attic Window:
Cut a small triangle for the upper window, frame it with thin strips of clay, and attach it above the door. -
Create the Side Window:
On one of the roof panels, attach a similar arched shape to mirror the door style, adding a grid pattern for window panes. -
Decorative Dots:
Roll tiny balls of clay and press them gently along the roof ‘planks’ to resemble nails or pegs.
Light feature
Cut out the window panes completely before assembly. After drying, place a battery-operated tea light inside for a glowing nightlight effect.
Step 4: Finishing
-
Slow Drying:
Let the house dry slowly away from direct heat or drafts for 24-48 hours. Turn it occasionally to ensure even drying. -
Sanding:
Once bone dry, use fine-grit sandpaper to smooth any rough edges or sharp points on the corners. -
Base Coat:
Paint the entire house in a warm white or cream acrylic paint. You want a matte finish, not glossy. -
Detail Painting:
Mix a watery wash of soft brown paint. Carefully paint the door frame, handle, and window frames. The wash technique helps it look like stained wood rather than solid plastic. -
Highlight the Dots:
Dab a tiny amount of the brown wash onto the ‘nail’ dots on the roof to make them pop against the white planks. -
Seal:
Finish with a light coat of matte spray sealant to protect your work without adding unnatural shine.
Place your finished cabin on a wood slice or shelf to enjoy a little piece of architectural serenity
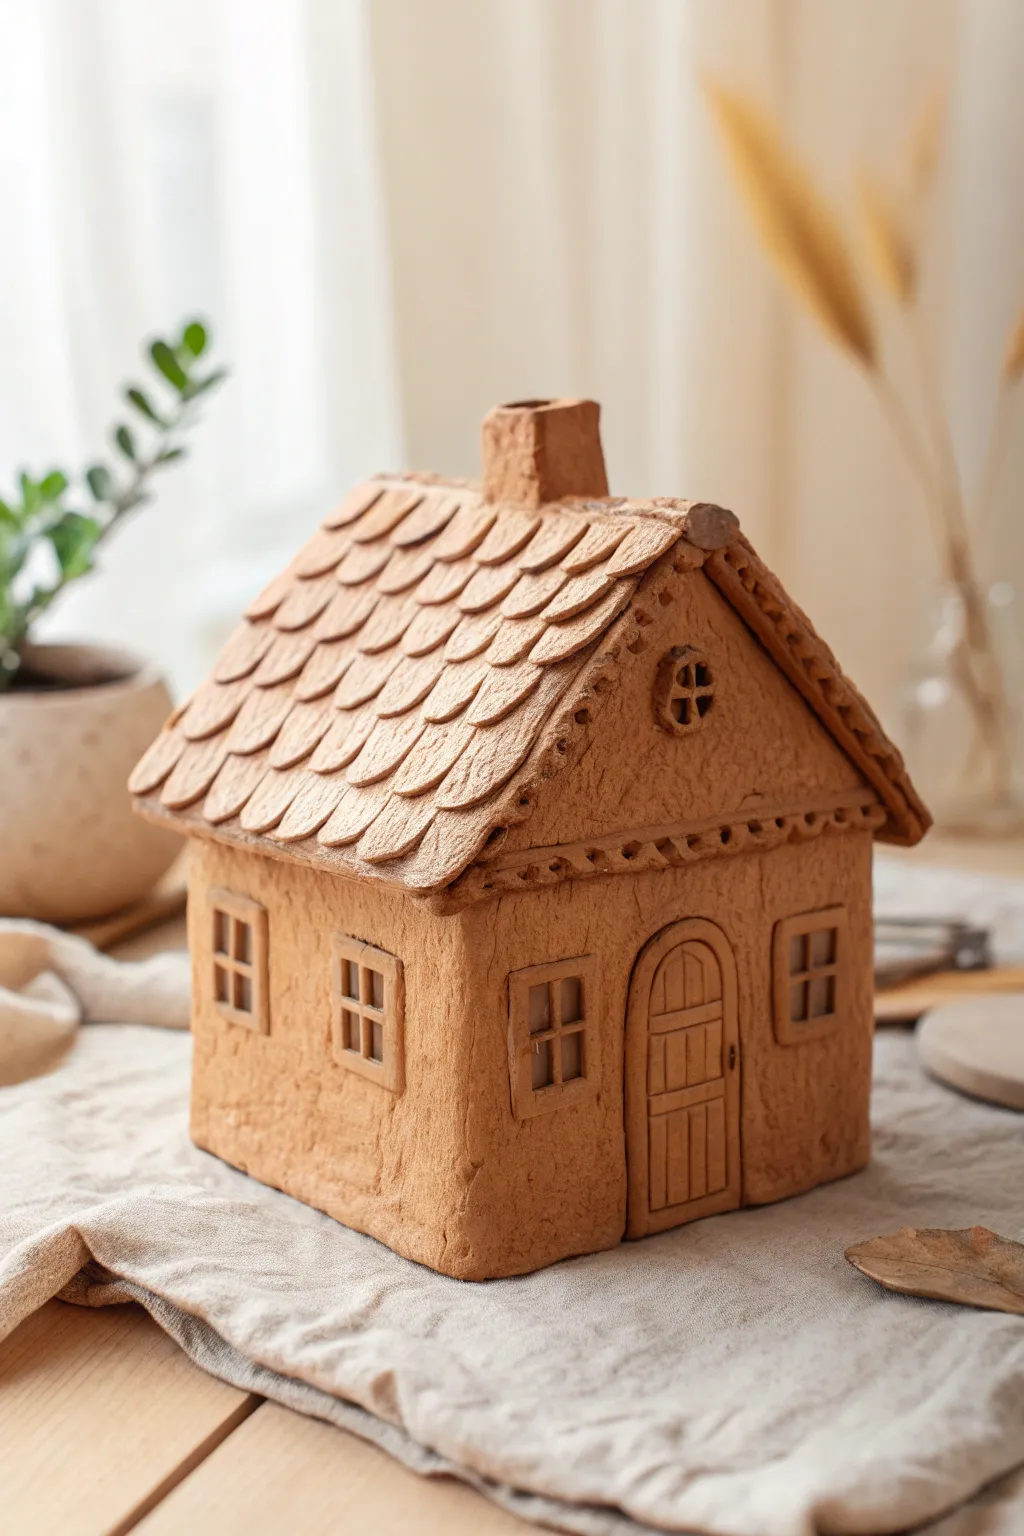
Farmhouse Mini House With Porch
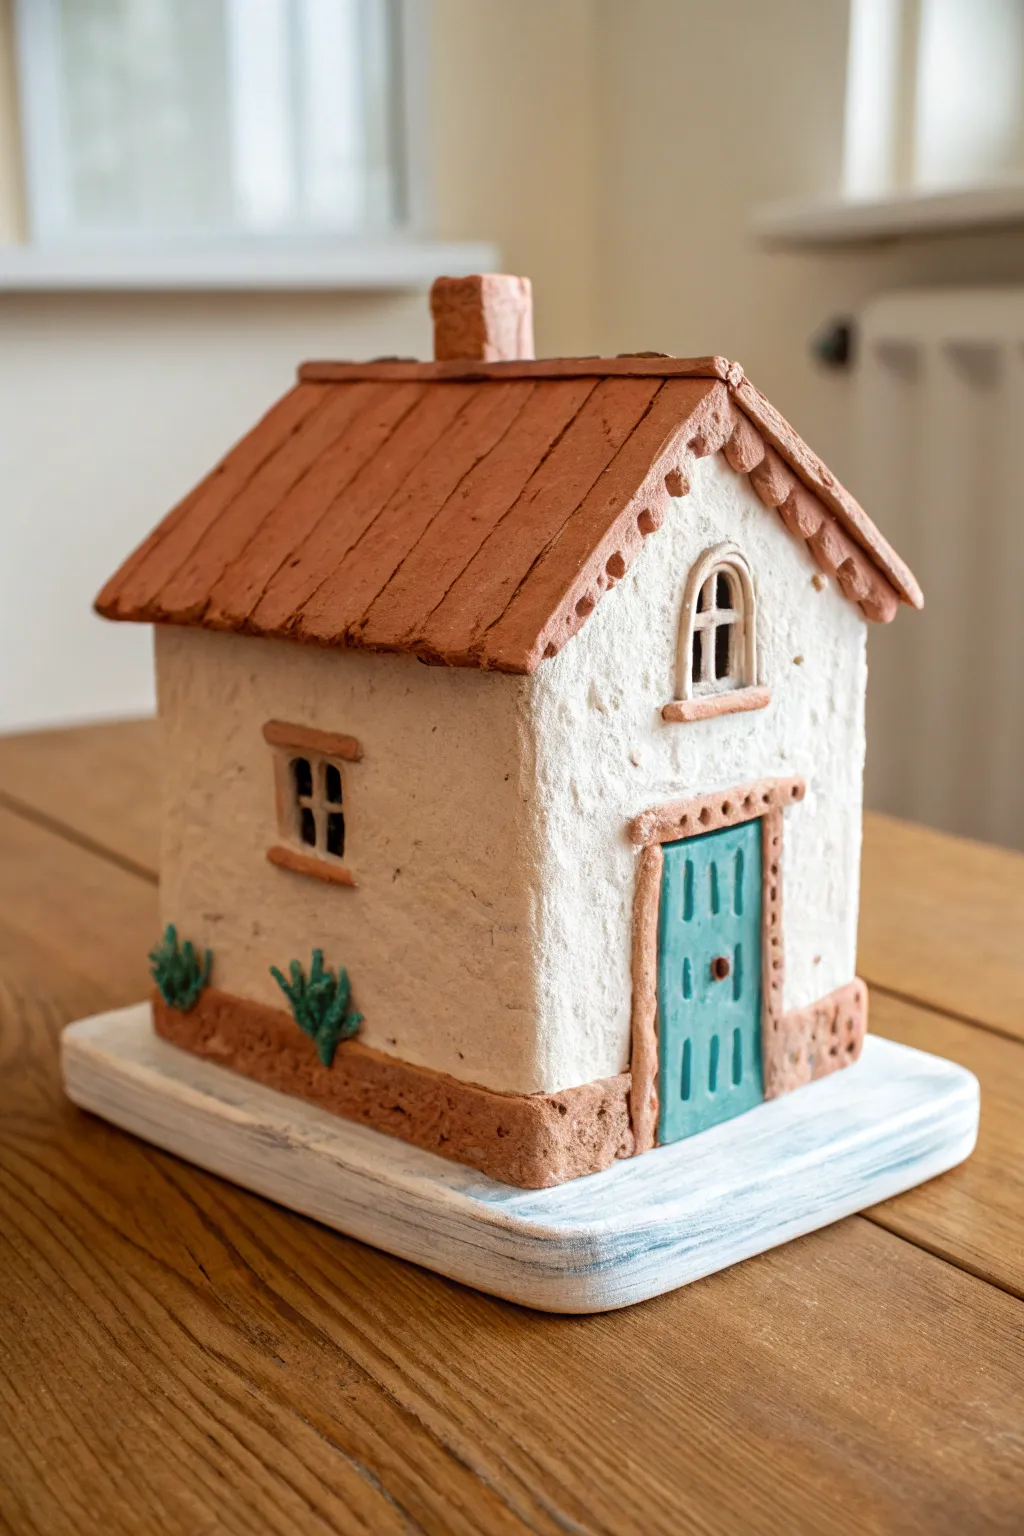
Capture the charm of a countryside dwelling with this delightful miniature clay house project. Featuring a realistic stucco texture, a classic slat roof, and a cheerful teal door, this piece makes for a heartwarming shelf decoration.
Step-by-Step Guide
Materials
- Air-dry clay (white or terracotta)
- Rolling pin
- Modeling tools (knife, needle tool)
- Acrylic paints (white, terracotta/burnt sienna, teal, brown, dark green)
- Paintbrushes (flat shader, fine liner)
- Texturing tool or old toothbrush
- Wooden base or thick cardboard
- Strong craft glue or PVA
- Water cup
Step 1: Constructing the Base Structure
-
Form the walls:
Begin by rolling out a slab of clay to about 1/4 inch thickness. Cut out four rectangular wall pieces: two longer sides and two shorter sides with peaked variations at the top for the roofline. -
Cut openings:
While the walls are flat, use your knife tool to carefully cut out the rectangular space for the main door on one peaked wall and a small window on the side wall. -
Assemble the box:
Score the edges of your wall pieces and apply a small amount of water or slip. Press the walls together to form a standing rectangular structure, smoothing the seams on the inside and outside with your finger or a modeling tool. -
Add texture:
This is crucial for that rustic look: take a texturing tool, a ball of foil, or an old toothbrush and firmly tap it all over the exterior walls to create a rough, stucco-like surface.
Cracks in the drying?
If small cracks appear as the clay dries, mix a tiny bit of fresh clay with water to make a paste (slip) and fill the cracks. Smooth it over with a finger and let dry again.
Step 2: Roof and Architectural Details
-
Make the roof slab:
Roll out another slab of clay, slightly thinner this time. Cut two large rectangles that are wide enough to overhang your wall structure slightly on all sides. -
Texturize the roof:
Before attaching, use a knife or a ruler to press parallel lines across both roof slabs to mimic wooden planks or tiles. Adding slight imperfections here makes it look more organic. -
Attach the roof:
Score the tops of the peaked walls and the undersides of your roof pieces. Place the roof slabs on top, ensuring they meet at the peak, and gently press them closer together. -
Add the ridge cap:
Roll a thin snake of clay and flatten it slightly. Place this over the very top seam of the roof to seal the gap and add a finished look. -
Create the chimney:
Form a small rectangular block of clay. Adhere it to the roof slope near the back, blending the clay at the base so it sits securely.
Step 3: Door, Windows, and Trim
-
Frame the door:
Roll thin coils of clay and flatten them. Apply these around the door opening to create a stone or wooden frame. -
Install the door:
Cut a slab to fit inside your door frame. Use a needle tool to score vertical lines for wood planks and press a tiny ball of clay for the doorknob. -
Window details:
For the side window, add a small sill underneath using a flattened coil. For the upper attic window, shape a small arch piece and attach it directly to the front wall, adding cross-bars with tiny clay strips. -
Add fascia trim:
Create a decorative scalloped or jagged edge strip of clay and attach it directly under the roofline on the front of the house for that charming gingerbread trim effect. -
Base molding:
Add a thicker strip of clay around the very bottom edge of the house to simulate a stone foundation or darker baseboard. -
Drying time:
Allow the entire structure to dry completely. This usually takes 24-48 hours depending on your clay thickness and humidity.
Level Up: Welcome Home
Create a miniature welcome mat from a scrap of felt or fabric and glue it in front of the door for an extra cozy texture contrast.
Step 4: Painting and Finishing
-
Base coat the walls:
Paint the textured walls with an off-white or cream acrylic paint. Dab the paint into the texture rather than brushing smoothly to highlight the rough surface. -
Paint the roof:
Use a terracotta or burnt sienna shade for the roof planks. I like to mix in a tiny bit of brown water afterward to create a wash that settles into the grooves. -
Detail the trim:
Paint the door frame, window sills, and base foundation in a similar terracotta or light brown tone to tie the look together. -
The pop of color:
Paint the door a vibrant teal or turquoise. Use a fine brush to paint the tiny doorknob black or bronze. -
Touch up greenery:
If you added small clumps of clay at the base for bushes, paint these dark green, adding lighter green highlights on the tips. -
Prepare the display base:
Paint your wooden base or cardboard platform white. While the paint is wet, streak in a little light blue to give it a weathered, washed look. -
Final assembly:
Once everything is dry, glue your finished house securely to the painted base.
Place your little cottage on a desk or shelf to enjoy a handmade touch of rustic warmth

TRACK YOUR CERAMIC JOURNEY
Capture glaze tests, firing details, and creative progress—all in one simple printable. Make your projects easier to repeat and improve.
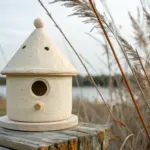
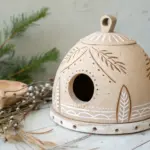
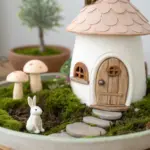
Round-Door Hillside Mini House
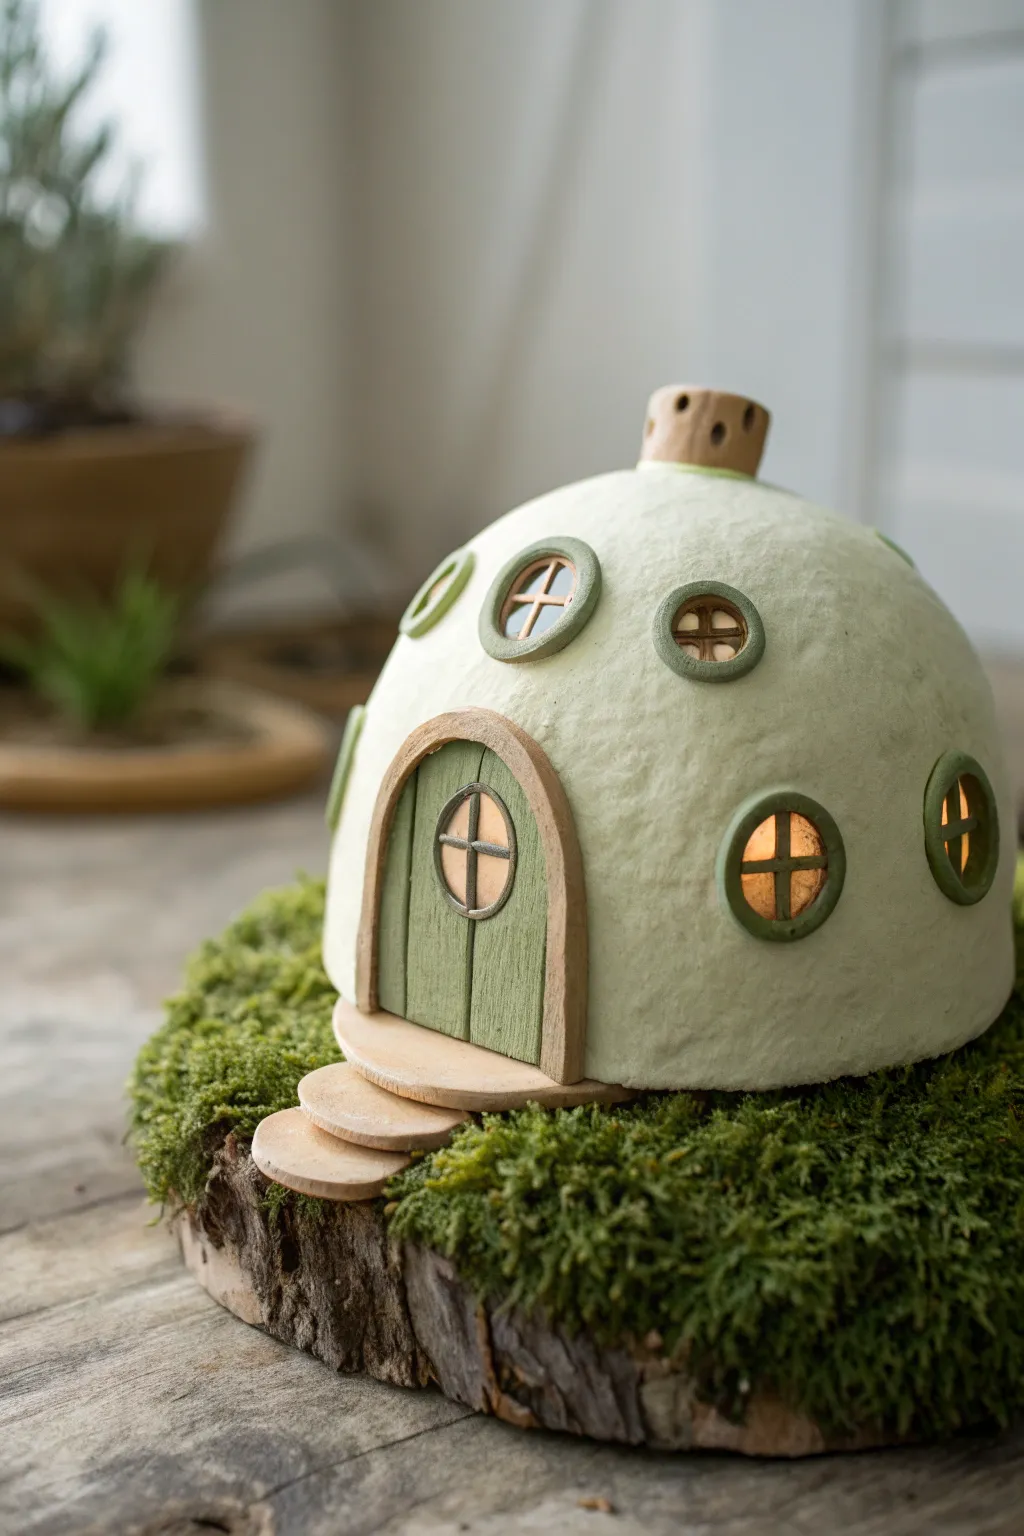
This charming domed mini house evokes the cozy feeling of a woodland creature’s hideaway, complete with soft interior lighting and a mossy base. Its textured pale green surface and inviting round door make it a perfect centerpiece for any fairy garden or tabletop display.
Step-by-Step
Materials
- Air-dry clay or polymer clay (white)
- Small styrofoam half-sphere (for structure)
- Texture paste or fine sand mixed with white acrylic paint
- Acrylic paints: sage green, dark brown, cream, light wood tone
- Balsa wood bits or strong cardstock
- Preserved moss
- Wood slice base (approx. 6-8 inches)
- LED tea light or small battery fairy lights
- Sculpting tools (needle tool, small spatula)
- Craft glue or strong adhesive
- Rolling pin
- Sandpaper
Step 1: Building the Dome Structure
-
Prepare the core:
Begin with your styrofoam half-sphere. If you plan to light it up, carefully carve out a hollow chamber inside and a small tunnel at the bottom back for the light switch or wire access. -
Roll out the clay:
Roll your white clay into a large, even sheet about 1/4 inch thick. It needs to be large enough to drape over the entire dome. -
Cover the form:
Drape the clay sheet over the styrofoam form. Smooth it downwards with your palms, gently easing out any folds or air bubbles until the dome is completely covered. -
Texturizing the surface:
While the clay is still soft, use a crumpled ball of aluminum foil or a stiff bristle brush to tap all over the surface. This creates that lovely organic, stone-like texture.
Cracking Clay?
If small cracks appear as the clay dries, mix a tiny bit of fresh clay with water to make a paste and fill them in easily.
Step 2: Sculpting Details
-
Cut the windows:
Use a small circular cutter or a bottle cap to mark positions for the windows. Carefully cut these circles out. I like to keep the cutouts to test paint colors later. -
Create window frames:
Roll small snakes of clay and flatten them slightly. Wrap these around the window openings to create frames. Add tiny cross-bars inside each window for panes. -
Construct the doorway:
Cut an arched doorway opening. Roll a thicker snake of clay and flatten it to create a sturdy arched door frame, pressing it firmly around the opening. -
The chimney detail:
Form a small cylinder of clay for the chimney. Press it onto the very top of the dome. Poke a few holes in it for ‘ventilation’ to mimic the photo. -
Making the door:
Measure the door opening and cut a piece of balsa wood or creates a clay slab to fit inside. Score vertical lines into it to look like wood planks. -
Steps to the entrance:
Fashion three flat, oval discs of clay in graduating sizes. These will be the stone steps leading up to your door. -
Drying time:
Allow all clay components to dry completely. For air-dry clay, this usually takes 24-48 hours depending on thickness.
Add Magic
Hide a tiny battery pack underneath the hollow base and use amber LEDs for a warm, fire-lit glow inside the windows.
Step 3: Painting and Assembly
-
Base coat the dome:
Mix a pale sage green acrylic paint. Apply this over the entire textured dome, ensuring you get paint into all the little crevices. -
Paint the details:
Paint the window frames and door arch a slightly darker, mossy green to make them pop. Paint the chimney a natural stone or wood color. -
Detailing the door:
Paint the door itself a light wood tone. Once dry, wash it with watered-down brown paint to settle into the grooves, highlighting the ‘planks’. -
Windows and illumination:
If you aren’t using real lights, paint the inside of the windows a warm yellow-orange to simulate a glow. If using lights, glue small scraps of tracing paper inside the windows to diffuse the LED light. -
Mounting the house:
Glue the finished house securely onto your wood slice base. -
Installing the steps:
Glue the clay steps in front of the door, stacking them slightly so they lead up to the entrance. -
Adding the greenery:
Apply craft glue generously around the base of the house and the steps. Press clumps of preserved moss into the glue, creating a lush, grassy lawn.
Now you have a cozy little hillside retreat ready to welcome tiny imaginary guests or simply brighten your shelf
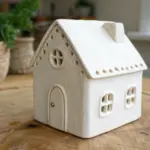
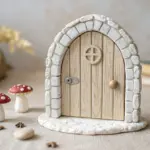
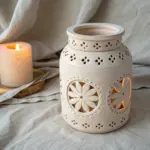
Greenhouse-Style Mini House
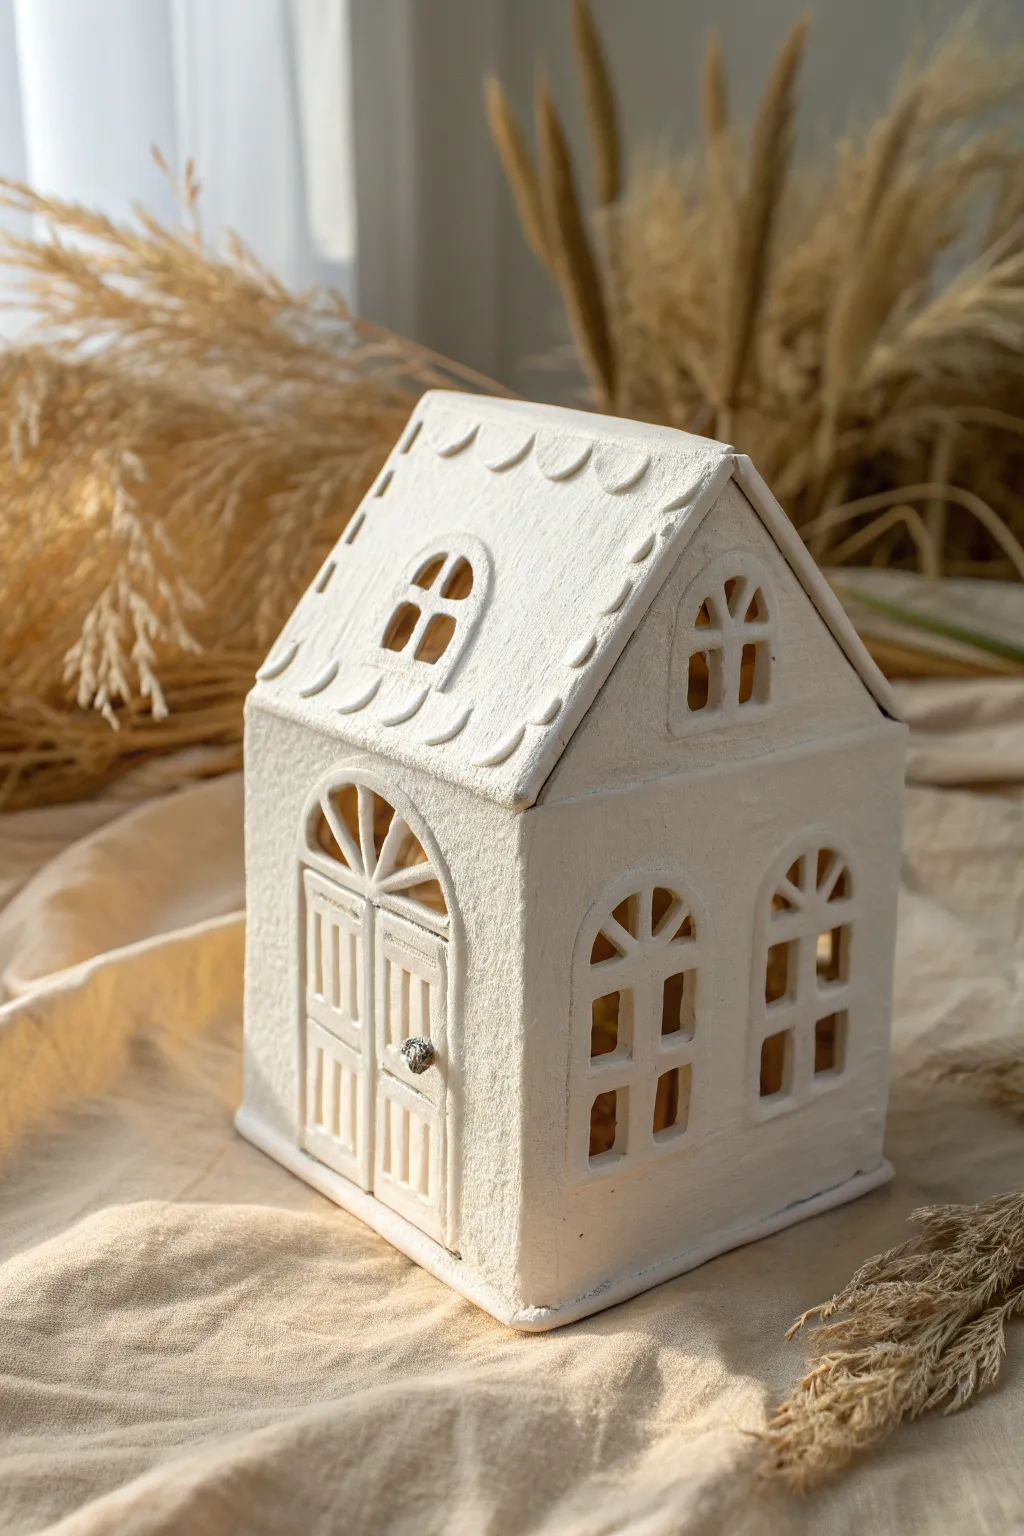
This elegant mini house brings a touch of fairytale charm to your shelf with its classic white scalloped roof and arched details. The textured finish gives it a lovely, handmade ceramic look without needing a kiln.
Detailed Instructions
Materials
- White smooth air-dry clay (approx. 500g)
- Rolling pin
- Parchment paper or non-stick mat
- Clay knife or craft scalpel
- Paper template (homemade)
- Ruler
- Slip (clay mixed with water)
- Clay sculpting tools (needle tool, small spatula)
- Fine grit sandpaper
- Small round bead or clay ball (for doorknob)
Step 1: Planning and Walls
-
Draft your templates:
Before touching any clay, sketch your house pieces on cardstock paper. You will need a front and back piece with a peaked roofline, two rectangular side walls, and two rectangular roof panels that are slightly larger than the slope of your peaks. -
Roll out the slabs:
Knead your air-dry clay until it is warm and pliable. Roll it out on parchment paper to a uniform thickness of about 5mm. Using slats or two magazines on either side of your roller can ensure even thickness. -
Cut the main shapes:
Place your paper templates onto the clay slab multiple times. Carefully trace around them with your craft knife to cut out the front, back, sides, and roof pieces. Cut slowly to keep the edges sharp. -
Carve the windows:
While the clay is flat, use a smaller arched template or freehand the window openings. There are two arched windows on the side walls and one smaller one in the attic space of the front gable. Carefully slice out the inside panes, leaving the clay ‘muntins’ (the cross bars) intact if possible, or build them later. -
Create the door detail:
For the front facade, cut a large arch for the doorway. Instead of removing the clay entirely, outline the double doors and add recessed rectangular panels to mimic wood. Add a semi-circle window detail above the doors.
Step 2: Assembly and Roofing
-
Dry fitting:
Let the flat pieces sit for about 30-45 minutes until they are leather-hard—firm enough to stand up but soft enough to join. This prevents the walls from bowing during assembly. -
Score and slip:
To join the walls, score (scratch cross-hatch marks) the edges of the side walls and the back of the front facade. Apply a generous amount of liquid slip to these roughened areas. -
Build the structure:
Press the walls together to form a box. Reinforce the inner seams by blending a thin coil of fresh clay into the corners with a modeling tool to ensure a strong bond. -
Attach the roof:
Once the base is stable, score and slip the top edges of the peaked walls. Gently place your two roof panels on top, ensuring they meet at the apex and overhang the sides slightly. -
Adding roof texture:
I like to roll tiny, thin uneven coils of clay and press them onto the roof surface in curved, scalloped rows. Use the back of a spoon or your thumb to flatten them downward, creating that gentle tiled effect seen in the photo.
Crack Control
If walls crack while drying, mix a paste of clay dust and white glue. Fill the crack, let dry, and sand smooth.
Step 3: Refining Details
-
Window refinement:
Go back to your windows. If you cut the holes completely open, you can now add thin strips of clay to create the cross-bars. Use a tiny dab of slip to secure them. -
The doorknob:
Roll a miniscule ball of clay or use a small metal bead. Press it firmly into the center of the double doors. You can add a tiny texture to it with a needle tool for a vintage look. -
Smoothing texture:
Use a slightly damp sponge or your finger to smooth out any harsh fingerprints, but leave the natural texture of the ‘stone’ walls. The slightly rough surface adds character. -
Drying process:
Let the house dry slowly away from direct sunlight or heat sources to prevent cracking. This usually takes 24-48 hours depending on humidity. -
Sanding and finishing:
Once bone dry, use fine-grit sandpaper to gently smooth the bottom edges so the house sits flat. You can leave the natural white clay finish or seal it with a clear matte varnish.
Let There Be Light
Cut a hole in the bottom base or leave the base open entirely so you can place an LED tea light inside for a warm glow.
Now you have a charming little architectural piece ready to display
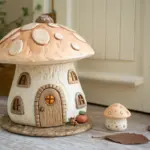
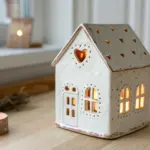
Mushroom-Roof Fairy Mini House
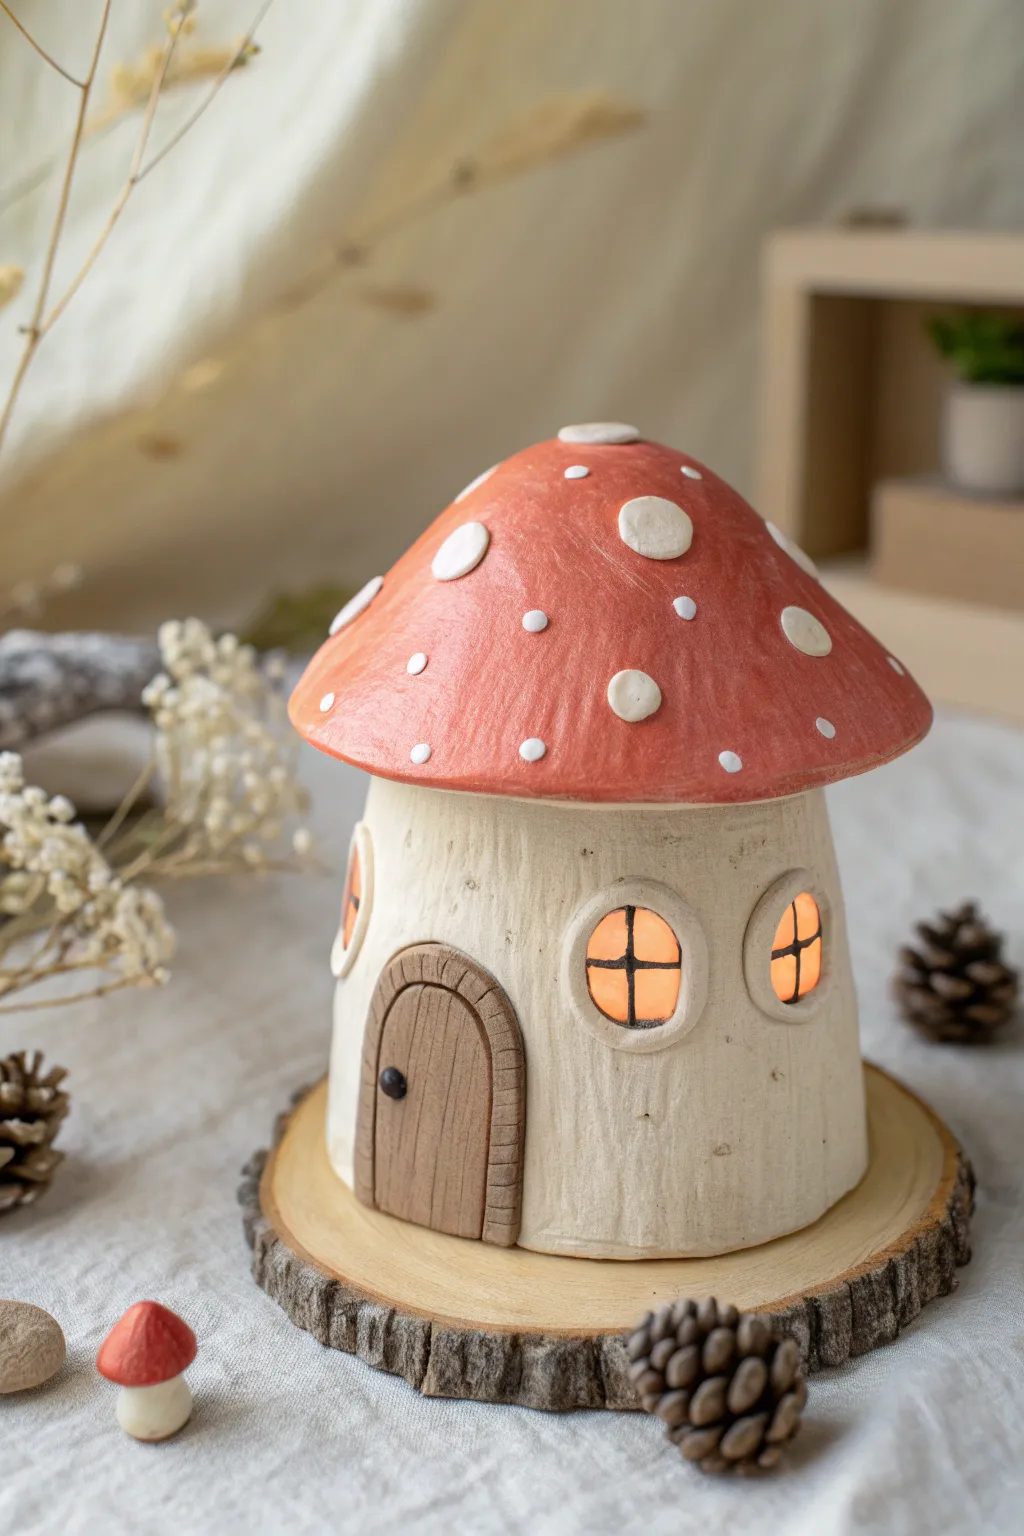
Bring a touch of magic to your shelf with this charming illuminated mushroom cottage. Featuring a classic red-and-white spotted cap, a textured stalk base, and glowing windows, this project is perfect adding cozy ambience to any room.
Step-by-Step
Materials
- Air-dry clay (white or light grey)
- Small rolling pin
- Clay sculpting tools (needle tool, modeling tool)
- Acrylic paints (Warm Red, Titanium White, Raw Umber, Black, Orange)
- Small paintbrushes (flat and detail round)
- Texture tool (or a stiff brush/fork)
- Craft knife
- Aluminum foil
- Battery-operated tea light
- Small bowl (for shaping the roof)
- Matte varnish or sealant
Step 1: Shaping the Base
-
Create the core:
Start by crumpling aluminum foil into a cylinder shape that is slightly wider at the bottom. This will act as an armature to save clay and keep the house lightweight. -
Roll the clay slab:
Roll out a slab of air-dry clay to about 1/4 inch thickness. Use a craft knife to cut a rectangle large enough to wrap around your foil cylinder. -
Wrap the stalk:
Wrap the clay sheet around the foil armature. Use a little water on your finger to smooth the seam where the clay edges meet until the join is invisible. -
Add texture:
Before the clay hardens, use a needle tool or a stiff brush to scratch vertical lines up and down the stalk. I like to keep these uneven to mimic organic bark or stalk fibers. -
Carve the windows:
Use a small circle cutter or a knife to cut out circular window openings. If you plan to put a light inside, ensure these go all the way through the clay.
Clay Cracking?
If small cracks appear as the clay dries, mix a tiny bit of fresh clay with water to make a paste and fill them in. Sand smooth once dry.
Step 2: The Mushroom Cap Roof
-
Form the roof shape:
Roll out a circle of clay. Drape it over a small inverted bowl or a foil dome to create the curved mushroom cap shape. -
Refine the edges:
Smooth the edges of your clay circle so they are rounded, not sharp. The roof needs to be slightly wider than the base you created earlier. -
Add the spots:
Roll tiny balls of clay, flatten them into irregular discs, and press them firmly onto the roof. Use a dab of water (slip) to ensure they stick permanently. -
Create the vent:
Add a small, flat circle of clay to the very top center of the mushroom cap for extra detail. -
Check the fit:
Before letting everything dry completely, gently place the roof on the base to make sure they fit together well. Remove it to dry separately.
Enhance the Forest Look
Glue some dried moss or very small pebbles around the bottom edge of the house to make it look like it grew straight out of the forest floor.
Step 3: Details and Assembly
-
Sculpt the door:
Create a small arch shape from a separate piece of clay. Texture the center to look like wood planks and add a thin snake of clay around the edge for the doorframe. -
Attach the door:
Score the back of the door and the spot on the base where it will go. Apply a little water or slip and press the door firmly onto the stalk. -
Window frames:
Roll very thin snakes of clay to create the cross-bars (mullions) for the windows. Carefully place them inside your window holes. -
Window trim:
Roll slightly thicker snakes of clay to encircle the windows, creating a finished frame. Smooth the edges into the main wall. -
Drying time:
Allow all pieces to dry completely for at least 24-48 hours. The clay should feel room temperature, not cool to the touch.
Step 4: Painting and Finishing
-
Paint the stalk:
Dilute Raw Umber paint with a lot of water to create a wash. Brush it over the textured base and wipe away the excess with a paper towel, letting the dark paint settle into the grooves. -
Paint the roof:
Apply two coats of Warm Red to the mushroom roof, carefully painting around the white spots. If you accidentally get red on a spot, wait for it to dry and touch it up with white later. -
Detail the door:
Paint the wooden door area with a solid coat of light brown, and paint the doorframe a darker shade for contrast. Add a tiny black dot for the doorknob. -
Inner glow:
If you aren’t using a real light, paint the inside of the windows with bright orange or yellow to simulate a warm glow. -
Final assembly:
Once the paint is dry, place a battery-operated tea light inside the base (remove foil if needed) and set the roof on top.
Now you have a cozy little dwelling ready to fairy-size your favorite bookshelf
Rooftop Garden Mini House
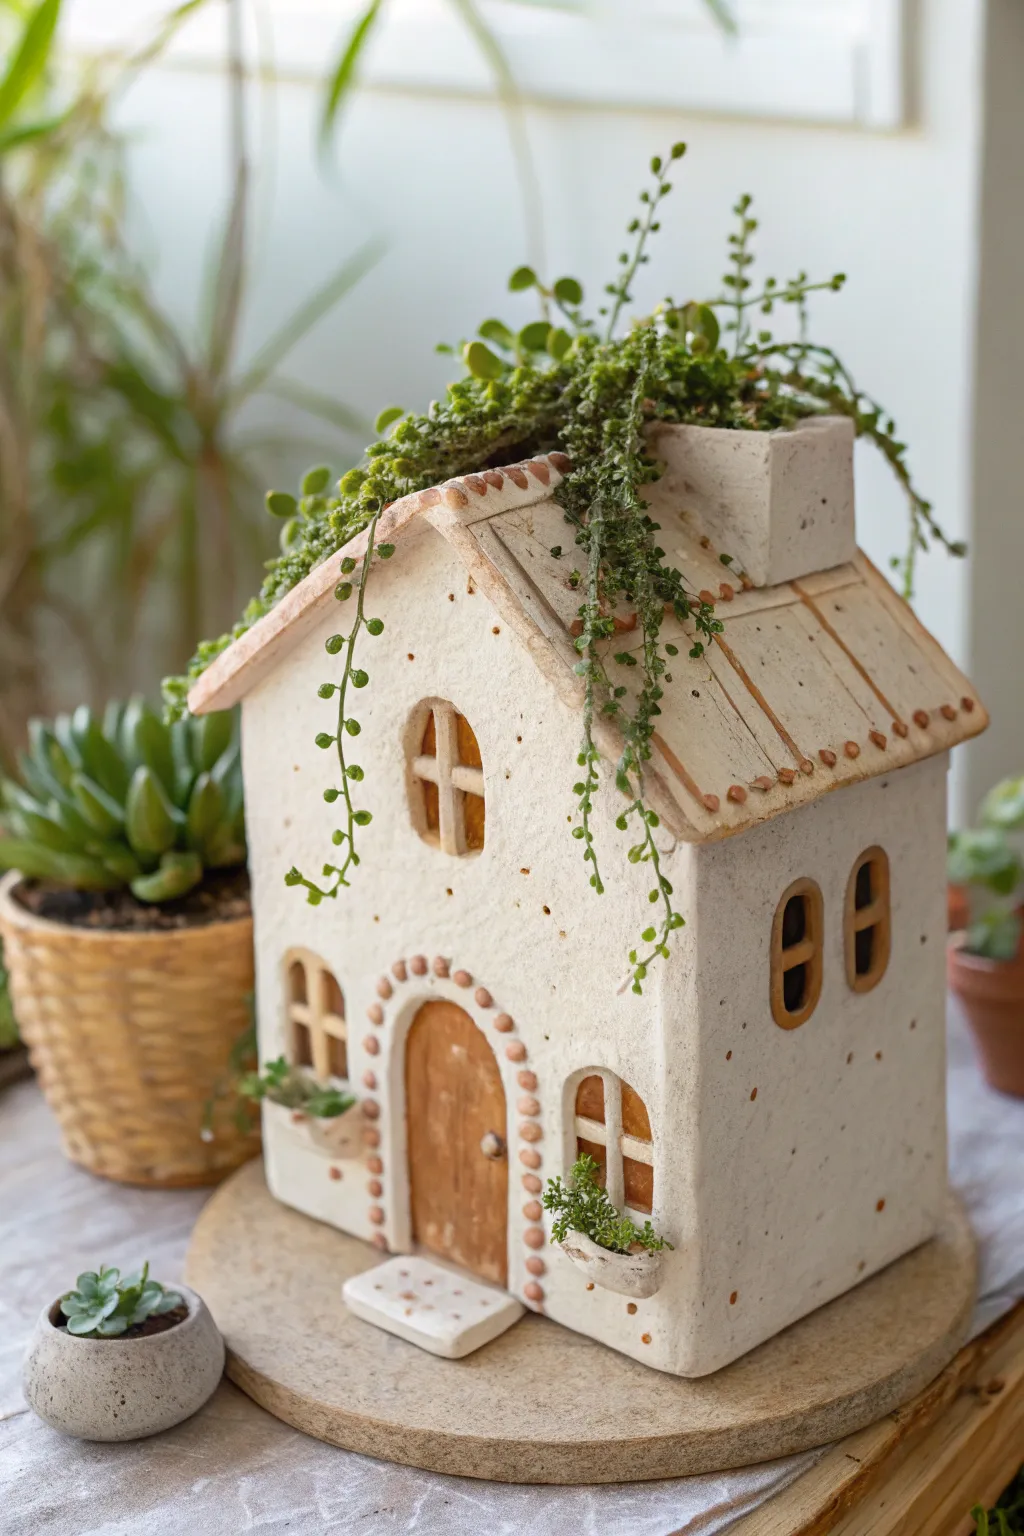
This whimsical project combines the charm of a rustic cottage with the life of a functional planter, featuring a hidden cavity in the roof for your favorite trailing succulents. The finished piece has a delightful textured white clay finish with warm terracotta accents and a cozy, inviting wood-grain door.
How-To Guide
Materials
- White or speckled stoneware clay (or air-dry clay if sealing thoroughly)
- Clay slab roller or rolling pin with guide sticks
- Pottery knife or fettling knife
- Needle tool
- Slip and scoring tool (toothbrush or serrated rib)
- Underglaze (Terracotta/Brown) or acrylic paints if using air-dry
- Clear matte glaze or waterproof sealer
- Small trailing plant (like String of Pearls or small sedum)
- Small wooden tools for detailing
Step 1: Constructing the Base Structure
-
Roll Your Slabs:
Begin by rolling out an even slab of clay, approximately 1/4 inch thick. You will need enough clay for four walls, a base, and the two roof panels. -
Cut the Walls:
Cut out two rectangular side walls and two peaked pentagon shapes for the front and back walls. Ensure the width of the side walls matches the straight vertical edges of your front and back pieces. -
Carve the Openings:
Before assembling, lay the front wall flat. Use your needle tool to carefully cut out an arched doorway, two small arched windows flanking the door, and a larger arched window in the gable. On one side wall, cut two taller oval windows. -
Texture the Walls:
Gently press a rough sponge or a crumpled ball of aluminum foil over the surface of all walls to create a stucco-like, pitted texture. This gives the house its aged, rustic look. -
Assemble the Walls:
Score the edges of your walls and apply slip. Stand the walls up on a clay base piece, pressing the corners firmly together. Smooth the interior seams with a coil of clay for stability, but leave the outside seams slightly visible for character.
Drainage is Key
Don’t forget to poke a hole from the bottom of your internal planter well down through the base of the house. This prevents root rot for your succulent.
Step 2: Creating the Rooftop Planter
-
Prepare the Roof Slabs:
Cut two rectangular slabs for the roof. Crucially, cut a large rectangular hole in the center of one or both slabs (depending on how they meet) to create the opening for the plant. -
Form the Planter Well:
Construct a small, open box made of clay slabs that fits inside the top of the house walls. Secure this ‘well’ to the inside walls just below the roofline. This ensures water doesn’t drip down the inside of the house. -
Attach the Roof:
Score and slip the roof panels onto the house peaks. Ensure the hole in the roof aligns with your internal planter well. -
Add Roofing Details:
Roll thin strips of clay and attach them vertically along the roof to mimic standing seams. Add a small blocky chimney to one side of the roof for extra vertical interest.
Make it a Lantern
Leave the back of the house open or cut a hole in the base. Insert a battery-operated LED tea light to make the windows glow warmly at night.
Step 3: Detailing and Decoration
-
Sculpt the Door:
Cut a slab slightly larger than your door opening. Use a needle tool to draw vertical wood grain lines. Attach this piece behind the door frame from the inside. -
Add Window Frames:
Roll tiny snakes of clay and cross them inside the window openings to create muntins (window panes). Smooth the edges into the existing wall. -
Create Window Boxes:
Form small, shallow U-shaped cups from clay scraps. Attach these under the lower windows using plenty of slip. I like to texture these heavily to look like rough stone. -
Apply Decorative Dots:
Roll tiny balls of clay. Press them in a row around the arch of the doorway and along the edges of the rooflines. These will become the terracotta accents later. -
Install the Step:
Create a simple rectangular slab for the front step. Texture it slightly and attach it to the base right in front of the door.
Step 4: Finishing
-
Bisque Fire:
Allow the piece to dry slowly to prevent warping, then bisque fire it according to your clay body’s instructions. -
Add Color:
Paint the door, the decorative dots, the window box rims, and the roof seam details with a terracotta or warm brown underglaze. Wipe away any excess that gets on the white walls. -
Glaze and Refire:
Apply a clear matte glaze to the entire piece to seal it, or just glaze the inside of the planter well to make it waterproof. Fire again to the final temperature. -
Planting:
Once cool, fill the roof cavity with succulent soil and gently tuck in your trailing plants so they cascade down the roof and walls.
Place your finished house near a sunny window and enjoy watching your rooftop garden grow
Floating Island Mini House Diorama
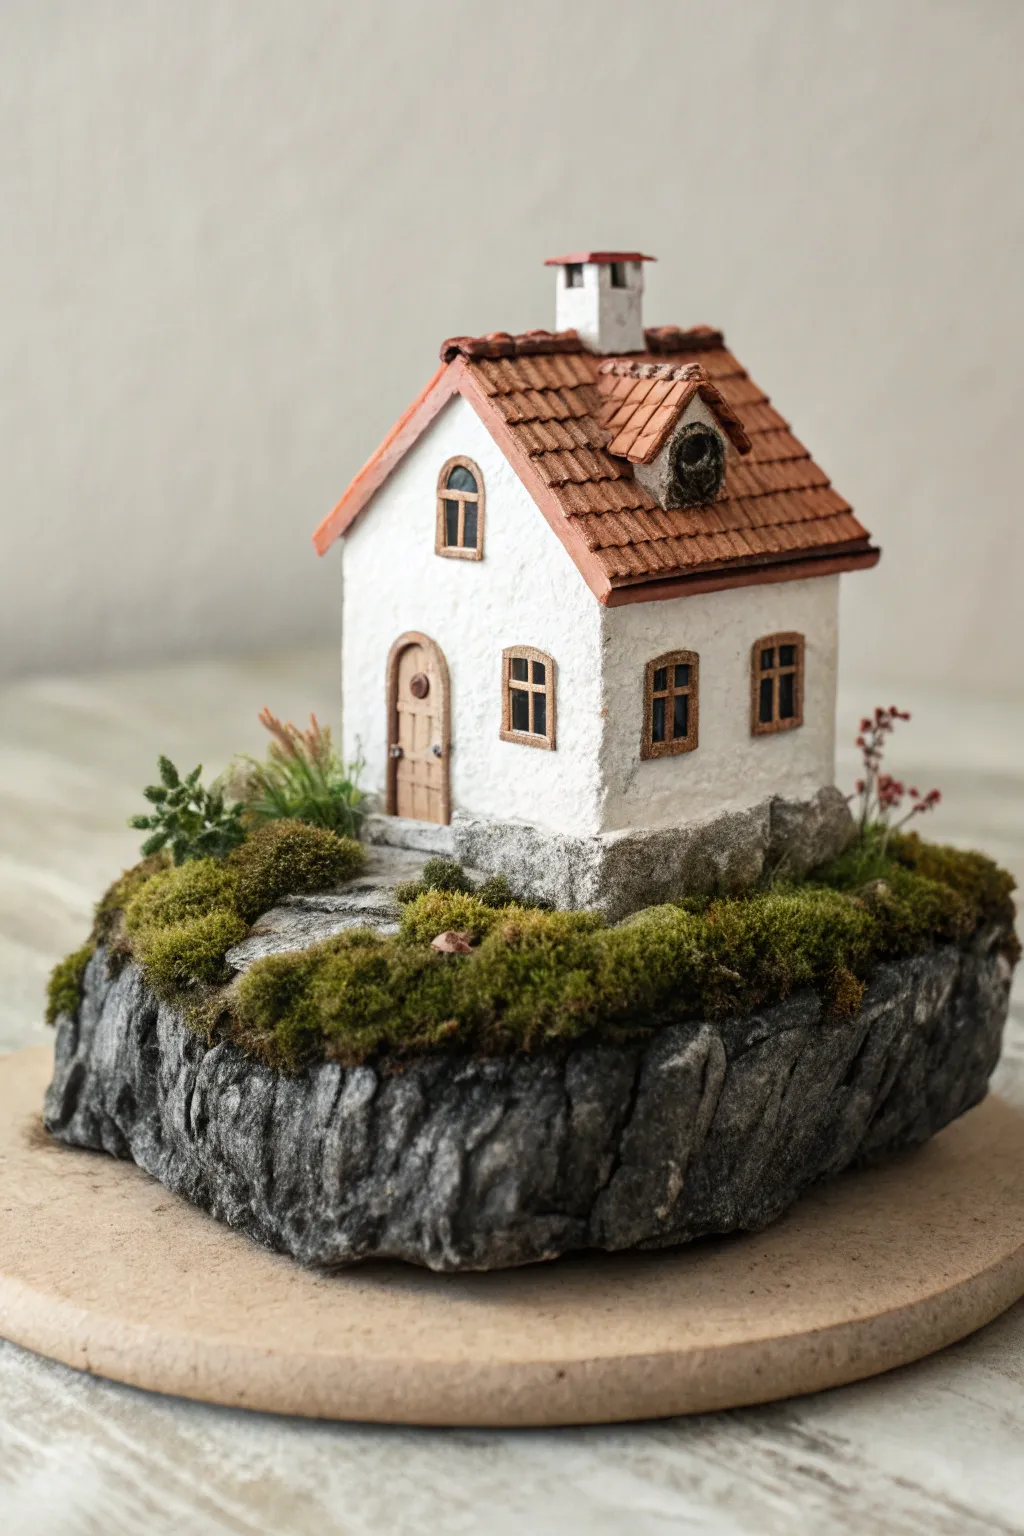
This whimsical project captures the cozy solitude of a cottage perched atop its own drifting island. By combining rugged rock textures with delicate architectural details, you’ll create a fantastical diorama that fits in the palm of your hand.
Step-by-Step Guide
Materials
- High-density foam (XPS) block
- Air-dry clay (white and terracotta colors)
- Craft knife and sculpting tools
- Acrylic paints (black, grey, white, browns)
- White texture paste or plaster
- Thin balsa wood or basswood sheets
- Wood stain or diluted brown paint
- Scenic moss, static grass, and dried floral sprigs
- PVA glue and super glue
- Rolling pin
- Fine-grit sandpaper
- Flat wooden base (coaster sized)
Step 1: Sculpting the Floating Base
-
Carve the core:
Cut a rough, irregular chunk of high-density foam to serve as your island base. It should be wider at the top and taper slightly towards the bottom to give it that ‘uprooted’ look. -
Texturize the rock:
Use a craft knife or a crumpled ball of aluminum foil to gouge deep vertical grooves and cracks into the sides of the foam. This creates the appearance of fractured, ancient granite. -
Build the foundation:
Cut a smaller block of foam for the house’s main structure and glue it securely to the top of your rock base. Leave enough room in front for a small garden path. -
Base coat:
Paint the entire rock base with dark grey acrylic paint mixed with a little PVA glue to seal the foam. Ensure you get into every crevice.
Sticky Situation?
If clay won’t stick to the foam core, score the foam surface first to roughen it up, or use a thin layer of tacky glue instead of standard white glue.
Step 2: Constructing the Cottage
-
Create the walls:
Roll out thin sheets of white air-dry clay. Cut panels to fit the sides of your foam house block and press them on using PVA glue. -
Stucco texture:
Before the clay dries, dap a stiff bristle brush or a crumpled texture sponge all over the walls. This mimics rough stucco or plaster perfectly. -
Roof structure:
Cut a piece of cardstock or thin wood for the roof base and glue it to the top. Don’t forget to build a tiny dormer window popping out of the front slope. -
Tiling the roof:
Roll out terracotta-colored clay. Cut tiny individual rectangles (shingles) or strips with indentations. Layer these starting from the bottom edge and working up to the peak. -
Adding the chimney:
Form a small rectangular chimney from white clay and attach it to the roof peak. Top it with a tiny flat square of terracotta clay.
Step 3: Adding Architectural Details
-
Crafting frames:
Cut very thin strips of balsa wood for the window frames and the arched door. Carefully assemble the window mullions (the cross shapes) separately. -
Staining wood:
Apply a dark wood stain or watered-down brown acrylic paint to all your wooden pieces. I usually do this before gluing so I don’t stain the white walls accidentally. -
Installing woodwork:
Glue the arched door and window frames onto the house. For the glass effect, you can paint the inside black before gluing, or use a tiny scrap of dark glossy plastic. -
Painting the rock:
Dry brush the rock base with lighter shades of grey and finally a touch of white. This highlights the texture you carved earlier.
Roof Realism
Vary the color of your roof tiles slightly by mixing tiny amounts of brown or orange into your terracotta clay before rolling it out.
Step 4: Landscaping the Scene
-
Laying the path:
Glue small, flat slate chips or flat bits of grey clay in front of the door to create a stepping stone path. -
Applying greenery:
Brush diluted PVA glue over the flat surfaces of the rock base. Press down clumps of static grass and scenic moss, clustering them heavily around the house foundation. -
Planting details:
Dip the stems of dried floral sprigs or tiny model shrubs into glue and plant them near the house corners to soften the transition between wall and ground. -
Final weathering:
Mix a very watery brown wash and lightly dab it near the bottom of the white walls and under the roof overhangs to simulate age and dirt runoff. -
Mounting:
Glue the finished floating island onto your circular wooden display base for stability.
Now you have a peaceful little sanctuary drifting on your shelf, ready to spark imagination whenever you look it
Book Nook Mini House Facade
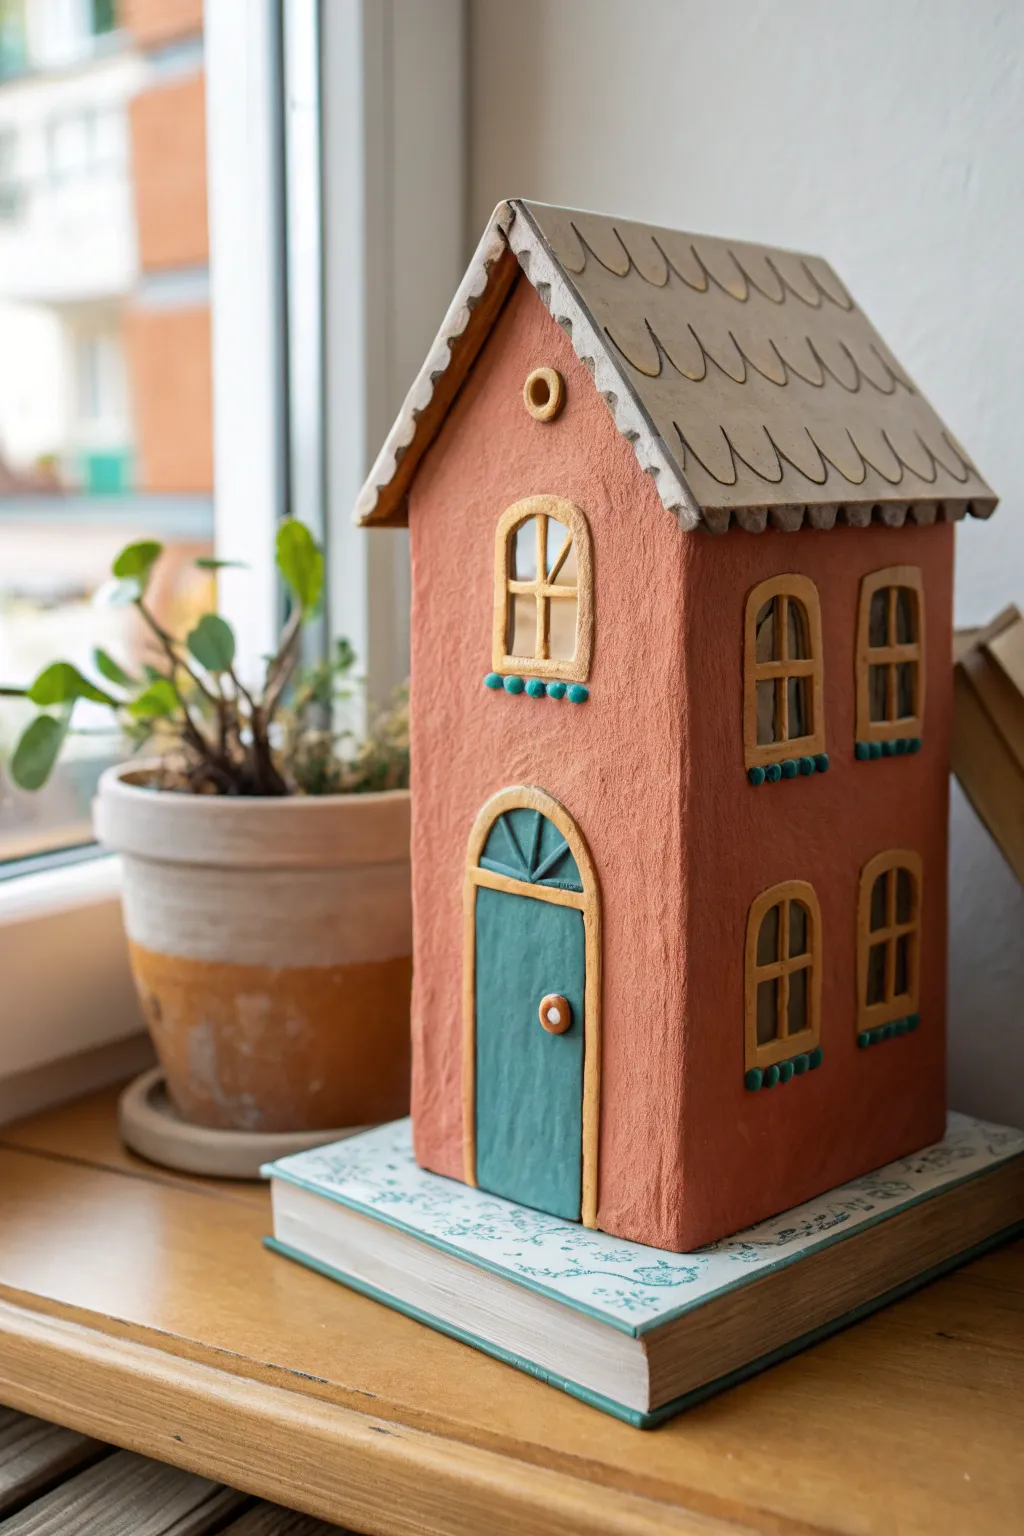
This whimsical, narrow house sculpture brings a touch of fairytale charm to any bookshelf, featuring a textured terracotta facade and a distinctive scalloped roof. The tall, slender profile makes it a perfect standalone piece or a facade to tuck between your favorite volumes.
Detailed Instructions
Materials
- Corrugated cardboard or foam core board (for the structure)
- Air-dry paper clay or modeling paste
- Craft knife and cutting mat
- Rolling pin
- Acrylic paints (Terracotta/Salmon, Teal Blue, Cream/Beige, Grey, Gold)
- Paintbrushes (flat shader and heavy-body round)
- PVA glue or tacky glue
- Pot of water
- Fine-grit sandpaper
- Ruler
Step 1: Building the Skeleton
-
Cut the walls:
Begin by measuring and cutting four cardboard panels. You’ll need two tall, narrow rectangles for the sides (approx. 4 inches wide by 8 inches tall) and two panels for the front and back. The front and back panels should be rectangular at the bottom but pointed at the top to form triangular gables for the roof pitch. -
Assemble the box:
Glue the four walls together using strong tacky glue to create a rectangular tube with a pointed top. Use masking tape to hold the edges together while the glue sets to ensure the structure remains square. -
Add the roof panels:
Cut two rectangular pieces of cardboard for the roof. These should be slightly wider and longer than the house structure to create an overhang. Glue them onto the angled gables. -
Cut window and door pieces:
Instead of cutting holes into the box, we will build the features in relief. Cut small arch shapes from leftover cardboard for the windows and a larger arch for the door. Glue these directly onto the surface of the house structure.
Glue for Grip
Before applying clay to slippery cardboard, brush on a thin layer of PVA glue. This dramatically helps the clay stick vertically without sliding down whilst you work.
Step 2: Clay Application & Texturing
-
Apply the base layer:
Roll out your air-dry clay to about 1/8 inch thickness. Use a little PVA glue on the cardboard surface to help it adhere, then drape the clay over the walls of the house. I find it easiest to work on one side at a time. -
Texture the walls:
While the clay is wet, use a crumpled ball of aluminum foil or a stiff bristle brush to tap gently all over the wall surfaces. This creates that lovely, rustic stucco effect. -
Sculpt the roof tiles:
Cover the roof cardboard with a separate sheet of clay. Use a modeling tool or the back of a knife to press in horizontal lines across the roof width. Then, carve ‘U’ shapes along these lines to mimic scalloped tiles. -
Refine the edges:
Sculpt the overhang of the roof by adding a thin strip of clay along the eaves. Use your tool to press indentations that match the scalloped pattern above.
Fairy Garden Vibe
Once fully dry, glue dried moss or tiny artificial climbing vines to one corner of the house to make it look like an abandoned cottage in the woods.
Step 3: Sculpting Details
-
Frame the windows:
Roll thin snakes of clay. Outline the cardboard window arches you glued on earlier to create 3D frames. Add a vertical and horizontal strip inside the frame to create the window panes. -
Create the entryway:
Outline the door arch with a slightly thicker snake of clay. Add a semi-circle fanlight detail at the top of the door with clay strips radiating outward. -
Add window sill details:
Roll tiny balls of clay—about the size of peppercorns. Press a row of them beneath each window and along the top of the window frames for decorative trim. -
Dry thoroughly:
Let the house dry completely. This structure is thick, so allow at least 24-48 hours. Keep it away from direct heat sources to prevent cracking.
Step 4: Painting & Finishing
-
Apply base color:
Paint the walls with a warm terracotta or salmon pink acrylic. You may need two coats to get into all the textured crevices. -
Paint the roof:
Use a soft grey for the roof tiles. Once dry, dry-brush a tiny amount of white or lighter grey over the raised scallops to highlight the texture. -
Detail the woodwork:
Paint the window frames and door trim in a warm cream or yellow ochre. Use a fine detail brush to keep the edges crisp. -
Paint the door:
Fill in the door and the fanlight window with a rich teal blue. Add a small dot of gold or brown for the doorknob. -
Accentuate the tiny trim:
Carefully paint those tiny clay balls (the window sill details) in the same teal color as the door to tie the color palette together. -
Deepen the shadows:
Mix a very watery dark brown or black wash. Paint it inside the window glass areas to simulate depth, wiping away excess if it gets on the frames.
Place your finished house atop a vintage book to complete the delightful display
Hanging Mini House Ornaments
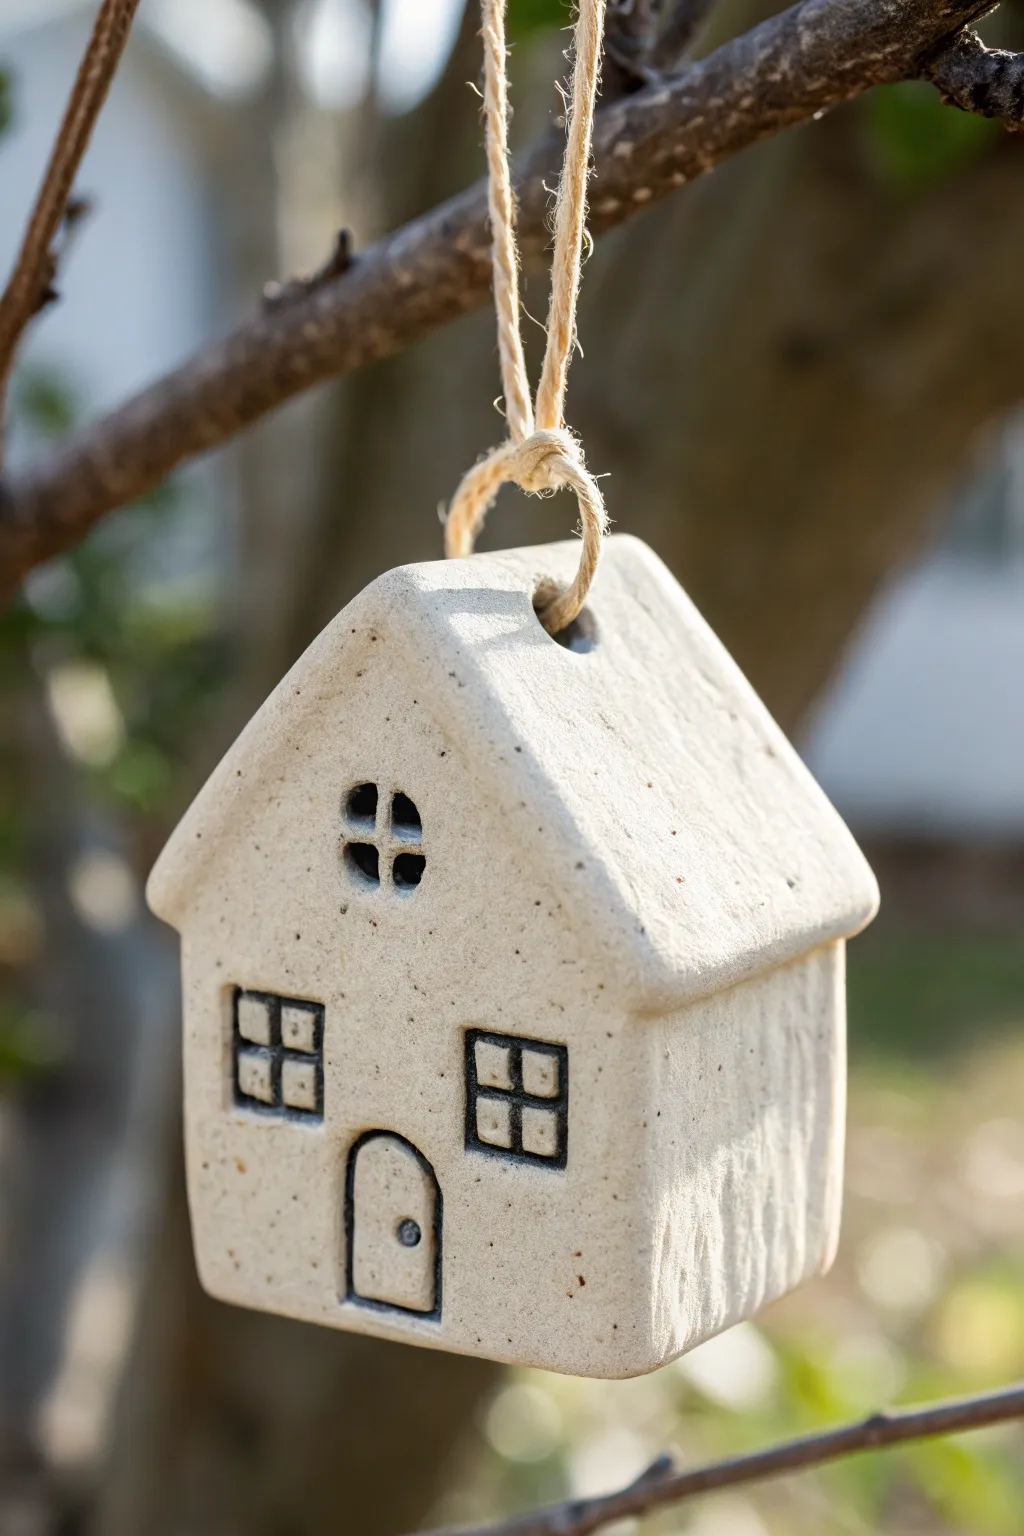
This charming little house brings a touch of whimsical village life to your garden or tree branches, featuring a raw, speckled clay finish and simple hand-painted details. Its sturdy construction and minimalist design make it a perfect beginner-friendly project that celebrates the natural texture of the material.
Step-by-Step Guide
Materials
- Speckled stoneware clay (or white air-dry clay mixed with sand)
- Rolling pin
- Sharp crafting knife or clay cutter
- Paper template (house silhouette)
- Wooden skewer or chopstick
- Black acrylic paint
- Fine-tipped liner paintbrush
- Sponge or fine-grit sandpaper
- Jute twine for hanging
Step 1: Shaping the Structure
-
Preparing the clay slab:
Begin by rolling out your speckled clay to an even thickness of about 1/4 inch. If you are using plain white clay, you can knead in a small amount of fine sand or dried coffee grounds beforehand to achieve that lovely stone-like texture. -
Cutting the main silhouette:
Place your paper house template onto the slab. Using a sharp knife held vertically, trace around the template to cut out the basic house shape, ensuring clean, straight edges for the walls and roof. -
Smoothing the edges:
Dip your finger in a little water and gently run it along the cut edges to soften any sharpness or burrs left by the knife. You want the perimeter to feel smooth and finished, not jagged. -
Creating the hanging hole:
Take a wooden skewer or a chopstick and pierce a hole through the top peak of the roof. Make sure this hole is large enough to accommodate your twine later, keeping in mind that clay shrinks slightly as it dries. -
Impressing details (Optional):
If you want the windows and door to have physical depth, lightly press a square cutter or the dull side of a knife into the surface to mark where the painted details will go. For the look in the photo, however, the surface remains flush. -
Initial drying phase:
Lay the clay house flat on a clean board or piece of drywall to dry slowly. I find loosely covering it with plastic for the first few hours helps prevent the edges from warping.
Clean Corner Hack
When painting the square windows, put tiny pieces of masking tape or painter’s tape on the clay first. Paint over the tape edges, then peel it away for perfectly crisp, straight window frames.
Step 2: Surface Finishing & Decoration
-
Sanding the surface:
Once the house is bone dry (or fully cured if using oven-bake clay), gently sand the surface with fine-grit sandpaper. This removes any fingerprints and enhances the speckled appearance of the stoneware. -
Sketching the windows:
With a very light pencil touch, draw two square windows on the lower half and a small arched window or vent near the roof peak. Also, outline a simple arched door at the bottom center. -
Mapping the window panes:
Inside the square windows, lightly draw a cross shape to create four panes. For the top arched window, draw a cross to create four distinct sections within the curve. -
Painting the outlines:
Dip your fine liner brush into black acrylic paint. Carefully paint over your pencil outlines, keeping the lines relatively thick and bold to mimic ironwork or dark wooden frames. -
Adding the door detail:
Outline the arched door at the bottom. Add a tiny dot on the right side of the door to represent the doorknob. -
Drying and sealing:
Let the paint dry completely. Since this is an outdoor ornament, apply a matte spray varnish to protect the clay from moisture without making it look glossy or plastic.
Make it a village
Vary the heights and roof angles of several pieces to create a diverse village set. You can even paint the roofs different muted colors like sage green or slate blue for subtle variety.
Step 3: Final Assembly
-
Preparing the twine:
Cut a length of rustic jute twine, approximately 12 inches long. Fold it in half to create a loop. -
Threading the hanger:
Push the folded end of the twine through the hole in the roof from front to back. Pull the loose ends through the loop created at the back and tighten gently to secure it with a lark’s head knot. -
Knotting the top:
Alternatively, you can thread a single strand through and tie a decorative overhand knot just above the roof peak, creating a secure loop for hanging. -
Adding texture to the rope:
Give the twine a little roughness by rubbing it between your fingers to fray the fibers slightly, enhancing the rustic aesthetic.
Now you have a quaint clay cottage ready to add charm to your favorite tree branch