When kids get their hands into modeling clay, the ideas start flying—and the best projects are the ones that feel doable right away. Here are my go-to modeling clay ideas for kids that stay simple, colorful, and super character-driven (because adding a face makes everything more fun).
Cute Animal Mini Figures From Basic Shapes
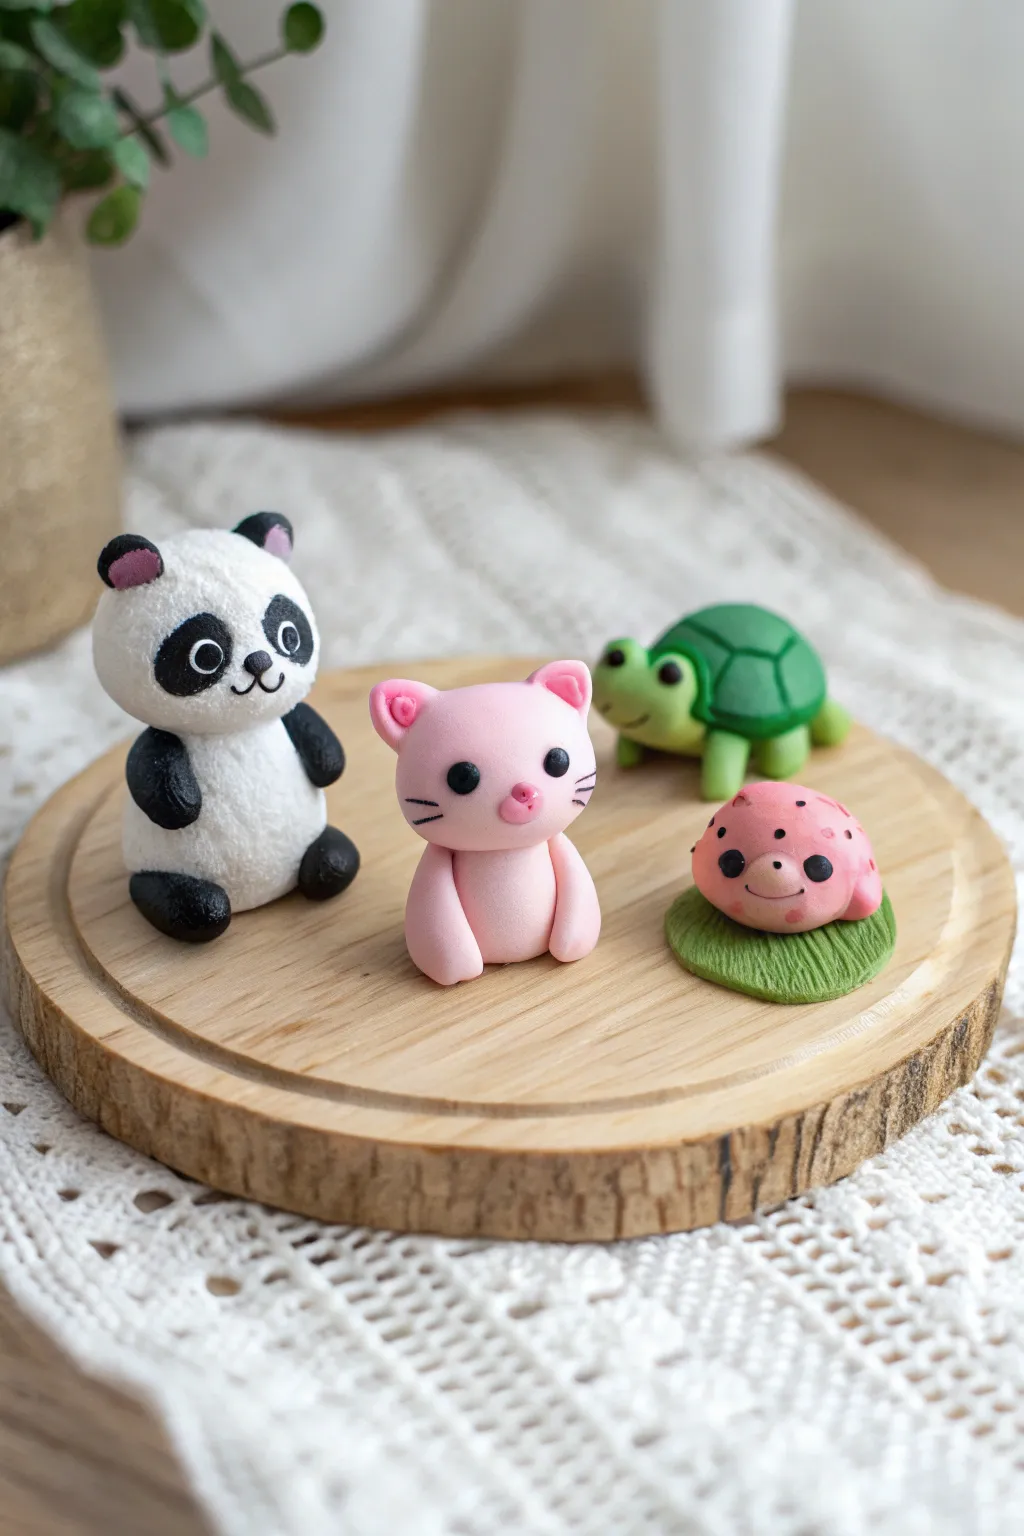
Create a charming set of four miniature animal friends using simple geometric shapes like spheres and ovals. These figures feature a soft, matte finish and adorable kawaii-style expressions that are perfect for beginners.
Step-by-Step Guide
Materials
- Polymer clay or air-dry clay (white, black, pink, light green, dark green, red)
- Clean working surface or rolling mat
- Ball stylus tool (small and medium)
- Plastic modeling knife or craft blade
- Needs-based adhesive (liquid clay or white glue)
- Black acrylic paint and fine detail brush (optional, for eyes)
- Toothpick or needle tool
Step 1: Sitting Panda
-
Body mechanics:
Start with a large ball of white clay for the body, shaping it slightly into a rounded pear shape. Roll a slightly smaller white ball for the head and press it gently onto the top of the body. If your clay is soft, you might want to insert a small piece of toothpick between the head and body for support. -
Limbs:
Roll two small black cylinders for legs and attach them to the bottom front of the body. Create two smaller black teardrop shapes for arms and press them against the sides of the white body. -
Face features:
Flatten two tiny black balls for the eye patches and press them onto the face. Add a small white dot inside each for the eye highlight. Place a tiny triangle of black clay for the nose and use a needle tool to sketch a small mouth below it. Finish with two small black semi-circles on top of the head for ears, adding a tiny pink dot inside each.
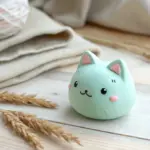
Step 2: Pink Kitty
-
Form the base:
Roll a smooth ball of light pink clay for the head. Create a slightly smaller cylinder shape for the body. -
Attach and shape:
Press the head firmly onto the body. To create the front paws, roll two sturdy sausage shapes of pink clay and attach them vertically to the front of the body so they look like the cat is sitting upright. -
Ears and details:
Pinch two small triangles of pink clay and attach them to the top of the head for ears. Press a tiny darker pink indent into the center of each ear. Add a small pink oval for the nose. -
Kitty face:
Use small black clay beads (or paint) for the eyes, placing them wide apart. Use a needle tool or knife to gently press three horizontal whiskers into each cheek.
Clay Cracking?
If using air-dry clay, smooth edges with a drop of water on your finger while working. If cracks appear while drying, fill them with a slurry made of clay and water.
Step 3: Tiny Turtle
-
Shell power:
Roll a ball of dark green clay and flatten the bottom to create a dome. Use a modeling knife to score a hexagonal ‘tortoiseshell’ pattern onto the back. -
Head and legs:
Using a lighter lime green clay, roll a small ball for the head and four tiny cylinders for legs. Tuck the legs under the shell dome. Attach the head to the front. -
Expression:
Add two tiny black eyes to the sides of the head using small beads of clay. Use a tool to press a small smiling curve into the face.
Clean Lines
Wash your hands or wipe them with a baby wipe when switching between dark colors (like the panda’s black clay) and light colors to avoid staining your white or pink clay.
Step 4: Little Ladybug
-
Leaf bed:
Flatten a piece of green clay into a rough oval disk. Use a knife tool to score fine lines across it to resemble the texture of a leaf or grass pad. -
Bug body:
Roll a pink ball for the body and press it onto the green base. Create a slightly smaller pink semi-circle and attach it to the front for the head. -
Spots and face:
Roll incredibly tiny strings of black clay (or use paint) to add small spots all over the back. Add two black eyes and a wide, etched smile to the face area.
Now you have a whole miniature zoo ready for display, perfect for a desk or shelf


Play Food Minis Kids Can “Serve”
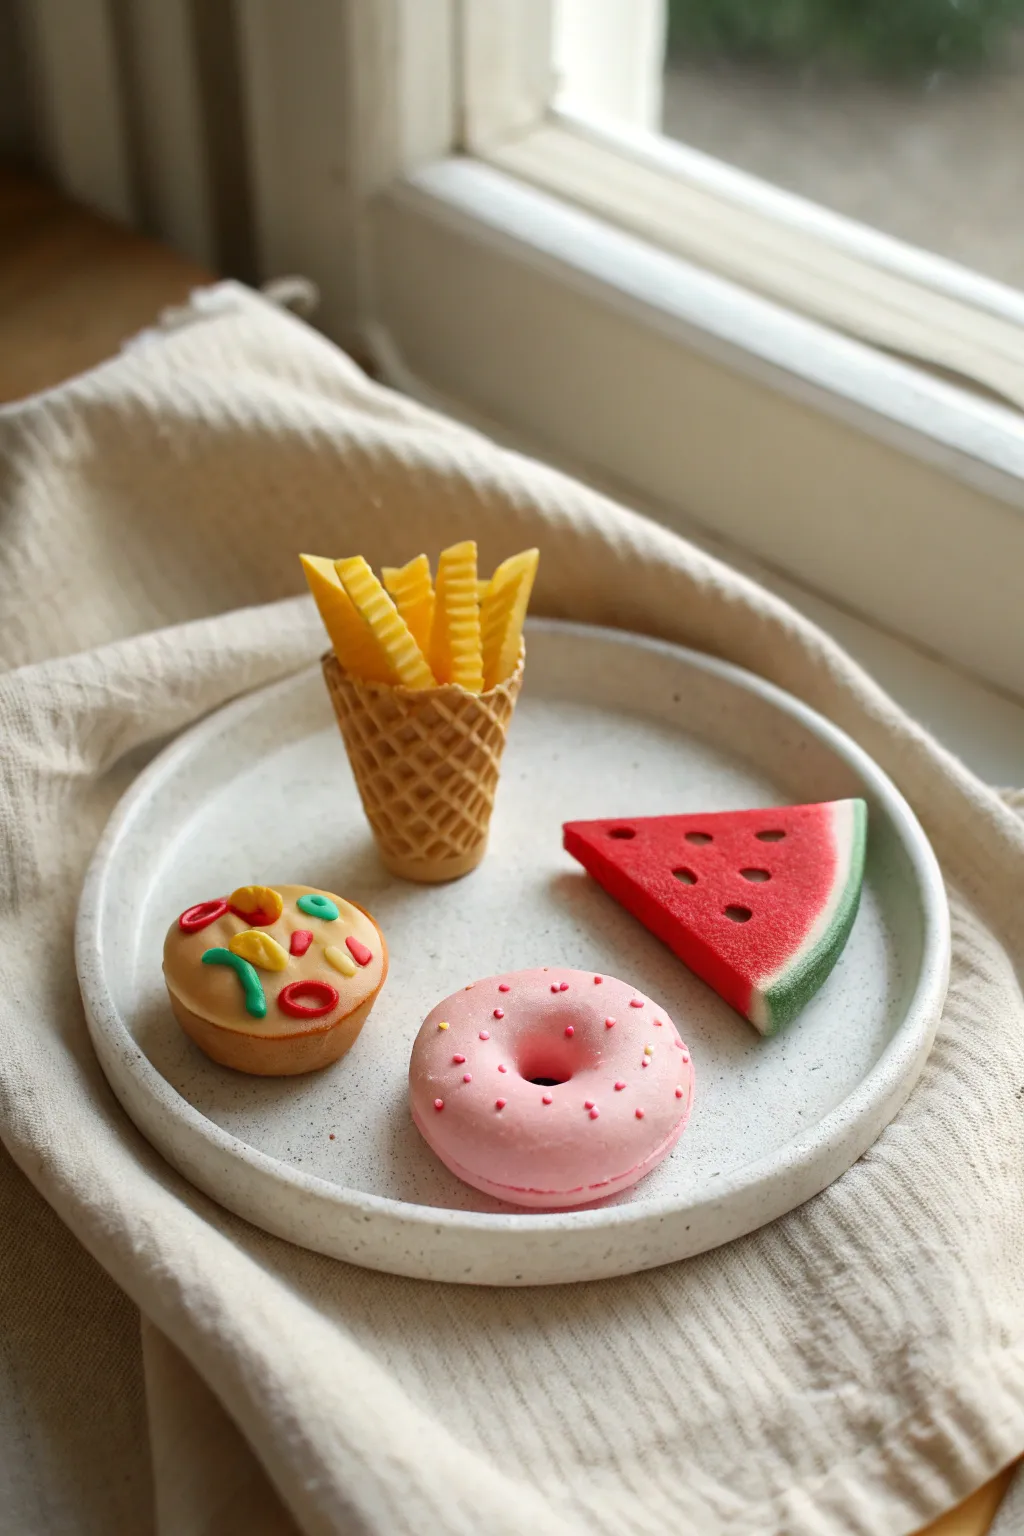
Create an adorable spread of tiny play food that looks almost good enough to eat. With simple modeling clay techniques, you’ll sculpt crinkle-cut fries, a sprinkle-covered donut, a slice of watermelon, and a miniature pizza, all perfectly sized for imaginative play.
Step-by-Step
Materials
- Polymer clay or air-dry clay (yellow, light brown/tan, red, green, white, pink)
- Clay sculpting tools (specifically a knife tool)
- Small rolling pin
- Crinkle cutter tool (optional, for fries)
- Toothpick or needle tool
- Texturing tool or old toothbrush
- Acrylic paints (optional, for shading)
- Matte finish varnish
Step 1: Fries in a Waffle Cone
-
Shape the Fries:
Roll out yellow clay into a flat sheet about 3mm thick. Use a crinkle cutter or a knife to slice narrow, rectangular strips to resemble french fries. -
Create the Cone Base:
Take a ball of light brown or tan clay and flatten it into a thin circle. -
Add Waffle Texture:
Before rolling the cone, gently press a grid pattern into the clay using the back of a knife or a specialized texturing tool to mimic a waffle cone pattern. -
Form the Cone:
Roll the textured circle into a cone shape, pinching the bottom closed, and gently press the fries into the top opening, arranging them so they fan out naturally.
Step 2: Miniature Pizza
-
Make the Crust:
Roll a ball of beige clay and flatten it into a thick disc. Pinch the edges slightly upward to create a raised crust rim. -
Add Texture:
I like to gently tap the crust with an old toothbrush to give it a baked, bready texture. -
Prepare Toppings:
Roll tiny snakes of red, green, and yellow clay. Slice them into small bits to creating peppers, pepperoni, or cheese chunks. -
Assemble the Pizza:
Press these tiny toppings firmly onto the center of your crust base, slightly flattening them so they look melted into the dough.
Realism Hack
Use soft pastels shaved into powder to brush ‘baked’ brown spots onto the pizza crust and waffle cone before baking for extra depth.
Step 3: Pink Sprinkle Donut
-
Form the Doughnut:
Roll a ball of pink clay and flatten it slightly into a thick disc. Use a the end of a paintbrush handle or a small round cutter to punch a hole directly in the center. -
Smooth the Shape:
Gently round off the edges with your finger so the donut looks puffy and soft rather than sharp-edged. -
Add Sprinkles:
Roll unbelievably tiny specks of white and yellow clay. Carefully press these onto the top surface of the pink donut using a toothpick or just your fingertip.
Make it a Charm
Insert a small metal eye pin into the top of the donut or pizza before baking to turn your mini food into a keychain or necklace.
Step 4: Watermelon Slice
-
Layer the Colors:
Start with a thick wedge of red clay. Roll a thin sheet of white clay and a slightly thicker sheet of green clay. -
Build the Rind:
Wrap the curved bottom edge of the red wedge first with the white strip, then cover the white with the green strip. Smooth the seams so the layers adhere together. -
Texture the Flesh:
Use a toothbrush or a ball of foil to tap texture onto the red part of the watermelon for a juicy look. -
Create Seeds:
Use a toothpick to indent small teardrop-shaped holes into the red flesh to represent where seeds would be.
Step 5: Finishing Touches
-
Bake or Dry:
If using polymer clay, bake according to the package instructions. If using air-dry clay, set aside in a dry, safe spot for 24-48 hours. -
Seal:
Once fully cured or dry, apply a matte varnish to protect your miniatures while keeping them looking realistic and food-like.
Arrange your tiny culinary creations on a small plate for the ultimate pretend picnic


Silly One-Eyed Monsters That Love “Mistakes”
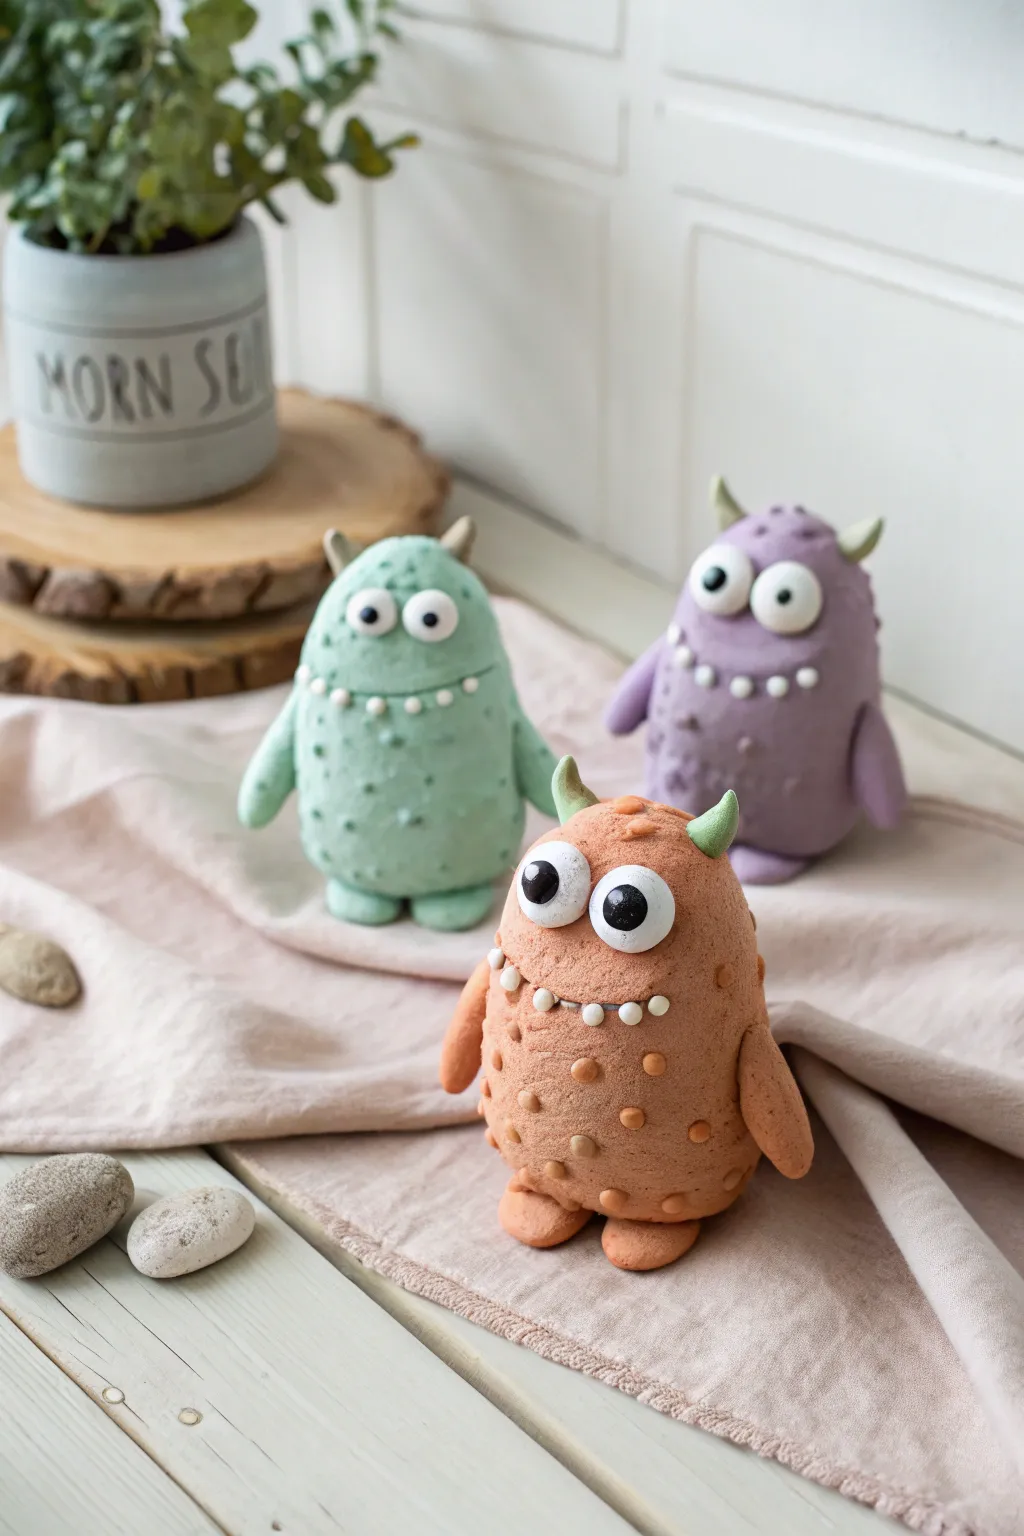
These adorable, textured monsters are distinct for their pebbly skin and wide-set eyes, creating a charmingly startled expression. You’ll learn to sculpt three unique characters—green, purple, and orange—perfect for a playful desktop display.
Detailed Instructions
Materials
- Air-dry clay or polymer clay (Green, Purple, Orange, White, Black)
- Clay texture tool (or a stiff toothbrush/crumbled foil ball)
- Small ball stylus or toothpick
- Rolling pin (optional)
- Flat, clean work surface
Step 1: Shaping the Bodies
-
Form the base:
Start with a handful of orange clay. Roll it into a smooth ball between your palms to remove any cracks. -
Create the egg shape:
Gently roll the ball on your surface with the side of your hand, tapering the top slightly to create a stout, egg-like shape with a flatter bottom so it stands upright. -
Add texture:
Using a stiffness toothbrush, a crumbled ball of tin foil, or a specialized texturing tool, gently press all over the surface of the clay body. You want a rough, porous look like foam or sponge cake. -
Repeat for friends:
Do the same process for the green and purple monsters, varying the heights slightly to give them individual personalities.
Clay Cracking?
If your air-dry clay starts cracking while you work, dip your finger in a tiny bit of water and smooth it over the crack immediately to seal it up.
Step 2: Limbs and Details
-
Make the feet:
Roll two small balls of the matching body color clay (orange for the orange monster). Flatten them slightly into oval shapes. Press them firmly onto the bottom front of the body to stabilize the figure. -
Sculpt the arms:
Create two sausage shapes of clay, slightly thinner at the shoulder and wider at the ‘hand.’ Smooth these onto the sides of the body, letting them hang down casually. Blend the seam at the shoulder into the body using your finger or a tool. -
Add warts and bumps:
Roll tiny distinct balls of clay in the same body color (or a slightly lighter shade if you have it). Press these randomly over the monster’s belly and back. Flatten them just enough so they stick but stay raised.
Make it Shine
Once your monsters are completely dry or baked, brush a coat of clear gloss varnish over just the eyes to make them look wet and alive.
Step 3: The Faces
-
Carve the mouth:
Use a clay knife or the side of a ruler to press a curved line for the mouth across the upper-middle section of the torso. -
Form the teeth:
Roll extremely tiny balls of white clay. Press these into the mouth indentation line. I usually place 3–5 tiny teeth randomly rather than a perfect row for a sillier look. -
Construct the eyes:
Roll two large balls of white clay. These should be quite big relative to the body to get that cartoonish look. Press them side-by-side just above the mouth. -
Add pupils:
Take two small bits of black clay, roll them into balls, and flatten them onto the white eyeballs. Place them slighty off-center or looking in different directions to enhance the goofy expression. -
Create horns:
Roll two small cones of a contrasting color (like pale green for the orange monster). Attach these to the very top of the head. -
Final check:
Look over your monster. If you smudged the skin texture while attaching limbs, go back with your texture tool and gently re-stipple those areas. -
Dry or Bake:
If using air-dry clay, let them sit undisturbed for 24-48 hours. If using polymer, bake according to the package instructions (usually 275°F/135°C for 15-30 mins).
Now you have a trio of goofy companions ready to guard your desk or shelf


Easy Dinosaurs With Big Feet and Tiny Spikes
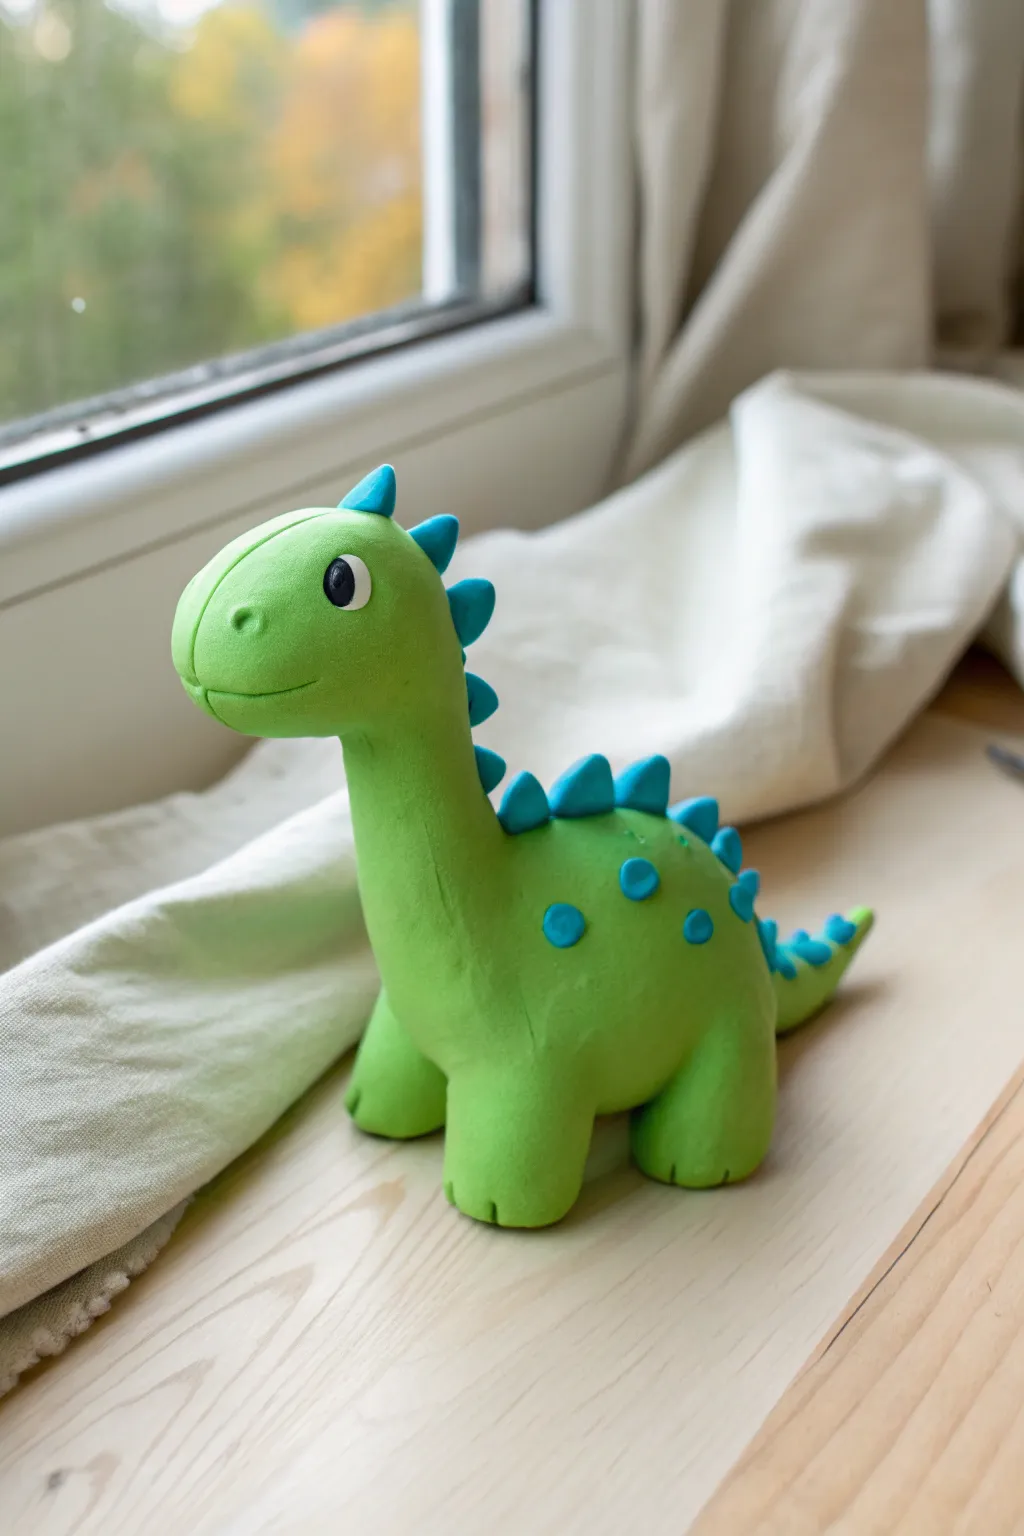
Create a cheerful, long-necked dinosaur companion that looks right at home sitting on a windowsill. This project features chunky feet for stability and bright blue accents that make its friendly personality pop.
Step-by-Step Guide
Materials
- Bright green modeling clay (polymer or air-dry)
- Bright blue modeling clay
- White modeling clay
- Black modeling clay
- Plastic clay knife tool
- Toothpick or blending tool
Step 1: Shaping the Base Body
-
Roll the main body:
Start with a large chunk of green clay and roll it into a smooth, thick oval shape. This will become the dinosaur’s belly region. -
Form the neck:
Take a slightly smaller piece of green clay and roll it into a thick cylinder. Gently bend it upward to create a curved neck posture. -
Attach neck to body:
Press the neck cylinder firmly onto the front top of the body oval. Use your finger or a clay tool to smudge the seam downward, blending the clay until the connection is seamless and smooth. -
Create the head:
Roll a medium ball of green clay and slightly elongate it into an egg shape for the head. Attach it to the top of the neck, again smoothing the seam underneath so it holds tight. -
Add a tail:
Roll a cone shape of green clay for the tail. Attach the wider end to the back of the body, blending the seams so it extends naturally and curves slightly upward at the tip.
Head Too Heavy?
If the neck droops, insert a toothpick inside the neck as a hidden internal skeleton to keep it upright while the clay hardens.
Step 2: Making Big Feet
-
Roll four legs:
Divide more green clay into four equal portions. Roll each into a short, stout cylinder. -
Flatten the bottoms:
Press the cylinder bottoms against your work surface to make them flat and stable. These chunky feet help the dinosaur stand up without tipping. -
Attach the legs:
Position the four legs under the body. Press them on firmly and blend the clay at the hips and shoulders so the legs look like they are growing out of the body, not just stuck on. -
Add toe details:
Use your clay knife to gently press two or three small vertical indents into the front of each foot to simulate toes.
Textured Skin
Before adding the spots, lightly press clean sandpaper or a piece of textured fabric onto the green clay to give the dinosaur a scaly skin effect.
Step 3: Face and Spikes
-
Create the eyes:
Flatten two small discs of white clay and press them onto the sides of the head. Add a tiny dot of black clay to the center of each for the pupils. -
Sculpt the mouth and nose:
Use the clay knife to slice a gentle curved smile into the snout. Use a rounded tool or toothpick to press a small nostril indent above the mouth. -
Make the spikes:
Using the blue clay, roll many small balls. Pinch the top of each ball to form a small triangular cone shape. -
Attach the spine spikes:
Starting at the top of the head and working down to the tail tip, press the blue triangles in a row along the dinosaur’s back. I find it helpful to press them down gently so they don’t lose their shape. -
Add decorative spots:
Roll a few tiny balls of blue clay and flatten them into discs. Press these randomly onto the sides of the dinosaur’s body for texture and color. -
Final smoothing:
Give the entire figure a once-over, gently rubbing out any accidental fingerprints with the warmth of your finger.
Place your new prehistoric friend on a shelf to dry or bake according to your clay’s instructions

The Complete Guide to Pottery Troubleshooting
Uncover the most common ceramic mistakes—from cracking clay to failed glazes—and learn how to fix them fast.
Snails With Swirly Shells and Sweet Faces

These charming snails are defined by their smooth, perfectly coiled shells and minimalist, friendly faces. By using simple clay rolling techniques and soft color palettes like terracotta and cream, kids can create a duo that looks lovely sitting on a windowsill.
Step-by-Step
Materials
- Air-dry clay or polymer clay (terracotta orange, soft pink, cream/white)
- Small wooden skewers or toothpicks (cut down)
- Wooden beads (tiny, dark brown) or dark clay for antennae tips
- Rolling pin
- Pointed sculpting tool or toothpick
- Black acrylic paint
- Pink acrylic paint or chalk pastel
- Fine detail paintbrush
- Smooth work surface or clay mat
- Clear matte varnish (optional)
Step 1: Shaping the Bodies
-
Prepare the base:
Start by taking a chunk of your body-color clay (soft pink for the left snail, cream for the right). Knead it well until it is soft and free of cracks. -
Roll the teardrop:
Roll the clay into a smooth ball first, then gently roll one side against your palm to create a fat teardrop or slug shape. This will be the main body. -
Flatten the base:
Press the bottom of the teardrop shape gently onto your table so the snail sits flat and stable. The front end should be slightly raised for the head. -
Create the neck curve:
Using your thumb, gently smooth the front portion upwards to distinguish the head area from the rest of the body where the shell will sit.
Step 2: Crafting the Swirl Shells
-
Roll a snake:
For the darker snail, take a large piece of terracotta clay. Roll it into a very long, even snake (cylinder) about the thickness of your finger. -
Taper the end:
I find it helpful to taper one end of the snake slightly thinner—this will become the center of the coil. -
Start the coil:
Tightly curl the tapered end inward to begin the spiral. Keep the edges flush so the shell forms a flat disc shape rather than a cone. -
Finish the spiral:
Continue rolling until the shell reaches your desired size. Press the outer end gently into the side of the coil to blend it so it doesn’t unravel. -
Attach the shell:
Score the back of the snail’s body and the bottom of the shell (scratch tiny lines). Add a drop of water or liquid clay for grip, then press the shell firmly onto the body’s back. -
Second shell variation:
For the cream snail, follow the same steps but use cream clay. Once coiled, use a toothpick to poke tiny, random accent holes along the spiral for texture. -
Shell detailing:
Use a sculpting tool to deepen the spiral groove on the cream snail if the definition faded during rolling.
Cracks Appearing?
If the clay cracks while rolling the coil, your clay might be too dry. Dip your fingers in water and knead it into the clay to rehydrate before trying the roll again.
Step 3: Adding Faces & Texture
-
Prepare antennae stalks:
Cut two small pieces of toothpick or a wooden skewer. They should be just long enough to stick into the head with a bit sticking out. -
Make the eyes:
Roll two tiny balls of brown clay or use small wooden beads. Press these onto the tips of your wooden stalks. -
Insert antennae:
Gently push the wooden stalks into the top of the snail’s head. Angle them slightly outward for a cute expression. -
Paint the face:
Using a very fine brush and black paint, add two small dots for eyes and a tiny ‘u’ shape for a smile. -
Add rosy cheeks:
Dip a fingertip or Q-tip into pink paint (or crushed pastel dust) and gently dab circles onto the cheeks for a sweet blush effect. -
Final textures:
For the pink snail, take a toothpick and press a small spiral pattern into the side of its tail, mimicking the shell. -
Smooth imperfections:
Check for any fingerprints. You can dip your finger in a little water to smooth them away before the clay dries completely. -
Dry and seal:
Let your snails dry according to the clay package instructions. Once fully hard, you can apply a matte varnish to protect the paint.
Level Up: Nature Style
Instead of rolling a clay shell, find a real empty snail shell from the garden. Clean it well and press it into the clay body for a realistic mixed-media look.
Let these sweet little creatures act as cheerful desk buddies or garden guardians once they are dry
Fairy House Minis for Small-World Play
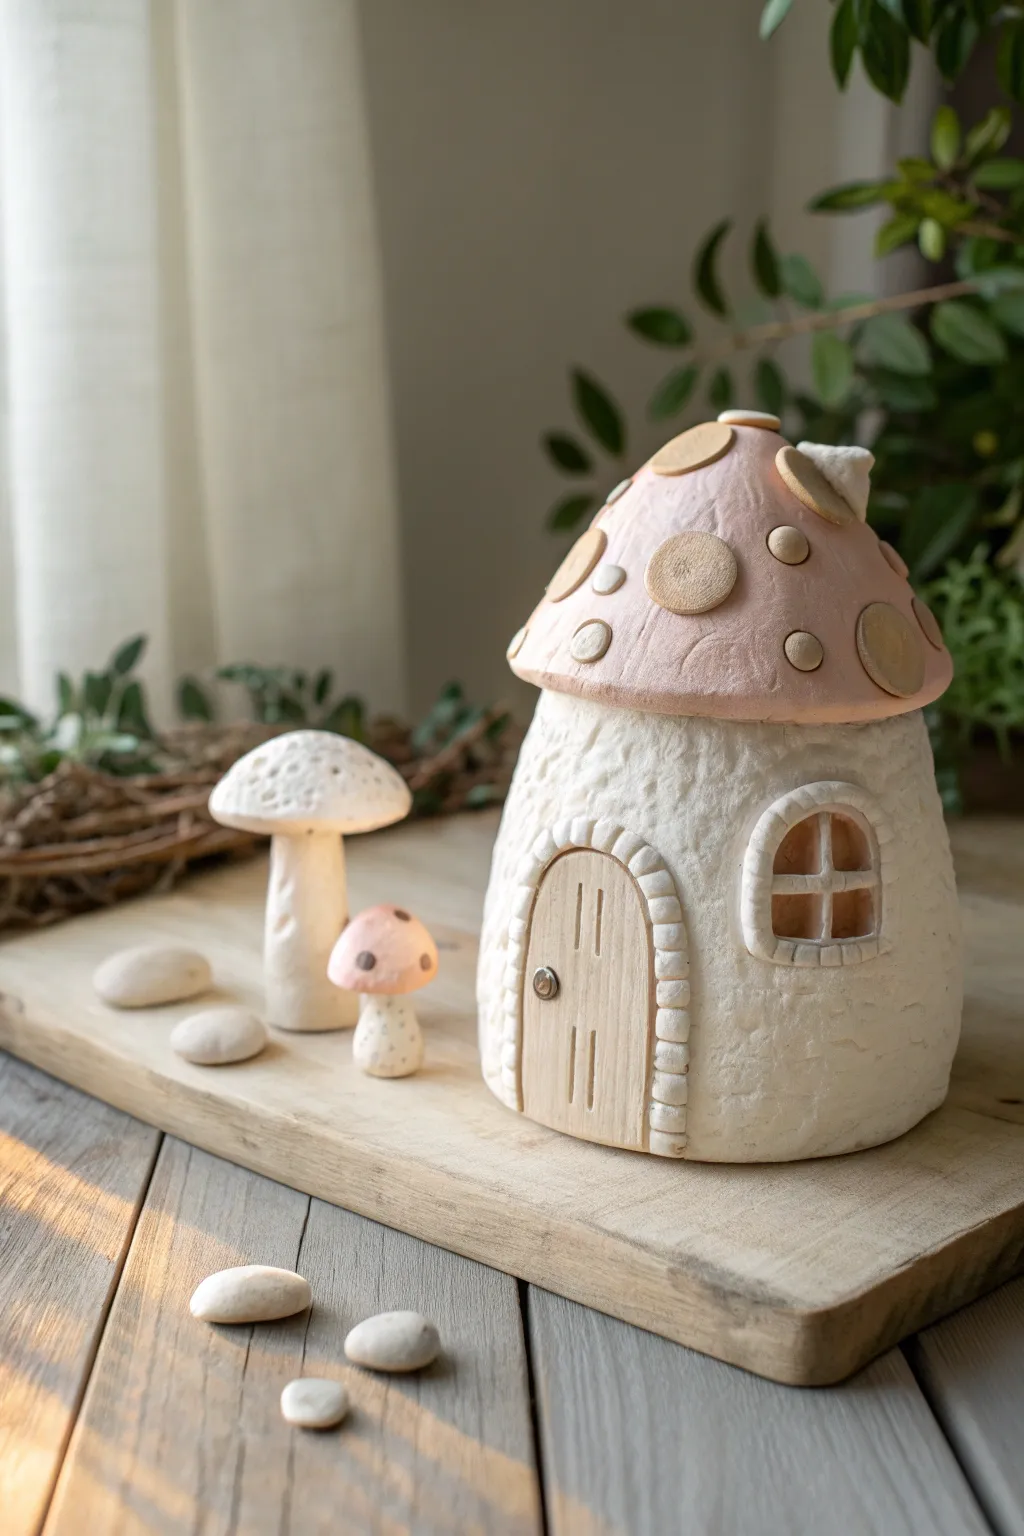
This adorable fairy house brings a touch of woodland magic to any playroom, featuring a textured white stalk and a soft pink cap adorned with wooden spots. Paired with miniature companion mushrooms, this clay creation is perfect for imaginative small-world adventures.
Step-by-Step Guide
Materials
- Air-dry clay (white)
- Acrylic paint (pale pink, cream, white)
- Wooden craft circles or buttons (various sizes)
- Miniature wooden door (pre-made or balsa wood)
- Clay sculpting tools (texture roller, knife tool)
- Detail paintbrush
- Water cup
- Aluminum foil (for armature)
- Hot glue gun or tacky craft glue
- Small pebbles or rolling pin
- Clear sealant (matte)
Step 1: Sculpting the House Base
-
Form the armature:
Begin by scrunching a large piece of aluminum foil into a stout cylinder shape. This saves clay and keeps the structure lightweight while it dries. -
Cover with clay:
Roll out a slab of white air-dry clay to about 1/4 inch thickness. Wrap this slab entirely around your foil cylinder, smoothing the seams with a little water on your finger. -
Build the walls:
Ensure the bottom is flat so it stands upright. Gently push the clay upwards to create a slightly tapered shape, narrower at the top where the roof will sit. -
Add texture:
Using a crumpled ball of foil or a stiff bristle brush, tap the entire surface of the white clay to create a stucco-like, rough texture. -
Attach the door frame:
Roll a thin snake of clay and gently press it into an arch shape on the front of the house to define the door area. -
Create the stone arch:
Use a knife tool to impress lines into that clay snake, making it look like individual stones surrounding the doorway. -
Sculpt the window:
Cut a small arched window shape out of the side wall. Roll tiny snakes of clay to form a crossbar and press them inside the opening. -
Frame the window:
Add a small clay border around the window, similar to the door frame, using your tool to create stone or brick markings.
Smoother Seams
Keep a small sponge damp with water nearby. Gently wipe it over clay joints to blend pieces seamlessly without leaving fingerprints.
Step 2: Crafting the Roof & Accessories
-
Shape the mushroom cap:
Form a second lump of foil into a wide, shallow dome. Roll out a circle of clay and drape it over this dome, smoothing the edges underneath to create a neat rim. -
Sculpt small mushrooms:
While the main pieces set up, use leftover clay to shape two smaller mushrooms—one tall and thin, one short and stout. -
Texture the small mushrooms:
Use a needle tool or toothpick to poke small holes into the caps of the mini mushrooms for a porous, organic look. -
Dry completely:
I usually let these thicker clay pieces dry for at least 24-48 hours. Turn them occasionally so the bottom gets air too.
Cracks Appearing?
If small cracks form while drying, mix a tiny bit of clay with water to make a paste (slip) and fill them in like spackle.
Step 3: Painting & Assembly
-
Paint the roof:
Once dry, paint the large mushroom cap a soft, dusty pink. You might need two coats for opaque coverage. -
Add the spots:
Use hot glue or tacky glue to attach the wooden craft circles randomly over the pink roof. If you don’t have wooden pieces, you can simply paint beige circles instead. -
Install the door:
Glue your miniature wooden door inside the stone archway on the main house base. -
Attach the roof:
Secure the pink roof onto the white house base with a ring of strong glue. -
Paint details:
Add a tiny metallic bead or dab of silver paint for the doorknob. Paint the caps of the small companion mushrooms to match or complement the house. -
Seal the project:
Brush a coat of matte sealant over the entire house to protect the clay from chipping during play.
Now your charming mushroom cottage is ready to welcome its first fairy residents


What Really Happens Inside the Kiln
Learn how time and temperature work together inside the kiln to transform clay into durable ceramic.
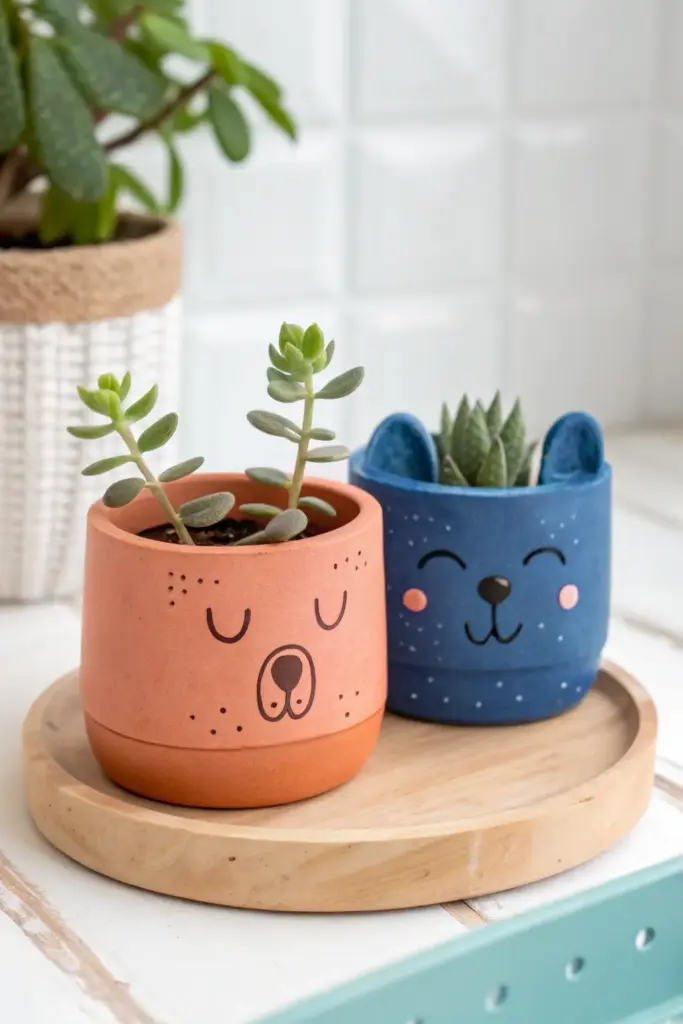
Mini Planters With Smiley Faces

Brighten up any windowsill with these adorable, sleepy-faced animal planters made from modeling clay. With their simple cylindrical shapes and sweet painted expressions, they are the perfect beginner project for creating a home for your tiniest succulents.
How-To Guide
Materials
- Air-dry modeling clay (terracotta and white)
- Acrylic paints (dark blue, black, pink, light sky blue)
- Small rolling pin
- Clay knife or plastic crafting tool
- Small bowl or cup (approx. 2-3 inches diameter) to use as a mold or template
- Water in a small cup
- Fine-grit sandpaper
- Fine-point paintbrush
- Dotting tool or toothpick
- Clear acrylic sealer spray (matte finish)
Step 1: Shaping the Pots
-
Prepare the clay:
Start by kneading a large ball of air-dry clay until it is soft and pliable. For the bear pot, use terracotta-colored clay; for the cat, use white clay that you can paint later, or pre-colored blue dough. -
Roll the base:
Pinch off a portion of clay and roll it into a ball, then flatten it into a thick disc to create the floor of your pot. It should be about 1/4 inch thick. -
Create the walls:
Roll out a long, rectangular strip of clay for the sides. Measure it against the circumference of your base disc to ensure it’s long enough to wrap all the way around. -
Assemble the cylinder:
Wrap the rectangular strip around the base disc. Use your fingers to smudge the clay where the wall meets the base, blending the seams together on both the inside and outside. -
Smooth the seam:
Where the two ends of the wall meet, use a little water on your finger to smooth the vertical seam until it disappears and the wall is uniform. -
Add the ridge detail:
For the bear pot, roll a thin snake of clay and wrap it around the bottom of the pot, blending the top edge slightly to create a subtle recessed look at the very base. -
Sculpt the ears:
Take two small balls of clay. For the blue cat pot, pinch them into triangles and attach them to the rim. For the bear, shape two small half-circles, flatten them slightly, and press them onto the rim. -
Secure the ears:
I like to score the bottom of the ears and the rim of the pot with a toothpick before attaching them, using a dab of water as ‘glue’ to make sure they stick permanently. -
Smooth everything out:
Dip your finger in water and run it over the entire surface of the pot to remove fingerprints and bumps. Let the pots dry completely for 24-48 hours.
Step 2: Painting and Finishing
-
Sand for perfection:
Once the clay is bone dry, lightly rub the surface with fine-grit sandpaper to remove any rough texture or uneven spots. -
Base coat the cat:
Paint the entire cat pot (including the inside rim) with a rich, matte blue acrylic paint. You may need two coats for opaque coverage. -
Keep the bear natural:
Leave the terracotta bear unpainted to show off the natural clay color, or give it a coat of matte terracotta paint if you used white clay. -
Paint the cheeks:
Using a small brush or a dotting tool, dab two circles of pink paint onto the cheeks of both animals. -
Draw the faces:
Use a fine-point brush and black acrylic paint to carefully draw the sleepy U-shaped eyes, the nose, and the mouth. -
Add bear details:
For the bear, paint an oval outline around the nose and mouth area to define the snout, and add tiny freckle dots near the cheeks. -
Add cat details:
For the blue cat, use a toothpick dipped in light sky blue or white paint to add tiny speckles all over the surface for a starry texture. -
Seal the work:
Once the paint is fully dry, take the pots to a well-ventilated area and spray them with a clear matte sealant. This protects the paint from moisture when you water your plants.
Cracks happen
If small cracks appear while the clay is air-drying, mix a tiny bit of fresh clay with water to make a paste and fill in the cracks. Smooth it over and let it dry again.
Drainage holes
Don’t forget to poke a hole in the bottom center of the pot while the clay is still wet! This prevents root rot for your succulents.
Fill your new little friends with soil and a small succulent to complete the look