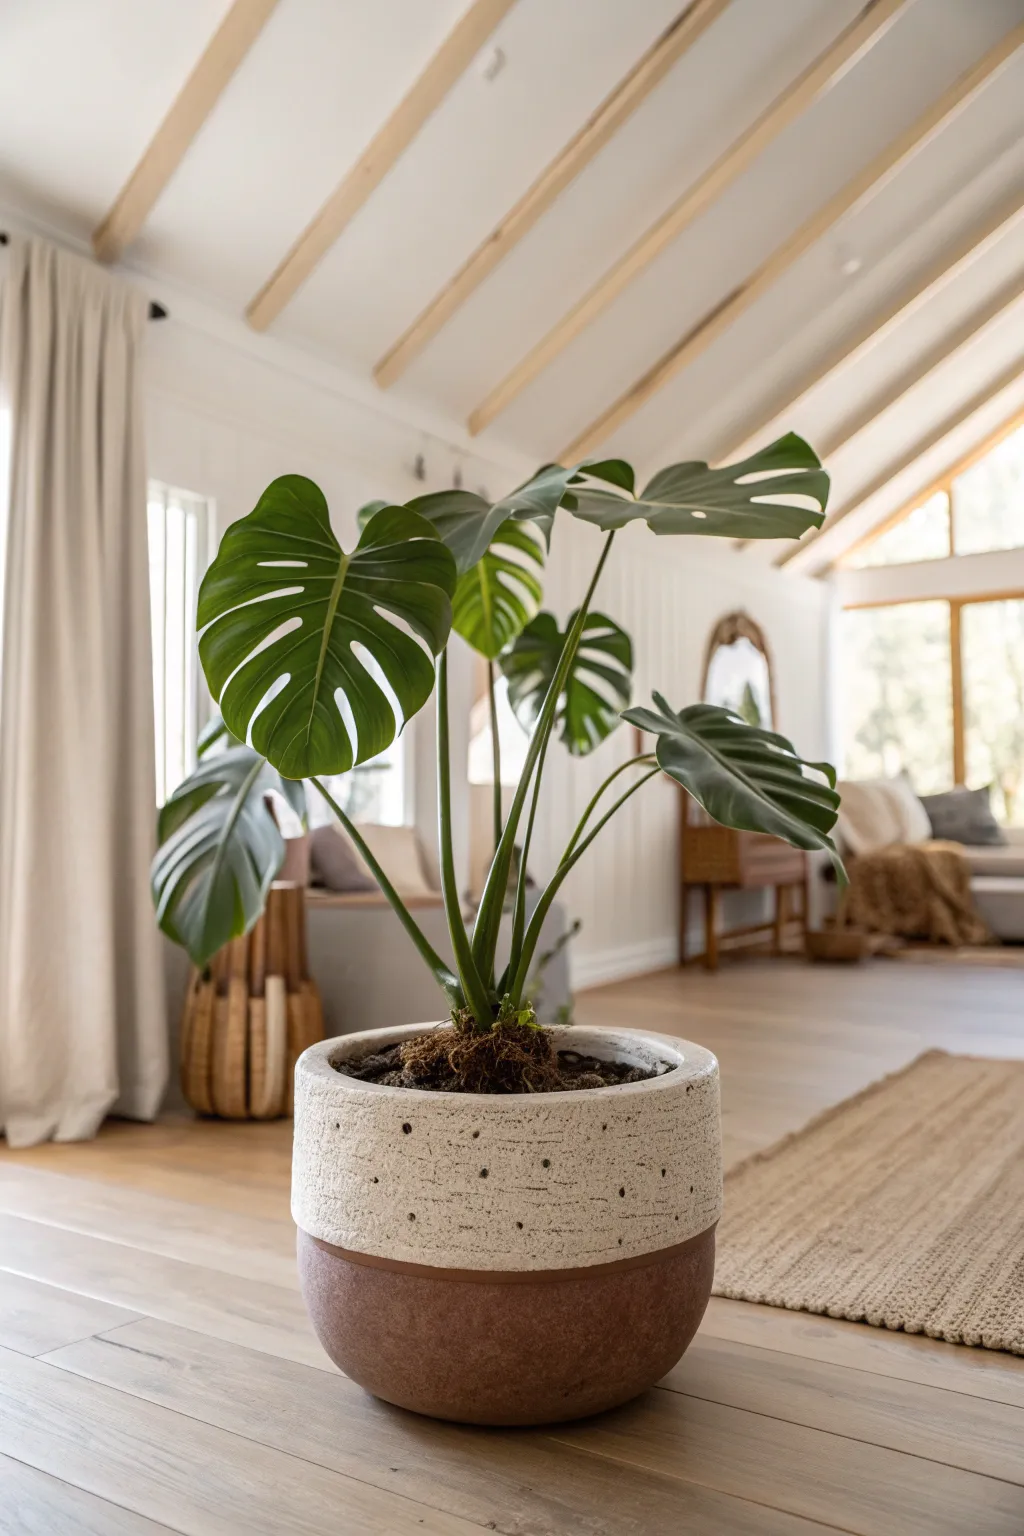
If you’ve got a Monstera, you already know it’s not a shy little houseplant—it wants to sprawl, climb, and become the star of the room. Here are my favorite monstera planter ideas that keep those big leaves looking intentional, supported, and seriously good in your space.
Classic Heavy Ceramic Floor Pot
Achieve the look of an expensive heavy ceramic or stone urn without the back-breaking weight or heavy price tag. This tutorial guides you through upcycling a standard plastic or fiberglass planter into a textured, aged masterpiece perfect for housing a dramatic Monstera.
How-To Guide
Materials
- Large plastic or fiberglass urn-style planter (rounded bottom)
- Coarse grit sandpaper (60-80 grit)
- Stone texture spray paint (e.g., Krylon or Rust-Oleum)
- Joint compound or premixed stucco patch
- Flat outdoor acrylic paint (warm off-white/cream)
- Flat acrylic paint (light grey)
- Espresso or dark brown acrylic paint (for aging)
- Sea sponge or large natural sponge
- Paintbrushes (bristle brush and chip brush)
- Matte clear sealer spray
- Plastic drop cloth
- Putty knife
Step 1: Preparation and Base Texture
-
Planter prep:
Begin by thoroughly cleaning your base planter with warm soapy water to remove any oils or mold release agents. Let it dry completely. -
Scuffing the surface:
Take your coarse sandpaper and vigorously sand the entire exterior of the pot. You want to create deep scratches so the texture material adheres well. -
Applying the texture compound:
Using a putty knife, smear a thin, uneven layer of joint compound or stucco patch all over the pot. I like to dab the knife against the wet compound to create little peaks and valleys. -
Creating the rim definition:
Build up the compound slightly thicker around the top rim of the planter to mimic the handcrafted lip of a stoneware pot. Smooth it just enough so it looks like turned clay rather than messy drywall. -
Drying time:
Allow the compound to dry completely. This usually takes 24 hours depending on humidity; it must be rock hard before painting.
Pro Tip: Weight Tricks
If you’re using a plastic base, put a heavy brick inside the bottom before adding soil. Monsteras can get top-heavy, and this prevents tipping.
Step 2: Painting the Stone Look
-
Base stone texture:
Spray the entire dried pot with the stone texture spray paint. This adds uniformity and that gritty ‘sandstone’ feel. Let this coat dry for an hour. -
First color coat:
Paint the entire pot with your warm off-white acrylic paint. Use a bristle brush and stab the paint into the crevices rather than brushing smoothly. -
Sponge mottling:
While the white coat is still slightly tacky, dip a dampened sea sponge into the light grey paint. Offload most of the paint on a paper towel. -
Applying the grey tones:
Lightly dab the grey sponge randomly over the pot, focusing on the lower belly and sides, leaving the rim mostly light. This creates depth. -
Softening the transition:
Use a clean, dry chip brush to feather the grey splotches while they are wet, blending them softly into the cream base so there are no harsh patterns.
Level Up: Mossy Patina
For an ancient garden look, dab small amounts of forest green and burnt umber paint near the base to simulate natural moss growth.
Step 3: Aging and Sealing
-
Mixing an antique wash:
Mix a very small amount of espresso brown paint with water (about 1 part paint to 10 parts water) to create a dirty wash. -
Applying the wash:
Brush the wash generously over the entire pot, letting it pool in the texture pits and under the rim. -
Wiping back:
Immediately wipe the surface with a lint-free rag. The dark color will stay in the texture crevices, making the raised areas pop. -
Final dry brushing:
Once the wash is dry, take a little bit of the original off-white paint on a dry brush and lightly graze the most raised surfaces to bring back the brightness. -
Sealing the finish:
Take the pot outside and apply two coats of matte clear sealer to protect your paint job from moisture and UV rays. -
Planting setup:
Since this was originally a lighter pot, place a few heavy rocks in the bottom for stability before adding soil and your Monstera plant.
Now step back and admire how substantial your elegant new planter looks in the sunlight

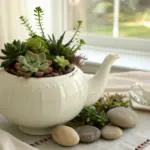
Terracotta Planter With Matching Saucer
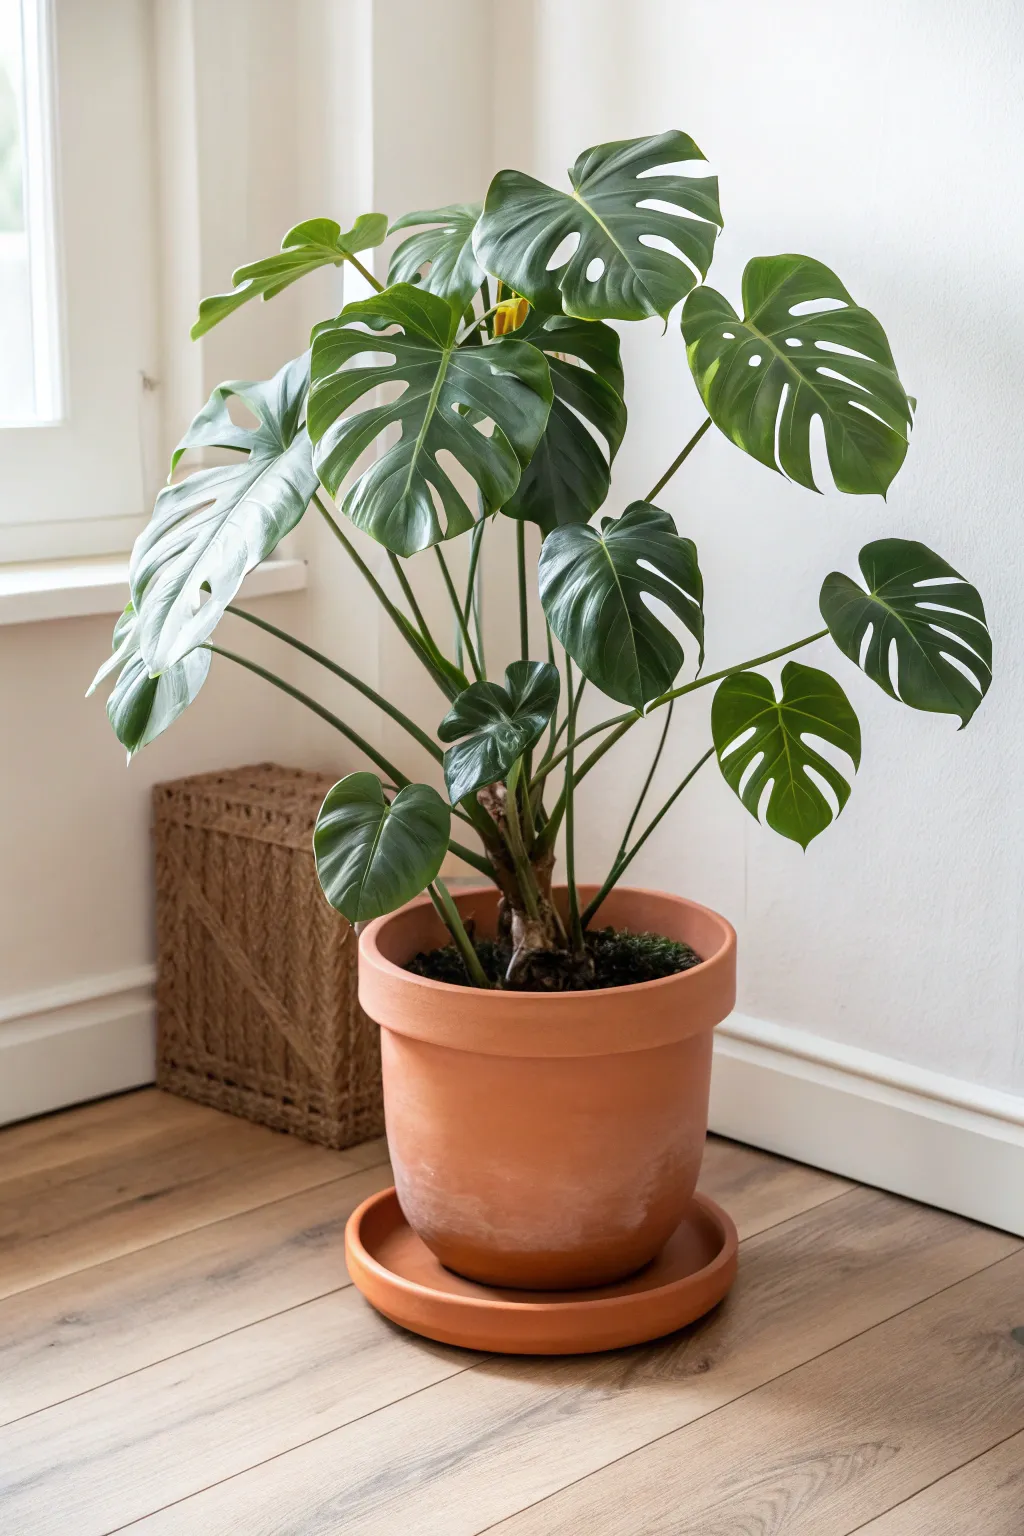
Embrace the enduring appeal of terracotta with this simple yet striking planting project that highlights the natural beauty of your Monstera. The warm, earthy tones of the clay provide a perfect contrast to the vibrant greens, while the slightly weathered finish adds immediate character and warmth to any corner.
Step-by-Step Guide
Materials
- Large unglazed terracotta pot (10-12 inch diameter)
- Matching terracotta saucer
- Monstera Deliciosa plant
- High-quality potting mix (aroid mix preferred)
- Perlite or orchid bark (for drainage)
- Small piece of mesh or a coffee filter
- Garden trowel
- Gardening gloves
- Watering can
- Soft cloth
Step 1: Preparation
-
Soak the Pot:
Before you begin, submerge your new terracotta pot and saucer in a bucket of water for at least 30 minutes. Terracotta is porous and will wick moisture away from your soil if it starts dry; soaking it ensures your plant gets the hydration it needs right from the start. -
Prepare the Drainage:
Place a small square of mesh, a coffee filter, or even a shard from a broken pot over the central drainage hole. This simple trick keeps the soil inside the pot while allowing excess water to flow freely into the saucer. -
Mix the Soil:
Create a custom soil blend that Monstera plants love. I prefer to mix standard potting soil with generous handfuls of perlite and orchid bark. This chunky ‘aroid mix’ ensures excellent aeration for the roots, mimicking their natural environment.
Step 2: Planting Process
-
Create a Base Layer:
Fill the bottom third of the terracotta pot with your prepared soil mix. Pat it down gently, but don’t pack it too tight, as you want to maintain those air pockets for root health. -
Position the Plant:
Gently remove your Monstera from its nursery container, being careful not to pull on the stems. Loosen the root ball slightly with your fingers to encourage new growth, then place it in the center of the terracotta pot. -
Check the Depth:
Ensure the top of the root ball sits about an inch or two below the rim of the pot. This headspace is crucial—it prevents water from spilling over the edge when you irrigate. -
Fill the Sides:
Scoop your soil mixture into the gaps around the root ball. Use your fingers or a chopstick to gently poke the soil down, eliminating large air pockets without compacting the dirt too much. -
Adjust the Stems:
As you fill the pot, observe the natural direction of the stems. Adjust the planting angle slightly if needed to ensure the iconic split leaves face outward beautifully, just like in the photo.
Pro Tip
Water terracotta more often than plastic pots. The clay breathes, drying out soil faster, which prevents root rot but requires vigilant checking.
Step 3: Finishing Touches
-
Top It Off:
Add the final layer of soil until it is level with the base of the stems. Press down lightly around the base of the plant to stabilize it. -
Initial Watering:
Water the plant thoroughly until you see liquid draining into the saucer below. This settles the soil around the roots and helps the plant recover from the shock of repotting. -
Clean the Pot:
Wipe down the exterior of the terracotta with a damp soft cloth to remove any soil smudges or dust from the potting process. -
Distress (Optional):
To achieve the aged look seen in the image immediately, you can lightly brush the exterior with a very diluted mixture of garden lime and water. Otherwise, simply let the natural minerals in your water build up a beautiful white patina over time. -
Final Placement:
Place the saucer on your floor and set the pot centered on top. Position the completed arrangement near a bright window with indirect light to keep those leaves glossy and green.
Level Up
Add a layer of sphagnum moss on top of the soil. It retains humidity and gives the planter a lush, professional greenhouse finish.
Enjoy the classic elegance of your new potted Monstera as it grows into its beautiful terracotta home

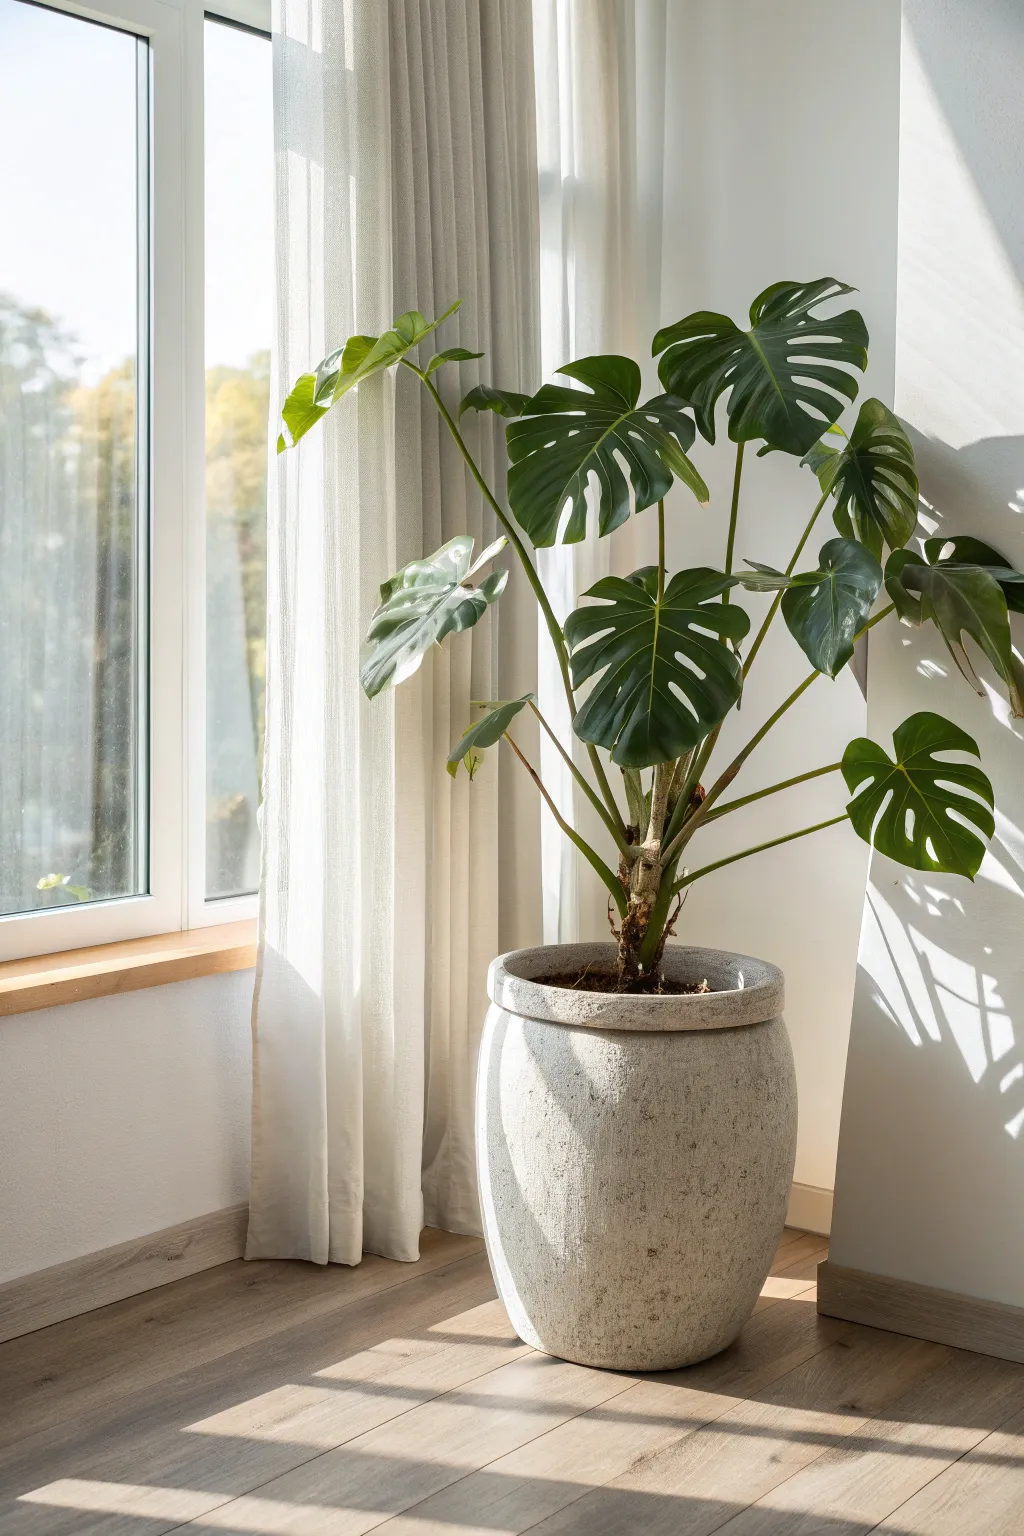
Matte White Cylinder Cache Pot
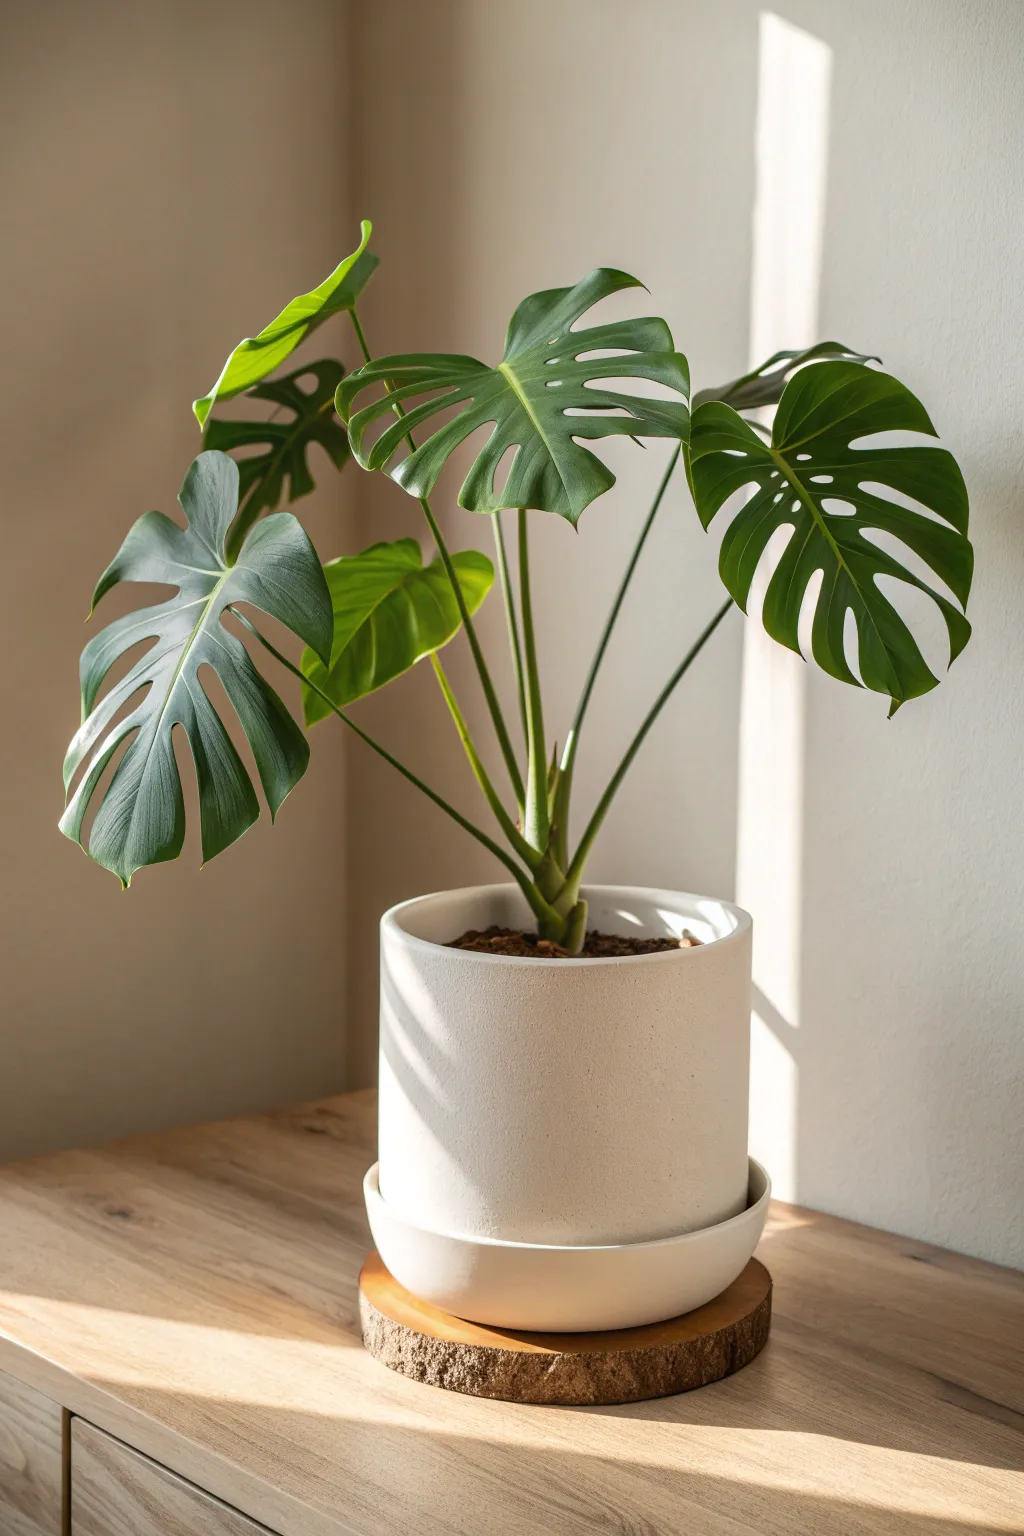
Achieve a high-end, gallery-style look for your Monstera with this sleek DIY pottery project. By transforming a basic terracotta or ceramic cylinder with textured matte paint and pairing it with a rustic wooden base, you create a striking contrast that lets the foliage shine.
Detailed Instructions
Materials
- Large cylindrical terracotta or ceramic pot (approximately 10-12 inches)
- Matching saucer (slightly wider than the pot)
- White matte spray paint (or chalk paint for a textured finish)
- Fine-grit sandpaper (220 grit)
- Thick round wood slice or cork trivet (slightly larger than pot base)
- Water-based polyurethane sealant (matte finish)
- Potting soil mix (well-draining, aroid mix preferred)
- Monstera deliciosa plant
- Drop cloth or cardboard
- Damp cloth
- Optional: Painter’s tape
Step 1: Preparing the Pot
-
Clean surface:
Begin by thoroughly cleaning your cylindrical pot and saucer. If you’re recycling an old pot, scrub away any mineral deposits or dirt. Use a damp cloth to wipe down the surface and ensure it’s completely dry and dust-free before painting. -
Light sanding:
Take your 220-grit sandpaper and lightly scuff the exterior of the pot and both sides of the saucer. This creates a ‘tooth’ for the paint to adhere to, which is crucial if you are painting over a glazed ceramic surface. -
Dust removal:
After sanding, wipe everything down again with a damp cloth or a tack cloth to remove every speck of sanding dust. Any debris left behind will show up as a bump in your sleek matte finish. -
Masking the interior:
If you want to keep the inside natural (which is better for soil breathability if using terracotta), use painter’s tape to mask off the top rim’s inner edge. Place the pot upside down on your drop cloth.
Step 2: Achieving the Matte Finish
-
First coat application:
Shake your matte white spray paint can vigorously for at least one minute. Hold the can about 8-10 inches away and apply a very light, misty coat. Don’t try to get full coverage yet; you just want a tacky base layer. -
Building opacity:
Wait about 15 minutes for the first coat to flash off. Apply a second coat, moving in steady horizontal sweeps. I find that keeping the can moving prevents those dreaded drips that ruin a minimalist look. -
Full coverage:
Apply a third and final coat to ensure stark, solid whiteness. Check for any spots where the original pot color shows through, especially near the base. Don’t forget to spray the edges of the saucer as well. -
Texture trick (optional):
If you want that stone-like texture seen in high-end boutiques, you can lightly dust the wet paint with baking soda before the final coat, or use a specific ‘stone texture’ spray paint before the white topcoat. -
Sealing the finish:
Once the white paint is fully dry (let it sit for 24 hours), apply a clear matte polyurethane sealer. This protects the white surface from yellowing and makes it easier to wipe off dirt fingerprints later.
Pro Tip: Avoid Yellowing
Water mineral buildup can yellow white pots. Use a nursery pot *inside* the cache pot, removing it to water in the sink. This keeps the outer finish pristine.
Step 3: The Rustic Wood Base
-
Selecting the wood:
Find a thick wood slice (often sold as rustic centerpieces at craft stores) that is slightly wider than your saucer. This acts as a riser and adds visual warmth. -
Preparing the wood surface:
If the wood slice is rough, sand the top surface smooth so the saucer sits level. Leave the bark edges raw for character. -
Sealing the wood:
Apply a coat of sealant to the wood slice. This is practical because water might eventually splash onto it during watering, and you want to prevent rot or warping.
Level Up: Fluted Texture
Before painting, glue half-round dowels vertically around the cylinder. Paint over them for a trendy, architectural fluted look that adds 3D depth.
Step 4: Assembly and Planting
-
Layering the setup:
Place your wood slice on the table, followed by the white saucer, and finally the white pot. Ensure the stack is stable and centered. -
Adding drainage layer:
Add a small layer of LECA (clay pebbles) or gravel at the bottom of the pot to assist with drainage, ensuring the roots don’t sit in stagnant water. -
Potting the plant:
Fill the pot halfway with your aroid mix. Gently remove your Monstera from its nursery pot, loosen the root ball slightly, and place it in the center. -
Filling and tamp:
Fill the remaining space with soil, tapping the sides of the pot gently to settle the dirt without compacting it too tightly. Leave about an inch of space at the top for watering. -
Final wipe down:
Use a clean, slightly damp microfiber cloth to remove any soil dust that may have landed on your pristine white pot during planting. -
Positioning:
Move your new planter to a spot with bright, indirect light to cast those beautiful leaf shadows reminiscent of the inspiration image.
Enjoy the serene and sculpted look your new planter brings to your space


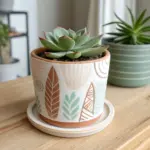

Neutral Speckled Stoneware Planter
Transform a plain, inexpensive pot into a high-end, neutral speckled stoneware piece that perfectly complements the lush green of a monstera. This simple upcycling project uses paint and texture to mimic the look of expensive ceramic pottery.
Step-by-Step Guide
Materials
- Simple ceramic or plastic planter (cylinder shape)
- Sandpaper (120-180 grit)
- White or cream matte spray paint (primer)
- Stone texture spray paint (e.g., Krylon or Rust-Oleum)
- Cream or off-white acrylic paint
- Soft brown or taupe acrylic paint
- Stiff bristle brush (e.g., old toothbrush)
- Wide foam brush
- Baking soda (optional for texture)
- Matte clear sealant spray
- Drop cloth or cardboard
Step 1: Preparation & Base Coat
-
Prep your surface:
Start by cleaning your base pot thoroughly to remove any dust or oils. If the original surface is glossy, lightly scuff it with sandpaper to help the new paint adhere better. -
Set up your workspace:
Lay down your drop cloth or cardboard in a well-ventilated area, preferably outdoors. -
Apply the primer:
Spray the entire pot with a coat of matte white or cream primer. This ensures an even color base and helps future layers stick. Let this dry completely according to the can’s instructions.
Step 2: Creating the Stoneware Texture
-
Mix your textured paint:
Pour your cream acrylic paint into a dish. For that authentic, gritty pottery feel, I like to mix in a tablespoon of baking soda until the paint reaches a fluffy, paste-like consistency. -
Apply the texture layer:
Using a wide foam brush or a sponge, dab the baking soda paint mixture onto the pot. Don’t brush it on smoothly; instead, use a pouncing motion to build up a slight, uneven texture. -
Refine the surface:
While the paint is still slightly tacky but mostly dry, you can lightly knock down any overly sharp peaks with your gloved hand or a dry brush to smooth it just enough so it looks like fired clay. -
Let it cure:
Allow this textured layer to dry fully. It might take a bit longer than standard paint due to the baking soda thickness.
Paint Peeling?
If paint peels off plastic pots, the surface was likely too smooth. Sand well before starting and use a plastic-bonding spray primer for the first coat.
Step 3: Adding the Speckled Detail
-
Prepare the speckle paint:
Dilute a small amount of dark brown or taupe acrylic paint with water. You want it fluid enough to flick easily, almost like ink. -
Test your technique:
Dip an old toothbrush or stiff bristle brush into the diluted paint. Practice flicking the bristles with your thumb over a piece of scrap paper until you get a nice spray of fine dots. -
Apply the first speckle layer:
Hold the brush about 6-10 inches away from the pot and flick the bristles to create a fine mist of speckles on one side. Move around the pot, maintaining a random pattern. -
Vary the density:
For a natural look, allow some areas to have slightly denser speckles than others, but avoid large blobs. -
Add dimension:
If you want more depth, mix a second batch of speckle paint in a slightly lighter grey or charcoal tone and repeat the flicking process sparingly. -
Correct mistakes:
If you get a large splatter you don’t like, simply dab it gently with a paper towel while wet, or touch it up with a bit of your cream base paint after it dries. -
Seal the finish:
Once you are happy with the speckling and everything is bone dry, spray the entire planter with a matte clear sealant. This protects the finish from water damage when you water your plant.
Dual-Tone Effect
Tape off the bottom third of the planter before texturing to leave a smooth, raw-looking base, creating a trendy ‘dipped’ ceramic effect.
Step 4: Final Styling
-
Pot your plant:
Place your monstera into the finished pot. If you painted a plastic nursery pot, you can just slip it inside. If directly planting, ensure you have drainage holes or use a saucer inside. -
Clean the rim:
Wipe the rim with a damp cloth to ensure the top edge looks crisp and finished against the soil or moss.
Now you have a custom, high-end looking planter that gives your Monstera the perfect minimalist home

The Complete Guide to Pottery Troubleshooting
Uncover the most common ceramic mistakes—from cracking clay to failed glazes—and learn how to fix them fast.
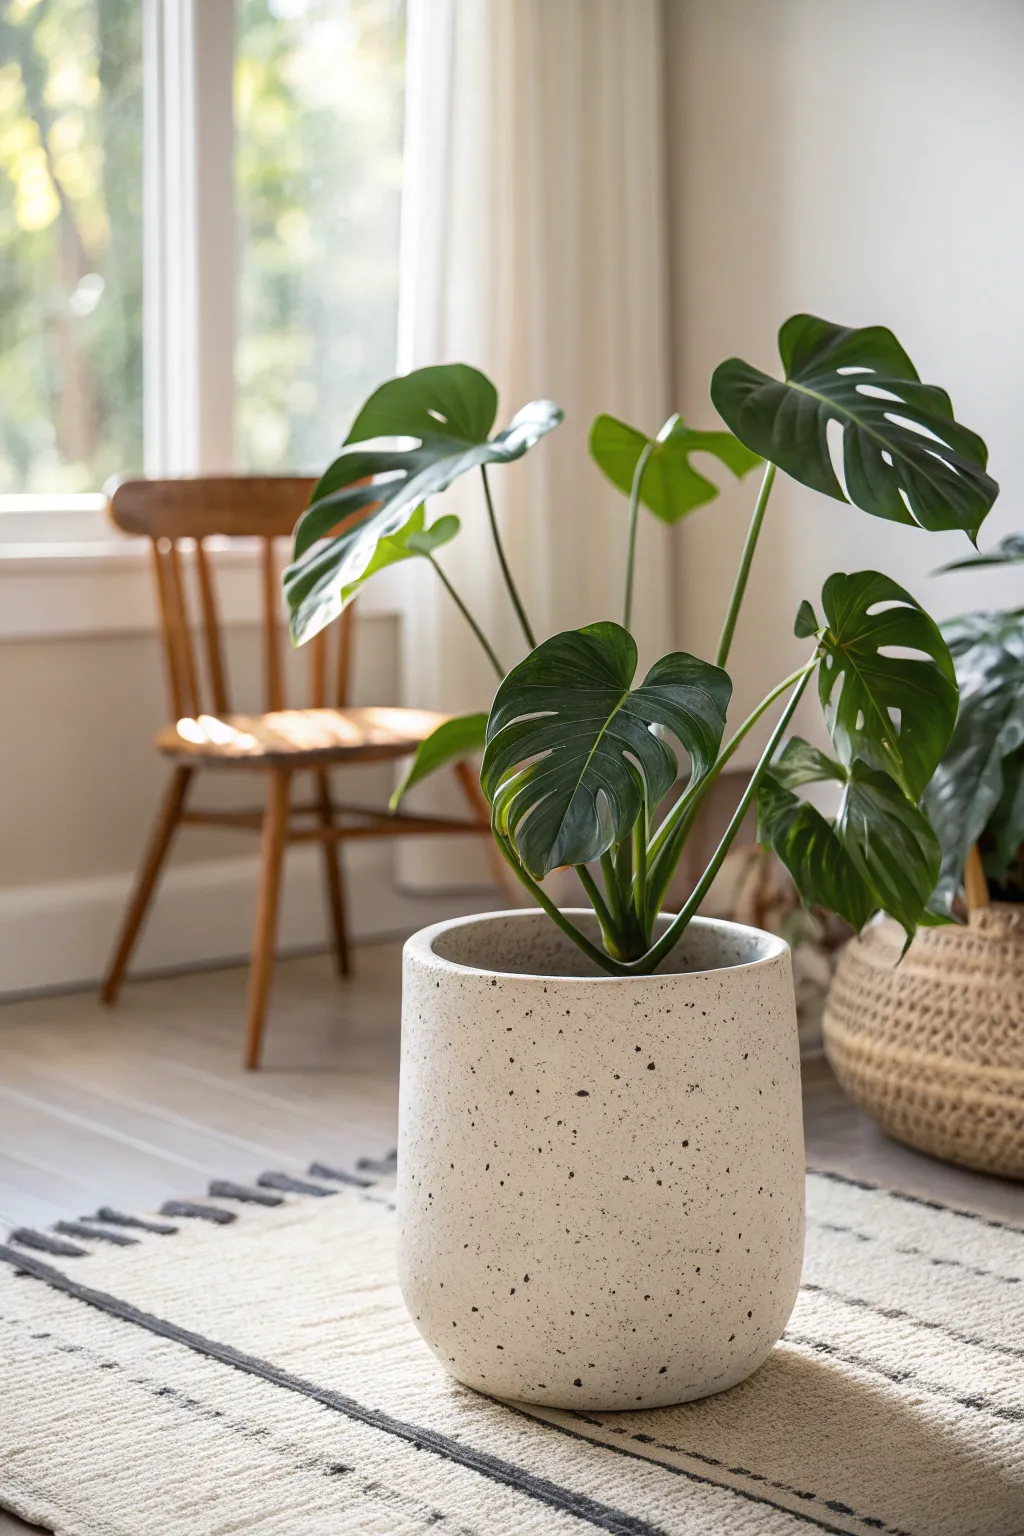
Low, Wide Planter for Big Root Balls
Transform a plain, inexpensive planter into this sophisticated, high-end ceramic lookalike that perfectly complements the sprawling roots of a Monstera. This project uses clever texturing techniques and a dual-tone paint job to mimic the earthy elegance of handcrafted pottery without the kiln.
Step-by-Step Tutorial
Materials
- Wide, low-profile planter (plastic or ceramic)
- Stone texture spray paint (crème or off-white)
- Terra cotta or rust-colored acrylic paint
- Matte white acrylic paint
- Sponge brush or sea sponge
- Painter’s tape
- Sandpaper (medium grit)
- Clear matte sealer spray
- Black acrylic paint (optional for speckling)
- Old toothbrush (optional)
- Drop cloth
Step 1: Base Preparation
-
Clean surface:
Begin by thoroughly cleaning your chosen planter with soap and water to remove any manufacturing oils or dust. Let it dry completely. -
Rough it up:
If you are using a plastic pot, lightly sand the entire exterior surface with medium-grit sandpaper. This helps the paint adhere better and last longer. -
Wipe clean:
Wipe away all the sanding dust with a damp cloth or tack cloth ensuring a pristine surface for your texture.
Tape Bleed Trouble?
If paint bleeds under the tape due to the texture, use a small artist’s brush and the base color to carefully touch up the line by hand.
Step 2: Creating the Texture
-
First texture coat:
Take your stone texture spray paint and apply a light coat to the entire planter, holding the can about 12 inches away. Don’t worry about full coverage yet; just get a base grit down. -
Second heavy coat:
Once the first coat is tacky (usually 15-20 minutes), apply a heavier second coat to build up that rough, ceramic-like surface visible in the top half of the inspiration image. -
Dry time:
Allow the texture spray to cure fully according to the can’s instructions—usually at least 24 hours. This patience prevents the texture from peeling off with tape later.
Step 3: The Dual-Tone Division
-
Tape the line:
Decide where you want your transition line. In the image, the division is about one-third of the way up from the bottom. Apply painter’s tape horizontally around the circumference of the pot at this height. -
Seal the tape:
I like to press the edge of the tape down firmly with my fingernail or a credit card to prevent paint bleed, especially given the bumpy textured surface. -
Mix the top color:
Mix a small amount of matte white acrylic into your crème base if needed to achieve that soft, limestone look for the top section. You want it warm, not stark white. -
Paint the top:
Using a sponge brush, dab—don’t drag—the lighter paint onto the top two-thirds of the planter. Dabbing preserves the stone texture you created.
Textured Grip Tip
Add a teaspoon of baking soda to your acrylic paint before applying. It creates an even grittier, more authentic ceramic feel than spray alone.
Step 4: Finishing the Bottom
-
Paint the base:
For the bottom section, apply your terra cotta or rust-colored paint. You can paint right over the lower tape edge. Use 2-3 coats for a solid, grounding color that contrasts with the textured top. -
Remove tape:
Carefully peel off the painter’s tape while the last coat of paint is still slightly wet. This helps achieve a cleaner line on textured surfaces.
Step 5: Detailing and Sealing
-
Adding speckles:
To recreate the speckled pottery look, mix a tiny drop of water into black acrylic paint. Dip an old toothbrush in it, point it at the top section, and run your thumb across the bristles to flick tiny specks onto the surface. -
Create distinct dots:
For larger, more distinct dark spots seen in the reference, use a toothpick or the handle end of a small paintbrush dipped in dark grey paint and gently dot it randomly around the upper white section. -
Protect the finish:
Once all paint is bone dry, spray the entire pot with a clear matte sealer. This protects your faux ceramic finish from water damage when watering your Monstera. -
Planting:
Fill with potting soil suitable for Monsteras and settle your plant in, letting the root ball sit slightly high to match the exposed look in the photo.
Now you have a stunning, expensive-looking vessel ready to showcase your favorite large plant
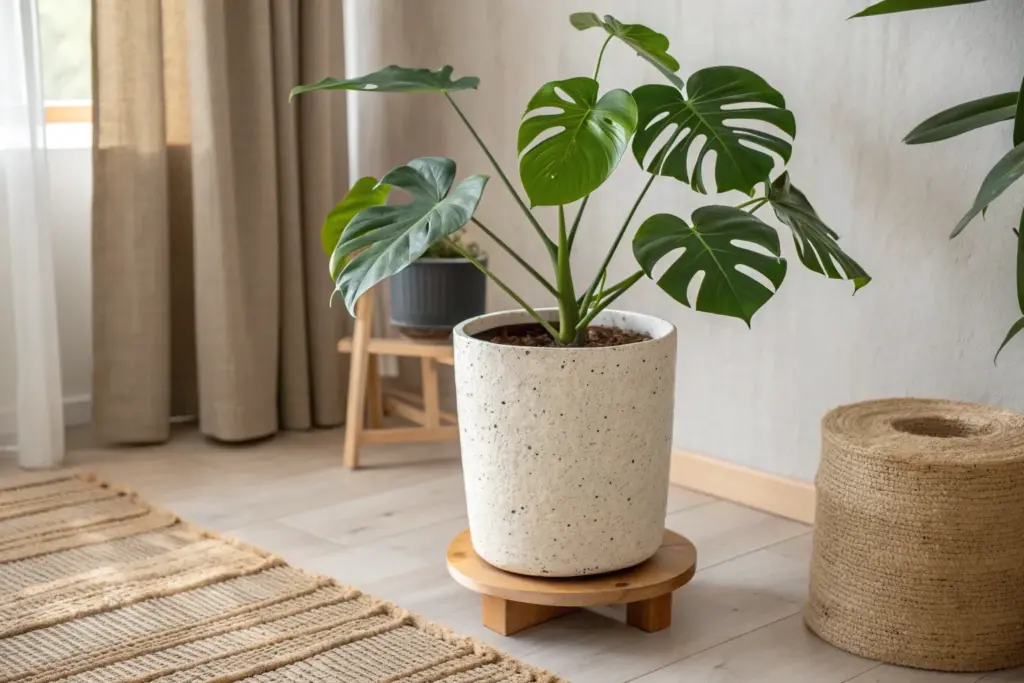
Elevated Planter on a Simple Stand
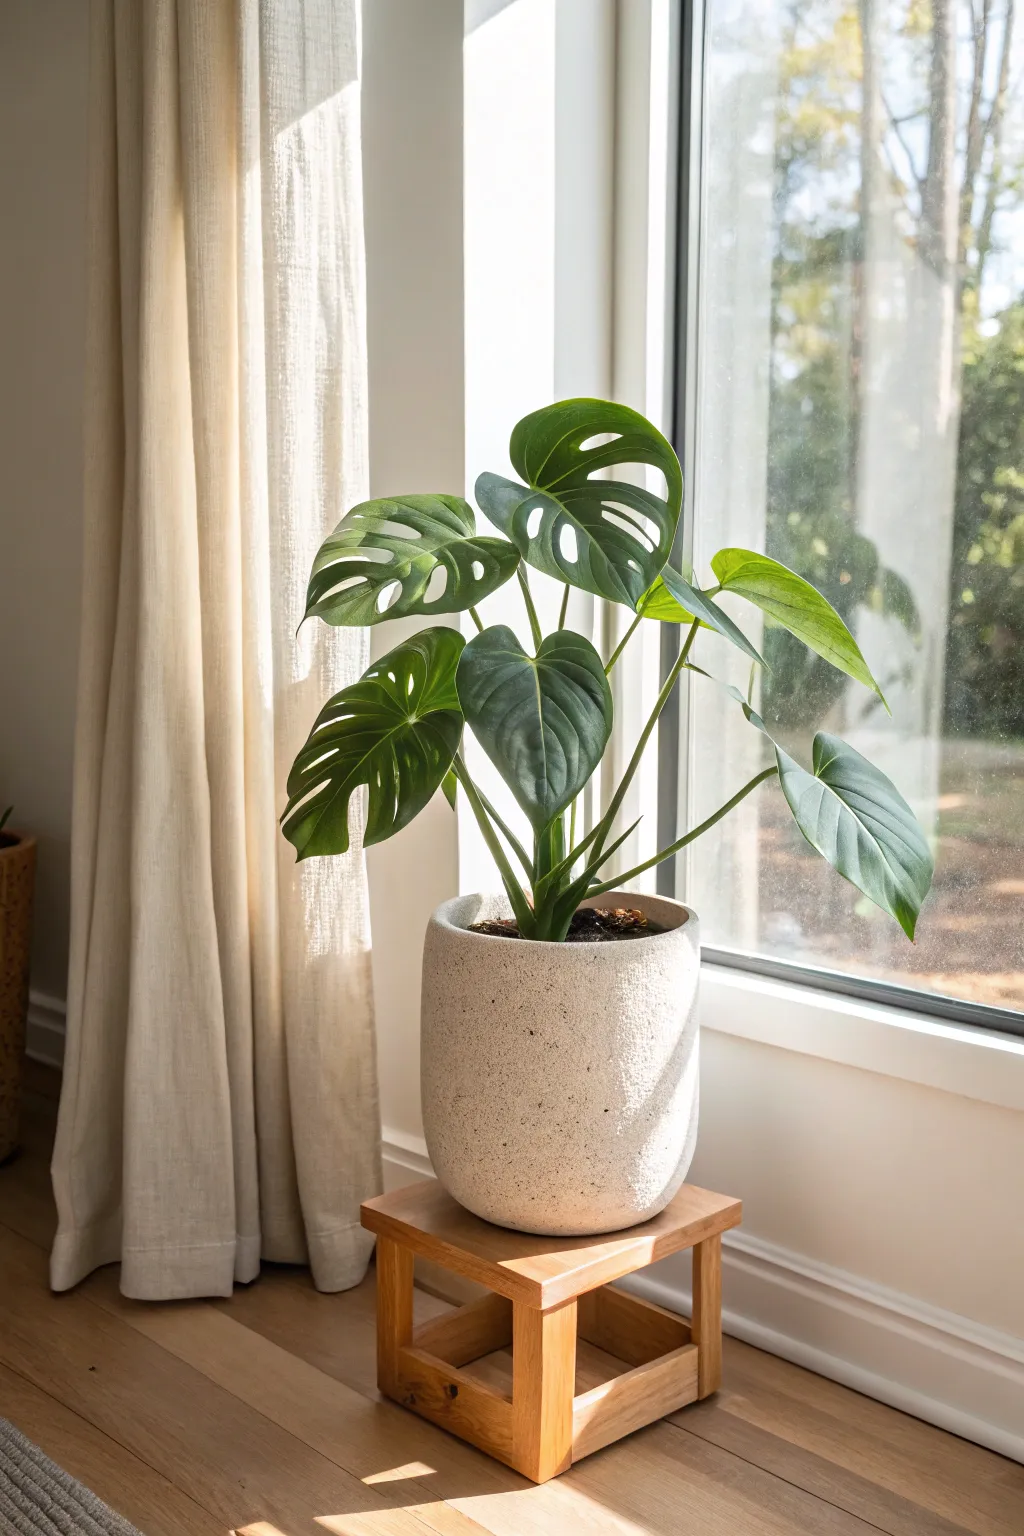
Give your Monstera the height it deserves with this minimalist setup that combines a texturized stone-look pot with a warm wooden base. This project focuses on customizing a simple ceramic planter with a faux-stone finish and building a basic, sturdy stand to catch the window light.
Step-by-Step Guide
Materials
- Large ceramic or plastic cylindrical planter
- Stone-texture spray paint (bleached stone or granite color)
- Matte white acrylic paint
- Sponge or stippling brush
- 1×2 inch lumber (oak or pine)
- Wood glue
- Pocket hole jig and screws (or wood screws)
- Sandpaper (120 and 220 grit)
- Clear matte polyurethane finish
- Drill with driver bits
- Saw (miter saw or hand saw)
Step 1: Creating the Faux-Stone Planter
-
Prep the planter surface:
Begin by cleaning your chosen planter thoroughly with soap and water to remove any oils or dust. If the surface is very glossy, scuff it lightly with 120-grit sandpaper to help the new finish adhere. -
Apply base coat:
Take the planter to a well-ventilated area. Apply a light, even base coat of the stone-texture spray paint while holding the can about 12 inches away. Let this layer dry to the touch, usually about 15-20 minutes. -
Build texture layers:
Apply two or three more coats of the texture spray, allowing partial drying time between each. The goal is to build up a gritty, irregular surface that hides the original material completely. -
Add dimension with sponge:
Once the spray paint is fully dry, pour a small amount of matte white acrylic paint onto a palette. Dip a sponge into the paint and offload most of it onto a paper towel until almost dry. -
Stipple the surface:
Lightly dab the sponge over the textured surface. This highlights the high points of the ‘stone’ texture, giving it a more realistic, sun-bleached look rather than a flat manufactured color. -
Seal the finish:
After the acrylic highlights are bone dry, spray the entire pot with a matte clear sealer. This protects your faux finish from water drips when you water your Monstera later.
Step 2: Building the Wooden Stand
-
Measure your pot:
Measure the bottom diameter of your finished pot. You want the stand’s top surface to be slightly wider than this measurement for stability. -
Cut the top frame pieces:
Cut your 1×2 lumber to create a square frame. You’ll need two longer side pieces and two shorter top pieces that will sandwich between them. A common size for this scale is a 10-inch square top. -
Cut the legs:
Cut four pieces of lumber for the legs. For the low-profile look in the photo, aim for legs that are about 8-10 inches tall. -
Assemble the top frame:
Using wood glue and screws (pocket holes work best for hiding joinery), assemble your top square frame. Ensure the corners are perfectly square before the glue sets. -
Attach the legs:
Attach one leg to the inside corner of your frame, flush with the top. Use glue and screws to secure it. Repeat for all four legs, checking periodically that the stand doesn’t wobble on a flat surface. -
Add lower supports:
Measure and cut two cross-braces to fit between the legs near the bottom, just a few inches off the ground. These act as stretchers to keep the legs from splaying out under the weight of a heavy plant. -
Install the stretchers:
Secure these lower cross-braces with glue and screws. I usually clamp these in place first to ensure they are level before driving the screws. -
Sand the wood:
Sand the entire stand, starting with 120-grit to smooth rough edges and moving to 220-grit for a silky finish. Pay special attention to softening the sharp corners of the legs. -
Apply finish:
Wipe away all sawdust with a tack cloth. Apply a clear matte polyurethane or a natural wood wax to bring out the grain while keeping the tone light and natural. -
Final assembly:
Once the stand is dry and cured, place your faux-stone pot on top. Pot your Monstera directly inside or use it as a cachepot, and position it near a bright window to complete the look.
Stone Effect Tip
For a more organic ‘aged’ look, mix a tiny drop of grey or beige paint into your white sponge layer to create subtle color variations.
Level Up: Tapered Legs
Use a jigsaw or table saw to taper the inside edge of the legs towards the bottom. This small detail makes the stand look much lighter and more mid-century modern.
Enjoy the elegant simplicity this custom planter brings to your space


What Really Happens Inside the Kiln
Learn how time and temperature work together inside the kiln to transform clay into durable ceramic.
Double-Pot Setup With a Pretty Cover Pot
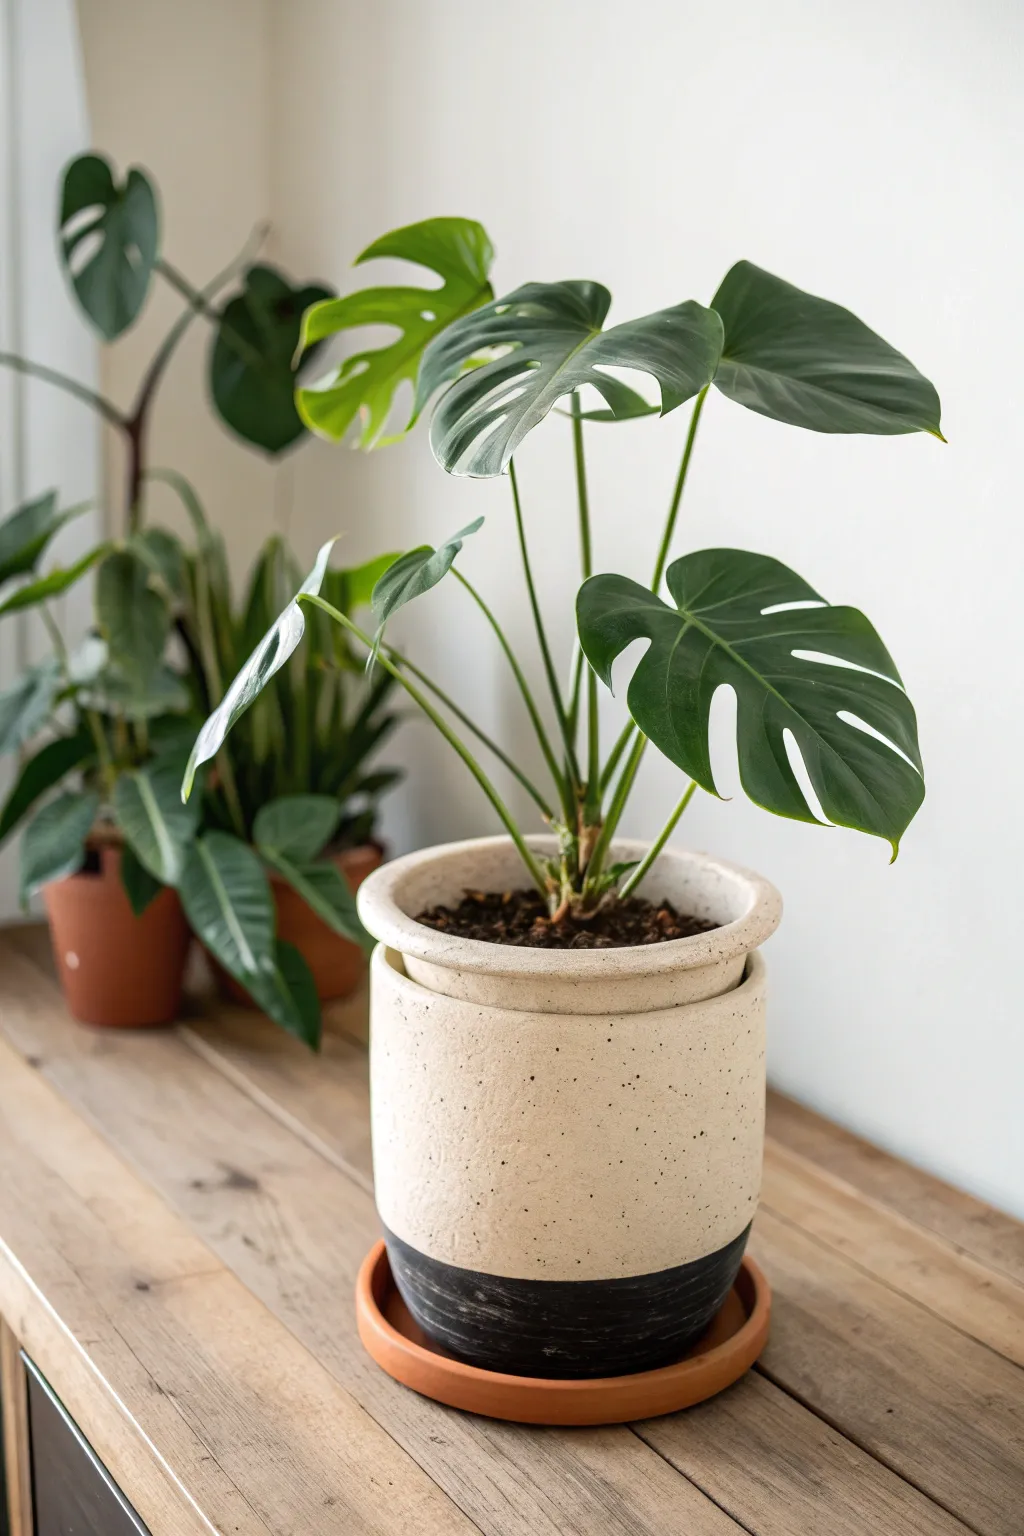
Transform a plain planter into a modern statement piece with this high-contrast, dipped-look design. The textured cream finish paired with a stark black base creates a sophisticated home for your monstera that mimics expensive ceramic studio pottery.
Detailed Instructions
Materials
- Cylindrical ceramic or terracotta planter (approx. 8-10 inches diameter)
- Small terracotta saucer (slightly larger than pot base)
- Stone-effect spray paint (Cream or Beige)
- Matte black acrylic paint
- Wide flat paintbrush
- Painter’s tape
- Plastic drop cloth or newspaper
- Fine-grit sandpaper (220 grit)
- Clear matte sealant spray
- Plastic nursery pot (to fit inside the ceramic one)
- Monstera plant
- Potting soil mix
Step 1: Preparation & Base Texture
-
Clean the surface:
Start with a clean, dry planter. If you are reusing an old pot, scrub it thoroughly to remove any dirt or salts. Wipe it down with a damp cloth to ensure there’s no dust left. -
Light sanding:
Gently scuff the surface of the pot with fine-grit sandpaper. This helps the spray paint adhere better, especially if your original pot has a glossy glaze. -
Set up your workspace:
Lay down your plastic drop cloth or newspaper in a well-ventilated area. Place the pot upside down on a scrap piece of cardboard to elevate it slightly. -
Apply stone texture:
Shake your stone-effect spray paint vigorously for at least one minute. Hold the can about 8-10 inches away and apply a light, even coat over the entire exterior of the pot. Don’t worry about full coverage yet. -
Layer the texture:
Let the first coat dry for 15-20 minutes. Apply a second coat, moving in sweeping motions to avoid drips. I like to focus on building up that speckled, sandy texture here. Repeat with a third coat if necessary until the original pot color is hidden. -
Cure the base:
Allow the stone texture paint to fully cure according to the manufacturer’s instructions. This usually takes at least 24 hours to become durable enough for taping.
Stone Texture Hack
If you can’t find stone spray paint, mix baking soda into cream acrylic paint. Dab it on with a sponge for a similar gritty, ceramic look.
Step 2: Creating the Dipped Look
-
Mark the horizon line:
Decide on the height of your black bottom section. In the example, it occupies the bottom 15-20% of the pot. Use a ruler to measure up from the bottom edge and make small pencil marks around the circumference. -
Tape it off:
Carefully apply painter’s tape around the pot, connecting your pencil marks. Press the edge of the tape down firmly with your fingernail or a credit card to prevent paint bleed. -
Protect the top:
Cover the upper cream section with plastic or paper, taping it to your horizon line tape. You don’t want any stray black paint ruining that beautiful stone texture. -
Paint the base:
Using your wide flat brush, apply the matte black acrylic paint below the tape line. Use horizontal strokes that mimic the rotation of a potter’s wheel for an organic look. -
Second coat:
Let the black paint dry to the touch (usually 20-30 minutes). Apply a second coat to ensure a deep, opaque black finish that contrasts sharply with the textured top.
Uneven Lines?
If paint bleeds under the tape, wait for it to dry fully. Then, use a small artist brush and the cream paint to carefully touch up the edge.
Step 3: Finishing & Assembly
-
Reveal the line:
While the second coat of black paint is still slightly tacky (not fully dry), carefully peel back the painter’s tape at a 45-degree angle. This creates the crispest line possible. -
Seal the work:
Once all paint is completely dry, take the pot back to your ventilated area. Spray the entire exterior with a clear matte sealant. This protects the finish from water drips during watering. -
Prepare the saucer:
For the saucer, leave it in its natural terracotta state to add warmth, or give it a quick coat of clear sealant to prevent moisture from seeping through to your furniture. -
Pot the plant:
Plant your Monstera into the plastic nursery pot using fresh potting mix. Ensure the nursery pot fits snugly inside your new decorative cover pot. -
Final arrangement:
Place the nursery pot inside the decorated ceramic pot. Set the entire assembly onto the terracotta saucer. Arrange the monstera stems so the leaves face the light source for optimal perkiness.
Now you have a stunning, boutique-style planter ready to showcase your monstera’s dramatic foliage
Woven Basket Over Pot for Soft Texture
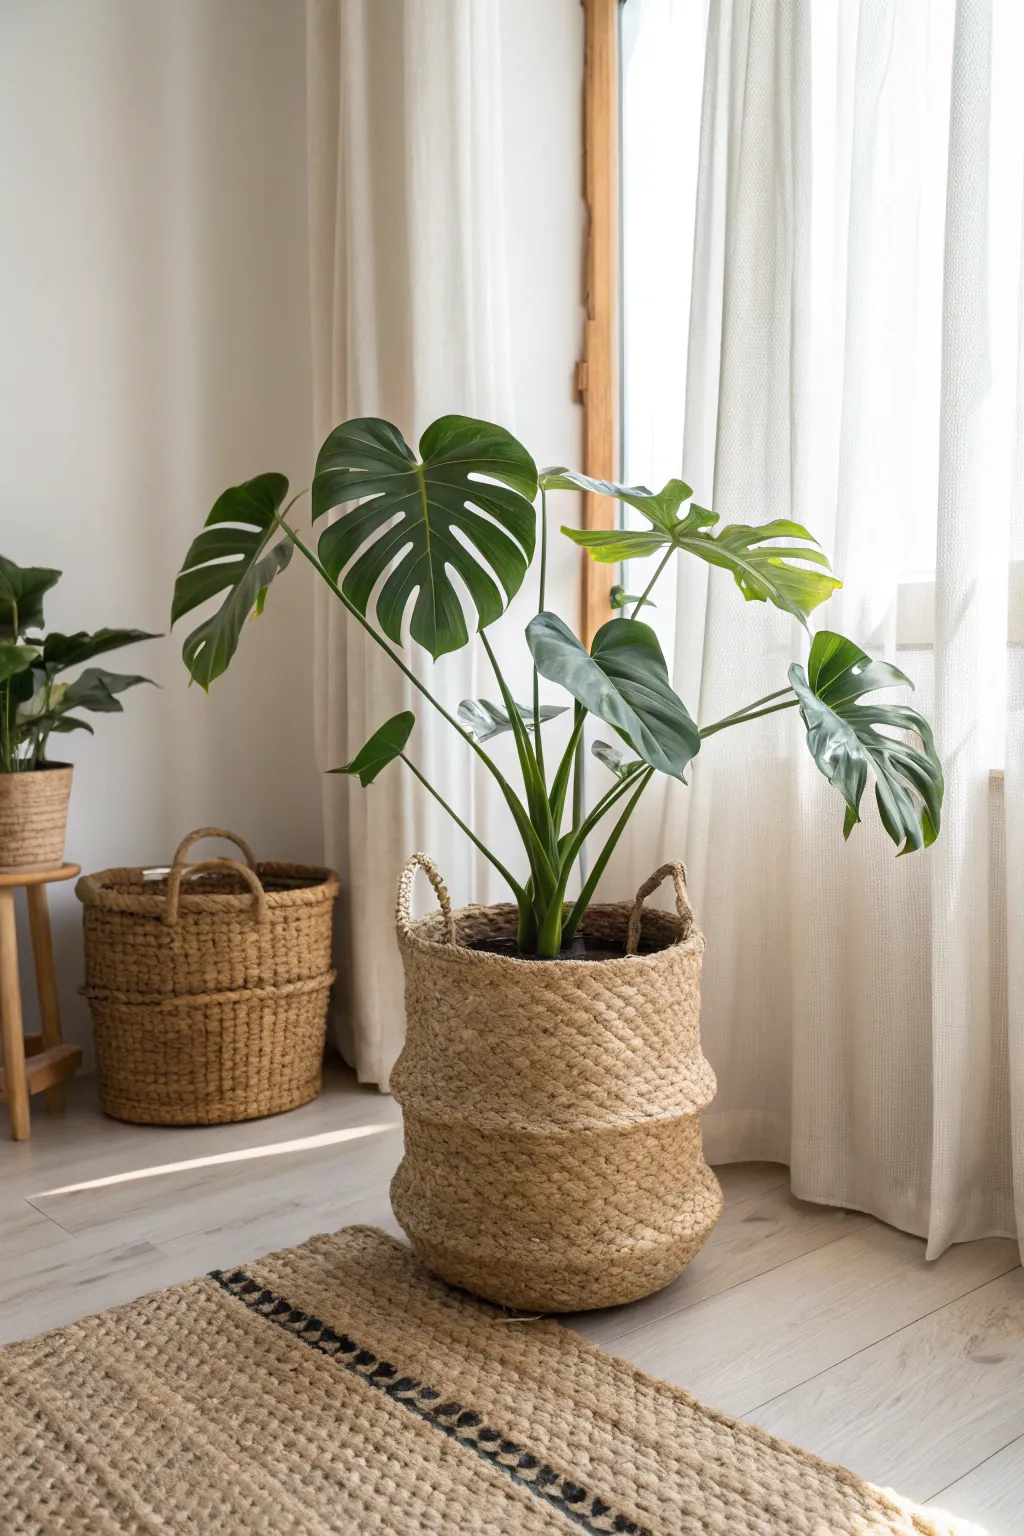
Transform a basic plastic nursery pot into a textured, earthy statement piece by nesting it inside a collapsible woven seagrass belly basket. This simple styling trick instantly adds warmth and organic softness to your indoor jungle without the need for messy repotting.
Step-by-Step Tutorial
Materials
- Large Monstera Deliciosa plant (in plastic nursery pot)
- Woven seagrass belly basket (sized 2-4 inches wider than your pot)
- Plastic saucer or drip tray (must fit inside the basket base)
- Sphagnum moss or decorative pebbles (optional)
- Plant stand or floor protector (optional)
Step 1: Preparation & Sizing
-
Check fit dimensions:
Measure the widest diameter of your Monstera’s nursery pot and compare it to the opening and belly width of your woven basket. The basket needs to be slightly larger to accommodate the pot without bulging awkwardly. -
Prepare the basket shape:
If your basket arrived folded (which is common for these belly baskets), pop the top half up so handles differ vertically. Gently push and mold the sides with your hands to create a rounded, symmetrical curve. I find that steaming the basket lightly helps remove creases and restores that perfect round shape. -
Inspect for stability:
Set the basket on a flat surface to ensure it doesn’t wobble. If the bottom is uneven, gently press down on the interior base to flatten the woven fibers.
Wobbly Basket?
If the basket base is uneven, place a cork trivet or a circular piece of thick cardboard inside, under the saucer. This creates a flat, rigid foundation for the heavy pot.
Step 2: Assembly
-
Insert drainage protection:
Place a plastic saucer or drip tray directly into the bottom of the basket. This is crucial for protecting the natural fibers from water damage and preventing leaks onto your floor. -
Test the tray fit:
Ensure the saucer sits flat and doesn’t tilt. If the basket bottom is slightly convex inside, you might need a smaller saucer that sits deeper in the center well. -
Position the plant:
Lift your Monstera and carefully lower it into the basket, resting it squarely on the saucer. Adjust the rotation of the plant so its ‘front’ (where the leaves face outward most naturally) aligns with how you plan to display the basket. -
Check height alignment:
The rim of the plastic nursery pot should sit just below the rim of the basket. If the plant sits too low, add a riser—like an inverted smaller saucer or a block of wood—under the drip tray to lift it up.
Go Boho-Chic
Customize your basket by adding a hanging tassel to one handle or painting the bottom half of the basket with white or black acrylic paint for a dipped, modern look.
Step 3: Styling & Shaping
-
Conceal the soil:
To elevate the look, cover the visible soil surface and the rim of the inner plastic pot with a layer of Spanish moss or decorative river stones. This hides the plastic mechanics and adds a finished, polished feel. -
Assess leaf clearance:
Check that none of the lower Monstera stems are being pinched by the basket handles or rim. Gently guide stems into the gaps between handles if necessary to allow them to drape naturally. -
Adjust the handles:
The handles of these baskets add great vertical interest. I typically leave them upright, but you can also fold them down if you prefer a more open, bowl-like aesthetic. -
Refine the basket shape:
Now that the weight of the plant is inside, step back and check the basket’s silhouette again. If the weight causes one side to sag, rotate the inner pot to balance the load. -
Clean the foliage:
Wipe down the large Monstera leaves with a damp cloth to remove dust and make them shine against the matte texture of the seagrass. -
Final placement:
Place your finished arrangement in bright, indirect light. The natural tones of the basket will glow beautifully near a window with sheer curtains.
Enjoy the relaxed, natural vibe your new Monstera basket brings to your living space

TRACK YOUR CERAMIC JOURNEY
Capture glaze tests, firing details, and creative progress—all in one simple printable. Make your projects easier to repeat and improve.
Planter With Built-In Moss Pole Space
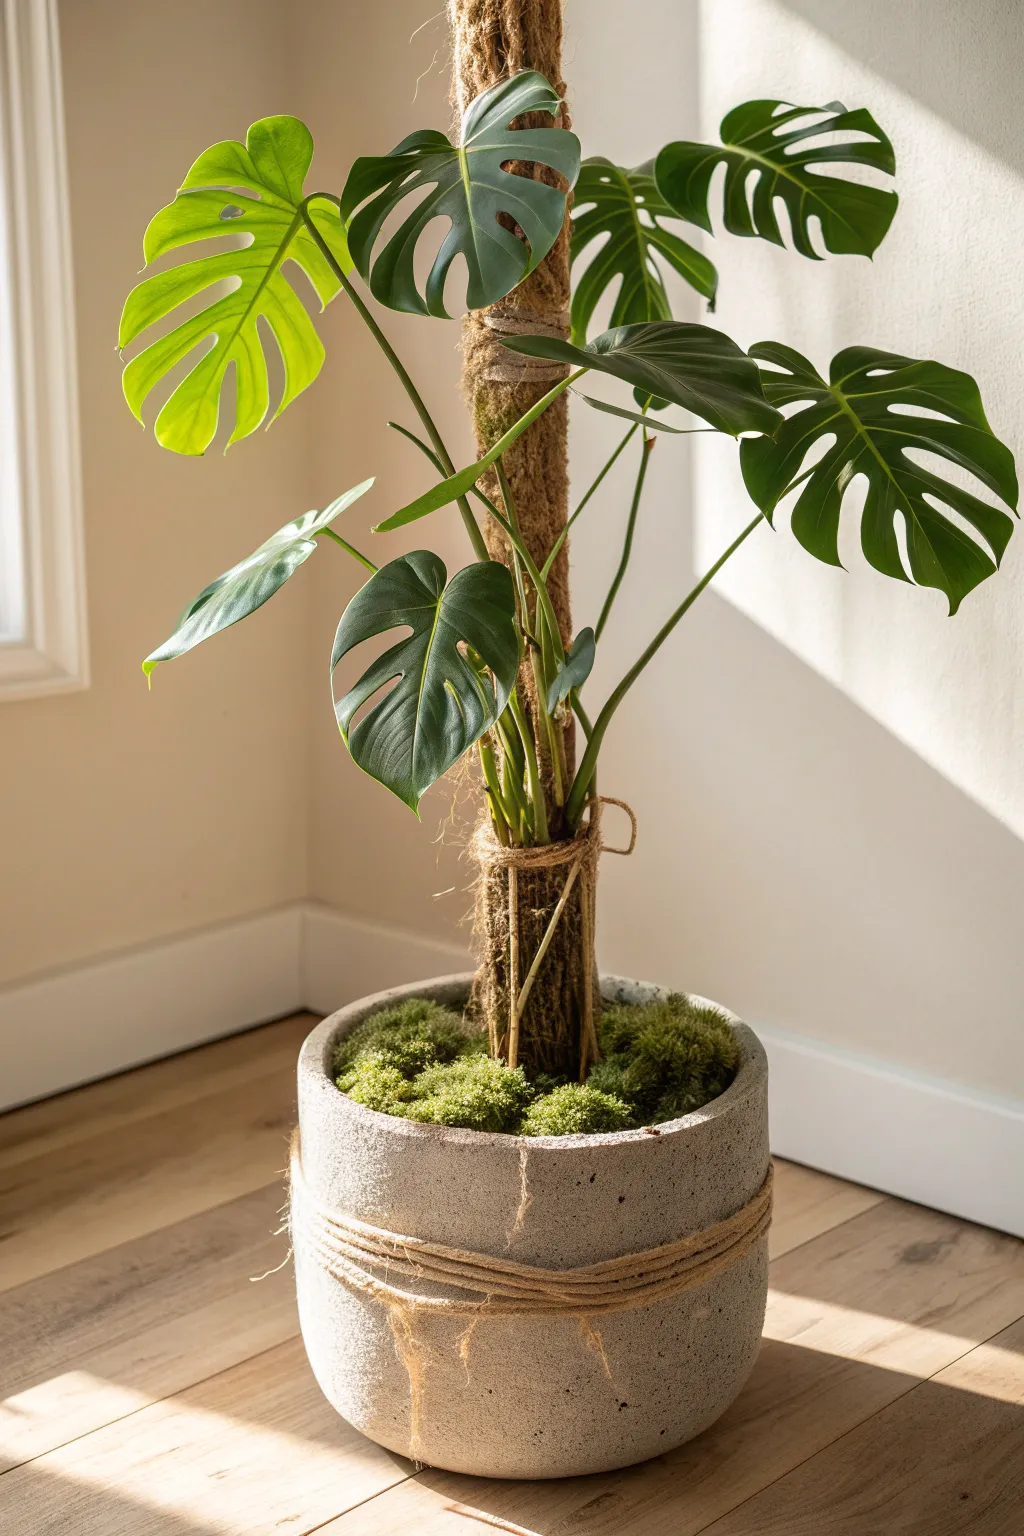
This project combines the raw, industrial beauty of a rounded concrete planter with the organic warmth of natural fibers and lush moss. It creates a seamless, built-in look for your Monstera’s support pole while adding a textural accent to any corner.
Detailed Instructions
Materials
- Large round concrete planter (approx. 12-14 inches diameter)
- Sphagnum moss pole (tall, matching planter scale)
- Monstera deliciosa plant (medium to large size)
- Premium potting mix (aroid mix preferred)
- Sheet moss or mood moss (preserved or fresh)
- Natural jute twine or hemp rope (thick gauge)
- Natural jute twine (thin gauge for tying)
- Gravel or LECA for drainage layer
- Landscape fabric or mesh
- Scissors
- Chopstick or dowel (for tucking moss)
Step 1: Preparing the Base
-
Create drainage layer:
Start by filling the bottom 2 inches of your concrete planter with gravel or LECA balls. This ensures your Monstera’s roots won’t sit in stagnant water, which is crucial for preventing root rot. -
Add separation barrier:
Cut a piece of landscape fabric or mesh to fit over the drainage layer. This keeps your potting soil from sifting down into the rocks while still allowing water to pass through. -
Position the pole:
Place your moss pole directly into the center of the pot before adding any soil. Holding it steady here is key—embedding it deeply now creates that ‘built-in’ stability later. -
Anchor with soil:
While holding the pole perfectly upright, fill the pot about one-third full with your aroid potting mix. Pack it down firmly around the base of the pole to lock it into position.
Step 2: Planting and Securing
-
Position the plant:
Gently remove your Monstera from its nursery pot. Tease the roots slightly, then arrange the plant so its back (where the aerial roots emerge) is facing the moss pole. -
Fill and tuck:
Fill the rest of the planter with soil, working around the root ball. I find using a chopstick helps to gently push soil into air pockets without damaging the roots. -
Initial tie-up:
Identify the thickest stems of the Monstera. Using the thin jute twine, gently secure these stems to the moss pole. Don’t tie the petioles (leaves), only the main vine stems. -
Create the twine accent:
Take a length of thin twine and wrap it several times around the base of the plant stems and the pole together, about 4-6 inches above the soil line. Tie it off securely but not too tight; this visually integrates the plant with the pole.
Wobbly Pole Fix
If the pole still leans after planting, insert two bamboo plant stakes deep into soil on opposite sides and zip-tie them to the pole’s core structure.
Step 3: Finishing Touches
-
Apply the moss topper:
Take your sheet moss or mood moss and lay it thickly over the exposed soil surface. Press it down around the edges of the pot and snugly against the base of the pole. -
Wrap the pot:
Grab your thick gauge jute rope. Starting about 3 inches down from the rim, wrap the rope around the concrete planter two or three times. -
Secure the rope:
You can let gravity hold the rope if it’s rough enough, or use a tiny dot of hot glue to secure the ends subtly at the back. Let the loose ends fray slightly for a rustic texture. -
Water and settle:
Water the plant thoroughly to settle the soil. If using fresh moss on top, give it a light misting. -
Final adjustment:
Step back and check the balance. Adjust the leaves gently to face your light source, ensuring the dramatic shadows fall just right.
Level Up: Ombre Moss
Mix different moss types (like cushion moss and reindeer moss) on the soil surface to create a textured, multi-tonal green landscape.
Enjoy your customized planter that brings a calm, rooted atmosphere to your indoor jungle
Ceramic Planter With Stake and Soft Ties
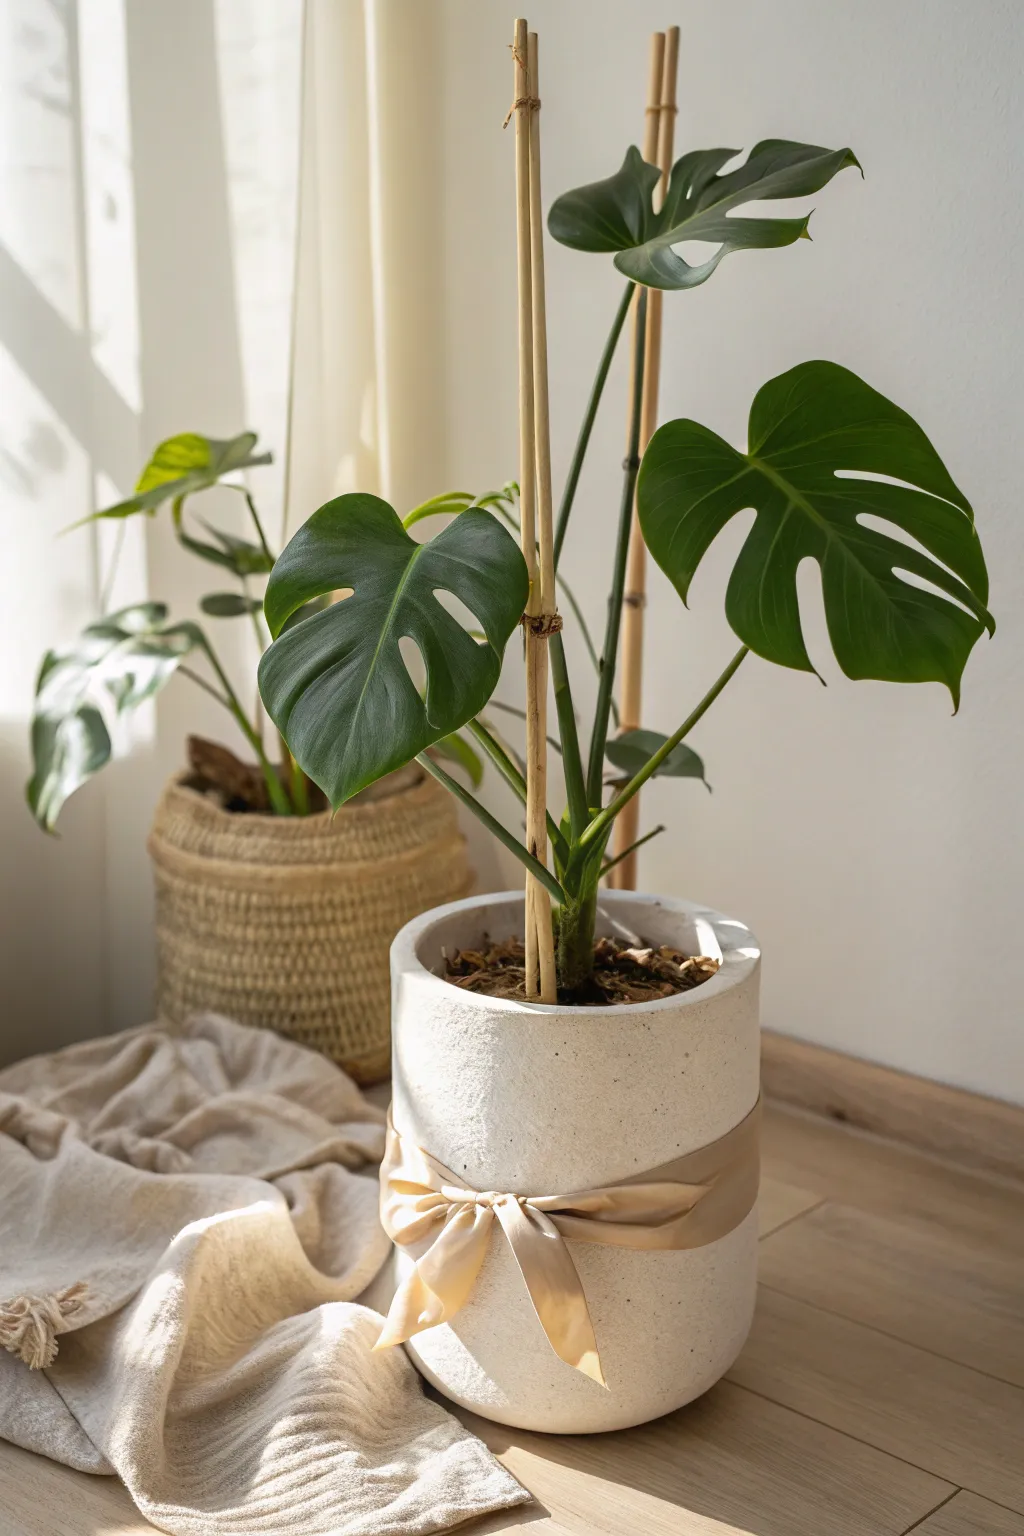
Elevate your indoor jungle with this chic, minimalist planter setup that provides essential support for climbing aroids. The combination of a textured ceramic pot, natural bamboo stakes, and a soft ribbon accent creates a sophisticated look that blends seamlessly with modern decor.
Step-by-Step Tutorial
Materials
- White cylindrical ceramic planter (approx. 8-10 inches)
- Monstera Deliciosa plant
- High-quality potting mix (aroid blend preferred)
- Two thin bamboo stakes (approx. 2-3 feet tall)
- Soft beige satin or silk ribbon (2 inches wide)
- Gardening twine or soft jute
- Small trowel
- Scissors
- Drainage pebbles (optional)
Step 1: Planting Preparation
-
Prepare the pot drainage:
Begin by ensuring your ceramic planter has adequate drainage holes. If the holes are large, cover them with a small piece of mesh or a pottery shard to keep soil in. If using a pot without holes, add a layer of drainage pebbles at the bottom. -
Create a soil base:
Fill the bottom third of the planter with your specialized aroid potting mix. This airy soil allows the roots to breathe and prevents rot. -
Position the plant:
Gently remove your Monstera from its nursery pot, loosening the root ball slightly if it’s tightly bound. Place it centrally into the ceramic planter, ensuring the base of the stems sits just below the rim. -
Establish the stakes:
Before filling in the rest of the soil, insert the two bamboo stakes deep into the pot. Position them towards the back of the plant, near the main stem, ensuring they hit the bottom of the pot for maximum stability. -
Fill and tamp:
Add the remaining soil around the root ball and stakes. Press the soil down firmly but gently with your fingers to eliminate air pockets and secure the stakes in place.
Step 2: Support and Styling
-
Identify attachment points:
Look for the thickest, sturdiest stems on your Monstera that need vertical guidance. You aren’t tying the leaves themselves, but the main petioles or vine structure. -
Initial ties:
Using gardening twine or soft jute, loosely tie the main stem to the bamboo stakes. I like to use a figure-eight knot here to prevent the tie from cutting into the plant tissue as it grows. -
Adjust tension:
Check that the plant is standing upright but not pulled too tightly against the stakes. The plant should still have a natural, slightly leaning posture. -
Clean the planter:
Wipe down the exterior of the ceramic pot with a damp cloth to remove any soil dust or fingerprints from the potting process. -
Measure the ribbon:
Unspool your wide beige ribbon and wrap it around the center of the pot to gauge the length. Cut enough length to allow for a generous bow. -
Wrap the ribbon:
Position the ribbon horizontally across the middle of the cylinder. Ensure it lies flat against the ceramic surface without twisting. -
Tie the bow:
Tie a classic bow at the front center of the pot. Adjust the loops so they are even and manipulate the tails so they drape softly downwards. -
Trim ribbon ends:
Cut the ends of the ribbon at a diagonal angle for a polished finish that prevents fraying. -
Surface dressing:
Add a thin layer of decorative bark or moss on top of the soil if desired, though leaving the soil bare works for this minimalist aesthetic. -
Final watering:
Water the plant thoroughly until water runs out the bottom (if drainage exists), or water sparingly if using a sealed pot, then place it in bright, indirect light.
Natural Stain Tip
Soak new bamboo stakes in strong black tea for an hour, then let dry. This darkens the wood slightly, giving it an aged, expensive look that matches pot decor.
Seasonal Switch
Swap the beige ribbon for velvet in winter or linen in summer. Changing the textile texture instantly updates the room’s vibe without repotting.
Enjoy the refined blend of structure and softness this planter brings to your space
Corner Planter Moment With Two-Tone Glaze
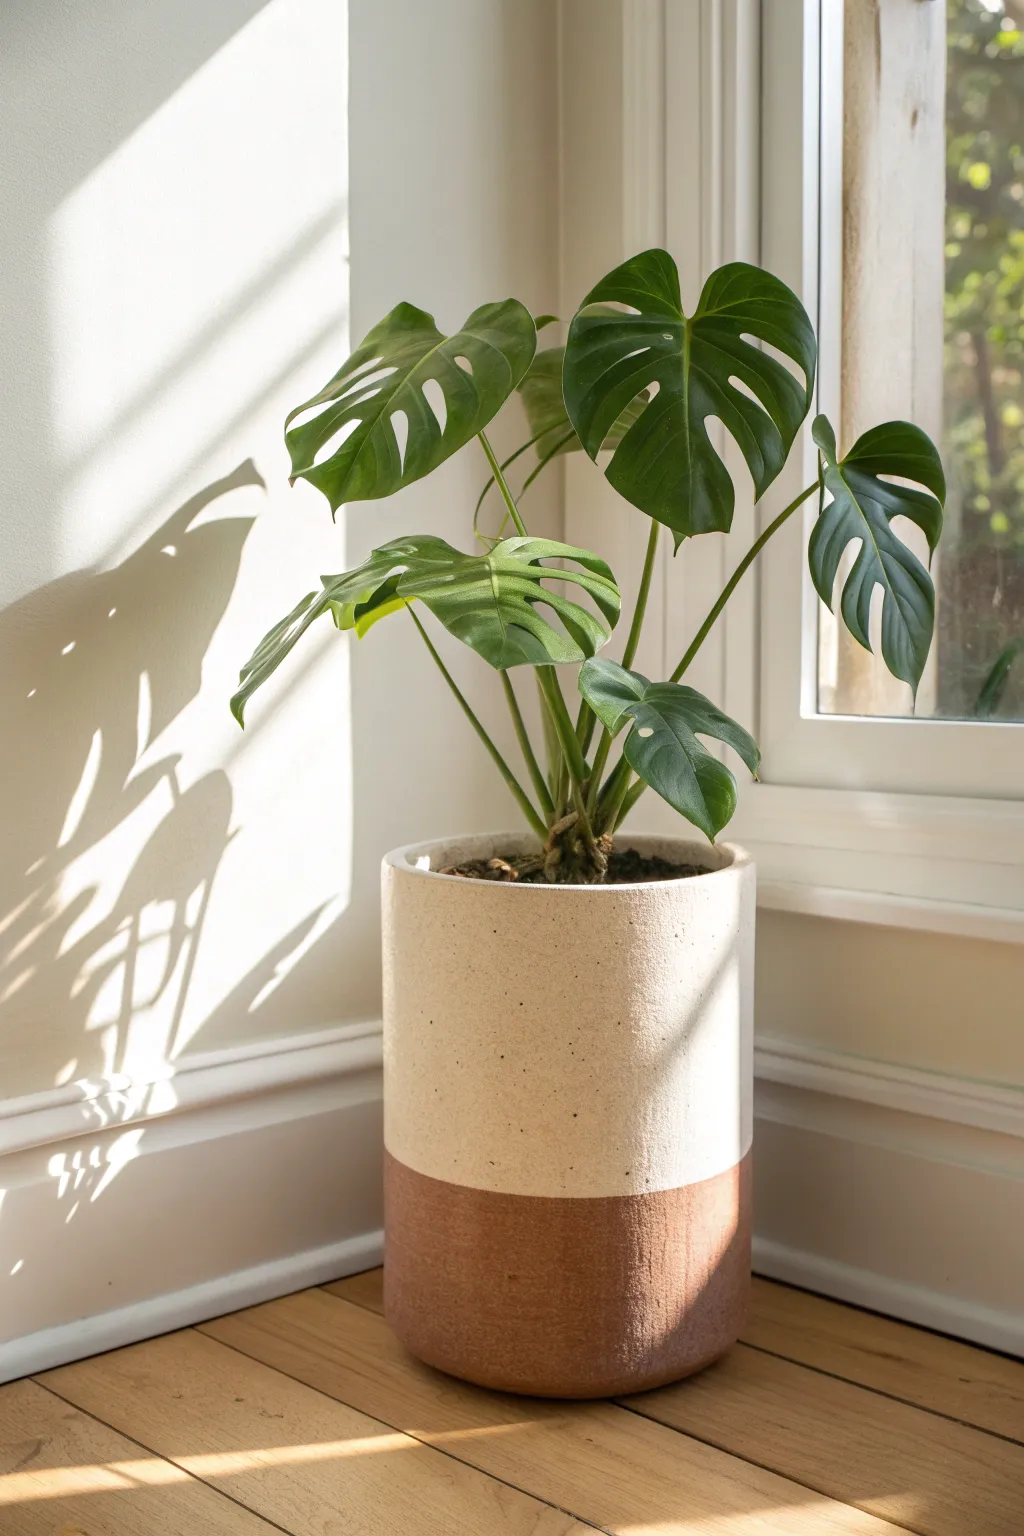
Transform a plain cylindrical planter into a chic, gallery-worthy vessel with this simple two-tone glazing technique. By combining a raw terracotta base with a speckled creamy upper, you create a modern, earthy home for your Monstera that catches the light beautifully.
Step-by-Step
Materials
- Cylindrical ceramic or terracotta planter (plain)
- Painter’s tape (wide width)
- Sandpaper (medium grit)
- White or cream ceramic spray paint (matte or satin finish)
- Terracotta or brown acrylic craft paint (matte)
- Faux stone or granite spray paint (light beige color)
- Clear matte sealant spray
- Paintbrush (medium flat brush)
- Plastic drop cloth or old newspaper
- Ruler or measuring tape
- Pencil
Step 1: Prep and Prime
-
Clean surface:
Begin by thoroughly wiping down your planter with a damp cloth to remove any dust, dirt, or oils. Let it dry completely before moving forward. -
Light sanding:
Scuff the surface of the planter gently with sandpaper. This helps the new layers of paint adhere better, especially if the original pot has a glossy finish. -
Base coat application:
Place the planter upside down on your drop cloth. Apply a coat of the white or cream ceramic spray paint over the entire exterior. I like to do two thin coats rather than one heavy one to prevent drips. -
Dry completely:
Allow the base coat to dry fully according to the manufacturer’s instructions, usually about an hour or two.
Clean Lines Hack
Before painting the bottom color, paint a thin layer of the TOP color (cream) over the tape edge. This seals the gap so any bleed is invisible.
Step 2: Creating the Speckled Top
-
Apply texture:
To achieve that stoneware look, lightly mist the planter with the faux stone spray paint. Hold the can further away than usual—about 12-15 inches—so you only get a fine dusting of speckles rather than full coverage. -
Inspect coverage:
Check the speckle density. You want subtle flecks that mimic ceramic clay, not a heavy stone texture. Let this layer dry completely.
Step 3: Blocking the Design
-
Measure the dividing line:
Decide on the proportion for your two-tone look. For this project, measure about one-third up from the bottom of the pot. Mark this height with a pencil at several points around the circumference. -
Connect the marks:
Using the pencil marks as a guide, carefully apply a strip of painter’s tape around the planter. Ensure the tape line is straight and level. -
Seal the tape:
Press down firmly on the edge of the painter’s tape with your fingernail or a credit card to prevent paint from bleeding underneath. -
Protect the top:
Cover the upper two-thirds of the pot (the part you want to remain cream) with paper or plastic, taping it securely to your dividing line so no overspray hits it.
Add Dimension
Mix a small amount of baking soda into your bottom acrylic paint. This creates a gritty, authentic terracotta texture that looks and feels like real clay.
Step 4: Painting the Base
-
Mix the bottom color:
Pour your terracotta or brown acrylic paint onto a palette. If the color feels too flat, mix in a tiny drop of orange or red to warm it up. -
Apply first coat:
Using the flat paintbrush, paint the exposed bottom section of the planter. Use horizontal strokes that follow the curve of the pot for a smooth finish. -
Texture technique:
While the paint is still wet, you can dab it lightly with a dry sponge or paper towel to give it a slightly rough, earthenware texture similar to the photo. -
Second coat:
Once dry to the touch, apply a second coat to ensure the color is rich and opaque. I find this creates that dipped-clay aesthetic perfectly.
Step 5: Finishing Touches
-
Remove tape:
Carefully peel away the painter’s tape while the bottom paint is still slightly tacky. Pull the tape away at a 45-degree angle to ensure a crisp, clean line. -
Touch ups:
If any paint bled through, use a small detail brush and a bit of the cream base paint to tidy up the line. -
Seal the deal:
Once the entire pot is dry (give it at least 24 hours to cure), spray the entire exterior with a clear matte sealant. This protects the finish from water drips creating spots later on. -
Planting:
Pot your Monstera directly into the planter, or place a nursery pot inside if you prefer effortless watering.
Your new custom planter creates a serene and modern focal point for any corner of the room
Textured Planter to Echo Leaf Drama
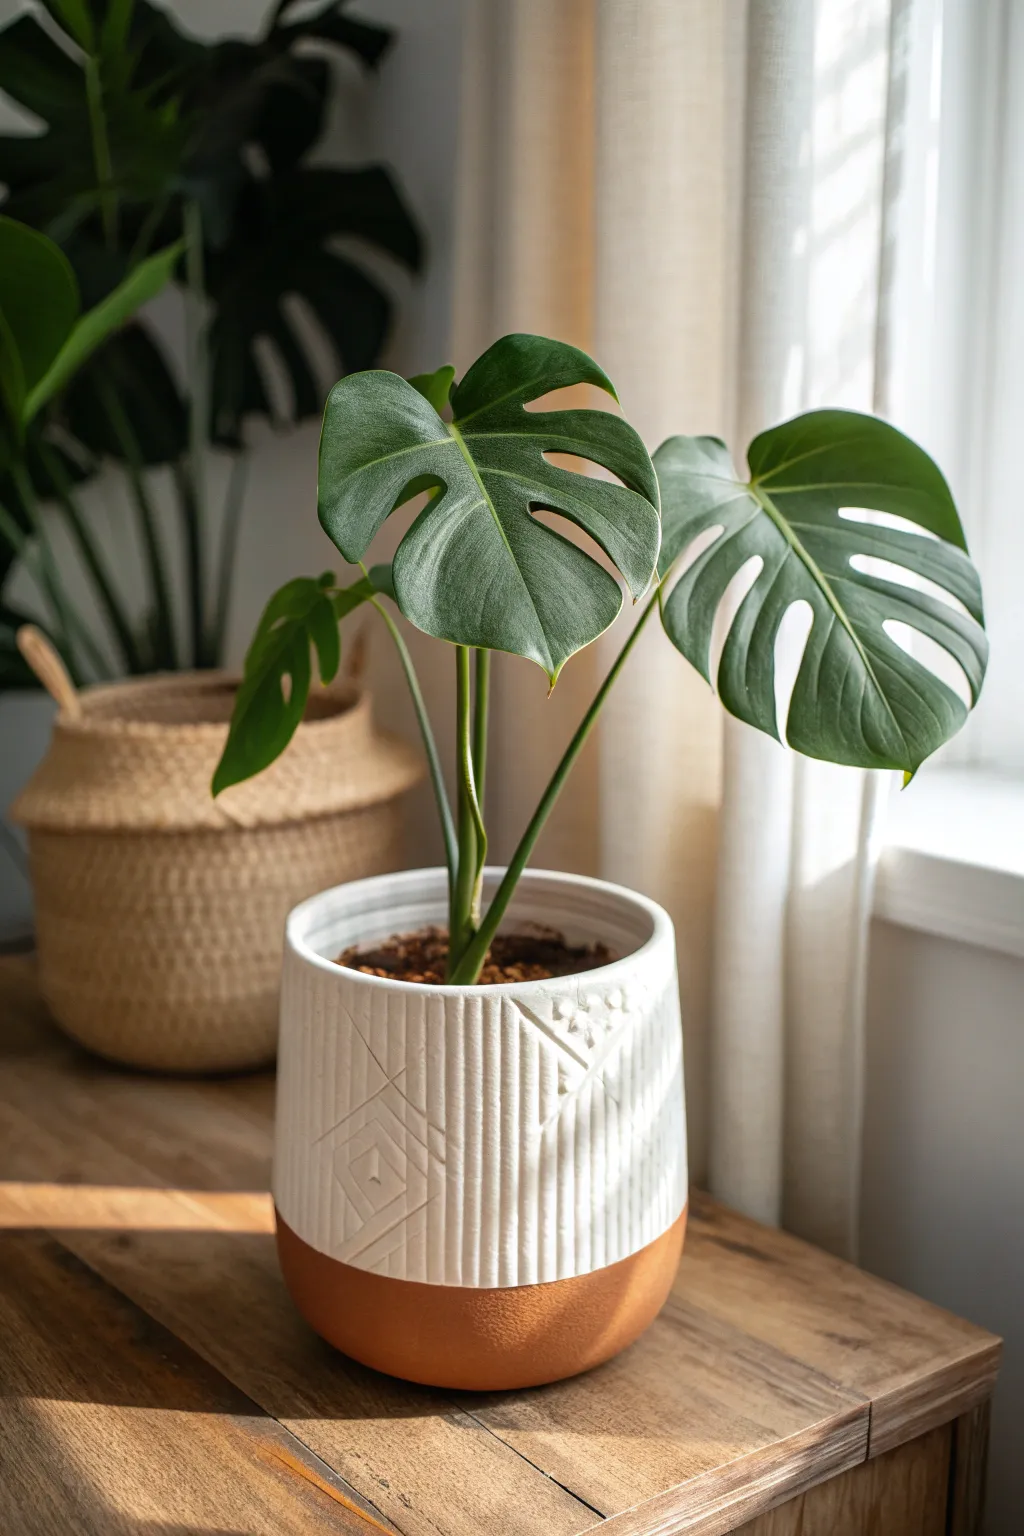
Elevate a simple terracotta pot into a modern, textured masterpiece that perfectly complements the dramatic leaves of a Monstera. This project combines vertical fluting with geometric relief and crisp white paint for a high-end ceramic look.
Step-by-Step Tutorial
Materials
- Standard terracotta pot (cylindrical shape preferred)
- Air-dry clay or polymer clay (white)
- Clay carving tools or a wooden skewer
- Rolling pin
- Ruler
- Craft knife or scalpel
- Water bowl and sponge
- Pottery sealer or strong craft glue
- White acrylic paint (matte finish)
- Small flat paintbrush
- Painter’s tape
- Clear matte varnish spray
Step 1: Preparation & Clay Application
-
Clean and tape:
Begin by wiping down your terracotta pot with a damp cloth to remove any dust or oils. Once dry, apply a strip of painter’s tape around the pot, marking off the bottom third that you want to leave as exposed clay. -
Condition the clay:
Take a large chunk of air-dry clay and knead it in your hands until it becomes soft, pliable, and free of cracks. -
Roll out the slab:
Using a rolling pin, roll the clay out on a smooth surface into a long rectangular slab. Aim for a thickness of about 1/4 inch (6mm). Ensure the length is enough to wrap around the circumference of your pot. -
Apply adhesive:
Brush a thin layer of craft glue or dedicated clay adhesive onto the terracotta surface above the taped line. This helps the clay bond securely to the porous pottery. -
Wrap the pot:
Carefully lift your clay slab and wrap it around the glued section of the pot. Press it firmly against the terracotta, smoothing out any air bubbles as you go. -
Create the seam:
Where the two ends of the clay meet, slice vertically with your knife to create a clean butt joint. Use a little water on your finger to smudge and smooth the seam until it disappears completely. -
Trim the edges:
Use your craft knife to slice away excess clay at the top rim and along the bottom edge where it meets the painter’s tape. Peel away the tape gently to reveal a crisp line.
Step 2: Carving the Texture
-
Mark vertical guides:
While the clay is still damp, use a ruler and a light touch with a needle tool to faintly mark vertical lines around the entire pot. Spacing them about 1/2 inch apart works well. -
Carve the fluting:
Using a U-shaped carving tool or the side of a wooden skewer, press into the clay along your vertical guides to create deep grooves. These ridges imitate wheel-thrown pottery. -
Smooth the ridges:
Dip your finger or a sponge in water and gently run it over the ridges you just carved. This softens any sharp crumbs of clay and gives it a refined, ceramic finish. -
Add geometric details:
Now for the ‘diamond’ feature seen in the image. Choose one section of the pot and carve diagonal lines connecting your vertical ridges to form a diamond shape. -
Embellish the geometry:
Inside your diamond outline, press additional small indentations or lines using a smaller tool to create the intricate nested pattern. I find a small flat-head screwdriver works surprisingly well for rectangular impressions. -
Dry thoroughly:
Allow the pot to dry completely. Since the clay is wrapped around a solid object, give it at least 24-48 hours in a cool, dry place to prevent cracking.
Crack Control
If hairline cracks appear in the clay as it dries, mix a tiny amount of fresh clay with water to make a paste (slip) and fill the cracks, then sand smooth.
Step 3: Finishing Touches
-
Protect the base:
Re-apply painter’s tape over the exposed terracotta bottom to protect it during the painting phase. -
Paint the textured area:
Apply two coats of white matte acrylic paint to the dried clay section. Use a small brush to get into all the deep grooves of the fluting and geometric carvings. -
Seal the work:
Once the paint is dry, take the pot outside and spray the entire piece (including the terracotta bottom if you wish) with a clear matte varnish. This protects the clay from moisture. -
Final reveal:
Remove the painter’s tape carefully. If any paint seeped under, you can gently scrape it off the terracotta with a craft knife for a perfect edge.
Go Geometric
Try mixing contrasting textures by leaving standard vertical fluting on the back and doing an complex Aztec-inspired geometric pattern on the front face.
Your stylish new planter is ready to add a touch of modern texture to your plant collection
Drainage-Friendly Planter With Catch Tray
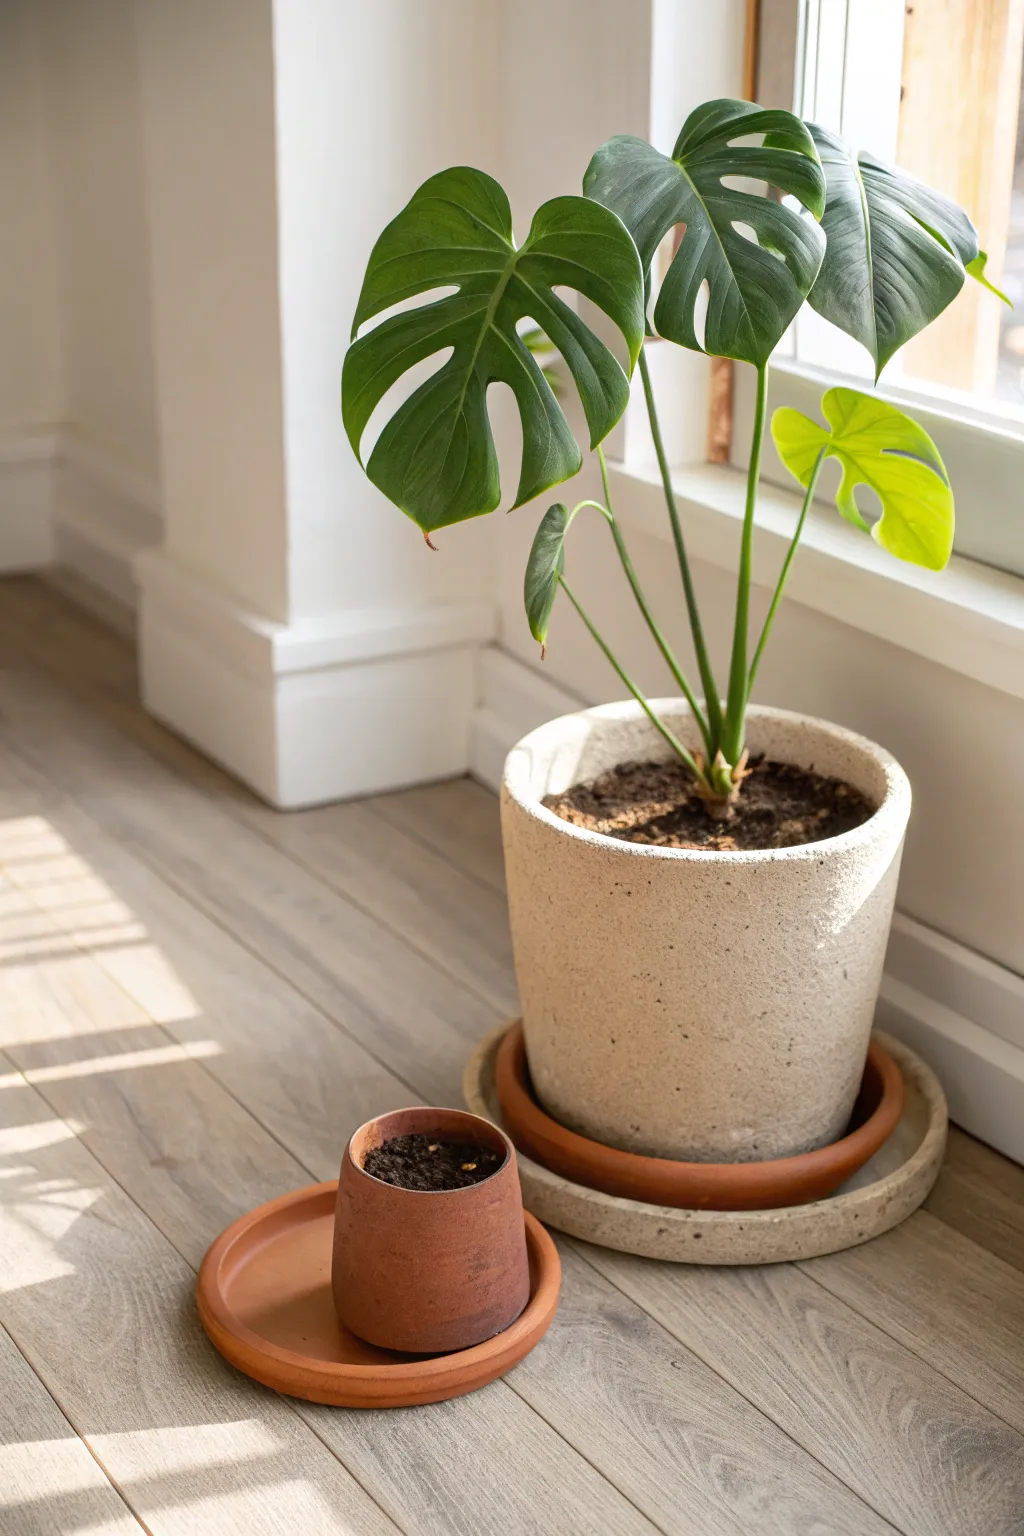
Transform a basic ceramic pot into a high-end, artisan-style vessel perfect for your monstera. This project mimics the organic look of rough-hewn stone using simple texturing mediums, creating a beautiful neutral base that lets your plant’s green foliage truly pop.
Detailed Instructions
Materials
- Large, plain ceramic or terracotta planter (cylinder shape)
- Plain terracotta saucer (slightly smaller than pot base)
- Large concrete or stone catch tray (wider than the saucer)
- Primer (spray or brush-on suitable for ceramic)
- Stone texture spray paint (cream/beige speckle)
- Matte cream or off-white acrylic paint
- Baking soda or plaster of Paris (for texture)
- Clear matte sealer spray
- Medium paint brush
- Small sea sponge
- Masking tape
- Fine-grit sandpaper
Step 1: Prepping the Base
-
Clean surface:
Begin by thoroughly cleaning your main planter to remove any dust, oils, or price stickers. Wipe it down with a damp cloth and let it dry completely. -
Sand for adhesion:
Lightly scuff the sleek exterior of your ceramic pot with fine-grit sandpaper. This creates a ‘tooth’ for the primer to grab onto, ensuring your finish lasts longer. -
Prime the pot:
Apply an even coat of primer to the entire exterior and the inner rim of the pot. Let this base coat cure fully according to the manufacturer’s instructions.
Uneven Texture?
If the baking soda paint lumps up too much, lightly sand the highest peaks once fully dry. You can re-coat with a thinner paint layer to smooth it out.
Step 2: Creating the Stone Texture
-
Mix textured paint:
In a disposable cup, mix your matte cream acrylic paint with baking soda or plaster of Paris. Aim for a ratio of roughly 1 part powder to 1 part paint until you achieve a thick, gritty paste similar to frosting. -
Apply base texture:
Using your medium brush, stipple this thick mixture onto the primed pot. I prefer to use a dabbing motion rather than long strokes to build up a random, organic relief surface. -
Let dry partially:
Allow this first textured layer to dry until it feels tacky but not set hard, usually about 15-20 minutes depending on humidity. -
Knock down high spots:
Gently gently press the flat side of your brush or a dry sponge against the tackiest areas to flatten overly sharp peaks, creating a worn, tumbled stone effect. -
Full cure:
Allow the textured paint layer to dry completely, preferably overnight, to ensure it won’t crack during the next steps.
Weathered Look
Mix a tiny drop of brown or gray paint with water to make a wash. Brush it into the crevices of the texture and wipe away the excess for an aged patina.
Step 3: Layering Color and Finish
-
Apply stone spray:
Lightly mist the dried pot with the stone texture spray paint. Hold the can about 12 inches away to avoid globs; you want a fine speckling of darker and lighter flecks to mimic granite or sandstone. -
Sponge blending:
Before the spray dries completely, dab a sea sponge lightly over the surface to blend the speckles into the cream texture, softening the look so it feels natural rather than manufactured. -
Dry and inspect:
Let the paint layers dry. Check for any bald spots where the primer shows through and touch them up with your textured paint mix if needed. -
Seal the deal:
Once you are happy with the finish, spray the entire exterior with a clear matte sealer. This is crucial for protecting the texture from water drips when watering your monstera.
Step 4: Assembling the Drainage System
-
Prepare the saucer:
Take your plain terracotta saucer. You can leave this in its natural state to provide a warm color contrast, as seen in the inspiration photo, or seal the inside to prevent water seepage. -
Prepare the catch tray:
Clean your large concrete or stone catch tray. If it’s too rough, you might want to attach small felt pads to the bottom to protect your floors. -
Final assembly:
Place the large concrete tray on the floor first. Center the terracotta saucer on top of it, and finally, place your newly textured planter inside the saucer. -
Potting up:
Fill the planter with a chunky, well-draining aroid mix and plant your monstera, ensuring the soil line is below the painted rim.
Now you have a sophisticated, layered planter setup that handles drainage perfectly while looking effortless
Sculptural Planter That Frames Aerial Roots
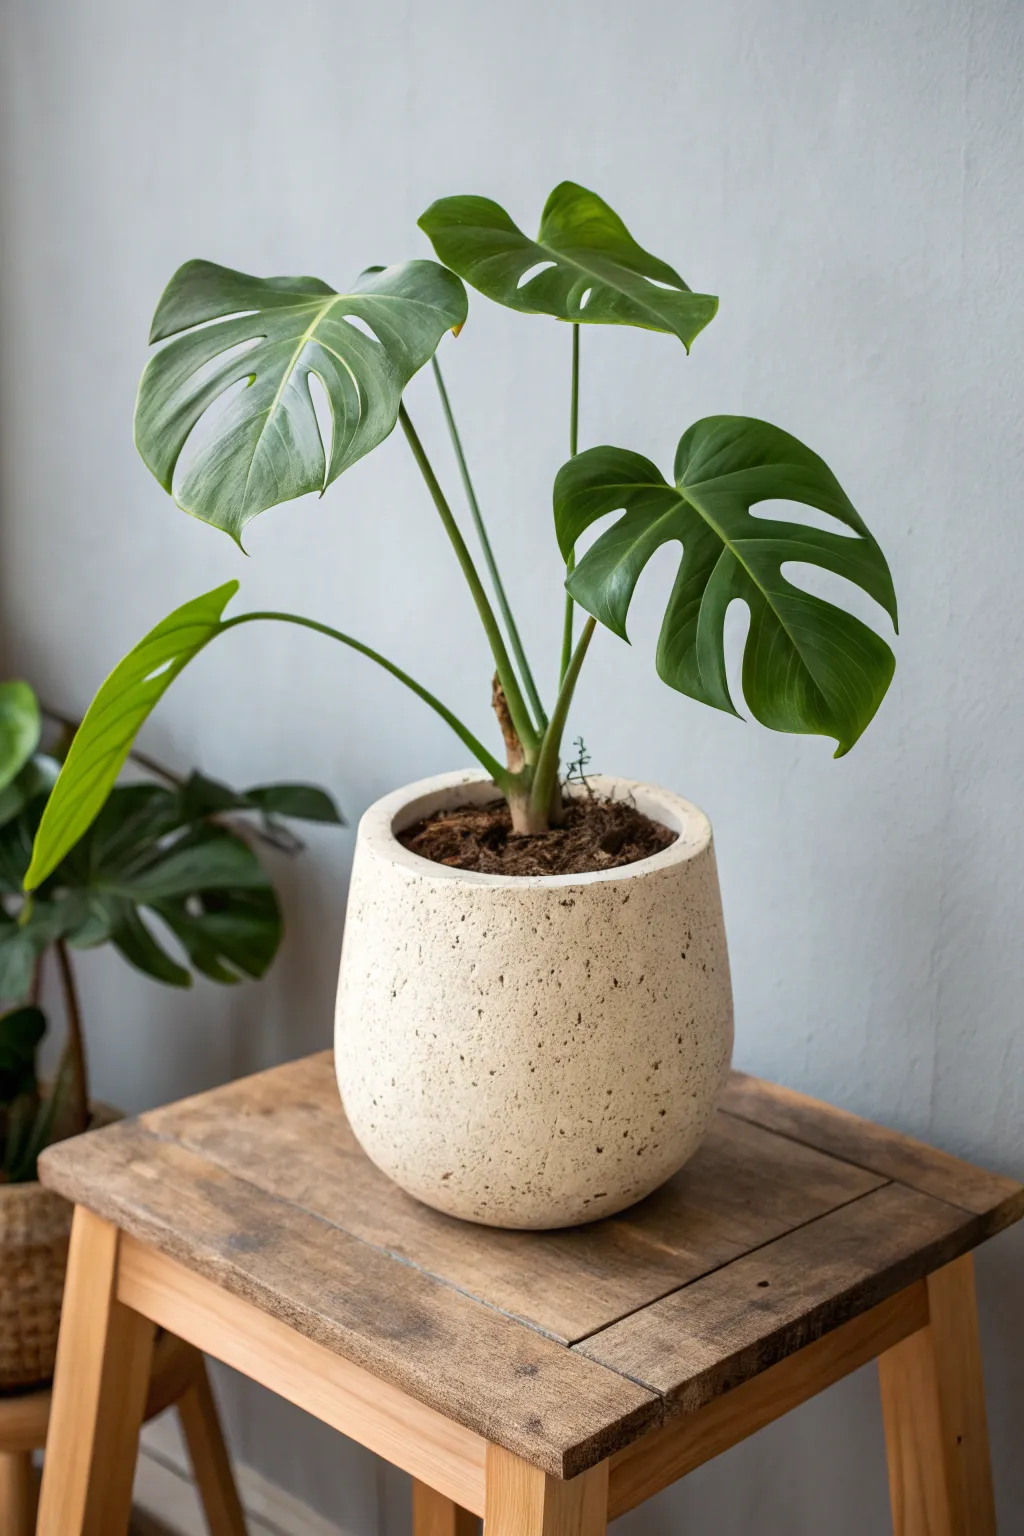
Transform a plain, inexpensive plastic or ceramic pot into a high-end sculptural vessel with a textured stone finish. This project uses simple paint techniques to mimic the look of speckled terrazzo or limestone, creating the perfect neutral backdrop for your Monstera’s dramatic foliage.
Step-by-Step Guide
Materials
- Round planter pot (plastic or ceramic)
- Sandpaper (120-grit)
- White or cream spray paint (matte finish)
- Stone texture spray paint (optional base)
- Acrylic paints (black, dark brown, and beige)
- Old toothbrush or stiff bristle brush
- Matte clear sealer spray
- Drop cloth or cardboard
- Gloves
- Painter’s tape (if masking the inside rim)
Step 1: Preparation
-
Select your vessel:
Choose a round, bulbous pot to match the sculptural shape shown in the image. Thrift stores are great for finding shapes that just need a surface update. -
Clean the surface:
Wipe down the entire planter with soapy water to remove dust, grease, or price tag residue. Let it dry completely. -
Rough it up:
If your pot is plastic or glossy ceramic, scuff the surface thoroughly with 120-grit sandpaper. This creates ‘tooth’ for the paint to adhere to, ensuring your faux stone finish lasts. -
Mask the interior:
Place painter’s tape just below the inner rim if you want to keep the inside clean, though painting a few inches down usually looks more professional.
Paint Peeling?
If paint lifts off plastic pots, the surface wasn’t sanded enough. Sand firmly and use a spray primer specifically designed for plastics before reapplying color.
Step 2: Base Coat Application
-
Set up your workspace:
Lay down your drop cloth in a well-ventilated area, preferably outdoors. -
Apply primer or texture:
Spray a light coat of stone texture spray if you want a rough, gritty feel. If you prefer a smoother stoneware look, skip straight to the color base. -
Layer the main color:
Apply your matte cream or off-white spray paint. Hold the can 8-10 inches away and use sweeping motions. -
Build coverage:
Apply 2-3 thin coats rather than one heavy one to prevent drips. Allow about 15 minutes of drying time between these layers. -
Inspect for evenness:
Check the pot from all angles to ensure the original color isn’t showing through, especially under the rim.
Add Weathered Texture
Before the final seal, lightly sponge some diluted grey paint near the bottom of the pot to mimic natural water staining and aging found on real limestone.
Step 3: Creating the Speckle Effect
-
Prepare the splatter mix:
Dilute a small amount of dark brown acrylic paint with water until it has a milky consistency. You want it fluid enough to fly off bristles, but not so thin it runs instantly. -
Test your technique:
Dip an old toothbrush into the paint mixture. Practice flicking the bristles with your thumb against a piece of cardboard to control the splatter size. -
Apply the dark speckles:
Work around the pot, flickering the dark brown paint onto the surface. vary your distance: closer for dense clusters, further away for a light mist. -
Add dimension with black:
Repeat the process with a small amount of diluted black paint. Use this color sparingly to create depth and contrast among the brown speckles. -
Soften with beige:
Here I like to add a very subtle layer of beige splatter. This helps blend the dark spots into the cream background so they don’t look too harsh. -
Fix mistakes:
If you get a blob that’s too large, quickly dab it gently with a paper towel to lift the excess, or wait for it to dry and sponge a little cream paint over it.
Step 4: Sealing and Planting
-
Dry thoroughly:
Let the paint cure for at least 24 hours. This is crucial to prevent the paint from bubbling when you water your plant later. -
Apply sealer:
Spray the entire exterior with a matte clear coat. This protects your faux stone finish from moisture and scratches. -
Add drainage:
If your pot doesn’t have a hole, use a masonry or plastic drill bit to create one now, or plan to use a nursery pot inside as a cachepot. -
Plant your Monstera:
Fill with high-quality potting mix and situate your plant, ensuring the aerial roots have space to cascade over the edge of your new sculptural creation.
Place your new planter on a wooden stool or stand to let the light highlight the subtle texture you have created
Geometric Planter for Modern Spaces
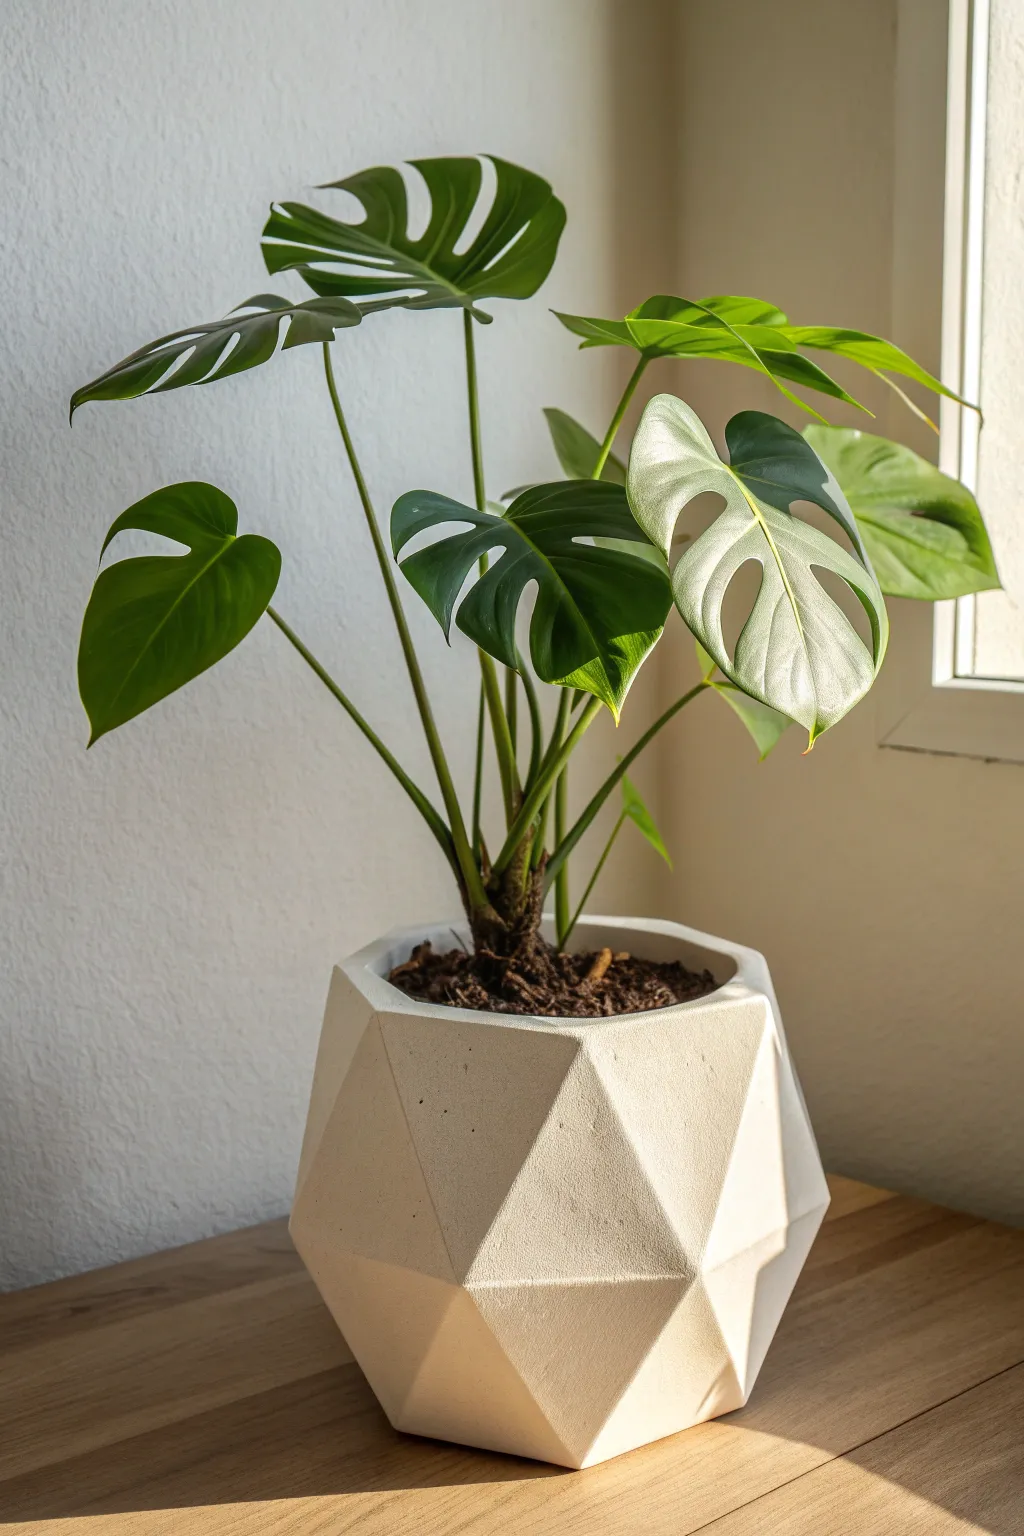
Elevate your Monstera’s display with this striking, faceted concrete planter that perfectly blends brutalist textures with organic greenery. This project uses a custom geometric mold to create a high-end, architectural vessel that looks far more expensive than its material cost.
Step-by-Step Tutorial
Materials
- Fine-grain concrete mix or white cement
- Cardboard or poster board (for the outer mold)
- Plastic container (for the inner mold, slightly smaller than the outer form)
- Duct tape or packing tape
- Hot glue gun and glue sticks
- Cooking spray or petroleum jelly (release agent)
- Sandpaper (120 and 220 grit)
- Utility knife or craft scissors
- Ruler and pencil
- Mixing bucket and stir stick
- Protective gloves and mask
- Water
Step 1: Designing the Geometric Mold
-
Sketch the template:
Begin by drawing a template for your faceted shape on cardboard. The design requires a series of connecting triangles and pentagons; you can find printable ‘geometric planter templates’ online to trace if you prefer precision over freehand sketching. -
Cut the shapes:
Carefully cut out your cardboard template using a sharp utility knife. Ensure your edges are crisp and straight, as any jagged lines will transfer directly to your finished concrete surface. -
Score the fold lines:
Using the back of your blade or a dull knife, lightly score the internal lines where the cardboard needs to fold. This crucial step ensures sharp, distinct angles on the exterior of your pot rather than rounded curves. -
Assemble the outer form:
Fold along your scored lines and tape the exterior seams securely with duct tape. I always reinforce these seams thoroughly from the outside because wet concrete is heavy and can burst weak joints. -
Waterproof the interior:
If you are using cardboard, cover the *inside* of the mold entirely with packing tape. This prevents the cardboard from soggy warping and creates a smoother finish on the concrete.
Air Pocket Problems?
If you see small holes (pockmarks) after unmolding, make a thick paste with concrete and water. Rub it into the holes with a gloved finger, let dry, and sand smooth.
Step 2: Casting the Concrete
-
Prepare the release agent:
Generously coat the inside of your geometric mold and the outside of your inner plastic container (your chosen insert) with cooking spray or petroleum jelly. This ensures easy removal later. -
Mix the concrete:
In your bucket, combine the concrete mix with water according to package directions. Aim for a consistency similar to thick pancake batter or peanut butter—pourable but not watery. -
Initial pour:
Pour the concrete into the geometric mold until it is filled about one-third of the way up. Tap the mold gently against the table several times to release trapped air bubbles. -
Insert the inner mold:
Press your lubricated plastic container into the center of the wet concrete. Push it down until the concrete rises to your desired rim height, leaving about an inch of concrete thickness at the bottom. -
Weight it down:
Place heavy rocks or sand inside the plastic inner container to keep it from floating back up. Ensure it stays centered so the planter walls are of equal thickness. -
Smooth the top:
Use a small trowel or the edge of a spoon to smooth out the concrete at the rim between the two molds.
Colored Concrete Tip
Mix powdered concrete pigment into the dry mix before adding water. For a marbled effect, only partially mix two different colored batches before pouring.
Step 3: Curing and Finishing
-
Let it cure:
Place the project in a cool, dry spot out of direct sunlight. Allow it to cure for at least 24 to 48 hours. Patience is key here; unmolding too early can cause cracks. -
Remove the inner mold:
Once dry, wiggle the inner plastic container carefully. Usually, twisting it slightly helps break the suction. Use pliers to grip the edge if it’s stubborn. -
Peel away the outer mold:
Peel off the tape and cardboard from the exterior. Since this is a one-time-use mold, you can tear it away to reveal the faceted shape underneath. -
Sand the imperfections:
Start with 120-grit sandpaper to smooth any rough edges on the rim or sharp burrs on the facets. Finish with 220-grit for a satin-smooth tactile feel. -
Add drainage:
Drill a hole in the bottom carefully using a masonry bit, or simply use this vessel as a cachepot (cover pot) for a nursery plastic pot.
Now your stunning planter is ready to add a structured, artistic touch to your plant collection
Handbuilt Planter With Leaf-Imprint Details
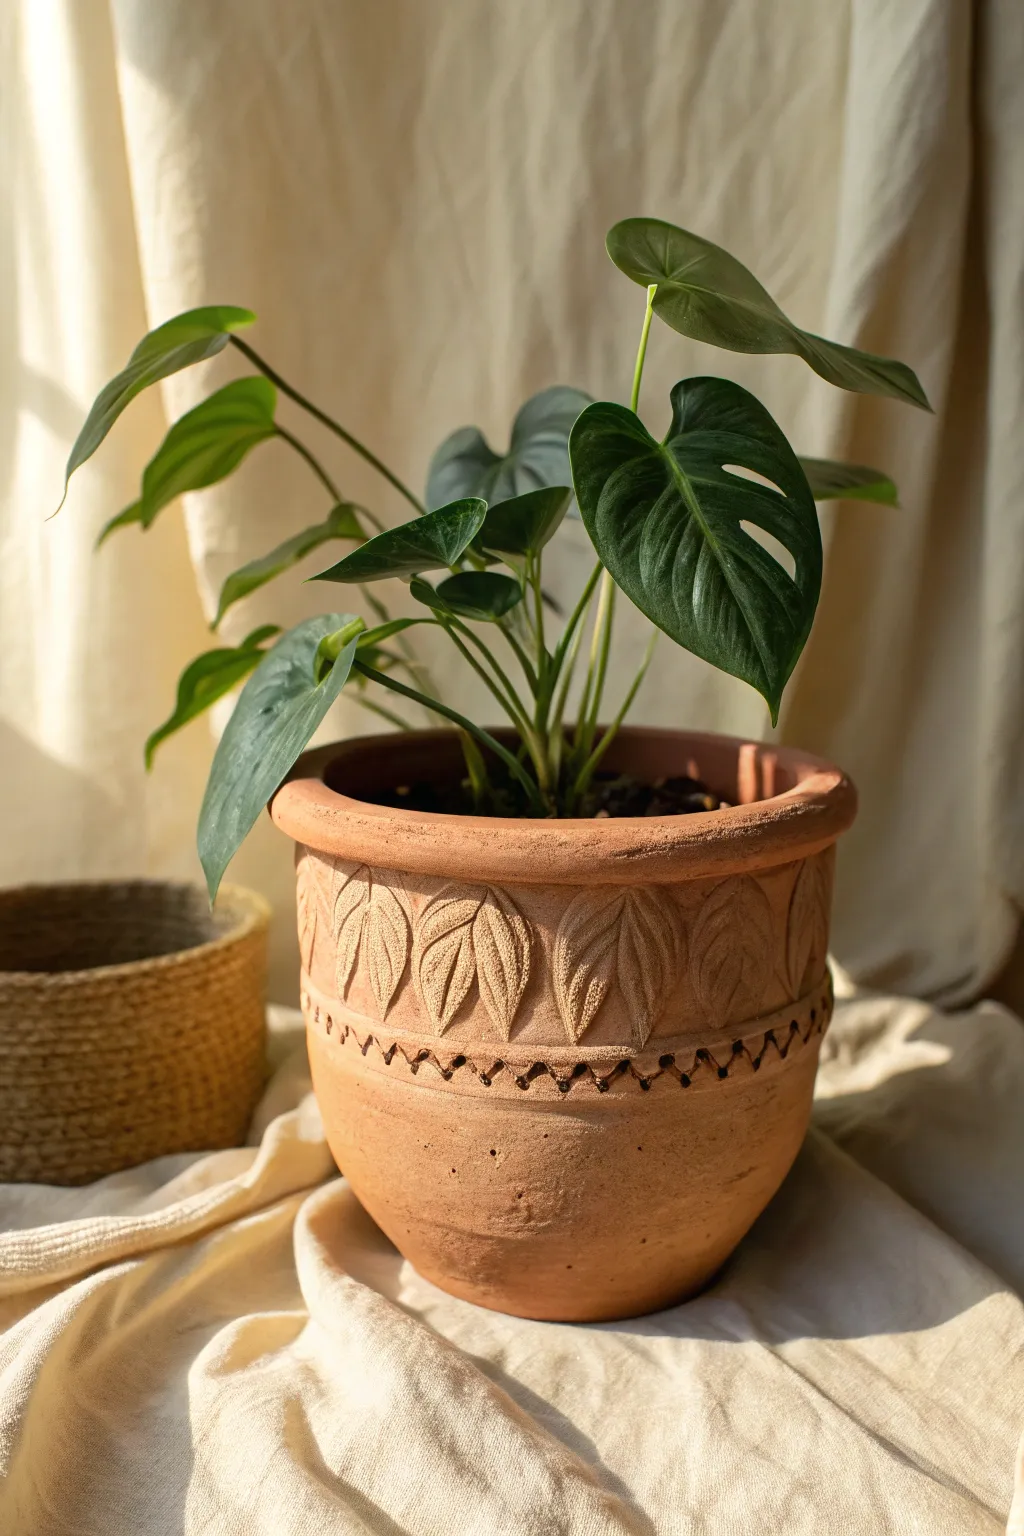
Embrace the natural beauty of earthenware with this hand-built terracotta planter featuring raised botanical motifs. The warm, unglazed clay provides a perfect, breathable home for a Monstera while the carved leaf band adds a sophisticated artisanal touch.
How-To Guide
Materials
- Terracotta clay (low-fire earthenware)
- Pottery wheel (optional, can be coil-built)
- Clay carving tools (loop tool, needle tool)
- Wooden modeling rib
- Small sponge
- Clean water
- Rolling pin (if hand-building)
- Canvas mat or work board
- Zigzag stamp or triangular tool
- Leaf-shaped cutter or cardstock template
- Scoring tool or old fork
- Slip (clay mixed with water)
Step 1: Forming the Base Vessel
-
Prepare your clay:
Begin by wedging your terracotta clay thoroughly to remove air bubbles, ensuring a smooth consistency for working. -
Build the main form:
Throw a cylinder on the wheel or build one using the coil method. Aim for a gently tapered shape that is wider at the top rim and narrows slightly toward the base, typical of classic flowerpots. -
Refine the rim:
Create a distinct, thickened rim at the top. If wheel-throwing, fold the lip over slightly; for coil building, attach a thicker coil at the top edge and smooth it down. -
Smooth the surface:
Use a wooden rib to smooth the exterior walls while the wheel spins or while rotating your hand-built pot. You want a clean canvas for your carving, but leave a slight texture if you prefer a rustic look. -
Dry to leather-hard:
Allow the pot to dry until it reaches the leather-hard stage. The clay should be firm enough to handle without deforming but still soft enough to carve into easily.
Step 2: Creating the Leaf Relief
-
Plan the leaf spacing:
Lightly mark the circumference of the pot just below the thickened rim to ensure your leaf pattern will be evenly spaced all the way around. -
Form the leaves:
Roll out a small slab of fresh clay, about 1/4 inch thick. Use a leaf-shaped cutter or cut freehand ovals with a needle tool to create the base shapes for your raised relief. -
Score and slip:
Score the back of each clay leaf and the corresponding spot on the pot wall. Apply a dab of slip to both surfaces to act as glue. -
Attach the leaves:
Press the leaves firmly onto the pot wall, arranging them side-by-side in a band. Gently blend the edges of the leaves into the pot surface so they look integrated rather than just stuck on. -
Carve the details:
Using a sharp needle tool or small carving tool, incise the central vein and side veins into each attached leaf. Make the cuts deep enough to show shadow but not so deep they weaken the structure.
Cracking Up?
If you see hairline cracks forming around the attached leaves as they dry, your slip wasn’t wet enough. Score the area again, add more slip, and compress tightly with a wooden tool.
Step 3: Adding Decorative Accents
-
Create the border:
Directly below the band of leaves, use a zigzag stamp or a triangular tool to press a continuous geometric pattern around the pot. This separates the detailed rim from the smooth body. -
Add texture marks:
Inside the zigzag pattern or just below it, create small punch marks or dots using the blunt end of a tool to add extra visual interest to the transition line. -
Sponge smooth:
Take a slightly damp sponge and very gently wipe over the carved leaves and stamped areas. This knocks back any sharp burrs or crumbs of clay without erasing your details. -
Verify drainage:
Ensure you have carved a drainage hole in the bottom center of the pot. If the clay has hardened too much, carefully drill it out now. -
Final drying:
Let the finished piece dry slowly under loose plastic for a day or two to equalize moisture, then uncover to bone dry. -
Firing:
Bisque fire the pot in a kiln to cone 04. Since this is a terracotta planter for a Monstera, you can leave it unglazed to allow the roots to breathe, or apply a clear matte glaze to the inside only.
Pro Tip: Rustic Texture
Don’t over-smooth the main body of the pot. Leaving some slight grog or tool marks adds to the handmade, earthy aesthetic that complements tropical foliage perfectly.
Once fired, fill your new artisanal creation with potting mix and your favorite Monstera cutting for a stunning display