If you want a Mother’s Day gift that feels heartfelt and actually gets used, you really can’t beat a personalized clay pot. These ideas are the kinds of projects I love seeing in my studio because they’re sweet, doable, and full of that “made just for Mom” energy.
Handprint Flower Pot for Mom
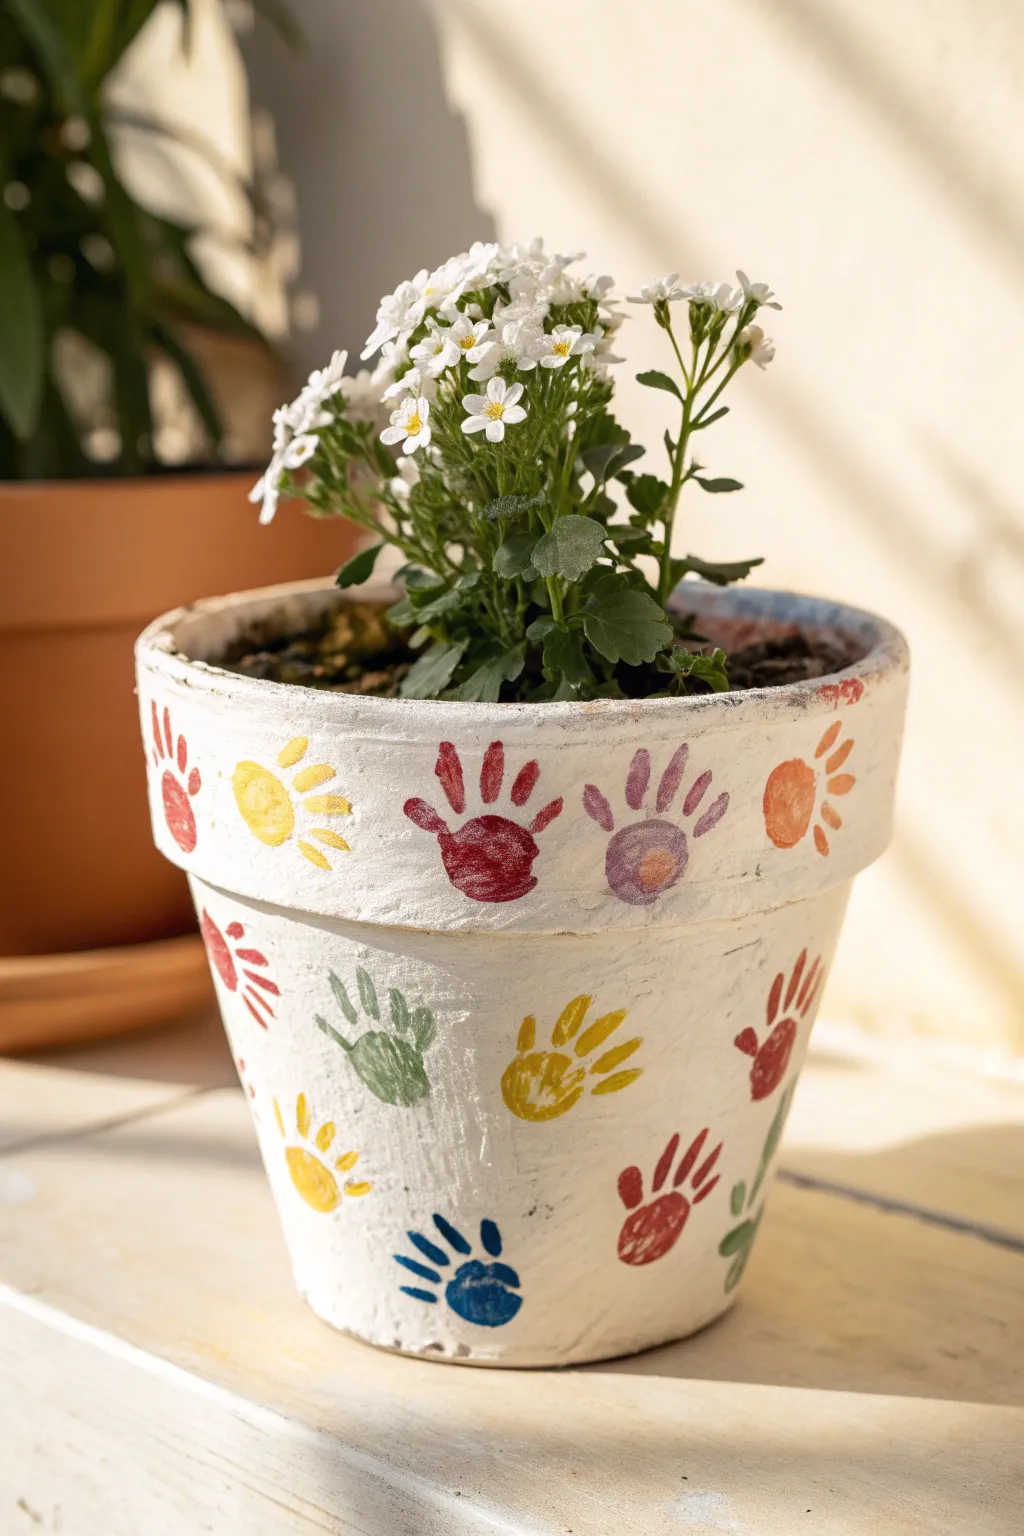
Capture the magic of littles ones’ growing hands with this sentimental yet practical garden pot. Painted with a crisp white background and adorned with a rainbow of thumbprint and palm-print flowers, it creates a cheerful, lasting memory for Mom’s favorite plant.
Step-by-Step Tutorial
Materials
- Terra cotta pot (standard size)
- White acrylic craft paint or white primer
- Various acrylic paint colors (red, orange, yellow, green, blue, purple)
- Wide foam brush or flat paintbrush
- Small round paintbrush
- Paper plate or palette
- Baby wipes or damp cloth (for quick cleanups)
- Clear acrylic sealer spray (outdoor rated)
Step 1: Base Coat
-
Clean the surface:
Begin by wiping down your terra cotta pot with a clean, slightly damp cloth to remove any dust or store shelf grime. Let the clay dry completely before applying any paint, as moisture can cause bubbling later. -
Prime the pot:
Pour a generous amount of white acrylic paint onto your palette. Using a wide foam brush, apply a coat of white paint over the entire exterior of the pot, including the top rim. -
Second coat:
Allow the first layer to dry until it is no longer cool to the touch. Apply a second coat of white paint to ensure full coverage so the orange clay doesn’t peek through. I like to paint a little bit inside the top rim as well for a polished look.
Curve Control
When printing on the curved surface, place a rolled-up towel inside the pot on its side to stabilize it so it doesn’t roll away while pressing little hands down.
Step 2: Handprints
-
Prepare the colors:
Squeeze dime-sized amounts of your rainbow acrylic colors—red, yellow, purple, blue, green, and orange—onto a paper plate, keeping them well separated. -
Paint the first hand:
Choose your first color (e.g., red) and use a brush to apply a layer of paint to the child’s palm and fingers. Painting the hand works better than dipping it, as it prevents big globs of paint that slide around. -
Create the print:
Carefully press the painted hand onto the side of the pot. Since the pot is curved, gently roll the hand from the palm up to the fingertips to ensure every part makes contact. Lift straight off to avoid smearing. -
Clean and repeat:
Wipe the child’s hand immediately with a baby wipe or wash with soap and water before moving to the next color. -
Fill the rim:
Continue adding handprints around the wide upper rim of the pot. Alternate colors or tilt the hands slightly in different directions to create a playful, scattered pattern. Let these dry completely.
Add Stems
Turn the handprints into a true garden by using a thin brush to paint green stems and leaves extending from the bottom of each palm print down to the base of the pot.
Step 3: Flower Details
-
Plan the base:
For the lower section of the pot, use the handprints to simulate flowers. You can use full handprints or just painted palms with finger ‘petals’ pointing upward. -
Apply lower prints:
Paint a new color onto the hand and press it onto the lower body of the pot. Aim to stagger these prints in the empty spaces between the prints on the rim above. -
Check spacing:
Ensure you leave a little room between prints so the white background remains visible; this keeps the design looking bright and airy. -
Touch-ups:
If any prints didn’t transfer perfectly solid, use your small round brush and a tiny bit of matching paint to fill in significant gaps, though leaving some texture adds to the charm.
Step 4: Finishing
-
Dry completely:
Set the pot aside in a safe place to cure. Acrylic paint on terra cotta needs at least a few hours to set fully, especially where the paint is thick on the prints. -
Seal the deal:
Once totally dry, take the pot outdoors or to a well-ventilated area. Spray the entire exterior with a clear acrylic sealer. This protects the handprints from water damage when you water the plant. -
Plant:
Fill your masterpiece with potting soil and add a sweet flowering plant, like the white Alyssum shown here, to complete the gift.
This blooming masterpiece is ready to brighten up any window sill or patio table for years to come


Fingerprint Garden Pot With Tiny Bugs
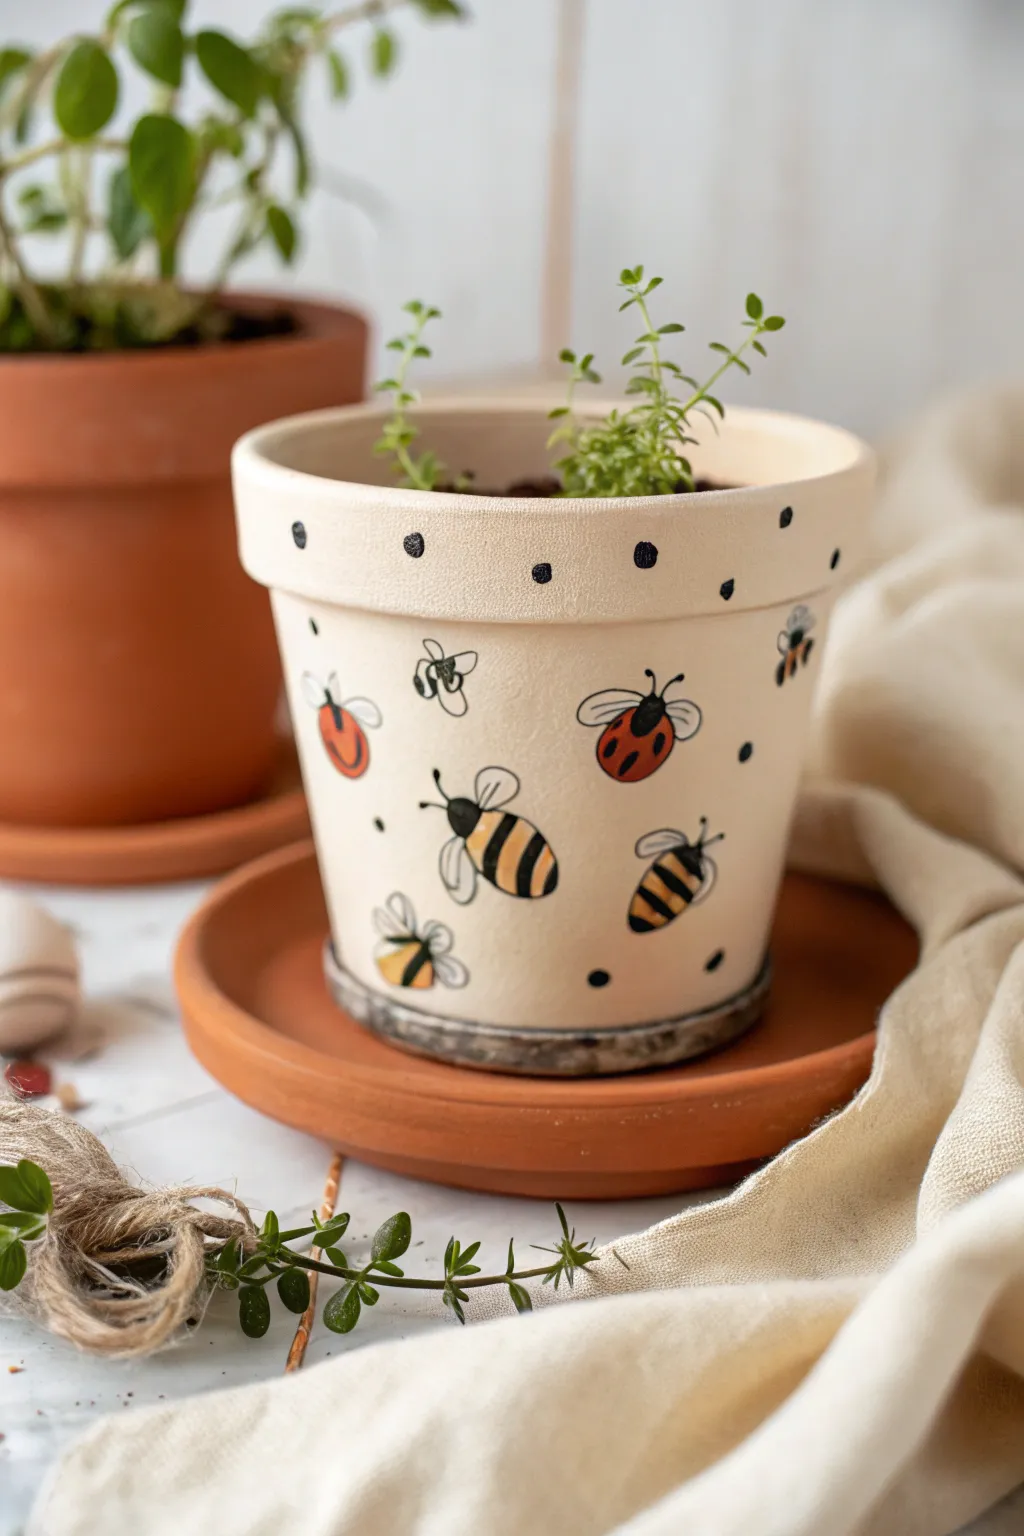
Transform a plain terra cotta pot into a charming home for tiny herbs with this buzzing garden theme. Featuring adorable hand-painted bees and ladybugs, this creamy beige planter adds a playful touch to any windowsill.
Detailed Instructions
Materials
- Small terra cotta pot with saucer
- Cream or off-white acrylic paint (matte finish)
- Black acrylic paint or black paint pen
- Yellow acrylic paint
- Red acrylic paint
- White acrylic paint
- Small flat paintbrush
- Fine detail paintbrush (size 0 or 00)
- Pencil
- Clear matte sealer spray or Mod Podge
- Small herb or succulent plant
- Potting soil
Step 1: Preparing the Base
-
Clean the pot:
Start by wiping down your terra cotta pot with a damp cloth to remove any dust or manufacturing residue. Let it dry completely before painting. -
Apply the base coat:
Using a flat paintbrush, cover the entire exterior of the pot and the upper inner rim with your cream or off-white acrylic paint. -
Let it dry:
Allow the first coat to dry for about 15-20 minutes. Terra cotta absorbs moisture, so the first layer might look streaky. -
Add a second coat:
Apply a second layer of cream paint to ensure solid, opaque coverage. I find painting in horizontal strokes helps create a smooth finish. Let this layer dry completely.
Paint Pen Shortcut
Struggling with brush control? Use Posca or acrylic paint pens for the black details. They make drawing tiny legs and antennae much easier and cleaner.
Step 2: Painting the Ladybugs
-
Sketch the shapes:
Lightly sketch oval shapes for the bug bodies using a pencil. Scatter them randomly around the pot, leaving room between them. -
Paint red bodies:
Fill in a few of your oval sketches with bright red acrylic paint to create the ladybug bodies. -
Add ladybug details:
Once the red paint is dry, use a fine detail brush or a black paint pen to draw a semi-circle head at the top of the oval. -
Draw spots and legs:
Add small black dots onto the red body. Then, draw delicate line antennae coming from the head and tiny legs extending from the sides. -
Create wings:
With white paint and a fine brush, outline two simple teardrop wing shapes extending from the ladybug’s back to give it a flying appearance.
Step 3: Creating the Bees
-
Paint yellow bodies:
For the bees, paint the remaining oval sketches with bright yellow acrylic paint. You may need two coats if the yellow is translucent. -
Add stripes:
Using your fine detail brush or black pen, carefully paint horizontal black stripes across the yellow ovals. -
Draw bee faces:
Paint a small black semi-circle for the head. You can leave it solid black or add a tiny white dot later for an eye highlight. -
Add antennas and stingers:
Draw two curved lines for antennae and a tiny triangular point at the bottom for the stinger. -
Outline the wings:
Using the fine brush and black paint (or a fine-tip pen), loosely sketch outline-style wings. Keep the lines thin and sketchy for a whimsical look. -
Fill the wings:
lightly fill the wing shapes with white paint, but don’t make it too solid—a slightly sheer look works well here.
Fixing Smudges
If you smear black paint onto the cream base, wait for it to dry completely. Then, dab a bit of your cream base color over the mistake to cover it up.
Step 4: Finishing Touches
-
Add rim details:
Dip the back end of a paintbrush into black paint and stamp small dots around the thick upper rim of the pot. -
Fill awkward spaces:
If there are large empty gaps between bugs, add extra tiny black loose dots or small flying trails. -
Seal the pot:
Once all paint works are bone dry, spray the entire pot with a clear matte sealer. This protects your artwork from water damage when you water the plant. -
Plant your greenery:
Fill the pot with soil and add your chosen herb or succulent to complete the look.
This little planter is now ready to bring a smile to Mom’s face every time she waters her herbs


“Thanks for Helping Me Grow” Message Pot
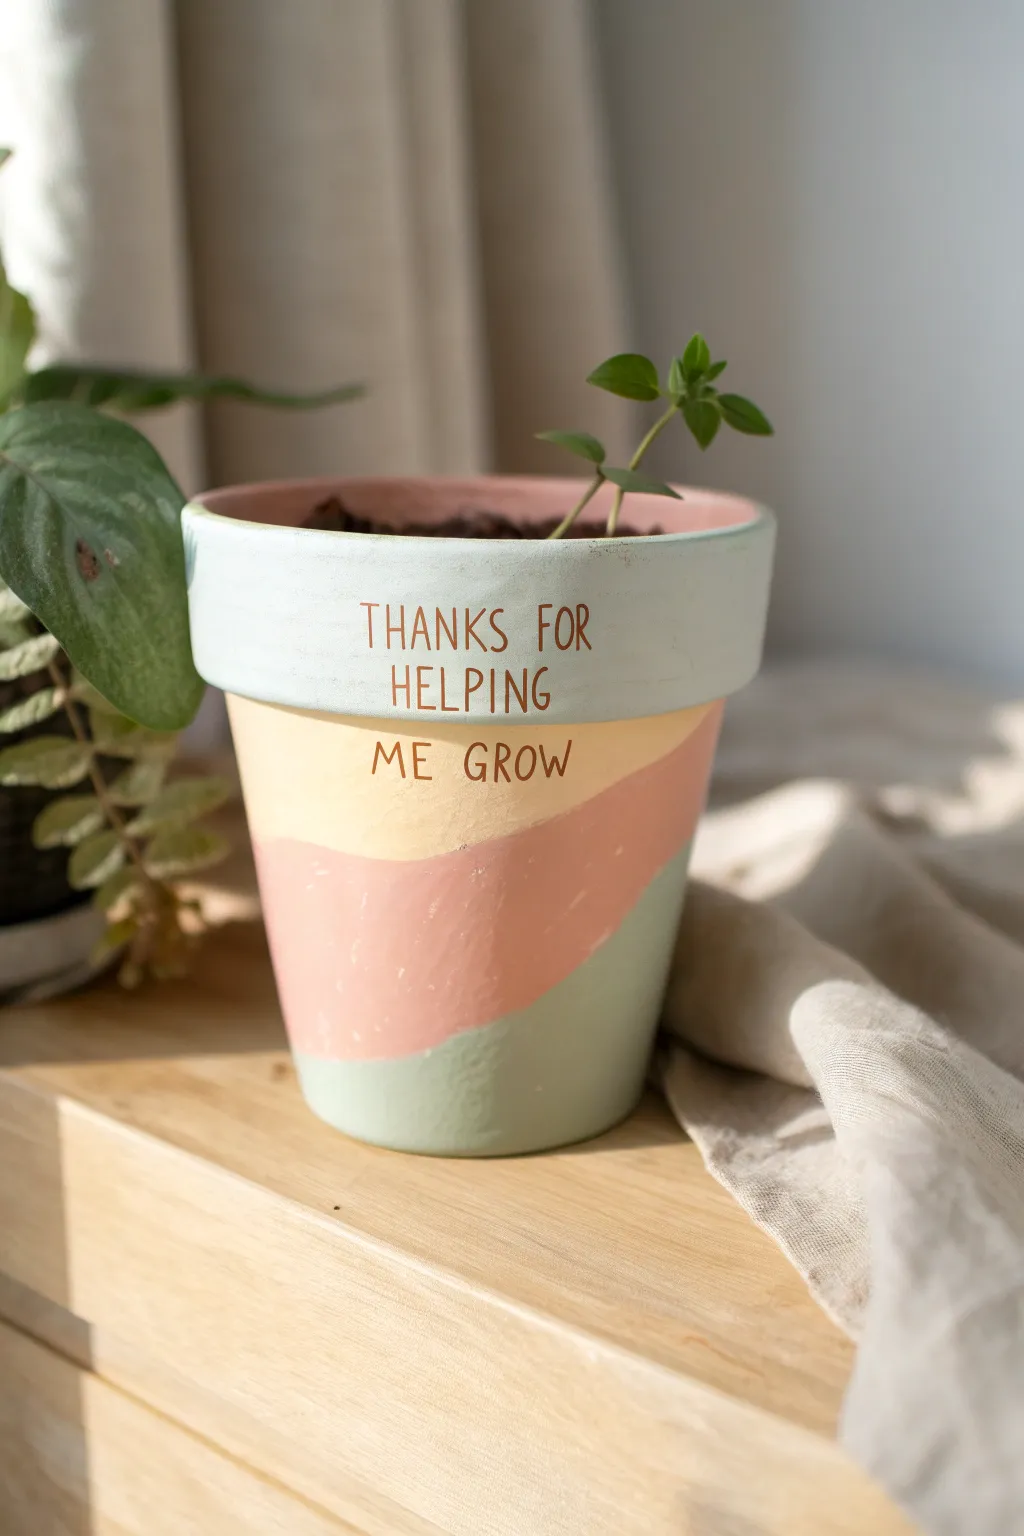
This thoughtful gift combines soft, calming pastels with a sweet message perfect for Mother’s Day. The organic, wavy color blocking gives the classic terracotta shape a modern, gentle update.
Step-by-Step
Materials
- Terracotta pot (4-6 inch diameter)
- Acrylic craft paints (light blue, butter yellow, soft pink, sage green)
- Brown paint pen or fine paintbrush
- Flat paintbrush (medium size)
- Detail paintbrush
- Pencil
- Matte sealer or varnish spray
- Paper plate or palette
- Water cup and paper towels
Step 1: Base Painting
-
Prepare the surface:
Wipe down your terracotta pot with a slightly damp cloth to remove any dust or debris, ensuring a clean surface for the paint to adhere to. -
Prime the pot:
Apply a coat of white acrylic paint or gesso to the entire exterior of the pot. This step is optional but helps the pastel colors pop more vibrantly against the orange clay. -
Paint the rim:
Load your flat brush with light blue paint and cover the entire rim of the pot. You may need two coats for opaque coverage, letting it dry between layers. -
Paint the inside rim:
Don’t forget to paint the top edge and about an inch down into the inside of the pot so the terracotta doesn’t show when soil is added.
Clean Lines Tip
If you struggle painting smooth curves freehand, use thin washi tape to mask off your wavy sections. Press the edges down firmly to prevent paint bleed.
Step 2: Color Blocking
-
Sketch the waves:
Lightly sketch wavy, organic lines around the body of the pot with a pencil. You want to create three distinct sections for your colors below the rim. -
Apply the yellow layer:
Paint the top section, right under the blue rim, with your butter yellow paint. Follow the curve of your sketched wave for the bottom edge of this section. -
Add the pink section:
Paint the middle wavy section with soft pink paint. Carefully cut in along the yellow line with a smaller brush to keep the boundary crisp. -
Finish with green:
Fill in the bottom remaining section with sage green paint. I like to rest the pot upside down on a cup while painting this lowest part to easily reach the bottom edge. -
Touch up edges:
Once the first coats are dry, apply second coats to any areas that look streaky. Use a detail brush to refine the lines where the colors meet.
Add Texture
Mix a tiny pinch of baking soda into your acrylic paints before applying. This creates a matte, plaster-like texture that looks like expensive ceramics.
Step 3: Lettering & Finishing
-
Draft the text:
Once clearly dry, use a pencil to very lightly write ‘THANKS FOR HELPING’ on the rim and ‘ME GROW’ on the yellow stripe. Center the alignment based on the front of your pot. -
Trace the letters:
Using a brown paint pen or a very fine liner brush with brown paint, carefully go over your pencil lines. Keep your hand steady and use light pressure for thin, neat letters. -
Thicken the strokes:
Go back over your letters to slightly thicken the downstrokes, giving the text a subtle hand-lettered look. -
Allow to cure:
Let the lettering dry completely. Paint pens can smear easily if you move to the sealing step too quickly. -
Erase guidelines:
If any pencil marks are still visible around your painted letters, gently erase them with a clean, soft eraser. -
Seal the pot:
Spray the entire pot with a matte clear sealer. This protects the paint from water damage when watering the plant later. -
Add a plant:
Fill your finished pot with soil and add a small seedling or succulent to complete the ‘growth’ theme.
Now you have a touching, handmade vessel ready to hold a growing plant for Mom


Kid Scribble Swirl Painted Mother’s Day Pot
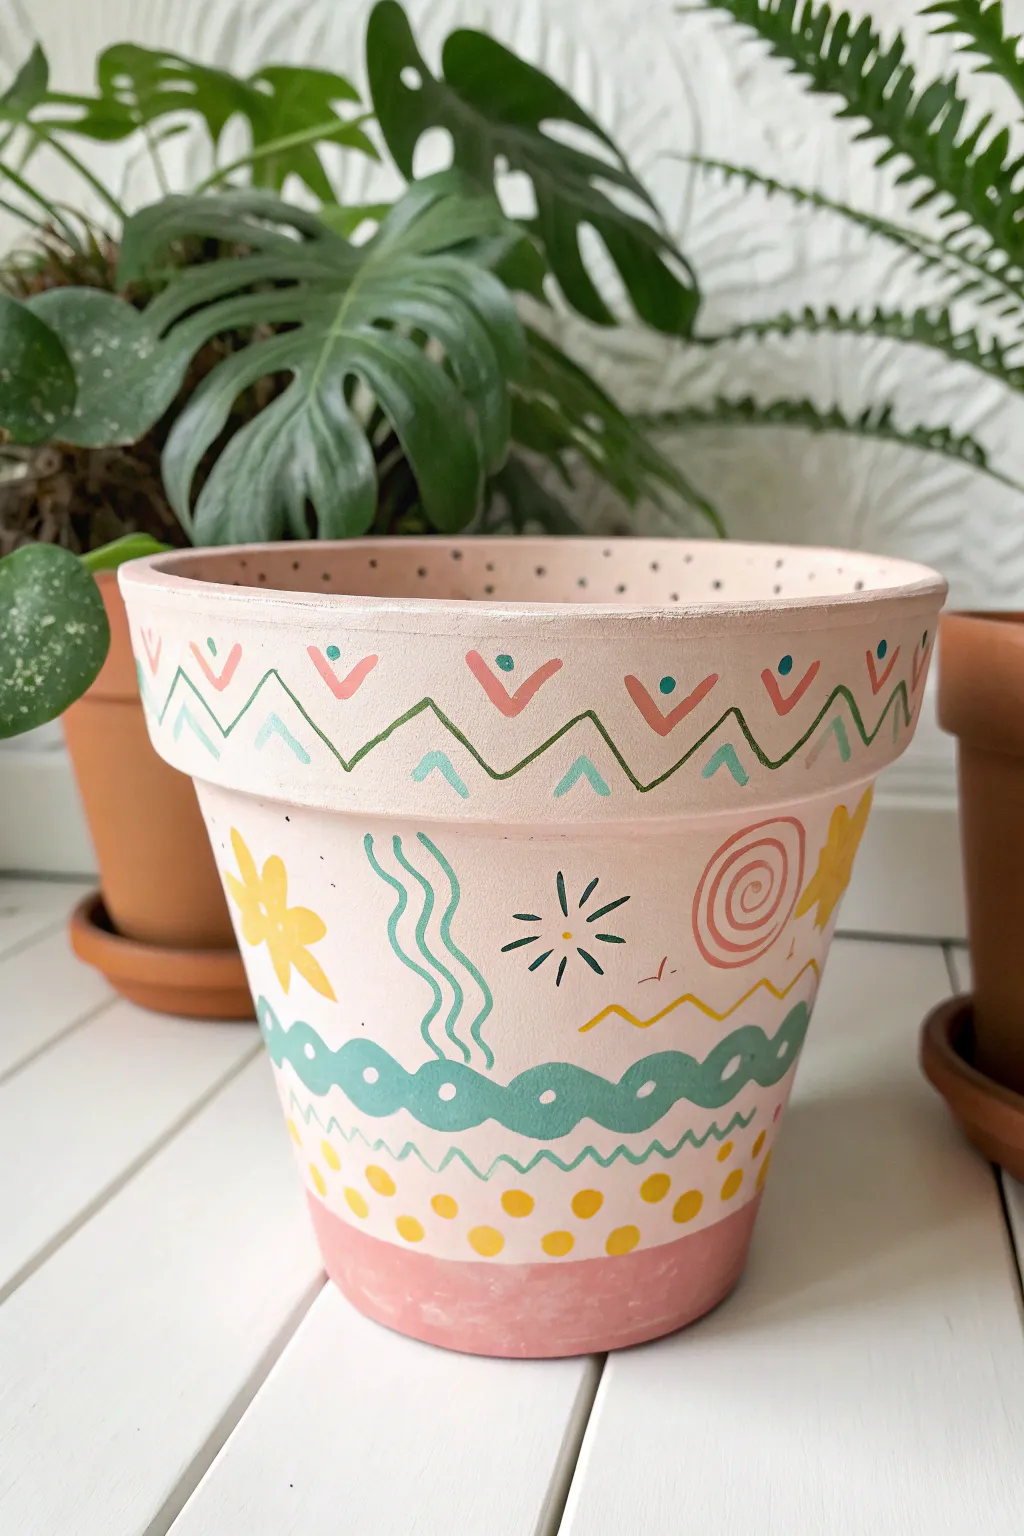
Transform a plain terracotta pot into a cheerful masterpiece featuring playful zig-zags, swirls, and sunny motifs. This pastel-toned design uses a ‘kid-scribble’ aesthetic that feels both modern and heartfelt, making it a perfect handmade gift for Mom.
How-To Guide
Materials
- Standard terracotta pot (approx 6-inch)
- Acrylic craft paints: light blush pink, coral pink, mustard yellow, teal green, dark forest green
- Medium flat paintbrush
- Small round detail brush (size 0 or 1)
- Pencil for sketching
- Palette or paper plate
- Cup of water and paper towels
- Clear acrylic sealer spray (matte or satin finish)
Step 1: Base Painting
-
Clean surface:
Before you begin, wipe down your terracotta pot with a damp cloth to remove any dust or debris, which ensures the paint sticks properly. -
Mix the base color:
Create a soft, pale blush pink by mixing white acrylic paint with a very small drop of coral or red. Aim for a milky, pastel hue. -
Apply base coat:
Using the medium flat brush, paint the entire exterior of the pot, including the rim. You’ll likely need 2-3 coats for full opacity, letting each layer dry completely in between. -
Paint the inside rim:
Paint the top inch of the inside of the pot with the same blush pink so the clay color doesn’t show when soil is added. -
Bottom accent:
Mix a slightly darker, rosier pink hue. Paint a band around the very bottom edge of the pot, about half an inch high, to anchor the design.
Keep it Loose
Don’t worry about shaky hands! The charm of this style comes from the ‘scribble’ look. Intentional imperfections make it look artistic rather than messy.
Step 2: Rim Details
-
Sketch guides:
Once the base is bone dry, lightly use a pencil to mark a zig-zag pattern around the rim. -
Paint the zig-zag:
Use your dark forest green paint and a thin liner brush to trace over your pencil zig-zag line. Keep the hand loose; imperfect lines add to the charm. -
Add floating V’s:
In the upper ‘V’ spaces created by the green line, paint small free-floating ‘V’ shapes using coral pink paint. -
Add dots:
Dip the non-brush end of your paintbrushhandle into teal paint and place a dot inside each coral ‘V’. -
Bottom accents:
In the lower inverted ‘V’ spaces under the green line, paint small upside-down ‘V’ shapes using a light teal or blue.
Step 3: Garden Doodles
-
Central wave:
Halfway down the main body of the pot, paint a thick, wavy teal green line that wraps all the way around. I find it easier to rotate the pot as I pull the brush. -
Decorate the wave:
Once the teal wave is dry, use a very fine brush or dotting tool to add small white circles along the center of the wave. -
Squiggle lines:
Above and below the teal wave, use the dark forest green to paint thin, loose squiggle lines that mirror the wave’s movement. -
Draw flowers:
In the empty space above the wave, paint simple yellow flowers using five quick brushstrokes for petals. -
Add swirls:
Next to the flowers, paint coral pink spirals that look like snail shells or lollipops. -
Greenery accents:
Fill in gaps with vertical wavy lines in teal, representing tall grass or seaweed. -
Sunbursts:
Add small starburst shapes using dark green lines to fill any significant empty spots.
Personalize It
Hide a secret message! Paint a small heart or write ‘Love You’ on the very bottom of the pot or inside a leaf for Mom to find later.
Step 4: Finishing Touches
-
Polka dots:
Below the main wave design and above the bottom pink band, add a row or two of large mustard yellow polka dots. -
Interior speckles:
For a fun surprise, dip an old toothbrush or stiff brush in black or dark grey paint and flick fine speckles onto the inner rim of the pot. -
Seal the work:
Once all paint is perfectly dry (give it at least an hour), spray the entire pot with a clear acrylic sealer to protect your artwork from water damage.
Fill this cheerful pot with a hearty succulent or fern and watch Mom’s face light up with joy

The Complete Guide to Pottery Troubleshooting
Uncover the most common ceramic mistakes—from cracking clay to failed glazes—and learn how to fix them fast.
Candy-Filled Clay Pot Gift Wrap-Up

Transform a simple terracotta pot into a delightful gift basket alternative that’s bursting with color and charm. This quick and easy project combines classic garden aesthetics with a sweet tooth’s dream, finished perfectly with a festive bow and tag.
Step-by-Step Tutorial
Materials
- Small terracotta clay pot (4-6 inch diameter)
- Assorted wrapped candies (taffy, caramels, or chocolates)
- Wide satin ribbon (burgundy or deep red)
- Kraft paper gift tag
- Red marker or paint pen
- Tissue paper or crinkle cut filling (optional)
- Scissors
- Clear cellophane (optional, for wrapping individual candies)
Step 1: Preparation & Filling
-
Clean the pot:
Begin by wiping down your terracotta pot with a damp cloth to remove any dust or loose clay particles. Let it dry completely so the ribbon doesn’t get dirty. -
Add a base layer:
If your pot is quite deep, crumple a small amount of tissue paper or place a handful of crinkle paper at the very bottom. This acts as a riser so you don’t need pounds of candy to make the pot look full. -
Prepare the treats:
Gather your assortment of candies. For the best visual effect, choose treats with brightly colored wrappers like saltwater taffy or foil-wrapped chocolates. -
Wrap loose candies:
If you have loose homemade treats or unwrapped sweets, wrap them individually in small squares of clear cellophane. Twist the ends tightly to keep them fresh and secure. -
Fill the container:
Start placing the candies into the pot, ensuring the bottom layer is stable. -
Mound the top:
Continue adding sweets until you reach the rim, then carefully pile more in the center to create a mounded, overflowing look. The most colorful pieces should be right on top for impact.
Slipping Ribbon?
If the ribbon slides down the tapered pot, add a tiny dot of hot glue or double-sided tape under the ribbon at the back of the pot to hold it in place while tying.
Step 2: Tag & Ribbon Assembly
-
Draw the heart:
Take your kraft paper tag and use a red marker or paint pen to draw a simple heart in the center. -
Fill in the design:
Color the heart in lightly. I find that leaving a few streaks or uneven spots gives it a charming, hand-sketched look rather than looking too perfect. -
Outline for contrast:
Go over the outline of the heart one more time with the marker to make the shape pop against the brown paper. -
Cut the ribbon:
Cut a length of your satin ribbon long enough to wrap around the pot with plenty of extra slack for a generous bow—usually about 24 to 30 inches. -
Position the ribbon:
Wrap the ribbon around the body of the pot, just below the rim. Hold it steady with your thumb to keep it from slipping down the tapered sides. -
Thread the tag:
Before tying the knot, thread one end of the ribbon through the hole in your decorated gift tag. -
Tie the initial knot:
Bring the ribbon ends together and tie a single tight knot to secure the tag against the pot. -
Form the bow:
Create a classic bow, pulling the loops until they are symmetrical and fluffy. -
Adjust the tails:
Trim the ends of the ribbon at an angle or into a V-shape for a professional finish. Tug the tails downwards so they drape nicely. -
Final arrangement:
Place a few extra candies loosely around the base of the pot on the table or napkin to complete the presentation.
Garden Theme
Paint the rim of the pot white or use a stenciled floral design on the terracotta before filling it to enhance the garden aesthetic.
This charming, candy-filled pot is ready to brighten Mom’s desk or kitchen counter
Pastel Polka Dot Pot With a Sweet Tagline
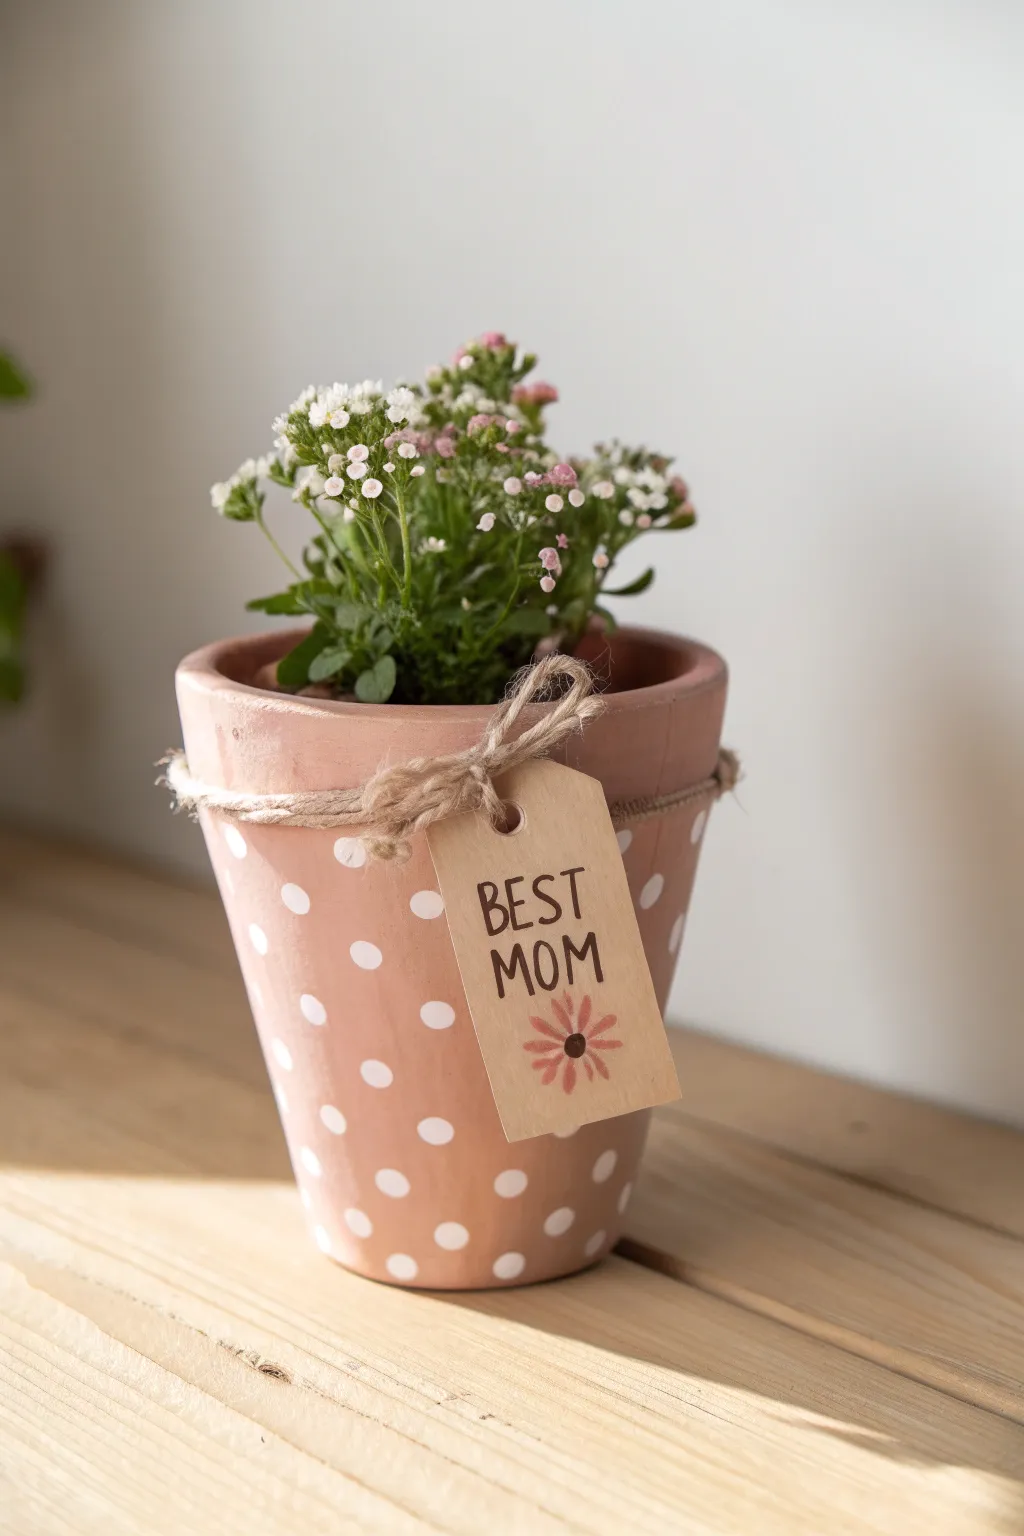
Treat Mom to a soft, sentimental gift with this charming painted terracotta pot featuring whimsical polka dots and a custom tag. The dusty pink finish paired with rustic twine creates a beautiful balance between modern sweetness and farmhouse warmth.
Detailed Instructions
Materials
- 4 to 6-inch Terracotta pot
- Dusty pink acrylic craft paint (matte finish)
- White acrylic craft paint
- Foam sponge brush
- Round foam pouncer (small size) or pencil eraser
- Tan cardstock or kraft paper tag
- Jute twine
- Fine-tip black marker or brush pen
- Red or dark pink marker (for flower detail)
- Small potted plant (Baby’s Breath or Kalanchoe work well)
- Scissors
- Hole punch (if tag isn’t pre-punched)
Step 1: Preparing the Base
-
Clean the surface:
Before painting, ensure your terracotta pot is clean and dry. Wipe it down with a slightly damp cloth to remove any dust or sticker residue, as this helps the paint adhere smoothly. -
Apply the base coat:
Using a foam sponge brush, apply an even coat of dusty pink acrylic paint to the exterior of the pot. Don’t worry about perfect opacity on the first pass; terracotta is porous and soaks up paint quickly. -
Paint the rim:
Carry the pink paint over the top rim and down the inside about one inch. This ensures that once the dirt and plant are inside, the visible interior still looks finished. -
Let it dry completely:
Allow the first coat to dry for about 20 minutes. If the terracotta color is still showing through, apply a second coat for a solid, creamy finish.
Uneven Dots?
If your pouncer slips or a dot looks smeared, wait for the white paint to dry completely. Then, use a small detail brush and your base pink color to carefully paint over the mistake and reshape the circle.
Step 2: Adding the Polka Dots
-
Prepare the stencil tool:
Pour a small yearly amount of white acrylic paint onto a palette or paper plate. You’ll want a round foam pouncer for perfectly circular dots. If you don’t have one, the flat end of a pencil eraser works great for petite dots. -
Test your spacing:
Before touching the pot, practice stamping a few dots on a piece of scrap paper to get a feel for how much pressure you need. -
Start the top row:
Begin stamping dots just under the rim of the pot. Space them out evenly around the circumference. I find it easiest to do the ‘north, south, east, west’ method first and then fill in the gaps. -
Create the pattern:
Continue adding rows of dots moving downward. Offset the dots in the second row so they sit in the empty spaces between the dots of the first row (like a brick pattern). -
Finish the bottom:
Complete the pattern all the way to the base. Let the white paint dry fully before handling the pot again to avoid smudging.
Step 3: Creating the Tag
-
Cut the tag shape:
If you aren’t using a pre-made tag, cut a rectangular piece of kraft paper or tan cardstock about 2 inches wide and 3 inches tall. Snip the top two corners at an angle to create a traditional tag shape. -
Punch the hole:
Use a hole punch to create a small opening centered near the top edge of the tag. -
Lettering the sentiment:
With a fine-tip black marker, hand-letter ‘BEST MOM’ in the center of the tag. Use a loose, all-caps style for a playful look. -
Draw the flower:
Below the text, draw a simple flower. Start with a small black dot for the center, then use a dusty pink or red marker to draw elongated oval petals radiating outward.
Seal the Deal
To make the pot waterproof and prevent the paint from bubbling over time, spray the entire inside and outside with a clear matte acrylic sealer before adding the soil and plant.
Step 4: Assembly
-
Wrap the twine:
Cut a long length of jute twine. Wrap it around the pot just below the rim. I like to wrap it around twice to add a bit of rustic bulk and texture. -
Thread the tag:
Before tying the final knot, thread one end of the twine through the hole in your ‘Best Mom’ tag. -
Secure the bow:
Tie the twine securely in a simple bow at the front of the pot. Adjust the tag so it hangs straight and the wording is visible. -
Add the greenery:
Place your small potted plant inside. A flowering plant with small blooms, like Kalanchoe or Baby’s Breath, complements the delicate polka dot pattern perfectly.
Now you have a custom-designed keepsake that will brighten Mom’s windowsill for months to come


What Really Happens Inside the Kiln
Learn how time and temperature work together inside the kiln to transform clay into durable ceramic.
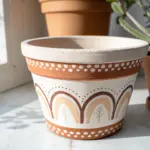
Forever Flower Pot With Handmade Stems
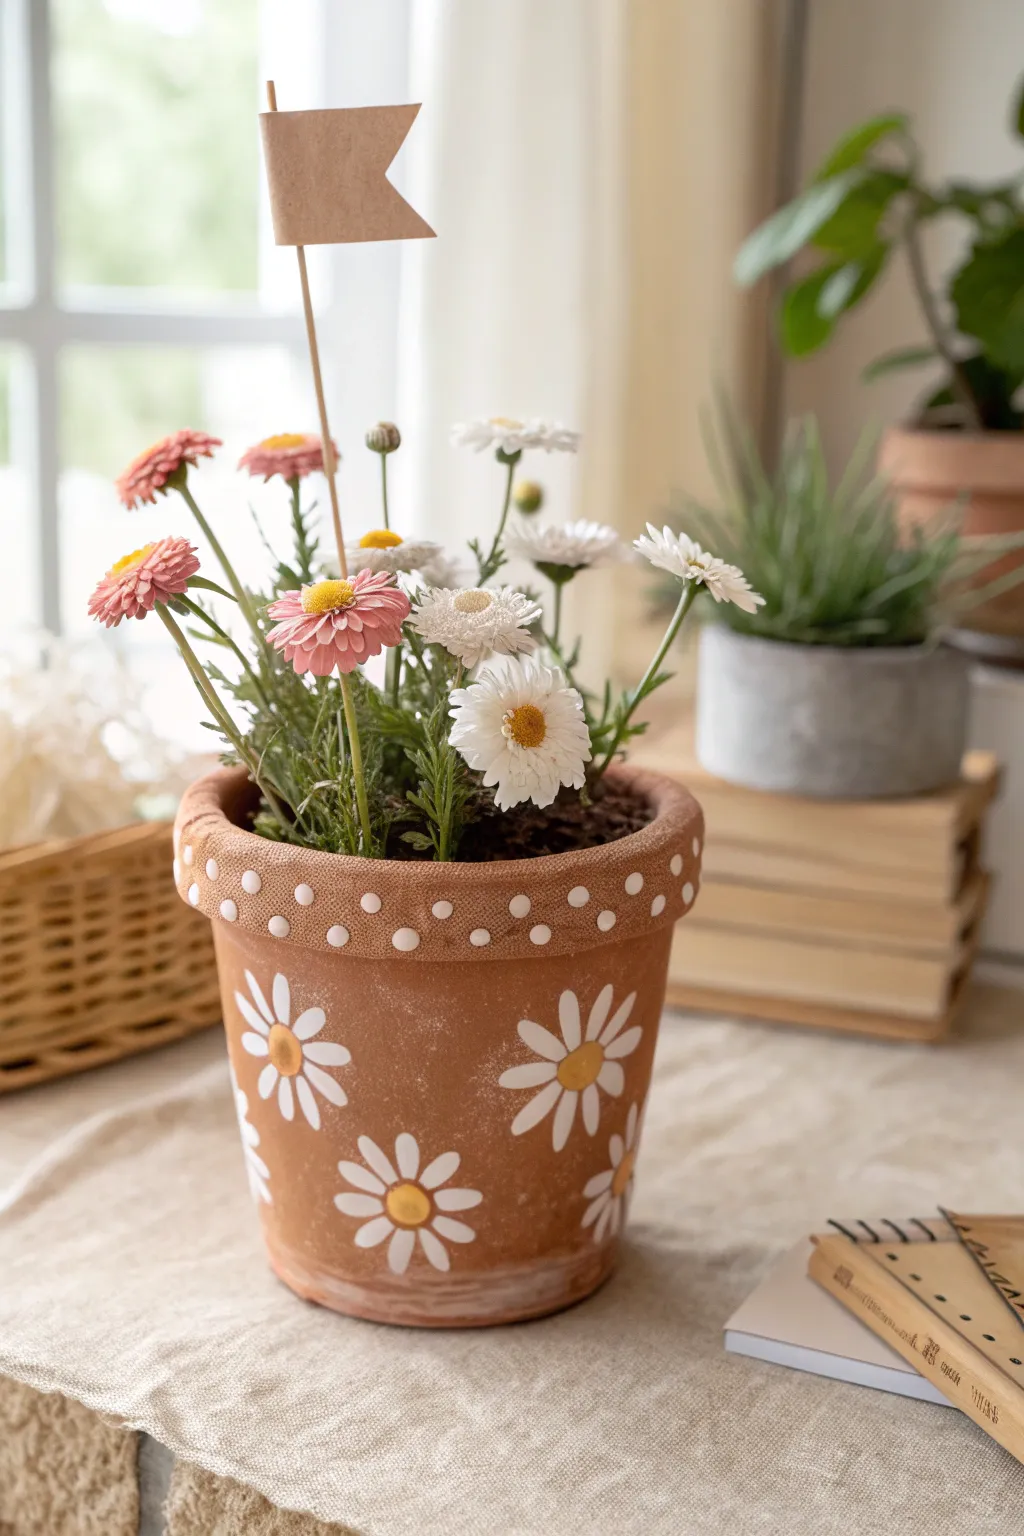
Transform a plain terracotta pot into a charming, rustic vessel for everlasting blooms with this simple painting technique. The cheerful daisy motif combined with delicate rim detailing creates a heartwarming gift that brings a touch of eternal spring to any windowsill.
Step-by-Step Tutorial
Materials
- Standard terracotta pot (approx. 4-6 inches)
- White acrylic craft paint
- Mustard yellow or gold acrylic craft paint
- Small round paintbrush (size 2 or 4)
- Detail brush or dotting tool (or a cotton swab)
- Artificial daisies (pink and white)
- Floral foam block
- Dried moss or potting soil (to cover foam)
- Small wooden skewer
- Kraft paper
- Glue gun and glue sticks
Step 1: Painting the Base Designs
-
Clean the surface:
Before dipping into your paint, wipe down the terracotta pot with a slightly damp cloth to remove any dust or debris, ensuring a smooth canvas for your flowers. -
Plan your placement:
Visualize where your daisies will sit; aim for a scattered, organic pattern around the lower two-thirds of the pot rather than perfect rows. -
Paint the centers:
Using the mustard yellow paint and a small round brush, paint simple circles where you want the center of each flower to be. I like to space them out enough to allow room for the petals. -
Let centers set:
Allow the yellow centers to dry to the touch, which usually takes about 10-15 minutes, so the white paint won’t smear into the yellow later. -
Add the petals:
Load your round brush with white acrylic paint. Press the brush down near the yellow center and pull outward to create a simple teardrop petal shape. -
Complete the flower heads:
Continue painting petals around each yellow center until the daisy is full. Don’t worry about making them identical; slight variations add to the hand-painted charm. -
Dry thoroughly:
Let the daisy designs dry completely before moving on to handling the pot again.
Seal the Deal
Terracotta is porous and soaks up paint. Apply a matte spray sealer over your dried painting to protect the design from moisture and fading.
Step 2: Adding Details and Assembly
-
Decorate the rim:
Using a dotting tool, the handle end of a paintbrush, or a cotton swab, dip into the white paint and stamp small dots around the thick rim of the pot. -
Create a pattern:
Alternate the placement of the dots—one high, one low—to create a zig-zag or wavy effect around the circumference of the rim. -
Insert floral foam:
Once all paint is dry, cut a piece of floral foam to fit snugly inside the pot. -
Arrange the blooms:
Trim the stems of your artificial pink and white daisies to various heights using wire cutters. -
Fill the pot:
Push the stems into the foam, arranging them so the taller ones are in the back or center and shorter ones frame the sides. -
Cover the mechanics:
Tuck dried moss or sprinkle loose potting soil over the exposed foam to hide it and give a realistic finish. -
Make the flag:
Cut a small rectangle from kraft paper and notch one end to create a pennant shape. -
Assemble the sign:
Apply a thin line of hot glue to the straight edge of the paper and wrap it around the top of a wooden skewer. -
Final touch:
Stick the wooden skewer into the arrangement so the flag rises just above the tallest blooms.
Make It Personal
Write a sweet message like ‘Mom’ or ‘Love Grows Here’ on the kraft paper flag using a fine-tip black marker or white gel pen.
Now you have a blooming masterpiece that captures the joy of a garden without any of the maintenance
Pressed Leaf and Flower Print Mother’s Day Pot
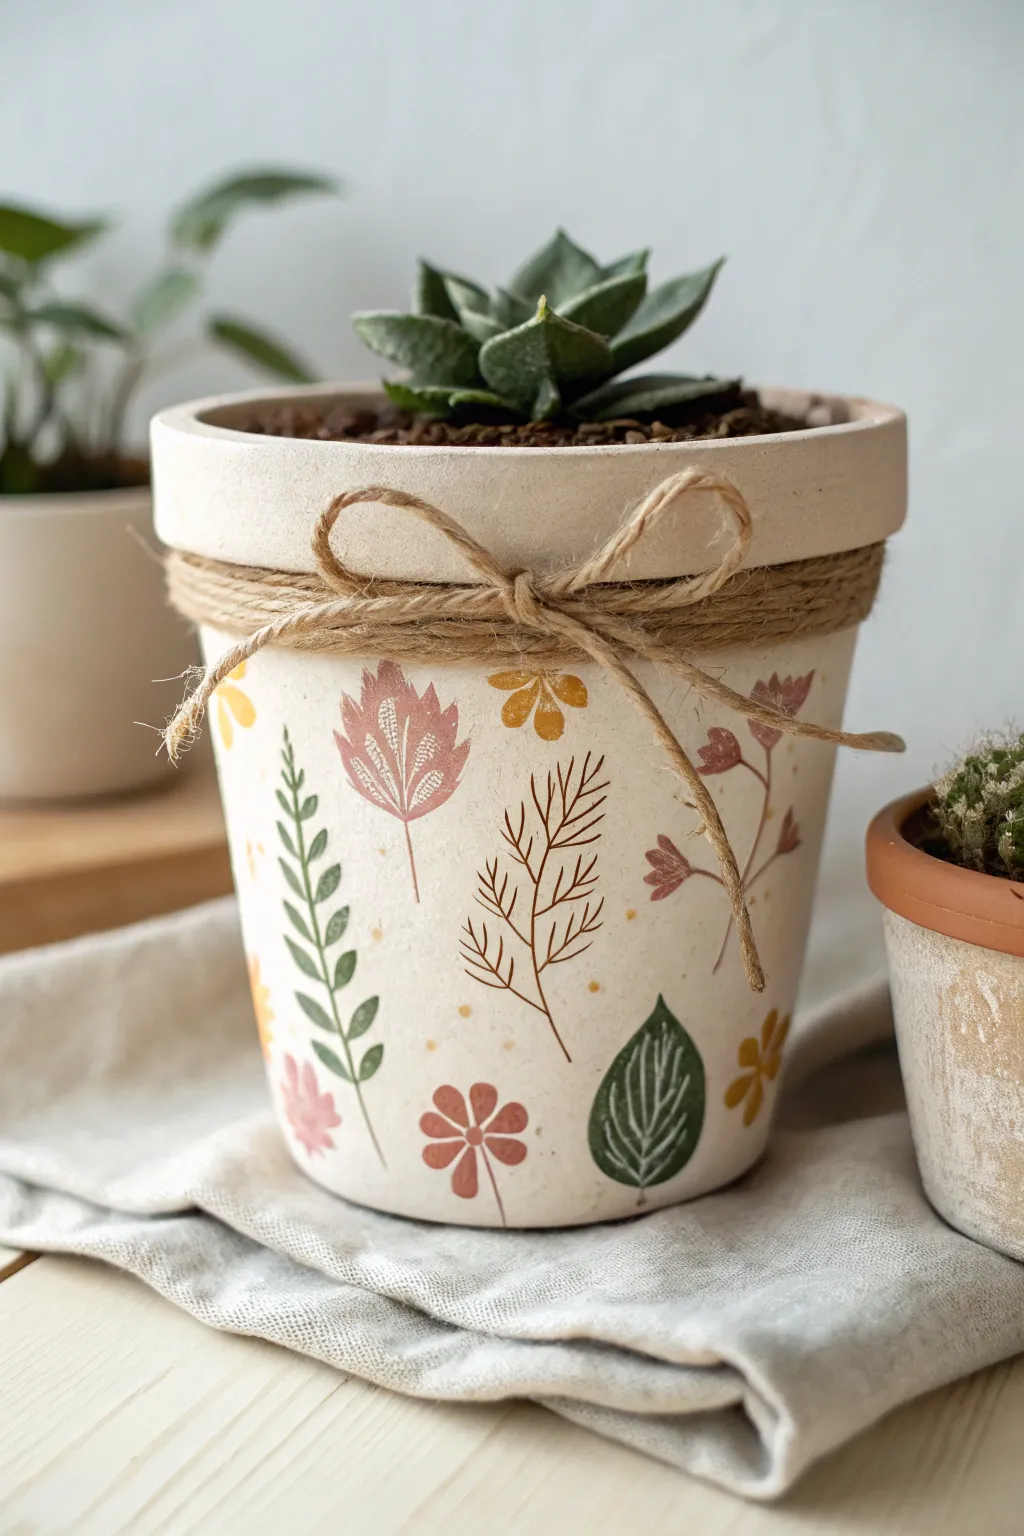
Transform a simple terracotta pot into a delicate garden-inspired keepsake featuring faux botanical prints. The soft, creamy background and rustic twine accent create a warm, cottage-core aesthetic perfect for surprising Mom.
Detailed Instructions
Materials
- Standard terra cotta pot (4-6 inch diameter)
- Cream or off-white acrylic craft paint
- Flat paintbrush (1-inch width)
- Small artist brushes (round and fine-tip liner)
- Acrylic paints in muted tones (sage green, dusty pink, mustard yellow, forest green, reddish-brown)
- Jute twine
- Matte finish spray sealant (optional)
- Pencil (optional)
- Succulent and potting soil
Step 1: Preparation & Base Coat
-
Clean the surface:
Before you begin, wipe down your terra cotta pot with a damp cloth to remove any manufacturing dust or loose clay particles. Let it dry completely. -
Mix your base color:
If you don’t have a premixed cream color, create a warm off-white by mixing a large dollop of white acrylic paint with a tiny drop of brown or yellow ochre. -
Apply the first coat:
Using your 1-inch flat brush, apply an even layer of the cream paint over the entire exterior of the pot, including the rim. Don’t worry if it looks streaky; the first coat usually soaks in. -
Layer for opacity:
Once the first layer is dry to the touch (about 15-20 minutes), apply a second coat. You want a solid, opaque finish that hides the original orange clay color. -
Paint the inner rim:
Don’t forget to paint the top 1-2 inches of the inside of the pot so the clay doesn’t show through once the soil is added.
Stamp Hack
Not confident painting freehand? Dip real leaves or rubber stamps lightly in paint and press them onto the pot for an authentic botanical print look.
Step 2: Painting the Botanicals
-
Plan your layout:
Visualize where your leaves and flowers will go. You want a random, scattered pattern rather than structured rows. If you’re nervous, lightly sketch the main shapes with a pencil first. -
Paint fern leaves:
Dip a small round brush into sage green paint. Paint a thin, slightly curved central stem. Then, make small, quick dab-like strokes outward from the stem to create leaflets, tapering them as you reach the tip. -
Create broad leaves:
Using a forest green shade, paint simple oval shapes that come to a point. I like to leave these solid for now and add details later. -
Add floral shapes:
Mix a dusty pink color and paint simple flower silhouettes. Think of tulip shapes or simple five-petal blooms. Keep the edges soft and organic. -
Incorporate colored leaves:
Switch to a reddish-brown or mauve tone to paint a large maple-style leaf. Use a flat brush to block in the shape, keeping the edges slightly jagged. -
Fill the gaps:
Look for empty spaces and fill them with small mustard yellow flowers or tiny floating petals. These small filler elements make the design feel cohesive.
Step 3: Adding Details & Finishing
-
Dry thoroughly:
Ensure all your colorful base shapes are completely dry before moving to the next step to avoid muddying the fine lines. -
Add white veins:
Using your finest liner brush and white paint (or a very light cream), paint delicate veins onto the darker green and reddish leaves. For the broad green leaf, simple straight lines work best. -
Add stem details:
Use a thin brown paint to add delicate stems connecting your flowers and leaves, giving them a rooted, botanical illustration look. -
Create texture:
For the pink leaves, instead of solid lines, use tiny white dots or stippling to create a textured vein down the center. -
Seal the pot:
Once your masterpiece is fully dry (give it at least an hour), spray the pot with a clear matte sealant to protect the paint from water damage. -
Wrap the rim:
Take your jute twine and wrap it around the indented groove just below the pot’s rim. Wrap it 3-4 times to create a nice band of texture. -
Tie the bow:
Cut a separate piece of twine and tie a simple shoelace bow. Use a dab of hot glue to secure the bow directly onto the center of the twine wrapping.
Add Subtle Age
After the main paint dries, lightly sponge a tiny bit of diluted distinctive brown paint over random spots to simulate a vintage, weathered ceramic look.
Fill your beautiful new vessel with a hardy succulent and present it to Mom for a gift that keeps on growing

TRACK YOUR CERAMIC JOURNEY
Capture glaze tests, firing details, and creative progress—all in one simple printable. Make your projects easier to repeat and improve.
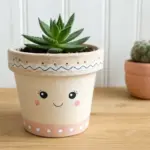
Mother’s Day Pot Face Planter With Cute Details
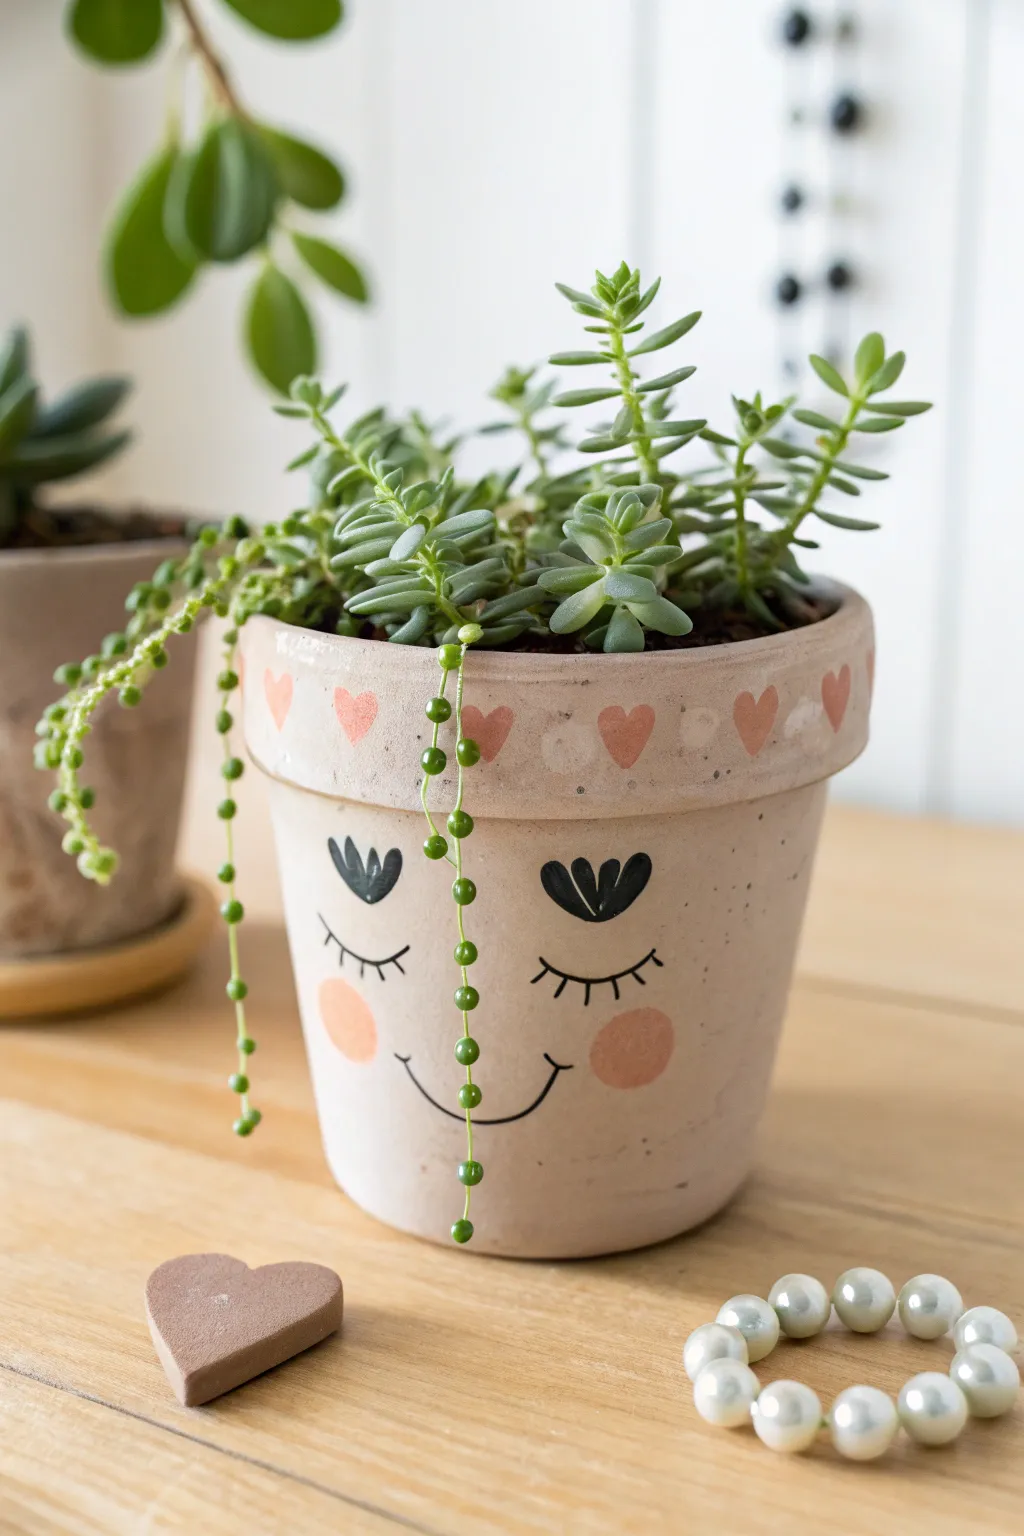
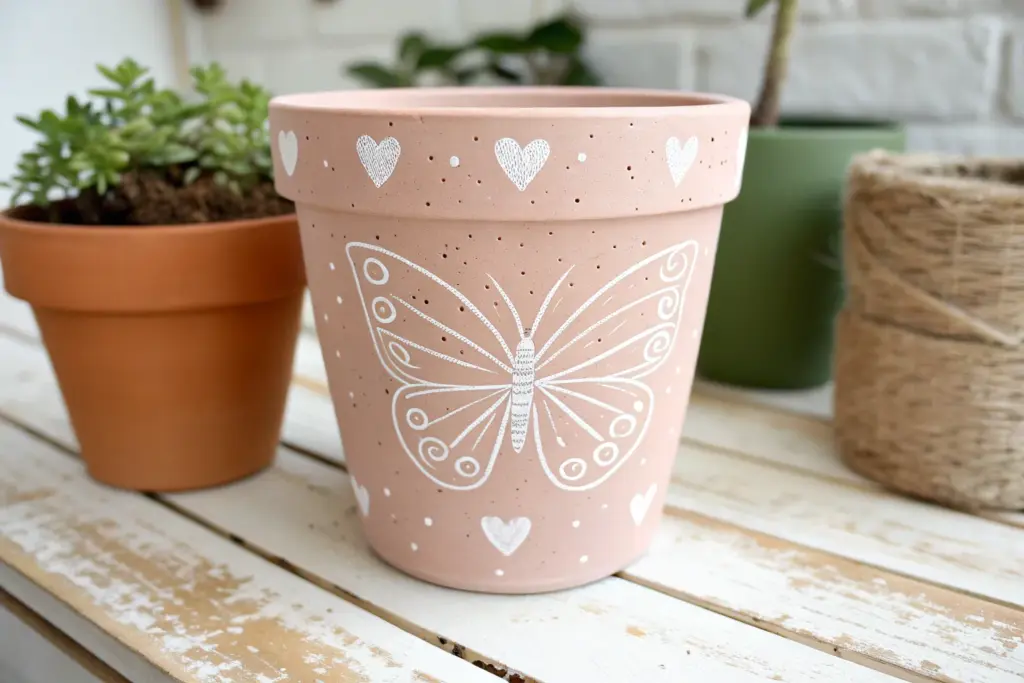
Give Mom the gift of greenery housed in this adorable, sleepy-faced terracotta pot. With its delicate heart border and peaceful expression, this project transforms a standard garden staple into a charming piece of personality-filled decor.
Step-by-Step
Materials
- Standard terracotta pot (4-inch or 6-inch)
- White or cream acrylic craft paint
- Soft pink acrylic craft paint
- Black acrylic craft paint or black paint pen
- Medium flat paintbrush
- Small round detail brush
- Pencil with eraser
- Clear matte sealant spray
- Succulent soil mix
- Small succulents (like Sedum or String of Pearls)
Step 1: Base Coat & Prep
-
Clean surface:
Start by wiping down your terracotta pot with a damp cloth to remove any dust or loose clay particles. Let it dry completely so the paint adheres properly. -
Mix the base color:
Create a wash by mixing your white or cream acrylic paint with a small amount of water (about a 2:1 paint-to-water ratio). This allows some of the natural terracotta texture to peek through for a softer, rustic look. -
Apply the wash:
Using the medium flat brush, paint the entire exterior of the pot, including the rim. Use long, horizontal strokes for a smooth finish. -
Let it dry:
Allow the first coat to dry for about 15-20 minutes. If you want a more opaque look, add a second coat now, but the semi-transparent whitewash style is very forgiving.
Clean Lines Hack
If you struggle painting fine lines with a brush, use a black ultra-fine point permanent marker or paint pen for the eyelashes and mouth. It offers way more control.
Step 2: Painting the Face
-
Sketch the features:
Lightly sketch the facial features with a pencil. Draw two closed eyelids with lashes about halfway down the pot, a small U-shaped smile underneath, and circles for cheeks. Don’t press too hard to avoid scratching the paint. -
Paint the lashes:
Using a very fine detail brush or a black paint pen, carefully trace over your pencil lines for the eyelids. Add three small, curved lashes extending outward from the corner of each eye. -
Add floral eyes:
Above the closed eyelid line, paint a small black ‘tulip’ shape or three small petals fanning out. This acts as a decorative eyebrow or floral detail that adds whimsy to the expression. -
Define the smile:
Trace the U-shaped mouth with your black paint or pen. Keep the line thin and delicate, curling the ends up slightly for a gentle expression. -
Rosy cheeks:
Dip a round brush or a sponge dauber into the soft pink paint. Dab it once on a paper towel to remove excess paint, then gently press it onto the cheek areas to create soft, circular blushes.
Add Dimension
Glue small fabric flowers or a tiny burlap bow to the rim of the pot to give the ‘hair’ a cute 3D accessory that matches the painted details.
Step 3: The Heart Rim
-
Plan the spacing:
Along the thick rim of the pot, use your pencil to mark light dots where you want your hearts to go ensuring they are evenly spaced. -
Paint the hearts:
Using the small round brush and the same pink paint as the cheeks, paint small hearts over your markings. I find it easiest to paint two small teardrops that meet at the bottom to form the heart shape. -
Add rim details:
Between the pink hearts, add faint, varied dots or smaller heart shapes in a lighter shade (mix white with a tiny bit of pink) to give the pattern a playful, organic feel. -
Dry completely:
Let all the paint work dry for at least one hour to ensure nothing smudges during the sealing process.
Step 4: Finishing Touches
-
Seal the art:
Take the pot to a well-ventilated area and spray it with a clear matte sealant. This protects your artwork from water damage when you water the plants later. -
Prepare for planting:
Once the sealer is dry, fill the bottom of the pot with a small layer of gravel for drainage, followed by succulent soil. -
Plant the hair:
Arrangement is key here. Plant trailing succulents like ‘String of Pearls’ near the rim so they drape down like hair, and spiky or rosette succulents in the center for volume.
Now you have a sweet, personalized planter ready to brighten up any windowsill this Mother’s Day