Mushrooms are basically the perfect pottery muse: simple shapes, tons of texture, and endless room for whimsy. Here are my favorite mushroom pottery ideas to spark your next clay session, from classic to totally unexpected.
Classic Fly Agaric Mushroom Figurines
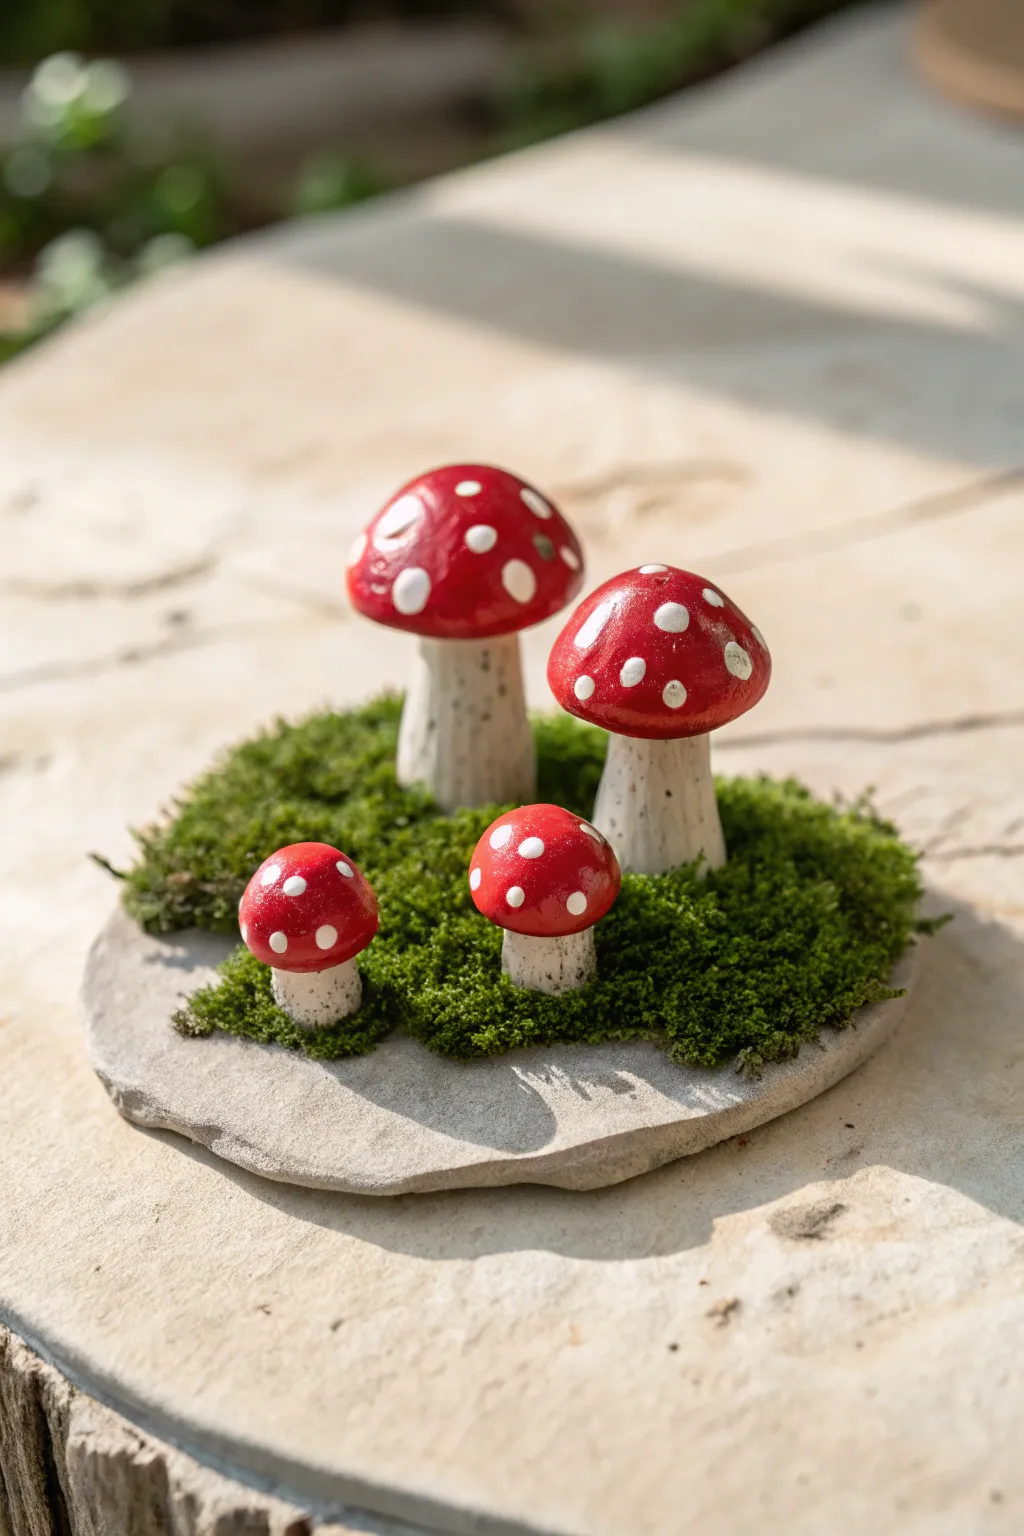
Create a whimsical forest floor scene with these four classic red-capped mushrooms nestled in a bed of lush green moss. Mounted on a natural stone base, this charming pottery arrangement brings a touch of fairytale magic to any shelf or garden nook.
Step-by-Step Tutorial
Materials
- Polymer clay or air-dry clay (white)
- Acrylic paints (bright red, titanium white, beige/dark grey for antiquing)
- Gloss varnish or glaze
- Sculpting tools (ball styluses, needle tool)
- Flat river stone or slate piece (approx. 4-6 inches)
- Preserved reindeer moss or sheet moss
- Strong craft glue (e.g., E6000) or hot glue gun
- Small paintbrushes (flat shader and fine detail liner)
- Aluminum foil (for armatures)
- Toothpicks (optional for stem support)
Step 1: Sculpting the Mushrooms
-
Prepare the stems:
Begin by conditioning your white clay until it is soft and pliable. Roll four thick cylinders for the stems—two larger ones about 1.5 inches tall, and two smaller ones about 0.75 inches tall. Taper each slightly so they are wider at the base. -
Texture the stalks:
Before the clay hardens, take a needle tool or a stiff bristled brush and drag it vertically down the stems. This creates delicate striations that mimic the natural texture of mushroom stalks. -
Form the caps:
Roll four balls of clay corresponding to your stem sizes. Flatten the bottom of each ball and gently dome the top with your fingers to create the classic umbrella shape. Smooth out any fingerprints with a drop of water or baby oil. -
Connect cap to stem:
Score the top of the stems and the underside of the caps with a needle tool. Apply a tiny bit of liquid clay or water (depending on your clay type) and press the parts together firmly to ensure a strong bond. -
Refine the shape:
Once assembled, check the silhouette. You might want to tilt one or two caps slightly to give them personality, as if they are reaching for sunlight. I find this subtle tilt makes the group look much more organic. -
Bake or dry:
Follow the manufacturer’s instructions for your specific clay. If using polymer clay, bake on a foil-lined sheet. If using air-dry clay, allow them to cure fully for 24-48 hours.
Step 2: Painting and Detailing
-
Base coat the stems:
Paint the stems using an off-white or creamy bone color. You don’t want them stark white. -
Antique the stems:
To bring out that vertical texture you sculpted earlier, create a wash by watering down some dark grey or beige paint. Brush it over the stems and immediately wipe the surface with a paper towel, leaving the darker color trapped in the crevices. -
Paint the red caps:
Apply a bright, opaque red acrylic paint to the mushroom caps. You will likely need two or three thin coats to get a solid, vibrant color without brushstrokes showing. -
Add the signature spots:
Dip the handle end of a paintbrush or a large ball stylus into thick white paint. Dot the red caps randomly. Vary the size of the dots slightly, placing some near the edges and some on top. -
Seal the finish:
Once all paint is completely dry, apply a high-gloss varnish to the red caps to give them a wet, dewy look. Use a matte varnish for the stems to keep them looking earthy and natural.
Pro Tip: Spot Perfection
Don’t make your white dots perfectly round circles. Wiggling the dotting tool slightly creates irregular, organic shapes that look much more realistic.
Step 3: Assembly
-
Prepare the base:
Clean your chosen stone slab with soap and water and let it dry completely to ensure the glue adheres properly. -
Arrange the composition:
Place your finished mushrooms on the stone without glue first to find the best arrangement. Grouping the two taller ones in the back and the smaller ones in front usually creates good depth. -
Glue the mushrooms:
Apply a generous dab of strong craft glue to the bottom of each mushroom stem and press them firmly onto the stone. Hold them in place for a minute until the glue grabs. -
Prepare the moss:
Tease apart your preserved moss into small, manageable clumps. Remove any pine needles or dirt debris hidden inside the moss tufts. -
Attach the greenery:
Apply glue to the stone surface surrounding the mushroom bases. Press the moss clumps into the glue, packing them tightly around the stems to hide the clay connection points. -
Final touches:
Use a toothpick to nurture small bits of moss into any gaps, ensuring the stone is covered in the center but the rocky edges are still visible.
Level Up: Dew Drops
After varnishing, add tiny droplets of clear UV resin or 3D dimensional glaze (like Diamond Glaze) onto the caps to mimic morning dew.
Now you have a permanent piece of the enchanted forest to brighten up your home

Pinch Pot Mushroom Caps and Stems
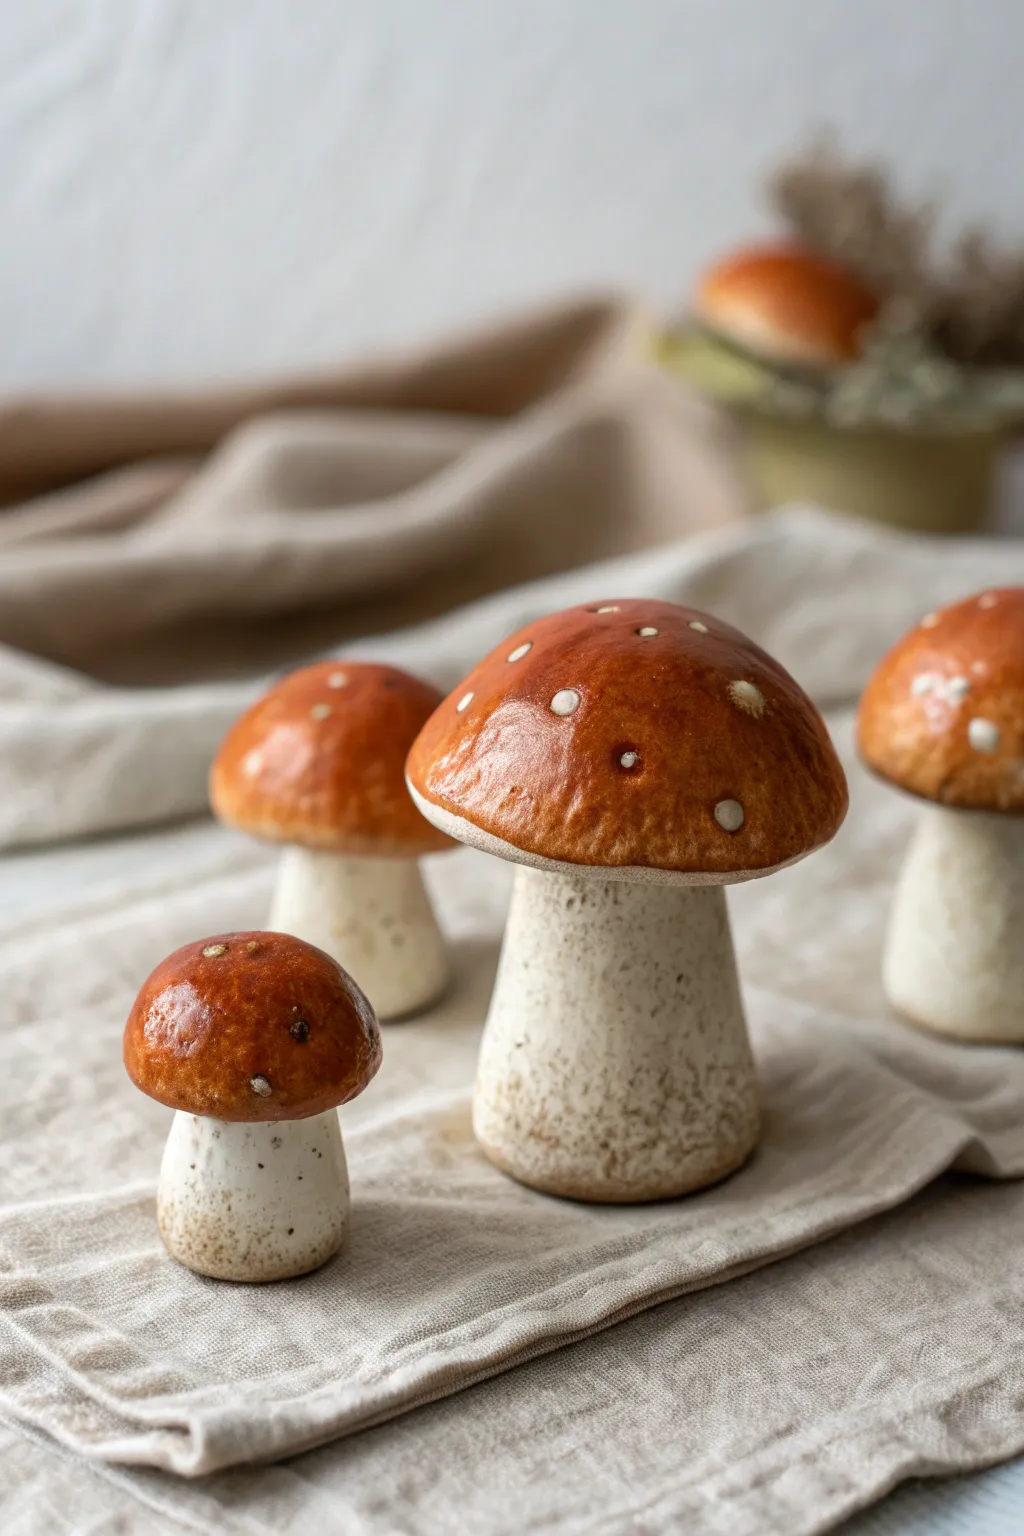
These charming ceramic mushrooms capture the earthy elegance of boletus fungi with their glossy, speckled caps and sturdy, textured stems. Using simple pinch pot techniques and thoughtful glazing, you can create a forest floor arrangement that feels both whimsical and grounded.
Step-by-Step Guide
Materials
- Stoneware clay (smooth or lightly grogged)
- Pottery wheel (optional, for stems)
- Scoring tool or fork
- Slip (clay and water slurry)
- Underglazes: Dark brown, white, tan
- Clear glossy glaze
- Sponge
- Needle tool
- Modeling tool or old toothbrush
- Kiln
Step 1: Forming the Stems
-
Shape the base:
Begin with a ball of clay roughly the size of a plum. Roll it into a thick cylinder, slightly wider at the base than at the top to mimic the classic porcini or bolete stem shape. -
Refine the form:
Use your palms to smooth the sides, but don’t aim for perfection. A slight unevenness or bulge near the bottom adds organic realism. If you want hollow stems for lighter pieces, you can quickly pinch a deep hole from the bottom up. -
Add texture:
Take a stiff brush or a scoring tool and gently stipple the lower half of the stem. You want to create faint, erratic vertical marks and tiny pockmarks that resemble the surface of a wild mushroom stem. -
Flatten the top:
Gently press the top of the stem against your work surface to create a flat or slightly concave area where the cap will eventually attach. Set the stems aside to firm up to leather-hard.
Natural Variation
Don’t make them identical! Vary stem thickness and cap tilt. Real mushrooms grow toward light, so a slight curve in the stem adds life.
Step 2: Creating the Caps
-
Start the pinch pot:
Roll a second ball of clay, slightly larger than the one used for the stem. Press your thumb into the center, but stop before you get too thin. -
Open the cap:
Pinch and turn the clay to open it up into a wide, shallow bowl shape. Keep the walls relatively thick—about a quarter inch—to maintain that fleshy fungal look. -
Round the curve:
Flip the pinch pot over onto a table. Gently pat and smooth the exterior with a flexible rib or your fingers to create a seamless, convex dome. The curve should be continuous and smooth. -
Join cap to stem:
Once both pieces are leather-hard, score the top of the stem and the underside center of the cap aggressively. Apply slip to both areas. -
Secure the bond:
Press the pieces together firmly with a slight twisting motion to lock the clay particles. Use a modeling tool to smooth the seam underneath so the cap looks heavily attached, not just resting on top. -
Final shaping:
With the mushroom assembled, you can gently tap the whole piece on the table to settle it. Ensure it stands straight or at a jaunty angle if you prefer character.
Gills and Frills
Before attaching, use a needle tool to score fine lines radiating from the center of the cap’s underside to mimic gills for hidden realism.
Step 3: Glazing and Surface Detail
-
Sponge finish the stem:
After your bisque fire, wipe the stem down with a damp sponge. Apply a very thin wash of tan underglaze and wipe most of it back, leaving color only in the textured crevices to highlight the earthy details. -
Apply base cap color:
Paint the top of the cap with three even coats of a rich, reddish-brown underglaze. Extend this color just over the rim to the very edge of the underside. -
Create the spots:
While the brown underglaze is dry, use a fine-tip brush or a needle tool dipped in white underglaze to tap small, random dots onto the cap. Vary their sizes; some should be tiny specks, others distinct spots. -
Glaze application:
Apply a clear glossy glaze over the entire cap to make it look wet and fresh. Leave the stem unglazed (or use a matte clear) to maintain the contrast between the slimy cap and the dry stalk. -
Underneath details:
If you want extra detail, you can paint the underside of the cap with a very pale cream underglaze before the final clear coat, or simply leave the raw clay body showing if it’s white enough. -
Fire:
Load the mushrooms into the kiln, ensuring the glazed caps don’t touch one another. Fire to the temperature recommended for your specific clay and glaze combination.
Arranged together on a shelf or table, these ceramic fungi bring a touch of woodland magic into your home


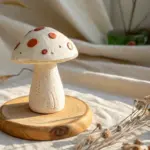
Mushroom Tealight Luminary
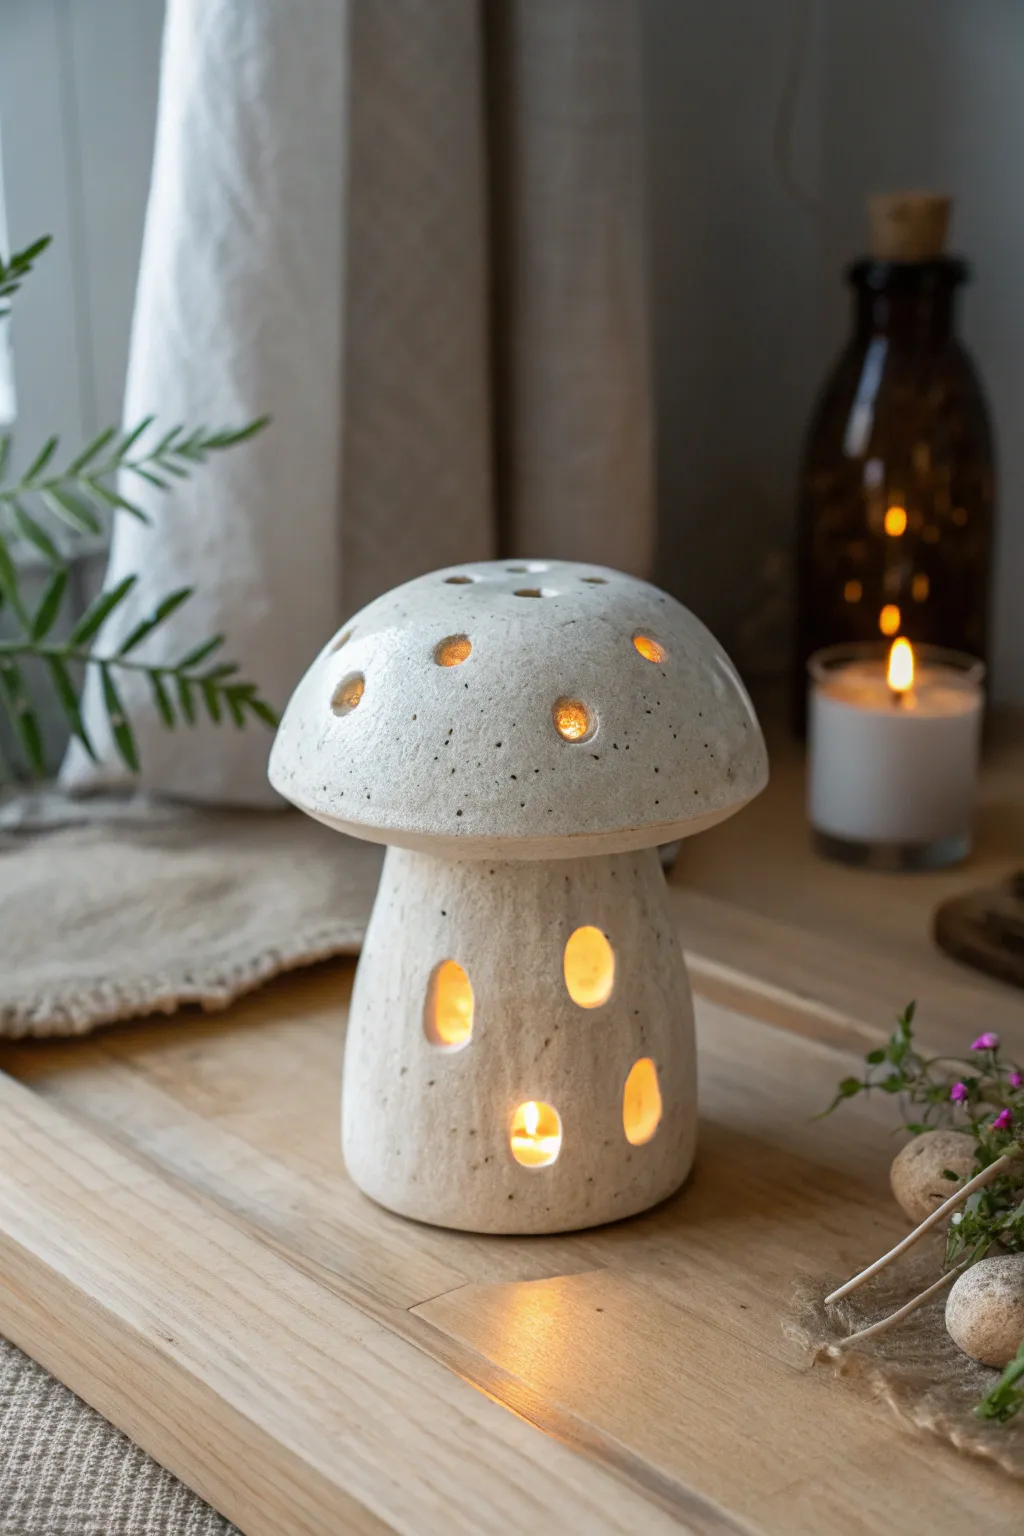
Bring a cozy woodland glow to your space with this hand-built pottery project that mimics the texture of speckled stone. This charming mushroom luminary features cutout windows that cast warm, dancing shadows when lit by a tealight.
Step-by-Step
Materials
- Stoneware clay (speckled or buff)
- Rolling pin
- Canvas work surface
- Circle cutter or template (approx. 4-5 inches)
- Fettling knife or needle tool
- Scoring tool (serrated rib)
- Slip
- Small hole cutters or a straw
- Wooden modeling tool
- Sponge
- Matte white glaze (semi-opaque)
Step 1: Forming the Stalk
-
Roll the slab:
Begin by rolling out a slab of clay to an even thickness of about 1/4 inch on your canvas. Compressed slabs are vital for structural integrity, so smooth it with a rib afterwards. -
Cut the rectangle:
Cut a rectangle from the slab measuring approximately 4 inches high and 8 inches wide. This will become the body of the mushroom stalk. -
Form the cylinder:
Stand the rectangle up and curve it into a cylinder, overlapping the ends slightly. Mark the overlap point, then score and slip both connecting surfaces thoroughly. -
Shape the stalk:
Press the seam together firmly and smooth it out inside and out so it disappears. Gently taper the cylinder slightly inward at the top to create a natural stalk shape. -
Cut the light holes:
While the clay is leather-hard but still workable, use a small oval cutter or a fettling knife to carve out random, organic-shaped windows in the stalk. Smooth the sharp edges of these cuts with a damp finger.
Step 2: Creating the Cap
-
Make a pinch pot:
Take a ball of clay about the size of an orange and begin forming a pinch pot. Press your thumb into the center and rhythmically pinch the walls while rotating the ball. -
Refine the curve:
Widen the pinch pot until it is significantly wider than your stalk cylinder. Aim for a shallow, umbrella-like curve rather than a deep bowl. -
Smooth the surface:
Turn the cap upside down on the table and gently paddle the exterior with a wooden spoon or paddle to create a smooth, rounded dome shape without finger marks. -
Perforate the cap:
Using a small hole cutter, a straw, or the back of a paintbrush, punch several holes through the top of the cap. I like to group some and scatter others for a natural look; these also serve as heat vents. -
Test the fit:
Place the cap onto the stalk to ensure the proportions look correct. The cap should overhang the stalk generously.
Clean Edges Matter
After cutting holes, let the clay firm up slightly before smoothing. Use a soft brush dipped in water to round over the cut edges for a professional finish.
Step 3: Assembly and Finishing
-
Join the parts:
Score the top rim of the stalk and the corresponding underside of the cap. Apply slip and press them together firmly. Reach inside the stalk if possible to reinforce the seam with a small coil. -
Clean the cutouts:
Once the piece is fully leather-hard, use a slightly damp sponge to go over all your cutout windows one last time to ensure no sharp burrs remain that the glaze might catch on. -
Bisque fire:
Allow the mushroom to dry slowly (covered loosely with plastic for a day or two) before letting it air dry completely. Fire to cone 04 (or your clay’s bisque temperature). -
Appy the glaze:
Dip or brush your matte white glaze onto the piece. If using a brush, apply 2-3 even coats. The key is using a glaze that breaks over texture so the clay’s speckles show through. -
Wipe the foot:
Use a wet sponge to wipe all glaze off the very bottom rim of the stalk so it doesn’t fuse to the kiln shelf. -
Final firing:
Glaze fire the piece to the maturity temperature of your clay and glaze (typically cone 5 or 6 for stoneware).
Make it Removable
Instead of joining the cap, add a small interior flange to the underside of the cap so it sits securely on the stalk but lifts off to easily insert the candle.
Place a tea light inside your finished mushroom and watch the light flicker through the speckled stone texture


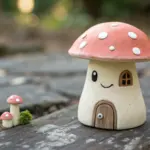
Mushroom House With Tiny Door and Windows
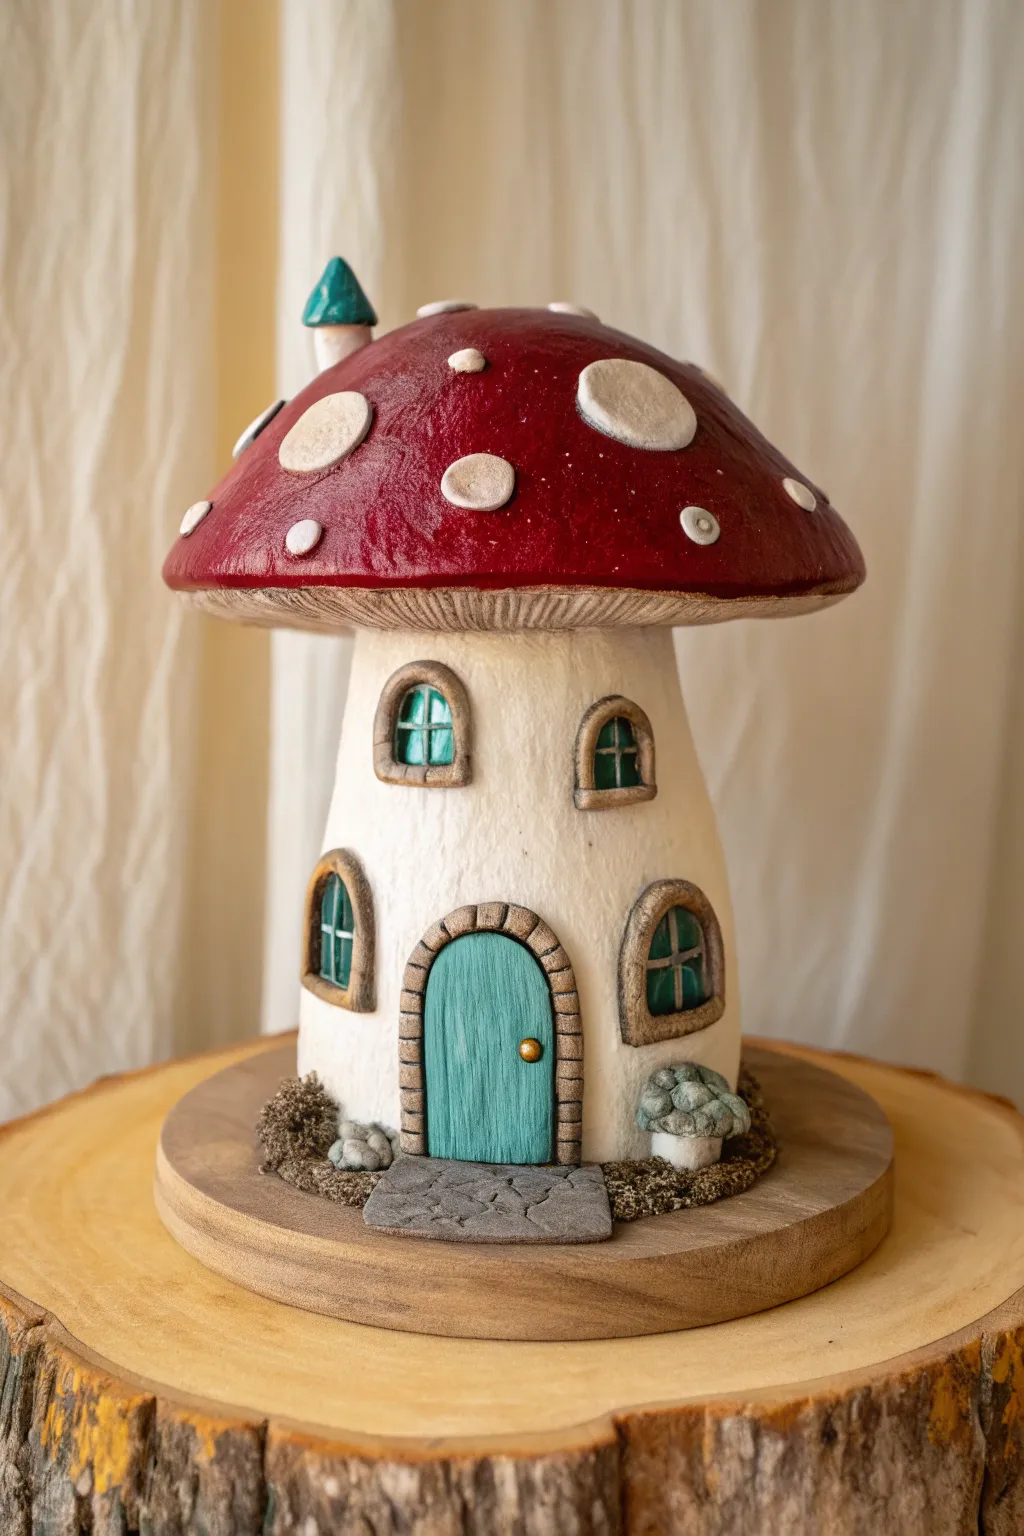
Bring a touch of fairy magic into your home with this delightful ceramic mushroom cottage, featuring a vibrant red cap speckled with white and a cozy teal door. This hand-built pottery project combines slab and pinch techniques to create a charming architectural piece perfect for garden decor or a bookshelf display.
Step-by-Step Tutorial
Materials
- White stoneware or earthenware clay
- Rolling pin and guide sticks (approx. 1/4 inch)
- Needle tool and fettling knife
- Scoring tool or serrated rib
- Slip (clay mixed with water)
- Small round cookie cutters or bottle caps
- Underglazes: Bright Red, White, Teal, Brown, Dark Grey
- Clear glaze (optional, depending on desired finish)
- Paintbrushes (various sizes)
- Sponge
- Wooden modeling tools
Step 1: Sculpting the Stalk Base
-
Shape the main body:
Start by taking a substantial ball of clay and forming it into a thick, sturdy cylinder. Taper it slightly towards the top, creating a classic mushroom stalk shape that is wider at the bottom for stability. -
Hollow the form:
For a lighter piece that dries evenly, carefully hollow out the cylinder from the bottom using a loop tool, leaving the walls about 1/4 inch thick. Alternatively, construct the stalk using the coil method, smoothing the coils together as you build up. -
Add surface texture:
Using a serrated rib or a stiff brush, scratch vertical texture lines into the surface of the stalk. This mimics the organic look of mushroom skin or stucco walls.
Step 2: Forming the Cap
-
Pinch pot cap:
Create a large pinch pot for the mushroom cap. Start with a ball of clay and press your thumb into the center, pinching and rotating to expand the walls until you have a wide, shallow bowl shape. -
Refine the curve:
Turn the pinch pot upside down on a flat surface and gently paddle it to create a smooth, domed curve. Ensure the diameter is significantly wider than your stalk base for that charming overhang. -
Detail the underside:
Flip the cap over and use a needle tool or a modeling tool to carve fine, radiating lines from the center to the edge on the underside, simulating mushroom gills. -
Create the chimney:
Roll a tiny cylinder of clay and a minuscule cone for a roof. Attach the cone to the cylinder, then attach this tiny chimney to the side of the main mushroom cap using the score and slip method.
Cracking Support
To prevent the heavy cap from sagging while joining, crumple a ball of newspaper and stuff it inside the top of the stalk to support the cap’s weight until the clay stiffens.
Step 3: Adding Architectural Details
-
Construct the door:
Roll out a small slab of clay and cut an arched door shape. Score and slip it onto the base of the stalk. Add a tiny ball of clay for the doorknob. -
Frame the door:
Roll a thin coil of clay and flatten it slightly. Attach it around the door arch to create a stone frame. Use a needle tool to impress lines into the frame, making it look like individual stones. -
Add windows:
Cut out four small arched shapes for windows—two for the lower level and two for the upper level. Attach them to the stalk. Roll tiny threads of clay to create the cross-mullions on the window panes. -
Window frames:
Similar to the door, frame each window with a small flattened coil of clay to give them depth and a finished cottage look. -
The welcoming step:
Create a small, flat trapezoid of clay and attach it directly in front of the door. Texture it to look like flagstone paving. -
Add spots:
Roll out a very thin slab and cut irregular circles or ovals. Attach these raised spots randomly over the roof of the mushroom cap using slip.
Mossy Level Up
After the final firing, glue dried preserved moss or faux craft moss around the base of the stalk and near the paving stones to make the cottage feel truly rooted in a forest.
Step 4: Assembly and Decoration
-
Attach cap to stalk:
Heavily score the top of the stalk and the center underside of the cap. Apply slip generosity and press the parts together firmly. Blend the clay at the seam on the inside if possible, or create a reinforcing coil underneath where the stalk meets the cap. -
Dry slowly:
Cover the piece loosely with plastic to ensure slow, even drying. This is crucial to prevent the heavy cap from cracking the stalk or warping. Let it dry until bone dry. -
Bisque fire:
Fire the piece to cone 04 (or your clay’s specific bisque temperature). -
Base painting:
Apply 3 coats of bright red underglaze to the mushroom cap, avoiding the raised spots. Paint the stalk a creamy white or light beige. -
Detail painting:
Paint the raised spots white. Use a rich teal underglaze for the door and window panes. Paint the stone frames around the door and windows with a light brown, wiping it back slightly to highlight the texture. -
Final touches:
Paint the chimney teal to match the door. Add a gold or brass color to the doorknob. Finish with a clear glaze if you want a glossy look, or leave the stalk matte for contrast.
Place your finished cottage on a wooden slice or among your houseplants for a hidden world effect

The Complete Guide to Pottery Troubleshooting
Uncover the most common ceramic mistakes—from cracking clay to failed glazes—and learn how to fix them fast.
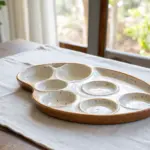
Mushroom Planter for Succulents
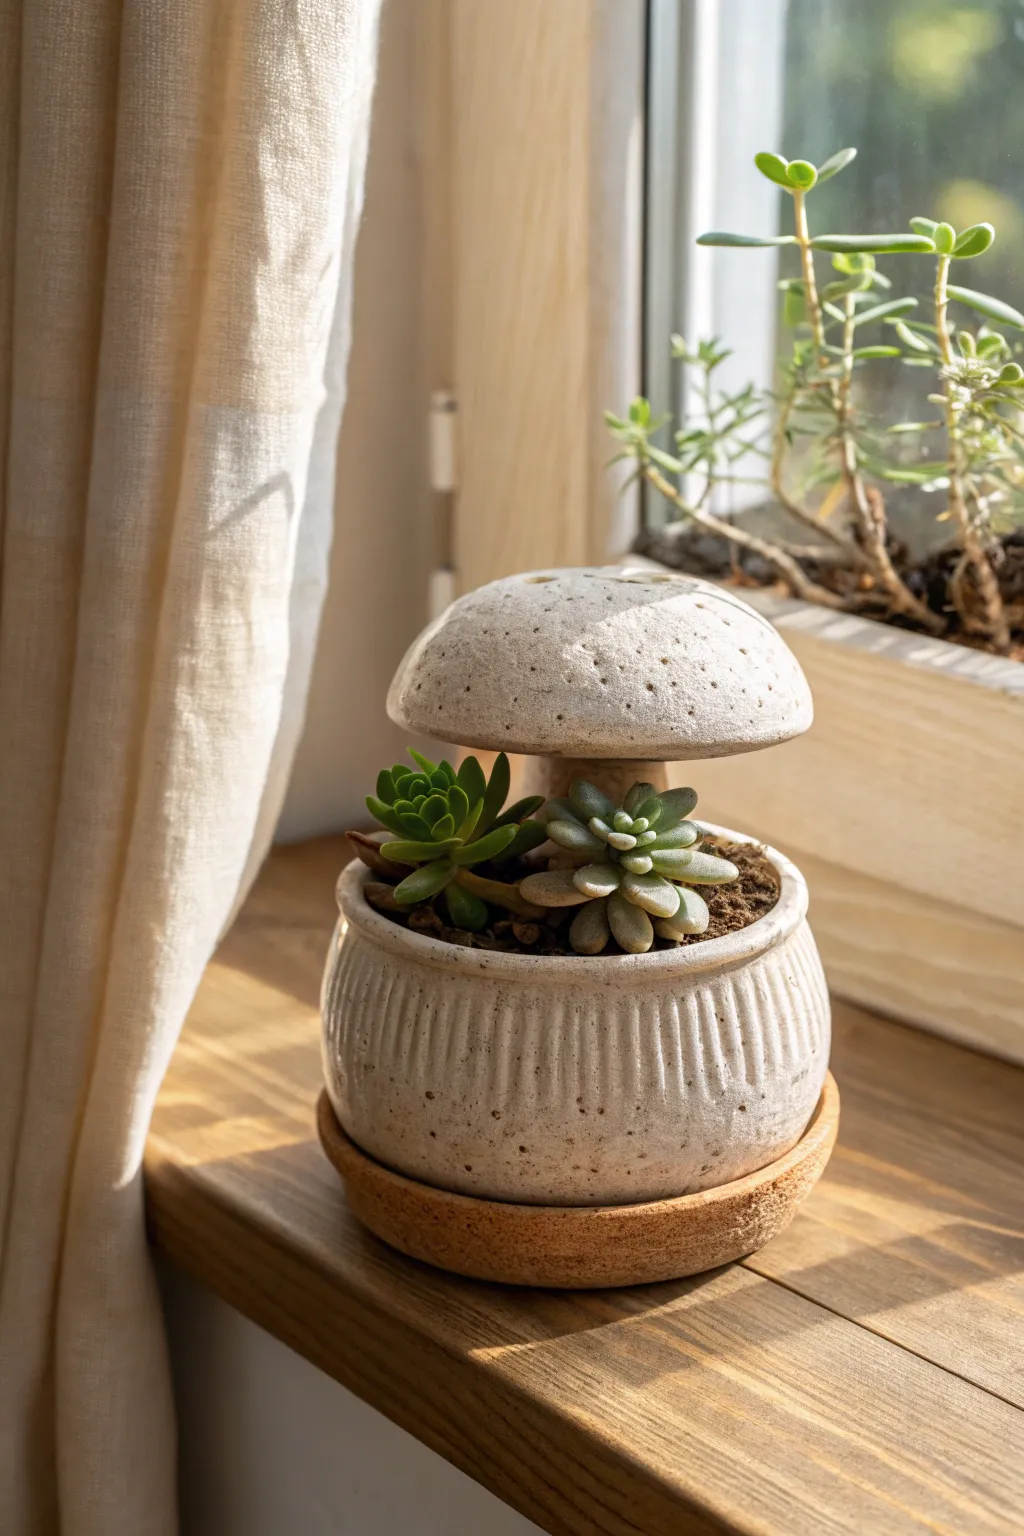
This whimsical ceramic project combines function and fantasy, creating a cozy home for your favorite small succulents. The two-piece design features a ribbed bowl base and a removable mushroom cap that offers partial shade, all finished in a lovely speckled cream glaze.
Step-by-Step Guide
Materials
- Speckled stoneware clay (approx. 2-3 lbs)
- Pottery wheel (or can be hand-built with coils)
- Rib tool (wooden or metal)
- Needle tool
- Trimming tools
- Sponge
- Wire cutter
- Creamy white dipping glaze
- Ceramic kiln
- Small succulents and cactus soil
Step 1: Throwing the Base Bowl
-
Center the clay:
Start with about 1.5 lbs of wedged speckled clay on your wheel. Center it firmly, creating a low, wide puck shape. -
Open and widen:
Open the clay down to the bat, leaving about a half-inch floor thickness. Pull the floor out until it’s about 4-5 inches in diameter to ensure plenty of room for roots. -
Raise the walls:
Pull up the walls to form a rounded, bulbous bowl shape. You want the rim to curve slightly inward to hold the soil securely. -
Add texture:
While the wheel is spinning slowly, press a carving tool or the edge of a credit card vertically against the outside walls to create the gentle, repetitive vertical ridges seen in the reference. -
Create the central support:
This is crucial: Using a surplus lump of clay in the center of the bowl’s floor (or attaching a thick coil after throwing), create a solid central column that rises slightly higher than the rim. This will hold the mushroom cap.
Pro Tip: Wobble Proofing
Make the central stem’s top slightly concave and the cap’s underside connection slightly convex (like a ball and socket) so the cap can tilt without falling off.
Step 2: Creating the Cap
-
Throw the cap:
With the remaining clay, throw a shallow, inverted bowl shape. This will be the mushroom cap top. Keep the curve gentle and organic. -
Refine the rim:
Use a sponge to round off the rim of the cap so it looks soft and not sharp. I like to leave it just slightly imperfect to mimic nature. -
Check the fit:
Use calipers to measure the central column on your base. Ensure the underside of your cap has a corresponding attachment point or hollow that will sit securely on that column.
Level Up: Saucer Style
Use a warm, textured stoneware clay and hand-build a matching saucer using a slab roller. Leave the rim raw and unglazed for a beautiful earthy contrast.
Step 3: Trimming and Assembly
-
Dry to leather hard:
Let both pieces dry to a leather-hard state. They should be firm enough to handle without deforming but still cool to the touch. -
Trim the base:
Flip the bowl base over and trim a neat foot ring. This lifts the piece slightly and gives it a finished look. -
Add drainage:
Use a hole cutter or drill bit to create a drainage hole in the bottom of the bowl, avoiding the central column area. -
Detail the cap:
Flip the mushroom cap and trim the underside. You can also press small indentations or use a needle tool on the top surface to simulate natural mushroom pores or texture.
Step 4: Glazing and Finishing
-
Bisque fire:
Fire both pieces in the kiln to cone 04 (or your clay body’s bisque temperature). -
Apply glaze:
Dip both the base and the cap into a creamy white glaze. The key here is a glaze that is translucent enough to let the clay’s natural speckles show through. -
Wipe the foot:
Thoroughly wipe the glaze off the foot of the bowl and the contact point between the cap and the stem to prevent them from fusing during firing. -
Glaze fire:
Fire the pieces to maturity (likely cone 5 or 6 for stoneware). Make sure the cap is fired separately on a stilt or shelf, not on the base. -
Planting:
Once cool, fill the base with cactus soil. Nestle your succulents around the central column, then gently place the ceramic cap on top to complete the look.
Now you have an adorable functional sculpture that brings a touch of forest magic to your windowsill
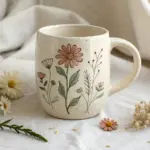
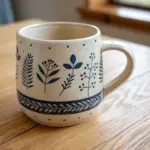
Mushroom Mug With 3D Appliqués
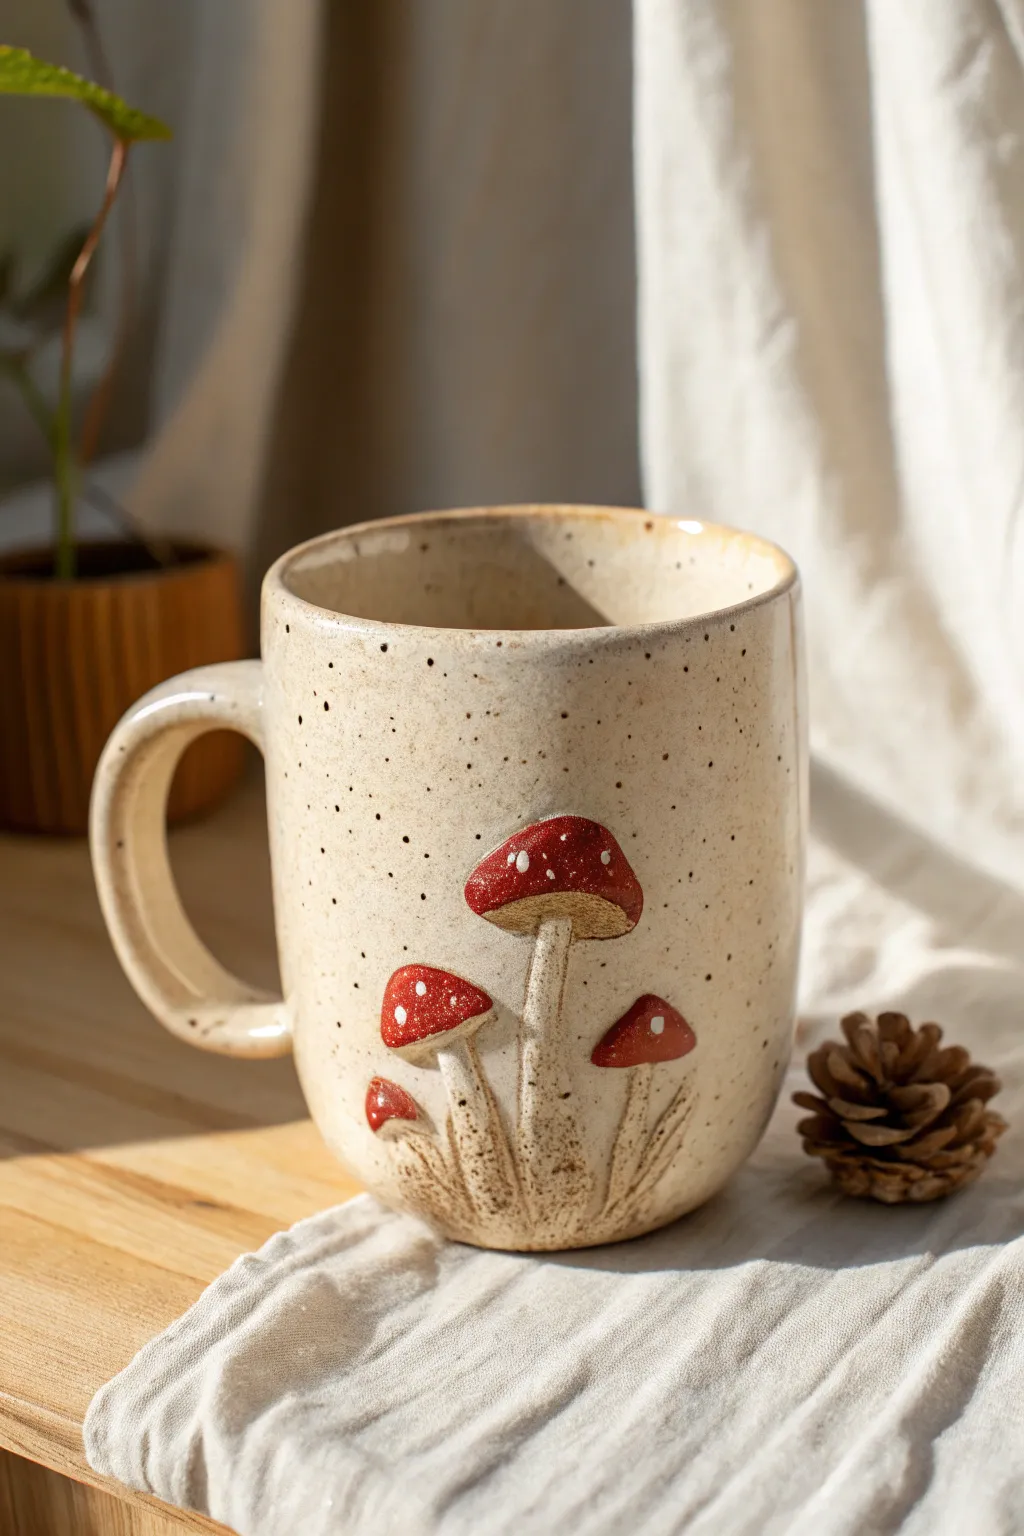
This charming ceramic mug features a wheel-thrown body with delicate, hand-sculpted mushroom appliqués that pop against the creamy, speckled clay. The playful 3D effect brings a touch of whimsy to your morning coffee routine, combining functional pottery with sculptural detail.
Step-by-Step
Materials
- Speckled buff stoneware clay
- Pottery wheel
- Trimming tools
- Needle tool
- Scoring tool (serrated rib or needle)
- Slip (made from the same clay body)
- Small painting brushes
- Red underglaze
- White underglaze
- Clear glossy glaze
- Kiln
Step 1: Throwing the Body
-
Prepare the clay:
Begin by thoroughly wedging about 1 to 1.5 lbs of speckled buff clay to remove air bubbles. -
Center and open:
Center the clay on your wheel head and open it up, creating a flat bottom about 3 inches wide. -
Pull the walls:
Pull the walls up vertically to form a simple cylinder. Aim for a height of about 4-5 inches, keeping a slightly thicker rim for durability. -
Shape the vessel:
Gently gently belly out the form slightly if desired, or keep the walls straight like the reference image. Smooth the rim with a chamois. -
Cut and dry:
Wire the mug off the wheel head and set it aside until it reaches leather-hard consistency.
Step 2: Trimming and Handle
-
Trim the foot:
Once leather hard, center the mug upside down on the wheel and trim the excess weight from the bottom, carving a neat foot ring. -
Pull a handle:
Pull a strap of clay for the handle. Shape it into a classic C-curve that complements the straight sides of your mug. -
Attach the handle:
Score and slip the attachment points on both the mug and the handle. Press firm to attach, smooth the seams, and verify the alignment.
Cracking Stems?
If delicate stems crack while drying, cover the appliqués with wax resist immediately after attaching to slow down their drying speed.
Step 3: Sculpting the Mushrooms
-
Form the stems:
Roll out four tiny coils of clay for the mushroom stems. Vary the heights slightly for a natural look, tapering them thicker at the base and thinner at the top. -
Attach the stems:
Score the surface of the mug near the base. Apply slip and press the stems onto the mug. Use a modeling tool to blend the bottom of the stems into the mug wall, creating a texture that looks like roots or grass. -
Create the caps:
Roll four small balls of clay and flatten them into domes. Shape them to look like classic mushroom caps—some slightly flatter, some more rounded. -
Attach the caps:
Score the tops of the attached stems and the underside of the caps. Slip and press them firmly together. I prefer to smooth the underside seam to ensure they don’t pop off during firing. -
Add texture:
Use a needle tool or small sculpting tool to scratch vertical lines into the stems and the ‘grassy’ area at the base for organic texture.
Forest Floor Texture
Press real moss or bark into the clay at the base of the stems before attaching to imprint authentic nature textures.
Step 4: Glazing and Firing
-
Bisque fire:
Allow the mug to dry completely (bone dry) before loading it into the kiln for a bisque fire (usually Cone 04). -
Paint the caps:
Apply 2-3 coats of bright red underglaze specifically to the mushroom caps. Let each coat dry before adding the next. -
Add the dots:
Using a fine-point brush or a slip trailer, carefully dot white underglaze onto the red caps. -
Glaze the mug:
Dip the entire mug into a clear glossy glaze. This will seal the clay and allow the natural speckles of the clay body to shine through. -
Final fire:
Wipe the foot ring clean and fire the mug to maturity (usually Cone 5 or 6, depending on your clay body).
Now brew your favorite tea and enjoy the woodland vibes of your new handmade mug


What Really Happens Inside the Kiln
Learn how time and temperature work together inside the kiln to transform clay into durable ceramic.
Mushroom Trinket Dish With Spore Prints
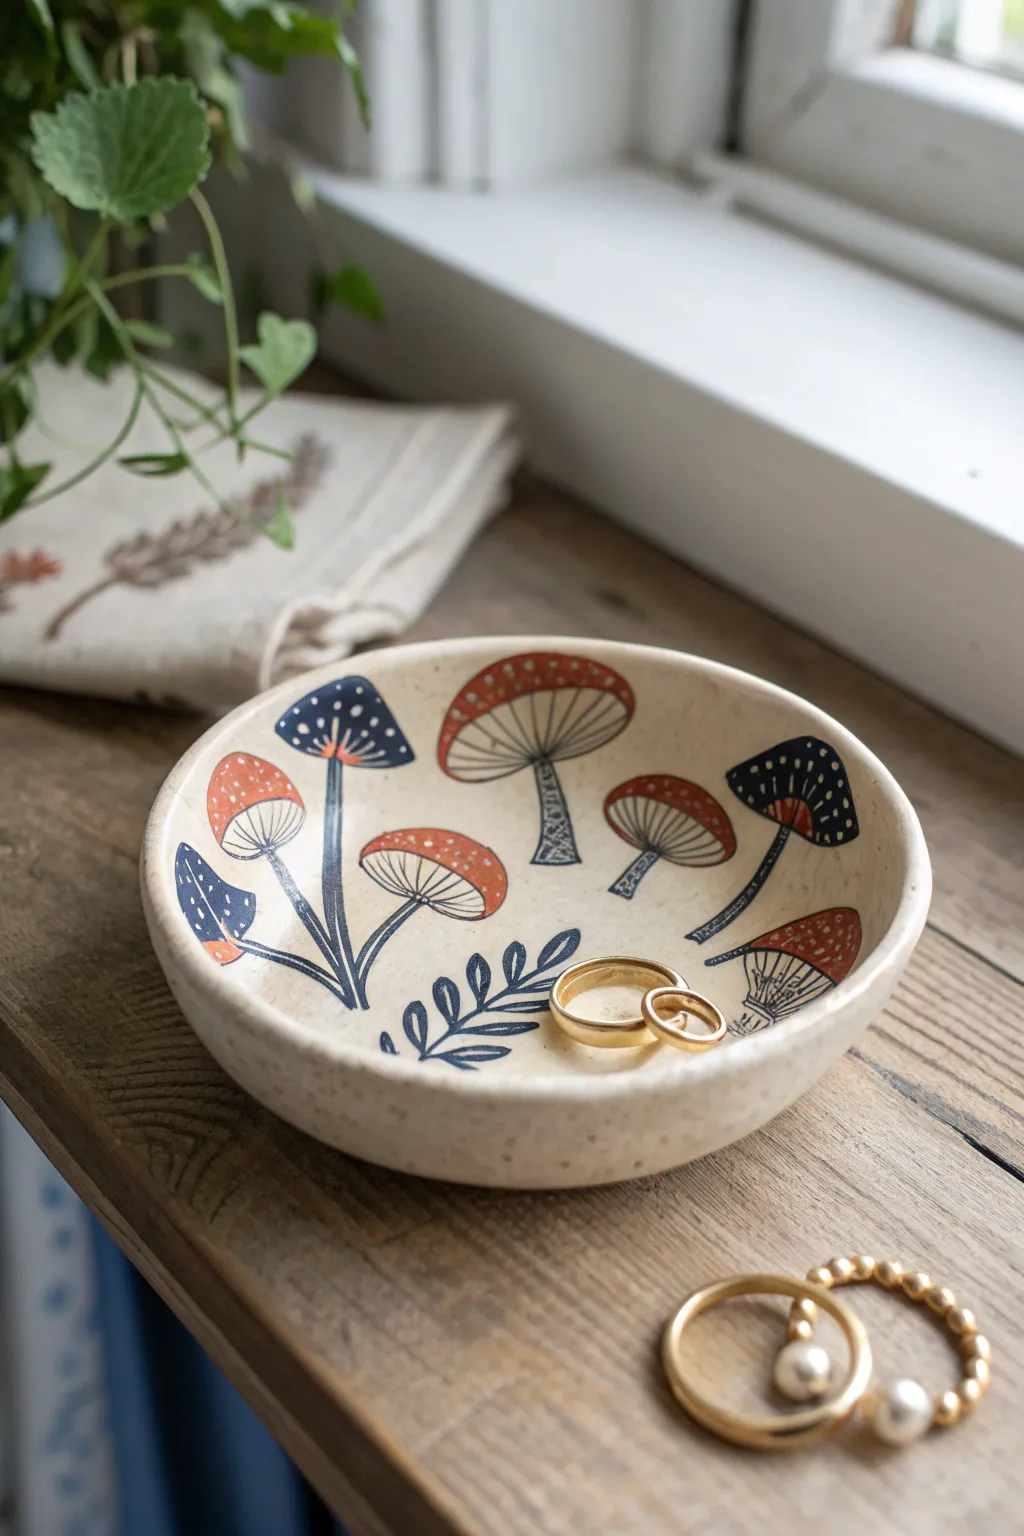
Capture the charm of a woodland walk with this handcrafted trinket dish featuring whimsical mushroom illustrations. The speckled clay body provides an earthy canvas for the deep navy and rustic red fungi, making it a perfect spot for your daily treasures.
Step-by-Step
Materials
- Speckled stoneware clay (approx. 1 lb)
- Pottery wheel (or slab roller for hand-building)
- Rib tool
- Sponge
- Trimming tools
- Underglaze (Navy Blue and Rust/Terracotta)
- Fine detail brushes (liner and round #1)
- Clear matte or satin glaze
- Kiln
Step 1: Forming the Dish
-
Prepare the Clay:
Wedge your speckled stoneware clay thoroughly to remove air bubbles and ensure an even consistency. A well-wedged ball of clay is the foundation of a centered pot. -
Center and Open:
Secure the clay ball to the wheel head and center it. Open the clay up relatively wide, as we are making a shallow dish rather than a tall cup. -
Pull the Floor:
Compress the floor of the dish with your fingers or a rib tool. Since this is for jewelry, a smooth, flat-ish curve is ideal so rings don’t slide around too much. -
Shape the Walls:
Pull up the walls gently, keeping them low. Aim for a height of about 1.5 to 2 inches. Gently curve the rim outward to create an open, welcoming bowl shape. -
Smooth the Rim:
Using a chamois or a wet sponge, compress and round off the rim. This ensures the edge is pleasant to touch and durable against chipping. -
Wire Off:
Run a wire tool under the base of the pot to separate it from the wheel head, then set it aside on a bat to dry to a leather-hard state.
Steady Hand Trick
Rest your painting hand’s pinky finger on the rim of the bowl while painting the center. It acts as an anchor for intricate gill lines.
Step 2: Trimming and Decorating
-
Trim the Foot:
Once leather-hard, center the dish upside down on the wheel. Trim away excess clay from the bottom to create a neat foot ring, defining the dish’s profile. -
Sketch the Layout:
Turn the pot right-side up. Lightly sketch your mushroom placement with a pencil. The graphite will burn off in the kiln, so don’t worry about being messy. -
Paint Cap Outlines:
Using your rust-colored underglaze and a round brush, paint the semi-circular shapes for the mushroom caps. Vary the sizes and angles for a natural, organic look. -
Paint Stems and Details:
Switch to the navy blue underglaze and a fine liner brush. Paint the stems, connecting them to the caps. Add some navy mushroom caps as well for contrast. -
Add Gill Lines:
With the finest brush tip and navy underglaze, carefully draw the gills under the caps. Use thin, radiating lines that start at the stem connection point and fan out. -
Dot the Caps:
Clean your brush or use a dotting tool. Dip into the bare clay slip or a white underglaze (if your clay is dark) and add tiny dots to the tops of the rust-colored caps. -
Incorporate Foliage:
Fill in the negative space by painting a simple fern frond or leafy sprig near the bottom center using the navy underglaze. -
Bisque Fire:
Allow the piece to dry completely until bone dry. Load it into the kiln for a bisque fire (typically Cone 04) to harden the clay and set the underglaze.
Step 3: Glaxing and Finishing
-
Apply Clear Glaze:
Wipe the bisque-fired piece with a damp sponge to remove dust. dip the entire dish into a clear matte or satin glaze. Shake gently to remove excess drips. -
Clean the Foot:
Use a sponge to wipe any glaze off the foot ring you trimmed earlier. This prevents the pot from fusing to the kiln shelf. -
Glaze Fire:
Fire the piece again to the final temperature required for your specific clay body (e.g., Cone 5 or 6). This vitrifies the clay and makes the glaze glass-like. -
Cool and Inspect:
Let the kiln cool naturally before opening. Remove your dish and check that the glaze surface is smooth and the speckles from the clay are showing through clearly.
Smeared Underglaze?
If you smudge a line, wait for it to dry completely. Then, gently scratch the mistake off with a needle tool or stiff brush.
Now you have a charming little spot to keep your rings safe.
Toadstool Ring Holder
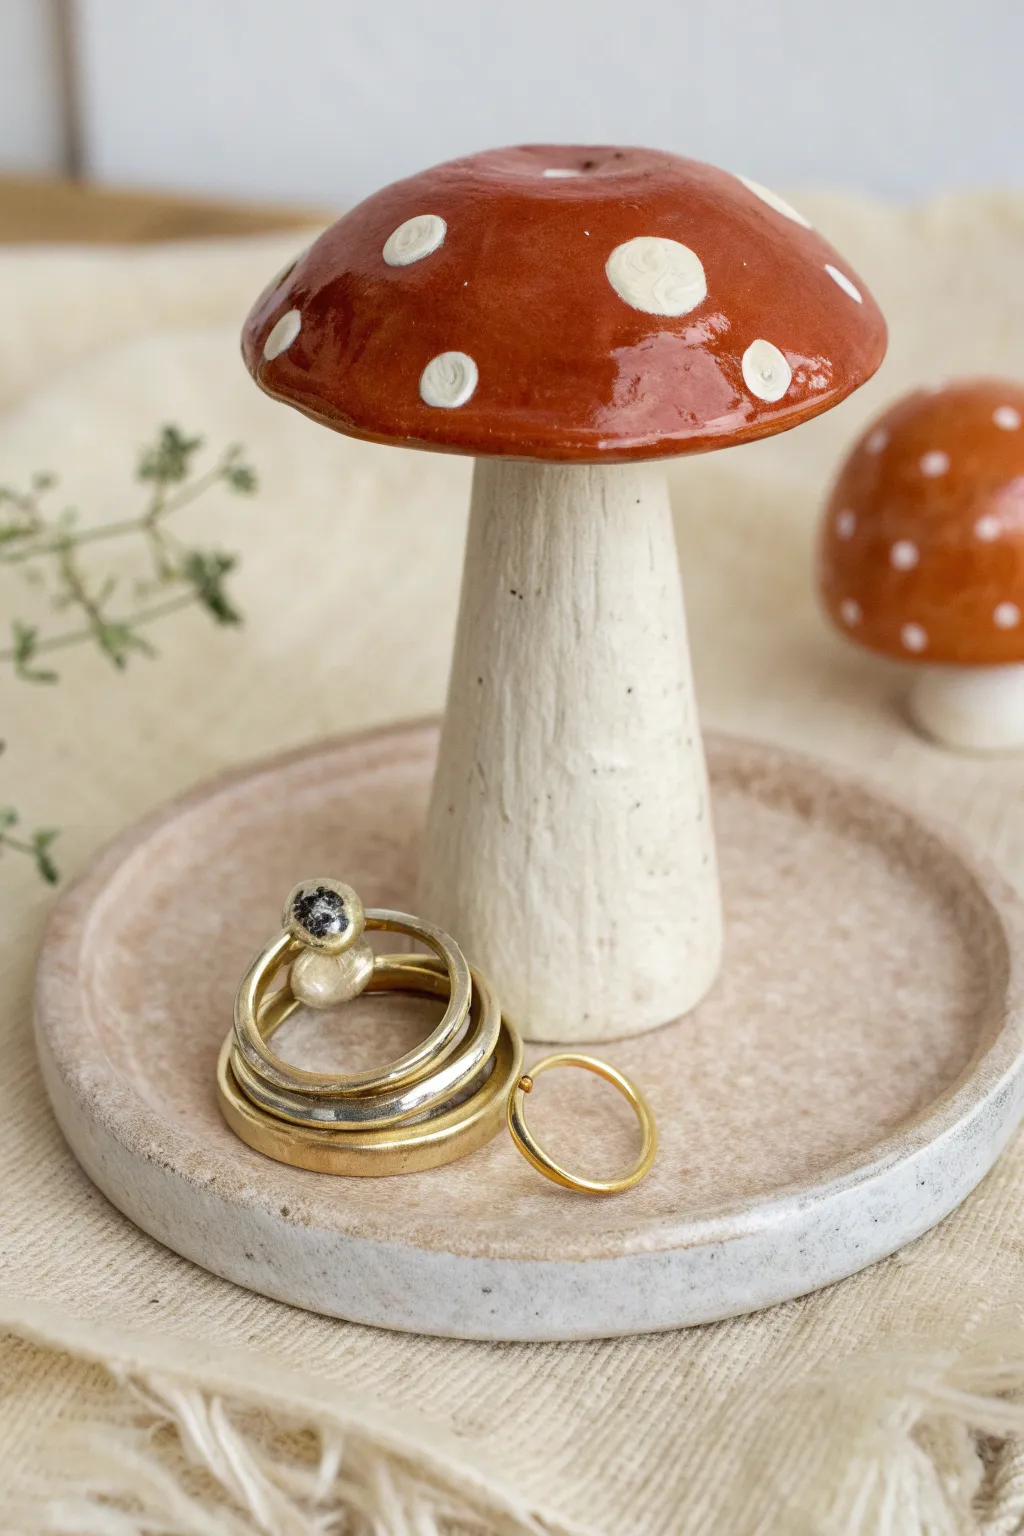
Bring a touch of the forest floor to your vanity with this charming hand-built ceramic ring holder. Featuring a speckled clay dish and a classic red-capped mushroom, it serves as both a sculptural piece and a functional spot for your favorite jewelry.
Step-by-Step
Materials
- Speckled stoneware clay (white or buff)
- Pottery wheel (optional, can be hand-built)
- Rib tool
- Pin tool or needle tool
- Sponge
- Scoring tool (or serrated kidney)
- Underglaze (Red, White)
- Clear glaze
- Base glaze (pinkish-beige or clear over speckled clay)
- Small paintbrushes
- Wire cutter
- Kiln
Step 1: Sculpting the Base Dish
-
Prepare the clay:
Start by wedging a ball of speckled stoneware clay about the size of a large orange to remove air bubbles. -
Form the slab:
Roll the clay out into a slab approximately 1/4 inch thick. Alternatively, throw a small, flat plate on the wheel. -
Cut the circle:
Use a round template or cookie cutter to cut a perfect circle, roughly 4-5 inches in diameter. -
Raise the rim:
Gently pinch up the edges of the circle to create a shallow rim. You want just enough lip to keep jewelry contained, about 1/2 inch high. -
Smooth the surface:
Use a damp sponge or a soft rib tool to smooth the interior floor of the dish perfectly flat.
Uneven Drying?
If the mushroom cap feels too heavy and causes the stem to slump while wet, prop the cap up with dry sponges or foam pieces until the clay stiffens to leather-hard.
Step 2: Forming the Mushroom Stem
-
Roll the stem coil:
Take a separate piece of clay and roll it into a thick coil for the mushroom stem. It should be slightly tapered, wider at the base and narrower at the top. -
Texture the stem:
For that realistic organic look, lightly drag a wooden tool or stiff brush vertically up the stem to create striations and bark-like texture. -
Score and slip:
Score the center of your dish and the bottom of your stem. Apply slip generously to both surfaces. -
Attach the stem:
Press the stem firmly into the center of the dish. Use a small tool to blend the clay at the seam so the connection is invisible and strong.
Level Up: Texture
Before attaching the cap, use a needle tool to scratch fine gill lines on the underside. It’s a hidden detail that makes the piece feel incredibly high-quality.
Step 3: Creating the Cap
-
Shape the cap:
Form a ball of clay and pinch it into a classic mushroom cap shape—rounded on top and slightly undercut underneath. -
Hollow carefully:
Use a loop tool to slightly hollow out the underside of the cap to reduce weight and ensure even drying. -
Attach to the stem:
Score and slip the top of the stem and the underside of the cap. wiggle the cap onto the stem to secure the bond. -
Add drainage (optional):
If you are worried about trapped air in the stem, poke a tiny, inconspicuous hole in the hidden underside of the cap. -
Bisque fire:
Let the piece dry slowly to the bone-dry stage, then load it into the kiln for a bisque firing.
Step 4: Glazing and Finishing
-
Apply base color:
Paint the stem with a white underglaze, or leave it bare if you prefer the raw clay texture shown in the photo. -
Paint the cap:
Apply 2-3 coats of bright red underglaze or glaze to the top of the mushroom cap. -
Add the dots:
Using a small round brush or a slip-trailing bottle, dab white spots onto the red cap. Vary the sizes for a natural look. -
Glaze the dish:
Apply a transparent or light pinkish-beige glaze to the interior of the dish plate. Keep the rim unglazed for a raw edge look if desired. -
Clear coat and fire:
Once the color is dry, apply a clear glaze over the mushroom cap to make it shine. Fire the piece again to your clay body’s maturation temperature.
Once fired, this piece is ready to hold your treasures and add a magical woodland vibe to your room

TRACK YOUR CERAMIC JOURNEY
Capture glaze tests, firing details, and creative progress—all in one simple printable. Make your projects easier to repeat and improve.
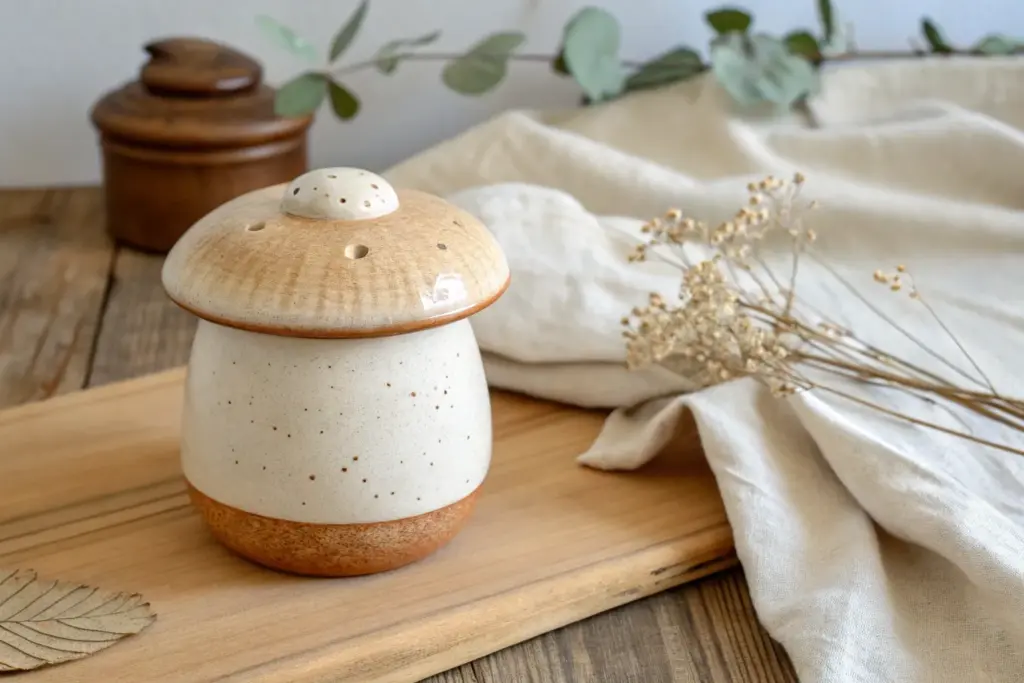
Mushroom Incense Holder
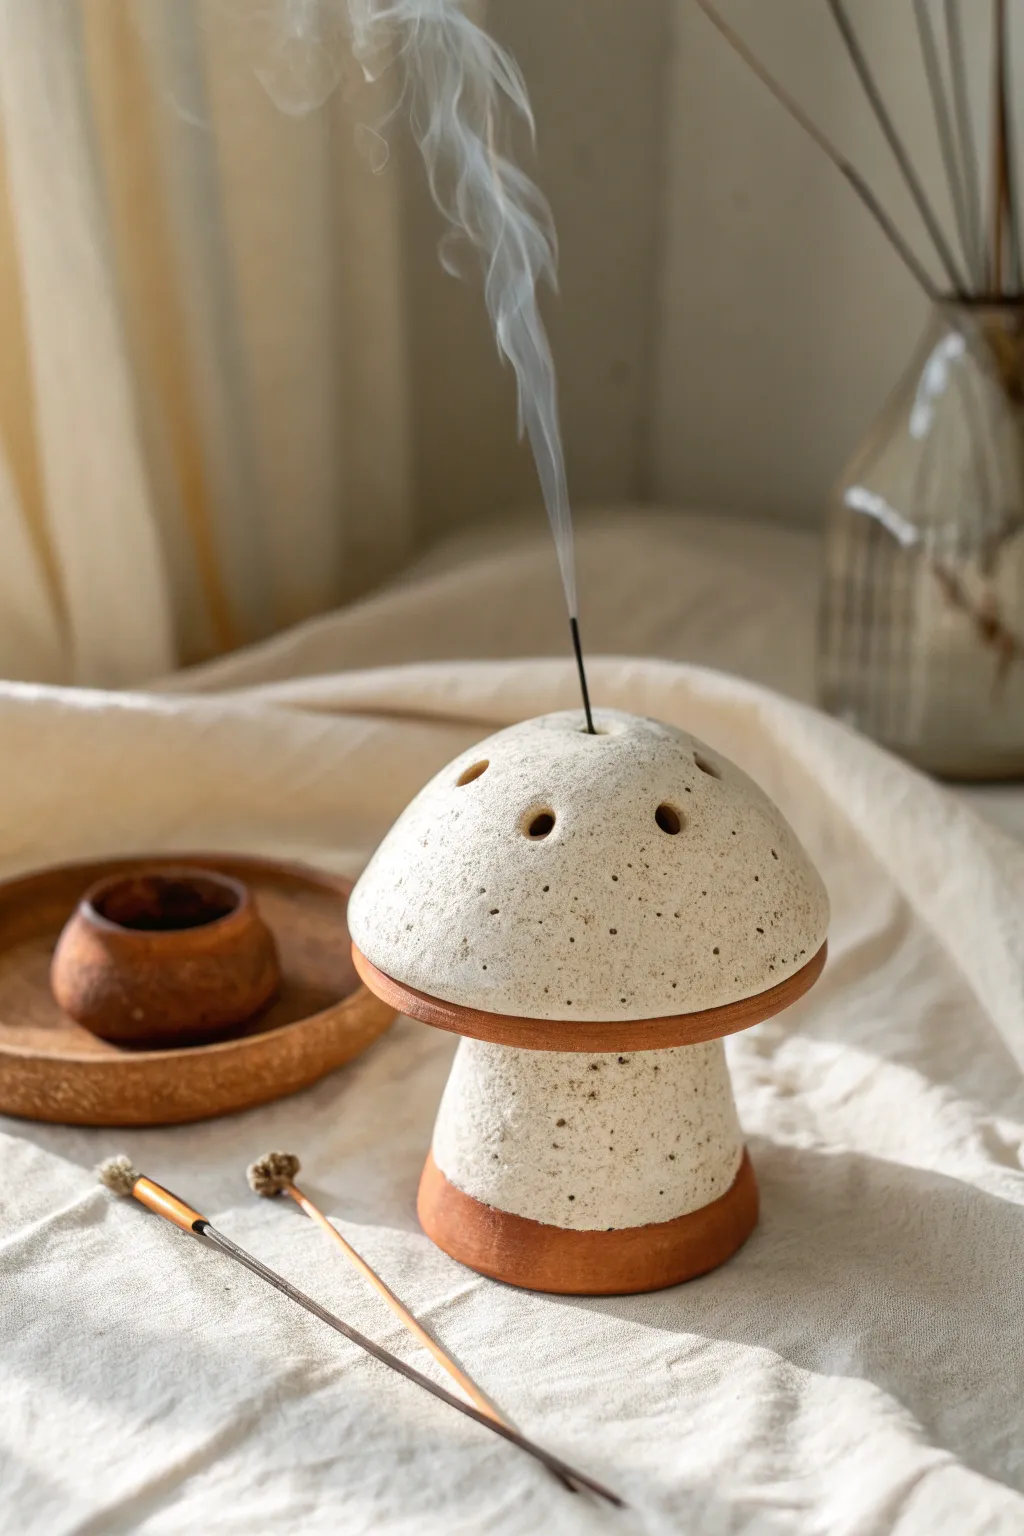
Bring a touch of forest charm into your home with this ceramic mushroom incense holder. Its natural terracotta base and freckled white cap create a cozy, organic aesthetic perfect for any relaxation corner.
Step-by-Step Guide
Materials
- Earthenware or stoneware clay (terracotta color)
- Speckled white glaze (or white glaze + speckle additive)
- Pottery wheel (optional, can be hand-built)
- Pin tool or needle tool
- Pottery sponge
- Wire cutter
- Small drill bit tool or hole punch
- Clear wax resist
- Kiln
Step 1: Forming the Stalk
-
Prepare the Clay:
Start by wedging a small ball of terracotta clay, about the size of a tangerine, to remove air bubbles and ensure consistency. -
Center and Open:
Throw the ball onto your wheel head and center it. Open up the clay down to the bat, creating a ring rather than a floor, as the bottom needs to be open for stability. -
Pull the Cylinder:
Pull the walls up to create a sturdy, slightly conical cylinder. You want it wider at the bottom for balance, tapering gently inward near the top. -
Refine the Rim:
Compress the rim of the stalk so it is smooth and flat. This area will eventually support the cap, so it needs to be level. -
Trim and Cut:
Use a wooden tool to undercut the base for a clean line. Run your wire cutter underneath and set the stalk aside to firm up to leather-hard.
Uneven Glaze Line?
If your wax line is jagged, use a fettling knife to gently scrape away dry glaze for a sharper edge before firing.
Step 2: Sculpting the Cap
-
Shape the Cap Form:
Take a slightly larger ball of clay and pinch it into a shallow bowl shape. Alternatively, throw a small bowl on the wheel and trim it later. -
Refine the Dome:
Flip the bowl over. Smooth the exterior curve with a rubber rib to create a perfect, seamless mushroom dome. -
Create Air Vents:
While the clay is leather-hard but still workable, use a hole punch or small circular cutter to create several vent holes around the upper curve of the cap. -
Make the Incense Port:
Find the exact center of the cap’s top. Use a needle tool or small drill bit to create a hole sized for a standard incense stick. Test fit a stick if you have one handy. -
Check the Fit:
Gently place the cap onto the stalk. Ensure the cap’s rim overhangs the stalk slightly, just like a real mushroom.
Glow Up
Try carving shallow grooves or using slip-trailing on the cap before glazing to add texture beneath the speckles.
Step 3: Finishing and Glazing
-
Bisque Fire:
Let both pieces dry completely. I like to dry them slowly under plastic to prevent warping. Fire them to cone 04 (or your clay’s bisque temperature). -
Apply Wax Resist:
Once bisqued, paint a careful band of wax resist around the very bottom rim of the cap and the bottom inch of the stalk’s base. -
Glaze the Cap:
Dip the cap into your speckled white glaze. The wax will keep the rim bare, creating that lovely contrast seen in the photo. -
Glaze the Stalk:
Pour glaze over the stalk or dip it, ensuring you stop right at your wax line so the terracotta base remains exposed. -
Clean Up:
Use a damp sponge to wipe away any stray glaze droplets from the waxed areas to ensure crisp, clean lines. -
Glaze Fire:
Place the pieces in the kiln, ensuring they aren’t touching. Fire to your glaze’s maturity temperature (e.g., cone 5/6).
Light your favorite scent and watch the smoke drift gently from your new creation
Mushroom Wind Chime or Hanging Mobile
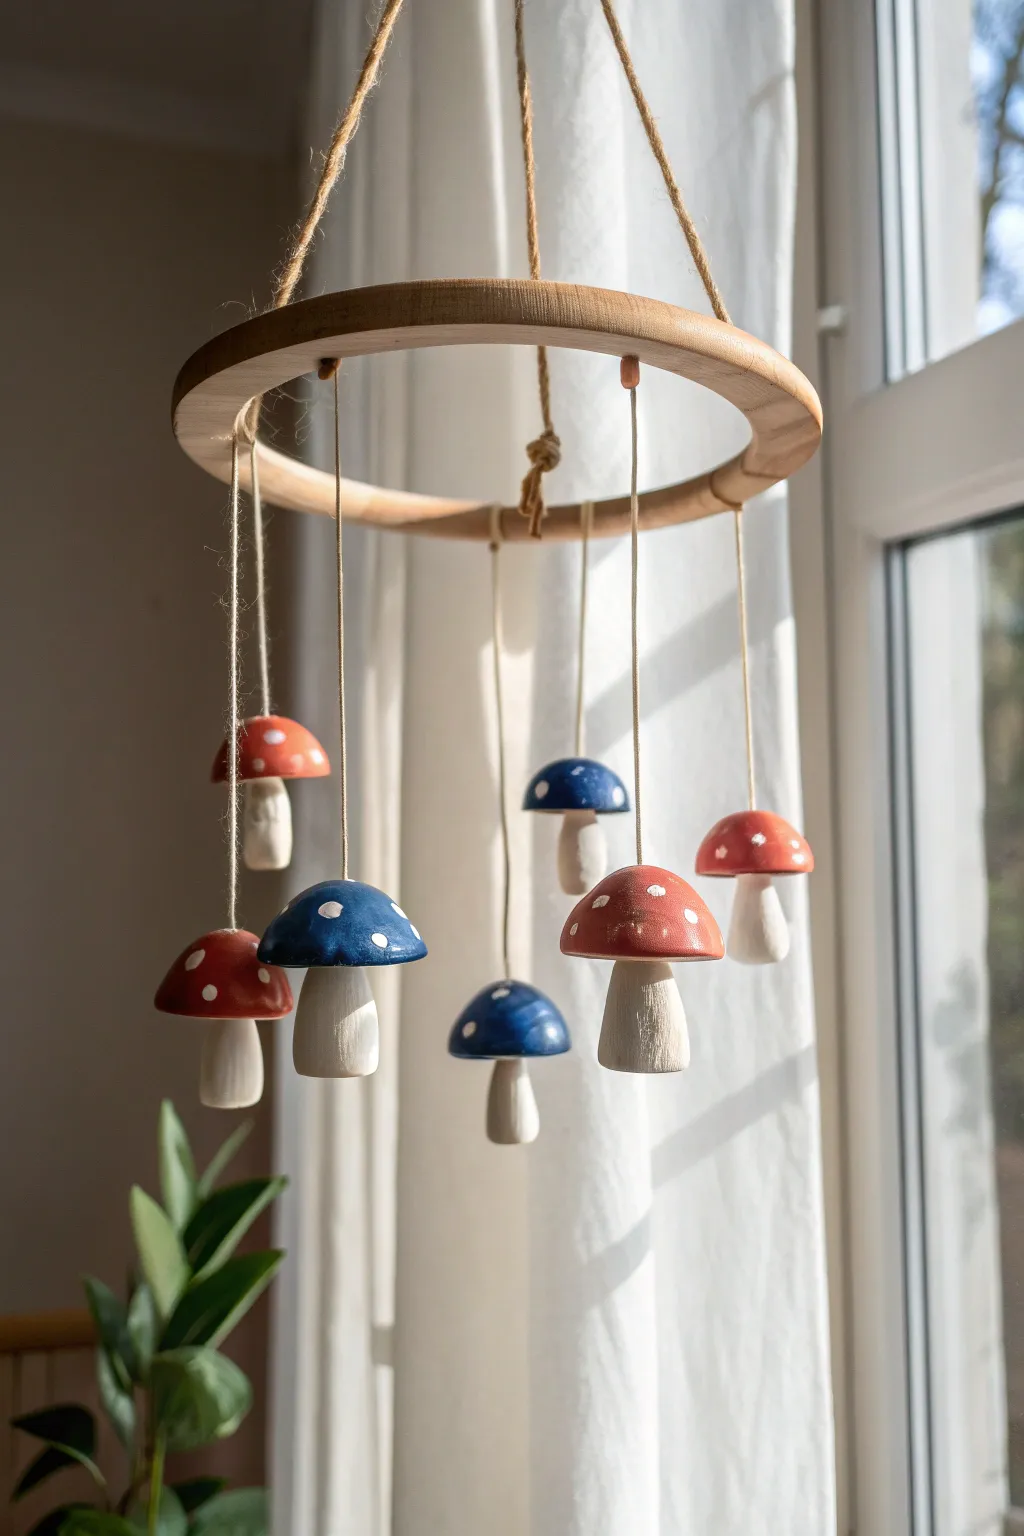
Bring a touch of forest magic indoors with this charming pottery mobile. Featuring handcrafted ceramic toadstools in striking red and deep blue, this beginner-friendly project adds a delightful kinetic element to any nursery or sunlit window.
Detailed Instructions
Materials
- Light-colored clay (earthenware or stoneware)
- Wooden hoop (approx. 8-10 inches)
- Natural jute twine or hemp cord
- Ceramic underglazes (Red, Deep Blue, White)
- Clear transparent glaze
- Small paintbrush (round size 2 or 4)
- Needle tool or toothpick
- Sponge for smoothing
- Scissors
- Kiln (or access to a firing service)
Step 1: Sculpting the Mushrooms
-
Prepare your clay:
Start by wedging your clay to remove air bubbles. Divide the clay into 7 or 8 equal portions, aiming for balls roughly the size of a walnut to keep the mobile light. -
Form the caps:
Take a portion of clay and roll it into a sphere. Gently press your thumb into the center to create a hollow dome shape, smoothing the edges as you go so the cap is rounded on top. -
Create the stems:
Roll a smaller coil of clay to form the stem. It should be slightly thicker at the base and taper very subtly toward the top where it will attach to the cap. -
Attach stem to cap:
Score the underside of the cap and the top of the stem with a needle tool. Apply a dab of slip (clay water) and press the parts together firmly. Smooth the seam with your finger or a tool so it disappears completely. -
Add the hanging hole:
This step is crucial. Using a needle tool, pierce a hole horizontally through the very top of the mushroom cap. Make sure the hole is wide enough to fit your twine even after the clay shrinks during firing. -
Repeat and refine:
Repeat this process for all your mushrooms. Vary the sizes slightly for visual interest. I like to use a damp sponge to smooth out any fingerprints before setting them aside to dry to the leather-hard stage.
Hole Sizing Tip
Twist your needle tool while creating the hanging hole to make it clean. Remember, glaze can fill small holes, so make it 20% larger than needed.
Step 2: Painting and Firing
-
Bisque fire:
Once the mushrooms are bone dry, fire them in the kiln to a bisque temperature (usually cone 04). This hardens the clay and prepares it for glazing. -
Apply base colors:
Select your red and blue underglazes. Paint the tops of the caps, carefully stopping at the rim so the stems remain the natural clay color. You will likely need 2-3 coats for solid, opaque coverage. -
Add the spots:
Dip the handle end of a paintbrush or a specialized dotting tool into white underglaze. Dot random spots onto the colored caps. Vary the pressure to create different sized speckles. -
Glaze coating:
Once the underglaze is dry, apply a coat of clear transparent glaze over the entire mushroom (cap and stem) to make them shiny and durable. -
Final firing:
Fire the pieces again according to your clay and glaze specifications (glaze firing). Ensure the holes remain clear of glaze so they don’t seal shut.
Step 3: Assembly
-
Prepare the hoop:
Cut three long pieces of jute twine to serve as the main hanger. Tie them equidistantly around the wooden hoop and knot them together at the top to create a suspension point. -
String the mushrooms:
Cut 7 or 8 lengths of twine, varying from 8 to 15 inches. Thread one end through the hole in a mushroom cap and tie a secure knot. -
Attach to hoop:
Tie the other end of each mushroom string onto the wooden hoop. Space them out evenly around the circumference, alternating between high and low hanging lengths to create a cascading effect. -
Balance check:
Lift the mobile by the top knot. If it tilts, slide the mushroom strings slightly left or right along the hoop until the weight is evenly distributed. -
Secure the knots:
Once you are happy with the placement, you can add a small dab of clear glue to the knots on the hoop to prevent them from slipping.
Uneven Hanging?
If the mobile leans, don’t re-tie everything. Simply glue a small metal washer or fishing weight to the top of the hoop on the lighter side to counterbalance.
Hang your new creation near a gentle airflow and enjoy the subtle movement of your handcrafted forest scene