When I want a project that’s crisp, colorful, and actually durable, I reach for oven-bake clay every time. Below are my go-to polymer clay ideas—starting with the classics you’ll make on repeat, then sliding into the fun, extra stuff that gets everyone in the studio asking, “How’d you do that?”
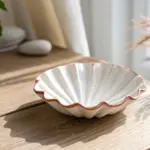
Marbled Trinket Dish

Transform simple polymer clay into a chic, high-end organizer for your favorite jewelry pieces. This tutorial guides you through creating a soft, warm-toned marbled dish that perfectly mimics the organic beauty of agate or marble stone.
Step-by-Step Tutorial
Materials
- Polymer clay (white, soft pink, peach/coral, beige)
- Acrylic rolling pin
- Medium-sized circle cutter or bowl template
- Craft knife
- Oven-safe bowl (for shaping)
- Fine-grit sandpaper (400 and 800 grit)
- Gloss glaze or polyurethane varnish
- Soft paintbrush
- Parchment paper
Step 1: Preparing the Clay
-
Condition the White Base:
Begin by taking a large chunk of white polymer clay. Knead it thoroughly in your hands until it becomes soft, pliable, and warm to the touch. This will be the bulk of your dish, so ensure it is free of cracks. -
Create Colored Snakes:
Condition smaller amounts of the pink, peach, and beige clays. Roll each color into a long, thin snake, about 4-5 inches in length. Roll a thick snake of the white clay as well. -
Combine the Colors:
Group the colored snakes together with the larger white snake. Twist them together gently like a rope to begin merging the colors. -
Fold and Twist:
Fold the twisted rope in half, then twist it again. Repeat this ‘fold and twist’ motion about 3-4 times. Be careful not to over-twist, or the colors will muddy into a single brown shade rather than distinct swirls.
Step 2: Marbling and Shaping
-
Roll into a Ball:
Once you have a nice striped rope, roll the entire mass into a smooth ball. You should already see interesting patterns emerging on the surface. -
Flatten the Clay:
Place the ball on a sheet of parchment paper. Using your acrylic rolling pin, roll the clay out into a flat slab about 1/4 inch thick. Roll in different directions to stretch the marble pattern organically. -
Check the Pattern:
Inspect your slab. If you aren’t happy with the swirl placement, you can fold it up and roll it out one more time, but remember that less is often more with marbling. -
Cut the Circle:
Place your circle cutter or an inverted bowl template over the most attractive part of the marbled pattern. Press down firmly or trace around the template with a craft knife to cut out a perfect circle. -
Smooth the Edges:
Gently run your finger along the cut edge of the clay circle to soften any sharp ridges or loose bits left by the cutting tool.
Muddy Colors?
If your colors blended into a single blob, you over-mixed. Stop twisting as soon as you see distinct striations. The rolling process will blend them further.
Step 3: Forming and Baking
-
Shape the Dish:
Carefully lift your clay circle and gently press it into the bottom of an oven-safe bowl. This will give the clay its curved, dish-like shape during baking. -
Refine the Curve:
I like to ensure the clay isn’t stuck too tightly to the bowl, so press lightly just to establish the curve, ensuring the bottom is somewhat flat so it will sit stable on a table later. -
Bake:
Bake the clay directly in the bowl according to the manufacturer’s instructions (usually 275°F/135°C for 15-30 minutes, depending on brand and thickness). -
Cool Down:
Remove the bowl from the oven and let it cool completely before attempting to pop the clay dish out. Removing it while warm can cause warping.
Add Some sparkle
Mix a small amount of gold leaf flakes or gold glitter into the translucent or white clay before twisting for a subtle, embedded shimmer.
Step 4: Finishing Touches
-
Sand the Edges:
Once cool, use a bit of water and your 400-grit sandpaper to smooth the rim of the dish. Follow up with 800-grit for a satin-smooth finish. -
Clean:
Wipe the dish down with a damp cloth to remove any sanding dust and let it dry fully. -
Glaze the Interior:
Apply a thin, even coat of gloss glaze to the top/inside of the dish using a soft brush. This brings out the vibrancy of the marble colors and adds a protective sheen. -
Paint the Rim:
For a refined look (optional), you might paint the very edge of the rim with a gold leaf paint, though the natural clay edge looks beautiful on its own as shown in the inspiration. -
Final Dry:
Allow the glaze to cure fully, usually for 24 hours, before placing any jewelry onto the surface.
Place your new creation on a nightstand to hold your treasures in style


Simple Geometric Earrings
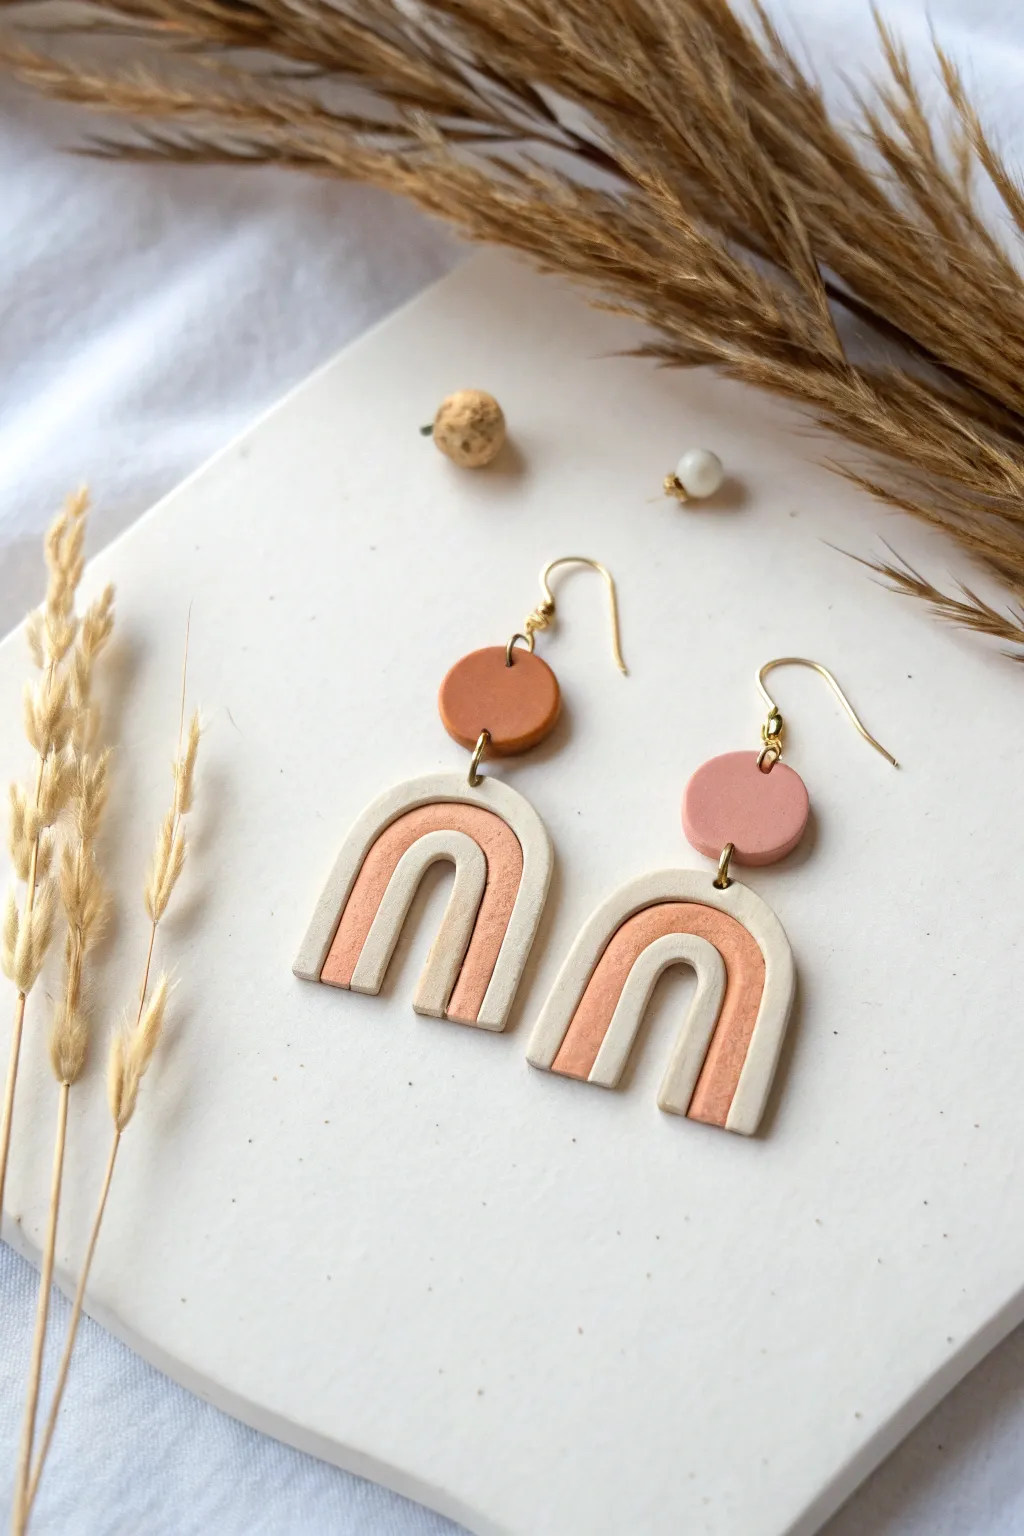
Capture the warmth of desert tones with these elegant, geometric rainbow earrings. Featuring a speckled pottery finish and earthy terracotta accents, this project combines simple shapes for a sophisticated, modern accessory.
Step-by-Step
Materials
- Polymer clay (white, beige, terracotta/rust, and peach)
- Black pepper or dried coffee grounds (for speckling)
- Acrylic roller or pasta machine
- Circle clay cutters (small for top, varying sizes for arch)
- Flexible tissue blade or craft knife
- Sandpaper (fine grit)
- Hand drill or needle tool
- Jump rings (gold)
- Earring hooks (gold)
- Jewelry pliers
- Parchment paper
Step 1: Preparing the Clay
-
Condition the clay:
Begin by kneading your white and beige clay together until soft and pliable. This warmth prevents cracking later. -
Create the stone texture:
Mix a pinch of ground black pepper or dried used coffee grounds into your white/beige mixture. Knead thoroughly until the specks are distributed evenly for that faux-stone agility. -
Roll out slabs:
Roll your speckled clay out to a thickness of about 3mm. Do the same with your terracotta and peach-colored clays, ensuring all slabs are equal thickness for a professional finish.
Sticky Situation?
If clay sticks to your cutters, dip the cutting edge in cornstarch or water before pressing down. This acts as a release agent for clean cuts.
Step 2: Shaping the Arches
-
Cut concentric arches:
Using a set of nested circle cutters or oval cutters, cut arched strips from each color. You will need a larger outer arch in speckled white, a middle arch in peach/terracotta, and a small inner arch in speckled white. -
Trim the shapes:
Use your tissue blade to cut the bottom half of your circles off, creating perfect U-shapes. Make sure the cut lines are straight and level. -
Nest the pieces:
Gently assemble the rainbow shape on your work surface by placing the peach arch inside the large speckled arch, and the small speckled arch inside the peach one. -
Bond the seams:
Lightly press the arches together sideways so they stick. I like to run a finger over the back to smooth the seams down slightly without distorting the front. -
Cut the stud tops:
From your terracotta or peach clay slab, use a small circle cutter to punch out two circles. These will connect the earring hook to the geometric drop.
Make it Shine
Coat the finished baked pieces with a thin layer of UV resin or glossy polyurethane varnish to make the terracotta colors pop and add durability.
Step 3: Baking and Assembly
-
Create holes:
Using a needle tool, carefully pierce a hole at the very top center of your main arch piece and at the bottom edge of your circular stud piece. -
Bake carefully:
Place all pieces on a parchment-lined baking sheet. Bake according to your brand of clay’s specific instructions (usually 275°F/135°C for 15-30 minutes). -
Cool down:
Allow the pieces to cool completely in the oven before removing them. This helps the clay cure fully and become durable. -
Sand edges:
Once cool, use fine-grit sandpaper to smooth any rough edges or fingerprints on the sides of the earrings for a clean look. -
Connect the pieces:
Using two pairs of jewelry pliers, twist open a jump ring. Loop it through the hole in the arch and the hole in the circle stud, then close it securely. -
Attach hooks:
Finally, attach the gold earring wire to the top of the circle stud using another jump ring, ensuring the front of the earring faces forward.
Now you have a stunning pair of handmade statement earrings ready to wear or gift


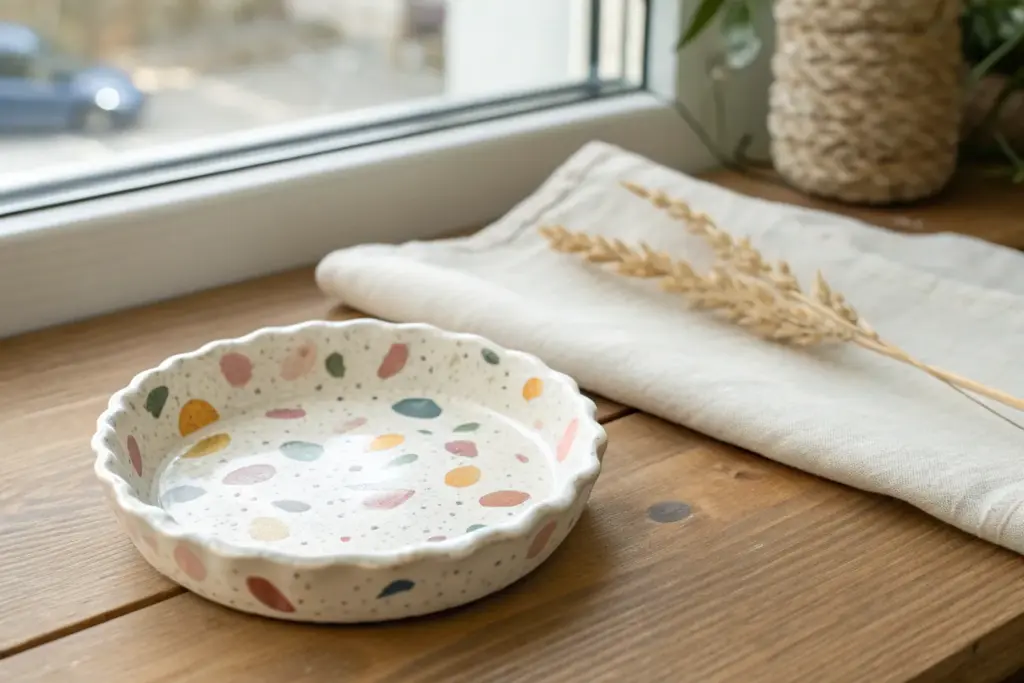
Terrazzo-Style Coasters
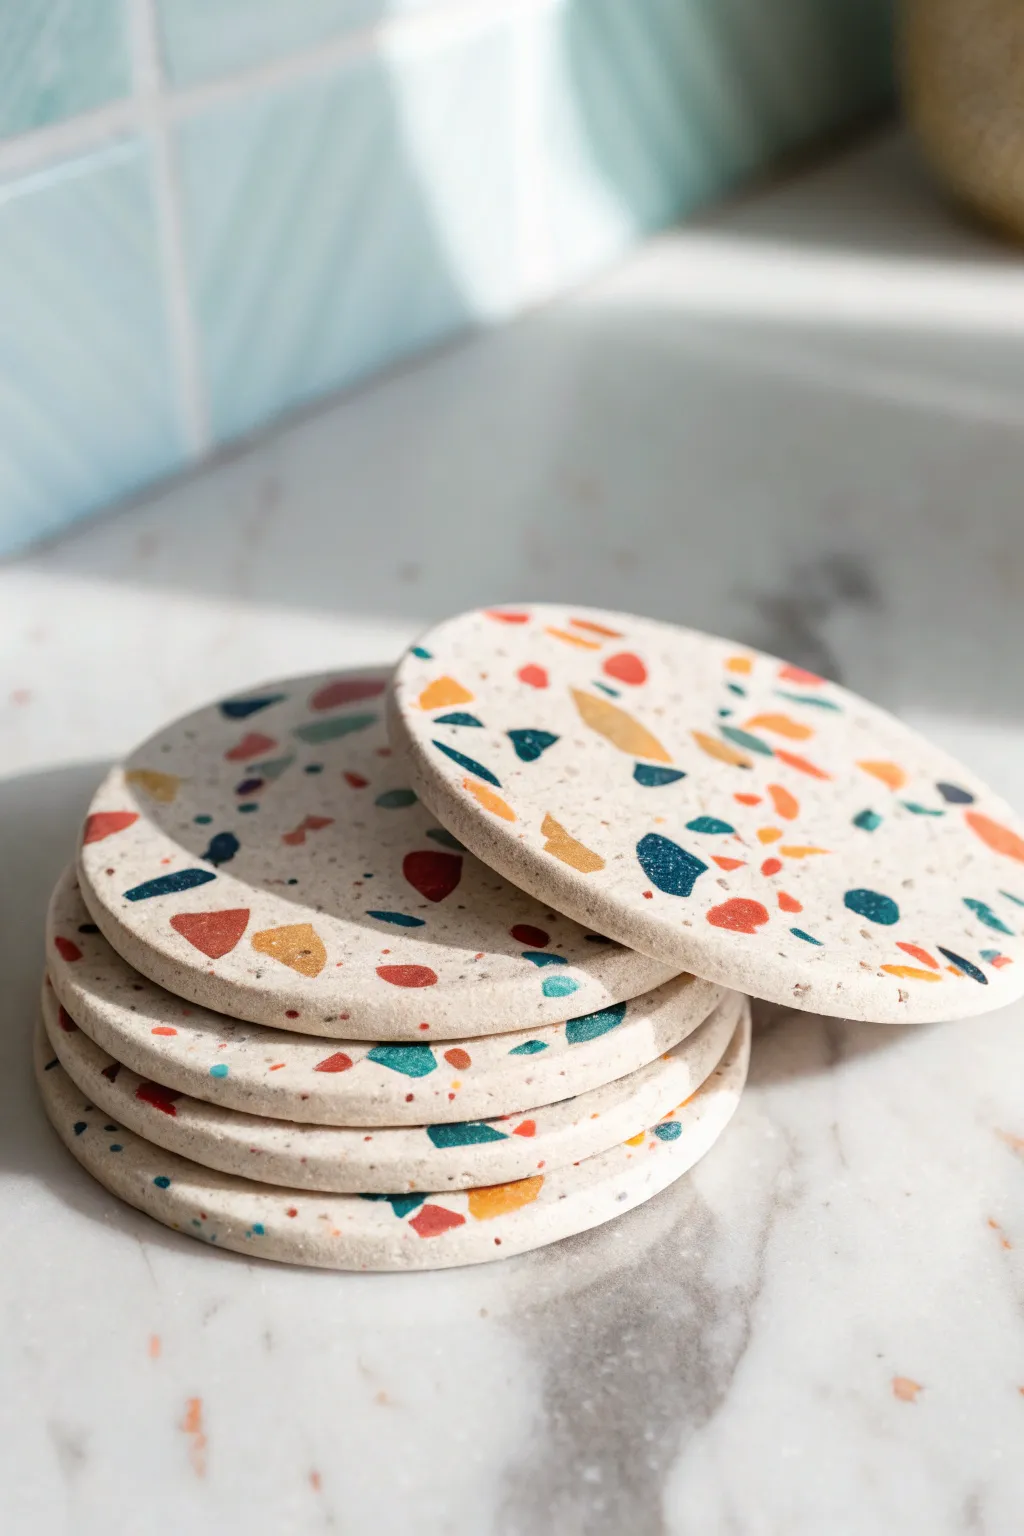
Bring the timeless elegance of Italian terrazzo into your home with these chic, speckled coasters. By embedding colorful clay fragments into a neutral base, you create a sophisticated stone effect that looks far more expensive than it actually is.
Step-by-Step
Materials
- White or cream oven-bake polymer clay (base color)
- Assorted colored polymer clay (teal, burnt orange, mustard yellow, brick red, navy)
- Acrylic rolling pin
- Round cookie cutter (approx. 4-inch diameter)
- Sharp craft knife or tissue blade
- Parchment paper or baking mat
- Fine-grit sandpaper (400, 600, and 1000 grit)
- Ceramic tile (optional, for baking)
- Heavy book (for flattening)
Step 1: Creating the Terrazzo Chips
-
Prepare accent colors:
Condition your small blocks of colored clay (teal, orange, yellow, red, navy) by kneading them until soft and pliable. -
Roll out thin sheets:
Roll each colored piece into a very thin sheet, roughly 1-2mm thick. The thinner the sheet, the more delicate your final chips will look. -
Chop the clay:
Use your craft knife to randomly chop these colored sheets into tiny, irregular geometric shapes. Aim for varied sizes, from tiny specks to larger triangles. -
Mix or keep separate:
You can keep the colors separated for controlled placement later, or gently toss them together in a pile for a more random confetti look.
Fixing Smears
If rolling the chips caused the colors to smear across the white base, simply sand the baked piece vigorously. The smear is usually just on the surface layer.
Step 2: Forming the Base
-
Condition base clay:
Take a large portion of your white or cream clay and knead it thoroughly until it is completely smooth and warm. -
Thick rolling:
Roll out the white clay into a thick slab, approximately 1/4 inch thick. This will ensure your coasters are sturdy. -
Apply the chips:
Sprinkle your colored clay chips over the top of the white slab. I like to gently press them down with my finger to tack them in place initially. -
Embed the pattern:
Use the rolling pin to roll over the slab again. Apply firm pressure to force the colored chips flush into the white base. -
Check surface level:
Continue rolling until the surface is completely smooth and you can’t feel the ridges of the colored chips anymore. -
Repeat if needed:
If the pattern looks sparse, add more chips to the empty spots and roll again until you are happy with the density.
Step 3: Cutting and Baking
-
Cut the shapes:
Place your round cutter on the best section of the pattern and press straight down firmly to cut out your coaster. -
Smooth the edges:
Lift the circle and gently rub your finger along the cut edge to soften any sharpness left by the cutter. -
Prepare for baking:
Place the coasters on a ceramic tile or baking sheet lined with parchment paper. -
Bake carefully:
Bake according to your clay package instructions (usually 275°F/135°C for 15-30 minutes). Do not overbake. -
Cool under weight:
As soon as you remove them from the oven, place a heavy book on top of the coasters while they cool. This generally prevents warping.
Glazed Finish
For a glossy, ceramic-like look instead of matte stone, coat the finished baked coasters with a thin layer of UV resin and cure under a UV lamp.
Step 4: Finishing Touches
-
Sand for stone effect:
Once fully cool, wet your sandpaper and sand the surface of the coasters under running water. Start with 400 grit. -
Refine the finish:
Move to 600 and then 1000 grit sandpaper. This process removes fingerprints and reveals the true clarity of the colored chips. -
Buff to matte:
Dry the coasters thoroughly. For a natural stone look, leave them unglazed, or buff briskly with a denim cloth for a slight sheen.
Enjoy your modern, durable coasters that add a splash of artistic color to your coffee table


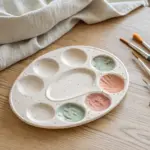
Ring Cone Organizer
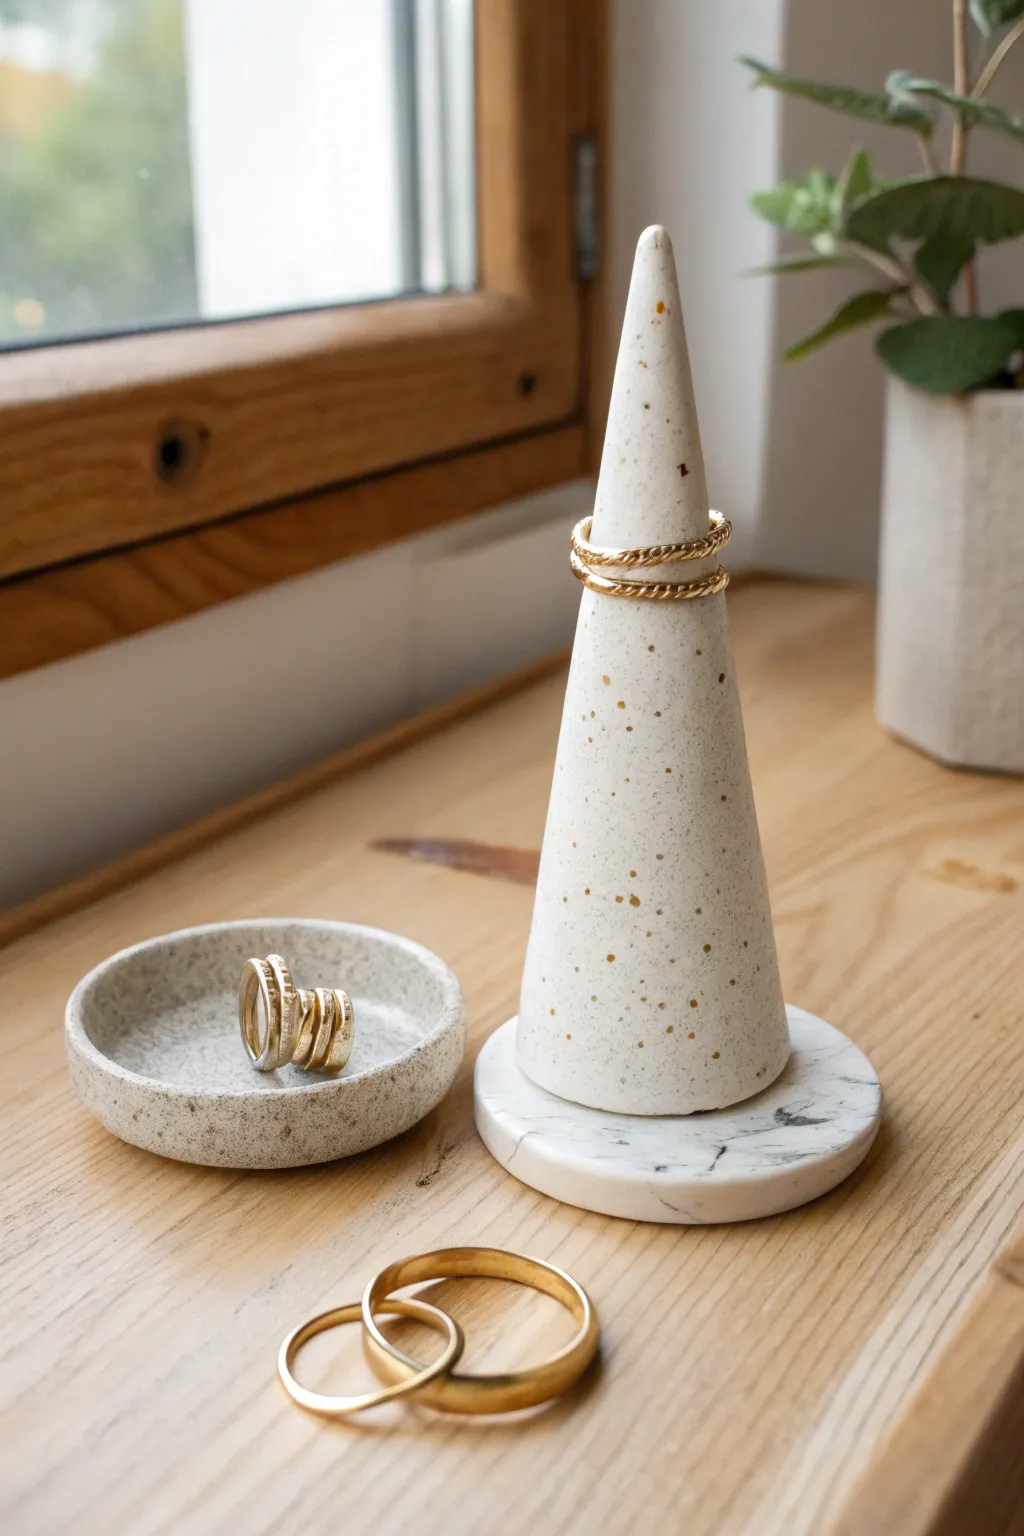
This elegant ring cone and matching dish set brings a modern, minimalist touch to your jewelry storage. The faux speckled ceramic look is easily achieved with polymer clay, while the marbled base adds a sophisticated finish.
Step-by-Step Tutorial
Materials
- White or cream polymer clay (approx. 2 oz)
- Black pepper or dried coffee grounds (for speckles)
- White and grey polymer clay (for marble base)
- Rolling pin or acrylic roller
- X-acto knife or clay blade
- Cone template (paper or cardstock)
- Small round cookie cutter or jar lid
- Sandpaper (fine grit)
- Matte varnish (optional)
Step 1: Creating the Speckled Clay
-
Condition the clay:
Start by kneading your white or cream polymer clay until it is soft and pliable. Warm clay is much easier to work with and less prone to cracking. -
Add texture:
Flatten the clay slightly and sprinkle a generous pinch of ground black pepper or very finely used coffee grounds onto the surface. -
Incorporate the speckles:
Fold the clay over the grounds and knead thoroughly. Continue folding and rolling until the speckles are evenly distributed throughout the entire ball of clay.
Natural Texture
Use coarse black pepper for larger, dramatic spots or fine ground pepper for a subtle granite look. Do a test ball first.
Step 2: Forming the Cone
-
Shape the base form:
Roll about two-thirds of your speckled clay into a smooth ball, ensuring there are no air bubbles trapped inside. -
Roll out a cone:
Place the ball on your work surface. Using the flat of your hand, roll the clay back and forth while applying more pressure to one side to create a tapered cone shape. -
Refine the height:
Stand the cone up. If it’s too short, gently roll it between your palms to elongate it. Aim for a height of about 3 to 4 inches. -
Flatten the bottom:
Press the cone firmly onto your table to create a completely flat bottom so it stands straight without wobbling. Smooth any fingerprints with a light touch.
Step 3: Forming the Dish
-
Roll a slab:
Shape the remaining speckled clay into a ball and use your roller to flatten it into a thick disc, about 1/4 inch thick. -
Create the walls:
Using your thumbs, gently press into the center of the disc while pulling up the edges to create a shallow rim. I find rotating the piece as I pinch creates the most even wall. -
Smooth the edges:
Run a wet finger along the rim of the dish to soften any sharp edges or cracks that formed during shaping.
Gold Accents
Paint the very tip of the cone or the rim of the dish with liquid gold leaf for a chic, high-end finish.
Step 4: Making the Marble Base
-
Prepare marble colors:
Take a chunk of fresh white clay and a very small amount of grey clay. -
Twist and combine:
Roll both colors into snakes, twist them together, fold, and twist again. Stop before the colors fully blend to maintain distinct veins. -
Cut the base:
Roll the marbled clay flat. Use a round cutter or a jar lid larger than the cone’s base to cut a perfect circle. -
Check fit:
Place the cone gently on top of the marble base to ensure the proportions look right, but don’t press them together permanently yet.
Step 5: Baking and Finishing
-
Bake the pieces:
Place the cone, the small dish, and the marble base on a baking tile. Bake according to your clay package instructions (usually 275°F for 15-30 minutes). -
Cool down:
Let the pieces cool completely in the oven or on a wire rack before handling them further. -
Sand for texture:
Lightly sand the surface of the cone and dish with fine-grit sandpaper to remove any fingerprints and enhance the stone-like texture. -
Assemble:
Use a dab of strong craft glue or superglue to attach the speckled cone to the center of the marble disc. -
Seal (Optional):
If you want extra protection, apply a thin coat of matte varnish, though leaving it raw mimics ceramic better.
Place your new organizer on your vanity and enjoy the satisfaction of displaying your rings on a piece you made yourself

The Complete Guide to Pottery Troubleshooting
Uncover the most common ceramic mistakes—from cracking clay to failed glazes—and learn how to fix them fast.
Textured Incense Holder
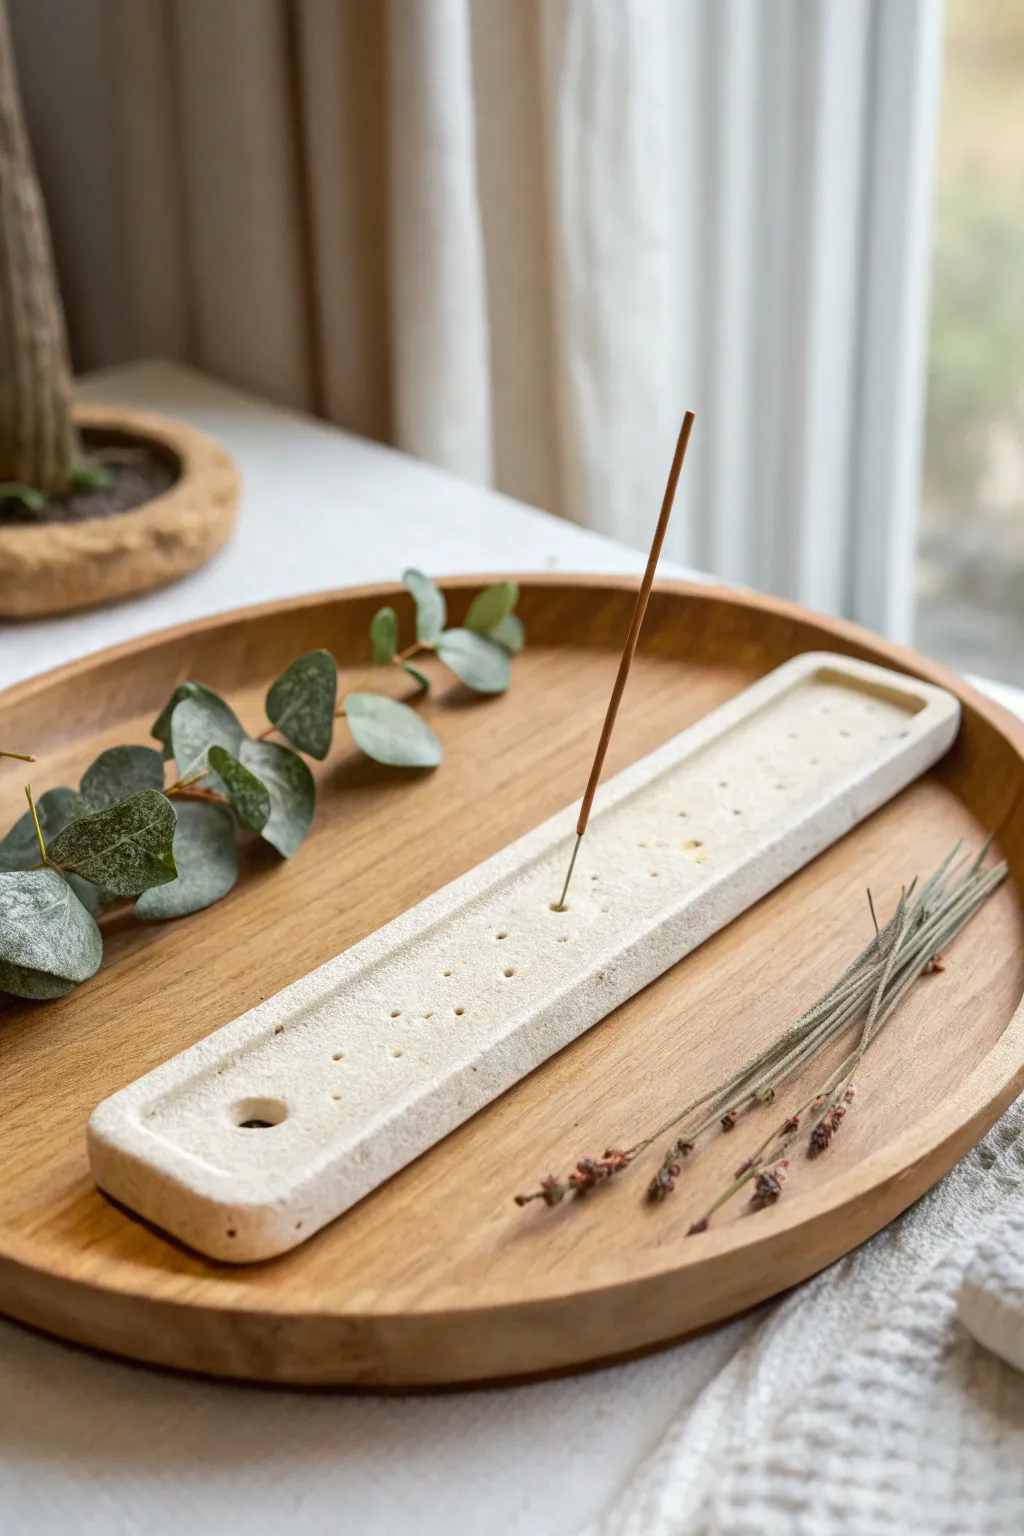
This elegant, grooved incense holder brings a serene, spa-like atmosphere to any space with its textured, stone-like finish. Its clever design features multiple holes to accommodate different incense stick sizes and a recessed channel to catch falling ash effortlessly.
How-To Guide
Materials
- White polymer oven-bake clay (or air-dry clay)
- Faux granite or speckled clay effect inclusions (or black pepper)
- Rolling pin
- Sharp craft knife or clay blade
- Sandpaper (fine grit)
- Small wooden skewer or needle tool
- Large straw or small circular cutter
- Ruler
- Modeling tool with a rounded/shaded end (or a spoon handle)
- Baking sheet and parchment paper
- Matte varnish (optional)
Step 1: Preparation & Shaping
-
Condition the clay:
Start by warming up your white clay in your hands until it is pliable. If you want that lovely speckled stone look shown in the photo, knead in a tiny pinch of cracked black pepper or specific ‘granite’ clay inclusions until evenly distributed. -
Roll out the slab:
Place the clay on a clean, flat surface or parchment paper. Use your rolling pin to create a long, rectangular slab. Aim for a thickness of about 1/4 to 1/2 inch to ensure it feels substantial. -
Cut the rectangle:
Use a ruler and your sharp craft knife to cut a precise, long rectangle. A good size is approximately 8-10 inches long and 1.5 inches wide, but you can adjust this based on the length of your favorite incense sticks. -
Soften the edges:
Once cut, the edges will be sharp and boxy. Gently tap them with your finger or use a slightly damp sponge to round off the corners and edges, giving it that soft, organic feel.
Step 2: Creating the Groove & Holes
-
Mark the center channel:
Lightly visualize where the central groove will go. It should run down the middle but leave a raised border on all sides. -
Carve the indentation:
Using a rounded modeling tool or the back of a small spoon, gently compress the clay down the center to create a shallow trough. This indentation is crucial for catching ash. -
Refine the border:
As you press the center down, the sides might bulge out. Use your ruler or blade to gently push the outer walls back into a straight line. -
Smoothen the interior:
run your finger or a slightly damaging tool along the groove to remove any tool marks and ensure a smooth surface for the ash to land on. -
Create the main stick hole:
Decide which end will hold the burning stick. Use a needle tool or skewer to poke a hole in the center of the groove. Insert it at a slight angle so the stick will lean over the tray, not straight up. -
Add decorative ventilation holes:
The image features a pattern of small decorative dots. Use your needle tool to poke random or patterned shallow holes along the groove. These add beautiful texture. -
Create the large accent hole:
At the opposite end of the holder (the bottom), use a straw or small circular cutter to punch a larger hole completely through the clay. This acts as a decorative element or a hanging point. -
Final texture check:
Before baking, look over the piece. If you want more texture, you can gently press a piece of sandpaper or a rough stone against the surface to enhance the stone-effect.
Stone Effect Secret
Mix spent coffee grounds or varied spices like nutmeg into white clay for different speckle colors and a truly organic, earthy texture.
Step 3: Baking & Finishing
-
Bake the clay:
Transfer the piece on parchment paper to a baking sheet. Bake according to your specific clay manufacturer’s instructions (usually around 275°F for 15-30 minutes). -
Cool completely:
Allow the incense holder to cool down fully in the oven with the door cracked, or on a wire rack. Don’t rush this, as warm clay is fragile. -
Sand for perfection:
Once cool, take your fine-grit sandpaper and wet-sand the piece (dip the sandpaper in water). Focus on the edges and the holes to remove any burrs or sharp spots. -
Seal (optional):
I usually prefer the raw matte look, but if you want to protect it from ash stains, apply a very thin coat of matte varnish.
Cone Adaptability
Flatten a small circular area near the end of the groove specifically so you can burn incense cones on the same holder safely.
Place your new holder on a wooden tray with some greenery and enjoy a moment of calm
Mixed-Shape Clay Beads
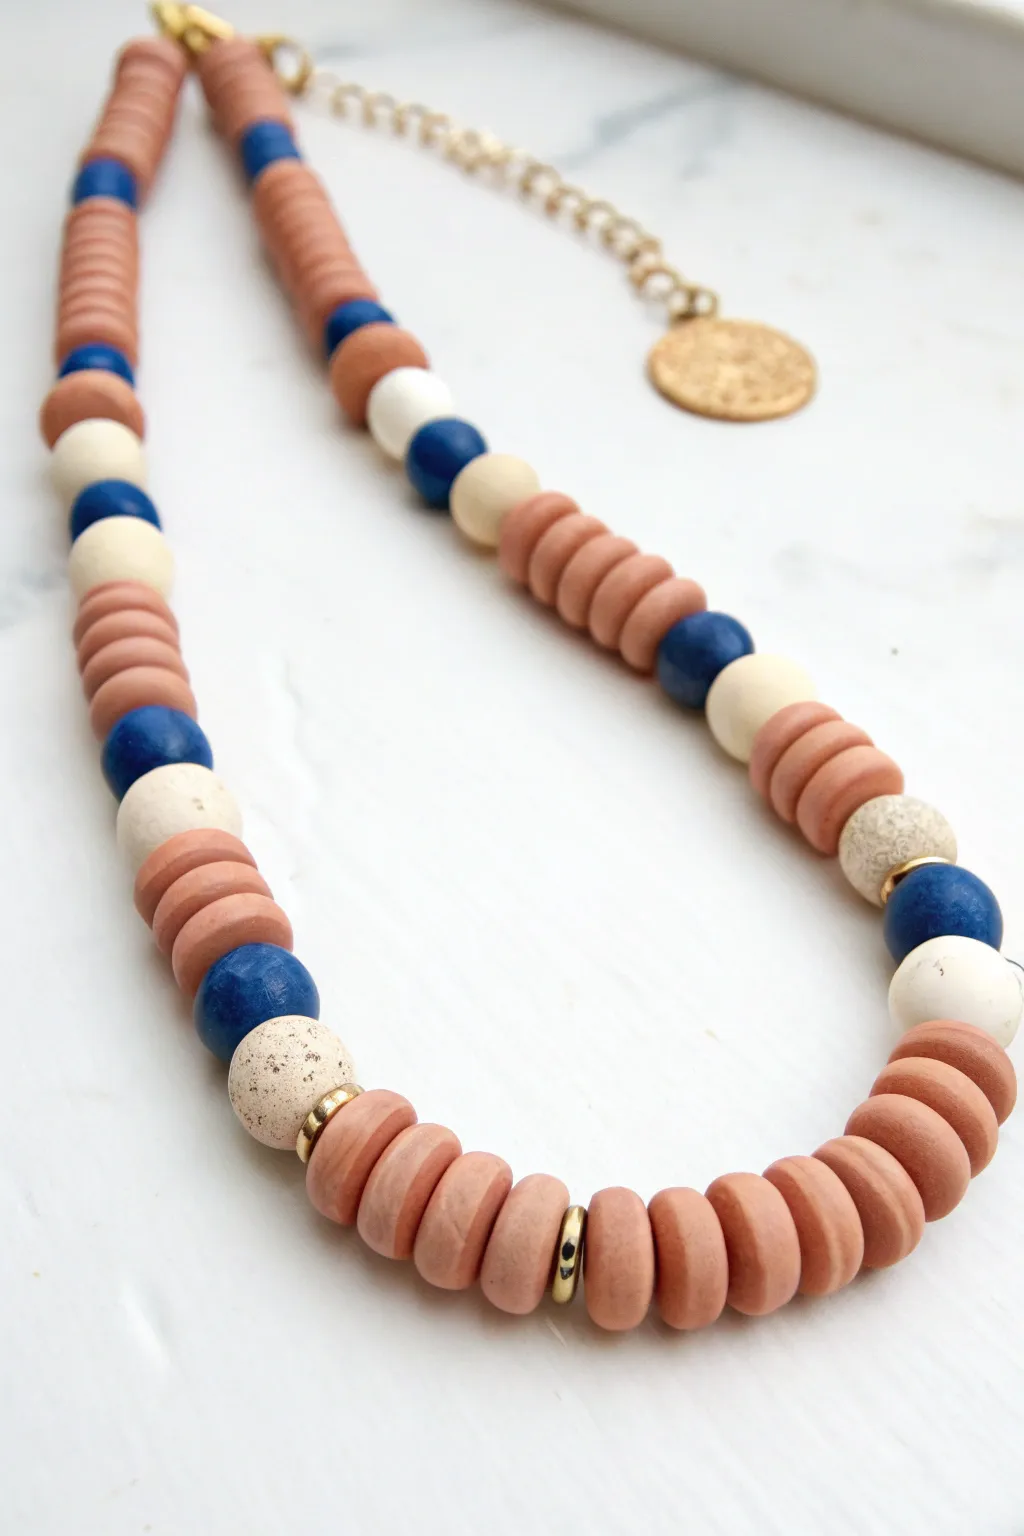
Embrace organic textures and earthy tones with this simple yet striking clay bead necklace. Mixing flat disc beads with round spheres creates varied visual interest, while gold accents add just the right amount of shine.
Step-by-Step
Materials
- Polymer clay (terracotta/peach, navy blue, white)
- Speckled clay or black pepper/sand for texture
- Rolling pin or acrylic roller
- Small round cutter (approx. 1cm)
- Toothpicks or a bead piercing tool
- Baking sheet and parchment paper
- Sandpaper (fine grit)
- Gold tone spacer beads (flat rings)
- Beading wire or strong cord
- Crimp beads and crimp tool
- Gold chain extender and clasp
- Jewelry pliers
Step 1: Shaping the Disc Beads
-
Condition the terra cotta clay:
Begin by kneading your terracotta or peach-colored clay until it is soft and pliable. This warmth prevents cracking during the shaping process. -
Roll out the slab:
Using an acrylic roller or rolling pin, flatten the conditioned clay into a uniform slab about 3-4mm thick. Try to keep the thickness consistent for uniform beads. -
Cut the discs:
Use your small round cutter to punch out numerous circles. For the necklace shown, you will need approximately 40-50 of these small discs, grouped in clusters. -
Smooth the edges:
Pick up each clay circle and gently tap the edges with your finger to remove any sharp cut marks or drag lines, softening the look slightly. -
Pierce the holes:
Carefully insert a toothpick or piercing tool through the center of the flat side of each disc. Verify the hole is large enough for your specific threading wire.
Hole distortion?
If your round beads get squashed while piercing, try letting them rest in the fridge for 10 minutes to harden slightly before poking the hole.
Step 2: Creating the Round Beads
-
Mix the speckled clay:
To achieve the stone-like white beads, take white clay and mix in a tiny pinch of cracked black pepper or actual sand. Knead thoroughly until the specks are evenly distributed. -
Roll the spheres:
Pinch off equal amounts of the navy blue, plain white, and your new speckled clay. Roll these pieces between your palms to create perfect spheres, slightly larger than your disc beads (about 12-14mm). -
Pierce the rounds:
Support the sphere gently in your hand to avoid squashing it as you push your piercing tool through the center. I find twisting the tool as I push helps keep the bead round. -
Bake the clay:
Arrange all your beads on a baking sheet lined with parchment paper. Bake according to the manufacturer’s instructions for your specific brand of clay (usually around 275°F/135°C for 15-30 minutes). -
Cool and finish:
Allow the beads to cool completely. Once cool, lightly sand any fingerprints or rough spots with fine-grit sandpaper for a professional matte finish.
Glaze it up
For a dual-texture look, apply a high-gloss glaze only to the navy blue beads after baking, keeping the terracotta and white beads matte.
Step 3: Assembly
-
Plan your pattern:
Lay out your beads on a table before stringing. The design shown uses a central focal point of discs, flanked by rounds, then more disc clusters. Use the gold spacers to separate feature beads. -
Start the stringing:
Cut a length of beading wire. Secure one end with a crimp bead and attach one half of your clasp so beads don’t slide off as you work. -
Thread the center section:
String the central group of terracotta discs first. Nestle a gold ring spacer in the middle of the stack for a subtle metallic glint. -
Add the accent beads:
Working outwards, add your larger round beads—alternating between speckled white and navy blue—interspersed with more stacks of terracotta discs. -
Complete the strand:
Continue the pattern until the beaded section reaches your desired length. Finish the ends with smaller discs or rounds tapering off. -
Attach the closure:
Thread a crimp bead onto the open end, followed by the chain extender or jump ring. Loop the wire back through the crimp bead and tighten it close to the work. -
Secure the crimp:
Use your crimping pliers to flatten the crimp bead securely. Trim any excess wire tails for a neat finish.
Now you have a stylish, custom accessory ready to wear with your favorite outfit


What Really Happens Inside the Kiln
Learn how time and temperature work together inside the kiln to transform clay into durable ceramic.
Moon Phase Wall Hanging
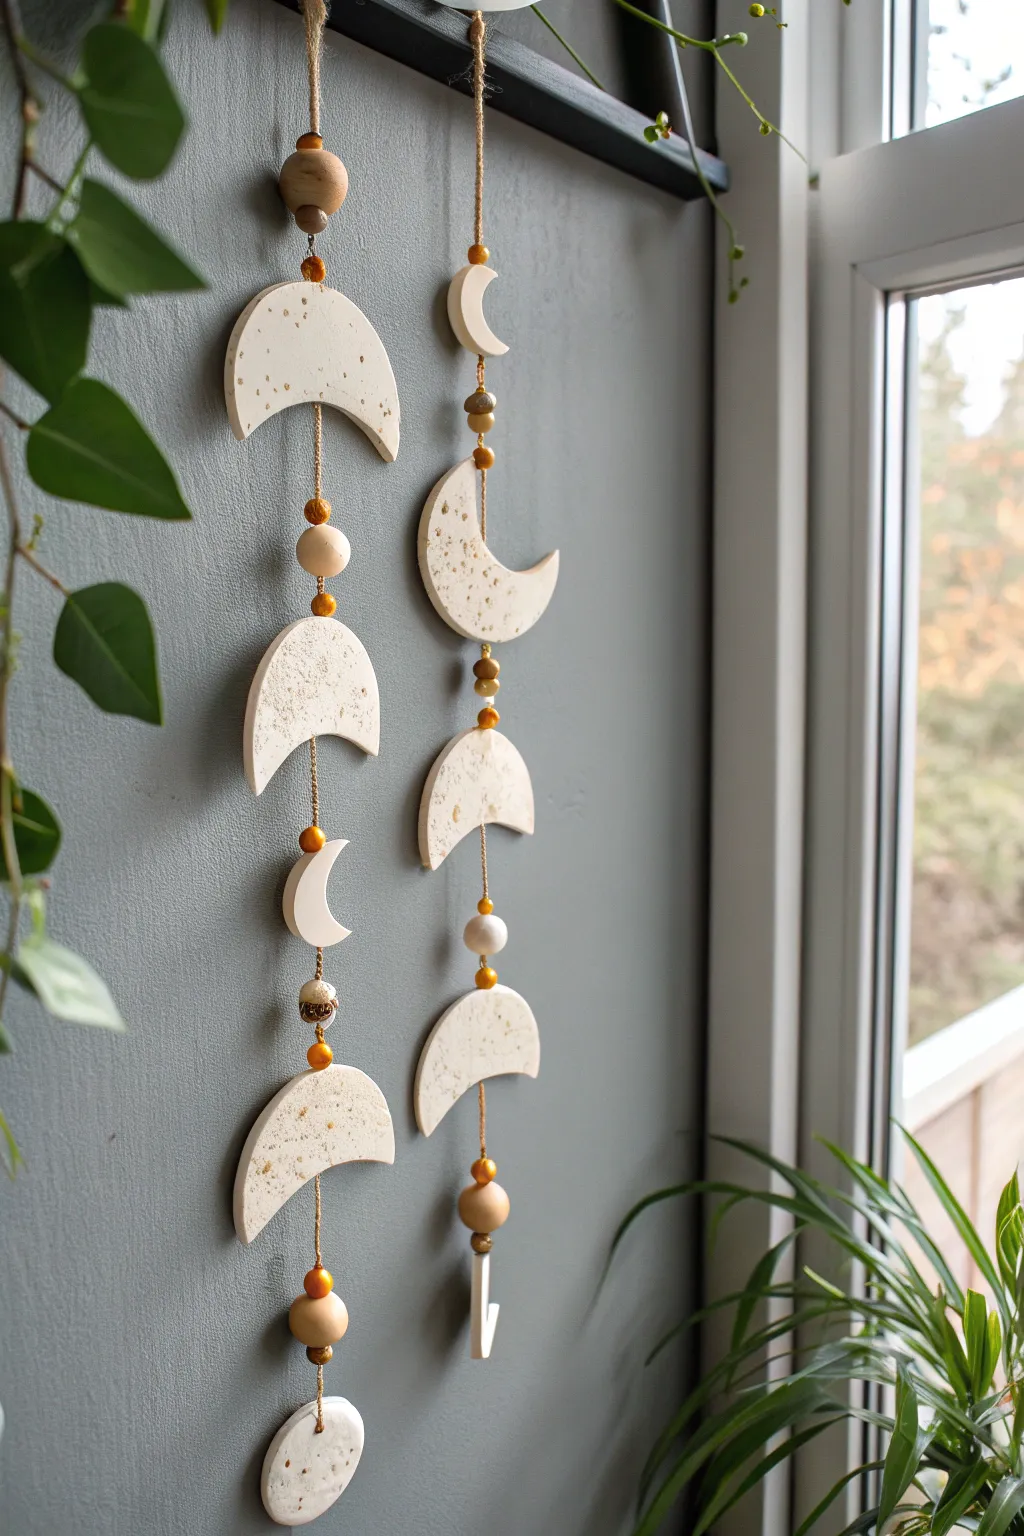
Bring celestial charm to your living space with this elegant textured wall hanging that mimics the look of real stone. Suspended on rustic twine with wooden and gold accents, these clay moons create a calming vertical rhythm perfect for narrow wall spaces.
How-To Guide
Materials
- White or beige polymer oven-bake clay (approx. 8 oz)
- Gold leaf flakes or coarse black pepper (for speckling)
- Circle cookie cutters (graduated sizes)
- Rolling pin or acrylic roller
- Jute twine or hemp cord
- Assorted wooden beads (natural unfinished)
- Gold metallic spacer beads
- Large-eye tapestry needle
- Toothpick or skewers
- Baking sheet with parchment paper
- Scissors
Step 1: Preparing the Clay
-
Condition the base:
Begin by warming the polymer clay in your hands, kneading it thoroughly until it becomes soft and pliable. This conditioning step prevents cracks during baking. -
Create the texture:
To achieve the speckled stone effect seen in the photo, flatten your clay slightly and sprinkle in either gold leaf flakes or coarse black pepper. Fold the clay over and knead again to distribute the speckles evenly throughout the block. -
Roll it out:
Roll the clay onto a clean, flat surface to a consistent thickness of about 1/4 inch. If you want a uniform finish, place wooden skewers on either side of the clay to guide your rolling pin.
Uneven Holes?
If your holes closed up slightly during baking, use a small hand drill or a heated needle to gently widen them without cracking the finished clay piece.
Step 2: Shaping the Moons
-
Cut the full moon:
Use your largest circle cutter to punch out a full circle. This will serve as the bottom anchor piece of the mobile. -
Create crescent shapes:
Cut another large circle, then shift the cutter slightly off-center and cut again into the same piece to create a crescent moon shape. Repeat this process to make at least 3-4 crescents of varying thicknesses. -
Make smaller phases:
Use smaller cutters to create the tiny crescent accent pieces that sit near the top or between larger moons. You’ll want a variety of sizes to create visual interest. -
Smooth the edges:
Dip your finger in a tiny bit of rubbing alcohol or cornstarch and gently rub the cut edges of each piece to smooth away any roughness or fingerprints. -
Pierce holes:
Before baking, use a toothpick or thick needle to poke holes through the clay. For crescents, poke a vertical hole from the top tip to the bottom tip if possible, or create two holes (top and bottom center) for connecting them.
Step 3: Baking and Assembly
-
Bake the batch:
Arrange your cloud shapes on a parchment-lined baking sheet. Follow your clay package instructions for temperature and time, usually baking at 275°F (135°C) for 15-30 minutes. -
Cool down:
Allow the pieces to cool completely on the baking sheet to harden. Moving them while hot might cause them to warp. -
Prepare the cord:
Cut a length of jute twine about 30 inches long. Tie a secure loop at the very top for hanging. -
Start stringing:
Thread a large wooden bead onto the twine near the top loop, followed by a smaller gold spacer bead to secure it. -
Attach the first moon:
Thread the twine through the top hole of your first crescent moon. If you pierced vertical channels, pass the string all the way through. -
Add bead spacers:
Between each clay moon, add a combination of wooden beads and gold spacers. I like to tie a small knot under each bead cluster to keep the moons hovering in place rather than sliding down. -
Continue the pattern:
Alternate clay shapes and bead clusters until you reach the bottom. Ensure the crescents are facing the directions you prefer. -
Secure the end:
Tie off the twine securely at the bottom of the final piece—usually the full circle or a weighty crescent. Trim any excess string close to the knot.
Level Up
Paint the edges of your crescent moons with liquid gold leaf after baking to make the shapes pop and match the gold spacer beads perfectly.
Now you have a stunning, handmade celestial accent ready to hang in your favorite sunny window
Stamped Name Keychain Tags
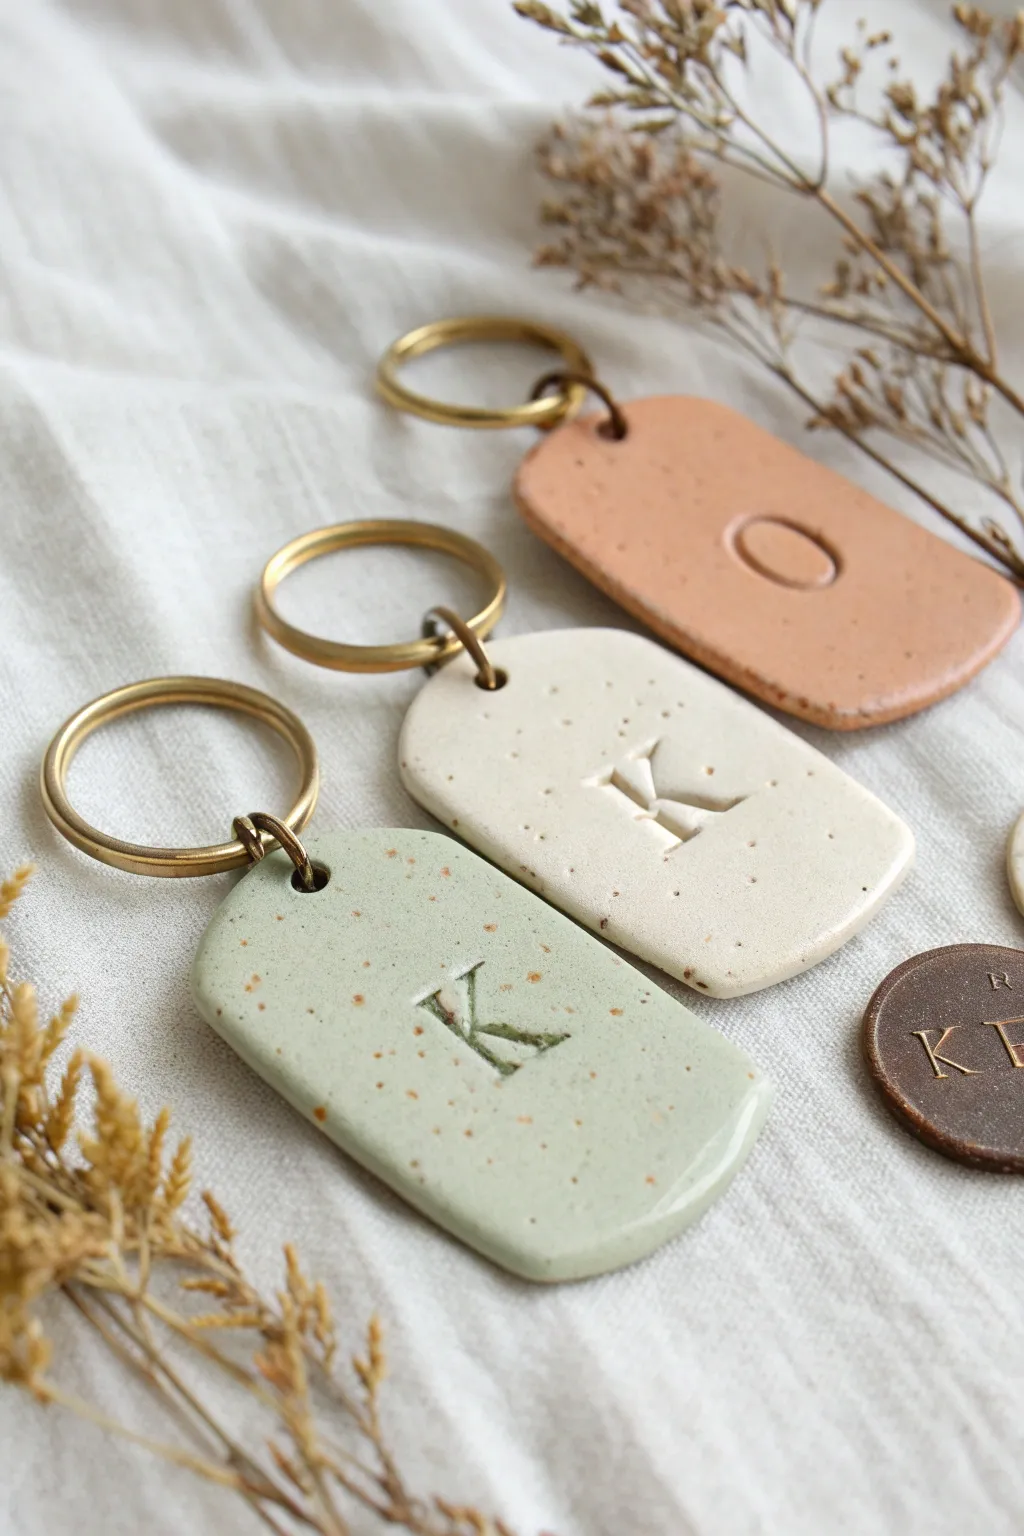
These minimalist, speckled clay keychains are a chic way to personalize your keys or create thoughtful gifts. With an organic stone-like finish and stamped initials, they offer a high-end look using simple oven-bake techniques.
Step-by-Step Guide
Materials
- Polymer clay (Speckled Green, Speckled White, and Terracotta colors)
- Acrylic rolling pin
- Parchment paper or ceramic tile work surface
- Rectangle clay cutter with rounded corners (approx. 2.5 inches)
- Letter stamps (serif font)
- Small circular cutter or straw (for the hole)
- Sandpaper (fine grit, 400-600)
- Brass key rings with jump rings
- Flat nose jewelry pliers
- Baking sheet
- Cornstarch (optional release agent)
- Gloss glaze or resin (optional)
Step 1: Preparation & Shaping
-
Condition the Clay:
Begin by warming a block of your chosen speckled polymer clay in your hands. Knead it thoroughly until it is soft, pliable, and free of cracks. -
Roll out a Slab:
Place the clay on a sheet of parchment paper or a smooth tile. Use your acrylic roller to flatten the clay evenly. Aim for a thickness of about 1/4 inch (6mm)—too thin and it might be brittle, too thick and it gets heavy. -
Cut the Shape:
Press your rounded rectangle cutter firmly into the clay slab. If you don’t have a specific cutter, you can cut a rectangle with a blade and gently round the corners with your finger. -
Smooth the Edges:
While the clay is still raw, gently run your finger along the cut edges to smooth out any sharpness or drag marks left by the cutter. Using a little cornstarch on your finger can help it glide smoothly without sticking. -
Create the Hole:
Use a small circular cutter, a straw, or the blunt end of a paintbrush to punch a hole centered near the top edge. Ensure the hole is large enough to accommodate your metal jump ring later, leaving about 3-4mm of clay above the hole for strength.
Uneven Impressions?
If your stamp sticks to the clay and ruins the impression, dust the stamp face lightly with cornstarch or dip it in water before pressing it into the clay.
Step 2: Stamping & Baking
-
Stamp the Initial:
Position your letter stamp over the center of the tag (or offset it slightly like the ‘K’ in the green tag). Press down firmly and evenly, but not so hard that you distort the tag’s shape. -
Clean Up:
Inspect the stamped impression. If the clay pushed up around the edges of the letter, gently tap it back down with a flat tool or your finger to keep the surface level. -
Bake:
Transfer the parchment paper with your tags onto a baking sheet. Bake according to the manufacturer’s instructions for your specific brand of polymer clay (usually around 275°F or 135°C for 15-30 minutes per 1/4 inch of thickness). -
Cool Down:
Once bakes, turn off the oven and let the tags cool down completely before handling them. They harden fully as they cool.
Step 3: Finishing & Assembly
-
Sand for Perfection:
Once cool, use fine-grit sandpaper slightly wet with water to gently sand the edges and the surface if there are any fingerprints. I often like to do this under a trickle of running water to keep dust down. -
Highlight the Letter (Optional):
If you want the letter to stand out more (like the dark ‘K’ on the green tag), wash a diluted dark acrylic paint into the crevices and wipe away the excess on the surface immediately with a damp cloth. -
Add a Glossy Touch (Optional):
For the shiny finish seen on the green tag, apply a thin layer of gloss glaze or UV resin. If you prefer the matte look of the terracotta tag, skip this step. -
Attach the Hardware:
Use two pairs of flat nose pliers to twist open a large jump ring. Remember to twist the ends away from each other (front to back) rather than pulling them apart side-to-side. -
Connect to Key Ring:
Slide the open jump ring through the hole in your clay tag, then loop on the main brass key ring. Twist the jump ring closed securely so there is no gap.
Level Up: Terrazzo Effect
Mix tiny chopped bits of different colored clay into your main color before rolling. When sanded later, it creates colorful terrazzo confetti patterns.
Now you have a set of durable, personalized tags ready to organize your keys in style

TRACK YOUR CERAMIC JOURNEY
Capture glaze tests, firing details, and creative progress—all in one simple printable. Make your projects easier to repeat and improve.
Clay Gift Tags That Keep
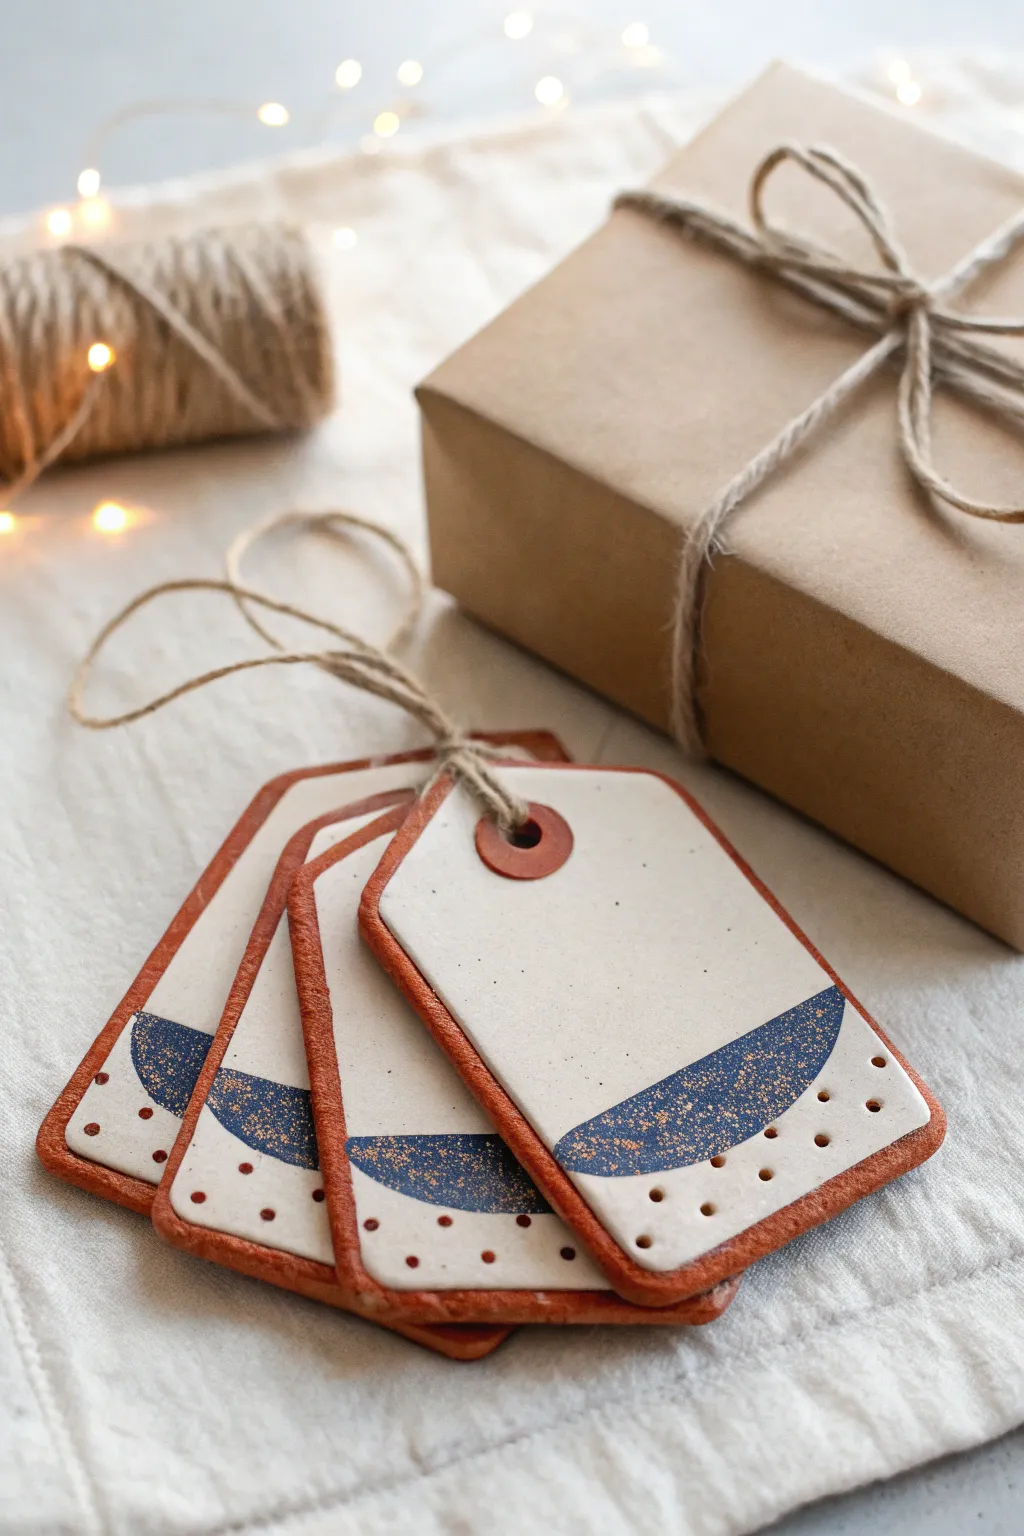
These reusable gift tags combine the rustic warmth of faux-terracotta with clean, modern lines. The dipped blue accent and gold detailing create a sophisticated look that turns simple gift wrapping into something truly special.
Detailed Instructions
Materials
- White polymer clay (oven-bake)
- Terra cotta colored polymer clay
- Rolling pin or acrylic roller
- Tag-shaped cookie cutter (or template and craft knife)
- Circular cutter (small, for the hole)
- Parchment paper
- Navy blue acrylic paint
- Gold acrylic paint or gold leaf pen
- Small flat paintbrush
- Old toothbrush or stiff bristle brush
- Pin tool or toothpick
- Fine-grit sandpaper
- Jute twine
- Matte varnish (optional)
Step 1: Preparing the Base
-
Condition the clay:
Start by warming up your white polymer clay in your hands until it becomes soft and pliable. Separately, condition the terra cotta clay until it has a similar consistency. -
Roll the backing layer:
Roll out the terra cotta clay on parchment paper to a thickness of about 1/16th of an inch. Aim for a uniform slab that will be large enough for all your tags. -
Roll the top layer:
Roll out the white clay to the same thickness. Gently lift the white slab and lay it directly on top of the terra cotta slab. -
Merge the layers:
Using your roller, gently roll over the stacked clays to bind them together. You want a final combined thickness of about 1/8th of an inch. Watch for air bubbles and smooth them out if they appear. -
Cut the shapes:
Press your tag-shaped cutter firmly into the layered clay. If you don’t have a cutter, trace a cardstock template with a sharp craft knife. -
Create the tie hole:
Use a small circular cutter or a straw to punch a hole at the top center of each tag for the string. -
Add the reinforcement ring:
Roll a tiny scrap of terra cotta clay very thin. Cut a small circle, then punch a smaller hole inside it to make a ring. Press this gently around the tag’s hole for a pop of contrasting color.
Step 2: Baking and Refining
-
Bake the tags:
Transfer the tags (still on parchment paper) to a baking sheet. Bake according to your polymer clay package instructions—usually around 275°F (135°C) for 15-30 minutes. -
Cool and inspect:
Remove from the oven and let the tags cool completely. They must be fully hardened before you start sanding. -
Sand the edges:
Take your fine-grit sandpaper and gently smooth the edges. Sanding at a slight angle can help reveal that beautiful terra cotta outline beneath the white top layer.
Sticky Situation?
If clay sticks to your cutter, dip the cutter in cornstarch or water before pressing down step. This helps it release cleanly without distorting the shape.
Step 3: Decorating
-
Mark the design line:
Lightly use a pencil or masking tape to mark a curved horizon line near the bottom third of the tag. -
Paint the blue accent:
Using a flat brush and navy blue acrylic paint, fill in the semi-circle shape at the bottom. You may need two thin coats for opaque coverage. -
Create the gold splatter:
Dip an old toothbrush into gold paint, then run your thumb across the bristles to flick tiny specks onto the blue area. I like to cover the white part of the tag with paper to protect it from stray splatters. -
Add dot details:
Dip the blunt end of a toothpick or a dotting tool into the terra cotta colored paint (or mix red and brown). Carefully place small dots along the outside of the blue curve and near the side edges. -
Seal (Optional):
If you want extra durability, apply a thin layer of matte varnish over the painted areas once they are completely dry. -
String it up:
Cut a length of jute twine, loop it through the reinforced hole, and tie a secure knot to finish your tag.
Make It Personal
Before baking, use letter stamps to impress names or ‘To/From’ into the white clay. It adds texture and eliminates the need to write on them later.
Now you have a set of durable, artist-quality tags ready to elevate your gift giving for years to come
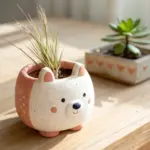
Tiny Pinch Pot Succulent Planters
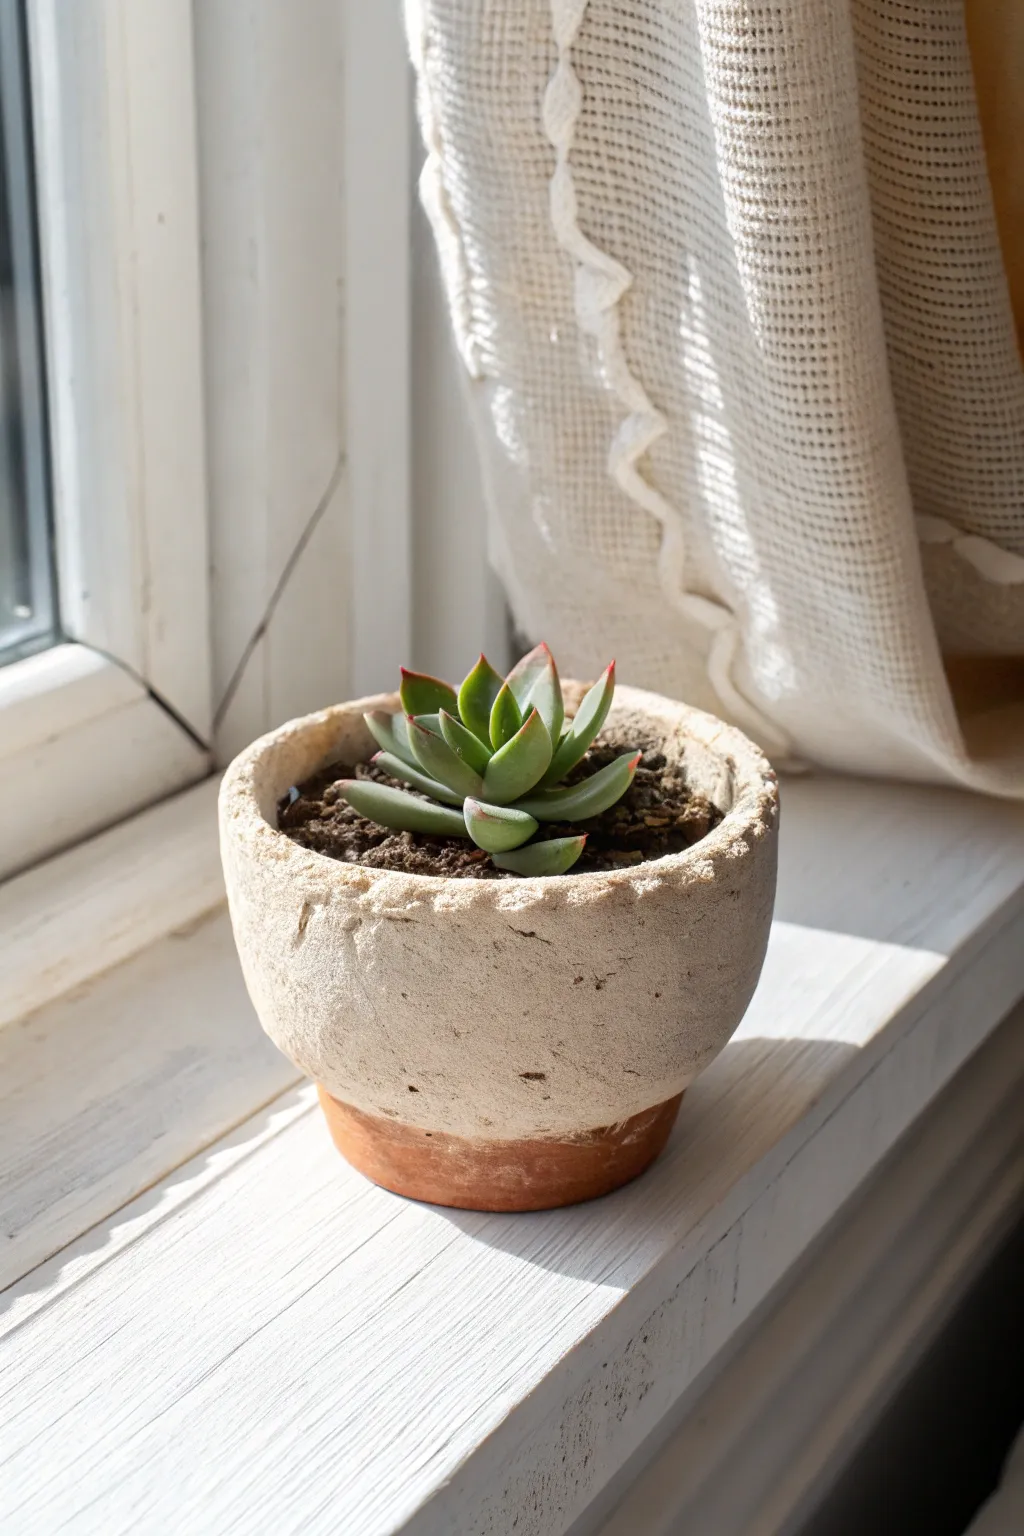
This charming little planter combines the rustic warmth of terracotta with a weathered, limestone-like texture for a unique dual-tone finish. It’s perfectly sized for small succulents and uses simple pinch pot techniques to achieve an organic, handmade feel.
How-To Guide
Materials
- White or Beige Polymer Clay
- Terracotta Polymer Clay
- Coarse Sand or Salt (for texture)
- Rough Stone or Sandpaper
- Oven
- Baking Sheet
- Small Succulent and Potting Soil
Step 1: Creating the Base
-
Condition the Clay:
Begin by warming up a small ball of terracotta polymer clay in your hands until it becomes soft and pliable. -
Form the Pinch Pot:
Roll the clay into a smooth sphere, then push your thumb into the center. -
Shape the Walls:
Gently pinch and turn the clay between your thumb and fingers to thin out the walls, creating a shallow bowl shape. Keep the bottom slightly thicker for stability. -
Flatten the Bottom:
Press the bottom of the pot gently against a flat surface to create a stable base so it won’t wobble on your windowsill.
Cracking Clay?
If the clay creates large fissures while shaping, it’s likely too dry. Knead in a drop of baby oil or clay softener to restore elasticity before shaping.
Step 2: Texturing the Top
-
Prepare the Upper Layer:
Take your white or beige clay and mix in a small amount of coarse sand or salt. Knead it thoroughly to distribute the texture evenly. -
Create a Sheet:
Roll or flatten this textured clay into a thick strip, long enough to wrap around the circumference of your terracotta base. -
Attach the Layers:
Wrap the textured strip around the upper half of the terracotta pot. The terracotta should still be visible at the bottom. -
Blend the Seams:
Use your fingers to smudge the clay where the two colors meet. You don’t want a sharp line; a slightly irregular transition looks more natural. -
Enhance the Roughness:
Press a rough stone or a crumpled ball of aluminum foil against the exterior of the beige clay to create deep pits and an eroded look. -
Distress the Rim:
Pinch uneven chunks out of the top rim to make it look chipped and weathered like an ancient artifact.
Weathered Effect
After baking, dilute brown acrylic paint with water. Brush it over the textured top and wipe it off quickly, leaving pigment only in the deep crevices.
Step 3: Finishing Touches
-
Check Dimensions:
Place your succulent’s nursery pot inside briefly to ensure the opening is wide enough. Remove it before baking. -
Bake the Clay:
Place the pot on a baking sheet and bake according to the specific manufacturer’s instructions for your brand of polymer clay. -
Cool Down:
Let the pot cool completely inside the oven with the door cracked slightly to prevent cracking. -
Sand for Realism:
Once cool, lightly sand the beige section to remove any fingerprints and enhance the stony matte finish. -
Add Drainage (Optional):
Drill a small hole in the bottom carefully if you plan to plant directly, or simply use it as a cachepot. -
Planting:
Fill the pot with succulent-specific soil and nestle your plant inside, brushing off any loose dirt from the rim.
Place your new creation in a sunny spot and enjoy the timeless, stony aesthetic you’ve crafted
Pressed Botanical Ornament Medallions

Capture the fleeting beauty of nature with these delicate clay ornaments featuring real pressed flowers and foliage. The soft, creamy finish of the clay highlights the rich russet and gold tones of the dried botanicals, creating a keepsake that feels both rustic and refined.
Step-by-Step
Materials
- White polymer clay (oven-bake) or air-dry clay
- Rolling pin (acrylic or smooth wood)
- Round cookie cutter (approx. 3-4 inches)
- Dried pressed flowers and leaves (small fern sprigs, yellow wildflowers, seed heads)
- Parchment paper or wax paper
- Straw or small circular cutter (for the hole)
- Jute twine or hemp cord
- Mod Podge or clear matte sealant
- Small paintbrush
- Tweezers (precision tip)
- Fine-grit sandpaper (optional)
Step 1: Preparing the Clay Base
-
Condition the clay:
Begin by warming a block of white polymer clay in your hands. Knead it thoroughly until it becomes soft, pliable, and free of any cracks or air bubbles. -
Roll it out:
Place the clay on a sheet of parchment paper to prevent sticking. Use your rolling pin to flatten the clay to an even thickness of about 1/4 inch or slightly thinner. -
Cut the shape:
Press your round cookie cutter firmly into the clay. Give it a tiny wiggle to ensure a clean cut, then lift the cutter away. Peel away the excess clay from the edges. -
Smooth the edges:
Dip your finger in a tiny bit of water (if using air-dry clay) or baby oil (if using polymer) and gently run it along the cut edge to smooth out any sharpness or roughness. -
Create the hanging point:
Using a plastic straw or a very small circular cutter, punch a clean hole near the top edge of the circle. Make sure it isn’t too close to the rim to prevent tearing later.
Pro Tip: Flatness
To keep pressed flowers from curling up when they hit the sealant, dab a tiny dot of glue under the thicker parts of the leaves before the final sealing step.
Step 2: Arranging the Botanicals
-
Plan your design:
Before touching the clay, lay out your dried flowers on a separate surface. I find it helpful to mock up the arrangement first to ensure the composition looks balanced. -
Place the central stem:
Using tweezers, gently pick up your largest leafy stem—the reddish-brown foliage works beautifully here—and place it slightly off-center on the clay disk. -
Add floral accents:
Position the small yellow flower on the left side, slightly lower than the top leaves. Use the tweezers to tuck its stem visually behind or near the main branch. -
Include texture:
Add delicate seed pods or wispy dried grasses to fill in the negative space on the right or bottom, creating a natural, meadow-like gathering. -
Press them in:
Place a fresh piece of parchment paper over the entire design. VERY gently roll over the paper with your rolling pin once or twice. You want to embed the plants flat into the surface without distorting the round shape. -
Add detail impressions (Optional):
If you want etched details like the stems shown on the flower, use a needle tool to lightly scratch or deepen the line where the stem connects to the flower head.
Step 3: Finishing and Assembly
-
Bake or dry:
Follow the instructions on your specific package of clay. For polymer clay, bake on a parchment-lined sheet (usually around 275°F/135°C for 15-30 minutes). If using air-dry clay, let it sit undisturbed for 24-48 hours. -
Cool down:
Allow the medallion to cool completely if baked. The clay needs to be fully hardened before you proceed to sealing. -
Check for rough spots:
Inspect the edges again. If any rough burrs remain, use a piece of fine-grit sandpaper to give the rim a quick, light polish. -
Seal the artwork:
Dip a soft brush into Mod Podge or a matte clear coat. Apply a thin layer over the front, paying special attention to the botanical elements to ensure they are encapsulated and won’t flake off. -
Let the sealant cure:
Allow the sealant to dry until clear and non-tacky. A second coat can be added for extra durability if this will be handled frequently. -
Add the hanger:
Cut a length of jute twine (about 8 inches). Fold it in half to create a loop. -
Secure the knot:
Push the folded loop end through the hole in the clay from front to back. Pull the tails of the twine through the loop and tighten gently to create a lark’s head knot.
Level Up: Vintage Wash
Dilute brown acrylic paint with water and brush it lightly over the dry clay, then wipe it off for an antique, aged ceramic look before sealing.
Hang your botanical medallion in a window or on a branch to enjoy a permanent piece of the garden inside your home
Checkerboard Napkin Rings
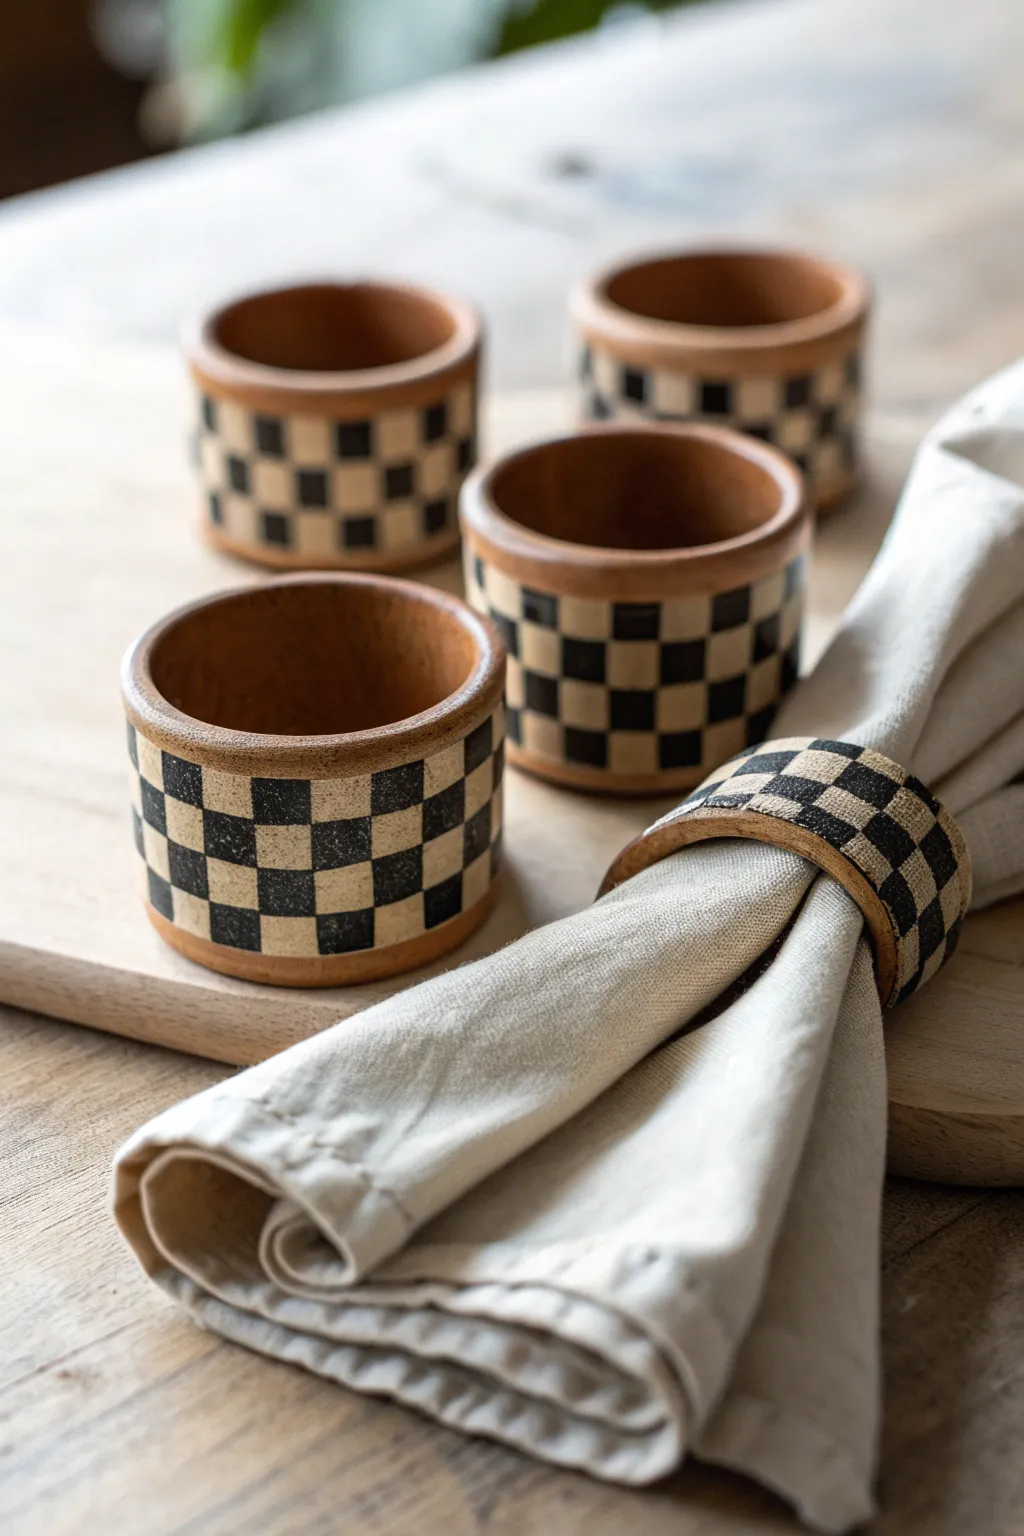
These sturdy, rustic napkin rings bring a touch of classic gaming style to your table setting with a timeless black and tan checkerboard pattern. The warm, earthy tone of the clay pairs beautifully with the crisp geometric design, making them perfect for both casual brunches and cozy dinners.
Step-by-Step Tutorial
Materials
- Oven-bake polymer clay (terracotta or tan color)
- Black acrylic paint
- Fine detail paintbrush (size 0 or 00)
- Rolling pin or clay machine
- Circle cookie cutter (approx. 2 inches) or PVC pipe section
- Craft knife or clay blade
- Ruler
- Fine-grit sandpaper (400-600 grit)
- Matte finish varnish or sealant
- Parchment paper
Step 1: Shaping the Rings
-
Condition the Clay:
Begin by warming the terracotta polymer clay in your hands, kneading it until remains soft, pliable, and free of cracks. This ensures the ring won’t be brittle after baking. -
Roll It Out:
Roll the clay into a flat, even sheet, aiming for a consistent thickness of about 1/4 inch. If you have a pasta machine dedicated to clay, this is the perfect time to use it for uniform results. -
Measure Strips:
Using your ruler and craft knife, cut long, straight strips of clay. You’ll want each strip to be approximately 1.5 inches wide and roughly 6 inches long. -
Form the Circle:
Wrap a clay strip around a cylindrical form, such as a rolling pin handle, a clean PVC pipe section, or even a toilet paper roll covered in parchment paper. -
Seal the Seam:
Cut away any excess length so the ends just meet without overlapping. Gently press the seam together with your finger, smoothing the clay so the join becomes invisible. -
Refine the Edges:
While the clay is still on the form, lightly tap the top and bottom edges against a flat surface to flatten them slightly, creating that clean, rimmed look seen in the photo. -
Bake:
Place your clay rings (still on their forms if they are oven-safe, or carefully slide them off) onto a baking sheet lined with parchment paper. Bake according to your specific clay package’s temperature and time instructions. -
Cool Down:
Once baked, turn off the oven and let the rings cool completely inside or on a wire rack before handling them to prevent warping.
Clean Lines Pro-Tip
For crisper squares, use tiny squares of painter’s tape or washi tape to mask off the ‘tan’ sections before painting. Peel them off while the paint is still slightly wet.
Step 2: Creating the Grid
-
Sand for Smoothness:
Lightly sand the exterior of the cooled rings with fine-grit sandpaper. This creates a slightly textured surface that helps the paint adhere better. -
Mark Horizontal Lines:
Use a pencil and ruler to lightly mark three horizontal guide lines around the circumference of the ring. You want to leave a thicker border at the top and bottom, with the central grid area divided into equal rows. -
Mark Vertical Lines:
Now mark vertical lines evenly spaced around the ring to create your grid. I find it helpful to mark opposite sides first to ensure the spacing remains reasonably consistent as you go around. -
Score the Pattern:
Using a very sharp craft knife or a needle tool, lightly score these pencil lines into the clay surface. This physical groove helps stop paint from bleeding into the wrong square.
Step 3: Painting and Finishing
-
Start Painting:
Dip your fine detail brush into black acrylic paint. Begin filling in the squares in a checkerboard pattern, alternating between painted and unpainted clay squares. -
Watch the Edges:
Carefully paint up to the scored lines. Don’t worry if the edges look a little rustic; that hand-painted quality adds to the charm of these specific rings. -
Second Coat:
Let the first layer of black paint dry completely. Apply a second coat to ensure the black squares are opaque and bold against the tan clay background. -
Clean Up:
If any paint strayed onto a tan square, you can gently scrape it away with your craft knife once dry or touch it up with a tiny bit of paint mixed to match the clay color. -
Seal the Work:
Apply a coat of matte varnish over the entire outside of the ring. This protects the paint from chipping and gives the clay a lovely finished feel without being too glossy. -
Final Dry:
Allow the varnish to cure fully according to the bottle instructions before sliding your linen napkins through them.
Level Up: Texture
Before baking, gently press a piece of coarse linen or canvas onto the clay surface to give the unpainted squares a woven texture that mimics fabric.
Set your table and enjoy the sophisticated yet handmade warmth these rings bring to your dining experience
Tiny Mushroom Figurines
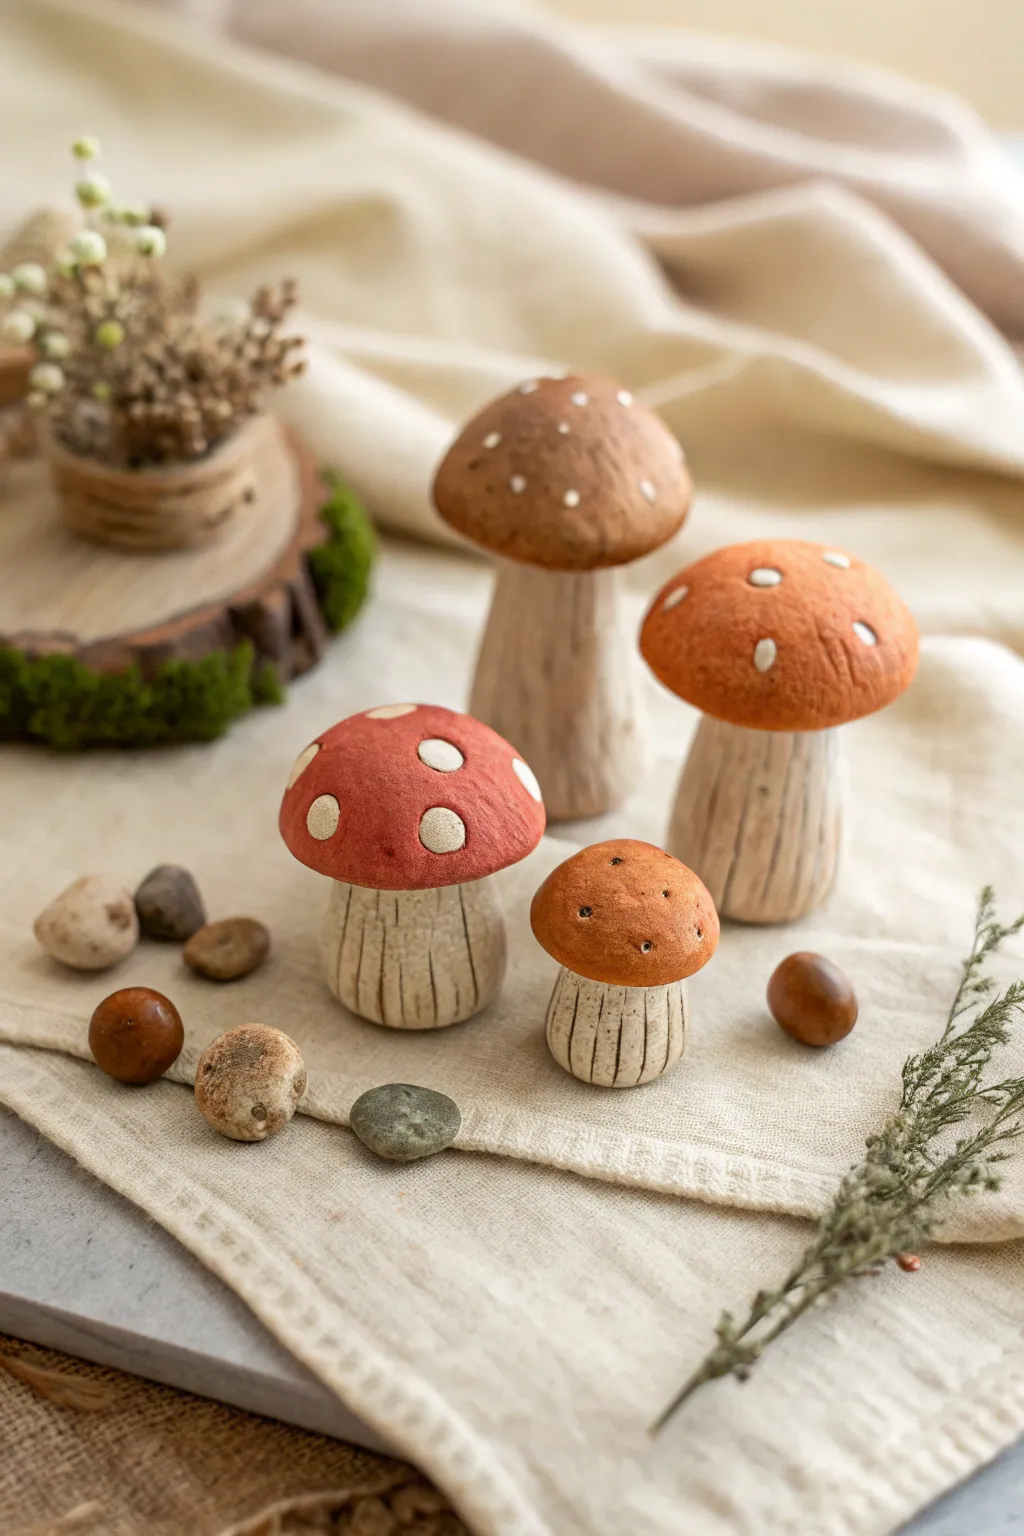
These charming rustic mushrooms feature deeply textured, woody stems topped with caps in varying shades of amber, rust, and clay-red. Their organic, handmade feel makes them perfect for autumn centerpieces or adding a touch of fairytale magic to your bookshelf.
Step-by-Step
Materials
- Oven-bake polymer clay (white or beige for stems, rust/brown/orange for caps)
- Clay sculpting tools (needle tool, small ball stylus)
- Acrylic paints (burnt sienna, ochre, dark brown, antique white)
- Fine-grit sandpaper
- Aluminum foil (for bulking larger shapes)
- Liquid clay or clay adhesive
- Matte varnish
- Small stiff-bristled brush
- Soft detail paintbrush
Step 1: Shaping the Stems
-
Create the core:
For the larger mushrooms, crumple a small piece of aluminum foil into a tight cylinder to serve as the core. This saves clay and ensures the thicker pieces bake evenly. -
Form the clay stem:
Condition your white or beige clay until soft, then roll it into a thick log. If using a foil core, wrap the clay sheet around it, smoothing the seams completely so the foil is hidden. -
Shape the silhouette:
Gently taper the top of the stem slightly narrower than the base. Press the bottom firmly onto your work surface to create a flat, stable standing base. -
Add vertical lines:
Using a needle tool or a sharp blade, carve vertical lines down the entire length of the stem. Vary the pressure to create deep grooves and shallow scratches, mimicking the look of aged bark or mushroom stalks. -
Distress the texture:
Take a stiff-bristled brush or even an old toothbrush and press it into the clay stem to soften the harsh carving lines and add organic pitting.
Step 2: Sculpting the Caps
-
Blend custom colors:
Mix your clay colors to achieve earthy tones—combine red with a touch of brown for rust, or orange with white for a soft coral-amber. You want a matte, natural finish. -
Form the cap dome:
Roll a ball of colored clay and gently flatten one side against your palm while cupping the other side to create a smooth dome shape. -
Refine the curvature:
Smooth out the dome with your fingers. For the flatter mushroom styles, press the top down gently; for the taller ones, keep the dome high and rounded. -
Create texture indentations:
Using a small ball stylus, press tiny, shallow divots into the surface of the cap. These will eventually become the light-colored spots seen in the reference photo. -
Add raised spots:
Alternatively, take tiny bits of light beige clay, roll them into flat discs, and press them firmly onto the cap surface for a protruding 3D spot effect.
Make It Fuzzy
Before baking, lightly roll a clean toothbrush over the cap surface. This creates a soft, velvety texture that mimics real fungi better than smooth clay.
Step 3: Assembly and Baking
-
Join the parts:
Apply a drop of liquid clay or clay adhesive to the top of the textured stem. Press the cap firmly onto the stem, giving it a slight wiggle to ensure a strong bond. -
Texture the connection:
I prefer to use my needle tool right under the cap lip to blend the connection point slightly, making it look like the gills connect to the stalk. -
Bake the pieces:
Place your mushrooms on a ceramic tile or baking sheet lined with parchment paper. Bake according to your specific clay manufacturer’s instructions (usually 275°F/135°C for 15-30 minutes depending on thickness). -
Cool down:
Turn off the oven and let the mushrooms cool completely inside. This gradual cooling helps prevent cracking.
Create a Forest Floor to Match
Glue your finished mushrooms to small wood slices and glue dried moss or small pebbles around the base for a complete mini-diorama.
Step 4: Finishing Touches
-
Apply a wash:
Mix a small amount of dark brown acrylic paint with water to create a thin wash. Brush this over the stems, ensuring it sinks into the deep vertical grooves. -
Wipe back the wash:
Before the paint dries, wipe the surface of the stem with a damp paper towel or cloth. The dark paint will remain in the cracks, highlighting the bark-like texture. -
Paint the spots:
If you created indented spots earlier, carefully paint inside the divots with an antique white or cream acrylic using a fine-point brush. -
Dry brush highlights:
Lightly dip a dry brush into a lighter creamy paint, wipe most of it off, and gently whisk it over the textured cap surface to emphasize the “fuzzy” look of the clay. -
Seal the work:
Finish by applying a coat of clear matte varnish to protect the paint and give the clay a professional, non-shiny finish.
Now you have a quaint set of forest mushrooms ready to bring a little bit of nature indoors.
Cane Slice Pattern Magnets
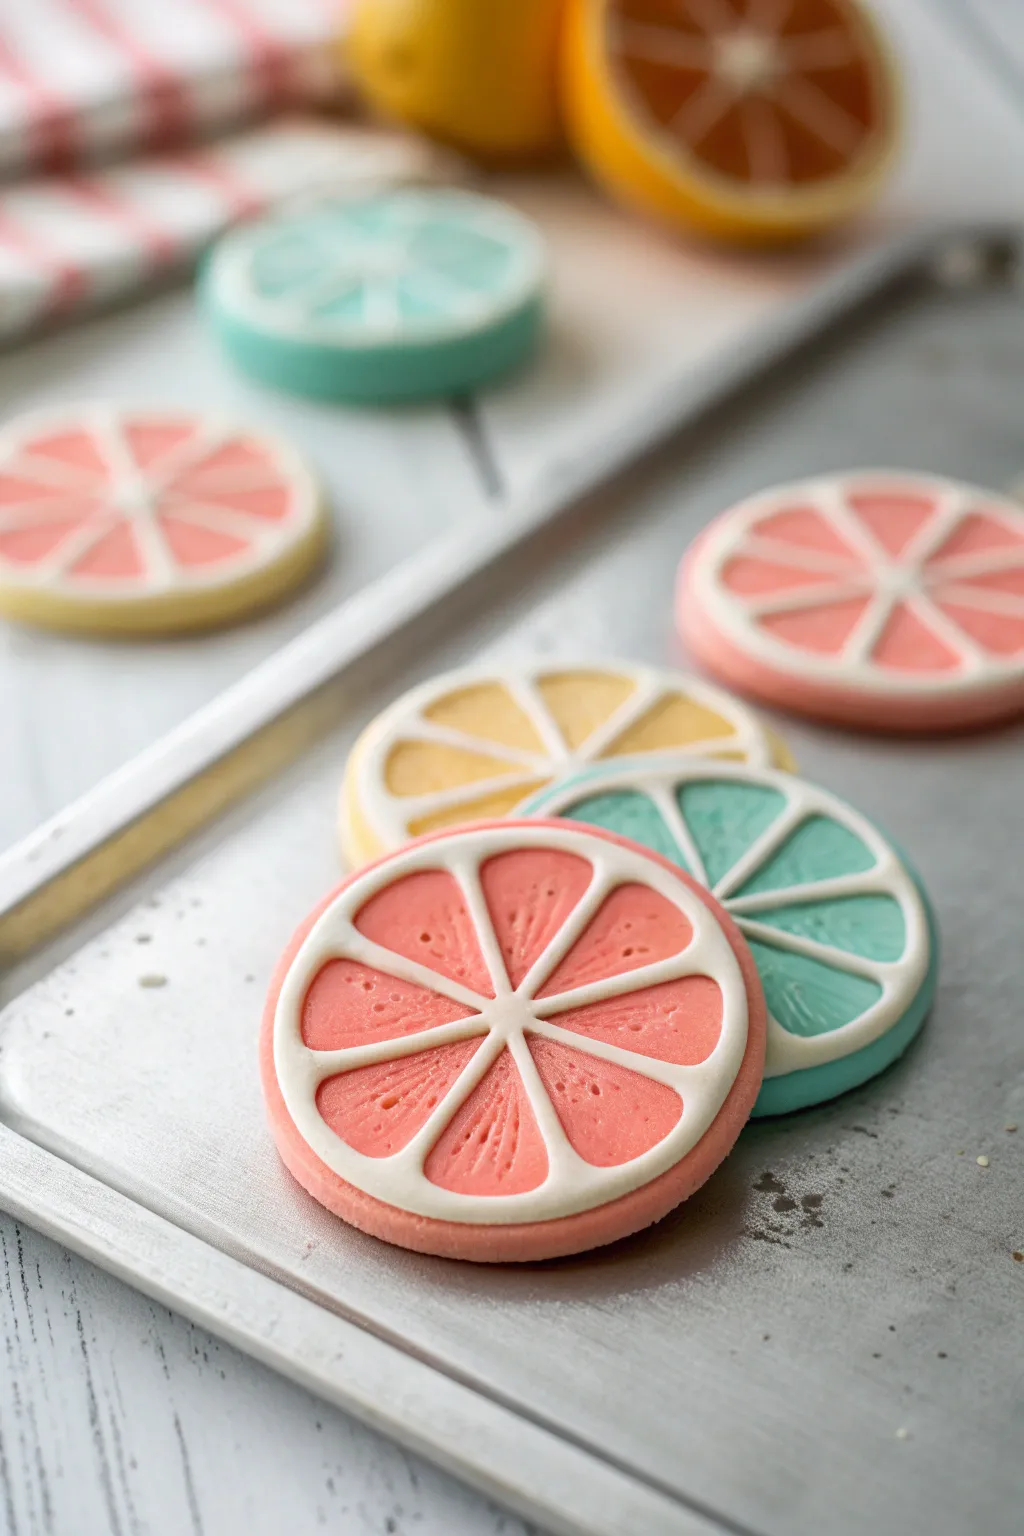
Bring a fresh squeeze of color to your fridge with these realistic citrus slice magnets. Using polymer clay cane techniques, you’ll create intricate fruit cross-sections that look good enough to eat.
Step-by-Step Tutorial
Materials
- Polymer clay (white, translucent, pink/coral, yellow, teal/mint)
- Clay roller or pasta machine
- Tissue blade or very sharp craft knife
- Round clay cutters (various sizes)
- Small magnets
- Strong craft glue (E6000 or super glue)
- Needle tool or toothpick
- Ceramic tile or parchment paper for baking
Step 1: Creating the Fruit Segments
-
Mix the colors:
Begin by conditioning your clay. For the grapefruit look, mix a coral pink with a small amount of translucent clay to give it that realistic, juicy depth. -
Form the core log:
Roll your fruit-colored clay into a thick log, about 1 inch in diameter. This will form the meaty part of the fruit segments. -
Prepare the pith:
Roll out a thin sheet of white clay. Wrap this sheet completely around your fruit-colored log, trimming the excess creates a clean seam. Smooth the seam with your finger. -
Shape the wedge:
To create the triangular segment shape, pinch the wrapped log along one side to create a teardrop profile. Roll and lengthen the cane until it is about 12 inches long. -
Cut the segments:
Using your sharp blade, cut the long teardrop cane into 8 equal lengths. These will become the individual slices of your citrus wheel.
Juicy Translucence
Mix translucent clay into your fruit colors at a 1:2 ratio. After baking, the fruit segments will look slightly see-through and incredibly realistic.
Step 2: Assembling the Cane
-
Make the center:
Roll a very thin snake of white clay to act as the central pith where all the segments meet. -
Arrange the segments:
Place the 8 teardrop segments around the white center snake, with the pointy ends facing inward. The thick, rounded sides should face out, forming a circle. -
Fill the gaps:
If there are tiny gaps between the segments near the outer edge, insert very small wedges of white clay to keep the circle tight. -
Wrap the exterior:
Roll out a thicker sheet of white clay and wrap the entire assembled circle. This creates the inner rind. -
Add the zest layer:
Choose a skin color (yellow for lemon, pink for grapefruit, teal/mint for a stylized lime) and roll a sheet. Wrap this as the final outer layer of your large cane. -
Reduce the cane:
Gently squeeze and roll the large cane to reduce its diameter. Start in the middle and work outward to avoid distorting the pattern inside. Aim for a diameter of about 2 to 3 inches.
Step 3: Slicing and Finishing
-
Chill the cane:
Place your reduced cane in the refrigerator for about 15-20 minutes. Firm clay slices much more cleanly without smushing the design. -
Slice the cookies:
Using your tissue blade, slice generous rounds from the cane, approximately 1/4 inch thick. Try to cut straight down rather than sawing. -
Texture the fruit:
I like to use a needle tool to gently prick the colored fruit sections. This mimics the tiny juice vesicles found in real citrus. -
Bake:
Preheat your oven according to the clay manufacturer’s instructions (usually 275°F or 130°C). Bake the slices on a ceramic tile or parchment-lined tray for 15-30 minutes. -
Cool down:
Let the clay slices cool completely in the oven with the door cracked, or on a wire rack. -
Attach magnets:
Once cool, apply a dab of strong adhesive to the back of each slice and press a magnet firmly into place. Let dry fully before using.
Smudged Slices?
If your design gets distorted while cutting, the clay is too warm. Pop the cane back in the freezer for 10 minutes, rotate the cane between cuts, and wipe your blade.
Now your kitchen has a permanent splash of summer color that will hold your favorite photos in place
Translucent “Stained Glass” Suncatchers
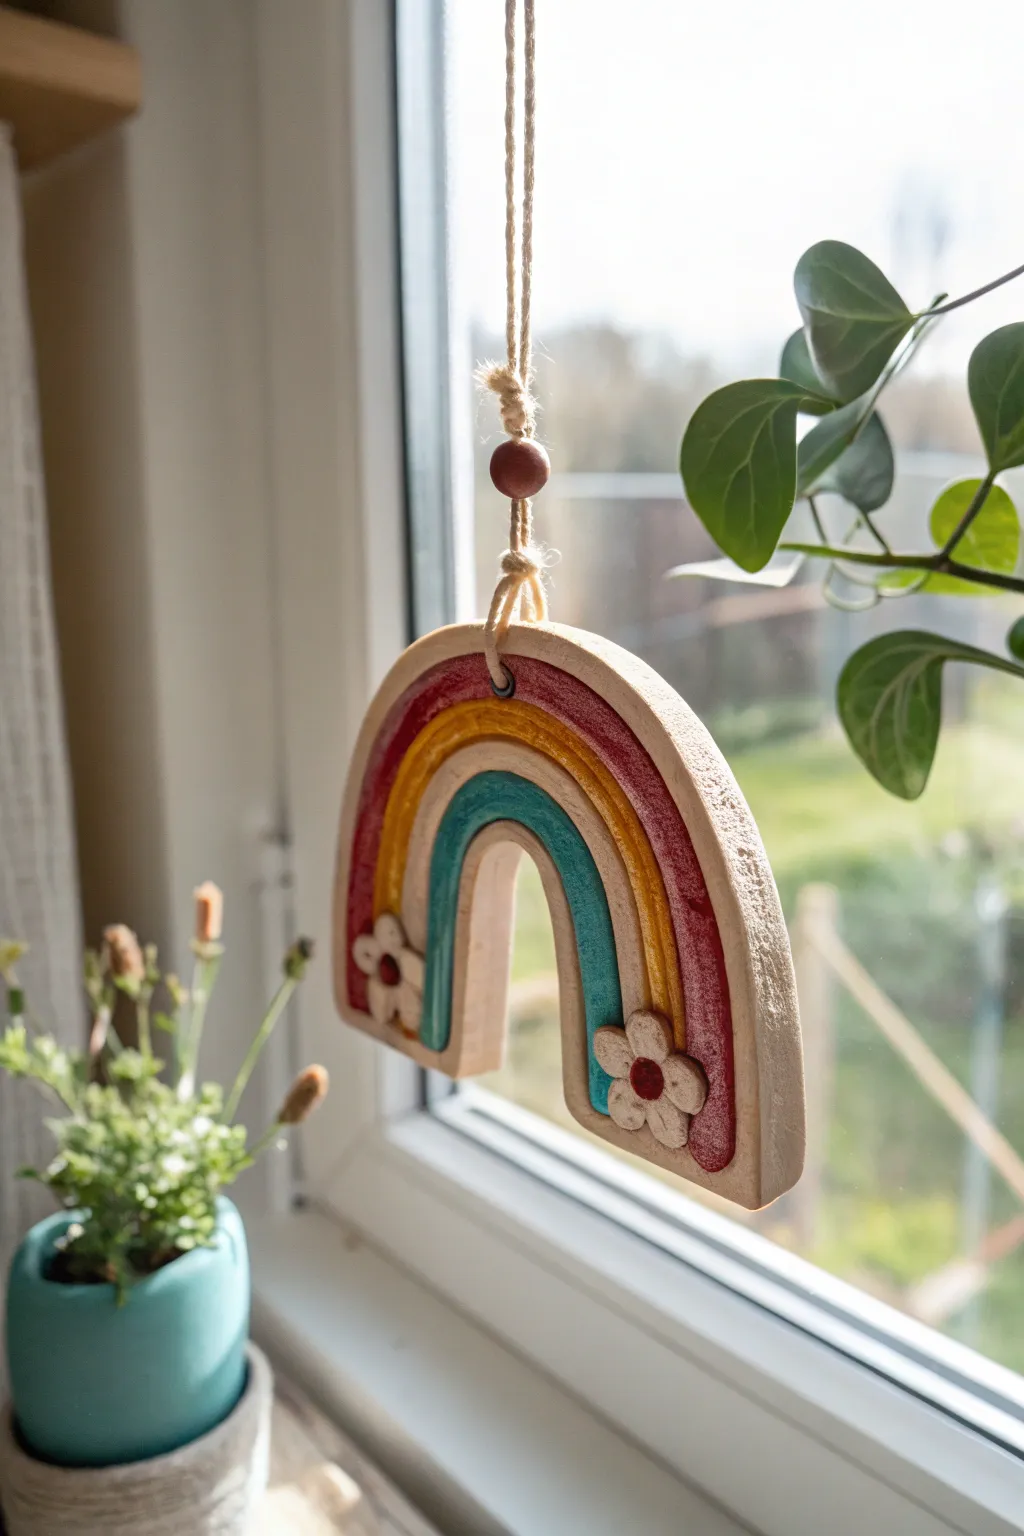
This charming hanging rainbow combines the rustic texture of oven-bake clay with the vibrant translucency of faux stained glass. Perfect for a sunny window, the light shines beautifully through the colorful resin centers, bordered by textured white clay and sweet flower accents.
Detailed Instructions
Materials
- White polymer clay (or air-dry clay)
- Rolling pin
- Craft knife or clay cutter
- Rainbow template (paper or cardstock)
- Texture sponge or toothbrush
- UV resin or 2-part epoxy resin
- Transparent glass paints or alcohol inks (red, orange/yellow, teal)
- Small silicone mixing cups and stir sticks
- UV lamp (if using UV resin)
- Small wooden bead
- Jute twine or heavy string
- Clear packing tape
- Sandpaper (fine grit)
- Ceramic tile or glass work surface
- Small circle cutter or straw (for the hole)
Step 1: Shaping the Clay Frame
-
Prepare the Clay:
Condition your white polymer clay by kneading it until it is soft and pliable. Roll it out on a smooth surface to an even thickness of about 1/4 inch (6mm). -
Cut the Rainbow Shape:
Place your paper rainbow template over the clay. Use a craft knife to cut out the main arch shape. Carefully cut out the inner arches, leaving thin borders of clay that will act as the ‘frame’ for your stained glass sections. -
Add Texture:
To mimic the stone-like look in the photo, gently press a coarse sponge or a clean toothbrush over the surface of the clay. This stippling effect adds wonderful character and hides fingerprints. -
Create Flower Accents:
Roll two tiny balls of clay for flower centers and ten smaller balls for petals. Press five petals together into a flower shape, place a center ball in the middle, and gently press them onto the bottom ends of the rainbow arch. Use a dotting tool to indent the centers. -
Make the Hanging Hole:
Use a straw or a small circular cutter to punch a clean hole at the very top center of the rainbow arch. Ensure it’s large enough for your twine to pass through later. -
Bake the Clay:
Transfer your piece to a baking sheet lined with parchment paper. Bake according to your clay manufacturer’s instructions (usually 275°F/135°C for 15-30 minutes). Let it cool completely before moving to the next phase.
Step 2: Creating the Stained Glass Effect
-
Seal the Back:
Once the clay is fully cooled, place a strip of clear packing tape firmly across the back of the rainbow, covering all the open gaps. Rub the tape firmly against the clay borders to create a tight seal so resin won’t leak. -
Mix the Red Resin:
Pour a small amount of clear resin into a mixing cup. Add a drop of transparent red glass paint or alcohol ink. Mix gently to avoid bubbles. You want a translucent tint, not opaque color. -
Pour the First Stripe:
Carefully pour the red resin into the outermost arc cavity. Use a toothpick or needle tool to guide the resin into the corners and pop any surface bubbles. Don’t overfill; it should be level with the clay. -
Cure the Resin:
If using UV resin, place the piece under a UV lamp for 60-90 seconds until hard. If using epoxy, cover the piece to protect from dust and let it cure for the recommended time (usually 24 hours). -
Repeat for Other Colors:
Repeat the mixing process for the yellow/orange stripe (middle) and the teal/blue stripe (inner). Pour each carefully and cure them individually to prevent colors from bleeding into each other if you accidentally overfill. -
Seal the Flowers:
For a little extra shine, I like to add a tiny drop of red-tinted resin to the center of each white flower and cure it. -
Remove the Tape:
Once all resin is fully cured and hard, peel off the packing tape from the back. The resin surface against the tape will be matte; you can brush on a thin layer of clear resin and cure again if you want the back glossy too.
Tape Seal Trick
Make sure your packing tape is pressed VERY firmly against the clay. Run a fingernail along the inner edges of the frame to ensure a leak-proof seal before pouring any resin.
Step 3: Assembly
-
Prepare the Twine:
Cut a length of jute twine or cord, approximately 12 inches long. Fold it in half to create a loop. -
Attach the Bead:
Thread the looped end of the twine through your wooden bead. Tie a simple overhand knot just above the bead to keep it in place, leaving a large loop at the top for hanging. -
Secure to Rainbow:
Thread the loose ends of the twine through the hole in the top of the rainbow from front to back. Bring them up and tie them securely to the main cord, wrapping it around the loop base for a rustic finish resembling a tassel knot.
Add Sparkle
Mix a tiny pinch of extra-fine iridescent glitter into your resin before pouring. It will catch the sunlight beautifully without overpowering the color.
Hang your beautiful new creation in a bright window and watch the colors dance across the room