Painting fireplace tile is one of my favorite ways to turn a dated surround into something you’re actually excited to style around. With the right color palette and a few clever techniques, your fireplace can go from “blah” to a true focal point without ripping anything out.
Classic Matte Black Modern Contrast

Transform dated or mismatched fireplace tile into a stunning, modern focal point with a high-contrast matte black finish. This project delivers a sophisticated, architectural look that pairs beautifully with natural wood tones and minimalistic decor.
How-To Guide
Materials
- TSP (Trisodium Phosphate) cleaner or heavy-duty degreaser
- Sanding sponges (120-grit and 220-grit)
- Painter’s tape (high quality)
- Drop cloths
- Bonding primer (specifically for tile/glossy surfaces)
- High-heat enamel paint (matte black) in quart tin
- Angled sash brush (1.5 inch or 2 inch)
- High-density foam roller (4-inch width)
- Roller tray
- Clean rags
- Respirator or mask (for ventilation)
Step 1: Preparation
-
Clear and Protect:
Remove any decor, the fireplace screen, and grate. Lay down drop cloths extensively around the hearth to protect your flooring from permanent drips. -
Deep Clean the Tile:
Scrub the tiles vigorously with TSP or a heavy-duty degreaser. Fireplaces accumulate soot and invisible oils that repel paint, so really work into the grout lines. Rinse thoroughly with water and let dry completely. -
Sand for Adhesion:
Using a 120-grit sanding sponge, scuff up the entire surface of the tile. You don’t need to strip the old finish, but you must dull the shine to give the primer some ‘tooth’ to grab onto. -
Wipe Down Dust:
After sanding, vacuum up the dust and wipe the tiles down again with a damp rag or tack cloth to ensure a perfectly clean surface. -
Tape Off Edges:
Apply painter’s tape carefully along the walls, the wood mantel legs, and the floor surrounding the hearth. Press the tape edges down firmly with a credit card or putty knife to prevent bleed-under.
Step 2: Priming
-
Cut in the Primer:
Using your angled sash brush, apply bonding primer to the grout lines and the corners where the roller won’t fit. I find it easiest to work in small sections here so the primer doesn’t dry with brush marks before rolling. -
Roll the Faces:
Use the high-density foam roller to apply primer to the faces of the tiles. The foam ensures a smooth finish without stipple texture. Let the primer cure according to the manufacturer’s instructions—usually overnight is best for tile.
Pro Tip
If your tile is extremely glossy, consider using an etching primer specifically designed for glass or ceramic to guarantee the black paint won’t chip.
Step 3: Painting
-
Inspect and Light Sand:
Once the primer is fully cured, lightly run a 220-grit sanding sponge over the surface to knock down any bumps or dust nibs. Wipe clean. -
Brush the Grout Lines:
Dip your angled brush into the matte black high-heat enamel. Carefully paint the grout lines first. Don’t overload the brush; you want to avoid drips pooling in the corners. -
Apply First Coat:
Immediately follow the brush work with the foam roller on the flat tile surfaces. Apply a thin, even coat. Don’t try to get full opacity on the first pass; thin coats prevent the paint from peeling later. -
Let Dry:
Allow the first coat to dry completely. This usually takes longer than wall paint, so check your can’s specific recoat time. -
Apply Second Coat:
Repeat the process—brushing grout lines then rolling tile faces—for your second coat. This should achieve that rich, solid black coverage. -
Detail Check:
Inspect the fireplace from different angles. Use a small artist’s brush to touch up any tiny spots in the grout or corners that might have been missed. -
Remove Tape:
While the final coat is still slightly tacky (not wet, but not fully hard), slow peel away the painter’s tape at a 45-degree angle to get a crisp line. -
Cure Time:
Let the paint cure for at least 3-5 days before placing any decor back on the hearth or lighting a fire, ensuring the finish hardens completely.
Level Up
For a sleek, monolithic look, apply paintable caulk over the deep grout lines before priming to smooth out the surface and reduce the grid pattern.
Enjoy the dramatic, modern update to your living space with your freshly painted focal point


Crisp White for a Clean Bright Look
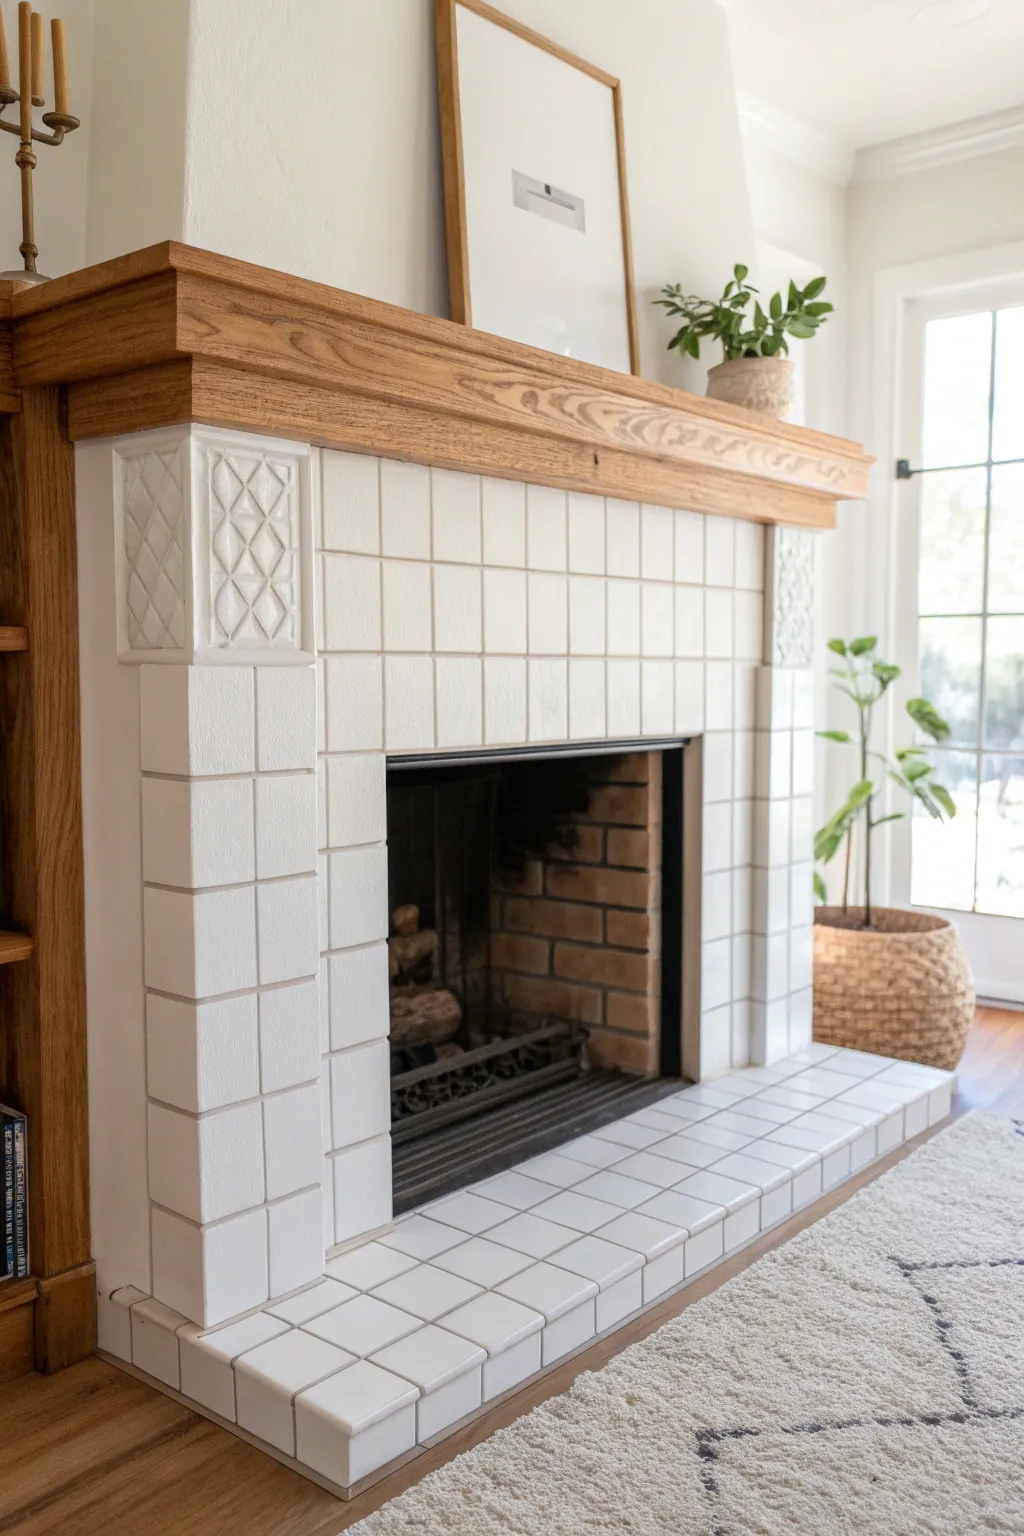
Transform a dated or dark fireplace surround into a bright, modern focal point with this clean white finish. This project creates a fresh, airy look that instantly updates the room without the messy demolition of removing old tile.
Step-by-Step Tutorial
Materials
- High-quality bonding primer (oil-based or urethane acrylic)
- Semi-gloss or satin enamel paint (white)
- Heavy-duty degreaser or TSP substitute
- Sanding sponge (220-grit)
- Painter’s tape (automotive grade or delicate surface)
- Drop cloths
- Small foam roller (4-inch)
- High-quality angled sash brush
- Scrub brush
- Lint-free tack cloth
Step 1: Preparation and Cleaning
-
Clear the area:
Begin by removing any decor from the mantel and clearing the hearth. Lay down drop cloths to protect your flooring, taping them securely at the edges so they don’t shift while you work. -
Degrease thoroughly:
Mix your heavy-duty degreaser or TSP substitute according to the package instructions. Scrub every inch of the tile and grout vigorously with a scrub brush to remove decades of soot, dust, and potential wax buildup. -
Rinse the surface:
Wipe down the entire tiled area with a clean, damp cloth and fresh water to remove any soapy residue. Repeat this step several times if necessary, as residue will prevent the paint from bonding. -
Scuff sand:
Once dry, use a 220-grit sanding sponge to lightly scuff the surface of the tiles. You don’t need to remove the glaze, just create a bit of ‘tooth’ for the primer to grip. -
Remove dust:
Vacuum up the sanding dust using a soft brush attachment. Follow up by wiping the tiles with a tack cloth to capture even the finest particles. -
Tape off boundaries:
Apply painter’s tape carefully around the wooden mantel, the firebox insert, and along the floor or carpet edge. Press the tape edges down firmly with a credit card or putty knife to prevent bleed-through.
Don’t Skip the Clean
Soot is oily and notoriously hard to cover. If you see yellowing bleeding through your primer, stop and apply a shellac-based blocker before continuing.
Step 2: Priming the Surface
-
Cut in the grout lines:
Using your angled sash brush, apply the bonding primer to the grout lines first. Brush it into the crevices, ensuring full coverage in the recessed areas. -
Prime the tile faces:
While the grout lines are still wet, use the small foam roller to apply primer to the flat faces of the tiles. Use a light touch to avoid leaving roller texture or ridges. -
Check for drips:
Scan the vertical surfaces immediately for any drips or runs, especially near the decorative relief tiles at the corners. Smooth them out gently with the brush tip before they dry. -
Allow to cure:
Let the primer try completely according to the manufacturer’s instructions. I usually like to give this step extra time—often overnight—to ensure the strongest possible bond before applying topcoats.
Step 3: Painting the Finish
-
Apply first coat to grout:
Just like with the primer, use your brush to paint the grout lines with your white enamel first. Work in small sections, perhaps 2-3 square feet at a time. -
Roll the first coat:
Immediately follow up with the foam roller on the tile faces in that section. This technique, ‘tipping off,’ helps blend the brush marks from the grout lines into a smooth finish. -
Detail the relief tiles:
For the decorative corner pieces with raised texture, use a dry-brush technique (very little paint on the brush) to dab paint into the recesses without pooling. -
Dry and assess:
Allow the first coat of paint to dry for at least 4-6 hours. If you notice any rough spots, very lightly sand them with a fine-grit sponge and wipe clean. -
Apply second coat:
Repeat the painting process for a second coat to achieve full opacity and a true, crisp white color. Two thin coats are always better and more durable than one thick one. -
Remove tape:
While the paint is still slightly tacky (not fully cured), carefully peel away the painter’s tape at a 45-degree angle. This prevents the dried paint from peeling up with the tape. -
Final cure:
Let the paint cure fully for several days before placing heavy decor back on the hearth or lighting a fire, ensuring the finish hardens completely.
Decorate the Hearth
Style your new white fireplace with a large seagrass basket or a minimalist art print in a wood frame to warm up the clean, cool white tones.
Now you have a stunning, modernized fireplace that brightens the entire living space


Soft Greige to Calm Busy Tile
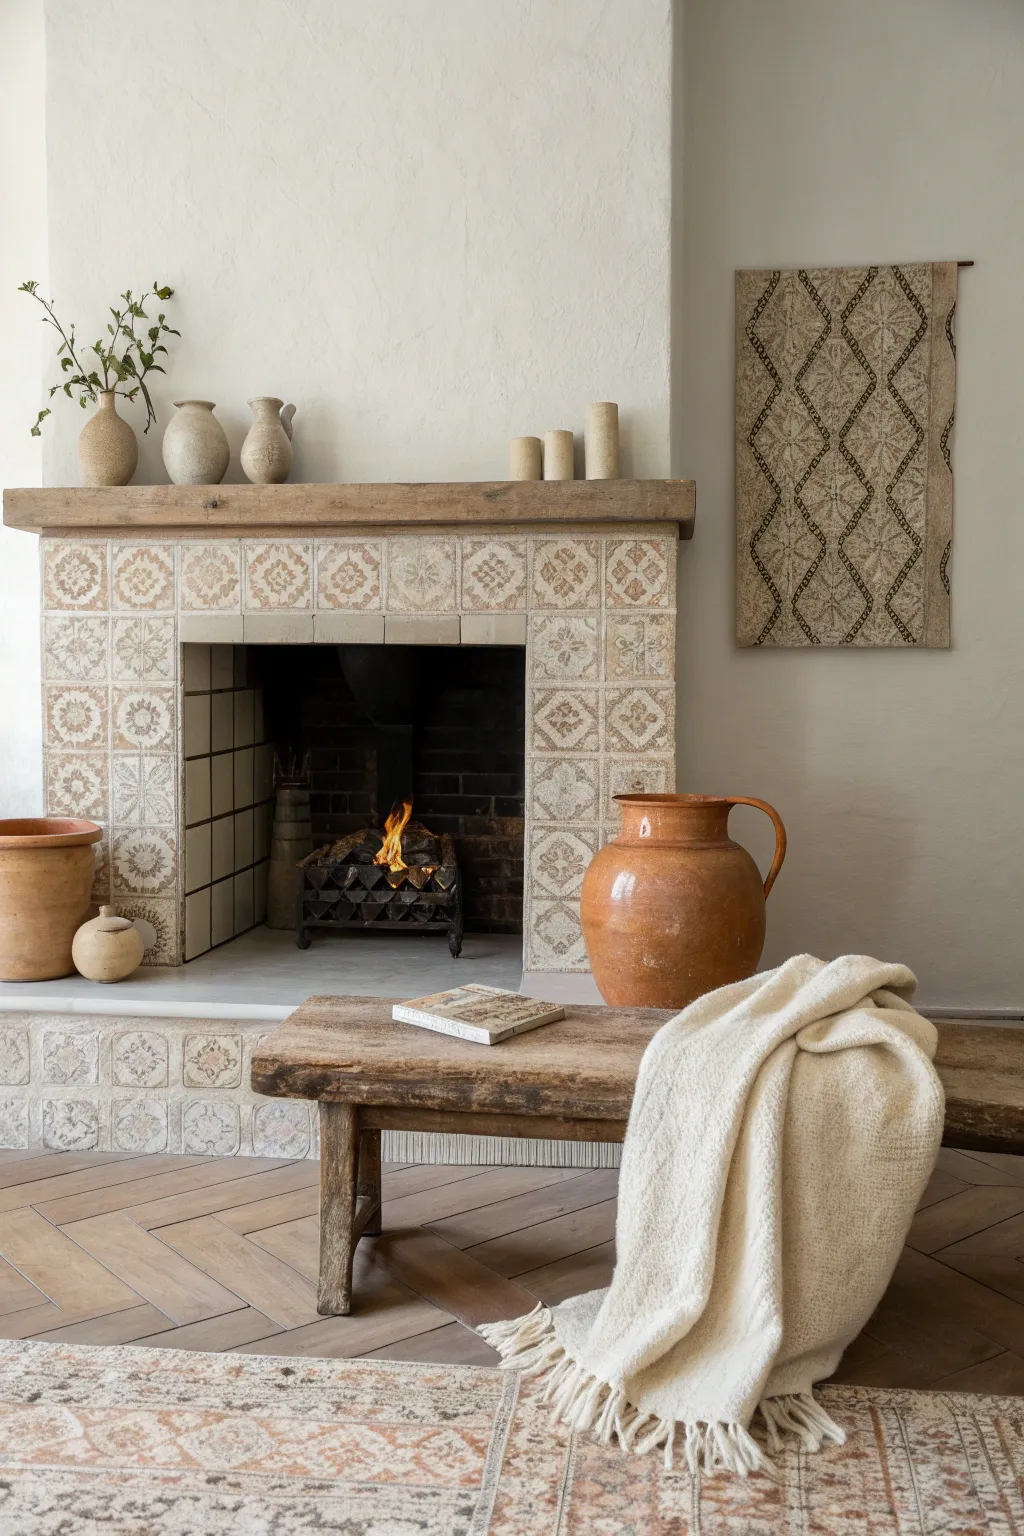
Transform busy, outdated fireplace tiles into a serene focal point using a subtle whitewashing technique. This project softens harsh patterns with a warm greige glaze, allowing just a hint of the original character to peek through for an authentic, aged Mediterranean look.
How-To Guide
Materials
- High-bonding primer (specifically for glossy surfaces)
- Chalk paint or matte latex paint (in warm beige/greige)
- Water (for diluting)
- Clean lint-free rags
- Medium-sized paintbrush (natural bristle preferred)
- Painters tape
- Degreasing cleaner (like TSP)
- Scrubbing sponge
- Small mixing container
- Matte clear sealer (polycrylic)
Step 1: Preparation
-
Clean thoroughly:
Begin by scrubbing the existing tiles vigorously with a degreasing cleaner like TSP. Fireplace surrounds accumulate unseen soot and oils that will repel paint, so don’t rush this step. -
Rinse and dry:
Wipe down the tiles with plain water to remove any chemical residue. Allow the surface to dry completely for at least a few hours. -
Protect the area:
Apply painter’s tape to the walls, the mantel, and the floor surrounding the fireplace. Lay down a drop cloth to catch any drips, as watered-down paint can be runny. -
Prime the surface:
Apply a thin, even coat of high-bonding primer. This is crucial for slick tile surfaces. Since we are going for a semi-transparent look later, ensure this primer coat isn’t too thick, or simply spot-prime if you want more transparency.
Step 2: Creating the Wash
-
Mix your paint:
In your small container, mix your beige or greige chalk paint with water. I like to start with a 1:1 ratio—equal parts paint and water. -
Test the consistency:
Stir until the mixture achieves the consistency of heavy cream or milk. Test it on a discreet corner tile first to see if it’s too opaque or too runny. -
Adjust the opacity:
If the test patch covers too much of the pattern, add more water. If it’s too translucent, add a touch more paint.
Rag Technique
Use a dry rag for more texture and a wet rag for a smoother, cleaner wipe-back. Keep multiple clean rags nearby so you aren’t just smearing paint around.
Step 3: Applying the Finish
-
Paint a small section:
Dip your brush into the wash and apply it over a section of about four to six tiles. Work the paint into the grout lines as well. -
Wipe back:
Immediately take a damp, lint-free rag and gently wipe over the painted area. This removes the excess paint from the high points of the tile while leaving pigment in the texture and grout lines. -
Check your pressure:
Vary your wiping pressure to create a weathered, organic look. Leaving some areas slightly more opaque than others adds to the rustic charm. -
Continue working:
Work your way across the fireplace in small sections. Working in small batches prevents the paint from drying before you have a chance to wipe it back. -
Address the grout:
If the grout lines look too stark, use a detailed artist brush to dab extra wash directly into them, blending slightly with the tile edges. -
Let it cure:
Allow the first layer to dry completely. This usually takes about an hour depending on the paint type and humidity. -
Layer if needed:
If the original pattern is still too loud for your taste, repeat the paint-and-wipe process with a second, very thin coat until you achieve that perfect soft greige level.
Add Burnt Umber
For an even more aged, antique look, mix a tiny drop of burnt umber pigment into your final clear sealer coat to
Step 4: Sealing
-
Apply sealer:
Once you are happy with the visual texture and the paint is fully dry (wait 24 hours to be safe), apply a matte polycrylic sealer. -
Finish up:
Remove the painter’s tape carefully while the sealer is still slightly tacky to avoid peeling any edges.
Now you have a beautifully softened fireplace that anchors the room with quiet elegance


Charcoal for Soot-Hiding Practical Style
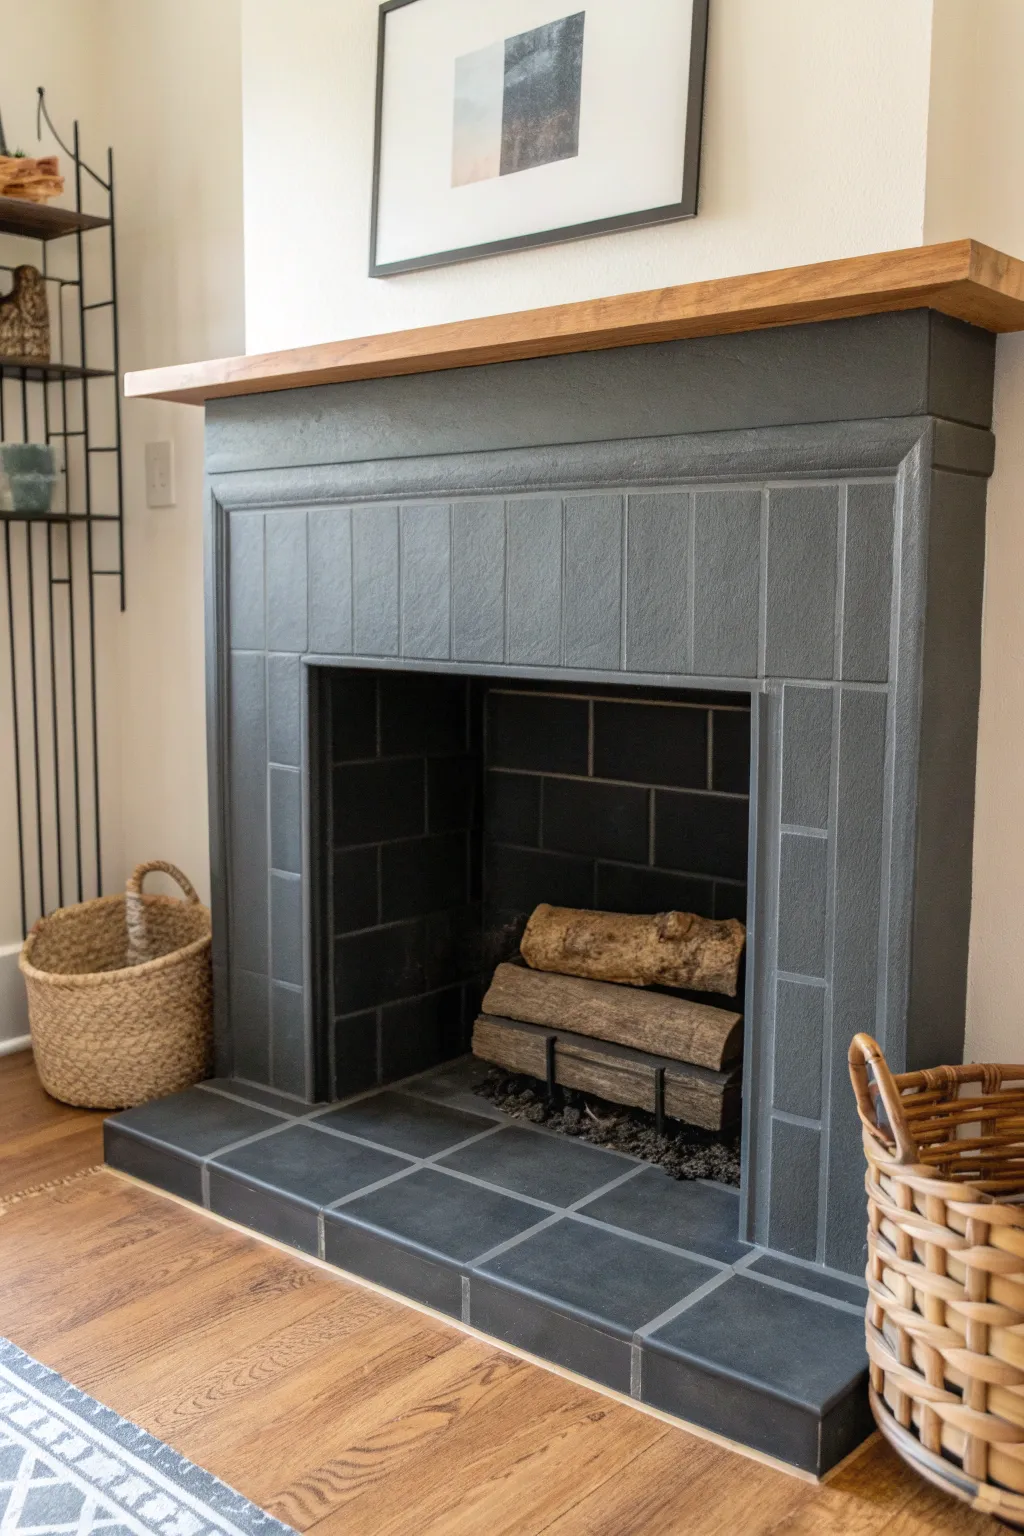
Transform dated or mismatched fireplace tile into a modern, sophisticated focal point with a coat of rich charcoal paint. This dark, matte finish not only adds dramatic contrast to a room but also cleverly conceals minor soot stains for a practical, low-maintenance update.
Detailed Instructions
Materials
- High-quality bonding primer (oil-based or specific for sleek surfaces)
- Interior latex paint or masonry paint (Charcoal/Dark Gray, flat or matte finish)
- Painter’s tape
- Drop cloths
- Degreasing cleaner (e.g., TSP or TSP substitute)
- Scrub brush or heavy-duty sponge
- Fine-grit sandpaper (220-grit)
- Tack cloth
- Small angled sash brush (1.5 to 2 inch)
- 4-inch foam roller or short-nap roller
- Small roller tray
- High-heat spray paint (black, high-heat matte) – optional for firebox interior
Step 1: Preparation & Cleaning
-
Protect the area:
Lay down drop cloths around the base of the fireplace hearth. Use painter’s tape to meticulously mask off walls, your wooden mantel, and the floor surrounding the tile. -
Heavy-duty cleaning:
Scrub the tiles thoroughly with a degreasing cleaner like TSP mixed with water. Fireplace tiles often hold unseen soot oils that repel paint, so really work the cleaner into the grout and surface. -
Rinse and dry:
Wipe the tiles down with fresh, clean water to remove all chemical residue. Allow the tile to dry completely, overnight if possible, as trapped moisture can ruin adhesion. -
Sanding the surface:
Lightly hand-sand the tile surface with 220-grit sandpaper. You aren’t trying to remove the finish, just roughening the glaze slightly to give the primer something to ‘bite’ into. -
Remove dust:
Vacuum up the sanding dust, then wipe the entire surface with a tack cloth to ensure it is perfectly dust-free.
Paint peeling off?
This usually means oily residue was left behind. Sand the peeling spot, re-clean aggressively with TSP, prime specifically that area, and re-paint.
Step 2: Priming
-
Cut in grout lines:
Using your small angled brush, apply the bonding primer into the grout lines first. Dab it in to ensure full coverage in the porous grout texture. -
Prime the faces:
Follow up immediately with the foam roller to coat the face of the tiles. Keep the layer thin and even to avoid drips. -
Inspect coverage:
Don’t worry if the old color shows through slightly; the goal is adhesion, not full blocks. Check for and smooth out any roller marks before moving on. -
Dry time:
Let the primer cure according to the manufacturer’s instructions. I usually give this a full 24 hours just to be safe with glossy tiles.
Add subtle texture
For a stone-like look instead of flat paint, use a texture additive in your paint or stipple the wet paint gently with a sea sponge.
Step 3: Painting
-
First coat grout work:
Just like with priming, dip your angled brush into the charcoal paint and carefully paint the grout lines first. Work in small sections, perhaps 2×2 feet at a time. -
Rolling the charcoal:
While the grout paint is still wet, roll the charcoal paint onto the tile faces with your foam roller. This wet-on-wet technique helps blend the brush and roller textures for a smoother finish. -
Check for drips:
Watch vertical edges and corners closely for drips or pooling paint and smooth them out immediately. -
Wait and repeat:
Allow the first coat to dry fully (usually 4-6 hours). Apply a second coat using the same method: cut in grout lines, then roll the faces. -
Assess coverage:
If the color looks uneven or the old tile is still shadowing through, apply a thin third coat. Dark colors sometimes require that extra layer for true depth.
Step 4: Finishing Touches
-
Firebox refresh (Optional):
If the interior brick looks shabby against the new sleek tile, tape off your fresh work and spray the interior firebox bricks with high-heat matte black paint. -
Remove tape:
Carefully peel away the painter’s tape while the final coat is slightly tacky or score the edge with a utility knife if dry to prevent peeling paint. -
Cure time:
Avoid placing accessories or lighting fires for at least a few days to let the paint finish harden completely.
Enjoy the cozy, modern vibe your new charcoal fireplace brings to the living space

The Complete Guide to Pottery Troubleshooting
Uncover the most common ceramic mistakes—from cracking clay to failed glazes—and learn how to fix them fast.
Painted Grout-Free Minimal Monochrome
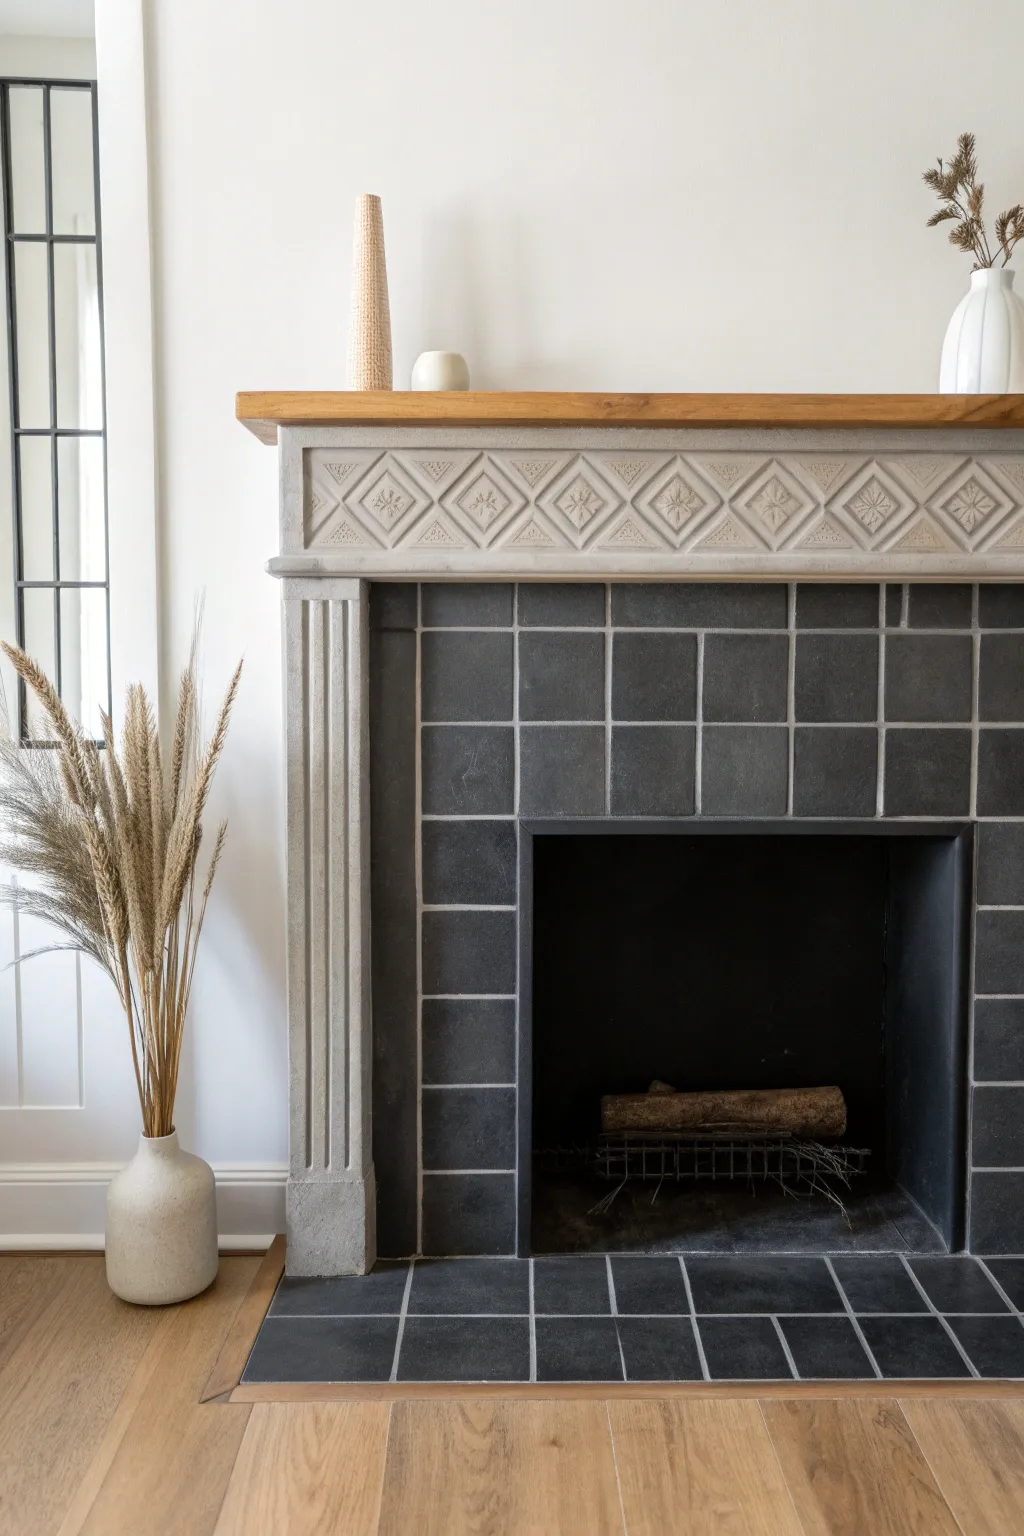
Transform dated fireplace tiles into a modern, minimalist statement piece with this monochromatic painting technique. By matching the grout color to the tile, you’ll create a seamless, sophisticated slate effect that mimics the look of high-end stone.
Step-by-Step Tutorial
Materials
- High-quality bonding primer (such as STIX)
- Matte chalkboard paint or matte enamel (charcoal or dark slate color)
- Painter’s tape
- Drop cloths
- Degreaser or TSP substitute
- Sanding sponge (medium grit)
- Small foam roller
- Angled sash brush (1.5 – 2 inch)
- Artist brush (for grout lines)
- Clean rags
- Paint tray
Step 1: Prep Work
-
Clean thoroughly:
Begin by scrubbing the entire tiled area with a degreaser or TSP substitute. Fireplaces accumulate soot and grime that can repel paint, so really work into the grout lines and rinse well with water. -
Tape off edges:
Once fully dry, apply painter’s tape to protect the surrounding mantel, walls, and floor. Press the tape edges down firmly to prevent bleed-through. -
Scuff the surface:
Use a medium-grit sanding sponge to lightly scuff the surface of the tiles. You aren’t trying to remove the glaze, just creating a ‘tooth’ for the primer to grip. -
Wipe away dust:
Vacuum up the sanding dust and follow with a damp rag to ensure the surface is completely clean before painting.
Sticky Situation?
If paint peels when you remove the tape, score the edge gently with a utility knife first. This separates the paint film from the tape for a clean break.
Step 2: Priming
-
Cut in grout lines:
Dip your angled brush into the bonding primer and paint all the grout lines first. Dab the brush into deep recesses to ensure full coverage. -
Roll the tiles:
Immediately follow with your foam roller on the flat tile surfaces. Roll smoothly to blend with the wet brush marks. -
Check for drips:
Keep an eye out for primer pooling in the corners of the tiles and smooth them out with your brush before they dry. -
Dry time:
Let the primer cure according to the manufacturer’s instructions. I like to let this dry overnight just to be safe, as adhesion is critical on tile.
Step 3: Painting
-
Mix your paint:
Stir your matte charcoal paint thoroughly. A truly flat or matte finish is key to achieving that slate-like appearance shown in the photo. -
Paint the grout first:
Using your angled brush or a smaller artist brush, paint the grout lines of a small section (about 2×2 feet). Applying paint to the grout first ensures no white gaps show through. -
Roll the section:
While the grout paint is still wet, use the foam roller to coat the tile faces in that same section. This wet-on-wet technique helps minimize texture differences. -
Feather the edges:
When moving to the next section, lightly roll over the edge of the previous section to blend the two areas seamlessly without creating a ridge. -
Repeat until covered:
Continue this process across the entire surround and hearth until the first coat is complete. -
Apply second coat:
After the first coat is dry to the touch, apply a second coat using the same method. The second coat creates that rich, deep opacity. -
Detail check:
Inspect the fireplace from different angles. Use a small artist brush to touch up any tiny spots where the original tile color might be peeking through, especially near the floor. -
Remove tape:
Ideally, peel off the painter’s tape while the final coat is still slightly tacky. Pull the tape away from the painted edge at a 45-degree angle to get a crisp line. -
Cure time:
Allow the paint to fully cure for several days before placing any decor on the hearth or lighting a fire, ensuring the finish hardens completely.
Faux Stone Texture
For a more realistic slate look, dab a tiny bit of lighter grey paint onto a sea sponge and very lightly blot random tiles before the final coat dries.
Enjoy the sleek, modern ambiance of your refreshed fireplace
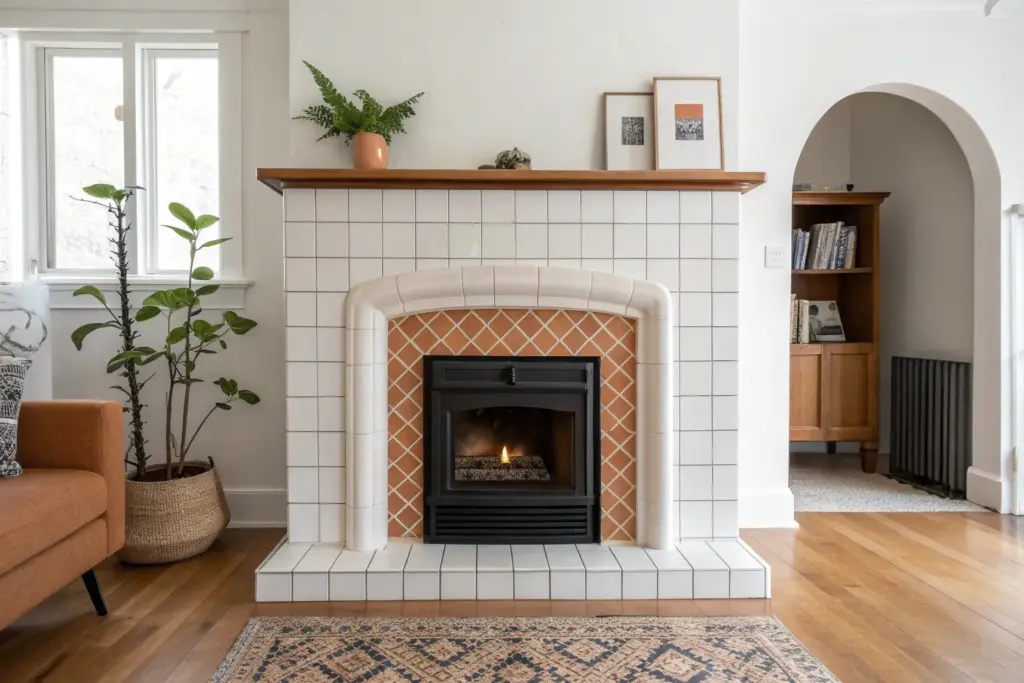
Two-Tone Border to Frame the Firebox
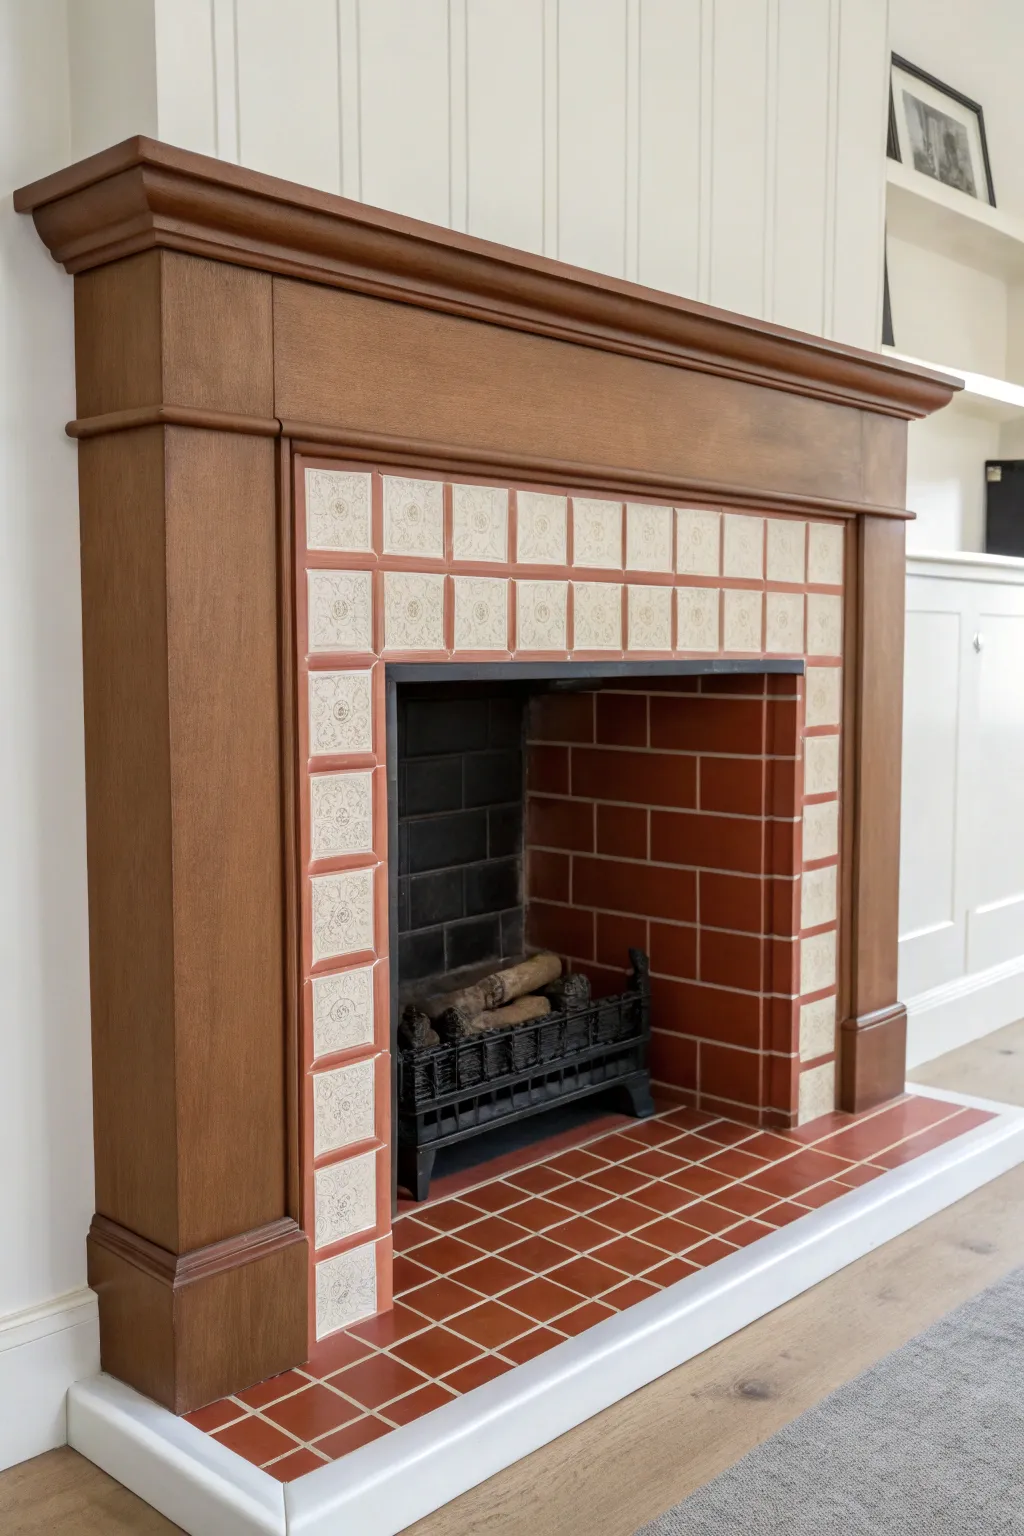
Transform a dated fireplace surround into a sophisticated focal point by using paint to create a custom tile look. This project mimics the charm of classic ceramic tiles with a terracotta-inspired border and a clean, patterned creamy inner section, giving your hearth a fresh, intentional design without the cost of retiling.
Step-by-Step
Materials
- High-heat primer (specifically for tile/glossy surfaces)
- Latex porch and floor enamel (Terra Cotta/Rust color)
- Latex porch and floor enamel (Cream/Off-White color)
- Painter’s tape (multi-surface)
- 1/4 inch painter’s tape (for grout lines)
- Small foam roller
- Small angled paintbrush
- Detail brush (for stencil work)
- Tile stencil (4×4 inch floral/geometric motif)
- Degreaser or TSP substitute
- Fine-grit sandpaper (220 grit)
- Clean rags
- Drop cloths
Step 1: Preparation
-
Clean thoroughly:
Begin by scrubbing the existing tiles vigorously with a degreaser or TSP substitute. Fireplaces accumulate soot and grime that will prevent paint adhesion, so ensure the surface is spotless and allow it to dry completely. -
Sand the surface:
Lightly scuff the shiny surface of the tiles with 220-grit sandpaper. You aren’t trying to remove the finish, just creating a ‘tooth’ for the primer to grab onto. Wipe away all dust with a damp rag. -
Protect surroundings:
Apply painter’s tape to the wooden mantel edges, the firebox insert, and the floor hearth to protect them from stray brushstrokes. Lay down a drop cloth to catch any drips. -
Prime the tiles:
Apply a coat of high-adhesion primer designed for glossy surfaces. Use a small foam roller for a smooth finish, getting into the grout lines with a brush. Let this cure according to the manufacturer’s instructions, usually overnight.
Clean Lines Secret
Before painting your accent color, brush a thin layer of the base color over the tape edge first. This seals the tape and ensures any bleeding matches the base, leaving a razor-sharp line.
Step 2: Creating the Base & Border
-
Tape the border:
Decide on your layout. For this two-tone look, we are keeping the outer border and hearth a solid rust color. If your tiles are already laid out in a border pattern like the photo, tape off the inner cream section to protect it while you paint the outer edge. -
Paint the rust tone:
Using the Terra Cotta floor enamel, paint the hearth tiles and the thin border tiles surrounding the main opening. Use a brush for edges and a roller for flat areas to minimize texture. Apply 2-3 thin coats, letting each dry fully. -
Seal the grout lines:
Once the rust color is dry, you can re-tape. If you want to keep the original grout lines visible between your new painted ’tiles,’ run thin 1/4 inch tape over the grout lines now. Alternatively, you can paint the whole surface and recreate grout lines later with a steady hand. -
Paint the cream base:
Now, tackle the inner section where the patterned tiles will go. Apply the Cream/Off-White enamel to these tiles. I find that a small brush helps work the paint into any existing texture before smoothing it out with a mini roller. -
Second coat:
Apply a second coat of the cream paint to ensure solid coverage. The base needs to be completely opaque so the stencil design sits on a clean background.
Smudged Stencil?
If paint bleeds under the stencil, don’t panic. Let it dry completely, then use a small detail brush and your base cream color to ‘erase’ the error carefully.
Step 3: Stenciling the Details
-
Position the stencil:
Once the cream base is cured (give it at least 24 hours), center your 4×4 inch stencil on the first tile. Use a small piece of painter’s tape to hold it in place securely. -
Load the brush:
Dip a stencil brush or small sponge into a very small amount of a darker neutral paint (like a taupe or soft grey). Off-load almost all the paint onto a paper towel until the brush feels dry. -
Apply the pattern:
Lightly tap the paint over the stencil design. Use a vertical dabbing motion rather than brushing to prevent paint from bleeding under the stencil edges. -
Repeat the process:
Carefully lift the stencil and move to the next tile. Check the back of the stencil periodically; if paint builds up, wipe it off to keep your lines crisp. -
Touch up edges:
Use a fine detail artist’s brush to hand-paint any corners or edges where the stencil didn’t quite fit or reach.
Step 4: Finishing Touches
-
Remove tape:
While the final paint is still slightly tacky (not fully dried), carefully peel away all painter’s tape at a 45-degree angle. This prevents the dried paint from peeling up with the tape. -
Clean grout lines (optional):
If you painted over the grout lines earlier, you can now use a thin artist brush and a grey or white paint to re-draw them for a crisp, tiled look. -
Seal the hearth:
For the floor tiles specifically, apply a clear, water-based polyurethane sealer. This protects the finish from foot traffic and ash. -
Final cure:
Allow the entire project to cure for several days before placing any fireplace tools or decor back on the hearth.
Enjoy the warmth of your newly updated fireplace, which now boasts a custom, handcrafted look without the demolition work


What Really Happens Inside the Kiln
Learn how time and temperature work together inside the kiln to transform clay into durable ceramic.
Stencil Look: Faux Cement Tile Pattern
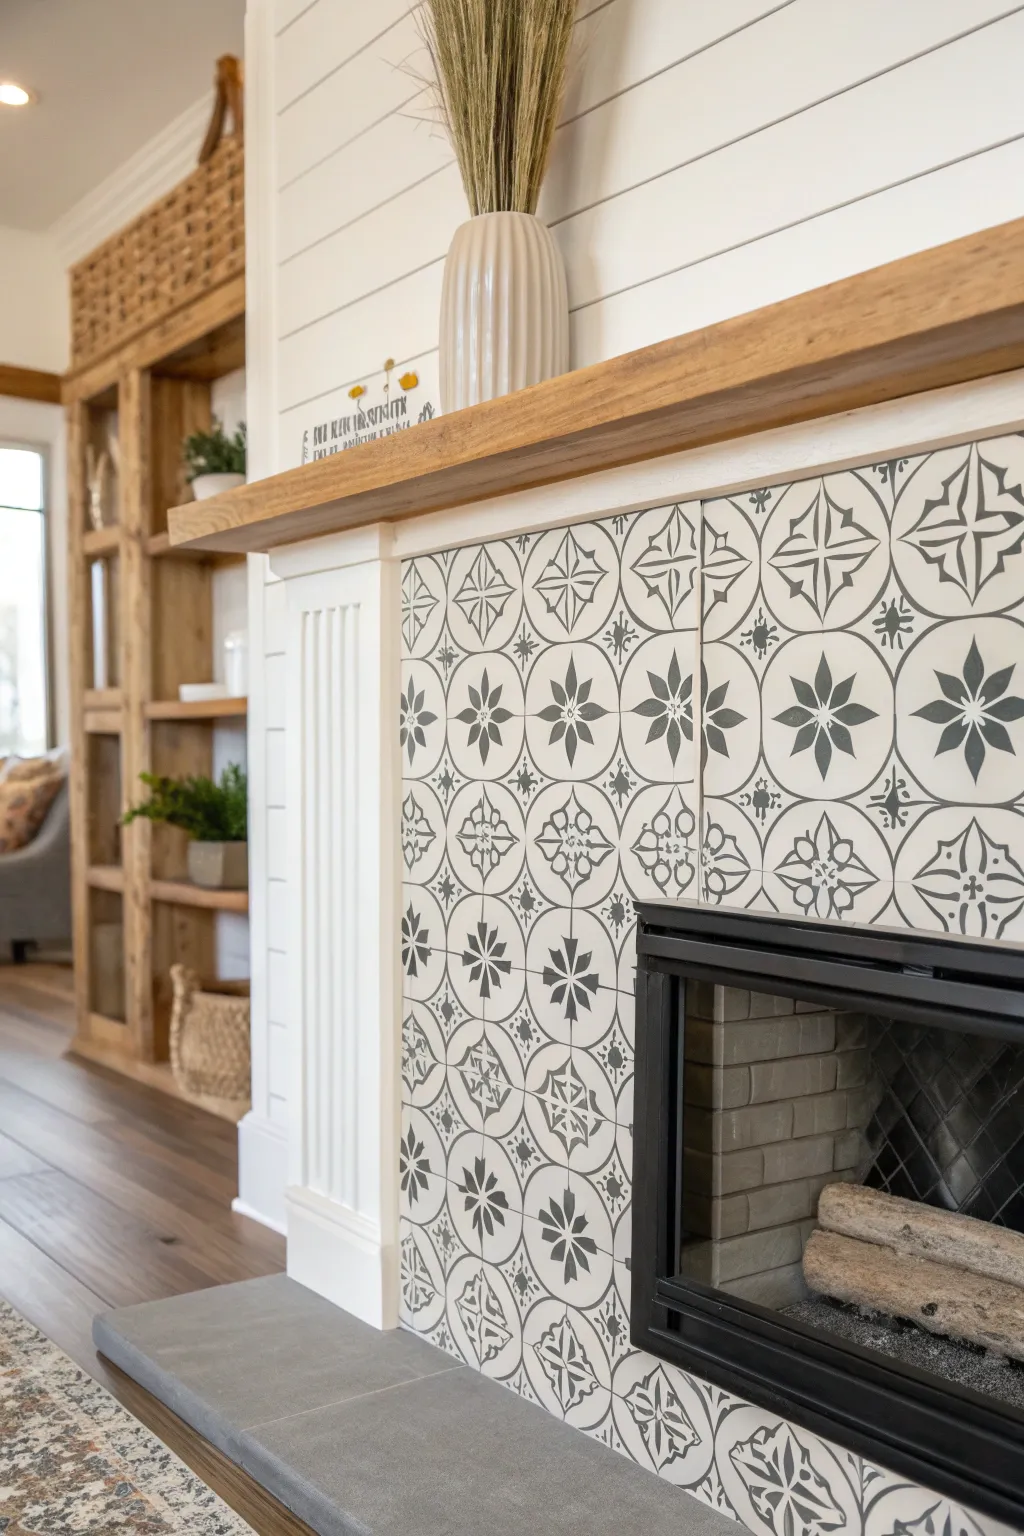
Transform outdated or plain fireplace tiles into a stunning modern farmhouse feature without the cost of demolition. This project mimics the high-end look of encaustic cement tiles using nothing but paint and a stylish stencil pattern.
Detailed Instructions
Materials
- High-quality adhesion primer (e.g., STIX)
- Chalk paint or latex paint (White/Base Color)
- Chalk paint or latex paint (Charcoal/Pattern Color)
- Geometric tile stencil (star/floral pattern)
- Small foam roller
- Stencil brush (dense bristle)
- Painter’s tape
- TSP substitute cleaner or degreaser
- Fine-grit sandpaper (220 grit)
- Lint-free rags
- Polycrylic topcoat (matte or satin finish)
- Paper towels
- Small artist’s brush
Step 1: Preparation
-
Clean the Surface:
Begin by thoroughly scrubbing the existing tile with a TSP substitute or a strong degreaser. Fireplace surrounds often harbor unseen soot and grease that will repel paint, so don’t skip this step. -
Rinse and Dry:
Wipe down the tiles with fresh water to remove any cleaning residue and dry the surface completely with a lint-free towel. -
Tape Off Edges:
Apply painter’s tape carefully around the mantel, the inner firebox surround, and the floor hearth to achieve crisp, professional lines. -
Sand for Adhesion:
Lightly scuff the surface of your glossy tiles with 220-grit sandpaper. You aren’t trying to strip them, just giving the primer something to grip onto. -
Prime the Tiles:
Apply a coat of high-quality adhesion primer using a foam roller. Ensure you get into the grout lines, but avoid pooling. -
Let it Cure:
Allow the primer to dry according to the manufacturer’s instructions, typically overnight, before moving on to the base coat.
Bleeding Lines?
A ‘dry brush’ is critical. If paint bleeds under the stencil, you have too much paint on your brush. Wipe immediately with a damp q-tip or touch up later with base color.
Step 2: Base Coat Application
-
Apply First Base Coat:
Roll on your white base color over the primed tiles. Use smooth, even strokes and don’t panic if coverage isn’t perfect yet. -
Apply Second Base Coat:
After the first coat is dry to the touch, apply a second coat for solid, opaque coverage. Let this layer dry completely for at least 24 hours so the stencil doesn’t peel it up.
Step 3: Stenciling the Pattern
-
Secure the Stencil:
Position your stencil in the center of the top row of tiles. Secure it firmly with painter’s tape to prevent shifting. -
Load the Brush:
Dip just the tip of your stencil brush or foam roller into the charcoal paint. Offload almost all the paint onto a paper towel until the brush feels nearly dry. -
Apply the Pattern:
Use a light tapping or swirling motion to apply the paint through the stencil. I like to build up the color slowly rather than forcing it, which helps prevent bleed-under. -
Move and Align:
Carefully lift the stencil straight up. Align the registration marks on the stencil with the previously painted design to ensure the pattern flows seamlessly to the next tile. -
Finish Full Tiles:
Continues stenciling all the full tiles across the face of the fireplace, cleaning paint buildup off the back of the stencil periodically. -
Handle Corners and Edges:
For the partial tiles at the edges, bend the flexible stencil into the corner and tape it down. Use a small stenciling brush to get into the crevice. -
Touch Up Imperfections:
Once the pattern is dry, use a small artist’s brush and your white base paint to correct any smears or bleeds. This makes a huge difference in the final look.
Aged Effect
For a vintage encaustic look, lightly sand the stenciled pattern after it dries but before sealing. This distresses the design slightly, making it look worn-in.
Step 4: Sealing
-
Apply Topcoat:
Protect your hard work by applying a thin layer of water-based Polycrylic sealer. A matte finish will look most like authentic cement tile. -
Final Coat:
After the first coat is dry, apply two more coats of sealer, lightly sanding with very fine sandpaper between coats for a buttery smooth finish. -
Remove Tape:
Score the edge of the painter’s tape with a craft knife before peeling it away to ensure you don’t pull up any paint.
Enjoy the sophisticated new focal point of your living room that looks like a high-end renovation.
Geometric Lines for a Modern Tile Illusion
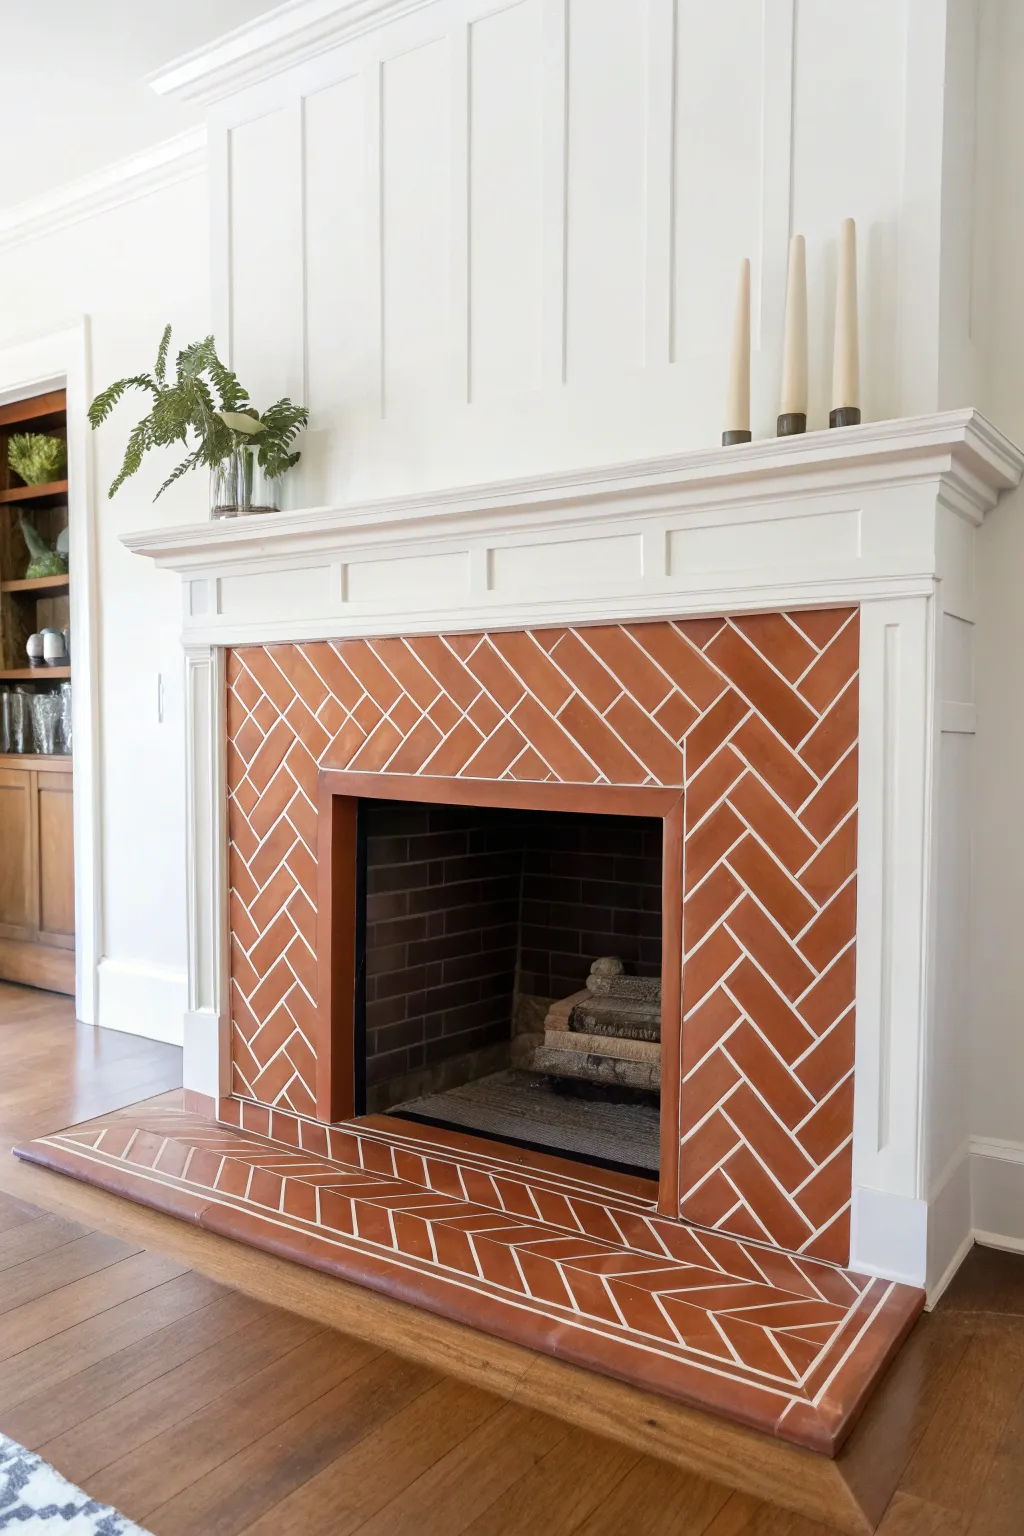
Transform a plain fireplace surround into a stunning modern focal point by painting a crisp herringbone pattern directly onto existing tile or smooth surface. This high-contrast illusion mimics the warmth of terracotta with fresh white grout lines, giving you a custom look without the demolition.
Step-by-Step
Materials
- High-adhesion primer (specifically for tile/glossy surfaces)
- Terra cotta or rust-colored porch and floor paint (durable satin or semi-gloss finish)
- White or cream paint (for the faux grout lines)
- White artist tape or very thin painter’s tape (1/8 inch or 1/4 inch width)
- Standard blue painter’s tape (1 inch or wider)
- High-density foam roller and handle
- Small synthetic angled brush (1-2 inch)
- Small craft brush (for touch-ups)
- Ruler or framing square
- Pencil or white chalk pencil
- Degreasing cleaner (TSP or similar)
- Sanding sponge (medium grit)
- Utility knife
Step 1: Preparation & Base Coat
-
Deep clean the surface:
Before even touching a paint can, scrub the existing fireplace surface thoroughly with a degreasing cleaner like TSP. Soot, dust, and old wax will prevent adhesion, so be diligent here and rinse with water afterward. -
Scuff sand for grip:
Once dry, lightly rub the entire surface with a medium-grit sanding sponge. You aren’t trying to strip old finish, just creating microscopic scratches that help the primer stick. -
Protect the perimeter:
Apply the wide blue painter’s tape along the inner edge of the mantel, the floor, and the metal firebox insert to protect them from wayward brushstrokes. -
Prime the surface:
Roll on a coat of high-adhesion primer designed specifically for slick surfaces. Use the small angled brush to cut in around the edges and corners first, then roll the larger areas smooth. -
Apply the ‘grout’ color:
Paint the entire surface with your chosen white or cream color. This will eventually become your grout lines, so ensure it covers solidly, potentially requiring two coats. Let this cure fully—ideally overnight—so tape won’t peel it up later.
Paint Bleed Panic?
If paint bled under the tape, don’t rush. Let it dry completely, then gently scrape the excess with a razor blade or craft knife. Touch up with a tiny brush for a perfect edge.
Step 2: Creating the Pattern
-
Mark the center line:
Find the exact horizontal center of the fireplace header and draw a faint vertical guide line with your pencil or chalk. This ensures your herringbone pattern is symmetrical. -
Establish the 45-degree angle:
Using a framing square or drafting triangle, lightly mark a 45-degree angle starting from your center line. This is critical because if the first line is crooked, the whole pattern will tilt. -
Tape the first directional lines:
Apply strips of the thin 1/8-inch artist tape along your 45-degree marks. Space them evenly to match the width of the ’tiles’ you want to create (usually about 3-4 inches apart). -
Tape the opposing lines:
Now tape the lines going the opposite direction to create a grid of diamonds. Ensure these intersect cleanly with your first set of lines. -
Cut the tape segments:
This is the tedious but magical part. To turn diamonds into herringbone rectangles, use your utility knife to carefully cut out every other segment of tape at the intersections. Refer to the reference photo often to ensure you are keeping the correct ‘long’ sides of your rectangles. -
Seal the tape edges:
I always take a moment to lightly brush a thin layer of the white ‘grout’ paint over the tape edges. This bleeds white paint under the tape (instead of the top color), creating razor-sharp lines later.
Step 3: Top Coat & Reveal
-
Apply the terracotta main color:
Using your foam roller, apply the rust-colored paint over the entire taped design. Use light pressure to avoid pushing paint underneath the tape strips. -
Add a second coat if needed:
Once the first coat is dry to the touch, assess the coverage. If the white is still peeking through the terracotta color, gently roll on a second coat. -
Remove tape while damp:
Wait until the final coat is slightly tacky but not fully dry. Slowly and carefully peel back the thin tape at a sharp angle. This prevents the dry paint from chilling or pulling up in chunks. -
Touch up imperfections:
It’s normal to have a few tiny bleeds. Dip a small craft brush into your white paint and carefully tidy up any fuzzy lines. You can also fix the terracotta sections if needed. -
Seal the floor area:
If you painted the hearth (the floor section), apply a clear, non-yellowing polycrylic sealer over the top. This protects the painted finish from foot traffic and ash clean-up. -
Final cleanup:
Remove the blue perimeter tape and stand back to admire your work. The illusion is complete.
Level Up: Texture
For a more realistic terracotta feel, mix a very small amount of baking soda or texture additive into your top coat paint. This removes the plastic shine and mimics fired clay.
Enjoy the warmth of your new modern hearth, creating a cozy atmosphere regardless of whether the fire is lit

TRACK YOUR CERAMIC JOURNEY
Capture glaze tests, firing details, and creative progress—all in one simple printable. Make your projects easier to repeat and improve.
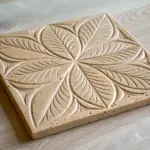
Mediterranean-Inspired Painted Motifs
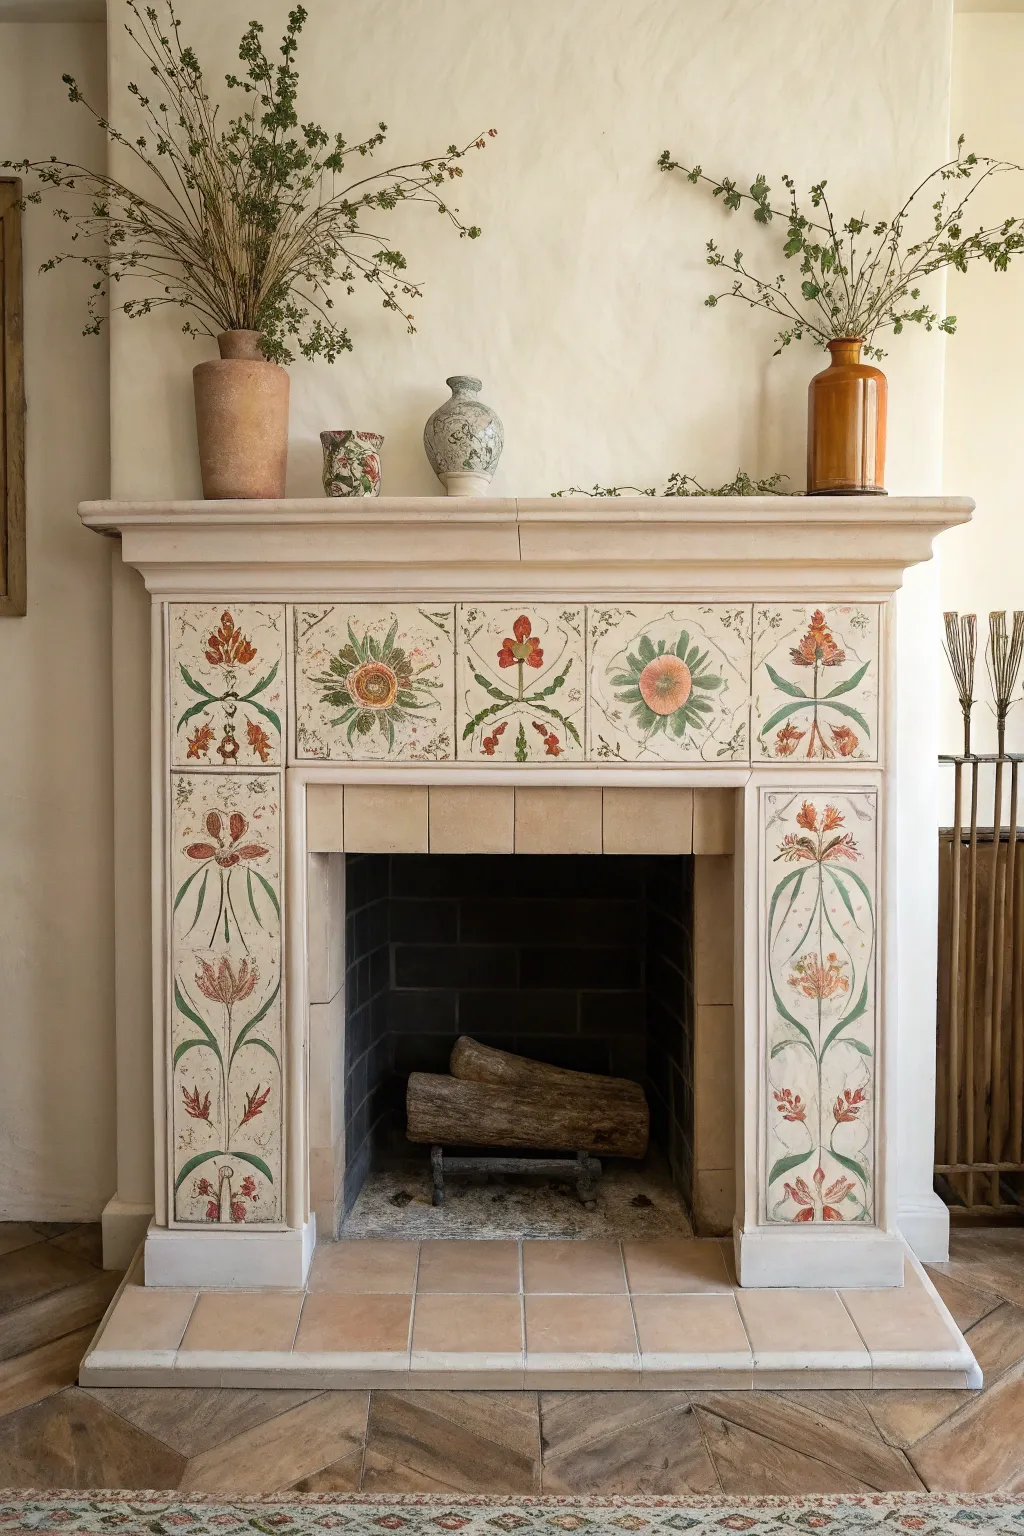
Bring the timeless charm of an old-world villa into your home with these hand-painted fireplace tiles. Featuring delicate botanical vines and stylized sunburst florals in earthy reds and sage greens, this project transforms plain tiles into an artisanal centerpiece.
Step-by-Step Guide
Materials
- Unglazed or matte-finish ceramic tiles (cream or beige base)
- Primer for slick surfaces (if working on existing glazed tiles)
- Acrylic ceramic paints or enamel paints (Sage Green, Terracotta Red, Deep Olive, Burnt Orange, Soft Pink)
- Set of detail brushes (Sizes 00 for vines, 2 for leaves, 4 for shading)
- Pencil and tracing paper
- Ruler or measuring tape
- High-gloss or satin clear sealant (polyurethane or ceramic sealer)
- Painter’s tape
- Disposable palette
- Damp cloth for corrections
Step 1: Preparation and Layout
-
Prepare the surface:
Clean your tiles thoroughly to remove any soot, grease, or dust. If you are painting over shiny glazed tiles, lightly sand the surface with fine-grit sandpaper and apply a specific tile primer to ensure adhesion. Let the primer cure completely according to the manufacturer’s instructions. -
Grid and center:
Measure the face of each tile and lightly mark the vertical center line with a pencil. This symmetry is crucial for the Mediterranean botanical style shown, where vines mirror each other perfectly. -
Draft the central stems:
On tracing paper, sketch your main vertical stem design. For the side tiles, design a long, sinuous S-curve vine that repeats vertically. For the header tiles, create individual square motifs—alternating between a central sunburst flower layout and a vertical botanical sprig layout. -
Transfer the designs:
Using charcoal or graphite transfer paper, trace your designs onto the tiles. Ensure the vertical vines on the side columns flow seamlessly from one tile to the next, creating a continuous climbing effect.
Step 2: Painting the Greenery
-
Base the vines:
Load a size 2 brush with Deep Olive paint. With a steady hand, paint the main central stems and the curving vines you traced. I find it helps to pull the brush toward you for smoother lines. -
Add the leaves:
Using Sage Green, fill in the long, slender leaves extending from the stems. Use a ‘press and lift’ stroke: start with light pressure, press down to widen the leaf body, and lift up to create a sharp tip. -
Detail the foliage:
Once the base green is dry to the touch, mix a lighter green (Sage mixed with a dot of white or yellow) and add tiny veins or highlights to one side of each leaf for dimensionality. -
Paint the corner flourishes:
Notice the delicate scrollwork in the corners of the top square tiles. Use your smallest brush (size 00) and thinned Deep Olive paint to create these wispy, decorative scrolls.
Paint Lifting?
If paint lifts off the tile while you’re adding layers, your base coat or primer didn’t cure long enough. Let the bottom layer dry for an extra hour, or lightly sand between coats for better grip.
Step 3: Adding Floral Elements
-
Block in the main flowers:
For the square tiles featuring the sunburst flower, paint a large circle in the center using Soft Pink or a muted peach tone. Keep the paint slightly translucent to mimic an aged fresco look. -
Add the petals:
Around the central pink circle, paint radiating petals using Sage Green and Deep Olive, creating a starburst effect. Ensure the strokes point outward from the center. -
Paint the vertical sprig flowers:
On the alternating tiles and side columns, identify the tulip-like or bell-shaped flowers. painting their bodies with Terracotta Red. Keep the application slightly loose; perfection isn’t the goal here. -
Detail the flower centers:
Use Burnt Orange to add depth to the base of the red flowers. For the large central sunbursts, add a darker red or orange ring in the exact center of the pink circle. -
Add accent buds:
Scattered along the vines are small buds or berries. Dip the tip of a round brush in Terracotta Red and dab these onto the ends of the smaller stems.
Make It Truly Antique
Mix a tiny drop of burnt umber glaze into your clear sealer for the final coat. This adds a subtle, uniform ‘tea-stained’ effect that makes the new paint job look decades old.
Step 4: Finishing Touches
-
Refine the lines:
Step back and look at the overall symmetry. If any vines look too thin, thicken them slightly with Deep Olive. Use a damp Q-tip to clean up any smudged edges immediately. -
Create an aged effect:
To mimic the rustic texture in the photo, you can dry-brush a tiny amount of diluted tan or beige paint over parts of the design once it’s dry. This softens the colors and makes the tile look established. -
Seal the artwork:
This is critical for a fireplace. Apply 2-3 coats of a high-quality sealant. If you used primer on glazed tile, ensure your sealant is compatible. A satin finish often looks most authentic for this style. -
Final cure:
Allow the sealant to cure for at least 48 hours before lighting any fires or placing objects on the mantel to ensure the finish is hard and durable.
Your fireplace will now radiate warmth and artisanal beauty, even when the fire isn’t lit
Color-Dipped Hearth for a Playful Twist
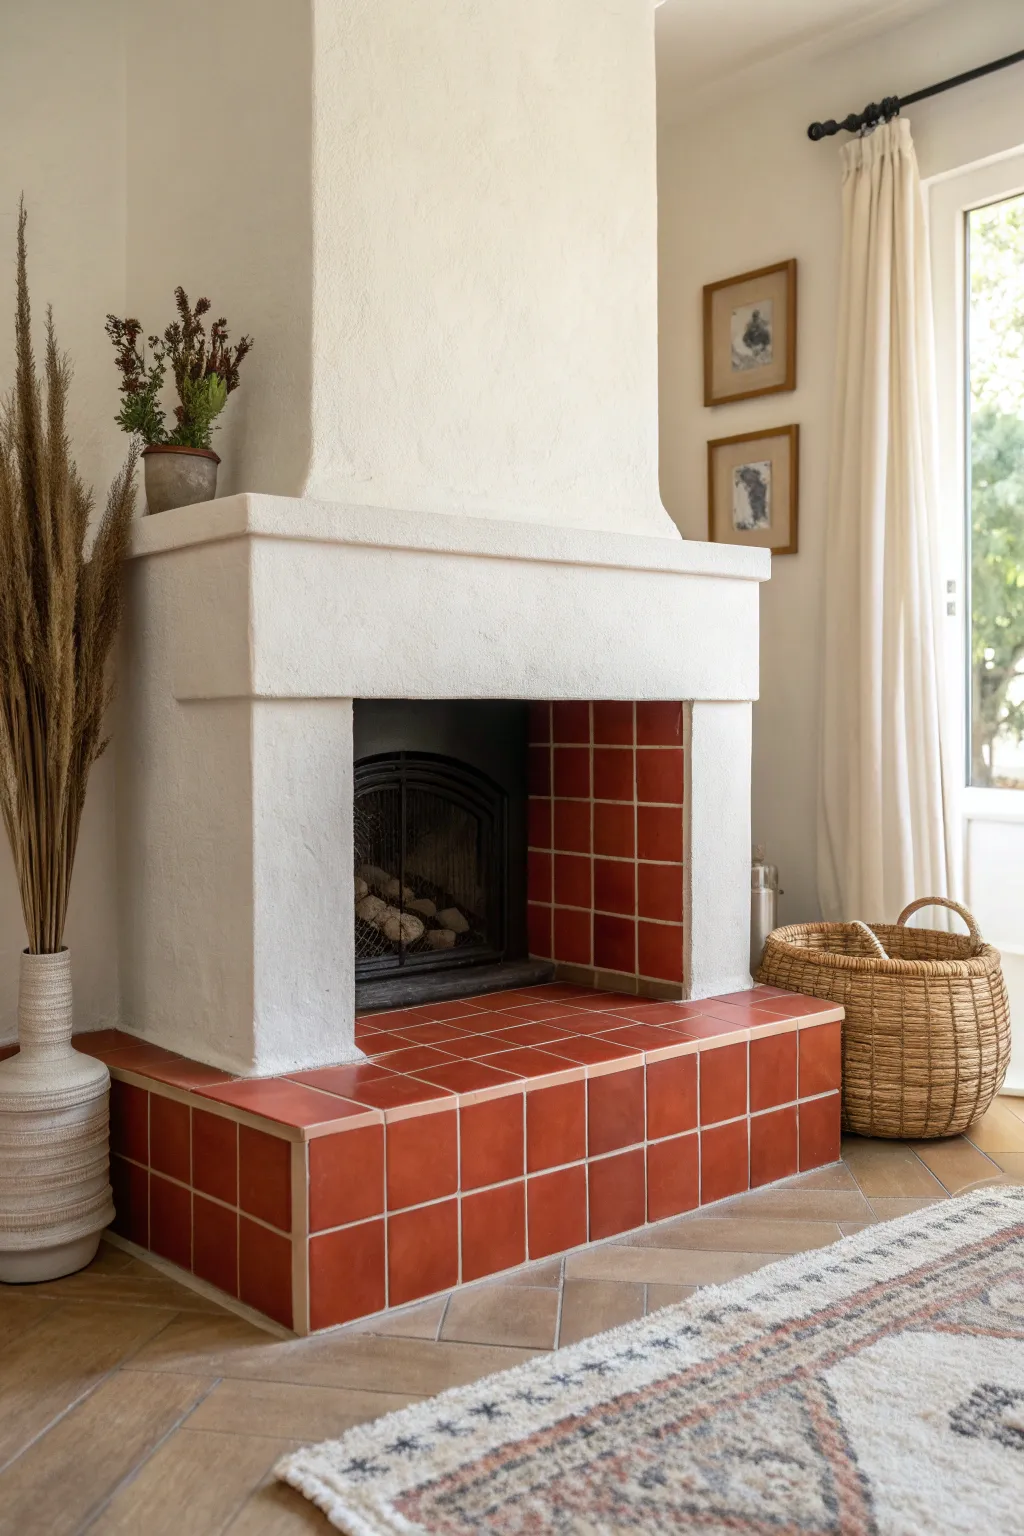
Transform a dated fireplace into a warm, inviting focal point by creating a ‘color-dipped’ effect on the hearth tiles. This project mimics the rich, earthy look of traditional terra-cotta using specialized primers and high-quality paint, proving you don’t need to replace tile to modernize your space.
Step-by-Step Guide
Materials
- High-adhesion primer (specifically for tile/glossy surfaces)
- Terra-cotta or rust-colored porch and floor paint (satin or semi-gloss)
- Heavy-duty degreaser or TSP substitute
- Medium-grit sandpaper (120-grit)
- Painter’s tape (multi-surface)
- High-density foam roller
- Small angled paintbrush
- Drop cloth
- Clean rags
- White grout pen (optional, for re-defining lines)
Step 1: Preparation and Cleaning
-
Clear and protect:
Begin by removing all fireplace accessories, logs, and grates. Lay down a drop cloth to protect the surrounding herringbone flooring, taping the edges carefully to prevent any slippage. -
Deep clean the tiles:
Using a heavy-duty degreaser or TSP substitute and a scrubbing sponge, vigorously clean every inch of the tile. Fireplace hearths accumulate invisible soot and wax, which will repel paint if not removed completely. -
Rinse thoroughly:
Wipe down the tiles multiple times with fresh water and clean rags to remove any chemical residue from the cleaner. Let the surface dry completely before moving on. -
Scuff sanding:
Lightly sand all the tile surfaces with 120-grit sandpaper. You aren’t trying to strip the finish, just creating tiny scratches that help the primer grip the glossy surface better. -
Dust removal:
Vacuum up the sanding dust, then wipe the tiles one last time with a tack cloth or a damp rag to ensure a pristine surface.
Step 2: Priming the Surface
-
Tape boundaries:
Apply painter’s tape along the base of the white stucco chimney breast and the floor edges. Press the tape edge down firmly with a credit card or fingernail to stop paint bleed. -
Apply perimeter primer:
Use your small angled brush to apply a bonding primer into the grout lines and along the edges where the roller won’t reach. -
Roll the flat surfaces:
Using a high-density foam roller, apply the primer to the main tile faces. The foam helps achieve a smooth finish without bristle marks. -
Dry and inspect:
Allow the primer to dry according to the can’s instructions (usually 24 hours for tile primers). I often check for any missed spots or uneven texture here and lightly sand them out if needed.
Adhesion Insurance
For slick ceramic tiles, wipe the surface with liquid deglosser after cleaning but before priming. It chemically etches the gloss for a super-strong bond.
Step 3: Applying Color
-
Cut in the color:
Open your rust-colored floor paint and stir well. Just like with the primer, start by using the angled brush to paint the grout lines and tight corners inside the firebox cheeks. -
Roll the first coat:
Roll on the first coat of paint in smooth, even strokes. Don’t worry if it looks slightly patchy or translucent; thin coats cure harder and look better than thick ones. -
Observe drying times:
Let this first coat dry fully. Floor paints often require longer drying times between coats than wall paints to ensure durability. -
Apply the second coat:
Repeat the cutting-in and rolling process for a second coat to achieve that rich, solid terra-cotta opacity shown in the image. -
Evaluate coverage:
Inspect the finish for any light spots. A third thin coat might be necessary depending on the quality of your paint and the darkness of the original tile.
Textured Upgrade
Mix a small amount of fine sand additive into your paint can. This mimics the slightly gritty, natural texture of real clay tile and adds slip resistance.
Step 4: Final Details
-
Remove tape:
Carefully peel away the painter’s tape while the final coat is still slightly tacky. Pulling it away at a 45-degree angle helps ensure a crisp line without lifting any paint. -
Cure time:
Resist the urge to place baskets or logs back on the hearth immediately. Allow the paint to cure for at least 72 hours before placing heavy objects on it to prevent scratches. -
Grout definition (Optional):
If you prefer the look of distinct white grout lines rather than the painted-over look, wait until the paint is fully cured and carefully trace the grid with a white grout pen.
Now you have a stunning, grounded feature that warms up the entire room
Muted Blue-Green for Vintage Cozy Energy
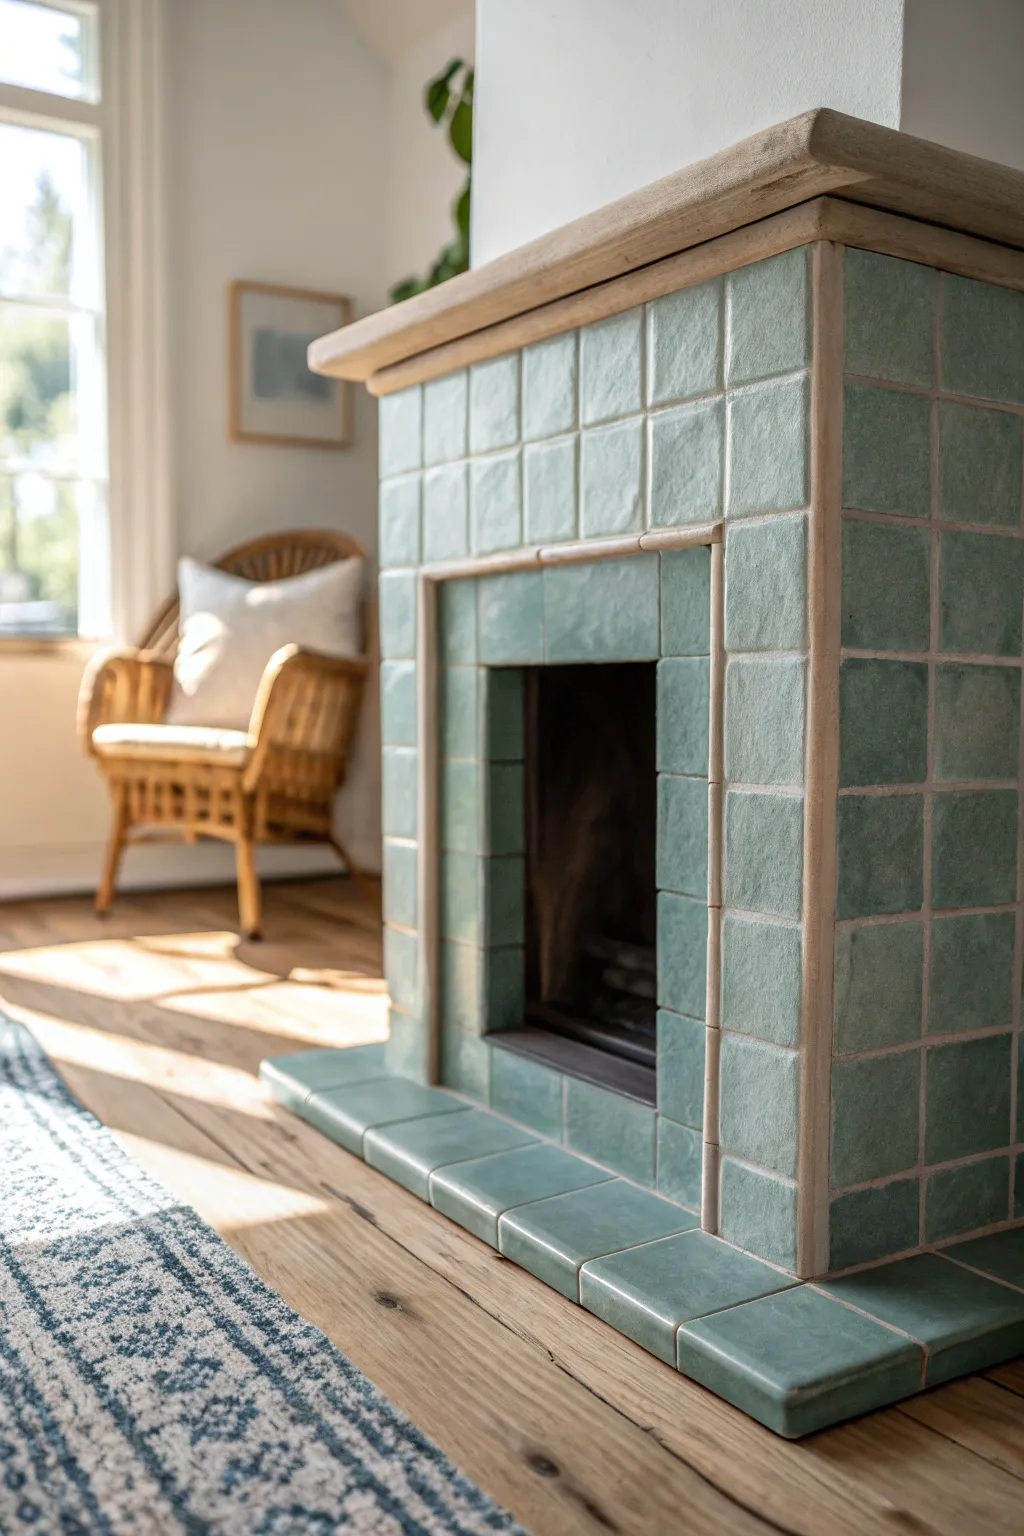
Give your fireplace a soft, nostalgic embrace by recreating the look of hand-glazed artisan tiles with just paint and patience. This project transforms a basic tiled surround into a focal point radiating muted blue-green warmth and vintage cozy energy.
Detailed Instructions
Materials
- High-adhesion bonding primer (specifically for tile)
- Latex or acrylic enamel paint (satin finish, muted seafoam green)
- Clear glazing medium
- Small foam roller (4-inch)
- Synthetic angled sash brush (1.5-2 inch)
- Artist’s detail brush
- Painter’s tape
- TSP cleaner or heavy-duty degreaser
- Fine-grit sandpaper (220-grit)
- Lint-free rags
- Grout pen or light beige/grey paint (for grout lines)
Step 1: Preparation & Cleaning
-
Clean thoroughly:
Scrub every inch of the existing tile with TSP (Trisodium Phosphate) or a heavy-duty degreaser. Fireplace tiles often harbor unseen soot or wax buildup that will ruin your paint adhesion, so be incredibly thorough here. -
Rinse well:
Wipe down the surface multiple times with clean water to remove any cleaning residue. Let it dry completely. -
Protect surroundings:
Apply painter’s tape to the walls, floor, mantel, and the inner metal firebox edge to protect them from splatters. -
Scuff sand:
Lightly sand the glossy surface of the old tiles with 220-grit sandpaper just to dull the shine. This gives the primer something to grip onto. -
Remove dust:
Vacuum up the sanding dust and wipe everything down once more with a damp lint-free rag or tack cloth.
Paint peeling off?
This usually means residual grease wasn’t fully removed. Clean heavily with TSP and sand again before re-priming the trouble spot.
Step 2: Priming & Base Coat
-
Apply bonding primer:
Roll on a thin, even coat of high-adhesion bonding primer. Use the angled brush to get into the corners and grout lines first, then smooth it out with the roller. -
Dry and assess:
Allow the primer to dry according to the can’s instructions—usually at least 24 hours for tile. If the original tile color is still showing through strongly, apply a second coat. -
Mix your base color:
Pour your muted seafoam green paint into a tray. I find that a satin finish mimics the look of honed ceramic tile best, avoiding the plastic look of high-gloss paint. -
First color coat:
Apply the first coat of your green paint. Don’t worry about perfect coverage yet; thin, even layers are better than thick, drippy ones. -
Sand between coats:
Once dry, very lightly run your fine-grit sandpaper over the surface to knock down any bumps or dust nibs, then wipe clean. -
Second color coat:
Apply the second coat for full opacity. Ensure the finish is smooth and consistent across the flat surfaces of the tiles.
Level Up: Faux Age
Mix a tiny drop of burnt umber acrylic into your glaze. Apply it very sparingly to the corners of the tiles to simulate decades of patina.
Step 3: Creating the Glazed Look
-
Prepare the glaze:
Mix a small amount of your base paint with clear glazing medium (about a 1:4 ratio) to create a translucent version of your color. -
Apply texture:
Using a brush or a crumbled rag, lightly dab this glaze onto the center of the tiles, keeping the edges slightly darker or lighter to mimic natural kiln variations. -
Soften the effect:
While the glaze is wet, use a clean, dry brush to feather out the texture so it looks melted and organic rather than stamped on. -
Seal (Optional):
If your fireplace sees heavy use, apply a coat of satin polycrylic sealer over the tiles for extra durability.
Step 4: Restoring the Grout Lines
-
Define the grid:
Painting over everything makes the tiles look like a flat sheet. To bring back the authentic tile look, use a grout pen or a steady hand with an artist’s brush and beige paint to re-draw the grout lines. -
Wipe mistakes immediately:
Keep a damp rag handy. If the grout color gets onto your beautiful green tiles, wipe it off instantly before it sets. -
Final inspection:
Step back and check for any missed spots or uneven grout lines. Touch up as needed. -
Remove tape:
Score the edge of the painter’s tape with a utility knife before peeling it off to ensure you don’t pull up any of your fresh paint. -
Cure time:
Let the paint cure fully (often several days) before placing any heavy décor items on the hearth or lighting a fire.
Now step back and enjoy the serene, handmade warmth your newly painted fireplace brings to the room
Checkerboard Painted Tile for Graphic Charm

Transform a dated or plain fireplace surround into a statement piece with this classic checkerboard pattern. The soft neutral palette keeps the graphic look sophisticated while adding a touch of playful cottage charm to your living space.
How-To Guide
Materials
- High-adhesion primer (specifically for tile/glossy surfaces)
- Latex or chalk paint (Base color: Cream/Off-white)
- Latex or chalk paint (Accent color: Beige/Taupe)
- Clear polyurethane sealer (matte or satin finish)
- Painter’s tape (high quality, 1-inch width)
- Small foam roller
- Small angled artist brush or sash brush
- TSP substitute or heavy-duty degreaser
- Sanding sponge (medium grit)
- Clean lint-free cloths
- Utility knife or razor blade
Step 1: Prep Work
-
Clean thoroughly:
Scrub the entire tiled surface with a TSP substitute or intense degreaser to remove years of soot, dirt, and oils. This step defines whether your paint sticks or peels. -
Rinse and dry:
Wipe down the tiles multiple times with fresh water to remove any cleaning residue, then let the surface dry completely. -
Scuff sand:
Lightly sand the glossy surface of the tiles with a medium-grit sanding sponge. You aren’t trying to remove the finish, just creating ‘tooth’ for the primer to grab onto. -
Wipe away dust:
Use a tack cloth or a damp lint-free rag to remove every speck of sanding dust. -
Tape off edges:
Apply painter’s tape along the mantel, floor, and firebox opening to protect surrounding areas from splatter.
Step 2: Base Coat Application
-
Apply primer:
Roll on a thin, even coat of high-adhesion primer using a foam roller. Ensure you get into the grout lines, but avoid letting paint pool there. -
Let primer cure:
Allow the primer to dry according to the manufacturer’s instructions, usually overnight is safest for tile projects. -
Paint the base color:
Apply your first coat of the lighter base color (cream/off-white) over the entire surface, including the grout lines. -
Apply second coat:
Once the first coat is dry, apply a second coat for full opacity. I find that light colors usually need this second pass to look truly solid. -
Dry completely:
Wait at least 24 hours for the base coats to fully harden before you start applying tape for the pattern.
Uneven Grout Lines?
If your original grout lines are very deep or uneven, skip taping them off. Instead, hand-paint the squares using a high-quality angled artist brush for a softer, hand-painted look.
Step 3: Creating the Pattern
-
Plan the grid:
If your tiles are square, follow their natural lines. If you have a flat surface without grout lines, measure and mark a grid lightly with a pencil. -
Tape horizontal lines:
Apply tape over the horizontal grout lines first. -
Tape vertical lines:
Apply tape over the vertical grout lines, creating a grid of open squares. -
Seal the tape edges:
Lightly brush a tiny amount of your *base* color over the edges of the tape. This seals the tape and prevents the darker color from bleeding underneath. -
Paint the checkerboard:
Using a small brush, fill in alternating squares with your accent (taupe/beige) color. Follow a reference photo to ensure you don’t accidentally paint two adjacent squares. -
Second accent coat:
If the beige paint looks streaky, apply a second thin coat after the first has dried to the touch. -
Remove tape carefully:
Peel the tape off while the final coat is still slightly damp. Pull slowly at a 45-degree angle to keep lines crisp. -
Touch up:
Use a tiny artist brush to fix any small bleeds or uneven edges once the tape is gone. -
Apply sealer:
Once the paint has cured for roughly 48 hours, apply two coats of clear matte poly sealer to protect the finish from heat and cleaning.
Level Up: Texture
For a rustic, tumbled stone look, use a dry brush technique on the beige squares. Dip your brush, wipe most paint off, and lightly drag it across to create subtle texture.
Step back and admire how a simple grid of paint completely redefined the focal point of your room
Metallic Accents for a Subtle Glow
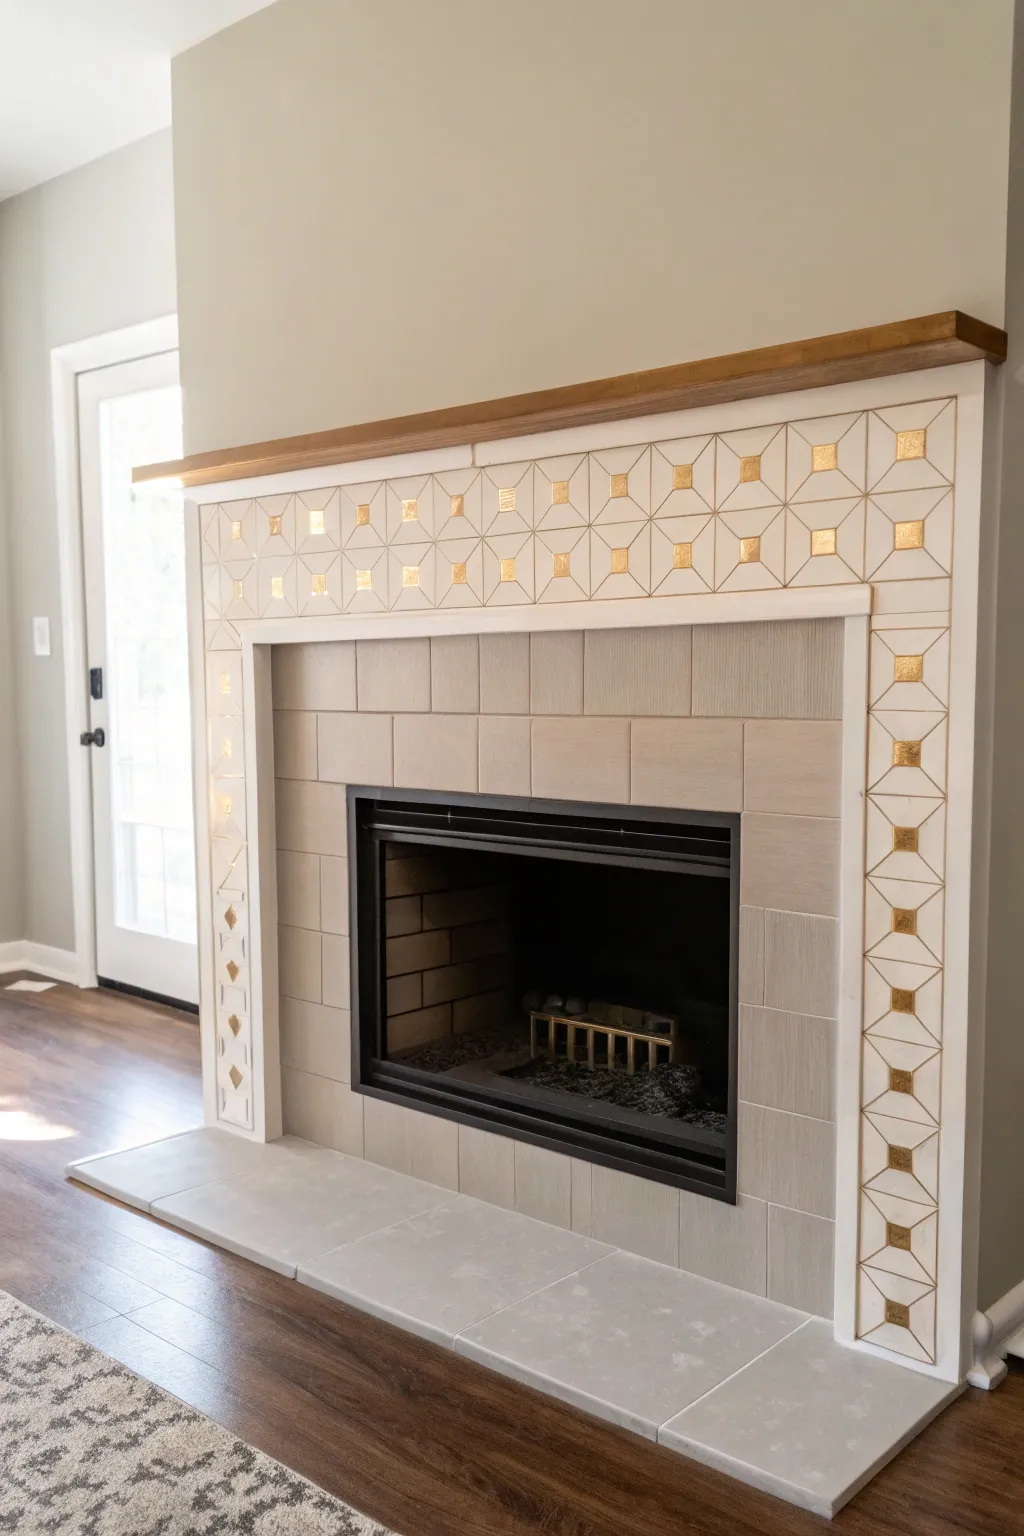
Transform a dated or plain tiled fireplace into a stunning modern focal point with this clever paint-and-stencil technique. The combination of a soft, matte neutral base with crisp metallic gold geometric details adds a sophisticated glow without overwhelming the space.
Step-by-Step
Materials
- High-heat primer (specifically for tile/glossy surfaces)
- Latex paint (satin or semi-gloss) in a soft white or cream
- High-heat paint in taupe/greige (for the inner surround)
- Metallic gold paint (liquid leaf or acrylic metallic)
- Geometric stencil (square/diamond pattern)
- Small foam roller and tray
- Fine-point detail artist brush
- Painter’s tape (delicate surface)
- TSP substitute cleaner and rags
- Sandpaper (220-grit)
- Drop cloths
Step 1: Cleaning and Prep
-
Clean thoroughly:
Begin by scrubbing every inch of the existing tile with a TSP substitute cleaner. Fireplace tiles often harbor soot and unseen grease that will prevent paint adhesion, so do a second pass to be sure. -
Light sanding:
Once dry, scuff the surface of the glossy tiles gently with 220-grit sandpaper. You aren’t trying to remove the finish, just creating ‘tooth’ for the primer to grab onto. -
Tape and protect:
Apply painter’s tape to the walls, floor, mantel shelf, and the metal firebox insert. Lay down drop cloths to protect your flooring from splatters.
Clean Lines Hack
If you struggle painting straight lines, use thin automotive masking tape (pinstriping tape) to mask off the geometric grid before applying the gold paint.
Step 2: Base Coat Application
-
Prime the surface:
Roll on a coat of high-adhesion primer designed for glossy surfaces. Use a brush to get into the grout lines first, then smooth it out with a foam roller. -
Paint the inner surround:
For the tiles immediately surrounding the firebox (the taupe section in the image), apply your greige paint. Use light, even coats with a foam roller to minimize texture, allowing full drying time between coats. -
Paint the outer border:
Apply your creamy white base color to the outer decorative border tiles. This will serve as the background for your gold geometric pattern. Achieving full opacity may take 2-3 thin coats.
Step 3: Adding the Geometric Design
-
Plan the stencil layout:
Before painting, hold your stencil up to the white border to determine the best starting point. Center the pattern so the geometric diamonds and squares look symmetrical. -
Secure the stencil:
Tape the stencil firmly in place on the white border tile. Use small pieces of tape to ensure it lies perfectly flat against the surface to prevent bleeding. -
Trace the lines:
Instead of rolling paint over the whole stencil, use a fine pencil or very light marker to trace the geometric lattice pattern onto the white tiles. This gives you a guide for hand-painting, which often looks sharper on textured tile than stenciling. -
Paint the gold lines:
Using a fine liner brush and metallic gold paint, carefully paint over your traced lines. A steady hand is key here; I find bracing my pinky finger against a dry section of the wall helps stabilize my hand. -
Fill the accents:
Identify the small squares within your pattern that need to be solid gold. Use a small flat brush to fill these in completely with the metallic paint. -
Repeat the process:
Move down the border, tracing and painting until the entire outer surround is covered in the lattice pattern. Ensure the pattern aligns perfectly at the corners.
Textured Grout Option
For a more vintage look, skip painting the grout lines on the inner surround; letting the dark grout show through the taupe paint adds dimension.
Step 4: Finishing Touches
-
Paint the hearth:
If your hearth tiles face heavy foot traffic, consider using a specialized floor paint in a matching grey/stone tone. Apply two coats for durability. -
Clean up lines:
Once the gold paint is fully dry, inspect your work. If any gold strayed outside the lines, use a tiny brush with the white base color to touch up and crisp up the edges. -
Seal the work:
Apply a clear, water-based polycrylic sealer over the painted tiles, especially the hearth and the stenciled area, to protect your artwork from chipping and soot. -
Remove tape:
Slowly peel away the painter’s tape at a 45-degree angle while the sealer is still tacky to ensure a clean line removal.
Step back and enjoy the warm, custom elegance your new fireplace brings to the room
Hand-Painted Folk Art Tiles as a Statement Strip

Transform a plain fireplace into a charming focal point with this hand-painted folk art design. The stylized botanical motifs and warm, earthy palette capture the timeless appeal of the Arts and Crafts movement.
Step-by-Step Guide
Materials
- Unglazed ceramic bisque tiles (4×4 or 6×6 inches)
- Acrylic enamel paints (gloss or satin finish): Ochre yellow, terra cotta, deep red, forest green, sage green, cobalt blue
- Fine-grit sandpaper (220-grit)
- Pencil and eraser
- Tracing paper (optional)
- Round synthetic brushes (sizes 2, 4, and 6)
- Liner brush (size 0 or 00 for stems)
- Painter’s tape
- Clear acrylic sealer or polyurethane (high-heat specific if near opening)
- Tile adhesive and grout (neutral color)
Step 1: Planning and Surface Prep
-
Measure and Map:
Measure your fireplace surround to determine how many tiles you need. This design uses a top row and two vertical side columns. Sketch your layout on paper, noting which flower goes where to ensure a balanced composition. -
Select the Motif Pattern:
The example image features three main floral types: tall-stemmed orange marigolds, red/blue pointed daisies, and stylized tulips. Assign a repeating pattern to your layout—for instance, alternating the marigolds with the pointed daisies along the top. -
Pre-Sand the Tiles:
Lightly sand the surface of your bisque tiles with 220-grit sandpaper to remove any manufacturing bumps and help the paint adhere better. Wipe away dust with a damp cloth.
Clean Lines Hack
Brace your pinky finger against the dry part of the tile while painting. This stabilizes your hand for steadier stems and crisp leaf points.
Step 2: Drafting the Design
-
Sketch the Center Lines:
Using a pencil, draw a light vertical line down the center of each tile. This acts as your anchor for the stems, ensuring the symmetry typical of folk art. -
Draw the Flower Heads:
Sketch the flower heads first. For the marigolds, draw a circle with radiate petals. For the pointed daisy shown in the center, draw a central oval with six pointed petals extending outward. -
Add Stems and Leaves:
Connect the flower heads to the bottom of the tile with a simple, curved stem. Add symmetrical leaves on either side. Keep the shapes simple and stylized rather than realistic. -
Create the Border Design:
For the bottom edge of the top row (and top/bottom of vertical tiles if desired), mark off a 1-inch strip. Sketch a repeating geometric pattern or small dots inside this band to mimic the decorative border seen in the photo.
Step 3: Painting the Folk Art Motifs
-
Base Coat the Leaves:
Load a size 4 round brush with forest green. Paint the leaves using single, confident strokes—press down at the base of the leaf and lift as you pull outward to create a point. -
Paint the Stems:
Switch to your liner brush or a size 2 round brush. With thinner paint consistency, trace the stem lines. Simplicity is key here; don’t overwork the lines. -
Block in Flower Colors:
Using the terra cotta and ochre paints, fill in the petals of the marigolds. For the pointed central flower, paint the petals red, leaving the center empty for now. Apply a second coat if the opacity looks uneven. -
Add Decorative Details:
Once the base colors are dry to the touch, add contrast. Use a size 2 brush to add small dots or lines inside the flower petals. Specifically, paint a cobalt blue center for the red pointed flower to make it pop. -
Paint the Geometric Border:
Fill in the background of your border strip with an earthy red tone. Once dry, use a small brush to add the repeating cream or yellow pattern over the top. -
Refine Edges:
Look closely at your work. If any paint has strayed, use a clean, damp brush to gently ‘erase’ mistakes while the paint is still semi-wet, or touch up with a background color if you painted one.
Level Up: Antique Effect
Before sealing, lightly dry-brush a thinned raw umber glaze over the edges of the tiles. It settles into texture and instantly ages the artwork.
Step 4: Sealing and Installation
-
Cure the Paint:
Allow the painted tiles to cure for at least 24-48 hours. This ensures the paint hardens completely before any sealant is applied. -
Apply Sealer:
Brush on a coat of clear acrylic sealer. If these tiles are going very close to the firebox opening, ensure you are using a high-heat resistant clear coat to prevent yellowing or peeling. -
Second Seal Coat:
Lightly sand the first coat of sealer once dry, then apply a second coat for durability and a smooth, professional finish. -
Install the Tiles:
Mount your tiles to the fireplace surround using appropriate tile adhesive. Use spacers to keep gaps even. -
Grout:
Apply a neutral-colored grout (like a soft beige or light grey) that complements the unglazed ceramic tone. Sponge off excess grout carefully to avoid scratching your painted work.
Step back and admire how this custom tilework brings warmth and personality to your hearth