A pinch clay whistle is one of those magical projects where a simple hollow form suddenly has a voice. Once you get that first clear note, it’s hard not to make a whole little choir of them.
Classic Chubby Bird Whistle
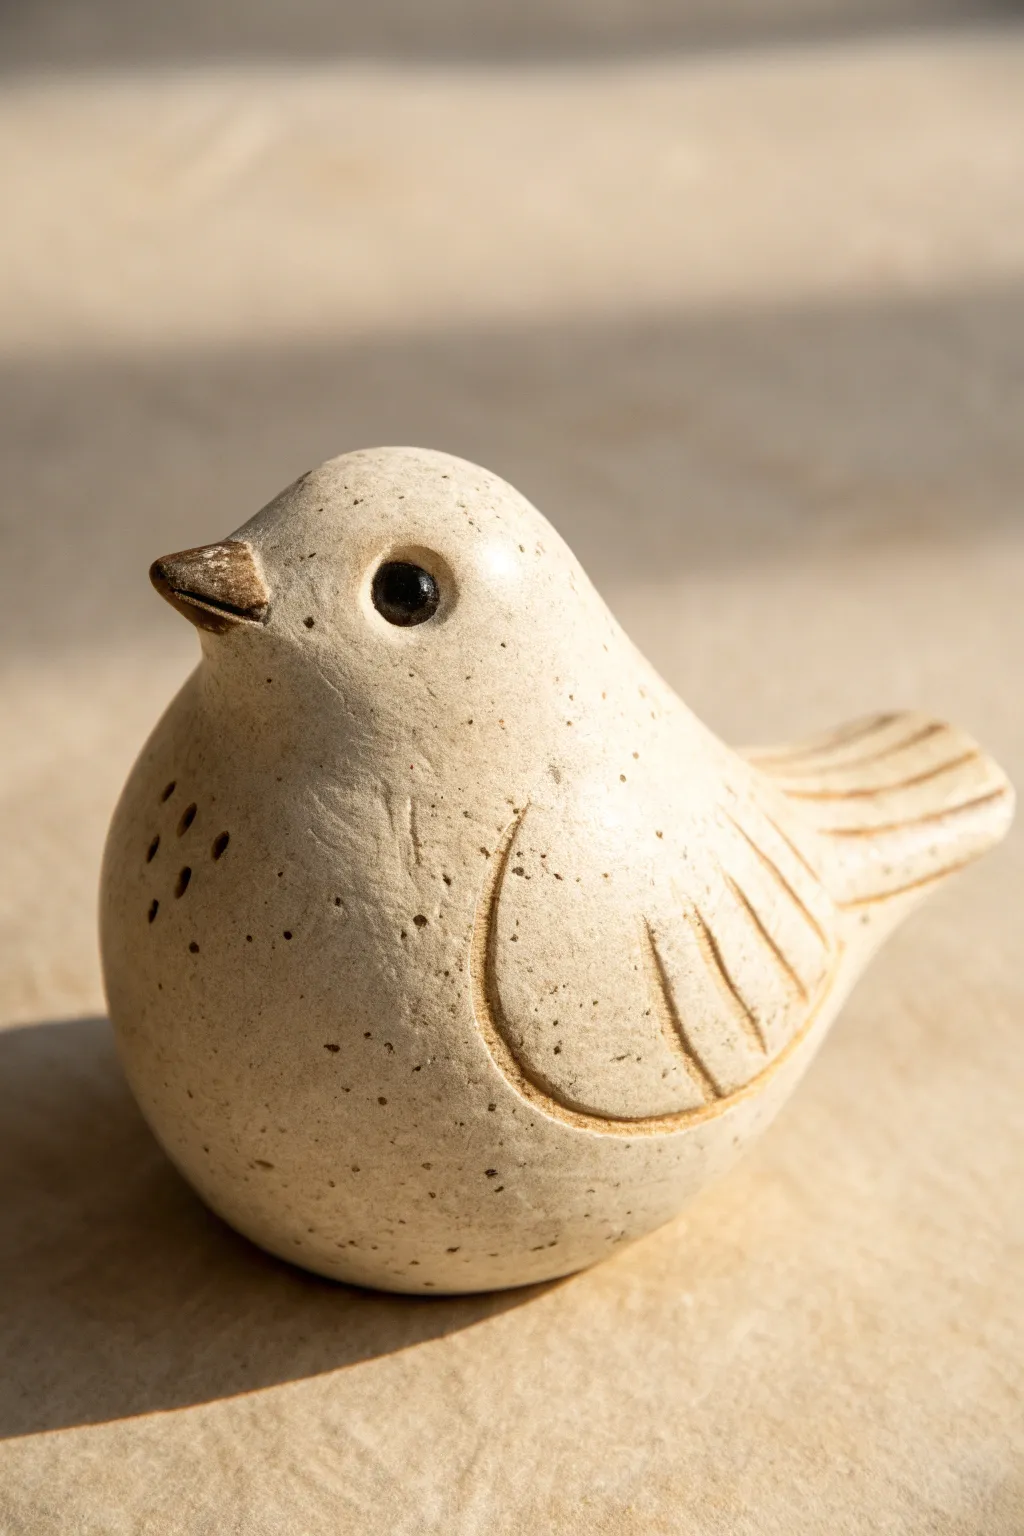
This charming, round-bellied bird whistle combines a timeless folk art aesthetic with a functional instrument. Its speckled clay body and simple carved details make it a delightful project for beginners and seasoned potters alike.
Step-by-Step Tutorial
Materials
- Speckled stoneware clay (mid-range cone 5-6 recommended)
- Popsicle stick or wooden modeling tool
- Fettling knife
- Needle tool
- Small sponge
- Slip (clay mixed with water)
- Scoring tool (or fork)
- Black underglaze (for the eye)
- Dark brown stain or oxide wash (optional, for beak)
Step 1: Forming the Body
-
Prepare the Clay:
Start by wedging a ball of speckled clay about the size of a tangerine. Ensure it is free of air bubbles, which is crucial for a hollow form. -
Pinch Pot Base:
Press your thumb into the center of the ball and begin pinching the walls evenly while rotating the clay. Aim for a consistent wall thickness of about 1/4 inch. -
Close the Form:
Instead of leaving the pot open, gently curve the walls inward until they meet at the top. Trap the air inside to create a hollow sphere. -
Seal the Seam:
Score and slip the edges where they meet, then smudge the clay together to seal the hollow ball completely. -
Rough Shaping:
Gently paddle or roll the sealed ball on your work surface to smooth it out. Then, squeeze slightly to create an egg shape, designating one end as the tail and the other as the head.
Step 2: Creating the Whistle Mechanism
-
Form the Mouthpiece:
Pinch a small amount of clay at the tail end to create a rectangular tab. This will become the mouthpiece of your whistle. -
First Incision:
On the underside of the tail (or the top, depending on preference, but the image suggests a hidden mechanism or tail-end blowhole), use your fettling knife to cut a steep 45-degree angle slot. -
Create the Airway:
Insert your popsicle stick or a specialized whistle tool into the end of the tail mouthpiece. Push it straight through until it meets the 45-degree bevel cut. -
Refining the Sound:
Clean up any clay burrs around the bevel. Blow gently into the mouthpiece to test the sound. Adjust the angle of the bevel adjacent to the airway until you get a clear, sharp tone.
Clear the Airway
If the sound is weak, the airway might be clogged. Re-insert your stick after sculpting to ensure the path remains open and clean.
Step 3: Sculpting the Bird
-
Define the Tail:
Once the whistle works, flatten the tail area slightly and create the fan shape shown in the image. -
Pull the Head:
At the opposite end, gently pinch and pull the clay upwards to suggest a rounded head distinct from the body. -
Attach the Beak:
Form a tiny, triangular cone of clay. Score the face area and the back of the beak, apply slip, and press firmly into place. Smooth the seam so it looks integral to the head. -
Carve the Wings:
Using a needle tool or a small loop tool, carve a curved line deep into the side of the body to outline the wing. Do this on both sides. -
Add Feather Details:
Inside the wing outline, carve three or four straight diagonal lines to represent feathers. Repeat similar lines on the tail fan. -
Poke Texture:
Use the tip of your needle tool to poke a small cluster of decorative holes on the chest area for added texture.
Hollow Sound?
If your whistle sounds breathy, the bevel edge isn’t splitting the air correctly. Sharpen the edge of the bevel (the “blade”) for a crisp tone.
Step 4: Refining and Finishing
-
Smooth the Surface:
Use a barely damp sponge to wipe away sharp crumbs or rough marks, but be careful not to erase your carving lines. -
Detail the Eye:
Press a small indentation for the eye. Roll a tiny bead of black underglaze or slip and press it into this socket (or paint it black) to give the bird life. -
Color Accents:
Paint the beak with a dark iron wash or brown underglaze to contrast against the speckled body. -
Dry and Fire:
I prefer to let these dry very slowly under loose plastic to prevent the seams from cracking. Once bone dry, bisque fire, then fire to the maturation temperature of your specific clay body.
This little speckled songbird is ready to bring a cheerful tune to your collection.


Plump Pig With Snout Mouthpiece

Transform a simple pinch pot into a charming, speckled pig whistle with a robust snout that doubles as the mouthpiece. This terracotta project features earthy textures and a whimsical expression, perfect for a rustic shelf display.
How-To Guide
Materials
- Terracotta or stoneware clay (grogged for texture)
- Popsicle stick or wooden modeling tool
- Fettling knife
- Needle tool
- Slip (clay mixed with water)
- Small sponge
- Pointed wooden stick or skewer
Step 1: Forming the Body
-
Make the base pinch pot:
Start with a ball of clay roughly the size of a tennis ball. Insert your thumb and pinch the walls evenly as you rotate the clay, creating a deep, uniform cup shape. -
Close the form:
Gently collar the rim of the cup inward until the edges meet. Pinch and smooth the clay together to trap the air inside, creating a hollow, airtight egg shape. -
Adjust the shape:
Roll the hollow form gently on your work surface to elongate it slightly into a plump oval. This will be the pig’s main body. -
Refine the surface:
Use a rib tool or your fingers to smooth out any major lumps, but leave some of the natural clay texture to mimic the rustic look in the photo.
Clearer Sound
Keep the ‘fipple’ window underneath clean and sharp. A dull splitting edge muffles the sound. Use a sharp knife to re-cut the bevel if it gets messy.
Step 2: Creating the Whistle Mechanism
-
Attach the snout block:
Form a thick rectangle of clay for the snout. Score and slip one end of your oval body, then press this block firmly onto the front. This extra thickness is crucial for the mouthpiece. -
Create the airway:
Insert a flat popsicle stick through the front of the snout, aiming straight back. Meanwhile, cut a small rectangular window (the fipple) on the underside of the pig’s neck, just behind where the snout attaches. -
Connect the channel:
Push the popsicle stick further until it emerges into the window cut. The stick creates the windway. Angle a bevel edge on the window’s far side (the side closest to the body) to split the air. -
Test the sound:
Blow gently through the snout. If it doesn’t whistle, adjust the angle of the splitting edge (the labium) until you get a clear tone. Once it works, leave it alone to stiffen slightly.
Rustic Patina
After bisque firing, rub a dark iron oxide wash over the pig and sponge nearly all of it off. This fills the texture pores and makes the details pop.
Step 3: Sculpting Features
-
Shape the snout:
Refine the blocky snout into a rounded oval shape. Use a small tool to press two indentations for nostrils on the front face. -
Add the ears:
Form two small triangles of clay. Score and slip the top of the head, attaching the ears just behind the snout area. Pinch them slightly to give them a curved, alert shape, and darken the inner tips with a bit of water or slip for emphasis. -
Create the eyes:
Use a small, round tool or the end of a paintbrush to press shallow circular indents below the ears for the eyes. Poke a deeper pupil hole in the center of each indent. -
Attach the legs:
Roll four short, stout cylinders of clay. Score and slip the bottom of the body, attaching the legs so the pig stands stable and level. Support the belly with a small sponge while the legs firm up. -
Add the tail:
Roll a tiny coil of clay and attach it to the rear, curling it slightly for a classic piggy tail.
Step 4: Finishing Touches
-
Texture the skin:
Using a stiff bristled brush or a needle tool, gently stipple the surface of the pig to create random pores and speckles. I like to focus this texture on the back and sides. -
Enhance details:
Take a needle tool and poke tiny random holes across the body to mimic the dark speckling seen in the inspiration image. -
Smooth the mouthpiece:
Ensure the area where your lips touch the snout is perfectly smooth. Use a damp finger to burnish just the rim of the snout. -
Final drying:
Let the pig dry slowly under loose plastic to prevent the legs from cracking. Once bone dry, fire it to the temperature recommended for your specific clay body.
Now you have a charming little musical companion ready for your shelf or garden


Chunky Fish With Tail Mouthpiece
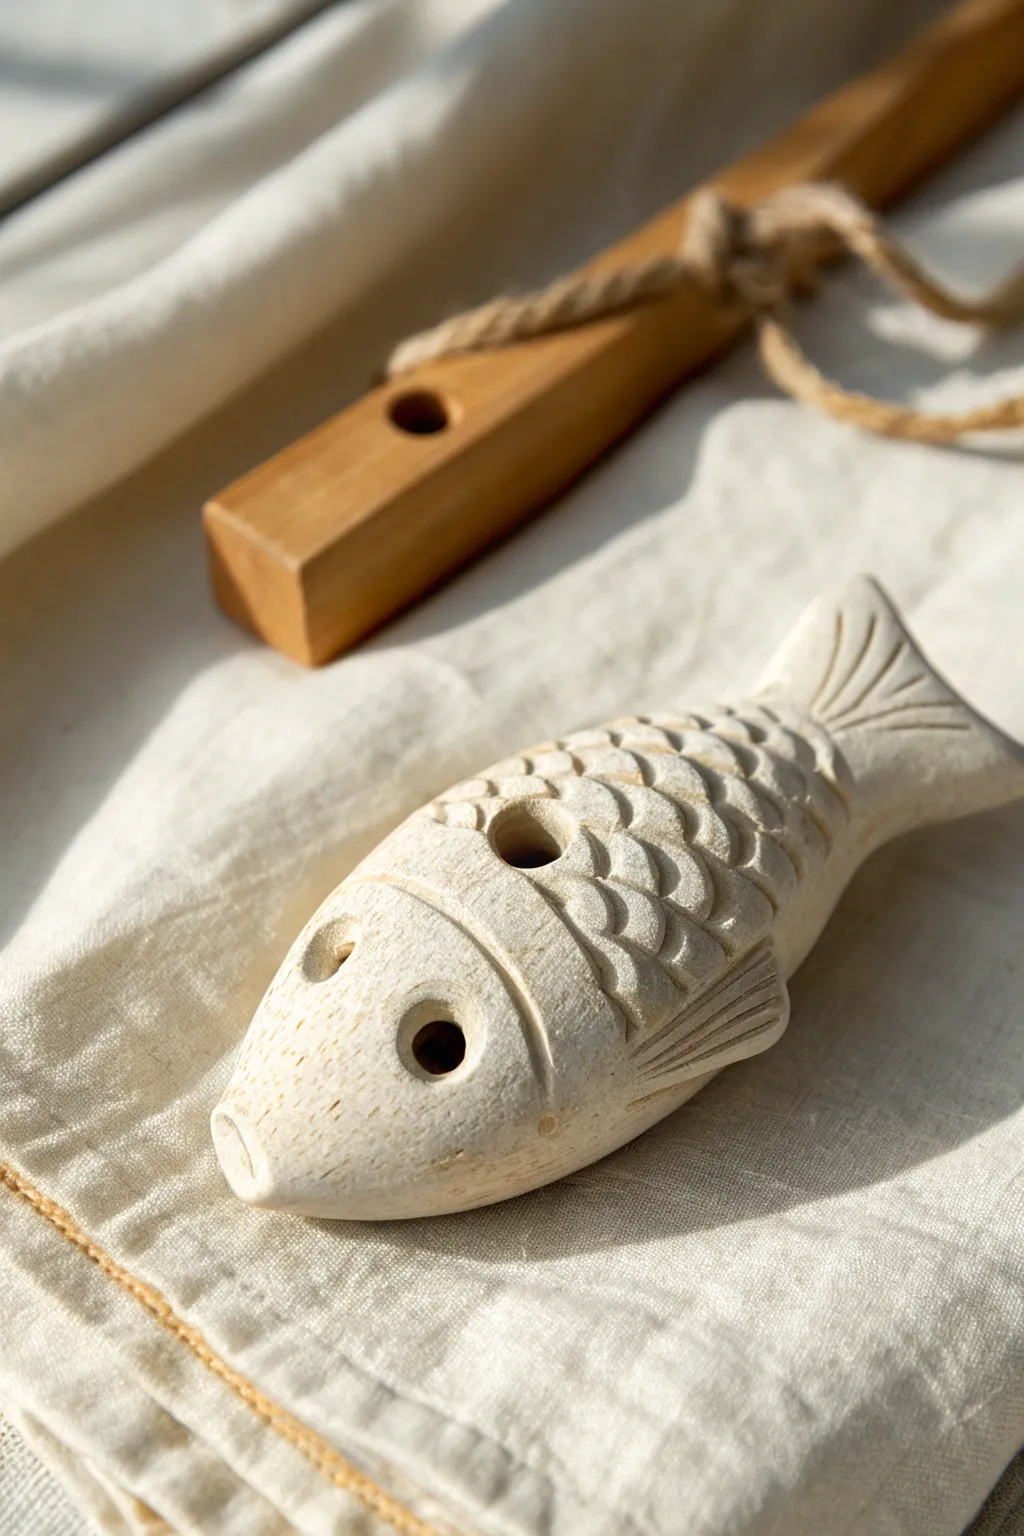
This charming project transforms a simple lump of clay into a functional musical instrument with a distinct personality. The finished piece features deeply carved scales, a streamlined body, and a natural, unglazed finish that feels wonderful in the hand.
Step-by-Step
Materials
- White stoneware or earthenware clay
- Wooden modeling tool with a flat edge
- Popsicle stick or fettling knife
- Needle tool
- Small loop tool
- Smooth wooden styling slat (optional)
- Small sponge
- Bowl of water
Step 1: Forming the Whistle Body
-
Pinch the primary shape:
Start with a ball of clay roughly the size of a tangerine. Using your thumbs, gently pinch into the center to create a hollow pinch pot, keeping the walls about 1/4 inch thick eventually. -
Close the form:
Shape the pot into an elongated oval. Gently pinch the rim closed until the opening is completely sealed, trapping air inside to help the clay hold its shape. -
Refine the fish silhouette:
Roll the sealed form on your work surface to smooth it out. Gently taper one end to creating a narrower tail section, leaving the head end delightfully chunky and round. -
Construct the voicing:
This is the trickiest part. Using your popsicle stick, create a rectangular channel on the top curve of the back, angling down into the hollow body at a 45-degree angle. This is the ‘blade’ or ‘fipple’ hole. -
Create the mouthpiece:
Insert your stick into the tail end, pushing straight through to meet the angled hole you just made. The air channel needs to hit the sharp edge of the blade hole precisely to create sound. -
Test the sound:
Before adding details, blow gently through the tail. If it doesn’t whistle, adjust the angle of the blade (the sharp edge of clay in the top hole) or clean out any clay burrs in the airway.
Clearer Sound Tip
The splitting edge (the sharp part of the top hole) must be razor sharp. Use a knife to carefully refine this edge so the air stream splits cleanly.
Step 2: Sculpting Details
-
Define the head:
Use the edge of your wooden modeling tool or a needle tool to score a deep, curved line separating the head from the body. This functions as the operculum or gill cover. -
Carve the eyes:
Using a small loop tool or the end of a paintbrush, press into the clay to create circular indentations for eyes. Make them deep enough to create shadows. -
Add pupil depth:
Take a smaller tool or needle and deepen the very center of the eye socket to imply a pupil, giving the fish a focused expression. -
Shape the mouth:
At the very front of the nose, use a round tool to press in a small, circular mouth. This is purely decorative and doesn’t affect the sound. -
Outline the scales:
Starting behind the gill line, press the curved edge of your wooden tool into the clay to stamp the first row of scales. Press firmly to get that ‘carved stone’ look. -
Layer the texture:
Continue stamping scale rows all the way down the body toward the tail. I like to stagger them like bricks so they look more organic and natural. -
Define the tail fins:
Flatten the tail mouthpiece area slightly. Use a needle tool to draw straight, radiating lines that mimic the rays of a tail fin. -
Add pectoral fins:
Score and slip small triangular wedges of clay onto the sides of the body for pectoral fins. Add striations with your needle tool to match the tail.
Silent Whistle?
If you hear rushing air but no tone, the air channel isn’t hitting the blade edge correctly. Re-insert the stick and slightly adjust the angle up or down.
Step 3: Refining and Finish
-
Smooth the surface:
Using a slightly damp sponge (wring it out well!), gently wipe over the high points of the fish. This softens sharp clay burrs without erasing your carving work. -
Check the airway again:
Smoothing can sometimes push crumbly bits into the whistle mechanism. Blow through it one last time to ensure the sound is still clear. -
Final drying:
Let the fish dry slowly under loose plastic for a day to prevent cracking, then uncover it to dry completely before firing.
Once fired, you’ll have a timeless, durable sculpture that sings a cheery note whenever you wish


Squat Frog With Big Eyes
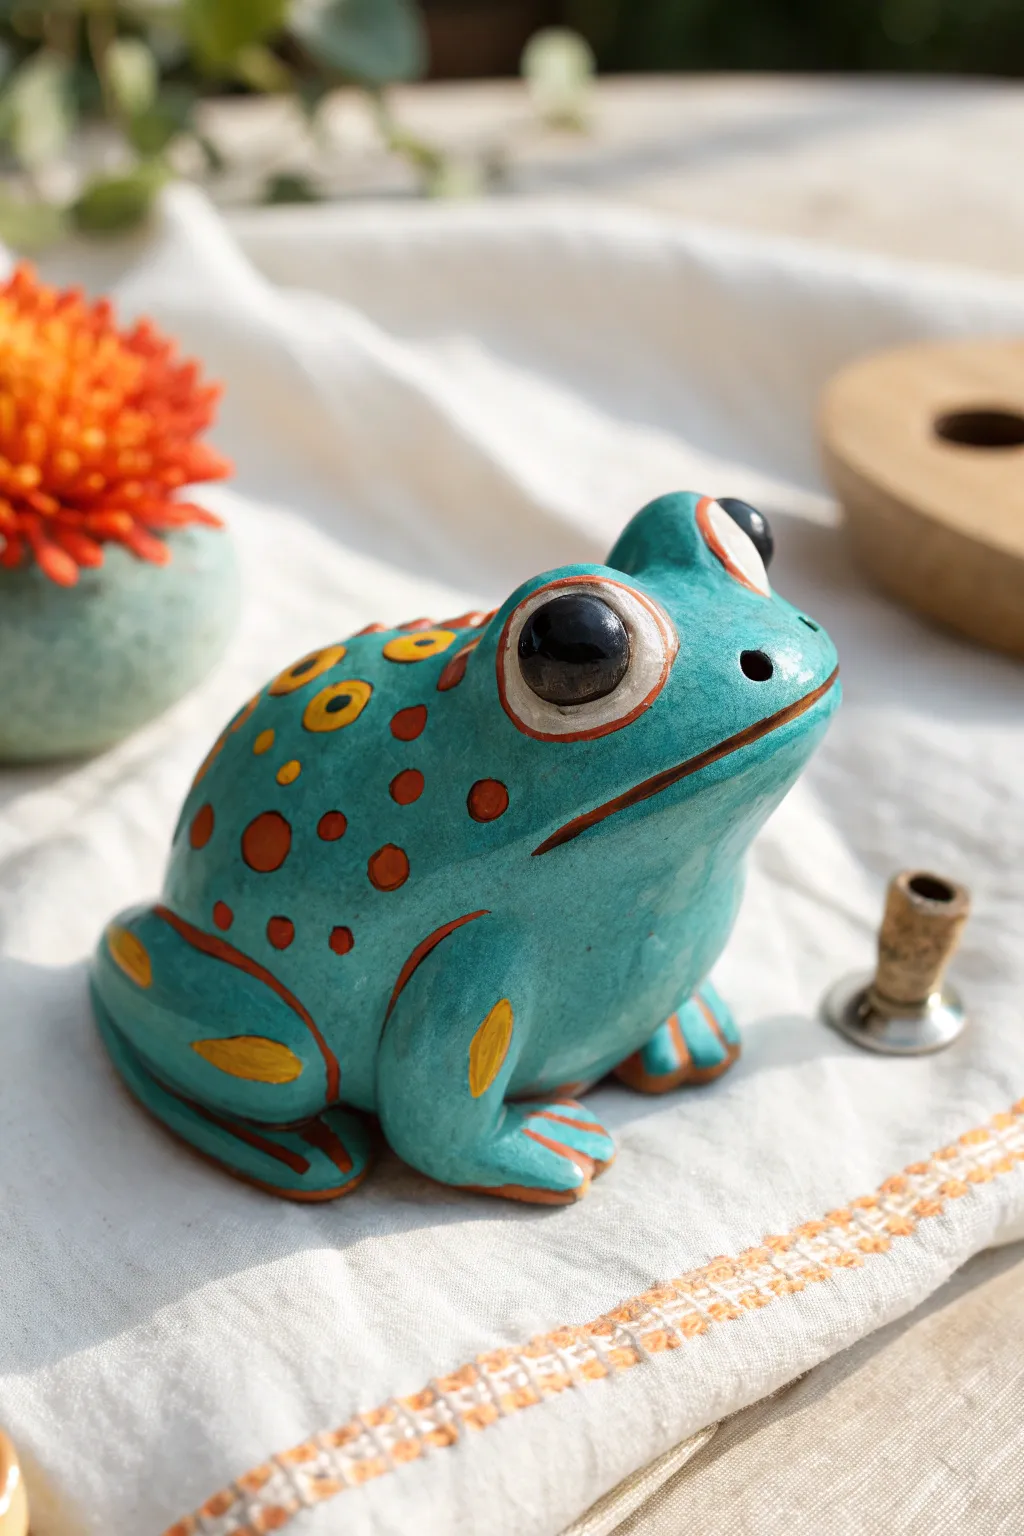
This charming, wide-set frog brings a whimsical touch to your whistle collection with its vibrant teal glaze and playful orange spots. Using simple pinch pot techniques, you’ll sculpt a perfectly rounded body and oversized eyes before turning it into a functional instrument.
Step-by-Step Guide
Materials
- White earthenware or stoneware clay
- Popsicle stick or wooden modeling tool
- Pin tool or needle tool
- Slip (clay mixed with water)
- Scoring tool (or an old toothbrush)
- Underglazes: Teal/Turquoise, Orange, Yellow, Black, White
- Clear glossy glaze
- Small paintbrush
- Sponge
Step 1: Forming the Body base
-
Create the main pinch pot:
Start with a ball of clay roughly the size of a tangerine. Stick your thumb in the center and pinch around the walls to create a uniform cup shape. This hollow space will be the resonance chamber for your whistle. -
Close the form:
Gently gently curve the rim of your pinch pot inward until the opening closes completely. Trap the air inside to help the sphere hold its shape while you smooth the seam closed. -
Shape the frog’s posture:
Once sealed, gently tap the bottom of the sphere on your table to flatten it slightly so the frog sits stable. Shape the body to be a bit squat, wider at the bottom than the top.
Silent Whistle?
If you lose the sound after adding legs, you likely dented the resonance chamber. Gently reform the hollow belly or clear the airway again with your stick.
Step 2: Building the Whistle Mechanism
-
Add the mouthpiece:
Attach a small rectangle of clay to the back lower section of the frog. Blend it seamlessly into the body to create a slight protrusion where you will blow. -
Create the airway:
Insert a popsicle stick horizontally into the mouthpiece to create the airway. Push it until it just enters the hollow cavity of the body. -
Cut the bevel:
On the underside of the frog’s body, just past where the airway enters, cut a rectangular window. Use a sharp tool to create a 45-degree angle (bevel) on the edge of the window closest to the mouthpiece. This splits the air to create sound. -
Test the sound:
With the stick removed and the bevel sharp, give it a soft blow. If it doesn’t whistle, adjust the angle of the bevel or clear any clay crumbs from the airway.
Step 3: Sculpting the Features
-
Add the front legs:
Roll two thick coils of clay. Score and slip them vertically onto the front of the body, blending the top edge into the chest and flattening the bottoms into feet. -
Form the hind legs:
Create large, curved sausage shapes for the thighs. Attach them to the sides of the body, curving them forward toward the front feet to mimic a sitting frog. -
Sculpt the eyes:
Roll two spheres of clay about the size of large marbles. Score and slip them to the top of the head. I like to use a modeling tool to smooth the clay from the bottom of the eye onto the head for a seamless connection. -
Refine the face:
Use a needle tool or knife to carve a wide, happy mouth line that curves up slightly. Poke two small nostril holes just above the mouth. -
Detail the toes:
Use your knife tool to press indentations into the front and back feet to separate the toes.
Clear Airway Trick
After glazing, re-insert a clean twist drill bit or stick into the airway just to ensure glaze hasn’t clogged the hole before you fire it.
Step 4: Painting and Glazing
-
Bisque fire:
Allow the clay to dry completely (bone dry) and fire it to cone 04 (or as per your clay’s instructions). -
Apply base color:
Paint the entire body with 2-3 coats of a vibrant teal or turquoise underglaze, avoiding the bottom where it sits. -
Paint the eyes:
Paint the eyeball spheres white. Once dry, add a large black pupil in the center. Outline the base of the eye with a thin line of orange or rust underglaze to make them pop. -
Add the spots:
Using a smaller brush, dab varied sizes of orange spots across the back and head. For the larger spots, you can add a yellow center or a dark outline for depth. -
Highlight the legs:
Add yellow oblong shapes to the thigh and knee areas of the legs as accents. -
Final glaze and fire:
Once the underglaze is dry, coat the entire piece (except the very bottom) in a clear glossy glaze. Fire again to the temperature required for your glaze/clay combo (usually cone 05 or 06).
Place your finished amphibian on a shelf or use it to call out to friends in the garden

The Complete Guide to Pottery Troubleshooting
Uncover the most common ceramic mistakes—from cracking clay to failed glazes—and learn how to fix them fast.
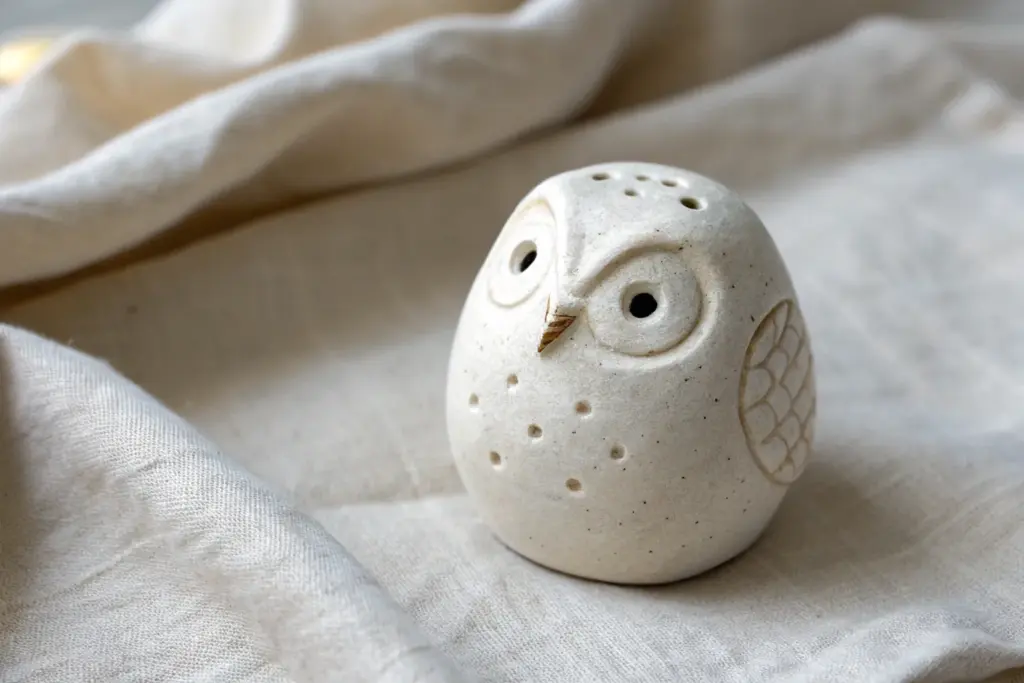
Wide-Eyed Owl Pinch Whistle
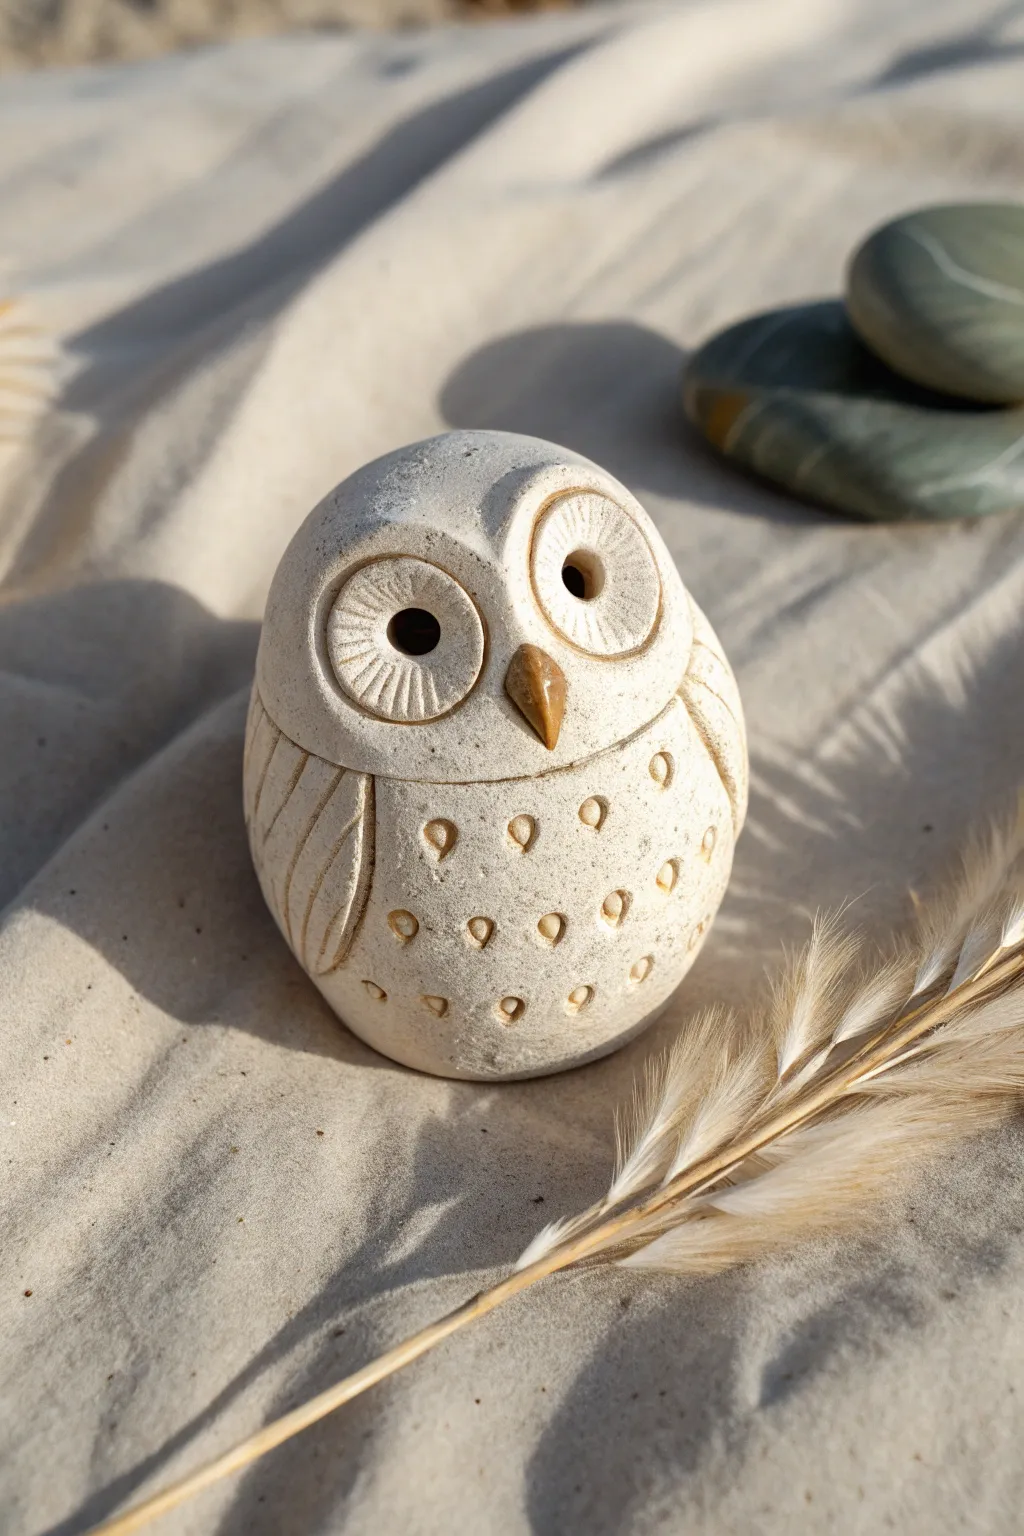
Transform a simple pinch pot into a charming, stone-textured owl with this delightful whistle project. With its exaggerated eyes and delicately stamped feather details, this little friend looks as though it was carved directly from river rock.
Step-by-Step
Materials
- Stoneware or earthenware clay (speckled buff works well)
- Small wooden modeling tool or popsicle stick
- Loop tool for hollowing (optional)
- Needle tool
- Small round piping tip or marker cap (for stamping eyes)
- Slip (clay mixed with water)
- Scoring tool or old toothbrush
- Small triangular pebble or extra clay (for the beak)
Step 1: Forming the Whistle Body
-
Create the pinch pot base:
Begin with a ball of clay roughly the size of a tangerine. Make a deep indentation with your thumb and gently pinch the walls while rotating the ball until you have a uniform cup shape. -
Close the form:
Gently curve the walls of your pinch pot inward until they meet at the top, trapping air inside to create a hollow sphere. Seal the seam smoothly so it disappears completely. -
Shape the owl’s body:
Roll the sphere on your work surface to smooth it, then gently tap the bottom to create a flat base so the owl stands upright. Adjust the form to be slightly egg-shaped, narrower at the top. -
Construct the whistle mechanism:
Form a small rectangular block of clay for the mouthpiece and attach it low on the back of the owl. Insert a popsicle stick into the mouthpiece to create the airway, aiming straight towards the sharp edge of the hole you’ll cut next. -
Cut the bevel:
Using your needle tool or knife, cut a small window into the hollow body where the stick’s path ends. The edge of this window must be sharp and angled to split the air. Test the sound now before adding details.
Step 2: Sculpting the Face and Wings
-
Define the head:
Lightly score a line around the upper third of the body to distinguish the head from the torso. This doesn’t need to be deep, just a subtle separation. -
Create the eye sockets:
Roll two small balls of clay and flatten them into thick discs. Score and slip the back of these discs, then press them firmly onto the face area side-by-side. -
Detail the eyes:
Use a small round tool or the end of a paintbrush to press deep pupils into the center of the discs. Then, use a needle tool to scratch radiating lines from the pupil to the edge of the disc for an iris texture. -
Add the beak:
Roll a tiny cone of clay (or use a small, triangular stone as seen in the photo) and press it firmly into the space between the lower part of the eyes. If using clay, smooth the attachment point. -
Shape the wings:
Score the sides of the owl’s body. Roll out two teardrop shapes of clay, flatten them slightly, and attach them to the sides, curving them forward to hug the belly. -
Carve wing feathers:
Use a needle tool or a small gouge to carve long, curved lines into the wing pads to represent flight feathers.
Voice Control
The size of the hollow chamber changes the pitch. A larger interior creates a deep hoot, while a smaller cavity makes a high-pitched peep.
Step 3: Adding Texture and Finish
-
Stamp the belly feathers:
Using the round end of a small tool or a stamping die, press small ‘U’ shapes or teardrop indentations across the belly area in a random pattern to mimic fluffy down feathers. -
Refine the surface:
Gently sponge the entire surface with a barely damp sponge to soften any sharp burrs from carving, giving the clay a weathered, stone-like appearance. -
Dry slowly:
Cover the owl loosely with plastic for the first day to ensure the thick areas (like the eyes) and thin areas dry at the same rate to prevent cracking. -
Fire the piece:
Once bone dry, bisque fire the piece. For the finish shown, apply a matte white or light grey wash that allows the clay’s natural speckles to show through, then wipe it back so the glaze stays mostly in the recesses.
Silent Owl?
If it won’t whistle, check the bevel edge. It must be sharp and perfectly aligned with the airway. Clear any clay crumbs blocking the path.
Listen to the cheerful toot of your new ceramic friend once it comes out of the kiln
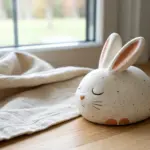
Sleepy Cat Loaf Whistle
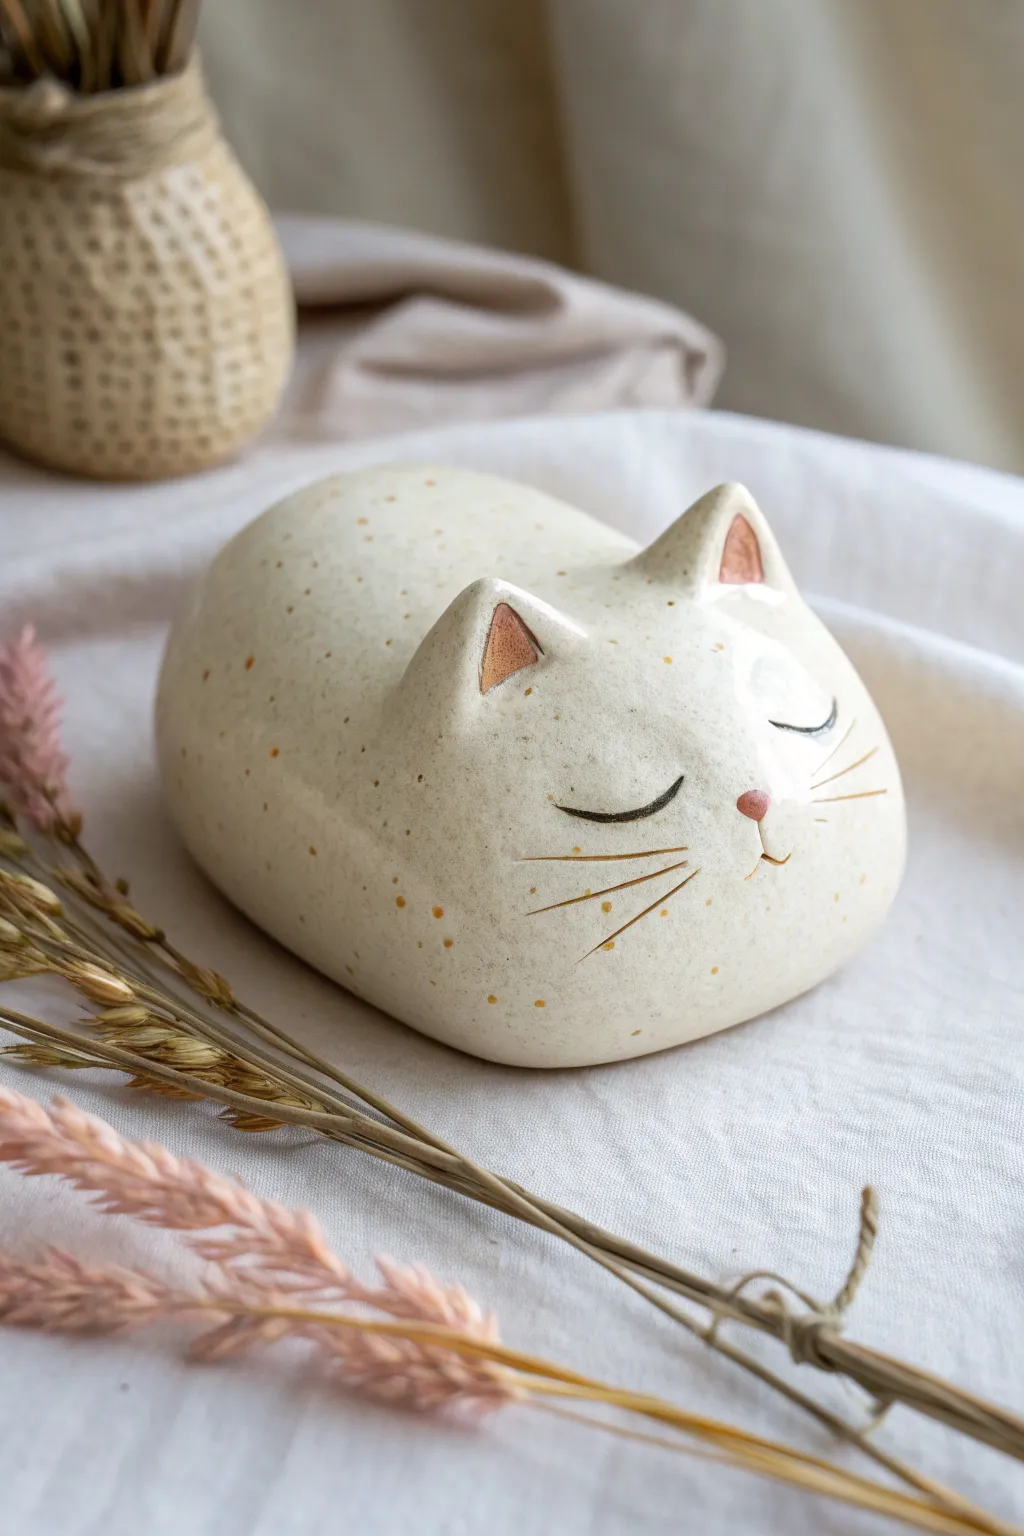
This charming project captures the peaceful energy of a napping cat in a smooth, pebble-like form known as the ‘loaf’ position. You’ll learn to sculpt a functional whistle mechanism hidden within this minimalist, speckled cream stoneware body, detailed with delicate closed eyes and perky ears.
Step-by-Step Guide
Materials
- Speckled cream stoneware clay (cone 5/6)
- Popsicle sticks (standard and thin)
- Needle tool
- Loop tool (small)
- Slip (liquid clay)
- Scoring tool or serrated rib
- Underglaze (pink/terracotta for ears and nose; brown/black for face details)
- Clear glaze (dipping or brush-on)
- Small sponge
- Fine detail paintbrush
Step 1: Forming the Body & Whistle
-
Pinch the base form:
Start with a ball of clay roughly the size of a tangerine. Holding it in your palm, gently pinch to open a hollow center, working your way around to create a uniform, oval-shaped pinch pot. This will be the cat’s body. -
Shape the ‘loaf’:
Turn the pinch pot upside down on your work surface gently tap it to flatten the bottom. Smooth the sides with a rib or your fingers to create an elongated, smooth mound shape that tapers slightly at what will be the head end. -
Construct the mouthpiece:
On the tail end of your loaf, add a small rectangular extension of clay. Blend this seamlessly into the body to create the mouthpiece area for the whistle mechanism. -
Create the airway:
Insert a popsicle stick flat into the mouthpiece extension, pushing straight toward the hollow center. This creates the channel for your air. -
Cut the bevel:
Turn the cat over to see the underside. Using a needle tool or small knife, cut a square bevel hole (the ‘window’) about an inch in from the mouthpiece edge. The sharp edge of this window splits the air to create sound. -
Align and tune:
With the stick still in the airway, ensure it lines up perfectly with the sharp edge of your bevel cut. Remove the stick gently and blow softly to test the sound. Adjust the angle until you get a clear, sharp tone. -
Close the form:
Once the whistle works, carefully seal the bottom of your pinch pot with a slab of clay if you prefer a fully closed form, or just leave it as an inverted pinch pot base for better acoustics. Refine the shape so it looks seamless.
Clear Sound Secret
Make the splitting edge (the bevel) as sharp and clean as a knife blade. A dull edge creates wind noise rather than a crisp whistle tone.
Step 2: Sculpting Cat Features
-
Attach the ears:
Form two small triangles of clay. Score the spots on top of the head where ears belong, add a dab of slip, and press the triangles firmly in place. Blend the seams at the back and base so they look like they grew from the form. -
Shape the inner ear:
Use the rounded end of a tool or your pinky finger to gently press an indentation into the front of each ear triangle, creating depth. -
Refine the surface:
Use a damp sponge to wipe down the entire body, smoothing away any fingerprints or rough tooling marks. The goal is a very smooth, pebble-like finish. -
Carve the whiskers:
With your needle tool held at a shallow angle, scratch three long, sweeping lines on each cheek area for whiskers. Keep your hand loose to give them a natural curve.
Step 3: Decoration & Glazing
-
Bisque fire:
Allow the piece to dry slowly and completely before bisque firing it to the appropriate cone for your clay body. -
Paint the details:
Using a fine brush, apply a terracotta or soft pink underglaze to the inner ear indentations and a tiny dot for the nose. -
Define the eyes:
Paint two gentle, U-shaped curves for the closed sleeping eyes using a dark brown or black underglaze. I find it helps to rest my pinky on the table for stability here. -
Accent the whiskers:
Carefully trace over your carved whisker lines with the dark underglaze to make them pop. Wipe away any excess that spills outside the grooves. -
Clear glaze application:
Dip the entire cat into a clear glaze (or brush on three even coats). Ensure the glaze doesn’t pool thick inside the whistle windway or bevel window, as this will ruin the sound. -
Clear the airway:
Before firing, double-check the airway is clear of glaze by running a clean tool or stick through it one last time. -
Final firing:
Fire the piece to the final temperature (likely cone 5 or 6). The speckles in the clay will emerge through the clear glaze during this firing.
Level Up: Rattle Cat
Before closing the pinch pot base, wrap smooth, dry clay balls in paper towel and seal them inside. The paper burns away, leaving a rattle!
Once fired, you’ll have a sweet, melodic companion perfect for a desk ornament or a playful gift.


What Really Happens Inside the Kiln
Learn how time and temperature work together inside the kiln to transform clay into durable ceramic.
Sitting Dog With Floppy Ears
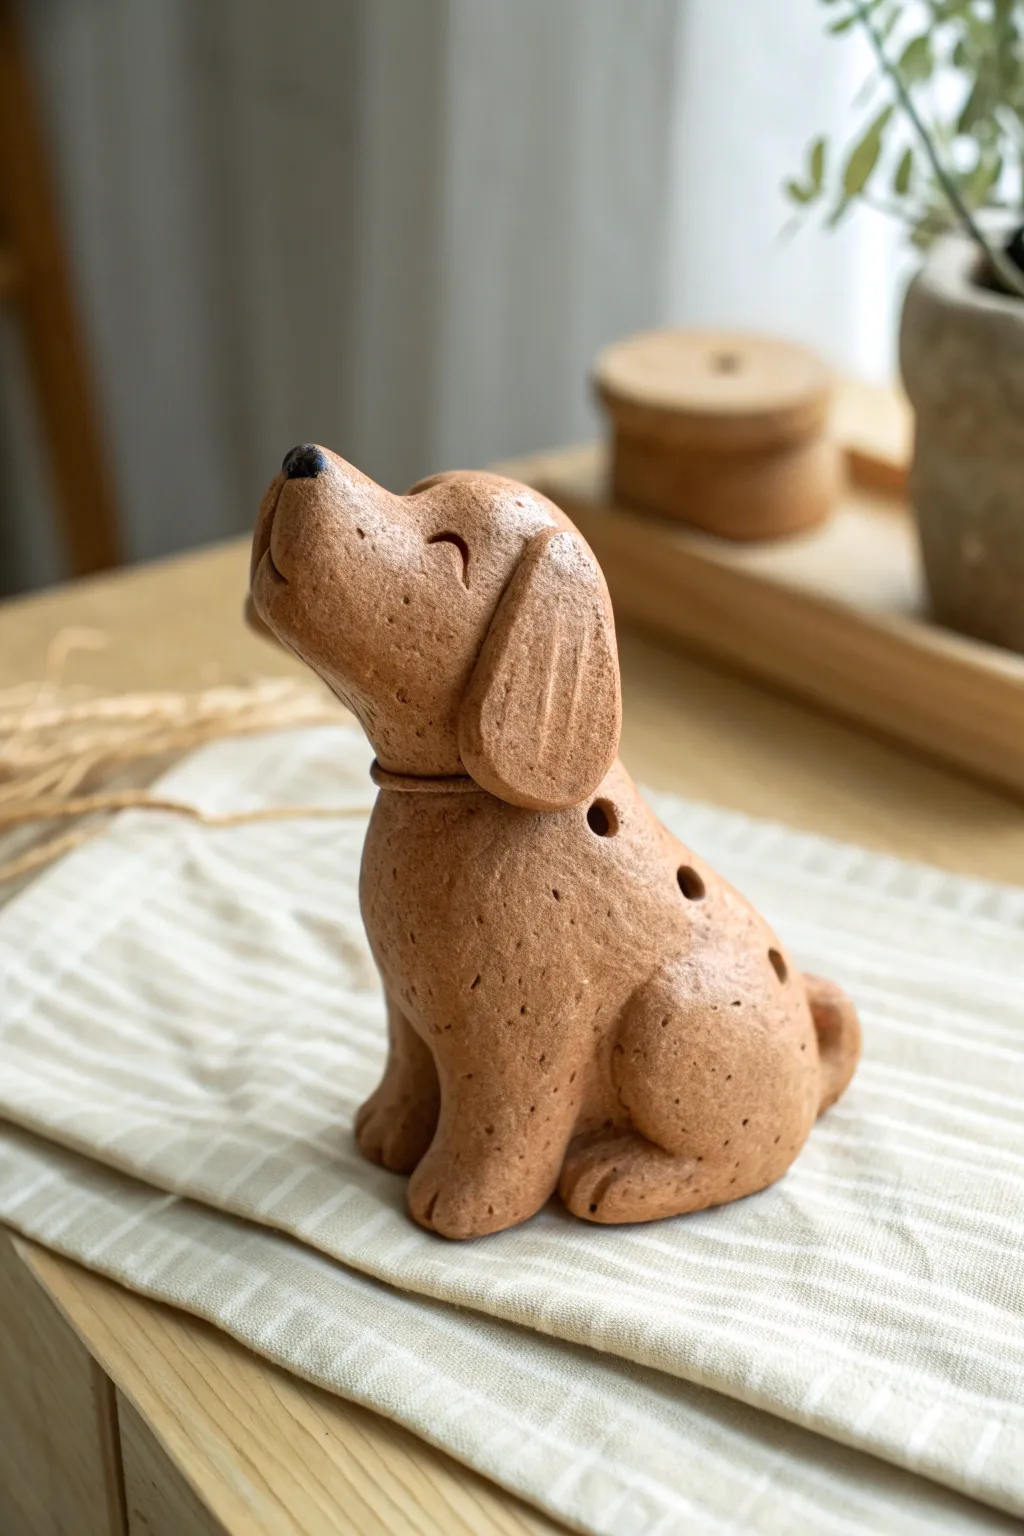
Sculpt a loyal companion that sings as sweetly as it sits. This delightful clay whistle features a perky, upward-gazing dog with adorable floppy ears and a textured, earthy finish reminiscent of classic terracotta.
Step-by-Step Tutorial
Materials
- Terracotta clay or polymer clay (terracotta color)
- Popsicle stick or flat modeling tool
- Fettling knife
- Needle tool
- Small loop tool
- Slip and scoring tool (if using ceramic clay)
- Sponge and water
- Rolling pin
Step 1: Forming the Whistle Body
-
Shape the pinch pots:
Start by rolling two equal balls of clay, roughly the size of heavy lush apricots. Press your thumb into the center of each to create two even pinch pots, keeping the walls about 1/4 inch thick. -
Join the pots:
Score the rims of both pinch pots and apply a dab of slip (or liquid clay). Press them together firmly to create a hollow sphere, smoothing the seam with your thumb until it disappears completely. -
Elongate the torso:
Gently gently squeeze and roll the sphere into a slightly elongated tear-drop shape. This will become the dog’s seated body, with the wider bottom providing a stable base. -
Create the mouthpiece:
Attach a small rectangular block of clay to the back of the body (where the tail would be). Flatten it slightly to form the mouthpiece slab. -
Construct the airway:
Carefully insert a popsicle stick through the mouthpiece slab and into the hollow body cavity. On the underside of the body, just where the mouthpiece meets the sphere, cut a specialized 45-degree angle bevel notch to split the air. -
Tune the sound:
Before sculpting further, test the whistle. Blow gently; if it doesn’t whistle, adjust the angle of the bevel notch until you get a clear tone. This is the most crucial step—don’t rush it.
Clear Airway Trick
Keep the popsicle stick inserted in the airway while you sculpt features like the legs or ears. This prevents accidental pressure from collapsing the delicate internal channel.
Step 2: Sculpting the Dog
-
Add the head:
Form a second, smaller solid ball of clay for the head. Attach it to the narrower top of your whistle body using the score-and-slip method. Tilt it backward slightly so the dog looks like it’s howling at the moon. -
Define the muzzle:
Pull the clay from the front of the head outward to create a distinct snout. Use your fingers to round it off, giving the pup a soft, curious profile. -
Shape the legs:
Roll two thick coils for the hind legs and two slightly thinner ones for the front. Press the hind legs onto the sides of the body in a rounded ‘haunch’ shape, and attach the front legs straight down from the chest to the ground. -
Detail the paws:
Use a needle tool or knife to gently press vertical lines into the bottom of each leg to define the toes. I like to slightly flatten the bottom of the paws so the dog sits stable. -
Attach the ears:
Flatten two small ovals of clay. Attach them to the sides of the head, letting them flop downwards. Use a modeling tool to verify the seam is invisible and blend the top edge into the skull.
A Spotted Coat
Use a darker clay slip or watered-down acrylic paint (post-firing) and flick it onto the surface with an old toothbrush to create scattered, natural-looking speckles.
Step 3: Refining Details
-
Add the tail:
Roll a small, tapered non-functional tail and attach it curled against the lower back, wrapping around one hind leg. -
Carve the face:
Using a needle tool, carve two crescent moon shapes for the happy, closed eyes. Add a tiny ball of clay for the nose and gently texturize it with a stippling motion. -
Add fingertip holes:
Carefully drill 3 or 4 tuning holes along the dog’s spine using a drill bit or a small hole cutter tool. Test the sound after each hole is made to ensure the pitch changes correctly. -
Texture the surface:
Take a stiff bristles brush or a textured sponge and lightly tap it all over the dog’s body (avoiding the mouthpiece bevel). This gives it a realistic fur-like or stone-like spotting. -
Smooth the neck:
Roll a very thin snake of clay and wrap it around the neck like a collar to hide the join between head and body. Smooth it down slightly purely for aesthetics. -
Final clean up:
Check the airway one last time to ensure no clay crumbs are blocking it. Use a damp sponge to remove any sharp burrs around the finger holes.
Once fired or baked according to your clay’s instructions, your loyal pup is ready to make some music
Turtle Shell Whistle With Hidden Window
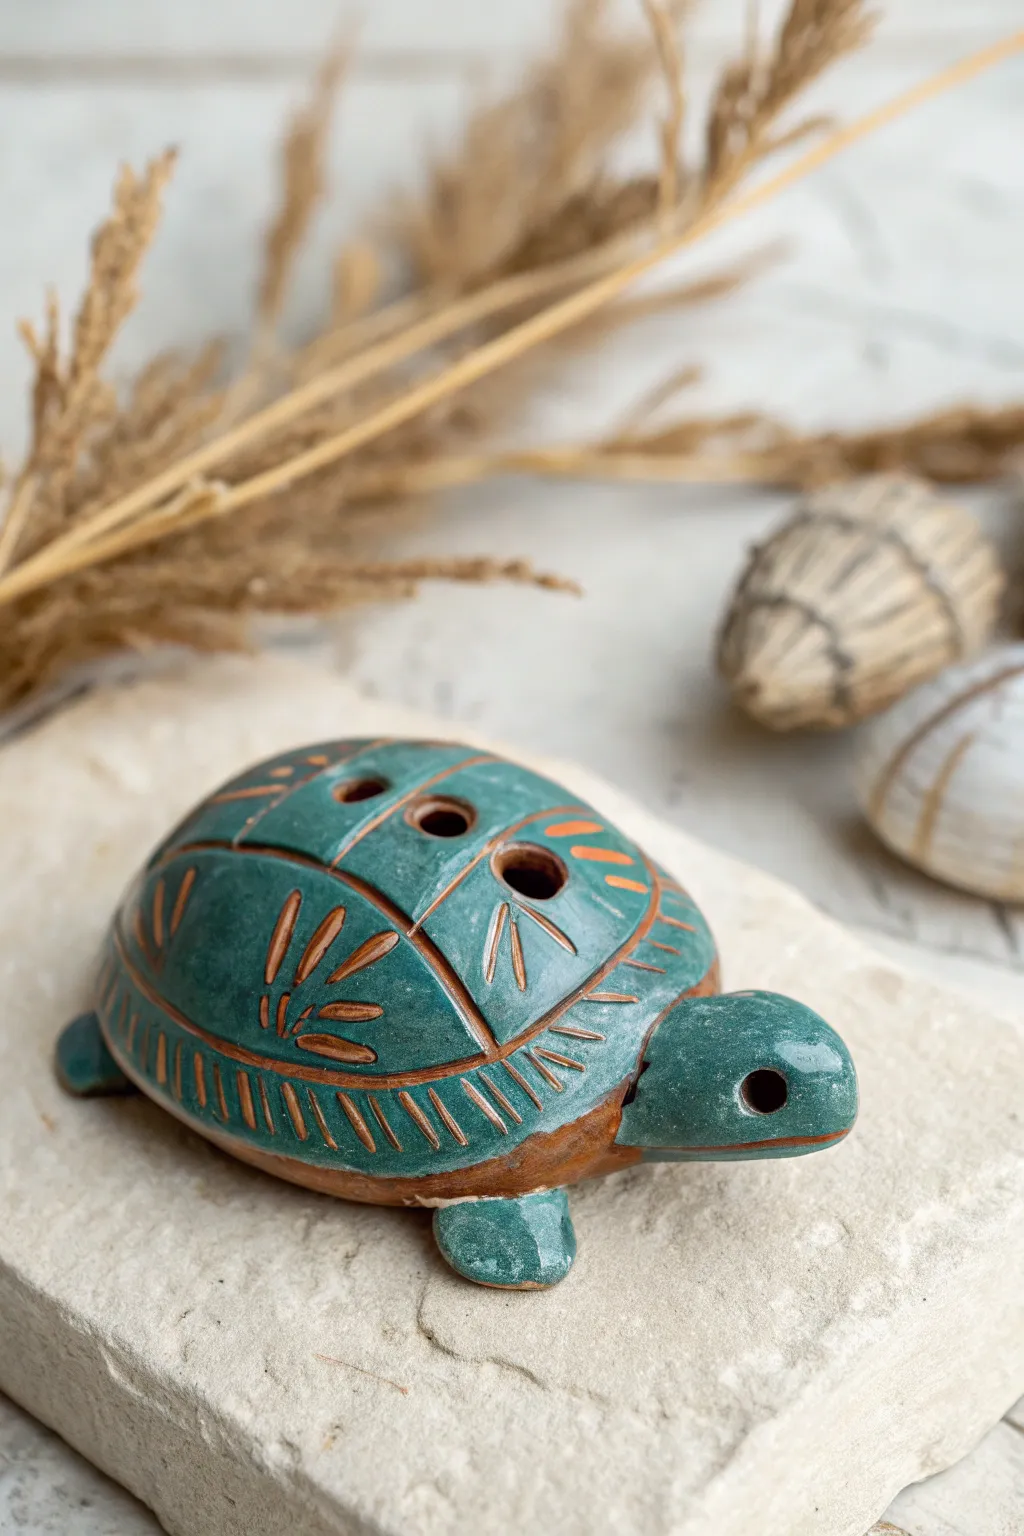
Transform a simple pinch pot into a charming musical companion with this teal and terracotta turtle whistle. Featuring intricate sgraffito details and pitch-changing finger holes, this little instrument is as lovely to look at as it is to play.
Step-by-Step
Materials
- Earthenware or stoneware clay (terracotta color recommended)
- Teal or emerald green underglaze
- Popsicle stick or wooden modeling tool
- Needle tool or sgraffito tool
- Small sponge
- Water cup
- Clear transparent glaze (optional)
- Small paintbrush
Step 1: Forming the Body
-
Create the base pinch pot:
Start with a ball of clay about the size of a tangerine. Make a pinch pot by pushing your thumb into the center and pinching the walls to an even thickness to form the turtle’s shell. -
Close the form:
Pinch the rim of the pot inward until it closes completely, trapping a hollow pocket of air inside. Smooth the seam so you have a sealed, dome-like pebble shape. -
Shape the shell:
Gently tap the dome on your work surface to flatten the bottom slightly. This creates the turtle’s belly and ensures it sits stable without rolling away. -
Attach the head and limbs:
Roll a small ball for the head and four smaller nuggets for the flippers. Score and slip these appendages onto the main body, blending the clay thoroughly to ensure a strong bond. -
Refine the shape:
Smooth out all the connection points with a damp sponge or your finger. Shape the head to look slightly inquisitive and flatten the flippers so they rest naturally against the ground.
Step 2: Creating the Whistle Mechanism
-
Construct the airway:
Using a flat popsicle stick, carefully insert it into the turtle’s rear (the blowing end) to create a rectangular airway channel. -
Cut the fipple window:
On the underside or the lower back edge of the shell, cut a small square ‘window’ with your needle tool. The ramp of this window needs to align perfectly with the airway you just made. -
Test the sound:
Blow gently into the mouthpiece. If it creates a clear whistle sound, you’re ready to proceed. If it sounds airy, adjust the angle of the splitting edge (the ramp) until it sings clearly. -
Add finger holes:
Punch two or three circular holes into the top of the shell using a straw or hole cutter. These will allow you to change the pitch when covered. -
Detail the face:
Use a small tool or the end of a paintbrush to press deep indentations for the eyes on the turtle’s head.
Silent Whistle?
If you lose the sound after glazing, check the airway. Glaze can easily clog the narrow passage. Use a pipe cleaner to clear the airway before firing.
Step 3: Decorating and Glazing
-
Apply the underglaze:
Once the clay is leather hard, paint 2-3 coats of deep teal underglaze over the entire shell and head. Leave the tips of the flippers and the belly bare if you prefer the natural clay look. -
Carve the shell design:
Wait for the underglaze to dry to the touch. Using a sharp needle or sgraffito tool, scratch through the teal layer to reveal the terracotta clay underneath. -
Pattern specifics:
Carve a geometric pattern on the shell: create distinct segments separated by lines, and fill these segments with smaller radiating dashes or leaf-like motifs. -
Add texture to the rim:
Carve short vertical hatch marks along the lower rim of the shell to mimic the marginal scutes of a real turtle. -
Bisque fire:
Allow the turtle to dry completely (bone dry) before firing it in a kiln to bisque temperature (usually cone 04). -
Glaze fire:
Apply a clear transparent glaze over the piece if you want a glossy finish, or leave the underglaze matte for a rustic texture. Fire again to the glaze temperature appropriate for your clay.
Tune Your Turtle
Vary the size of the finger holes to create specific musical notes. Larger holes generally produce higher pitches, allowing you to tune a scale.
Once fired, you’ll have a durable little musical sculpture ready to display or play

TRACK YOUR CERAMIC JOURNEY
Capture glaze tests, firing details, and creative progress—all in one simple printable. Make your projects easier to repeat and improve.
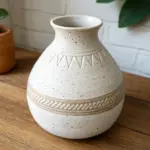
Simple Horse Whistle With Mane Texture
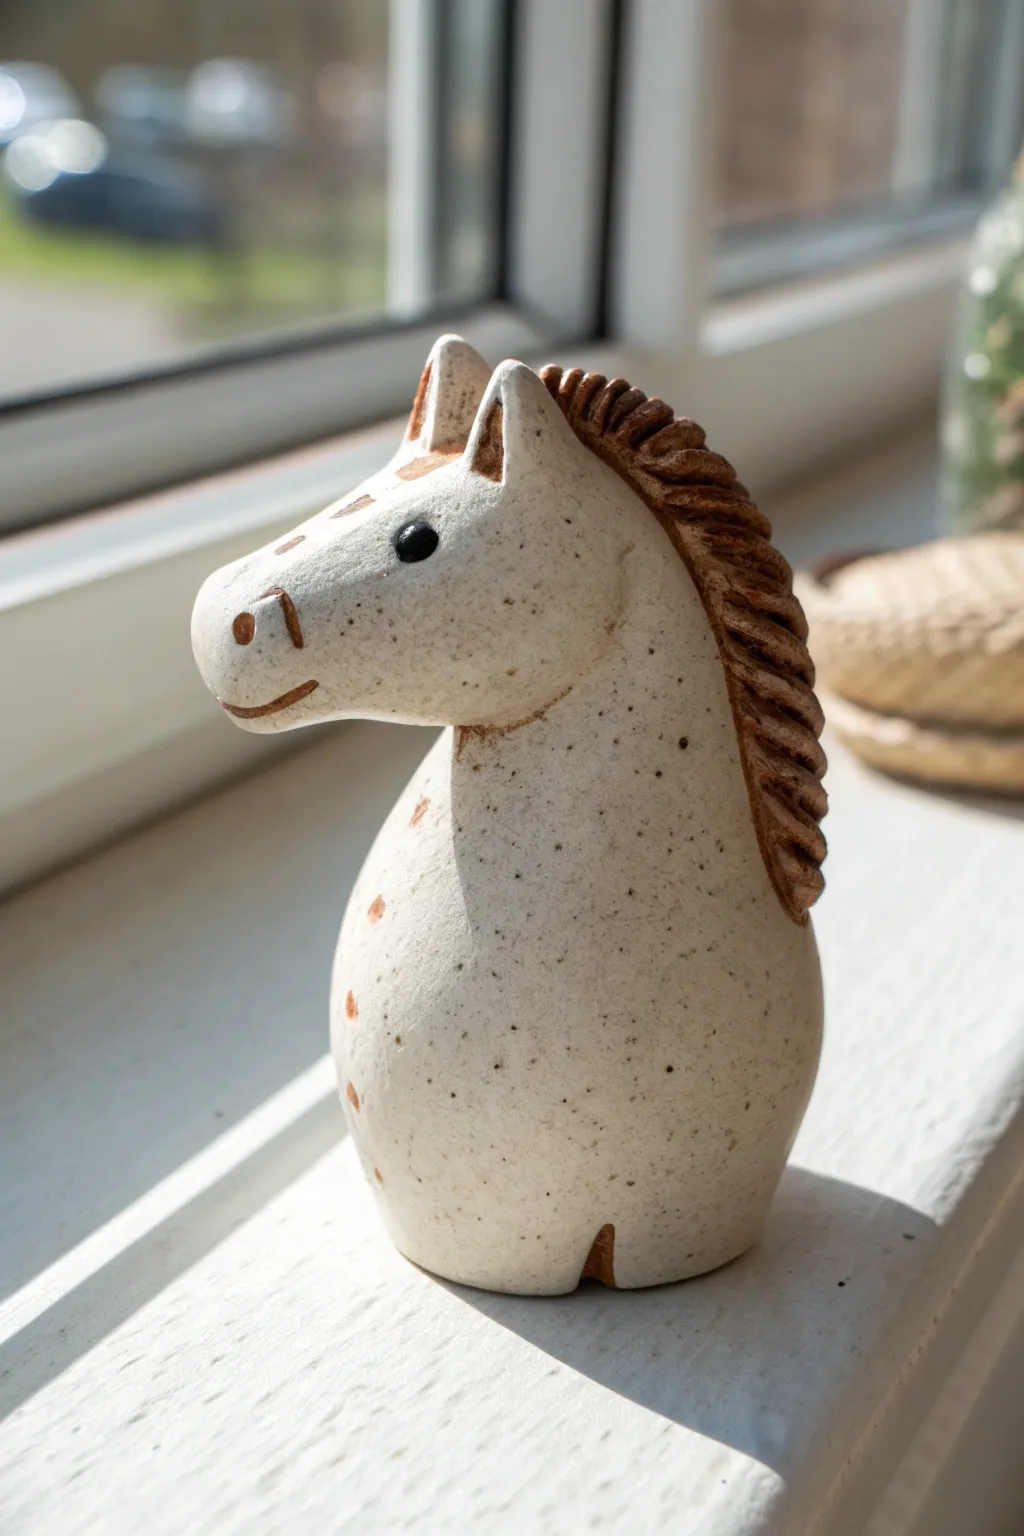
This charming ceramic whistle combines a simple pinch-pot base with endearing sculpted details to create a stylized pony. Its creamy speckled finish and textured mane give it a rustic, folk-art appeal that looks lovely sitting on a windowsill.
How-To Guide
Materials
- Speckled cone 5/6 stoneware clay (white or buff)
- Popsicle stick or wooden modeling tool
- Underglaze (dark brown or iron oxide wash)
- Small round paintbrush
- Clear matte or satin glaze
- Pin tool or needle tool
- Scoring tool (or serrated rib)
- Slip (clay mixed with water)
- Sponge
Step 1: Forming the Whistle Body
-
Shape the pinch pots:
Start with two balls of clay, roughly the size of a golf ball. Insert your thumb into one and gently pinch the walls while rotating to create a small bowl shape. Repeat for the second ball to make a matching pair. -
Join the pinch pots:
Score the rims of both bowls (scratch up the surface) and apply a dab of slip. Press the rims together firmly to trap a hollow pocket of air inside. This forms the main body of your horse. -
Refine the shape:
Gently paddle or smooth the joined clay into a unified, slightly elongated egg shape. The bottom needs to be slightly flatter so the horse stands upright on its own. -
Construct the voicing mechanism:
Create a small rectangular mouthpiece and attach it to the lower back of the body. Use a popsicle stick to carefully cut the bevel and airway towards the hollow interior. Test the sound frequently—getting a clear tone is easier while the clay is still flexible.
Clear Your Airway
Before the clay hardens, run your popsicle stick through the airway one last time to remove any crumbs that might muffle the sound.
Step 2: Sculpting the Horse Features
-
Model the neck and head:
Roll a thick coil of clay for the neck and attach it to the top-front of the body using the score-and-slip method. Gently curve it forward. -
Form the head shape:
Shape a slightly smaller oval of clay for the head. Attach this to the neck, blending the clay downwards so the neck flows seamlessly into the jawline. -
Add the ears:
Pinch two small, triangular pieces of clay. Attach them to the top of the head using slip. Use your wooden tool to press a small indentation into the front of each ear for depth. -
Create the signature mane:
Roll a thin coil of clay and attach it running from between the ears down the back of the neck. This doesn’t need to be perfect; a little irregularity adds character. -
Texture the mane:
Using a dull knife or wooden tool, press rhythmic, diagonal lines into the mane coil. This creates the ‘braided’ or thick hair texture seen in the photo. -
Detail the face:
Use a small tool to press minimal nostrils into the nose area. For the mouth, carve a simple curved line that gives the horse a gentle smile.
Step 3: Decoration and Glazing
-
Applying underglaze details:
Once the clay is bone dry (greenware), use a small brush to apply dark brown underglaze or iron oxide wash. Paint the mane, the insides of the ears, and add small spots primarily on the snout and chest area. -
Define the eyes:
Paint two solid dark circles for the eyes. Keep them simple and round to match the folk-art style. -
Sponge back the texture:
If you used oxide on the mane, I like to gently wipe a damp sponge over the raised areas. This leaves the dark color in the crevices while revealing the clay body on the high points. -
Bisque fire:
Fire the piece in the kiln to cone 04 (or your clay’s specific bisque temperature). -
Glaze application:
Dip the entire horse into a clear matte or satin glaze. Ensure the whistle airway remains clear of glaze by blowing through it gently or plugging it with wax resist beforehand. -
Final firing:
Glaze fire the piece to the maturity temperature of your clay (likely cone 5 or 6) to achieve that durable, stone-like finish.
Keep it Standing
If the horse is front-heavy due to the head, tap the base firmly on the table while the clay is soft to flatten the bottom and lower the center of gravity.
Once fired, place your new ceramic friend near a sunny window to let the light catch those lovely speckles
Elephant Whistle With Trunk Mouthpiece
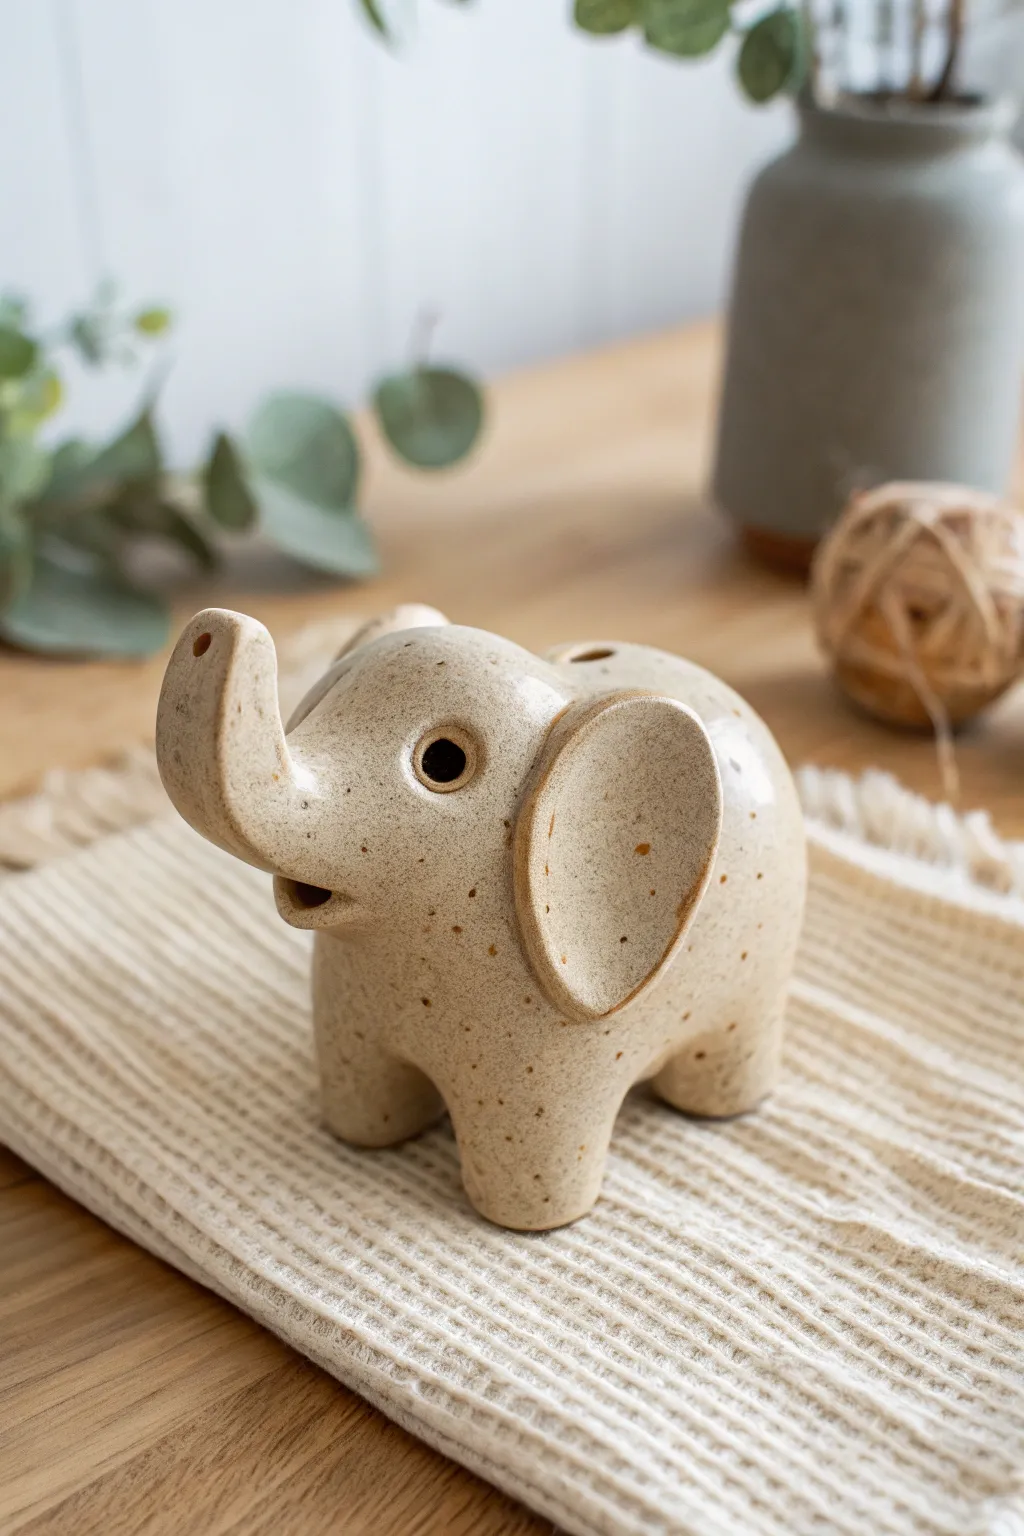
This charming ceramic elephant combines the fun of a musical instrument with adorable sculptural details. With its uplifted trunk serving as the mouthpiece and a speckled glaze finish, this piece is as delightful to look at as it is to play.
Step-by-Step
Materials
- Stoneware clay (speckled or light buff)
- Popsicle stick or wooden modeling tool
- Fettling knife
- Slip (clay mixed with water)
- Scoring tool or old toothbrush
- Small sponge
- Whistle voicing tool (or a beveled wooden stick)
- Glaze (transparent or light beige)
- Kiln
Step 1: Forming the Body & Whistle Mechanism
-
Pinch the body:
Start with a ball of clay roughly the size of a tangerine. Gently press your thumb into the center and pinch the walls evenly to create a hollow sphere, keeping the opening relatively small. -
Close the form:
Gradually pinch the opening closed to trap air inside, creating a hollow, sealed egg shape. Roll it gently on your work surface to smooth it out; this will be the elephant’s main body. -
Shape the mouthpiece block:
Attach a small rectangle of clay to one end of the egg shape where the head will be. This addition provides the extra thickness needed to carve the whistle’s airway. -
Create the airway:
Insert your popsicle stick into the mouthpiece block to create the windway. Push it straight in until you reach the hollow cavity of the body. -
Cut the bevel:
On the underside of the mouthpiece block (which will become the elephant’s chin area), make a 45-degree angled cut that intersects with the end of your airway channel. Removing this wedge of clay creates the sharp edge needed to split the air and make sound. -
Test the sound:
Blow gently through the airway. If it doesn’t whistle, adjust the angle of the bevel slightly or clear any hanging clay debris. I like to get a clear tone before adding any decorative features.
Silent Whistle?
If you get only air noise, the bevel edge isn’t splitting the air stream. Re-insert the stick into the airway and check that it aligns perfectly with the sharp edge of the bevel cut.
Step 2: Sculpting the Elephant Features
-
Form the trunk:
Roll a coil of clay that tapers at one end. Ideally, you want to attach this around the mouthpiece hole so the trunk acts as the blowing tube, but for this specific design shown, the mouthpiece is actually the mouth below the trunk. Attach the coil above the mouthpiece area, curving it upwards in a joyous gesture. -
Refine the trunk tip:
flattening the very end of the trunk slightly and use a small tool to poke two nostrils. This adds character and mirrors the holes often found on the whistle’s top. -
Attach the legs:
Roll four short, sturdy cylinders of clay for the legs. Score and slip the bottom of the body, then press the legs firmly into place. Tap the elephant gently on the table to ensure it stands flat and level. -
Blend the seams:
Use a modeling tool to smooth the clay where the legs meet the body so they look like they grow naturally from the form rather than just being stuck on. -
Add the ears:
Flatten two small balls of clay into teardrop shapes. Attach these to the sides of the head using the score and slip method. Press the center of each ear slightly to give it a concave, cupped shape. -
Create the eyes:
Roll two tiny spheres of clay. Press an indentation into the head for the eye socket, place the sphere inside, and use a hollow tube tool or a small stick to press a pupil into the center, securing the eye.
Step 3: Finishing & Glazing
-
Smooth the surface:
Once the clay is leather hard, use a damp sponge to wipe away any fingerprints or rough textures. Be careful not to get water inside the whistle mechanism, as this can alter the sound. -
Tune the instrument:
Poke two small holes on the top of the elephant’s back to act as finger holes. Test the sound again to ensure these notes play clearly. -
Bisque fire:
Allow the elephant to dry slowly and completely before firing it in the kiln to a bisque temperature (usually cone 04). -
Apply glaze:
Dip the fired piece into a transparent or light beige glaze. If you used a speckled clay body, the spots will show through beautifully after firing; if not, use a speckled glaze. -
Clear the airway:
Immediately after glazing, use a clean, dry brush or twist of paper to ensure no glaze is clogging the airway or the bevel edge. This is critical for the whistle to work after the final firing. -
Final fire:
Fire the piece to the maturity temperature of your clay and glaze (often cone 5 or 6 for stoneware) to achieve that glossy, durable finish.
Texture Twist
Before glazing, gently press a piece of burlap or lace onto the elephant’s back to give the skin a wrinkled texture, mimicking a real elephant’s hide under the glaze.
Now you have a whimsical little creature that sings as good as it looks
Whale Whistle With Blowhole Window
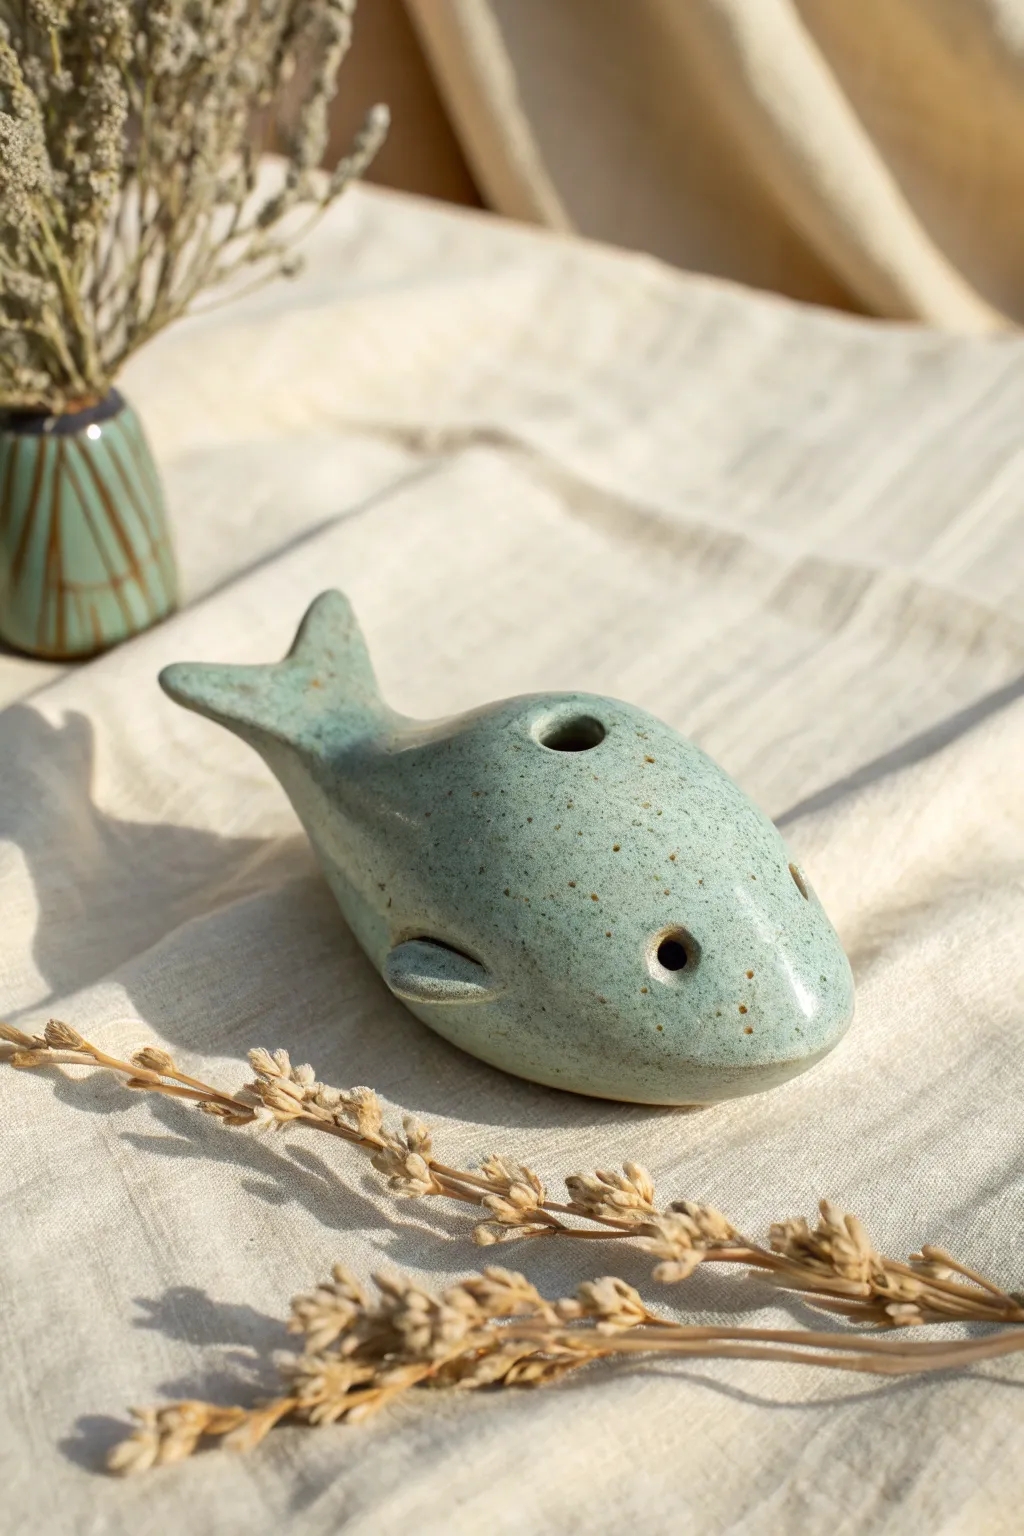
This charming ceramic project transforms two simple pinch pots into a stylized, singing whale complete with a functional blowhole. Finished with a speckled, sea-foam green glaze, it makes for a delightful desk companion or a functional musical instrument.
Step-by-Step Guide
Materials
- Stoneware or earthenware clay (plastic consistency)
- Popsicle stick or wooden modeling tool
- Fettling knife
- Slip (clay mixed with water)
- Scoring tool or fork
- Small sponge
- Drill bit or hole cutter (small diameter)
- Speckled Celadon or turquoise glaze
- Kiln for firing
Step 1: Forming the Body
-
Create two pinch pots:
Begin with two equal balls of clay, roughly the size of a tangerine. Press your thumb into the center of each and pinch the walls evenly until you have two symmetrical cup shapes. -
Join the pots:
Score the rims of both pinch pots generously and apply a layer of slip. Press the rims together firmly to trap a pocket of air inside, creating a hollow sphere. -
Shape the whale:
Gently paddle or roll the sphere on your work surface to elongate it slightly into an egg shape. Identify which end will be the tail and pinch it slightly to taper the form.
Silent Whistle?
If you hear rushing air but no whistle, the air isn’t splitting correctly. Re-angle the bevel edge to be sharper, or slightly adjust the angle of the mouthpiece stick.
Step 2: Creating the Whistle Mechanism
-
Form the mouthpiece:
Take a small extra piece of clay and fashion a rectangular mouthpiece. Attach this to the tapered ‘tail’ end of your body, blending the clay smoothly so it looks seamless. -
Insert the airway:
Using a popsicle stick, carefully push straight through the mouthpiece to create the air channel. Stop just before you breakthrough into the hollow body cavity. -
Cut the window:
On the underside of the whale (or top, if you prefer the mechanism hidden), cut a small square ‘window’ into the hollow body exactly where your popsicle stick airway ends. -
Ideally angle the bevel:
This is the crucial part: Use your tool to create a sharp, 45-degree angle on the distinct edge of the window hole that faces the mouthpiece. The air needs to split against this sharp edge to create sound. -
Clear the airway:
Push your popsicle stick through the mouthpiece again until it is visibly peeking into the window. Adjust it so the air stream hits the sharp bevel directly. Test the whistle carefully—it should produce a clear tone.
Step 3: Adding Character Details
-
Sculpt the tail flukes:
Flatten the tail section vertically. Use a knife to cut a ‘V’ notch, then round out the two resulting lobes to create a classic whale tail shape. Smooth the edges with a damp finger. -
Add pectoral fins:
Shape two small, flattened tear-drop pieces of clay. Score and slip them onto the lower sides of the body, angling them slightly backwards for a streamlined look. -
Create the eyes:
Using a circular tool or the back of a drill bit, press two deep indentations on either side of the head area to represent eyes. Keep them simple and geometric. -
Carve the blowhole:
On the very top center of the head, press a small, deep hole to mimic the whale’s blowhole. Make sure this doesn’t puncture all the way through if you want to maintain the specific pitch of your whistle. -
Refine the surface:
Once the clay is leather-hard, use a damp sponge to smooth away any harsh fingerprints or joining marks. I like to pay special attention to the mouthpiece area to ensure it’s comfortable against the lips.
Tuning Up
Make the interior cavity larger for a deeper, mournful whale sound, or keep the body small and tight for a higher-pitched chirp.
Step 4: Glazing and Firing
-
Bisque fire:
Allow the whale to dry completely (slowly is best to avoid cracks). Fire the piece in the kiln to bisque temperature. -
Wax the airway:
Apply a little wax resist inside the mouthpiece and the bevel edge of the whistle window. This prevents glaze from clogging the delicate mechanism and ruining the sound. -
Apply glaze:
Dip the whale into a speckled celadon or soft teal glaze. Ensure the coat is even, but shake off excess drops. -
Clean the eyes:
Check that the eye indentations and the blowhole aren’t completely filled with thick glaze; use a pin tool to clear them slightly if needed so the details remain crisp. -
Final firing:
Fire the piece for a second time according to your clay and glaze specifications, likely to Cone 5 or 6 for stoneware.
Once cooled, your ceramic whale is ready to sing its song and bring a touch of the ocean to your home
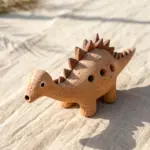
Hedgehog Whistle With Texture Spines
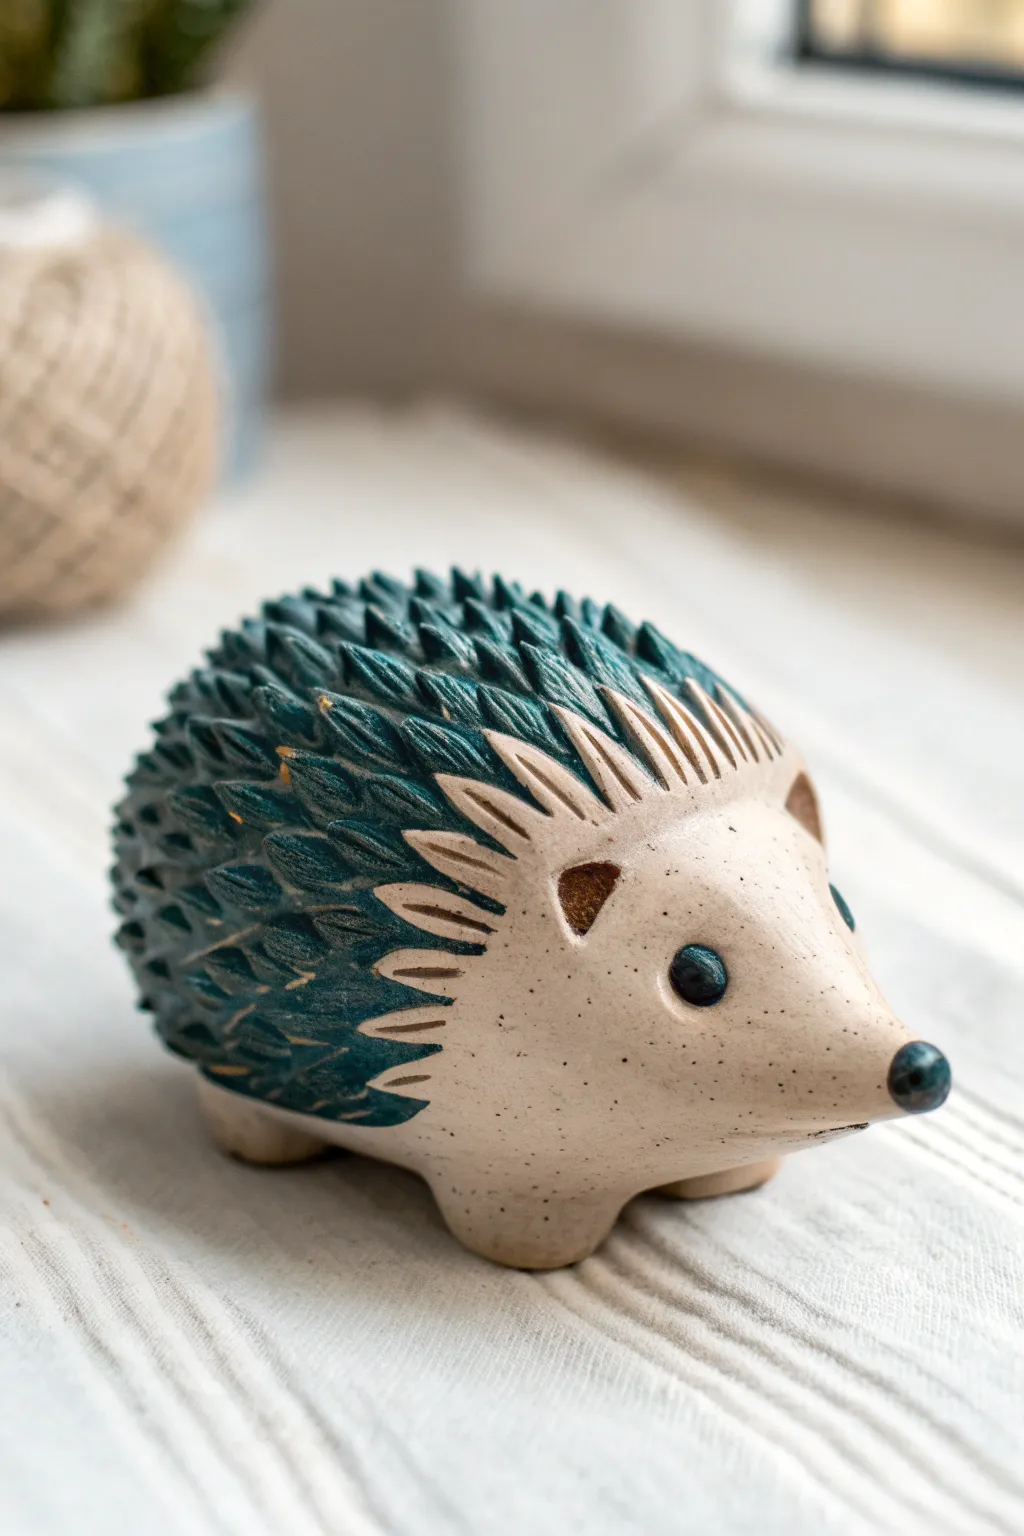
This charming hedgehog whistle features a speckled beige body contrasted by deeply carved, teal-colored spines. Its sturdy four-footed stance and alert expression make it as delightful to display as it is to play.
How-To Guide
Materials
- Stoneware clay (speckled or buff)
- Small loop tool or carving gauge
- Needle tools
- Popsicle stick or bevel cutter
- Teal or dark green underglaze
- Clear transparent glaze
- Small paintbrush
- Black underglaze (for eyes/nose)
- Sponge
Step 1: Forming the Whistle Body
-
Pinch the bases:
Start with two small balls of clay, roughly the size of golf balls. Pinch each into identical bowl shapes, ensuring the walls are an even thickness of about 1/4 inch. -
Join the halves:
Score the rims of both pinch pots and apply slip. Press them firmly together to create a hollow sphere, trapping the air inside. -
Shape the silhouette:
Gently paddle or roll the sphere on your table to elongate it slightly into an egg shape. Pinch and pull one end to create a pointed snout for the hedgehog’s face. -
Add feet:
Roll four small, equal-sized balls of clay. flattened slightly, score and slip them onto the bottom of the body so the hedgehog stands stably. -
Construct the mouthpiece:
Create the whistle mechanism on the rear end (opposite the face). Attach a small rectangle of clay, angle the mouthpiece, and cut the bevel/window carefully. Test the sound immediately while the clay is still workable.
No Sound?
If the whistle stops working after attaching feet, the body shape may have distorted. Re-check the bevel angle and ensure the airway is completely clear of debris using a clean popsicle stick.
Step 2: Carving and Detailing
-
Define the spine area:
Lightly sketch a curved line with a needle tool along the sides of the body where the ‘spines’ will meet the smooth face and belly. -
Carve the first row:
Using a sharp v-gouge or small loop tool, carve the first row of spines directly behind the face line. Start the stroke deep and pull backward, lifting out to create a tapered point. -
Continue texturing:
Work your way back towards the tail in staggered rows. Keep the carving strokes rhythmic and overlapping to simulate dense quills. -
Smooth the face:
Use a slightly damp sponge to wipe the face and belly area smooth, removing any clay crumbs from the carving process. -
Add facial features:
Attach two tiny flattened balls for ears just behind the eyes. Press in indentations for the eyes and attach a small ball for the nose tip.
Step 3: Decoration and Glazing
-
Bisque fire:
Allow the clay to dry slowly and completely before bisque firing it to cone 04. -
Apply spine color:
Brush a rich teal or dark green underglaze heavily over the carved spine area. Make sure it gets into all the deep crevices. -
Wipe back:
I prefer to use a damp sponge to wipe the surface of the spines gently. This leaves the teal color deep in the carved grooves while revealing the natural clay color on the raised ridges. -
Detail the face:
Use a fine liner brush and black underglaze to paint the nose tip and the eyes. You can add a tiny white dot to the eyes for a ‘glint’ of life. -
Dip in clear:
Once the underglaze is dry, dip the entire piece in a clear transparent glaze to seal it and make the colors pop. -
Final Fire:
Fire the piece again to the maturation temperature of your specific clay body (e.g., cone 5 or 6).
Make it rattle
Before sealing your initial pinch pots together, place small dried clay balls or ceramic beads inside. Your whistle will double as a gentle rattle when shaken.
Now you have a woodland creature that sings as beautifully as it looks on the shelf
Chameleon Whistle With Curled Tail Mouthpiece

This charming ceramic wind instrument disguises itself as a friendly chameleon, complete with textured skin and a clever curled tail that doubles as the mouthpiece. Its soft green body is highlighted with warm terracotta geometric patterns, making it as delightful to look at as it is to play.
Detailed Instructions
Materials
- White or light-colored earthenware clay (low-fire)
- Popsicle stick or wooden modeling tool
- Fettling knife
- Needle tool
- Slip (clay and water mixture)
- Underglazes: Mint green, terracotta/orange, black (for pupil)
- Sponge
- Small paintbrush
- Clear glaze (optional)
Step 1: Forming the Whistle Body
-
Pinch the bases:
Begin with two balls of clay, roughly the size of golf balls. create two pinch pots by pressing your thumb into the center and thinning the walls evenly. These will form the main hollow body. -
Join the pinch pots:
Score the edges of both pots using a needle tool and apply a liberal amount of slip. Press the open ends together firmly to create a sealed hollow sphere, trapping air inside. -
Shape the lizard:
Gently paddle or roll the sphere into an elongated oval shape. Pull a portion of the clay at one end to begin suggesting the head, and pinch the opposite end slightly to prepare for the tail attachment. -
Construct the voicing:
Create a solid block of clay for the tail/mouthpiece area. Using a popsicle stick, create the fipple mechanism by cutting a 45-degree wedge (the window) and carefully tunneling an airway that splits the air stream against the sharp edge of the wedge. -
Attach the mouthpiece:
Score and slip the whistle mechanism onto the rear of the body. Test the sound immediately; if it doesn’t whistle, adjust the angle of the wedge before proceeding.
Step 2: Sculpting Details
-
Form the curled tail:
Roll a tapered coil of clay and attach it to the end of the mouthpiece block. Curl it upwards into a tight spiral, blending the seams smoothly so it looks like a natural extension of the body. -
Add the legs:
Shape four short, sturdy sausage shapes for legs. Attach them to the lower body using the score-and-slip method, bending them slightly forward to give the chameleon a poised, ready-to-move stance. -
Create the eyes:
Roll two small balls of clay. Press them firmly onto the sides of the head. Use a small molding tool to flatten a circular area in the center of each ball for the eyeball, leaving a raised eyelid rim around it. -
Adding the mouth:
Use a fettling knife to slice a gentle curve horizontally across the front of the face to create the wide mouth. Smooth the edges of the cut with a damp finger so they aren’t sharp. -
Spine details:
Pinch a small amount of clay along the spine to create a ridge. Using a needle tool, notch this ridge to create the spiky scales running from the head down the back.
No Sound?
If the whistle stops working after adding details, debris likely fell into the airway. Use your flat stick to gently clear the passage again while the clay is leather-hard.
Step 3: Surface Decoration
-
Carving the pattern:
Lightly sketch a grid of diamond or square shapes on the chameleon’s flanks with a needle tool. I find it helpful to draw these lightly first before carving deeper lines to define the borders. -
Texturing the skin:
Use the point of a needle tool to gently stipple the areas of ‘skin’ outside the geometric patches, giving the clay a pebbled, reptile-like texture. Keep the texture areas random for a natural look. -
Bisque firing:
Allow the piece to dry slowly under plastic to prevent cracking, then bisque fire it according to your clay body’s instructions. -
Applying base color:
Dilute a mint green underglaze slightly with water and wash it over the entire body. Use a damp sponge to wipe back the high points, leaving the green pigment settled into the stippled texture and carved lines. -
Painting the accents:
Using a fine brush, carefully fill in the geometric squares and the spinal ridge with terracotta orange underglaze. Add dashed lines on the legs and tail for continuity. -
Final details:
Paint the pupil of the eye pitch black. Finish with a matte or clear glaze if desired, or leave it unglazed for a natural stone-like feel.
Clean Lines
For the crispest geometric patterns, carve your lines when the clay is ‘leather hard’—neither sticky nor dry. This prevents the edges from dragging or chipping.
Once fired, you’ll have a playful little reptile that sings as well as it sits
Ladybug Whistle With Spot Finger Holes
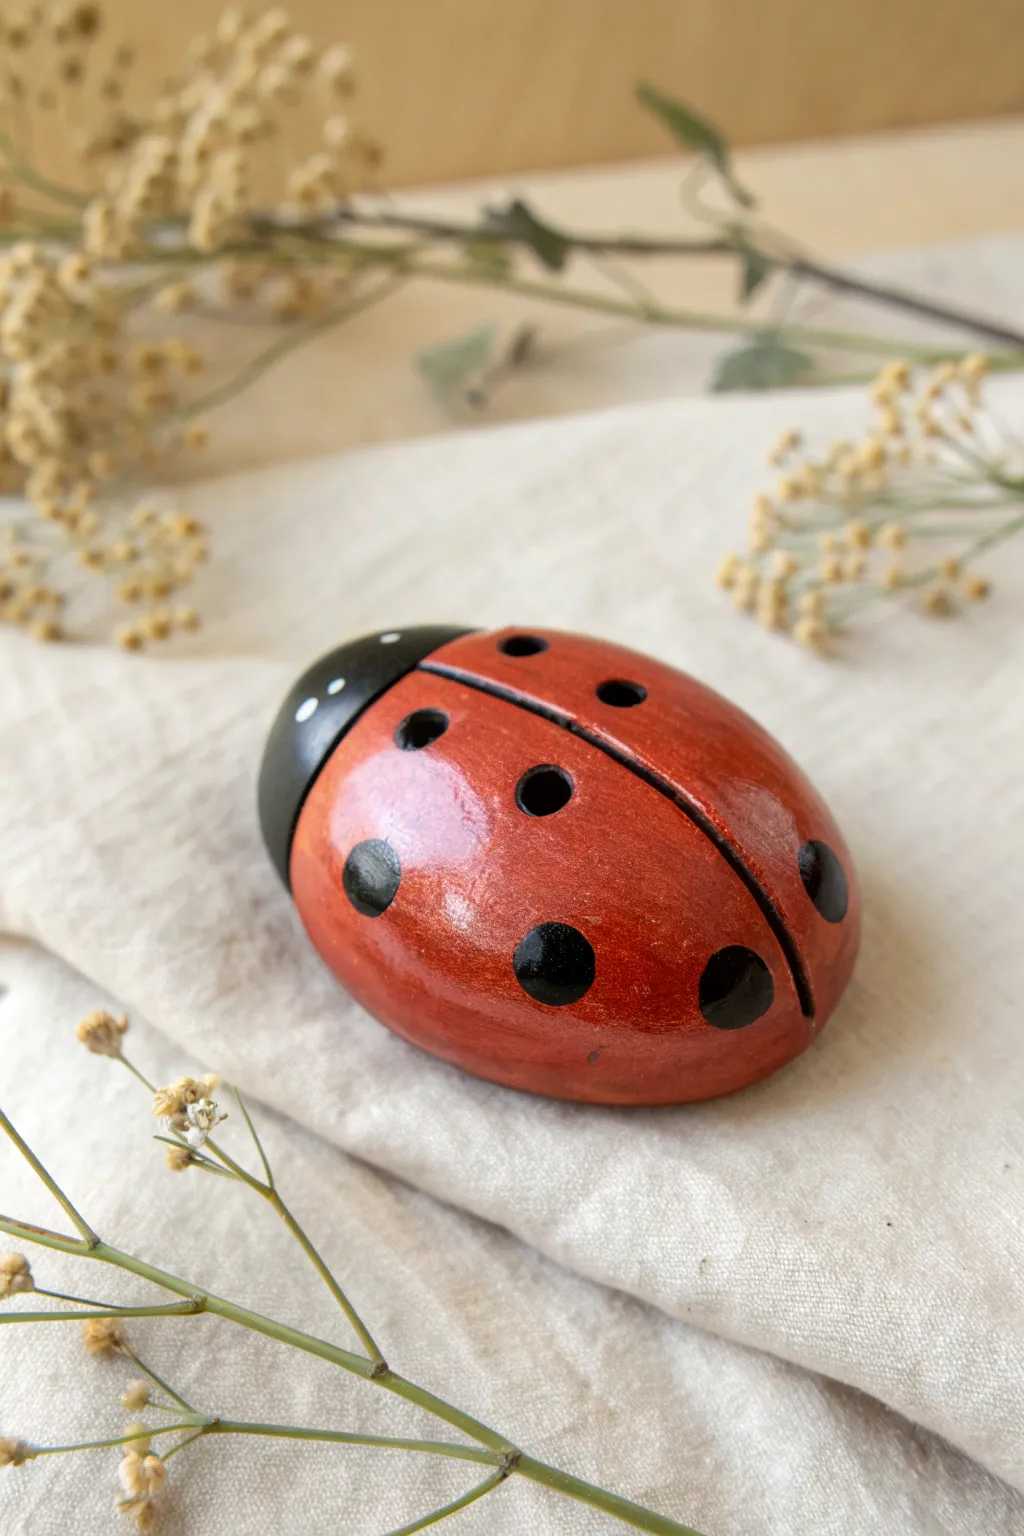
Transform a simple pinch pot into a delightful ladybug whistle that fits continuously in the palm of your hand. This charming instrument features a rich red glazed finish with classic black spots that cleverly double as finger holes for changing pitch.
Step-by-Step
Materials
- Earthenware or polymer clay
- Popsicle stick or modeling tool
- Small dowel or round stick (approx. 5mm)
- Acrylic paints (Red, Black, White)
- High-gloss varnish or glaze
- Small paintbrush
- Needle tool
- Water for smoothing
Step 1: Forming the Body
-
Shape the base:
Begin with a ball of clay roughly the size of a plum. Gently pinch into the center to open it up, creating a simple, thick-walled pinch pot shape. -
Close the form:
Slowly pinch the rim of the pot inward until the edges meet, trapping a hollow pocket of air inside. Seal the seam completely and smooth the clay until you have a seamless, egg-like oval. -
Flatten the bottom:
Tap the oval gently against your work surface to create a flat belly. This ensures your ladybug won’t roll away when placed on a table.
Clean Sounds Only
If the whistle sounds breathy, the bevel edge is likely dull. Re-sharpen the ramp angle so it splits the air cleanly like a knife blade.
Step 2: Constructing the Whistle Mechanism
-
Make the mouthpiece:
At one end of the oval (where the head will be), create a rectangular mouthpiece shape by flattening the clay slightly. Insert a popsicle stick horizontally into this end to create the windway. -
Create the bevel:
On the underside of the ladybug, measure about an inch from the mouthpiece opening. Use a needle tool to cut a small square window. Then, use your tool to create a sharp 45-degree angle ramp (the bevel) splitting the airflow from the mouthpiece. -
Test the sound:
With the popsicle stick removed, blow gently into the mouthpiece. Adjust the angle of the bevel carefully until you get a clear, clean whistling tone.
Step 3: Adding Details & Tuning
-
Define the wings:
Use a needle tool or modeling knife to score a deep line down the center of the ladybug’s back, stopping just before the head area to suggest separate wing casings. -
Define the head:
Score a horizontal curved line across the front portion to separate the black head section from the red body. -
Create finger holes:
Using your small dowel tool, punch four distinct holes into the back of the ladybug—two on each side of the center line. These will become the spots. -
Check the pitch:
Blow the whistle again while covering and uncovering these new holes to ensure they alter the sound effectively. Clean up any clay debris from inside the holes. -
Dry or bake:
Allow the clay to dry completely (if air-dry) or bake according to the manufacturer’s instructions for polymer clay.
Make it a Family
Create different sizes of ladybugs. Smaller clay chambers produce higher pitches, while larger ones will sound deeper.
Step 4: Painting and Finishing
-
Base coat the body:
Paint the main body area with a deep, warm red acrylic paint. You may need two coats for a solid, opaque coverage. -
Paint the head:
Carefully paint the front section (the head area) with a rich black paint. -
Paint the spots:
Using a fine-tip brush, paint black circles around the finger holes you created earlier. Add a few extra painted-only spots near the bottom edges for balance. -
Add the eyes:
Dip the non-brush end of a paintbrush into white paint and dot two small eyes onto the black head section. -
Seal for shine:
Once all paint is fully dry, apply a generous coat of high-gloss varnish. This mimics the hard, shiny shell of a real beetle.
Enjoy playing simple tunes on your glossy new pocket instrument
Mushroom Whistle With Stem Mouthpiece
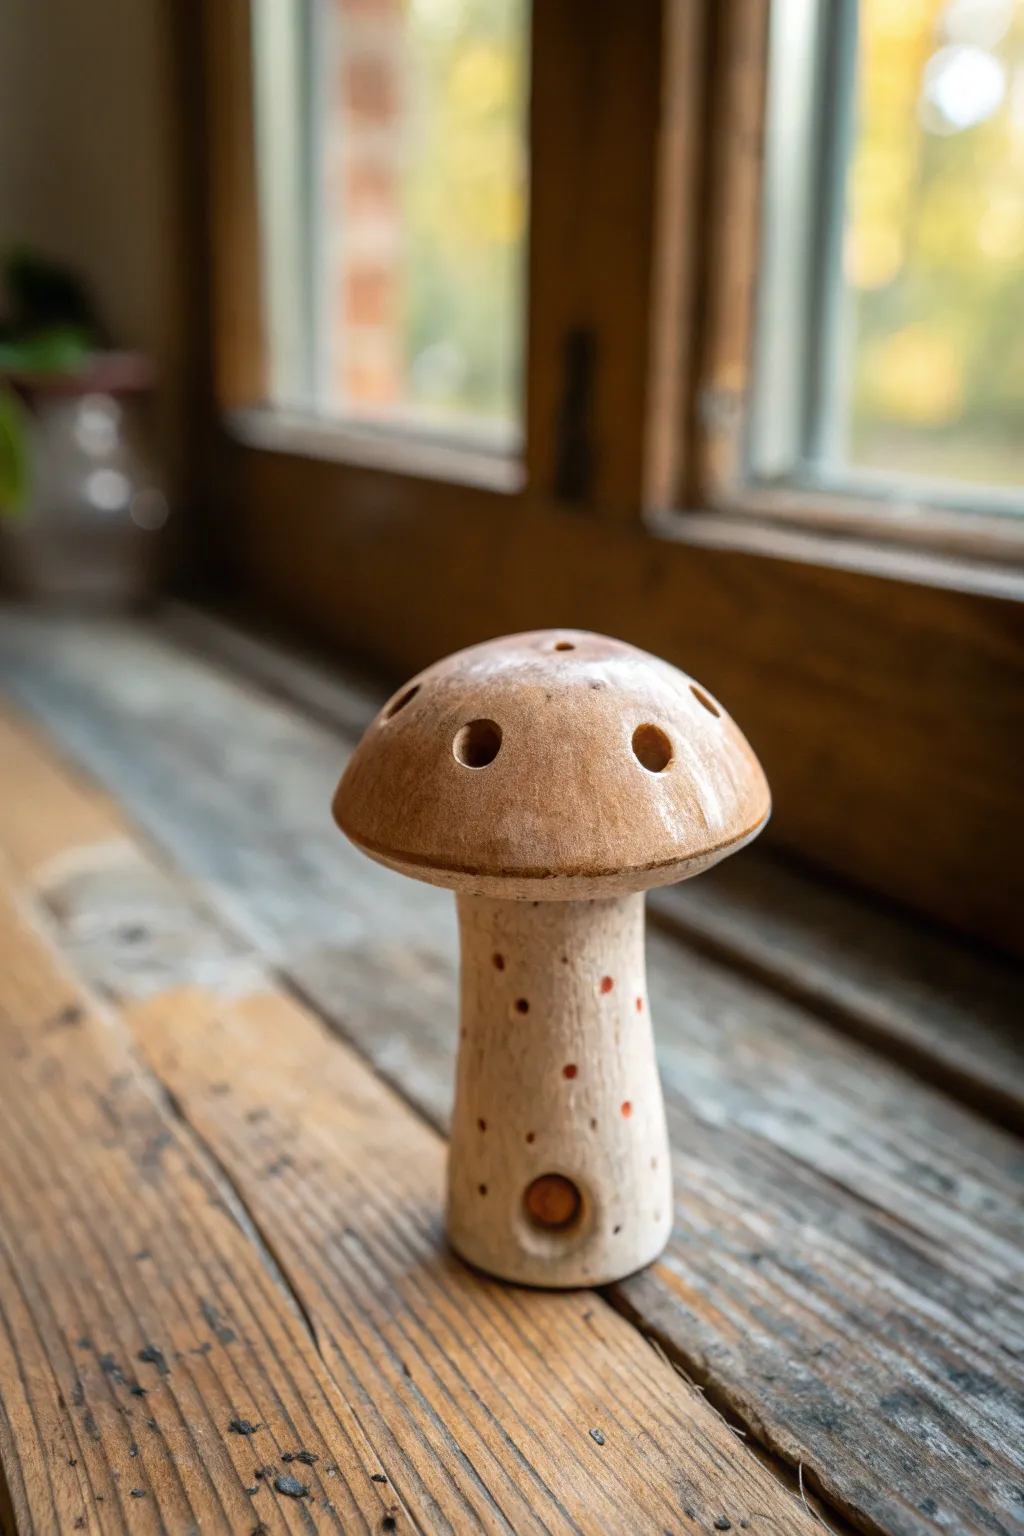
This charming little mushroom isn’t just a garden decoration; it hides a musical secret within its stem. With a speckled stalk and a classic brown cap, this clay project combines basic pinch pot techniques with the mechanics of a functional whistle.
How-To Guide
Materials
- Earthenware or stoneware clay (a smooth body works best)
- Popsicle stick or wooden modeling tool
- Fettling knife
- Sponge
- Red and orange underglazes
- Clear glossy glaze
- Pointed tool (pin tool or needle tool)
- Small round paintbrush
- Slip (clay mixed with water)
Step 1: Forming the Whistling Stem
-
Shape the base:
Start with a ball of clay roughly the size of a golf ball. Gently roll it into a cylinder that is slightly wider at the bottom than the top, creating a classic mushroom stalk shape. -
Hollow the stem:
Hold the cylinder in one hand and use your thumb to press into the wide bottom end, pinching outwards to hollow out the stem. Leave the top end solid and closed for now. -
Construct the mouthpiece:
Flatten the bottom of the stem slightly so it stands up. You might need to add a small rectangular slab of clay to the bottom to create a dedicated mouthpiece area that juts out slightly. -
Create the airway:
Insert a popsicle stick horizontally into the mouthpiece area to create the windway. Then, carefully cut a sharp, 45-degree angle hole (the bevel) on the vertical side of the stem so that the sharp edge splits the air coming from your popsicle stick channel. -
Test the sound:
Before attaching anything else, blow gently through the mouthpiece. If it doesn’t whistle, adjust the angle of the bevel or clear any clay crumbs from the airway. This is the most critical step.
Silent Whistle?
If you hear rushing air but no tone, the air hitting the bevel isn’t splitting correctly. Re-insert the stick and adjust the sharp wedge edge up or down incrementally.
Step 2: Sculpting the Cap
-
Pinch the cap:
Take a second ball of clay, slightly larger than the first, and form a pinch pot. Press your thumb into the center and rotate, pinching walls of even thickness to create a dome shape. -
Refine the rim:
Smooth out the edges of your pinch pot. You can gently tap the rim on a flat surface to create a consistent, level edge where it will meet the stem. -
Prepare connection points:
Score the top of the stem (the closed end) and the center underside of the cap heavily with a needle tool. Apply a generous amount of slip to both scored areas. -
Attach cap to stem:
Press the cap firmly onto the stem. Wiggle it slightly to seat it securely, then use a modeling tool to blend a small coil of clay underneath the cap connection for extra strength if needed. -
Open the resonance chamber:
Using a needle tool, poke a hole from the hollow stem up into the hollow cap. This connects the two chambers, allowing the large cap to act as a resonator for deeper notes.
Step 3: Detailing and Surface Decoration
-
Create sound holes:
Using a small circular cutter or the back of a paintbrush, punch 4-6 holes around the top of the mushroom cap. These are functional tuning holes that can change pitch, as well as decorative elements. -
Texture the stem:
Take a scratchy tool or a stiff-bristled brush and drag it vertically down the stem to create a bark-like texture. -
Add the spots:
Using a needle tool, poke shallow, random indentations all over the stem. These will be filled with color later to mimic the spots seen in the reference image. -
Clean up the bevel:
I always double-check the whistle mechanism one last time before drying. Use a small, clean brush to remove any clay burrs from the bevel hole that might have been created while handling the mushroom. -
Dry partially:
Let the mushroom dry to a leather-hard state. This makes it easier to paint without smudging the texture.
Resonance Tip
Make sure your connection between the stem and cap is airtight. Any unintended holes in the seam will leak air and ruin the sound quality.
Step 4: Firing and Glazing
-
Apply stem color:
Using a fine-tip brush, dab small dots of red or orange underglaze into the indented spots on the stem. Leave the rest of the stem bare to show the natural clay color. -
Glaze the cap:
Paint the cap with a brown or tan glaze. For the look in the photo, wipe back some of the glaze with a sponge so it stays darker in the recessed holes but lighter on the surface. -
Bisque fire:
Fire the piece to a bisque temperature suitable for your specific clay body (usually cone 04 or 06). -
Final finish:
If you want the shiny finish seen on the cap in the photo, apply a clear gloss glaze over the entire piece (except the bottom) and fire again. Be careful not to let glaze thick clog the whistle airway.
Place your finished mushroom near a sunny window to let the light play off the glazed cap while you enjoy its earthy tune
Teapot Whistle With Spout Mouthpiece
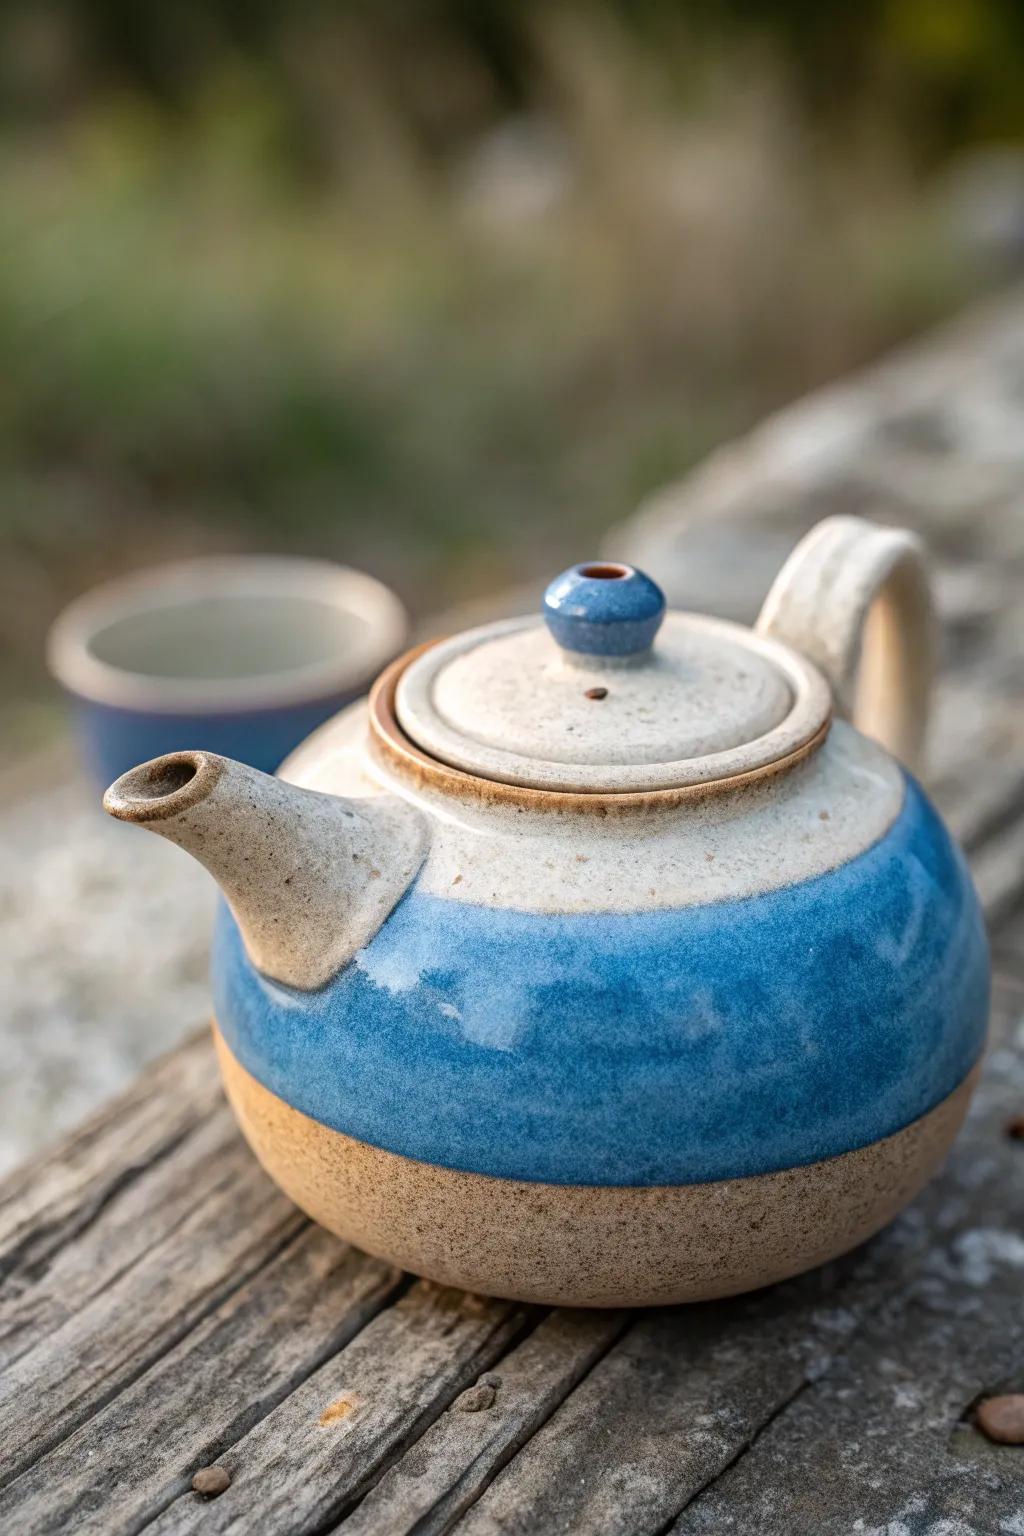
This charming ceramic whistle disguises itself as a rustic, wheel-style teapot with distinct bands of speckled cream and ocean blue. By creating a hollow vessel and turning the spout into a functional mouthpiece, you craft a whimsical instrument that looks right at home on a tea tray.
Detailed Instructions
Materials
- Stoneware clay (speckled or buff)
- Small rolling pin
- Popsicle stick or modeling tool
- Whistle voicing tool (or sharpened dowel)
- Slip and scoring tool
- Needle tool
- Gloss blue glaze (cone 5/6 recommended)
- Clear or cream glaze
- Wax resist
- Paintbrushes
Step 1: Forming the Body
-
Pinch pot base:
Start with a ball of clay roughly the size of a tangerine. Insert your thumb and pinch evenly while rotating to create a deep, rounded bowl shape. Keep the walls somewhat thick (about a 1/4 inch) to support the later additions. -
Closing the form:
Gently curve the rim of your bowl inward to create a squatter, enclosed shape, leaving a small opening at the very top where the lid would sit. This enclosed volume is essential for the sound chamber. -
Refining the shape:
Use a wooden paddle or flat spatula to gently tap the bottom, creating a flat foot so the teapot sits stable without rolling.
Step 2: Constructing the Spout Mechanism
-
Rolling a coil:
Roll a short, thick coil of clay for the spout. It should be tapered, wider at the base where it attaches to the pot and narrower at the tip. -
Creating the channel:
Insert a skewer or narrow tool through the length of the spout to create the airway. Flatten the tip slightly to form a comfortable mouthpiece. -
Cutting the voicing window:
On the underside of the spout (or the side facing the pot, depending on your airflow preference), cut a small rectangular window about halfway down. Use your voicing tool to sharpen the edge of this window at a 45-degree angle—this ‘splitting edge’ is what creates the sound. -
Attaching the spout:
Score and slip the attachment point on the teapot body. Press the spout firmly into place, ensuring the airway is clear. Pierce a hole through the body wall inside the spout attachment so air can travel into the main chamber. -
Testing the tone:
Before sealing everything too tightly, blow gently through the mouthpiece. Adjust the angle of the splitting edge until you get a clear, strong whistle, then smooth the attachment seam.
Clear Airway Tip
Glaze can easily clog small airways. Apply a drop of wax resist inside the mouthpiece opening and the voicing window edge before glazing to keep the whistle functional.
Step 3: Adding Details
-
Creating the lid:
Roll a small slab and cut a circle slightly larger than the top opening. Add a smaller ring of clay underneath so it seats securely into the teapot’s mouth. -
Lid knob:
Form a tiny ball of clay and attach it to the center of the lid. Use your thumb to create a slight indentation or cup shape on top for that authentic wheel-thrown knob look. -
Handle fabrication:
Pull or roll a small strap of clay. Curve it into an ear shape and attach it opposite the spout using the score-and-slip method. Keep the handle relatively small to match the scale of the whistle. -
Surface smoothing:
Use a slightly damp sponge to smooth out any fingerprints or harsh tooling marks, ensuring the transition between the spout and body looks seamless.
Tuning the Note
Want a deeper note? Make the hollow chamber volume larger. For a higher pitch, make the body smaller. You can tune it while the clay is leather hard.
Step 4: Glazing
-
Bisque firing:
Allow the piece to dry slowly and completely before bisque firing it to the appropriate temperature for your clay body. -
Waxing the raw clay:
Apply wax resist to the bottom third of the teapot and the very rim of the lid. This preserves the beautiful raw, speckled clay texture seen in that bottom band. -
Applying the blue band:
Carefully brush a thick band of blue glaze around the middle section of the teapot body. I find that rotating the pot on a banding wheel helps get that crisp, straight line. -
Glazing the top:
Apply a cream or clear glaze to the top ‘shoulder’ of the teapot and the lid. Let the blue and cream glazes meet or slightly overlap for a natural transition. -
Knob accent:
Dip just the very top knob of the lid into the blue glaze to tie the color scheme together. -
Final wipe:
Clean any stray glaze off the unglazed bottom section or the mouthpiece area (to prevent sticking during firing) and fire to cone 5 or 6.
Once cooled, your little teapot is ready to sit on a shelf as art or be played as a unique musical instrument
Monster Whistle With Big Teeth Window
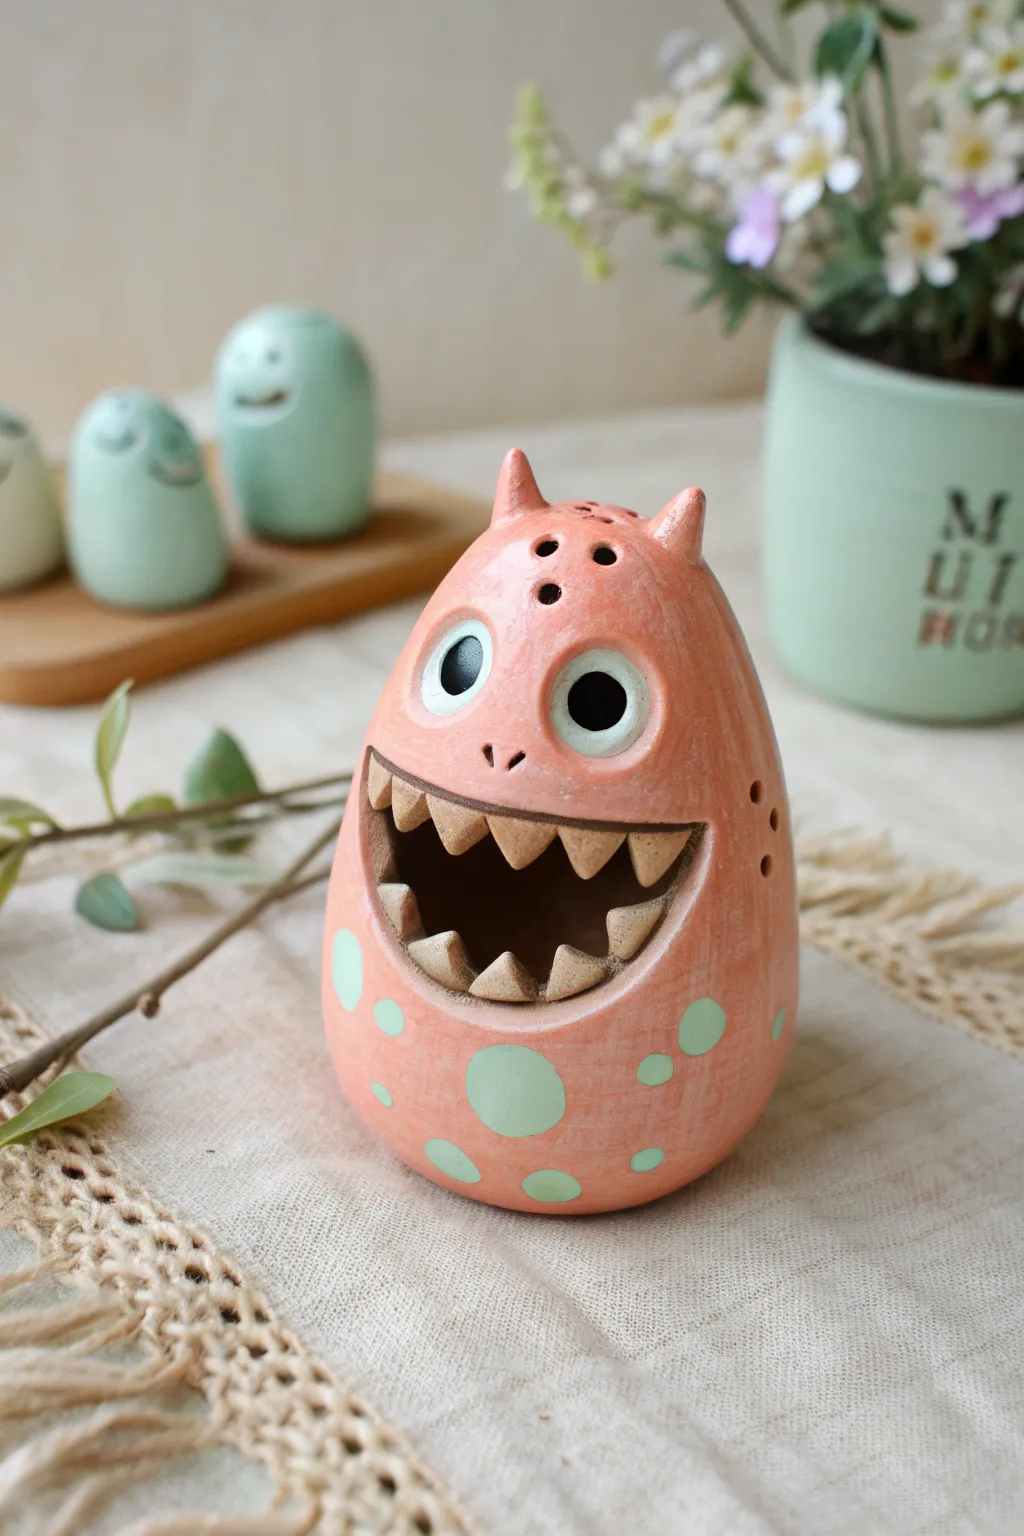
This charming ceramic whistle features a wide, toothy grin that acts as a sound chamber window, giving it loads of personality. With its coral-pink glaze, teal polka dots, and expressive eyes, it’s a playful project that sounds as fun as it looks.
Step-by-Step Guide
Materials
- Stoneware or earthenware clay (light color recommended)
- Small wooden modeling tools
- Popsicle stick or fettling knife
- Needle tool
- Slip (clay mixed with water) and scoring tool
- Underglazes: Coral/Salmon Pink, Teal/Mint Green, White, Black
- Clear transparent glaze
- Small paintbrush
- Sponge
Step 1: Forming the Base Body
-
Pinch the main form:
Start with a ball of clay roughly the size of a tennis ball. Insert your thumb and start pinching the walls evenly to create a hollow, egg-shaped vessel. The walls should be about ¼ inch thick throughout. -
Close the form:
Gently gently taper the top of your pinch pot inward until the clay meets, closing the sphere completely. Smooth the seam thoroughly so trapped air is sealed inside. -
Refine the egg shape:
Roll the closed hollow form gently on your table to create a smooth, elongated egg shape. The narrower end will be the top of the monster’s head. -
Create the flat base:
Tap the wider bottom of the egg firmly against your work surface to create a flat spot so the monster stands upright without wobbling.
Clear The Airway
Glaze can easily clog the whistle mechanism. Before the final firing, double-check the airway with a needle tool to ensure the sound path remains open and clear.
Step 2: Carving the Mouth and Whistle Mechanism
-
Cut the mouth opening:
Using a fettling knife or needle tool, cut a large, wide semi-circle out of the front lower section. This ‘window’ will be the mouth. Remove the clay but save it for later. -
Form the mouthpiece:
On the back of the monster (opposite the mouth), add a small wedge of clay near the top to form the mouthpiece area, blending it seamlessly into the body. -
Create the airway:
Insert a flat tool (like a popsicle stick) through the mouthpiece to create the airway. It should aim towards the sharp edge of a small hole you will cut on the top of the head just above the eyes. -
Construct the bevel:
Carefully cut a small rectangular window on the top of the head. Position the edge of this window so it splits the air coming from your mouthpiece. Adjust until you get a clear whistle sound.
Step 3: Adding Features and Details
-
Add the teeth:
Roll a small coil of clay and attach it inside the upper and lower lips of the mouth opening. Use a modeling tool to carve and separate this strip into triangular teeth. -
Sculpt the eyes:
Form two small balls of clay for eyeballs and press them onto the upper face. Roll tiny coils to wrap around them as eyelids, blending the outer edges into the head. -
Attach the horns:
Shape two tiny cones of clay. Score and slip the attachment points on top of the head, then press the horns on firmly. Add small drilled nostrils with your needle tool just below the eyes. -
Add texture:
Using a stiff bristle brush or a scratch tool, lightly cross-hatch the surface of the monster’s skin to give it a rough, organic texture, avoiding the smooth eyes and teeth. -
Vent the body:
Poke a few decorative holes near the top or sides (like the three small holes on the forehead) to ensure air can escape during firing, preventing explosions.
Monster Mash-Up
Try varying the teeth shapes! Swap triangular shark teeth for square, blocky teeth or rounded ‘baby’ teeth to completely change the character’s expression.
Step 4: Glazing and Finishing
-
Bisque fire:
Allow the clay to dry slowly and completely before bisque firing it in the kiln according to your clay body’s specifications. -
Apply base color:
Paint the main body with a coral or salmon pink underglaze. Apply 2-3 coats for solid coverage, but be careful not to clog the whistle airway. -
Detail specifically:
Paint the polka dots using a mint green or teal underglaze. Use white for the eyes and black for the large pupils. Leave the teeth unglazed or use a raw clay-colored wash for a natural look. -
Clear glaze:
Dip or brush a clear, transparent glaze over the entire piece (except the bottom) to seal the underglaze and make the colors pop. -
Final smooth firing:
Fire the piece a second time to the glaze temperature. Double-check that the bottom is wiped clean of glaze before loading the kiln.
Now you have a quirky little desk companion ready to make some noise
Geometric Pinch Whistle With Carved Facets
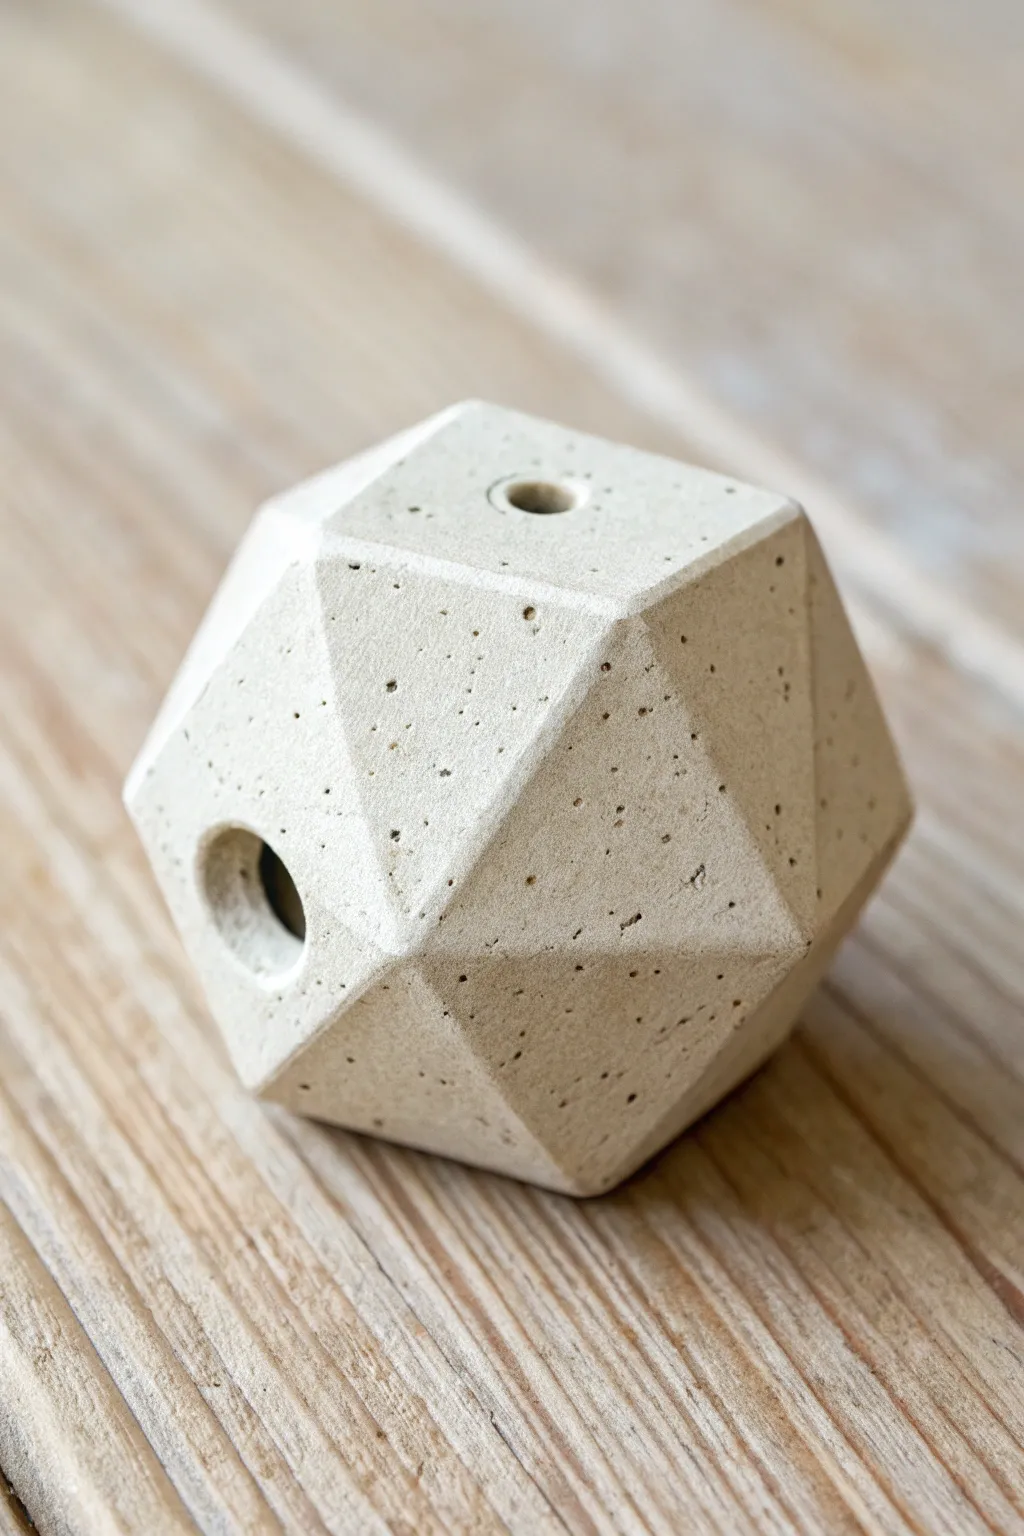
This project transforms a simple clay sphere into a modern, architectural-style whistle that looks almost like hewn stone. The clean, sharp facets catch the light beautifully, while the speckled clay body adds a natural, rustic texture.
How-To Guide
Materials
- Speckled stoneware clay (mid-fire)
- Popsicle stick or fettling knife
- Pin tool or needle tool
- Surform tool (cheese grater style)
- Flexible metal rib
- Sponge and water
- Drill bit or hole cutter (small diameter)
- Sandpaper (fine grit)
Step 1: Forming the Whistle Body
-
Pinch a sphere:
Start with a ball of clay about the size of a lemon. Pinch it into a hollow sphere using the traditional pinch pot method—create two small bowls and join them, or pinch a single ball closed. -
Refine the shape:
Roll the hollow ball gently on your work surface to ensure it is perfectly round and the walls are even. Trapped air inside provides resistance, helping it hold its shape. -
Create the mouthpiece:
Form a small rectangle or cube of extra clay and attach it firmly to one side of the sphere to serve as the mouthpiece area. -
Construct the airway:
Using a popsicle stick or wedge-shaped tool, insert it into the mouthpiece to create the windway. Carefully angle it so it will direct air toward the sharp edge (bevel) you will cut next. -
Cut the bevel:
On the sphere body, just below where the mouthpiece meets it, cut a small, sharp 45-degree angle notch. This ‘blade’ splits the air to create sound. -
Test the sound:
Before proceeding, blow gently to ensure the whistle works. Adjust the angle of the blade or the airway until you get a clear tone.
Step 2: Carving the Facets
-
Firm up the clay:
Let the sphere dry to a stiff leather-hard stage. This is crucial—if the clay is too soft, the facets will warp; too hard, and they will chip. -
Plan the geometry:
Visualize an icosahedron or similar polyhedron. You want 20 or so triangular faces. You can lightly sketch lines with a pin tool if you want precision. -
Slice the first facet:
Using a sharp fettling knife or a wire cutter, slice off a triangular section of the sphere’s curve. I like to start near the top to establish a flat plane. -
Continue faceting:
Cut adjacent flat planes around the entire form. The goal is to remove all curved surfaces, replacing them with flat, angular faces. -
Preserve the mechanism:
Be extremely careful when carving around the mouthpiece and the bevel hole. You can facet these areas, but ensure you don’t slice into the airway itself. -
Refine the edges:
Once the general shape is carved, use a Surform tool or a flat rib to sharpen the ridges between the faces. The contrast between light and shadow relies on crisp edges.
Keep it crisp
Use a cheese-cutter style wire tool for the initial facet slices. It creates cleaner, flatter planes than a knife, which can sometimes drag or create suction marks.
Step 3: Finishing Touches
-
Drill finger holes:
To make this an ocarina-style instrument, carefully drill or cut 1-4 small holes on different facets. These will change the pitch. -
Tune the holes:
Test the sound as you create each hole. Start small; you can always make a hole larger to raise the pitch, but you can’t make it smaller easily. -
Smooth surfaces:
Use a barely damp sponge to wipe away clay crumbs, but avoid rounding over your crisp geometric edges. -
Final sanding:
Once bone dry (before firing), use fine-grit sandpaper to polish the flat faces. This reveals the beautiful speckling in the clay body. -
Bisque fire:
Fire the piece to cone 04. Wipe it down afterwards to remove dust. -
Glaze or leave bare:
For the look in the image, leave the exterior unglazed to highlight the raw clay texture. You can apply a clear matte glaze if you prefer protection. -
Final firing:
Fire to the maturation temperature of your specific clay body (e.g., Cone 6).
Color Pop
After bisque firing, rub a black or dark brown oxide wash into the cracks and pits, then wipe it back. This accentuates the speckles and geometric lines.
Listen to the clear, earthy tones your new geometric creation produces when played