When you’ve got a soft lump of play clay in your hands, the best ideas are the ones you can make fast—and instantly recognize. Here are my go-to play clay ideas that feel satisfying for beginners, super fun for kids, and still cute enough to display on a shelf.
Mini Play Clay Food Favorites
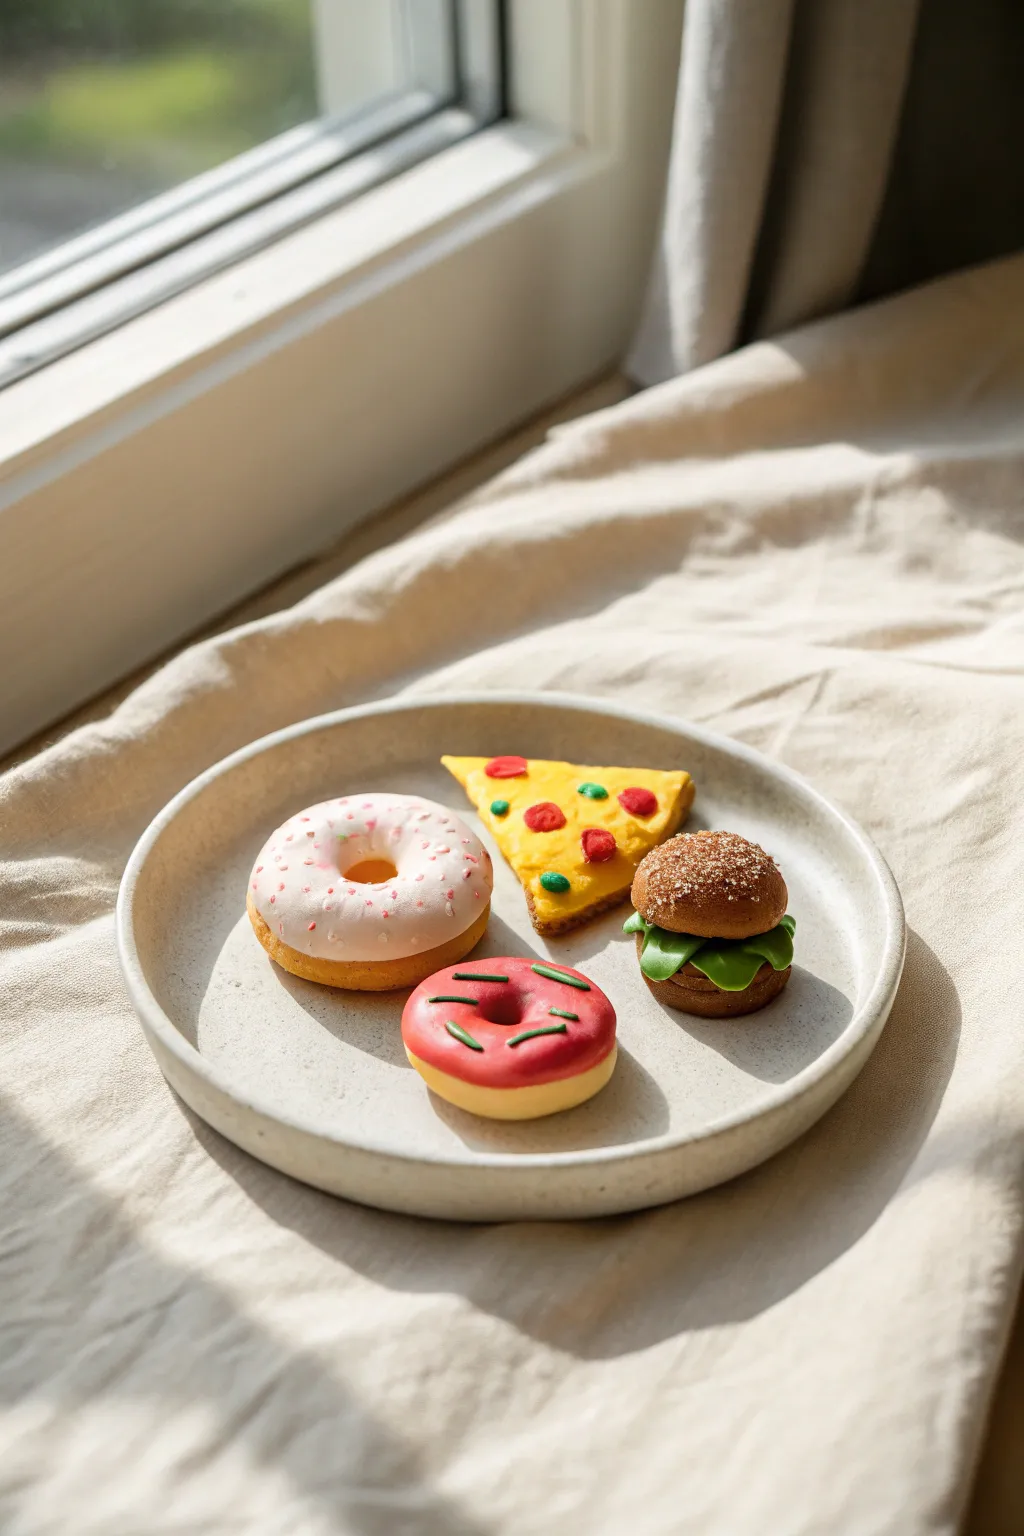
Create an adorable spread of bite-sized comfort foods that look good enough to eat but are perfect for play. This tutorial guides you through crafting realistic textures and vibrant tiny toppings for donuts, pizza, and a classic burger.
How-To Guide
Materials
- Polymer clay (tan/ochre, light pink, red, green, brown, white, yellow)
- Clay sculpting tools (needle tool, ball stylus)
- Texturing tool (toothbrush or crumpled foil)
- Liquid polymer clay or translucent liquid sculpey
- Soft pastel chalks in brown and orange tones (for shading)
- Small paintbrush
- Gloss glaze (optional)
Step 1: Crafting the Classic Pink Donut
-
Form the Base:
Start by conditioning the tan or ochre clay until soft. Roll it into a smooth ball about the size of a large marble, then gently flatten it into a thick disc shape. -
Create the Hole:
Use a medium-sized ball stylus or the back of a paintbrush to press a hole directly through the center. Widen the hole slightly by rotating the tool, smoothing the edges with your finger. -
Add Texture:
Gently tap a clean toothbrush or a ball of crumpled foil over the entire surface of the donut to mimic a baked cake texture. Lightly brush varying shades of brown pastel dust over the clay for a golden-brown finish. -
Apply the Frosting:
Make a thin, irregular patty from light pink clay. Lay it over the top of your donut, gently pressing the edges down so they look like dripping glaze. -
Add Sprinkles:
Roll extremely thin snakes of white and red clay. Cut them into tiny segments and press them gently into the pink frosting.
Texturing Tip
For ultra-realistic baked goods, brush ‘chalk pastel’ dust (shaved from art chalks using a blade) onto raw clay before baking. Use burnt ochre for perfectly toasted edges.
Step 2: Creating the Red Ring Donut
-
Shape the Dough:
Repeat the base creation process used for the pink donut, forming a tan ring and adding the realistic baked texture with your toothbrush tool. -
Top with Red Glaze:
Roll out a small piece of red clay. Cut a ring shape that matches the donut size but with wavy, organic inner and outer edges to simulate liquid glaze. -
Adhere the Glaze:
Carefully place the red ring on your textured base. Smooth the edges down onto the sides of the donut to ensure it looks connected. -
Decorate with Green:
Roll a very thin snake of green clay. Cut small pieces and arrange them in a random pattern on top of the red glazing.
Fixing Falling Parts
If your tiny toppings won’t stick, use a tiny drop of liquid polymer clay (or ‘Bake and Bond’) as glue between the pieces before baking.
Step 3: Sculpting the Pizza Slice
-
Form the Crust:
Shape tan clay into a thick triangle. Roll the wide end slightly backward to create a raised crust edge. Texture the crust thoroughly with your foil tool. -
Add Sauce and Cheese:
Mix a tiny bit of red clay with yellow to make an orange-yellow ‘cheese’ color. Flatten this onto the triangle, leaving the crust exposed. -
Create Toppings:
Make tiny flat circles of bright red clay for pepperoni slices. Add minuscule green bits for peppers or herbs. -
Assemble the Slice:
Press the toppings firmly into the cheese layer. I find that lightly texturing the cheese layer around the toppings adds extra realism.
Step 4: Assembling the Mini Burger
-
Make the Buns:
Create two domes of brown clay—one flattened for the bottom and a taller, rounder one for the top. Texture the top bun heavily. -
Texture the Top Bun:
After texturing, sprinkle real white sand or tiny bits of white clay on the top bun to look like sesame seeds. -
Form the Patty:
Make a dark brown disc for the meat. Use a needle tool to stipple the edges, giving it that rough, grilled ground beef texture. -
Add Lettuce:
Flatten a piece of green clay very thin. Tear the edges to make them ragged and fold the clay slightly to create ruffled lettuce leaves. -
Stack and Finish:
Stack the bottom bun, lettuce, meat patty, and top bun. Press gently to adhere layers without squishing the shapes. Bake all items according to your clay package instructions.
Now you have a charming fast food platter ready for imaginative play


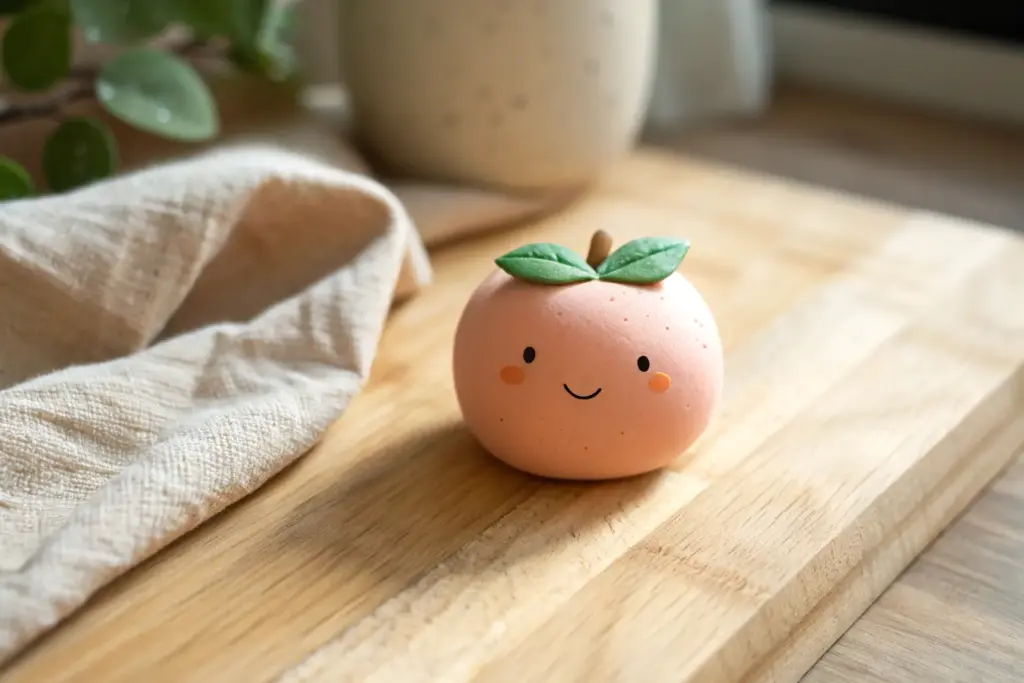
Cute Fruit Characters With Faces
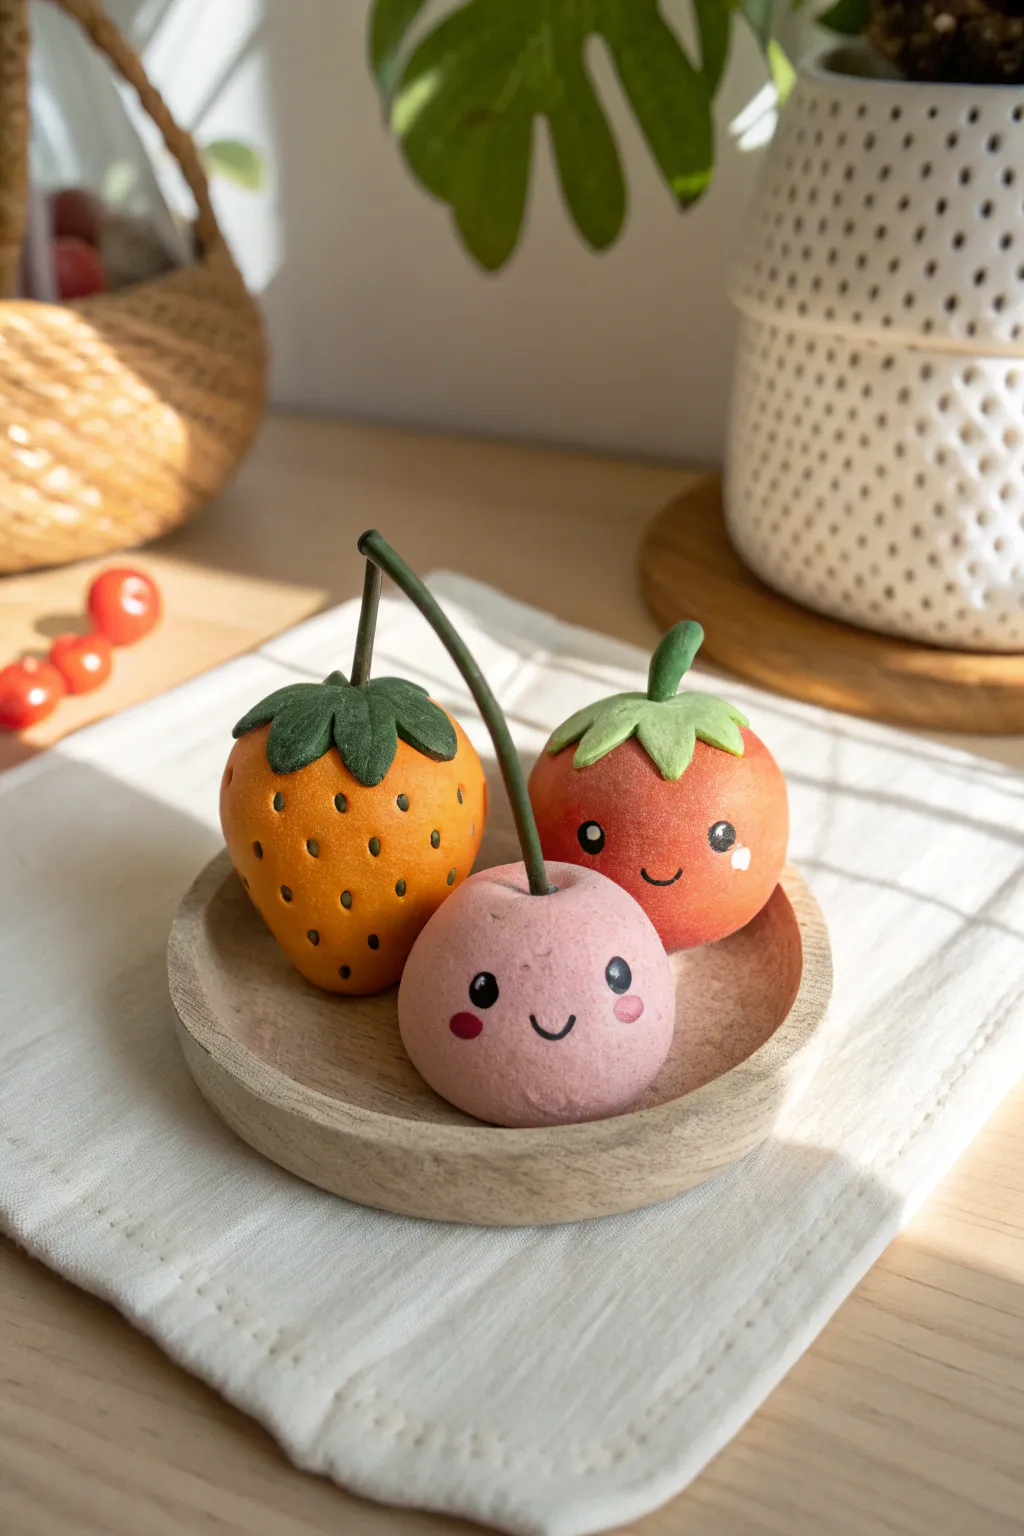
Sculpt a delightful little family of smiling produce featuring an orange strawberry, a ripe tomato, and a sweet pink cherry. These miniature clay figures rely on simple shapes and gentle dry brushing to achieve a soft and textured artisanal look.
Step-by-Step
Materials
- Polymer clay (orange, muted red, soft pink, dark green, light green)
- Black acrylic paint
- Pink acrylic paint or soft pastel
- Small dotting tool or toothpick
- Fine detail paintbrush
- Needle sculpting tool
- Coarse-bristled toothbrush or stiff brush (for texturing)
- Small piece of flexible wire (for stems)
- Matte varnish (optional)
Step 1: Sculpting the Tomato
-
Shape the Base:
Start by conditioning a ball of muted red clay roughly the size of a walnut. Roll it until it is perfectly smooth, then gently press the bottom against your work surface to create a flat base so it stands upright without wobbling. -
Add Texture:
Before adding details, take a coarse toothbrush or a stiff bristle brush and gently tap it all over the surface of the tomato. This removes fingerprints and gives the clay a lovely, organic matte texture. -
Create the Leaf Cap:
Flatten a small pea-sized amount of light lime green clay. Use a craft knife or needle tool to cut a messy star shape with about five or six points. -
Attach the Leaves:
Place the green star on top of your red ball. Gently press the points down so they conform to the curve of the tomato. -
Make the Stem:
Roll a tiny sausage of dark green clay. Press it into the center of the leaf cap, slightly curving the top so it looks whimsical.
Fingerprint Fix
If you forgot to texture and have visible fingerprints, dip a Q-tip in a tiny bit of rubbing alcohol or baby oil and gently smooth the clay surface before baking.
Step 2: Crafting the Strawberry
-
Form the Berry Shape:
Take a ball of orange clay—slightly smaller than the tomato—and shape it into a rounded cone. Flatten the widest part slightly for the top, and round off the bottom point so it isn’t too sharp. -
Texture the Surface:
Just like the tomato, give this shape a light stippling with your toothbrush to create that soft, velvety skin texture, but be careful not to squash the cone shape. -
Add Seed Indentations:
Using a needle tool or a very small dotting tool, press tiny holes evenly across the entire surface of the orange cone to simulate strawberry seeds. -
Sculpt the Strawberry Leaves:
Flatten a piece of dark green clay. Cut out separate teardrop shapes or a multi-pointed star that is larger and droopier than the tomato’s leaves. I find that making them slightly uneven adds to the realism. -
Stem Setup:
Embed a short piece of wire into the top center of the strawberry for stability, then cover the exposed wire with a thin layer of dark green clay to form a long, jaunty stem.
Make Them Jewelry
Insert a screw eye pin into the top of the fruit before baking instead of the clay stem. Once baked, attach jump rings to turn these into adorable charms or earrings.
Step 3: Forming the Cherry
-
Roll the Cherry:
Condition a ball of soft pink clay, making it the smallest of the three fruits. Roll it into a smooth sphere and flatten the bottom slightly. -
Create the Stem Divot:
Use a ball tool to press a deep, rounded indentation into the very top center of the pink sphere where the stem will emerge. -
Wire Support:
Cut a longer piece of wire (about 2 inches) and bend it into a gentle curve. Insert one end deeply into the cherry’s top indentation. -
Covering the Stem:
Roll a very thin snake of dark green clay. Carefully sheath the wire with the clay, smoothing it down until the metal is completely hidden.
Step 4: Baking & Refining
-
Bake:
Bake all three figures according to your polymer clay package instructions. Let them cool completely before painting.
Step 5: Painting the Faces
-
Paint the Eyes:
Using a fine detail brush or a dotting tool dipped in black acrylic paint, add two small, wide-set eyes to each fruit. Place them low on the shape for maximum cuteness. -
Add Highlights:
Once the black paint is dry, use a toothpick to place a tiny white dot in the upper corner of each eye to bring them to life. -
Draw the Smiles:
Paint a tiny, simple ‘U’ shape between the eyes using your finest brush. Keep the line thin and delicate. -
Apply Blush:
Dip a Q-tip or dry brush into pink pastel powder or very diluted pink paint. Gently dab rosy cheeks onto the sides of the cherry and tomato faces.
Now you have a trio of sweet characters ready to brighten up your desk or shelf


Veggie Pals for Pretend Cooking
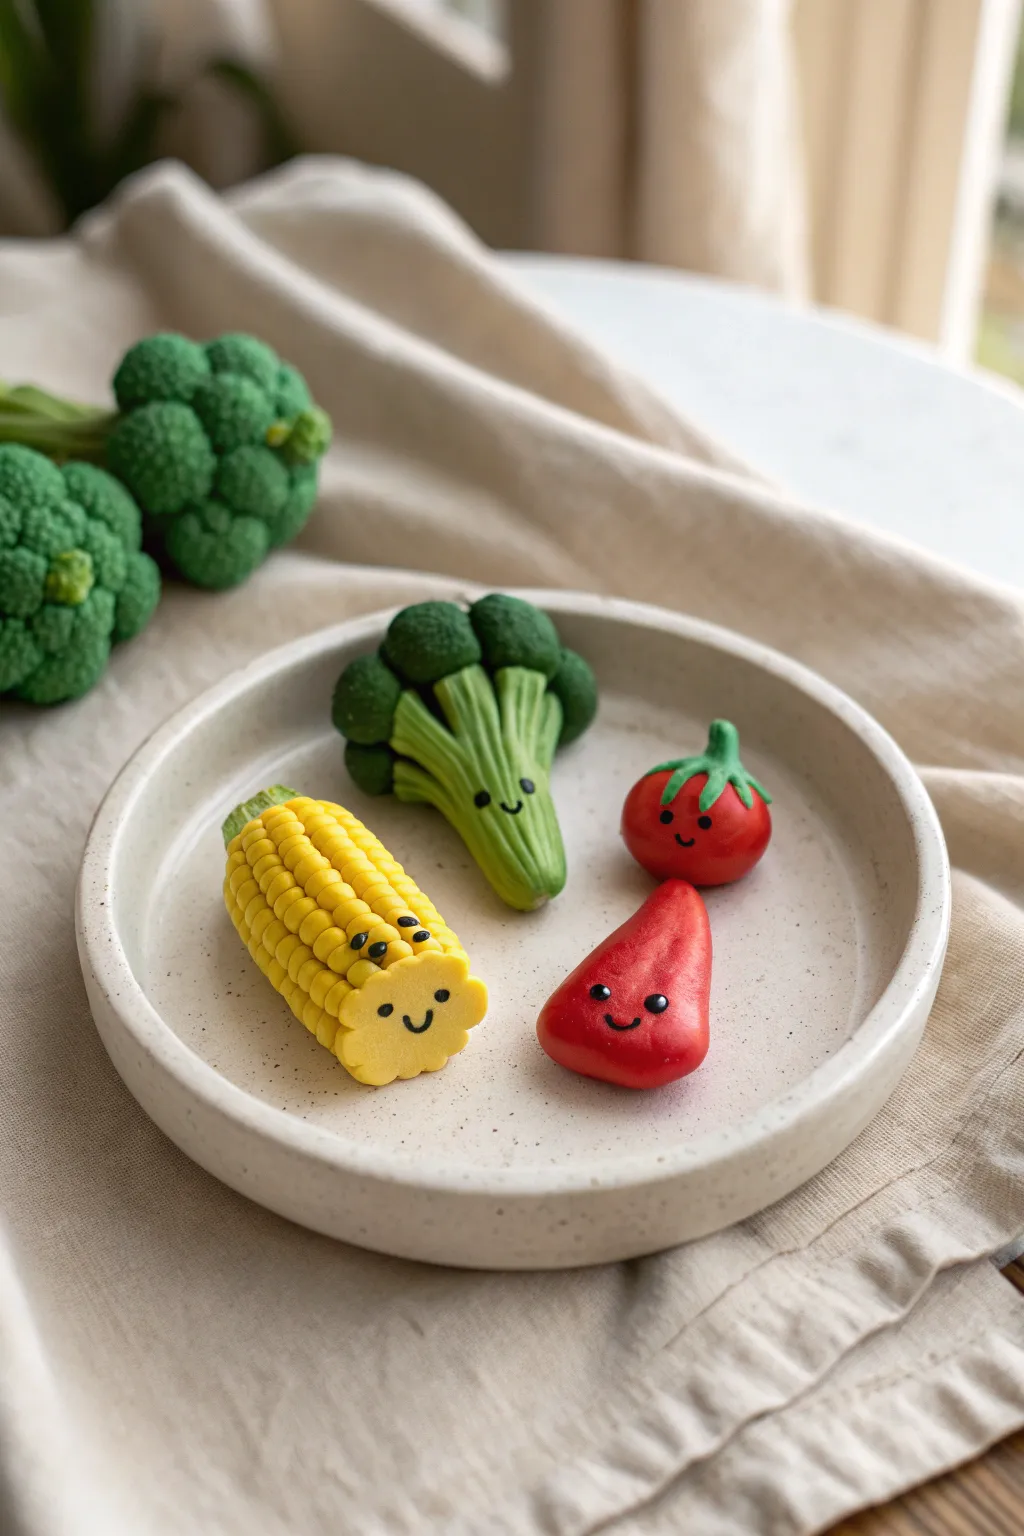
Bring your pretend play kitchen to life with these incredibly charming clay vegetables, each sporting a signature sweet smile. This project focuses on molding simple shapes and adding tiny, precise details to give ordinary produce extraordinary personality.
Step-by-Step Guide
Materials
- Polymer clay or air-dry clay (Yellow, Green, Red, Dark Green, Black)
- Clay sculpting tools (specifically a needle tool and a small rounded tool)
- Acrylic rolling pin
- Small blade or clay knife
- Clean work surface (ceramic tile or silicone mat)
- Oven (if using polymer clay) or drying rack
Step 1: Crafting the Corn Cob
-
Shape the base:
Start with a generous amount of yellow clay. Roll it into a thick cylinder that tapers slightly at one end, creating the core shape of a corn cob. -
Create the kernels:
Using a blade or the side of a sculpting tool, gently press horizontal and vertical grid lines all around the yellow cylinder. Keep the indentations fairly deep to simulate rows of kernels. -
Add the husk:
Take a small piece of light green clay and flatten it into a rough, leafy cap. Press this onto the wider (bottom) end of your corn cob to mimic the stalk attachment. -
Sculpt the face:
Before baking or drying, roll two tiny balls of black clay for eyes and a darker yellow or black thin snake for the smile. Press them gently onto the front of the cob. I find placing the eyes slightly wide apart adds extra cuteness.
Clean Hands, Clean Clay
Red and black clay can stain lighter colors like yellow. Always use baby wipes or wash hands thoroughly when switching clay colors to keep your corn bright.
Step 2: Building the Broccoli
-
Form the stalk:
Roll light green clay into a thick stalk shape that widens at the top. Use a blade to carve vertical grooves up the stem to give it a fibrous, realistic texture. -
Create florets:
Roll several medium-sized balls of dark green clay. Texture them by stippling the surface with a needle tool or an old toothbrush to look like florets. -
Assemble the head:
Press the textured dark green balls firmly onto the top of your light green stalk, arranging them in a tight cluster to form the broccoli head. -
Add personality:
Just like the corn, apply tiny black clay balls for eyes and a small curved mouth directly onto the smooth part of the light green stalk.
Make it a Keychain
Insert a metal screw eye pin into the top of the veggies before baking. Once hard, you can attach a keyring to take your veggie pal with you anywhere.
Step 3: Shaping the Tomato
-
Roll the body:
Take a portion of red clay and roll it into a smooth, perfect sphere. Tap it gently on your work surface to create a slightly flat bottom so it won’t roll away. -
Make the calyx:
With dark green clay, form a small star shape or several tiny teardrops. Join them at the center and place this little leafy crown on top of the red sphere. -
Stem detail:
Add a tiny vertical stem of green clay emerging from the center of your leafy crown. -
Apply the face:
Place your tiny black clay eyes and smile near the center of the red sphere, ensuring they are symmetrical.
Step 4: Modeling the Tiny Pepper
-
Shape the pepper:
Using red clay (perhaps slightly darker than the tomato if you have it), mold a cone shape with a rounded top and a slightly blunt point. -
Refine the form:
Gently press the sides to give it a slightly irregular, organic curve, typical of a bell pepper or chili. -
Final features:
Add the face low on the pepper’s body for a shy look, using the same black clay technique. Finish all pieces by baking or drying according to your clay package instructions.
Now you have a nutritious-looking set of friends ready for display or play


Simple Play Clay Animals From Basic Shapes
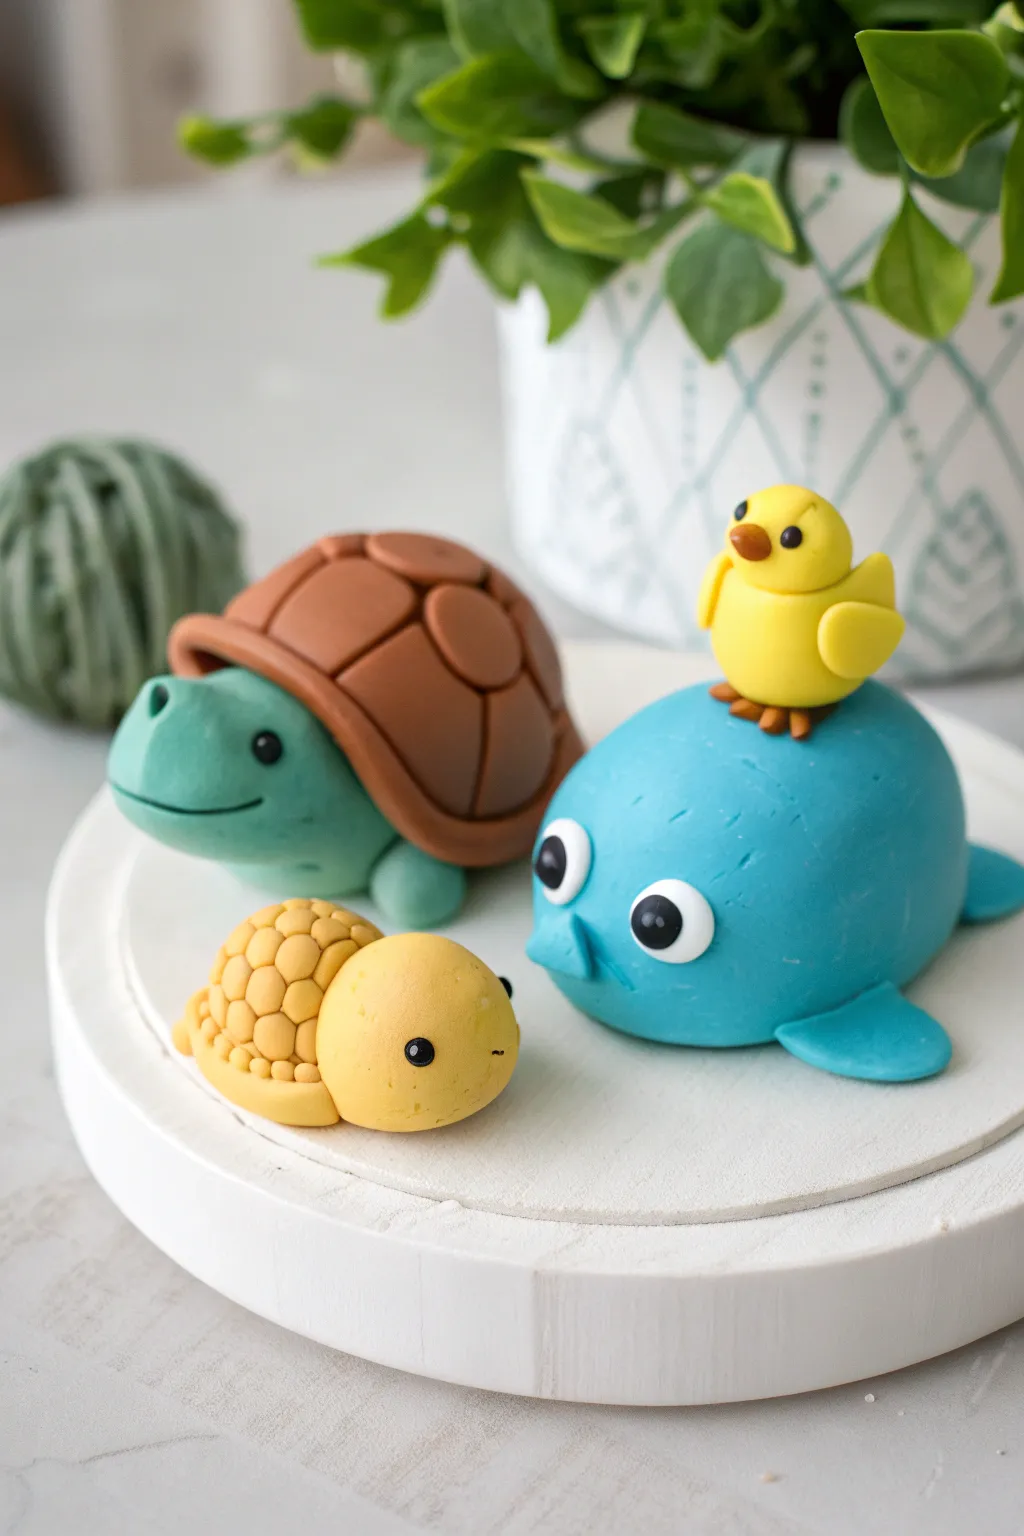
These adorable play clay figures transform simple spheres and ovals into a charming set of animal friends. With their smooth, bright colors and cartoonish features, they make a perfect beginner project for learning shape modeling.
Detailed Instructions
Materials
- Polymer clay or air-dry clay (Teal, Brown, Yellow, Bright Blue, White, Black)
- Clay sculpting tools (specifically a small knife tool and a dotting tool)
- Smooth work surface or silicone mat
- Rolling pin (optional)
- Small toothpick or wire (for structural support)
Step 1: The Large Turtle
-
Shape the Body:
Start by rolling a ball of teal clay, then gently press it into an oval shape for the turtle’s body. Pinch one end slightly to form a stubby tail. -
Form the Shell Base:
Take a portion of brown clay and roll it into a ball, then flatten the bottom so it becomes a dome. Make sure this dome is slightly larger than the turtle’s body width. -
Add Shell Details:
Roll small balls of brown clay and flatten them into discs. Press these onto the brown dome to create the scute pattern. I like to start with a central disc and surround it with others for symmetry. -
Attach the Shell:
Press the finished brown shell firmly onto the back of the teal body. -
Create the Head:
Roll a smooth ball of teal clay for the head. Use a tool to indent a wide, happy mouth line and two small nostrils. -
Add Eyes and Connect:
Press two tiny black clay balls into the head for eyes. Attach the head to the front of the body, blending the clay at the neck slightly for a secure hold.
Smooth Moves
Before attaching any parts, rub the clay with a tiny bit of baby oil on your finger. This removes fingerprints and creates that professional, polished look.
Step 2: The Little Yellow Friend
-
Yellow Body Base:
Roll a small ball of pale yellow clay and slightly elongate it to form the main body section. -
Texture the Shell:
Create a textured ‘shell’ by rolling many tiny balls of the same yellow clay. Press them closely together in rows over the back half of the body to mimic a bumpy texture. -
Head and Features:
Form a smaller, smooth ball of yellow clay for the head. Attach tiny black eyes and use a needle tool to add a tiny smile, then press the head onto the front of the textured body.
Step 3: The Whale and Chick
-
Mold the Whale Body:
Use a large amount of bright blue clay to form a smooth, rounded mound. This will be the whale’s main body. -
Add Flippers and Tail:
Shape two flattened triangles for side flippers and a smaller triangle for the tail. Press these onto the sides and back of the blue mound. -
Create Googly Eyes:
Flatten two small balls of white clay into discs and press them onto the front of the whale. Add smaller black discs on top for pupils. -
Shape the Chick Body:
Roll a small yellow ball for the chick’s body and a slightly smaller one for the head. Stack the head on top of the body. -
Wings and Beak:
Attach two tiny flattened yellow teardrops for wings. Add a minuscule orange triangle for the beak and tiny black dots for eyes. -
Final Assembly:
Add tiny orange feet to the bottom of the chick, then gently press the finished bird onto the top of the blue whale’s head.
Falling Apart?
If the chick won’t stay on the whale or heads keep drooping, insert a small piece of toothpick or wire between the pieces to act as an internal skeleton.
Now you have a cheerful collection of clay critters ready for display

The Complete Guide to Pottery Troubleshooting
Uncover the most common ceramic mistakes—from cracking clay to failed glazes—and learn how to fix them fast.
Silly One-Eyed Play Clay Monsters
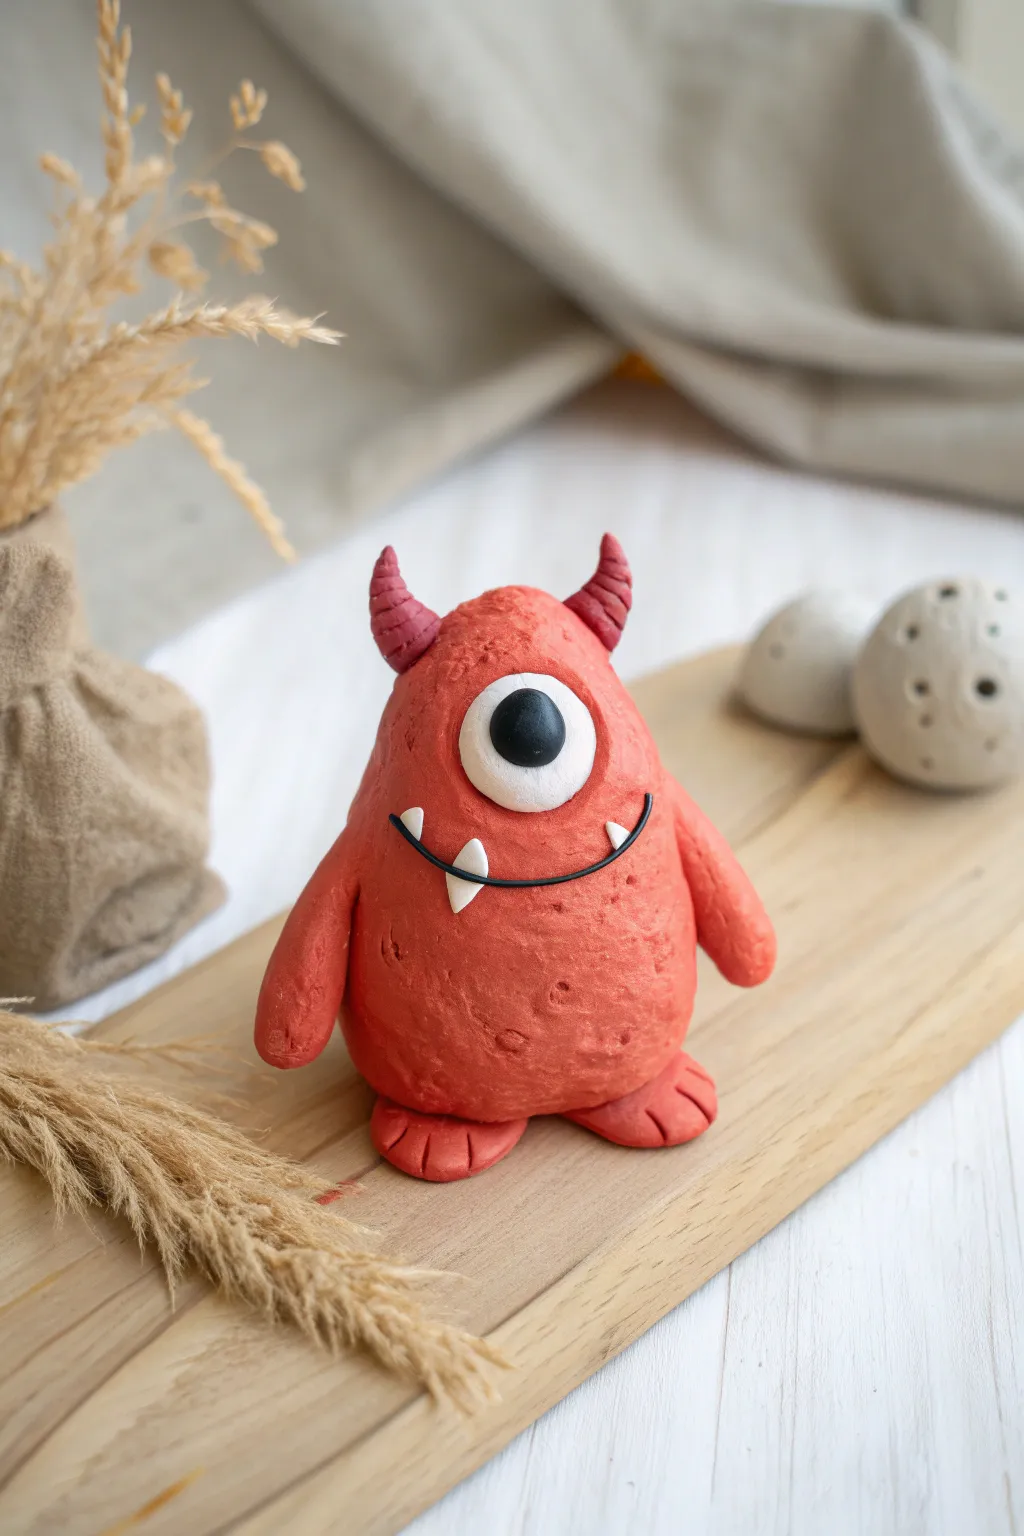
This charming, textured monster features a vibrant red body with a single oversized eye and whimsical horns. It is a perfect beginner project that introduces basic shaping, attaching techniques, and creating interesting surface textures.
Step-by-Step
Materials
- Red modeling clay (polymer or air-dry)
- White modeling clay
- Black modeling clay
- Dark red or burgundy clay (for horns)
- Toothpick or stiff bristle brush
- Modeling tool or butter knife
Step 1: Shaping the Base
-
Body Form:
Start by taking a large ball of red clay and rolling it between your palms. Gently shape it into a rounded pear shape, slightly wider at the bottom so it stands up on its own. -
Texturing:
Use a toothbrush or a stiff bristle brush to gently tap all over the surface of the body. This creates the stone-like, pitted texture seen in the photo instead of a smooth finish. -
Adding Details:
For extra character, use the rounded end of a tool to press a few larger, shallow indentations randomly around the monster’s belly.
Step 2: Creating the Face
-
Eye Base:
Flatten a small ball of white clay into a thick disc. Press this firmly into the upper center of the body. -
Pupil:
Roll a smaller ball of black clay and press it into the center of the white disc. Gently flatten it so it doesn’t bulge out too much. -
Highlight:
I like to add a tiny speck of white clay to the black pupil to give the eye a reflective spark of life. -
The Smile:
Roll a very thin snake of black clay. Curve it into a wide U-shape and press it onto the body just below the eye. -
Teeth:
Shape two tiny triangles of white clay. Attach one pointing up from the bottom lip and one pointing down from the top lip for a goofy snaggle-toothed look.
Seamless Attachment
For extra strength when attaching the heavy horns, insert a small piece of toothpick inside the joint to act as an internal anchor.
Step 3: Adding Limbs
-
Arms:
Roll two sausage shapes from the red clay. Round off one end of each for the hands. -
Attach Arms:
Press the arms onto the sides of the body. You can blend the clay at the shoulder joint slightly to ensure they stick well. -
Feet Prep:
Create two flattened oval shapes from red clay for the feet. -
Toes:
Use a knife tool to press two indentations into the front of each foot to create three distinct toes. -
Attach Feet:
Place the feet under the heavy base of the body, positioning them slightly turned out for stability.
Creative Colors
Make a whole monster family by varying body colors and textures! Try making a blue one with polka dots or a green one with scales.
Step 4: Horns and Finishing
-
Horn Shape:
Using the darker red or burgundy clay, roll two small cones. -
Ribbing:
Take a knife tool and gently press rings around the horns from the base to the tip to give them a ribbed texture. -
Curving:
Gently bend the tips of the horns slightly so they curve inward or outward depending on your preference. -
Final Assembly:
Press the horns onto the top of the head, one on each side. If using polymer clay, bake according to package instructions; otherwise, allow it to air dry completely.
Place your little red cyclops on a shelf where its goofy smile can brighten your day
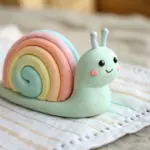
Tiny Snails With Swirly Shells
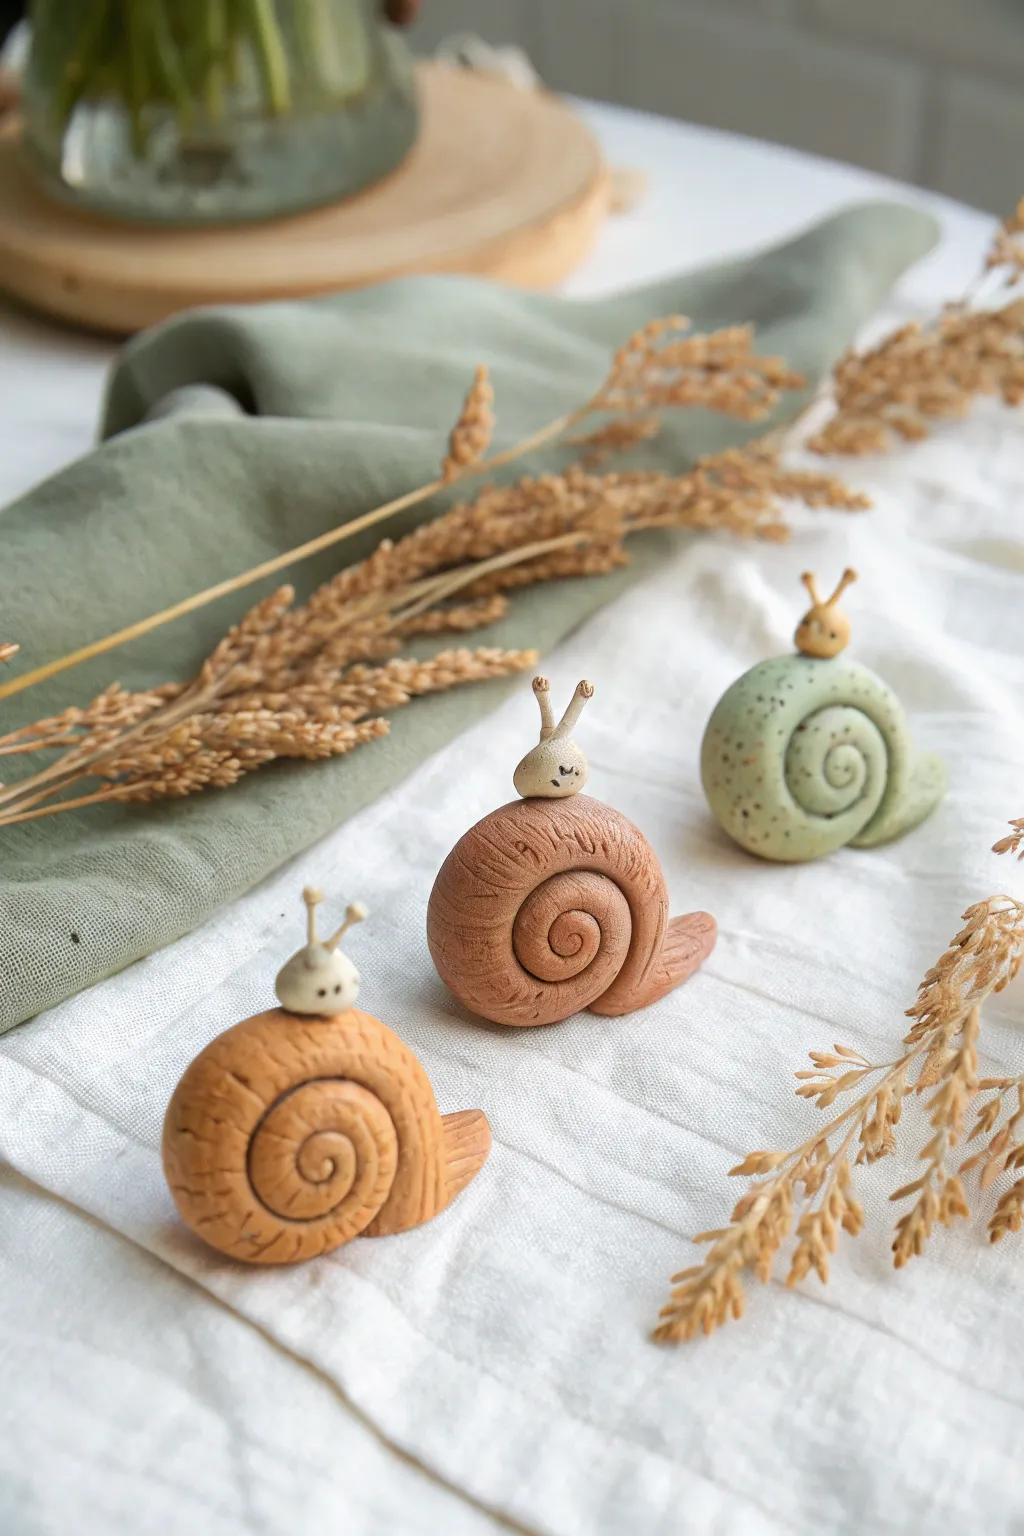
These charming miniature snails bring a touch of woodland whimsy to any desk or shelf with their earthy tones and spiraled shells. Using basic clay techniques, you’ll sculpt distinct textures that make each little creature unique, from smooth speckled green to rugged terra cotta.
Step-by-Step Tutorial
Materials
- Polymer clay or air-dry clay (terra cotta, brown, sage green, beige/cream)
- Clean work surface (ceramic tile or silicone mat)
- Needle tool or toothpick
- Small ball tool
- Soft paintbrush
- Toothbrush (for texturing)
- Black acrylic paint (tiny amount for eyes)
- Clay roller or acrylic rod
- Fine grit sandpaper (optional for finishing)
Step 1: Forming the Shell
-
Condition the clay:
Start by taking a chunk of your shell-colored clay (terra cotta, brown, or green) and kneading it in your hands until it becomes soft, pliable, and free of cracks. -
Roll a snake:
Place the ball of clay on your work surface and roll it back and forth to create a long, even snake shape. Aim for one end to be slightly thicker than the other, tapering down to a blunt point. -
Begin the spiral:
Note which side of the snake looks smoothest. Starting at the thinner end, tightly curl the clay inward upon itself to begin the center of the shell. -
Coil the body:
Continue rolling the snake around that center point, keeping the coils flush against each other so there are no large gaps. -
Shape the tail:
When you reach the thickest end of the snake, don’t curl it completely under. Instead, gently flatten the very end and flare it slightly outward to act as the snail’s tail or foot. -
Smooth the seams:
I like to gently press the coils together on the underside or back to ensure the shell stays structurally sound, while keeping the spiral definition sharp on the front.
Step 2: Texturing
-
Create lines:
For the brown or terra cotta snails, use your needle tool to gently score vertical lines across the coils, mimicking the natural ridges seen on real snail shells. -
Add speckles:
If making the green snail, skip the heavy lines. Instead, take a toothbrush or the bristles of a coarse brush and gently tap it against the clay to create tiny pit marks and organic texture. -
Soften edges:
Run your finger lightly over any sharp ridges created by your tools to soften the look, giving it a weathered, ceramic feel.
Natural Speckles
Mix black pepper or dried tea leaves into your green clay before sculpting. This creates realistic, embedded speckles that won’t rub off like paint might.
Step 3: Sculpting the Head
-
Roll the head base:
take a small amount of beige or cream-colored clay—roughly the size of a pea—and roll it into a smooth, slightly oval ball. -
Make the stalks:
Create two very tiny, thin logs of the same beige clay for the eye stalks. They should be delicate but thick enough to stand upright. -
Attach the stalks:
Press these tiny logs onto the top of the head piece. Use your small ball tool or a toothpick to blend the clay at the seam so the stalks are securely attached. -
Form antenna vibes:
For a cute touch, gently press small indentations into the tips of the stalks, or add microscopic balls of clay to the very tips.
Head Won’t Stick?
If the head keeps falling off the round shell, gently flatten the specific spot on the shell where the head sits to create a stable “platform” for attachment.
Step 4: Assembly & Details
-
Attach head to shell:
Place the head on top of the shell, just above where the spiral meets the tail. Press down gently to adhere the clays together. -
Secure the bond:
If the clay feels dry, you can score the contact points (make little scratches) and add a tiny dab of water or liquid clay to act as glue. -
Paint the face:
Using the finest point of a toothpick or a specialized detail brush, dip into black acrylic paint and dot two tiny eyes low on the head. -
Add a smile:
Very carefully draw a tiny ‘v’ or curved line between the eyes for the mouth. Keep it subtle for that minimalist look. -
Final drying/baking:
If using air-dry clay, set the snails aside in a safe spot for 24-48 hours. If using polymer clay, bake according to the manufacturer’s instructions on your clay package.
Once dry or baked, arrange your trio of snails on a linen napkin to admire their slow-paced charm


What Really Happens Inside the Kiln
Learn how time and temperature work together inside the kiln to transform clay into durable ceramic.
Play Clay Fast Food Set
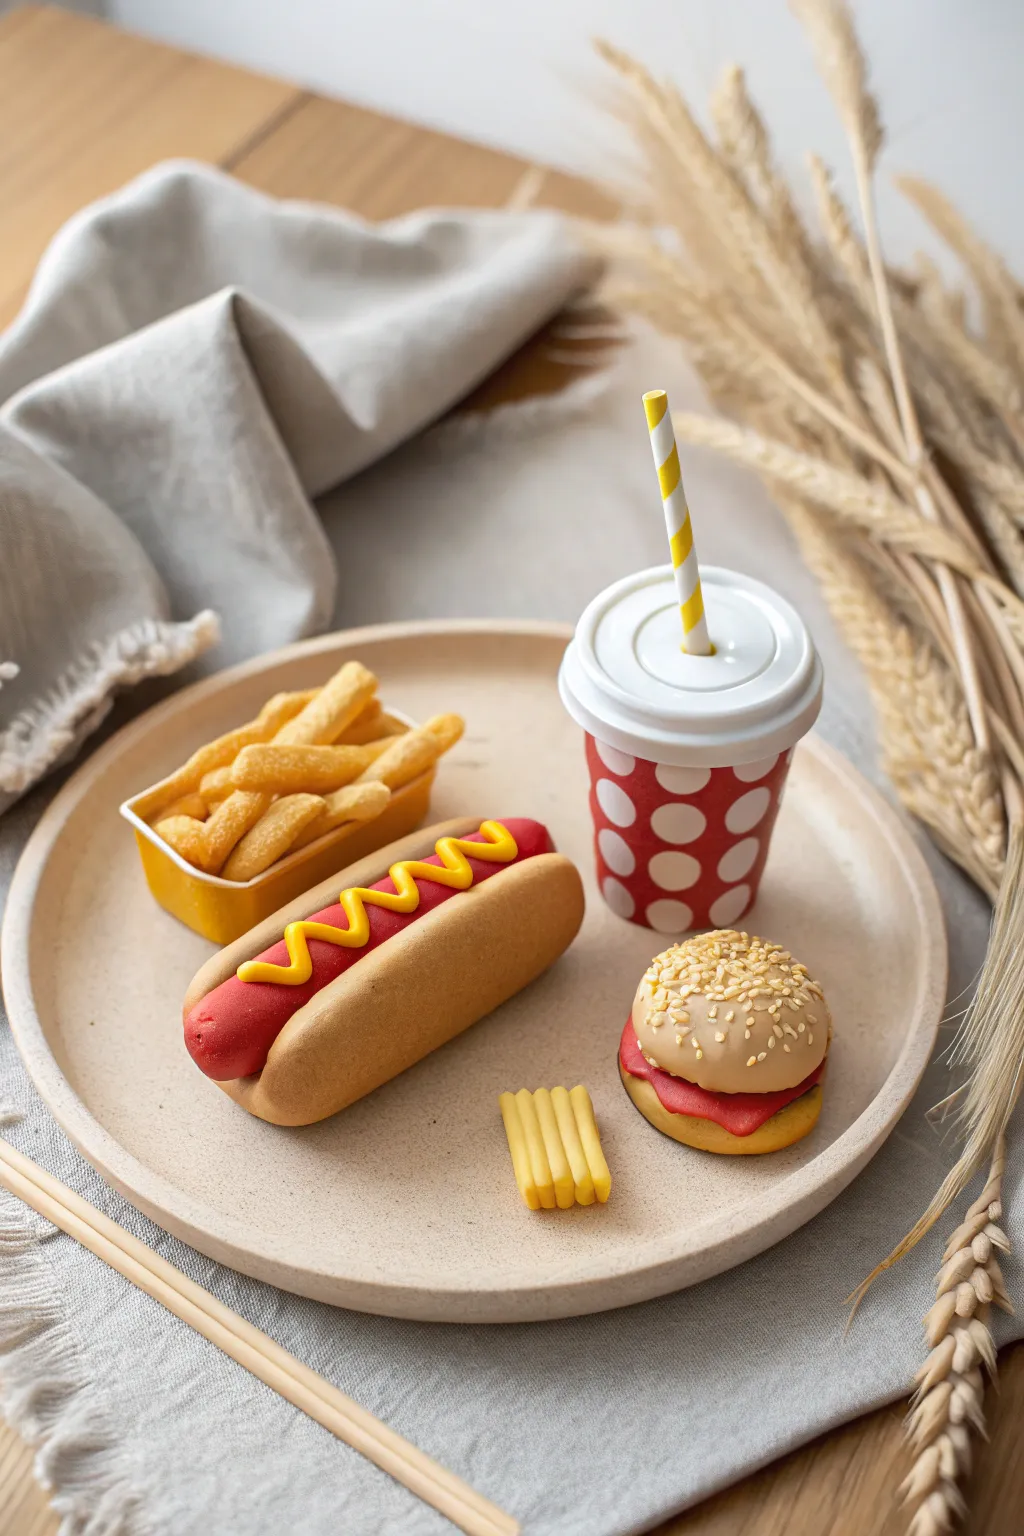
Create a charmingly tiny fast food meal that looks good enough to eat but is made entirely from molding clay. This project features perfectly textured burger buns, golden fries, and a classic soda cup, all crafted with simple tools.
Step-by-Step
Materials
- Polymer clay or air-dry clay (Red, White, Yellow, Tan/Beige, Brown)
- Small rolling pin
- Clay sculpting tools (specifically a needle tool and a small flat blade)
- Texture tool or toothbrush (for bread texture)
- Small square cookie cutter (optional, for fries)
- Clear varnish or gloss glaze (optional)
Step 1: The Classic Fries
-
Mix the perfect color:
Start by mixing a golden yellow clay with a tiny bit of tan and white to achieve a realistic deep-fried potato color. -
Shape the fries container:
Using bright yellow clay, roll out a thin sheet and cut a strip. Fold it into a rectangular box shape, pinching the corners to seal. You can leave the top open or flare the sides slightly like a cardboard scoop. -
Cut the fries:
Roll your potato-colored clay into a thick slab, about 1/4 inch high. Using your blade, slice the slab into equal-width strips to form crinkle-cut or straight-cut fries. -
Texture and assemble:
Gently tap the sides of each fry with a toothbrush to give them a fried texture. Arrange them inside the yellow container, stacking them loosely so they look natural. -
Make the stack:
With leftover fry dough, cut four small, uniform rectangles. Stack them neatly in a row and press them gently together to create the separate fry stack piece shown in the image.
Texturing Tip
For ultra-realistic bread, use a stiff-bristle brush and tap it straight down onto the clay. Then, lightly brush pastels in a darker brown over the top for a ‘baked’ look.
Step 2: The Hot Dog
-
Form the bun:
Roll a log of tan clay, tapering the ends slightly. Use your blade to make a deep slice down the center, but don’t cut all the way through, creating the hinge for the bun. -
Texture the bread:
I like to gently dab the surface of the bun with a toothbrush or a crumpled ball of aluminum foil to simulate the baked bread texture. -
Create the frankfurter:
Roll a smooth cylinder of reddish-brown clay. Ensure it is slightly longer than the bun so the ends peek out. -
Assembly:
Place the frankfurter into the sliced bun. Gently press the sides of the bun inward so it hugs the meat. -
Add mustard:
Roll a very thin snake of bright yellow clay. Carefully lay it in a zigzag pattern across the top of the hot dog, pressing lightly so it adheres.
Step 3: The Slider & Soda
-
Shape the burger buns:
Form two small discs from tan clay. Dome the top disc significantly and flatten the bottom disc slightly. Texture both with your toothbrush. -
Sesame seeds:
Take tiny flecks of white or light cream clay, roll them into minuscule teardrops, and press them all over the top bun. -
The filling:
Create a thin patty from brown clay for the meat. For the ketchup, flatten a small piece of red clay into an irregular shape that will drape over the edges. -
Assemble the burger:
Stack the bottom bun, the meat patty, the red ketchup layer, and finally the seeded top bun. Press down gently to secure the stack. -
Build the cup:
Form a tapered cylinder from red clay. Add dots of white clay to the exterior and roll the cup gently to flatten the dots into the surface for a polka-dot pattern. -
Lid and straw:
Create a white disc for the lid with a raised rim. Poke a hole in the center. Twist a thin snake of yellow and white clay together to make the straw and insert it into the lid.
Make it a Keychains
Before baking or drying the clay, insert a small metal eye pin into the top of the burger or hot dog. Once hardened, you can attach a keyring for cute accessories.
Arrange your completed feast on a small plate for a delightful miniature display.
Play Clay Charms for Backpack Zippers
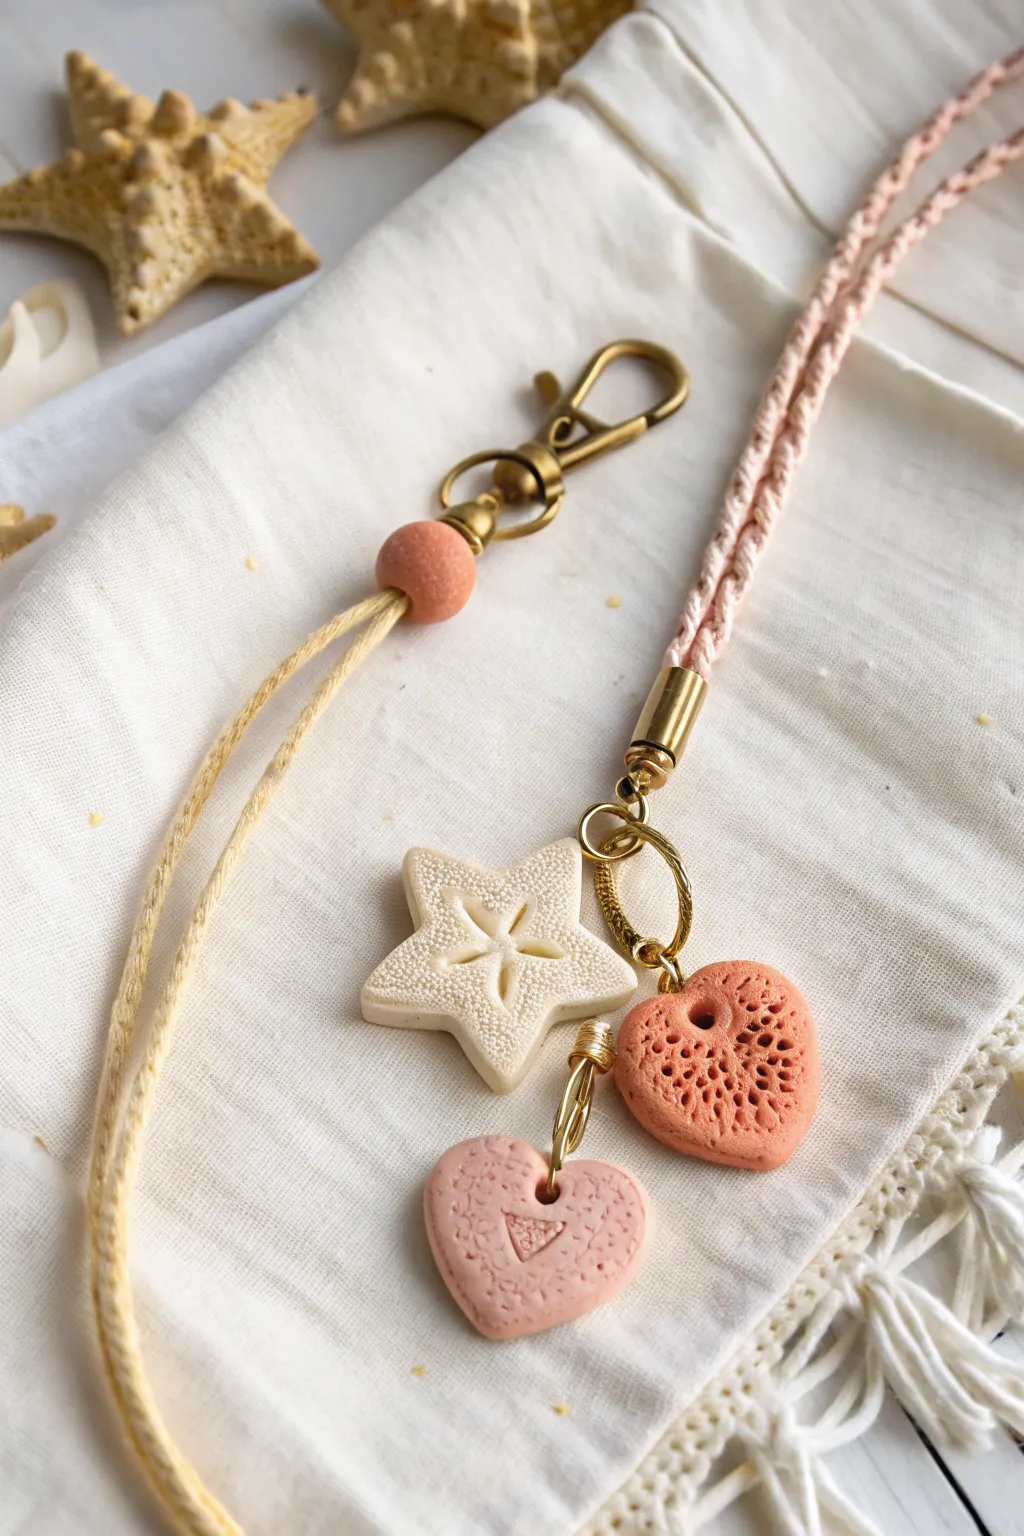
Add a touch of handmade warmth to your favorite bag with these delightful polymer clay charms. Featuring textured stars and hearts in soft, beachy tones of coral, cream, and blush, these durable accessories are as fun to make as they represent a lovely personalized gift.
Step-by-Step Tutorial
Materials
- Polymer clay (coral/terracotta, white/cream, pale pink)
- Textured items for imprinting (lace, sponges, sandpaper)
- Small clay cutters (star and heart shapes)
- Pointed tool or toothpick for piercing
- Waxed cotton cord or macramé cord (pale yellow and blush pink)
- Jewelry findings: large jump rings, lobster clasp, cord ends (gold or brass finish)
- Jewelry pliers
- Baking sheet and parchment paper
- Oven
Step 1: Crafting the Clay Charms
-
Condition the clay:
Start by warming the polymer clay in your hands, kneading each color separately until it is soft and pliable. You want a smooth consistency that won’t crack when flattened. -
Roll out slabs:
Roll each color into a slab about 1/4 inch thick. These charms need to be sturdy enough for zipper pulling, so avoid rolling them too thin. -
Create the Star texture:
For the creamy white star, gently press a piece of sandpaper or a rough fabric onto the clay surface to give it a fine, grainy texture before cutting. -
Cut the Star shape:
Use your star cutter to stamp out the shape. Afterward, use a modeling tool to gently press an indentation in the center and radiating lines toward each point to mimic a sand dollar or sea star pattern. -
Texture the Coral Heart:
Take the coral/terracotta clay slab. To achieve the deep, sponge-like porosity shown, press a piece of dried sea sponge or a crumpled ball of aluminum foil deeply into the surface. -
Cut the Coral Heart:
Cut out a heart shape from the heavily textured coral clay. Gently smooth the edges with your finger to remove any sharp cutting artifacts. -
Make the Pink Heart:
For the pale pink heart, impress a piece of lace or a pattern stamp onto the clay. Cut the heart shape, then use a small triangular tool or stamps to add a focal detail in the center. -
Pierce the holes:
Use a toothpick or a dedicated piercing tool to make holes near the top of each charm. Ensure the holes are large enough to accommodate your thick jump rings. -
Make the bead:
Roll a small amount of coral clay into a sphere. Pierce a hole straight through the center to create the bead for the yellow cord lanyard. -
Bake the clay:
Arrange all pieces on a parchment-lined baking sheet. Bake according to your customized clay package instructions (usually around 275°F/135°C for 15-30 minutes) and let them cool completely.
Hole Distortion?
If piercing the clay distorts the charm’s shape, bake the piece first, then use a small hand drill to carefully make the hole after the clay has hardened.
Step 2: Assembly
-
Attaching jump rings:
Open your large jump rings using pliers. Thread one through the hole of the white star and another through the coral heart charm. Close them securely. -
Wire wrapping the small heart:
For the small pink heart, I like to use a bit of gold wire to create a messy wrap loop through the hole, attaching it to a jump ring for added visual interest. -
Prepare the pink cord:
Cut three lengths of pink cord and braid them together tightly. Alternatively, use a pre-braided macramé cord. -
Add cord ends:
Secure the ends of your pink braid into a brass cord end cap. Use strong glue or crimp the metal down tightly with pliers to hold the fibers in place. -
Assemble the cluster:
Attach the cord end loop to a large central jump ring. Then, slide the jump rings of all three charms (star, coral heart, pink heart) onto this central ring so they hang in a cluster. -
Assemble the yellow lanyard:
For the simpler lanyard, fold a long piece of yellow cord in half. Thread the looped end through the bottom ring of the lobster clasp. -
Secure the bead:
Pass the two loose tails of the yellow cord through your handmade clay bead. Tie a simple overhand knot or a stopper knot below the bead to keep it in place.
Scented Charms
Add a drop of essential oil to the porous coral heart after baking. The deep texture acts like a diffuser, turning your backpack charm into a portable air freshener.
Now you have a set of earthy, textured charms ready to accompany you on your next adventure

TRACK YOUR CERAMIC JOURNEY
Capture glaze tests, firing details, and creative progress—all in one simple printable. Make your projects easier to repeat and improve.
Initial Tiles for Name Play
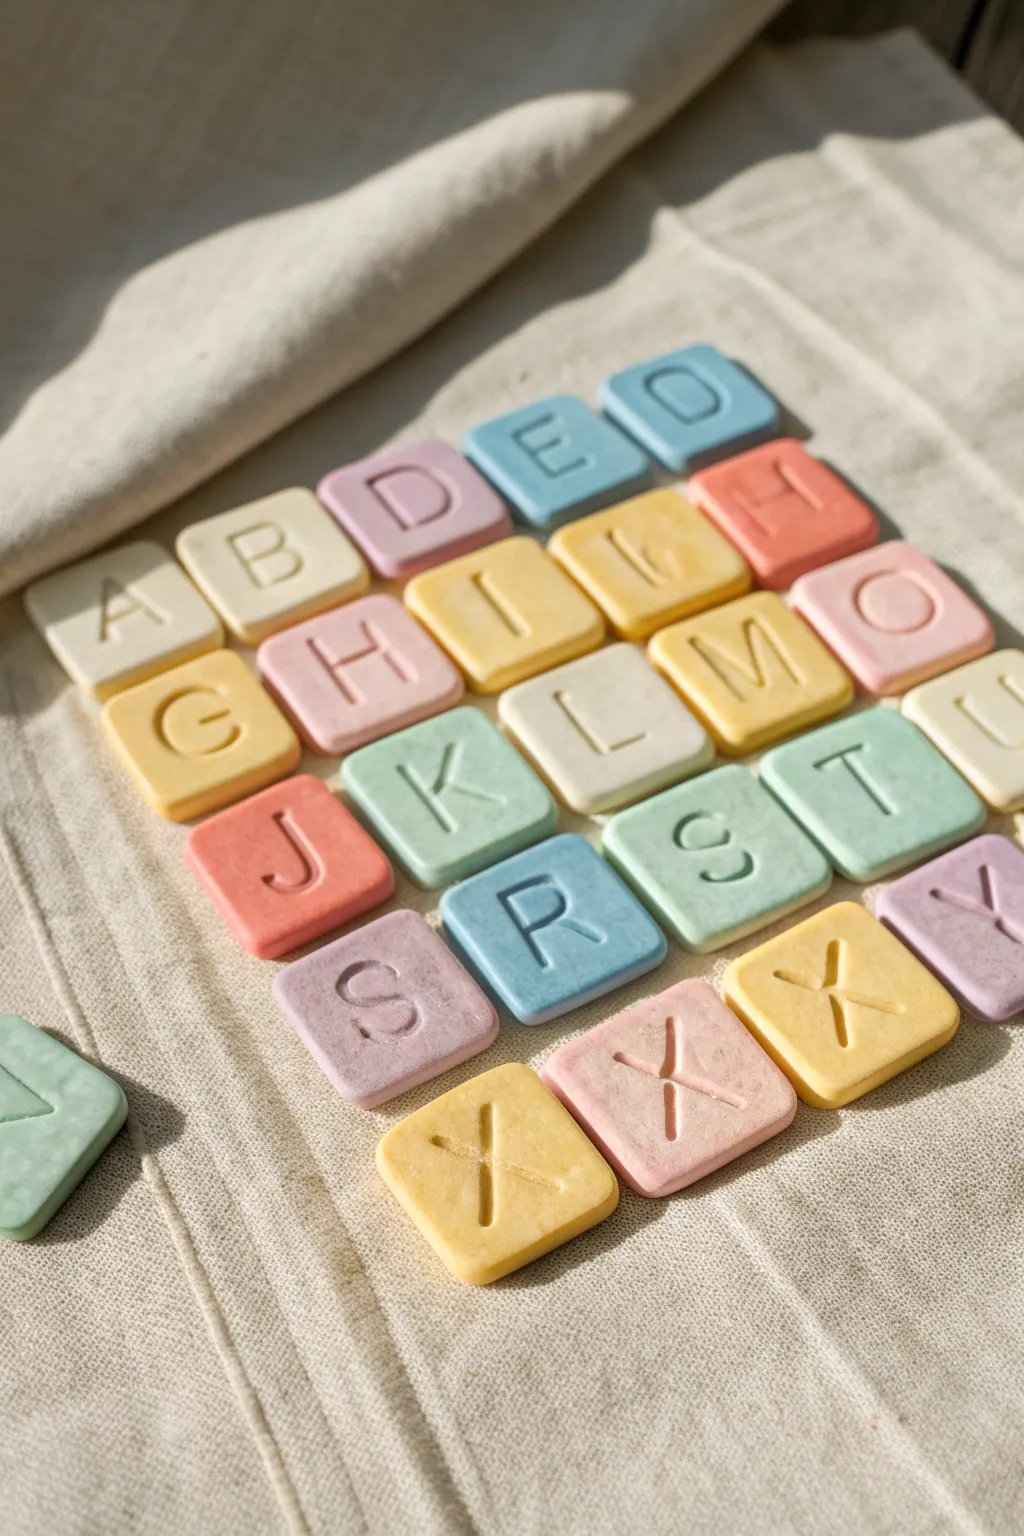
These charming, candy-colored alphabet tiles are perfect for helping little ones learn to spell their names, or simply as delightful tactile decor. With their soft matte finish and gentle pastel hues, they invite hands-on play and colorful exploration.
How-To Guide
Materials
- Polymer clay or air-dry clay (white base)
- Acrylic paints (pastel set) or clay pigments (yellow, pink, blue, green)
- Rolling pin (acrylic or smooth wood)
- Square cookie cutter (approx. 1.5 – 2 inches)
- Alphabet stamp set (large uppercase)
- Parchment paper or silicone work mat
- Fine-grit sandpaper (optional)
- Matte spray sealant (optional)
Step 1: Coloring the Dough
-
Divide the clay:
Start with a large block of white clay. Divide it into four or five equal portions, depending on how many distinct colors or letters you plan to make. -
Tint the first batch:
Take one portion of white clay and add a very small pea-sized amount of yellow pigment or acrylic paint. Knead the color thoroughly into the clay until it is uniform and streak-free. -
Check the shade:
If the color is too pale, add a tiny bit more pigment. Aim for a soft, creamy pastel tone rather than a vibrant primary color. Remember, some clays darken slightly as they cure. -
Repeat for all colors:
Repeat the tinting process for the remaining portions, creating soft pinks, baby blues, mint greens, and perhaps leaving one portion off-white or cream.
Step 2: Shaping the Tiles
-
Roll out the slab:
Working with one color at a time, place the clay ball onto a piece of parchment paper or a silicone mat. Roll it out to an even thickness of about 1/4 inch. -
Cut the shapes:
Using your square cookie cutter, press firmly into the clay slab to cut out your tile shapes. Lift the cutter straight up to keep the edges clean. -
Smooth the edges:
Gently lift the squares away from the scrap clay. Use your fingertip to softly smooth down any sharp ridges or burrs on the edges of the squares. -
Position for stamping:
Arrange the cut squares on your baking sheet (if using polymer) or drying surface (if air-dry) so they are flat and not touching.
Sticky Stamps?
If clay sticks inside tight letter curves (like ‘B’ or ‘R’), lay a piece of cling wrap over the clay before stamping. It creates a softer edge and prevents sticking.
Step 3: Stamping and Finishing
-
Prepare stamps:
Select the letters needed for your project. If your stamps tend to stick, you can lightly dust them with cornstarch or dip them in water before pressing. -
Impress the letters:
Center the stamp over a clay square. Press down firmly and evenly, ensuring you go deep enough to leave a clear impression but not so deep that you distort the square shape. -
Refine the surface:
Inspect the impressed letter. If the clay pushed up around the stamp lines, gently tap it back down with a flat tool or your finger. -
Cure the clay:
Follow the manufacturer’s instructions for your specific clay type. For polymer clay, bake in the oven at the recommended temperature. For air-dry clay, let it sit undisturbed for 24-48 hours. -
Final smoothing:
Once fully cured or dry, check the edges. I find that a quick pass with fine-grit sandpaper makes the tiles feel much more professional and pleasant to hold. -
Dust off debris:
Wipe away any clay dust from sanding with a slightly damp cloth or a dry soft brush. -
Seal the tiles:
To protect surfaces from dirt and oils, apply a light coat of matte spray sealant. This preserves the soft look while making them more durable for play.
Pro Tip: Thickness
Use rolling guides or two stacks of playing cards on either side of your roller to ensure every single tile is the exact same thickness.
Enjoy arranging your new alphabet set for spelling practice or simply admiring the soothing color palette
Tiny Play Clay Trinket Dishes
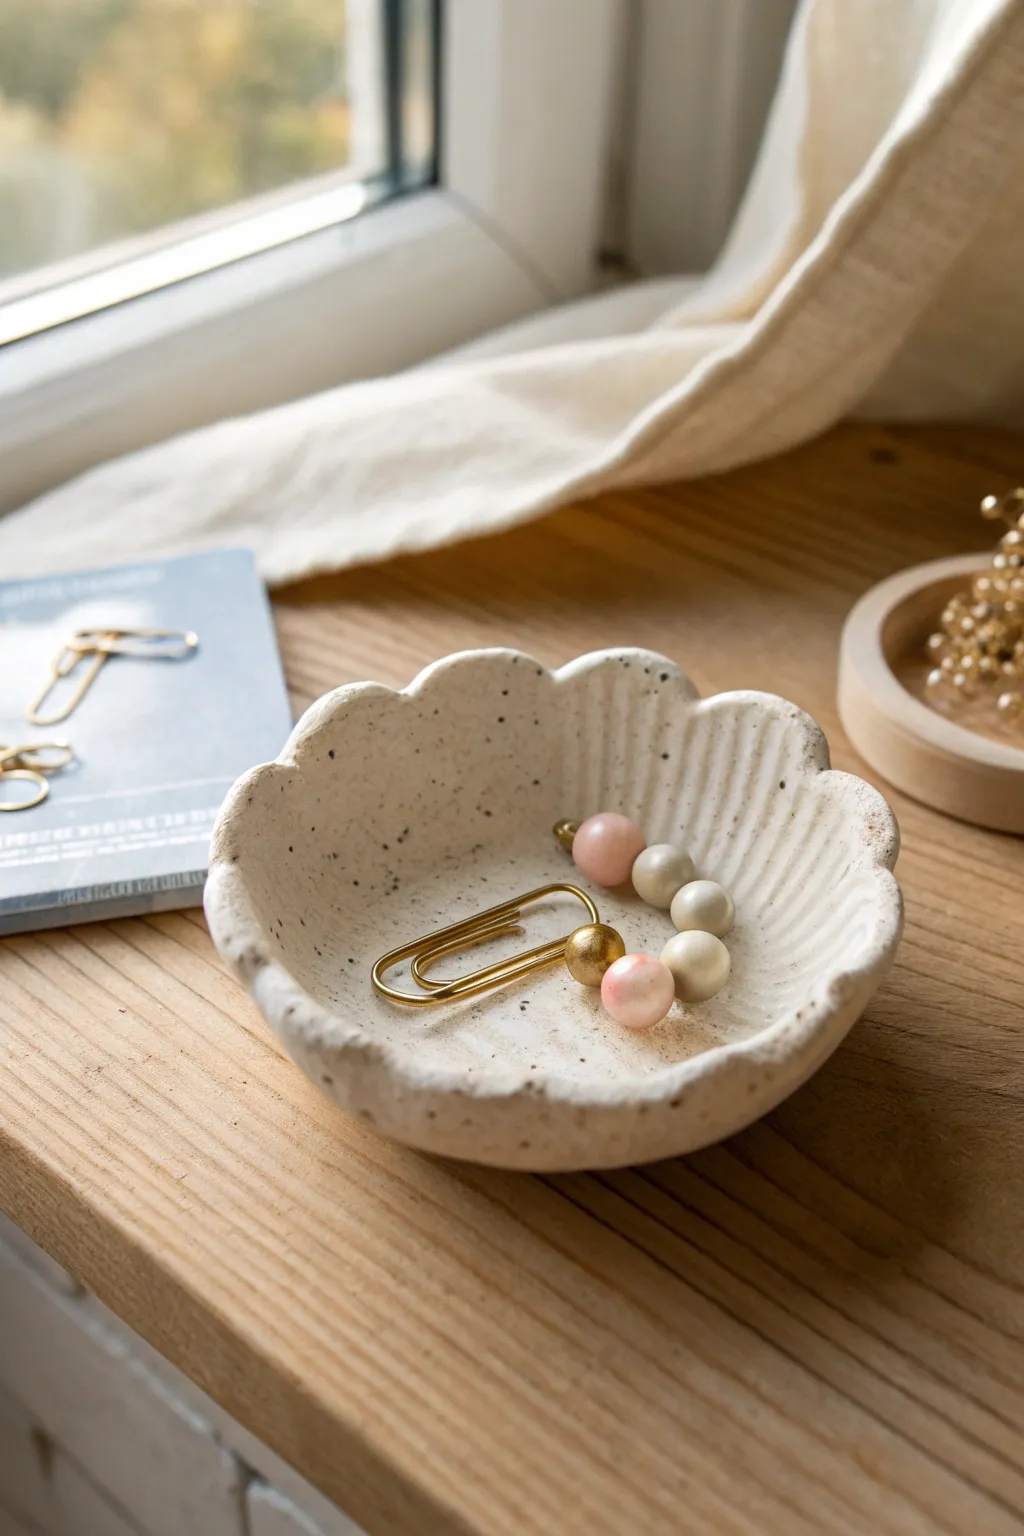
Transform simple air-dry clay into an elegant, shell-inspired organizer perfect for holding small treasures like rings or paperclips. This project mimics the high-end look of speckled ceramic with an organic, wavy texture that feels beautifully handmade.
Step-by-Step
Materials
- White air-dry clay (or polymer clay)
- Acrylic rolling pin
- Small round bowl or plastic sphere (for shaping)
- Craft knife or clay needle tool
- Sandpaper (fine grit)
- Acrylic paint (black/dark brown for speckles)
- Old toothbrush or stiff bristle brush
- Water bowl and sponge
- Clear matte varnish or sealant
- Toothpick or clay sculpting tool
Step 1: Shaping the Clay
-
Condition and Roll:
Start by taking a golf-ball-sized chunk of clay. Knead it in your hands until it is warm and pliable to prevent cracks later. -
Flatten the Base:
Using your acrylic rolling pin, roll the clay out into a circle roughly 1/4 inch thick. Aim for an even thickness throughout. -
Cut the Circle:
Use a round cookie cutter or trace around a jar lid with your craft knife to cut a perfect circle from your rolled clay. -
Create the Scalloped Edge:
Gently press your thumb or the back of a sculpting tool into the edge of the circle at regular intervals. This pushes the clay inward slightly to create the initial wavy, scallop shape. -
Refine the Waves:
Pinch the sections between your thumb indentations outward to sharpen the ‘peaks’ of the shell pattern. It should look like a flower or seashell silhouette. -
Add Texture Lines:
Take a toothpick or needle tool and gently press vertical lines extending from the center of the dish up towards each scalloped peak. Don’t cut through the clay; just indent it. -
Soften with Water:
Dip your finger in a little water and smooth over the texture lines and edges to remove any harsh tool marks or crumbs of clay. -
Form the Curve:
Carefully drape your clay circle inside a small bowl or over a curved object to give it a cupped shape. Press gently so it takes the form of the bowl. -
Dry Completely:
Leave the clay in the bowl to dry. Depending on your brand of clay and humidity, this could take 24 to 48 hours. Wait until it is bone dry and chalky white.
Step 2: Finishing Touches
-
Sand the Edges:
Once dry, pop the dish out of the mold. Use fine-grit sandpaper to smooth any rough spots on the rim for a professional finish. -
Prepare the Speckle Paint:
Mix a tiny drop of black or dark brown acrylic paint with water. You want a very watery, fluid consistency. -
Apply the Speckles:
Dip an old toothbrush into the watery paint. hold it over the dish and run your thumb across the bristles to flick tiny droplets onto the clay surface. -
Control the Texture:
I prefer to do a test splatter on a piece of paper first to ensure the droplets aren’t too large. You want a fine mist for that stone-like effect. -
Let Paint Dry:
Allow the speckles to dry completely, which should only take about 10-15 minutes since the paint is thin. -
Seal the Dish:
Apply a coat of clear matte varnish to the entire dish, front and back, to protect it from moisture and give it a finished feel. -
Final Cure:
Let the varnish cure according to the bottle instructions before placing any jewelry or clips inside.
Clean Lines Pro-Tip
To prevent fingerprints while shaping, place a sheet of plastic wrap over the clay before pressing your indentation lines. This keeps the surface incredibly smooth.
Level Up: Gold Rim
Paint the very oscillating edge of the rim with metallic gold leaf paint. This adds a subtle luxurious touch that highlights the scallop shape.
Your speckled seashell dish is now ready to hold your delicate jewelry or office supplies on your desk
Play Clay Beads and Simple Jewelry
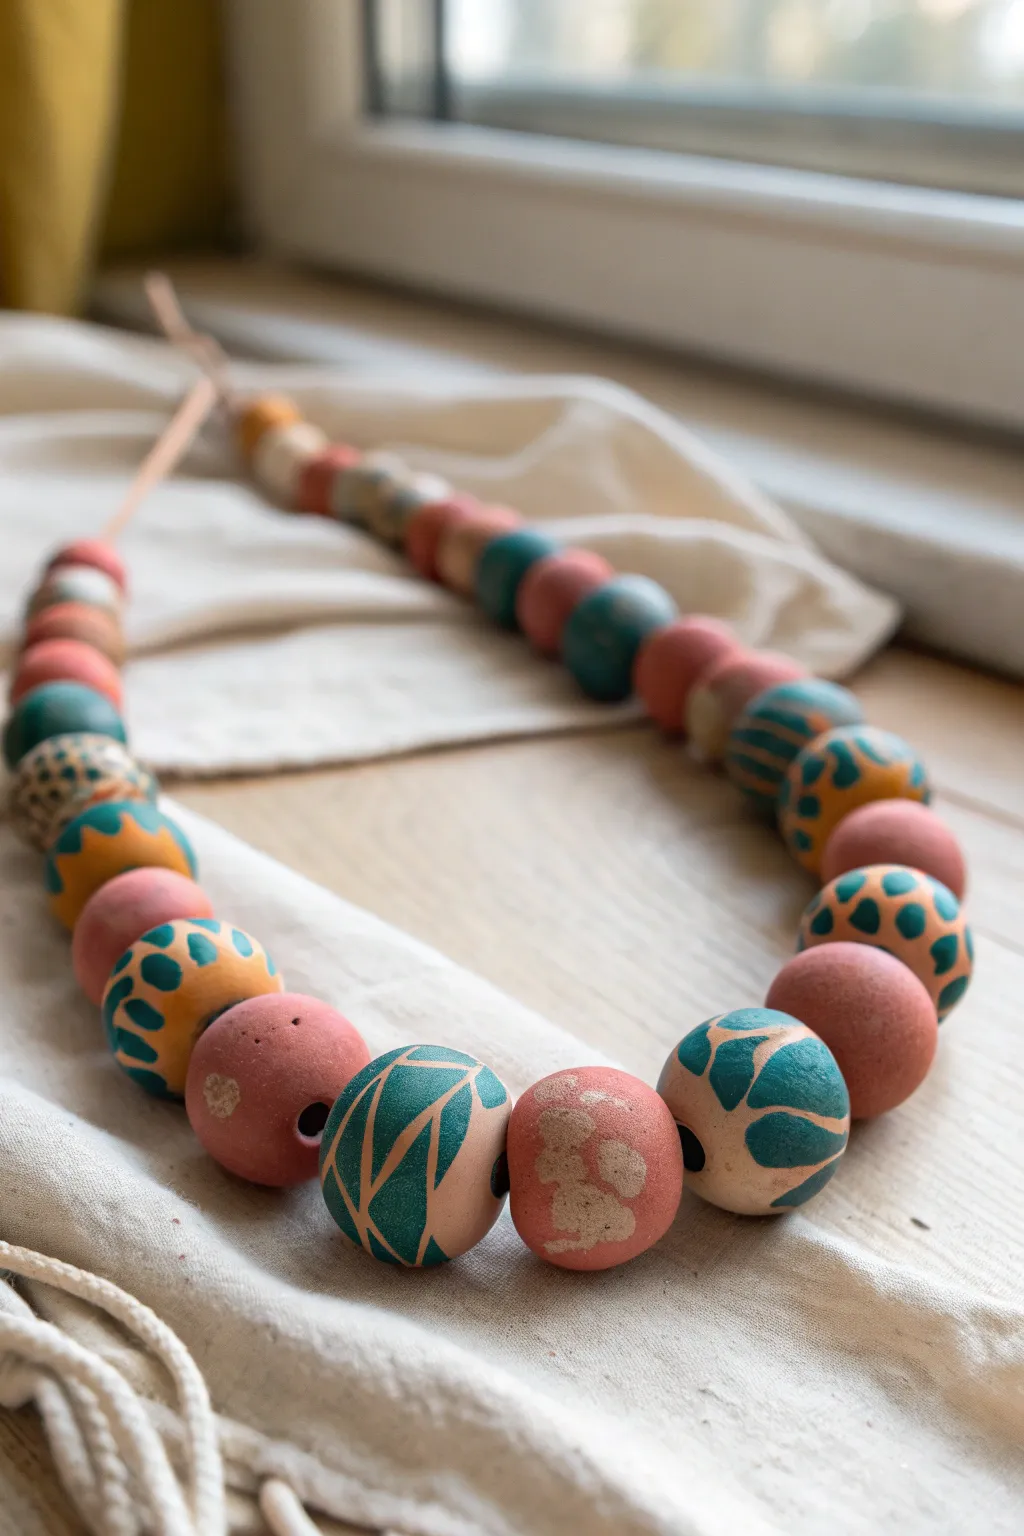
Create a stunning statement necklace that combines earthy warmth with modern patterns using handmade clay beads. These chunky, textured baubles feature a mix of organic spots, geometric leaf motifs, and solid matte colors for a sophisticated bohemian look.
Step-by-Step Guide
Materials
- White or terracotta air-dry clay (or polymer clay)
- Acrylic paints (Coral/Terracotta, Deep Teal, Mustard Yellow, Cream)
- Fine grit sandpaper
- Skewers or toothpicks (for piercing)
- Detail paintbrushes (size 0 and 2)
- Matte varnish or sealant
- Leather cord or waxed cotton string
- Rolling pin (optional)
- Small sponge (optional for texture)
Step 1: Shaping the Beads
-
Prepare the Clay:
Begin by conditioning your clay. If using air-dry clay, knead it briefly to ensure it’s pliable and smooth. Break off chunks roughly the size of a large cherry or walnut. -
Roll Spheres:
Roll the clay pieces between your palms to create uniform spheres. Aim for a mix of sizes for visual interest—some slightly larger for the center of the necklace and smaller ones for the ends. -
Create Texture:
Instead of smoothing them perfectly, gently tap the surface with a dry sponge or lightly roll them on a textured fabric to achieve that rustic, stone-like pitted surface seen in the image. -
Pierce the Holes:
While the clay is still soft, gently twist a skewer or toothpick through the center of each bead. Twist as you push to avoid squashing the sphere shape. Make sure the hole is wide enough for your chosen leather cord. -
First Drying Phase:
Allow the beads to dry according to package directions. For air-dry clay, turning them every few hours ensures even drying and prevents flat spots. -
Sand and Refine:
Once fully cured, use fine-grit sandpaper to gently smooth any rough edges around the bead holes, but leave the main surface texture intact.
Step 2: Painting the Motifs
-
Base Colors:
Select your color palette. Paint about a third of the beads a solid terracotta coral, another group in deep teal, and the remainder in a warm mustard yellow or cream base. I like to do two thin coats rather than one thick one for better coverage. -
Animal Print Spots:
On the yellow or cream beads, paint irregular, kidney-shaped blobs using the deep teal paint. These don’t need to be perfect circles; wobbly edges look more organic. -
Geometric Leaf Details:
On a few of the coral or cream beads, use your finest brush (size 0) with teal paint to create abstract leaf patterns. Draw a central vein line, then add sharp, angular lines branching off to mimic a stylized palm frond. -
Negative Space Design:
For the striking teal and coral leaf bead, paint the bead solid teal first. Once dry, use a detail brush and the coral paint (or cream) to paint thin lines defining the leaf shapes, leaving the teal showing through as the ‘leaf’ body. -
Distressed Metallic Accents:
For the solid coral beads that look slightly speckled, dip a dry, stiff brush into a tiny amount of cream or metallic gold paint. Wipe most of it off, then dab it randomly onto the bead to create a worn, textured look. -
Final Drying:
Let all paint dry completely. Arrange the beads in a line to plan your final stringing pattern before they are sealed.
Skewered handling
Keep beads on skewers while painting. Stick the skewers into a block of floral foam or a cardboard box to let them dry without touching any surfaces.
Step 3: Assembly
-
Sealing:
Apply a coat of matte varnish to protect the paint. A matte finish is crucial here to maintain the earthy, natural aesthetic of the clay. -
Stringing:
Cut a length of leather cord long enough to slip over your head. Thread the beads onto the cord, alternating colors and patterns to balance the design. -
Knotting:
Tie strong knots at both ends of the beaded section to keep them centered, or simply tie the two ends of the leather cord together for an adjustable fit.
Make it essential
Add a drop of essential oil to the porous clay beads before sealing (or skip sealing the back of one bead) to turn your necklace into a portable diffuser.
Now you have a unique piece of wearable art that celebrates natural textures and colors
Texture Play With Stamps and Rollers
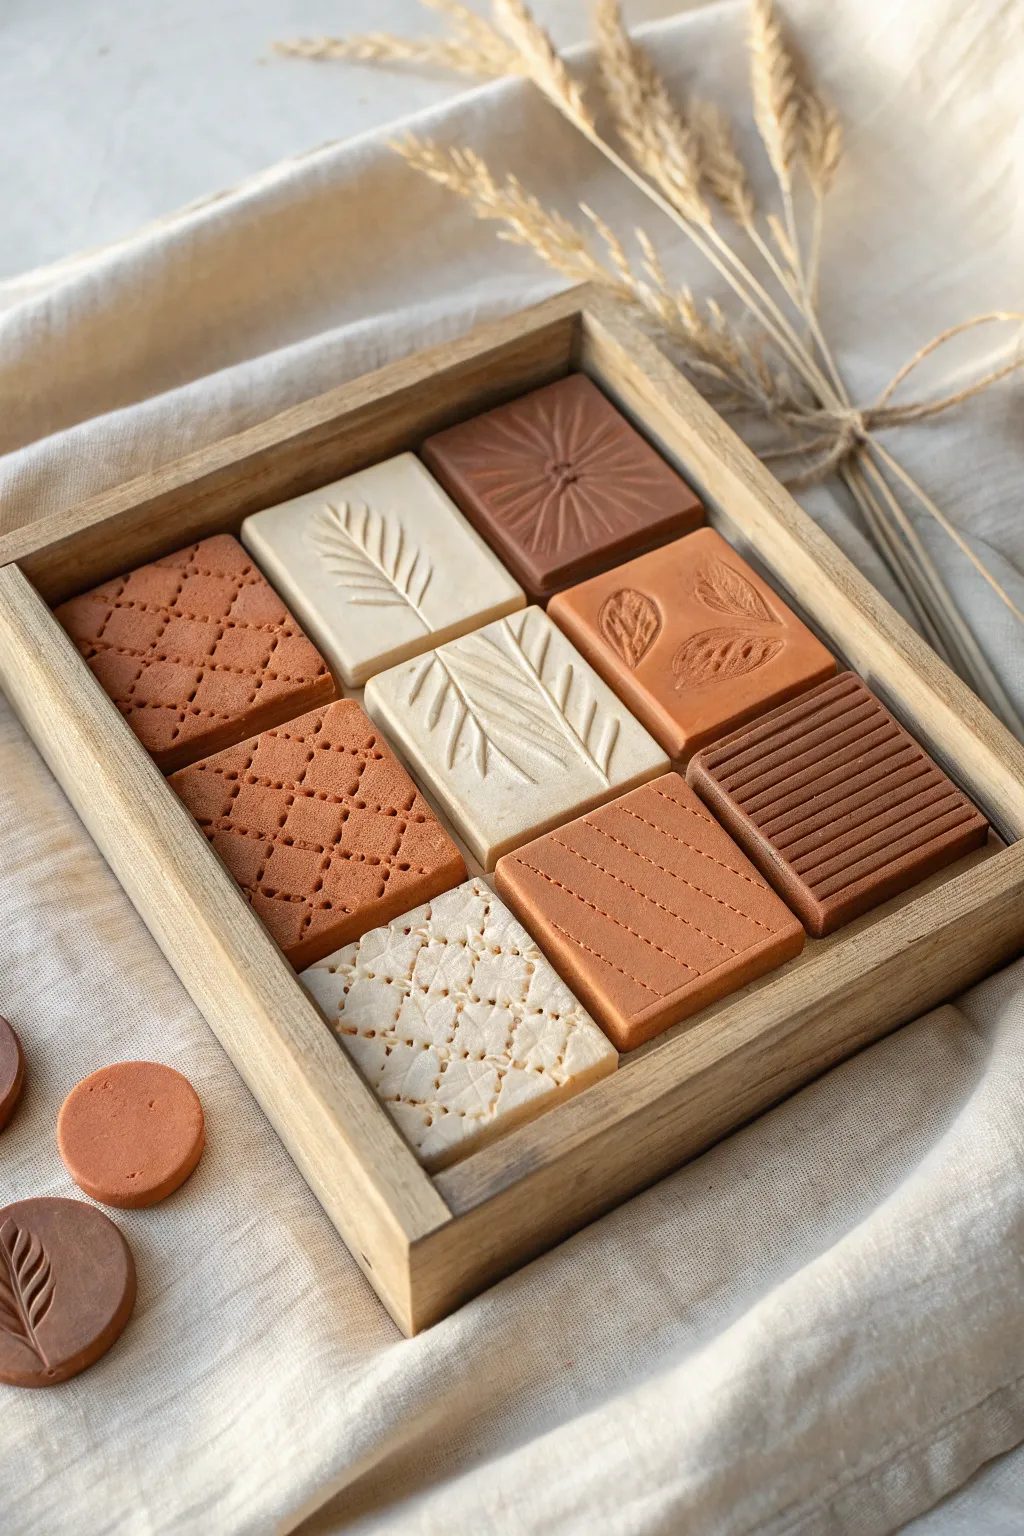
Create a soothing sensory experience with this grid of beautifully textured clay tiles in natural tones. This project combines simple geometric stamping with warm, earthy colors to create a piece that feels both modern and grounding.
Step-by-Step Tutorial
Materials
- Air-dry clay or polymer clay
- Acrylic paints (terracotta, chocolate brown, cream/white, beige)
- Small wooden box or tray (square)
- Rolling pin
- Square cookie cutter (sized to fit your box grid, approx. 2 inches)
- Clay sculpting tools or household objects (forks, toothpicks, stamps)
- Leaf stamps or real pressed leaves
- Sandpaper (fine grit)
- Mod Podge or matte varnish (optional)
Step 1: Clay Preparation & Coloring
-
Divide the Batch:
Start by dividing your clay block into three or four equal portions. You will want a variety of ‘clay body’ colors to mimic the look of natural earth. -
Mix Your Shades:
Knead acrylic paint directly into the clay portions. Leave one portion natural white/cream. Mix terracotta paint into the second for a rust orange. Mix brown into the third for a deep chocolate shade. Create a fourth beige tone if desired. -
Knead Thoroughly:
Work the color in until the clay is uniform and streak-free. This ensures the color is solid throughout the tile, not just painted on top. -
Roll It Out:
Take your first colored batch and roll it out onto a flat surface to a uniform thickness, about 1/4 to 1/2 inch thick.
Uneven Drying?
If your air-dry clay tiles curl up at the corners while drying, place a heavy book on top of them (with wax paper in between) once they are semi-dry to flatten them back out.
Step 2: Shaping & Texturing
-
Cut the Squares:
Using your square cutter, press firmly to cut out several tiles from each color. Aim for sharp, clean edges. -
Leaf Imprints:
For the cream and light terracotta tiles, gently press a rubber leaf stamp or a sculpting tool into the center to create a botanical motif. -
Grid Dot Pattern:
On a rust-colored tile, use a ruler to lightly score a diamond grid. Then, take a blunt needle tool or toothpick and prick holes at every intersection to create a quilted look. -
Diagonal Dashes:
Create the dashed line tile by pressing the edge of a credit card or a flat sculpting tool into the clay at a 45-degree angle. Repeat in columns. -
Horizontal Grooves:
For the dark brown tile, press a long, thin rod or the handle of a paintbrush horizontally across the surface to create deep, parallel channels. -
Starburst Texture:
On a chocolate-colored tile, press a tool into the center and drag outward in all directions to create radiating lines. -
Refine Edges:
Once textured, gently tap the sides of each square to ensure they haven’t deformed during the stamping process. They need to fit snugly in the box.
Step 3: Crying & Assembly
-
Drying Phase:
Place all tiles on a drying rack. If using air-dry clay, let them sit for 24-48 hours, flipping occasionally to prevent warping. If using polymer, bake according to package instructions. -
Sanding:
Once fully cured, use fine-grit sandpaper to smooth any rough edges or burrs on the sides of the tiles. -
Test Fit:
Arrange the tiles inside your wooden box to finalize the layout. I usually move them around until the balance of light and dark colors feels right. -
Mounting:
Apply a small dab of strong craft glue to the back of each tile and press them firmly into the wooden tray. -
Create Extras:
Use leftover clay to cut small circles and impress a simple leaf pattern; these make charming accompanying tokens or fridge magnets.
Scented Tiles
Add drops of essential oil like cinnamon or cedarwood into the clay while kneading. The porous clay will hold the scent, turning your art piece into a subtle room diffuser.
Now you have a stunning, tactile display that brings a touch of nature’s geometry into your home
Play Clay Coil Shapes and Snakes
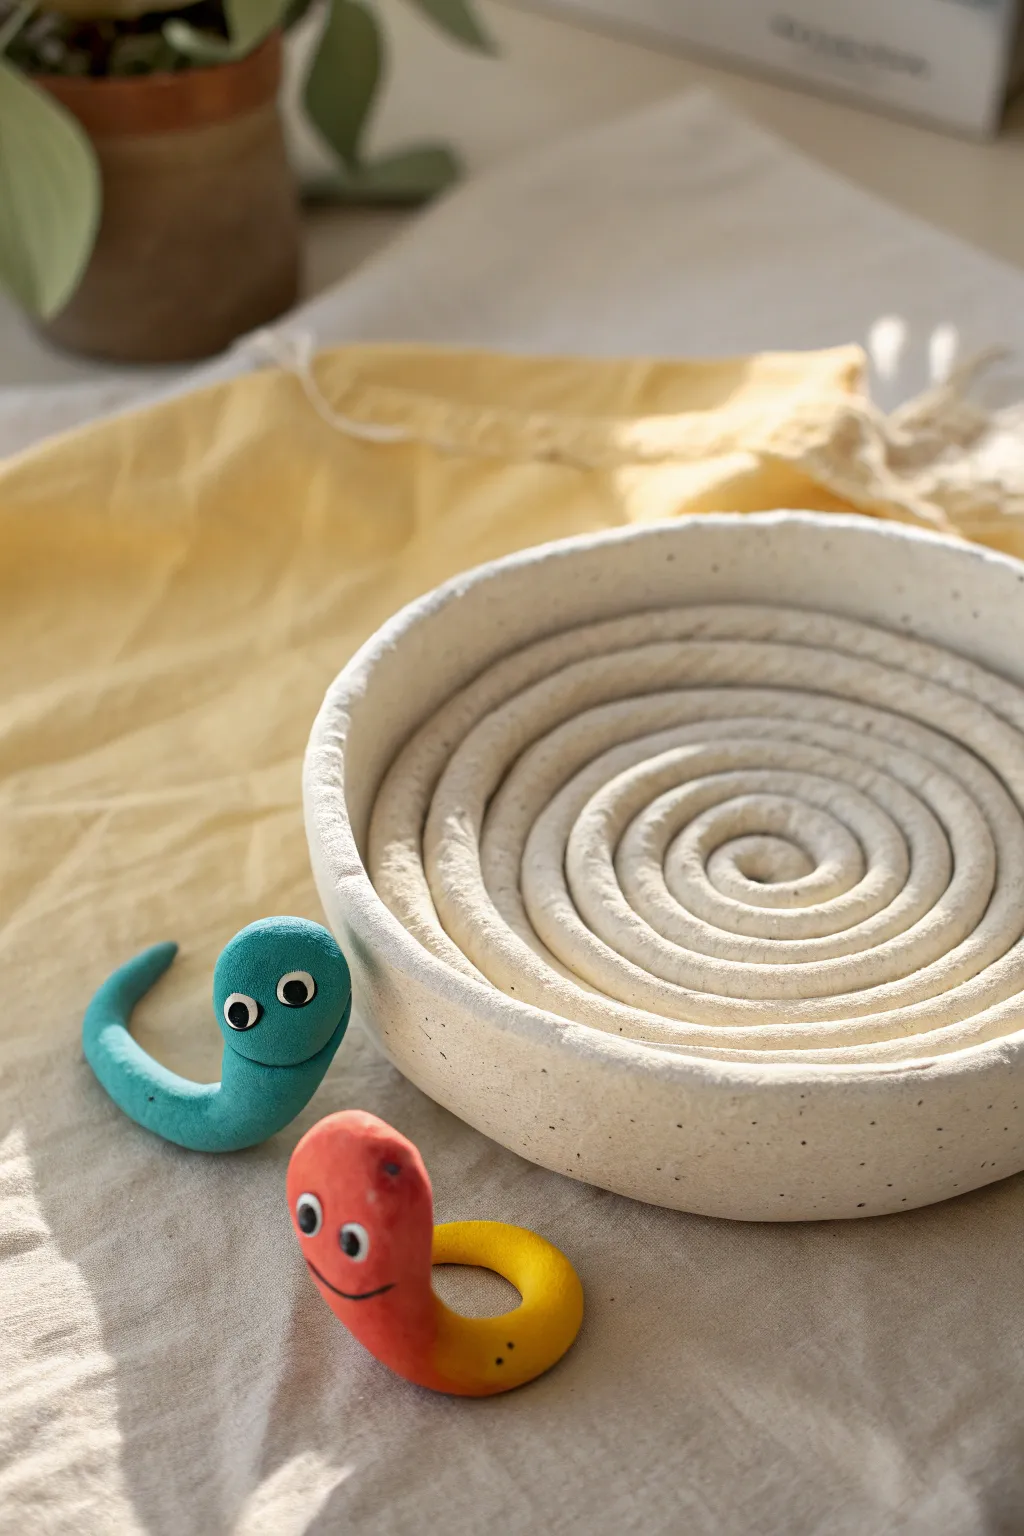
Transform simple snakes of play clay into a functional coiled bowl and a pair of charismatic crawling buddies. This project teaches the foundational coil technique while creating a charming set of handmade accessories perfect for holding trinkets.
Step-by-Step
Materials
- White air-dry clay or polymer clay
- Teal, orange, and yellow colored clay (or acrylic paints)
- Small googly eyes
- Basic sculpting tools or a toothpick
- Rolling pin or smooth surface for rolling
- Small bowl (optional, for shaping support)
- Matte sealant (optional)
Step 1: Creating the Coiled Bowl
-
Prepare the Base Clay:
Start with a large chunk of white clay. Knead it well until it is soft, pliable, and free of cracks to ensure your coils roll out smoothly. -
Roll Long Coils:
Take a portion of the clay and roll it against your work surface using the palms of your hands. Apply even pressure, moving from the center outward, until you have long, even ropes about the thickness of a marker. -
Start the Spiral:
Take one end of a clay rope and curl it tightly in on itself to create a snail-shell shape. This will be the very center of your bowl’s base. -
Build the Floor:
Continue wrapping the clay rope around that center spiral, keeping it flat on the table. Press the edges gently together as you go so the coils fuse slightly without losing their definition. -
Shape the Sides:
Once your base is the desired width (about 3-4 inches), begin stacking the next coil slightly on top of the outer edge rather than next to it. This upward stacking creates the bowl’s walls. -
Smooth the Interior:
For better structural integrity, I like to gently smudge the coils together on the *inside* of the bowl only, or just ensure they are pressed firmly. The image shows the coils preserved visible inside, so press firmly to bond them while keeping the distinct spiral look. -
Finish the Rim:
Continue stacking until you reach the desired height. Taper the very end of your clay rope and smooth it into the rim so there isn’t a blunt stop. -
Dry or Bake:
If using air-dry clay, let the bowl sit for 24-48 hours. If using polymer, bake according to the package instructions. A speckled look can be achieved later with paint flicking if using plain white clay.
Pro Tip: Seamless Coils
To join a new clay rope to an old one, cut both ends at a 45-degree angle. Overlap the angled cuts and smooth them together for an invisible join.
Step 2: Sculpting the Snake Friends
-
Mix Colors:
Prepare a small amount of teal clay for the first snake. For the second snake, you can marble orange and yellow clay together for a sunset gradient effect. -
Shape the Bodies:
Roll the colored clay into tapered logs. Make one end slightly bulbous for the head and let the other end taper off into a pointy tail. -
Pose the Teal Snake:
Curve the teal snake into an ‘S’ shape, lifting the head slightly so it looks like it is slithering upwards looking for a snack. -
Pose the Gradient Snake:
Curve the orange/yellow snake into a loose loop, raising its head similarly to its friend. Smooth out any fingerprints. -
Add Expressions:
Use a toothpick or a small sculpting tool to press a simple, curved line into the face area for a smile. -
Attach Eyes:
Press small googly eyes into the soft clay heads. If the clay is too firm, you might need a dab of glue after the project dries. -
Final Texture:
If you want the speckled look shown on the bowl, wait until it is fully dry. Dilute some black or dark brown paint and use an old toothbrush to flick tiny specks across the white surface.
Troubleshooting: Sagging Walls
If your bowl walls flop over while building, build the clay coils around a real cereal bowl covered in plastic wrap for support until it stiffens.
Display your new speckled bowl on a shelf and let the little clay snakes guard your treasures
Mini Garden: Cactus and Mushrooms
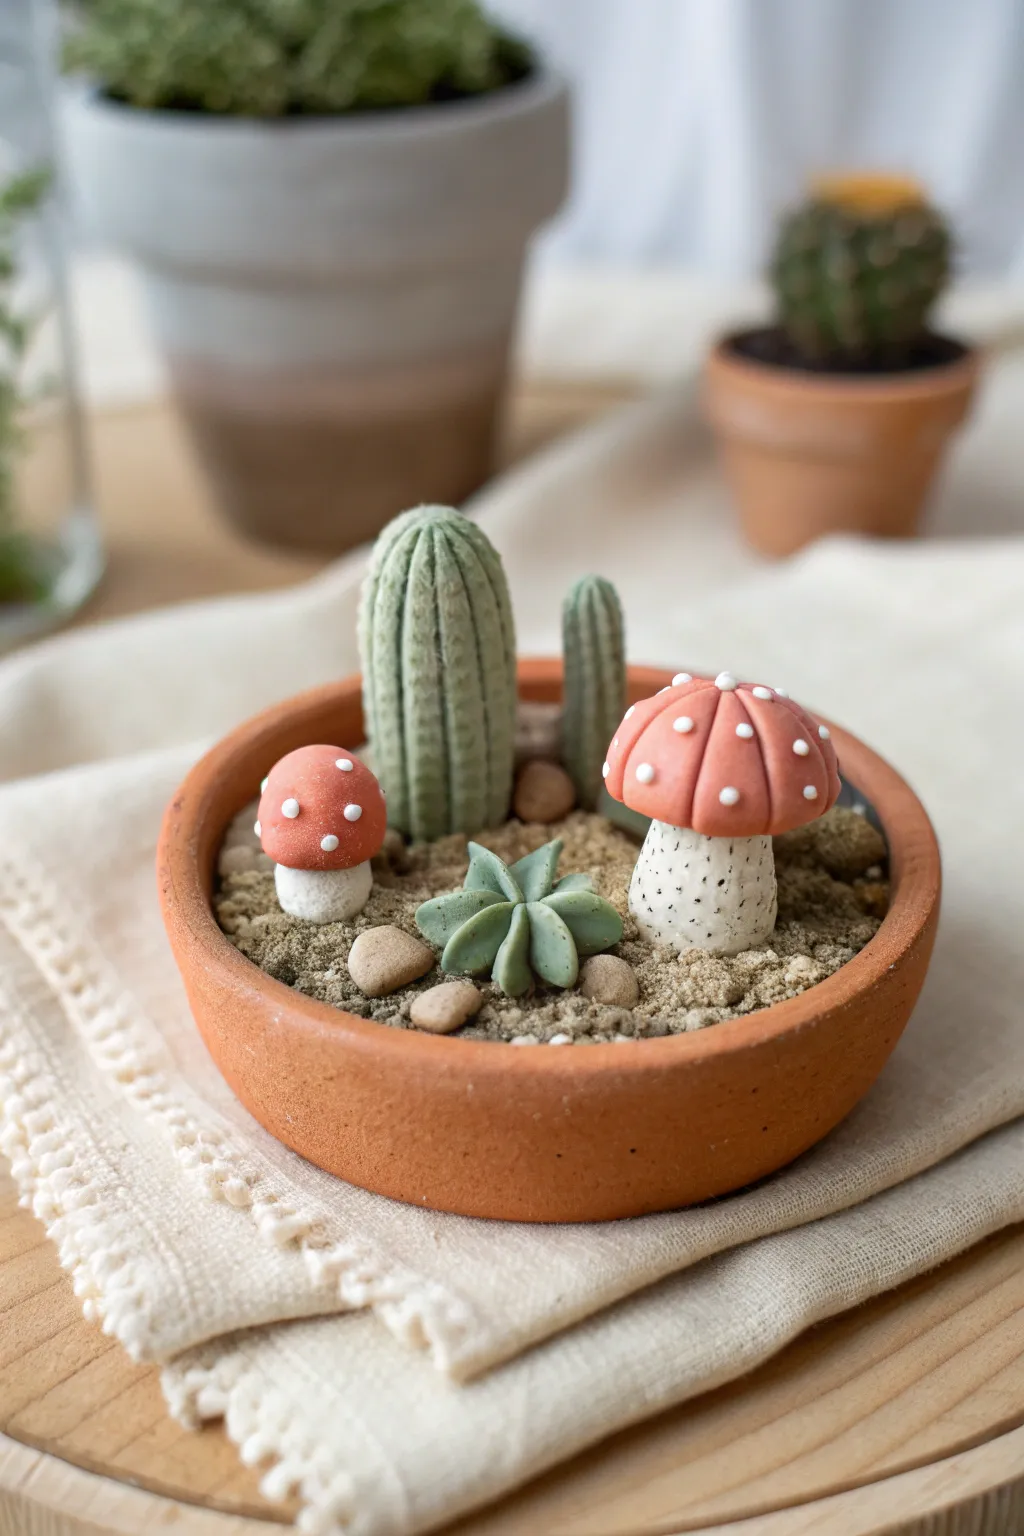
Create a whimsical desert oasis that fits in the palm of your hand with this charming clay project. Combining the prickly textures of cacti with the fairytale allure of toadstools, this miniature garden offers a delightful mix of shapes and earthy tones.
Step-by-Step Tutorial
Materials
- Polymer clay (Sage Green, Forest Green, Terracotta/Red, White, Beige/Tan)
- Small terracotta saucer (approx. 3-4 inches diameter)
- Texture tools (needle tool, toothbrush, or stiff brush)
- Ball stylus tool
- Liquid clay adhesive (optional)
- Translucent liquid clay or gloss glaze (optional)
- Fine sand or crushed beige clay for substrate
- Small pebbles or rocks
- Oven for baking
Step 1: Preparing the Base
-
Fill the saucer:
Begin by filling your terracotta saucer with a layer of beige or tan scrap clay to act as a foundation. This doesn’t need to be perfect since it will be covered, but ensure it’s flat and sits just below the rim. -
Texture the ground:
Apply a thin layer of liquid clay adhesive over the base clay. Sprinkle fine sand or crumbled, baked clay bits over the top to simulate specialized desert soil. Press it down gently so it adheres.
Loose Sand?
If your sand isn’t sticking to the base clay, mix a little liquid clay directly into the sand to create a paste before spreading it.
Step 2: Sculpting the Cacti
-
Form the main cactus:
Roll a log of sage green clay, about 2 inches tall. Round off the top into a dome shape. I find it helpful to slightly taper the base so it nestles into the ground better. -
Ribbing texture:
Use a needle tool or the back of a craft knife to press vertical lines from the top center down to the base all around the cylinder to create the cactus ribs. -
Surface detail:
Gently tap a stiff toothbrush or stippling brush over the entire surface of the green clay to give it a realistic, fuzzy, or prickly texture. -
Create the smaller cactus:
Repeat the previous process with a smaller, thinner log of sage green clay to act as a companion cactus, placing it slightly behind the main one. -
Mount the cacti:
Press both cacti firmly into the sandy base. You can use a dab of liquid clay for a stronger bond.
Step 3: Crafting the Mushrooms
-
Shape the stems:
Roll two thick cylinders of white clay. Taper them slightly so they are wider at the bottom. Use a needle tool to poke tiny, random holes all over the stems to mimic a porous organic texture. -
Form the caps:
create two domes from terracotta or muted red clay—one large and one small. Flatten the bottoms slightly where they will join the stems. -
Indent the caps:
Using the side of a needle tool, press indentations from the center of the cap down to the rim, creating puffy segments similar to a peeled orange. -
Add the spots:
Roll incredibly tiny balls of white clay. Press them gently onto the red caps, focusing on the center of each segmented section. -
Assemble the fungi:
Attach the red caps to the white stems. Place the large mushroom on the right side of the saucer and the smaller ‘button’ mushroom on the left.
Level Up: Glossy Caps
After baking, paint a thin layer of gloss glaze or UV resin solely on the red mushroom caps. This makes them look damp and contrasts beautifully with the matte cactus.
Step 4: The Succulent and Finishing Touches
-
Make succulent leaves:
Pinch off small pieces of sage green clay and shape them into teardrops. These will be the leaves of your ground succulent. -
Assemble the rosette:
Arrange the teardrop shapes in a radial star pattern directly on the sandy base, pressing the pointed centers together to form a rosette. -
Add accent rocks:
Place a few small, smooth pebbles or balls of beige clay shaped like rocks around the base of the plants to fill empty spaces. -
Final texture check:
Look over your composition. If you smudged any textures while assembling, gently re-stipple those areas now. -
Bake:
Bake the entire piece, saucer included, according to your clay manufacturer’s instructions (usually 275°F for 15-30 minutes).
Place your finished mini garden on a sunny windowsill or desk for a permanent touch of nature that never needs watering
Stackable Play Clay Cake Slices
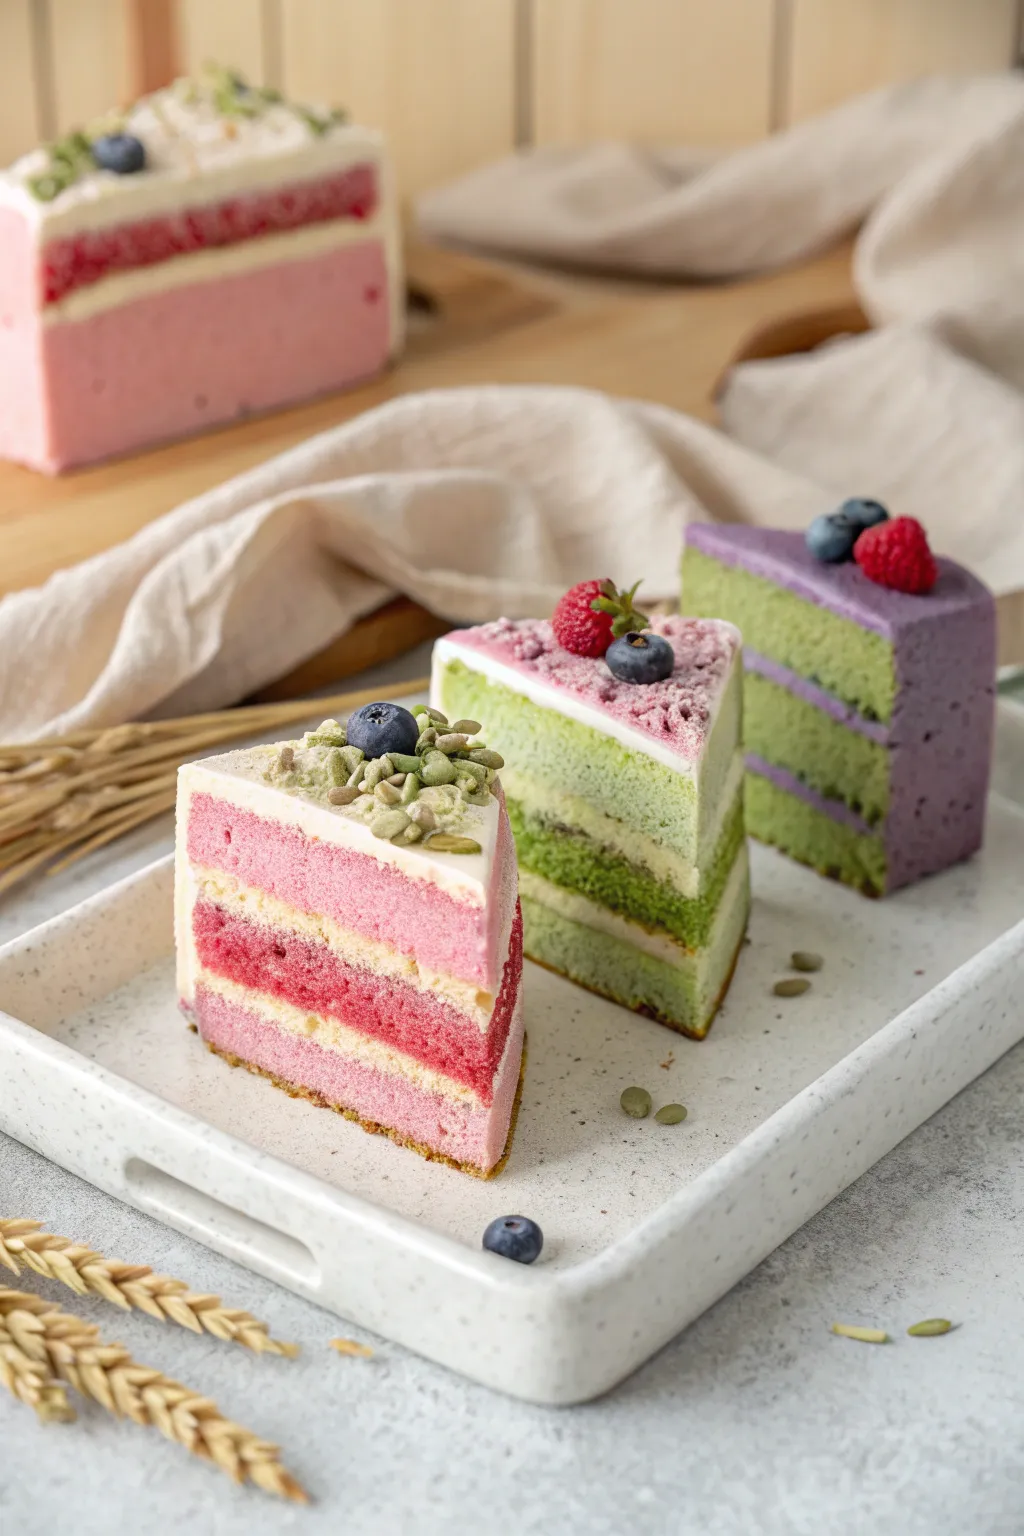
These delightfully realistic cake slices look ready to eat but are actually a long-lasting play food creation. Using simple texturing techniques, you’ll transform basic clay into airy sponge layers topped with detailed faux fruit and frosting.
How-To Guide
Materials
- Polymer clay or air-dry lightweight clay (pink, green, purple, white, cream)
- Texture tool (needle tool, toothbrush, or crumpled aluminum foil)
- Liquid clay (TLS) or thick white glue (for ‘frosting’)
- Clay roller or pasta machine
- Blade or X-Acto knife
- Real blueberries, raspberries, and pumpkin seeds (for reference, creating molds, or hand-sculpting)
- Soft pastel chalks (dark pink, dark green, dark purple)
- Small paintbrush
- Satin or matte varnish
Step 1: Creating the Sponge Layers
-
Mix your colors:
Start by mixing your clay to get soft, bakery-inspired shades. For the pink slice, mix white with a tiny dot of red for a pale pink, and a slightly larger amount of red for a darker berry layer. Repeat this logic for the matcha (green) and yam (purple) slices. -
Roll the sheets:
Roll out your colored clays into thick sheets, about 1/4 inch thick. Also, roll out a sheet of cream or white clay for the filling layers; these should be slightly thinner than your colored sponge layers. -
Texture the surface:
Before cutting specific shapes, use a stiff toothbrush or a ball of crumpled aluminum foil to press a sponge-like texture into the top surface of your colored clay sheets. -
Stack and slice:
Cut your sheets into rectangles or squares. Stack them in an alternating pattern: colored sponge, cream filling, darker sponge, cream filling, and a final colored sponge on top. Once stacked, use your blade to slice the block diagonally to create perfect triangular wedges.
Step 2: Texturing the Cake Crumb
-
Rough up the sides:
This is the most crucial step for realism. Take a needle tool to the cut sides of your cake slice. Gently pick and pull at the clay in a circular motion to disturb the smooth cut surface. -
Refine the texture:
Continue texturing until the layers look like baked crumbs rather than smooth plastic. Pay special attention to the lines where the filling meets the sponge, blending them slightly so it looks like the frosting has soaked in. -
Add baked depth:
Shave a small amount of soft pastel chalk (darker pink for the berry cake, deep green for matcha) into a powder. With a dry brush, dust this powder onto the textured sponge areas to mimic the deeper color of moist cake crumb.
Crumble Texture Hack
To get realistic uneven crumbs, bake a scrap piece of clay first, then grate it with a spice grater. Press these hard crumbs into the raw soft clay.
Step 3: Frosting and Decorations
-
Frost the tops:
Depending on the look you want, either roll a thin sheet of white clay for a fondant look or spread a mixture of liquid clay (or thick glue) and white clay for a creamy buttercream effect on the top surface. -
Sculpt the berries:
Hand-roll tint balls of dark blue clay for blueberries and red clay for raspberries. I find it helpful to use a needle tool to press the tiny segments into the raspberry surface for texture. -
Make the seeds:
For the pumpkin seeds shown on the pink and green cakes, roll tiny teardrops of olive-green clay and flatten them. For the sunflower seeds, use a pale beige clay. -
Arrange the toppings:
Place your sculpted fruit and seeds onto the frosting layer while it is still tacky. Group them clustered near the back crust edge for a professional pastry look. -
Add surface sprinkles:
For the middle cake, create ‘crumbles’ by grating dried clay scraps or chopping raw clay very finely. Sprinkle these over the wet frosting. -
Final cure:
If using polymer clay, bake according to the manufacturer’s instructions (usually 275°F for 15-30 minutes). If using air-dry clay, allow the piece to dry fully for 24-48 hours. -
Seal the deal:
Once cool or dry, apply a matte varnish to the sponge areas and a satin varnish to the fruit pieces to make them look juicy and fresh.
Scented Slices
Mix a tiny drop of vanilla, berry, or matcha soap fragrance oil into the clay before sculpting to make your play food smell exactly like the real dessert.
Display your beautiful trio of cake slices on a mini serving tray for a tea party setup that looks good enough to eat
Mini Story Characters for Imaginative Play
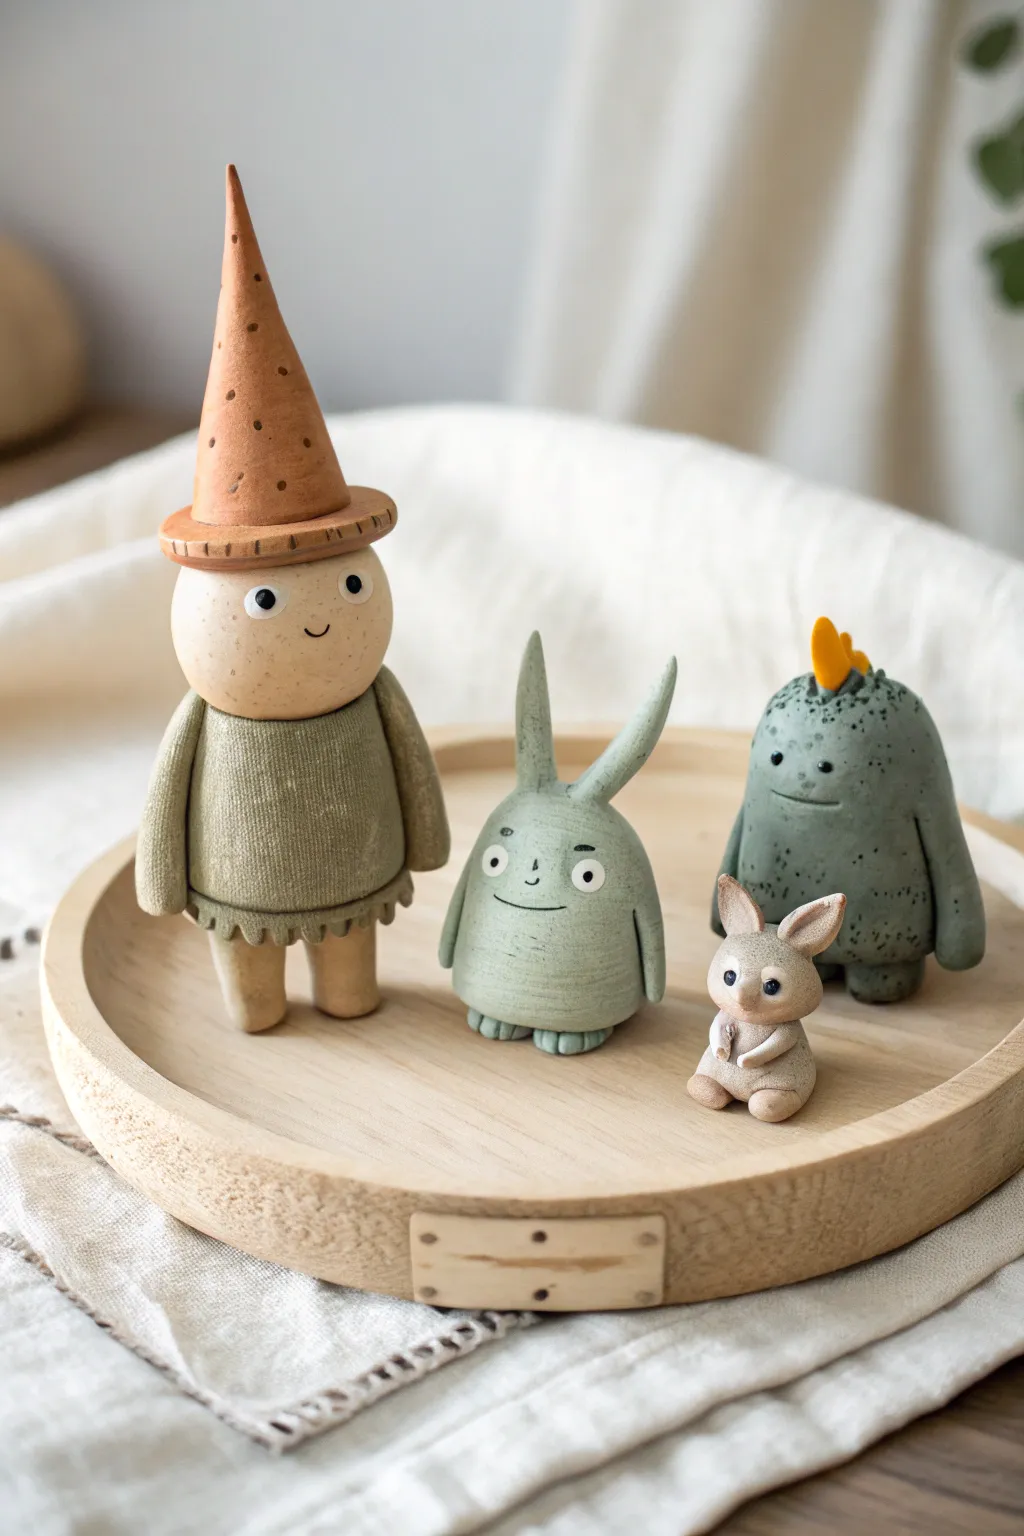
Bring a touch of storybook magic to your shelf with these four charming clay characters, featuring earthy tones and adorable, simple expressions. This project focuses on simple shapes and subtle textures to create a cohesive set perfect for imaginative play or sweet décor.
Step-by-Step Tutorial
Materials
- Polymer clay (beige/sand, sage green, dark moss green, yellow, brown)
- Acrylic paint (black and white for eyes/details)
- Small dotting tool or toothpick
- Sculpting tools (needle tool, small blade)
- Texture tools (sandpaper, toothbrush, or stiff bristle brush)
- Matte varnish (optional)
Step 1: The Cone-Hat Wanderer
-
Form the body:
Start with sage green clay, rolling a cylinder that widens slightly at the bottom for the tunic. Press a circular indentation into the top where the head will sit. -
Add tunic details:
Roll two small snakes of green clay for arms and attach them seamlessly to the sides. Use a blade to create a scalloped edge along the bottom hem of the tunic for a ruffle effect. -
Create the head and legs:
Roll a smooth beige sphere for the head and place it into the neck indentation. For legs, attach two short, sturdy beige cylinders under the tunic so the figure stands balanced. -
Sculpt the hat:
Shape brown clay into a tall, classic cone. Create a flat brim by flattening a small disk of brown clay and attaching the cone on top. Press small indentations into the brim edge for texture. -
Add texture:
Gently press a piece of coarse sandpaper or a toothbrush against the hat and tunic to give them a fabric-like, stone-ware texture. Place the hat atop the head.
Clay Too Soft?
If your clay gets too warm and sticky to hold detail, pop it in the fridge for 10 minutes. This firms it up, making it easier to carve those tiny smiles and toes.
Step 2: The Sage Green Hare
-
Shape the base:
Using light sage green clay, roll a smooth egg shape that’s slightly flattened at the bottom so it sits securely. -
Add ears:
Roll two tapered logs of the same green clay. Attach them to the top of the head, blending the seams downward so they look like one piece. Curve one ear slightly for character. -
Define the arms and feet:
Instead of separate pieces, use a modeling tool to carve slight vertical grooves into the sides of the body to suggest arms held close. Add tiny flattened balls for feet at the base, marking toes with a knife. -
Surface finishing:
Before baking, I like to gently roll the entire figure over a textured surface or lightly tap with a stiff brush to mimic that matte, ceramic feel seen in the photo.
Pro Tip: Seamless Blending
To make limbs look like they grew from the body (not just stuck on), use a silicone or rubber tip tool to drag the clay across the seam until it disappears completely.
Step 3: The Mossy Monster
-
Mold the body:
Take a larger portion of dark moss green clay and form a heavy, rounded mound shape. It should look sturdy and grounded. -
Create speckles:
Mix tiny flecks of black or very dark green clay into your main color, or wait to paint speckles later. The clay mixing method gives a more natural stone look. -
Attach appendages:
Blend two thick arms onto the sides, letting them hang low. For the crest, shape three small yellow triangles and press them in a row along the top of the head. -
Facial features:
Use a needle tool to scribe a wide, straight line for the mouth. Prick two small holes for the eyes.
Step 4: The Tiny Bunny
-
Form the mini body:
Use a small amount of beige clay to make a tiny pear shape for the body and a smaller sphere for the head. -
Tiny details:
Add minuscule ears and tiny paws resting on the belly. This figure is much smaller than the others, so use a light touch to avoid squishing the shapes.
Step 5: Baking and Finishing
-
Bake:
Bake all figures according to your clay package instructions. Monitor the oven temperature closely to prevent the light colors from scorching. -
Paint eyes:
Once cool, use a dotting tool and white paint for the eyes of the Sage Hare and Cone Wanderer. Add tiny black pupils once the white is dry. For the Mossy Monster, use simple black dots. -
Final touches:
Add tiny smiles with a very fine black pen or liner brush. Paint the hat spots on the Wanderer with dark brown paint.
Arranging your new little friends together creates an instant storytelling scene ready for adventures
Play Clay Picture Drawing (Clay Mosaics)
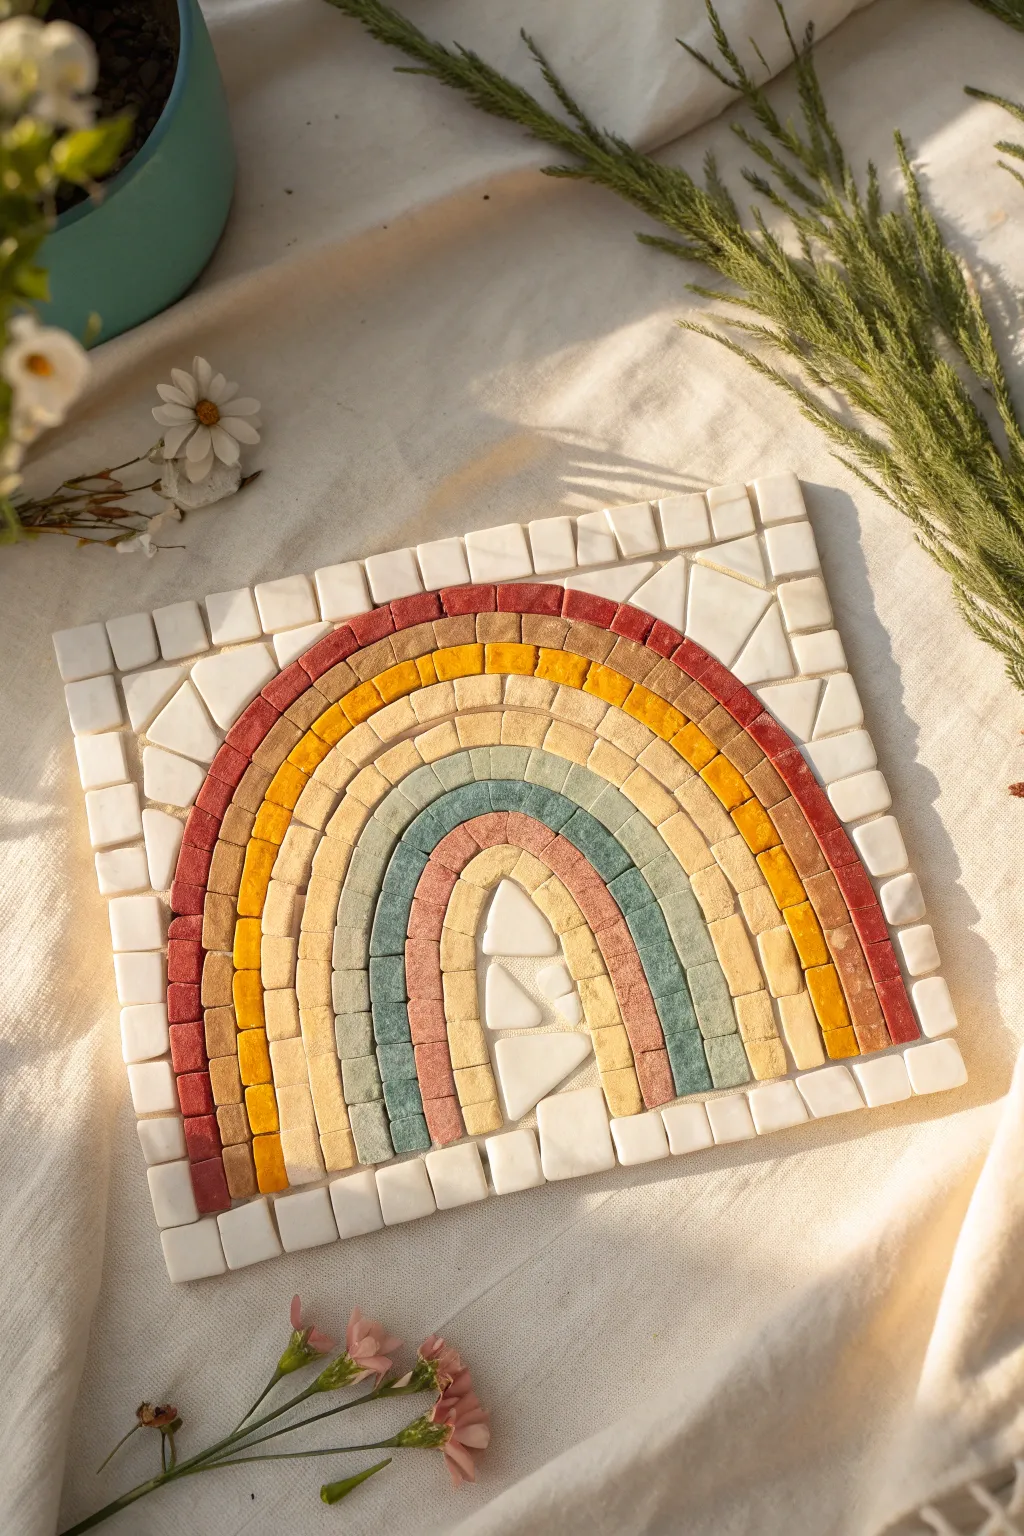
Create a stunning, textured piece of wall art using simple clay tiles arranged in a calming, muted rainbow arch. This mosaic project combines the satisfaction of puzzling with the tactile joy of working with clay, resulting in a beautiful decor item with a rustic, handmade feel.
How-To Guide
Materials
- Air-dry clay (white)
- Acrylic paints (muted terracotta, ochre, sandy beige, sage green, dusty pink)
- Square plywood or sturdy cardboard base (approx. 8×8 inches)
- Rolling pin
- Ruler
- Craft knife or clay cutting tool
- Fine-grit sandpaper
- Strong craft glue (e.g., PVA or tacky glue)
- Paintbrushes
- Pencil and compass (for sketching the arch)
- Clear matte varnish (optional)
Step 1: Prepping the Tiles
-
Roll out the clay:
Begin by conditioning your air-dry clay and rolling it out on a smooth surface to an even thickness of about 1/4 inch. If you want perfectly uniform tiles, use guide rails or two paint stirrers on either side of your rolling pin. -
Cut the tiny squares:
Using a ruler and your craft knife, cut long strips of clay that are roughly 1 cm wide. Then, cut across those strips to create dozens of small, square tiles (tesserae). You will need roughly 150-200 small squares depending on your base size. -
Create irregular shapes:
Don’t forget to cut some larger, irregular triangular and trapezoidal shapes. Looking at the reference, these will be used to fill the awkward corners and the very center of the rainbow arch. -
Smooth the edges:
As you cut, gently tap the edges of the tiles with your finger to soften any sharp corners. This gives the finished mosaic a more tumbled, organic stone look rather than sharp ceramic. -
Let them dry completley:
Lay all your cut pieces on a flat board lined with parchment paper. Let them dry for at least 24-48 hours, flipping them once halfway through to ensure the bottoms dry evenly and don’t curl.
Keep Tiles Flat
To prevent air-dry clay tiles from curling up at the edges while drying, place a lightweight book or flat board on top of them after the first hour of drying.
Step 2: Painting the Elements
-
Sort your tiles:
Once fully dry, separate your square tiles into five groups for the rainbow arches, plus a pile for the white border and background. -
Mix your palette:
Prepare your acrylic paints. To achieve the boho look seen in the photo, mix your colors with a tiny bit of white or brown to mute them. You want a deep terracotta, a golden ochre, a light sand, a sage/teal green, and a dusty rose. -
Paint the red arch:
Paint the first group of tiles with the deep terracotta color. Paint the tops and sides, but you can leave the bottoms plain since they will be glued down. -
Paint the yellow arch:
Paint the second group with your golden ochre shade. Varying the water content slightly can create nice subtle tonal variations on the clay surface. -
Paint the remaining arches:
Continue painting the remaining groups in the sand, sage green, and dusty rose colors. Leave the border tiles and the larger irregular filler pieces unpainted in their natural white clay state.
Step 3: Assembling the Mosaic
-
Mark your base:
Take your square wooden or cardboard base. Find the center point near the bottom edge and use a compass (or a string and pencil) to lightly sketch the five concentric arches of your rainbow. -
Start with the center:
I find it easiest to start from the middle and work outward. Glue down the white, irregular triangular pieces in the very center ‘eye’ of the rainbow first. -
Dry fit the first arch:
Before gluing, place the dusty rose tiles along the smallest pencil arch to check spacing. You might need to gently sand the sides of some tiles to make them fit the curve better. -
Glue the rose arch:
Apply a dab of craft glue to each tile and press it firmly into place along your guide line. -
Build the rainbow:
Continue adding the subsequent rows color by color: sage green, sand, ochre, and finally the outer terracotta arch. Keep the gaps between tiles relatively tight, but small imperfections add character. -
Create the border:
Once the rainbow is complete, arrange the unpainted white square tiles around the perimeter of the square base to form a neat frame. -
Fill the corners:
Now, tackle the tricky triangular spaces between the curved rainbow and the straight border. Use your larger, irregular white pieces here. You may need to use sandpaper to shape them into specific wedges to fit snugly. -
Clean up:
Check for any glue strings or smudges. If you want extra durability, you can apply a coat of matte varnish over the painted sections, though raw clay has a lovely texture on its own.
Gaps Too Big?
If you end up with awkward gaps that your pre-cut tiles won’t fill, mix a tiny amount of wet clay with white glue to make a paste and use it like ‘grout’ to fill specific holes.
Hang your finished mosaic on the wall or display it on a shelf to bring a warm, artistic touch to your space