Whenever I’m stuck for inspiration, I grab a few colors of polymer clay and make something small enough to finish in one cozy session. Here are my favorite polimer clay ideas—classic crowd-pleasers first, then some playful twists once you’re warmed up.
Easy Statement Polymer Clay Earrings
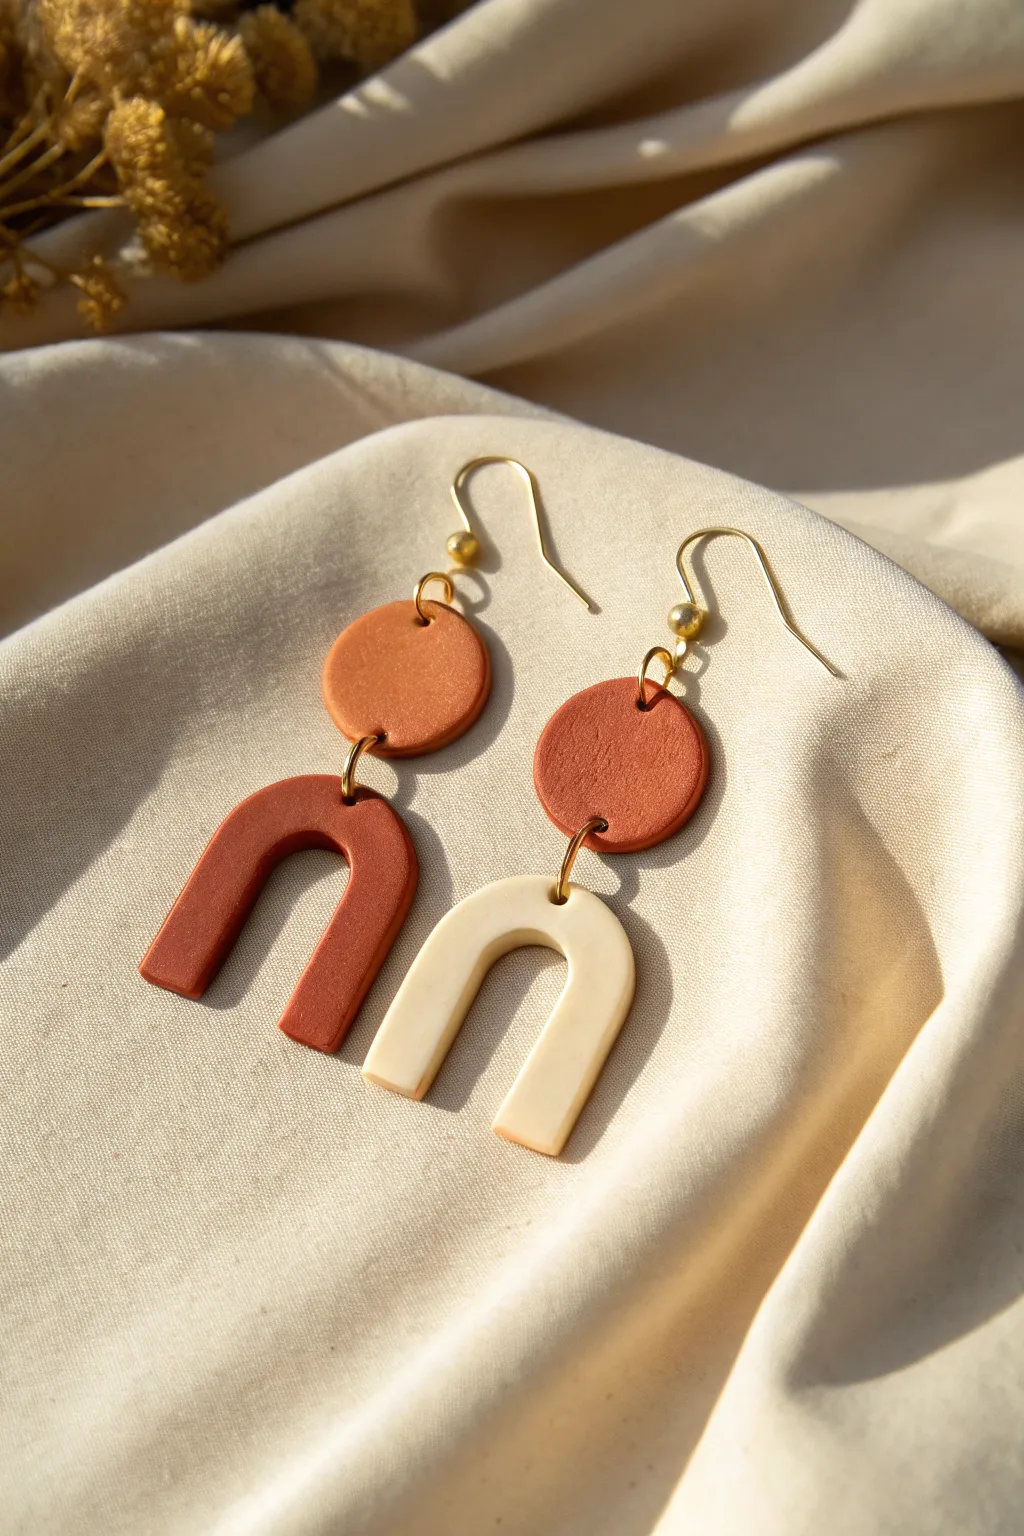
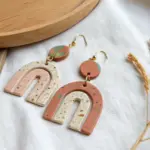
Embrace a warm, desert-inspired aesthetic with these chic polymer clay earrings featuring a classic arch and circle geometric design. The mismatched color palette between the dangles adds a modern, playful twist to an otherwise minimalist accessory.
Step-by-Step
Materials
- Polymer clay in terracotta, rust red, and cream/off-white
- Acrylic rolling pin or pasta machine
- Circle cutter (approx. 1 cm)
- U-shaped arch cutter (approx. 2.5 cm)
- Parchment paper or ceramic tile
- Gold ear wires (shepherd’s hooks)
- Gold jump rings (6mm or 7mm)
- Jewelry pliers (flat nose and round nose)
- Hand drill or needle tool
- Fine-grit sandpaper (optional)
- Oven
Step 1: Prepping and Cutting
-
Condition the Clay:
Begin by kneading each color of clay—terracotta, rust red, and cream—separately in your hands until they are soft and pliable. This prevents cracking later. -
Roll It Out:
Roll each clay color into a flat slab of even thickness, approximately 3mm thick. If you’re using a pasta machine, stick to a medium setting. -
Cut the Circles:
Using your small circle cutter, punch out two circles from the terracotta clay slab. These will serve as the top connectors for both earrings. -
Cut the Arches:
Use your arch cutter to punch one shape from the rust red slab and one shape from the cream slab. This creates the mismatched dangle look. -
Smooth the Edges:
Before baking, gently run your finger along the cut edges of each piece to soften any sharp ridges or loose bits of clay.
Step 2: Piercing and Baking
-
Mark Hole Placements:
Carefully mark where the holes will go. You need one hole at the top and bottom of each terracotta circle, and one hole at the apex of each arch. -
Pierce the Holes:
Using a needle tool or toothpick, pierce the marked spots. Ensure the hole is wide enough for your jump rings to move freely. -
Double Check Alignment:
Hold the circle above the arch to make sure your holes line up vertically so the earrings hang straight. -
Bake the Pieces:
Place your clay pieces on a parchment-lined baking sheet or a ceramic tile. Bake according to your brand’s specific temperature and time instructions—usually around 275°F (135°C) for 30 minutes. -
Cool Down:
Allow the pieces to cool completely inside the oven or on the baking sheet before handling them, as warm clay is fragile. -
Sand for Perfection:
If there are any rough spots or fingerprints after baking, lightly buff the edges and surface with fine-grit wet sandpaper for a professional matte finish.
Clean Edge Secret
Before cutting your shapes, place a sheet of plastic wrap over the clay slab. Press the cutter down through the plastic for instantly rounded, domed edges that require zero sanding.
Step 3: Assembly
-
Open the Jump Rings:
Using two pairs of pliers, twist your gold jump rings open laterally (side-to-side, not pulling apart) to preserve their shape. -
Connect the Pieces:
Thread an open jump ring through the bottom hole of a terracotta circle and the top hole of the rust arch. Close the ring securely. -
Repeat for Second Earring:
Repeat the previous connection step with the second terracotta circle and the cream-colored arch. -
Attach Ear Wires:
Open the small loop at the base of your ear wire hook using your pliers. -
Final Connection:
Thread the ear wire loop through the top hole of the terracotta circle. Ensure the hook faces the back so the finished front is visible when worn. -
Secure Everything:
Gently squeeze the ear wire loop closed. Give the earrings a little shake to make sure all parts move freely.
Texture Play
For a terrazzo effect, sprinkle tiny chopped bits of the opposing color onto the clay slabs and roll flat before cutting. Add dried flower petals for an organic look.
Enjoy wearing these earthy, lightweight accessories that you crafted with your own hands


Mini Charm Keychains From Polymer Clay
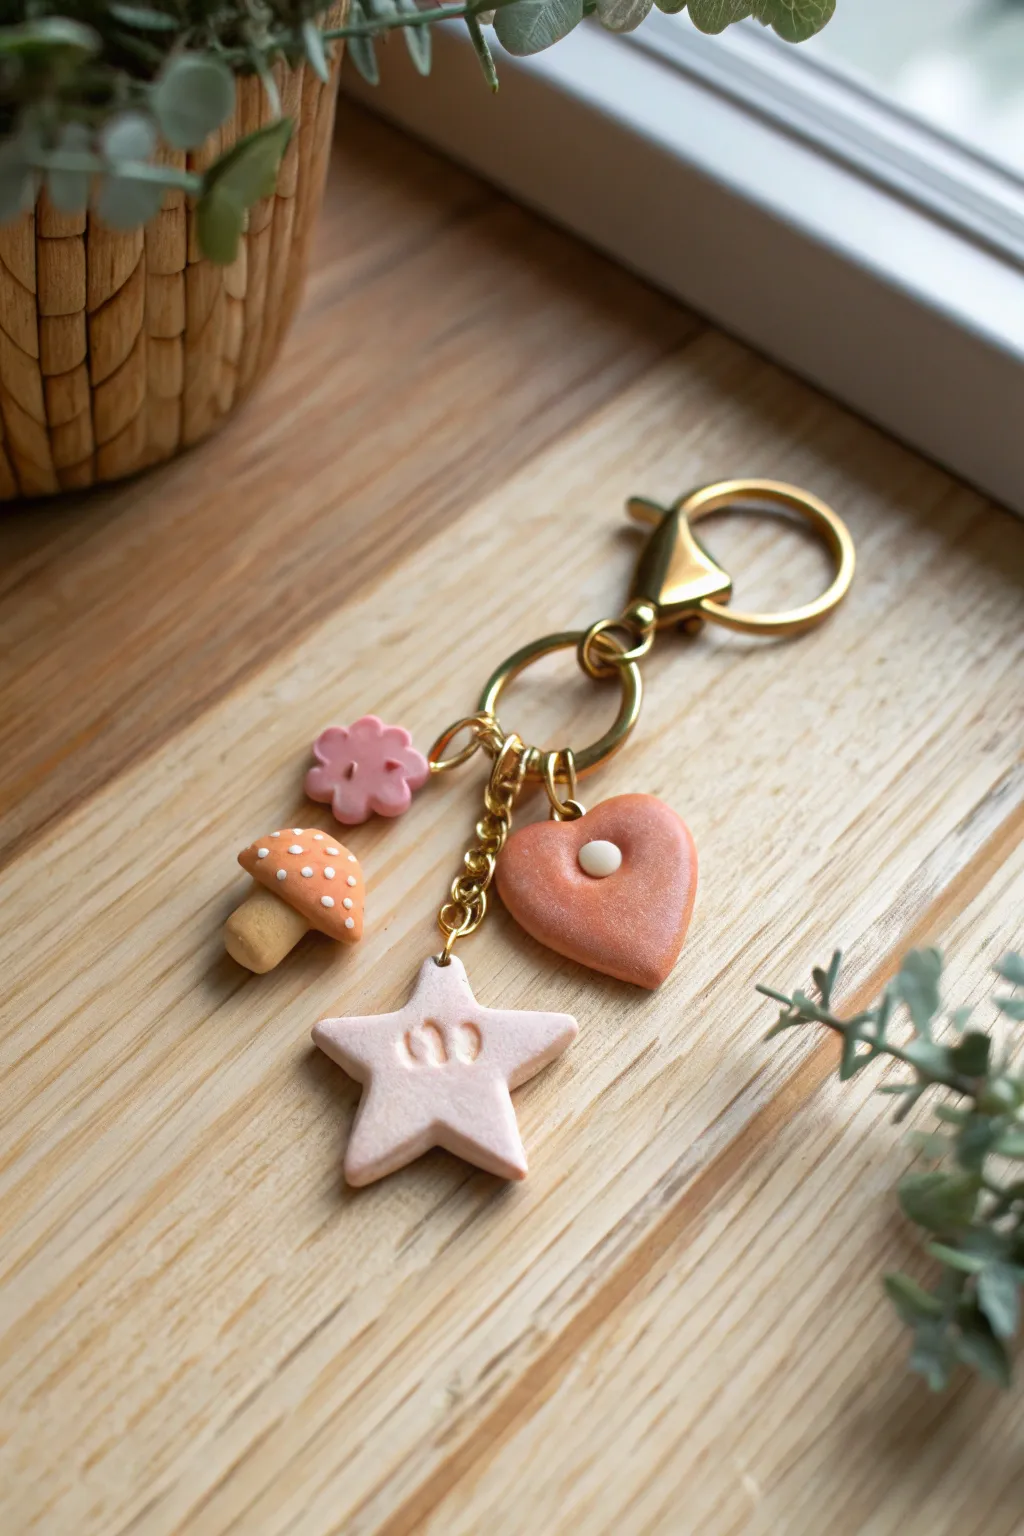
Create a personalized, dangling accessory featuring four distinct mini-charms: a mushroom, a flower, a star, and a heart. This project combines simple modeling techniques with elegant hardware for a boutique-style finish.
How-To Guide
Materials
- Polymer clay in beige/tan (mushroom stem), orange (mushroom cap), pink (flower), light pink (star), and shimmer terracotta (heart)
- White liquid clay or white clay bit (for dots)
- Eye pins (gold tone)
- Jump rings (gold tone, assorted sizes)
- Keychain clasp with chain extender (gold tone)
- Basic sculpting tools (needle tool, small ball tool)
- Cookie cutters (small star, small flower, small heart)
- Needle nose pliers
- Wire cutters
- Gloss glaze (optional)
Step 1: Prepping and Modeling the Charms
-
Condition the clay:
Start by thoroughly conditioning each color of polymer clay until it is soft and pliable. Roll them into smooth balls to prepare for shaping. -
Shape the mushroom stem:
Take a small pea-sized amount of beige clay and roll it into a thick cylinder. Gently flatten the bottom so it stands upright. -
Form the mushroom cap:
Roll a slightly larger ball of orange clay and flatten one side to create a dome. Press this gently onto your beige stem to join them. -
Add mushroom details:
Using a very small tool or toothpick, apply tiny dots of white liquid clay (or tiny rolled balls of white clay) to the orange cap. Vary the sizes for a natural look. -
Cut the star charm:
Roll out a slab of light pink clay to about 1/4 inch thickness. Use a small star cutter to punch out your shape; smooth any rough edges with your finger. -
Imprint the star:
Personalize the star by gently pressing an initial stamp or a patterned tool into the center, being careful not to push all the way through. -
Create the flower:
Use pink clay to form or cut a simple five-petal flower shape. Use a needle tool to press an indentation into the center of each petal for dimension. -
Model the heart:
Form the shimmer terracotta clay into a plump heart shape by hand or using a cutter. Soften the edges so it looks pillowy rather than sharp. -
Detail the heart:
Press a small indentation into the center of the heart and place a tiny dot of white clay inside it.
Secure That Pin
Bend the end of your eye pin into a tiny ‘L’ shape or zig-zag before inserting it into the raw clay. This creates an internal anchor so the pin can’t be pulled out after baking.
Step 2: Assembly and Baking
-
Insert eye pins:
Trim your gold eye pins to an appropriate length (about halfway through the charm). Insert one into the top of every charm. To secure them, I like to add a tiny dab of liquid clay to the wire before inserting. -
Bake the charms:
Arrange your charms on a parchment-lined baking sheet. Bake according to your specific clay manufacturer’s instructions (usually 275°F for 15-30 minutes). -
Cool down:
Allow the charms to cool completely before handling. This hardening phase is crucial for durability. -
Glaze (optional):
If you want extra shine, apply a thin coat of gloss glaze to the mushroom cap or the heart and let it dry.
Add Sparkle
Before baking, brush a tiny amount of mica powder or pearlescent eyeshadow over the terracotta heart to enhance the shimmer effect shown in the original design.
Step 3: Hardware Attachment
-
Prepare the chain:
Lay out your keychain hardware. Decide where each charm will sit; staggering them at different heights creates a nice cluster effect. -
Open jump rings:
Using two pairs of pliers, twist your jump rings open sideways (never pull them apart). -
Attach the main charms:
Slide the loop of the heart and star charms onto jump rings and attach them to the lower links of the chain. -
Attach accent charms:
Attach the smaller mushroom and flower charms to upper links or directly to the main split ring for visual balance. -
Secure everything:
Twist all jump rings closed tightly, ensuring there are no gaps where the charms could slip off.
Clip your new handmade accessory onto your keys or bag and enjoy the gentle jingle of your custom charms


Kawaii Mini Food Charms
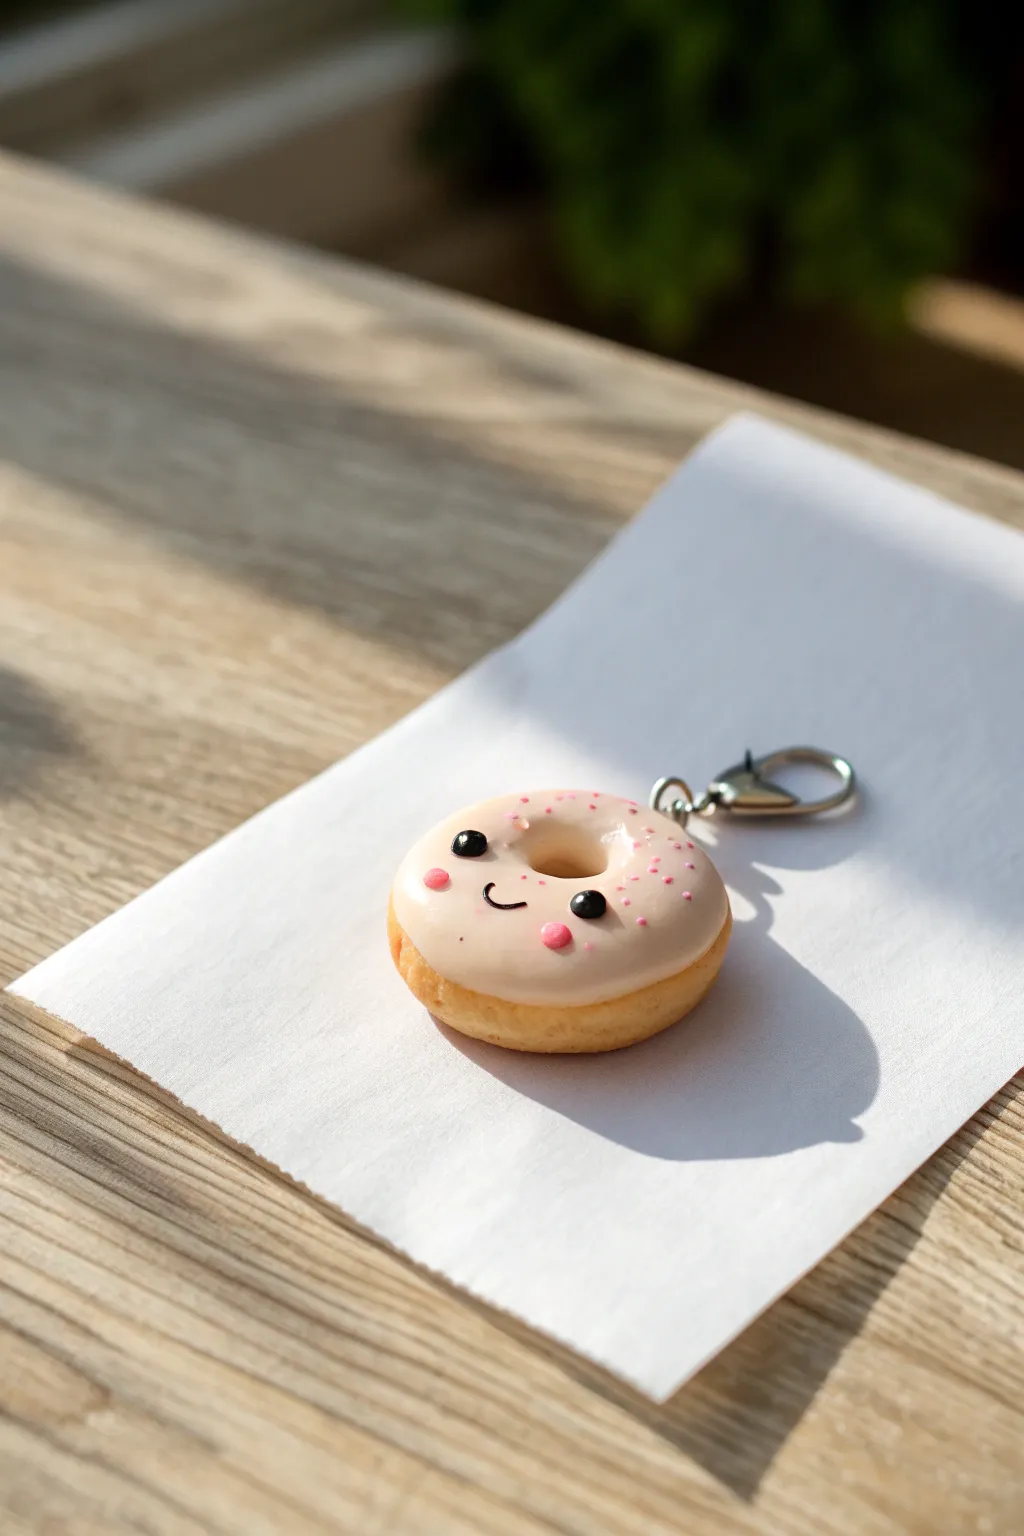
Turn a simple lump of clay into the sweetest pastry accessory with this adorable donut charm tutorial. Featuring soft doughy textures, glossy pink icing, and a tiny smiling face, this project is perfect for beginners looking to add a touch of whimsy to their keychain collection.
Step-by-Step
Materials
- Light tan/beige polymer clay (dough color)
- Pale pink polymer clay (icing color)
- Black polymer clay (tiny amount for eyes/mouth)
- Pink or red polymer clay (tiny amount for cheeks)
- Small eye pin
- Jump ring and lobster clasp keychain hardware
- Liquid polymer clay (translucent or white mixed with paint)
- Pastel chalks (orange/brown)
- Small paintbrush
- Needle tool or toothpick
- Ball stylus tool
- Dotting tool
- Gloss glaze or UV resin (optional)
Step 1: Shaping the Dough Base
-
Condition the Clay:
Start by taking a piece of tan or beige clay about the size of a large marble. Knead it thoroughly in your hands until it becomes soft and pliable, which prevents cracking later during baking. -
Form the Base Shape:
Roll the clay into a smooth, seamless ball. Gently flatten it between your palms or against your work surface until you have a thick, rounded disc that resembles an unbaked donut. -
Create the Center Hole:
Using a needle tool or the rounded end of a paintbrush, press directly into the center of the disc. Push all the way through, then wiggle the tool slightly to widen the hole until it looks proportional. -
Soften the Edges:
If the hole has sharp edges where the tool entered, gently tap and smooth the clay with your finger to give it that realistic, puffy fried dough look. -
Texture and Shade:
To make the donut look golden-baked, scrape a little orange and brown pastel chalk into a powder. Dry brush this powder around the edges and bottom of the donut, leaving the center slightly lighter for a realistic ‘baked’ gradient.
Pro Tip: Texturing
Use an old toothbrush to gently tap the tan ‘dough’ areas before baking. This creates a realistic sponge-cake texture that contrasts beautifully with the smooth icing.
Step 2: Adding the Sweet Icing
-
Prepare the Pink Icing:
Condition a smaller amount of pale pink clay. You want this to look fluid, so mix it with a tiny drop of liquid polymer clay or baby oil to soften it significantly, or simply roll it out very thinly. -
Cut the Icing Shape:
Flatten the pink clay into a thin sheet. You can use a small circular cutter slightly smaller than your donut, or hand-cut a wavy, uneven circle to mimic poured glaze. -
Apply the Icing:
Gently drape the pink clay over the top of your tan donut. Smooth it down the sides slightly so it looks like it is melting over the curves, but don’t cover the bottom. -
Refine the Center:
Don’t forget the hole! Use your needle tool to pierce through the pink icing where the donut hole is, smoothing the pink clay down into the hole for a seamless finish. -
Add Sprinkles:
For the tiny pink specks seen in the photo, either use tiny bits of darker pink clay rolled into microscopic balls, or create a speckled effect by flicking a toothbrush with diluted pink paint. I prefer placing tiny clay dots manually for control.
Troubleshooting: Dirty Clay
Light clay acts like a magnet for dust and lint! Keep baby wipes nearby and clean your hands and tools thoroughly before switching to the white or light pink clay.
Step 3: Creating the Kawaii Face
-
Mark the Placement:
Before committing with black clay, lightly mark where you want the eyes and mouth to go using a needle tool to ensure symmetry. -
Make the Eyes:
Roll two minuscule balls of black clay. Press them gently onto the icing, spacing them somewhat wide apart to achieve that classic cute aesthetic. -
Form the Smile:
Roll an incredibly thin snake of black clay—as thin as a thread. Cut a tiny segment and carefully curve it into a ‘U’ shape using your needle tool, placing it centered between the eyes. -
Add Blushing Cheeks:
Take two tiny dots of bright pink or red clay. Flatten them onto the cheeks, just below and to the outside of the eyes, to give the donut a shy, happy expression. -
Eye Highlights:
For that sparkle in the eyes, use a needle tip to apply a tiny dot of white paint or white liquid clay to the upper corner of each black eye.
Step 4: Assembly and Finishing
-
Insert Hardware:
Trim an eye pin to the right length (about 1cm). Dip the end in a little liquid polymer clay for extra grip and insert it firmly into the top of the donut. -
Bake:
Place your creation on a ceramic tile or baking sheet. Bake according to your brand of clay’s instructions—usually around 275°F (130°C) for 15-20 minutes. -
Cool Down:
Let the donut cool completely before handling. It will still be slightly soft when hot but hardens as it reaches room temperature. -
Glaze (Optional):
If you want the icing to look wet and sugary, apply a coat of gloss glaze or UV resin just to the pink parts and the eyes, avoiding the ‘dough’ areas. -
Attach Keyring:
Once everything is dry and set, use pliers to open a jump ring, thread it through the eye pin loop, attach your lobster clasp, and close the ring securely.
Now you have a charming little companion ready to sweeten up your keys or backpack


Simple Cute Animal Figurines
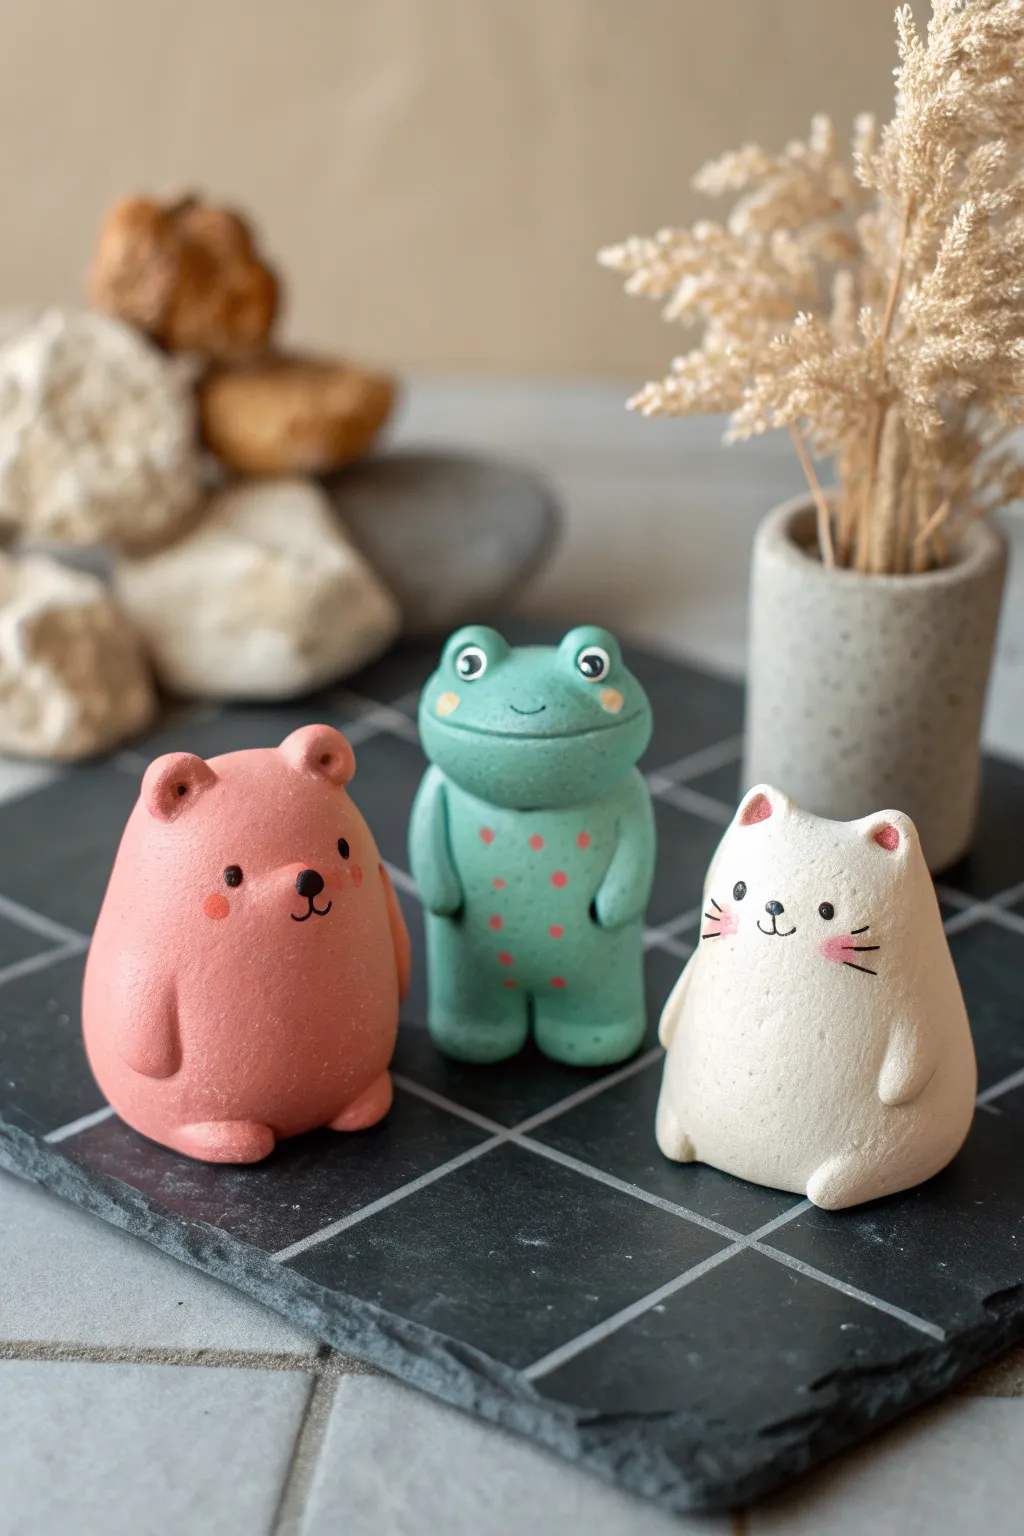
These charming, minimalist animal figurines are perfect for beginners, featuring soft, rounded shapes and sweet expressions. You’ll create a pastel pink bear, a spotted green frog, and a cheerful white cat using basic sculpting techniques.
Step-by-Step Tutorial
Materials
- Polymer clay in pastel pink, mint green, and white
- Acrylic paint (black, pink, orange)
- Fine detail paintbrush or dotting tool
- Modeling tools (ball tool, needle tool)
- Baking sheet and parchment paper
- Matte varnish (optional)
Step 1: Shaping the Base Bodies
-
Condition the clay:
Start by kneading each color of polymer clay separately until it is soft, pliable, and free of cracks. This ensures a smooth finish later. -
Form the main shapes:
Roll three balls of clay: a larger one in white for the cat, a medium one in pink for the bear, and a medium one in green for the frog. -
Create the heavy-bottomed look:
Gently gently roll each ball into a rounded cone or teardrop shape, flattening the bottom so they sit stable. Aim for a ‘chunky’ silhouette where the body and head are fused into one organic shape. -
Refine the frog’s shape:
For the green frog, I like to press slightly inward near the mid-section to distinguish a head area from the body, though keeping it subtle is key to the style.
Step 2: Adding Ears and Limbs
-
Make the bear ears:
Roll two tiny balls of pink clay. Press them gently onto the top corners of the pink body and use a small ball tool to make an indentation in the center of each ear. -
Add the cat ears:
Pinch two small triangles of white clay. Attach them to the top of the white body, smoothing the seams downward into the head so they look integrated rather than stuck on. -
Sculpt the frog eyes:
Roll two small balls of green clay and press them onto the top of the frog’s head. Unlike the others, these should protrude upwards distinctly. -
Attach the arms:
For all three animals, roll snake-like shapes for arms. Attach them to the sides of the bodies, blending the shoulder area smooth. For the bear and cat, keep them simple; for the frog, allow them to rest slightly on its belly. -
Form the feet:
Create small oval shapes for feet. Tuck two under the front of each animal so just the tips stick out, giving them a seated appearance.
Smooth Operator
Before baking, brush a tiny amount of baby oil or clay softener over the figures with your finger. This removes fingerprints and creates a flawless finish.
Step 3: Baking and Painting Details
-
Bake the figures:
Place your trio on a baking sheet lined with parchment paper. Bake according to your clay manufacturer’s instructions (usually around 230°F – 275°F for 15-30 minutes) and let them cool completely. -
Paint the bear’s face:
Using a fine brush or dotting tool, paint two small black eyes wide apart. Add a small nose and a vertical line for the mouth. Use pink paint to dab rosy cheeks. -
Detail the frog:
Paint white circles on the frog’s eye bumps, then add black pupils. Paint a simple curved smile. Add pink dots vertically down its belly for a whimsical touch. -
Finish the cat:
Paint wide-set black eyes, a tiny nose, and a ‘w’ shaped mouth. Add three whiskers on each cheek. Paint the insides of the ears pink to match the blush. -
Seal the work:
Once the paint is fully dry, apply a thin coat of matte varnish if you want to protect the surface without making it glossy.
Dull Colors?
If your white clay looks dirty after baking, use a cotton swab dipped in rubbing alcohol or acetone to gently wipe away surface dust or lint before painting.
Set your trio on a shelf or desk where their sweet expressions can brighten your day

What Really Happens Inside the Kiln
Learn how time and temperature work together inside the kiln to transform clay into durable ceramic.
Marbled Polymer Clay Pendants
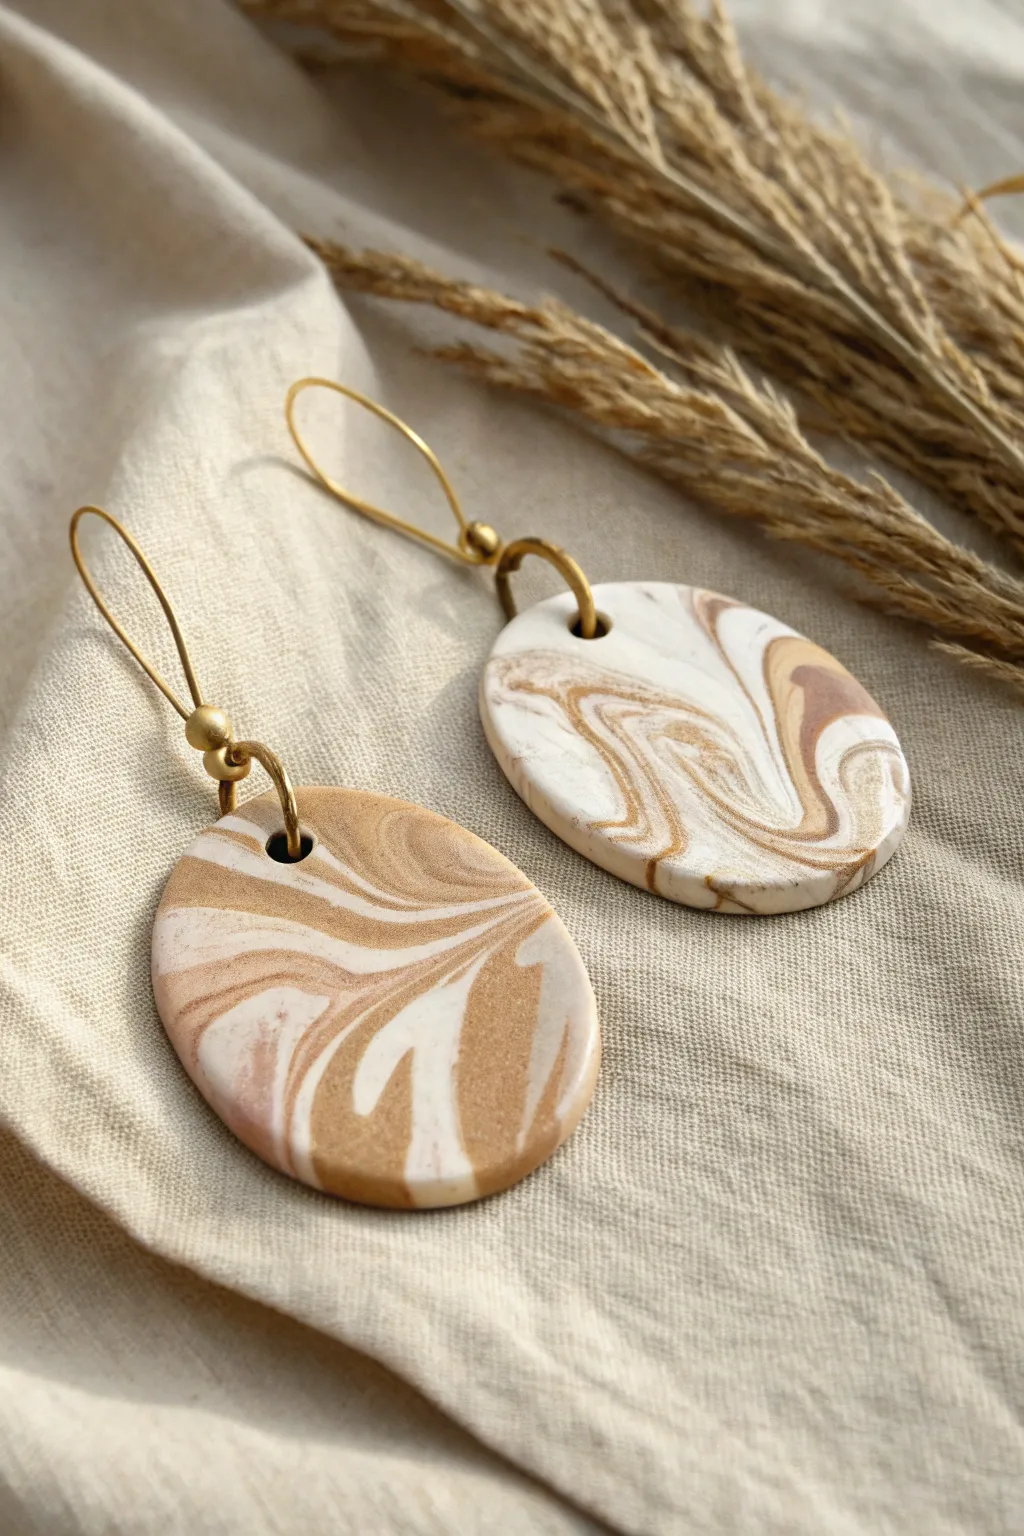
Capture the elegance of natural stone with these understated yet striking marbled polymer clay earrings. The swirling blend of cream, beige, and shimmering gold creates a warm, neutral accessory that pairs perfectly with any outfit.
Step-by-Step
Materials
- Polymer clay (White, Beige/Tan, Metallic Gold, Translucent)
- Acrylic rolling pin or pasta machine
- Oval clay cutter (approx. 1.5 – 2 inches)
- Hobby knife or clay blade
- Hand drill or small round cutter (for holes)
- Fine grit sandpaper (400-1000 grit) or sanding sponge
- Jewelry pliers (flat nose and round nose)
- 2 Large gold jump rings (6-8mm)
- 2 Gold kidney ear wires
- Ceramic tile or glass baking sheet
- Oven (for baking clay)
Step 1: Creating the Marble Mix
-
Condition the Clay:
Start by thoroughly conditioning your polymer clay blocks. You will need roughly equal parts of white and beige, a slightly smaller amount of metallic gold, and a pinch of translucent clay. Warm them in your hands or run them through your pasta machine until pliable. -
Form Snakes:
Roll each color into a long, thin rope or ‘snake’ about 4-5 inches long. The thickness can vary slightly to create interest in the pattern. -
Twist Together:
Gather your snakes into a bundle. Twist the bundle tightly from both ends, like you are wringing out a towel, until the colors start to spiral around each other. -
Fold and Roll:
Fold the twisted rope in half and twist it again. Roll this thicker rope into a ball, compacting the colors together. -
Initial Flattening:
Squish the ball slightly and begin to roll it into a thick log again. This manipulation helps distribute the colors deeper into the clay body.
Step 2: Shaping and Cutting
-
Roll Out the Slab:
Using your acrylic roller or pasta machine on a medium-thick setting (about 3mm), roll out your marbled log. Roll in different directions to stretch the marble pattern organically. -
Select Your Pattern:
Examine your slab. Use your oval cutter to hover over different sections, framing the swirl patterns you like best. I like to look for areas where the gold streaks are prominent but not overpowering. -
Cut the Shapes:
Once you’ve found your spots, press the oval cutter firmly into the clay. Give it a tiny wiggle to ensure it cuts all the way through to your work surface. -
Remove Excess Clay:
Carefully peel away the excess clay from around your cut ovals. Lift the ovals gently; if they are stuck, slide a thin blade underneath to release them without distorting the shape. -
Smooth the Edges:
Before baking, gently run your finger along the cut edges of the clay to smooth out any harsh lines or burrs left by the cutter. -
Pierce the Hole:
Use a small circular cutter or a tool to poke a hole near the top of the oval. Make sure the hole is large enough to accommodate your thick jump rings but not too close to the edge.
Clean Cuts Only
To avoid distortion when lifting your cut shapes, place a piece of plastic wrap over the clay slab before pressing your cutter down. This creates a lovely domed edge.
Step 3: Baking and Finishing
-
Bake:
Place your clay pieces on a ceramic tile or baking sheet. Bake according to the manufacturer’s instructions for your specific brand of clay—usually around 275°F (135°C) for 30-45 minutes. -
Cool Down:
Allow the pieces to cool completely inside the oven or on a cooling rack. Do not try to flex them while they are still warm. -
Sand for Finish:
Dip your fine-grit sandpaper in water and gently sand the edges and surface of the pendants. This removes any fingerprints and gives the clay a smooth, professional stone-like feel. -
Buff (Optional):
For a slight sheen, buff the surface vigorously with a piece of denim or a soft cotton cloth. -
Attach Jump Rings:
Using two pairs of pliers, twist open a large gold jump ring. Thread it through the hole in the clay pendant. -
Add Ear Wires:
Before closing the jump ring, slide on the loop of your kidney ear wire. Ensure the earring faces forward properly. -
Close and Secure:
Twist the jump ring closed so the ends meet perfectly flush. Give the connection a gentle tug to ensure it is secure.
Add Subtle texture
Before baking, gently press coarse sea salt or a textured sponge into the beige areas to mimic the pitted surface of real sandstone.
Wear your new creations with pride, knowing you’ve crafted a unique piece of wearable art
Terrazzo-Style Polymer Clay Coasters
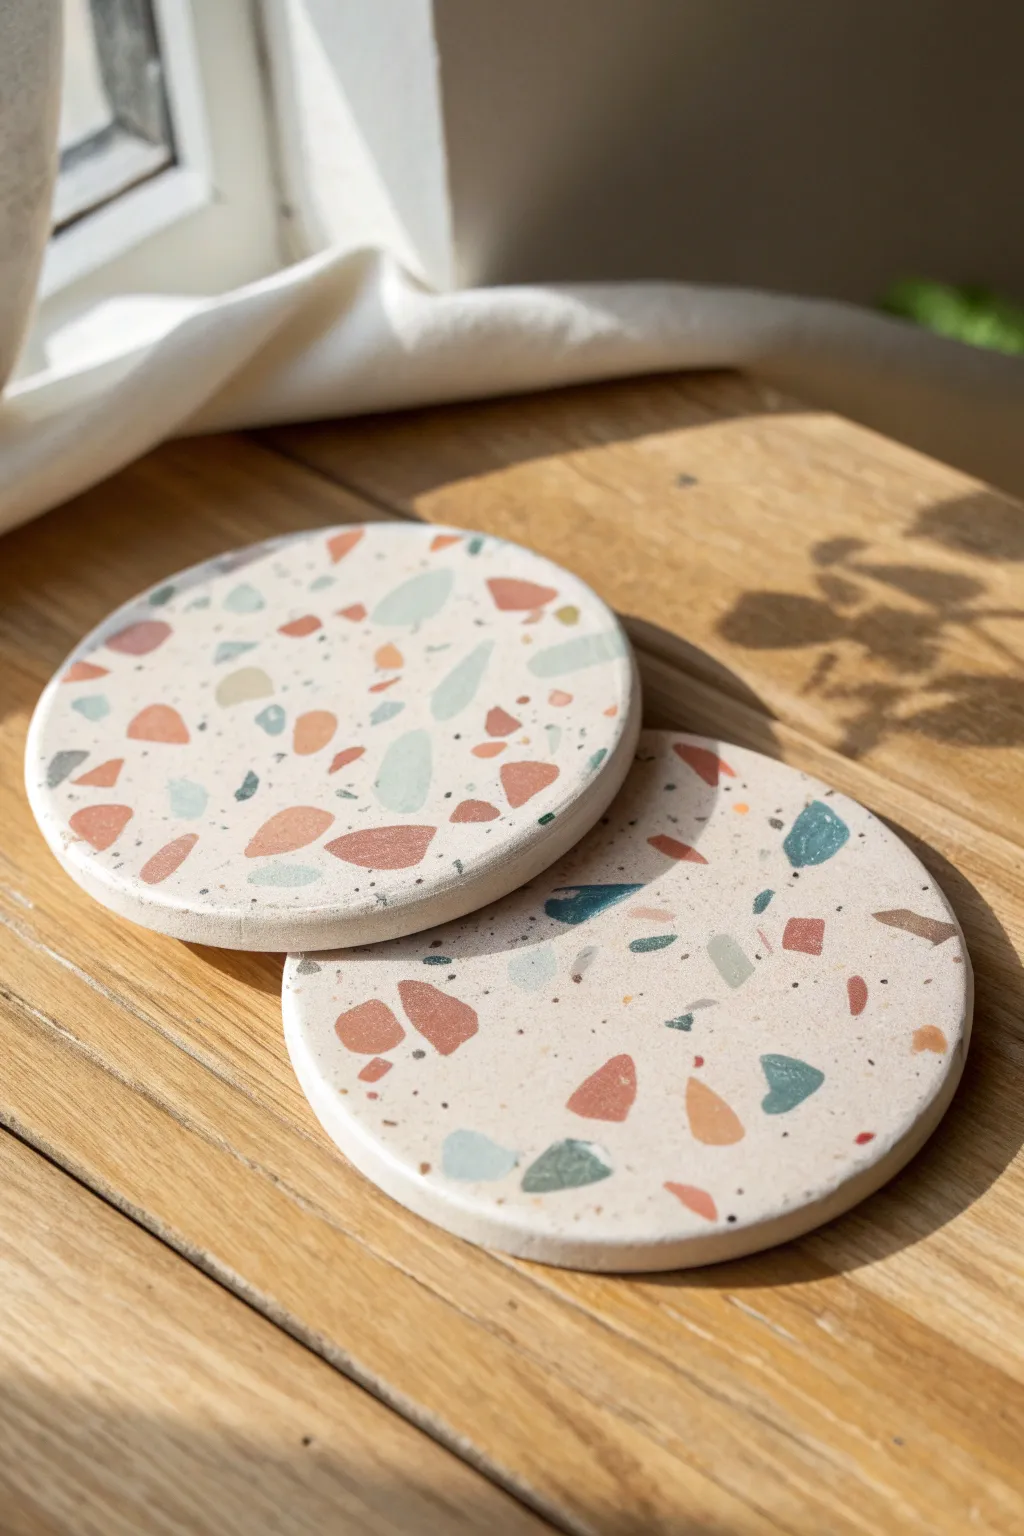
Bring the timeless elegance of Italian flooring to your coffee table with these charming terrazzo-style polymer clay coasters. Featuring a matte, stony finish and a playful scatter of pastel chips, this project is surprisingly simple but yields incredibly professional-looking results.
Detailed Instructions
Materials
- Polymer clay (white or beige for the base)
- Polymer clay (terracotta, teal, blush pink, dark grey)
- Acrylic rolling pin or pasta machine
- Round cookie cutter (approx. 4 inches / 10 cm)
- Craft knife or tissue blade
- Sanding paper (wet/dry, grit 400, 600, 1000)
- Parchment paper
- Ceramic tile or glass sheet (for baking)
- Optional: UV resin or matte varnish for sealing
Step 1: Prepping Your Palette
-
Condition the clay:
Start by thoroughly conditioning your base color clay—I personally suggest a mix of white with a tiny pinch of beige to get that natural stone look. Knead it until soft and pliable. -
Create the color chips:
Condition small amounts of your accent colors: terracotta, teal, blush pink, and dark grey. Roll these out into very thin separate sheets. -
Bake the chips (Part 1):
Place these thin accent sheets on a baking tray lined with parchment paper. Bake them for just 10-15 minutes at the manufacturer’s recommended temperature. We want them hard enough to chop. -
Chop the cooled clay:
Once the thin sheets have cooled completely, use your craft knife or tissue blade to chop them into irregular, angular fragments. Aim for a variety of sizes, from tiny specks to larger shards.
Step 2: Forming the Terrazzo Slab
-
Roll the base:
Roll out your conditioned base color into a thick slab, roughly 4-5mm thick. This needs to be slightly thicker than your final coaster. -
Scatter the fragments:
Take your chopped baked chips and press them randomly onto the surface of the raw base slab. Cover the surface generously, leaving small gaps of the base color showing through. -
Roll to embed:
Cover the slab with parchment paper and use your acrylic roller to press the chips firmly into the clay. Roll back and forth until the surface is completely flat and the chips are flush with the base. -
Check the underside:
Flip the slab over. If you want the pattern on both sides, repeat the scattering and rolling process on the back. Otherwise, just smooth it out.
Sticky Situation?
If clay sticks to your cutter, dip the rim in cornstarch or water before pressing down. This acts as a release agent for clean cuts.
Step 3: Shaping and Refining
-
Cut the shapes:
Place your round cookie cutter onto the slab. Press down firmly to cut out your coaster shapes. Wiggle slightly to separate the clay before lifting. -
Smooth the edges:
Gently run your finger around the circumference of the cut circles to soften the sharp edge left by the cutter. This makes the final product feel more like polished stone. -
Final bake:
Place the cut coasters on a ceramic tile or baking sheet. Bake for the full duration recommended by the clay manufacturer (usually 30-45 minutes) to ensure durability. -
Cool down:
Allow the coasters to cool completely inside the oven or on a wire rack. Don’t rush this step, as warm clay is soft.
Pro Tip: Depth Effect
Mix translucent clay into your base color (about 20%). When sanded, this creates a faux-stone depth where some chips look deeper than others.
Step 4: The Stone Finish
-
Start sanding:
Place your 400 grit sandpaper on a flat surface and add a little water. Place the coaster face down and sand in circular motions to reveal the crisp edges of the embedded chips. -
Refine the grit:
Switch to 600 grit, then 1000 grit sandpaper, continuing the wet sanding process. This removes scratches and creates a buttery smooth, matte finish. -
Wash and dry:
Rinse the coasters under cool water to remove all clay dust residue. Pat them dry with a clean cloth. -
Buffing:
Rub the surface vigorously with a piece of denim or a soft cotton cloth to bring out a subtle, natural sheen without making it glossy.
Now you have a set of durable, modern coasters ready to protect your surfaces in style


The Complete Guide to Pottery Troubleshooting
Uncover the most common ceramic mistakes—from cracking clay to failed glazes—and learn how to fix them fast.
Marbled Trinket Ring Dish
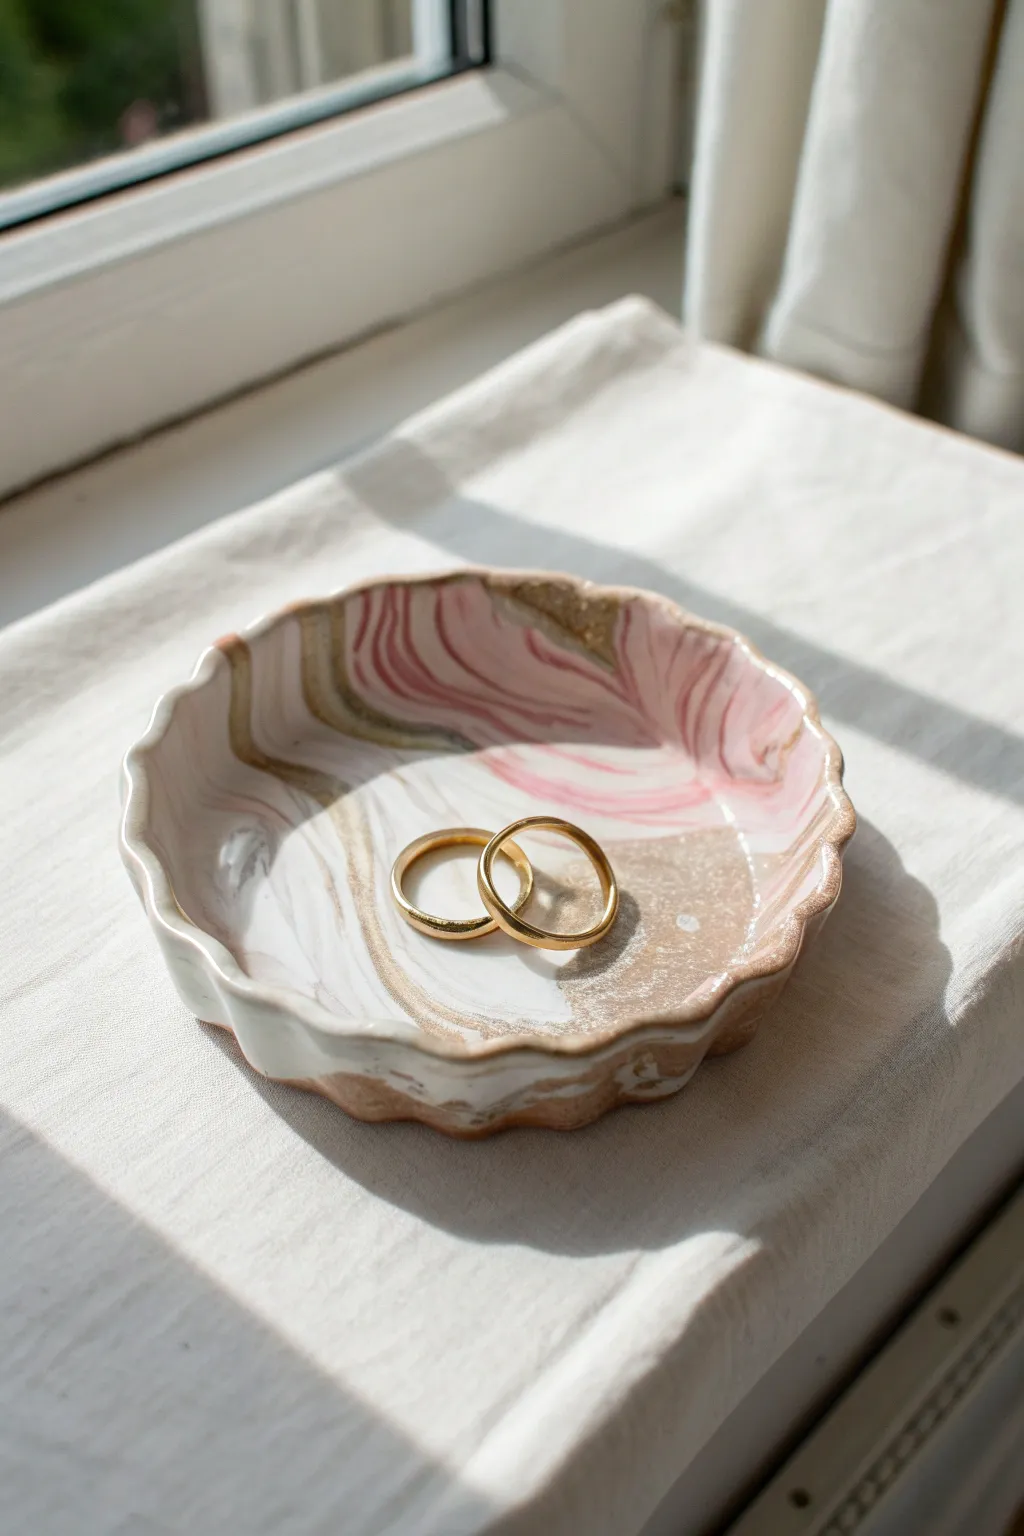
This elegant trinket dish mimics the luxurious look of natural stone by swirling together white, soft pink, and dusty rose polymer clay. The scalloped edges and flashes of gold leaf create a sophisticated resting place for your favorite rings.
Step-by-Step Guide
Materials
- White polymer clay
- Light pink polymer clay
- Dusty rose or mauve polymer clay
- Translucent polymer clay (optional)
- Gold leaf sheets or metallic gold paint
- Acrylic rolling pin or pasta machine
- Circular cookie cutter or a bowl template
- Hobby knife (X-Acto)
- Small oven-safe bowl (for shaping)
- Sandpaper (fine grit)
- Gloss glaze (water-based polyurethane)
Step 1: Prepping and Mixing
-
Condition the Clay:
Begin by kneading each color of polymer clay separately until they are soft, pliable, and warm to the touch. -
Create Snakes:
Roll each conditioned color into a long snake using your hands on a flat surface. Make the white snake slightly thicker if you want it to be the dominant background color. -
Add Gold Accents:
If you are using gold leaf for the marbling effect, tear off small irregular shreds of the leaf and press them randomly onto the clay snakes before twisting. -
Twist Together:
Gather all your clay snakes into a single bundle. Twist the ends in opposite directions to create a candy-cane spiral pattern. -
Double the Fold:
Fold the long twisted rope in half and twist it again. Repeat this fold-and-twist motion 2-3 times to begin blending the colors without muddying them. -
Form a Ball:
Roll the twisted rope into a tight ball. This compresses the layers and prepares the clay for the final marbling reveal.
Clean Cuts
Before cutting your circle, place a piece of plastic wrap over the clay. Press the cutter down through the plastic. This creates a soft, rounded bevel on the edge rather than a harsh angle.
Step 2: Shaping the Dish
-
Roll out the Slab:
Using your acrylic roller or pasta machine, flatten the ball into a smooth slab about 1/4 inch thick. Roll in different directions to stretch the marble pattern nicely. -
Inspect the Pattern:
Check both sides of your slab. Often the underside has a more interesting swirl, so choose the side you like best to be the face of your dish. -
Cut the Circle:
Place your circular cutter or bowl template over the best part of the pattern. Press down or trace around it with a hobby knife to cut a clean circle. -
Create Scalloped Edges:
With your fingers, gently pinch the rim of the clay circle at regular intervals to create a wavy, fluted effect. You can also press the handle of a paintbrush gently into the edge to form the divots. -
Shape the Curve:
Place your clay circle inside or over an oven-safe bowl to give it a curved dish shape. Ensure the scallops still look defined.
Gilded Edges
For an extra touch of luxury, paint the very rim of the dish with liquid gold leaf. The metallic border highlights the scalloped shape beautifully.
Step 3: Finishing Touches
-
Bake:
Bake the clay according to the manufacturer’s package instructions (usually 275°F/135°C for 15-30 minutes). Let it cool completely in the bowl to hold its shape. -
Sand the Edges:
Once cool, remove the dish and gently sand the rim with fine-grit sandpaper to remove any sharp bits or fingerprints. -
Paint Gold Details:
If you didn’t use gold leaf earlier, or want more shine, take a fine brush and paint metallic gold streams along the natural veins of the marble pattern. -
Seal:
Apply a thin coat of gloss glaze to the entire surface. This protects the gold leaf from tarnishing and gives the clay that polished ceramic look. -
Dry:
Allow the glaze to dry fully before placing any jewelry in the dish.
This sophisticated little dish makes a perfect handmade gift or a stylish spot for your daily jewelry
Polymer Clay Hair Clips With Patterns
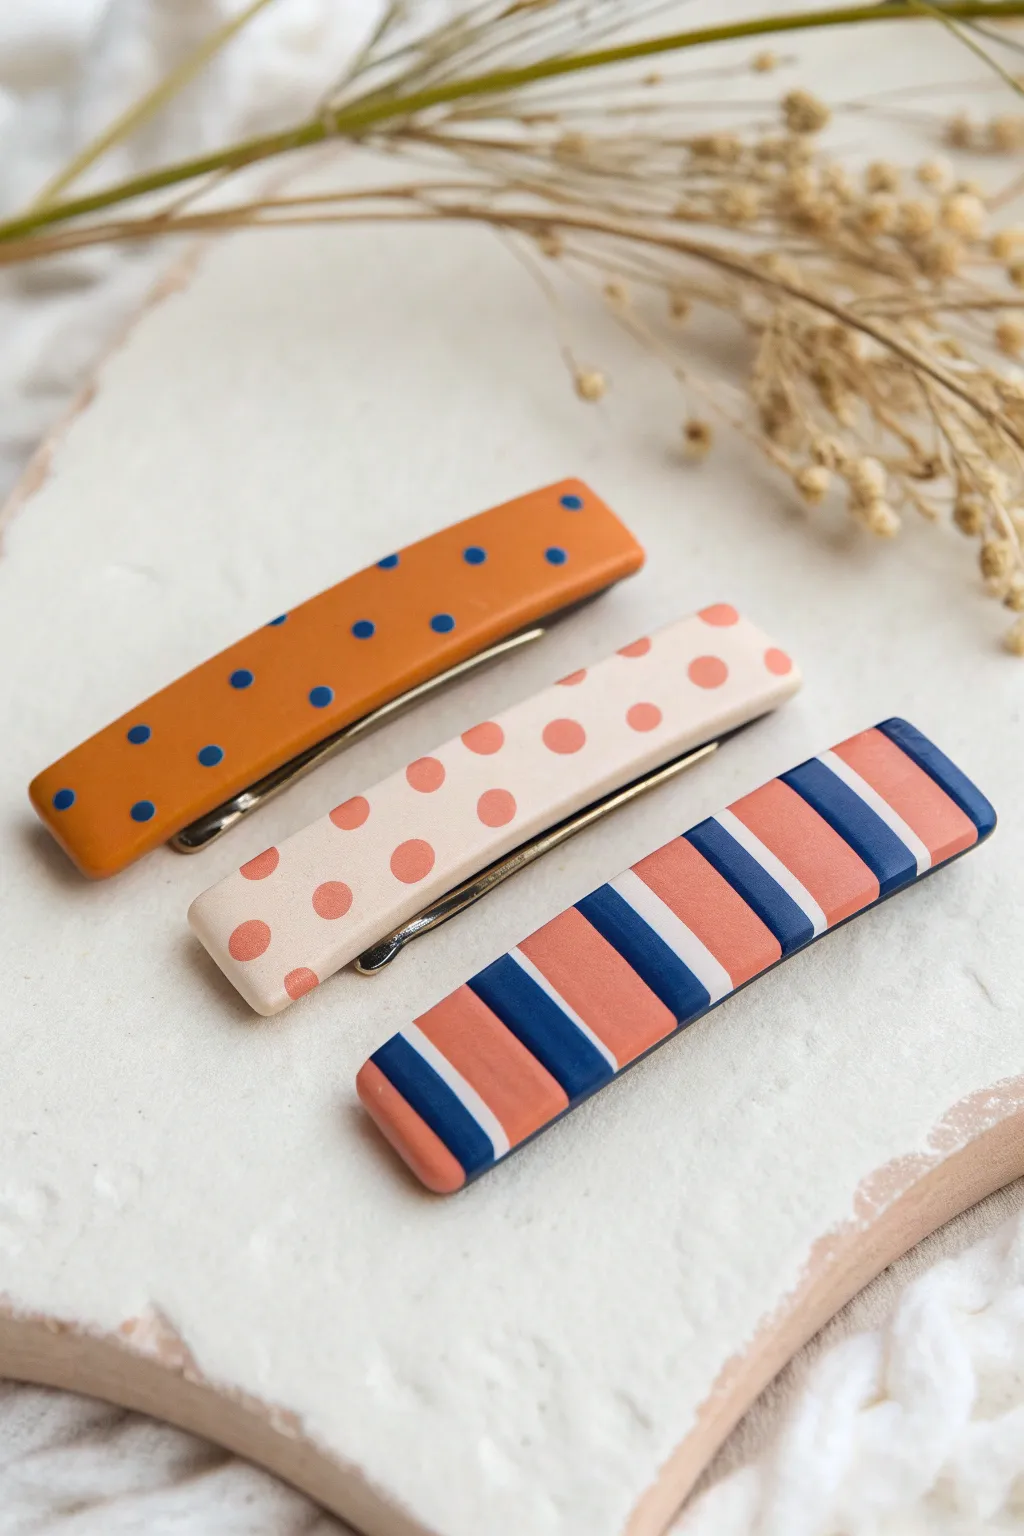
Bring a touch of retro charm to your hairstyle with this trio of geometric polymer clay clips. Featuring bold stripes and playful polka dots in a coordinated palette of terracotta, navy, and cream, these barrettes are surprisingly simple to construct using basic slab techniques.
How-To Guide
Materials
- Polymer clay in terracotta/burnt orange
- Polymer clay in navy blue
- Polymer clay in pale cream or bone
- Polymer clay in coral pink
- Clay roller or pasta machine
- Rectangular clay cutter (approx. 3 inches long)
- Small round cutter or a straw (for dots)
- Tissue blade or rigid slicing blade
- Metal alligator hair clips (blank bases)
- Strong jewelry adhesive (E6000 or similar)
- Sandpaper/buffing block
- Matte or satin varnish (optional)
Step 1: Prepping the Base Slabs
-
Condition the Clay:
Begin by thoroughly conditioning each color of clay until it is soft and pliable. This prevents cracks and ensures your patterns blend smoothly later on. -
Roll the Sheets:
Roll out a sheet of the terracotta clay and a sheet of the cream clay to a medium thickness (setting 2 or 3 on a pasta machine) to serve as the base for the polka dot clips. -
Create the Backing Layer:
Roll out a scrap sheet of clay to the same thickness. This will be an invisible backing layer for the striped clip, providing stability for the slices.
Clean Cuts Pro Tip
Before pressing your cutter into the clay, cover the slab with a piece of plastic cling wrap. This creates a beautifully domed, rounded edge on your cut pieces, saving you sanding time later.
Step 2: Creating the Polka Dot Patterns
-
Cut the Dots:
Roll out thin sheets of navy blue and coral pink clay (thinner than your base sheets). Use a very small round cutter, or even the end of a drinking straw, to punch out numerous small circles from each color. -
Arrange Blue Dots:
Take your terracotta base sheet. Gently place the navy blue circles onto the surface in a random but balanced polka dot pattern. Leave enough space between them so it doesn’t look crowded. -
Arrange Coral Dots:
Repeat the process with the cream base sheet, applying the coral pink circles in a similar scattered arrangement. -
Embed the Patterns:
Cover the patterned sheets with parchment paper or plastic wrap. Gently roll over the surface with your acrylic roller designed for clay. Apply enough pressure to flatten the dots so they become flush with the background clay, creating a smooth, unified slab.
Step 3: Constructing the Striped Slab
-
Prepare Thick Blocks:
Form rectangular blocks of navy blue, terracotta, and thin sheets of white clay. You want the colored blocks to be thicker than the white separators. -
Stack the Stripes:
Stack the clay in a repeating pattern: Terracotta block, thin white sheet, navy blue block, thin white sheet. Repeat this until the stack is long enough for your cutter. -
Slice the Stack:
Turn the stack on its side so the stripes are vertical. Using your tissue blade, slice a slab off the stack. The slice should result in a single sheet showing all the stripes clearly. -
Attach to Backing:
Lay this striped slice onto the scrap backing sheet you prepared earlier. Roll gently to adhere them together without distorting the precise lines of the stripes.
Level Up: Texture
Before baking, try gently pressing a piece of coarse sandpaper or a fabric texture sheet onto the surface of the clay. This gives the barrettes a realistic, matte fabric-like finish.
Step 4: Cutting and Finishing
-
Cut the Rectangles:
Using your long rectangular cutter, cut one shape from the terracotta dot slab, one from the cream dot slab, and one from the striped slab. I find it helpful to frame the pattern in the cutter window first to ensure the best alignment. -
Smooth the Edges:
Gently rub the raw edges of the cut rectangles with your fingertip to round them off slightly and remove any sharp bits or drag marks from the cutter. -
Bake:
Place the three pieces on a ceramic tile or baking sheet covered with cardstock. Bake according to the clay manufacturer’s instructions (usually 275°F/135°C for 30-45 minutes). -
Cooling:
Allow the clay pieces to cool completely before handling them. They are fragile while warm. -
Sanding and Buffing:
Once cool, lightly sand the edges and surface with fine-grit wet/dry sandpaper if you want an ultra-smooth finish. Buff with a soft cloth. -
Attach the Hardware:
Apply a line of strong jewelry adhesive to the flat surface of the alligator clip. Press the clay rectangle firmly onto the clip and let it cure for the full time recommended on your glue bottle.
Clip these into a messy bun or side part to add an instant pop of artistic color to your day

TRACK YOUR CERAMIC JOURNEY
Capture glaze tests, firing details, and creative progress—all in one simple printable. Make your projects easier to repeat and improve.
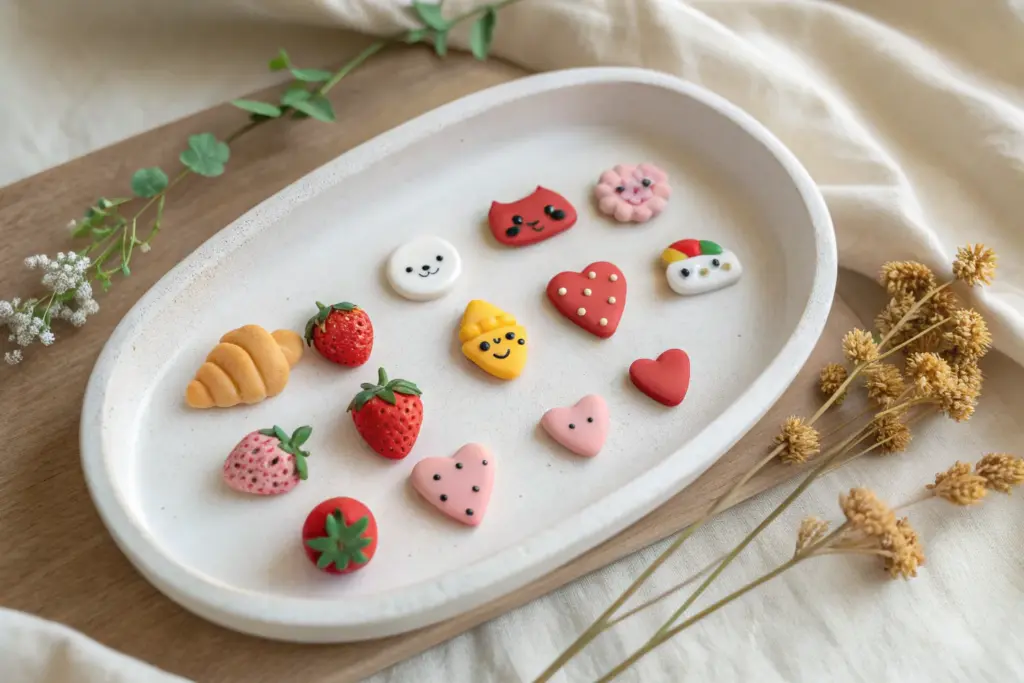
Cute Polymer Clay Fridge Magnets
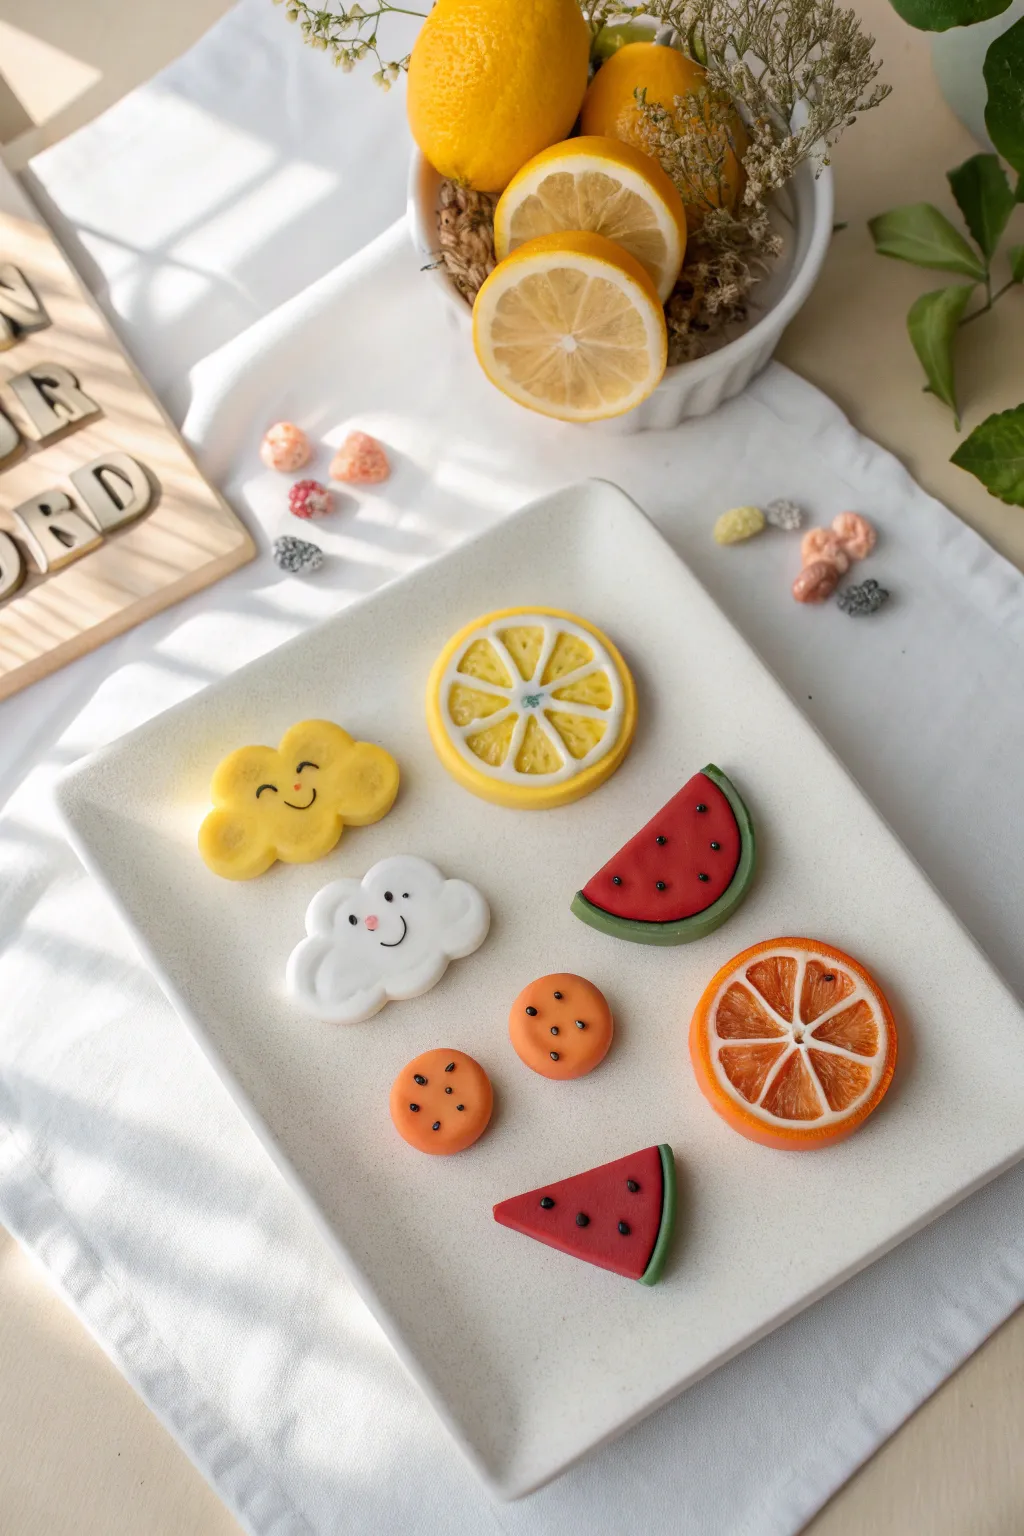
Brighten up your kitchen with this cheerful collection of polymer clay magnets featuring smiling clouds and fresh fruit slices. The smooth finish and kawaii-style faces give these pieces a soft, whimsical charm perfect for holding notes on your fridge.
Detailed Instructions
Materials
- Polymer clay (Yellow, White, Translucent Orange, Translucent Yellow, Red, Green, Black)
- Liquid polymer clay (White and Translucent)
- Clay rolling pin or pasta machine
- Circle cutters (various sizes)
- Needle tool or toothpick
- Dotting tool or small ball tool
- X-acto knife or tissue blade
- Gloss glaze or UV resin (optional for fruit segments)
- Strong round magnets
- Super glue or E6000
Step 1: Sculpting the Happy Clouds
-
Condition the Clay:
Begin by thoroughly conditioning your yellow and white clay separately until they are soft and pliable. Roll each color into a sheet about 1/4 inch thick. -
Shape the Base:
For the clouds, you can use a flower-shaped cutter and gently squish it to look more organic, or form 5-6 small balls of clay and press them together into a cluster. -
Smooth the Seams:
If you used the ball method, use your finger or a silicone tool to gently smooth the back and front seams so the cloud looks like one cohesive unit, keeping the edges bubbly. -
Add Facial Features:
Roll two impossibly tiny specks of black clay for the eyes. Use a needle tool to pick them up and press them onto the cloud face. For the smile, roll a very thin snake of black clay, curve it into a ‘U’ shape, and press it gently between the eyes. -
Blushing Cheeks:
Add a tiny touch of pink pastel chalk dust or a microscopic flattened ball of pink clay to the cheeks for a sweet, blushing effect.
Keep it Clean
White and yellow clay pick up dust easily. Keep a pack of baby wipes nearby to clean your hands and tools often, especially between color changes.
Step 2: Crafting the Citrus Slices
-
Create the Rind:
For the lemon and orange slices, start by making a ‘cane’. Roll a cylinder of translucent yellow (for lemon) or translucent orange (for orange) about 1 inch thick. -
Wrap the Segments:
Wrap this cylinder in a thin sheet of white clay. This white layer will become the pith of the fruit. -
Divide and Conquer:
Cut the wrapped cylinder into 8 equal wedges. Place a thin sheet of white clay between each wedge to create the segment lines, then reassemble the cylinder. -
Final Rind Wrap:
Wrap the reconstituted cylinder in a final, thicker layer of opaque yellow or orange clay to create the outer skin. Reduce the cane by rolling it gently until it’s the diameter of your desired magnet. -
Slice and Texture:
Slice the cane into discs. For the lemon, use a needle tool to gently scratch the translucent parts to mimic the juice sac texture. -
Resin Finish (Optional):
I usually like to pre-bake these slices slightly if I’m adding liquid clay details, but you can also wait until the end. Adding a drop of gloss or resin to the fruit segments later makes them look juicy.
Fixing Smudges
If you get a fingerprint or a spec of dust on your raw clay, dip a Q-tip in a tiny bit of rubbing alcohol or baby oil and gently swirl it over the blemish to smooth it out.
Step 3: Making the Watermelon Wedges
-
Layer the Colors:
Roll a thick log of red clay. Wrap it in a very thin sheet of white clay, followed by a slightly thicker sheet of green clay. -
Form the Shape:
Pinch the top of the log to turn the circle profile into a teardrop or triangle shape, creating a long wedge. -
Slice and Seed:
Slice the log into individual wedges. Roll tiny teardrops of black clay for the seeds and press 3-5 of them into the red flesh of each slice.
Step 4: Baking and Assembly
-
Bake:
Place all your pieces on a ceramic tile or a baking sheet lined with parchment paper. Bake according to your brand of clay’s instructions (usually 275°F/135°C for 15-30 minutes). -
Cool Down:
Let the pieces cool completely inside the oven or on a wire rack before handling to prevent cracking. -
Attach Magnets:
Once cool and hard, flip the pieces over. Apply a dab of strong glue (like E6000 or super glue gel) to the back and press a round magnet firmly into place. Let the glue cure fully before sticking them to your fridge.
Now your fridge is dressed up with a delightful dose of vitamin C and sunshine.
Tiny Succulent Pots in Polymer Clay
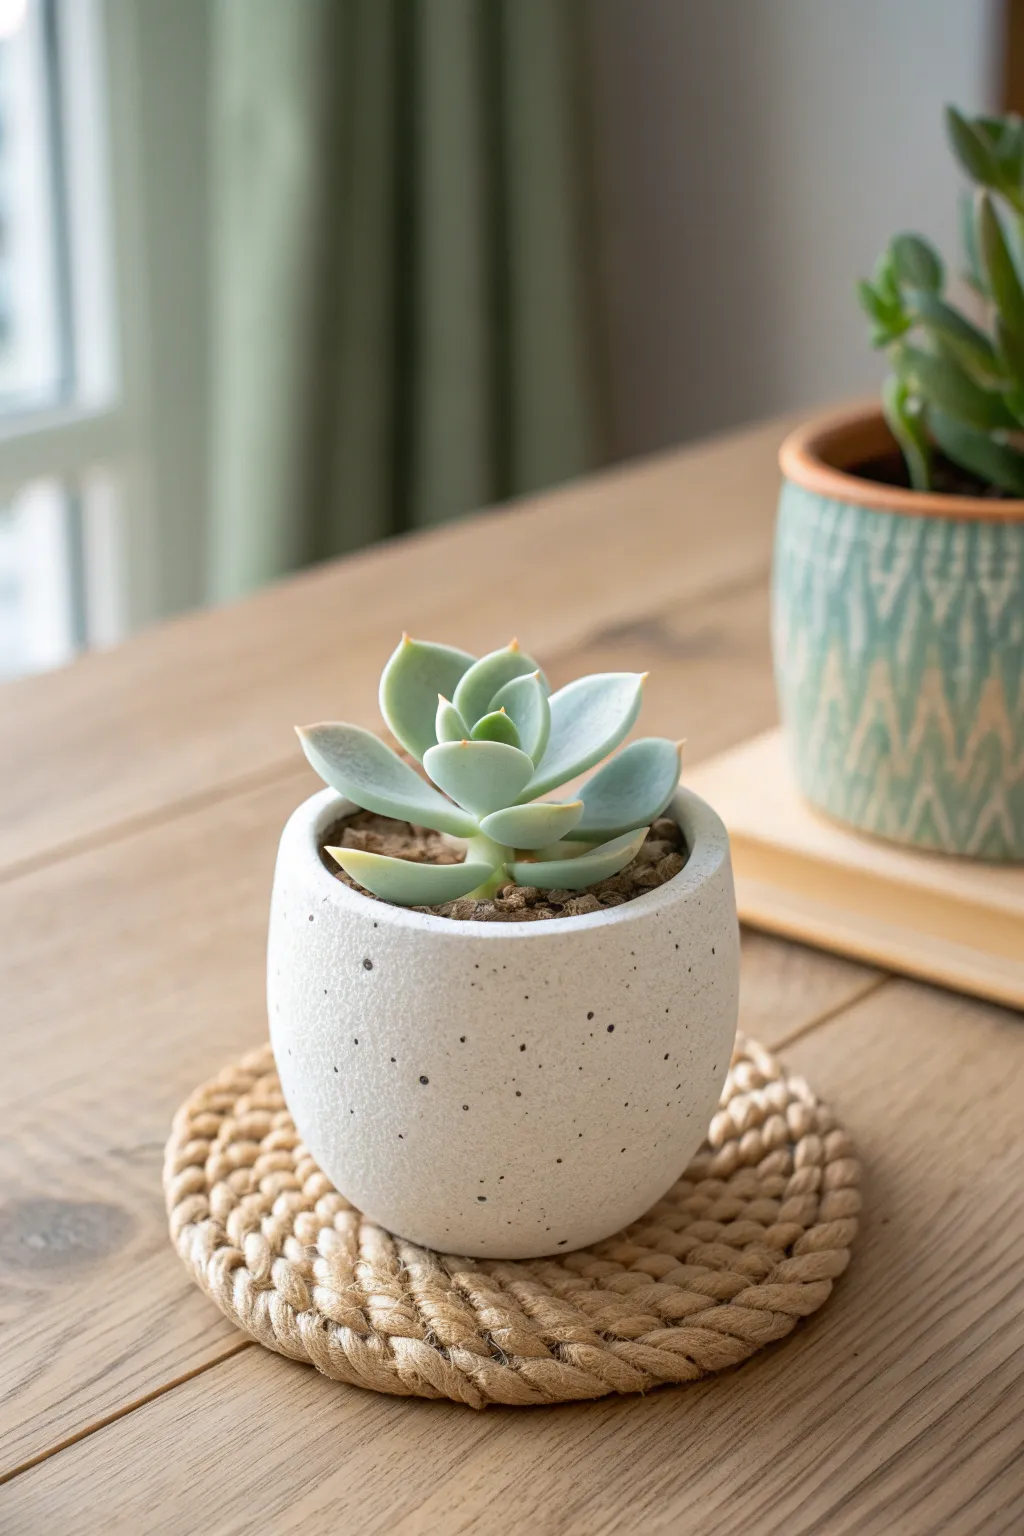
Bring a touch of modern minimalism to your desk with this incredibly realistic faux-stone planter made entirely from polymer clay. The subtle speckled texture and organic bowl shape give it a high-end ceramic look without the need for a kiln.
Step-by-Step
Materials
- White or translucent polymer clay (approx. 2oz)
- Black pepper or dried tea leaves (finely ground)
- Acrylic rolling pin or glass jar
- Small bowl or ramekin (to use as a mold)
- Cornstarch (release agent)
- Craft knife or tissue blade
- Fine-grit sandpaper (400 and 800 grit)
- Matte varnish (optional)
- Oven for baking
Step 1: Preparing the Faux Stone Clay
-
Condition the base:
Begin by thoroughly conditioning your white polymer clay until it is soft and pliable. If you want a slightly more translucent, porcelain look, mix one part translucent clay with three parts white clay. -
Add the speckles:
Flatten the clay into a pancake and sprinkle a small pinch of ground black pepper or very finely crushed dried tea leaves onto the surface. I prefer black pepper for that classic granite look. -
Incorporate the texture:
Fold the clay over to trap the speckles and knead thoroughly. Repeat the folding and rolling process until the particles are evenly distributed throughout the batch. Don’t overdo it; you want random specks, not a grey sludge.
Pro Tip: Hidden Texture
Before baking, gently dab the outside of the clay with a stiff toothbrush or crumpled foil. This adds micropores that make the faux stone look incredibly authentic.
Step 2: Shaping the Pot
-
Roll out the slab:
Roll your speckled clay into a smooth sheet approximately 1/4 inch thick. A slightly thicker wall helps mimic the look of cast cement or ceramic. -
Prepare the mold:
Take your small bowl or ramekin form and lightly dust the *outside* bottom half with cornstarch. This ensures the clay doesn’t stick permanently to your mold during baking. -
Form the base:
Cut a circle from your clay sheet that is slightly larger than the bottom of your mold. Place this centered on the bottom of the upside-down mold. -
Build the walls:
Cut a long rectangular strip of clay for the sides. Wrap this around the mold, overlapping the ends slightly. Gently press the seam together, smoothing it with your thumb so it disappears. -
Join base and walls:
Where the wall meets the circular base, use a modeling tool or your finger to blend the clay downward, fusing the pieces into one seamless cup shape. -
Refine the shape:
Gently pat the clay against the mold to ensure a snug fit and a nice curve. Trim the top rim with your darker craft knife to make it straight and even.
Step 3: Baking and Finishing
-
First bake:
Bake the clay *on the mold* according to your clay manufacturer’s instructions (usually 275°F/130°C for 15-20 minutes). Let it cool completely before removing the clay form. -
Sand for realism:
Once cool and removed from the mold, wet-sand the pot under running water. Start with 400 grit to smooth any fingerprints, then move to 800 grit for a silky, stone-like feel. -
Soften the rim:
Pay special attention to the top rim while sanding; rounding it off slightly removes the sharp ‘cut’ look and makes it appear more like tumbled stone. -
Seal (Optional):
If you plan to put a real plant with moist soil inside, seal the interior with a waterproof varnish. For the outside, leave it raw or use a matte varnish to preserve the natural stone texture.
Troubleshooting: Seams Showing?
If your side seam is visible after baking, don’t panic. Use a bit of baby oil while sanding the area vigorously. The oil helps break down the surface just enough to hide lines.
Pop in your favorite tiny succulent and enjoy your custom hand-crafted decor
Mini Cactus Planters and Desk Decor

Bring a touch of greenery to your desk that never needs watering with this realistic polymer clay cactus arrangement. You’ll sculpt a convincing cement-style pot and fill it with detailed, spiky succulents for a clean, modern aesthetic.
Step-by-Step Guide
Materials
- Polymer clay (light mint green or white mixed with a touch of green)
- Polymer clay (forest green, lime green, white)
- Texture sponge or sandpaper
- Liquid polymer clay (bake and bond)
- Needle tool or toothpick
- Small scissors
- Acrylic paint (white, light brown)
- Fine detail paintbrush
- Actual small pebbles or beige polymer clay scraps
- Aluminum foil
- Cylindrical cutter or jar (for sizing)
Step 1: Sculpting the Pot
-
Form the Base:
Condition your light mint green clay until pliable. Roll out a thick sheet, about 1/4 inch thick, and cut a long rectangular strip and a circular base. I like to use a glass jar as a mold to ensure the circle matches the cylinder’s diameter perfectly. -
Assemble the Cylinder:
Wrap the rectangular strip around the base circle to form a cylinder. Join the seams by smoothing the clay together with a modeling tool or your finger. -
Texture the Surface:
To mimic the concrete look in the photo, gently press a coarse texture sponge or sandpaper against the outside of the pot. Avoid making the texture too deep; you just want a matte, natural finish. -
Pre-Bake the Pot:
Bake the pot according to your clay package instructions (usually 275°F/130°C for 15 minutes) to set its shape before filling it.
Drooping Cactus?
If your tall cactus bends during baking, insert a toothpick or piece of wire into the center before baking to act as an internal armature for support.
Step 2: Creating the Cacti
-
Mix Custom Greens:
While the pot cools, create varied green shades. Mix forest green with a tiny bit of lime for the main body, and keep some lighter green handy for variation. -
Shape the Tall Cactus:
Roll a log of green clay approximately 2 inches tall. Round off the top dome smoothly. If you want to save clay, use a small core of aluminum foil inside. -
Add Vertical Ribs:
Use a needle tool to gently press vertical lines running from the base to the center of the top dome. These ribs give the cactus its structure. -
Form the Round Cacti:
Roll two smaller balls of green clay—one medium and one small. Flatten their bottoms slightly so they will sit stable. -
Rib the Round Shapes:
Just like the tall cactus, press vertical indentations all around these spheres, meeting at the very top center. -
Create Spines:
This is the tedious but rewarding part. You have two options: either pull tiny points up from the ridges with a needle tool, or apply tiny dots of white liquid clay along the ridges to simulate soft spines. -
Detail the Tops:
For the very top center of each cactus, stipple the clay with your needle tool to create a fuzzy, growth-point texture.
Step 3: Assembly and Finishing
-
Fill the Pot:
Fill the cooled pot base with scrap clay or foil, leaving about half an inch of space at the top. Cover this filler with a thin layer of brown clay to act as ‘dirt’. -
Position the Plants:
Place your three cactus shapes onto the brown clay base. I prefer to group them slightly off-center for a more organic look. Use a dab of liquid clay to secure them. -
Add Pebbles:
Roll tiny distinct balls of beige, tan, and white clay to mimic gravel. Fill the empty space around the cacti bases with these ‘stones,’ pressing them gently into the brown base. -
Final Bake:
Bake the entire assembled piece again for the full recommended time (usually 30-45 minutes) to fully cure the thick cactus bodies. -
Dry Brushing:
Once cool, use a very dry brush with a tiny amount of white paint. Lightly dust the spines and the texture of the pot to highlight the details. -
Highlighting Stones:
Add a wash of diluted light brown paint over the pebbles to settle into cracks, adding depth and realism to the gravel layer.
Realistic Spines
instead of sculpting spines, snip tiny bristles from an old white paintbrush and insert them into the raw clay ridges before baking for ultra-realism.
Place your new everlasting garden on a sunny shelf or gift it to a friend with a not-so-green thumb
Simple Polymer Clay Incense Holders
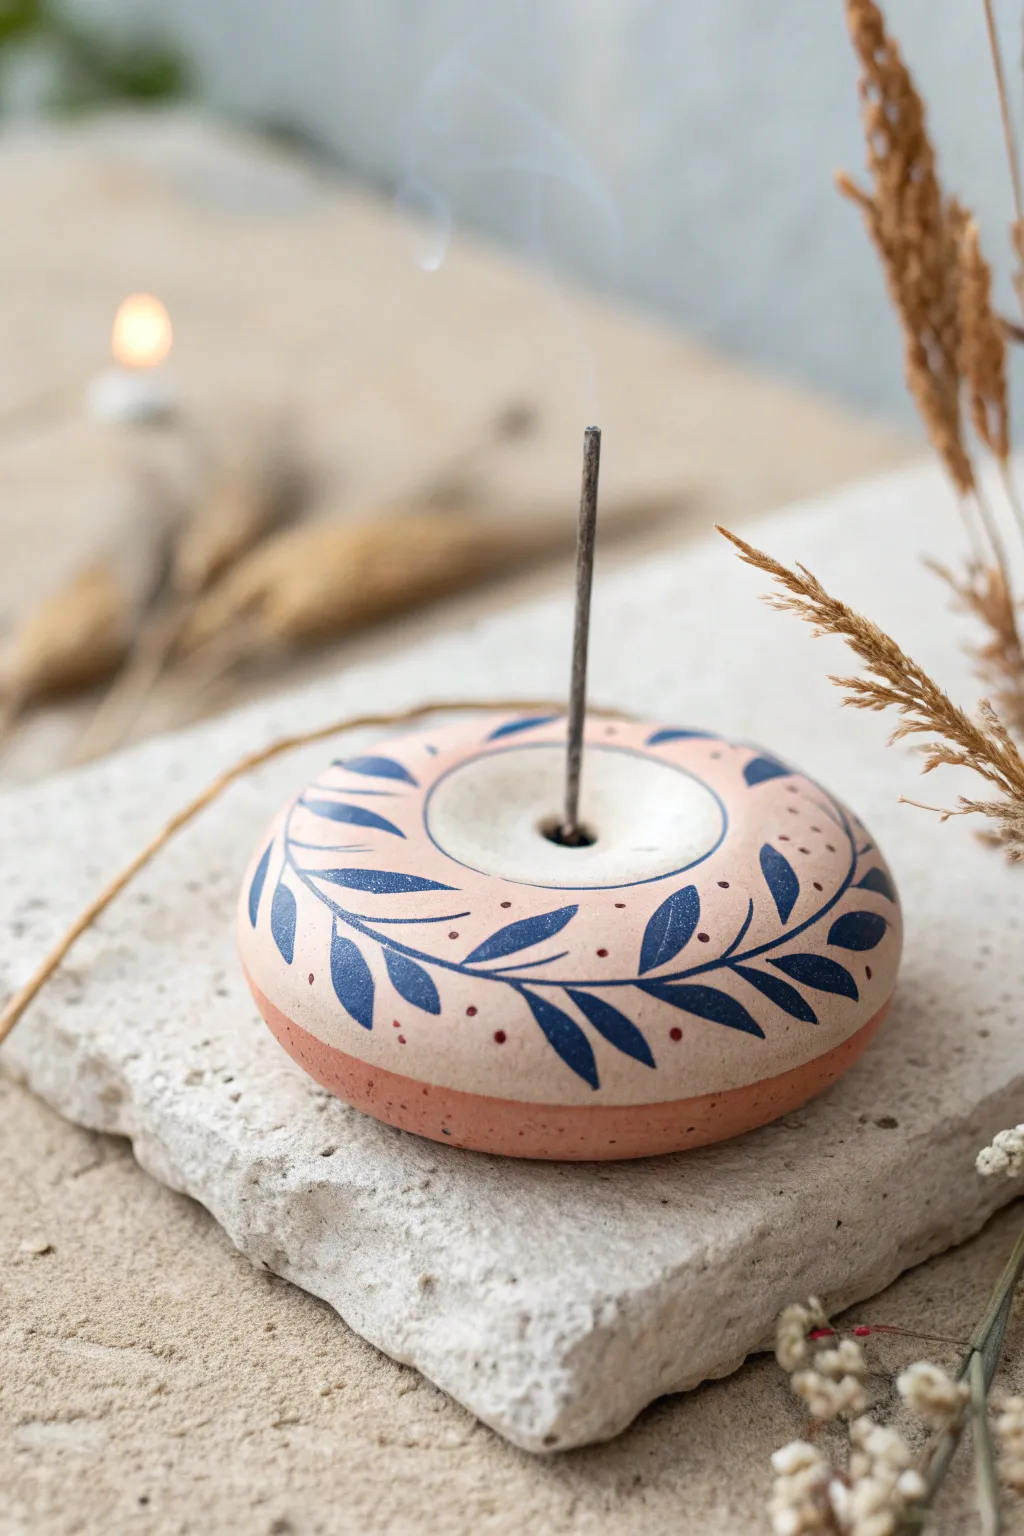
This charming incense holder combines a modern, rounded donut shape with delicate botanical illustrations for a piece that feels both earthy and elegant. The smooth, matte finish and hand-painted leaf vines wrap effortlessly around the curve, creating a perfect spot for your favorite scents.
Step-by-Step Tutorial
Materials
- Polymer clay in ‘Terracotta’ or ‘Beige’
- Acrylic rolling pin
- Circle cutter (approx. 3 inches or 7-8 cm)
- Small ball tool or rounded object (like a lightbulb base)
- Incense stick (for sizing)
- Acrylic paint (Navy Blue and Burnt Sienna)
- Fine detail paintbrush (size 0 or 00)
- Matte varnish or sealant
- Baking sheet and parchment paper
- Fine grit sandpaper (optional)
Step 1: Shaping the Base
-
Condition the Clay:
Begin by thoroughly conditioning your terracotta or beige polymer clay until it is soft and pliable. Warm clay prevents cracks during the shaping process. -
Form a Smooth Ball:
Roll the conditioned clay into a tight, smooth ball between your palms. ensure there are no visible seams or air bubbles trapped inside. -
Flatten into a Disc:
Gently press the ball onto your work surface using the palm of your hand or an acrylic roller to create a thick disc. Aim for a height of about 3/4 inch (2 cm) with rounded edges. -
Refine the Shape:
Pick up the disc and smooth the edges with your fingers, maintaining that soft, rounded ‘pebble’ or ‘donut’ profile rather than sharp, cookie-cutter edges. -
Create the Center Indentation:
Using your thumb or a large ball tool, press gently into the exact center of the disc to create a concave depression. This will catch any falling ash. -
Punch the Incense Hole:
Use the non-burning end of an actual incense stick to poke a hole in the center of the indentation. Insert it straight down, but not all the way through to the bottom. -
Widen the Hole Slightly:
Give the stick a tiny wiggle to enlarge the hole just a hair—clay shrinks slightly when baked, and you want to ensure the stick fits later. -
Final Smoothing:
Do a final pass over the clay with your finger dipped in a tiny bit of baby oil or cornstarch to remove any fingerprints before baking.
Smooth Moves
Before baking, lightly brush your raw clay with a little baby oil or cornstarch. This magically smooths away fingerprints for a professional finish.
Step 2: Baking and Decorating
-
Bake the Piece:
Place your holder on a parchment-lined baking sheet and bake according to your clay manufacturer’s instructions. Usually, this is around 275°F (135°C) for 30 minutes. -
Cool Completely:
Allow the piece to cool fully inside the oven or on a wire rack. The clay hardens as it cools, so don’t rush this step. -
Plan the Design:
Lightly sketch a flowing vine pattern around the top surface using a pencil if you’re nervous about freehand painting, or just visualize a continuous wave. -
Paint the Vine Stem:
Dip your fine brush into navy blue acrylic paint. Paint a single, continuous wavy line that encircles the top face of the holder. -
Add the Leaves:
Along the vine stem, paint small, almond-shaped leaves. I like to alternate the direction of the leaves to give it a natural, organic look. -
Add Colorful Accents:
Using a toothpick or a dotting tool, add tiny dots of Burnt Sienna or reddish-brown paint scattered between the leaves for a bit of contrast and texture. -
Let Paint Dry:
Ensure the acrylic paint is completely dry to the touch before moving to the sealing phase. -
Seal the Holder:
Apply a thin coat of matte varnish over the entire piece. This protects the paint from scratching and makes ash cleanup easier.
Terrazzo Twist
Instead of painting, chop up dried clay bits in contrasting colors and mix them into your raw base clay for a trendy terrazzo effect.
Once the varnish is dry, pop in your favorite incense stick and enjoy the serene atmosphere you’ve created
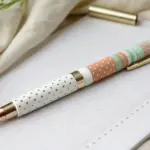
Polymer Clay Beads for Bracelets
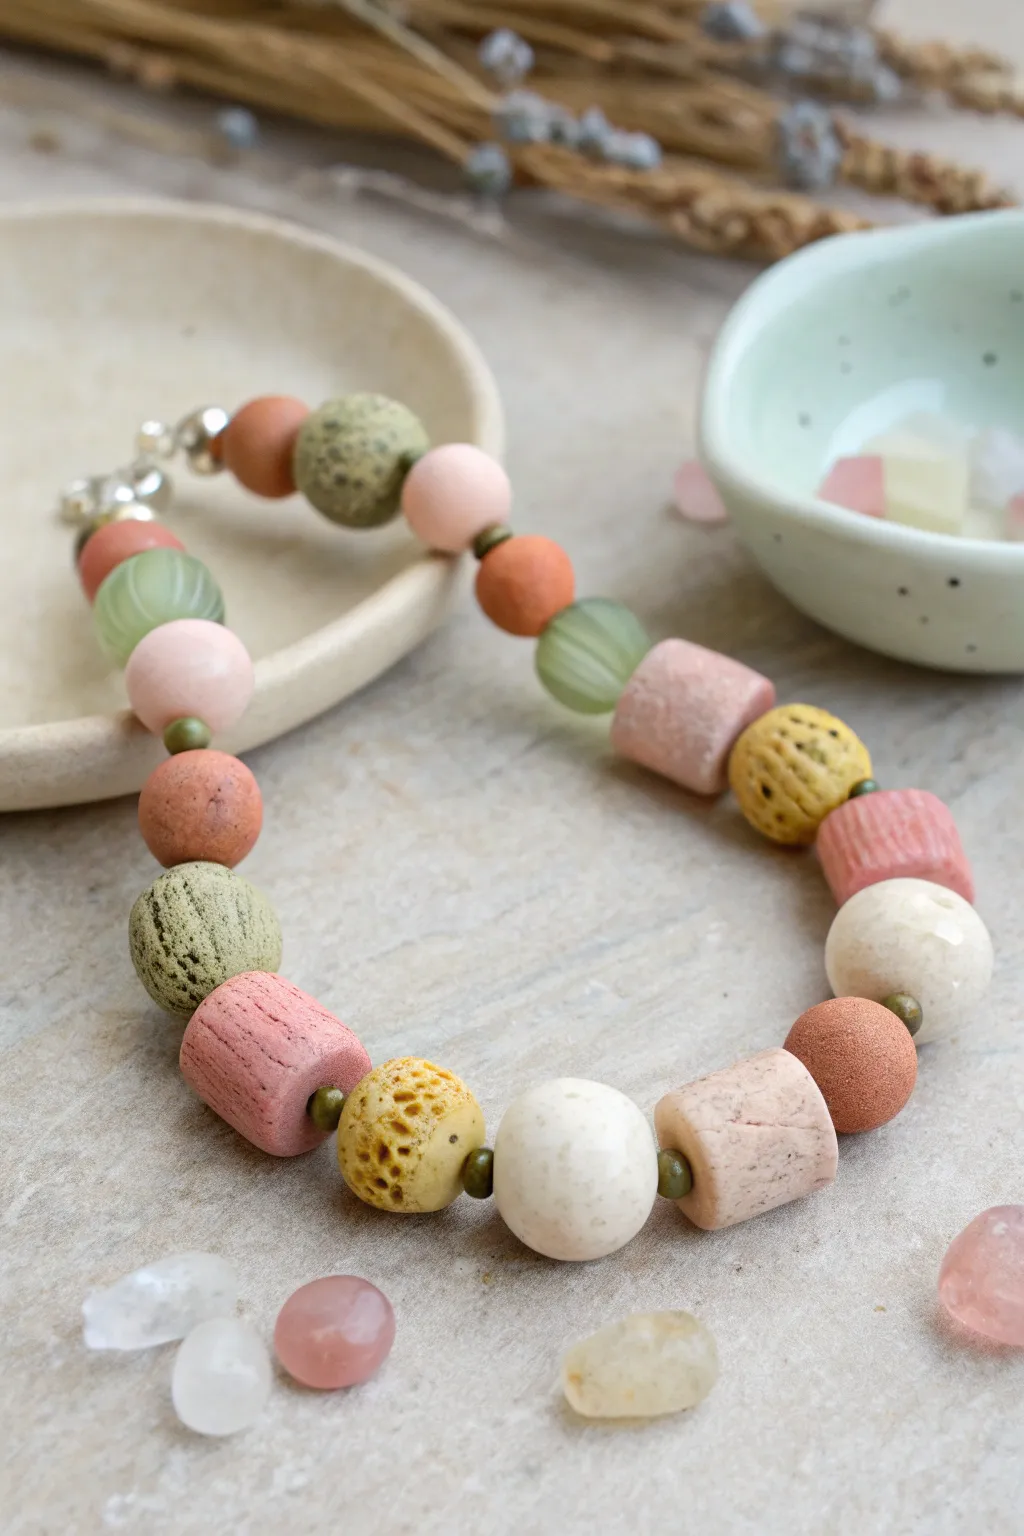
Embrace the beauty of natural stone textures with this stunning polymer clay bracelet. Featuring a mix of round, cylinder, and textured spacer beads in earthy pinks, sages, and creams, this project perfectly mimics the look of real ceramic and gemstone beads.
How-To Guide
Materials
- Polymer clay (terracotta, light sage green, cream/white, blush pink, yellow ochre)
- Coarse salt or sugar (for texturing)
- Sandpaper or a stiff toothbrush
- Acrylic roller
- Clay blade or craft knife
- Needle tool or bead piercing pins
- Jewelry wire or strong beading cord
- Crimp beads and crimping pliers (if using wire)
- Lobster clasp and jump rings
- Small metal spacer beads (antique brass finish)
- Oven for baking
Step 1: Preparing the Clay Colors
-
Mix Custom Shades:
Begin by conditioning your clay. To achieve the organic look seen in the photo, avoid using straight-from-the-package colors. dull down bright pinks with a touch of beige, and mix white into your sage green for a softer, mossy tone. -
Create a ‘Stone’ Effect:
For the speckled cream and sage beads, mix a pinch of ground black pepper or dried herbs (like dill) directly into the clay. Knead it thoroughly until the speckles are evenly distributed. -
Portion Control:
Roll your various colors into uniform snakes about ½ inch thick. Cut equal-sized segments from these snakes to differentiate which chunks will become round beads and which will be cylinders.
Salt Texture Gone Wrong?
If the salt doesn’t dissolve fully, the water wasn’t warm enough. Re-soak in hot tap water and use a stiffer brush to aggressively scrub the craters clean.
Step 2: Shaping the Beads
-
Rolling Round Beads:
Take your cut segments and roll them between your palms to create smooth spheres. Aim for a mix of sizes; the photo features larger feature beads (approx. 12mm) and slightly smaller supporting beads. -
Forming Cylinders:
For the pink cylindrical beads, roll a smooth log of clay and slice it into 8mm–10mm lengths. Gently tap the flat ends against your work surface to square them off while keeping the edges slightly soft and rounded. -
Creating the Melon Beads:
For the translucent green beads, form a round ball. Using the side of a needle tool or a dull blade, gently press vertical indentations around the bead to mimic a pumpkin or melon shape.
Pro Tip: Matte Finish
Never varnish these organic-style beads. The natural, matte texture of baked clay looks like real stone. Buffing them with denim gives a perfect soft sheen.
Step 3: Adding Texture
-
Salt Texturing:
Roll the yellow ochre beads and the textured green beads in coarse salt or sugar. Press the granules firmly into the surface so they don’t fall off before baking. This creates the crater-like, pitted texture seen in the reference. -
Surface Scratching:
For the ‘wood’ or ‘matte stone’ look on the pink cylinders, lightly scratch the surface with sandpaper or a stiff toothbrush. I usually rotate the bead while doing this to ensure even coverage. -
Piercing the Holes:
Carefully pierce each bead with your needle tool or bead pin. To avoid squishing your shape, insert the needle while twisting gently, go halfway through, then pull it out and finish the hole from the other side.
Step 4: Baking and Finishing
-
Baking:
Arrange your beads on a baking sheet lined with parchment paper or cardstock. Bake according to your brand’s instructions (usually 275°F/130°C for 30 minutes). If you used pins, you can bake the beads right on the pins to keep the holes straight. -
Water Bath:
Once baked and cooled, drop the salt-textured beads into a bowl of warm water. Let them soak for 10 minutes, then scrub them with a brush to dissolve the salt, revealing the deep pits and texture. -
Washing:
Give all other beads a quick wash with soapy water to remove any oils or residue.
Step 5: Assembly
-
Layout Design:
Lay out your beads on a bead board or cloth. Follow the pattern seen in the image: alternate shapes (round vs. cylinder) and textures. Place tiny metal spacer beads between the larger clay beads to add flexibility and a professional finish. -
Stringing:
Cut a length of beading wire about 10 inches long. String your beads following your layout. The metal spacers are crucial here—they separate the larger beads so they sit comfortably around the wrist. -
Attaching the Clasp:
Thread a crimp bead onto one end of the wire, followed by a jump ring or wire guard attached to one half of your clasp. Loop the wire back through the crimp bead. -
Securing:
Pull the wire snug (but not tight), leaving about 2mm of slack for movement. Use your crimping pliers to flatten the crimp bead securely. -
Final Connection:
Repeat the crimping process on the other end with the second part of the clasp. Trim any excess wire with flush cutters and tuck the tail inside the nearest bead.
Now you have a beautiful, durable bracelet that looks like it came from a high-end boutique
Cane Slice Designs for Tiny Details
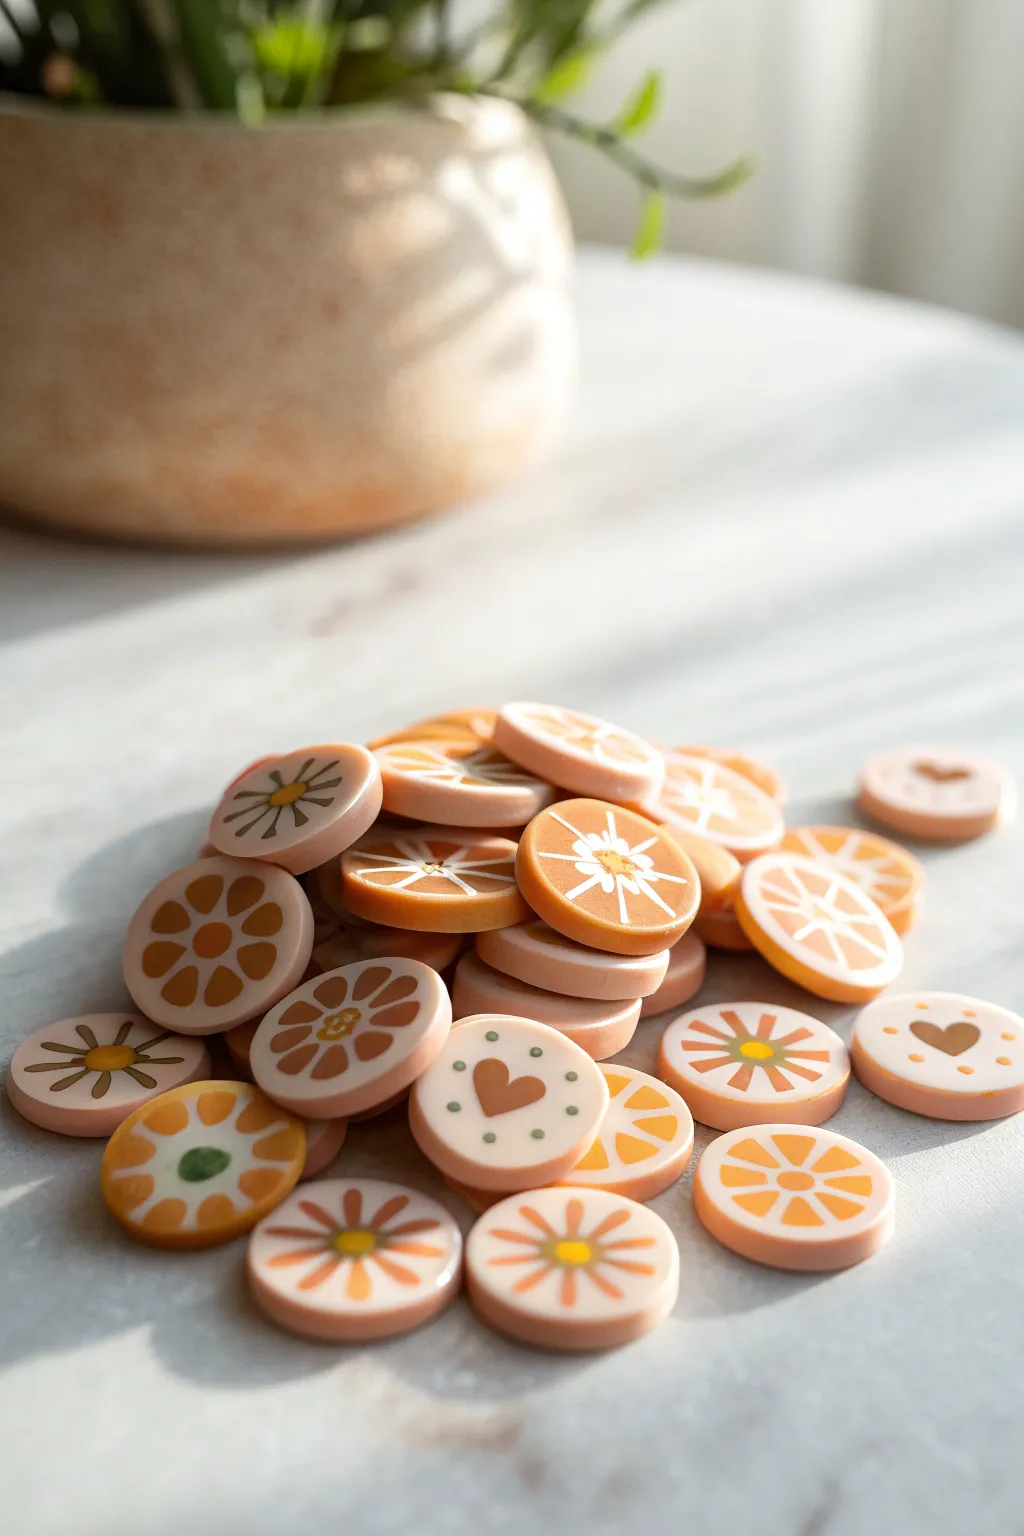
These delightful polymer clay slices feature a mix of sunny citrus patterns, geometric flowers, and simple hearts in a soft, warm palette of creams, oranges, and soft browns. Perfect for nail art, miniature food decoration, or simple beadwork, they are created using the classic millefiori caning technique.
Detailed Instructions
Materials
- Polymer clay (white, translucent, orange, beige, soft brown, yellow)
- Acrylic roller or pasta machine
- Tissue blade or sharp clay slicer
- Extruder (optional for consistent round logs)
- Ruler
- Baking sheet and parchment paper
- Oven
Step 1: Color Prep & Basic Logs
-
Condition the clay:
Begin by thoroughly conditioning each color of clay until it is soft and pliable. This prevents cracking later. -
Create custom shades:
Mix a small amount of orange with white to create a soft peach, and mix brown with white for a latte beige. Keep some pure white and pure orange for contrast. -
Form the centers:
Roll small snakes of yellow, white, or brown clay to serve as the centers for your canes. These should be about 5mm thick initially.
Keep It Clean
Clean your blade with a baby wipe or alcohol between cuts and colors. Dirty tools can smear brown clay onto white areas, ruining the crisp graphic look.
Step 2: Building the Citrus Cane
-
Shape the segments:
Roll a thick log of orange clay (or your peach mix) about 1 inch thick. Pinch one side along the entire length to creating a teardrop or wedge shape profile. -
Wrap the segments:
Roll a thin sheet of white clay on the thickest setting of your pasta machine. Wrap this sheet around your orange teardrop wedge, trimming the excess neatly. -
Reduce to segment size:
Gently stretch and roll this wrapped wedge until it is long and thin, then cut it into 6-8 equal lengths. -
Assemble the wheel:
Take a small snake of white or translucent clay for the pith center. Arrange the wedge segments around this center point, with the narrow points touching the middle. -
Final wrap:
Roll a final thick sheet of white or beige clay and wrap it around the entire bundle of segments to form the outer ‘rind’ or skin of the fruit.
Variation Ideas
Before baking, use a needle tool to poke two holes in the center of the slices to turn them into actual sewable buttons for doll clothes.
Step 3: Creating the Flower & Heart Canes
-
Simple daisy construction:
Similar to the citrus, create round logs of petal colors (white or beige). Wrap each log in a thin layer of contrasting color (like brown). -
Assemble the flower:
Place a yellow center log down, then arrange 5-6 petal logs around it. Squeeze them gently so they adhere to the center. -
Fill the gaps:
Take small triangles of background colored clay (white or beige) and press them into the V-shaped gaps between the outer petals to keep the cane round. -
The heart cane:
Shape a log of brown clay into a teardrop shape. Use a credit card or needle tool to press an indentation into the round top of the teardrop, forming a heart cleavage. -
Surround the heart:
Fill the indentation and surround the heart shape with logs of white clay, smoothing it until the whole cane is a perfect cylinder again.
Step 4: Reducing & Slicing
-
Rest the canes:
I prefer to let the canes sit for about 20 minutes before reducing; this allows the different clays to equalize in temperature, making them reduce more evenly. -
Reduce diameter:
Gently squeeze the cane from the center moving outwards, rolling it on your work surface to lengthen it and reduce the design to your desired diameter (roughly 1cm for these buttons). -
Chill the cane:
Place the reduced canes in the fridge for 15-30 minutes. Firm clay slices much cleaner than warm, mushy clay. -
Slice the discs:
Using a very sharp tissue blade, slice straight down through the cane to create uniform disks about 2-3mm thick. Rotate the cane slightly after every few cuts to prevent a flat bottom. -
Smooth the edges:
If the slicing distorted the shape, gently tap the edges with your finger to round them back out. -
Bake:
Arrange onto a parchment-lined baking sheet and bake according to your manufacturer’s instructions (usually 275°F/135°C for 15-30 minutes).
Once cooled, these adorable patterned slices are ready to be glued onto studs, used as cabochons, or scattered as decorative confetti
Faux Gemstone Cabochons

Replicate the serene beauty of polished river stones and semiprecious gems with this simple polymer clay technique. By mixing translucent clays with inks or paints, you can achieve a depth and luster that rivals the real thing.
Step-by-Step
Materials
- Translucent polymer clay (high quality)
- Alcohol inks (emerald green, purple, yellow, amber)
- Acrylic paint (white, optionally pearl)
- Fimo liquid or liquid polymer clay (optional for extra glassiness)
- Gloss varnish or UV resin
- Fine grit wet/dry sandpaper (400 to 2000 grit)
- Buffing wheel or denim cloth
- Ceramic tile or glass work surface
- Clay blade
- Oven
Step 1: Creating the Base Colors
-
Condition the translucent clay:
Start by thoroughly conditioning your translucent polymer clay until it is soft and pliable. This is crucial for avoiding ‘plaquing’ or little moon-shaped marks in the final bake. Divide the clay into six equal portions to match the stones in the photo. -
Mix the green hues:
For the deep green stone, take one portion of translucent clay and add a drop of emerald alcohol ink. Knead it in well. If you want a slightly milky look like jade, add a pinhead-sized speck of white clay. -
Create the minty green:
For the lighter green stone, use a tiny amount of green ink mixed with a larger amount of white clay or a ‘pearl’ effect clay mixed into the translucent base. You want this one to be more opaque and pastel. -
Form the purples:
For the dark purple, use purple alcohol ink. For the lighter lavender stone, mix a tiny bit of the purple clay you just made into a fresh ball of translucent clay to dilute the color significantly. Add a touch of pearl mica powder if desired for shimmer. -
Mix the yellows:
For the amber stone, use yellow and a touch of orange or brown ink. For the pale cream stone, keep the translucent clay mostly clear but add a tiny smudge of white and yellow acrylic paint for a soft, moonstone glow.
Step 2: Shaping the Cabochons
-
Check for inclusions:
Before shaping, look closely at your clay. If you want realistic stone inclusions, you can mix in tiny flecks of black pepper, dried tea leaves, or glitter, but for the smooth look in the photo, keep the clay clean. -
Roll into balls:
Roll each colored portion into a smooth, seamless ball between your palms. Ensure there are no cracks or fold lines, as these will show up later. -
Flatten onto surface:
Place the balls onto your ceramic tile or glass baking surface. Gently press down on each one with the pad of your thumb or an acrylic block to form a domed cabochon shape. -
Refine the shape:
Lightly smooth the edges with your finger to ensure a nice, rounded slope. The bottom should be flat against the tile, while the top remains a gentle dome.
Cloudy Outcomes?
If your translucent clay looks milky after baking, you may have introduced air bubbles while conditioning or the oven temp was too low. Use a temp thermometer.
Step 3: Baking and Finishing
-
Bake the stones:
Bake according to your clay manufacturer’s instructions. Usually, this is around 275°F (130°C) for 30 minutes. I personally like to quench them in ice water immediately after baking to increase translucency. -
Wet sanding:
Once cool, begin wet sanding. Start with 400 grit sandpaper under running water to remove fingerprints. Progress through 600, 800, 1000, and up to 2000 grit. This step transforms the matte clay into a smooth stone. -
Buffing:
Dry the stones completely. Buff them vigorously with a piece of denim or a buffing wheel on a rotary tool. This creates a natural, soft sheen. -
Gloss coating (optional):
If you want the high-gloss look seen in the dark purple and green stones, apply a thin layer of UV resin or gloss varnish. Cure or dry as directed to get that glass-like finish. -
Final arrangement:
Your faux gemstones are now ready to be used in jewelry settings, glued onto accessories, or simply displayed in a dish as elegant decor.
Pro Tip: Depth of Color
Layering is key! Create a core of opaque clay and wrap it in a tinted translucent layer. This gives the ‘stone’ incredible visual depth.
Enjoy the calming process of creating these little treasures and arranging them in your home
Shaker Charms With Tiny Fillers
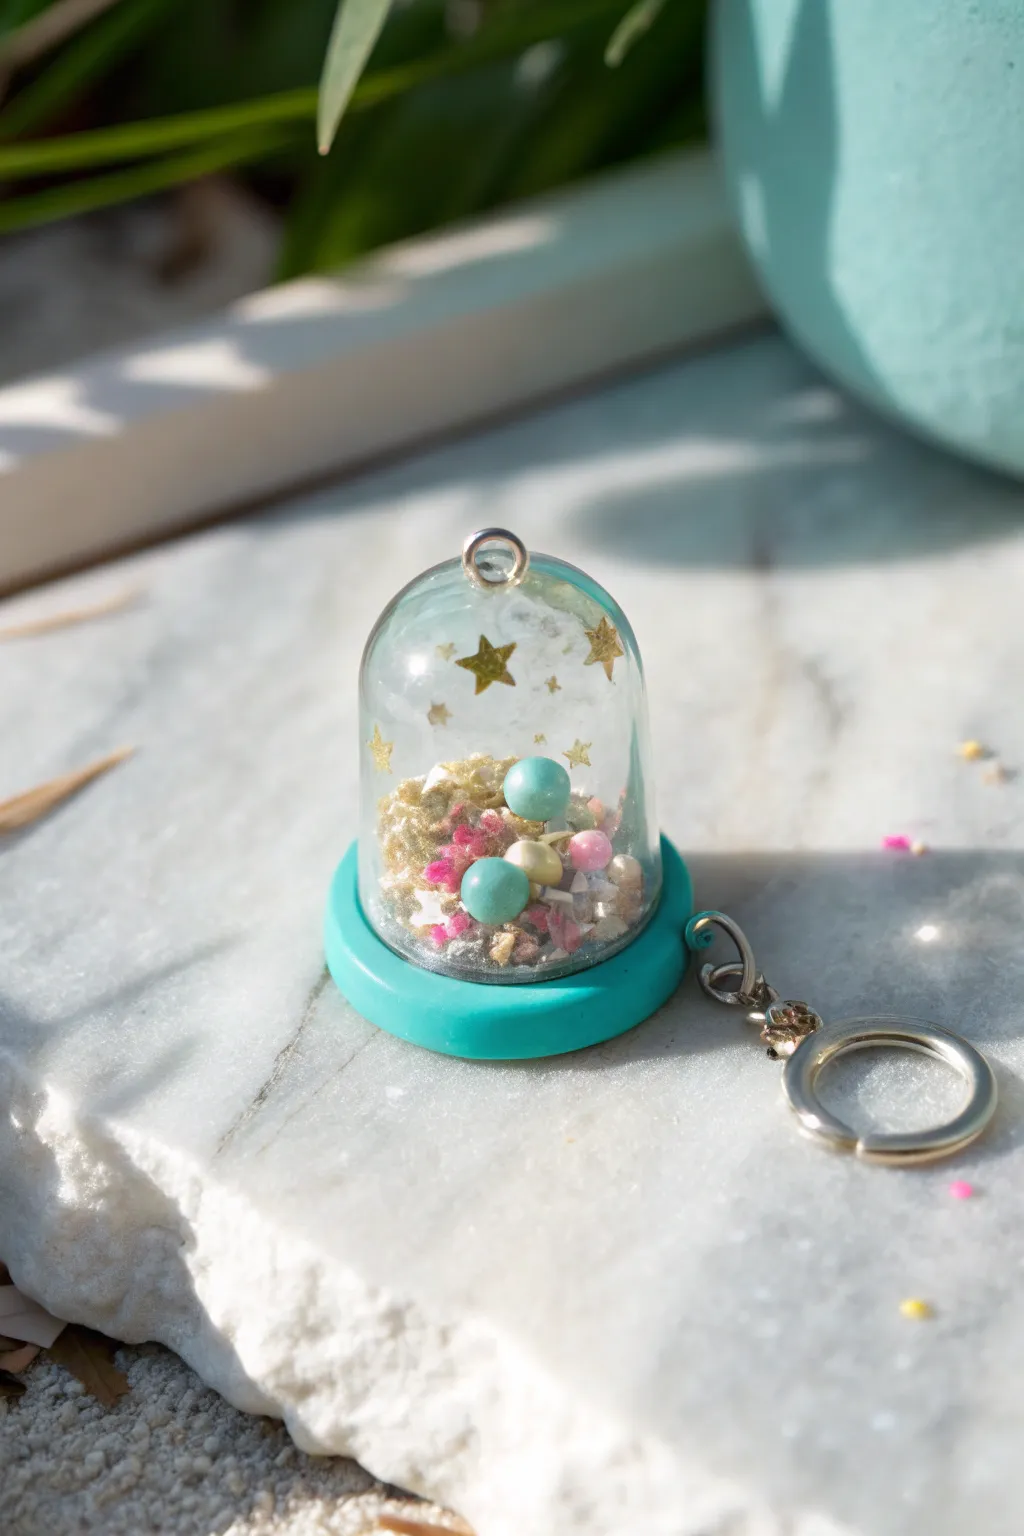
Capture a tiny world of wonder with this adorable bell jar shaker charm. Featuring a teal polymer clay base and a clear dome filled with floating gold stars and pastel pearls, it makes for a magical addition to any keychain or bag.
Step-by-Step Guide
Materials
- Teal polymer clay (pre-conditioned)
- Small glass or plastic bell jar dome (approx. 1 inch)
- UV resin (soft or hard type)
- UV lamp
- Gold star confetti or glitter
- Small pearls or beads (teal, pink, cream)
- Gold glitter dust
- Eye screw pin
- Jump ring and keychain attachment
- Round clay cutter (slightly larger than dome diameter)
- Modeling tool or toothpick
- Super glue or E6000
- Parchment paper or silicone mat
Step 1: Creating the Base
-
Condition the Clay:
Start by kneading your teal polymer clay until it is soft and malleable. Roll it out into a smooth, even sheet that is about 1/4 inch thick. -
Cut the Circle:
Using a round cutter that is just slightly larger than the opening of your bell jar dome, punch out a perfect circle. This will serve as the sturdy foundation for your shaker. -
Smooth the Edges:
Gently run your finger around the cut edge of the clay circle to soften any sharp corners left by the cutter, creating a pleasant, rounded finish. -
Check the Fit:
Lightly press your bell jar dome onto the clay to ensure the size is correct. You want a tiny lip of clay extending past the glass rim, but not too much. -
Pre-Bake the Base:
Place your clay circle on a baking sheet lined with parchment paper. Bake according to the manufacturer’s instructions (usually 275°F for 15 minutes) and let it cool completely.
Static Free Zone
Wipe the inside of your dome with a dryer sheet before filling. This removes static electricity so your glitter shakes freely instead of sticking to the walls.
Step 2: Preparing the Dome
-
Attached Floating Stars:
While the base cools, take your clear dome and apply tiny dots of UV resin to the inside walls where you want the gold stars to ‘float.’ Using a toothpick, place a gold star on each dot. -
Cure the Stars:
Flash cure the dome under your UV lamp for about 30-60 seconds to lock the stars in place against the glass. -
Add the Hardware:
Since glass domes can’t easily be drilled, adhere a metal cap or a small jump ring loop to the very top exterior of the glass using strong UV resin or E6000 glue. Cure or let dry fully.
Liquid Shaker Option
For a slow-motion snow globe effect, fill the dome with baby oil before sealing. Use UV resin carefully to ensure a watertight seal around the rim.
Step 3: Filling and Assembly
-
Prepare the Glitter Bed:
Flip your cooled clay base so the flat side is facing up. You can add a very thin layer of UV resin to the center and sprinkle fine gold glitter dust to create a sparkly floor, then cure it. -
Add the Shaker Elements:
Carefully pile your loose filler materials onto the center of the base. Add the pastel pearls, pink bits, and a pinch of loose gold glitter. Keep everything centered so it doesn’t interfere with the rim. -
Prepare the Rim:
Apply a precise, continuous ring of strong adhesive (E6000 is great for glass-to-clay bonds) or thick UV resin around the outer edge of the clay circle. -
Seal the Shaker:
Place the dome over the pile of filling, pressing it firmly into the adhesive ring on the base. Make sure the seal is airtight so no glitter escapes. -
Final Cure or Dry:
If using UV resin to seal, cure under the lamp for 2-3 minutes, rotating to ensure all sides are hard. If using glue, let it sit undisturbed for 24 hours. -
Attach Keychain:
Open a jump ring with pliers and thread it through the loop on top of your dome. Attach your keychain hardware and close the ring securely.
Now you have a sparkling keepsake ready to catch the light wherever you go
Page Clips and Mini Bookmarks
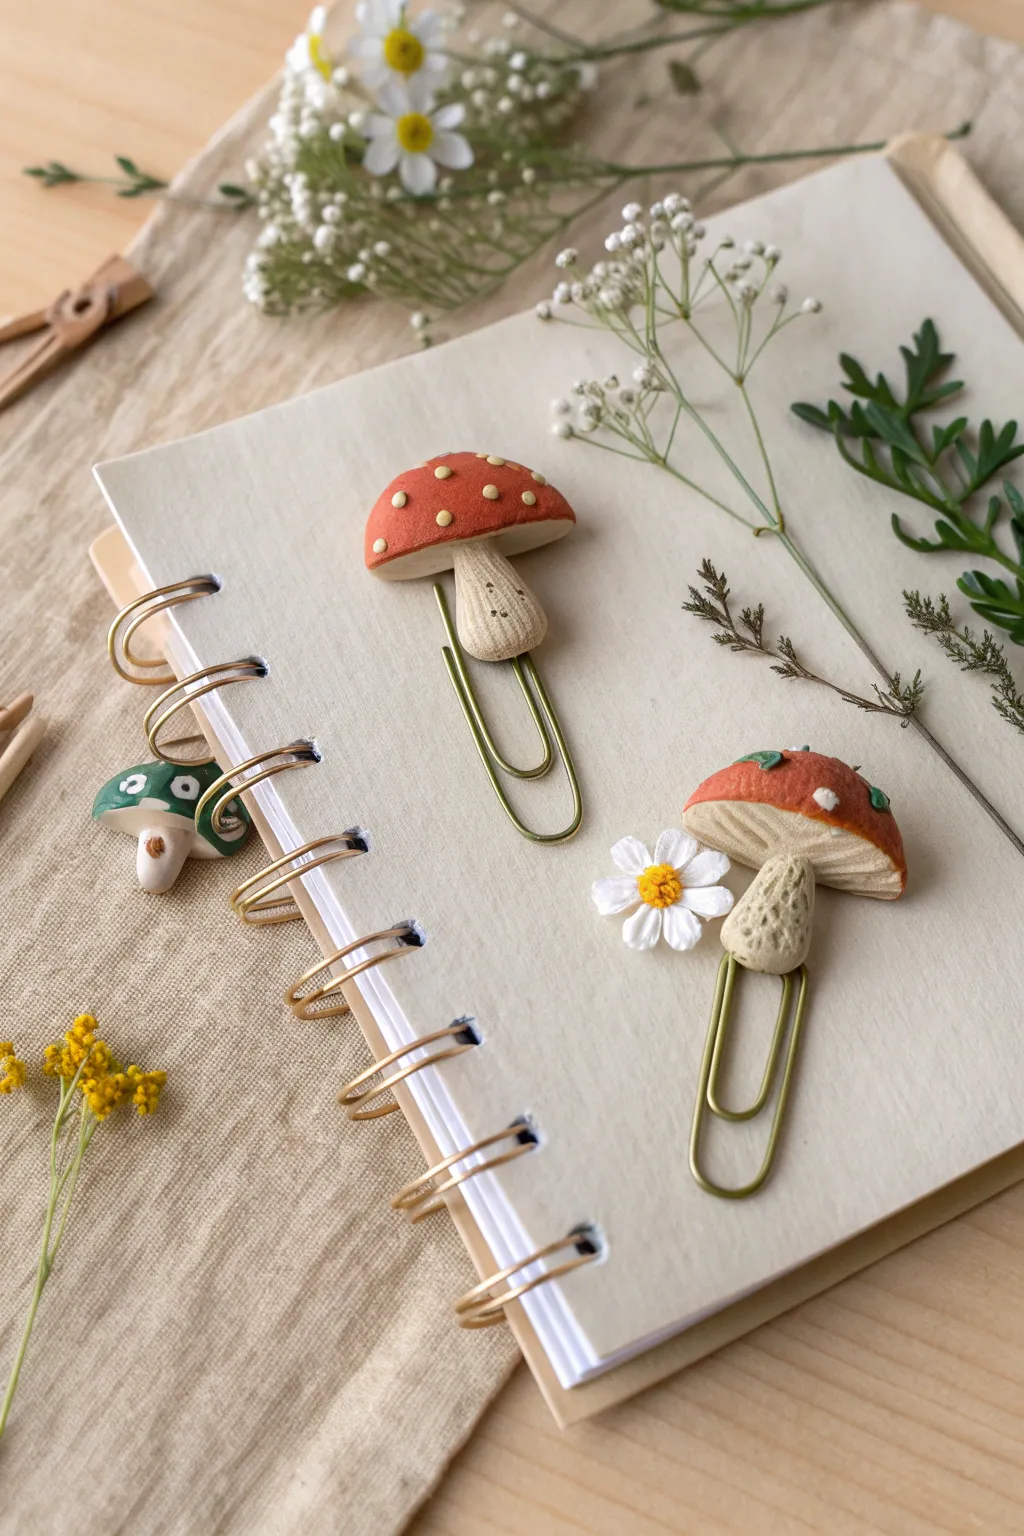
Transform ordinary office supplies into enchanting stationary accessories with these adorable polymer clay mushroom clips. Featuring textured stems and vibrant caps, they look like they were plucked straight from a fairy garden to keep your place in your favorite book.
How-To Guide
Materials
- Polymer clay (red, beige/tan, green, white)
- Large gold-tone paper clips
- Liquid polymer clay (bakeable adhesive)
- Needle tool or toothpick
- Ball stylus tool
- Soft pastel chalks (brown/umber)
- Small paintbrush
- Craft knife or scalpel
- Oven and baking sheet
Step 1: Forming the Base
-
Prepare the clip:
Take a large gold paper clip and identify the single loop end where the clay will sit. Apply a very small drop of liquid polymer clay to the top curve of this loop to help the clay bond to the metal. -
Create the stem core:
Roll a small ball of beige clay, about the size of a pea. Flatten it slightly and sandwich the top loop of the paper clip inside the clay, ensuring the metal is completely covered on both sides. -
Shape the stem:
Gently roll and pinch the clay around the wire to form a bulbous mushroom stem shape—wider at the bottom and slightly narrower where it will meet the cap. Smooth out any fingerprints.
Step 2: Texturing the Stalk
-
Create gill lines:
At the very top of the stem, use a needle tool to scratch fine lines radiating outward. This mimics the gills of the mushroom that will peek out from under the cap. -
Add stem texture:
Using a needle tool or an old toothbrush, gently stipple the surface of the beige stem to give it a porous, organic look rather than a perfectly smooth plastic finish. -
Shade for realism:
Scrape a little brown soft pastel into a powder. With a dry paintbrush, lightly dust the textured parts of the stem, especially near the base, to highlight the details.
Adhesion Pro Tip
If the clay feels loose on the wire after baking, wiggle it off gently, add a drop of superglue to the wire, and slide the clay back on for a permanent hold.
Step 3: Sculpting the Caps
-
Form the cap shape:
Roll a ball of red clay slightly larger than your stem base. Flatten the bottom and round the top into a dome shape. For variety, make some caps tall and pointy, and others wider and flatter. -
Texture the underside:
Flip the cap over and press a small indentation in the center where the stem will connect. Use your needle tool to score lines radiating from this center point to the edge, creating the underside gills. -
Attach the cap:
Place a tiny dab of liquid clay on the top of your beige stem. Press the red cap firmly onto the stem, ensuring a good connection without squashing your textures.
Level Up: Glossy Finish
After baking and cooling, coat just the red mushroom caps with a high-gloss polyurethane varnish to make them look wet and freshly sprouted.
Step 4: Detailing and Baking
-
Add white spots:
For the classic toadstool look, roll tiny specks of white or dusty yellow clay. Press them gently onto the red cap, flattening them slightly so they look natural. -
Sculpt mossy details:
For a woodland variation, take tiny bits of green clay and smudge them onto the cap or stem base to resemble moss or small leaves. -
Final smooth:
Give the piece a final inspection. I like to use a bit of baby oil on my finger to smooth out any unwanted fingerprints on the smooth parts of the cap before baking. -
Bake:
Place your clips on a parchment-lined baking sheet. Bake according to your brand of clay’s instructions (usually 275°F/135°C for 15-30 minutes). -
Cool down:
Let the clips cool completely on the baking sheet. The clay is fragile while hot, so resist the urge to test the clip mechanism until it has hardened fully.
Now you have a charming set of woodland accessories ready to gift or use in your own journals.
Mini Tic-Tac-Toe Desk Game Pieces
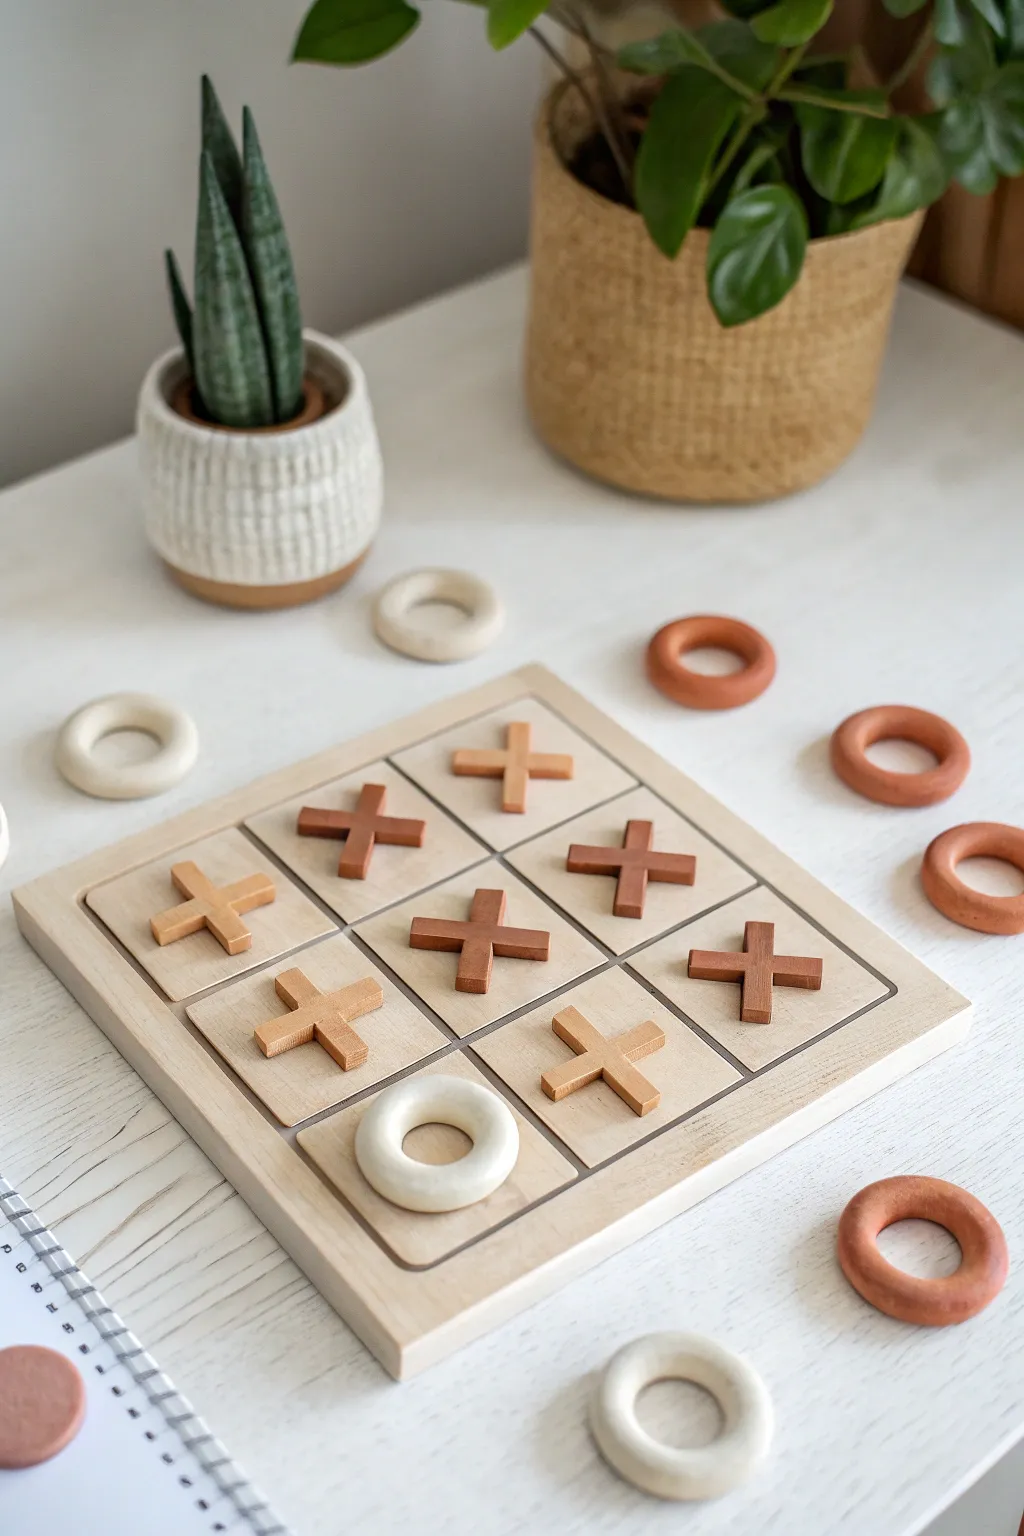
Upgrade your desk decor with this sleek, earth-toned take on the classic game using polymer clay to mimic smooth wood and stone finishes. The pieces are chunky, tactile, and designed to fit perfectly into a simple grid for endless rounds of play.
Step-by-Step Tutorial
Materials
- Polymer clay (Terracotta or warm brown color)
- Polymer clay (Cream or bone white color)
- Polymer clay (Light birch wood color or beige)
- Acrylic rolling pin
- Clay knife or rigid blade
- Circle cutter (approx. 1.5 inch diameter)
- Small circle cutter (approx. 0.75 inch diameter)
- Ruler
- Sandpaper (fine grit)
- Oven and baking sheet
- Matte varnish (optional)
Step 1: Creating the Game Board Base
-
Condition the base clay:
Begin by conditioning the light beige or birch-colored clay until it is soft and pliable, ensuring there are no air bubbles trapped inside. -
Roll out the slab:
Use your acrylic rolling pin to roll the beige clay into a thick, square slab, aiming for a consistent thickness of about 1/4 inch. -
Cut the square:
Measure and cut a perfect 5×5 inch square using your ruler and rigid blade; this will serve as the game board. -
Scribe the grid:
Using the back of your knife or a needle tool, gently press a 3×3 grid into the surface of the clay, being careful not to cut all the way through. -
Detailing the grid lines:
To make the grid distinct like the reference, widen the scribed lines slightly by pressing a thin knitting needle or round tool along the grooves.
Step 2: Forming the ‘O’ Pieces
-
Prepare the colors:
You will need five ‘O’ pieces. Decide on your color mix—the reference shows a mix of terracotta and cream rings. -
Roll and cut outer circles:
Roll your chosen clay colors to a 1/4 inch thickness. Use the larger circle cutter to stamp out five circles. -
Cut inner circles:
Center the smaller circle cutter inside each large circle and press down to remove the middle, creating a clean ring shape. -
Smooth the edges:
Gently rub the cut edges of the rings with your finger to soften any sharp angles left by the cutters.
Clean Lines Hack
Chill your rolled clay in the fridge for 10 minutes before cutting. This firms it up, preventing the ‘X’ shapes and rings from dragging or warping under the blade.
Step 3: Sculpting the ‘X’ Pieces
-
Create clay strips:
Roll out terracotta and light brown clay to the same 1/4 inch thickness. Cut long strips that are roughly 1/2 inch wide. -
Cut segment lengths:
Measure and cut ten rectangular segments from the strips, each about 1.5 inches long. -
Notch the centers:
For a flush fit, cut a small square notch halfway through the center of each strip so they can interlock, or simply cross them and press firmly if keeping it simple. -
Assemble the crosses:
Lay one strip across another to form an ‘X’ shape. Gently press the center junction so the clay bonds together. -
Refine the shape:
I find it helpful to use the side of my blade to push the edges of the ‘X’ straight again if they distorted during pressing.
Texture It Up
Before baking, gently drag a stiff-bristled toothbrush or coarse sandpaper across the raw clay surface to create a realistic, subtle wood grain texture.
Step 4: Baking and Finishing
-
Pre-bake check:
Place all pieces on a baking tile or sheet lined with parchment paper. Ensure the board is perfectly flat. -
Bake the project:
Bake according to your polymer clay package instructions (usually 275°F for 15-30 minutes depending on thickness). -
Cool down:
Allow the pieces to cool completely in the oven with the door slightly ajar to prevent cracking. -
Sanding for faux-wood effect:
For that matte, wooden look, lightly sand the surfaces of the board and pieces with fine-grit sandpaper to remove any shine or fingerprints. -
Seal the deal:
Finish with a very thin coat of matte varnish if you want to protect the pieces from scratching without adding gloss.
Set up your stylish new game on your desk and enjoy a quick mental break with a friend.