When the air turns crisp, I always reach for polymer clay because it’s perfect for tiny, cozy projects that scream fall without being fussy. Here are my favorite polymer clay fall ideas—from classic pumpkins to quirky little keepsakes you’ll actually want to display (or wear) all season.
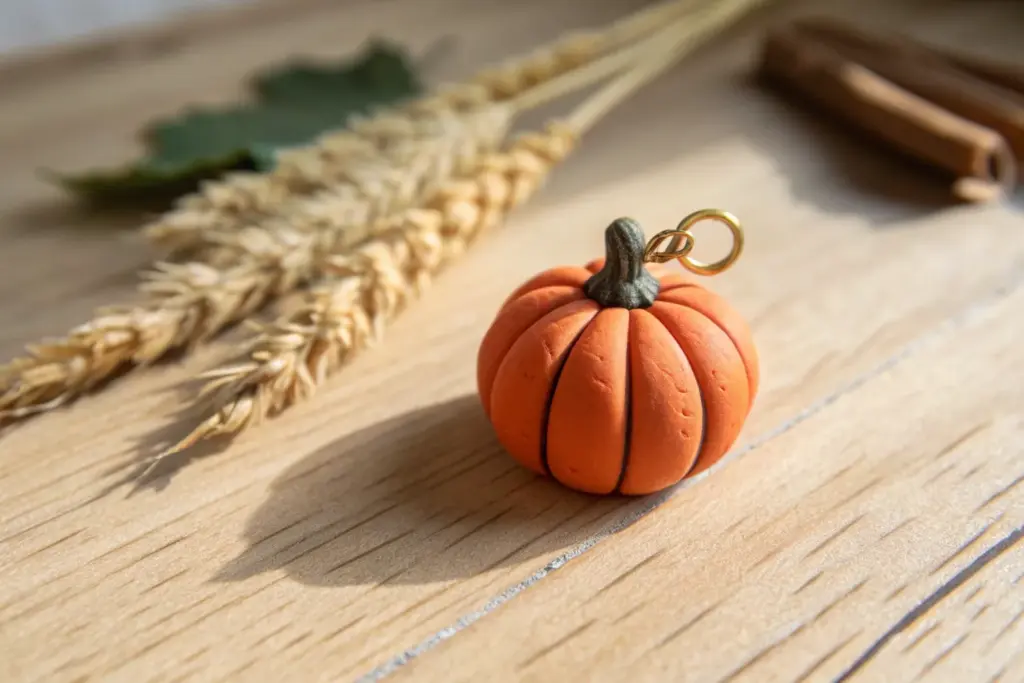
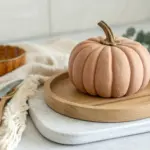
Mini Pumpkin Charms
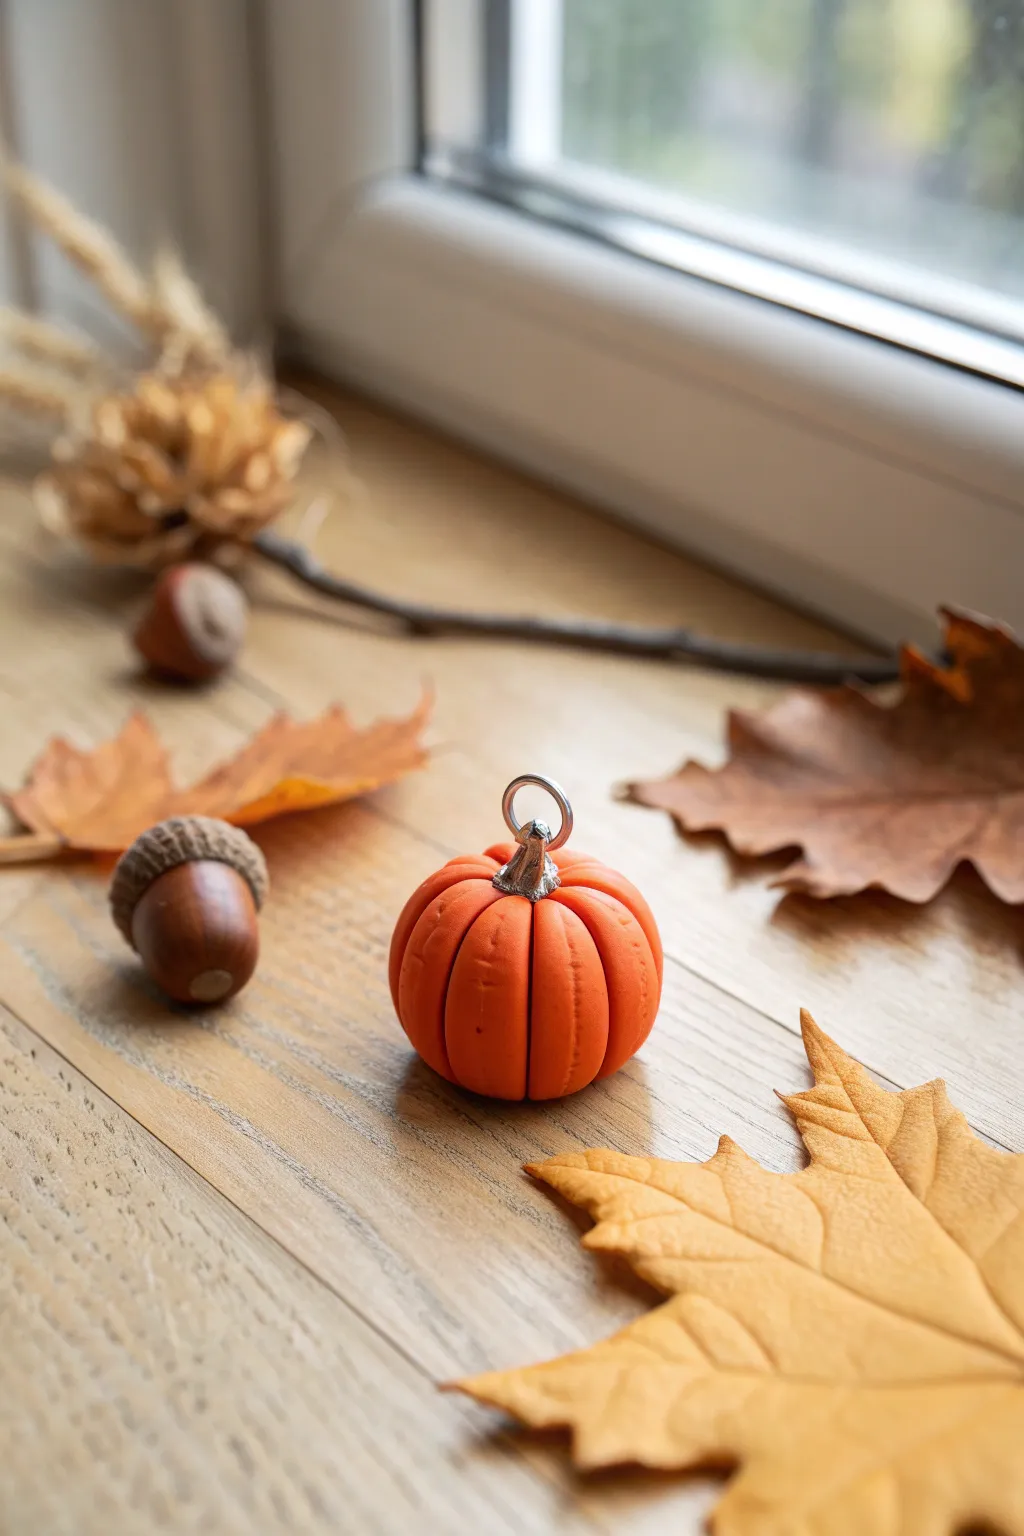
Capture the essence of autumn in a tiny, wearable package with this segmented pumpkin charm. The bright orange clay uses a clever rolling technique to create distinct ribs, while a shining silver stem adds a polished finish perfect for jewelry.
Step-by-Step Tutorial
Materials
- Bright orange polymer clay
- Silver or metallic grey polymer clay (for the stem)
- Small metal eye pin or jewelry bail
- Razor blade or clay slicing tool
- Needle tool or toothpick
- Acrylic roller
- Gloss glaze (optional)
Step 1: Forming the Pumpkin Segments
-
Condition the Clay:
Begin by conditioning a small block of orange clay in your hands until it becomes soft, pliable, and free of any cracks. -
Create a Log:
Roll the conditioned orange clay into a smooth, even log shape. Aim for a thickness of about 1/2 inch to 3/4 inch, depending on how large you want your final pumpkin to be. -
Slice Equal Portions:
Using your razor blade or clay slicer, cut the log into 8 to 10 equal segments. These slices will become the individual ribs of your pumpkin. -
Shape the Slices:
Take each individual slice and gently roll it in your palm to round off any sharp edges from cutting, forming slightly flattened spheres or thick discs. -
Form the Wedges:
Gently pinch one side of each disc to make it slightly thinner than the other, creating a subtle wedge shape similar to an orange segment. -
Assemble the Core:
Take a small scrap of orange or scrap clay and roll it into a tiny cylinder to act as a center axis. This helps hold everything together. -
Attach the Segments:
Press your orange segments onto the central cylinder one by one, arranging them in a circle. Make sure the thicker outer edges are facing outward. -
Close the Circle:
Once all segments are attached, gently squeeze the entire assembly together to close any gaps between the slices.
Clean Grooves
Dust your needle tool with a tiny bit of cornstarch before re-defining the grooves. This prevents the tool from dragging or tearing the sticky raw clay.
Step 2: Refining and Adding Detail
-
Smooth the Form:
Roll the assembled pumpkin very gently between your palms. You want to bond the clay pieces without completely losing the deep grooves between the segments. -
Enhance Textures:
If the grooves smoothed out too much, use the side of a needle tool or the back of your blade to re-indent the vertical lines between each rib. -
Create the Stem Depression:
Use the rounded handle of a tool or your pinky finger to press a small indentation into the top center of the pumpkin where all the segments meet. -
Adding Realism:
I like to use a stiff brush or a piece of sandpaper to lightly texture the orange skin, giving it renewed matte look rather than a shiny plastic finish. -
Form the Stem:
Take a tiny amount of silver metallic clay and shape it into a cone. Twist the top slightly to give it an organic, vine-like appearance. -
Attach the Hardware:
Insert your metal eye pin through the center of the silver stem. Make sure the loop sticks out the top completely. -
Mount the Stem:
Press the stem (with the eye pin inside) firmly into the depression you created earlier on the orange body. Ensure the silver clay bonds well with the orange. -
Final Adjustments:
Check the shape one last time. If the pumpkin got squished during assembly, gently push the top and bottom to make it slightly squat and realistic. -
Bake:
Bake the charm according to your specific brand of polymer clay’s instructions, usually at 275°F (135°C) for about 15-20 minutes.
Shading Depth
Before baking, brush a tiny amount of brown soft pastel powder into the creases of the pumpkin ribs to create instant dimension and realistic shadows.
Once cooled, your charming little pumpkin is ready to be strung onto a necklace or added to your favorite fall bracelet


Jack-o’-Lantern Earrings
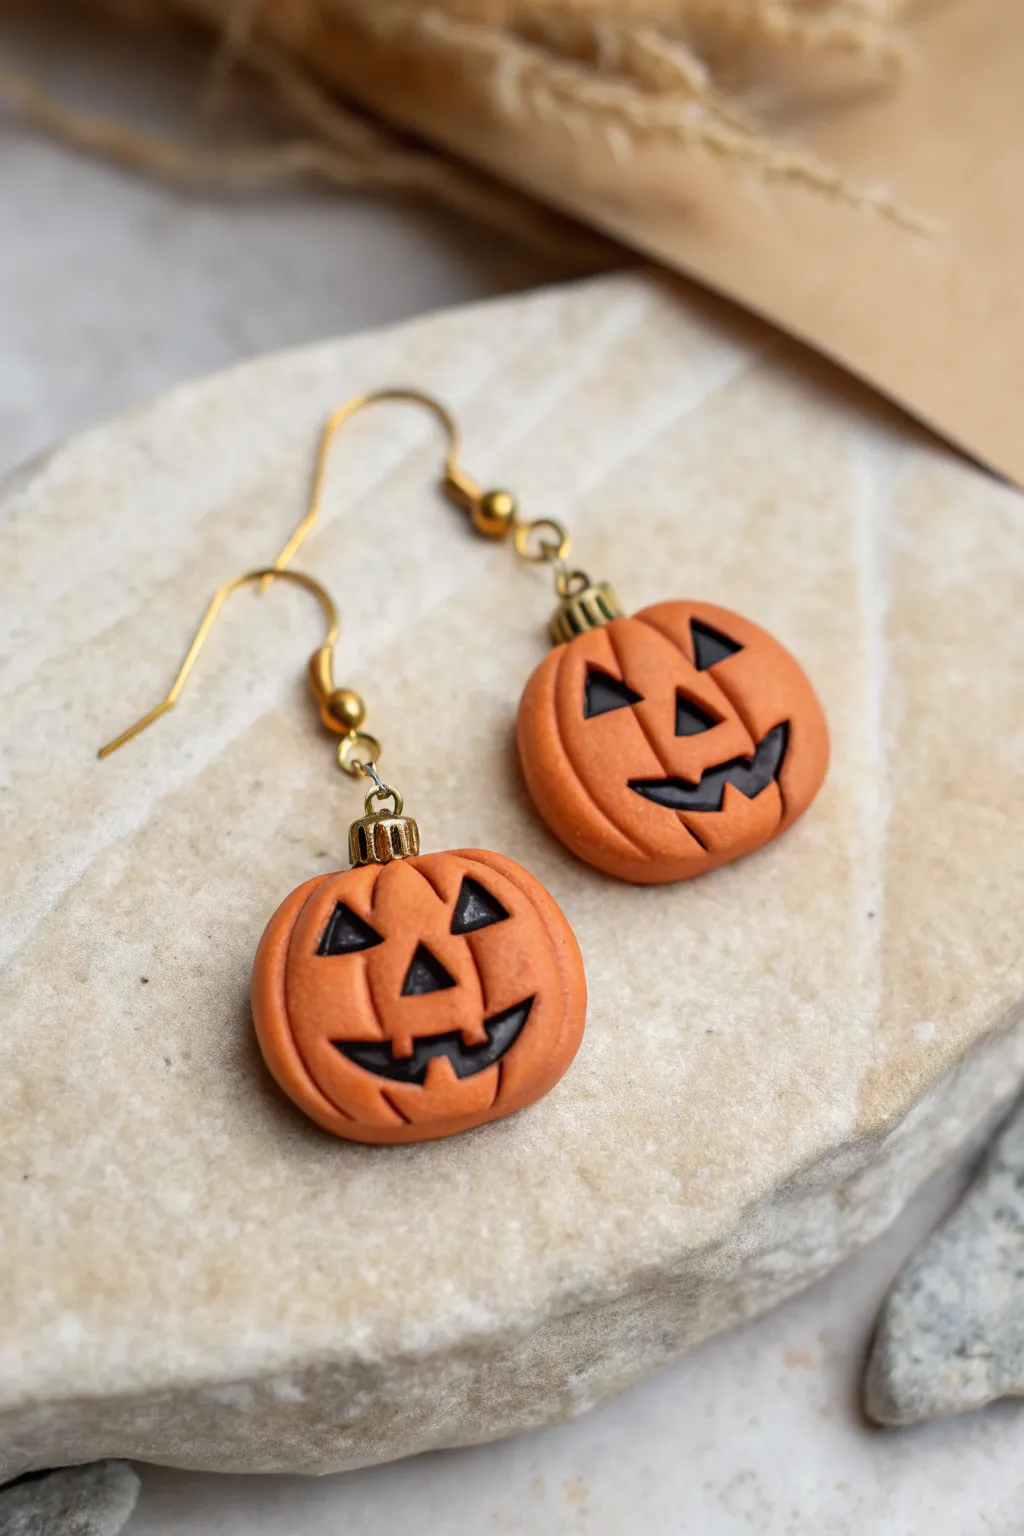
Celebrate the Halloween season with these charmingly classic jack-o’-lantern earrings. Made from polymer clay with delicate carved details and golden findings, they add just the right amount of festive flair to any autumn outfit.
Step-by-Step
Materials
- Orange polymer clay (slightly terracotta or burnt orange shade)
- Black polymer clay
- Ball tool or dotting tool
- Needle tool or toothpick
- X-Acto knife or craft blade
- Gold tone crimp cord ends (small)
- Small gold jump rings (4mm or 5mm)
- Gold tone earring hooks (fishhook style)
- Jewelry pliers (round nose and flat nose)
- Liquid polymer clay (optional, for secure bonding)
- Super glue (cyanoacrylate)
- Oven for baking
Step 1: Shaping the Pumpkins
-
Condition the Clay:
Begin by kneading your orange polymer clay until it is soft and pliable. If the color is too bright, mix in a tiny pinch of brown to achieve that natural, earthy pumpkin tone seen in the photo. -
Form the Base:
Roll two equal-sized balls of clay, approximately 1.5 cm in diameter. Flatten them slightly into a thick disc shape rather than a perfect sphere, similar to a M&M but thicker. -
Create the Ribs:
Using a needle tool or the back of a craft knife, gently press vertical indentations around the perimeter of the pumpkin discs to create the ribbed texture. Smooth the edges of these lines with your finger so they look organic, not sharp. -
Indent the Top:
Use a ball tool to create a small depression at the very top center of each pumpkin. This is where your finding will sit later.
Fixing Smudges
If black clay smudges onto the orange during the filling process, dip a Q-tip in a tiny bit of rubbing alcohol or acetone and gently wipe the surface clean before baking.
Step 2: Carving the Face
-
Make the Eye Sockets:
With an X-Acto knife, carefully cut out two small triangles for the eyes on the front face of the pumpkin. Remove the orange clay from these cutouts. -
Add the Nose:
Cut a slightly smaller triangle directly below the eyes for the nose. Keep your cuts clean and vertical. -
Carve the Mouth:
Cut a jagged, smiling mouth across the bottom section. Start with a horizontal curve, then notch out the ‘teeth’ shapes. Remove this excess clay carefully. -
Backfilling with Black:
Roll out a very thin sheet of black polymer clay. Cut small pieces that roughly match your carved holes. -
Inserting the Filling:
Gently press the black clay pieces into the carved recesses. Use your needle tool to push the black clay into the corners so it fills the gaps completely without overflowing onto the orange surface. -
Smooth the Surface:
Once filled, gently roll the needle tool or a smooth dowel over the face to ensure the black inserts are flush with the orange pumpkin surface.
Pro Tip: Texture Trick
To make the pumpkins look more realistic, gently brush the unbaked orange clay with cornstarch or baby powder. This removes fingerprints and imparts a soft, matte finish.
Step 3: Adding Hardware & Baking
-
Prepare the Top Finding:
Take your gold crimp cord end. If it has a loop, great; if not, you might need to insert an eye pin through it. For this look, we are embedding the crimp end directly into the clay. -
Insert the Stem:
Place a tiny drop of liquid polymer clay (or bake-and-bond) into the top depression you made earlier. Press the gold crimp end firmly into the clay so the textured cylinder acts as the pumpkin stem. -
Bake the Pieces:
Place your pumpkins on a ceramic tile or baking sheet. Bake according to your specific clay brand’s instructions (usually 275°F/135°C for about 15-30 minutes). -
Cool Down:
Allow the pieces to cool completely before handling. I usually let them sit in the oven as it cools to prevent thermal shock. -
Reinforce the Stem:
Once cool, test the gold stem finding. If it feels loose, carefully pull it out, add a dab of super glue, and reinsert it for a permanent hold.
Step 4: Assembly
-
Open Jump Rings:
Using two pairs of pliers, twist open your gold jump rings. Remember to twist sideways (front to back), never pull them apart, to maintain the circle shape. -
Connect the Hook:
Slide the open jump ring through the loop on the top of the pumpkin stem (crimp end). -
Attach Earring Wire:
Thread the loop of the fishhook earring wire onto the same jump ring. -
Close the Ring:
Use your pliers to twist the jump ring closed securely, ensuring there is no gap for the hook to slip through. -
Final Check:
Repeat for the second earring and ensure both faces point forward when held up.
Wear these festive pumpkins to your next costume party or gift them to a Halloween-loving friend to spread some seasonal cheer


Marbled Autumn Leaf Pendants
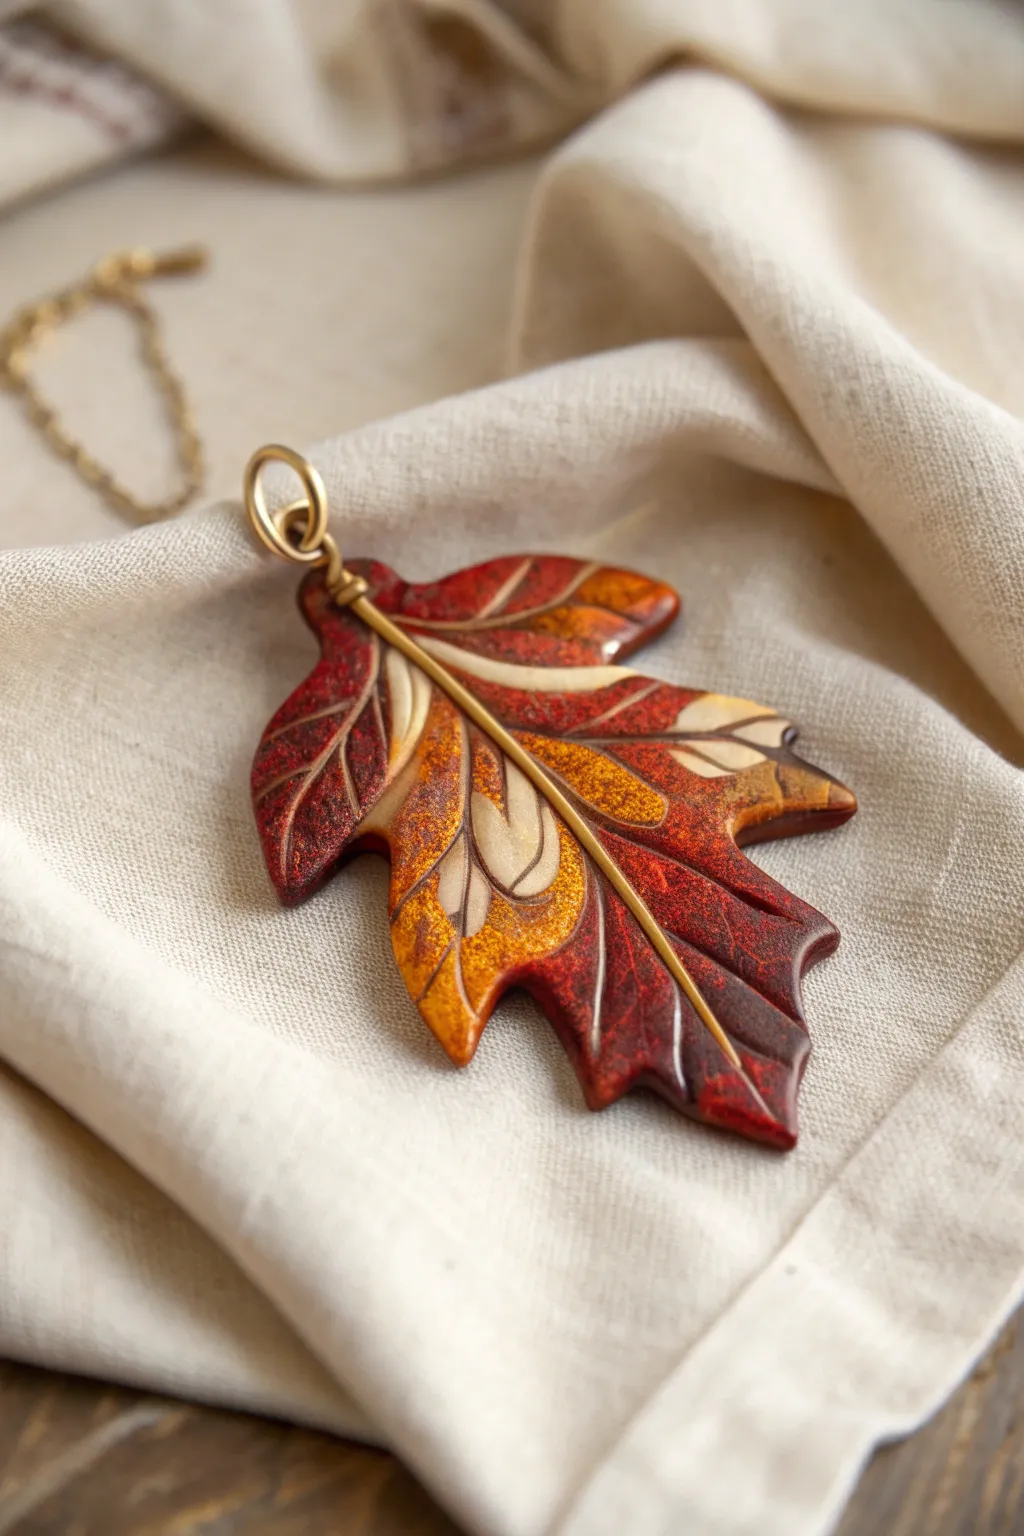
Capture the fleeting beauty of autumn with this stunning oak leaf pendant, featuring rich swirls of crimson, burnt orange, and cream. The distinct central vein creates a backbone for the design, adding both structure and an elegant metallic touch.
Step-by-Step Guide
Materials
- Polymer clay in deep red, burnt orange, gold, and translucent cream
- Liquid polymer clay (optional)
- Brass or gold-colored craft wire (20-gauge for the spine, 24-gauge for wrapping)
- Leaf shape cutter (oak style) or a scalpel/craft knife
- Needle tool or toothpick
- Pasta machine or acrylic roller
- Wire cutters and round-nose pliers
- Fine grit sandpaper
- Matte or satin varnish
Step 1: Creating the Marbled Slab
-
Condition the clay:
Begin by thoroughly conditioning each color of polymer clay until soft and pliable. I find that warming the clay slightly in your hands helps prevent initial crumbling. -
Form logs:
Roll each color into a long, thin log or ‘snake,’ roughly the thickness of a pencil. -
Twist together:
Gather your logs and twist them together into a single, thick rope. Fold this rope in half and twist again to start blending the colors. -
Roll and fold:
Pass the twisted clay through your pasta machine (or use a roller) to flatten it. Fold it over and roll again, but don’t over-mix; you want defined streaks of color, not a muddy brown. -
Final sheet thickness:
Roll your final marbled sheet to a medium thickness, about 3mm to 4mm, to ensure the pendant feels substantial.
Muddy Colors?
If your colors mix too much and turn brown, stop rolling immediately. Tear the clay into chunks and press them back together randomly to reset the marbling pattern.
Step 2: Shaping and Adding the Vein
-
Cut the leaf shape:
Use an oak leaf cutter to punch out your shape. Alternatively, lightly sketch the outline on the clay with a needle tool and carefully cut it out with a scalpel for a more organic, hand-carved look. -
Smooth the edges:
Gently run your finger along the cut edges of the clay to smooth out any sharpness or drag marks left by the blade. -
Prepare the center wire:
Cut a piece of darker brass wire (20-gauge) slightly longer than the leaf. Straighten it out as best as possible. -
Embed the spine:
Press the wire gently into the vertical center of the leaf. Don’t push it all the way through; just deep enough so it sits securely in the clay surface. -
Create the bail:
At the stem end, use round-nose pliers to curl the excess wire into a loop. You can wrap a thinner piece of wire around the base of the loop for a finished look.
Pro Tip: Mica Shift
Add a pinch of gold mica powder to the translucent clay before mixing. It adds a subtle inner shimmer that catches the light beautifully.
Step 3: Detailing and Finishing
-
Carve side veins:
Using a needle tool or a specialized clay carving tool, carefully etch veins radiating outward from the central wire spine toward the leaf lobes. -
Texturize the surface:
For added realism, gently press a piece of coarse sandpaper or a texture sponge against the clay surface to give it a natural, organic feel rather than a plastic shine. -
Bake carefully:
Place the pendant on a ceramic tile or cardstock. Bake according to your clay manufacturer’s instructions, usually around 275°F (130°C) for 30 minutes. -
Cool down:
Allow the piece to cool completely in the oven or on the counter before handling to prevent warping. -
Sand edges:
Once cool, use fine-grit sandpaper to buff the edges of the leaf if any rough spots remain. -
Seal the piece:
Apply a thin layer of matte or satin varnish to protect the surface and deepen the colors without making it look artificially glossy. -
Final assembly:
Attach a jump ring to the wire loop you created earlier and string it onto a simple brass chain.
Now you have a piece of wearable autumn art that will last all year round


Tiny Ghosts Holding Pumpkins
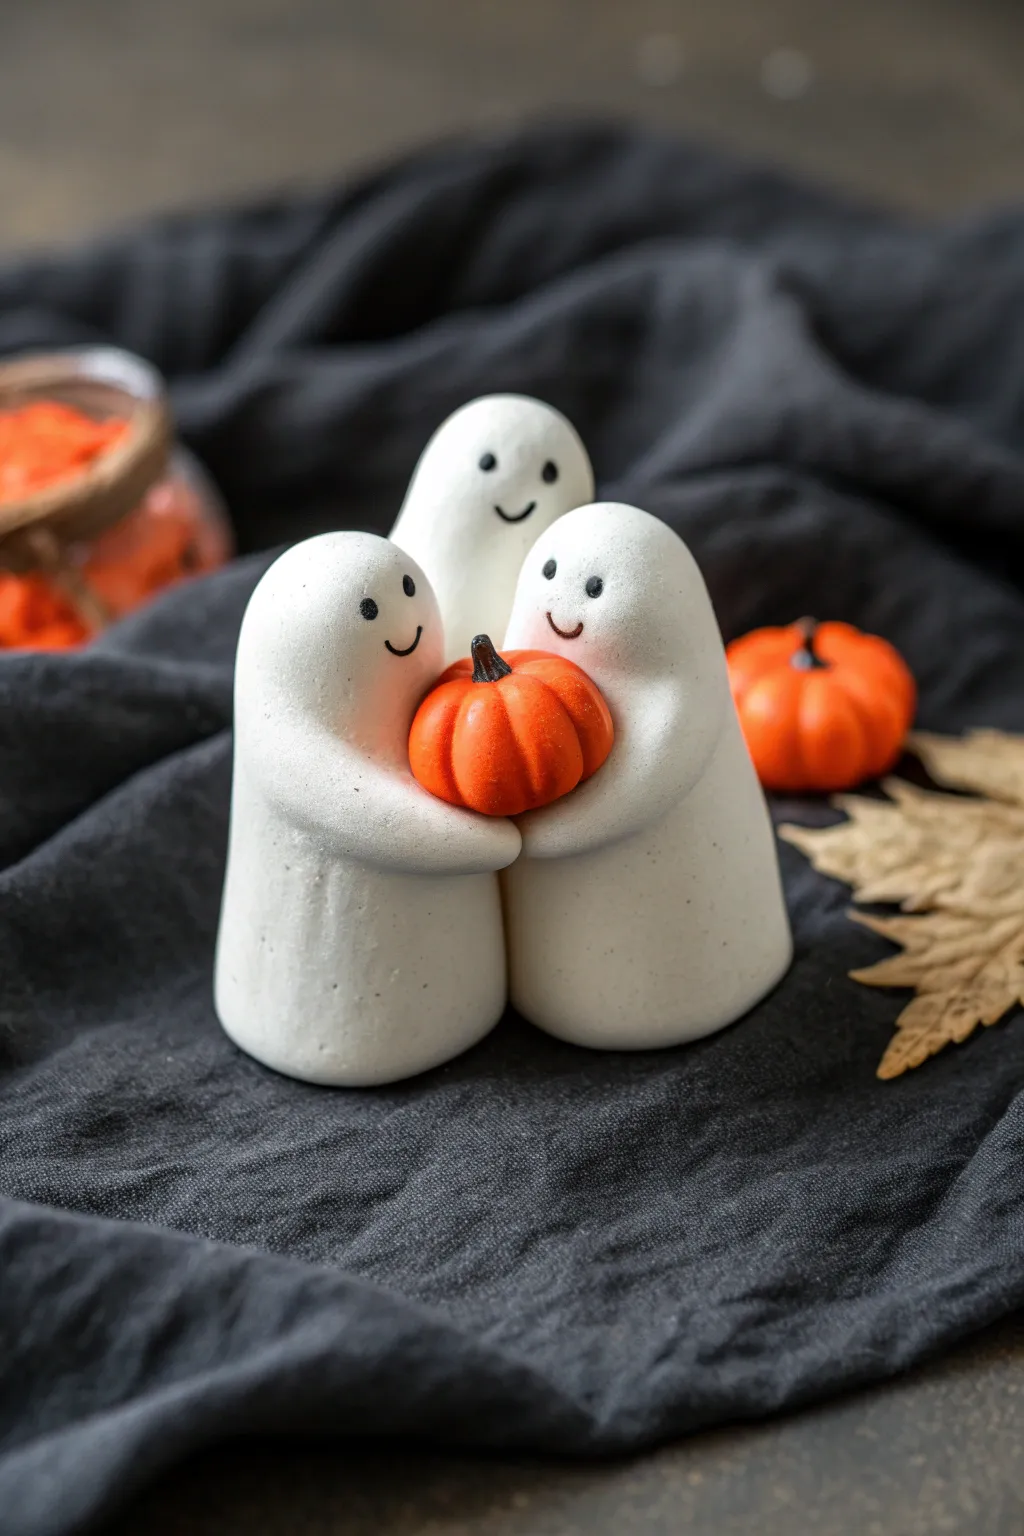
These adorable phantoms prove that Halloween decorations don’t have to be scary to be festive. Create a heartwarming scene of three smooth, matte-white ghosts gathering around their prize pumpkin, perfect for a subtle autumn vignette.
Detailed Instructions
Materials
- White polymer clay
- Orange polymer clay
- Black polymer clay (tiny amount) or brown
- Black acrylic paint
- Small dotting tool or toothpick
- Fine detail paintbrush
- Needle tool
- Soft pastel chalk (brown/orange) – optional for shading
- Smooth work surface
- Oven for baking
Step 1: Forming the Ghost Bodies
-
Condition the white clay:
Begin by kneading a good amount of white polymer clay until it is soft and pliable. This prevents cracks during baking. -
Shape the base forms:
Roll three balls of white clay. Two should be roughly the same size for the front ghosts, and one slightly taller for the back ghost. -
Create the ghost shape:
Gently roll each ball into a thick, rounded cone or cylinder shape. Flatten the bottom slightly by tapping it on your work surface so they stand independently. -
Smooth the surfaces:
Use your finger to gently buff out any fingerprints. The charm of these ghosts is their smooth, matte finish. -
Draft the arrangement:
Position the two smaller ghosts side-by-side, touching slightly. Place the taller ghost directly behind them, nestled in the space between their shoulders.
Step 2: Creating the Pumpkin
-
Roll the pumpkin base:
Take a small piece of orange clay, about 1/4 the size of a ghost, and roll it into a slightly flattened sphere. -
Add texture:
Use a needle tool or the back of a knife to press vertical indentations all around the orange sphere to create the pumpkin ribs. -
Add the stem:
Roll a tiny sliver of black or dark brown clay into a tapered stem. Press it firmly into the center top of your pumpkin. -
Optional shading:
I like to brush a tiny bit of brown pastel dust into the crevices of the pumpkin for extra depth, though this is optional.
Clean Clay Troubles
White clay picks up dust easily. Keep a pack of baby wipes nearby to clean your hands and tools often, or wear latex finger cots.
Step 3: Assembly and Arms
-
Position the pumpkin:
Press the finished pumpkin gently against the chests of the two front ghosts. It should sit comfortably between them. -
Create the arms:
Roll two small snakes of white clay. These will be the arms for the front ghosts. -
Attach the arms:
Attach one arm to the outer side of the left ghost and one to the outer side of the right ghost. Gently curve them forward so the ‘hands’ rest on the pumpkin. -
Blend the seams:
Use a silicone tool or your finger to smooth the clay where the arm meets the body, making it look like a seamless piece. -
Secure the gathering:
Gently press the entire group together to ensure all contact points (ghosts against ghosts, pumpkin against bodies) are secure.
Arm Attachment
If the arms won’t stick, scratch the attachment point slightly with a needle tool and add a tiny drop of liquid polymer clay as glue.
Step 4: Faces and Finishing
-
Pre-bake check:
Look over the piece for any lint or dust. Remove specks carefully with a bit of rubbing alcohol on a brush. -
Bake the project:
Bake the clay according to the manufacturer’s instructions on your package. Let it cool completely before painting. -
Paint the eyes:
Using a small dotting tool dipped in black acrylic paint, dab two small oval or round eyes onto each ghost face. -
Add the smiles:
With a very fine detail brush or a toothpick, paint a simple, delicate ‘U’ shape for the mouth centered between the eyes.
Set your ghostly trio on a shelf or mantle for a touch of handmade Halloween spirit

What Really Happens Inside the Kiln
Learn how time and temperature work together inside the kiln to transform clay into durable ceramic.
Thanksgiving Turkey Place Card Holders
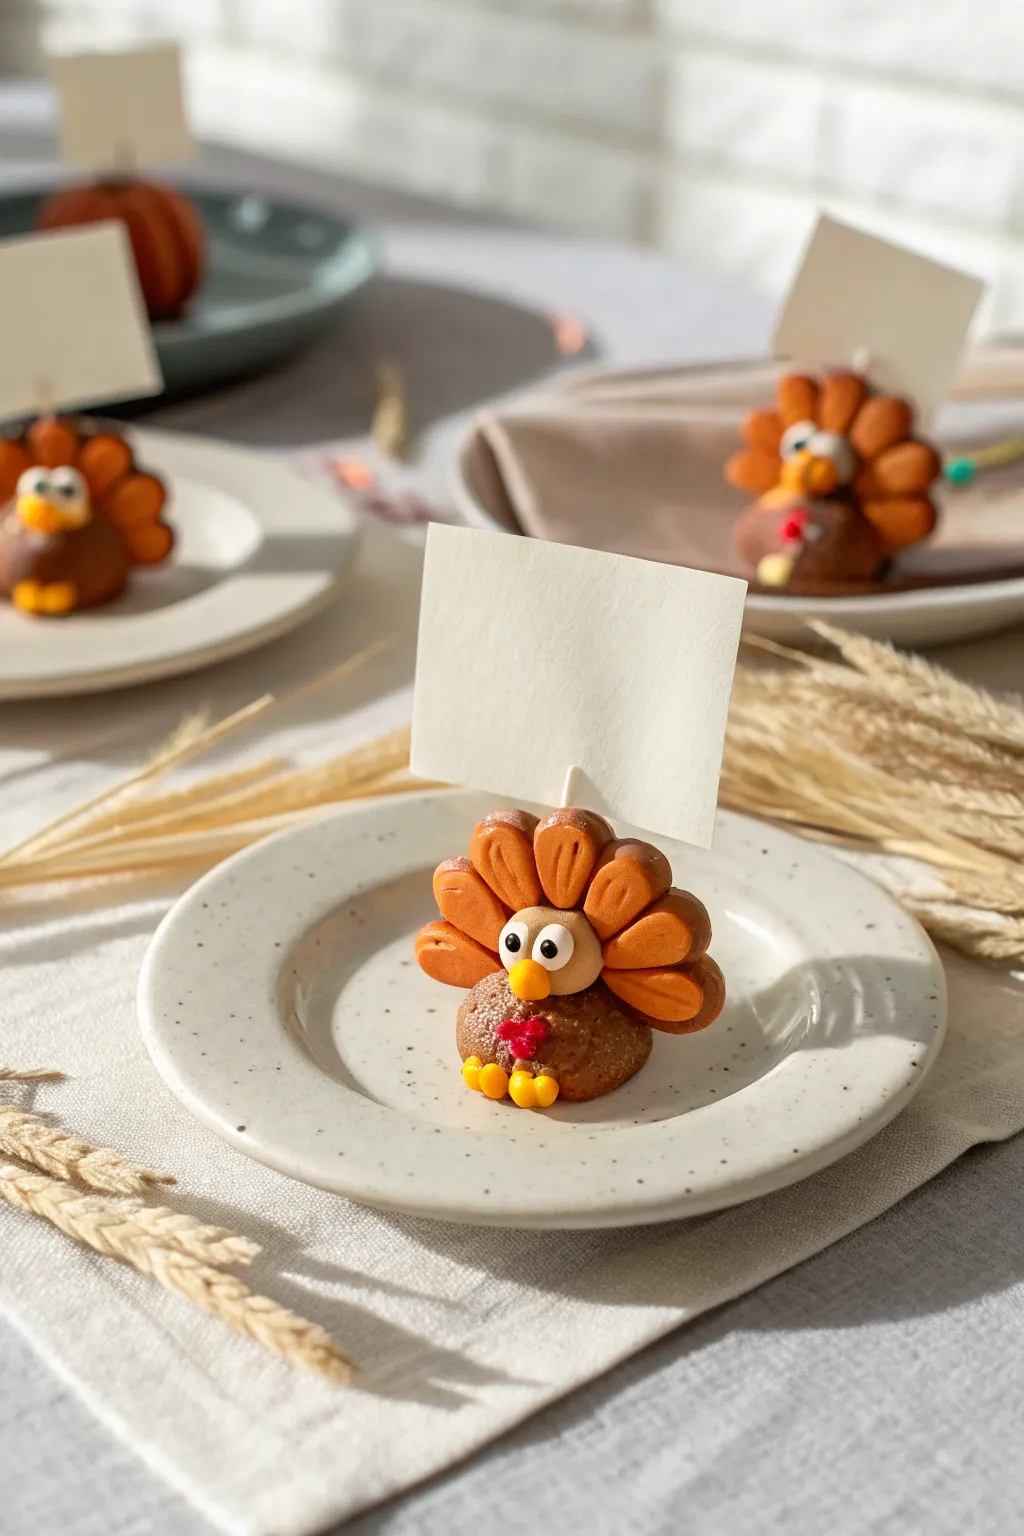
These adorable polymer clay turkeys add a whimsical and personalized touch to your Thanksgiving table setting. With their expressive eyes, vibrant tail feathers, and sturdy design, they serve as both charming decor and functional place card holders.
Step-by-Step
Materials
- Polymer clay in brown, orange, dark orange/terracotta, yellow, white, black, and red
- Basic sculpting tools (ball tool, needle tool)
- Small craft wire or thick paperclips (for the card holder mechanism)
- Cardstock or thick paper for the name cards
- Baking sheet and parchment paper
- Clay roller or pasta machine
- Small blade or craft knife
- Optional: Glaze or matte varnish
Step 1: Body & Head
-
Form the Base:
Start by conditioning a chunk of brown clay until it is soft and pliable. Roll it into a smooth ball about the size of a large walnut or a ping-pong ball. Flatten the bottom slightly by pressing it gently onto your work surface so it sits stable without rolling. -
Texture the Body:
Using a stiff toothbrush or a texturing tool, gently tap over the entire surface of the brown ball. This creates a fluffy, feathery texture rather than a smooth plastic look. -
Create the Head:
Roll a smaller ball of beige or light brown clay for the head. It should be proportional to the body but slightly smaller than the base. Flatten the back of this ball slightly where it will attach to the feathers later. -
Attach the Head:
Press the head firmly onto the front-center of the textured body. You can use a tiny dab of liquid clay or translucent liquid sculpey (TLS) to ensure a strong bond between the raw clay pieces.
Clean Clay Tip
Keep baby wipes or hand sanitizer nearby. Clean your hands thoroughly when switching from dark colors (like the brown body) to light colors (like the white eyes) to avoid staining.
Step 2: Facial Features
-
Make the Eyes:
Roll two small balls of white clay and flatten them into discs. Press these onto the upper part of the beige head, side-by-side. Make sure they are touching for that cute cartoon look. -
Add Pupils:
Roll two tiny specks of black clay. Press them onto the white discs. Placing them slightly cross-eyed or looking in a specific direction adds a lot of personality. -
Sculpt the Beak:
Take a small piece of yellow clay and shape it into a cone or teardrop. Press the wider end between the eyes, pointing the tip downward. -
Add the Snood:
Using a tiny bit of red clay, roll a small teardrop shape for the turkey’s wattle (snood). Attach it to the side of the beak, letting it drape slightly over the body. -
Create the Feet:
Roll two small balls of yellow clay. Flatten them slightly and use a needle tool or knife to press two indentations into the front of each, creating three ‘toes.’ Attach these to the bottom front of the body.
Custom Colors
Try marbling different shades of orange and yellow clay together for the tail feathers. It creates a stunning, realistic autumnal variation without any painting required.
Step 3: Tail Feathers
-
Prepare Clay Colors:
Condition your orange and dark orange (terracotta) clay. You want two distinct shades to create depth in the tail. -
Shape the Feathers:
Create about 5-7 teardrop shapes. Flatten them significantly so they look like petals. Make the central feathers slightly larger and the outer ones slightly smaller. -
Detail the Feathers:
Use a needle tool or a knife to carefully press a central vein line down the middle of each feather. You can add small diagonal lines coming off the center vein for extra texture. -
Assemble the Fan:
Arrange the feathers in a fan shape on your work surface, overlapping them slightly at the bottom point. Fan them out so they will frame the turkey’s head perfectly. -
Attach the Tail:
Press the assembled feather fan onto the back of the turkey body. The feathers should rise up behind the head. Blending the clay at the attachment point on the back will make it more secure.
Step 4: Baking & Assembly
-
Insert Wire Holder:
Cut a 2-inch piece of craft wire. Insert one end about halfway down into the top center of the tail feather fan. Leave the other end sticking up to hold the card. -
Final Check:
Before baking, give your turkey a once-over. Smooth out any accidental fingerprints (a little baby oil on your finger helps) and ensure the base is still flat and stable. -
Bake:
Bake the turkey according to your clay manufacturer’s instructions (usually 275°F / 135°C for 15-30 minutes per 1/4 inch of thickness). I generally recommend tenting foil over the top to prevent the light colors from scorching. -
Cool Down:
Let the turkey cool completey before handling. Polymer clay is fragile when hot. -
Add the Name Card:
Cut a small rectangle of cardstock. Write your guest’s name on it. If your wire is just a straight stick, you can attach the card with a small piece of tape on the back, or shape the wire into a spiral or split clip before inserting.
Once you’ve made one, you’ll find it easy to create a whole flock to welcome your guests to the table
Woodland Fox Pocket Figurines
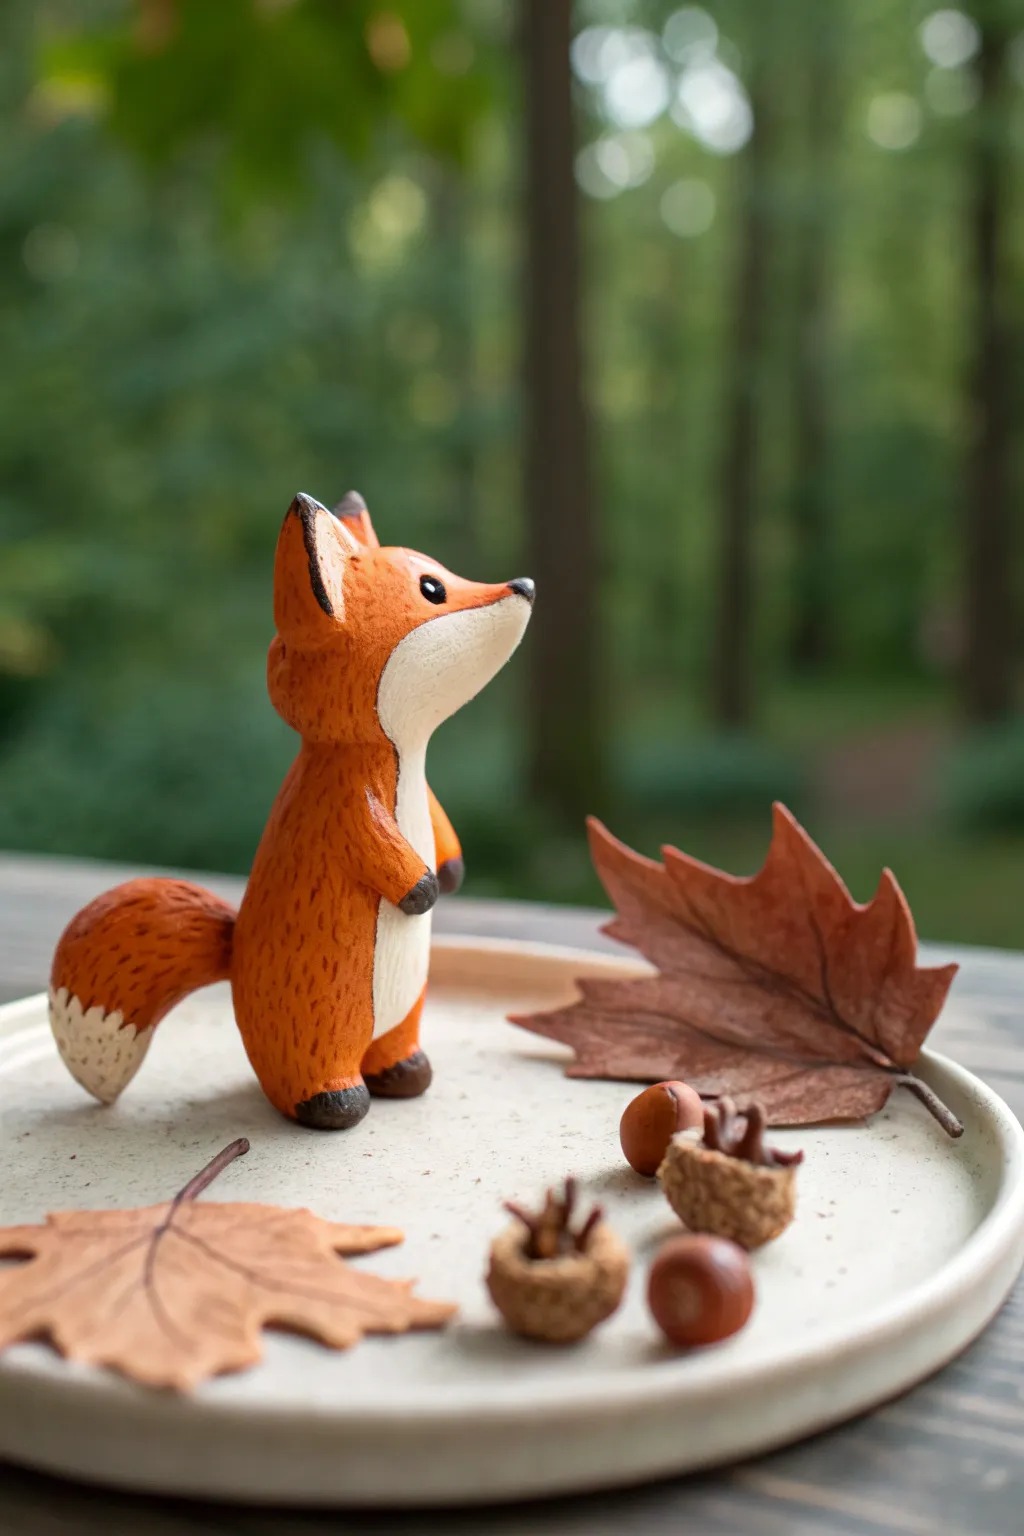
Capture the cozy spirit of autumn with this darling polymer clay fox figurine, designed to stand upright on its own hind paws. Its bright orange fur, textured finish, and tiny woodland accessories make it the perfect seasonal desk companion or a heartwarming pocket-sized gift.
How-To Guide
Materials
- Polymer clay (orange, white, black, brown, dark brown)
- Needle tool or toothpick
- Ball stylus tool
- Small craft blade
- Soft clay blending brush
- Texture sponge or old toothbrush
- Aluminum foil (for core)
- Baking sheet
- Oven (per clay instructions)
- Matte or satin varnish (optional)
Step 1: Sculpting the Body
-
Form the foil core:
Crumple a small piece of aluminum foil into a teardrop shape—this will serve as the armature for the body to save clay and reduce weight. It should be slightly smaller than you want the final fox to be. -
Cover with clay:
Condition your orange clay until pliable, then roll it into a sheet. Wrap this sheet around your foil core, smoothing the seams so the foil is completely hidden and you have a smooth, elongated teardrop shape. -
Shape the head:
Roll a separate ball of orange clay for the head. Pinch one side slightly to begin forming the snout, then press this ball onto the top of your body teardrop. Blend the clay at the neck seam using your thumb or a blending tool until seamless. -
Add the white chest:
Flatten a thin, oval-shaped piece of white clay. Gently press this onto the front of the fox’s body, running from the neck down to the belly. Use a soft brush or fingertip to smooth the edges so the white appears to be part of the fur, not just sitting on top. -
Define the muzzle:
Take a smaller piece of white clay and shape it into a heart-like patch for the face. Apply this to the snout area, curving up around where the eyes will go. Smooth the edges carefully. -
Create the legs:
Roll two small logs of orange clay for the hind legs. Attach them to the bottom sides of the body, bending them slightly to form a knee. Flatten the bottoms so the fox can stand upright. -
Attach the arms:
Roll two shorter, thinner logs for the front arms. Attach them high on the chest, angling them downwards as if the fox is curious. Blend the shoulder joins smoothly into the main body.
Unstable Fox?
If the fox keeps falling over, bake the body and legs first for 10 minutes to harden them, then add the tail in a position that supports the weight before the final bake.
Step 2: Adding Details & Texture
-
Sculpt the ears:
Form two small triangles of orange clay. Press a tiny bit of white clay inside each, then attach them to the top of the head. Use a needle tool to add a tiny line of black clay to the outer tips for that classic fox look. -
Give it a tail:
Create a large, fluffy tail shape using orange clay. Add a white tip to the end, blending the transition with a zig-zig pattern to mimic fur. Attach this firmly to the lower back, curving it upwards for balance. -
Add paws:
Using tiny bits of dark brown or black clay, add small pads to the ends of the arms and feet. I prefer to press these flat rather than leaving them rounded to help with stability. -
Face features:
Place a tiny black ball for the nose at the very tip of the muzzle. Use a needle tool to indent eye sockets, then insert small black beads of clay for the eyes. Add a tiny white speck to each eye for a life-like glint. -
Fur texture:
This is crucial for the rustic look: take a needle tool or a stiff brush and gently scratch short, repetitive lines all over the orange parts of the clay. Follow the direction fur would naturally grow.
Pro Tip: Realistic Fur
After texturing the fur with a needle, brush a tiny amount of brown pastel chalk dust into the crevices before baking to give the coat depth and shadow.
Step 3: Woodland Accessories & Baking
-
Make the acorns:
Roll small balls of brown clay for the nuts. Create separate caps using textured dark brown clay, pressing a cross-hatch pattern into them before placing them on the nuts. Add a tiny stem on top. -
Create the leaves:
Flatten light brown or beige clay and cut out maple leaf shapes with a blade. Use your needle tool to score veins into the leaves. Gently curl the edges up to make them look dried and fallen. -
Final check:
Stand your fox on a ceramic tile or baking sheet. ensure it balances on its own. If it tips, adjust the tail to act as a third point of contact (a tripod) for support. -
Bake:
Bake the fox and accessories according to your specific clay brand’s package instructions. Usually, this is around 275°F (135°C) for 15-30 minutes depending on thickness. -
Finish:
Once cool, you can lightly brush a matte varnish over the eyes and nose to make them shine, while leaving the fur matte for a natural texture.
Place your little fox and his autumn treasures on a shelf to bring a touch of woodland magic indoors


The Complete Guide to Pottery Troubleshooting
Uncover the most common ceramic mistakes—from cracking clay to failed glazes—and learn how to fix them fast.
Fall Owl Charms in Earth Tones
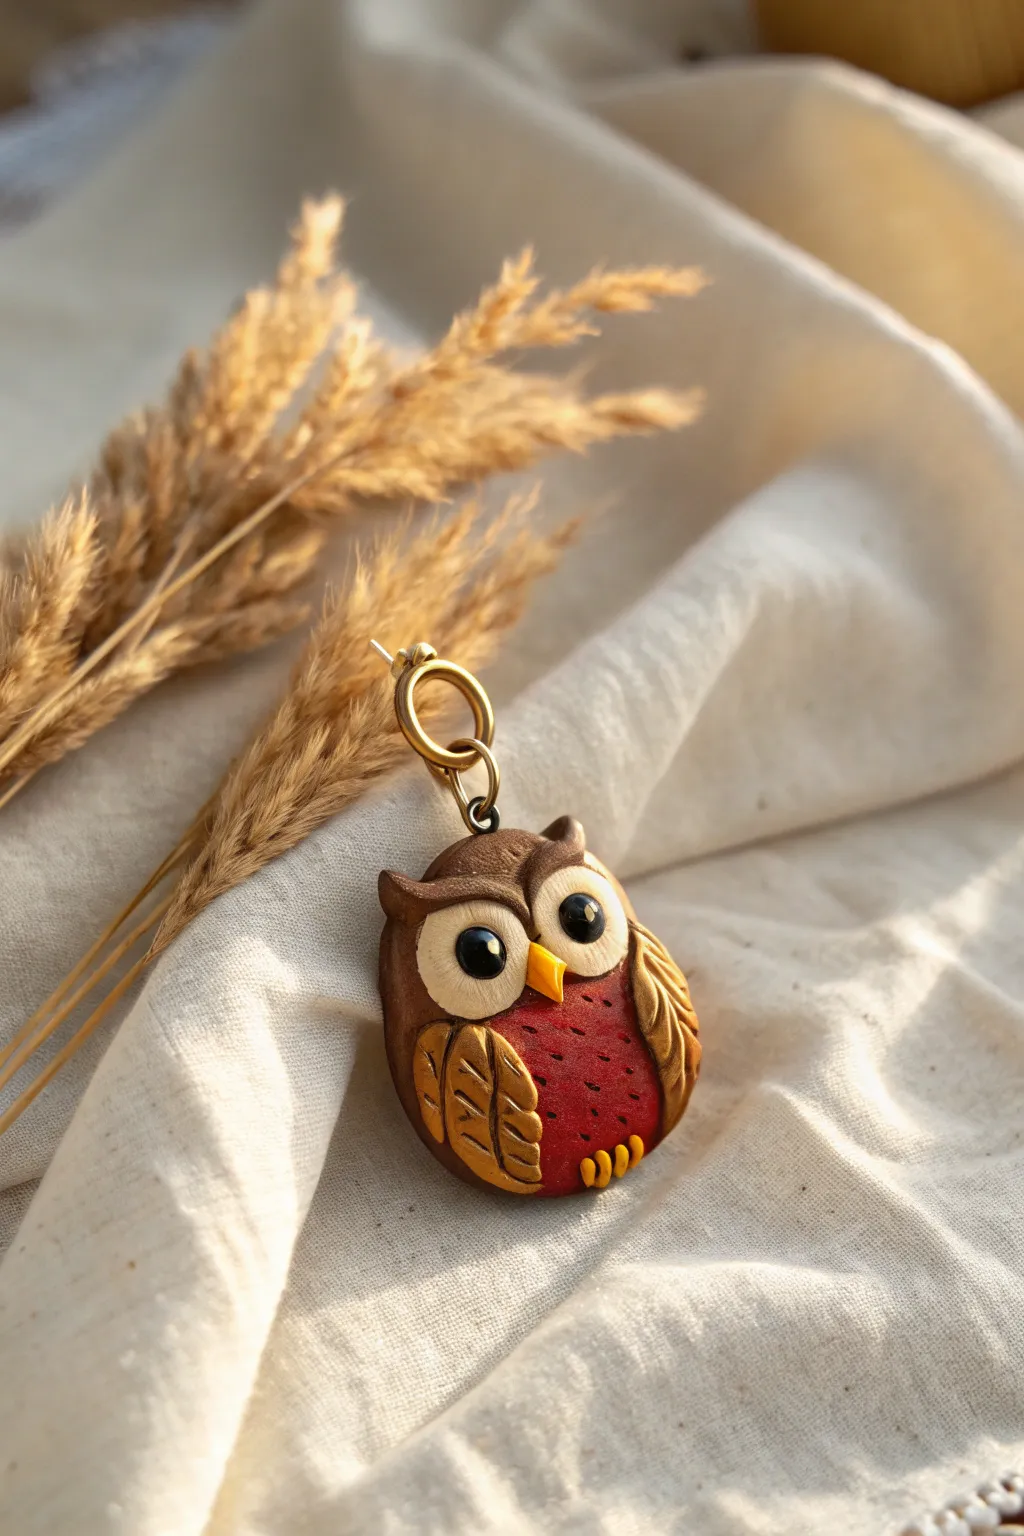
Capture the essence of an autumn forest with this charming polymer clay owl, featuring rich earth tones and textured details. Its cozy red belly and golden wings make it a perfect accessory for fall, evoking the warmth of the changing season.
Step-by-Step
Materials
- Polymer clay in dark brown, burnt red/maroon, white, black, and mustard yellow
- Gold mica powder or acrylic paint
- Basic sculpting tools (needle tool, ball stylus)
- Small circle cutters (optional)
- Brass jump ring and findings
- Liquid polymer clay or Bake & Bond
- Gloss glaze (optional for eyes)
- Hobby knife
Step 1: Shaping the Base
-
Prepare the Body:
Start by conditioning a chunk of dark brown clay and rolling it into a smooth oval shape, roughly an inch tall. Flatten it slightly against your work surface so the back is flat but the front remains rounded. -
Form the Head:
Gently pinch the top two corners of the oval to create slight points, forming the owl’s ear tufts. Smooth the clay down towards the center of the head to define the brow line. -
Add the Belly:
Roll a smaller ball of burnt red or maroon clay and flatten it into a teardrop shape. Press this onto the lower center of the brown body. Use your thumb to blend the edges seamlessly if you prefer a smoother look, or leave them distinct for dimension. -
Texturing the Plumage:
Using a needle tool, gently poke small, random holes all over the red belly area to simulate fluffy down feathers.
Clean Clay Tip
White clay picks up lint easily. Always wash your hands and wipe your tools with a baby wipe before handling the white clay for the eyes to keep them pristine.
Step 2: Feather & Wing Details
-
Create the Wings:
Shape two small logs of brown clay into flattened teardrops. Attach one to each side of the owl’s body, curving them slightly to hug the red belly. -
Sculpt Flight Feathers:
Use a dull knife tool or a needle to press deep diagonal grooves into the wings, creating the look of layered feathers. -
Apply Gold Accents:
Dip your finger or a small brush into gold mica powder and gently rub it over the raised ridges of the wings. This highlights the feather texture beautifully. -
Add Tiny Feet:
Roll three tiny sausages of mustard yellow clay for each foot. cluster them together at the bottom edge of the red belly to look like talons gripping a branch.
Fixing Fingerprints
If you notice fingerprints on the smooth brown back before baking, brush a tiny amount of baby oil over the surface to smooth them out instantly.
Step 3: The Face
-
Eye Sockets:
Take two flat discs of beige or light brown clay and press them side-by-side on the upper face area to create the distinct ‘mask’ of the owl. -
Whites of the Eyes:
Roll two balls of white clay, flatten them into discs, and press them firmly into the center of the beige mask circles. Ensure they are symmetrical. -
Pupils:
Add small black balls of clay to the center of the white ones. Flatten them gently. To make the owl look cute rather than startled, create small white reflection dots and place them in the upper right corner of each pupil. -
The Beak:
Form a tiny pyramid or diamond shape from mustard yellow clay. Press it between the eyes, pointing downward, securing it with a dot of liquid clay if needed.
Step 4: Assembly & Finishing
-
Insert Hardware:
Before baking, gently insert a metal eye screw or a looped wire into the top center of the owl’s head. I find twisting it in slowly helps grip the clay better. -
Bake:
Bake the piece according to your specific brand of clay’s instructions (usually around 275°F or 130°C for 15-30 minutes). Let it cool completely inside the oven to prevent cracking. -
Attach the Large Ring:
Once cool, open a large brass jump ring or decorative connector using pliers. Slide it through the eye pin loop on the owl’s head and close it securely. -
Varnish (Optional):
For a bit of life, add a drop of gloss glaze or UV resin just to the eyes and beak to make them shine against the matte feathers.
Hang this little guardian on your bag or necklace chain to enjoy a touch of whimsy all season long
Moody Ombre Fall Landscape Pendant
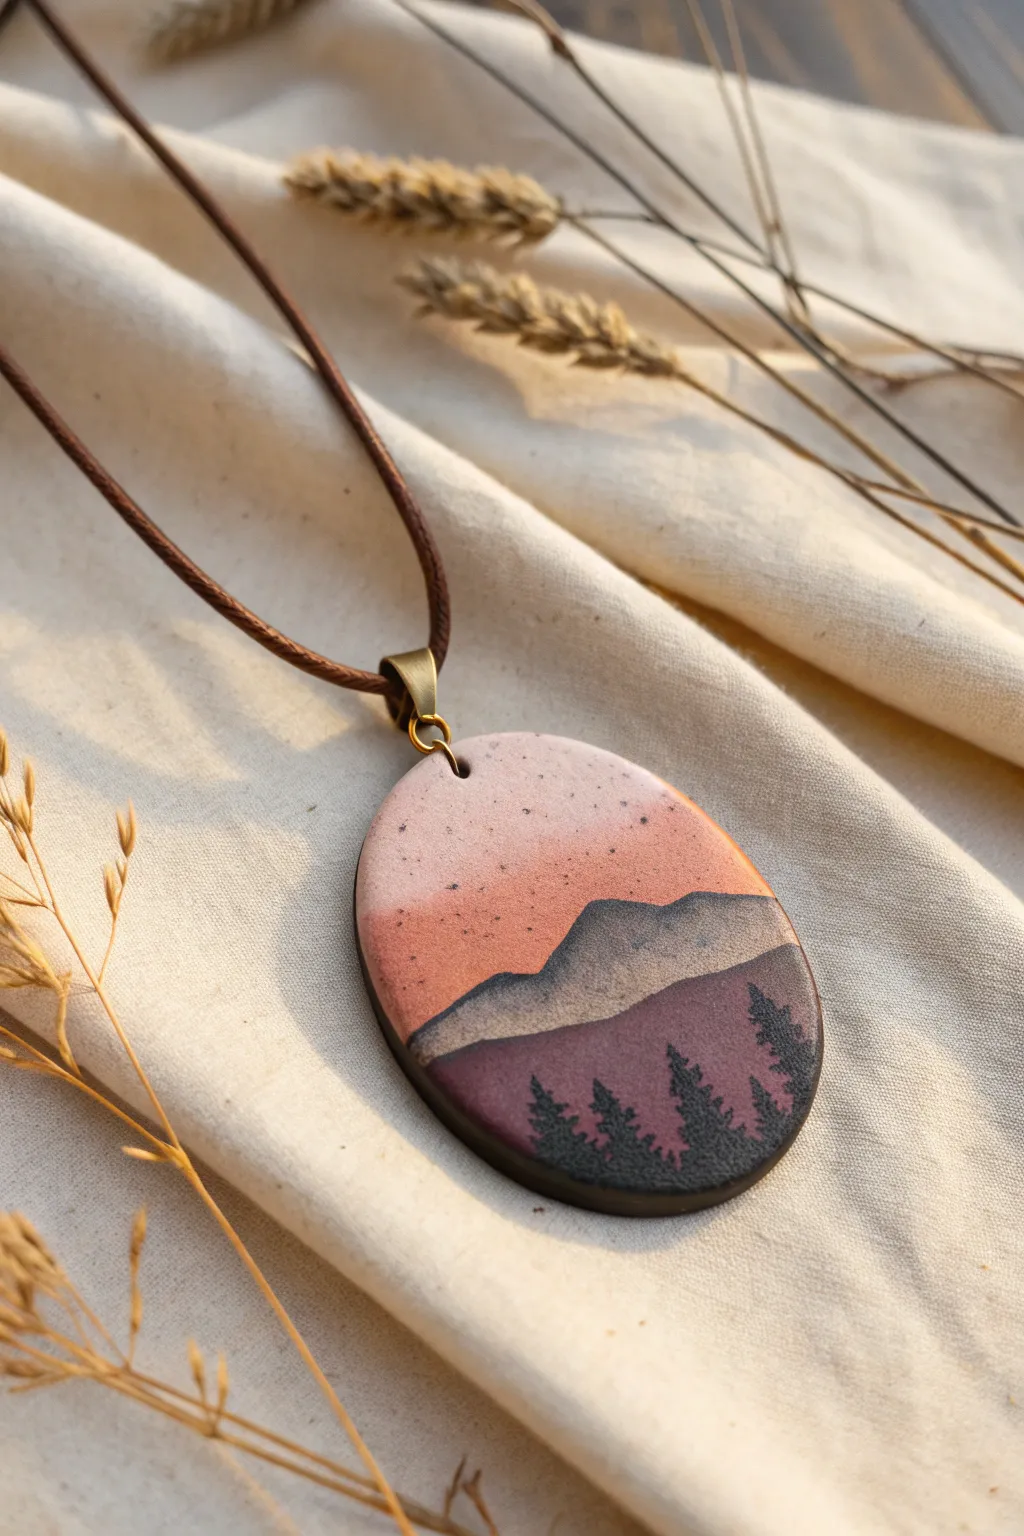
Capture the serene beauty of a twilight mountain range with this layered polymer clay pendant. The subtle ombre sky fades gracefully into silhouetted peaks and pine trees, creating a wearable piece of art perfect for autumn layering.
Step-by-Step Guide
Materials
- Polymer clay (white, peach/blush, translucent, dark purple/brown, black)
- Oval clay cutter
- Acrylic roller or pasta machine
- Tissue blade or X-Acto knife
- Soft pastel chalks (black, dark brown)
- Fine detail paintbrush (00 or 000)
- Black acrylic paint
- Sandpaper (400-1000 grit, optional)
- Small drill bit or pin drill
- Jump ring and pendant bail (bronze or antique gold)
- Jewelry pliers
- Brown waxed cotton cord or leather cord
- Matte varnish (optional)
Step 1: Creating the Ombre Sky
-
Condition the clay:
Start by conditioning your white, peach, and a touch of translucent clay separately until they are soft and pliable. The translucent clay adds depth to the sky. -
Form the gradient:
Create a ‘Skinner Blend’ or a simple stacked blend. Roll a log of peach and a log of white. Place them side-by-side and flatten them. Fold and roll repeatedly through your pasta machine or with a roller until the colors merge seamlessly from dark peach to pale pink/white. -
Adding texture:
Before cutting your shape, sprinkle a tiny amount of grated black or dark brown pastel chalk over the clay sheet. Roll over it gently once to embed the specks; this creates a trendy, speckled pottery effect. -
Cut the base shape:
Use your oval cutter to punch out the main pendant shape from the speckled ombre sheet. Smooth the edges with your finger to remove any stray clay bits.
Step 2: Building the Landscape
-
Mix mountain colors:
Mix a muted brownish-grey tone for the distant mountains and a deeper plum or dark brown for the closer range. I like to keep these colors slightly desaturated to match the moody fall vibe. -
Roll out thin sheets:
Roll your mountain colors into very thin sheets. They need to be delicate so they don’t add too much bulk to the pendant surface. -
Cut the mountain ridge:
Using your tissue blade, freehand cut a jagged, uneven line across the top of your lighter grey-brown sheet to mimic a mountain ridge. -
Layer the first range:
Place this lighter mountain layer onto the pendant, positioning it about halfway down. Press gently to adhere it to the ombre background without trapping air bubbles. -
Cut the foreground range:
Repeat the cutting process with the darker plum/brown clay, creating a slightly different ridge pattern. -
Layer the second range:
Place this darker layer below the first mountain range, overlapping it slightly. Trim any excess clay hanging off the rounded bottom edge of the oval using your cutter or a blade. -
Smooth the seams:
Run your finger or a roller lightly over the entire piece to ensure all layers are unified and the surface is relatively flat.
Clean Edges Pro-Tip
Before baking, gently rub a tiny bit of baby oil or cornstarch on the clay surface and edges. This helps smooth out fingerprints and softens the cut lines for a polished look.
Step 3: Baking and Detailing
-
Bake the pendant:
Place the pendant on a ceramic tile or baking sheet lined with parchment paper. Bake according to your polymer clay manufacturer’s instructions (usually 275°F/130°C for 30 minutes). -
Cool and sand:
Allow the piece to cool completely. If there are any sharp edges or fingerprints, gently wet-sand them with fine-grit sandpaper for a professional finish. -
Paint the trees:
Using your finest detail brush and black acrylic paint, paint tiny evergreen silhouettes along the bottom curve. Start with a vertical line for the trunk, then dab small, horizontal strokes getting wider toward the bottom. -
Dry and seal:
Let the paint dry fully. If you want to protect the paint, apply a very thin layer of matte varnish, though the bare clay look is lovely too.
Level Up: Texture
Instead of painting the trees, use a needle tool to scratch the tree shapes into the raw clay before baking, then fill the grooves with dark acrylic paint after baking (an antique wash).
Step 4: Assembly
-
Drill the hole:
Using a small hand drill or pin vise, carefully drill a hole at the very top center of the oval. -
Attach hardware:
Open a jump ring with your pliers, slide it through the bail loop and the drilled hole, and close it securely. -
String it up:
Thread your brown cord through the bail. Tie knots or add clasps to finish the necklace length to your preference.
Wear your new landscape pendant with a cozy sweater to complete the ultimate autumnal look