When I need a low-pressure creative win, I reach for polymer clay figures—they’re small, forgiving, and ridiculously satisfying to finish in one sitting. Here are 20 figure ideas I keep coming back to, from classic cute critters to quirky little characters with big personality.
Chibi Sitting Bunny Figure
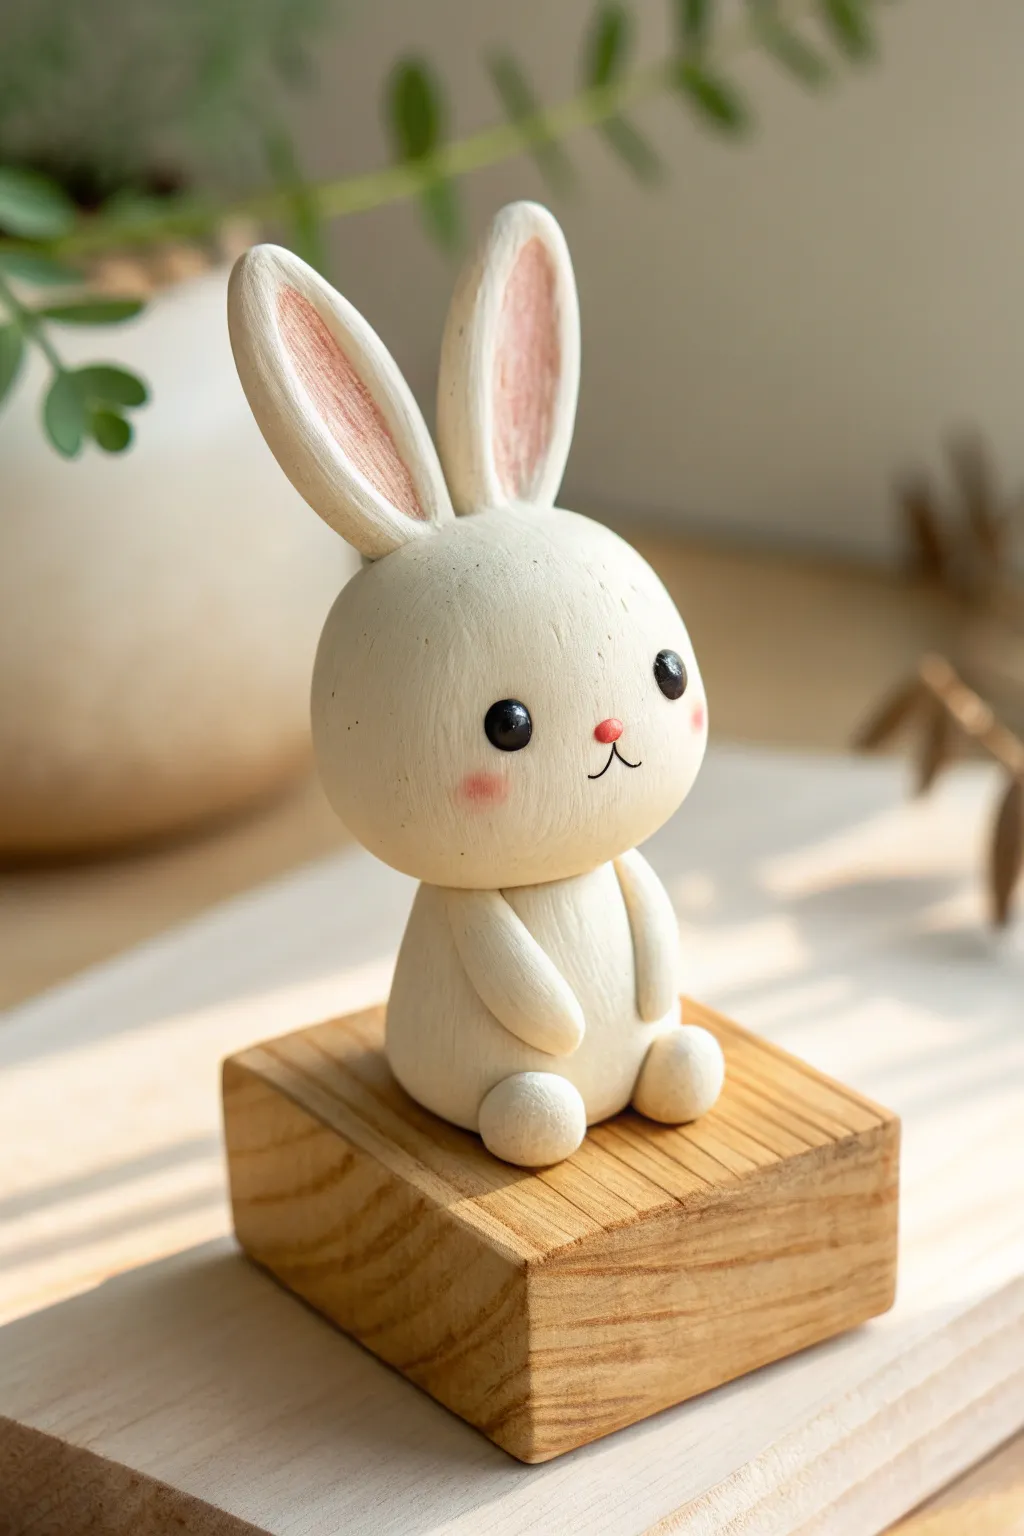
This adorable sitting bunny figure captures the charm of classic wood carvings with the ease of polymer clay. Its clean, creamy white finish, delicate blushing cheeks, and minimal facial features make it a perfect project for beginners looking to practice simple shapes.
Step-by-Step Tutorial
Materials
- Polymer clay (Cream or White)
- Polymer clay (Soft Pink)
- Polymer clay (Black) or 4mm black beads
- Acrylic paint (Red)
- Soft pastel chalk (Pink/Rose)
- Detailing tool or needle tool
- Blade or craft knife
- Soft paintbrush
- Aluminum foil (for core)
- Small wooden block (for display)
- Matte finish varnish (optional)
Step 1: Shaping the Head
-
Prepare the core:
Crumple a small ball of aluminum foil, roughly the size of a walnut, to serve as the lightweight core of the bunny’s head. -
Cover the core:
Condition a generous amount of cream-colored clay until pliable, flatten it into a sheet, and wrap it completely around the foil ball, smoothing out all seams. -
Refine the shape:
Roll the clay ball between your palms to create a smooth, slightly flattened sphere; this will be the bunny’s oversized, cute head. -
Add texture:
Using a fine-grit sandpaper or a stiff-bristled brush, lightly tap the surface to remove fingerprints and give it a subtle, matte texture resembling stoneware or wood.
Sticky Seams?
If blending limbs is difficult, use a tiny drop of translucent liquid clay (like Bake & Bond) as ‘glue’ between parts before pressing them together.
Step 2: Body and Limbs
-
Form the body:
Roll a smaller ball of cream clay into a teardrop shape. Flatten the bottom so it sits securely, then press the narrow top onto the underside of the head. -
Create the arms:
Roll two small sausage shapes of cream clay. Taper one end of each slightly and attach them to the sides of the body, curving them forward so they rest on the belly. -
Make the feet:
Form two small balls for the feet. Press them gently against the bottom front of the body, spacing them slightly apart so the bunny looks settled. -
Blend seams:
Use a rubber-tipped sculpting tool to gently blend the clay where the limbs attach to the body, ensuring a strong bond without ruining the rounded shapes.
Step 3: Ears and Face
-
Shape the ears:
Roll two medium-sized logs of cream clay. Flatten them gently and taper the tops to create long, bunny-ear shapes. -
Add inner ear detail:
Take a tiny amount of soft pink clay, flatten it into a long teardrop, and press it into the center of each ear. I like to use a texturing tool to scratch vertical lines into the pink clay for a furry look. -
Attach the ears:
Press the base of the ears onto the top of the head. Use a blending tool to smooth the clay connection at the back and sides so they stand upright. -
Insert the eyes:
Press two small indentations into the face with a ball tool. Insert small black clay balls or black beads into these sockets for the eyes. -
Sculpt the nose and mouth:
Place a tiny speck of pink or red clay between the eyes for the nose. Use a needle tool or very fine blade to incise a simple inverted ‘Y’ shape below it for the mouth.
Wood-Carved Look
Before baking, use a sharp craft knife to shave tiny, shallow facets off the rounded surfaces. This mimics the look of hand-whittled wood.
Step 4: Finishing Touches
-
Apply blush:
Scrape some pink soft pastel chalk into a powder. Use a soft, dry brush to gently dust rosy circles onto the bunny’s cheeks. -
Bake carefully:
Bake the figure according to your clay manufacturer’s instructions, usually at 275°F (130°C) for about 30 minutes. Let it cool completely. -
Mount and seal:
Once cool, use a dab of strong glue to attach the bunny to a small wooden block. You can optionally apply a layer of matte varnish to protect the surface.
Place your finished bunny on a windowsill or desk to bring a calm, cheerful presence to your space


Mini Farm Animal Figure Set
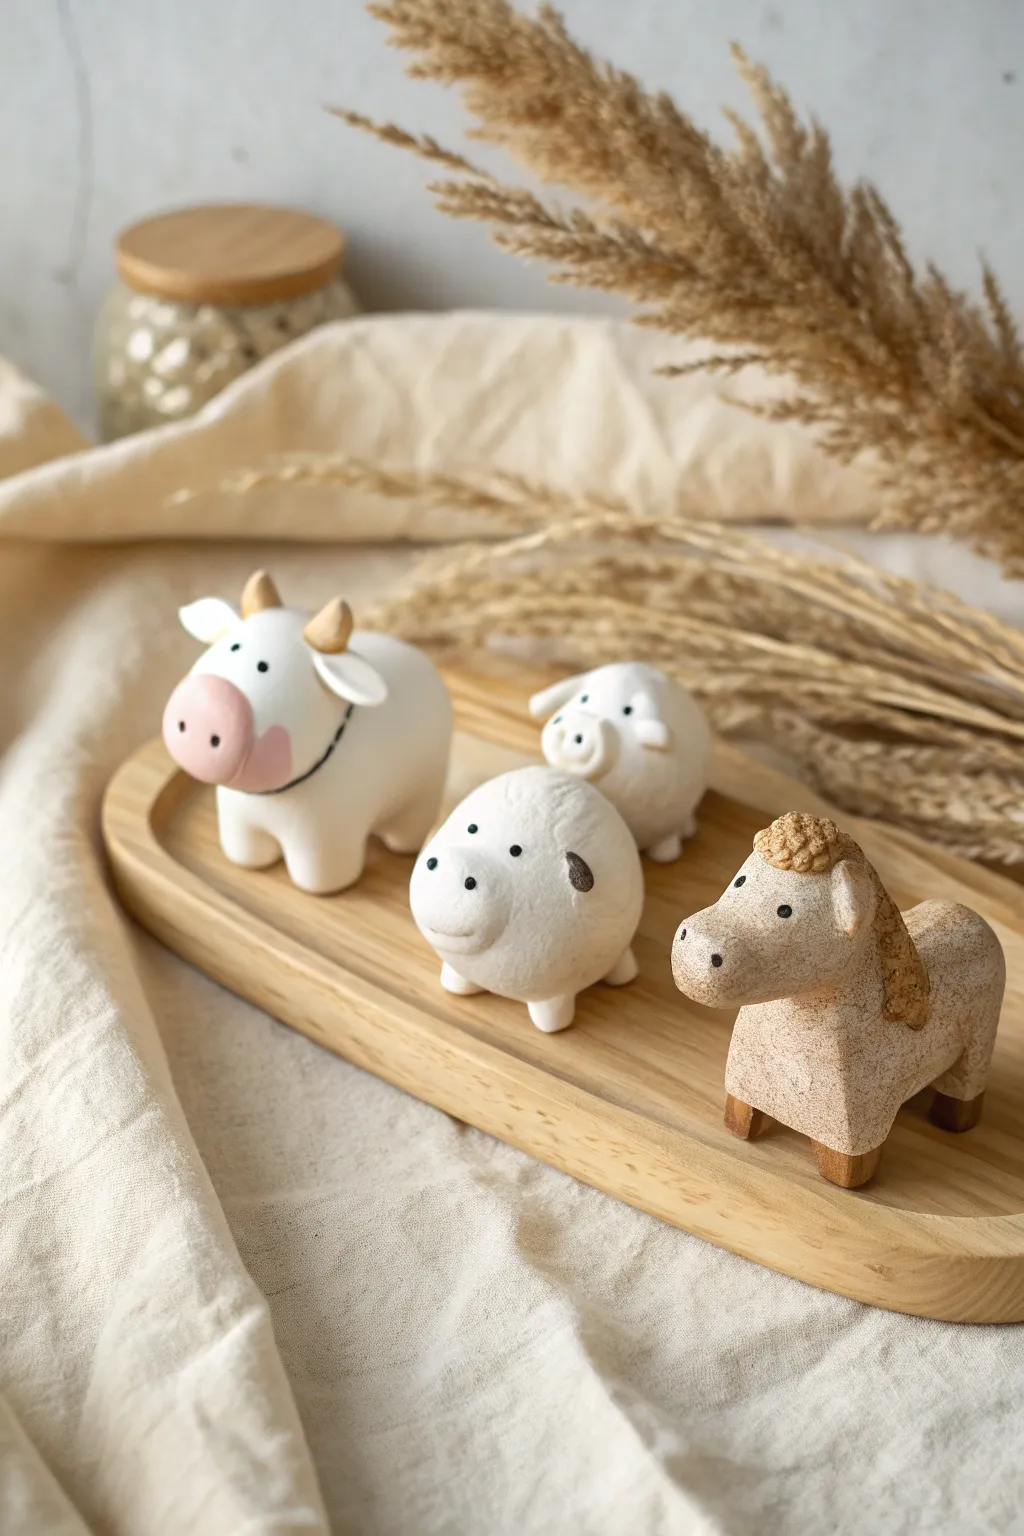
Create a charming collection of miniature farm friends with simple rounded shapes and a soft, matte finish. This project features a stylized cow, horse, sheep, and piglet, all crafted with a minimalist aesthetic perfect for modern nursery decor.
Step-by-Step Guide
Materials
- Polymer clay (White, Beige/Tan, Light Pink, Gold/Ochre, Black)
- Small ball tool or dotting tool
- Modeling tool or clay knife
- Soft-bristled brush (for texture)
- Sandpaper or textured sponge (optional for speckled look)
- Baking sheet and parchment paper
- Oven
Step 1: Shaping the Cow
-
Form the Body:
Start with a large chunk of conditioned white clay. Roll it into a smooth, plump oval for the body. Gently pull four sturdy, short legs from the bottom, smoothing the seams so they are integrated rather than attached separately. -
Sculpt the Head:
Roll a slightly smaller ball of white clay for the head. Attach it to the front-top of the body, blending the neck connection for stability. -
Add the Snout:
Flatten a small oval of light pink clay. Press this firmly onto the front of the face to create the signature snout area. Use your ball tool to make two small indentations for nostrils. -
Horns and Ears:
Roll two tiny cones of gold or ochre clay for the horns and place them on top of the head. Add two small, flattened teardrops of white clay just below the horns for ears. -
Final Cow Details:
Roll a very thin snake of black clay and wrap it around the neck for a collar. Add two minuscule black dots for eyes. I like to press these in slightly so they sit flush.
Fixing Smudges
White clay picks up dust easily. Keep a scrap piece of ‘garbage clay’ nearby to roll in your hands to clean them before touching the white parts.
Step 2: Crafting the Round Sheep & Pig
-
Basic Round Form:
Both the sheep and pig start with a similar spherical body shape. Roll a ball of white clay for each. Keep the sheep quite round and the pig slightly more oval. -
Piglet Features:
For the pig in the center, attach a small flattened circle of white clay for the snout. Use a tool to poke two nostrils and two eye holes. Add tiny triangle ears on top. -
Sheep Texture:
For the sheep (the slightly taller white figure in the back), use a small loop tool or a texturing sponge to gently roughen the surface of the body, giving it a fluffy wool appearance. -
Tiny Limbs:
Roll very small balls of clay for the feet of both animals—four for each. Press the bodies onto these feet so they stick firmly. This gives them a low, crouching look. -
Spotty Details:
On the pig, add a small, flattened patch of darker brown or grey clay on the side for a spot. Use black clay for tiny eye dots.
Step 3: Modeling the Textured Horse
-
Textured Base:
Mix beige and a tiny bit of brown clay to get a speckled, oatmeal color. Form a blocky, rectangular body with four legs pulled downwards, similar to the cow but more angular. -
Horse Head Shape:
Shape a long, rounded rectangle for the head and attach it to a thick neck rising from the body. The profile should be distinct and slightly boxier than the cow’s. -
Mane and Tail:
Using a slightly darker tan or brown clay, create a textured strip for the mane. Press it down the back of the neck and roughen it with a needle tool to look like hair. Add a smaller piece for the tail. -
Hooves and Finish:
Add tiny flattened pads of darker brown clay to the bottom of the legs for hooves. Use a toothbrush or sandpaper to gently tap the entire surface of the horse to give it a stone-like texture before baking.
Texture Twist
Before baking, gently roll the beige horse figure over a piece of coarse sandpaper. This imitates the lovely stone-like finish seen in the photo perfectly.
Step 4: Baking and Finishing
-
Final Check:
Line your baking sheet with parchment paper. Arrange your animals, ensuring no heads or tails are drooping. Smooth out any accidental fingerprints with a drop of baby oil. -
Bake:
Bake the figures according to your clay package instructions (usually 275°F/130°C for 15-30 minutes depending on thickness). Watch the white clay closely to ensure it doesn’t scorch. -
Cool Down:
Let them cool completely in the oven with the door cracked. This helps preventing cracking, especially where the heads join the bodies.
Now you have a serene little farmyard scene to display on your shelf or desk


Cat Loaf Desk Buddy Figure
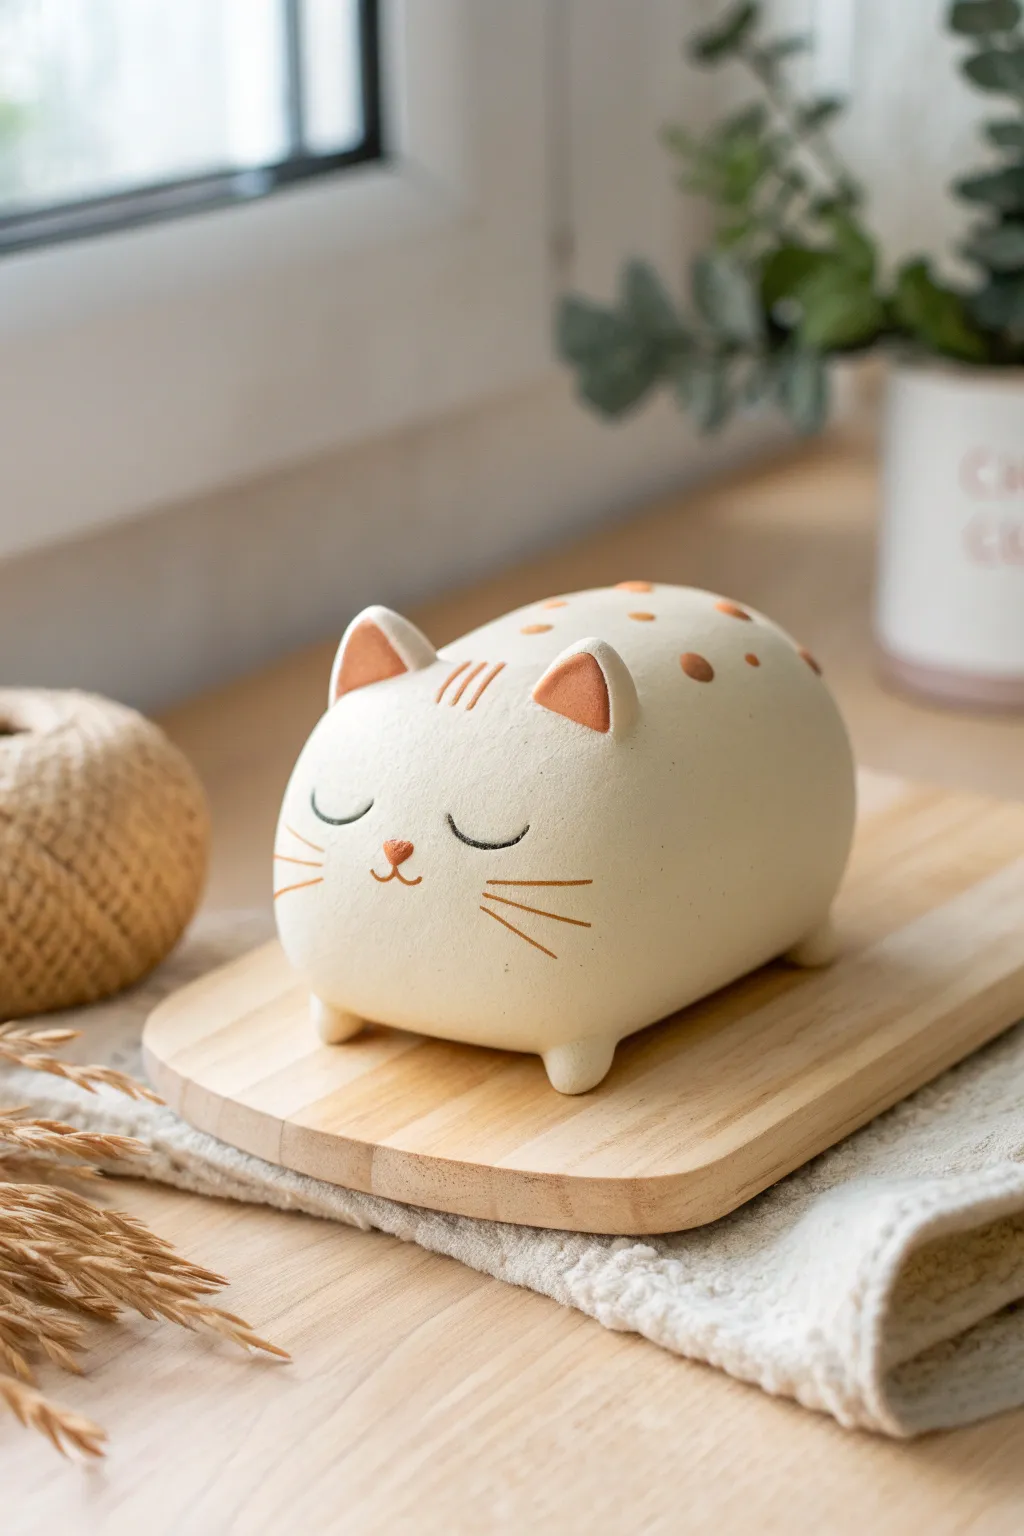
Create a serene, minimalist feline friend to keep you company while you work. This project focuses on simple shapes, smooth blending, and a charming matte finish that mimics the look of unglazed ceramic.
Step-by-Step
Materials
- White or cream polymer clay (approx. 2 oz)
- Terra cotta or brown polymer clay (very small amount)
- Acrylic roller or pasta machine
- Rubber shaping tools or clay shapers
- Needle tool
- Small ball tool
- Isopropyl alcohol and a soft brush (for smoothing)
- Baking sheet and parchment paper
- Oven (per clay manufacturer instructions)
Step 1: Shaping the Base
-
Condition the clay:
Start by thoroughly conditioning your white or cream clay until it is soft and pliable. This prevents cracking later. -
Form the loaf:
Roll the clay into a smooth ball free of seams. Gently flatten it into an oval shape, then tap the bottom on your work surface to create a flat base. It should resemble a bread loaf or a very smooth potato. -
Refine the surface:
Use your fingers to smooth out any bumps. The goal is a uniform, rounded shape for the body. -
Add the feet:
Create four tiny balls of the same white clay. Attach two near the front corners and two near the back corners on the underside. -
Blend the seams:
Using a rubber shaping tool, blend the clay from the feet onto the body until the seams disappear completely. The feet should look like little nubbins emerging naturally from the main form.
Fingerprint Eraser
Use a little cornstarch or baby powder on your fingertips when handling white clay. It prevents dust stickiness and keeps the white clay pristine.
Step 2: Sculpting the Face
-
Create ear triangles:
Form two small, equal-sized triangles from the white clay. They should be relatively thick but tapered at the top. -
Attach the ears:
Place the ears on the top front of the head. Use your rubber tool to blend the bottom, back, and side seams into the head, leaving the front face of the ear distinct. -
Add inner ear color:
Take a tiny amount of terra cotta clay and flatten it into two smaller triangles. Press these gently onto the front of the white ears. -
Make the nose:
Roll a tiny speck of terra cotta clay into a triangle shape with rounded corners. Press this into the center of the face area. -
Carve the mouth:
Using a needle tool, very gently verify the center point below the nose. Lightly drag the needle to create a small ‘w’ shape for the mouth. Keep the lines shallow and delicate. -
Indicate the eyes:
For the sleeping eyes, use the needle tool or a small curved tool to press two U-shapes into the clay. These should line up horizontally with the top of the nose.
Custom Cats
Change the clay colors to match your real-life pet! Try grey clay for a tabby, or mix black and orange patches for a calico version.
Step 3: Adding Details & Finishing
-
Add forehead stripes:
Roll extremely thin threads of terra cotta clay. Cut three tiny pieces and press them vertically between the ears. -
Create whiskers:
Roll six thin threads of terra cotta clay. Carefully press three on each cheek area, radiating outward like sun rays. Flatten them slightly so they adhere well. -
Apply body spots:
Take various small pieces of terra cotta clay, flatten them slightly, and press them randomly along the back of the figure. I like to vary the sizes to make it look more organic. -
Final smoothing:
Brush the entire piece lightly with a little isopropyl alcohol. This melts the top layer slightly to remove fingerprints and dust. -
Create texture (Optional):
To get the stone-like look in the photo, gently tap the surface with an old toothbrush or a stiff bristle brush before baking. -
Bake the figure:
Place your cat loaf on parchment paper and bake according to your polymer clay package directions (usually around 275°F/135°C for 15-30 minutes depending on thickness). -
Cool down:
Turn off the oven and let the figure cool completely inside. This gradual cooling makes the clay stronger.
Your adorable desk buddy is ready to bring a sense of calm to your workspace.


Mini Turtle With Textured Shell
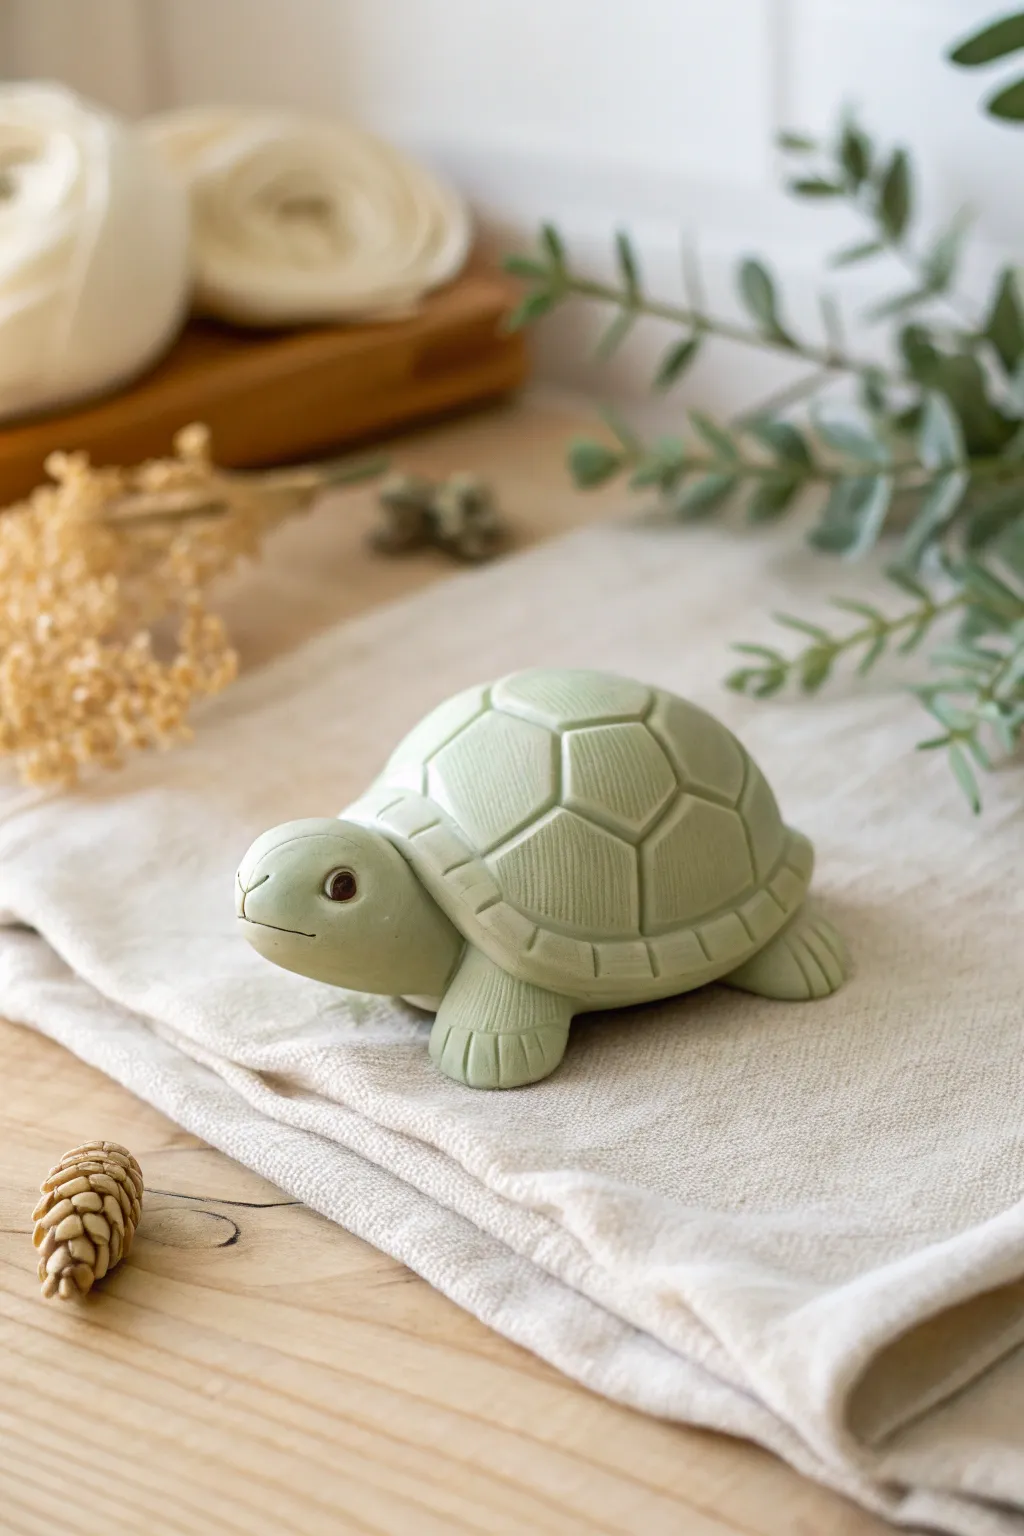
This charming little turtle features a soft, matte sage green finish and delicately carved shell details that give it a sophisticated, handcrafted look. Perfect as a desk companion or a potted plant decoration, its gentle expression and realistic yet stylized form make it a delightful project for intermediate clay artists.
Detailed Instructions
Materials
- Polymer clay (Sage Green or mix White with a touch of Olive Green)
- Black polymer clay (tiny amount for eyes)
- Needle tool or dental pick
- Ball stylus tool (small)
- Flexible clay blade
- Soft texture sponge or sandpaper (for skin texture)
- Aluminum foil (for armature)
- Rubbing alcohol and a soft brush (for smoothing)
- Matte varnish (optional)
Step 1: Forming the Core
-
Condition the Clay:
Begin by conditioning your sage green clay until it is soft and pliable. If you are mixing your own color, aim for a pale, milky green by using a 4:1 ratio of white to green. -
Prepare the Armature:
Crumple a small piece of aluminum foil into a tight, flattened dome shape. This will be the core of the shell, saving clay and reducing baking weight. -
Cover the Shell:
Roll out a sheet of green clay to about 3mm thickness. Drape this over your foil dome, smoothing the edges underneath to encase the foil completely. Roll it gently on your work surface to ensure it is perfectly round and smooth.
Shell Symmetry Hack
Draw your pattern on paper first, then place it gently over the curved shell to trace the lines through the paper for perfect spacing.
Step 2: Sculpting the Body
-
Shape the Head:
Roll a separate ball of green clay for the head. Shape it into a slightly elongated oval, making it slightly narrower where it will connect to the shell. -
Attach the Head:
Press the head firmly onto the front of the shell dome. Use a clay shaper or your finger to blend the clay at the neck seam, ensuring a strong bond. -
Create the Flippers:
Form four equal-sized small logs of clay. Flatten one end of each log into a paddle shape to create the legs/flippers. -
Attach the Limbs:
Position two legs near the front and two near the back. Blend the hidden upper parts of the legs into the underside of the shell so the turtle sits flat and stable. -
Add Skin Texture:
Before adding the shell details, lightly press a piece of coarse sandpaper or a texture sponge against the legs and neck to give the skin a subtle, organic grain. -
Define the Toes:
Use a needle tool or a dull knife edge to press three vertical lines into the end of each flipper, creating the illusion of toes.
Step 3: Detailing the Shell and Face
-
Map the Shell Pattern:
Using a very light touch with a needle tool, sketch a hexagon in the center top of the shell. From the points of this hexagon, draw lines extending outward to create the surrounding scutes. -
Carve the Scutes:
Once you are happy with the spacing, deepen these lines using a V-tool or by carefully retracing with your needle tool to create distinct separation between the shell plates. -
Texture the Shell:
I like to add fine parallel lines inside each scute plate using a needle tool. Ideally, scuff vertical lines on the side plates and horizontal lines on the top plates for realistic variation. -
Add the Eyes:
Use a small ball tool to make indentations on either side of the head. press a tiny bead of black clay into these sockets. -
Create the Expression:
Roll a nearly microscopic snake of green clay and place it over the eye to form an eyelid, blending the top edge into the head. Use the needle tool to carve a gentle, smiling line for the mouth. -
Refine the Rim:
Roll a thin snake of clay, flatten it slightly, and wrap it around the bottom edge of the shell to create a distinct rim. Use your tool to mark vertical notches around this rim at regular intervals. -
Smooth and Prep:
Brush the entire piece lightly with a little rubbing alcohol to remove any fingerprints and smooth out rough carving edges.
Fixing Dust Specks
Light colored clay shows lint easily. Keep a scrap piece of ‘garbage clay’ nearby to tap your fingers on periodically to clean them while working.
Step 4: Baking and Finishing
-
Bake:
Bake the turtle according to your clay manufacturer’s instructions (usually 275°F/135°C for 15-30 minutes per 1/4 inch of thickness). -
Cool Down:
Allow the figure to cool completely inside the oven if possible, which helps prevents cracking. -
Seal (Optional):
Since the reference image has a matte look, leave the clay bare or apply a very thin coat of matte varnish for protection without adding shine.
Now you have a serene little reptile friend ready to bring a touch of calm to your space

The Complete Guide to Pottery Troubleshooting
Uncover the most common ceramic mistakes—from cracking clay to failed glazes—and learn how to fix them fast.
Cute Dino Buddy With Big Eyes
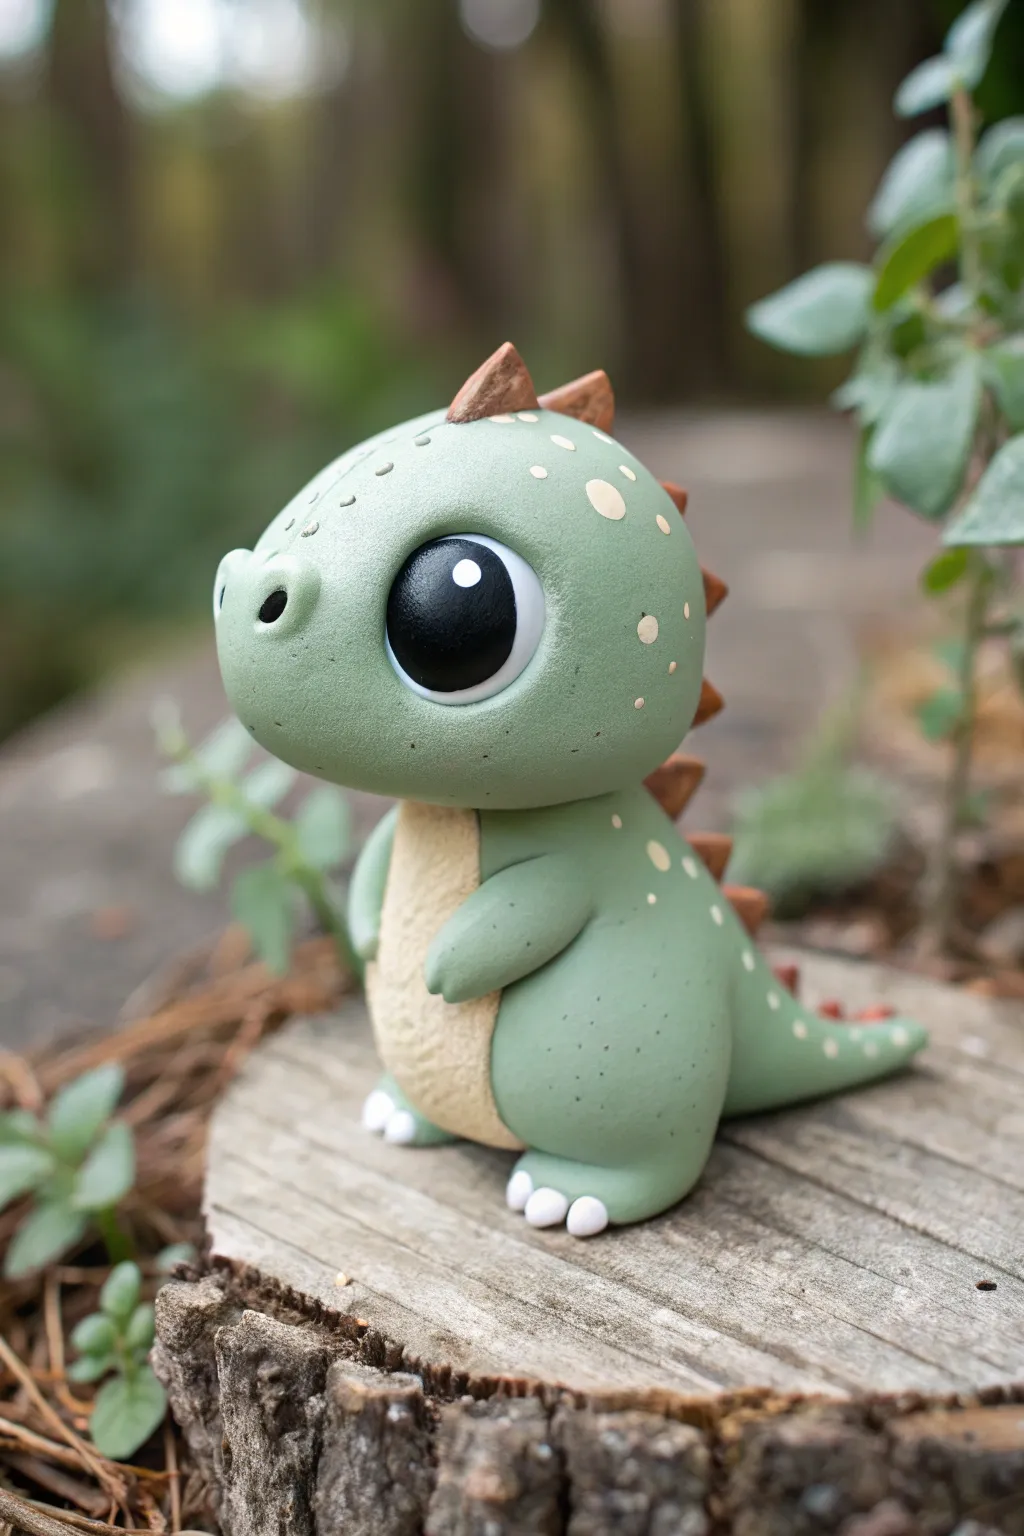
This adorable polymer clay dinosaur features oversized eyes and a chubby silhouette that gives it maximum cuteness factor. With its soft sage green color and textured details, it makes for a perfect desk buddy or a thoughtful handmade gift.
Step-by-Step Guide
Materials
- Polymer clay (Sage Green, Light Tan, Burnt Sienna/Brown, White, Black)
- Ball stylus tools (various sizes)
- Needle tool or toothpick
- Sculpting blade
- Aluminum foil (for armature core)
- Oven-bake clay adhere or liquid clay
- Gloss varnish (optional for eyes)
- Wet wipes (for cleaning hands)
Step 1: Shaping the Head
-
Prepare the core:
Crumple a small piece of aluminum foil into a tight ball about the size of a walnut. This reduces weight and saves clay. -
Cover with green clay:
Condition your sage green clay until soft, then flatten a sheet and wrap it completely around the foil ball. Roll it smooth in your palms to remove seams. -
Refine the shape:
Gently press the sphere into a slightly oval shape for the head, keeping the front face area somewhat flatter. -
Create eye sockets:
Use your largest ball stylus or thumb to press two large, deep indentations where the eyes will go. These should be very oversized relative to the head. -
Add the snout:
Roll a smaller ball of green clay and press it onto the lower center of the face, just below the eye sockets. Blend the edges seamlessly into the main head shape using a sculpting tool or your finger. -
Sculpt nostrils:
Use a medium ball tool to press two nostril indentations into the snout, angling them slightly outward.
Smooth Operator
Before baking, use a brush dipped in baby oil or clay softener to lightly smooth out fingerprints and blend seams effortlessly.
Step 2: Body and Limbs
-
Form the body:
Roll a teardrop shape of green clay slightly smaller than the head. Flatten the bottom so it sits upright securely. -
Attach the belly:
Roll a thin oval of light tan clay. Texture it lightly by tapping with a toothbrush or piece of sandpaper, then press it onto the front of the body teardrop. -
Connect head to body:
Insert a piece of wire or toothpick into the neck area of the body for support. Add a drop of liquid clay and press the head firmly onto the body. -
Arm placement:
Create two small elongated teardrops of green clay. Attach them to the sides of the body, curving them slightly forward to rest near the belly. -
Add the legs:
Form two chunky balls of green clay for the feet. Press them onto the base of the body. Add tiny balls of white clay for claws—three on each foot. -
Attach the tail:
Roll a cone of green clay and attach it to the back of the body, curving it to one side so it rests on the surface.
Dino Evolution
Try marbling two shades of green together for the skin, or swap the spikes for small clay wings to turn your dino into a dragon.
Step 3: Details & Features
-
Make the eyes pop:
Roll two balls of black clay and press them firmly into the eye sockets you made earlier. They should be slightly convex. -
Add eye highlights:
Place a small white dot of clay in the upper right corner of each pupil, and a tiny second dot below it for extra sparkle. -
Create the spikes:
Using brown clay, form tiny triangles or pyramids. Place them in a row running from the top of the head down the back to the tail. -
Spotted texture:
Roll very tiny, flat discs of light tan clay. Apply them randomly over the head and back to create a spotted pattern. -
Surface texture:
I like to gently stipple the green skin areas (avoiding the eyes) with an old toothbrush or stiff bristle brush to give it a realistic, matte reptile skin texture. -
Bake and finish:
Bake according to your clay manufacturer’s instructions (usually 275°F/130°C for 15-30 minutes). Once cool, you can apply gloss varnish to the black eyes for a wet look.
Now you have a charming prehistoric companion ready to brighten up your shelf
Kawaii Ghost Figure With Blush Cheeks
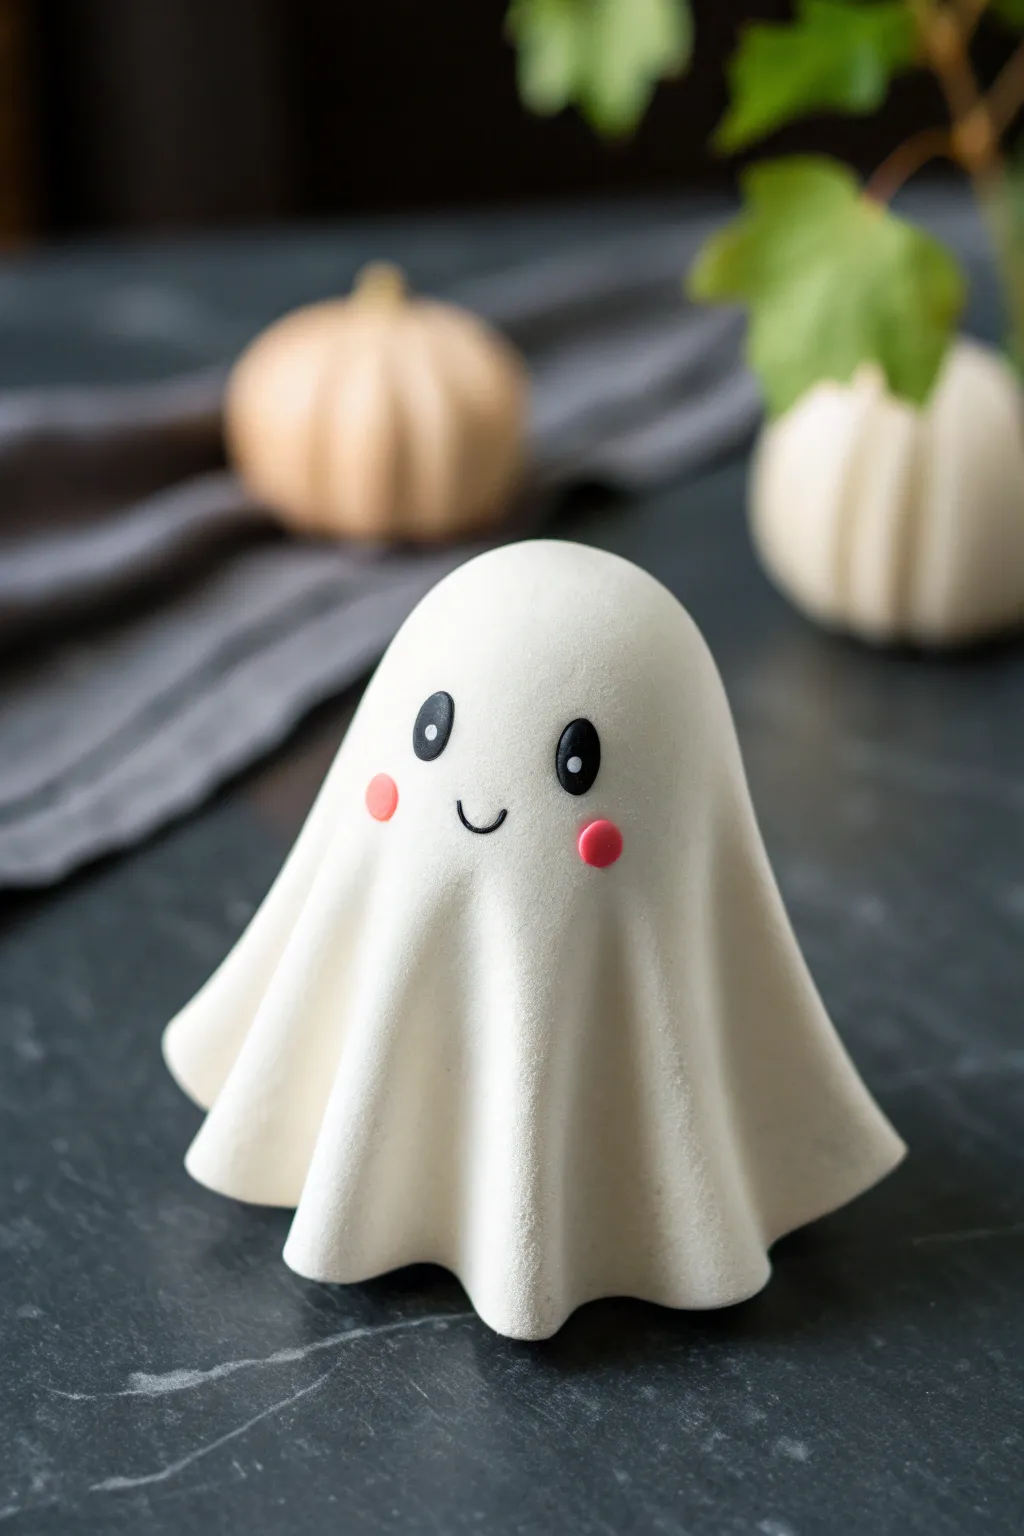
This adorable polymer clay ghost figure captures the essence of Halloween but with a hefty dose of kawaii charm. Its soft matte finish and gentle drapery folds make it perfect for desk decor or a spooky season centerpiece.
Detailed Instructions
Materials
- White polymer clay (approx. 2oz block)
- Black polymer clay (tiny amount)
- Pink polymer clay (tiny amount)
- Small white acrylic paint or white clay liquid for highlights
- Ball stylus tool (medium and large)
- Needle tool or toothpick
- Aluminum foil core
- Rolling pin or pasta machine
- X-acto knife or clay blade
- Soft brush (optional for smoothing)
- Matte varnish or cornstarch (for finish)
Step 1: Forming the Base Structure
-
Create the foil core:
Ball up a piece of aluminum foil into a gumdrop shape, roughly 1.5 inches tall. This saves clay and keeps the ghost lightweight while baking. -
Smooth the core:
Roll the foil against your work surface to compress it tightly, ensuring the bottom is flat so your ghost will stand upright. -
Condition the white clay:
Knead your white polymer clay thoroughly until it’s pliable and warm. I find this warmth is crucial to prevent cracking later. -
Roll out the sheet:
Roll the white clay into a flat circle, about 1/8 inch thick. It should be large enough to completely drape over your foil core with extra room for folds.
Clean Clay, Happy Ghost
White clay attracts lint like a magnet. Wipe your hands and work surface with a baby wipe before starting, and keep a piece of scrap clay nearby to roll over your hands to pick up dust.
Step 2: Draping and Shaping
-
Cover the core:
Place the clay sheet centrally over your foil gumdrop, gently smoothing the top dome first to remove air bubbles. -
Create the folds:
Let the clay skirt hang down naturally. Use your fingers to gently pinch and encourage vertical folds, mimicking fabric draping. -
Refine the edges:
Use a large ball tool or the handle of a paintbrush to push inwards between the folds at the bottom, creating those distinct wavy curves along the hem. -
Trim excess:
If the skirt is too long, use your blade to carefully trim the bottom edge, keeping the wavy motion consistent. -
Smoothing texture:
Check for fingerprints. Lightly buff the surface with a tiny bit of cornstarch on your finger or a soft brush to get that smooth, matte look.
Step 3: Adding the Kawaii Face
-
Mark eye placement:
Use a needle tool to make two tiny pilot dots where the eyes will go, ensuring they are level. -
Make the eyes:
Roll two tiny balls of black clay into oval shapes. Press them flat onto the face over your marked spots. -
Create the smile:
Roll an extremely thin snake of black clay. Cut a tiny U-shape segment and gently press it between the eyes to form the smile. -
Add blush cheeks:
Roll two small circles of pink clay. Press these below and slightly outside the eyes for that cute flushed look. -
Secure the features:
Gently tap the facial features with a flat finger to ensure they are fully adhered to the white base.
Glow in the Safety of Dark
Swap the standard white clay for glow-in-the-dark polymer clay. The process is identical, but your little friend will double as a spooky nightlight when the lights go out.
Step 4: Baking and Finishing
-
Bake carefully:
Bake the figure according to your clay package instructions (usually 275°F for 15-30 minutes). Tent with foil to prevent the white clay from scorching. -
Cool down:
Allow the ghost to cool completely before handling to prevent deformation. -
Add eye highlights:
Using a toothpick or fine brush, add two tiny dots of white acrylic paint to the top right of each black eye oval. -
Optional matte finish:
If you want to reduce shine further, coat the baked piece in a matte varnish.
Place your little phantom on a shelf or adhere a magnet to the back for some spooky fridge flair


What Really Happens Inside the Kiln
Learn how time and temperature work together inside the kiln to transform clay into durable ceramic.
Pumpkin Patch Critter Figure

Embrace the cozy autumn vibes with this adorable bunny figurine disguised as a pumpkin stack. With its soft cream tones, textured ridges, and tiny orange vest, this polymer clay project brings a touch of whimsy to your seasonal decor.
How-To Guide
Materials
- Polymer clay: White (or cream), Orange, Black, Pale Pink, Green & Light Brown
- Sculpting tools: Needle tool, ball stylus, blending tool
- Acrylic rolling pin
- Clay slicer or craft knife
- Translucent liquid clay (optional for bonding)
- Gloss glaze (optional for eyes)
- Oven for baking
Step 1: Shaping the Pumpkin Body
-
Mix your base color:
Start by conditioning your white or cream clay until soft. If you want a warmer, antique look like the photo, mix in just a pinch of translucent or light brown clay to kill the bright white starkness. -
Form the body base:
Roll a sphere of clay regarding the size of a golf ball. Gently flatten the bottom so it stands on its own, then taper the top slightly to create a heavy pear shape. -
Add the ribbed texture:
Use a needle tool or the back of a craft knife to press vertical indentations all around the body. Start from the bottom center and curve up toward the neck to mimic pumpkin ribs. Deepen the lines gently to create pillowy sections. -
Create the tummy panel:
Roll a thin sheet of orange clay. Cut a long, narrow teardrop shape that fits the front of the body. Press this gently onto the front center of your white pumpkin body, smoothing the edges so it looks flush. -
Detail the vest:
Use a small ball stylus to press three circular indents into the orange panel for buttons. You can add tiny rolled balls of orange clay into these indents for raised buttons if you prefer, or leave them impressed for a modern look.
Troubleshooting Cracks
If you see tiny cracks in the creases after baking, fill them with a mix of liquid clay and base color clay, then re-bake for 10 minutes.
Step 2: Sculpting the Head
-
Form the head shape:
Roll a slightly smaller sphere of cream clay for the head. Press it gently to flatten it slightly into a squat pumpkin shape. -
Add pumpkin creases:
Just like the body, use your needle tool to create vertical ribs all around the head. Ensure the lines curve naturally towards the center top and bottom. -
Attach the head:
Insert a small piece of toothpick or wire into the body’s neck for stability. Add a drop of liquid clay if you have it, then press the head firmly onto the body. -
Create the face:
Use a medium ball tool to make two sockets for the eyes. Roll two tiny spheres of black clay and press them into the sockets. Add a minuscule black triangle for the nose and use a needle tool to scribe a tiny ‘w’ mouth below it. -
Blush the cheeks:
Roll two very small, flat discs of pale pink clay. Press them gently onto the cheeks, just below the outer corners of the eyes, blending the edges slightly for a soft look.
Step 3: Ears and Finishing Details
-
Shape the ears:
Roll two equal logs of cream clay and taper both ends. Flatten them gently to form long leaf shapes. -
Add the inner ear:
Do the same with a smaller amount of pale pink clay. Lay the pink shapes onto the cream ears and press flat so they become one unit. -
Attach the ears:
Attach the ears to the top of the head. I find it helpful to blend the clay at the base of the ears into the head using a silicone tool for a seamless connection. -
Add the collar leaf:
Create a tiny teardrop of green clay. Flatten it and use a needle tool to draw a vein down the center. Attach this right at the neck where the head meets the body, overlapping the top of the orange vest. -
Final texture check:
Before baking, give your bunny a once-over. Soften any fingerprints with a bit of baby oil on your finger, and re-deepen any pumpkin grooves that may have flattened during handling. -
Bake the figure:
Bake according to your clay manufacturer’s instructions (usually 275°F/130°C for 15-30 minutes depending on thickness). Let it cool completely in the oven to prevent cracking. -
Optional accessories:
If you have extra orange clay, shape small balls and add ribs to create mini pumpkins to sit alongside your bunny.
Level Up: Washes
After baking, apply a diluted wash of burnt umber acrylic paint into the grooves and wipe away the excess. This mimics the antiqued shading seen in the photo.
Place your finished bunny among real mini pumpkins or autumn leaves for a charming seasonal display
Valentine Heart Character Figure
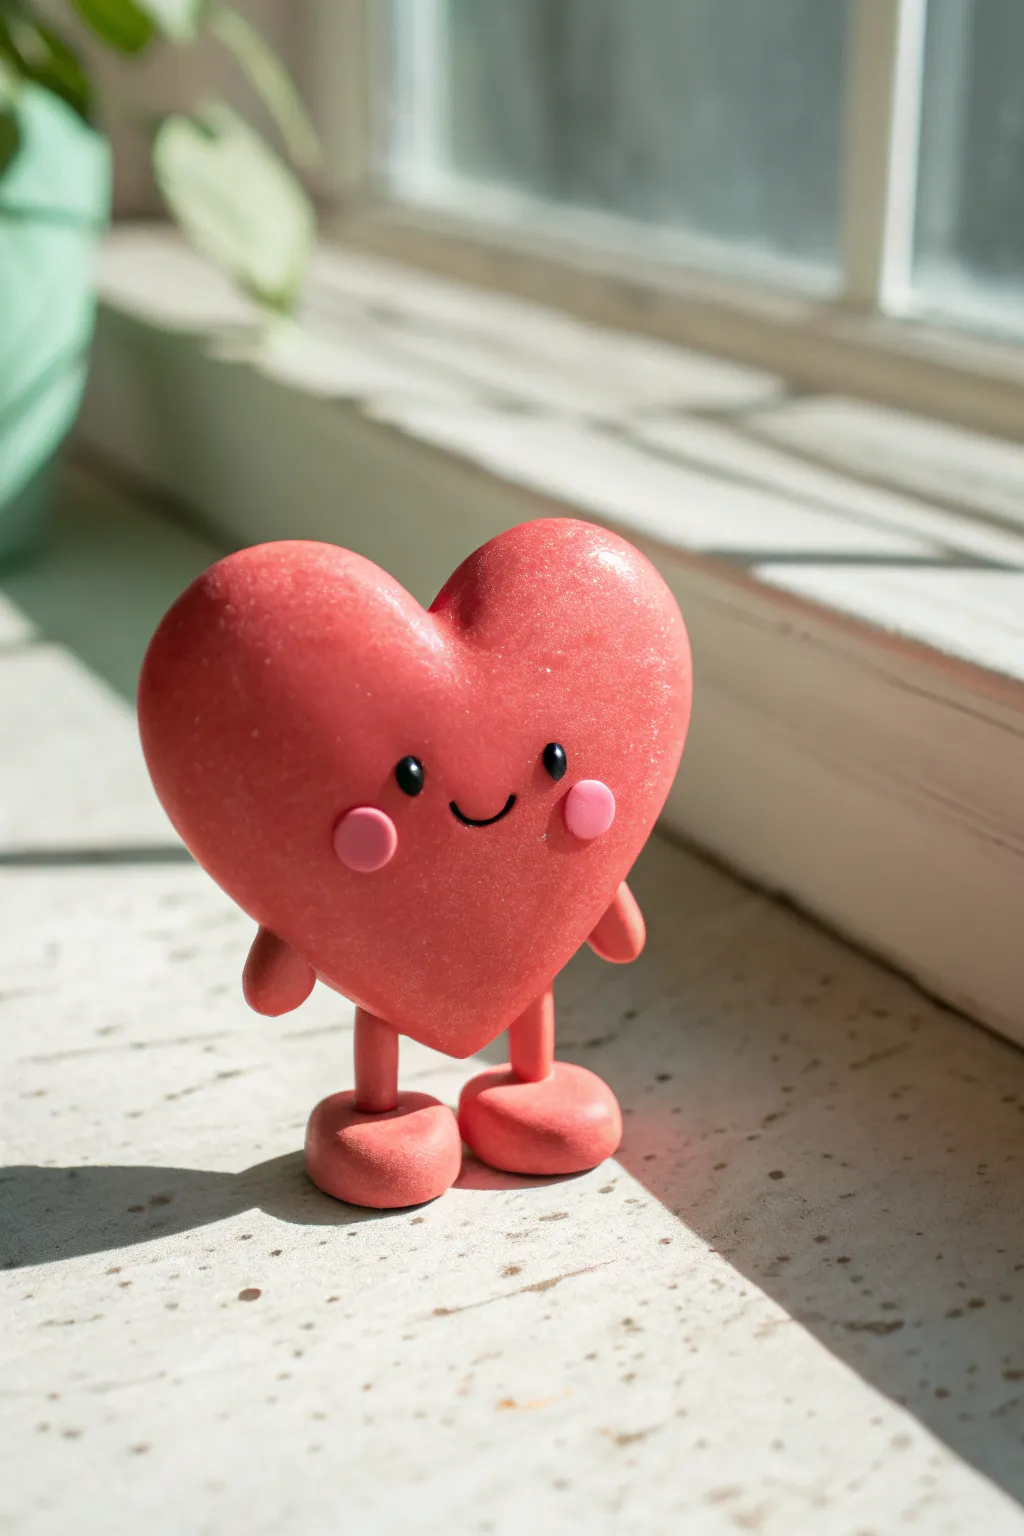
This adorable anthropomorphic heart character brings a dose of sweetness to any desk or shelf. With its subtle shimmer finish and cheerful expression, it’s the perfect beginner-friendly polymer clay project for Valentine’s Day or just because.
Step-by-Step Tutorial
Materials
- Red polymer clay (with subtle glitter or mica shift effect)
- Black polymer clay
- Pink polymer clay
- Liquid polymer clay (optional but recommended for bonding)
- Armature wire or toothpicks (for leg support)
- Dotting tools or ball stylus
- X-acto knife or clay blade
- Gloss glaze (optional)
Step 1: Shaping the Main Body
-
Condition the Clay:
Start by thoroughly kneading your red clay until it is soft and pliable. If you want that subtle sparkle seen in the photo, mix a tiny amount of mica powder or glitter into translucent red clay, or use a pre-mixed glitter red. -
Form the Base Shape:
Roll a large portion of the red clay into a smooth ball about the size of a golf ball. Ensure there are no cracks or air bubbles. -
Create the V-Notch:
Flatten the ball slightly into a thick disc. Using your thumb or a modeling tool, press an indentation into the top center to begin forming the classic heart cleft. -
Refine the Heart:
Gently pinch and smooth the bottom to form a rounded point, while simultaneously rounding out the two top lobes. The heart should look plump and pillowy, not flat. -
Check Symmetry:
Stand the heart up on your work surface to ensure the curves are even on both sides; smooth out any fingerprints using a drop of baby oil on your finger if needed.
Smooth Operator
Before baking, lightly brush the entire figure with a little cornstarch or baby powder to remove sticky fingerprints, or smooth it down with baby oil for a glass-like surface.
Step 2: Adding the Face
-
Position the Eyes:
Use a medium ball stylus to press two indentations where the eyes will go. Placing them slightly lower on the heart makes it look cuter. -
Create the Eyes:
Roll two tiny glossy black clay balls. Place them into the indentations and press gently to flatten them so they conform to the curve of the heart. -
Add Highlights:
With a needle tool or the smallest dotting tool, add a microscopic speck of white clay or white paint to the upper corner of each eye for a spark of life. -
Sculpt the Mouth:
Roll a very thin snake of black clay. Cut a tiny U-shape and gently press it into the clay between the eyes to create a simple, happy smile. I like to use a needle tool to curve the ends slightly upward. -
Apply Rosy Cheeks:
Flatten two small discs of pink clay. Press these onto the face just below and to the outside of the eyes.
Step 3: Limbs and Assembly
-
Form the Shoes:
Roll two balls of red clay (slightly darker or the same shade) and flatten them into thick ovals. These will be the shoes. -
Make the Legs:
Roll two short, thick sausage shapes for the legs. Insert a small piece of wire or toothpick into each leg for structural integrity. -
Attach Legs to Shoes:
Press the legs firmly onto the center of the shoe ovals. Use a tiny dab of liquid clay here to ensure a strong bond. -
Create the Arms:
Roll two smaller sausage shapes for the arms, rounding off one end of each to look like a handless nub. -
Final Assembly:
Attach the legs to the bottom of the heart body and the arms to the sides. Check the balance to ensure the figure stands independently before baking. -
Bake:
Bake carefully according to your clay package instructions (usually 275°F/135°C for 15-30 minutes per 1/4 inch thickness). Let it cool completely before handling.
Glittery Glaze
After baking and cooling, brush a coat of gloss glaze mixed with ultra-fine iridescent glitter over the heart body to mimic the sparkle seen in the reference image.
Now you have a charming little heart companion ready to brighten up any room

TRACK YOUR CERAMIC JOURNEY
Capture glaze tests, firing details, and creative progress—all in one simple printable. Make your projects easier to repeat and improve.
Mini Food Friend Figures
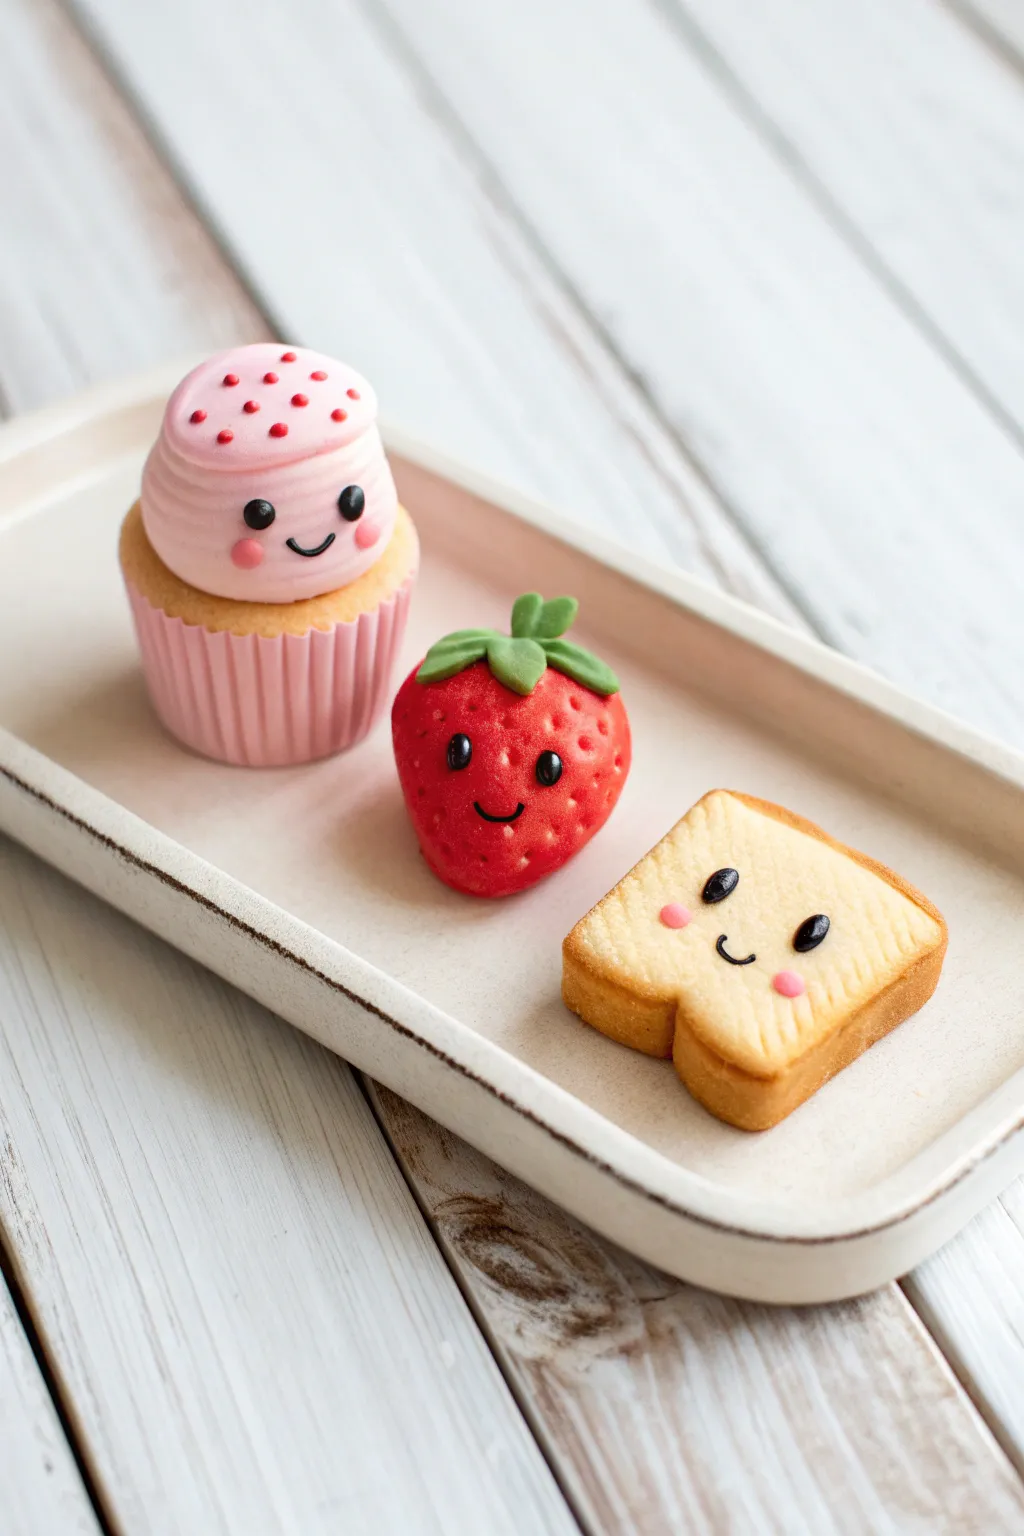
These adorable miniature friends bring a sweet touch of whimsy to any desk or shelf. With their simple shapes and expressive little faces, this project is perfect for practicing texture techniques and creating cohesive sets.
Detailed Instructions
Materials
- Polymer clay (colors: light pink, dark pink, tan, white, red, green, black)
- Liquid polymer clay (Translucent or Bake & Bond)
- Dotting tools (various sizes)
- Needle tool or toothpick
- Soft pastel chalks in brown/orange (for shading)
- Small soft brush
- Texture tool (toothbrush or stiff brush)
- Blade or craft knife
- Gloss glaze (optional)
Step 1: Sweet Strawberry
-
Shape the Base:
Start with a ball of red clay about the size of a large marble. Gently roll it into a rounded cone shape, flattening rapid the top slightly so the leaves will sit nicely. -
Add Texture:
Use a small dotting tool to press shallow indentations all over the surface of the strawberry to mimic seeds. Leave a smooth area in the center specifically for the face. -
Create the Leaves:
Take a small amount of green clay and flatten it into a rough star shape. Use a needle tool to create vein lines, then gently press this onto the top of your strawberry. -
Add the Stem:
Roll a tiny cylinder of green clay and press it into the center of the leaves, smoothing the connection point with a tool if needed.
Step 2: Happy Toast
-
Form the Bread:
Mix white clay with a tiny bit of tan to create a pale bread color. Shape this into a thick square, then use your finger to gently indent the top edge to create the classic dip in a loaf slice. -
Crust Creation:
Roll a thin strip of tan clay—long enough to wrap around the sides and bottom of the slice. Wrap it carefully, trimming the excess at the top corners so the top ‘crumb’ is exposed. -
Toast Texture:
Use a texturing tool or an old toothbrush to tap the surface of the pale clay, giving it a realistic bread crumb texture. I like to keep the center smooth for the face. -
Baking Effect:
Shave a little brown soft pastel into a powder. Use a soft brush to gently apply this ‘toasted’ effect around the edges of the bread face.
Clean Clay Tip
Keep separate baby wipes handy! Clean your hands thoroughly between colors, especially before handling the white bread or light pink frosting, to avoid lint or color transfer.
Step 3: Cheery Cupcake
-
Make the Liner:
Form a cylinder of light pink clay for the base. Use the side of a needle tool to press vertical ridges all around the cylinder to simulate a paper liner. -
Add the Cake:
Create a small, flattened dome of yellow-tan clay and press it onto the liner, allowing it to peek out slightly over the edge. -
Frosting Swirl:
Roll a snake of light pink clay. Coil it on top of the cake base, tapering it as you go up to create a soft-serve swirl shape. Smooth the seams gently with a silicone tool. -
Sprinkle Details:
Roll extremely tiny balls of dark pink or red clay and press them onto the top of the frosting swirl for decoration.
Make them Charms
Before baking, insert a screw eye pin into the top of each figure. Once baked and cooled, you can attach them to a keychain, zipper pull, or necklace chain.
Step 4: Bringing Them to Life
-
Create Eye Sockets:
For all three figures, use a medium dotting tool to make two small indentations where the eyes will go. This helps the eyes sit securely. -
Insert Eyes:
Roll tiny balls of black clay and press them into the sockets you just made. -
Add Smiles:
Roll incredibly thin snakes of black clay. Cut small curved sections and press them gently between the eyes using a needle tool to form smiles. -
Rosy Cheeks:
Take tiny dots of pink clay and flatten them just below the eyes on the outer edges of the face for a blushing look. -
Final Bake:
Bake your trio according to your clay manufacturer’s instructions, usually at 275°F (130°C) for 15-30 minutes depending on thickness.
Once cooled, arrange your little food friends together for a display that looks good enough to eat
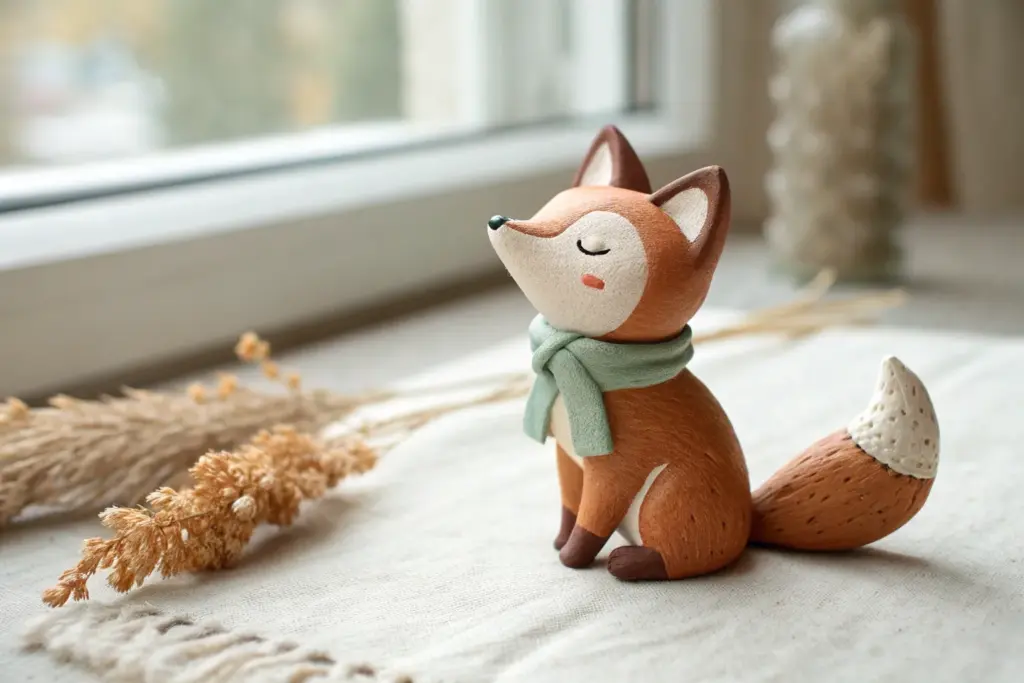
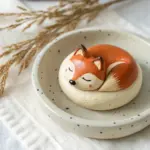
Mushroom-Back Forest Animal Figure

Create a charming woodland scene featuring a serene fox and a trio of tiny mushrooms, all crafted to look like hand-carved wood. Using clever painting techniques on polymer clay, you’ll achieve a rustic, heirloom finish without ever touching a carving knife.
How-To Guide
Materials
- Polymer clay (white or beige base)
- Acrylic paints: Burnt Sienna, Raw Umber, Cream/Off-White, Black, Pink, White
- Paintbrushes: Flat shader (medium), fine liner, stiff bristle brush
- Aluminum foil (for armature)
- Sculpting tools (needle tool, ball stylus)
- Sandpaper (fine grit)
- Matte varnish
Step 1: Sculpting the Fox Base
-
Core construction:
Begin by crumpling a small ball of aluminum foil into a pear shape for the fox’s body and a slightly flattened oval for the head. This saves clay and keeps the figure lightweight. -
Covering the body:
Sheet your base clay to about 1/4 inch thickness. Wrap the foil pear shape completely, smoothing the seams with your thumb until the surface is uniform. Gently flatten the bottom so it stands securely. -
Shaping the head:
Cover the foil head armature with clay similarly. Refine the shape so it tapers slightly towards the chin area, but keep the cheeks round and chubby. -
Adding ears:
Shape two small triangles of clay for the ears. Attach them to the top of the head using a blending tool to seamlessly merge the clay at the base. Gently press a smaller, indented triangle inside each one for the inner ear. -
Joining the pieces:
Insert a short piece of wire or a toothpick into the top of the body and push the head onto it. Press firmly to ensure a bond, tilting the head slightly if you want a curious expression. -
Arms and tail:
Roll two long teardrop shapes for the arms. Attach them starting at the shoulders, curving them inward so the ‘hands’ rest on the belly. Smooth the top seams into the body while leaving the arm shape distinct.
Texturing Trick
Before baking, lightly drag a stiff toothbrush vertically down the clay surface. The paint wash will settle into these grooves later, enhancing the wood grain effect.
Step 2: Creating the Mushrooms
-
Stems and caps:
Roll three small cylinders for stems—make one thicker and two thinner. Create three dome shapes for caps in varying sizes. Press the caps onto the stems, blending the underside connection slightly for strength. -
Baking:
Place the fox and mushrooms on a ceramic tile or baking sheet. Bake according to your clay manufacturer’s instructions (usually 275°F/130°C for 15-30 minutes). Let everything cool completely.
Step 3: The Faux-Wood Finish
-
Base coat:
Paint the entire fox (except the belly and face mask area) and the mushroom caps with a solid coat of Burnt Sienna. Paint the belly, face mask, and mushroom stems with Cream/Off-White. -
Wood grain texture:
Mix a small amount of Raw Umber with water to create a wash. Using a stiff brush, streak this lightly over the brown areas to simulate wood grain direction. I find moving vertically down the body looks most like carved wood. -
Face details:
Paint the inner ears Cream. Using a very fine liner brush and Black paint, carefully draw two U-shapes for sleeping eyes and a tiny smile. Add a small black oval for the nose. -
Blush and fur:
Dry brush a tiny amount of Pink onto the cheeks. Using the fine liner brush with watered-down Raw Umber, add tiny tick marks on the cream belly patch to suggest fur texture. -
Mushroom details:
Paint the mushroom caps a reddish-brown (mix Burnt Sienna with a touch of Red/Orange). Once dry, use a dotting tool or toothpick to add White dots. -
Sealing:
Once all paint is thoroughly dry, coat the fox and mushrooms with a matte varnish. This removes the ‘plastic’ shine of the clay and solidifies the wooden toy aesthetic.
Forest Floor Base
Create a wooden slice base using polymer clay! Marbelize dark and light brows, flatten into a disc, and texture the edges to look like rough bark before mounting your fox.
Now you have an adorable woodland set that brings a touch of fairytale magic to your desk or shelf
Pocket Dragon Figure With Tiny Wings
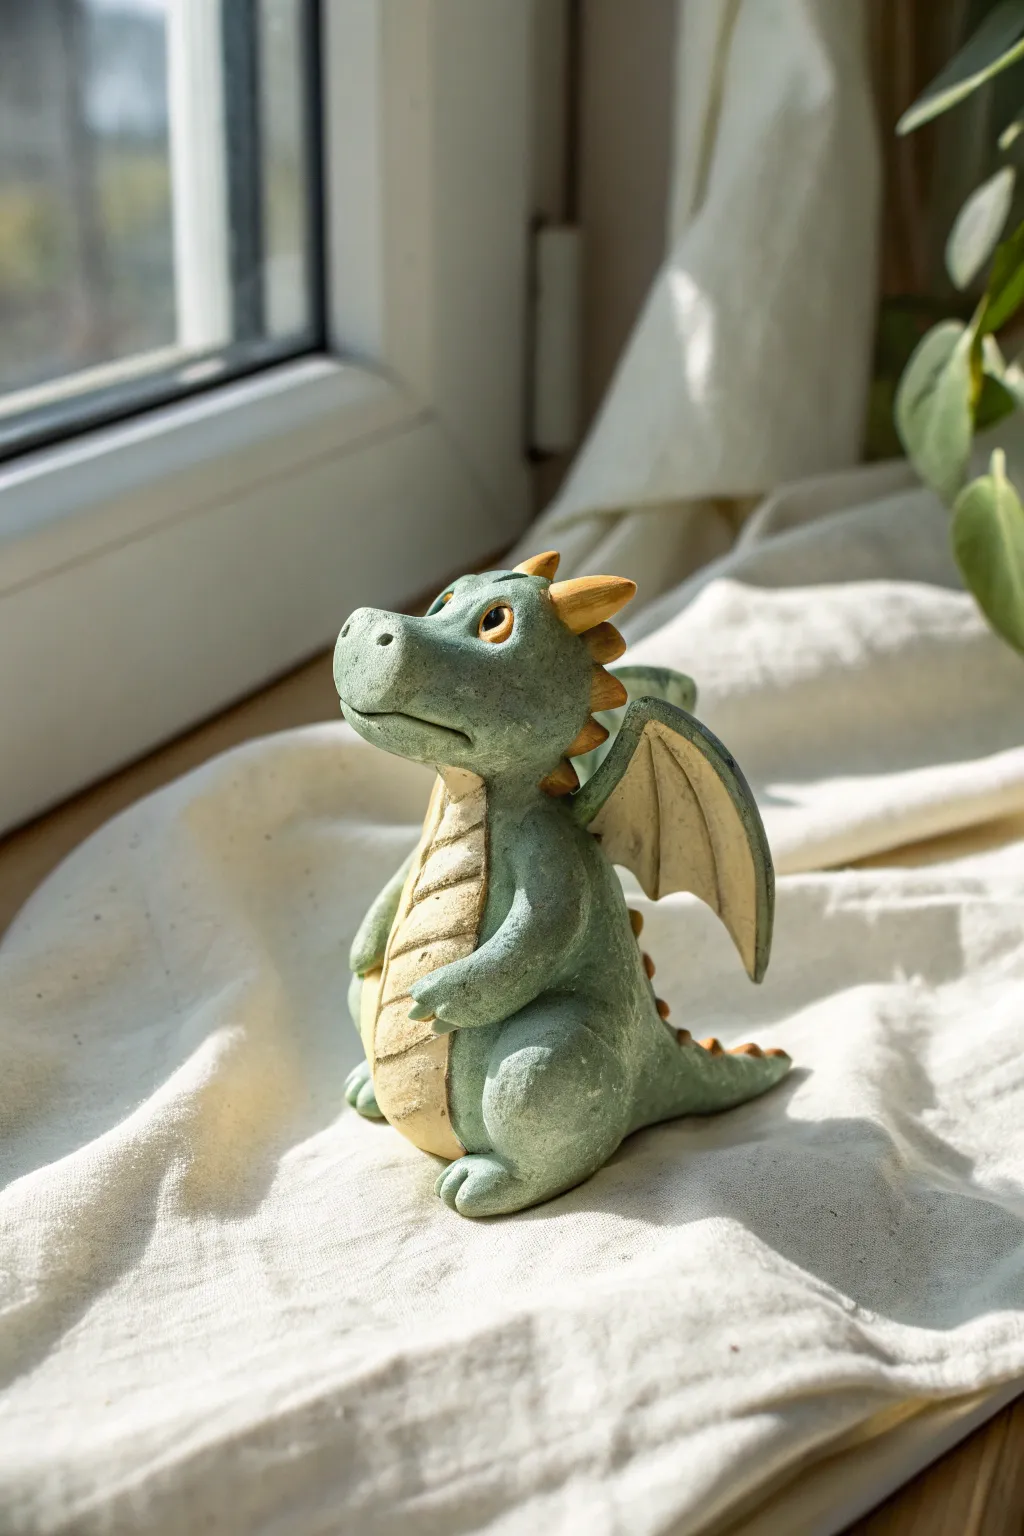
This charming little dragon figurine captures the heart with its curious expression and textured, stone-like finish. Perfectly sized for a desk companion or shelf sitter, this project uses simple shapes and careful texturing to create a piece that feels ancient yet adorable.
Step-by-Step
Materials
- Polymer clay (Sage Green, Cream/Beige, Golden Yellow)
- Aluminum foil (for armature)
- Sculpting tools (needle tool, ball stylus, rubber shaper)
- Toothbrush or stiff bristle brush (for texturing)
- Black glass beads (2mm) or black clay for eyes
- Wire or toothpicks (for internal support)
- Acrylic paints (dark green wash, white for dry brushing)
- Matte varnish
Step 1: Forming the Core
-
Create the armature:
Crumple a small piece of aluminum foil into a pear shape about the size of a large walnut. This will be the body. Make a smaller, slightly flattened sphere of foil for the head. This saves clay and keeps the figure lightweight. -
Cover the body:
Condition your sage green clay until soft. Roll out a sheet about 1/8 inch thick and wrap it completely around the body foil armature. Smooth the seams with your fingers until you have a seamless pear shape. Flatten the bottom so it sits securely. -
Shape the head:
Cover the head armature with green clay similarly. Refine the shape to have a slightly protruding snout. Connect the head to the body; I like to use a small piece of wire or a toothpick inserted between them for stability, blending the clay at the neck for a smooth transition.
Sticky Situation?
If your clay gets too soft and fingerprints are showing, pop the sculpture in the fridge for 10 minutes. The firm clay will take texturing tools like the toothbrush much cleanly without deforming.
Step 2: Building the Body Parts
-
Add the legs:
Roll two thick sausages of green clay for the chunky legs. Attach them to the sides of the lower body, blending the upper thigh area into the torso. Bend the bottom slightly to form round feet. -
Sculpt the feet:
Use a needle tool or small knife to press indentations into the front of the foot lumps to create three toes on each foot. Soften the edges of these cuts with a rubber tool. -
Attach the arms:
Create two smaller sausage shapes for arms. Attach them higher up on the torso, angling them slightly forward as if the dragon is waiting for a hug. Minimal detailing is needed for the hands—just simple mitten shapes work best here. -
Added the tail:
Roll a cone of green clay. Attach the wider end to the lower back of the dragon, blending the clay seamlessly. Curl the tail around the side of the body so it’s visible from the front.
Step 3: Detailing and Texturing
-
Create the belly:
Roll a thin oval of cream or beige clay. Press this onto the front of the dragon from the chest down to the bottom. Use a sculpting tool to impress horizontal lines across the belly to mimic scaly plates. -
Shape the face:
Use a ball tool to create deep sockets for the eyes. Press in two small black glass beads or balls of black clay. Add a tiny roll of green clay above each eye for a brow ridge, giving him that inquisitive expression. -
Add the snout details:
deeply indent two nostrils on the tip of the snout. Use a blade to carefully cut a wide, gentle smile line that curves up slightly at the corners. -
Apply texture:
This is crucial for the stone look: take an old toothbrush or stiff brush and firmly tap it all over the green skin of the dragon. Avoid the cream belly and the eyes. This creates the pitted, rock-like surface.
Level Up: Magic Eyes
Instead of plain black eyes, paint a tiny white reflection dot on the upper right side of the black beads after baking. Then, add a drop of clear UV resin or gloss varnish over the eye for a wet, living look.
Step 4: Wings and Spines
-
Construct the wings:
Cut two triangle shapes from a flattened sheet of green clay. Add a cream colored triangle inside for the membrane. Shape a green ‘bone’ along the top edge. Attach these to the back shoulder blades. -
Add the spines:
Form several small cones from golden yellow clay. Press them in a row running from the top of the head down the back of the neck and along the tail. Vary the sizes, making them smaller as you go down the tail. -
Bake the piece:
Bake your dragon according to your polymer clay package instructions (usually 275°F/130°C for 15-30 minutes per 1/4 inch thickness). Let it cool completely.
Step 5: Finishing Touches
-
Apply an antique wash:
Mix a tiny bit of dark green or black acrylic paint with water. Brush it over the textured green skin, getting into all the pits. Quickly wipe off the excess surfaces with a damp paper towel, leaving the dark paint only in the recesses. -
Dry brush highlights:
Dip a dry brush into white paint, wipe almost all of it off, and very lightly brush over the raised textures. This makes the ‘stone’ texture pop. -
Seal:
Finish with a coat of matte varnish to protect the paint and preserve that natural, unglazed look.
Now you have your own mythical guardian ready to perch on your windowsill and watch the world go by
Chibi Mermaid Figure on a Shell Base
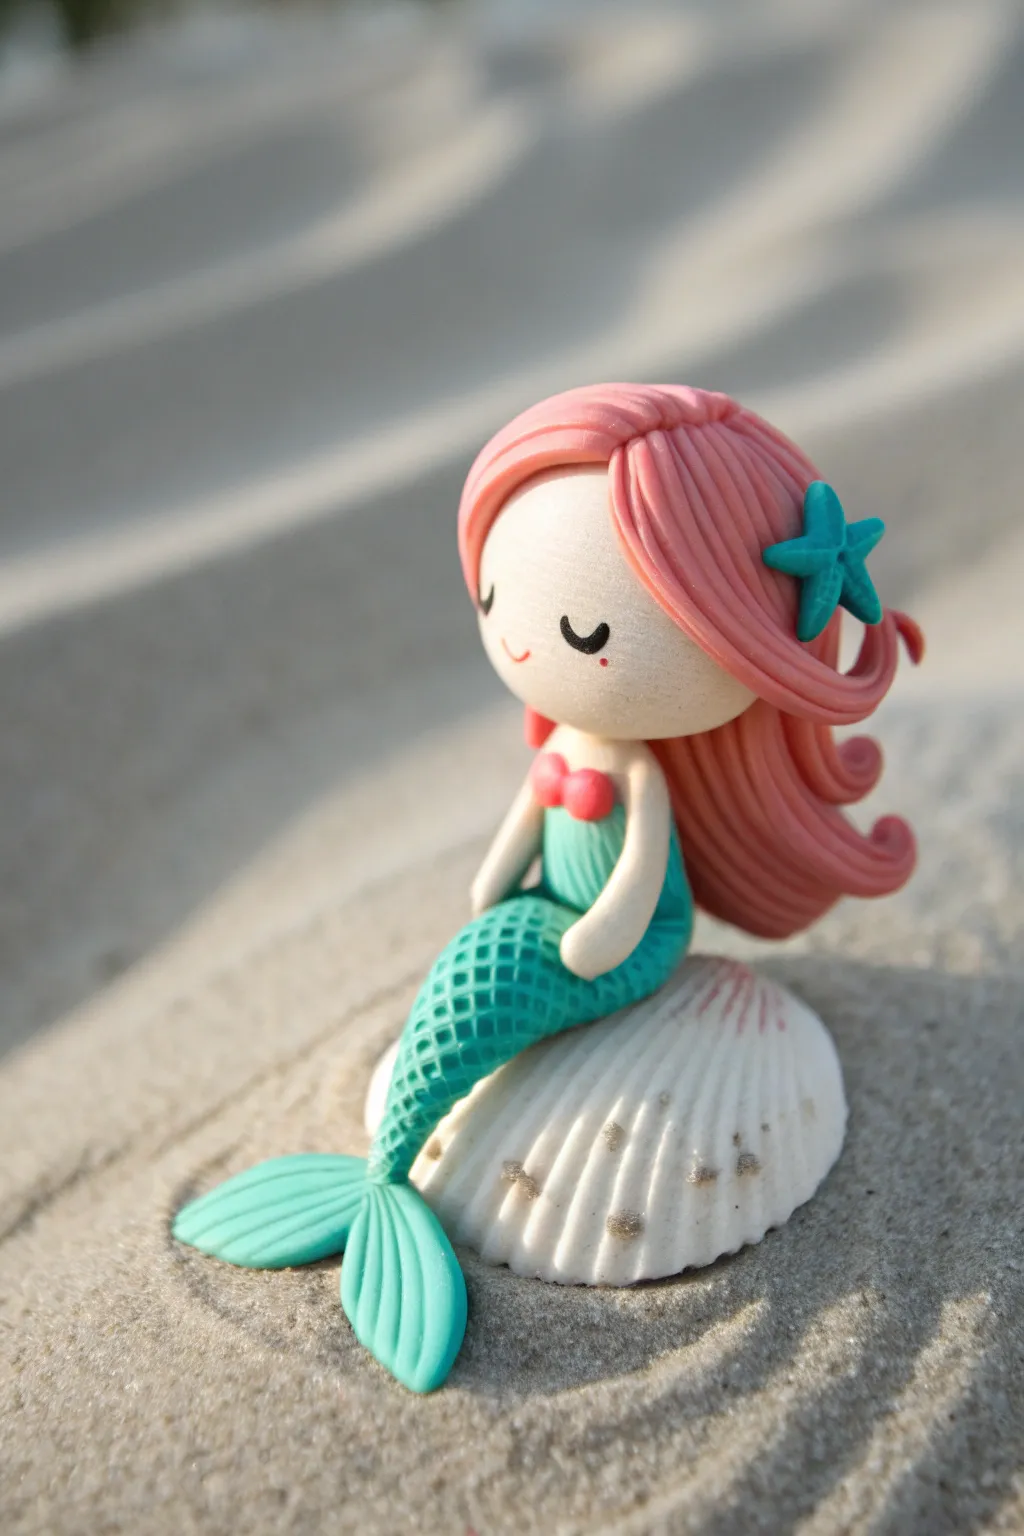
Capture the magic of the ocean with this adorable chibi mermaid sitting peacefully on a seashell. With her textured teal tail, flowing pink locks, and sweet expression, she makes a perfect summer decoration or thoughtful handmade gift.
Step-by-Step Guide
Materials
- Polymer clay: skin tone, teal/turquoise, pastel pink, bright pink (small amount)
- White polymer clay (for the shell)
- Needle tool or toothpick
- Ball stylus tool (small)
- Wire mesh or tulle (for scale texture)
- Black acrylic paint
- Fine detail paintbrush
- Blush or soft pastels (pink)
- Flexible blade or craft knife
- Oven for baking
Step 1: Sculpting the Base and Body
-
Form the shell base:
Start with a ball of white clay and flatten it slightly into a dome shape. Use your needle tool to press vertical ridges all around the perimeter to mimic a cockleshell texture. Press the top gently to create indents for texture. -
Shape the tail:
Take a portion of teal clay and roll it into a elongated cone or teardrop shape. Bend it gently so it looks like it’s resting. -
Create the scale texture:
Before attaching the tail, gently press a piece of wire mesh or tulle onto the surface of the teal clay. Peel it back carefully to reveal a consistent scale pattern. -
Attach the tail:
Place the textured tail onto the white shell base, curving it slightly to the side so it sits naturally. -
Add the fin:
Flatten two small pieces of teal clay into teardrops. Use your needle tool to press lines into them for fin details, then attach them to the narrow end of the tail. -
Make the torso:
Roll a small cylinder of skin-tone clay for the upper body. Attach this securely to the top of the tail section, blending the clay where they meet if needed. -
Add the bikini top:
Mold two tiny balls of bright pink clay into teardrops and press them onto the chest area to create the bikini top.
Sticky Situation?
If the clay gets too soft and fingerprints are showing, pop your sculpture in the fridge for 10 minutes to firm it up before adding final details.
Step 2: Head, Hair, and Details
-
Form the head:
Roll a larger ball of skin-tone clay for the head. It should be slightly oversized to achieve that cute ‘chibi’ look. Press it gently onto the neck area (you can use a small piece of wire inside for stability). -
attach the arms:
Roll two thin snakes of skin-tone clay for arms. Attach them at the shoulders and curve them so they rest gently on her lap or tail. -
Prepare hair strands:
Roll out several long, thin snakes of pastel pink clay. Taper the ends to sharp points. -
Layer the hair:
Begin attaching the pink strands to the head, starting from the back and working your way forward. Lay them so they flow down her back and over one shoulder. -
Style the bangs:
Add shorter strands across the forehead for bangs, sweeping them to the side. Use a needle tool to add extra texture lines into the hair clay for realism. -
Add the starfish accessory:
Shape a tiny piece of teal clay into a five-pointed star. Press a small hole in the center with a needle tool and place it on the side of her head. -
Bake the figure:
Bake the piece according to your polymer clay package instructions. I usually let it cool completely inside the oven to prevent cracking. -
Paint the face:
Once cool, use a fine brush and black paint to draw two small curved lines for sleepy eyes and a tiny smile. -
Add finishing touches:
Dust her cheeks lightly with pink chalk pastel or blush using a soft brush to give her a rosy glow. You can add a tiny dot of red paint for a beauty mark if you like.
Texture Trick
Don’t have wire mesh? You can use the cap of a small marker or a drinking straw cut in half to stamp individual ‘U’ shaped scales onto the tail.
Place your finished mermaid on a shelf where she can remind you of sunny beach days all year round
Tiny Robot Buddy Figure
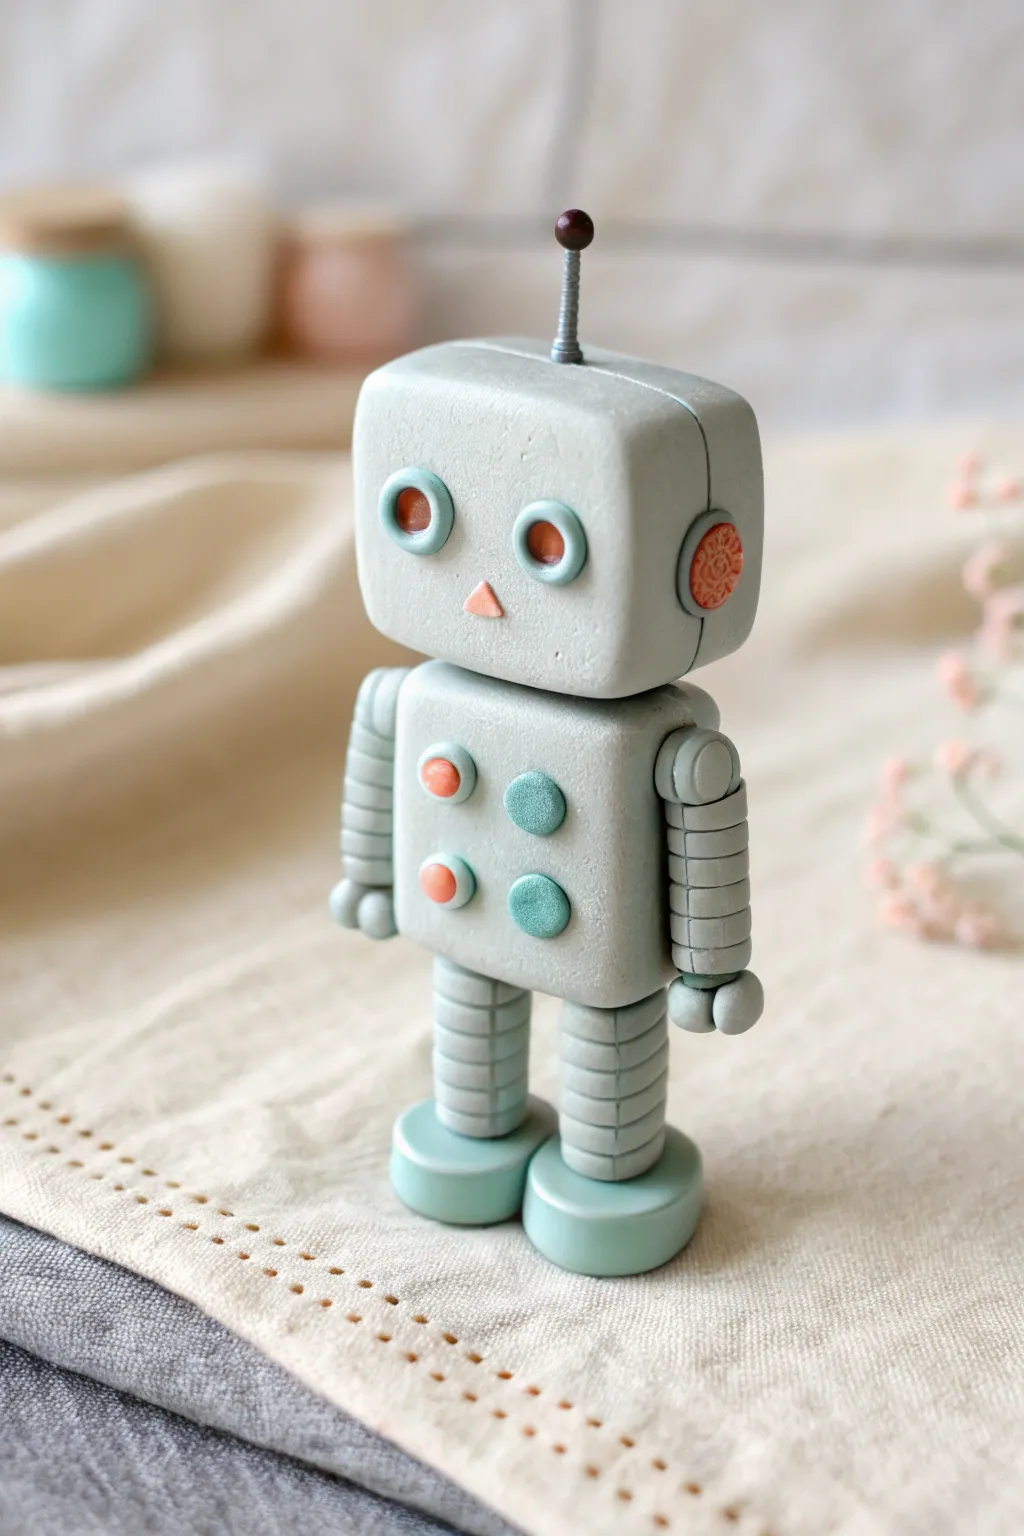
This charming little robot brings a touch of vintage sci-fi to your desk with its soft pastel palette and simple geometric shapes. Its quirky antennae and button panel give it personality, making it a perfect beginner-friendly sculpting project.
Step-by-Step Tutorial
Materials
- Polymer clay: Light grey (body), mint green (feet/buttons), salmon pink (details), metallic silver/grey (antenna/joints)
- Needle sculpting tool or toothpick
- Small dotting tool
- Craft knife or tissue blade
- Beading wire or headpin (for antenna)
- Acrylic roller
- Oven for baking
Step 1: Forming the Body and Head
-
Mix the base color:
Start by conditioning your light grey clay until it’s soft and pliable. If you want that specific stony look from the photo to be subtle, you can mix in a tiny speck of granite-effect clay, though plain grey works perfectly too. -
Shape the head:
Roll a smooth ball of grey clay and gently flatten six sides against your work surface to create a rounded cube shape. The edges should remain soft, not sharp. This will be the robot’s head. -
Create the torso:
Repeat the process to make a slightly smaller rounded cube for the body. It should be proportional to the head—think of it as a slightly flattened square. -
Connect the main pieces:
Place a small, flattened disk of darker grey or silver clay between the head and torso to act as a neck. Gently press the head down onto the body to secure them, or use a small piece of wire internally for extra stability.
Step 2: Adding Facial Features
-
Make the eye sockets:
Roll two small balls of mint green clay and flatten them into thick discs. Press these firmly onto the front of the face, spacing them evenly apart. -
Add the pupils:
Take tiny bits of salmon pink clay and roll them into balls. Press one into the center of each mint green eye disc. Use a dotting tool to slightly indent the center of the pink pupil for depth. -
Create the nose:
Cut a tiny triangle from a flattened sheet of salmon pink clay. Carefully place this small triangle between and slightly below the eyes to serve as the nose.
Head Won’t Stay Up?
If the head feels top-heavy and wobbles during assembly, insert a short piece of toothpick or wire through the neck and into both the head and body for an invisible internal spine.
Step 3: Building the Limbs
-
Construct the arms:
Roll a snake of grey clay and cut two equal lengths for the arms. To create the ribbed, flexible tubing look, use your craft knife to gently roll parallel lines around the cylinder every few millimeters. -
Attach the shoulders:
Form two small balls of grey clay for the shoulders. Attach these to the sides of the torso first, then attach your ribbed arm pieces to the bottom of the shoulder balls. -
Make the hands:
For the pinchers, roll two small grey balls. Use your knife to make a single slit halfway through the ball, creating a pac-man shape. Attach these to the ends of the arms. -
Form the legs:
Create the legs using the same ribbed cylinder technique as the arms, but make them slightly thicker to support the robot’s weight. Attach them to the bottom of the torso. -
Shape the feet:
Use the mint green clay to shape two thick oval discs. Press the robot’s legs firmly onto these discs to create a stable standing base.
Instant Vintage Texture
To get that matte, slightly stony look seen in the photo, gently pat the unbaked clay with an old toothbrush or a piece of coarse sandpaper to remove the plastic-like shine.
Step 4: Final Details
-
Add the control panel:
Create tiny, flat circles from your mint green and salmon pink clay. Arrange four of them in a square pattern on the robot’s chest to mimic buttons. -
Create the ear piece:
Roll a small ball of salmon pink clay and flatten it onto the side of the head. Use a needle tool or a textured stamp to press a pattern into it, creating a speaker or dial look. -
Install the antenna:
Insert a short piece of wire or a headpin into the top center of the head. Cover the visible wire with a very thin snake of clay to look like a spring, or leave the metal bare. Top it with a tiny dark ball. -
Smooth fingerprints:
Before baking, lightly brush the clay with a tiny amount of baby oil or cornstarch to smooth out any accidental fingerprints. -
Bake the figure:
Bake according to your specific brand of polymer clay instructions—usually around 275°F (135°C) for 15-30 minutes depending on thickness. Let it cool completely before handling.
Now you have an adorable robotic companion ready to guard your workspace
Stacked Totem Animal Figure

Create a charming vertical display with this adorable stack of forest friends, featuring an owl, a bear, and two foxes. The rustic, earthy tones and textured finish give these polymer clay figures a handmade, organic feel perfect for a nursery or desk decor.
Step-by-Step Guide
Materials
- Polymer clay in burnt orange, light sage green, chocolate brown, tan/beige, and white
- Acrylic rolling pin
- Ball stylus tools (various sizes)
- Needle tool or toothpick
- Black acrylic paint or black clay
- Very fine detail paintbrush
- Soft pastel chalks (pink) for blushing cheeks
- Texture sponge or stiff bristle brush
- Strong craft glue or liquid polymer clay
- Oven for baking
Step 1: Base Fox Layer
-
Form the base body:
Start with a large ball of burnt orange clay. Flatten the bottom slightly to create a stable base and gently shape it into a rounded, squat cylinder that tapers slightly toward the top. -
Add the face panel:
Roll out a thin sheet of white clay. Cut a heart shape with a rounded bottom point. Press this onto the front of your orange base, smoothing the edges so it integrates seamlessly. -
Sculpt the paws:
Create two small ovals of orange clay. Attach them to the bottom front of the body, just overlapping the white face panel. Use a knife tool to press three small indentations into each paw for toes. -
Create the face details:
Add a small black nose in the center of the white area. Using a needle tool, gently etch two ‘U’ shapes for sleeping eyes and a small anchor shape for the mouth.
Seamless Strength
Apply a tiny drop of liquid polymer clay (like Bake & Bond) between each animal layer before baking. This acts as a powerful glue that fuses the pieces together permanently in the oven.
Step 2: Middle Bear & Fox Heads
-
Shape the bear head:
Roll a ball of sage green clay slightly smaller than the base. Flatten the top and bottom so it becomes a thick disk. -
Detail the bear face:
Similar to the base, add a small white muzzle oval. Attach a small black nose. For the eyes, press two small indentations with a ball tool, fill them with black clay (or paint later), and add tiny white highlights. -
Add bear ears:
Form two small semi-circles of green clay and attach them to the top sides of the head. Indent the centers slightly with a ball tool. -
Shape the fox head:
Using the burnt orange clay again, create another flattened sphere identical in size to the bear head. This will sit on top of the green bear. -
Detail the fox face:
Add a white heart-shaped face patch like you did for the base. Add a black nose and use your needle tool to etch sleeping ‘U’ shaped eyes. -
Add fox ears:
Fashion two triangular ears from orange clay. Press a smaller black triangle or dot inside each ear for depth and attach them firmly to the top of the head.
Step 3: Top Owl Layer
-
Form the owl body:
Create a tall, rounded cylinder from tan or light brown clay. This piece should be narrower than the heads below it. -
Create the face mask:
Shape a flat, wide heart or spectacle shape from white clay and press it onto the upper half of the body. Add a tiny orange triangle beak in the center. -
Add wings:
Form two long teardrops from dark brown clay. Press them onto the sides of the owl’s body, wrapping them slightly around the front. -
Texture the belly:
Use a needle tool to create small vertical dashes across the exposed belly area to mimic feathers.
Turn it into Decor
Make the totem functional by sculpting the base around a small glass jar to hold pencils, or form the very top owl around a strong magnet to stick on the fridge separately.
Step 4: Assembly & Finish
-
Texture the surface:
I like to gently tap the surface of the green bear and orange fox sections with a stiff brush or texture sponge to give them a stone-like or furry texture before baking. -
Stack and secure:
Stack your pieces: Base fox, then green bear, then orange fox head, then owl. Insert a toothpick or wire vertically through the center of all pieces to keep them aligned and stable. -
Bake:
Bake the entire stack according to your clay manufacturer’s instructions (usually 275°F/135°C for 15-30 minutes per 1/4 inch thickness). -
Paint details:
Once cool, use a fine brush and black acrylic paint to deepen the etched eye lines if needed. Use dry pastel powder on a Q-tip to dab soft pink cheeks onto the fox and bear faces.
Place your finished totem on a shelf where its calm expressions can bring a little peace to your day
Mini Character Figure With a Diorama Base
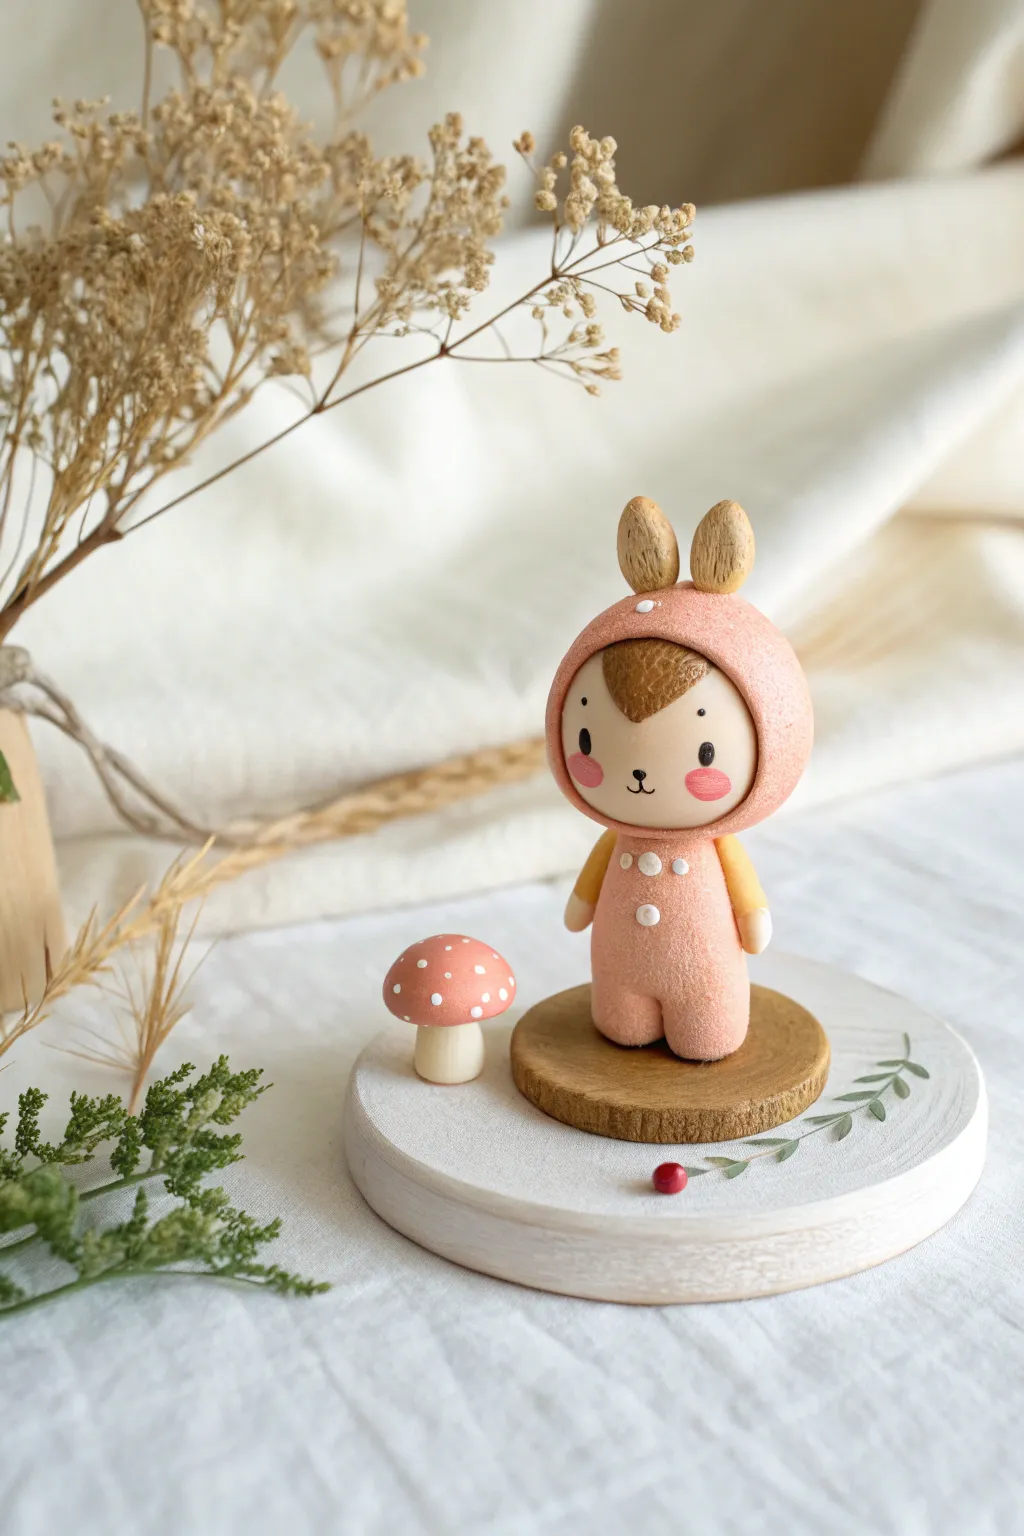
This adorable project features a stylized bunny-child character dressed in a textured pink suit, standing sweetly beside a tiny mushroom. It’s a perfect beginner-friendly diorama that combines simple shapes with charming details like rosy cheeks and a soft, faux-felt finish.
Step-by-Step
Materials
- Polymer clay (peachy-pink, skin tone, beige/tan, white, red)
- Small wooden disc for the main base (approx. 3-4 inches)
- Smaller wooden disc for the figure stand (approx. 1.5 inches)
- Texture tool (toothbrush or stiff bristle brush)
- Dotting tools or ball stylus
- Aluminum foil (for armature core)
- Acrylic paints (black, pink, white)
- Fine detail paintbrush
- Liquid clay or bake-and-bond
- Green acrylic paint (for vine detail)
- Small dried red berry or bead
- Matte varnish
Step 1: Sculpting the Bunny Figure
-
Create the Head Base:
Start by rolling a ball of aluminum foil about the size of a large grape to use as a lightweight core. Cover this core with a smooth layer of skin-tone polymer clay, ensuring there are no air bubbles trapped underneath. -
Add the Hood:
Roll out a sheet of peachy-pink clay. Cut a circle and wrap it around the back and sides of the head, leaving the face area open. Smooth the seams at the back and gently curve the edges around the face to create a hood shape. -
Texture the Suit:
To achieve that cozy, felt-like texture shown in the photo, gently tap a clean toothbrush or stiff bristle brush all over the pink hood. Do this lightly so you don’t distort the shape. -
Form the Body:
Roll a cylinder of the same pink clay for the body. Make a small vertical indentation at the bottom center to suggest legs, rounding off each ‘foot’ area. Texture this piece with your brush as well. -
Attach Head to Body:
Insert a small piece of wire or a toothpick into the top of the body and place the head onto it. Use a dab of liquid clay to secure the connection. -
Add Hair and Ears:
Press a small, flattened triangle of brown or tan clay onto the forehead for bangs. For the ears, shape two small teardrops of beige clay. Texture them slightly to look like wood or fur, and attach them to the top of the hood. -
Arms and Details:
Roll two small sausages of yellow or cream clay for arms and attach them to the sides of the body. Add tiny white clay balls for hands. Finally, place small flat dots of white clay down the front of the suit for buttons.
Pro Tip: Texturing
When texturing the clay with a toothbrush, use a dusting of cornstarch on the bristles. This prevents the clay from sticking to the brush and lifting off the figure.
Step 2: Creating the Mushroom Companion
-
Stem and Cap:
Roll a thick stalk of white or cream clay for the mushroom stem. For the cap, shape a dome of reddish-pink clay and flatten the bottom. -
Assembly and Dots:
Press the cap onto the stem. Use your smallest dotting tool to add tiny white clay dots all over the red cap for that classic toadstool look. -
Baking:
Place your figure and the mushroom on a baking tile. Bake according to your clay manufacturer’s instructions (usually 275°F/130°C for 15-30 minutes). Let them cool completely before handling.
Troubleshooting: Fingerprints
If you accidentally squash your texture or leave a fingerprint, lightly brush a small amount of baby oil over the area and re-texture gently with your brush.
Step 3: Base Assembly and Painting
-
Face Painting:
Once the figure is cool, use a fine brush or a needle tool dipped in black paint to draw two small eyes and a tiny mouth. Use pink pastel powder or diluted pink paint for the rosy cheeks. -
Prepare the Wooden Base:
Take your larger wooden disc and paint it white or leave it natural depending on your preference. I think painting it white really makes the colors pop. -
Painting the Vine:
Using a very fine brush and sage green paint, carefully hand-paint a delicate vine curving along the edge of the large white base. Let it dry. -
Mounting the Figure:
Glue the finished clay figure onto the smaller wooden disc. Then, glue that disc onto the larger white base, slightly off-center. -
Final Touches:
Glue the mushroom beside the figure. Add a tiny red berry or bead near the painted vine for a splash of color.
Now you have a sweet little scene perfect for a desk companion or a handmade gift