If you’ve been itching to make polymer clay mushrooms, you’re in for the coziest little project rabbit hole. I love how mushrooms can swing from classic woodland-realistic to totally whimsical with just a few tiny tweaks in color, texture, and personality.
Classic Spotted Toadstool Caps
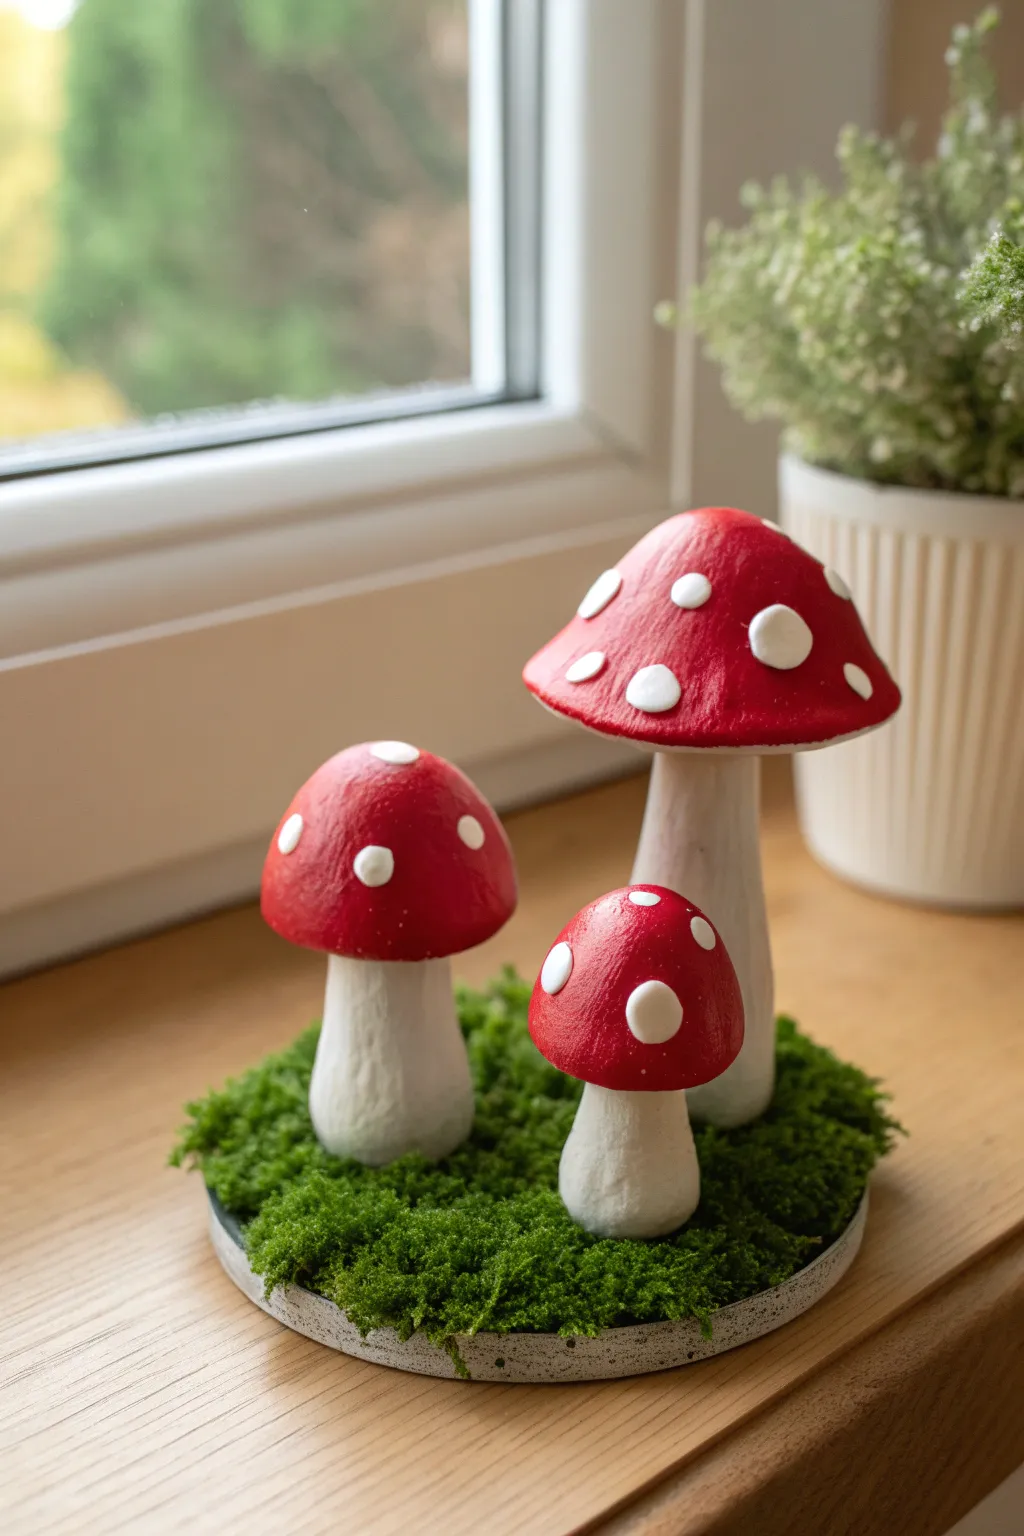
Bring a touch of fairytale charm to your windowsill with this delightful trio of polymer clay toadstools. Featuring classic red caps adorned with raised white spots and set upon a mossy base, this project perfectly captures the enchanting look of the forest floor.
Step-by-Step Tutorial
Materials
- White polymer clay (approx. 2 blocks)
- Red polymer clay (approx. 1 block)
- Aluminum foil
- Liquid polymer clay (Bake & Bond)
- Sculpting tools (ball styluses, needle tool)
- Acrylic roller or pasta machine
- Round cutter or concrete coaster for the base
- Artificial craft moss
- Strong craft glue (e.g., E6000 or super glue)
- Oven for baking
- Matte varnish (optional)
Step 1: Sculpting the Stems
-
Create armature cores:
To save clay and reduce weight, tightly crumple three pieces of aluminum foil into stem shapes. Make one large (about 3 inches tall), one medium, and one small. -
Condition white clay:
Knead your white polymer clay until it is soft and pliable. Roll it out into a flat sheet about 3mm thick. -
Cover the stems:
Wrap the whote clay sheet around each foil stem armature. Smooth the seams carefully with your fingers or a modeling tool so the clay is seamless. -
Texture the stalks:
For a natural look rather than perfect smoothness, gently roll the stems between your palms. Use a needle tool to add very subtle vertical striations if you want extra realism. -
Refine the bases:
Flatten the bottom of each stem by pressing it gently against your work surface so they will stand upright securely.
Step 2: Crafting the Caps
-
Form foil domes:
Crumple three more pieces of foil into dome shapes corresponding to your stem sizes. The largest should be wider and slightly flatter on top, while the smaller ones can be rounder. -
Cover with red clay:
Condition the red clay and roll it into a sheet. Drape the red clay over the top of your foil domes, smoothing it down the sides. Leave the underside exposed for now. -
Line the underside:
Roll out a thin sheet of white clay. Place your red cap upside down and press the white sheet into the underside to cover the foil. Trim any excess flush with the red edge. -
Create the gills (optional):
If you like extra detail, use a needle tool to score fine lines radiating from the center of the white underside to the rim. -
Attach caps to stems:
Make a small indentation in the center of the white underside of each cap. Apply a drop of liquid polymer clay (Bake & Bond) to the top of each stem and press the cap firmly onto it.
Spot Trouble?
If white spots fall off after baking, they weren’t pressed on firmly enough. Reattach them using a tiny dot of super glue or liquid clay and re-bake briefly.
Step 3: Adding the Spots
-
Make clay dots:
Roll tiny balls of white clay in varying sizes. You want irregular sizes for a natural look, not uniform perfection. -
Apply the spots:
Press the little white balls onto the red caps. Flatten them slightly with your fingertip so they adhere well but remain somewhat raised and tactile. -
Vary placement:
Place larger spots near the center top of the cap and smaller spots toward the edges. I find this mimics how real fly agaric mushrooms grow.
Make It Magical
Before baking, dust the red caps with a tiny bit of gold mica powder for a subtle shimmer that catches the sunlight.
Step 4: Baking and Assembly
-
Bake the mushrooms:
Place your three mushrooms on a baking sheet or tile. Bake according to your clay manufacturer’s instructions (usually 275°F/130°C for 15-30 minutes). -
Cool down:
Let the mushrooms cool completely in the oven with the door cracked open to prevent cracking from thermal shock. -
Prepare the base:
While cooling, take your round coaster or base (concrete, wood, or baked clay) and apply a generous layer of craft glue. -
Attach the moss:
Press clumps of artificial craft moss into the glue, covering the entire top surface of the base to create a lush green bed. -
Mount the mushrooms:
Apply strong glue to the bottom of the baked mushroom stems. Nestle them firmly into the moss, arranging them in a clustered group with the tallest in the back. -
Final touches:
If desired, apply a light coat of matte varnish to the red caps to protect them and give a soft sheen, though leaving them raw also looks lovely.
Now you have a permanent piece of woodland magic to brighten up any corner of your home

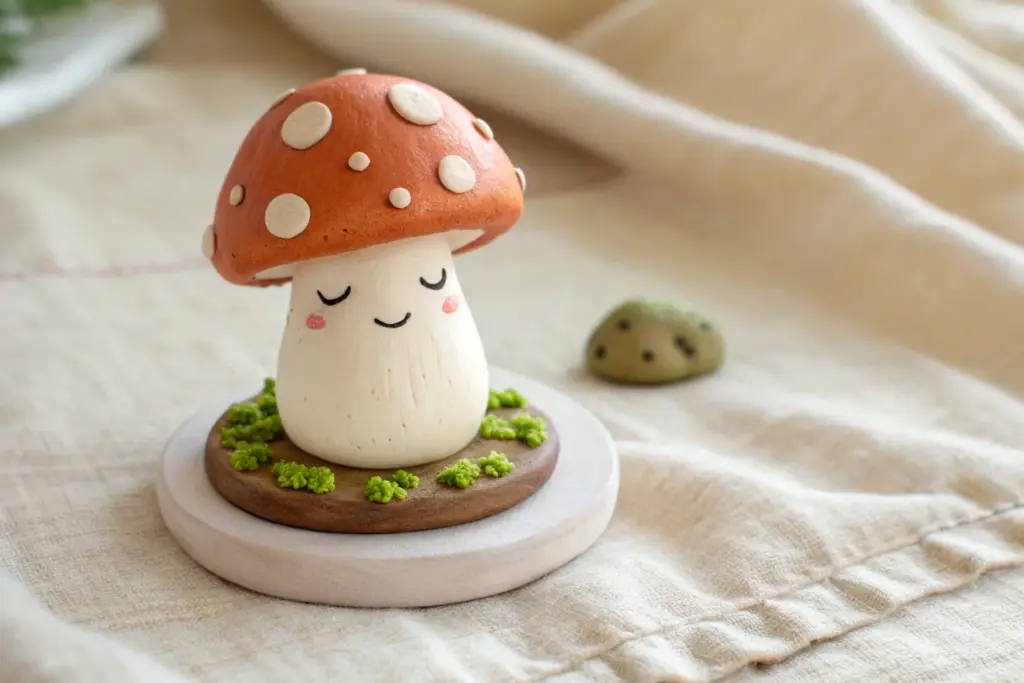
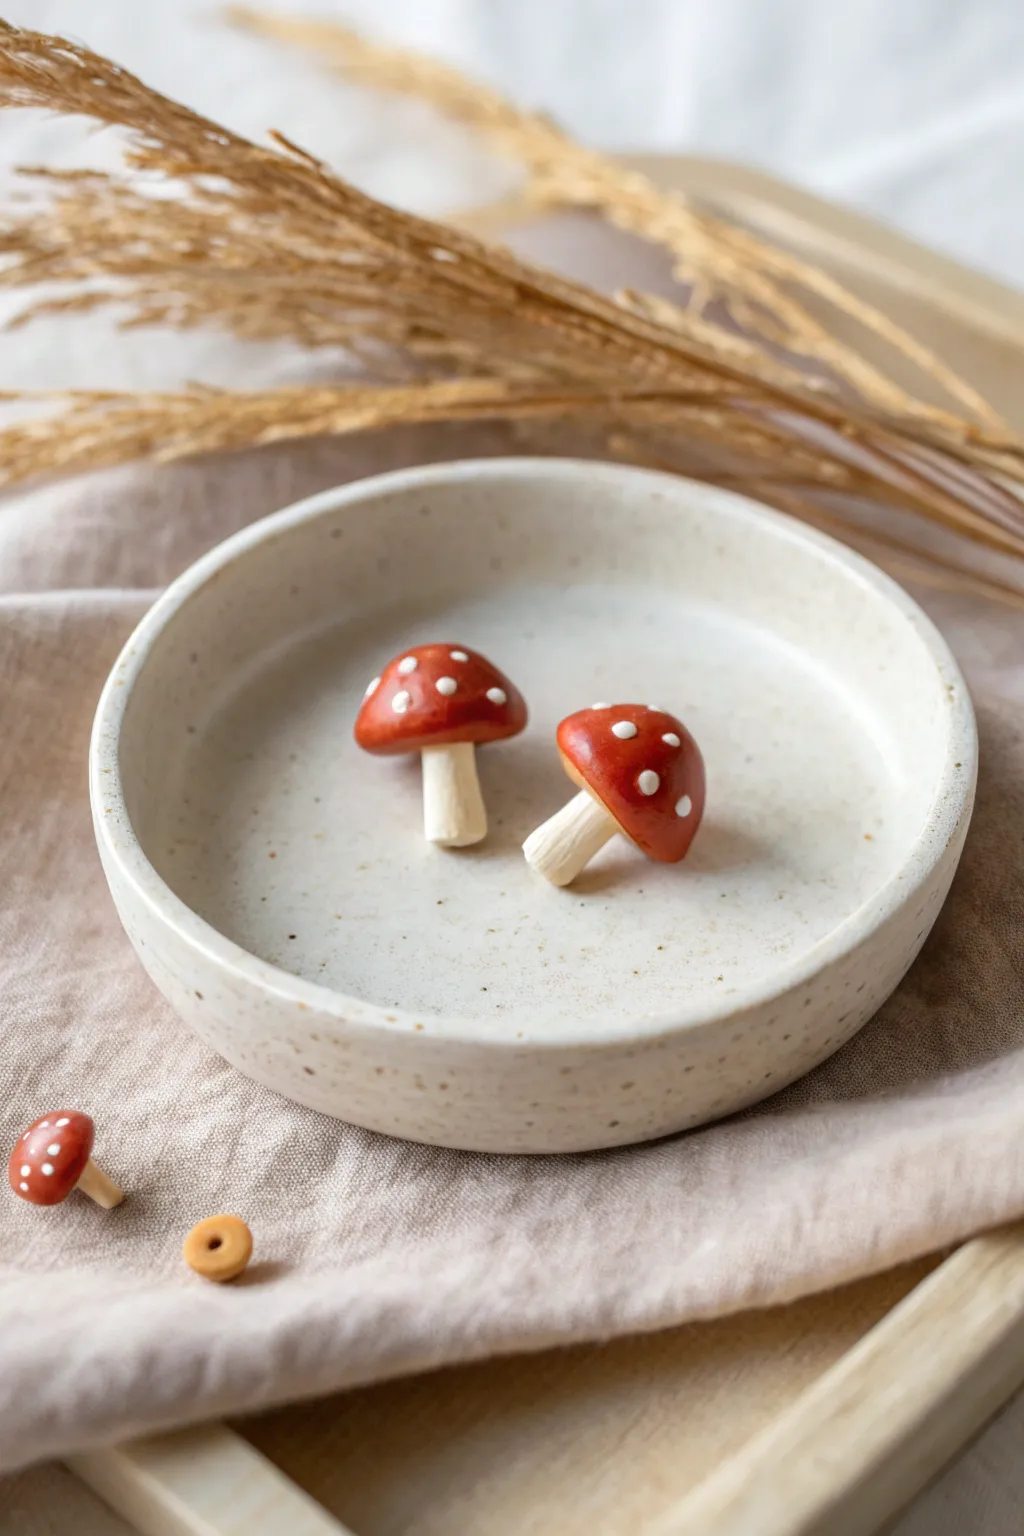
Cute Mushroom Faces and Blush Cheeks
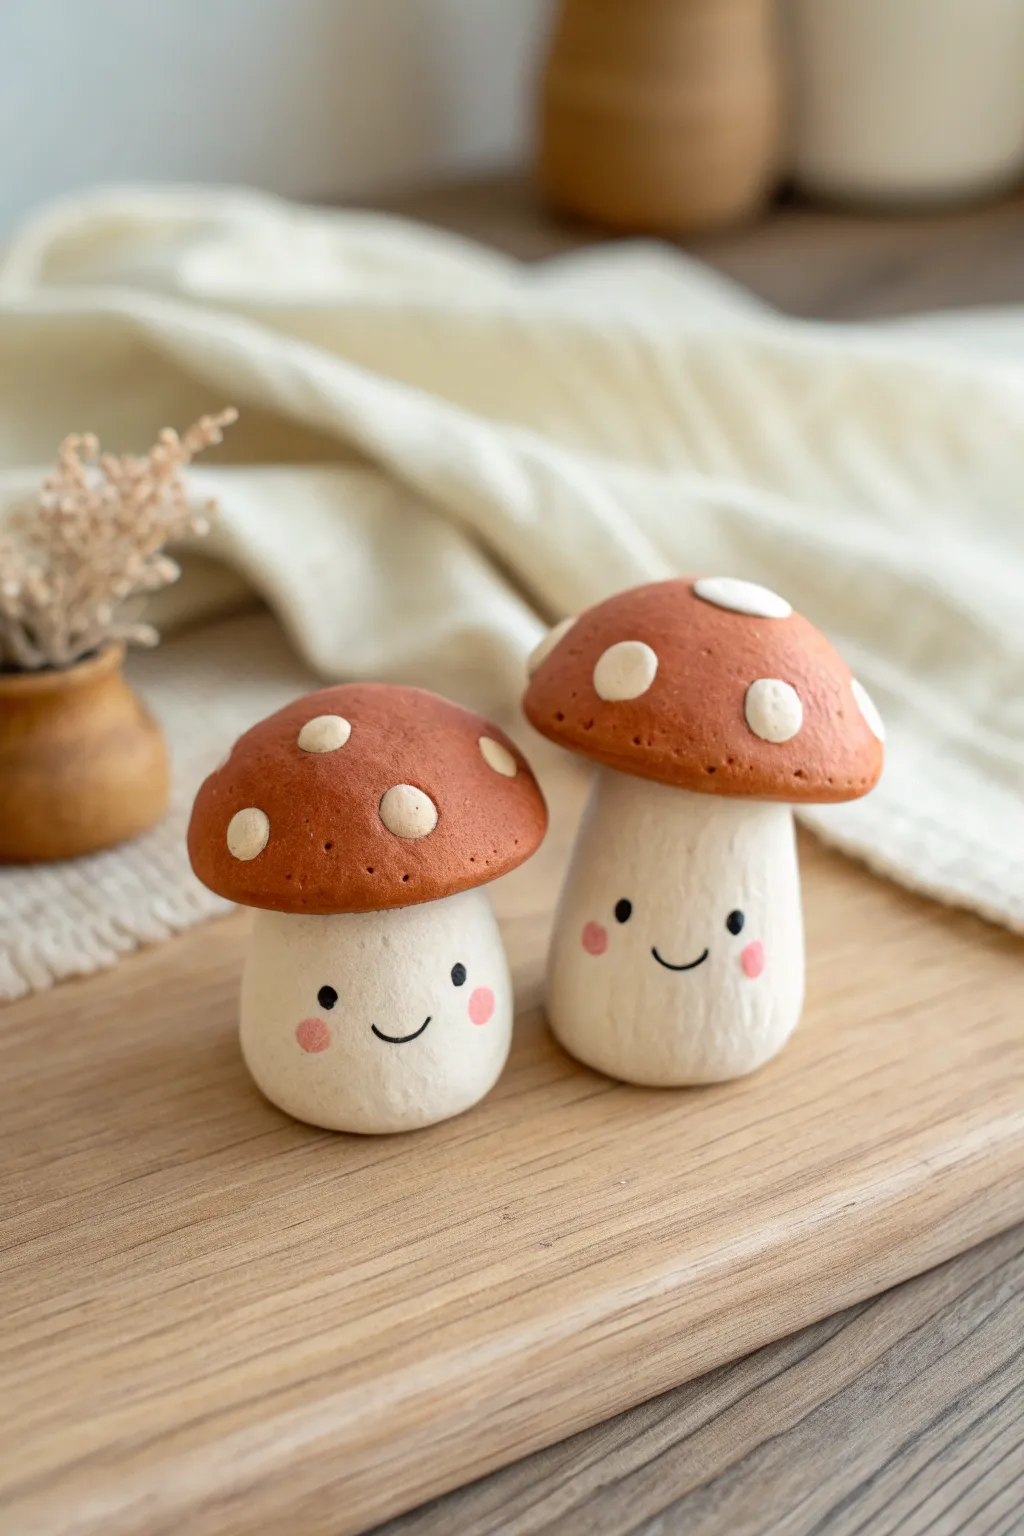
Bring a touch of forest charm to your desk or shelf with these adorable smiling mushrooms. Featuring textured white stems, rust-colored caps with polka dots, and sweet painted faces, this duo is full of personality.
How-To Guide
Materials
- White or beige polymer clay
- Terracotta or rust-colored polymer clay
- Aluminum foil
- Toothpicks or wire armature
- Texture tool (needle tool or stiff toothbrush)
- Black acrylic paint
- Pink acrylic paint or soft pastels
- Fine detail paintbrush
- Dotting tool
- Gloss glaze (optional)
Step 1: Forming the Base
-
Create the armature:
Start by scrunching a small piece of aluminum foil into a cone shape. This saves clay and keeps your mushroom lightweight. Create two foil cores: one slightly taller and thinner, and one shorter and rounder. -
Condition the white clay:
Knead your white or beige clay until it is soft and pliable. Roll it into a smooth sheet about 1/4 inch thick. -
Cover the stems:
Wrap the white clay sheet around your foil cores. Smooth the seams with your finger so the join is invisible and blend the clay at the bottom to create a stable, flat base so they stand upright easily. -
Shape the bodies:
Refine the shapes. For the taller friend, gently squeeze the middle to give it a slight waist; keep the smaller one plump and rounded. Smooth the top of the stems into a gentle dome. -
Add texture:
Using a needle tool or a stiff toothbrush, gently scratch vertical lines up and down the stems. This mimics the fibrous texture of real mushroom stalks and adds a lovely organic feel.
Sticky fingerprints?
If you’re leaving fingerprints on the smooth clay, lightly brush the raw clay with a little baby oil or cornstarch before baking to smooth them out effortlessly.
Step 2: Cap and Details
-
Prepare the cap clay:
Condition your rust or terracotta-colored clay. Roll two balls, sizing them to be slightly wider than your stems. -
Shape the caps:
Press your thumb into the center of each ball and pinch around the edges to form a dome or bowl shape. Keep the edges relatively thick and rounded for a cartoony look. -
Texture the cap surface:
Before attaching, tap the surface of the colored caps with a toothbrush or crumpled foil just slightly to remove fingerprints and give it a porous, earthy texture. -
Connect the pieces:
Insert a toothpick or a short piece of wire into the center of each white stem, leaving half exposed. Push the caps onto the exposed wire to secure them firmly in place. -
Make the spots:
Pinch off tiny pieces of your white clay. Roll them into small balls and flatten them into irregular discs. Press these randomly onto the rust-colored caps. -
Blend the spots:
Gently press the white spots down so they look inlaid rather than just sitting on top, ensuring they follow the curve of the dome.
Level Up: Forest Floor
Glue your finished mushrooms onto a slice of wood or a flat rock, and add glued-on dried moss around the base to create a permanent mini-diorama scene.
Step 3: Baking and Face
-
Bake the figures:
Bake your mushrooms according to the manufacturer’s instructions on your specific package of clay (usually around 275°F/135°C for 15–30 minutes). Let them cool completely before painting. -
Paint the eyes:
Dip a dotting tool or the handle end of a paintbrush into black acrylic paint. Dot two wide-set eyes onto the smooth area of the stem. -
Paint the smile:
Using your finest detail brush and thinned black paint, carefully draw a simple, small ‘u’ shape between the eyes. I find resting my pinky on the table helps steady my hand for this delicate line. -
Add blush cheeks:
Mix a tiny amount of pink paint or scrape some pink pastel dust. Dab it gently on the cheeks below the eyes using a dry brush or a Q-tip for that rosy, shy look. -
Highlight the eyes:
Once the black paint is fully dry, add a minuscule dot of white paint to the upper corner of each eye to bring them to life. -
Varnish (Optional):
If you want a ceramic look, brush a coat of gloss glaze over just the colored caps and the eyes, leaving the textured stems matte for contrast.
These sweet smiling fungi are now ready to brighten up your workspace


Tiny Mushroom Charm Set
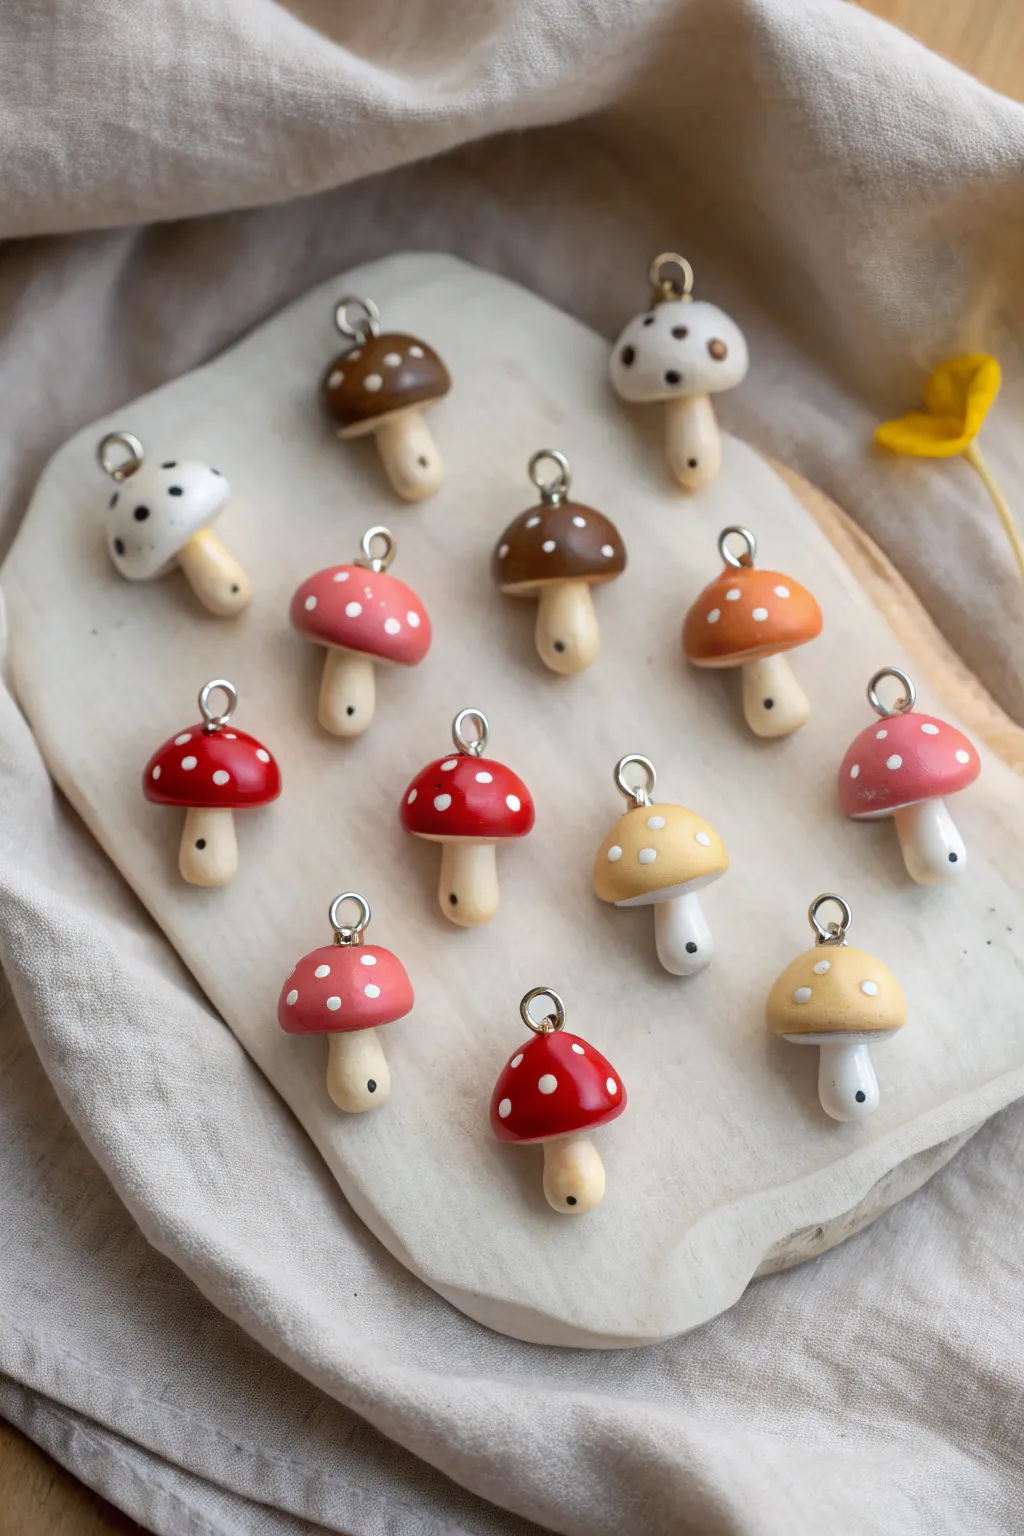
These delightful little fungi charms are perfect for earrings, necklaces, or zipper pulls. With their rounded caps and earthy color palette, they bring a touch of woodland magic to any jewelry collection.
Step-by-Step Tutorial
Materials
- Polymer clay (white, beige, translucent, red, brown, yellow, orange)
- Small metal screw-eye pins (silver or gold tone)
- White acrylic paint
- Small dotting tool or toothpick
- Gloss glaze or polyurethane varnish
- Baking tile or parchment paper
- Needle tool
- Oven
Step 1: Shaping the Stems
-
Mix the Stem Color:
Combine beige polymer clay with a tiny amount of translucent clay. This gives the stems a more realistic, slightly organic finish rather than a flat, plastic look. -
Portion the Clay:
Roll your mixed stem clay into a thin log, approximately 1/4 inch thick. Cut equal-sized segments, about 1/2 inch long, for as many mushrooms as you plan to make. -
Model Each Stem:
Take a segment and roll it into a smooth cylinder. Gently taper one end so it is slightly narrower where it will attach to the cap, leaving the bottom rounded and slightly bulbous. -
Add Texture:
Using a needle tool, poke a single, tiny hole near the bottom of the stem to mimic the natural imperfections found on wild mushrooms.
Loose Pins?
If a screw-eye pin feels loose after baking, twist it out, apply a tiny drop of superglue to the threads, and screw it back into the same hole swiftly.
Step 2: Creating the Caps
-
Prepare Cap Colors:
Condition your colored clays. We’re aiming for a variety: classic red, warm caramels, soft pinks, and creamy whites. I like to mix a little brown into my reds and oranges to keep the tones earthy. -
Form the Domes:
Roll small balls of colored clay, slightly wider than your stems. Press each ball gently onto a work surface to flatten the bottom, then smooth the top into a perfect dome shape. -
Attach Stems to Caps:
Press the tapered end of a stem gently against the center of the flat side of a cap. Wiggle it slightly to ensure the clays bond without squashing the shapes. -
Secure the Connection:
If the clay feels dry, you can add a tiny dab of liquid polymer clay or bake-and-bond between the pieces before pressing them together.
Glow Up
Mix glow-in-the-dark powder into your white paint for the dots. Your little mushroom forest will magically light up when the lights go out.
Step 3: Hardware & Baking
-
Insert Eye Pins:
Take a screw-eye pin and carefully twist it into the very top center of the mushroom cap. Twist until the eye loop sits flush with the clay surface. -
Check Alignment:
Look at the charm from all angles to ensure the pin is straight and the stem hasn’t been distorted during insertion. -
Bake:
Arrange the mushrooms on a baking tile or parchment paper. Bake according to your brand of clay’s instructions (usually 275°F/130°C for 15-30 minutes). -
Cool Down:
Allow the pieces to cool completely in the oven or on a wire rack. The clay is fragile when hot, so resist touching them until cool.
Step 4: Finishing Details
-
Paint the Dots:
Dip a small dotting tool or the tip of a toothpick into white acrylic paint. Carefully apply small dots to the mushroom caps. -
Vary the Pattern:
For a natural look, make some dots slightly larger than others and scatter them randomly rather than in perfect rows. -
Dry the Paint:
Let the white paint dry fully. This usually takes about 10-15 minutes depending on how thick your dots are. -
Seal the Charms:
Apply a coat of gloss glaze over the caps to make them shine and protect the paint. You can leave the stems matte for contrast or glaze the whole piece. -
Final Cure (Optional):
If using a heat-set glaze, pop them back in the oven briefly. Otherwise, let the air-dry varnish set overnight before attaching jump rings.
Now you have a handful of forest treasures ready to become your next favorite accessory


Mushroom Stud Earrings
These tiny, rustic toadstools capture the charm of a woodland floor with their deep red caps and delicate white speckles. Perfect for turning into petite stud earrings, they bring a touch of fairytale magic to your everyday style.
Step-by-Step Guide
Materials
- Polymer clay (Deep Red or Terracotta)
- Polymer clay (Beige or Cream)
- White acrylic paint or White liquid clay
- Fine-point dotting tool or toothpick
- Razor blade or craft knife
- Earring posts and backs
- Strong jewelry glue (e.g., E6000)
- Gloss varnish (optional)
- Baking tile or parchment paper
Step 1: Shaping the Stems
-
Condition the beige clay:
Begin by warming a small amount of beige clay in your hands. Knead it thoroughly until it is soft, pliable, and free of cracks. -
Form the base log:
Roll the conditioned clay into a thin, consistent log or snake, roughly the thickness you want your mushroom stems to be—about 3-4mm is ideal for earrings. -
Cut the stem sections:
Use your craft knife to cut two equal segments from the log, each about 6-8mm long. I like to cut a few extras just in case one gets squashed during assembly. -
Refine the shape:
Gently roll one end of each segment to slightly taper it, creating the part that will attach to the cap. The bottom should remain slightly wider and natural-looking. -
Add texture:
Take a toothpick or needle tool and gently scratch vertical lines up the stem to mimic the fibrous texture of a real mushroom stalk.
Clean Hands, Clean Clay
Red clay stains easily! Work with your beige stems first, wash your hands thoroughly, and then move on to the red caps to keep your whites looking crisp.
Step 2: Creating the Caps
-
Prepare the red clay:
Condition a small ball of deep red clay. If the red is too bright, mix in a tiny speck of brown or black to achieve that earthy, vintage tone seen in the photo. -
Split into spheres:
Divide the red clay into two equal spheres. Compare them side-by-side to ensure your earrings will be symmetrical. -
Shape the domes:
Gently press each sphere down onto your work surface to flatten the bottom, then smooth the top into a rounded dome shape. -
Hollow the underside:
Flip the domes over and use a rounded tool or the end of a paintbrush handle to create a small indentation in the center. This helps the stem sit securely.
Droopy Stems?
If your stems are tilting too much while baking, support the mushroom caps with a tiny bed of cornstarch or baking soda to hold them upright in the oven.
Step 3: Assembly and Baking
-
Join cap and stem:
Press the tapered end of a stem gently into the indentation of a cap. If the clay is fresh, it should stick on its own without additional adhesive. -
Bend for realism:
Give the stem a very slight curve or tilt just before placing it on the baking surface. Perfectly straight mushrooms look manufactured; a little wonkiness adds character. -
Bake the pieces:
Place your mushrooms on a ceramic tile or parchment-lined tray. Follow the baking temperature and time instructions on your specific brand of clay—usually around 275°F (130°C) for 15-30 minutes. -
Cool down:
Allow the pieces to cool completely inside the oven or on a wire rack before handling them, as warm clay is brittle.
Step 4: Finishing Touches
-
Paint the spots:
Dip a fine dotting tool or the tip of a toothpick into white acrylic paint. Carefully dab tiny, irregular dots onto the red caps. -
Vary dot sizes:
Make some dots slightly larger and others tiny speckles to mimic the natural pattern of a Fly Agaric mushroom. -
Seal (Optional):
If you want a dewy look, coat just the red caps with a thin layer of gloss varnish once the paint is fully dry. -
Attach posts:
Apply a small dab of strong jewelry glue to the flat pad of an earring post. -
Secure the backing:
Press the glue-coated post firmly against the back of the mushroom cap or top of the stem, depending on how you want them to sit on the ear. Let the glue cure for 24 hours.
Now you have a charming pair of woodland accessories ready to wear or gift

The Complete Guide to Pottery Troubleshooting
Uncover the most common ceramic mistakes—from cracking clay to failed glazes—and learn how to fix them fast.
Simple Mushroom Magnets
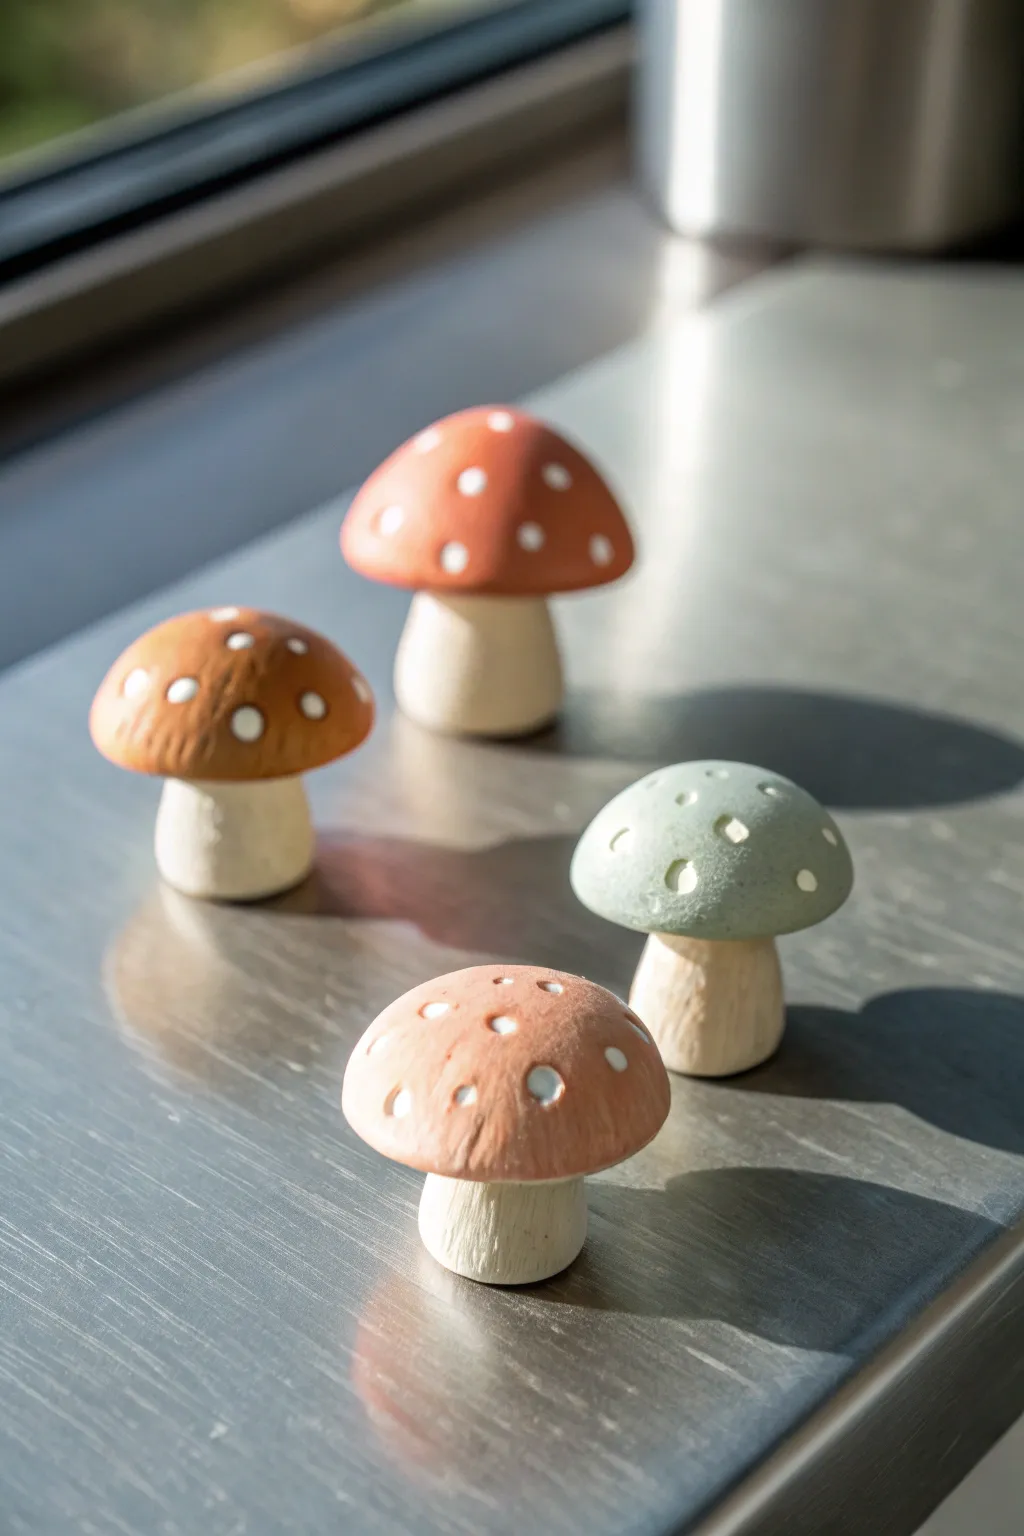
These charming, stylized mushrooms feature a soft, matte finish and earthy color palette that mimics the feel of ceramic pottery. Perfect for adding a touch of woodland whimsy to your fridge, they are simple to sculpt and delightful to display.
Step-by-Step
Materials
- Polymer clay (white, beige, terracotta, brown, sage green)
- Liquid polymer clay or bake-and-bond
- Small round magnets (neodymium recommended)
- Dotting tool or small ball stylus
- Craft knife or tissue blade
- Super glue (cyanoacrylate)
- Detail needle tool or toothpick
- Baking sheet and parchment paper
- Oven
Step 1: Shaping the Stems
-
Condition the white clay:
Start by thoroughly kneading your white or light beige polymer clay until it is soft and pliable. This prevents cracks during baking. -
Create the base cylinder:
Roll four small balls of clay, each about the size of a marble. Gently roll these into short, thick cylinders to form the mushroom stems. -
Shape the taper:
Press the cylinder down onto your work surface to flatten the bottom. Gently pinch and roll the top portion so it is slightly narrower than the base. -
Add texture:
Using a needle tool or toothpick, gently scratch vertical lines up and down the stem. I like to keep these uneven to mimic the organic texture of a real mushroom stalk. -
Flatten the magnet spot:
Turn the stems over to the flat side. If you want the magnet embedded, press your magnet slightly into the back to create an indentation, then carefully remove it before baking.
Step 2: Crafting the Caps
-
Mix your colors:
Prepare your clay colors. You’ll need a terracotta orange, a warm brown, a lighter peach-tan, and a sage green. -
Roll the cap spheres:
For each mushroom, roll a ball of colored clay that is roughly twice the volume of the stem clay. -
Form the dome:
Flatten the bottom of the colored ball against your palm or work surface. Smooth the top into a perfect dome shape with your fingers. -
Create the underside:
Flip the cap over. Use your thumb or a large ball tool to create a shallow concave indentation in the center where the stem will attach. -
Shape the rim:
Gently pull the edges of the cap downward slightly so they curve over the stem area, giving it that classic toadstool silhouette.
Clean Texture Trick
Before baking, lightly brush the raw clay with cornstarch or baby powder. This removes fingerprints and gives the mushrooms that soft, matte ceramic look shown in the photo.
Step 3: Assembly and Details
-
Attach stem to cap:
Apply a tiny drop of liquid polymer clay or bake-and-bond to the top of a stem. Press it firmly into the indentation of the matching cap. -
Blend the seam:
Use a silicone tool or your finger to smooth the clay slightly where the stem meets the underside of the cap to ensure a strong bond. -
Prepare the dots:
Roll out a very thin snake of white clay. Slice off tiny, almost microscopic pieces and roll them into varying sizes of miniature balls. -
Apply the spots:
Press the tiny white balls onto the mushroom caps in a random pattern. Flatten them gently so they look inlaid rather than sitting on top. -
Add distinctive dimples:
For the green mushroom shown, instead of adding white clay, try using a dotting tool to press small circular indentations into the cap for a different texture.
Magnet Won’t Stick?
If the magnet pops off the baked clay, scratch the back of the clay and the magnet surface with sandpaper to create rough ‘teeth’ for the super glue to grip onto.
Step 4: Baking and Finishing
-
Bake the batch:
Place your mushrooms on a parchment-lined baking sheet. Bake according to your clay manufacturer’s instructions (usually 275°F/130°C for 15-30 minutes). -
Cool completely:
Let the mushrooms cool inside the oven with the door open. This gradual cooling makes the clay stronger. -
Attach the magnets:
Once fully cool, apply a drop of super glue to the back of the stem (or the indentation you made earlier) and press the magnet in place. -
Let the glue cure:
Allow the glue to dry completely for at least an hour before placing your new art on the fridge.
Enjoy arranging your little forest collection on any magnetic surface
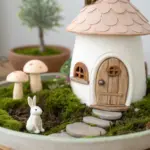
Mushroom Plant Stakes for Pots
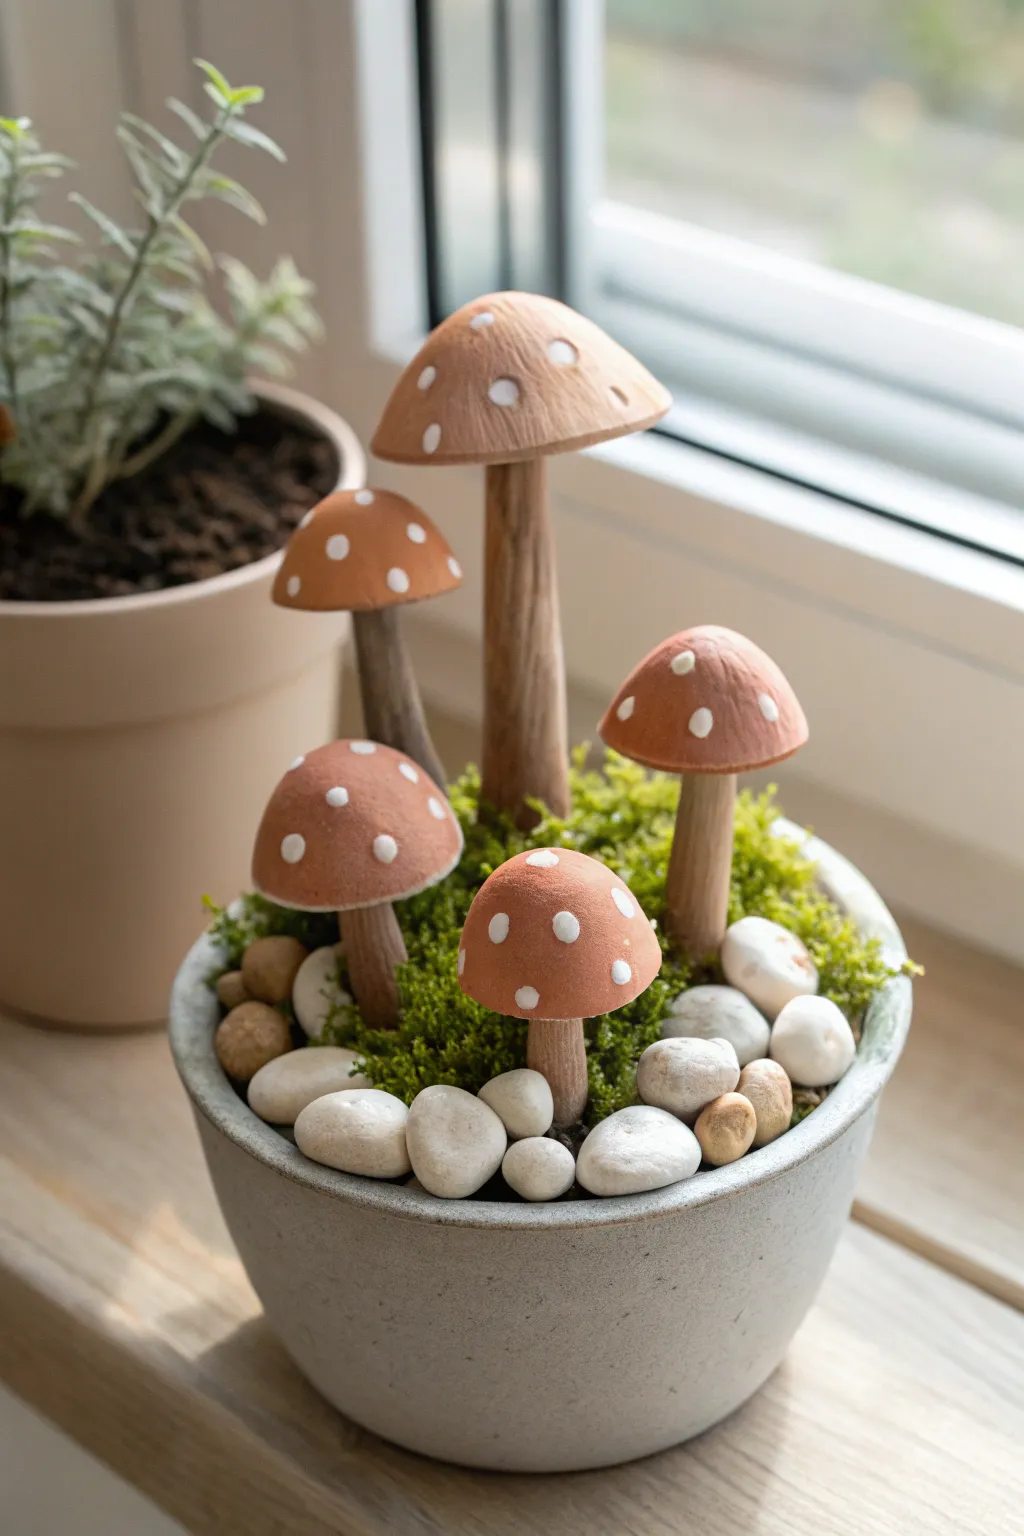
Bring a touch of the forest floor indoors with this charming arrangement of faux mushrooms nestled in moss and stones. The combination of textured wood-like stems and smooth, spotted caps creates a delightful rustic aesthetic perfect for a windowsill display.
Detailed Instructions
Materials
- Polymer clay (terracotta/reddish-brown, white, and a light wood/beige color)
- Small ceramic planter bowl or pot
- Floral foam block or dry styrofoam
- Preserved sheet moss
- Smooth white river pebbles
- Small beige/tan decorative gravel
- Acrylic paint (brown and black for antiquing)
- Texturing tools (needle tool, toothbrush, or stiff bristle brush)
- Liquid polymer clay (optional, for bonding)
- Wire cutters
- Aluminum crafting wire (16 or 18 gauge)
- Sculpting tools
- Matte varnish (optional)
- Oven for baking clay
Step 1: Sculpting the Stems
-
Prepare the Armatures:
Cut five pieces of aluminum wire to varying lengths, ranging from 2 to 5 inches. These will serve as the core strength for your mushroom stems. -
Condition the Clay:
Take your light wood-colored polymer clay and condition it in your hands until it becomes soft and pliable. If you don’t have a pre-mixed wood color, mix equal parts beige, white, and a tiny dot of brown. -
Wrap the Wires:
Roll the clay into snakes and wrap each wire piece completely, leaving about half an inch of bare wire at the bottom to stick into the foam later. Roll the wrapped wire on your work surface to smooth it out. -
Shape the Stems:
Taper the stems slightly so they are thicker at the base and thinner near the top. Gently bend a few of the stems to give them a natural, organic growth curve rather than being perfectly straight. -
Texture the Wood:
Use a needle tool or a stiff brush to drag vertical lines down the length of the stems. This mimics the grain and texture of real wood or dried mushroom stalks. Vary the pressure to create deeper grooves.
Droopy Caps?
If caps slide down wires during baking, prop them up with crumpled foil under the rim. You can also bake stems first, then add raw caps and bake again for stability.
Step 2: Creating the Caps
-
Form the Base Shapes:
Using the terracotta-colored clay, roll five balls of varying sizes to correspond with your stem heights. The largest stem needs the biggest cap. -
Shape the Domes:
Press your thumb into the center of each ball and gently pinch around the edges to form a domed mushroom cap shape. Keep the edges slightly rounded rather than sharp. -
Add the Dots:
Roll tiny, almost microscopic balls of white polymer clay. Press these randomly onto the surface of the terracotta caps. Flatten them gently so they look painted on but still have a tiny bit of dimension. -
Texture the Caps:
Lightly tap a toothbrush or a piece of sandpaper over the caps to remove fingerprints and give the clay a matte, earthy texture similar to unglazed pottery. -
Attach Caps to Stems:
Press the top of a stem into the underside of a cap. Remove it, add a drop of liquid polymer clay (or use a textured bond), and reattach securely. Ensure the seal is tight. -
Baking:
Arrange your mushrooms on a baking sheet, using crumpled foil or polyester batting to support the caps so they don’t slump. Bake according to your clay package instructions (usually 275°F/130°C for 15-30 minutes).
Pro Tip: Realistic Texture
For a hyper-realistic terracotta look, mix a pinch of baking soda or fine sand into your reddish-brown clay before sculpting. It adds a gritty, stone-like grain.
Step 3: Assembly & Finishing
-
Antique the Stems (Optional):
Once cool, create a watery wash of brown acrylic paint. Brush it over the stems and immediately wipe it off with a paper towel. The dark paint will stay in the grooves, highlighting the wood texture. -
Prepare the Pot:
Cut your floral foam or styrofoam to fit snugly inside your ceramic bowl. It should sit about half an inch below the rim. -
Plant the Mushrooms:
Insert the bare wire ends of your baked mushrooms into the foam. I like to group the tallest ones in the back or center, with the smaller ones clustered around the front for depth. -
Add Moss Layer:
Tuck pieces of preserved sheet moss tightly around the base of the stems, completely covering the foam foundation. Use a small tool to push the moss into the gaps between stems. -
Place the Pebbles:
Arrange the large white river stones around the perimeter of the bowl and nestle a few smaller beige stones near the moss line to create a natural transition.
Now you have a maintenance-free miniature forest scene to brighten up your desk or shelf


What Really Happens Inside the Kiln
Learn how time and temperature work together inside the kiln to transform clay into durable ceramic.
Mini Mushroom Family Clusters
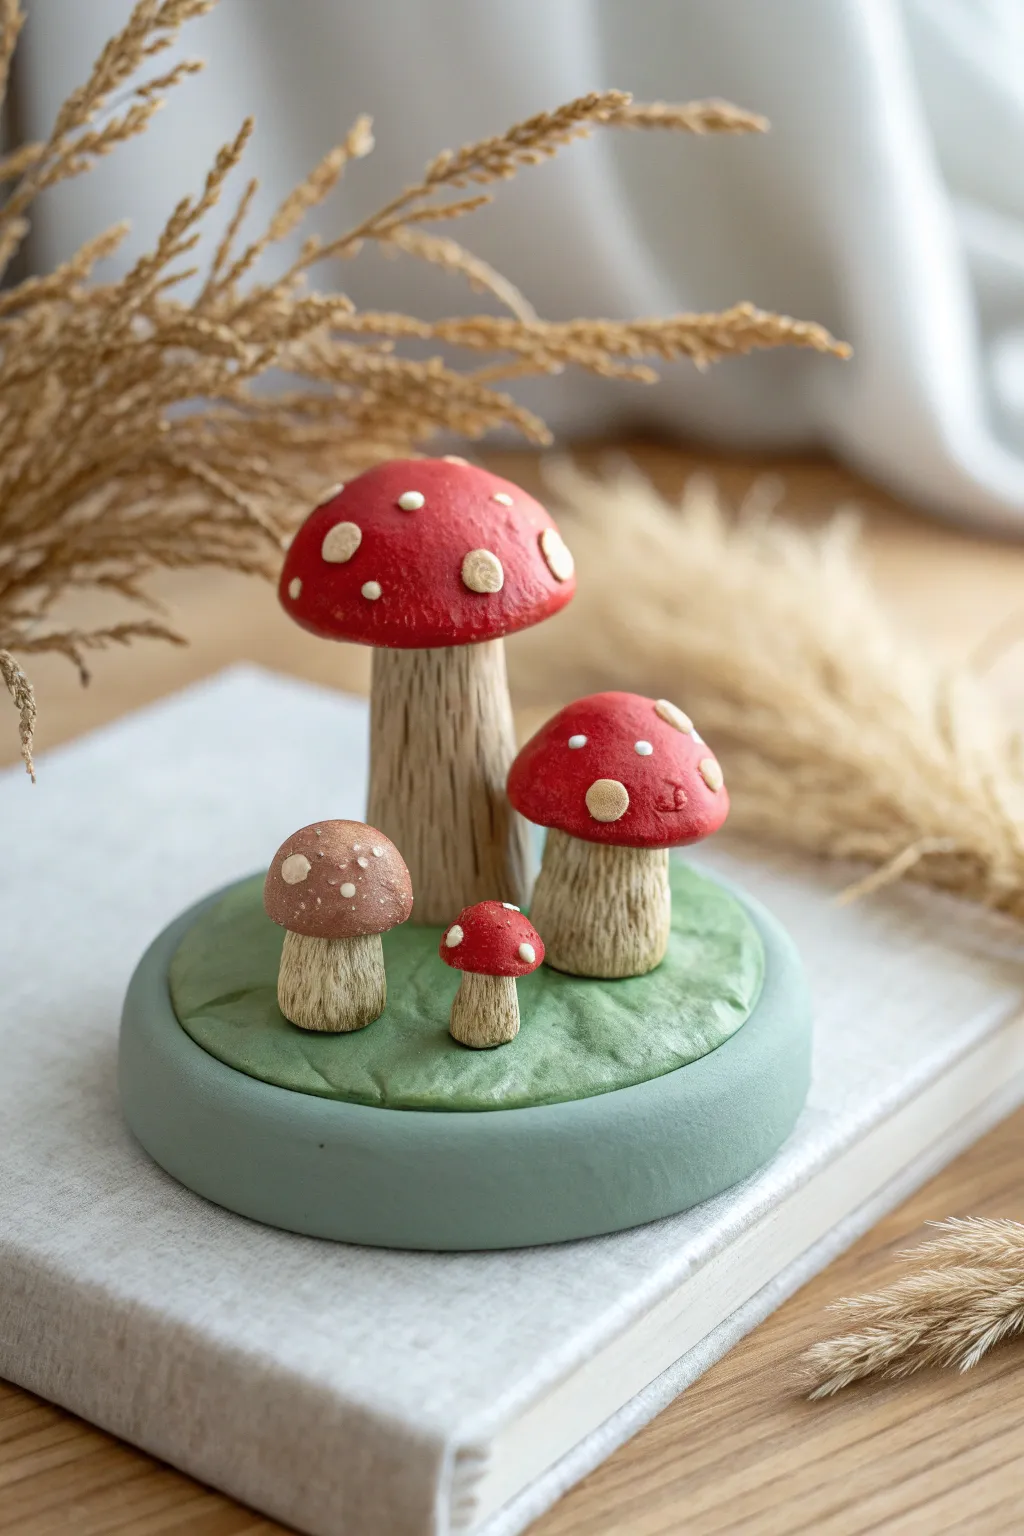
Capture the magic of an enchanted forest floor with this adorable cluster of polymer clay mushrooms. Featuring detailed textures and a sweet family grouping, this piece makes a perfect desk companion or shelf accent.
Step-by-Step Tutorial
Materials
- Polymer clay (Red, White, Beige/Tan, Brown, Sage Green, Muted Teal/Grey)
- Round clay cutter (approx. 3-4 inches diameter)
- Needle tool or toothpick
- Ball stylus tool
- Liquid polymer clay or Bake & Bond
- Acrylic roller or pasta machine
- Soft paintbrush
- Clear matte varnish (optional)
Step 1: Creating the Base
-
Shape the Foundation:
Start by conditioning a substantial amount of muted teal or grey clay. Roll it into a thick slab, about half an inch high, and use your large round cutter to create a clean, perfect circle. Smooth the edges with your finger to remove any sharp cut lines. -
Add the Grass Layer:
Condition the sage green clay and roll it out much thinner than the base, roughly 1/8th of an inch. Cut a circle slightly smaller than your teal base. -
Texture the Moss:
Before attaching the green layer, use a ball tool or crumpled aluminum foil to gently press irregular textures into the surface, giving it an uneven, organic ‘mossy’ look. Place this green circle centrally on top of the teal base.
Step 2: Sculpting the Stems
-
Form the Stalks:
Take your beige or tan clay and roll four varying cylinders. You’ll need one tall and thick stalk, one medium-thick stalk, one small stubby stalk, and one medium stalk for the brown mushroom. Taper them slightly so they remain wider at the bottom. -
Apply Bark Texture:
Using a needle tool, scratch vertical lines up and down each stem. Vary the pressure to create deep and shallow grooves that mimic the fibrous texture of a mushroom stalk. -
Secure the Stems:
Apply a tiny dab of liquid polymer clay to the bottom of each stem. Press them firmly onto the green moss base, arranging them in a cozy cluster. I like to keep the tallest one in the back to create depth.
Natural Texture Hack
Instead of just pressing flat dots onto the red caps, pinch the edges of the white spots slightly before applying them to give a raised, crusty texture.
Step 3: Crafting the Caps
-
Shape the Main Cap:
Roll a large ball of red clay for the distinctive Papa mushroom. Flatten the bottom and gently round the top into a classic dome shape. -
Form the Remaining Caps:
Repeat the dome process with red clay for the medium and tiny mushrooms. For the fourth mushroom, use a soft brown clay mixed with a touch of white to create a speckled, milky cocoa color. -
Attach the Caps:
Add a drop of liquid clay to the top of each texturized stem. Gently press the corresponding caps onto the stalks, ensuring the stems don’t squish down too much under the pressure.
Drooping Caps?
If your large red cap is too heavy and creates a leaning stem, insert a piece of uncooked spaghetti or a toothpick through the stem and into the cap for internal support.
Step 4: Detailing & Baking
-
Make the Spots:
Roll tiny, irregular bits of white or pale beige clay. Flatten them into thin flakes of varying sizes. -
Apply the Spots:
Press these flakes randomly onto the red mushroom caps. Don’t worry about making them perfect circles; organic, jagged shapes look more natural. -
Detail the Brown Cap:
For the brown mushroom, use smaller, lighter brown or tan clay flakes to create subtle speckling on its cap. -
Final Texture Check:
Look over your piece. If you smoothed out any stem texture while attaching the caps, gently re-trace the lines with your needle tool now. -
Bake the Piece:
Bake according to your clay manufacturer’s instructions (usually 275°F/135°C for 15-30 minutes depending on thickness). Because the base is thick, I recommend baking for at least 45 minutes to ensure the core cures fully. -
Cool and Finish:
Allow the sculpture to cool completely in the oven. Once cool, you can brush a matte varnish over the caps to protect the clay and deepen the colors.
Now you have a charming little fungi family ready to bring a touch of nature indoors
Mossy Mushroom Diorama Bases
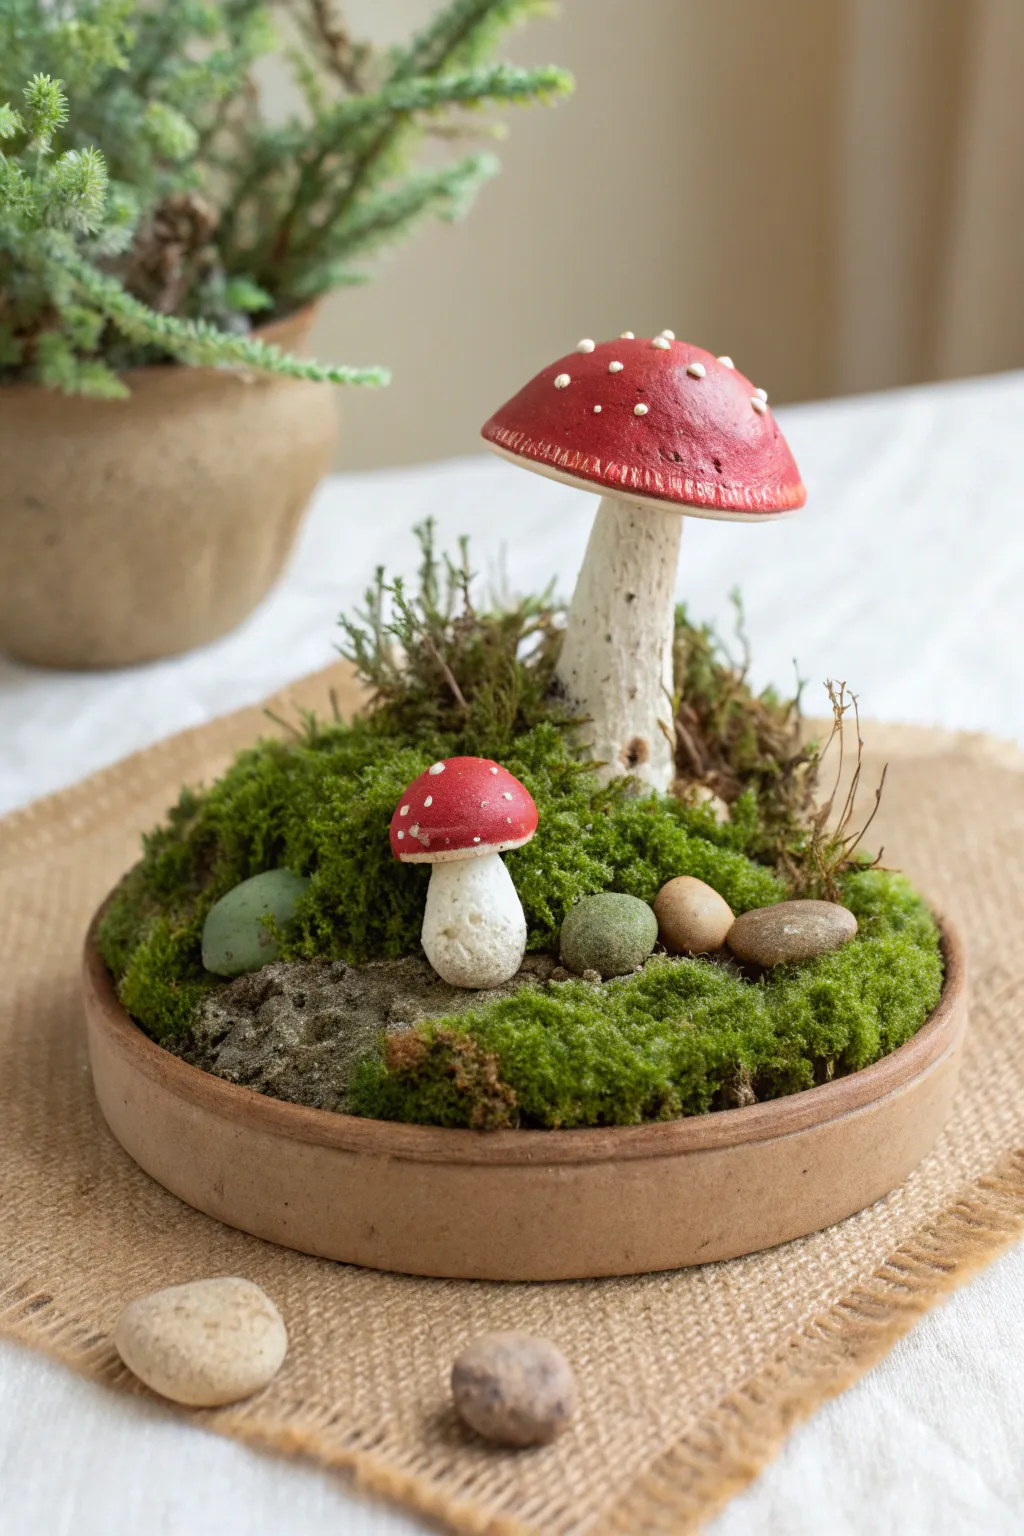
Bring a touch of the forest floor indoors with this charming clay diorama. Featuring realistic red capped mushrooms nestled in a bed of lush faux moss, this project creates a serene, permanent centerpiece that never needs watering.
Step-by-Step Guide
Materials
- Polymer clay (White, Red, Beige/Tan, Gray)
- Shallow round terracotta or ceramic dish (approx. 4-6 inches)
- Aluminum foil
- Liquid polymer clay (optional)
- Sculpting tools (needle tool, ball stylus)
- Faux moss (sheet moss and loose clumps)
- Dried botanicals (small twigs, preserved reindeer moss)
- Small pebbles or crushed stone
- Craft glue or strong adhesive
- Acrylic paints (brown, dark green, cream)
- Gloss varnish (for caps)
Step 1: Sculpting the Mushrooms
-
Form the armatures:
Crumple small pieces of aluminum foil into a cone shape for the large mushroom cap and a cylinder for the stem. This saves clay and keeps the structures light. -
Wrap the stems:
Roll out a sheet of white polymer clay mixed with a tiny speck of beige to create an off-white, natural bone color. Wrap this around your stem foil armature. -
Texture the stalks:
Before the clay hardens, use a needle tool or a stiff toothbrush to stipple the surface of the stem. I like to add deeper grooves near the base for a realistic, dirt-covered look. -
Create the caps:
Sheet out your red clay. Smooth it over the foil cap armature, curling the edges slightly underneath. Repeat this process for the smaller mushroom, using a solid ball of clay since it’s tiny. -
Detail the gills:
For the underside of the caps, use a knife tool to score fine lines radiating from the center to the edge to mimic mushroom gills. -
Assemble the fungi:
Attach the caps to the stems. If the connection feels weak, insert a small piece of wire or a toothpick between them and secure with a drop of liquid polymer clay. -
Add the signature spots:
Roll tiny, varied sizes of white clay into irregular balls. Press these flat onto the red caps. Don’t make them perfect circles; jagged edges look more natural. -
Pre-bake shading:
Lightly brush a small amount of gray or brown pastel powder or acrylic paint wash at the very bottom of the stems to simulate soil stains. -
Bake the pieces:
Bake your mushrooms according to your specific clay manufacturer’s instructions (usually 275°F/135°C for 15-30 minutes). Let them cool completely.
Uneven Terrain?
If your moss won’t stick to steep clay slopes, use U-shaped pins made from floral wire or paperclips to stake the moss down into the clay base while the glue dries.
Step 2: Building the Landscape
-
Prepare the base:
Fill your shallow dish with a layer of scrap clay or air-dry clay to create a mounded foundation. This gives your terrain height variation. -
Plant the mushrooms:
While the base clay is still soft (or using glue if hard), press your baked mushrooms firmly into the center or slightly off-center for a pleasing composition. -
Apply the moss layer:
Coat the visible surface of your mounds with generous amounts of craft glue. Press sheet moss down firmly, tearing edges to ensure it fits the curve of the dish. -
Stipple the texture:
Use a stiff brush to poke at the moss while the glue is wet, fluffing it up so it doesn’t look like a flat carpet. -
Position the stones:
Nestle three or four smooth stones into the moss. Try grouping them in odd numbers, perhaps tucking one partially under the small mushroom’s cap. -
Add vertical interest:
Insert small dried twigs or sprigs of preserved greenery behind the large mushroom to create the feeling of a dense undergrowth. -
Final weathering:
If the moss looks too bright, dry brush a little brown acrylic paint over the highest points to age the scene. -
Varnish the caps:
Once everything is set, paint a coat of gloss varnish solely on the red parts of the mushroom caps to give them a wet, dewy appearance.
Fairy Ring Upgrade
Add tiny snail shells or a miniature polymer ladybug climbing the stem. You can also mix glow-in-the-dark powder into the white spots for a magical night look.
Place your finished landscape on a shelf or desk to enjoy a peaceful glimpse of nature every day

TRACK YOUR CERAMIC JOURNEY
Capture glaze tests, firing details, and creative progress—all in one simple printable. Make your projects easier to repeat and improve.
Realistic Earth-Tone Woodland Mushrooms
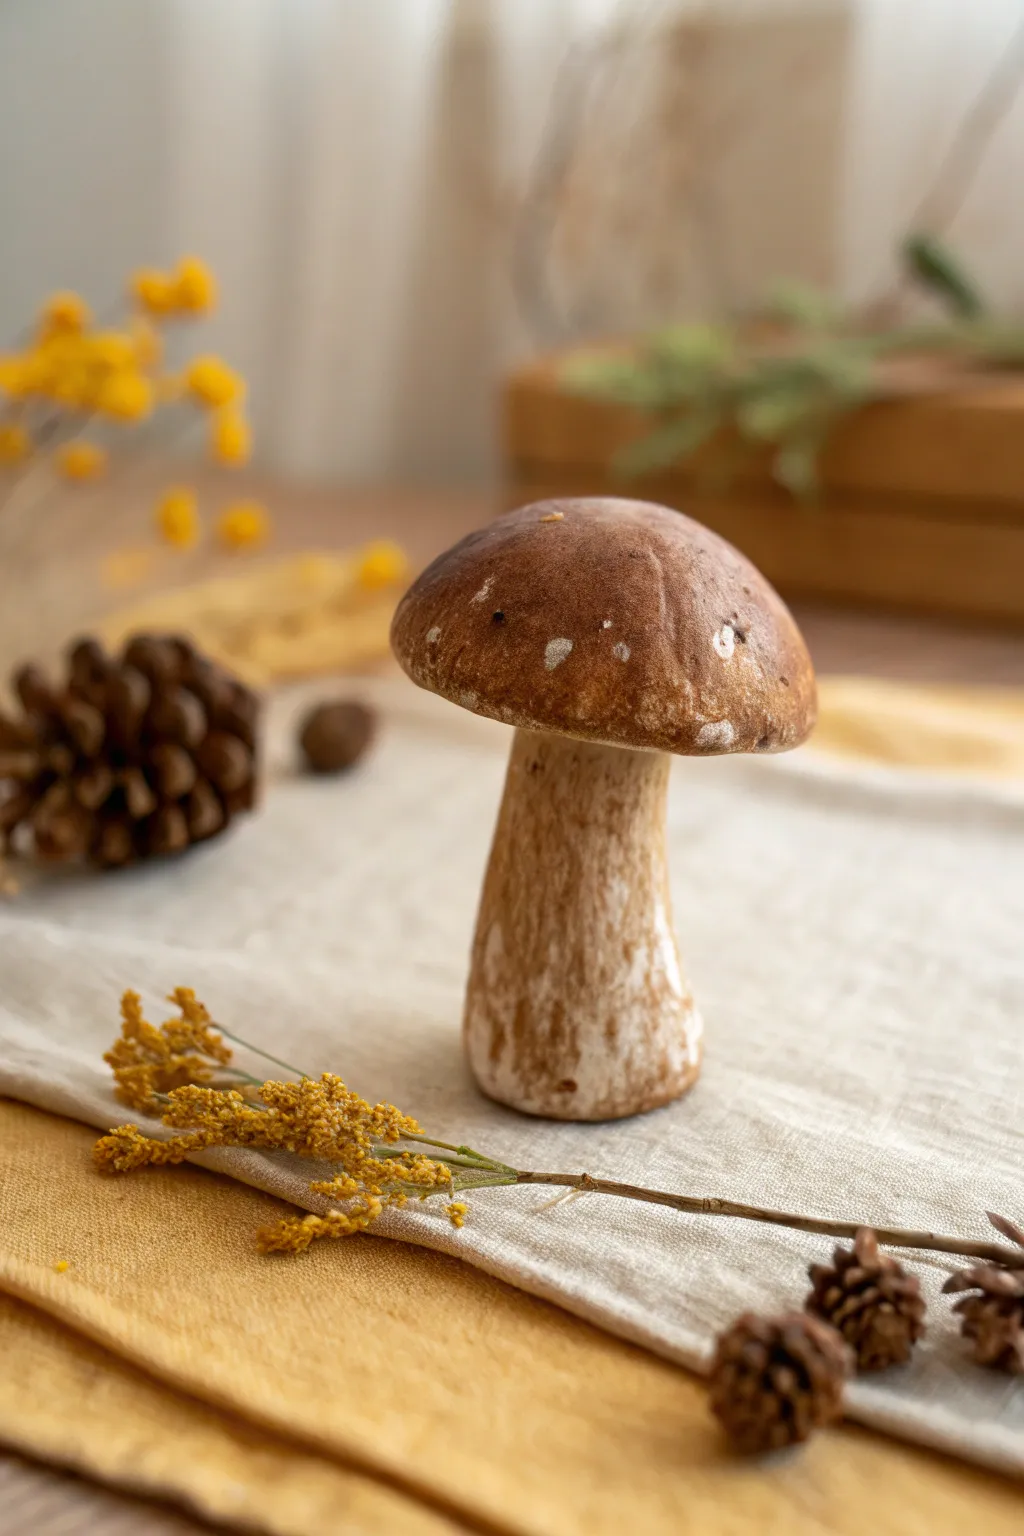
Capture the essence of an autumn walk with this incredibly lifelike bolete mushroom sculpture. Using subtle texturing and layering techniques, you’ll create a piece so realistic it looks like it was just plucked from the moss.
Detailed Instructions
Materials
- White or translucent polymer clay
- Brown polymer clay (chocolate shade)
- Soft delicate pastels (ochre, burnt umber, dark brown)
- Liquid polymer clay (optional)
- Acrylic paints (white, raw umber)
- Needle tool or stiff toothbrush
- Old toothbrush for texturing
- Small stiff paintbrush
- Soft fluffy paintbrush
- Balling tool
- Texture sponge or sandpaper
Step 1: Forming the Base Structure
-
Mix the Stem Color:
Start by conditioning your white clay. To make it look organic rather than stark white, mix in a tiny crumb of brown or translucent clay until you have a warm, off-white bone color. -
Shape the Stipe:
Roll a thick cylinder of your clay mixture. Gently taper it slightly towards the top, leaving the base bulbous and heavy, characteristic of bolete varieties like porcini. -
Create the Cap Core:
Roll a ball of scrap clay or aluminum foil tightly into a flattened dome shape to save material. Cover this core with a sheet of your mixed off-white clay, smoothing the seams underneath. -
Join the Parts:
Attach the cap to the narrower end of the stem. Blend the clay at the join point underneath the cap so it looks like one continuous growth, or use a drop of liquid clay for a stronger bond.
Step 2: Texturing for Realism
-
Texture the Cap Surface:
Use a toothbrush or texture sponge to gently tap the entire top surface of the cap. You want a subtle, leathery texture, not deep holes. -
Detail the Stem:
Drag a stiff paintbrush or a needle tool vertically up the stem. These lines shouldn’t be perfectly straight; allow them to wave and overlap to mimic fibrous growth patterns. -
Refine the Base:
At the bulbous base, add extra texture by poking it gently with a ball tool or roughening it with sandpaper to simulate where it was pulled from the dirt. -
Add Cap Imperfections:
Real mushrooms aren’t perfect. Use your tool to create tiny dents, nicks, or nibble marks on the cap edge for character.
Natural Imperfection
Don’t over-blend your clay. Leaving slight streaks of translucent or darker clay in the stem adds depth that mimics organic fiber.
Step 3: Coloring and Finishing
-
Shade the Cap:
Shave some brown and burnt umber chalk pastels into a powder. Using a soft fluffy brush, dust the top of the cap heavily, darkening the center more than the edges. -
Add Stem Grime:
Mix a small amount of ochre pastel powder. Lightly brush this vertically onto the textured striations of the stem, focusing on the bottom third to look like soil residue. -
Create the Signature Cap Texture:
For the specific look in the photo, take a stiff brush with white acrylic paint. Remove almost all paint on a paper towel (dry brush technique) and lightly stipple random spots on the brown cap. -
Enhance the Stem Streaks:
If your stem texture looks too clean, mix a very watery wash of raw umber acrylic paint. Paint it over the stem and immediately wipe it off with a damp cloth, leaving dark paint only in the deepest crevices. -
Baking:
Bake the mushroom according to your clay manufacturer’s instructions, usually at 275°F (130°C) for about 30 minutes per 1/4 inch of thickness. -
Cooling and Handling:
Let the piece cool completely in the oven to prevent thermal shock cracks. The pastel finish gives it a natural matte look, so no varnish is needed unless you want a wet-look cap. -
Final White Patches:
Once cool, inspect the cap. If you want more contrast, dab tiny amounts of white paint on the most textured bumps to highlight the ‘scuffed’ look shown in the reference image.
Forest Floor Display
Glue dried tea leaves or real dried moss to the very bottom of the stem after baking for an instant woodland diorama effect.
Now you have a charming botanical specimen that brings a touch of quiet nature to your shelf
Detailed Gills Under the Cap
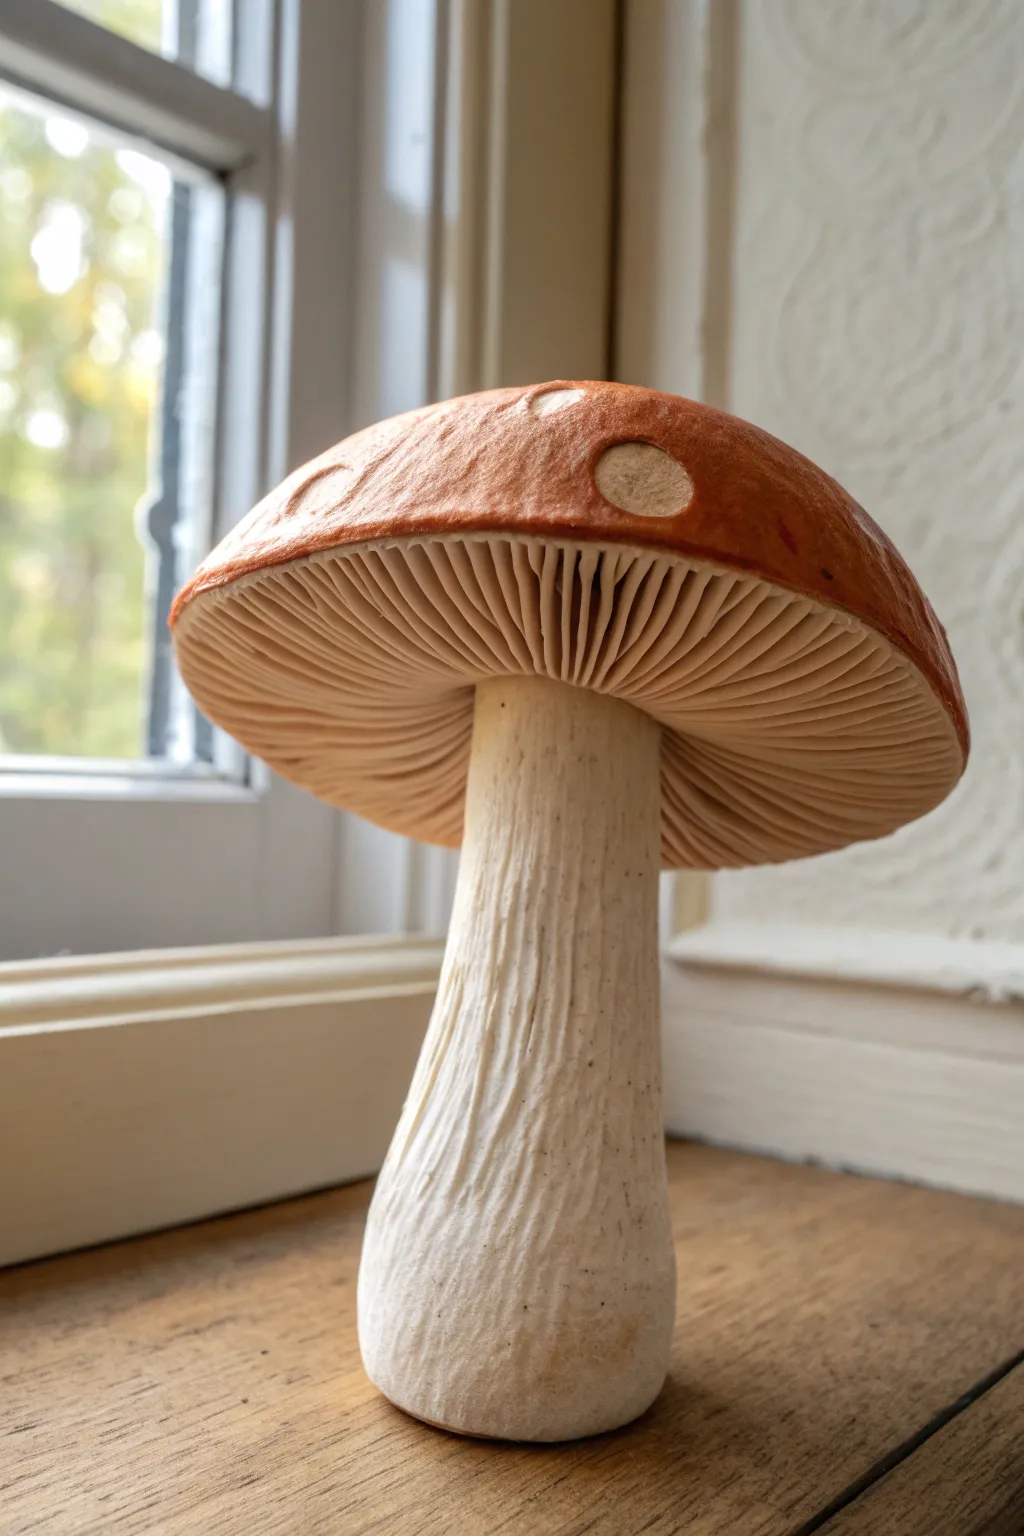
This project focuses on creating a strikingly realistic mushroom sculpture featuring a textured, robust stalk and incredibly intricate, deep gills hidden beneath a classic tawny cap. It captures the natural imperfections of forest fungi, from the slightly pitted surface of the cap to the fibrous look of the stem.
How-To Guide
Materials
- White or translucent white polymer clay
- Terracotta or warm orange-brown polymer clay
- Internal armature wire (14 or 16 gauge)
- Aluminum foil
- Thin sculpting tool or needle tool
- Soft paintbrush
- Texture sponge or toothbrush
- Translucent liquid clay (optional)
- Brown and ochre pastel chalks (for shading)
Step 1: Building the Stalk Structure
-
Form the armature:
Cut a piece of wire roughly 4 inches long. Crumple aluminum foil tightly around the wire to create a thick, tapered cone shape, wider at the base and slightly narrower at the top. -
Cover with clay:
Condition a large block of white clay. Roll it into a thick sheet and wrap it entirely around your foil armature, smoothing the seams so no foil is visible. -
Initial shaping:
Roll the clay-covered stem on your work surface to ensure it is round. Gently flare out the base so it sits stably on a flat surface. -
Texture the stem:
Using a needle tool or a sculpting blade, drag vertical lines up the length of the stem. Vary the pressure to create a mix of deep grooves and shallow scratches, mimicking a fibrous, organic texture. -
Refine the surface:
Lightly brush over the textured stem with your finger or a rough sponge to soften any harsh clay crumbs, but keep those deep vertical grooves defined.
Fixing Smushed Gills
If you accidentally squash your detailed gills while handling the cap, don’t panic. Use the dull side of a blade to gently separate and re-define the plates before baking.
Step 2: Creating the Cap and Gills
-
Form the cap base:
Create a flattened dome shape using foil, slightly larger than the top of your stem. Cover the underside with a thin layer of white clay. -
Mark the center:
Locate the center of the underside where the stem will connect. You can make a small indentation here as a guide. -
Carving the gills:
This is the most critical step. Using your finest needle tool, press radiating lines from the center indentation all the way to the outer edge of the cap. -
Deepen the details:
Go back over your radiating lines. Wiggle the tool slightly to widen the gaps between the gills. The gills should look like thin, distinct plates, not just scratches. -
Add intermediate gills:
Nature rarely uses perfect straight lines. Add shorter gills near the outer edge in between the long ones to fill the gaps as the circumference gets wider. -
Cover the top:
Roll out a sheet of your terracotta or orange-brown clay. Carefully drape this over the top of the foil dome, smoothing it down to meet the edge of the white gills underneath. -
Blend the edge:
Gently curl the orange clay slightly under the rim so it meets the white gill layer, ensuring no foil is visible at the seam. -
Add cap texture:
Press small, irregular patches of lighter clay (or scrape away tiny circles if you layered colors) onto the brown cap to create the ‘warts’ or spots. Texture them slightly so they aren’t perfectly smooth.
Step 3: Assembly and Finishing
-
Connect the parts:
If your wire extends from the stem, push the cap onto it. If not, use liquid clay as adhesive to join the stem to the center of the gill underside. -
Seal the connection:
Use a small tool to blend the very top of the stem texture into the start of the gills, making the connection look seamless and grown, rather than glued. -
Shade with pastels:
Before baking, use a soft brush to dust some brown chalk pastel into the deep grooves of the stem and the recesses of the gills to add depth and an earthy look. -
Final texture check:
Give the cap a final pat with a texture sponge to remove fingerprints and give it a matte, natural skin. -
Bake:
Bake the sculpture according to your clay package instructions. I usually prop the cap up with some extra polyester batting to keep it from drooping while hot. -
Cool down:
Let the mushroom cool completely in the oven to prevent thermal shock cracks.
Adding Realism
Dust real dirt or coffee grounds lightly onto the base of the stem before baking. It creates a convincing ‘just plucked from the ground’ effect.
Place your finished fungus on a sunny shelf or in a plant pot to add a touch of woodland magic to your home
Textured Stems With Barky Lines
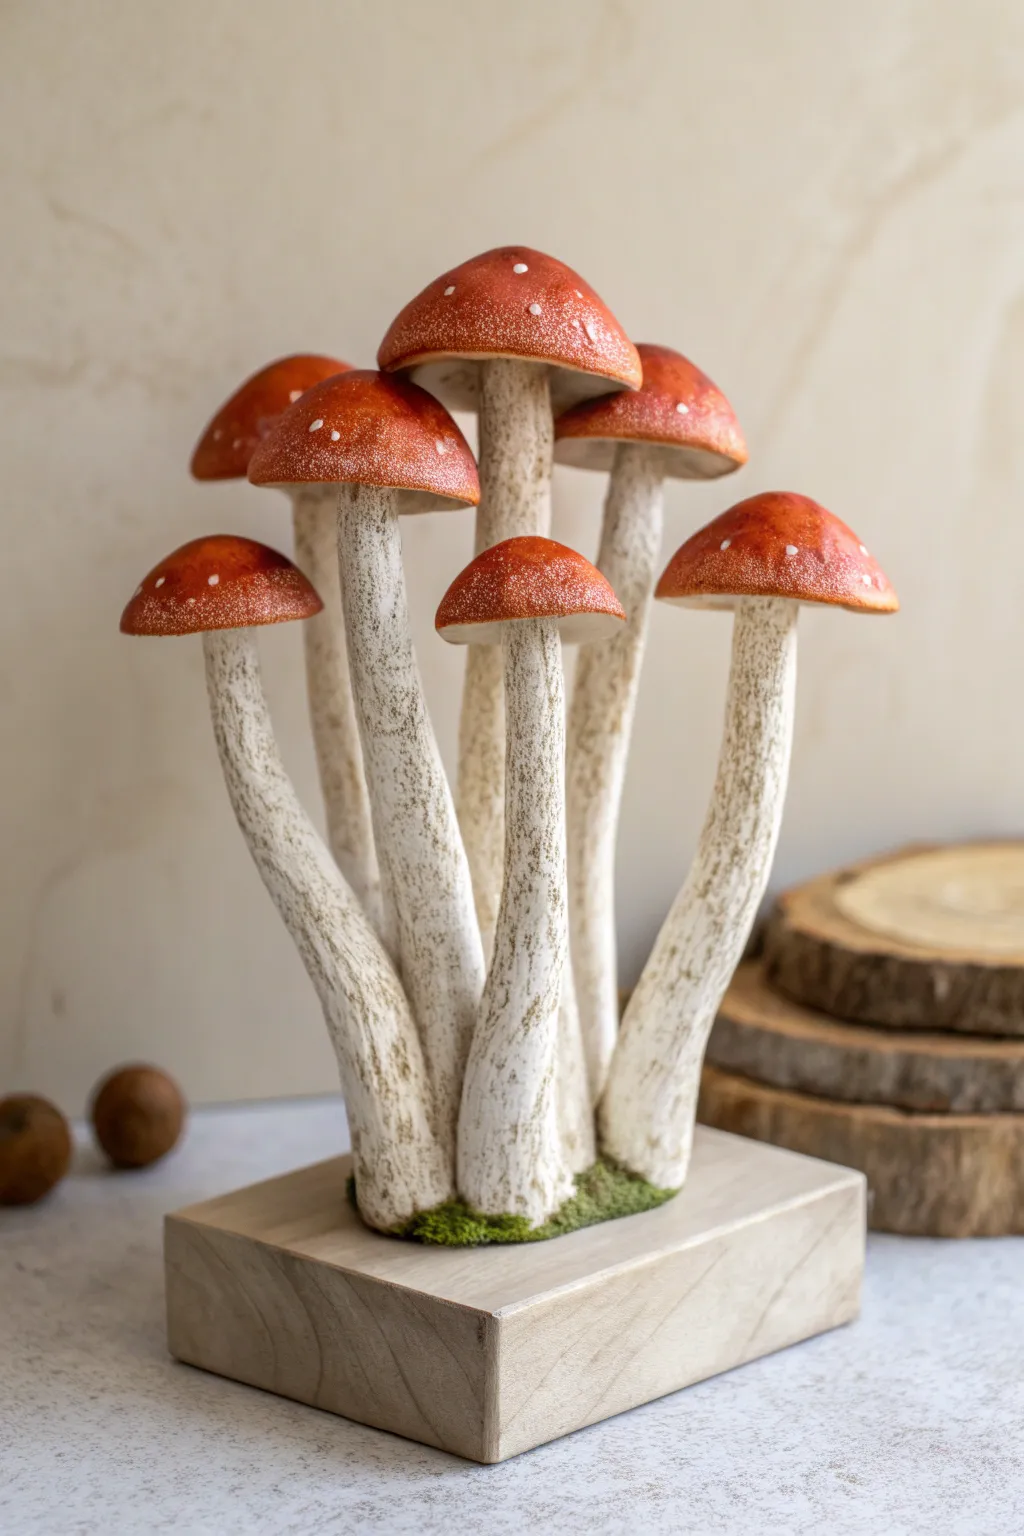
Create a striking centerpiece with this cluster of tall, elegant mushrooms featuring signature red caps and uniquely textured stems. The realistic, bark-like finish on the stalks adds depth and earthy charm to this whimsical sculpture.
Step-by-Step
Materials
- White or cream polymer clay
- Red polymer clay
- Translucent polymer clay
- Strong wire or armature wire (16-18 gauge)
- Wooden base block
- Acrylic paints (brown, ochre, white)
- Texture tools (needle tool, stiff toothbrush, or sandpaper)
- Liquid clay or Bake & Bond
- Dried moss (optional)
- Varnish (matte and satin)
Step 1: Planning and Armature
-
Prepare the base:
Start with a clean, smooth wooden block. Drill small holes into the top surface where you want each mushroom stem to sit; grouping them tightly creates a natural cluster effect. -
Cut the wires:
Cut lengths of wire for your stems. Vary the heights significantly to create visual interest. You’ll need about 7-8 wires for a full cluster like the example. -
Secure the armature:
Dip the end of each wire into super glue or strong adhesive and insert them firmly into the drilled holes in your wooden base. Let the glue cure completely so the wires don’t wobble while you work.
Step 2: Forming the Stems
-
Bulk out the stems:
Condition your white or cream clay. Roll it into long snakes and sheath each wire, pressing the clay firmly against the metal to remove air pockets. -
Shape the taper:
Smooth the clay so the stems are thicker at the bottom and gently taper as they go up. The example shows stems that curve slightly, so bend the wire and clay gently now to mimic organic growth. -
Create the texture base:
Take a stiff brush or a crumpled ball of aluminum foil and press it all over the stems to remove fingerprints and create a porous, organic surface. -
Add vertical lines:
To get that specific ‘barky’ look, use a needle tool or a sharp sculpting distinct tool to carve vertical, slightly irregular lines running up the length of the stems. -
First bake:
Since tall thin stems can be fragile while working on caps, cushion the base with polyester batting and bake the stems for 15 minutes to set them hard.
Texturing Tip
For a woodier stem texture, dragging a piece of coarse sandpaper vertically up the raw clay creates perfect, uniform micro-grooves before you add deeper cuts.
Step 3: Creating the Caps
-
Form the cap base:
Mix a little translucent clay with white for the underside of the caps. Roll balls of clay, flatten them slightly, and create a small indentation in the center where the stem will fit. -
Add the red tops:
Roll out a sheet of red clay. Cover the top of your white base shapes with the red clay, smoothing the edges downward so the red wraps slightly under the rim. -
Texture the underside:
Before attaching, use a craft knife to gently score fine gill lines radiating from the center of the white underside to the outer edge. -
Attach caps to stems:
Apply a drop of liquid clay to the top of each baked stem. Press the caps firmly onto the wire tips. I find it helps to hold them for a few seconds to ensure a tight bond. -
Refine the shape:
Adjust the angle of the caps so they aren’t all uniform; tilt some sideways or downward for a natural look. -
Final bake:
Bake the entire sculpture again for the full recommended time (usually 30 minutes at 275°F/130°C depending on your brand) to cure the caps and bond them to the stems.
Natural Variation
Mix tiny scraps of beige or grey clay into your white stem clay but don’t blend fully. This creates a subtle marble effect that looks incredibly realistic under the paint wash.
Step 4: Painting and Finishing
-
Apply a wash:
Dilute brown and ochre acrylic paint with plenty of water. Brush this wash over the white stems, letting the pigment settle into the textured vertical grooves. -
Wipe back:
Before the paint dries, quickly wipe the surface of the stems with a damp paper towel or wet wipe. This leaves the dark color in the cracks while revealing the pale clay on the raised areas. -
Add white speckles:
Using white acrylic paint and a fine dotting tool or toothpick, add small clusters of dots to the red caps. Concentrate them slightly more at the very top center. -
Seal the piece:
Coat the stems with a matte varnish to keep them looking like dry bark. Use a satin or gloss varnish on the red caps to make them look dewy and fresh. -
Add the moss:
Glue small tufts of dried green moss around the base of the stems where they meet the wood to hide the connection points and complete the scene.
Place your finished sculpture on a shelf where the light can catch the subtle textures of the stems
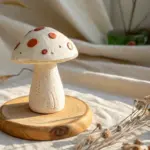
Pastel Fantasy Mushroom Palette
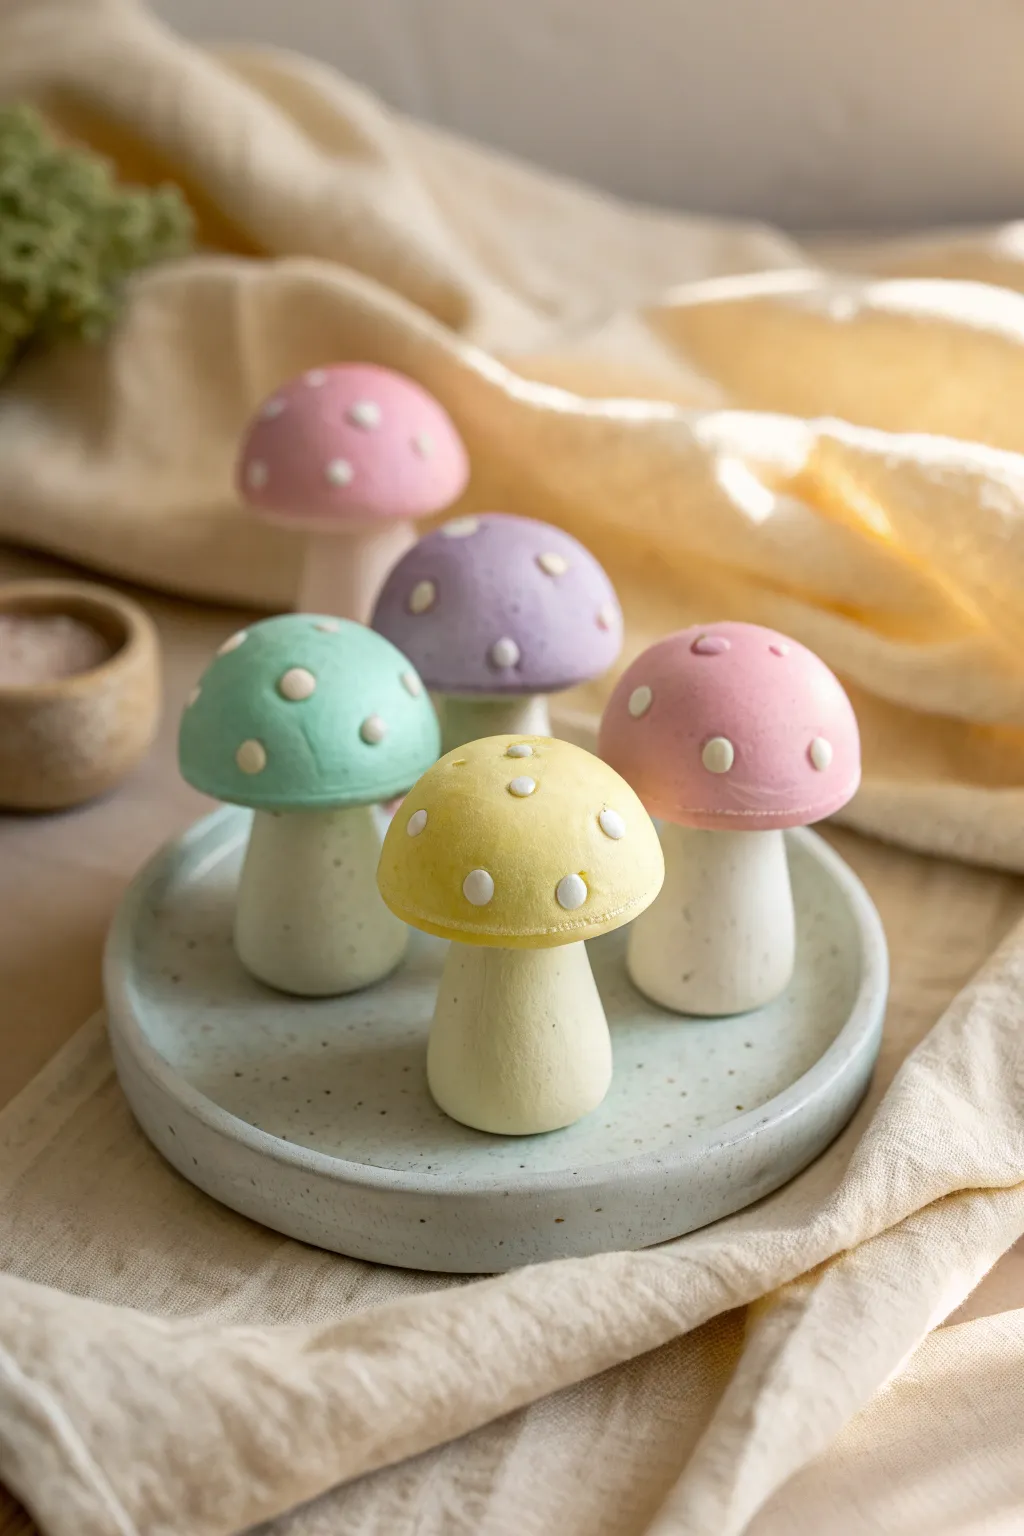
Soft and dreamy, this collection of pastel mushrooms brings a fairytale touch to any desk or shelf. With their smooth, matte finish and delicate white spots, they look like they’ve just sprouted from a storybook forest floor.
Step-by-Step Tutorial
Materials
- Polymer clay (White, Pastel Pink, Pastel Yellow, Lavender, Mint Green)
- Acrylic roller or pasta machine
- Liquid polymer clay (Translucent or White)
- Small ball tool or dotting tool
- Clay blade or craft knife
- Needle tool
- Ceramic tile or glass work surface
- Soft paintbrush
- Cornstarch (optional, for smoothing)
- Oven for baking
Step 1: Preparing the Clay Colors
-
Condition the white clay:
Start by conditioning a large block of white polymer clay until it is soft and pliable. This will form the stems and the base for your pastel shades if you are mixing your own colors. -
Create the heavy base stems:
Roll thick cylinders of white clay for the stems. These should be wider at the bottom and slightly tapered at the top. Gently press the base of each cylinder onto your work surface to flatten it so the mushroom stands independently. -
Mix pastel shades:
If you don’t have pre-mixed pastels, take small amounts of pink, yellow, purple, and green clay and mix each with a significant amount of white clay. You want a very soft, milky hue for that fantasy look. -
Form the cap balls:
Roll your pastel clays into smooth, crack-free spheres. The size should be proportional to your stems; aiming for a sphere slightly wider than the stem base creates a pleasing balance.
Sticky Situation?
If your white clay helps show dust or lint, keep a baby wipe handy to clean your hands and tools often. Use a bit of rubbing alcohol on a brush to clean clay before baking.
Step 2: Shaping and Assembly
-
Shape the caps:
Gently flatten the bottom of each pastel sphere with your thumb to create a dome shape. Don’t make the bottom completely flat; a slight concave curve helps it sit better on the stem. -
Texture the underside (optional):
For added detail, you can use a needle tool to scratch very fine lines radiating from the center of the cap’s underside to mimic gills, though keeping it smooth maintains the minimal aesthetic. -
Connect cap to stem:
Apply a tiny drop of liquid polymer clay to the top of a white stem. Press the pastel cap firmly but gently onto the stem, ensuring the connection is seamless without squashing the shapes. -
Smooth the seams:
Use your finger or a rubber shaping tool to ensure the clay under the cap meets the stem cleanly. If fingerprints appear, I like to lightly brush the surface with a little cornstarch to smooth them away. -
Check the stance:
Stand each completed mushroom on your baking tile. Make sure they aren’t leaning too comfortably; adjust the base flatness if necessary.
Step 3: Adding the Details
-
Prepare the dots:
Roll out a very thin snake of white clay, or flatten a small sheet of white clay as thin as paper. -
Cut the spots:
Using a small cutter or simply pinching off tiny bits, create small, irregular circles of white clay. Varying the sizes slightly adds to the organic feel. -
Apply the spots:
Place the white dots randomly onto the pastel caps. Press them down gently so they adhere and become nearly flush with the dome surface, rather than sitting high on top. -
Refine the surface:
Give the caps one final gentle smooth-over with a fingertip to ensure the dots are secure and the dome is perfectly round. -
Baking:
Bake the mushrooms according to the manufacturer’s instructions for your specific brand of clay. Usually, this is around 275°F (135°C) for 15-30 minutes depending on thickness. -
Cooling:
Allow the mushrooms to cool completely in the oven with the door slightly ajar. This gradual cooling helps prevent cracks. -
Finishing touch:
The image shows a matte finish, so no glaze is needed. However, if your white stems picked up dust, you can lightly sand them with fine-grit sandpaper available at hardware stores.
Glow Up
Mix glow-in-the-dark powder into your white clay spots before applying them. When the lights go out, your fantasy garden will emit a soft, magical luminescence.
Now you have a serene little forest scene ready to display
Metallic-Accent Magic Mushrooms
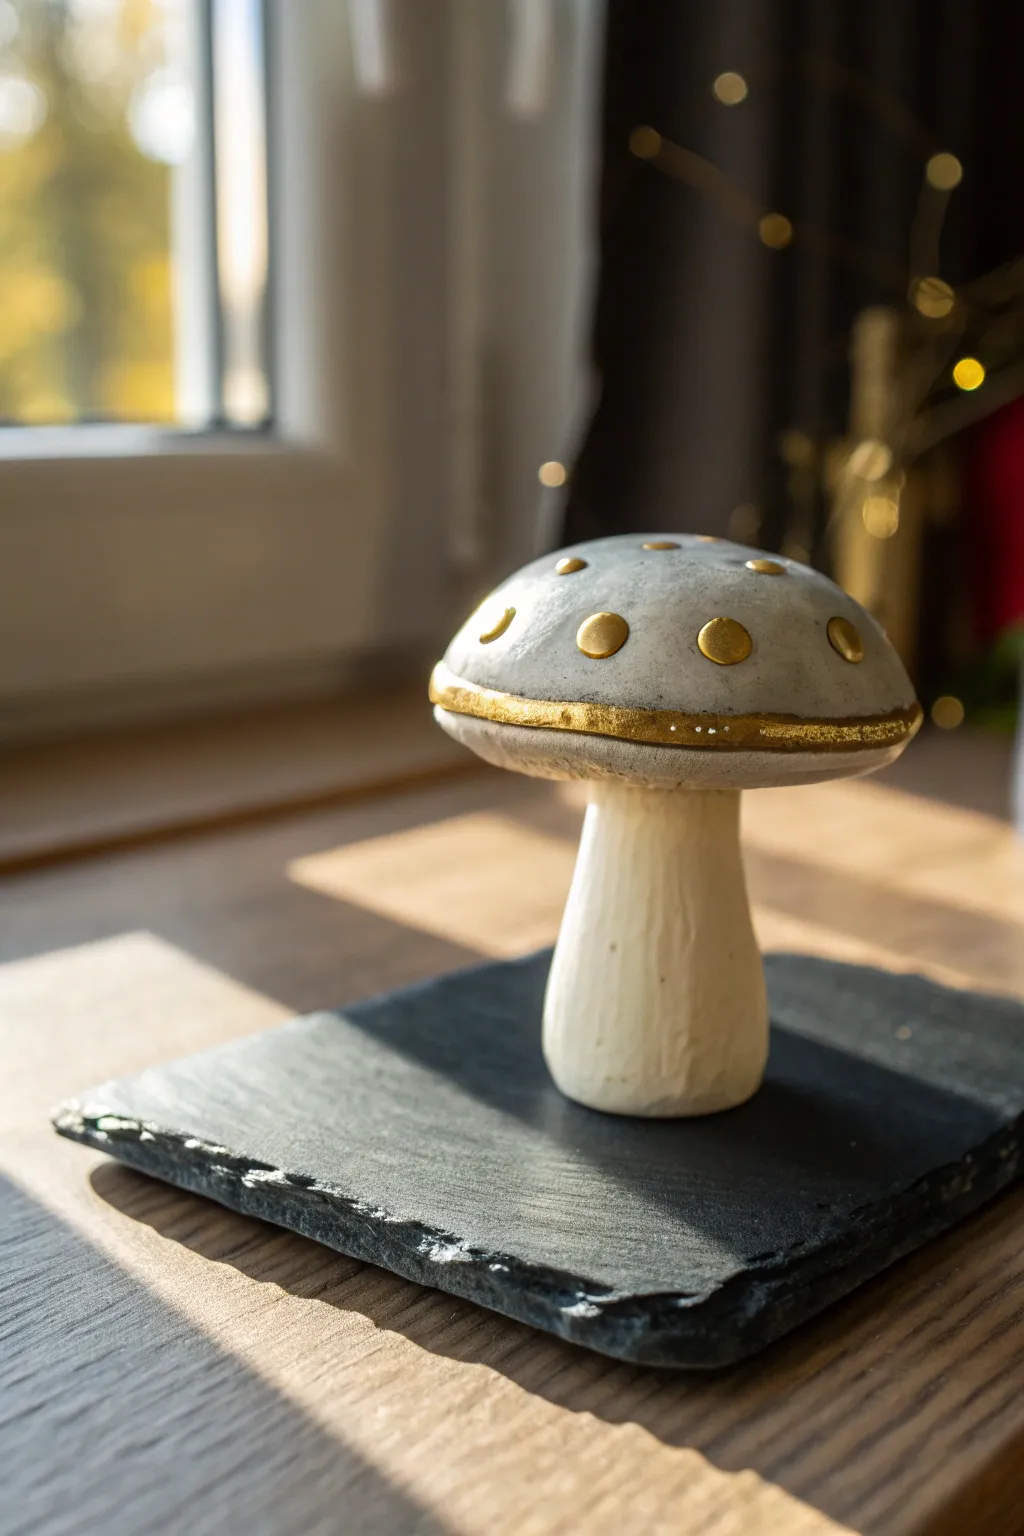
This elegant project combines the rustic charm of stone textures with the luxurious gleam of gold leaf. The finished piece features a beautifully tactile cap and a sturdy stalk, perfect for adding a touch of sophisticated whimsy to your holiday decor or mantelpiece.
Step-by-Step
Materials
- White polymer clay
- Granite or stone-effect polymer clay (grey speckled)
- Gold leaf or liquid gold gilding paint
- Gloss glaze or varnish
- Sculpting tools (needle tool, ball stylus)
- Small fine-point paintbrush
- Aluminum foil (for armature)
- Black slate coaster (optional, for display)
Step 1: Forming the Base Structure
-
Create the core:
Start by crumpling a small piece of aluminum foil into a mushroom cap shape. This saves clay and keeps the sculpture lightweight. -
Shape the stalk armature:
Roll a smaller piece of foil into a thick cylinder for the stem, slightly flaring it at the bottom for stability. -
Connect the parts:
Press the foil stem firmly into the underside of the foil cap. You can secure it with a dab of liquid clay if it feels loose. -
Condition the white clay:
Warm up your white polymer clay in your hands until it becomes pliable and smooth. -
Encapsulate the stem:
Sheet the white clay and wrap it fully around the foil stem, blending the seams until invisible. -
Texture the stem:
Before baking, use a sculpting tool or a stiff brush to drag vertical lines down the white clay stem, mimicking the fibrous texture of a real mushroom stalk.
Stone Effect Hack
If you don’t have granite clay, mix black pepper or dried tea leaves into white clay to create your own speckled faux-stone effect.
Step 2: Sculpting the Cap
-
Prepare the stone clay:
Condition the grey granite-effect clay. Roll it into a smooth sheet about 1/4 inch thick. -
Cover the cap:
Drape the grey sheet over the foil cap form. Gently smooth it down properly, trimming away excess clay underneath where it meets the stem. -
Refine the shape:
Use your fingers to round out the dome, ensuring a smooth, stone-like curve without fingerprints. -
Add the rim detail:
Roll a thin snake of white clay and press it around the bottom edge of the cap to create a distinct rim line. -
Indent the pattern:
Using a large ball stylus or the rounded end of a paintbrush, press circular indentations sporadically across the cap surface where the gold dots will go. -
Initial Bake:
Bake the mushroom according to your clay package instructions (usually 275°F/135°C for 15-30 minutes). Let it cool completely.
Step 3: Gilding and Finishing
-
Apply gold to indentations:
Using a very fine brush, carefully fill the circular indentations on the cap with liquid gold leaf or metallic gold paint. -
Gild the rim:
Paint a solid, thick band of gold along the rim of the cap, following the line you sculpted earlier. I find holding the brush steady and rotating the mushroom works best. -
Add texture highlights:
If desired, dry brush a tiny amount of white paint very lightly over the grey cap to enhance the ‘stone’ look. -
Seal the work:
Once the paint is fully dry, coat the entire mushroom—except the textured stem—with a gloss varnish to protect the gold and give the cap a polished ceramic feel.
Make it a Set
Create a trio of mushrooms at varying heights and cap shapes; sculpt one with a tall, thin conical cap for visual contrast.
Place your finished metallic mushroom on a slate coaster to emphasize the natural aesthetic
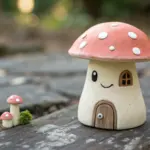
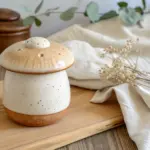
Mushroom Trinket Box With Cap Lid
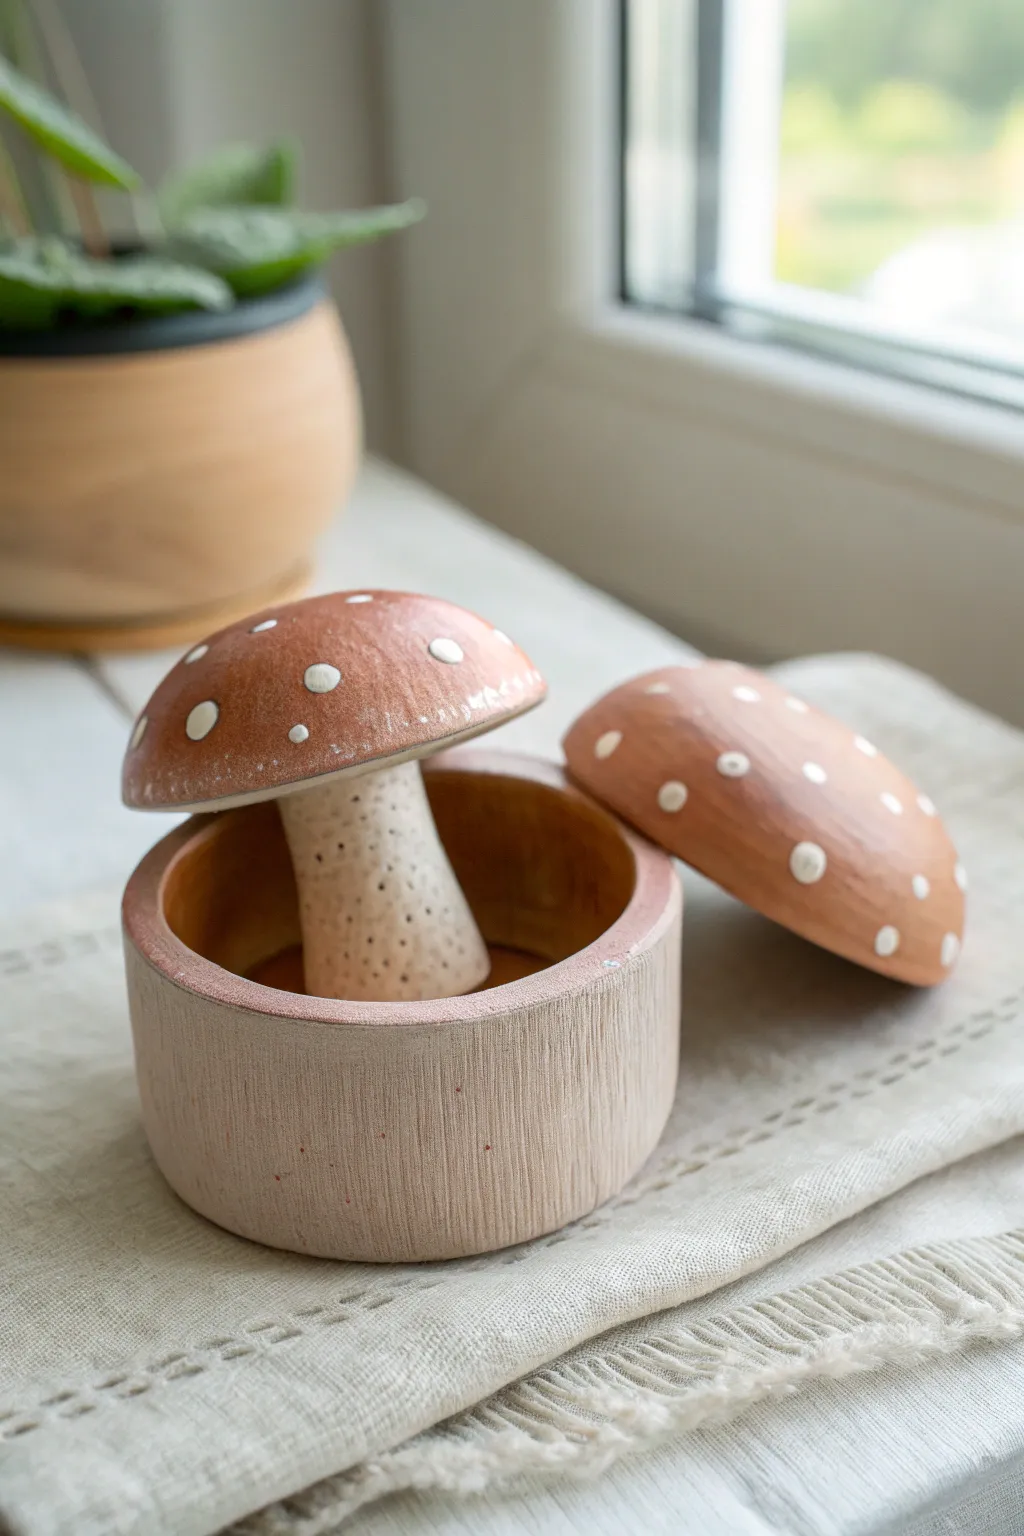
Transform simple polymer clay into an adorable, nature-inspired storage vessel perfect for holding small treasures. This intermediate project features a hollow base with a clever mushroom cap lid that looks like it was plucked straight from a fairytale forest.
How-To Guide
Materials
- Polymer clay (beige/tan, terracotta/brown, white)
- Circular clay cutter (approx. 3-4 inch diameter)
- Small glass jar or aluminum foil armature (for forming the base)
- Rolling pin or pasta machine
- Texture tools (toothbrush, needle tool, sponge)
- Liquid polymer clay or Bake & Bond
- Aluminum foil
- Acrylic paints (optional, for weathering)
- Matte varnish
Step 1: Forming the Base
-
Prepare the base armature:
Find a small, straight-sided oven-safe glass jar or create a cylinder from tightly packed aluminum foil to serve as your mold. If using foil, wrap it in a layer of masking tape for a smoother surface. -
Roll out the clay:
Condition your beige or tan clay until soft, then roll it into a slab about 1/4 inch thick. You want it substantial enough to hold its shape but not too heavy. -
Cut the base circle:
Using your circular cutter or a template, cut a round disc for the floor of your box. Place this on your baking tile or parchment paper. -
Create the walls:
Cut a long rectangular strip of the same clay thickness. The height should match your desired box depth (about 1.5 to 2 inches). Wrap this strip around your armature or directly onto the base circle. -
Join the seams:
Blend the seam where the strip ends meet, smoothing it with a tool or your finger until invisible. Then, carefully blend the clay wall down onto the base circle to create a watertight seal. I find a rubber-tipped tool works best for this inner seam. -
Add texture:
Before baking, gently drag a toothbrush or coarse sponge vertically along the outside walls to give it a striated, organic texture resembling bark or rough ceramic.
Seamless Fits
Make the mushroom cap diameter about 0.5 inches wider than the base cylinder so it creates an overhang, making it easier to lift off.
Step 2: Creating the Stem and Cap
-
Form the internal stem:
Roll a thick log of beige clay, tapering it slightly towards the top. This will be the mushroom stalk. -
Texture the stem:
Take a needle tool and poke numerous small, shallow holes all over the stem surface to mimic the porous texture of a mushroom stalk. -
Attach the stem:
Use a dab of liquid polymer clay to adhere the stem to the center of the box floor inside the cylinder. -
Shape the cap armature:
Create a doomed shape using aluminum foil roughly the same diameter as your box base. Press it down slightly so it isn’t a perfect half-sphere, but more of a natural bun shape. -
Cover the cap:
Roll a sheet of terracotta or brown clay and drape it over your foil dome. Smooth it down, trimming excess clay at the bottom rim. -
Refine the underside:
Flip the cap over. To ensure it sits securely on the stem, gently press the center of the underside to create a slight indentation where it will rest on the stalk. -
Add the spots:
Roll tiny balls of white clay. Press them flat onto the brown cap, irregularly spacing them for a natural look. Gently roll over the whole cap with your palm to embed the dots flush with the surface.
Secret Compartment
Why not make the stem hollow too? Build the stem around a pen cap to create a tiny hidden space inside the box for extra-small items.
Step 3: Finishing Touches
-
Initial Bake:
Bake all component parts according to your clay manufacturer’s instructions (usually 275°F for 15-30 minutes). Let them cool completely. -
Remove armature:
Carefully twist and remove the glass jar or pull out the aluminum foil from inside the base and the cap. -
Sand the edges:
Use fine-grit sandpaper to smooth the top rim of the box base and the bottom rim of the mushroom cap so they fit together cleanly. -
Optional weathering:
If the clay looks too perfect, dilute a little brown acrylic paint with water and wash it over the textured base and stem, wiping away the excess to highlight the grooves. -
Seal the piece:
Apply a thin layer of matte varnish to the entire project to protect the surface and give it that soft, ceramic-like sheen shown in the photo.
Place your finished mushroom box on a sunny windowsill or shelf to add a touch of woodland magic to your room
Translucent Stained-Glass Style Mushrooms
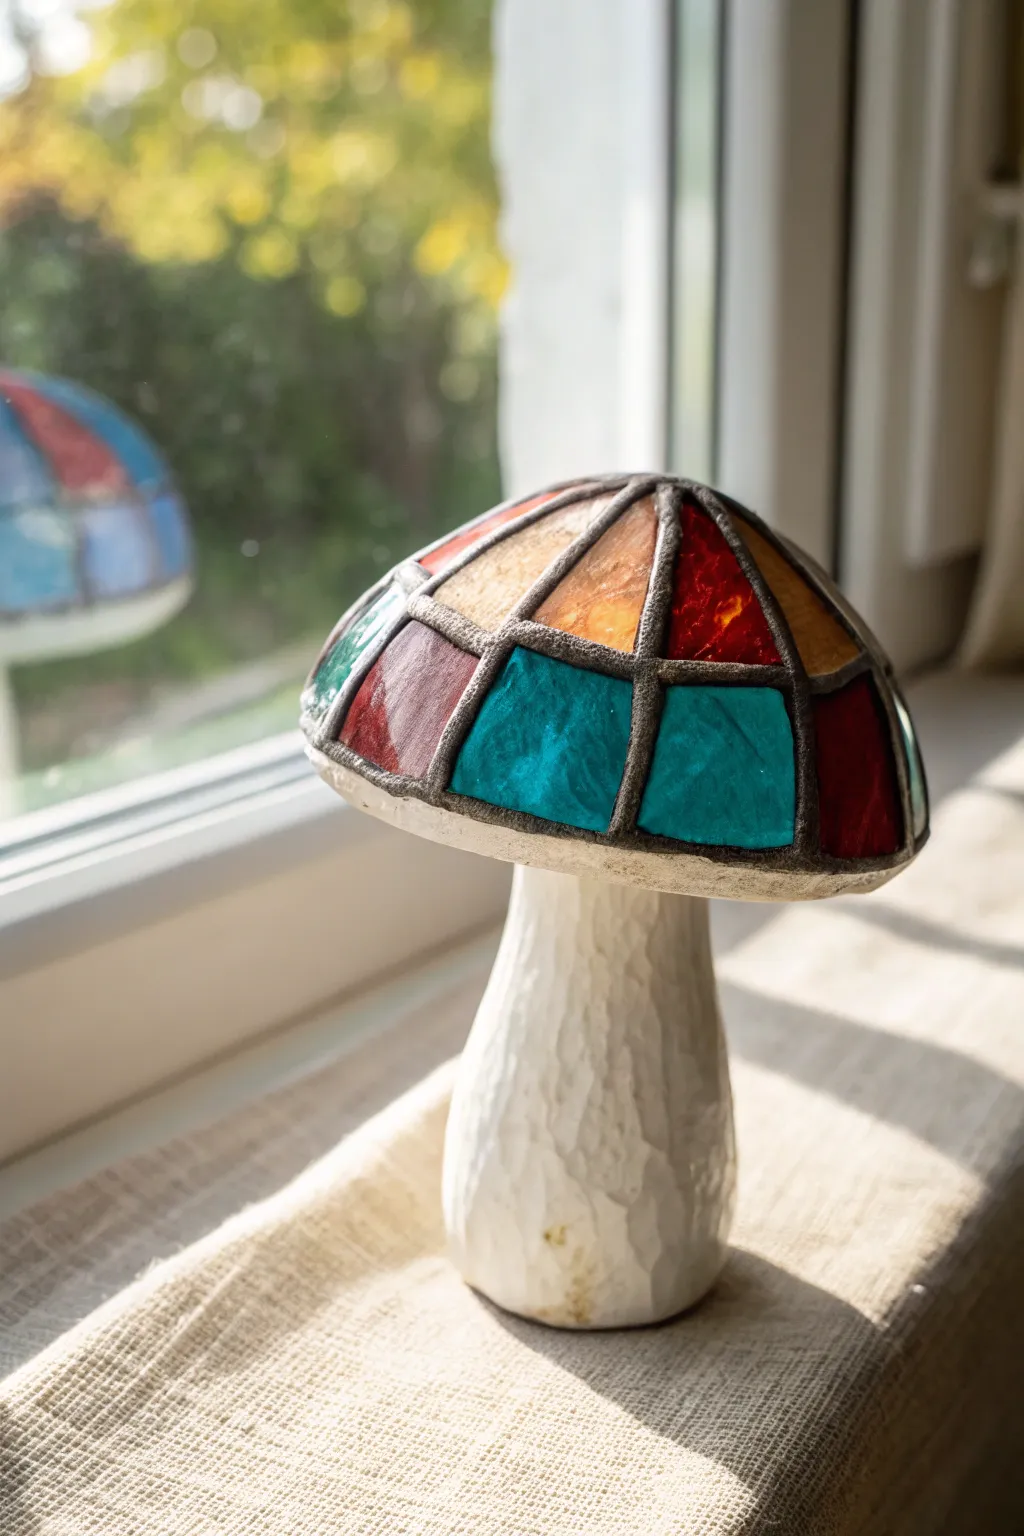
Capture the magic of vintage Tiffany lamps with this stunning polymer clay mushroom that glows in the sunlight. By combining translucent clay with dark outlining, you’ll create a convincing stained-glass effect without cutting a single piece of glass.
Step-by-Step Guide
Materials
- Polymer clay (white for stem)
- Translucent polymer clay (various colors like red, teal, amber)
- Black or dark grey polymer clay (for the ‘lead’ lines)
- Liquid polymer clay (translucent)
- Alcohol inks (optional, to tint plain translucent clay)
- Clay sculpting tools (needle tool, blending tool)
- Aluminum foil
- Acrylic roller or pasta machine
- Gloss varnish or UV resin
Step 1: Sculpting the Base Form
-
Create the core armature:
Crumple a piece of aluminum foil into a mushroom shape. You need a sturdy stem and a doomed cap. Ensure the bottom of the stem is flat so it stands upright on your work surface. -
Construct the stem:
Condition your white polymer clay until pliable. Roll it into a sheet about 3mm thick. -
Cover the stem armature:
Wrap the white clay sheet around the foil stem, smoothing the seams together. Extend this slightly under the cap area. -
Add texture:
Using a sculpting tool or the back of a knife, gently carve vertical, uneven grooves up and down the stem to mimic organic wood grain or bark texture. -
Prepare the cap base:
Cover the underside of the foil cap with a thin layer of white or metallic spectral clay to helps reflect light, though this part won’t be fully visible.
Cloudy Clay Colors?
If your translucent clay looks dull after baking, immediately plunge the hot piece into ice water. This thermal shock enhances clarity significantly.
Step 2: Creating the Stained Glass Effect
-
Roll the lead lines:
Take your black or dark grey clay and roll it into long, thin snakes. These will act as the ‘lead’ soldering lines. -
Apply the main structure:
Lay the black snakes onto the foil cap form. Start with a circle around the rim, then add vertical lines radiating from the center top down to the rim, dividing the cap into segments. -
Create smaller panes:
Add horizontal lines between the vertical spokes to create a grid of smaller, irregular geometric shapes. Press them gently onto the foil so they stick. -
Prepare translucent colors:
Condition your translucent clays. If you are using clear translucent clay, mix in a tiny drop of alcohol ink to tint it red, blue, or amber. Keep the colors distinct. -
Cut the panes:
Flatten your colored translucent clay. I find it easiest to lay a small piece over a specific segment on the cap, trace the shape, and then cut it to size. -
Fill the segments:
Place the cut translucent pieces inside the black grid lines. Gently press the edges so the colored clay meets the black borders seamlessly. -
Texture the glass:
Lightly dab the surface of the colored panels with a coarse sponge or crumpled foil to give them a textured, antique glass appearance. -
Refine the borders:
Go over the black lines again with a needle tool or finger to ensure they are slightly raised above the colored panels, enhancing the leaded look. -
Bake the project:
Bake the mushroom according to your clay manufacturer’s instructions (usually around 275°F/130°C for 30 minutes). Let it cool completely.
Pro Tip: Liquid Shine
Mix a drop of liquid clay into your translucent colors before applying so they are softer and self-level slightly within the black ‘lead’ frames.
Step 3: Finishing Touches
-
Apply a finish:
Brush a coat of gloss varnish or UV resin over the colored ‘glass’ panels to make them shine and increase transparency. -
Seal the stem:
Apply a matte varnish to the white stem to protect it while keeping the natural, organic look distinct from the shiny cap. -
Final cure (if using resin):
If you used UV resin on the cap, cure it under a UV lamp for a few minutes until hard and tack-free.
Place your finished mushroom on a sunny windowsill to see the colors illuminate beautifully during the day