Whenever I want cozy, handmade holiday decor that actually lasts, I reach for polymer clay ornaments—they’re colorful, lightweight, and so fun to personalize. Here are my go-to ornament ideas, starting with the classic shapes everyone loves and ending with a few studio favorites that feel extra special on the tree.
Classic Cookie-Cutter Stars and Trees

Capture the magic of a snowy forest with these delicate white clay stars. Featuring hand-painted evergreen trees and subtle snowflake details, they bring a cozy, minimalist aesthetic to your holiday decor.
Step-by-Step
Materials
- White polymer clay (oven-bake)
- Star-shaped cookie cutter (approx. 3-4 inches)
- Acrylic rolling pin
- Parchment paper or ceramic tile (for baking)
- Fine grit sandpaper (400-600 grit)
- Acrylic paints: Forest Green, Rust/Burnt Sienna, Metallic gold
- Fine detail paintbrushes (size 0 and size 00)
- Toothpick or small skewer
- Gold thread or ribbon for hanging
- Matte varnish (optional)
Step 1: Shaping the Base
-
Condition the clay:
Start by warming the white polymer clay in your hands, kneading it thoroughly until it is soft and pliable. This prevents cracking later. -
Roll it out:
Place the clay on a smooth surface or parchment paper. Roll it out evenly with your acrylic roller until it is about 1/4 inch thick. Aim for a consistent thickness so it bakes evenly. -
Cut the shape:
Press your star-shaped cookie cutter firmly into the clay. Give it a tiny wiggle to ensure it cuts all the way through, then lift the cutter. -
Refine the edges:
Gently peel away the excess clay from the outside of the star. If the edges of the star look rough, smooth them lightly with your fingertip. -
Create the hanging hole:
Using a toothpick or a small skewer, pierce a hole near the top point of the star. Wiggle the tool slightly to make the hole large enough for your ribbon to pass through after baking. -
Bake the clay:
Transfer the clay star (still on its parchment paper or tile) to a baking sheet. Bake according to the manufacturer’s instructions on your clay package, usually around 275°F (135°C) for 15-30 minutes. -
Cool and smooth:
Allow the star to cool completely. Once cool, take your fine-grit sandpaper and very gently sand the edges to remove any sharp points or fingerprints for a professional finish.
Step 2: Painting the Design
-
Sketch lightly:
If you are nervous about freehand painting, you can use a very light pencil or a stylus to faintly mark where your two trees will go in the center of the star. -
Paint the green tree base:
Using Forest Green paint and a size 0 brush, paint a solid triangle shape for the right-hand tree. Add small jagged edges on the sides to mimic branches. -
Add the tree trunk:
Mix a tiny bit of Rust/Burnt Sienna with water to make it flow easily. Paint a small rectangular trunk at the base of your green tree. -
Paint the stylized tree:
To the left of the green tree, paint the second tree using only the Rust color. Draw a vertical line for the trunk, then add simple downward-slanting lines for branches, creating a skeletal, modern look. -
Add ornaments:
Once the green tree is dry to the touch, use the very tip of your brush or a toothpick dipped in Rust paint to add small dots as ornaments scattered across the branches. -
Paint the snowflakes:
Switch to your metallic gold or a diluted Rust color for the snowflakes. Paint simple asterisk shapes (*)—one large one above the trees and a few smaller ones scattered around the remaining white space. -
Add tiny details:
Use the very tip of your smallest brush to add tiny dots or ‘stars’ in the empty white spaces to balance the composition. I find less is often more here, so start with just a few. -
Seal the design:
Allow the paint to dry completely. If you want extra protection, apply a thin coat of matte varnish over the surface, though the raw matte clay look is also lovely on its own.
Clean Edges Pro-Tip
Before baking, dip your finger in a little baby oil or cornstarch and rub it over the clay surface. This smooths out fingerprints instantly.
Step 3: Finishing Touches
-
Attach the hanger:
Cut a length of gold thread or ribbon approximately 6 inches long. -
Loop and tie:
Thread the gold ribbon through the hole you made earlier. Tie a secure knot at the base near the star, or tie the ends together to create a loop.
Add Dimension
Instead of painting the green tree flat, paint it, let it dry, and then smudge a slightly lighter green on the branch tips for a 3D effect.
Hang your beautiful handmade star on the tree and enjoy the rustic elegance it adds to your holiday season


Stamped Name Tag Ornaments
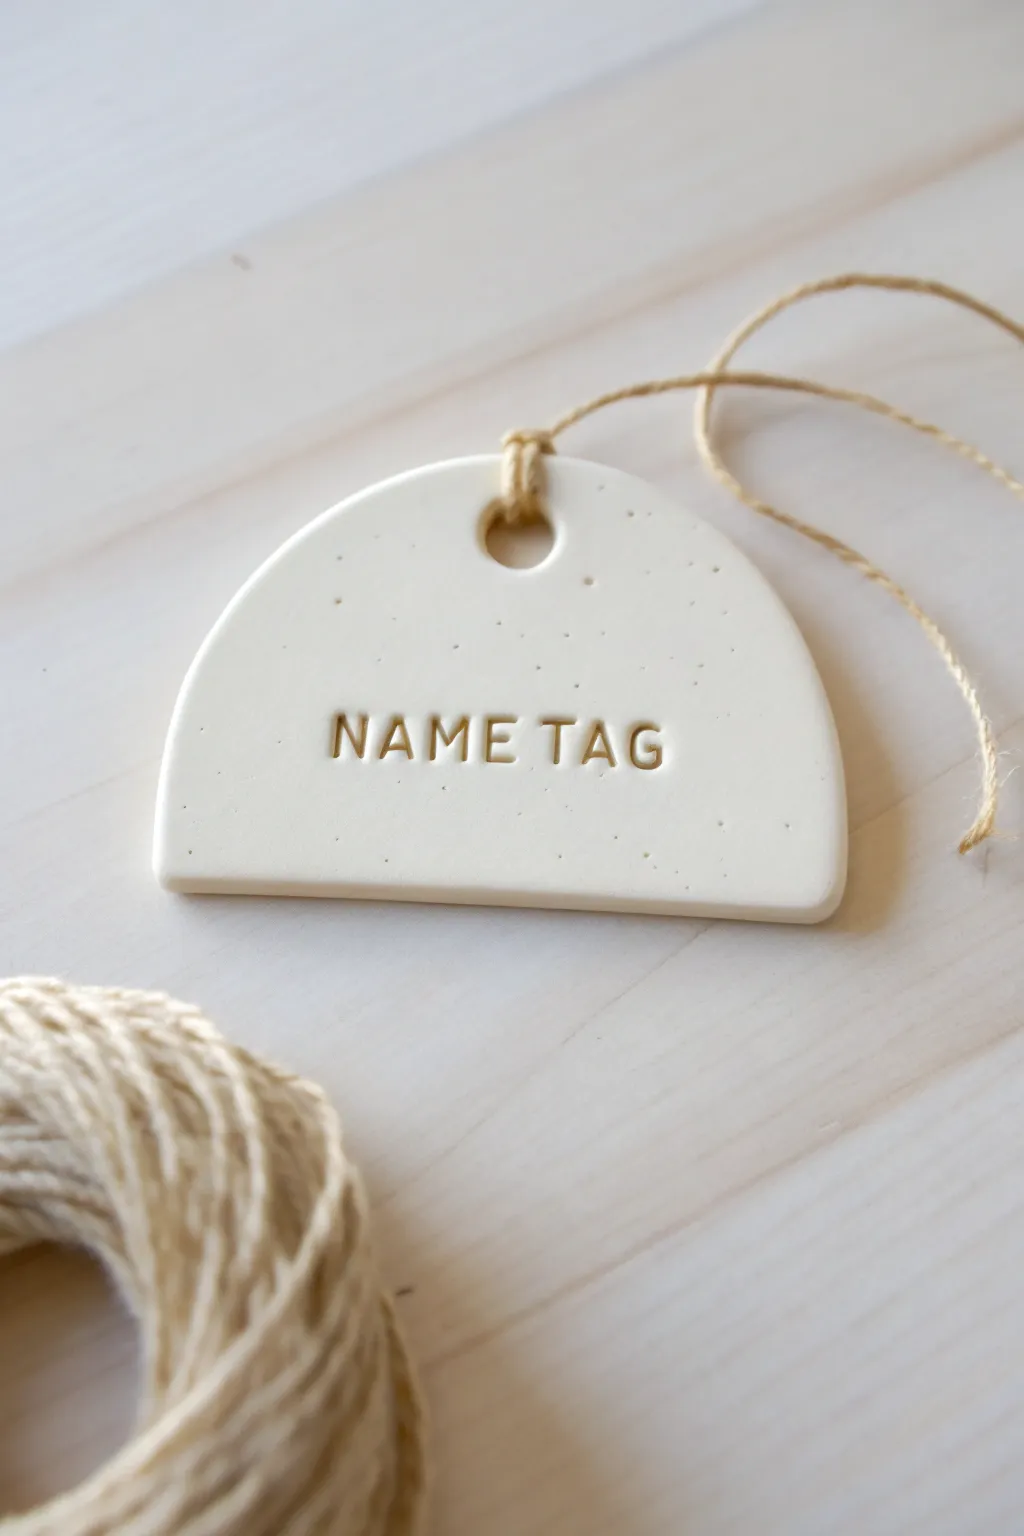
These elegant, semi-circle name tags mimic the look of speckled stoneware pottery using polymer clay. They make perfect personalized gift toppers or minimalist holiday ornaments with a clean, modern aesthetic.
How-To Guide
Materials
- White polymer clay (approx. 2oz)
- Black pepper or dried coffee grounds (for speckles)
- Acrylic rolling pin or pasta machine
- Semi-circle or arch-shaped clay cutter
- Small letter stamp set
- Drinking straw or small circular cutter
- Jute twine or hemp cord
- Fine-grit sandpaper (optional)
- Baking sheet
- Parchment paper
Step 1: Preparing the Clay
-
Condition the clay:
Start by warming the white polymer clay in your hands, kneading it thoroughly until it becomes soft and pliable. -
Add texture:
To achieve that faux-stone look, sprinkle a very small pinch of ground black pepper or dried coffee grounds onto the flattened clay. -
Incorporate the speckles:
Fold the clay over the speckles and knead again until they are evenly distributed throughout the white base. -
Roll it out:
Using an acrylic roller or pasta machine, roll the clay out into a slab that is approximately 1/4 inch thick for a sturdy tag.
Step 2: Shaping and Stamping
-
Cut the shape:
Place your clay slab on a piece of parchment paper so it doesn’t stick to your work surface. -
Press the cutter:
Position your semi-circle or arch cutter and press down firmly to cut out the base shape. -
Clean the edges:
Gently lift away the excess clay surrounding your cutout. If the edges look rough, smooth them lightly with your fingertip. -
Create the hole:
Use a drinking straw or a small circular cutter to punch a hole at the top center of the arch for hanging. -
Prepare your stamps:
Select the letters for your desired name or word (like ‘NAME TAG’) from your stamp set. -
Align the text:
I prefer to lay the stamps out on the table first to visualize the spacing before touching the clay. -
Stamp the center:
Start with the middle letter of the word, positioning it in the exact center of the tag to ensure symmetrical spacing. -
Finish the word:
Work your way outwards, stamping the remaining letters to the left and right of the center character. -
Check depth:
Press firmly enough to leave a clear impression, but be careful not to adhere the stamp to the clay.
Stamp Release Trick
To prevent your plastic stamps from sticking to sticky unbaked clay, lightly dust the stamp face with cornstarch or dip it in water before pressing down.
Step 3: Baking and Finishing
-
Prepare for baking:
Transfer the parchment paper with your cutout onto a baking sheet. -
Bake:
Bake the clay according to the manufacturer’s instructions on the package (temperature and time vary by brand). -
Cool down:
Allow the ornament to cool completely on the baking sheet before handling it, as hot clay is fragile. -
Sand edges:
Once cool, use fine-grit sandpaper to gently buff away any sharp edges or fingerprints. -
Prepare the twine:
Cut a length of natural jute twine, approximately 8 inches long. -
Attach the hanger:
Thread the twine through the hole and secure it with a simple lark’s head knot or a loop knot at the top.
Antiqued Letters
After baking, paint brown acrylic paint into the stamped letters and immediately wipe the surface clean, leaving dark paint only in the recesses for contrast.
Your finished faux-ceramic tag is now ready to add a personalized touch to any gift or tree


Botanical Impression Disc Ornaments
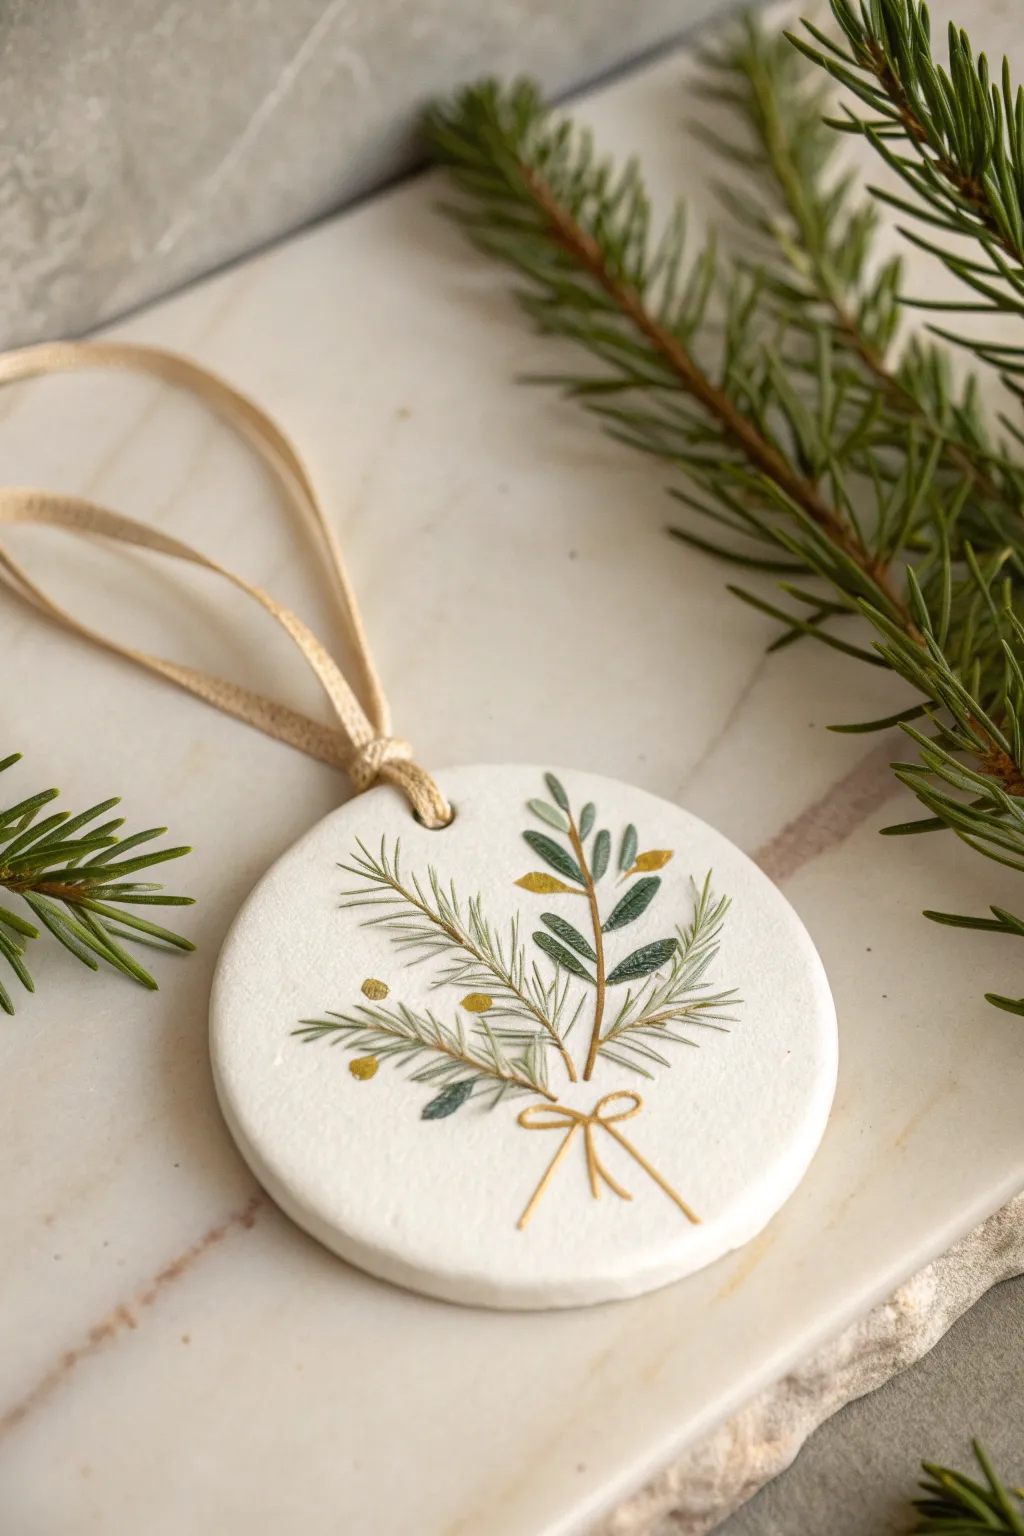
Create a delicate keepsake that captures the quiet beauty of winter flora with this painted clay ornament. Featuring fine botanical details and subtle gold accents on a smooth white base, this project blends the simplicity of minimalism with festive charm.
Step-by-Step Guide
Materials
- White polymer clay (oven-bake)
- Acrylic rolling pin
- Circle cookie cutter (approx. 3 inches)
- Fine grit sandpaper (400-600 grit)
- High-quality acrylic paints (sage green, forest green, metallic gold)
- Micro detail paintbrush (size 000 or 00)
- Small straw or clay tool for hole punching
- Beige satin or silk ribbon (1/4 inch width)
- Matte varnish or sealant (optional)
- Baking sheet and parchment paper
Step 1: Preparing the Base
-
Condition the Clay:
Begin by warming the white polymer clay in your hands, kneading it thoroughly until it is soft and pliable. This conditioning step is crucial to prevent cracks during baking. -
Roll the Sheet:
Place the clay on a clean, smooth surface or silicone mat. Use your acrylic rolling pin to flatten the clay to a uniform thickness of about 1/4 inch. Rotating the clay as you roll helps keep the thickness even. -
Cut the Shape:
Press your circle cookie cutter firmly into the clay. Give it a gentle wiggle before lifting to ensure a clean cut, then carefully peel away the excess clay from around the circle. -
Create the Hanging Hole:
Using a small straw or a dedicated clay tool, punch a hole near the top edge of the circle. Make sure it’s not too close to the rim to prevent breakage later—about 1/4 inch down is usually safe. -
Smooth the Edges:
Dip your finger in a tiny bit of water (or baby oil) and gently run it around the circumference of the clay disc to smooth out any rough edges or fingerprints. -
Bake the Ornament:
Transfer the disc to a parchment-lined baking sheet. Bake according to your specific clay package’s instructions—usually around 275°F (135°C) for 15-30 minutes. -
Cool and Sand:
Allow the ornament to cool completely on a flat surface. Once cool, lightly sand the surface with fine-grit sandpaper if there are any bumps, creating a perfectly smooth canvas for your painting.
Step 2: Painting the Foliage
-
Establish the Stems:
Load your micro detail brush with thinned forest green acrylic paint. Paint a thin, central vertical line starting from the bottom third, and add two shorter stems branching slightly outward to the left. -
Paint the Pine Needles:
Using the same forest green, paint very fine, short strokes radiating from your left-side stems. Use a flicking motion to keep the needle tips sharp and delicate. -
Add Leafy Sprigs:
Switch to a slightly darker or sage green tone. On the right-hand stem, paint small, elongated oval leaves attached in pairs. I find it helps to press the brush down slightly at the leaf base and lift up as you taper the tip. -
Layering Colors:
Once the green base layers are dry, go back over a few pine needles or leaf veins with a slightly lighter green mix to add dimension and visual interest.
Steadier brush strokes
Rest your pinky finger on the unpainted portion of the clay disc while painting details. This anchors your hand and gives you much better control.
Step 3: Adding Gold Accents
-
Paint the Berries:
Dip a dotting tool or the back end of your brush handle into meallic gold paint. Place small dots sparsely among the pine needles to represent winter berries. -
Gild the Leaves:
Add tiny touches of gold to the tips of one or two leaves on the right side, just enough to catch the light without overpowering the greenery. -
Draw the Bow:
With your finest brush and gold paint, draw a small bow at the convergence point of the stems. Create two loops and two trailing tails for a classic ribbon look.
Fixing paint mistakes
If you make a stray mark, use a slightly damp cotton swab or toothpick to gently lift the wet acrylic paint off the baked clay surface immediately.
Step 4: Finishing Touches
-
Seal the Artwork:
If desired, apply a thin coat of matte varnish over the painted area to protect your design from scratching. Let this dry completely before handling. -
Attach the Ribbon:
Thread a length of beige satin ribbon (about 8 inches) through the hole at the top. -
Secure the hanger:
Tie the ends of the ribbon into a secure knot or bow, trimming any frayed ends for a polished finish.
Now you have a sophisticated botanical ornament ready to hang on the tree or gift to a loved one


Candy Cane Stripe Swirl Ornaments
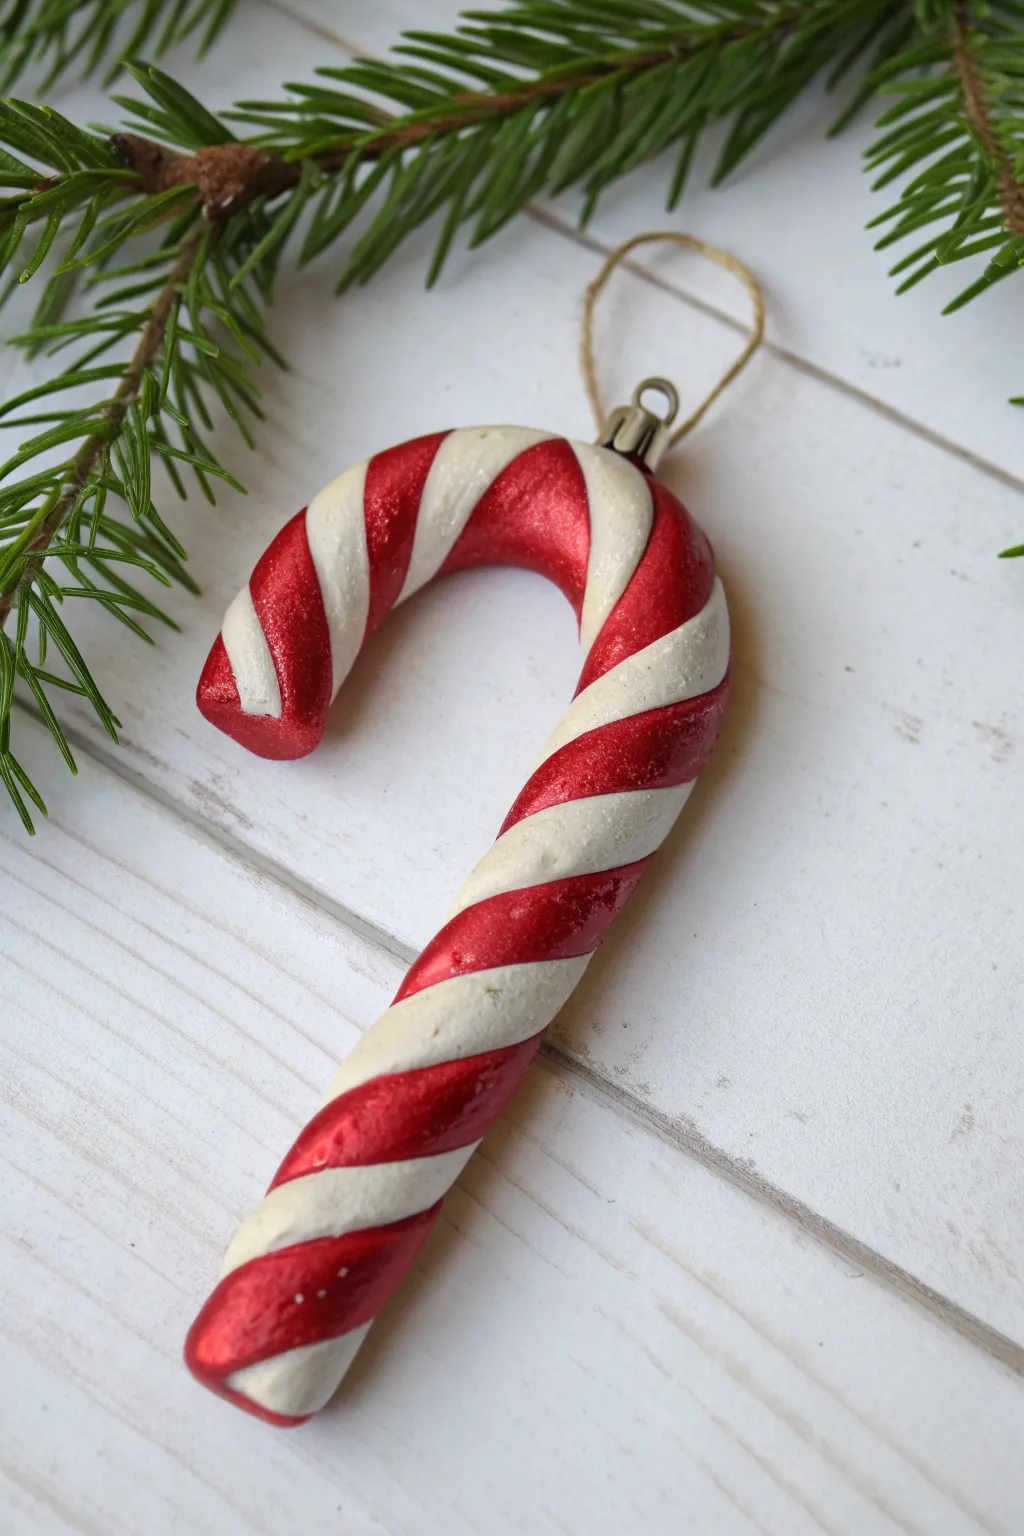
Capture the classic nostalgia of Christmas with this swirled polymer clay candy cane ornament. By twisting ropes of sparkling red and creamy white clay together, you’ll create a seamless barber-pole effect that looks good enough to eat but lasts forever on your tree.
Detailed Instructions
Materials
- Red polymer clay (preferably with pearl or metallic finish)
- White or translucent white polymer clay
- Acrylic roller
- Clay knife or blade
- Metal ornament cap with loop
- Gold twine or string
- Super glue (cyanoacrylate)
- Small piece of sandpaper (fine grit, 400-600)
- Gloss glaze (optional)
Step 1: Prepping the Twist
-
Condition the clay:
Begin by thoroughly conditioning your red and white clay separately. Warm them in your hands until they are soft and pliable to prevent cracking during the twisting phase. -
Roll the logs:
Roll each color into a long, even snake or log. Aim for a thickness of about 1/2 inch (1.2 cm) for each log. They should be roughly the same length and diameter. -
Combine the colors:
Lay the red and white logs side-by-side on your work surface. Gently press them together along their length so they adhere slightly but don’t blend. -
Begin the twist:
Holding one end of the joined logs steady, slowly twist the other end to create a spiraled stripes pattern. Continue twisting until the stripes are angled to your liking, usually about 45 degrees. -
Smooth the shape:
Once twisted, gently roll the combined log on your work surface. This smooths out the ridges between the colors and creates a uniform cylinder while locking the twist in place.
Step 2: Forming and Baking
-
Cut to size:
Trim the uneven twisted ends off your log using your clay blade. I like to cut the final cylinder to about 5 or 6 inches in length for a standard ornament size. -
Create the hook:
Gently bend the top third of the log into a classic shepherd’s hook shape. Be careful not to pinch the clay; use the curve of your thumb to keep the bend round and smooth. -
Prep for hanging:
At the very top center of the curve, press the metal ornament cap slightly into the raw clay to create an indentation, then remove it. This ensures a perfect fit later. -
Add texture (optional):
If you want a weathered look like the reference photo, lightly scuff the surface with a coarse sponge or leave slight fingerprints for a handmade feel before baking. -
Bake the cane:
Place your candy cane on a ceramic tile or baking sheet lined with parchment paper. Bake according to your clay manufacturer’s instructions, typically at 275°F (130°C) for 15-30 minutes. -
Cool down:
Allow the ornament to cool completely inside the oven or on a wire rack before handling. Polymer clay is fragile while hot.
Uneven Twists?
If your stripes look wonky, roll the combined snake slightly thinner before bending. This elongates the pattern and makes inconsistent widths less noticeable.
Step 3: Finishing Touches
-
Sand the surface:
Once cool, inspect your cane. Use fine-grit sandpaper to smooth out any rough fingerprints or sharp edges on the ends. -
Attach the cap:
Place a small drop of super glue into the indentation you made earlier at the top of the cane. Press the metal ornament cap firmly into place and hold for a few seconds. -
Secure the hanger:
Thread a length of gold twine through the loop on the metal cap. Tie a knot to create a hanging loop. -
Apply glaze (optional):
For a glassy, candy-like finish, brush on a coat of gloss glaze. Let it dry completely before hanging.
Sparkle Tip
Mix a pinch of translucent clay into your red clay before rolling. This adds depth and makes the ‘red’ look more like hard candy when baked.
Hang your classic creation on a prominent branch to add a timeless touch of sweetness to your holiday decor

The Complete Guide to Pottery Troubleshooting
Uncover the most common ceramic mistakes—from cracking clay to failed glazes—and learn how to fix them fast.
Gingerbread Figure Ornaments
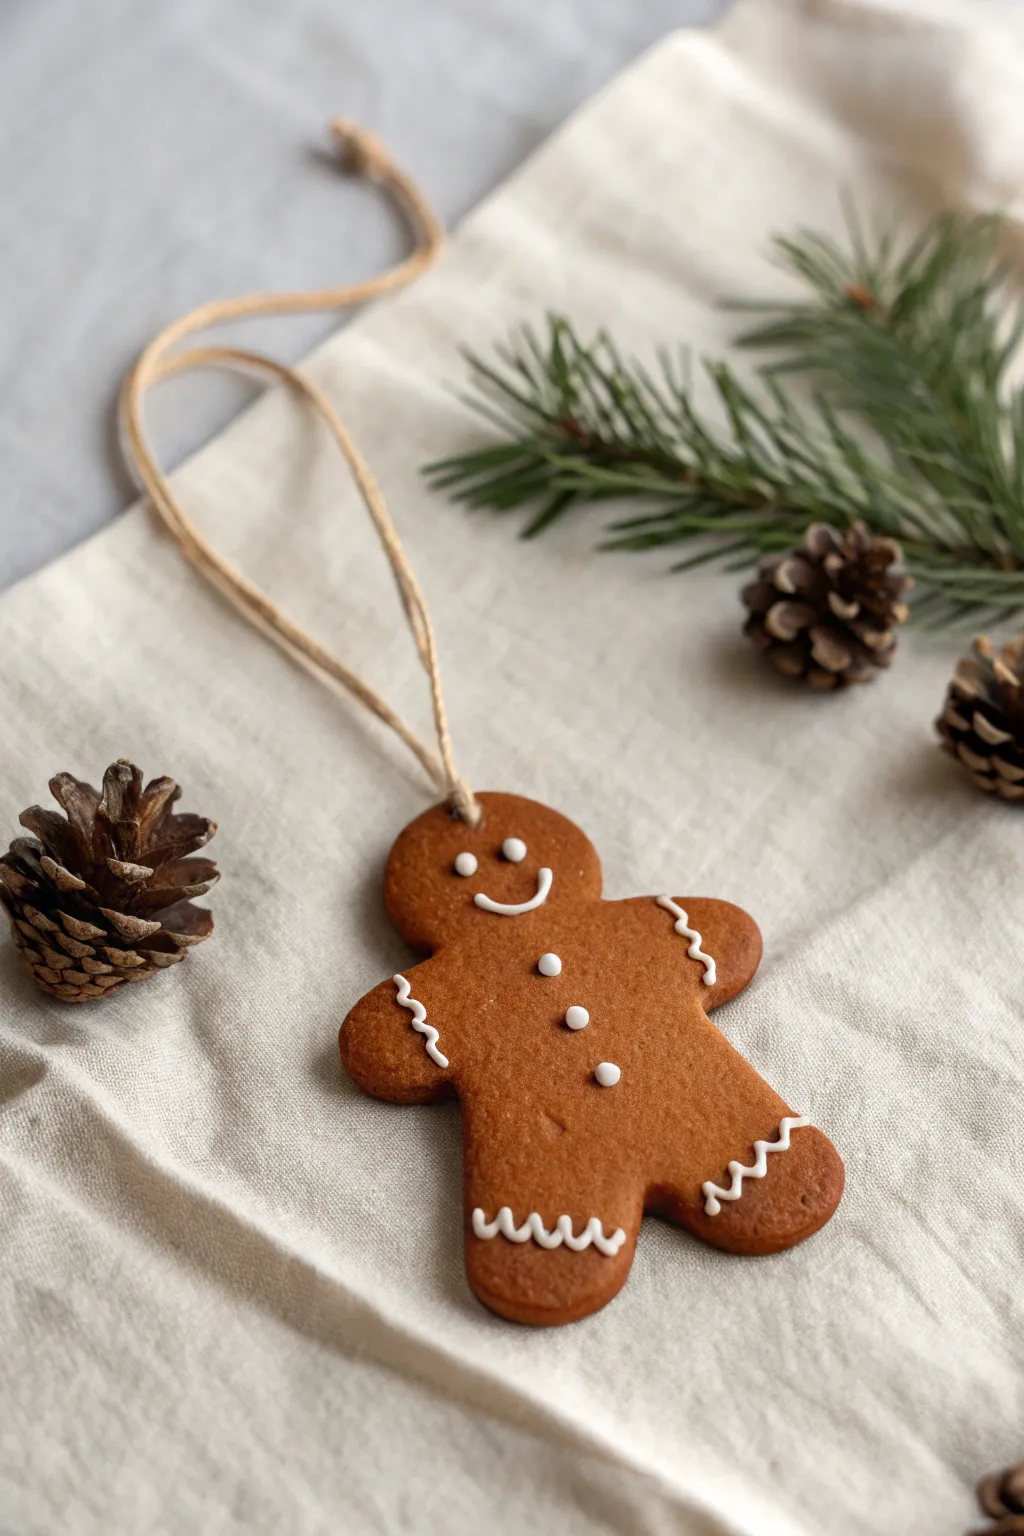
Capture the cozy warmth of holiday baking without the crumbs using this realistic polymer clay gingerbread man. With its textured finish and puffy white “icing” details, this durable ornament looks good enough to eat but will last for years to come.
Step-by-Step Tutorial
Materials
- Polymer clay (burnt umber or gingerbread color)
- Liquid polymer clay (white)
- Polymer clay (white – solid)
- Gingerbread man cookie cutter
- Rolling pin or pasta machine
- Texture tool (sandpaper, toothbrush, or crumpled foil)
- Needle tool or toothpick
- Jute twine or hemp cord
- Small eye pin (optional)
- Baking sheet and parchment paper
- Oven (dedicated to clay use)
Step 1: Shaping and Texturing
-
Condition the clay:
Start by warming the brown clay in your hands, kneading it until it is soft and pliable. If you don’t have a pre-mixed gingerbread color, mix brown with a small amount of translucent and a tiny pinch of red and yellow to get that rich, baked look. -
Roll out the slab:
Roll your conditioned clay into a flat sheet, aiming for a thickness of about 1/4 inch (6mm). You want it slightly thicker than a real cookie to ensure it’s sturdy enough to hang. -
Add texture:
Before cutting the shape, gently press your texturing tool—a clean toothbrush or a ball of crumpled aluminum foil works wonders here—evenly across the surface. This mimics the crumbly texture of a real baked cookie. -
Cut the shape:
Press your gingerbread man cookie cutter firmly into the textured clay. Give it a tiny wiggle to ensure a clean cut, then lift the cutter away. Peel away the excess clay from the outside. -
Create the hanging hole:
Use a needle tool or a straw to poke a hole at the very top of the head for the string. Alternatively, carefully insert a metal eye pin into the top of the head if you prefer a hidden hanging mechanism. -
Soften the edges:
Gently tap the cut edges of the clay with your finger to round them off slightly. Real cookies don’t have sharp, 90-degree angles, so this step adds realism.
Secret Ingredient
Mix real cinnamon or nutmeg into the brown clay before rolling. It adds realistic speckles and a faint holiday scent that lasts for weeks.
Step 2: Applying the Icing
-
Prepare the liquid clay:
It’s time for the fun part. If your white liquid clay is too runny, let it sit on a piece of paper for a few minutes to leach out some oils. If it’s too thick, add a drop of clay softener. -
Create the smile:
Using a fine-tip applicator bottle or a needle tool dipped in liquid clay, carefully draw a simple, curved smile on the face. -
Add face details:
Dab two small dots of liquid clay above the smile for the eyes. I find using a ball stylus helps make these dots perfectly round. -
Pipe the buttons:
Place three evenly spaced dots down the center of the gingerbread man’s chest to represent gumdrop buttons. -
Create the limb patterns:
Carefully draw squiggly zigzag lines across the wrists and ankles using the liquid clay. Mimic the look of piped royal icing by keeping the line continuous. -
Pre-bake solid clay option:
If you don’t have liquid clay, you can roll extremely thin snakes of solid white clay for the mouth and zigzags, and small balls for the buttons/eyes. Press them gently onto the raw brown base before baking.
Clean Lines Only
If your liquid clay icing spreads too much, your clay is likely too warm. Pop the gingerbread base in the fridge for 10 minutes before decorating.
Step 3: Baking and Assembly
-
Bake the ornament:
Place your gingerbread man on a parchment-lined baking sheet. Bake according to your brand of clay’s instructions (usually 275°F/135°C) for about 30 minutes to ensure full strength. -
Cool down:
Allow the ornament to cool completely on the baking tray. Do not try to move it while it’s hot, as polymer clay is slightly flexible and fragile until fully cooled. -
Cut the twine:
Cut a length of jute twine or hemp cord, approximately 8-10 inches long. -
Thread the hanger:
Pass the twine through the hole in the head (or the eye pin). Bring the ends together and tie a simple overhand knot near the ends to form a loop.
Hang your new creation on the tree and enjoy the charm of gingerbread without the bakery mess
Snowman Face Ornaments
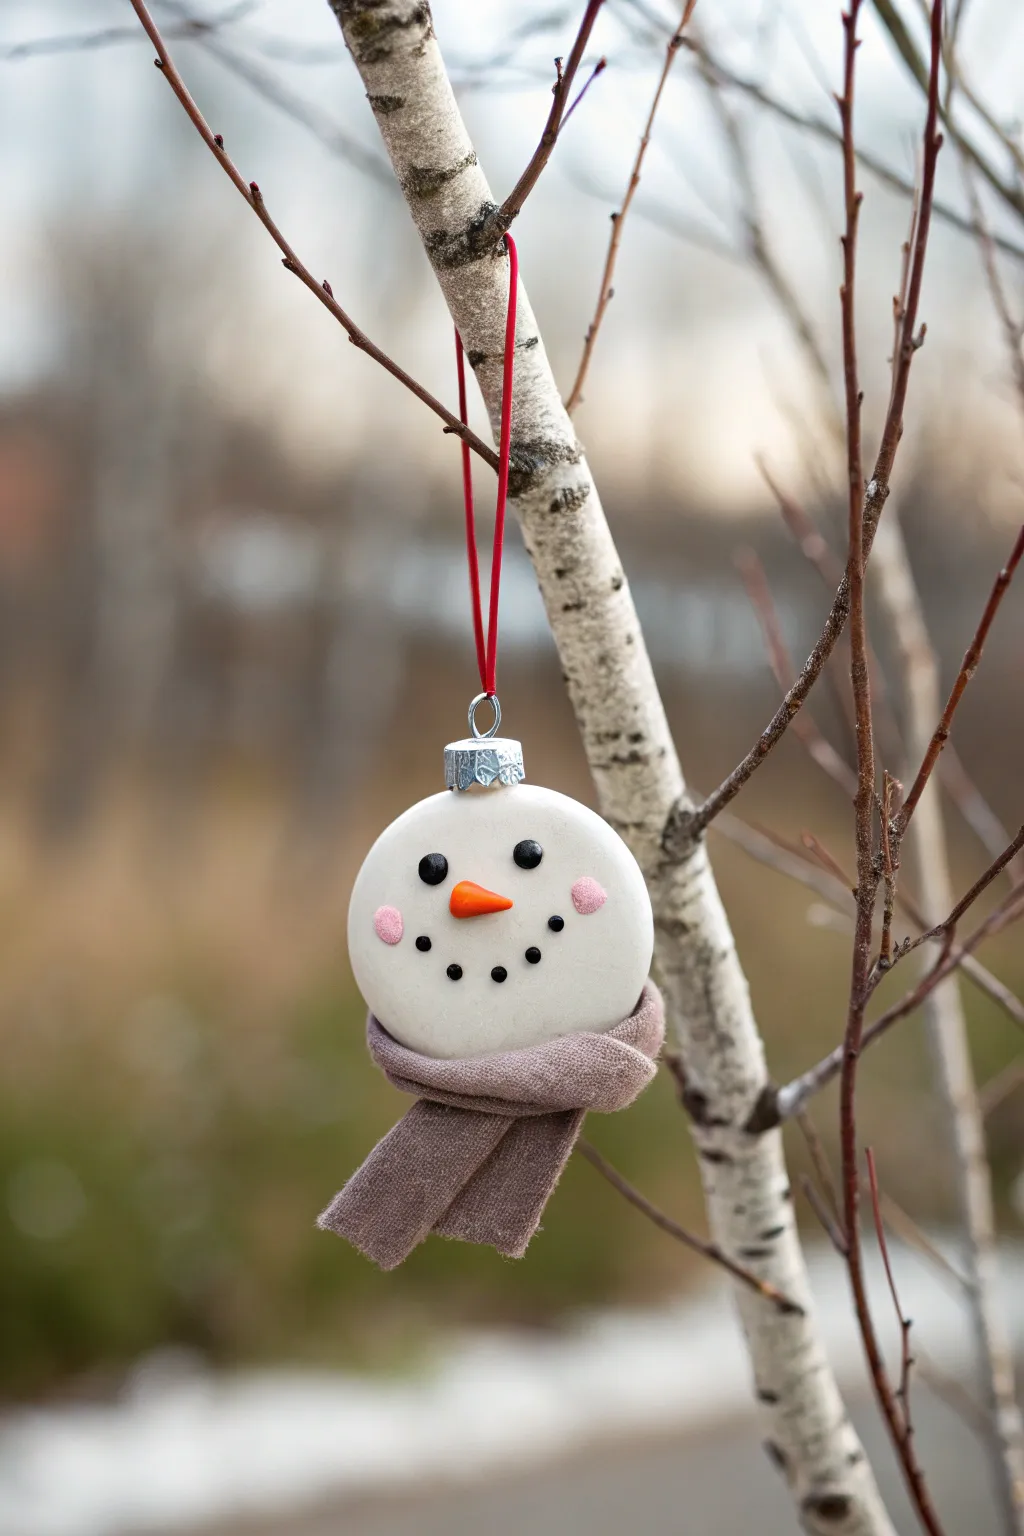
Capture the charm of winter with this softly rounded snowman face ornament, complete with a snug knitted scarf. Its simplified, cheerful features and smooth matte finish make it a timeless addition to any tree, blending rustic warmth with clean, modern crafting.
How-To Guide
Materials
- White polymer clay (approx. 2oz)
- Small amounts of orange, black, and pink polymer clay
- Rolling pin or pasta machine
- Round cookie cutter (approx. 2.5 – 3 inches)
- Scrap fabric (grey/taupe knit or jersey)
- Silver eye screw
- Silver metal ornament cap (recycled from an old bulb or purchased)
- Red satin cord or ribbon
- Super glue or heavy-duty craft glue
- Needle tools or toothpicks
- Oven for baking
Step 1: Sculpting the Base
-
Preparing the clay:
Begin by conditioning the white polymer clay in your hands until it becomes soft and pliable. This warmth prevents cracking later. -
Rolling out:
Roll the white clay into a smooth ball first, then flatten it into a thick disc. Aim for about 1/4 to 1/2 inch thickness for a substantial, sturdy ornament. -
Refining the shape:
If you want a perfect circle, use your round cookie cutter now. Alternatively, you can hand-shape it into a slightly organic round shape for a softer look. -
Smoothing:
Gently rub the edges with your finger to remove any sharp cut marks or fingerprints. The surface should be impeccably smooth. -
Inserting hardware:
Take your silver eye screw and gently twist it into the top center of the clay disc. Remove it for baking so it doesn’t get stuck, or leave it in if it’s oven-safe (most are).
Step 2: Creating the Face
-
Making the eyes:
Roll two tiny balls of black clay. These should be fairly small to give the snowman a sweet expression. -
Placement:
Press the black eye balls firmly onto the upper half of the white disc, spacing them widely apart. -
Blushing cheeks:
Mix a tiny speck of red into white clay to make pale pink, or use pre-made pink clay. Create two small flat circles, slightly larger than the eyes. -
Applying cheeks:
Place these pink spots below and slightly outside the eyes. I like to gently tap them with a texture tool or sandpaper to give them a softer look. -
Carrot nose:
Roll a small piece of orange clay into a cone shape. Keep it relatively short and rounded at the tip rather than dangerously sharp. -
Attaching the nose:
Press the nose into the center of the face, right between the eyes and cheeks. Ensure it bonds well with the base clay. -
The smile:
Roll five very tiny balls of black clay for the mouth. These should be smaller than the eyes. -
Forming the smile:
Arrange these five dots in a U-shape under the nose, pressing them flat so they don’t fall off after baking.
Clean Slate Trick
White clay picks up dust instantly! Keep a pack of baby wipes nearby and clean your hands and tools thoroughly right before handling the white base clay.
Step 3: Baking and Assembly
-
Baking:
Place your snowman face on a parchment-lined baking sheet. Bake according to your specific clay brand’s instructions (usually 275°F for 15-30 minutes). -
Cooling:
Let the ornament cool completely before handling. It will be fragile while still warm. -
Fabric prep:
While the clay cools, cut a strip of your grey knit fabric. It should be about 1 inch wide and 6-8 inches long. -
Scarf wrapping:
Once the ornament is cool, apply a dot of super glue to the bottom edge of the ‘chin’. Press the center of your fabric strip there. -
Creating the knot:
Bring the ends of the fabric around to the front and tie a simple overhand knot or cross them over, securing the overlap with another drop of glue. -
Trimming:
Trim the ends of the scarf to a length you like. You can fringe the ends slightly with scissors for extra texture. -
Final hardware:
Unscrew the eye pin, add a dab of super glue to the hole, and screw it back in permanently. Slide the silver ornament cap over the eye pin for a polished bauble look. -
Hanging:
Thread a length of thin red satin cord through the eye pin loop and tie it securely.
Loose Scarf?
If the fabric won’t stay put on the round clay edge, use a tiny bit of hot glue for the initial tacking instead of super glue—it grabs faster on fabric.
Hang this cheerful little face on a prominent branch where let it showcase its heartwarming winter spirit


What Really Happens Inside the Kiln
Learn how time and temperature work together inside the kiln to transform clay into durable ceramic.
Simple Reindeer Head Ornaments
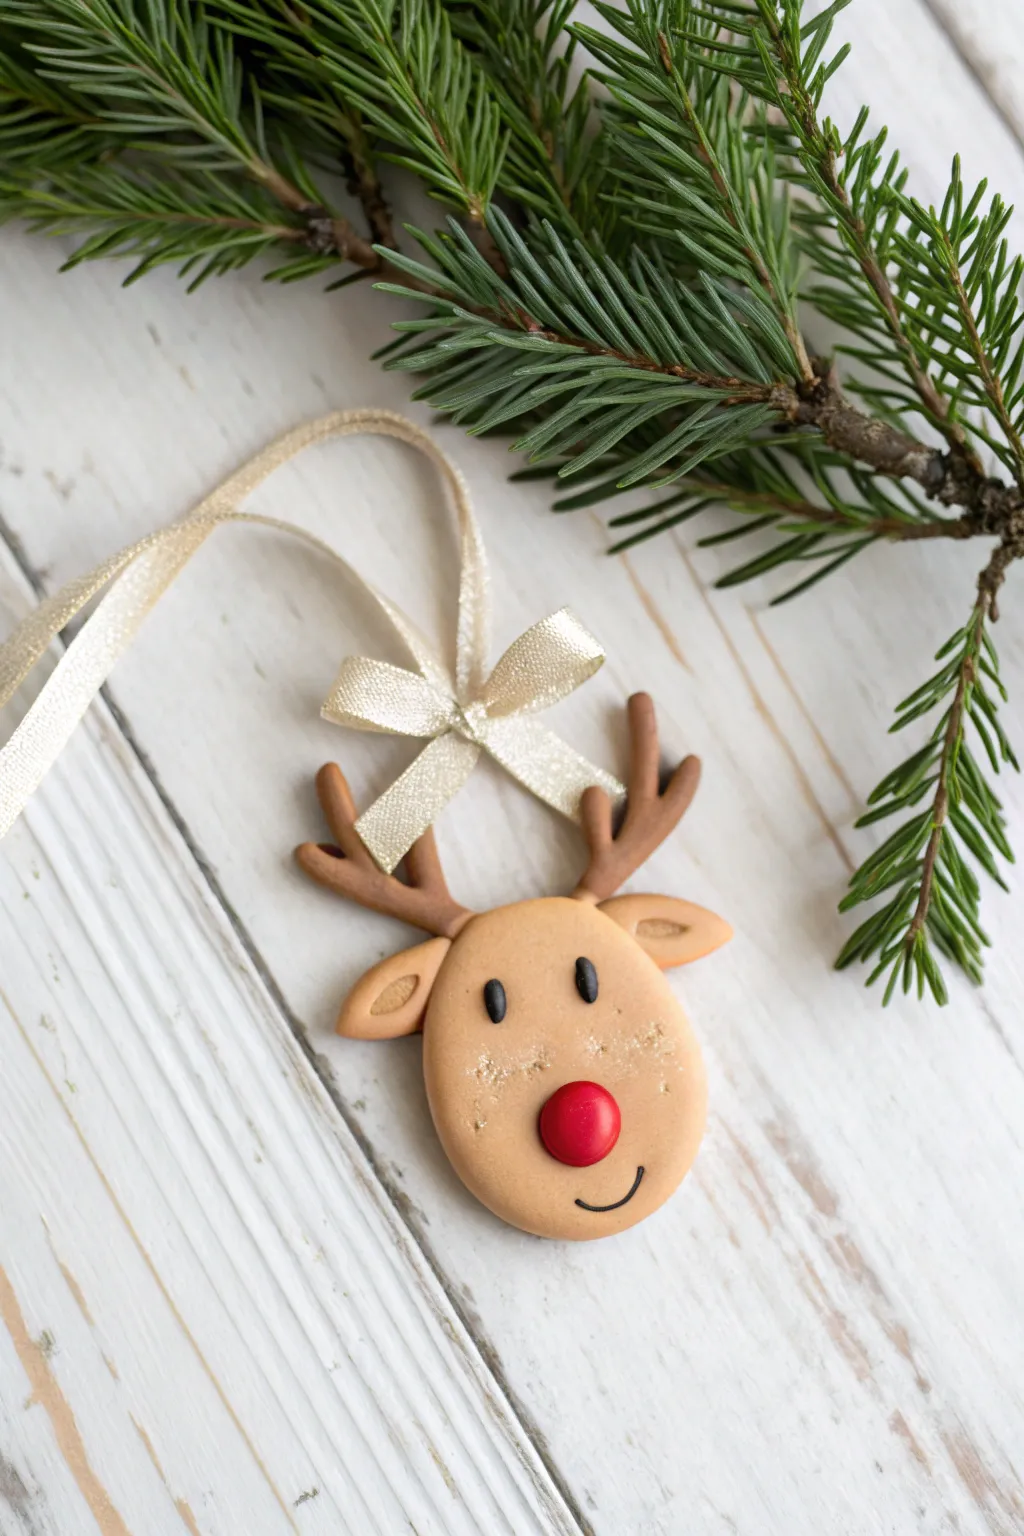
This adorable reindeer ornament features a smooth, cookie-like finish and a bright pop of red that captures Rudolph’s charm perfectly. With his sweet smile and shimmering gold ribbon, he makes a delightful addition to any tree or gift package.
Step-by-Step Tutorial
Materials
- Polymer clay (light warm brown, medium brown, black, red)
- Rolling pin or pasta machine
- Oval clay cutter (approximately 2 inches)
- Craft knife or scalpel
- Small ball stylus tool
- Needle tool
- Gold glitter dust or mica powder (optional)
- Eye pin (gold finish)
- Translucent liquid clay or Bake & Bond
- Gold ribbon (approx. 1/4 inch wide)
- Super glue (gel formula recommended)
- Fine-grit sandpaper (optional)
- Toaster oven or conventional oven for baking
Step 1: Shaping the Head and Face
-
Condition the Clay:
Start by thoroughly conditioning your light warm brown clay until it is soft and pliable. This prevents cracking later on. -
Roll out the Base:
Roll the light brown clay into a smooth sheet, approximately 1/4 inch thick. You want it substantial enough to be durable but not too heavy. -
Cut the Head Shape:
Using your oval cutter, punch out a clean shape for the reindeer’s head. Smooth the edges gently with your fingertip to remove any sharp cut marks. -
Form the Nose:
Take a small amount of red clay and roll it into a tight ball. Flatten it slightly so it looks like a button rather than a sphere. -
Attach the Nose:
Place the red nose on the lower center of the face. Press it down gently to secure it without squashing the shape. -
Create the Ears:
Roll two small teardrop shapes from the light brown clay. Flatten them gently to form the ears. -
Detail the Ears:
Use a smaller tool or the back of a paintbrush to create an indentation in the center of each ear, giving them dimension. -
Attach the Ears:
Apply a tiny dot of liquid clay to the side of the head and press the ears into place, angling them slightly downward.
Clean Clay Pro Tip
Keep baby wipes or hand sanitizer nearby. Clean your hands thoroughly before switching from the red or black clay back to the light brown to avoid colour transfer.
Step 2: Adding Details and Antlers
-
Form the Antlers:
Switch to your medium brown clay. Roll a thin snake of clay and cut two main curved pieces for the antler stems. -
Add Antler Points:
Cut very small pieces of the brown snake and attach them to the main stems to create the branching points. Smooth the seams with a rubber tool or your finger. -
Attach Antlers:
Press the base of each antler onto the top corners of the head. I like to blend the clay slightly at the back for a stronger hold. -
Insert the Eye Pin:
Carefully insert a gold eye pin into the very top center of the head, between the antlers. If the pin is too long, trim it first with wire cutters. -
Add the Eyes:
Roll two tiny, pill-shaped ovals of black clay. Place them vertically above the nose to create his sweet expression. -
Carve the Smile:
Using a needle tool or the edge of a small circular cutter, gently impress a small curved smile just below the nose, slightly off-center to the right. -
Emphasize the Smile:
Roll an incredibly thin thread of black clay and carefully lay it into the smile indentation you just made for a crisp black line. -
Add Sparkle:
Lightly brush a small amount of gold glitter dust onto the cheeks for a festive shimmer.
Fixing Fingerprints
If you notice fingerprints on the smooth face before baking, lightly brush the surface with a little baby oil or cornstarch to smooth them away instantly.
Step 3: Finishing Up
-
Bake the Ornament:
Bake according to your clay manufacturer’s instructions (usually 275°F/135°C for 15-30 minutes). Let it cool completely. -
Secure the Eye Pin:
Once cool, if the eye pin feels loose, pull it out, add a drop of super glue, and slide it back in. -
Tie the Bow:
Thread your gold ribbon through the eye pin loop. Tie a small bow directly at the top of the loop, securing the knot with a dab of glue so it stays perfect.
Now your charming little reindeer is ready to spread holiday cheer from the branches of your tree
Mini Wreath Ring Ornaments
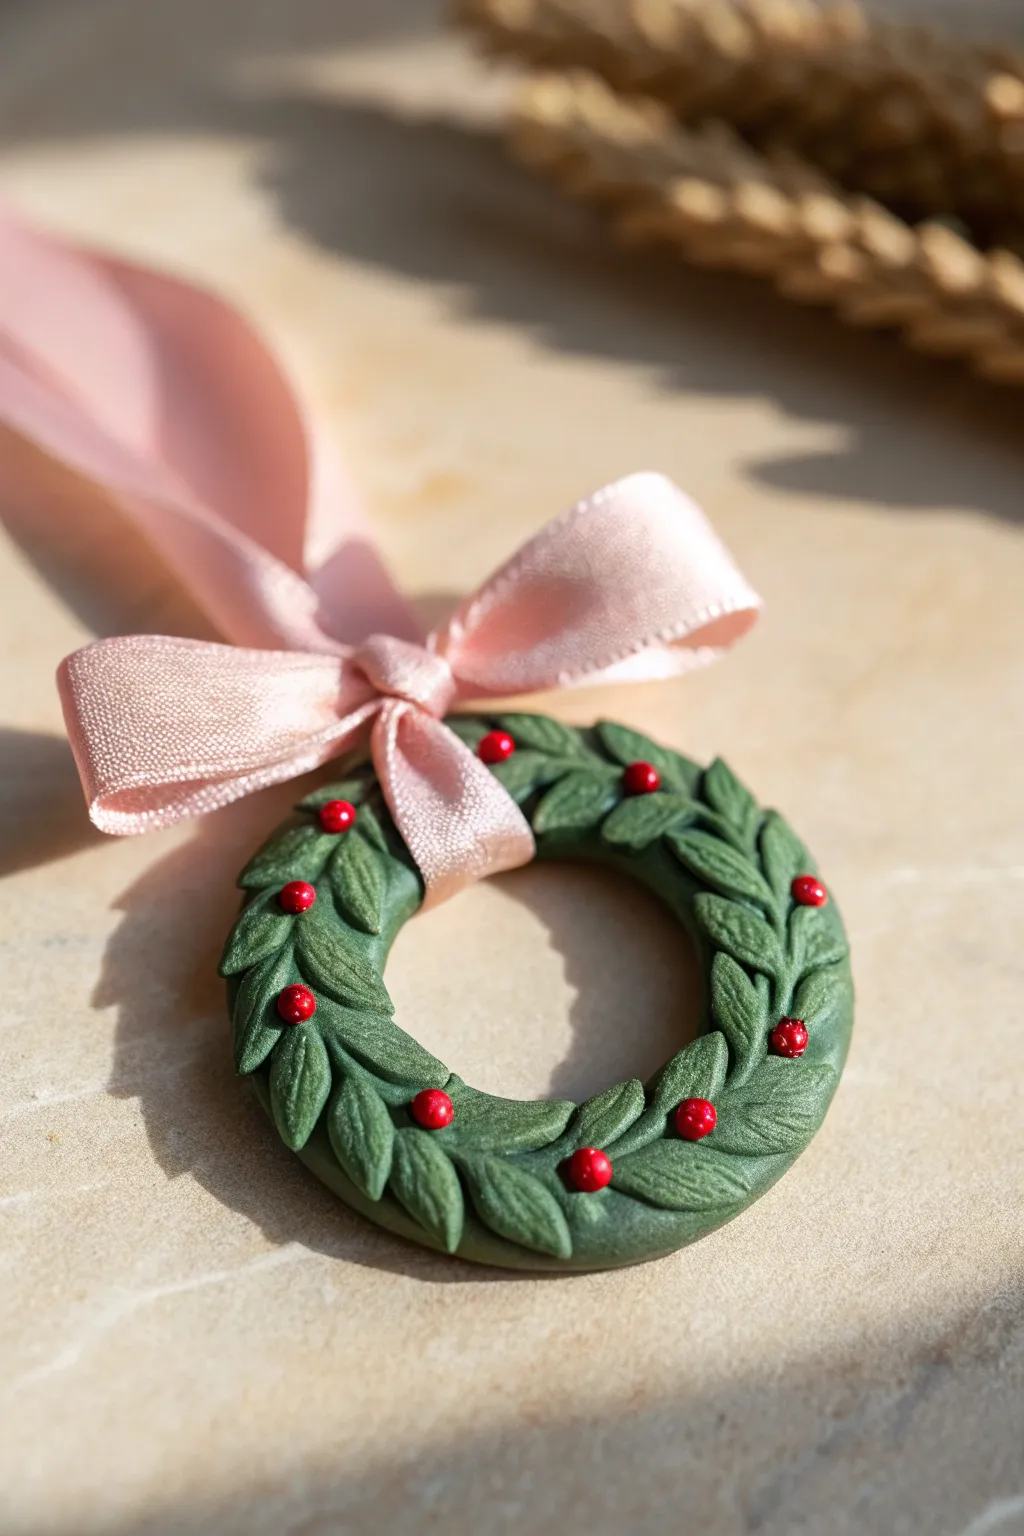
Capture the spirit of the season with this delicate miniature wreath, featuring individually sculpted leaves and tiny berry accents. Its matte finish and soft pink ribbon give it a sophisticated, vintage-inspired look perfect for tucking into small spaces on your tree.
Detailed Instructions
Materials
- Green polymer clay (a muted, sage or forest green tone)
- Red polymer clay (bright berry red)
- Rolling pin or clay machine
- Small round cutter (approx. 1.5 – 2 inches)
- Needle tool or toothpick
- Small ball tool
- Blade or X-Acto knife
- Liquid polymer clay (optional, for adhesion)
- Pale pink satin ribbon (1cm width)
- Oven for baking
Step 1: Forming the Base
-
Condition the clay:
Start by thoroughly conditioning your green clay until it is soft and pliable. This prevents cracks during baking. -
Roll a snake:
Roll a portion of the green clay into a thick snake, approximately 1/4 inch in diameter and 3-4 inches long. -
Create the ring:
Curve the snake into a circle, pressing the ends together to seamless join them. This forms the foundational ring for your wreath.
Step 2: Sculpting the Foliage
-
Prepare leaf bits:
Pinch off many tiny pieces of green clay, rolling each into a small teardrop shape about the size of a grain of rice. -
Flatten the leaves:
Gently press each teardrop flat between your fingers or on your work surface to create a basic leaf shape. -
Add vein details:
Take your needle tool and carefully score a central vein down the middle of each leaf. -
Add texture:
Add small diagonal indentations branching from the central vein to mimic natural leaf texture. I find varying the pressure slightly makes them look more organic. -
Begin layering:
Start placing your leaves onto the clay ring base. Press the bottom (wider end) of the leaf onto the ring, letting the pointed tip lift slightly. -
Overlap the leaves:
Apply the next leaf so it slightly overlaps the base of the previous one. Continue this pattern all the way around the ring until the base is fully covered. -
Check for gaps:
Inspect the wreath for any spots where the base ring shows through and tuck in extra small leaves if needed.
Natural Texture Hack
Instead of hand-drawing veins, gently press your raw clay leaves against a real stiff leaf or a texture stamp before attaching them.
Step 3: Adding Accents & Finishing
-
Create berries:
Roll tiny spheres of red polymer clay. Keep them very small to maintain the delicate scale of the ornament. -
Attach berries:
Press the red berries gently onto the leaves in random clusters. If your clay is dry, a tiny dab of liquid clay helps them stick securely. -
Create a hanging hole:
Before baking, ensure there is a natural gap amidst the leaves at the top, or carefully widen a space between leaves to allow the ribbon to pass through later. -
Bake the ornament:
Place your wreath on a ceramic tile or baking sheet. Bake according to your clay manufacturer’s instructions (usually 275°F for 15-30 minutes). -
Cool down:
Allow the piece to cool completely before handling. It will be slightly fragile while warm. -
Add the ribbon:
Cut a length of pale pink satin ribbon. Thread it through the center of the wreath. -
Tie the bow:
Tie a neat bow at the top of the wreath, adjusting the loops so they sit perky and upright.
Frosted Finish
Before baking, lightly brush white pastel chalk powder onto the leaf tips to simulate a light dusting of winter frost.
Hang your handcrafted mini wreath on a branch where its gentle colors can be admired

TRACK YOUR CERAMIC JOURNEY
Capture glaze tests, firing details, and creative progress—all in one simple printable. Make your projects easier to repeat and improve.
Sweater-Texture Mittens and Stockings
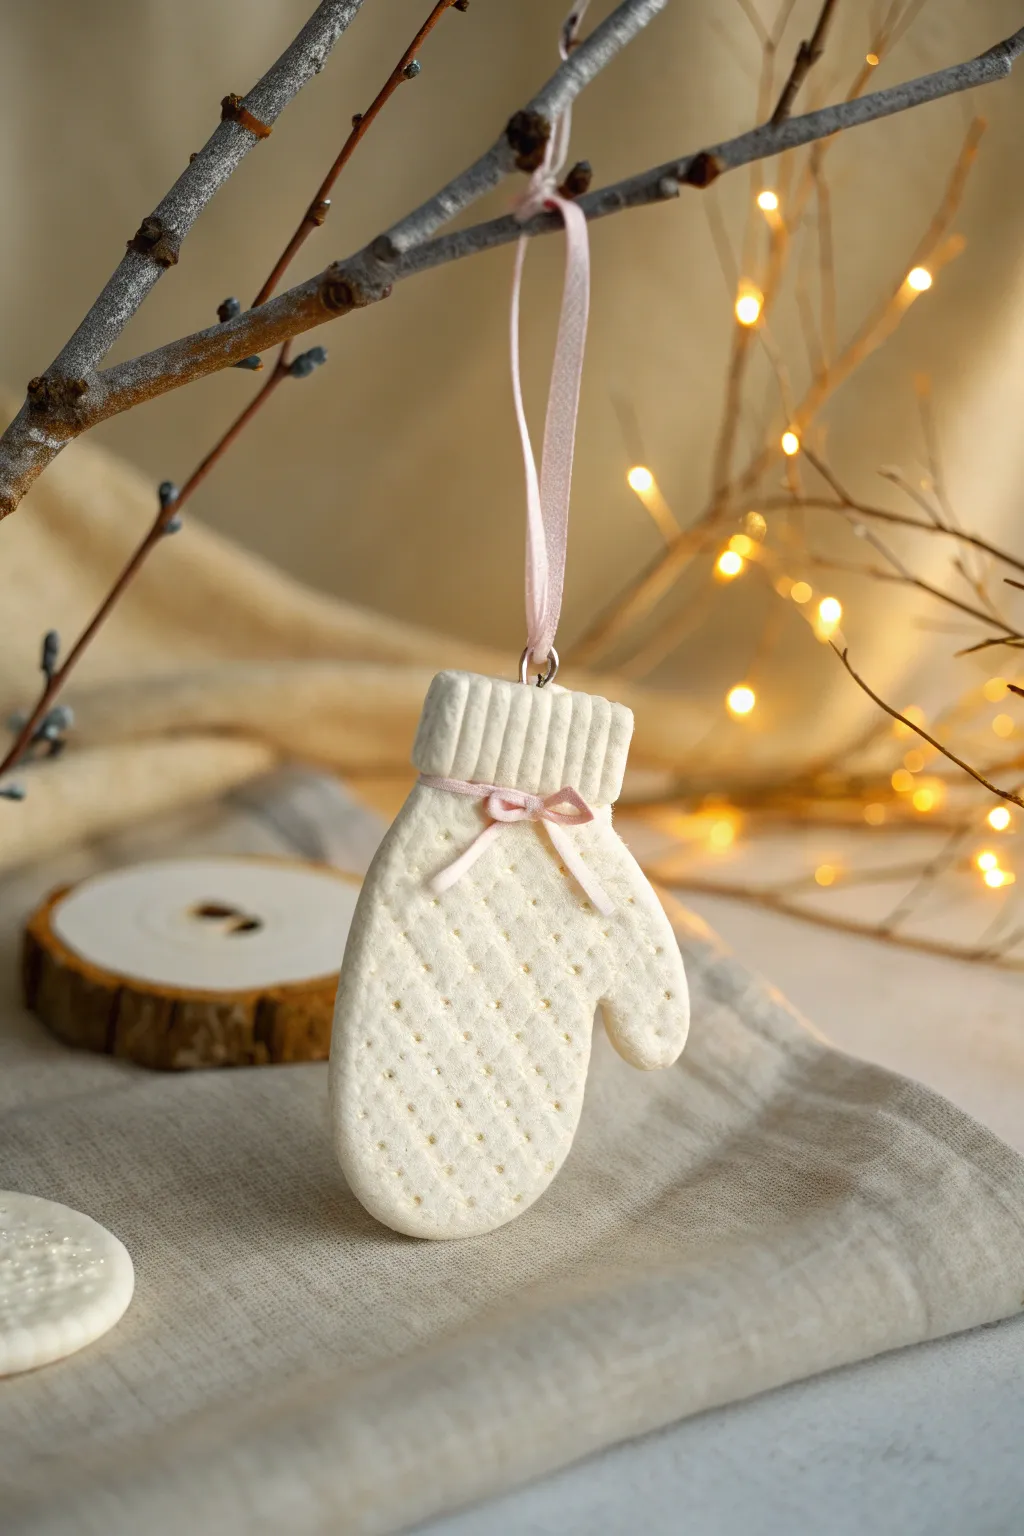
Capture the warmth of winter woolens without picking up a single knitting needle with this charming mitten ornament. Using simple texturing tools and white polymer clay, you’ll sculpt a keepsake that looks soft to the touch but endures for years.
Step-by-Step
Materials
- White or cream polymer clay
- Rolling pin or acrylic roller
- Mitten-shaped cookie cutter (approx. 3-4 inches)
- Texture sheet (seed stitch, diamond pattern, or waffle grid)
- Rigid blade or craft knife
- Small eye pin or metal jewelry loop
- Pink satin ribbon (1/8 inch width)
- Strong craft glue or liquid clay
- Needle tool or toothpick
- Oven for baking polymer clay
Step 1: Base Construction
-
Condition the Clay:
Begin by thoroughly kneading your white polymer clay until it is soft and pliable. Use your hands to warm it up, ensuring there are no air bubbles trapped inside. -
Roll the Slab:
Roll out the clay to a uniform thickness of about 1/4 inch. Creating a slightly thicker slab helps the ornament maintain its structural integrity and gives it a satisfying, chunky knit look. -
Create the Main Texture:
Place your chosen texture sheet—something with a repeating dot or diamond grid mimics the ‘seed stitch’ look best—firmly onto the clay slab. Roll over the sheet once with even pressure to imprint the pattern deeply. -
Cut the Shape:
Position your mitten cookie cutter over the textured clay. Press down firmly to cut the shape, then gently wiggle it to release. If the edges are rough, carefully smooth them with your finger without squashing the texture. -
Separate the Cuff:
Using your rigid blade, make a clean, horizontal cut across the wrist area of the mitten to separate the top cuff portion from the hand portion. Set the textured hand portion aside for a moment.
Sticky Texture?
If the clay sticks to your texture sheet, lightly dust the clay surface with cornstarch or spritz the sheet with water before pressing down.
Step 2: Ribbed Cuff & Assembly
-
Prepare the Cuff Clay:
Take the small piece of clay you just cut off for the cuff (or a fresh scrap) and roll it into a small rectangular log that matches the width of the mitten wrist. -
Texture the Ribbing:
Press the side of a toothpick or a dull knife vertically into this clay rectangle at regular intervals. This creates the vertical ‘ribbed’ knitting effect commonly found on sweater cuffs. -
Reattach the Cuff:
Lightly score the top edge of the textured mitten hand and the bottom edge of your new ribbed cuff. Apply a tiny amount of liquid clay or bond as ‘glue’ and press the two pieces back together gently. -
Refine the Seam:
On the back of the ornament, smooth the clay across the seam to ensure the cuff is securely attached. The join on the front will be covered later by the ribbon. -
Insert Hardware:
Take your metal eye pin and carefully insert the straight shaft into the top center of the ribbed cuff. Make sure it goes deep enough for stability but doesn’t poke through the front or back faces.
Step 3: Finishing Touches
-
Bake the Clay:
Place your mitten on a baking sheet lined with parchment paper or a ceramic tile. Bake according to your specific brand of polymer clay’s instructions (usually 275°F/135°C for 15-30 minutes). -
Cool Down:
Allow the clay to cool completely in the oven with the door slightly ajar. This gradual cooling helps preventing thermal shock cracks. -
Tie the Bow:
While the clay cools, cut a short length of the thin pink ribbon. Tie a very small, tidy bow, trimming the tails at an angle to prevent fraying. -
Attach the Decoration:
Once the mitten is fully cool, place a small dot of strong craft glue right at the seam where the ribbed cuff meets the main mitten body. -
Secure the Ribbon:
Press your premade bow into the glue dot. Hold it in place for a few seconds to ensure it grabs the textured surface securely. -
Add the Hanger:
Thread a longer piece of the pink ribbon through the metal eye pin at the top, tie a knot, and your cozy ornament is ready to hang.
Add Sparkle
Before baking, brush a tiny amount of white mica powder or iridescent glitter over the textured surface to give it a frosty, snowy shimmer.
Hang your cozy creation on a lit branch to see the shadows highlight that beautiful knit texture
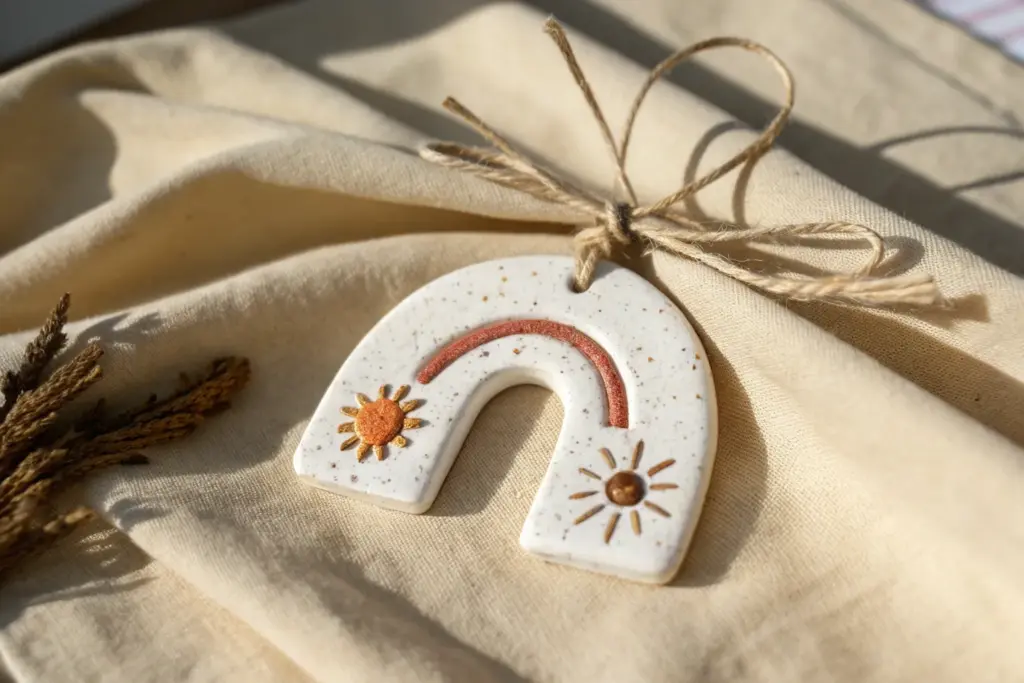
Tiny Present Box Ornaments
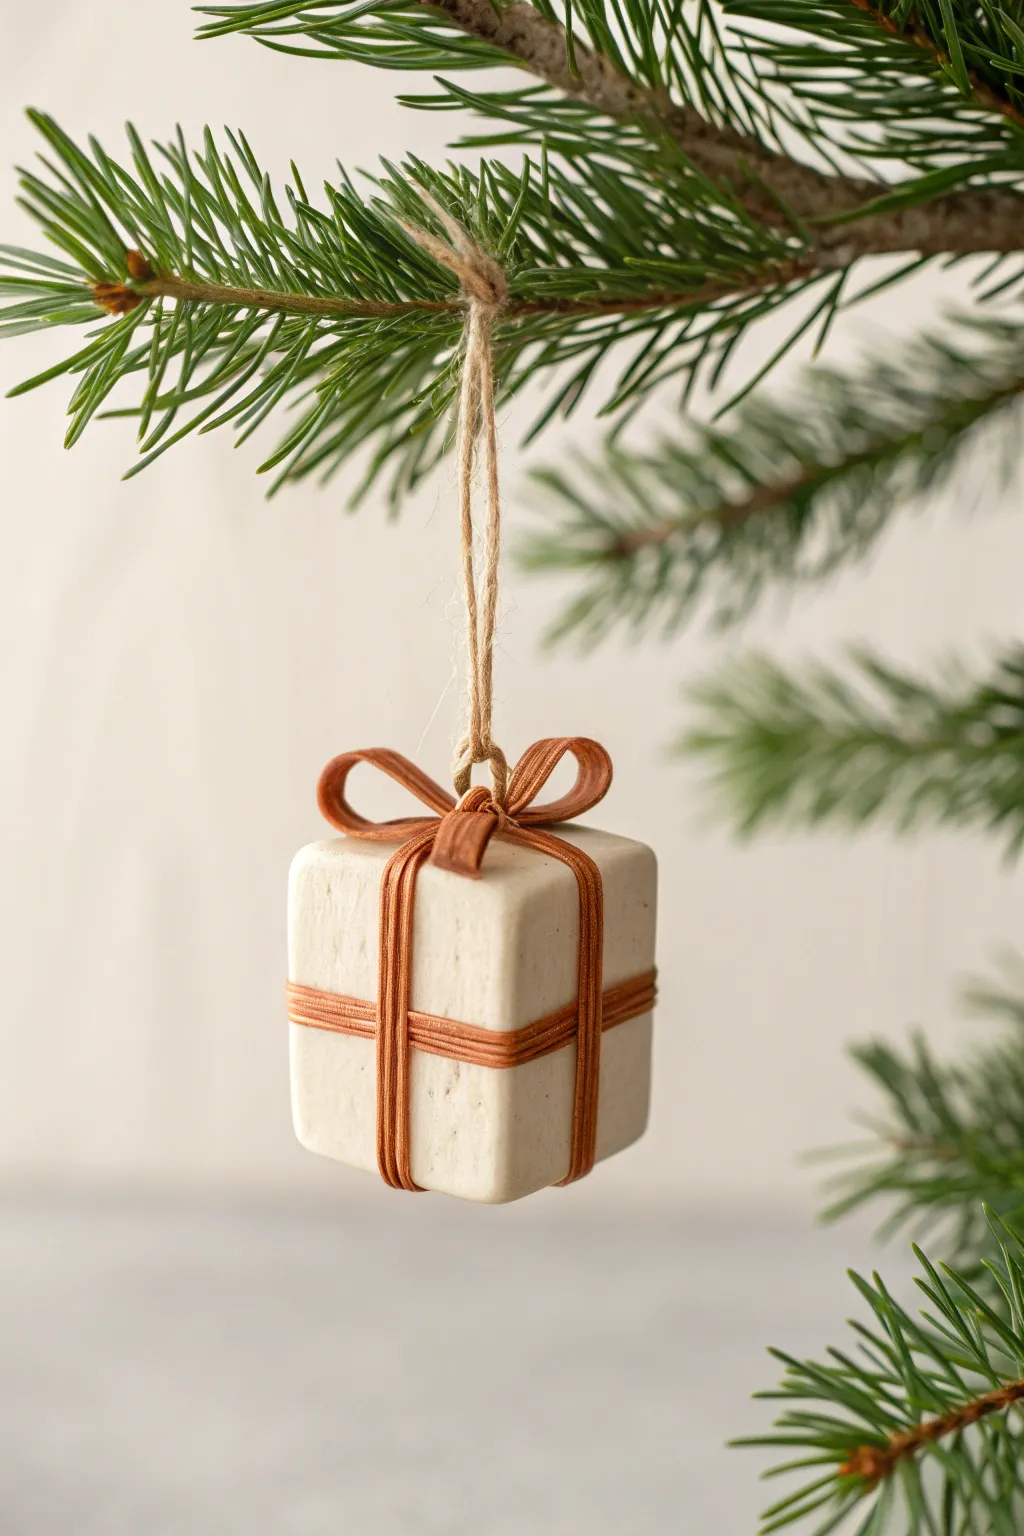
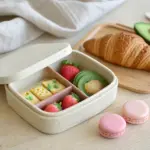
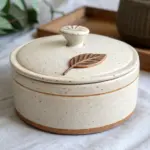
These miniature presents bring a minimalist, rustic charm to your tree with their faux-stone finish and delicate wrappings. They look surprisingly heavy but remain lightweight enough for even the smallest branches.
Step-by-Step Guide
Materials
- White polymer clay (granite or stone effect clay works best)
- Extruder tool with a small flat rectangle disc
- Copper or rust-colored polymer clay
- Sharp craft blade
- Large square cutter or ruler
- Needle tool or toothpick
- Jute twine for hanging
- Liquid polymer clay (optional)
- Sandpaper (fine grit)
- Ceramic tile or glass work surface
Step 1: Shaping the Box Base
-
Condition the base clay:
Start by thoroughly conditioning your white or stone-effect clay until it is pliable. If you want that speckled look but only have plain white clay, mix in a tiny pinch of black pepper or black embossing powder. -
Form a cube:
Roll the clay into a thick slab, approximately 1 inch thick. You can stack layers if needed to get the height. -
Cut the shape:
Using a sharp blade or a square cutter, trim the slab into a neat 1-inch cube. Ensure the sides are as parallel as possible for a clean, graphical look. -
Soften the edges:
Gently tap the sharp corners of your cube against your work surface. You want to round them slightly so the box looks like tumbled stone rather than a sharp geometric solid. -
Create the hanging hole:
Insert a needle tool straight down into the center of the top face of the cube. Wiggle it slightly to create an anchor point for the twine later, though we will bake the twine into the bow structure.
Fixing Broken Ribbons
If extruded ribbon snaps while wrapping, don’t restart. Use a drop of liquid clay to rejoin the ends and smooth the seam. The texture hides repairs well.
Step 2: Creating the Ribbon
-
Prepare the ribbon clay:
Condition your copper or rust-colored clay. This contrasting color gives the ornament its warmth. -
Extrude the strips:
Load the clay into an extruder fitted with a small, flat rectangle disc. Press out a long, continuous strip. If you don’t have an extruder, roll a very thin snake and flatten it evenly with a roller. -
Texture the ribbon (optional):
For added realism, firmly drag the needle tool down the length of the extruded strip to create subtle striations, mimicking fabric or raffia texture. -
Vertical wrap:
Lay a strip of clay across the top center of the cube, down the sides, and across the bottom. Trim the excess and press the ends gently into the bottom of the cube. -
Horizontal wrap:
Repeat the process horizontally, wrapping a second strip around the middle of the cube. Where the strips cross, press lightly to fuse them.
Step 3: The Bow and Assembly
-
Form the loops:
Cut two small segments of your ribbon strip, each about 1.5 inches long. Fold the ends of each segment inward to meet in the middle, creating a simple loop shape. -
Attach the loops:
Place these two loops in the center of the top of the box where the ribbons cross. A tiny dot of liquid polymer clay here helps ensure a permanent bond. -
Create the knot:
Cut a very small, short piece of the ribbon strip. Wrap this over the center of your two loops to conceal the join and create the ‘knot’ of the bow. -
Prepare the hanger:
Cut a piece of jute twine and knot the ends together to form a loop. The knot should be large enough to catch inside the clay. -
Insert the hanger:
Using your needle tool, carefully poke a hole right through the center of the clay bow knot and slightly into the cube. Push the knotted end of the twine into this hole using the tool. -
Seal the hanger:
Push the clay of the bow knot gently back around the twine to trap it securely. I usually smooth this area with a rubber-tipped sculpting tool to hide the entry point. -
Final texture check:
Inspect your box for fingerprints. If you find any on the white sections, gently brush them away with a little baby oil or buff them out with a scrap of denim. -
Bake the ornament:
Bake according to your clay manufacturer’s instructions (usually 275°F/135°C) for 30–45 minutes. Since the cube is thick, a longer, slower bake ensures the core cures fully.
Make It Look Antique
Mix translucent clay into your ribbon color (50/50 mix). Once baked, the ribbon will look slightly semi-transparent, resembling real organza or vintage tape.
Hang these on your tree in clusters for a sophisticated, handcrafted holiday vignette
Photo Frame Keepsake Ornaments
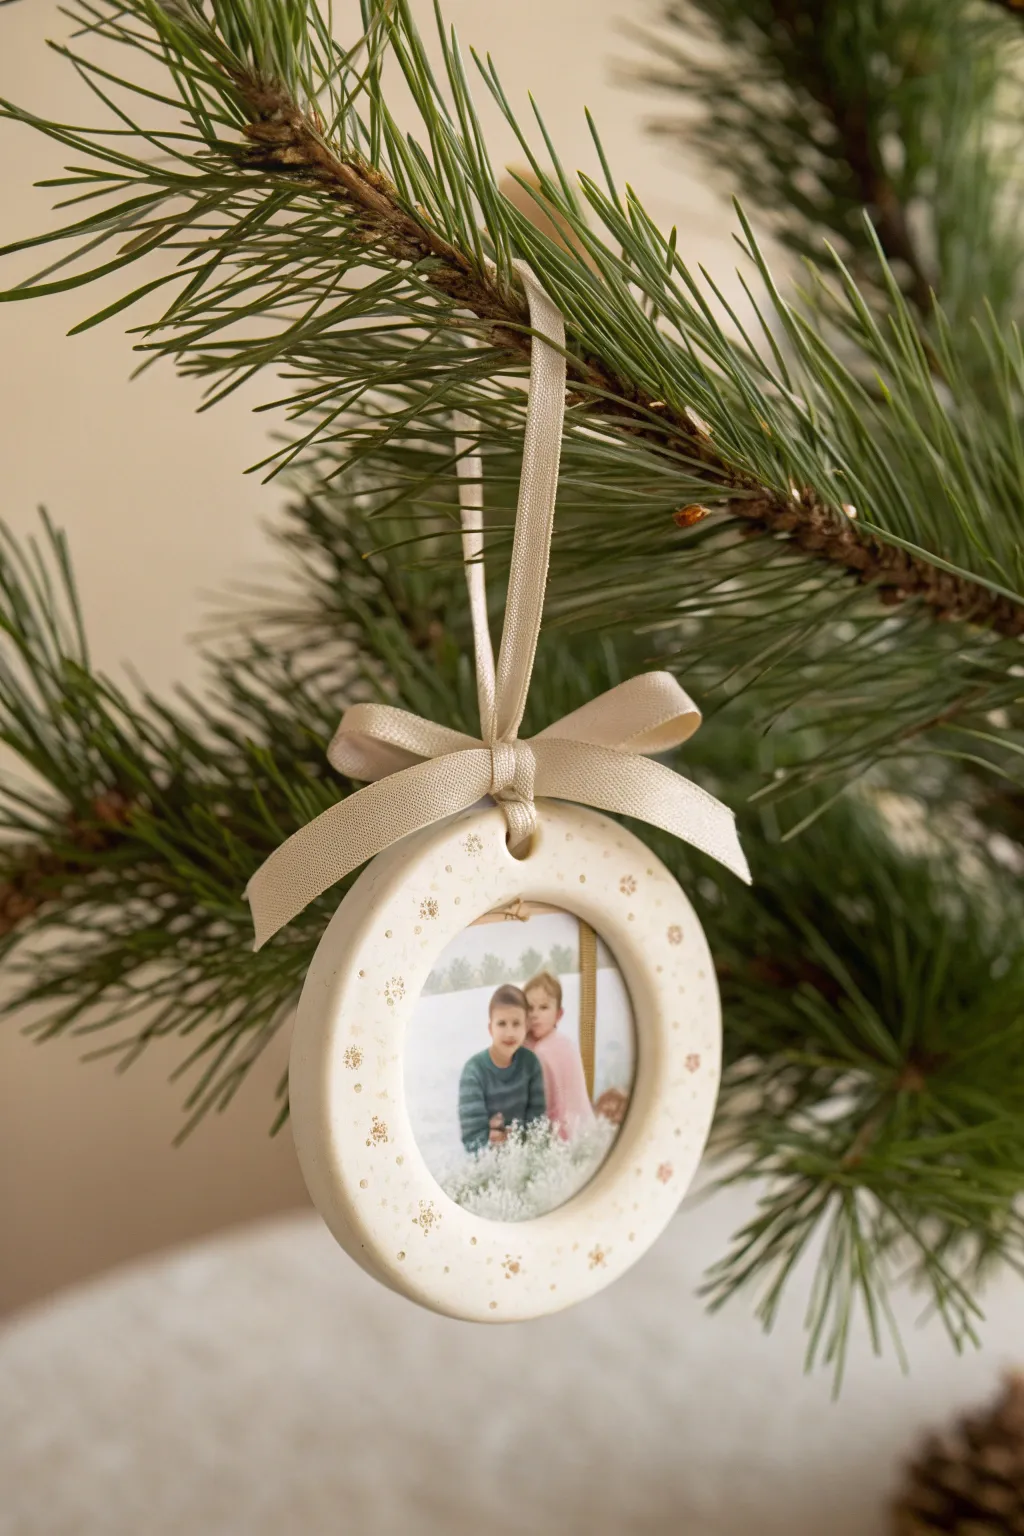
This elegant keepsake ornament combines the classic charm of polymer clay with a personal touch, framing a cherished photo in creamy white. The delicate gold snowflake details and soft ribbon create a timeless look perfect for gifting grandparents or marking a baby’s first Christmas.
Step-by-Step Tutorial
Materials
- White or translucent white polymer clay
- Rolling pin
- Two circle cutters (one large approx. 3-inch, one smaller approx. 2-inch)
- Small snowflake stamp or embossing tool
- Gold metallic acrylic paint
- Detail paintbrush or cotton swab
- Drinking straw or small hole punch tool
- Printed photograph (sized to fit the frame)
- Glossy glaze or polyurethane varnish (optional)
- Cream satin ribbon (1/4 inch or 3/8 inch width)
- Craft glue or strong adhesive
- Baking sheet and parchment paper
- Cardstock (for backing)
Step 1: Shaping the Clay Frame
-
Condition the clay:
Begin by warming the white polymer clay in your hands, kneading it until it is soft, pliable, and free of cracks. -
Roll it out:
Use your rolling pin to flatten the clay on a clean surface to an even thickness of about 1/4 inch. If you want a perfectly even surface, playing cards stacked on either side of the roller can act as guides. -
Cut the outer shape:
Press the larger circle cutter firm ly into the clay to create the main ornament shape. Remove the excess clay from around the edges before lifting the cutter. -
Cut the inner window:
Center the smaller circle cutter inside the large one and press down to remove the center. This creates your donut-shaped frame. -
Create the hanging hole:
Use a drinking straw to punch a clean hole at the very top of the clay ring. Make sure it’s not too close to the edge to prevent tearing. -
Smooth the edges:
Dip your finger in a little bit of water (or baby oil) and gently run it along the cut edges to smooth out any sharpness or burrs left by the cutters.
Step 2: Adding Details and Baking
-
Stamp the pattern:
Take your tiny snowflake stamp. Gently press it into the surface of the clay in a scattered, random pattern. Do not press too deeply; you just want a clear impression for the paint to settle into. -
Bake the clay:
Carefully transfer the clay ring to a parchment-lined baking sheet. Bake according to your brand’s specific instructions (usually 275°F/135°C for 15-30 minutes). -
Cool completely:
Once baked, I always let the piece cool down fully on the baking sheet to ensure it hardens correctly without warping.
Stamp Substitutes
No snowflake stamp? Use the head of a small screw, a decorative button, or even the tip of a textured pen cap to create similar indentations.
Step 3: Finishing Touches
-
Apply the gold accents:
Dip a fine brush into gold metallic paint and dab it into the stamped snowflake indentations. You don’t need to be perfectly neat here. -
Wipe the surface:
Immediately after painting, use a slightly damp paper towel to wipe the surface of the clay. This removes the paint from the high points but leaves the gold trapped inside the snowflake impressions. -
Seal (Optional):
If you prefer a glossy ceramic look, apply a coat of polymer clay glaze. For a matte, biscuit-porcelain look like the example, you can skip this step. -
Prepare the photo:
Cut your photograph into a circle slightly larger than the inner window opening of your frame. -
Attach the backing:
Cut a circle of cardstock the same size as your outer frame. Glue your photo to the center of this cardstock circle. -
Assemble the frame:
Apply strong craft glue to the back of the clay frame and press it firmly onto the cardstock/photo assembly. Let it dry under a heavy book. -
Punch the backing hole:
Once the glue is dry, use your hole punch or a sharp tool to clear the cardstock from the hanging hole area you created earlier. -
Add the ribbon:
Thread a length of cream satin ribbon through the hole to create a hanging loop. Tie a separate small bow from the same ribbon and glue it just below the loop for a polished finish.
Help! Dirty Clay?
White clay picks up dust easily. Clean your hands and work surface with baby wipes before starting, or use a cotton swab with rubbing alcohol to clean raw clay.
Hang this beautiful keepsake on your tree and enjoy the memories year after year
Snow Globe Scene Ornaments
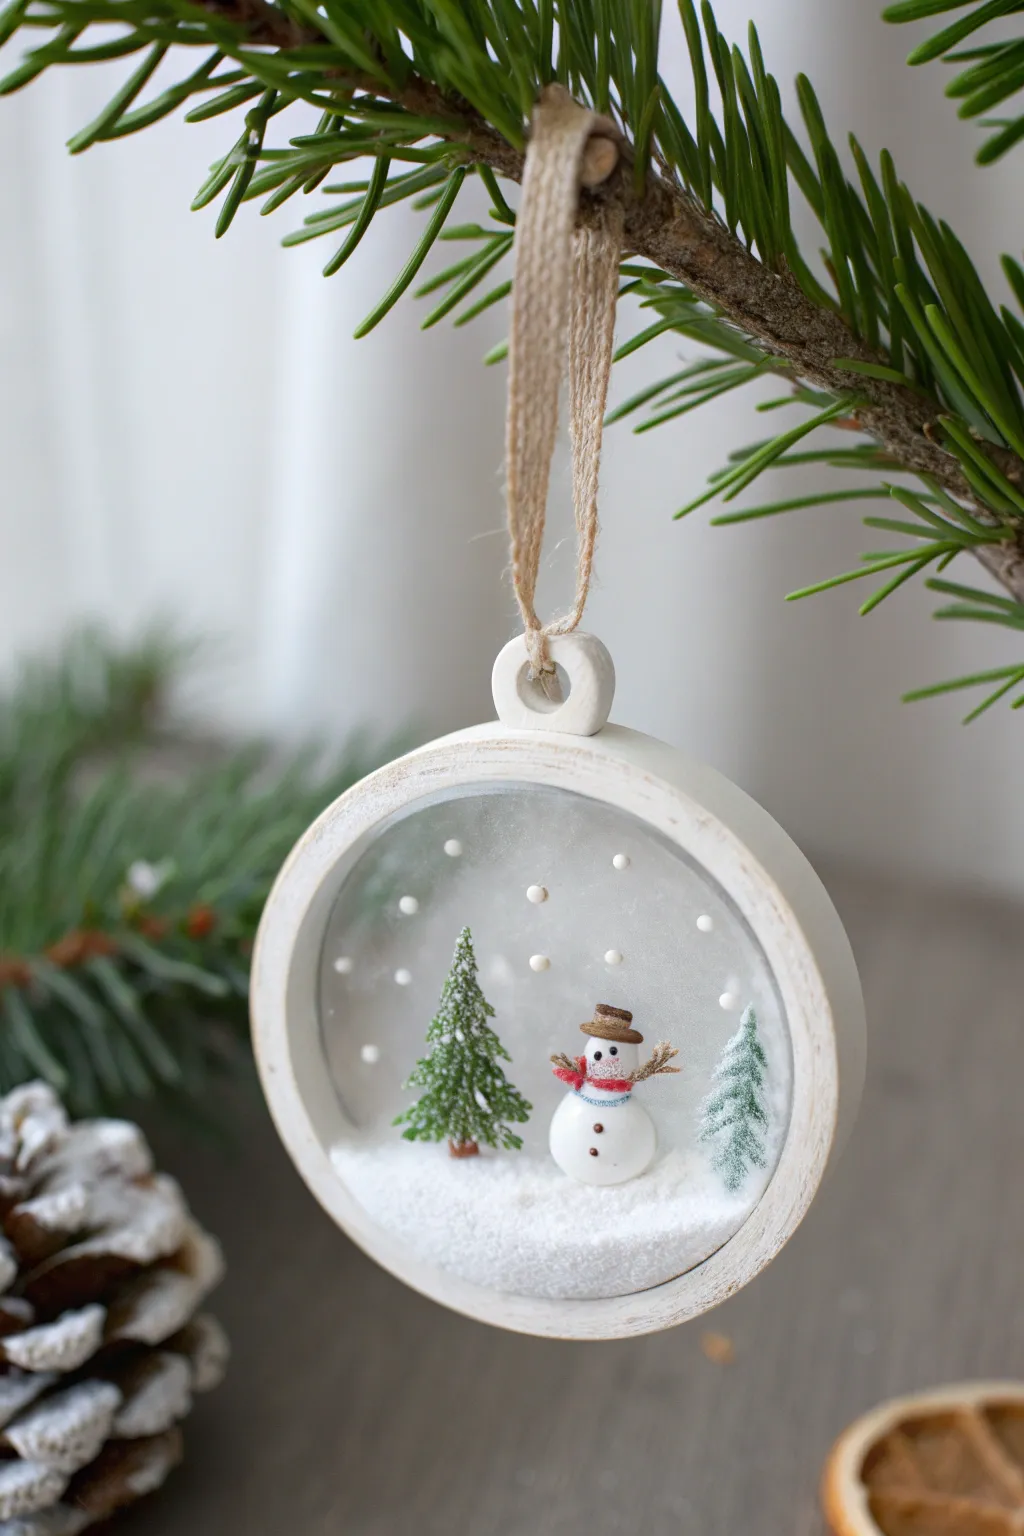
Capture the stillness of a snowy day inside a charming circular frame that hangs beautifully on any tree. This delicate shadowbox effect combines miniature polymer clay figures with a dusting of faux snow for a cozy, three-dimensional scene.
How-To Guide
Materials
- White polymer clay (for the frame and snowman)
- Brown, red, and orange polymer clay (small amounts)
- Green polymer clay or pre-made miniature bottle brush trees
- Liquid polymer clay (translucent)
- Faux snow powder or white glitter
- Clear acetate sheet or thick plastic packaging
- Round cookie cutters (two sizes to create a ring)
- Texture tool or toothbrush
- Jute twine
- Craft glue or UV resin
- White acrylic paint (optional for distressing)
- Rolling pin
- Blade or X-Acto knife
Step 1: Creating the Frame
-
Roll the base:
Start by conditioning your white polymer clay until it’s pliable. Roll out a thick slab, approximately 1/4 inch thick. This depth is important because it needs to house your little scene without the figures protruding too much. -
Cut the outer ring:
Use your larger circle cutter (about 3 inches in diameter) to cut a perfect circle from the slab. Smooth the edges gently with your finger to remove any sharp cut marks. -
Ideally, hollow out the center:
Using a slightly smaller circle cutter, cut out the center of your disc to create a ring. The rim should be about 1/4 inch wide. Save the inner circle for another project! -
Form the hanger loop:
Fashion a small, rectangular tab of white clay with a hole in the center. Attach this securely to the top of your ring using a dab of liquid clay to bond it. Blend the seams so it looks like one solid piece. -
Texture the frame:
To mimic the look of painted wood, lightly drag a toothbrush or stiff bristles horizontally across the ring’s surface. This adds a subtle grain texture. -
Bake the frame:
Bake the frame according to your clay package instructions. I usually let it cool completely on a flat surface to prevent warping.
Clean Clay Tip
Keep wet wipes handy when working with white clay. Dust and lint love to stick to it! Wipe your hands and tools before handling the white clay to keep it pristine.
Step 2: Sculpting the Winter Scene
-
Make the snowman body:
Roll two small balls of white clay—one slightly larger for the base and a smaller one for the head. Stack them and press gently to adhere. You can insert a tiny bit of wire or a toothpick segment internally for stability. -
Add snowman details:
Roll a minimal cone of orange clay for the carrot nose. Create a tiny brown hat by flattening a small disc and topping it with a cylinder. Finish with a thin red snake of clay wrapped around the neck for a scarf. -
Create the trees:
For the trees, you can shape green clay into rough cones and use a needle tool to pull at the clay, creating a textured, pine-needle effect. Alternatively, trim tiny tips off a model bottle brush tree if you prefer a mixed-media look. -
Add snow dots:
Roll incredibly tiny balls of white clay (about the size of peppercorns) to serve as falling snowflakes. You’ll attach these to the background later. -
Bake miniature figures:
Bake your snowman and clay trees separately. Since they are small, keep a close eye on them to ensure the white clay doesn’t scorch.
Step 3: Assembly & Finishing
-
Prepare the backing:
Cut a circle from your clear acetate sheet that is slightly smaller than the outer diameter of your frame but larger than the inner opening. This will be the window. -
Create the snowy ground:
Cut a semi-circle shape from a thin sheet of white clay or sturdy white cardstock to fit inside the bottom curved edge of your frame. This acts as the snow drift base. -
Attach the figures:
Glue your snowman and trees onto this snow drift base. Arrange them so they fit comfortably within the circle’s view. -
Create the floating snow:
Glue the tiny baked white clay ‘snow dots’ directly onto the acetate circle in a random pattern. This creates the illusion of suspended snowfall. -
Assemble the layers:
Glue the acetate sheet to the back of the white frame. Then, glue the snow drift assembly (with figures attached) behind the acetate at the bottom. -
Add loose snow:
For extra texture, brush a layer of craft glue over the snow drift base and sprinkle faux snow powder or white glitter over it before doing the final seal. -
Seal the back:
To protect the scene, cut a final circle of white cardstock or a thin sheet of baked white clay and glue it to the very back of the ornament, sandwiching everything together cleanly. -
Distressed finish:
Dry brush a tiny amount of white acrylic paint over the trees and the edge of the frame to enhance the frosty, wintery feel. -
String it up:
Thread a piece of rustic jute twine through the top loop and knot it securely.
Shaker Style
Make it interactive! Instead of gluing the ‘snow dots’ to the acetate, leave them loose inside the frame creating a rattle or shaker ornament effect.
Hang this little frozen moment on a sturdy branch and enjoy the peaceful vibe it brings to your holiday decor
Marbled Gemstone Slice Ornaments
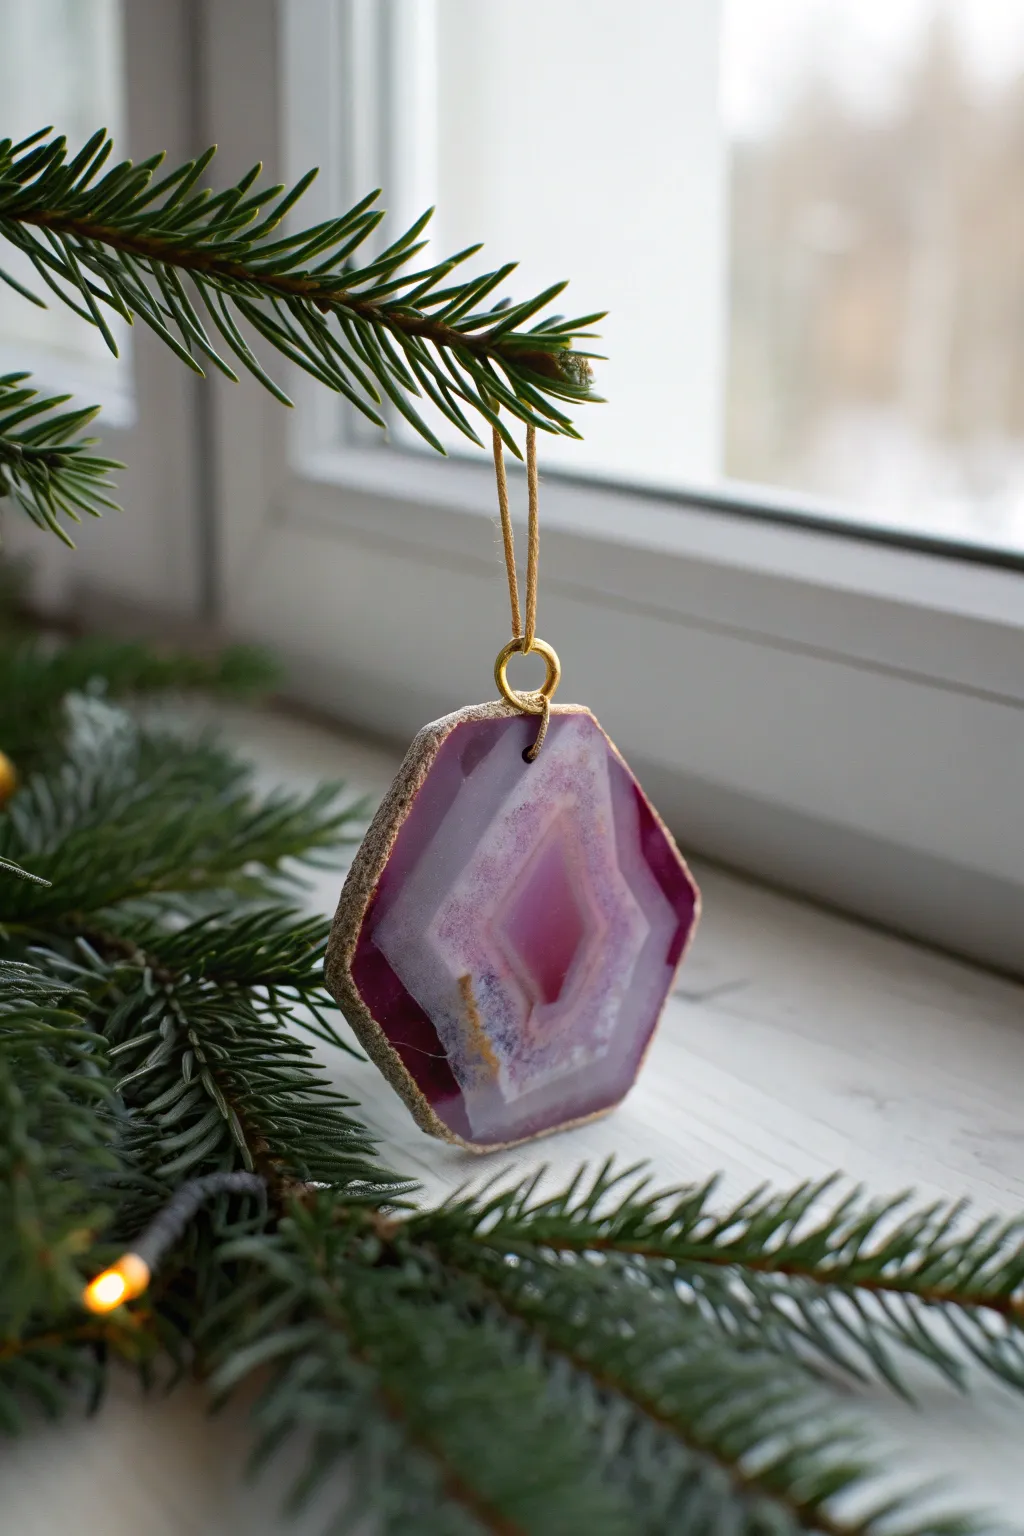
These ornaments mimic the stunning translucence and banding of real agate slices but are made entirely from polymer clay. The hex shape and gilded edges give them an elegant, modern feel perfect for a minimalist winter tree.
Step-by-Step Tutorial
Materials
- Translucent polymer clay
- Fuchsia or plum alcohol ink
- White alcohol ink or white liquid clay
- Gold leaf or gold acrylic paint
- Hexagon cookie cutter (approx 2-3 inches)
- Rolling pin or pasta machine
- Blade or X-Acto knife
- Small drill bit or needle tool
- Gloss glaze or UV resin
- Small paintbrush
- Gold jump ring and twine
Step 1: Prepping the Clay
-
Condition the translucent clay:
Start by thoroughly conditioning your translucent clay until it’s soft and pliable. This step is crucial to prevent plaque marks (those tiny little moons) from showing up after baking. -
Tint the clay:
Divide your clay into three uneven balls. One small ball will be left plain translucent. The largest ball gets tinted with fuchsia alcohol ink to a deep plum shade. The medium ball should be a lighter lavender shade, achieved by using less ink or mixing in a tiny bit of the plain. -
Create opacity:
Take a very small portion of the plain translucent clay and mix in white alcohol ink or a drop of opaque white clay. This will act as the milky quartz band often seen in geodes.
Ice Water Shock
Plunging hot translucent clay straight into a bowl of ice water instantly stops the baking process and significantly boosts clarity.
Step 2: Creating the Agate Pattern
-
Form the center:
Roll a small snake of the darkest plum clay and surround it with a thick wrapping of the lighter lavender mix. Pinch this cylinder into a diamond or rhombus shape rather than a perfect circle. -
Add the white band:
Roll your opaque white clay into a thin sheet. Wrap a layer of this around your central diamond shape. This creates that striking contrast ring seen in the photo. -
Build outer layers:
Continue wrapping layers of your dark plum and plain translucent clay around the cane. Vary the thickness of these wraps to make the banding look organic and natural. -
Compress the cane:
Gently squeeze and compress the entire block from all sides to fuse the layers without distorting the central diamond shape too much. Let the cane rest for about 20 minutes so it firms up before slicing. -
Slice the slab:
Cut thick slices (about 1/4 inch) from your cane. Lay four or five slices next to each other on your work surface, overlapping their edges slightly. -
Flatten and merge:
Use an acrylic roller to flatten the slices together into a single cohesive sheet. Roll in different directions to gently distort the pattern, enhancing the natural stone look.
Step 3: Shaping and Finishing
-
Cut the shape:
Place your hexagon cutter over an area of the slab where the ‘eye’ or center of a slice is prominent. Press down firmly to cut your ornament shape. -
Soften edges:
Gently run your finger along the cut edges to smooth out any sharp ridges left by the cutter. Real tumbled stones rarely have razor-sharp corners. -
Texture the rim:
Using a stiff toothbrush or a crumpled ball of foil, tap texture precisely along the thin outer rim of the hexagon. This rough surface will catch the gold paint later. -
Add the hole:
Use a needle tool or small straw to punch a hole near the top point of the hexagon for hanging. -
Bake:
Bake the clay according to the manufacturer’s instructions. Usually, 275°F (135°C) for 30-45 minutes works well for this thickness. To increase translucency, I plunge the hot pieces directly into ice water immediately after removing them from the oven. -
Glaze:
Once dry, coat the front and back with a high-gloss glaze or UV resin. This step is vital—it makes the translucent clay turn from cloudy to clear, revealing the depth of your layers. -
Gild the edges:
Paint the rough, textured edges with metallic gold acrylic paint or apply liquid leaf. Let the gold slightly overlap onto the front face of the ornament for a raw, encased look. -
Assemble:
Insert a gold jump ring through the hole and thread a piece of natural twine or gold cord through it to finish.
Add Sparkle
Mix a pinch of fine holographic glitter or mica powder into the plain translucent layers before rolling for a druzy quartz effect.
Hang your new gem on a branch near a light source to see the beautiful colors glow
Faux Stained Glass Window Ornaments
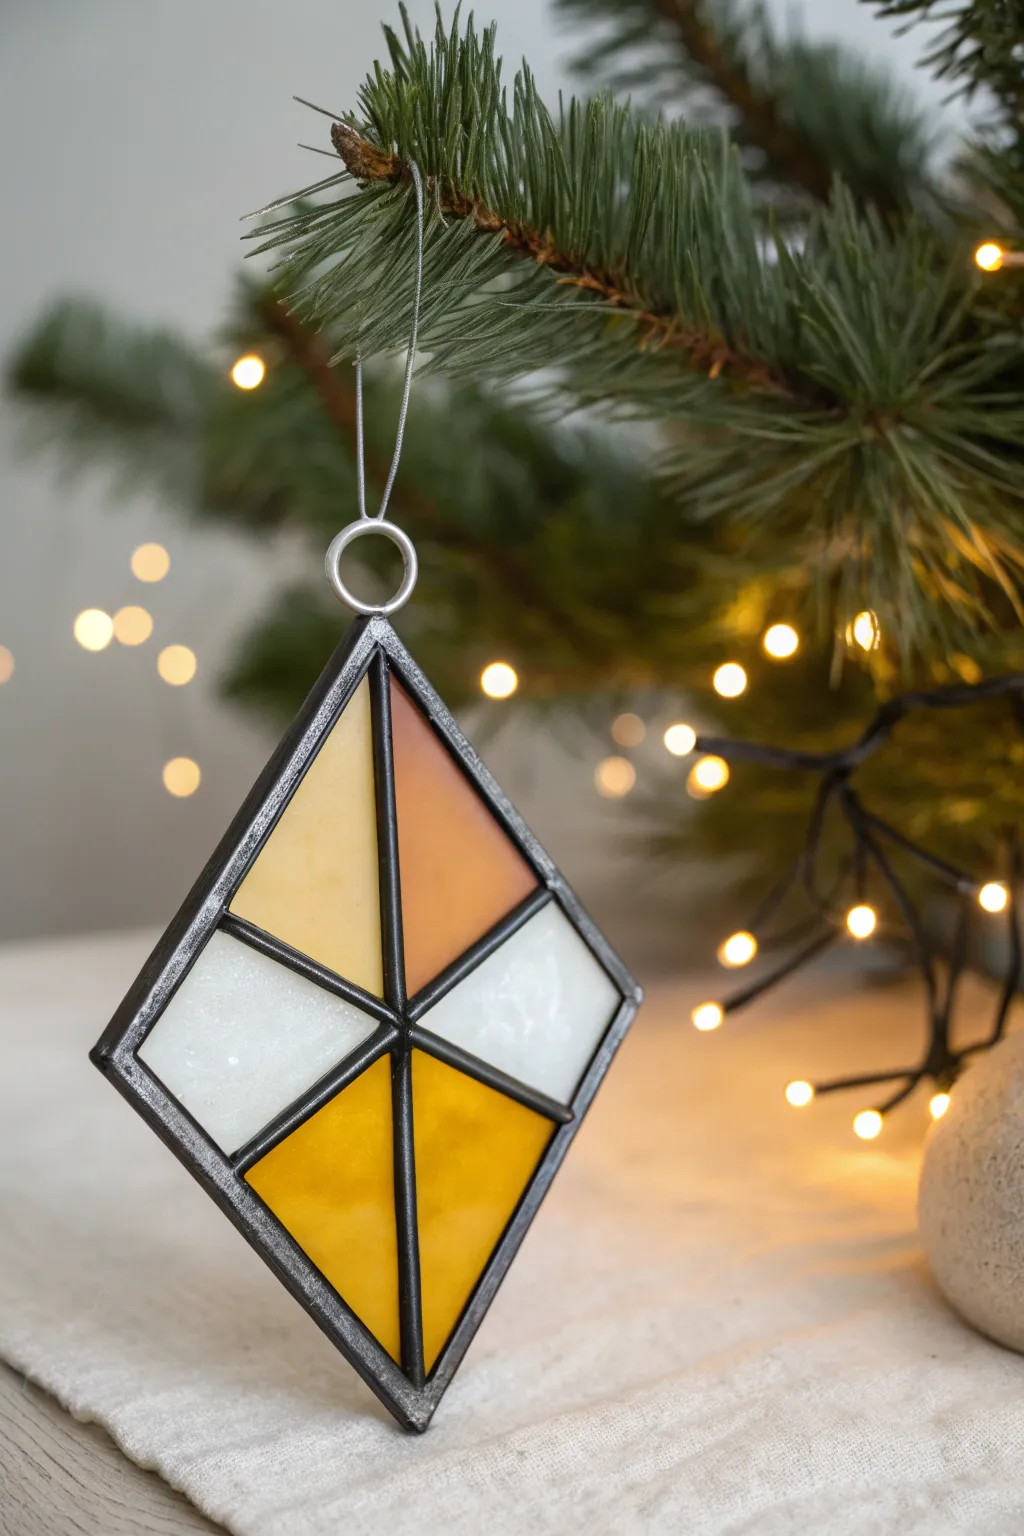
Achieve the look of traditional leaded glass without the soldering iron using liquid polymer clay and careful outlining. This sophisticated diamond-shaped ornament features translucent panels in amber, cream, and clear tones held together with striking black clay “lead lines.”
Detailed Instructions
Materials
- Black polymer clay (firm consistency)
- Liquid polymer clay (clear)
- Alcohol inks (amber/yellow, orange, white)
- Glass or ceramic work tile (smooth and oven-safe)
- Polymer clay blade or craft knife
- Extruder with small round disc (optional but recommended)
- Needle tool
- Metal jump ring (silver)
- Silver cord for hanging
- Oven (for curing)
Step 1: Creating the Frame
-
Condition the dark clay:
Start by thoroughly conditioning your black polymer clay until it is pliable but firm. This will serve as the faux lead came that holds the ‘glass’ panels. -
Create the heavy outer frame:
roll a snake of black clay that is roughly 3-4mm thick. If you have an extruder, use a medium round disc to get an even thickness. Arrange this into a diamond shape on your glass tile, pressing the corners together firmly to seal the shape. -
Insert the vertical divider:
Make a slightly thinner snake of black clay for the internal lines. Cut a piece that spans the entire vertical length of the diamond, pressing it into the top and bottom internal corners of the outer frame. -
Add horizontal dividers:
Cut two smaller pieces of the thinner black clay snake. Place these horizontally, connecting the vertical center line to the left and right sides of the diamond frame. This creates four triangular sections. -
Seal the seams:
Use a needle tool or small clay shaper to gently blend the clay where the lines intersect. You want the black lines to look like continuous metal soldering, so smooth out any obvious gaps. -
Pre-bake the frame:
To make filling the sections easier, bake this black skeleton frame on the tile for about 15-20 minutes at the manufacturer’s recommended temperature. This prevents the lines from smushing while you add the liquid clay.
Seal the Dam
If liquid clay leaks under the frame, your black clay wasn’t pressed down firmly enough. Wipe the leak away with alcohol before baking and press the frame harder.
Step 2: Adding the Faux Glass
-
Release the frame:
Once the frame has cooled, gently pop it off the tile just to ensure it isn’t stuck, then place it back down. Ensure it’s lying perfectly flat against the glass surface to prevent leaks. -
Mix the amber tint:
Pour a small amount of clear liquid polymer clay into a cup or palette. Mix in a tiny drop of amber or yellow alcohol ink. You want it translucent, so go easy on the pigment. -
Fill the bottom section:
Carefully pour or squeeze the amber mixture into the bottom-right triangular section. Use a needle tool to guide the liquid into the sharp corners, ensuring it touches the black frame edges completely. -
Create the orange tone:
Mix a second batch of liquid clay with a drop of orange alcohol ink. Fill the top-right section with this warmer, deeper hue. -
Mix the cream color:
For the left side, mix clear liquid clay with a drop of yellow and deeply tiny amount of white alcohol ink to create a creamy, opaque look. Fill the top-left section. -
Fill the final panel:
The bottom-left panel can be filled with either clear liquid clay mixed with white alcohol ink for a frosted look, or a very pale grey. I like to keep this one the most translucent to catch the light. -
Check for bubbles:
Let the liquid clay sit for 10 minutes so air bubbles rise to the surface. Pop any visible bubbles with a needle tool or a quick pass of a lighter flame (don’t touch the clay with the flame). -
Final cure:
Bake the entire piece again according to your liquid clay instructions (usually 20-30 minutes at 275°F/130°C). Ideally, leave it on the tile so the back stays glossy and smooth.
Step 3: Hardware and Finishing
-
Cool and removal:
Allow the ornament to cool completely before peeling it off the glass tile. The back should now look like smooth glass. -
Attach the jump ring:
Use a heavy-duty adhesive (like E6000 or a gel superglue) to attach a large silver jump ring to the very top point of the black diamond frame. -
Secure the ring:
For extra security, you can add a tiny snakes bit of black liquid clay over the junction where the ring touches the frame and re-bake briefly, essentially ‘welding’ the ring in place. -
Add suspension cord:
Thread a loop of thin silver cord through the jump ring and knot it securely.
Frosted Texture Trick
To get the frosty texture seen in the white panels, sprinkle a tiny bit of clear embossing powder or white glitter into the wet liquid clay before baking.
Hang your finished geometric masterpiece near a string of lights to see the beautiful transparency come to life.
Layered Silhouette Scene Ornaments
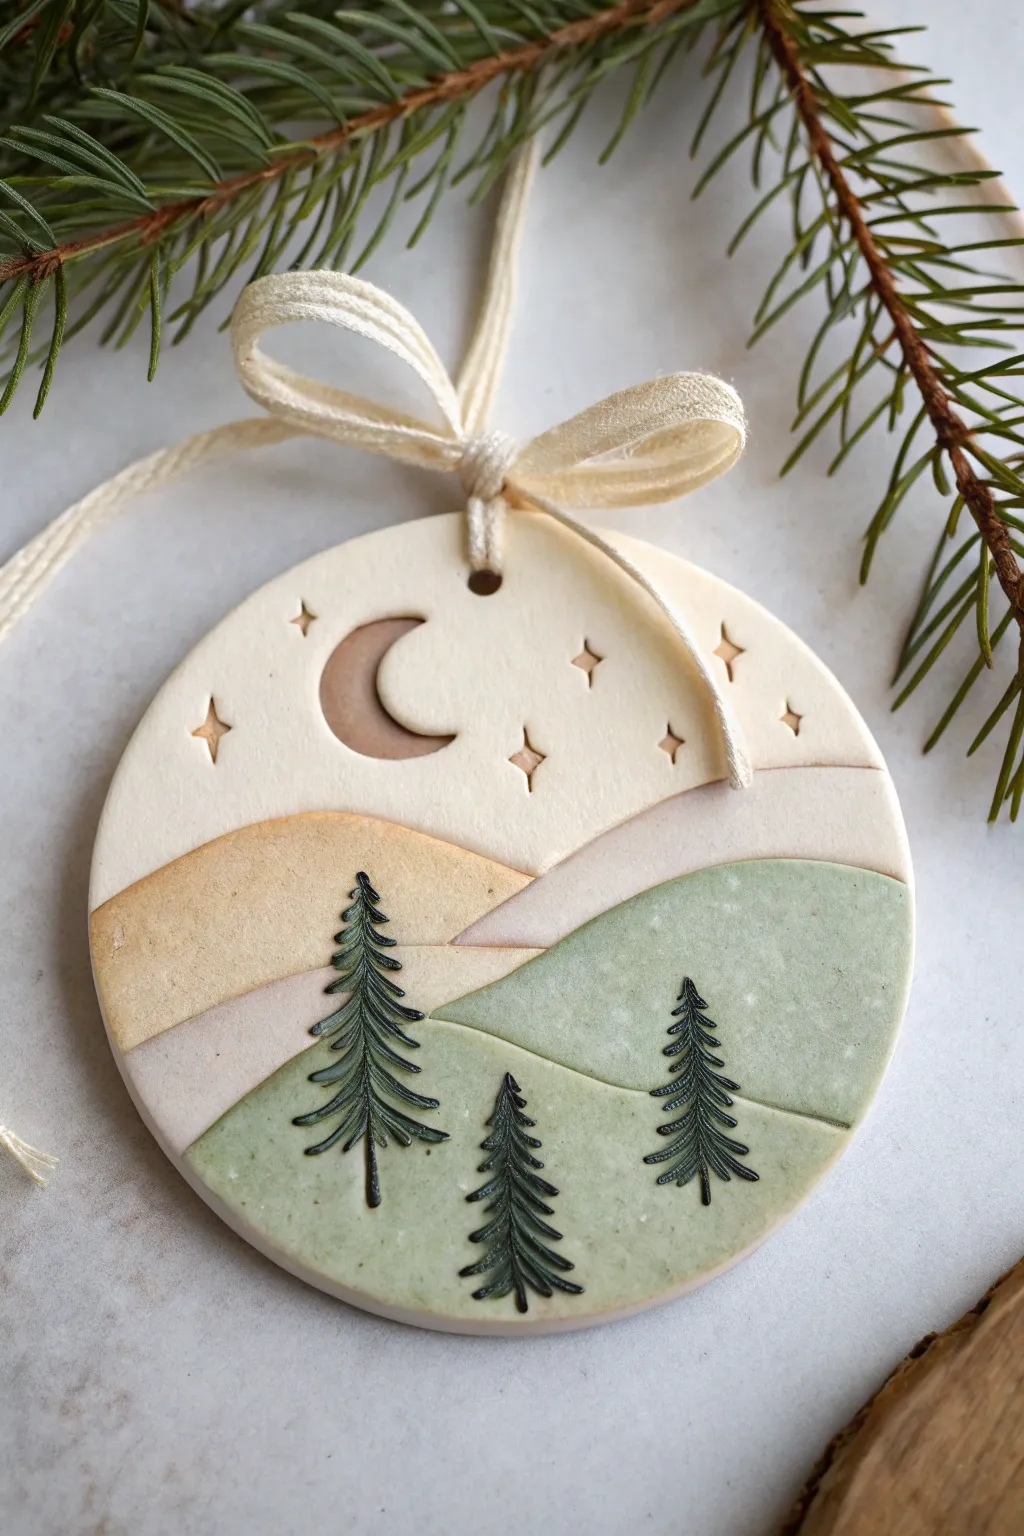
Capture the serene beauty of a mountain night with this layered polymer clay ornament, featuring soft earth tones and delicate stamped details. The finished piece has a lovely ceramic-like matte texture perfect for bringing a natural touch to your holiday decor.
How-To Guide
Materials
- Polymer clay in white, translucent, sage green, beige/sand, and terracotta brown
- Rolling pin or pasta machine
- Round cookie cutter (approx. 3-4 inches)
- X-Acto knife or clay blade
- Miniature moon cutter (or a straw/small piping tip)
- Star stamps or needle tool
- Small tree rubber stamp or fine point black marker/acrylic paint
- Black acrylic paint (for antiquing, optional)
- Sandpaper (fine grit)
- Ribbon or twine for hanging
Step 1: Creating the Base Sky
-
Condition the Clay:
Start by conditioning your white polymer clay until it is soft and malleable. I like to mix in a tiny pinch of translucent or beige clay to warm up the white so it looks more like natural stoneware. -
Roll the Base:
Roll out the conditioned white clay to an even thickness of about 1/4 inch. This will ensure your ornament is sturdy enough to handle stamping and layering. -
Cut the Shape:
Use your large round cookie cutter to punch out the main circle shape. Smooth the edges gently with your finger to remove any little fraying bits of clay. -
Add the Moon Inlay:
Use a tiny crescent cutter or carefully hand-cut a moon shape from the upper left quadrant of your circle. Remove the white clay. -
Fill the Moon:
Roll out a small piece of brownish-terracotta clay to the same thickness. Cut the same crescent shape and gently press it into the empty space in your white circle, smoothing the seam so it is flush.
Fixing Smudges
If dust gets on your light clay, apply a tiny bit of rubbing alcohol or acetone on a Q-tip and gently wipe the raw clay before baking.
Step 2: Layering the Landscape
-
Prepare Landscape Colors:
Condition your beige (sand) clay and your sage green clay separately. Roll them out much thinner than your base—around 1/16th of an inch is ideal. -
Cut the Distant Mountains:
Cut a wavy strip from the beige clay to represent the distant hills. Place this across the middle of your white circle, gentle pressing it down to adhere. -
Trim the Overhang:
Use your large round cutter again to trim off the excess beige clay that is hanging off the edges of the circle, ensuring a perfect fit. -
Cut the Foreground Hills:
Repeat the previous process with the sage green clay. Cut a wavy strip that sits slightly lower than the beige layer, creating depth. Press it onto the bottom third of the ornament. -
Final Trim:
Once all layers are stacked, do one final pass with the round cutter or a blade to clean up the entire outer edge.
Granite Effect
Mix ground black pepper or dried tea leaves into your white clay during the conditioning phase to create a realistic speckled stone look.
Step 3: Adding Details & Baking
-
Stamp the Stars:
Using small star stamps or the tip of a needle tool, impress scattered four-point stars into the white sky area around the moon. -
Create the Hanger Hole:
Use a straw or small round cutter to create a hole at the very top of the ornament for your ribbon. -
Bake the Ornament:
Bake according to your clay manufacturer’s instructions (usually 275°F for 15-30 minutes). Let it cool completely on a flat surface. -
Sand the Surface:
Once cool, lightly sand the surface under water with fine-grit sandpaper. This removes fingerprints and creates that smooth, matte stone finish. -
Stamp the Trees:
Load a detailed pine tree rubber stamp with black permanent ink (like StazOn) or black acrylic paint. Carefully press three trees onto the green foreground layer. -
Detail the Stars:
If you want the stars to pop, you can wash a little diluted brownish paint into the impressions and wipe away the excess. -
Final Assembly:
Tie a piece of cream-colored ribbon or twine through the top hole into a bow to complete the look.
Hang your miniature mountain scene on the tree and enjoy the calm, natural aesthetic it brings to your holiday collection
Glitter Shaker Bubble Ornaments
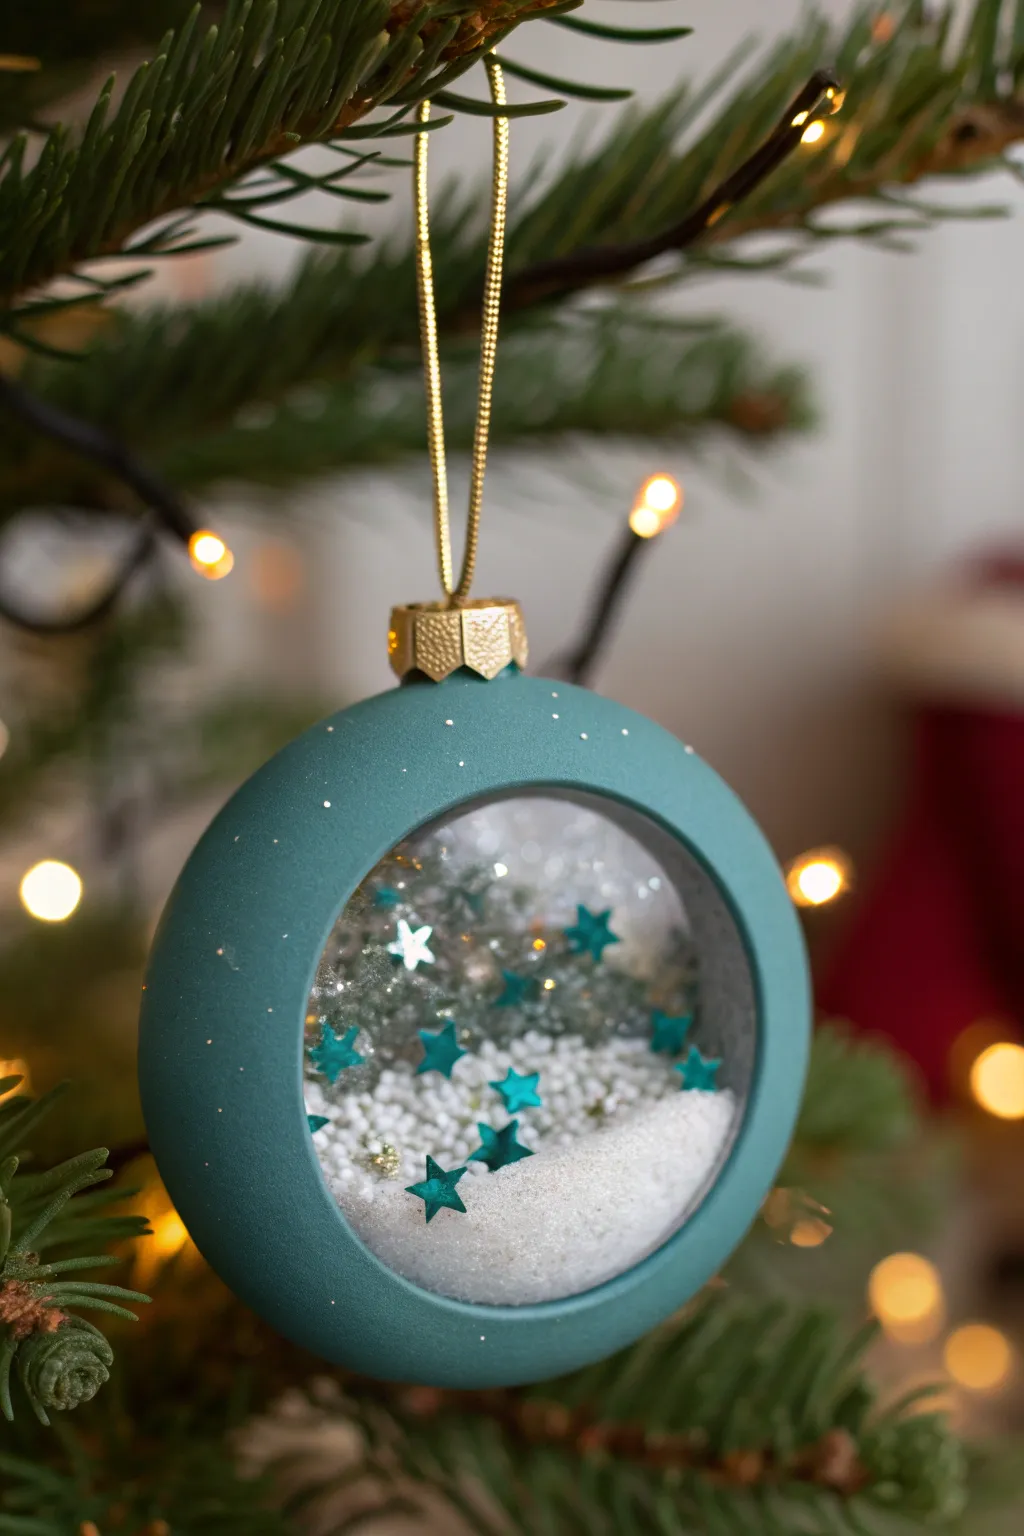
Capture the magic of a snowy evening with this enchanting shaker ornament featuring a matte teal finish and a sparkling inner world. This project combines polymer clay sculpting with a clever transparent window to hold a flurry of faux snow and stars.
Step-by-Step
Materials
- Teal polymer clay (matte finish)
- Clear plastic fillable ornament ball (60mm or 80mm)
- Liquid polymer clay (translucent)
- Small star confetti (teal/turquoise)
- Faux snow or white micro-beads
- Silver or iridescent fine glitter
- Gold ornament cap and gold string
- Craft knife or scalpel
- Circular clay cutter (slightly smaller than ornament diameter)
- Oven-safe glass sheet or tile
- Sandpaper (fine grit)
- UV resin or clear craft glue
Step 1: Preparing the Base
-
Separate the ornament:
Take your clear plastic fillable ornament and separate the two halves. You will only be using one half for the shaker window front, but keep the other handy for sizing. -
Condition the clay:
Thoroughly condition your teal polymer clay until it is soft and pliable. Roll it out into a uniform sheet about 3mm thick. -
Cut the clay window:
Use your circular cutter to create a large hole in the center of your clay sheet. This will become the viewing window for your snowy scene. -
Form the dome:
Carefully drape the clay sheet with the hole over the front of the plastic ornament half. Gently smooth the clay down the sides to conform to the dome shape, ensuring the cut-out aligns perfectly with the center. -
Trim the edges:
Using your craft knife, trim away excess clay at the back edge of the plastic half so the clay is flush with the plastic rim. Smooth out any fingerprints or tool marks with a drop of baby oil. -
Add texture:
For that subtle snowy look seen in the photo, you can lightly stipple the surface with a toothbrush or leave it smooth for a modern matte finish. I like to dust it slightly with cornstarch before baking to prevent shiny spots.
Step 2: Creating the Shaker Mechanism
-
Bake the front shell:
Bake the clay-covered plastic shell according to your clay package instructions. Most quality plastics can withstand polymer clay baking temperatures, but keep an eye on it. -
Prepare the back plate:
Roll out a second sheet of teal clay. Cut a circle that is the exact same diameter as the full ornament width. This will be the back wall of your shaker. -
Bake the back plate:
Bake this flat circle separately on a glass tile to ensure it stays perfectly flat. -
Sand the edges:
Once both pieces are cool, use fine-grit sandpaper to smooth the rim of the dome and the edge of the back plate so they will fit together snugly.
Plastic Melting?
If your plastic ornament warps in the oven, try using a glass bauble instead or pre-bake the clay dome over a metal hemisphere form, then glue the plastic window in afterwards.
Step 3: Assembly and Filling
-
Create the seal:
Apply a thin line of UV resin or strong clear glue around the inner rim of your domed front piece. -
Add the snow mix:
Place your faux snow, micro-beads, fine glitter, and star confetti onto the center of the flat back plate. Keep the pile centralized so it doesn’t interfere with the glue rim. -
Seal the ornament:
Carefully lower the domed front piece onto the flat back plate, trapping the glitter mix inside. Press firmly to seal them together. -
Cure or dry:
Cure the resin with a UV lamp or allow your glue to dry completely. Ensure there are no gaps where the ‘snow’ could leak out. -
Finish the seam:
To hide the join line, roll a very thin snake of teal clay. Apply a little liquid clay to the seam, press the snake into the gap, and smooth it seamlessly with a sculpting tool. You may need a quick secondary bake to set this final seal.
Add a Scene
Before sealing the back plate, glue miniature trees or a tiny house to the background wall so the snow shakes around a stationary 3D scene.
Step 4: Final Touches
-
Attach the cap:
Glue a gold ornament cap onto the top of the bauble. Make sure it is centered securely. -
Thread the string:
Loop a gold cord or ribbon through the cap’s eyelet for hanging. -
Add sparkle:
For extra magic, dot tiny specks of white or silver acrylic paint on the teal exterior to mimic falling snow.
Give your completed shaker a gentle rattle and watch the winter storm swirl inside your creation.