If you’ve ever grabbed a block of polymer clay and found lint stuck to it or colors smudged together, you already know storage matters. I like storage that keeps clay clean, separated, and easy to grab mid-project without wrecking my workflow.
Keep Colors Separate in Individual Bags
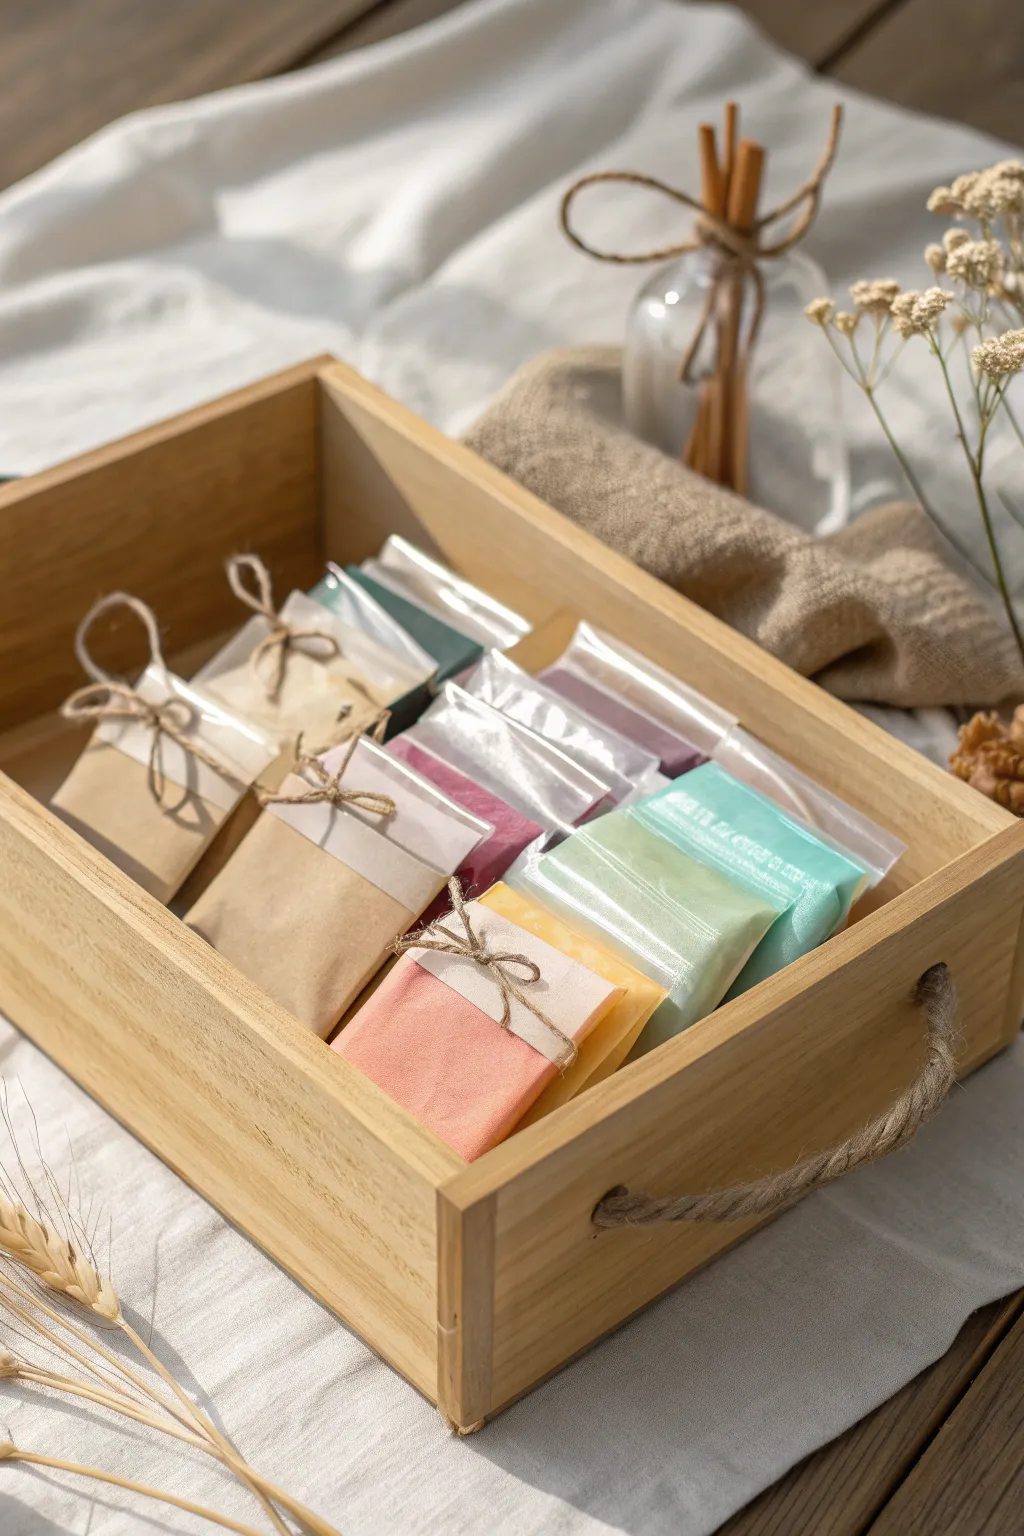
Transform your chaotic clay collection into a serene, organized display with this rustic-chic storage solution. By individually wrapping blocks in clear sleeves and unifying them with kraft accents and twine, you create a system that looks as lovely as it is functional.
Detailed Instructions
Materials
- Shallow wooden crate or storage box (approx. 8×10 inches)
- Clear cellophane bags or resealable poly bags (sized to fit clay blocks)
- Kraft paper or recycled brown paper
- Jute twine or hemp cord
- Scissors
- Double-sided tape or gluestick
- Polymer clay blocks (various colors)
- Ruler
- Pencil
Step 1: Preparing the Wrappers
-
Measure the clay blocks:
Before you start cutting, take one of your standard polymer clay blocks and measure its width and height. This ensures your wrappers will fit snugly. -
Cut kraft paper sleeves:
Using your measurements, cut strips of kraft paper. The width should match the width of your clay block, and the length should be enough to wrap around the bottom half of the block with a small overlap on the back. -
Create variation:
For a visual mix like the photo, you don’t need to wrap every single color identically. Leave some blocks fully visible, especially vibrant teals and mints, to add pops of color to the arrangement. -
Pre-cut twine lengths:
Cut 10-12 inch lengths of jute twine. Having these ready beforehand makes the tying process much smoother.
Label Logic
Write the brand and color code on the back of the kraft wrapper before taping it. This keeps the front aesthetic clean but ensures you can reorder the exact shade later.
Step 2: Packaging the Clay
-
Insert clay into bags:
Slide each block of polymer clay into its own clear cellophane or poly bag. Ensure the bag is airtight to prevent the clay from drying out or collecting dust. -
Seal the bags:
Fold over the excess plastic at the top of the bag. If using non-adhesive bags, secure the flap tightly to the back of the package with a small piece of clear tape. -
Apply kraft sleeves:
Take a pre-cut kraft paper strip and wrap it around the lower portion of a bagged clay block. I like to secure the paper at the back with a little double-sided tape for a clean look. -
Tie the twine:
Wrap a piece of jute twine around the center of the kraft sleeve (or directly around the plastic for unwrapped blocks). -
Secure with a bow:
Tie the twine into a simple, tight knot first, then finish with a small bow. Adjust the loops so they are even and trim the tails if they look too long. -
Repeat for all colors:
Continue wrapping and tying until your entire clay collection is uniformed dressed. Alternating wrapper styles creates that charming artisan vibe.
Scent Infusion
Tuck a small dried lavender sachet into the corner of the wooden box. It won’t affect the clay, but it adds a lovely sensory experience every time you open your supply kit.
Step 3: Assembly and Arrangement
-
Prepare the wooden crate:
Ensure your wooden box is clean and free of splinters. If you’re upcycling an old fruit crate, a quick sanding might be necessary. -
Start the first row:
Begin placing your wrapped clay vertically into the box. Angle them slightly backward, leaning against the back wall of the crate like files in a cabinet. -
Organize by gradient:
Arrange the colors in a pleasing gradient or group them by tonal families—neutrals in the front, followed by pastels and deeper shades. -
Fill the space:
Pack the rows gently but firmly so the packages support each other and stand upright. If you have extra space, you can add a crumpled piece of burlap fabric at the back to keep everything snug. -
Final adjustment:
Run your fingers across the tops of the packages to align them and ensure all the twine bows are facing forward and looking perky.
Now your studio feels like a curated boutique shop with every color waiting to be used


Use Airtight Boxes for Opened Blocks
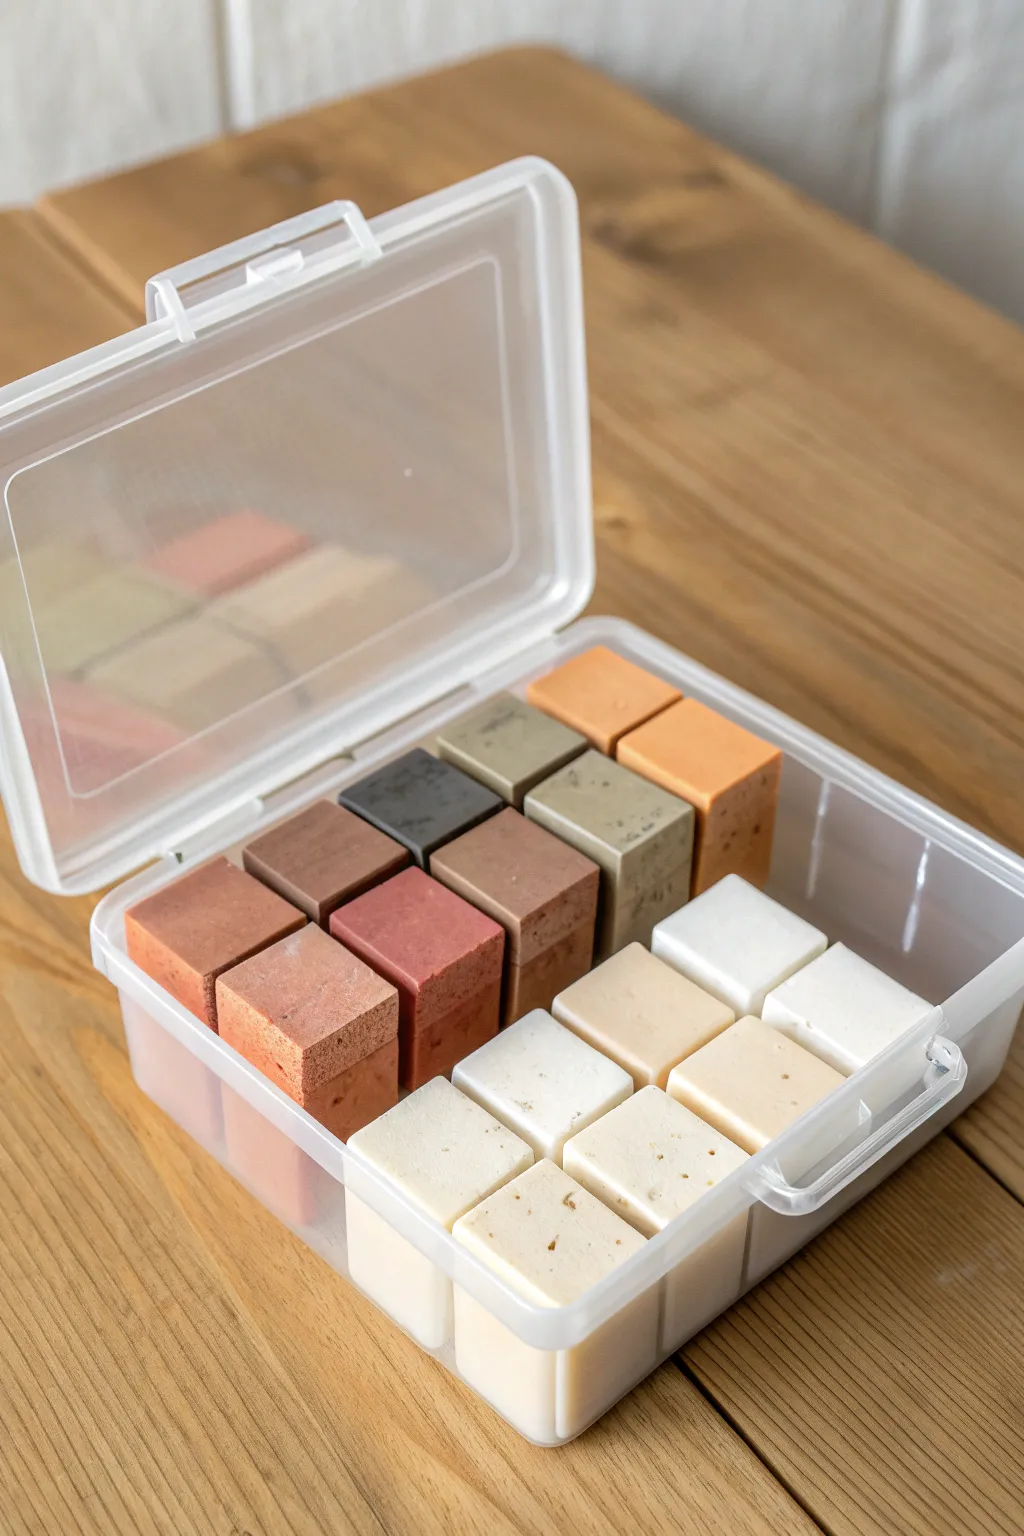
Transform your chaotic pile of opened clay packages and scraps into a visually satisfying palette of uniform cubes. This organizational method not only keeps your clay fresh and airtight but makes color selection a breeze by creating neat, stackable blocks.
Step-by-Step
Materials
- Plastic storage box with adjustable dividers (approximately 5×7 inches)
- Polymer clay (various open packages or scraps)
- Clay roller or pasta machine
- Tissue blade or rigid clay slicer
- Ruler
- Work surface (glass or ceramic tile)
- Baby wipes (for cleaning hands between colors)
Step 1: Prepping the Container
-
Select the right box:
Choose a clear polypropylene storage box with a secure latch. The one displayed here has a single open cavity, but using one with movable dividers is ideal if you want to separate specific color families later. -
Clean the interior:
Wipe the inside of the box with a lint-free cloth or a quick swipe of rubbing alcohol to ensure no dust or debris will stick to your fresh clay blocks.
Step 2: Processing the Clay
-
Sort your scraps:
Gather your opened packages of polymer clay. Sort them by color groups: earthy reds, warm browns, olives, and neutrals like white and translucent. -
Condition the first color:
Start with your lightest color (usually white) to prevent staining. Knead the clay until it is soft and pliable. If it’s crumbly, add a drop of clay softener. -
Form a rough block:
Once conditioned, squish the clay into a rough cube shape with your hands to get the mass concentrated. -
Create a uniform slab:
For perfect cubes, I find it easiest to roll the clay into a thick sheet first. Aim for a thickness of about 0.75 inches (2 cm). You can stack several thinner sheets together if needed. -
Square the edges:
Place your thick slab on your work surface. Use your rigid tissue blade to slice off the rounded, uneven edges, creating a perfect rectangular brick. -
Measure the cuts:
Use a ruler to mark intervals along the brick. You want the width to match the height to create a true cube shape.
Separation Savers
Cut small squares of wax paper or deli sheets to place between cubes if you live in a very warm climate. This prevents different colors from fusing together in the heat.
Step 3: Creating the Cubes
-
Slice the cubes:
Press the blade straight down firmly to cut the brick into individual cubes. Avoid ‘sawing’ back and forth, as this will warp the square shape. -
Example dimensions:
The cubes in the project shown are approximately 1-inch squares. Adjust your sizing based on how much clay you typically have of each color. -
Smooth the faces:
Pick up each cube and gently tap the six sides against your work surface to flatten any slight distortions from the cutting process. -
Fingerprint check:
Lightly brush your finger over the surface to smooth out any prints. For a matte finish, you can roll the cube gently between two sheets of paper. -
Repeat for all colors:
Clean your hands and blade, then move to the next darker color. Repeat the conditioning, shaping, and slicing process for your browns, terracottas, and greens.
Color Mixing Station
Don’t just store straight colors! Pre-mix your favorite custom shades (like a 50/50 white and beige blend) and store them as ready-to-go cubes for future projects.
Step 4: Final Arrangement
-
Plan the layout:
Before placing them in the box, arrange your cubes on the table. Grouping them by gradient—light to dark or warm to cool—makes finding colors easier later. -
Packing the grid:
Place the white and cream cubes in the bottom right corner. Build outwards, adding the lighter beiges next to them. -
Adding earth tones:
Place the reddish-brown and terracotta cubes in the row above or next to the neutrals. -
Filiing the rest:
Finish by placing your darkest tones—the deep greys and olives—towards the back or left side of the container. Ensure the cubes aren’t squished too tightly together so they don’t fuse over time. -
Seal it up:
Close the lid firmly. Store the box in a cool, dark place away from direct sunlight.
Now you have a beautifully organized palette that invites creativity every time you open the lid


Try a Divider Box for Small Pieces
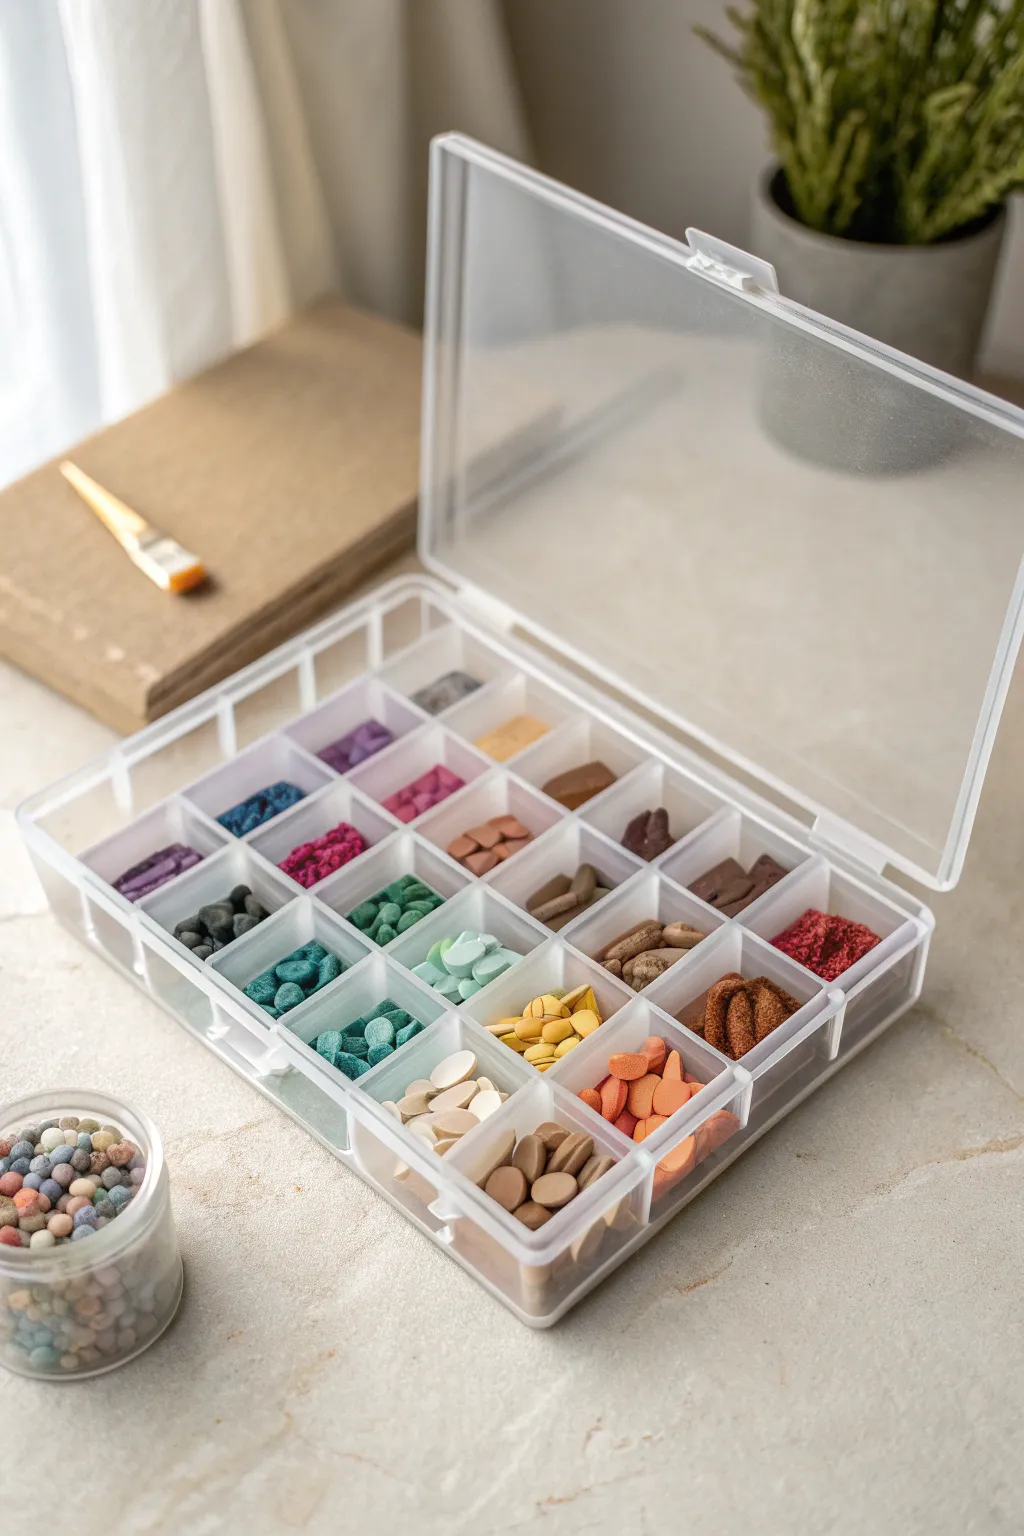
Transform a chaotic collection of polymer clay scraps and cane ends into a visually satisfying palette using a simple divided organizer. This method keeps your small, usable bits separated by color and ready for your next terrazzo or mosaic project.
Step-by-Step Guide
Materials
- Clear plastic divider box (w/ adjustable compartments)
- Assorted polymer clay scraps and cane ends
- Blade or craft knife
- Small glass jar (optional, for mixture)
- Label maker (optional)
- Wet wipes or rubbing alcohol
Step 1: Preparation and Sorting
-
Clean the container:
Before you begin, ensure your plastic divider box is completely clean and dry to prevent any dust or oils from contaminating your clay. A quick wipe with rubbing alcohol works wonders here. -
Configure compartments:
Insert the adjustable dividers into the slots. Create a grid layout that suits the volume of your scraps; keep the compartments uniform for the neatest aesthetic. -
Gather scraps:
Collect all your loose bits of polymer clay—cane ends, leftover custom mixtures, and small uncured scraps that are too good to throw away. -
Process large chunks:
If you have larger irregular chunks that won’t fit well or look messy, use a sharp tissue blade to chop them into smaller, more uniform nuggets or slices.
Sticky Situation
If raw clay sticks to the plastic dividers, lightly dust the compartment walls with cornstarch before filling. This prevents stubborn adhesion over long periods.
Step 2: Color Organization
-
Sort by temperature:
Begin grouping your clay pieces on your workspace. Separate cool tones (blues, greens, purples) from warm tones (reds, oranges, yellows, browns). -
Create distinct piles:
Refine your sorting into specific color families. Make separate piles for teals, pure greens, mints, earthy browns, and vibrant reds. -
Fill the warm sections:
Start filling the compartments on one side of the box with your warm tones. Place red scraps, yellow discs, and orange chunks into adjacent slots to create a gradient effect. -
Fill the cool sections:
Move to the next rows and fill them with your cool tones. I usually like to transition from purples into blues and then greens to maintain a rainbow flow. -
Handle neutrals:
Dedicate a row or specific corner to your neutrals. Sort greys, whites, blacks, and beige tones into their own compartments so they don’t muddy the bright colors. -
Use the glass jar:
If you have very tiny, mixed-color spheres or ‘confetti’ bits that are too hard to separate, pour them into a small glass jar or a designated corner compartment as a ‘mixed media’ topping.
Color Gradient Hack
Arrange compartments by hue and value (light to dark) within each row. This makes it instantly easier to find the perfect shade for shading or blending projects.
Step 3: Refining the Display
-
Maximize space:
Gently shake the box side-to-side to settle the pieces. This helps the clay nuggets nestle together and reveals if you have room for more scraps in specific slots. -
Check for strays:
Inspect each compartment for rogue pieces—like a bright red chunk in the blue bin—and move them to their correct home to keep the palette clean. -
Identify cane slices:
If you have specific cane butterfly or flower slices, place these on top of the generic chunks in their respective color bins so they are easily visible for quick selection. -
Store safely:
Close the lid securely. Ensure the latch clicks so the dividers don’t lift up, which could cause colors to mix if the box is tipped sideways. -
Labeling (Optional):
Create small labels for specific brand colors or color recipes if you need to remember exact shade names for re-ordering later.
Now your workspace is tidy and your inspiring scraps are ready for their next creative life

Dedicate a Drawer Just for Polymer Clay
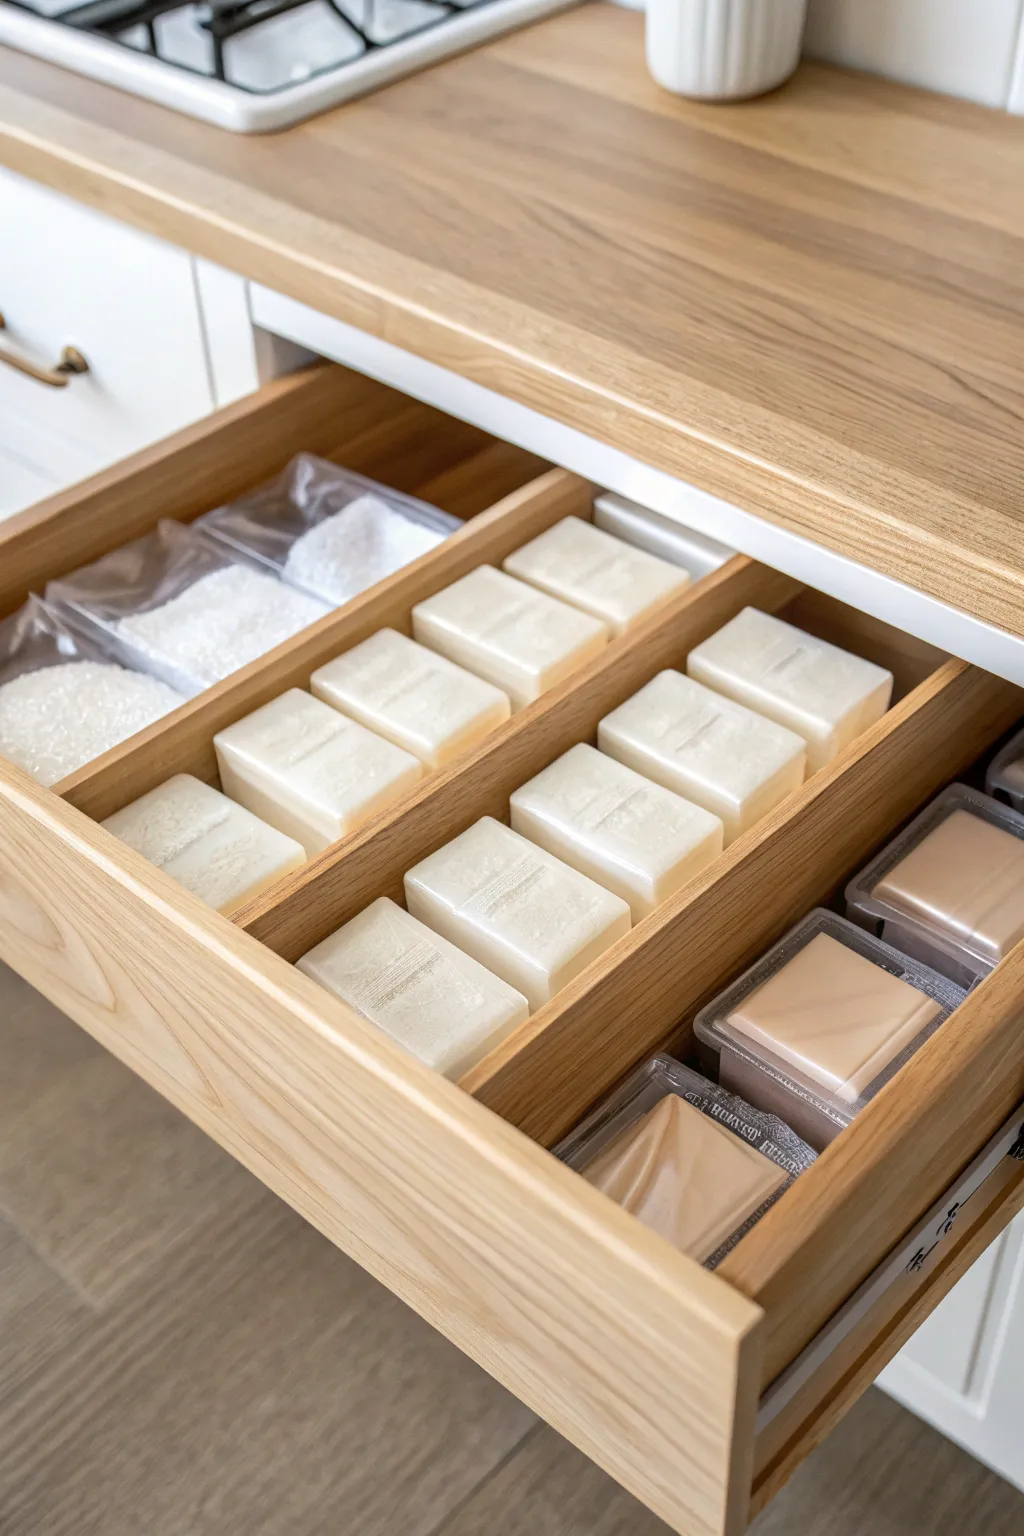
Transform a chaotic craft space into a serene storage solution by building custom wooden dividers for a dedicated polymer clay drawer. This project creates a beautifully structured home for your clay blocks and inclusions, keeping everything visible and accessible.
Step-by-Step
Materials
- Drawer to be organized
- 1/4 inch thick basswood or plywood (strips)
- Measuring tape
- Pencil
- Fine-tooth saw or utility knife
- Sandpaper (medium and fine grit)
- Wood glue
- Masking tape or painter’s tape
- Clear varnish or wood sealant (optional)
- Polymer clay blocks (for spacing)
- Small plastic bags (for inclusions)
Step 1: Planning and Measuring
-
Empty the drawer:
Start by completely emptying the drawer you intend to use. Wipe down the interior surfaces to ensure they are clean and dust-free. -
Measure the interior:
Measure the length, width, and depth of the drawer’s interior. Note these measurements down precisely. -
Determine layout:
Place your actual polymer clay blocks and inclusion bags inside the empty drawer to visualize the best arrangement. A three-column grid often works well for standard 2oz clay blocks. -
Calculate divider lengths:
Decide on two long strips running front-to-back to create three main channels. Measure the exact interior depth of the drawer for these long vertical dividers. -
Measure horizontal dividers:
If you want horizontal sections within the columns, measure the width between where your vertical dividers will sit. For this specific look, we are focusing primarily on long vertical channels.
Step 2: Cutting and Preparing the Wood
-
Mark your cuts:
Transfer your measurements onto the 1/4 inch basswood strips using a pencil. Double-check your measurements against the drawer again before cutting. -
Cut the main dividers:
Using a fine-tooth saw or a sharp utility knife with a straight edge, carefully cut the two long vertical divider strips. Ensure the cuts are straight and clean. -
Dry fit the pieces:
Place the cut strips into the drawer to test the fit. They should be snug but not so tight that they bow or damage the drawer sides. -
Sand the edges:
Sand the cut ends and the top edges of your wood strips. You want them smooth to the touch so you don’t snag your fingers or clay packaging later. -
Seal the wood (optional):
If you want to protect the wood from oily residue, apply a thin coat of clear varnish or wood sealant. Let this dry completely before proceeding.
Use Removable Dividers
Instead of gluing dividers permanently, use tension or museum wax. This allows you to reconfigure the layout later.
Step 3: Assembly and Organization
-
Position the dividers:
Place a few clay blocks in the drawer to act as temporary spacers. This ensures your channel width is perfect for the supplies you are storing. -
Secure the dividers:
Apply a small amount of wood glue to the bottom edge and ends of the divider strips. Press them firmly into place inside the drawer. -
Clamp or tape:
Since you can’t easily clamp inside a drawer, use masking tape to hold the dividers upright and in position while the glue acts as a fastener. I like to leave this overnight for maximum strength. -
Clean up excess glue:
Wipe away any glue squeeze-out immediately with a damp cloth to keep the drawer bottom clean. -
Stock the channels:
Once the glue is fully cured, remove the tape. Begin stacking your unwrapped or wrapped clay blocks in the central and right channels. -
Organize inclusions:
Use the left channel for irregular items. Place granules, translucent mixes, or scrap clay in clear, resealable bags and stack them neatly. -
Final arrangement:
Arrange your clay by color family or type (e.g., translucent, metallic, opaque) to make finding the right shade effortless during your next crafting session.
Color-Code Your Storage
Group clay by gradient—light to dark—within each channel. It looks stunning and speeds up color selection.
Enjoy the satisfaction of sliding open your drawer to see a perfectly ordered collection ready for creativity

The Complete Guide to Pottery Troubleshooting
Uncover the most common ceramic mistakes—from cracking clay to failed glazes—and learn how to fix them fast.
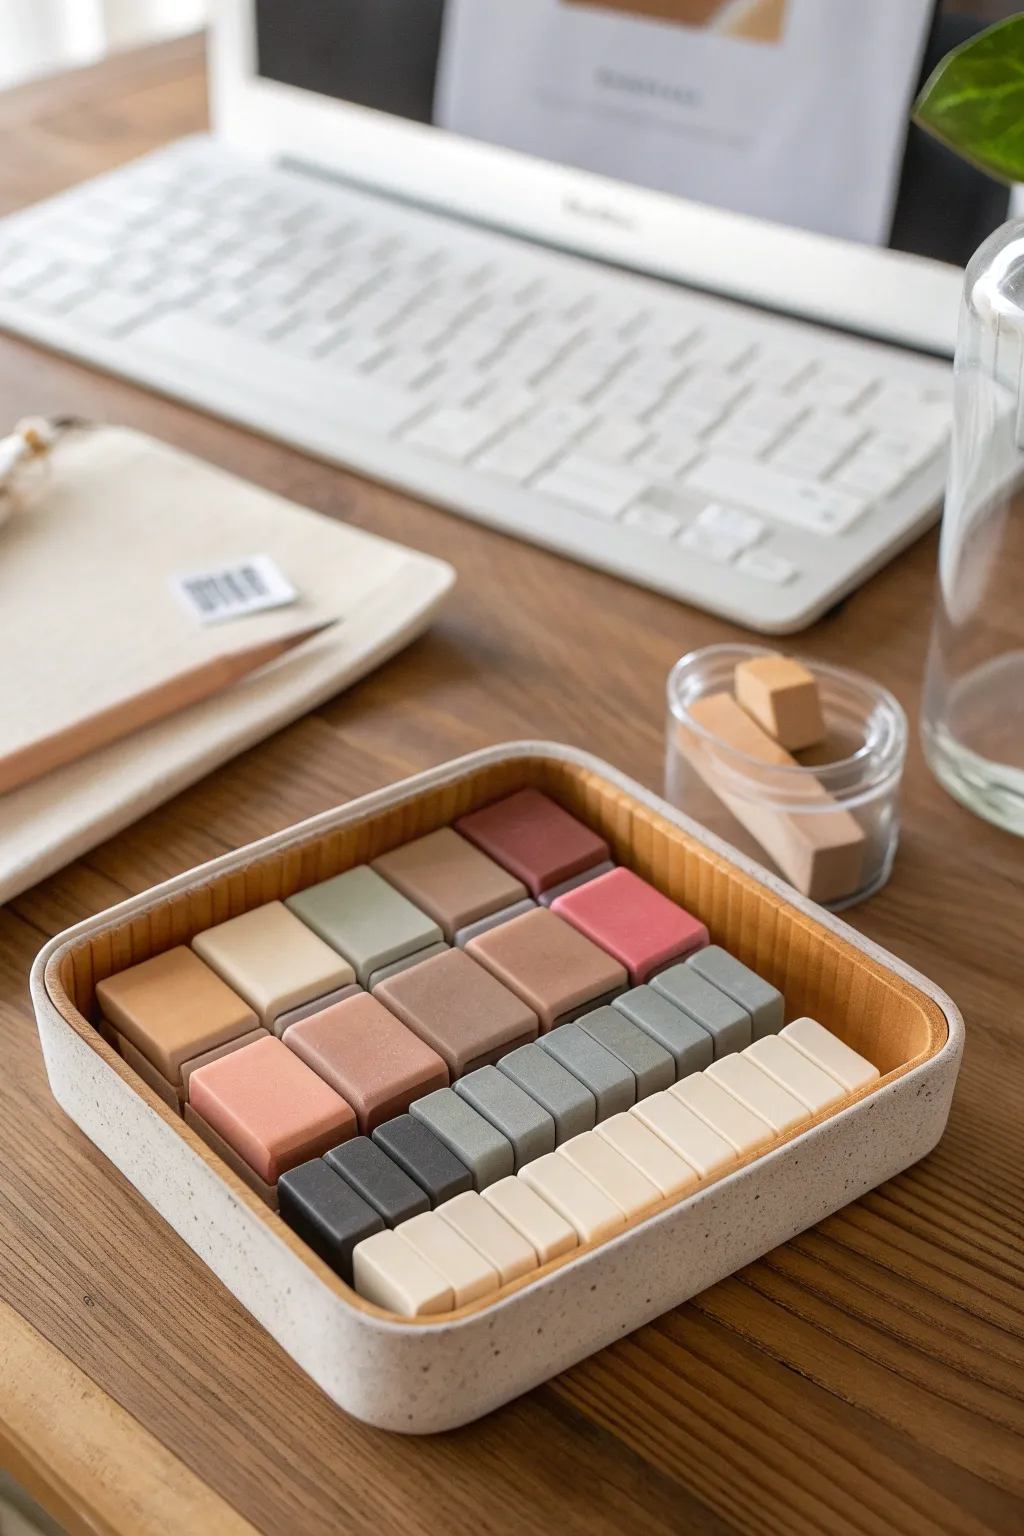
Build a Rainbow “Brick” Filing System
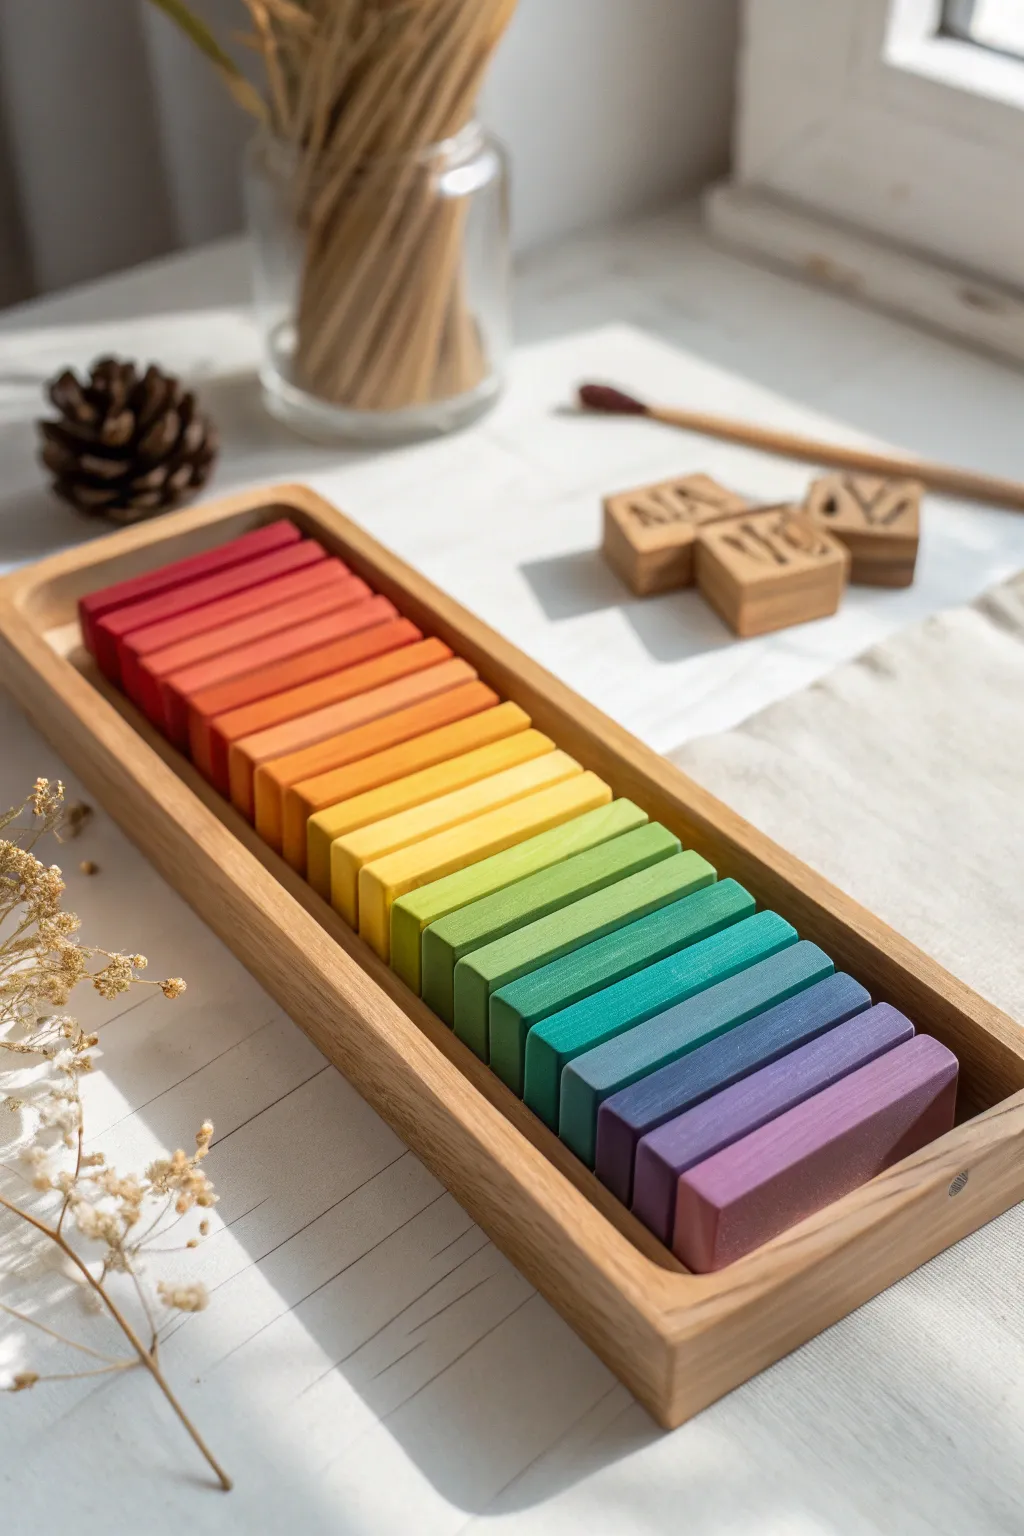
Transform your chaotic polymer clay stash into a visually stunning and highly functional gradient filing system. This project organizes your clay into uniform, color-flow bricks that sit perfectly within a custom wooden tray for easy selection.
How-To Guide
Materials
- Polymer clay (various colors for mixing)
- Acrylic rolling pin or pasta machine
- Flexible tissue blade
- Ruler
- Parchment paper or ceramic tile
- Wooden tray (sized to fit your desired brick count)
- Cornstarch or baby powder (optional for release)
Step 1: Creating the Color Palette
-
Assess your clay stash:
Begin by gathering all your polymer clay packages. Sort them roughly by color family—reds, oranges, yellows, greens, blues, and purples—to visualize the full spectrum you have available. -
Mix custom shades:
To achieve a seamless gradient like the one shown, you’ll likely need to mix intermediate colors. Blend distinct colors (like a pure red and a pure orange) in equal parts to create transition shades that bridge the gaps in your rainbow. -
Condition the clay:
Thoroughly condition each color of clay by kneading it until it is warm and pliable. This step is crucial for ensuring the bricks are smooth and free of cracks or air bubbles.
Sticky Situation?
If your fresh clay bricks stick together in the tray, lightly dust the sides of each block with cornstarch before filing them. This acts as a barrier.
Step 2: forming the Bricks
-
Roll out sheets:
Using an acrylic roller or a pasta machine on the thickest setting, roll each conditioned color into a thick, uniform sheet. Aim for a thickness of about 1/4 to 1/2 inch depending on your preference. -
Measure your tray:
Measure the inner width of your wooden storage tray. Your bricks will need to be slightly narrower than this width to slide in easily without getting stuck. -
Create a cutting template:
Cut a piece of cardstock to your determined brick dimensions (e.g., 1 inch x 3 inches). I find using a template ensures every single block matches perfectly, which makes the final result so satisfying. -
Cut the rectangles:
Place your template over a rolled sheet of clay. Use your flexible tissue blade to slice straight down around the template. Avoid dragging the blade, which can warp the rectangular shape. -
Refine the edges:
Gently tap the cut edges of each brick against your work surface to square them off and sharpen the corners. Smooth away any fingerprints with a light touch. -
Repeat for all colors:
Continue cutting and refining bricks for every color in your gradient. Lay them out on parchment paper as you work so you can see the color flow developing.
Step 3: Arranging and Finalizing
-
Check the gradient:
Line up all your raw clay bricks on a clean surface. Rearrange them until the transition from one shade to the next is as smooth as possible, just like a color wheel. -
Prepare the tray:
Ensure your wooden tray is clean and free of dust. If the wood is rough, give it a quick sand with fine-grit sandpaper so it doesn’t snag the clay. -
Filing the clay:
carefully transfer the bricks into the tray, starting from one end. Stand them upright on their long edge, packing them gently against each other. -
Adjust the fit:
If the bricks are too loose, you might need to make a few extra ‘spacer’ bricks of neutral clay. If they are too tight, gently compress the row to make room for the final pieces. -
Labeling (optional):
For easier re-ordering, you can lightly stamp or scratch the color code or brand name onto the bottom or side of each brick before placing it in the tray.
Gradient Master
To get perfectly matching hues, mix white into your base colors in progressive amounts (10%, 20%, 30%) to create uniform tints for a pastel version.
Now you have a neatly organized, inspiring palette of clay ready for your next masterpiece
Choose Clay-Safe Plastic Containers
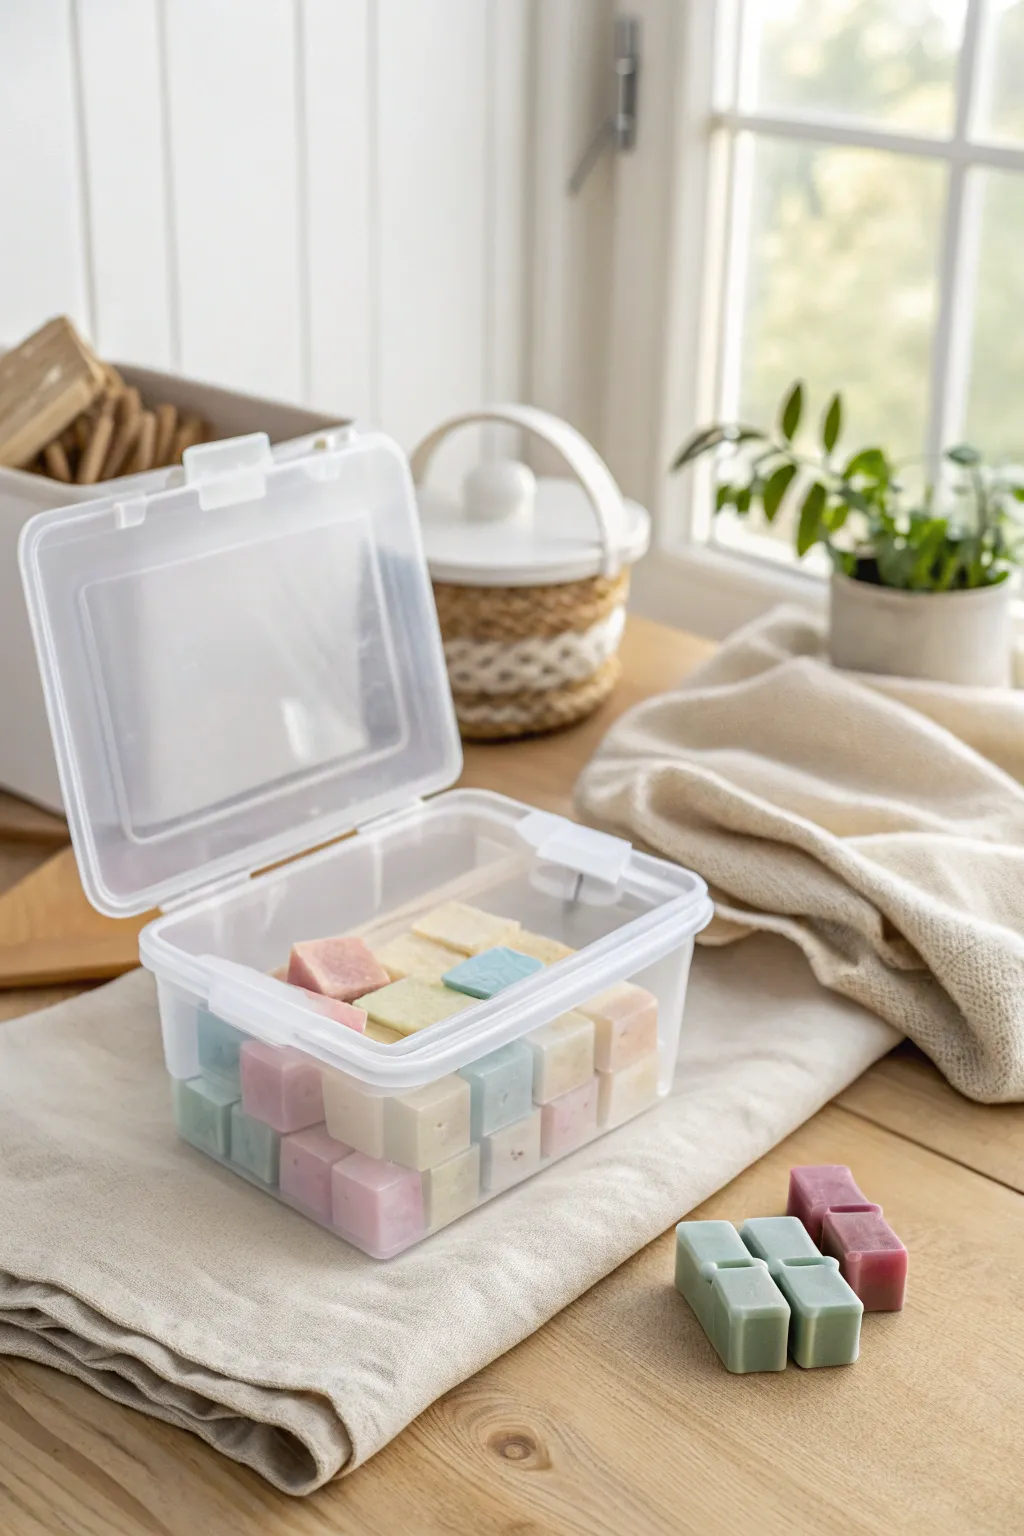
Maximize your crafting efficiency with this clean and colorful storage method for polymer clay scraps or custom color mixes. By organizing your clay into uniform cubes within a clear, clay-safe container, you create a visually pleasing palette that keeps your supplies fresh and ready for inspiration.
Step-by-Step Guide
Materials
- Polymer clay (various colors/scraps)
- Small clear plastic container with latching lid (must be polypropylene, marked PP or recycling number 5)
- Clay roller or pasta machine
- Tissue blade or sharp clay knife
- Ruler
- Wax paper or ceramic tile (work surface)
Step 1: Preparing the Clay
-
Gather scraps:
Collect your leftover polymer clay scraps, separating them into general color families to prevent muddying vibrant hues. -
Condition the clay:
Working with one color family at a time, warm the clay in your hands and knead it until it is soft and pliable. -
Mix colors:
If desired, blend different scraps together completely to create solid new custom shades, or stop partway for a marbled effect. -
Check consistency:
ensure there are no air bubbles trapped in the clay, as these can cause issues later if you decide to bake the cubes directly.
Plastic Safety Check
Polymer clay eats certain plastics! Only use containers marked with recycling symbol #5 (PP) to prevent the plastic from melting and ruining your clay.
Step 2: Shaping the Cubes
-
Form a block:
Use your hands to roughly shape the conditioned clay into a thick, rectangular log. -
Refine the shape:
Press the clay log against your work surface, using an acrylic block or the flat side of a ruler to square off the edges. -
Roll for thickness:
Alternatively, roll your clay into a very thick slab (approximately 1/2 inch) using a roller or the widest setting on a pasta machine, then stack layers if needed to achieve the right height. -
Measure the cuts:
Use a ruler to mark even intervals along the length of your clay log or slab. A width of roughly 1/2 inch to 3/4 inch works well for standard storage containers. -
Slice vertically:
Using a sharp tissue blade, slice straight down through the clay at your marked intervals to create strips. -
Cross-cut:
Turn the strips 90 degrees and cut across them at the same interval width to result in uniform cubes. -
Smooth the edges:
Pick up each cube and gently tap the sides against your work surface to sharpen the corners and remove potential fingerprints.
Step 3: Organizing the Container
-
Verify container safety:
Double-check the bottom of your plastic container for the number ‘5’ or the letters ‘PP’. This ensures the plastic won’t react with the polymer clay over time. -
Clean the bin:
Wipe out the container with a lint-free cloth to ensure no dust or debris sticks to your fresh clay. -
Arrange bottom layer:
Place your clay cubes into the container, arranging them by color gradients—for example, moving from cool blues to warm pinks. -
Stack gently:
If your container is deep enough, add a second layer of cubes. You can separate layers with a small sheet of wax paper if you are worried about them sticking together in warm weather. -
Seal tightly:
Close the latch firmly on the lid to protect the clay from dust and pet hair. -
Store properly:
Keep the filled container in a cool, dry place away from direct sunlight to preserve the colors and consistency.
Swatch It
Bake one tiny cube from each color batch and glue it to the outside of the container lid. This acts as a perfect color swatch reference for dried results.
Your colorful collection is now neatly organized and ready for your next burst of creativity


What Really Happens Inside the Kiln
Learn how time and temperature work together inside the kiln to transform clay into durable ceramic.
Go for Glass Jars for Tiny Scraps
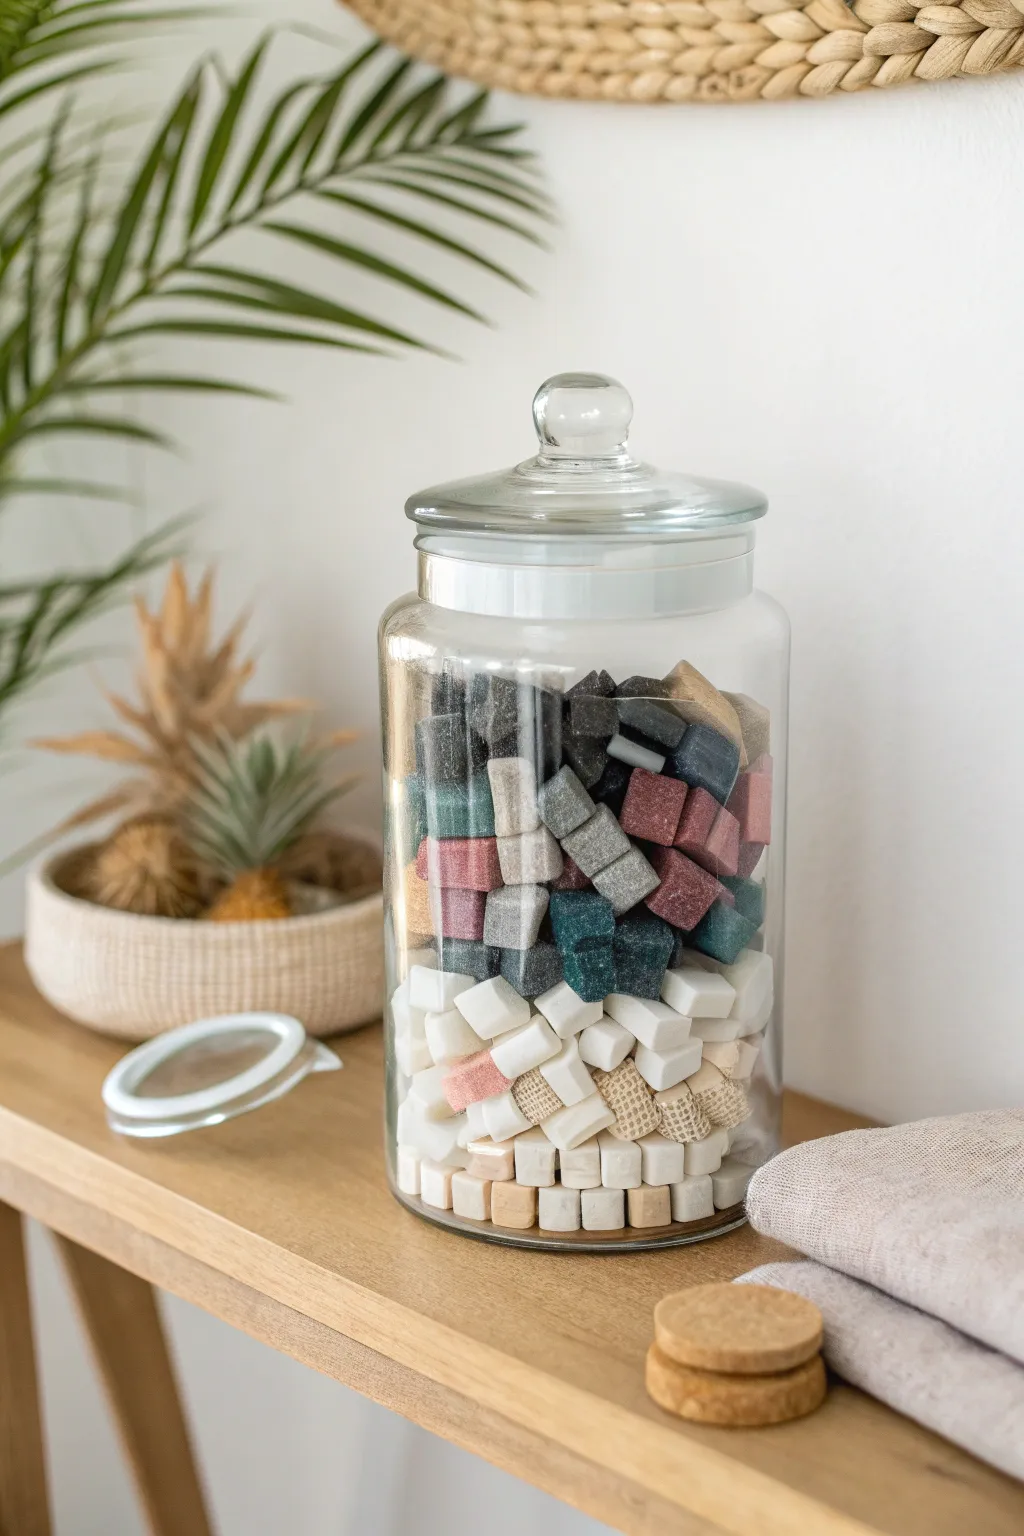
Transform your leftover bits of polymer clay into an aesthetically pleasing display by organizing scraps into uniform, textured cubes. This project turns chaotic waste into a modern, geometric storage solution that looks stunning when displayed in clear glass.
Step-by-Step
Materials
- Leftover polymer clay scraps (various colors)
- Large apothecary-style glass jar with lid
- Pasta machine or acrylic roller
- Square clay cutter (approx. 1cm or 0.5 inch)
- Sharp tissue blade
- Texture sheets or tools (waffle pattern, cheesecloth, sandpaper)
- Baking sheet
- Parchment paper
Step 1: Sorting and Prep
-
Sort your scraps:
Begin by emptying your scrap bin and separating the clay into general color families. Group all whites and creams together, put dark greys and blacks in another pile, and create separate piles for muted reds, blues, or greens. -
Condition the white clay:
Start with the lightest colors first to avoid color contamination. Take your white and translucent scraps and knead them together thoroughly until the clay is soft and pliable. -
Create a slab:
Run the conditioned white clay through your pasta machine on the thickest setting multiple times. You want a thick, substantial slab, so you may need to stack two or three thick sheets together. -
Compact the layers:
If you stacked sheets, gently roll over them with an acrylic roller to ensure no air bubbles are trapped between the layers and to create a smooth, unified surface.
Use Dirty Clay
Don’t toss ‘dirty’ white clay! Use it for the core of these cubes and wrap a thin sheet of clean, textured clay around the outside to hide lint or dust specs.
Step 2: Cutting and Texturing
-
Cut the cubes:
Using a small square cutter, punch out as many cubes as possible from your thick white slab. Alternatively, you can use a tissue blade to cut long grid lines for a more organic, hand-cut look. -
Refine the shape:
Gently tap the sides of each cube on your work surface to square them up if they got slightly distorted during cutting. -
Process colored scraps:
Repeat the conditioning and slab-making process with your colored scrap piles. I like to marble some colors slightly rather than fully blending them for visual interest. -
Apply texture:
Before cutting the colored slabs, press a texture sheet or a piece of coarse fabric (like cheesecloth or burlap) firmly into the surface. This mimics the waffle-knit look seen in some of the cubes. -
Cut textured cubes:
Carefully cut your textured slabs into squares, being mindful not to smudge the pattern you just created. -
Review your collection:
You should now have a large pile of unbaked cubes in varying colors: a base of whites/creams, followed by mid-tones and dark accents.
Step 3: Baking and Assembly
-
Prepare for baking:
Line a baking sheet with parchment paper and arrange your cubes in a single layer. Ensure they aren’t touching, so they bake evenly and don’t fuse together. -
Tent the clay:
Cover the cubes with a tent of aluminum foil or an inverted aluminum pan. This is crucial for keeping the white clays bright and preventing scorching on the textured surfaces. -
Bake the cubes:
Bake according to the manufacturer’s instructions for your specific brand of scrap clay. Since these are thick cubes, aim for the longer side of the recommended baking time, usually around 45-60 minutes at 275°F (130°C). -
Cool completely:
Allow the cubes to cool fully on the baking sheet. They will harden completely as they return to room temperature. -
Clean the jar:
While the clay cools, wash and dry your glass apothecary jar thoroughly to ensure it is sparkling clear. -
Layer the bottom:
Begin filling the jar by placing the white and light cream cubes at the bottom. This creates a visual ‘foundation’ similar to the reference image. -
Fill the jar:
Pour the remaining colored and textured cubes on top of the white base layer. You don’t need to arrange them perfectly; a random tumble looks best. -
Seal it up:
the final step is simply placing the lid on your jar, turning your waste material into a chic decor piece
Scent Your Storage
Place a few drops of essential oil on a small piece of unglazed ceramic or wood and hide it in the middle of the jar for a scented decor feature.
Now your workspace is decluttered and you have a stylish jar that doubles as inspiration for future color palettes
Separate “Clean” Clay From “Scrap” Clay
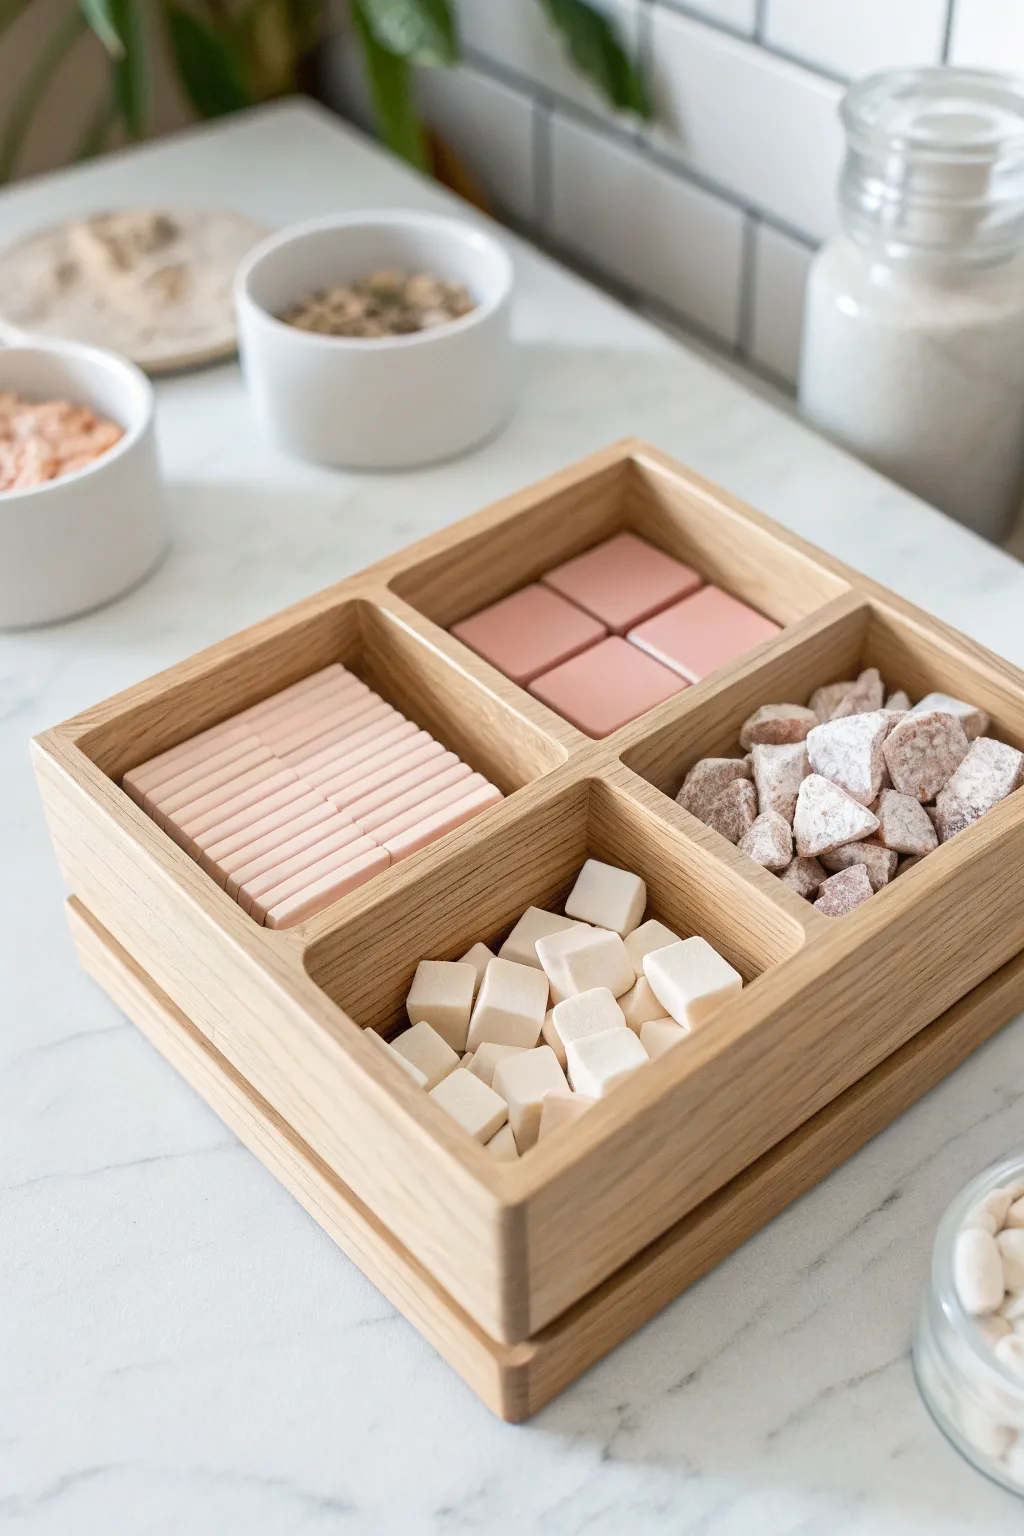
Keep your pristine clay separate from your scrap piles with this beautifully organized wooden storage solution. This project transforms a simple divided tray into a functional artist’s palette, showcasing different states of polymer clay ready for use.
Step-by-Step Tutorial
Materials
- Unfinished wooden divided tray (4 compartments)
- Polymer clay (pale pink, white, and scrap colors)
- Fine grit sandpaper (220 and 400)
- Clean ceramic tile or glass work surface
- Tissue blade or rigid clay slicer
- Cornstarch or baby powder (for the scrap coating)
- Small soft brush
- Rolling pin or pasta machine
- Matte wood sealer or varnish (optional)
Step 1: Preparing the Wooden Base
-
Sand the tray:
Begin by smoothing out your wooden tray. Take the 220 grit sandpaper and gently go over all surfaces, paying special attention to the dividers and corners to remove any splinters or rough patches. -
Finish sanding:
Follow up with the 400 grit sandpaper for a silky smooth finish. This ensures that no wood grain texture will accidentally transfer to your soft clay if it touches the sides. -
Clean the dust:
Wipe the entire tray down thoroughly with a slightly damp cloth or tack cloth. You want absolutely no sawdust remaining before you introduce the clay. -
Seal (optional):
If you wish to protect the wood from oils in the clay, apply a thin coat of matte wood sealer. Let this dry completely according to the manufacturer’s instructions before proceeding.
Step 2: Creating the ‘Clean’ Clay Stock
-
Condition the pink clay:
Take a block of pale pink polymer clay and condition it by kneading until it is soft and pliable. Pass it through your pasta machine on a medium-thick setting or roll it out evenly by hand. -
Cut uniform rectangles:
Place the sheet on your ceramic tile. Using the tissue blade, cut the clay into long uniform strips, approximately 1cm wide. -
Refine the tiles:
Slice these strips into identical rectangular tiles, about 3-4cm long. I like to use a ruler as a guide here to ensure they stack perfectly. -
Stack and arrange:
Neatly stack these rectangular tiles like dominos in the top-left compartment of your tray. The uniformity is key to the aesthetic. -
Create square tiles:
Roll out a thicker slab of the same pink clay. Use a square cutter or measure and cut four precise squares that fit snugly into the top-right compartment. -
Smooth the edges:
Gently run your finger along the cut edges of the squares to soften them slightly, then place them flat into their designated section.
Keep It Clean
Wipe your blade with alcohol between colors. Even tiny specks of pink in your white clay cubes will ruin the pristine look of your organized tray.
Step 3: Managing the Scrap and Raw Clay
-
Prepare white clay cubes:
Condition a large block of white clay. Roll it into a thick log or square ‘snake’ approximately 1.5cm thick. -
Cube the clay:
Using your rigid blade, slice the log into rough cubes. Don’t worry about making these perfect; the slight irregularities show they are raw working stock. -
Fill the section:
Tumble these white cubes into the bottom-left compartment, filling it loosely to create a nice textural contrast with the neat pink tiles. -
Gather scrap clay:
Collect your mixed scrap clay. If the colors are muddy, that’s fine, as we will be coating them. -
Texture the scrap:
Break the scrap clay into irregular, rock-like chunks. You can pinch and tear them to create jagged, natural-looking surfaces. -
Apply powder coating:
Dip your soft brush into cornstarch or baby powder. Generously dust the scrap chunks. This prevents them from sticking together and gives them a distinct sugary, textured look. -
Arrange the scrap:
Place these dusted chunks into the final bottom-right compartment. The powder coating visually separates this ‘waste’ material from your fresh supply. -
Final inspection:
Check the arrangement. Ensure the neat sections look disciplined and the organic sections look loose, creating a satisfying visual balance for your studio space.
Sticky Situation?
If clay sticks to the wooden bottom, cut a small piece of parchment paper or wax paper to line the bottom of each compartment invisibly.
Now you have a functional separation system that turns your raw materials into a display piece

TRACK YOUR CERAMIC JOURNEY
Capture glaze tests, firing details, and creative progress—all in one simple printable. Make your projects easier to repeat and improve.
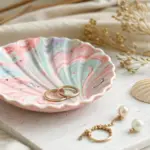
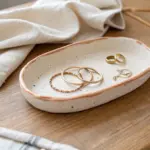
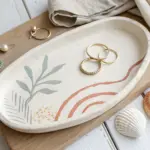
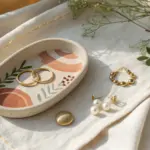
Add a “Current Project” Clay Tray
Create a sleek, minimalist tray that perfectly mimics high-end ceramic and wood organizers. This project combines a durable polymer clay shell with a warm veneer interior, designed specifically to keep your current color palette neatly arranged and accessible.
Step-by-Step
Materials
- White or Beige Polymer Clay (approx. 4-6 oz)
- Black Polymer Clay (tiny amount for speckling)
- Wood Veneer Sheet (thin, flexible)
- Liquid Polymer Clay (translucent)
- Square Cookie Cutter or Clay Blade
- Sandpaper (various grits)
- Strong Craft Glue or E6000
- Rolling Pin or Pasta Machine
- Cardstock or thick paper (for template)
- Oven
Step 1: Creating the Speckled Base
-
Prepare the speckles:
Begin by taking a tiny pinch of black polymer clay. Chop it into microscopic, dust-like particles using your clay blade. You want these to look like ground pepper, not chunks. -
Mix the clay body:
Condition your white or beige clay until soft. Sprinkle the black ‘dust’ over the clay and fold it in. Continue rolling and folding until the speckles are evenly distributed, creating a faux-stone effect. -
Create the base slab:
Roll your speckled clay out into a thick, even sheet, about 1/4 inch thick. This thickness gives the final tray a substantial, ceramic feel. -
Cut the shape:
Use a square cutter or a cardstock template to cut a 4×4 inch (or your desired size) square base. Use your finger or a tool to gently round off the sharp corners for a softer look. -
Form the walls:
Roll a long snake of the remaining speckled clay and flatten it into a strip of uniform height (about 0.75 inches tall). Wrap this strip around the perimeter of your base. -
Blend the seams:
On the outside and inside, carefully smudge the clay from the wall down onto the base to bond them. Use a clay tool or your finger to smooth the seam until it fits seamlessly. -
Refine the edges:
Double-check that the walls are straight and the rim is even. I find running a flat blade gently across the top helps level everything out perfectly.
Step 2: Adding the Wood Interior
-
Pre-bake measurement:
Before baking, measure the exact inner dimensions of your tray. This will be crucial for cutting the wood veneer later. -
Bake the clay shell:
Bake the clay tray according to your package directions (typically 275°F for 15-30 minutes). Let it cool completely. -
Cut the veneer base:
Using your measurements, cut a square of wood veneer that fits snugly into the bottom of the tray. Test the fit and trim if necessary. -
Cut the veneer walls:
Cut long, narrow strips of veneer to line the inner vertical walls. The height should match the inner depth of your tray exactly. -
Check flexibility:
If your tray has rounded corners, ensure your wood veneer is flexible enough to bend without snapping. You can dampen the back of the veneer slightly if it’s too brittle. -
Glue the base:
Apply a strong adhesive to the bottom of the baked clay tray. Press the square veneer piece firmly into place, ensuring no air bubbles are trapped underneath. -
Install the wall lining:
Apply glue to the inner walls of the tray. Carefully press the veneer strips against the sides. Use clips or painter’s tape to hold the veneer tight against the corners while the glue dries. -
Sand the rim (Optional):
Once the glue is fully cured, if the veneer extends slightly above the clay rim, gently sand it flush for a perfectly integrated look. -
Seal the wood:
Apply a very light coat of matte varnish or liquid polymer clay (cured with a heat gun) to the wood veneer to protect it from staining.
Pro Tip: Seamless Corners
Use a rounded object, like the handle of a thick paintbrush, to press the veneer into the curved corners while the glue sets for a smooth fit.
Level Up: Magnetic Bottom
Embed small magnets into the base of the clay before baking so the tray snaps onto metal work surfaces or stacks securely.
Now you have a stylish, functional tray ready to hold your next creative palette
Keep Cured Pieces in Padded Compartments
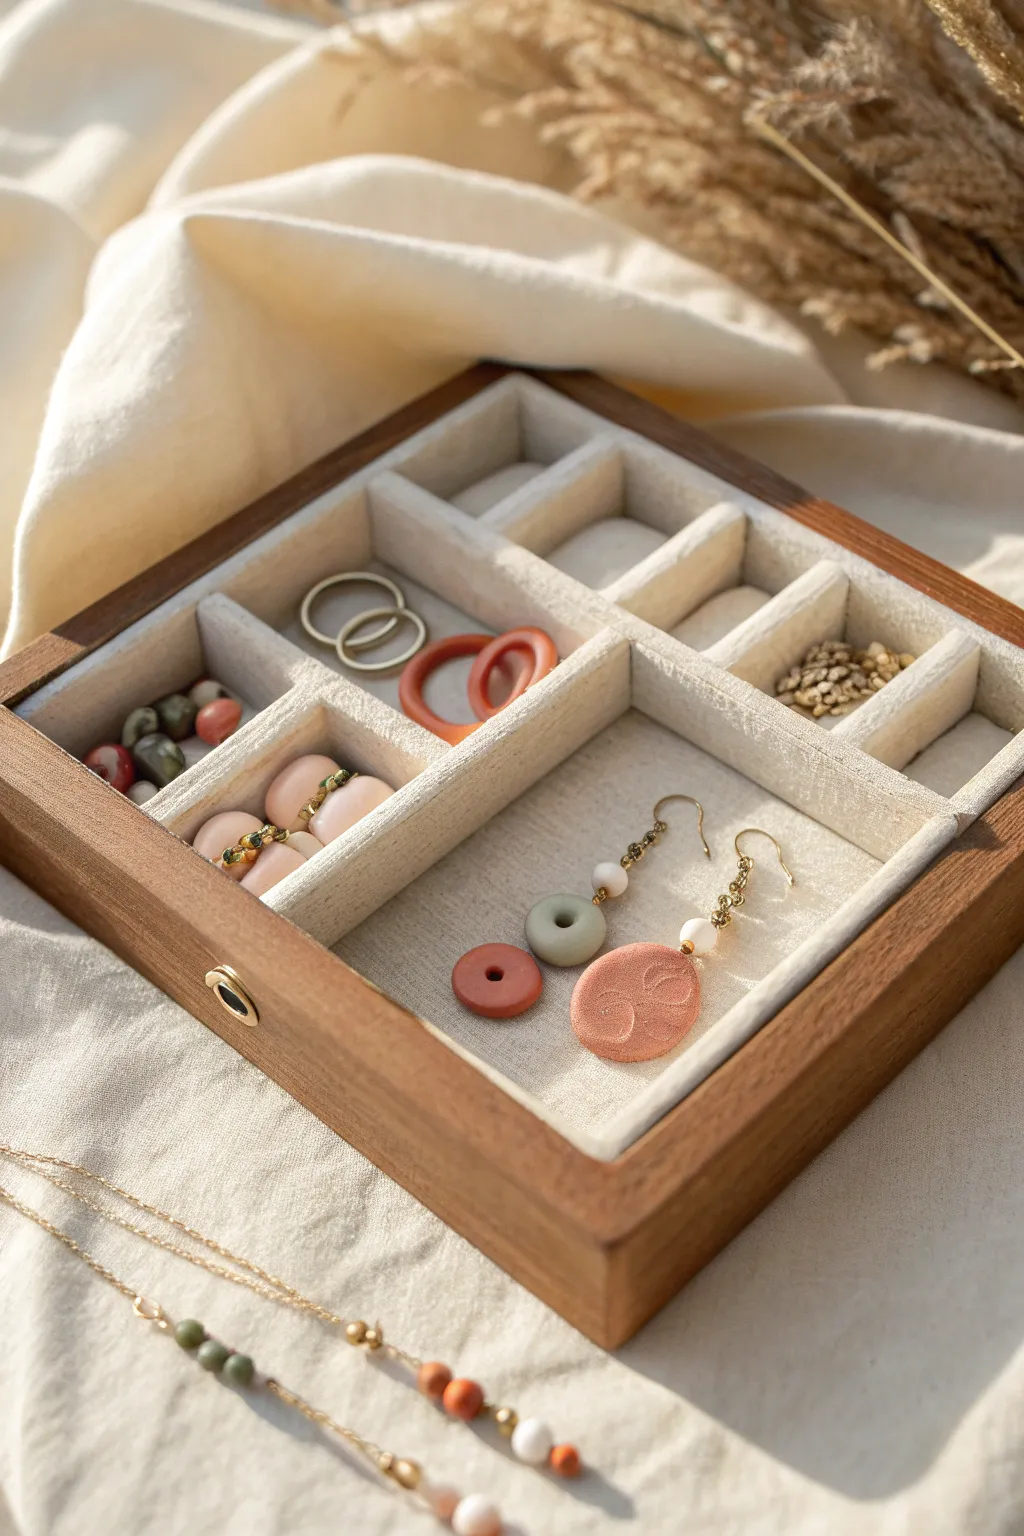
Transform a plain wooden box into a boutique-style organizer perfect for protecting your cured polymer clay creations. The soft, padded compartments prevent scratches while showcasing your handmade earrings and beads in an elegant, earthy display.
Detailed Instructions
Materials
- Unfinished wooden box (hinged lid)
- Foam board or thick cardstock
- Adhesive velvet or velvet fabric
- Batting or thin craft foam sheet
- Fabric glue or spray adhesive
- Ruler and pencil
- Craft knife or box cutter
- Wood stain (walnut or oak)
- Lint-free cloth
- Scissors
Step 1: Staining the Box
-
Prepare the wood:
Begin by lightly sanding your unfinished wooden box to remove any rough splinters or existing varnish. Wipe away all dust with a clean, dry cloth. -
Apply the stain:
Using a lint-free cloth or sponge brush, apply a coat of wood stain. I prefer a medium walnut tone to give it that warm, vintage look shown in the image. -
Wipe and dry:
Let the stain sit for a few minutes, then wipe off the excess in the direction of the grain. Allow the box to dry completely, preferably overnight, before adding the interior.
Velvet Victory
Use self-adhesive velvet sheets instead of fabric and glue for a faster, mess-free application that stays smooth.
Step 2: Creating the Grid Structure
-
Measure the interior:
Accurately measure the inside length, width, and depth of your box base. Plan a grid layout; the example uses a central divider with smaller sections on the sides. -
Cut the base strips:
Cut strips of foam board to match the depth of your box (minus a few millimeters so they don’t hit the lid). You will need long strips for the length and shorter ones for the width dividers. -
Padding the dividers:
Cut thin strips of batting or craft foam that match the size of your foam board dividers. Glue this padding to both sides of each divider strip for a plush feel.
Color Coordination
Choose a velvet color that contrasts with your jewelry. Dark blues or greens make gold and light clay pieces pop.
Step 3: Upholstering the Compartments
-
Cutting the velvet:
Cut your velvet fabric into strips that are wide enough to wrap completely around your padded dividers, with a little overlap. -
Wrapping the dividers:
Apply fabric glue to the padded divider. Center it on a velvet strip, wrap the fabric tightly around, and secure the seam on the bottom edge. Repeat for all divider pieces. -
Creating slot cuts:
To create the interlocking grid, cut halfway through your long divider where you want the cross-sections to go. Do the same on the shorter dividers (cutting from the bottom up). -
Assemble the grid:
Slide the shorter dividers into the slots of the longer divider to create your grid structure. Ensure the velvet isn’t bunching up in the corners.
Step 4: Final Assembly
-
Line the box floor:
Cut a piece of cardstock exactly the size of the box floor. Apply a layer of batting, then wrap it in velvet just like you did the dividers. -
Install the floor:
Place this velvet-covered panel into the bottom of the wooden box. It should fit snugly. -
Insert the grid:
Push your assembled velvet grid down into the box on top of the lined floor. It should be a tight fit that stays in place without extra glue. -
Add ring rolls (Optional):
If you want a ring section like the top right corner, roll small cylinders of batting, wrap them individually in velvet, and glue them side-by-side into one compartment. -
Polish the hardware:
If your box has metal clasps or hinges, give them a quick polish to ensure the whole piece looks brand new and ready for display.
Now you have a professional-grade display case that keeps your polymer clay treasures safe and organized
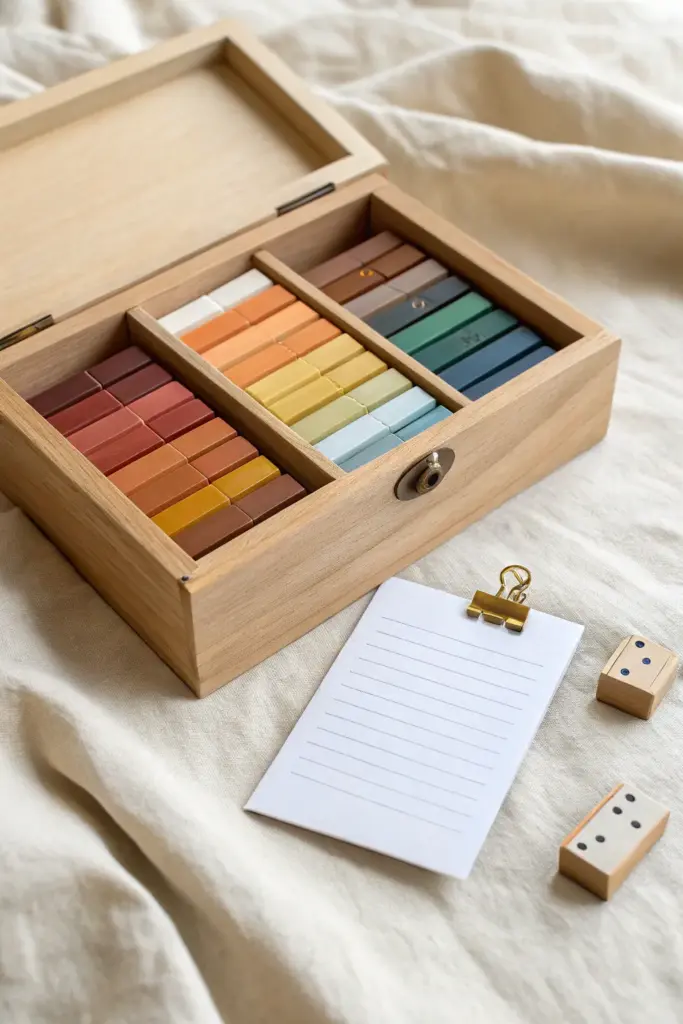
Track Inventory With a Quick-Check List

Keep your polymer clay collection organized and visually inspiring with this custom-divided wooden storage box. By arranging your clay bricks in a spectrum and pairing them with a handy inventory checklist, you can see exactly what colors you have at a glance.
Step-by-Step
Materials
- Unfinished wooden box with hinged lid (approximately 8×10 inches)
- Balsa wood or thin craft plywood strips (for dividers)
- Wood glue or strong craft adhesive
- Fine-grit sandpaper (220 grit)
- Ruler
- Pencil
- Hobby knife or small saw
- Polymer clay blocks (various colors)
- Small cardstock or notepad paper
- Mini gold binder clip
- Clear matte varnish (optional)
Step 1: Preparing the Box Structure
-
Sand the surfaces:
Start by giving your unfinished wooden box a light sanding. Focus on the corners and edges to ensure they are smooth to the touch, and wipe away any dust with a tack cloth. -
Measure the interior:
Using your ruler, precisely measure the interior width and length of the box. You need to create three distinct sections: two smaller side sections and a larger central area, or whatever fits your specific clay brick sizes best. -
Cut the main divider:
Cut a strip of balsa wood to fit the exact length of the box’s interior. This will be your long, central spine divider. Test the fit dry to ensure it sits flush against the bottom and sides. -
Cut cross-dividers:
Measure the distance from your central spine to the box walls. Cut two shorter pieces of balsa wood to act as perpendicular dividers. These will create the separate compartments for your color groups. -
Glue the dividers:
Apply a thin bead of wood glue to the bottom and side edges of your balsa wood pieces. Press them firmly into place inside the box. I find using small clamps or masking tape helps hold them straight while the glue sets.
Sticky Situation?
If your clay sticks to the wood dividers, line the compartments with parchment paper or coat the wood with a sealer before filling.
Step 2: Organizing the Clay
-
Sort by spectrum:
While the glue dries completely, gather your polymer clay blocks. Unwrap them if you prefer the raw look, or keep them in clear wrap for protection. Organize them by color: warm reds and oranges together, cool blues and greens, and neutrals. -
Test the arrangement:
Place the clay blocks into the compartments. Stand them upright on their narrow edges to maximize space. You might need to gently squish the sides of the clay blocks just a tiny bit to get a perfect friction fit if they are loose. -
Create gradients:
Refine the order of the blocks to create a pleasing gradient effect. Transition from dark reds to light pinks, or deep blues to teals. This visual organization makes it much faster to find the exact shade you need.
Step 3: The Inventory System
-
Cut the inventory cards:
Take a sheet of cardstock or notepad paper and cut it down to a rectangle that fits comfortably near the box, roughly 3×5 inches. -
Draw the lines:
Using a ruler and a fine-point pen, draw evenly spaced horizontal lines across the paper. These will serve as your checklist rows for recording color names or codes. -
Attach the clip:
Clip the gold binder clip to the top center of your paper. This adds a functional, metallic accent that matches the hardware on many wooden boxes. -
List your stock:
Write down the names, brands, or color codes of the clay you currently have stored. Keep this list next to the box so you know when you’re running low on a specific shade without digging through the compartments.
Swat it Up
Make small, baked chips of each clay color and glue them to the top of the inventory sheet for an instant real-color reference guide.
Your studio is now organized with a system that is as beautiful as it is functional