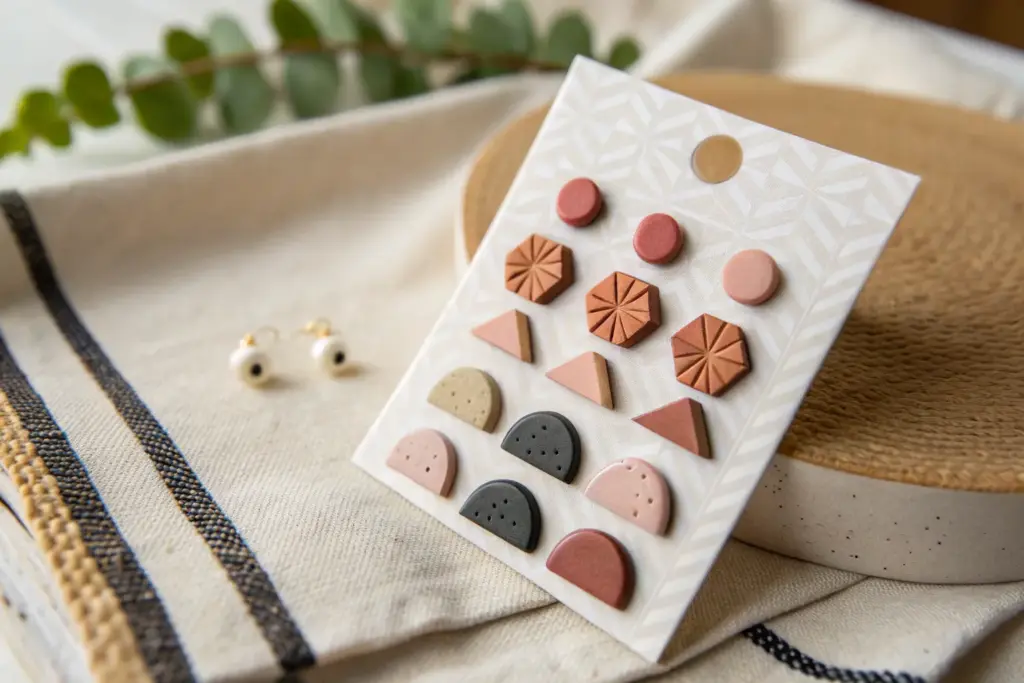
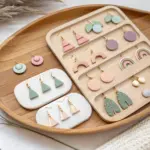
When I’m making polymer clay stud earrings, I love how a tiny shape can still carry big color and texture. Here are my favorite stud earring ideas—from classic everyday pairs to the playful, “how did you make that?” kind.
Classic Round Dot Studs
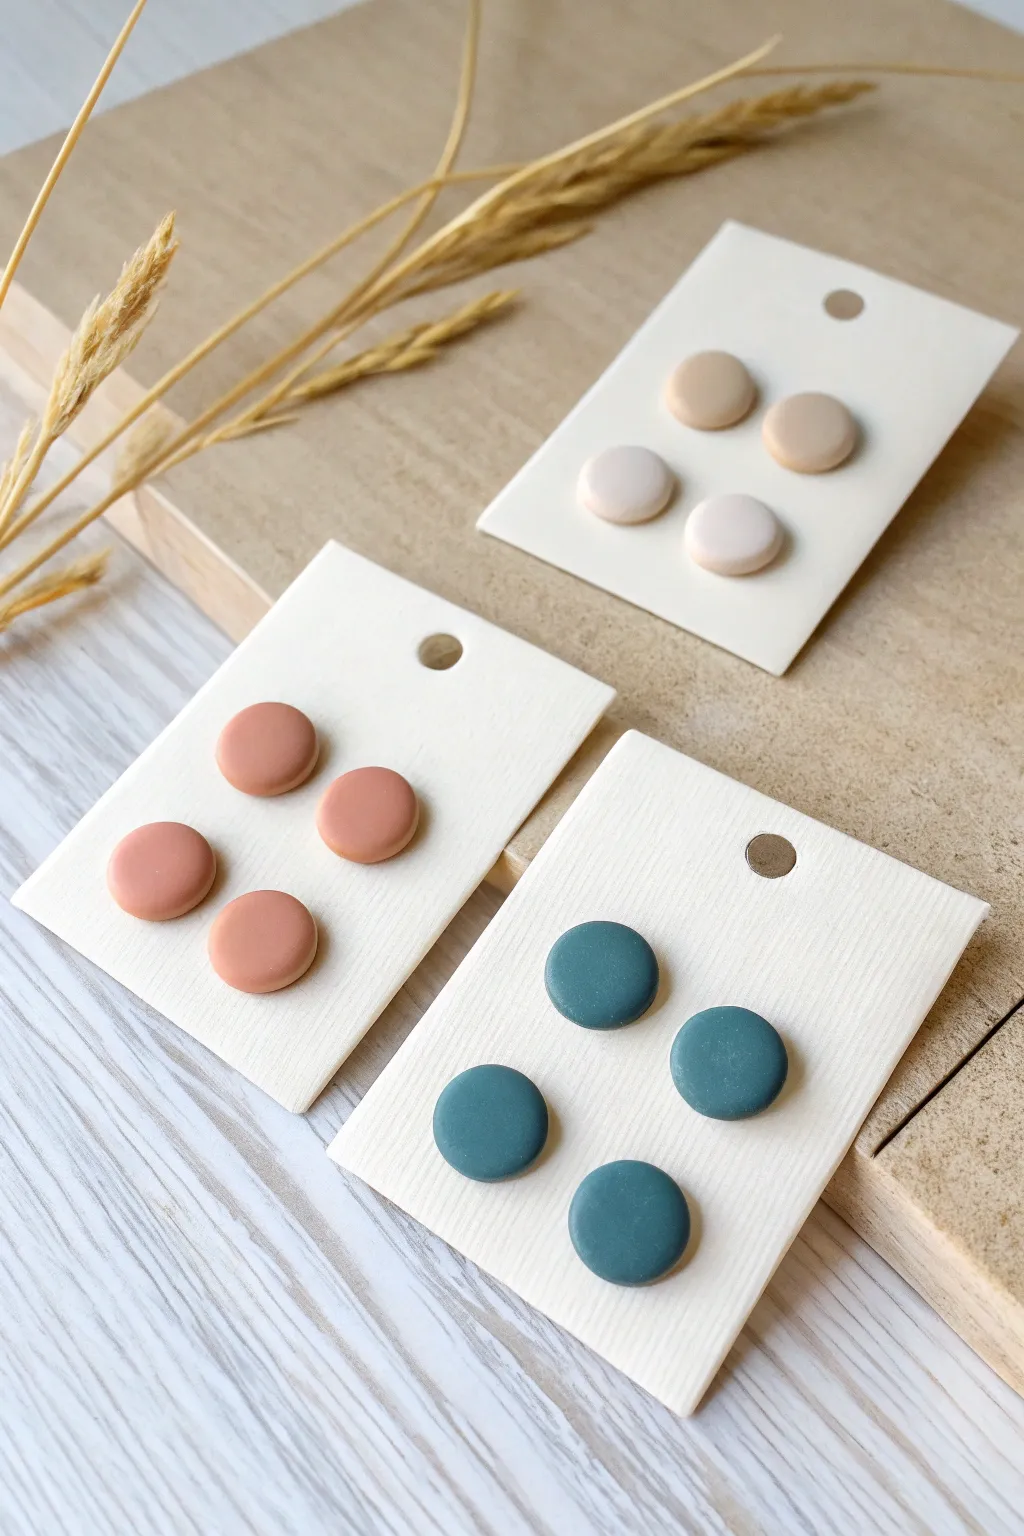
Embrace the beauty of simplicity with these understated, flat round stud earrings. Featuring a smooth, matte finish and earthy tones, these versatile pieces are perfect for everyday wear and make excellent gifts.
Step-by-Step Guide
Materials
- Polymer clay (colors shown: beige, terracotta/peach, muted teal)
- Small round clay cutter (approx. 8mm – 10mm)
- Acrylic rolling pin
- Depth guides or playing cards
- Ceramic tile or glass baking sheet
- Earring posts (surgical steel or sterling silver)
- Jewelry glue (e.g., E6000 or Loctite Gel)
- Fine grit sandpaper (400-800 grit)
- Cornstarch or baby powder (optional)
- Tissue blade or X-Acto knife
Step 1: Preparation & Conditioning
-
Prepare your workspace:
Clean your work surface and rolling pin with a baby wipe or alcohol to remove any lint or dust, which shows up easily on solid colors. -
Condition the beige clay:
Start with the lightest color first to avoid color transfer. Knead the beige clay in your hands until it is soft and pliable. -
Roll out the slab:
Using your acrylic roller and depth guides (about 2-3mm thick), roll the conditioned clay into a smooth, even sheet. Ensure the thickness is consistent, as thinner studs can be brittle. -
Release the clay:
Gently lift the clay sheet off your surface and place it back down. This ensures the clay isn’t stuck, which would distort your circles when you cut them.
Use Plastic Wrap
For a softer, more rounded ‘pillow’ edge without sanding, lay a sheet of cling wrap over your clay slab before pressing your cutter down.
Step 2: Cutting & Shaping
-
Dip the cutter:
Dip your small round cutter into a little cornstarch or baby powder. This acts as a release agent and helps the clay pop out cleanly. -
Cut the circles:
Press the cutter firmly into the clay slab. Give it a tiny wiggle before lifting to ensure a clean cut. -
Release the shape:
If the circle stays on the table, use your blade to gently lift it. If it stays in the cutter, gently poke it out from the back using a blunt tool, being careful not to dent the surface. -
Smooth the edges:
I like to take a moment here to gently run my finger around the rim of each circle to soften the sharp cut edge, giving it that nice domed look seen in the photo. -
Repeat for other colors:
Clean your hands and tools, then repeat the conditioning, rolling, and cutting process for the terracotta and teal clay colors.
Step 3: Baking & Finishing
-
Arrange for baking:
Place your cut circles onto a ceramic tile or a baking sheet lined with plain printer paper. Space them out slightly. -
Bake the pieces:
Bake according to your clay manufacturer’s instructions (usually 275°F/130°C for 30-45 minutes). Don’t rush this step; properly baked clay is durable. -
Cool down:
Allow the clay pieces to cool completely on the baking surface before handling them. -
Sand for perfection:
If there are any rough spots on the edges, gently sand them with fine-grit sandpaper. To get that ultra-matte finish, you can also lightly sand the top surface. -
Clean residue:
Wipe the baked pieces with a damp cloth or rinse them to remove any sanding dust.
Fingerprints?
If you see fingerprints before baking, lightly brush the surface with a tiny amount of baby oil or acetone on a Q-tip to smooth them away.
Step 4: Assembly
-
Prepare the glue:
Squeeze a small amount of strong jewelry glue onto a piece of scrap paper. -
Apply to posts:
Dip the flat pad of the earring post into the glue. You want full coverage but not a overflowing globs. -
Attach posts:
Press the post firmly onto the center of the back of the clay circle. Give it a tiny twist to ensure a good bond. -
Full cure time:
Let the glue cure completely (usually 24 hours) before wearing the earrings or attaching them to the display cards.
Enjoy mixing and matching these classic colors for a modern, sophisticated look

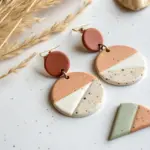

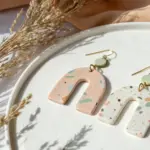
Minimal Arch Studs
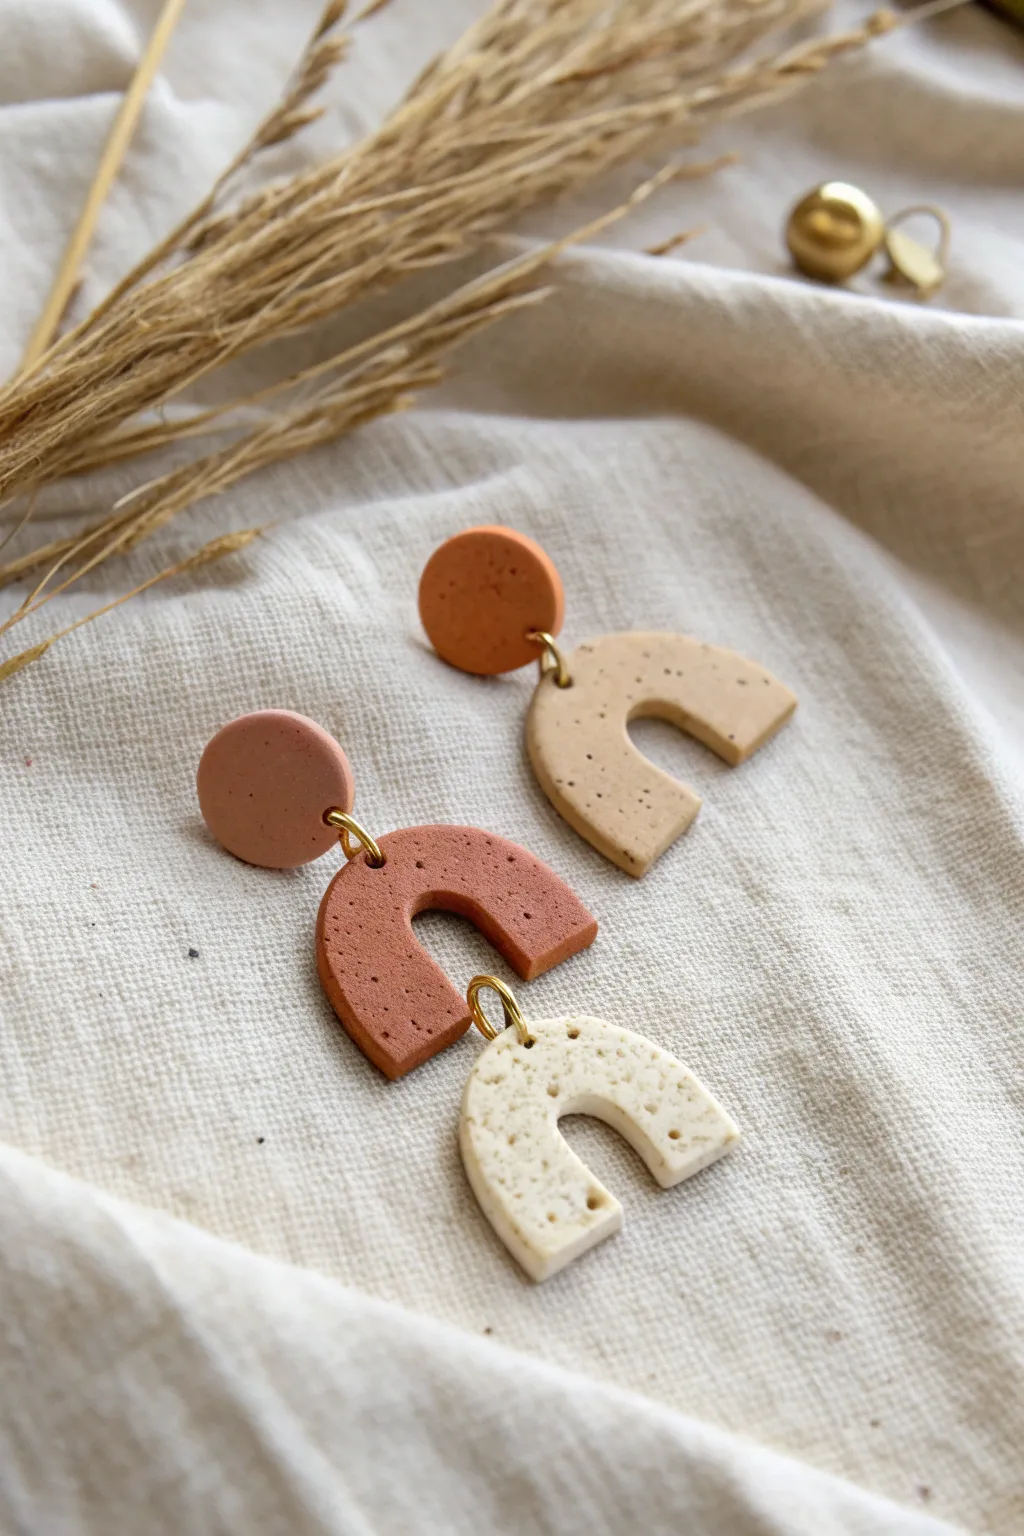
Embrace organic textures and warm, earthy hues with these minimalist arch earrings. The subtle granite effect and tiered design create a sophisticated, modern look perfect for everyday wear.
How-To Guide
Materials
- Polymer clay (terracotta, beige, and cream)
- Black pepper or dried coffee grounds (for speckling)
- Acrylic rolling pin
- Clay cutters (circle shapes and arch shapes)
- Needle tool or toothpick
- Gold jump rings (6mm)
- Jewelry pliers
- Earring posts and backs
- Super glue or liquid polymer clay
- Baking sheet and parchment paper
- Sandpaper (optional, for edges)
- Oven
Step 1: Preparing the Patterned Clay
-
Condition the clay:
Start by warming up your terracotta, beige, and cream clay blocks in your hands. Knead them separately until they are soft and pliable, ensuring there are no air bubbles trapped inside. -
Create the speckled effect:
To achieve that natural, stony look seen in the photo, flatten each color of clay slightly. Sprinkle a tiny pinch of ground black pepper or very finely ground dried coffee onto each slab. -
Mix the speckles:
Fold the clay over the speckles and knead it again. Repeat this process until heavy specks are evenly distributed throughout the dough, giving it a granite-like texture. -
Roll out slabs:
Using your acrylic roller, roll each color out onto a flat surface. Aim for a distinct thickness of about 3mm to 4mm so the final earrings feel substantial but not heavy.
Uneven Texture?
If your pepper or coffee grounds are causing bumps or tears when cutting, roll the clay slightly thicker or grind your inclusions into a finer powder.
Step 2: Cutting and Shaping
-
Cut the studs:
Use a small circle cutter (approx. 10-12mm) to punch out the top stud pieces. For the asymmetrical look shown, cut one circle from terracotta and one from a matching rusty-orange shade if available, or simply match your arches. -
Cut the arches:
Use your arch-shaped cutters on the beige and terracotta slabs. For the tiered earring, you will need a medium terracotta arch and a slightly wider or matching cream arch for the bottom. -
Refine the shapes:
If you don’t have specific arch cutters, you can use a circle cutter to cut a round shape, and then use a smaller circle cutter to remove the inner bottom section, creating a U-shape manually. -
Smooth the edges:
Gently run your finger along the cut edges of the raw clay to smooth out any harsh lines or burrs left by the cutters. A soft touch here saves sanding time later. -
Pierce assembly holes:
Using a needle tool, carefully poke holes where the jump rings will go. For the stud, pierce near the bottom edge. For the middle arch, pierce the top center and bottom center. For the bottom arch, pierce just the top center. -
Double-check alignment:
Before baking, lay the pieces out on your work surface in their final formation to ensure the holes align correctly and the drop length looks balanced.
Step 3: Baking and Assembly
-
Bake the pieces:
Transfer all perfectly shaped clay pieces to a parchment-lined baking sheet. Bake according to your brand of polymer clay’s instructions (usually 275°F/135°C for 30 minutes). -
Cool down:
Allow the pieces to cool completely on the baking sheet. They are fragile while warm, so patience is key here to avoid snapping them. -
Sand for perfection:
If there are any rough spots on the edges after baking, use fine-grit sandpaper to gently buff them smooth. Wipe away any dust with a damp cloth. -
Attach the posts:
Flip the circular stud pieces over. Apply a dab of super glue or liquid clay to the flat pad of an earring post and press it firmly onto the back of the clay circle. Let this dry fully. -
Open jump rings:
Using two pairs of jewelry pliers, twist a gold jump ring open laterally (twisted sideways, never pulled apart like a C). -
Connect the tiers:
Thread the open jump ring through the hole in the stud and the top hole of the first arch. Close the ring securely by twisting it back into place. -
Final assembly:
For the multi-tiered earring, use a second jump ring to connect the bottom of the terracotta arch to the top of the cream arch. Ensure all rings are closed tightly so pieces don’t slip off.
Level Up: Resin Finish
For a glossy ceramic look, coat the baked clay with a thin layer of UV resin and cure under a UV lamp. This intensifies the speckle colors beautifully.
Enjoy styling these versatile, stony beauties with your favorite linen outfits


Half-And-Half Color-Block Studs
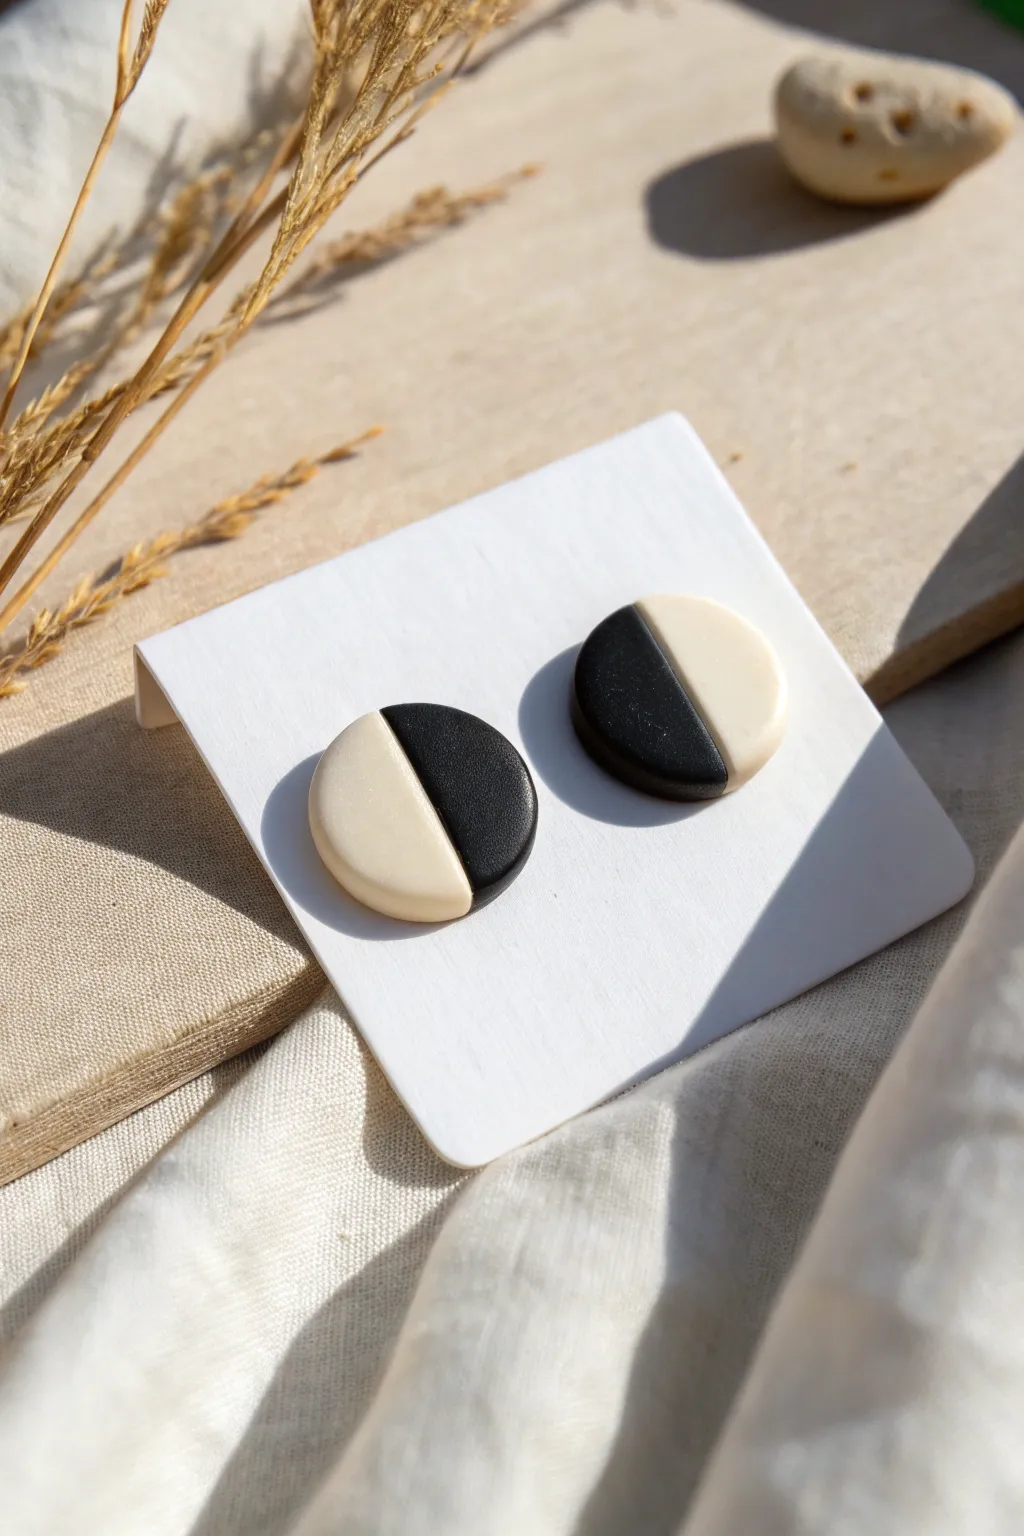
These minimalist studs master the art of contrast, pairing deep black with creamy bone in a seamless circular design. The result is a crisp, two-tone accessory that works perfectly with everything from casual tees to office blazers.
Step-by-Step Guide
Materials
- Black polymer clay
- Cream or beige polymer clay
- Small circular clay cutter (approx. 10-15mm diameter)
- Rigid tissue blade or X-Acto knife
- Acrylic rolling pin or pasta machine
- Ceramic tile or glass baking surface
- Earring posts (surgical steel or titanium recommended)
- Strong jewelry glue (like E6000 or Loctite Gel)
- Rubbing alcohol and Q-tips (for cleaning)
- Fine grit sandpaper (400-1000 grit, optional)
- Oven thermometer
Step 1: Conditioning and Sheeting
-
Prepare the Clay:
Start by thoroughly conditioning your black and cream clay separately. Knead each color in your hands until it becomes soft, pliable, and warm to the touch. -
Roll to Thickness:
Using your acrylic roller or pasta machine, roll both colors out into sheets. You want them to be the exact same thickness, roughly 2mm to 3mm thick for sturdy studs. -
Clean Your Hnds:
Before moving between colors, wipe your hands and tools with a baby wipe or alcohol. Black clay loves to leave smudge marks on lighter colors, so hygiene is key here.
Step 2: Creating the Color Block
-
Cut Straight Edges:
Use your rigid tissue blade to slice a clean, straight edge on both your sheet of black clay and your sheet of cream clay. -
Join the Seams:
Push the two straight edges together on your work surface. Press them firmly enough so they adhere, but gently enough so you don’t distort the thickness. -
Secure the Bond:
To ensure the seam is strong, gently roll over the join with your acrylic roller. I like to roll diagonally across the seam to meld the two clays without stretching them out of shape. -
Check the Back:
Flip the sheet over carefully to make sure the seam is tightly closed on the reverse side as well. If there’s a gap, gently push the clays together again.
Seamless Smoothness
To hide the seam completely, place a piece of cling wrap over the clay before cutting your circles. This creates a lovely domed edge that looks incredibly polished.
Step 3: Cutting and Refining
-
Position the Cutter:
Take your small circular cutter and position it directly over the seam line. Aim to have the line run perfectly down the center of the circle for an equal half-and-half look. -
Cut the Studs:
Press down firmly. Twist the cutter slightly before lifting to ensure a clean break from the surrounding clay. -
Repeat:
Cut a second circle along the seam line to create your pair. -
Smooth the Edges:
Once removed from the cutter, gently run your finger along the rim of the circles to soften any sharp edges created by the cutting process. -
Clean Up:
Dip a Q-tip in a little rubbing alcohol and very gently brush the top surface. This removes fingerprints and lint, leaving a flawless matte finish.
Smudge Alert
If black residue gets on the cream section, use a Q-tip dipped in acetone (nail polish remover) to gently wipe the baked clay. It lifts stains instantly.
Step 4: Baking and Assembly
-
Prepare for Baking:
Place your clay circles on a ceramic tile or a baking sheet lined with parchment paper. -
Baking:
Bake according to your specific clay brand’s instructions (usually around 275°F or 130°C). I recommend using an oven thermometer to ensure the temperature stays consistent. -
Cool Down:
Allow the pieces to cool completely inside the oven or on the counter. Do not try to move them while hot, as the clay is still fragile. -
Optional Sanding:
If the edges feel rough after baking, lightly wet-sand them with fine-grit sandpaper for a professional touch. -
Attach Posts:
Apply a small dab of strong jewelry glue to the flat pad of an earring post. -
Final Set:
Press the post firmly onto the back of the clay circle. Let the glue cure fully—usually 24 hours—before wearing them to ensure maximum durability.
Now you have a stunning pair of geometric studs ready to elevate your daily style


Soft Marbled Swirl Studs
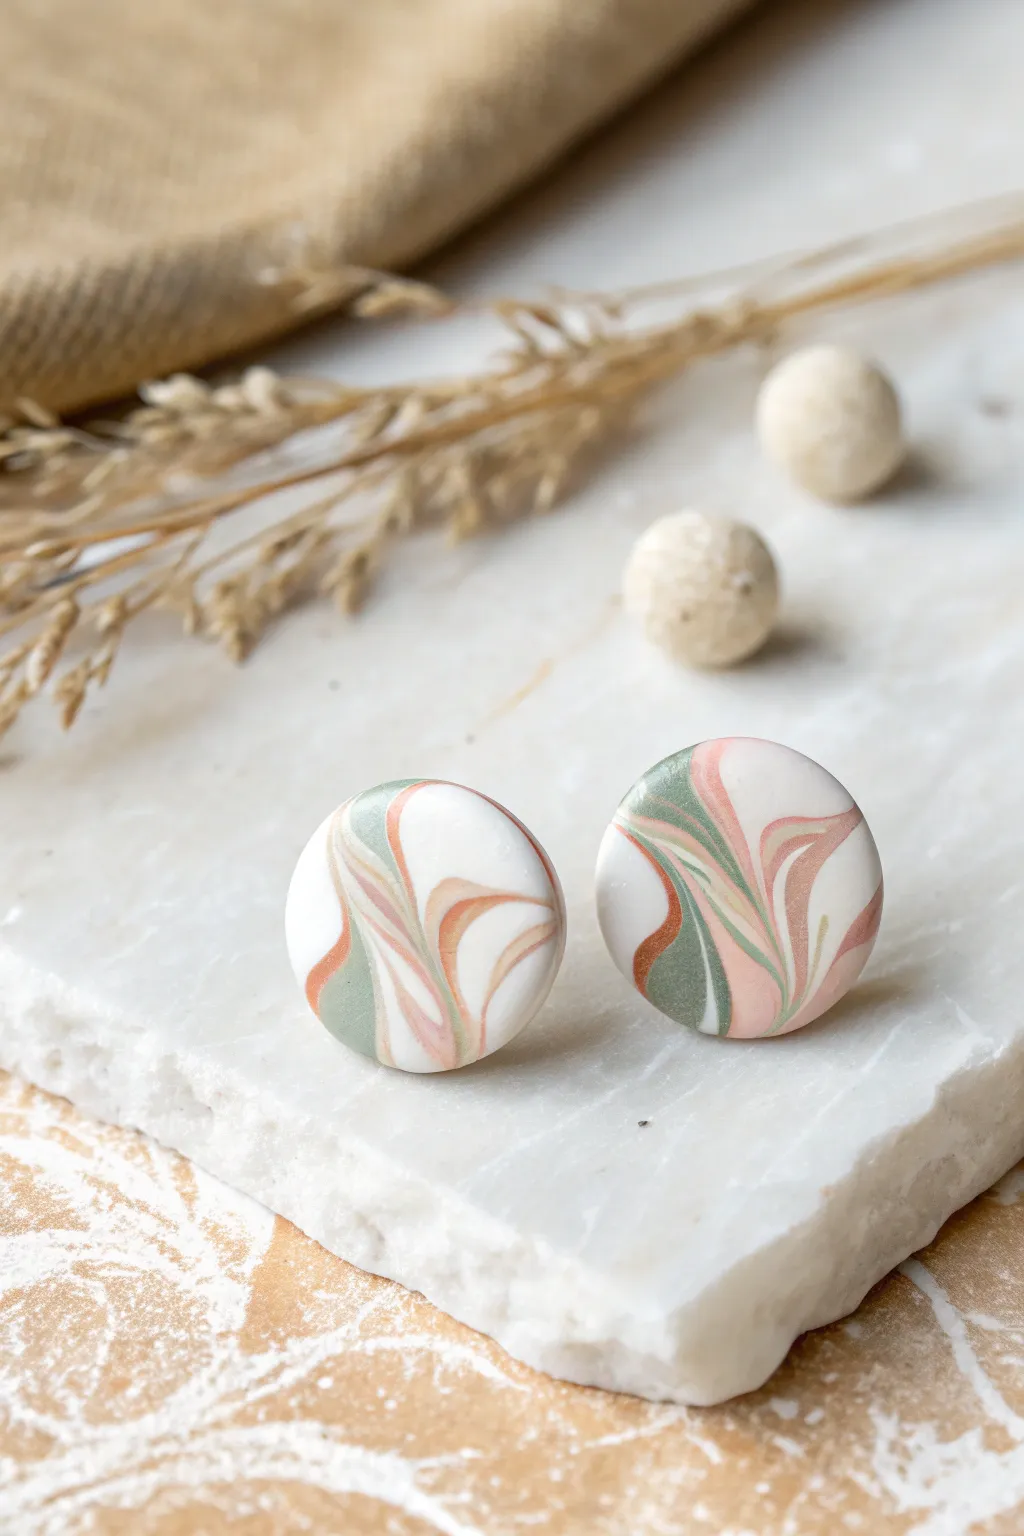
Capture the essence of spring with these elegant polymer clay studs, featuring delicate swirls of sage green, soft peach, and hints of copper against a creamy white base. The organic marbling technique ensures that every earring is a unique piece of wearable art with a finish that looks like polished stone.
Detailed Instructions
Materials
- Polymer clay (White, Sage Green, Peach/Soft Pink, Metallic Copper)
- Small circle clay cutter (approx. 10-12mm)
- Acrylic rolling pin or pasta machine
- Tissue blade or X-Acto knife
- Ceramic tile or glass work surface
- UV resin or polyurethane gloss varnish
- Small paintbrush or UV lamp (if using resin)
- Earring posts and backs
- Super glue or liquid polymer clay (for attaching posts)
- Wet/dry sandpaper (400-1000 grit) or a buffing tool
Step 1: Preparing the Clay Palette
-
Conditioning the Clay:
Begin by thoroughly conditioning each color of clay separately. Knead the white, sage green, peach, and metallic copper until they are soft, pliable, and free of cracks. -
Creating Base Logs:
Roll each color into a thin log or ‘snake’. Since white is the dominant background color, make the white log significantly thicker than the others—about twice the volume of the colored logs combined. -
Color Proportion:
Refine your color ratios. You want smaller amounts of the accent colors (sage, peach, copper) to prevent the pattern from becoming muddy. Keep these logs thin compared to the white base.
Don’t Overmix
Stop rolling while the colors are distinctive! If you twist and roll too many times, the sage and peach will blend into a muddy brown rather than clean, suspended swirls.
Step 2: Creating the Marbled Slab
-
Combining the Logs:
Gather your clay snakes and twist them together into one large rope. Fold the rope in half and twist again. Repeat this twisting and folding process 3-4 times, but be careful not to over-blend just yet. -
Marbling Technique:
Roll the twisted rope into a smooth ball. Then, roll it back out into a thick log. This helps elongate the streaks of color. -
Forming the Slab:
Use your acrylic roller to flatten the log into a slab. As you roll, you’ll see the pattern emerge. Aim for a thickness of about 3mm for sturdy earrings. -
Reading the Pattern:
Inspect your slab. If the swirl isn’t intricate enough, you can cut the slab in half, stack the pieces, and roll it out again to create finer lines and more complex movement.
Step 3: Cutting and Baking
-
Selecting the Best Spots:
Hover your circle cutter over different areas of the slab. Look for sections with a pleasing balance of white space and colorful swirls—like the elegant swoops seen in the image. -
Cutting the Shapes:
Press the cutter firmly into the clay. Give it a tiny wiggle to ensure it cuts all the way through, then lift. Use plastic wrap over the clay before cutting if you want softer, more domed edges. -
Smoothing Edges:
Gently gently run your finger tip around the cut edge of each circle to smooth out any harsh lines or fingerprints before baking. -
Baking:
Place your cutouts on a ceramic tile or baking sheet lined with parchment paper. Bake according to your brand of clay’s instructions (usually 275°F/130°C for 30 minutes for Premo or Fimo). -
Cooling:
Allow the clay pieces to cool completely before moving to the finishing steps. The clay hardens fully as it returns to room temperature.
Gold Leaf Accent
Instead of copper clay, mix in small flakes of real gold leaf during the twisting phase. The metallic flecks will float in the resin finish for an extra luxe touch.
Step 4: Finishing and Assembly
-
Sanding:
Dip your cooled pieces in water and lightly sand the edges and surface with fine-grit sandpaper if needed to remove any lint or uneven spots. -
Attaching Posts:
Apply a small dot of super glue or liquid clay to the back of the earring stud. Press the earring post into the glue. If using liquid clay, you will need to bake the pieces again briefly to set the bond. -
Glazing Basics:
Ensure the surface is clean and dry. Apply a thin, even layer of UV resin or glad varnish to the front of the stud to achieve that high-gloss, glass-like finish shown in the photo. -
Curing the Finish:
If using UV resin, cure under a UV lamp for 2-4 minutes until hard and tack-free. If using varnish, let it air dry completely in a dust-free area. -
Final Buff:
Give the earrings a final wipe with a soft cloth to maximize shine before wearing.
Enjoy wearing these sophisticated swirled studs that look just like custom-made stones

The Complete Guide to Pottery Troubleshooting
Uncover the most common ceramic mistakes—from cracking clay to failed glazes—and learn how to fix them fast.
Terrazzo Chip Studs
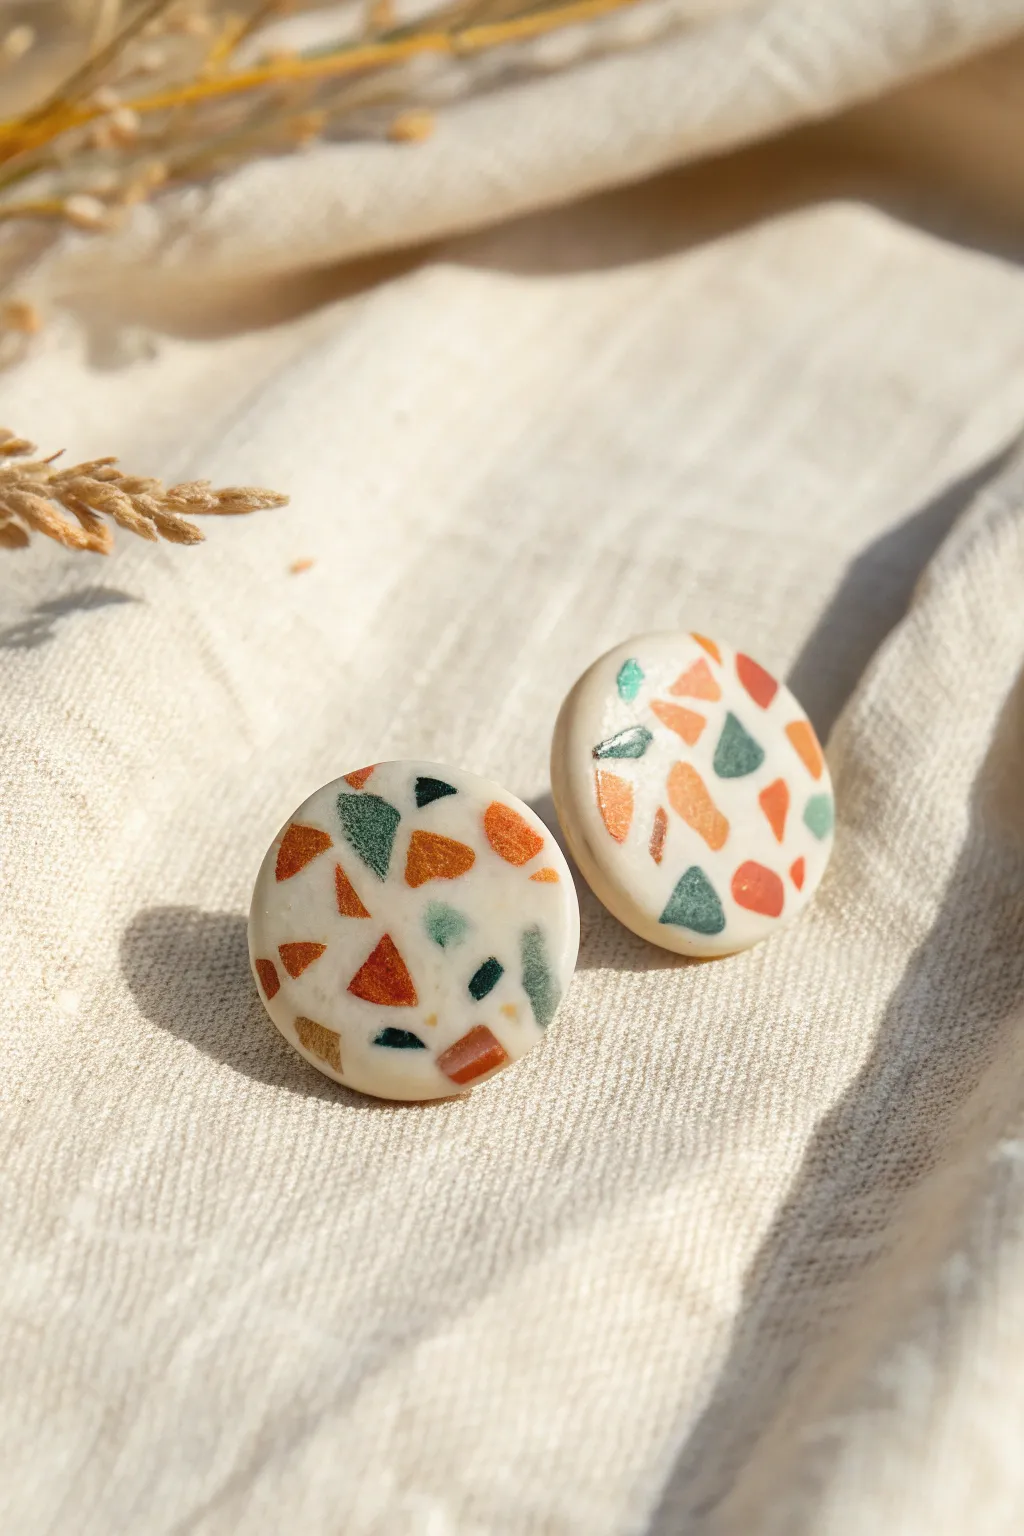
Capture the chic, dappled look of Italian flooring in miniature with these stylish polymer clay earrings. The warm rust and teal chips create a sophisticated pop of color against a creamy background, perfect for everyday wear.
Step-by-Step
Materials
- Polymer clay: Cream (or white), Rust/Orange, Teal/Dark Green, Gold (optional)
- Acrylic rolling pin or pasta machine
- Tissue blade or X-acto knife
- Small round clay cutter (approx. 1 cm)
- Parchment paper or ceramic tile
- Earring posts and backs
- Super glue or jewelry adhesive
- Sandpaper (various grits: 400, 600, 800, 1000)
- Buffing cloth or denim scrap
Step 1: Creating the Chips
-
Condition the colors:
Start by thoroughly kneading your Rust and Teal polymer clays until they are soft and pliable. If you want a bit of sparkle, condition a tiny amount of Gold clay as well. -
Roll out thin sheets:
Roll each of these colored clays into very thin sheets, ideally the thinnest setting on a pasta machine or about 1mm thick by hand. -
Bake the sheets:
Place these thin sheets on parchment paper and bake them according to the package instructions for about 10–15 minutes. We want these fully cured so we can chop them up later. -
Cool and chop:
Once baked and fully cooled, use your tissue blade to chop the colored sheets into tiny, irregular shards. Aim for varied triangle-like shapes, keeping them small enough to fit nicely on an earring stud.
Step 2: Assembling the Terrazzo Slab
-
Prepare liquid clay:
Condition your Cream colored clay until soft. Roll it into a thick sheet, about 3mm to 4mm thick. This will be the base of your slab. -
Sprinkle the chips:
Generously scatter your chopped baked chips over the raw cream clay sheet. Try to distribute the colors evenly so you don’t have clumps of just orange or just teal. -
Press into the base:
Cover the clay with a piece of parchment paper. Use your acrylic roller to firmly press the chips down into the raw cream clay until the surface feels relatively flush. -
Roll smooth:
Roll the slab slightly thinner now to ensure the chips are fully embedded. If the pattern stretches too much, you can simply push the sides back in to consolidate the slab.
Chip Control
Don’t make your chips too big! Large pieces can make cutting the small circles difficult and may distort the round edge of the cutter.
Step 3: Cutting and Finishing
-
Cut the shapes:
Position your small round cutter over an area with a pleasing arrangement of chips. Press down firmly to cut out your two earring circles. -
Final bake:
Place your raw cut circles on a ceramic tile or baking tray lined with parchment. Bake for the full recommended duration (usually 30 minutes per 1/4 inch at 275°F/130°C) to ensure durability. -
Cool down:
Allow the pieces to cool completely before determining if they need sanding. -
Sand for depth:
Sanding is the magic step here. Wet sand the surface starting with 400 grit sandpaper. This removes the thin layer of cream clay over the chips, revealing their true vibrant colors. -
Refine the finish:
Continue wet sanding through the higher grits (600, 800, then 1000) until the surface is incredibly smooth to the touch. -
Buff to a sheen:
Rub the sanded earrings briskly against a piece of denim or a microfiber cloth. This friction polishing gives them that professional, soft matte glow without needing glaze. -
Attach the hardware:
Apply a small dot of strong jewelry adhesive or super glue to the flat pad of an earring post. -
Secure the post:
Press the glued post onto the back of the clay circle. I usually hold it in place for 30 seconds to ensure a tight initial bond. -
Allow to cure:
Let the glue cure fully overnight before wearing to ensure your posts don’t pop off.
Embedded Backs
For a ultra-durable finish, sandwich the earring post between the main clay circle and a thin backing layer of raw clay before the final bake.
Now you have a sophisticated pair of custom earrings that look like tiny pieces of modern art
Linen-Imprint Texture Studs
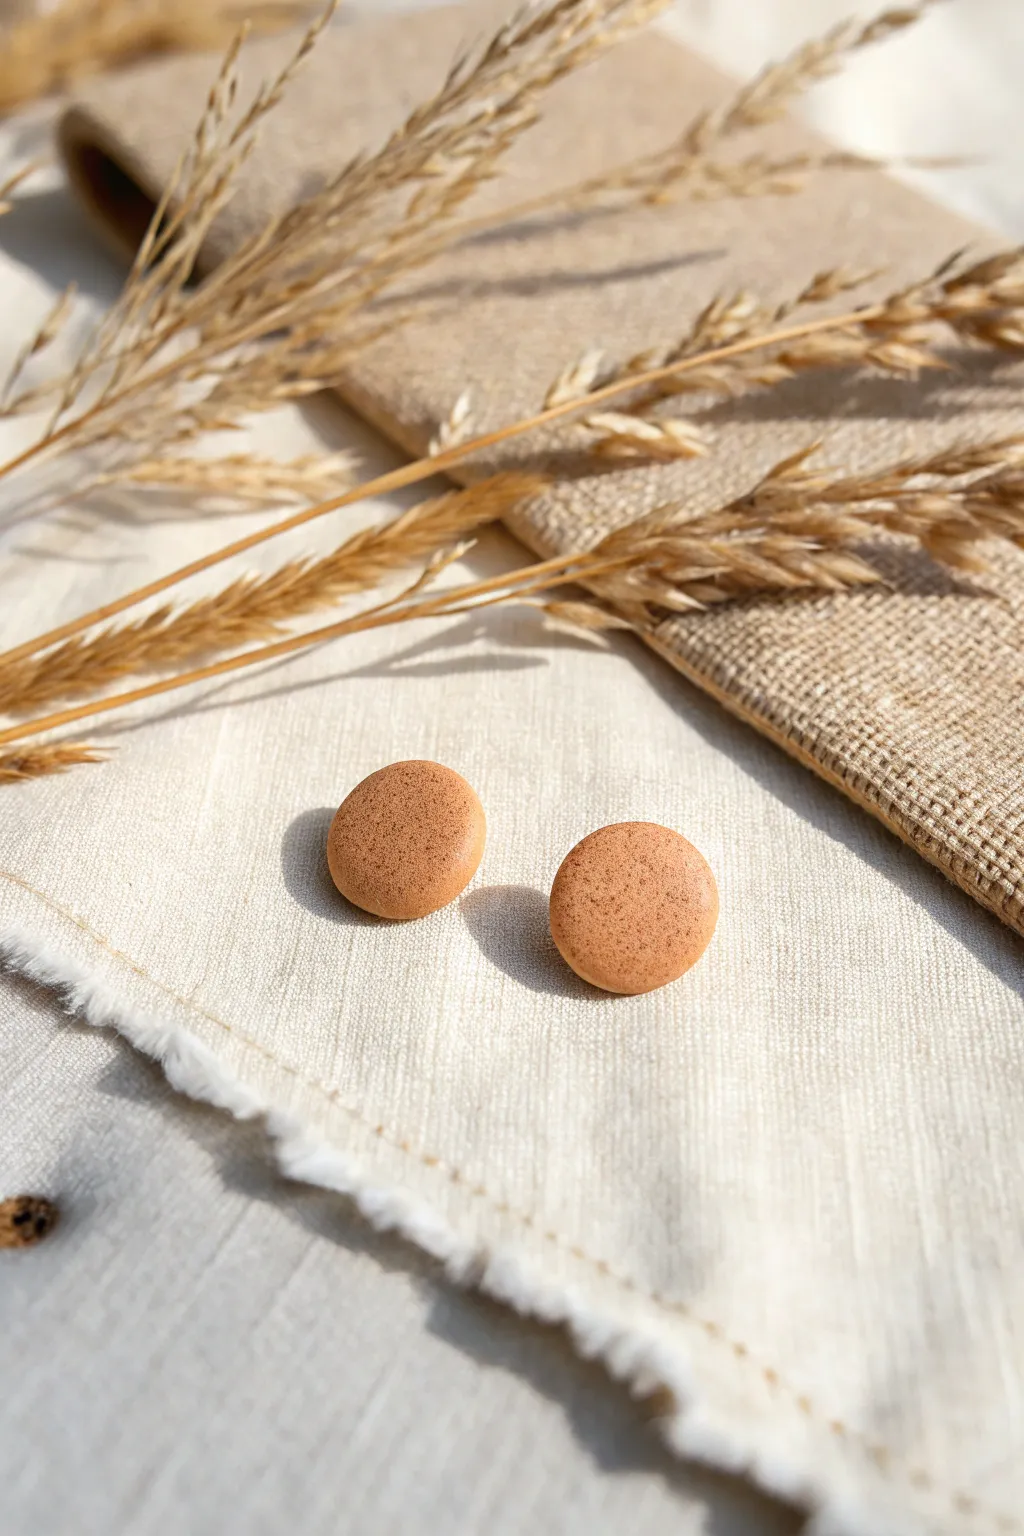
These sweetly simple studs mimic the organic imperfections of pottery with a warm, speckled finish and a subtle fabric texture. Using common spices found in your pantry is the secret to achieving that natural, earthy look without needing special effect clays.
Step-by-Step
Materials
- Beige or tan polymer clay (like Sculpey Soufflé in Latte or Igloo swirled with a tiny bit of brown)
- Ground nutmeg or cinnamon
- Coarse linen or muslin fabric scrap
- Small circle cutter (approx. 10-12mm)
- Acrylic rolling pin
- Depth guides or playing cards
- Stainless steel stud posts (flat pad)
- Strong craft glue (like E6000 or Loctite Gel)
- Gloss or matte varnish (optional)
- Ceramic tile or baking sheet
- Cardstock or parchment paper
- Oven thermometer
Step 1: Clay Preparation
-
Condition the base:
Begin by thoroughly conditioning your beige polymer clay until it is soft, pliable, and warm in your hands. -
Add the speckles:
Flatten the clay into a pancake shape and sprinkle a small pinch of ground nutmeg or cinnamon onto the surface. I prefer nutmeg for a more scattered, random speckle. -
Incorporate the spice:
Fold the clay over the spice and knead it thoroughly. Continue rolling and folding until the specks are evenly distributed throughout the batch. -
Review the density:
Check your speckled density; if you want a heavier look, add another tiny pinch and repeat the kneading process. -
Roll out the slab:
Using your acrylic roller and depth guides (about 3mm thick works well for studs), roll the clay out into a smooth, even sheet on your work surface.
Step 2: Texturing and Cutting
-
Prepare the fabric:
Take your scrap of coarse linen or muslin and check for loose threads that might leave unwanted impressions. -
Apply the texture:
Gently lay the fabric over your clay slab. Roll over it firmly once with your acrylic roller to imprint the weave into the clay surface. -
Reveal the pattern:
Carefully peel back the fabric to reveal the subtle textile texture left behind on the clay. -
Cut the shapes:
Press your small circle cutter firmly into the textured clay. Give it a tiny wiggle to ensure it cuts all the way through to the surface below. -
Lift shapes:
Remove the excess clay from around the circles first, then slide a thin blade under the circles to lift them without distorting their round shape. -
Hone the edges:
lightly tap the edges with your fingertip to soften the sharp cut line, making the finished piece look more like fired ceramic.
Use Saran Wrap
For a gorgeous domed ‘pillow’ effect, lay plastic wrap over the textured clay before using your cutter. This rounds the edges automatically.
Step 3: Baking and Assembly
-
Prepare for baking:
Place your clay circles on a ceramic tile or baking sheet lined with cardstock. -
Bake:
Bake in a preheated oven according to your clay manufacturer’s instructions. Usually, this is around 275°F (130°C) for 30 minutes for optimal durability. -
Cool down:
Allow the clay pieces to cool completely inside the oven or on the counter before handling them to prevent warping. -
Clean the backs:
If the back of the clay is shiny or uneven, lightly sand it with fine-grit sandpaper to create a better surface for adhesion. -
Glue the posts:
Apply a small dot of strong craft glue to the flat pad of your earring post. -
Attach and set:
Press the post firmly onto the center of the earring back. Let the glue cure fully according to the package directions (often 24 hours). -
Optional varnish:
If you want a glazed pottery look, apply a thin coat of gloss varnish to the top; otherwise, leave them matte for a raw stone effect.
Burnt Spices?
If your specks turn black or smell burnt, your oven is too hot. Use an oven thermometer to verify the temp, as dial displays are often inaccurate.
Now you have a charming set of faux-stone earrings ready to complement any cozy outfit


What Really Happens Inside the Kiln
Learn how time and temperature work together inside the kiln to transform clay into durable ceramic.
Simple Leaf Stud Silhouettes
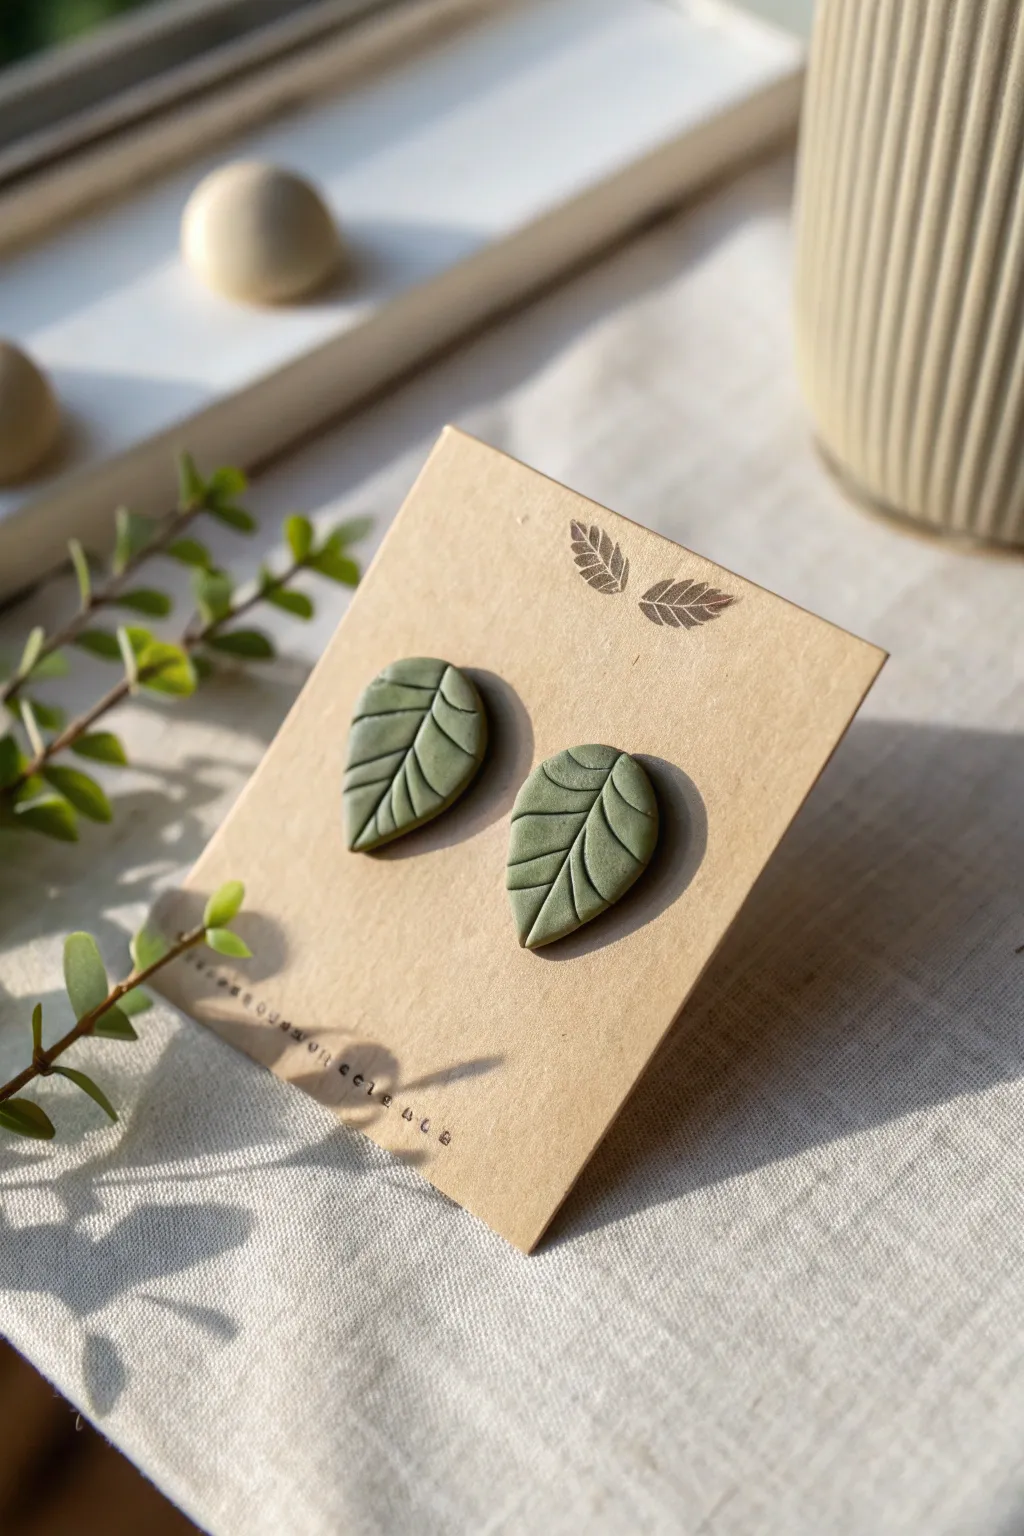
Capture the serene beauty of the outdoors with these minimalist leaf earrings. Crafted from polymer clay in a soft sage hue, these studs feature delicately impressed veins for a textured, organic finish that looks effortlessly chic.
Step-by-Step Guide
Materials
- Polymer clay (Sage green or mix Olive Green with White)
- Acrylic rolling pin or pasta machine
- Ceramic tile or glass work surface
- Leaf-shaped mini clay cutter (approx. 15-20mm)
- Needle tool or X-acto knife
- Stainless steel earring posts
- Liquid polymer clay (Bake & Bond)
- Rubbing alcohol
- Q-tips
- Oven thermometer
- Baking sheet with parchment paper
- Fine-grit sandpaper (optional)
Step 1: Preparing the Clay
-
Condition the clay:
Begin by warming the sage green polymer clay in your hands. Knead and roll it repeatedly until it becomes pliable and soft, ensuring there are no air bubbles trapped inside. -
Roll the slab:
Using an acrylic rolling pin or the thickest setting on a pasta machine, create a flat, even sheet of clay. Aim for a thickness of about 3mm—thick enough to hold the imprint but light enough for ears. -
Secure to surface:
Gently press your clay sheet onto a ceramic tile or glass surface. This prevents the clay from moving while you work and allows you to bake directly on the surface so the shapes don’t warp.
Lines not deep enough?
If your vein lines disappear during baking, press a bit harder next time. The clay expands slightly in heat, sometimes pushing shallow details back out.
Step 2: Shaping and Detailing
-
Cut the shapes:
Take your mini leaf-shaped cutter and press firmly into the clay. Lift the cutter straight up. If the clay sticks inside, gently push it out from the top edges. -
Remove excess clay:
Carefully peel away the excess ‘scrap’ clay from around your cut leaf shapes, leaving the leaves undisturbed on the tile. -
Smooth the edges:
Dip your finger or a Q-tip in a tiny amount of gently rubbing alcohol and lightly run it over the edges of the leaves to remove any sharp burrs or fingerprints. -
Create the central vein:
Using the back of a needle tool or a dull knife edge, gently press a curved line down the center of the leaf. I prefer to start from the bottom stem and curve slightly toward the tip for a natural look. -
Add side veins:
Press shorter, diagonal lines branching off from the central vein. Apply even, gentle pressure so you indent the clay without cutting all the way through. -
Check symmetry:
Ensure both earrings look like a pair. They don’t need to be identical copies, but the vein patterns should feel balanced.
Step 3: Baking and Assembly
-
Preheat the oven:
Set your oven to the temperature recommended on your clay package (usually 275°F/130°C). Use an oven thermometer to verify the heat is accurate. -
Bake the pieces:
Place the tile with your clay leaves into the oven. Bake for approximately 30 minutes. Polymer clay is stronger when baked longer, so don’t rush this step. -
Cool down:
Remove the tile carefully and let the clay cool completely before attempting to pop the leaves off. They will harden fully as they cool. -
Prepare posts:
Prepare your stainless steel earring posts. Apply a small drop of liquid polymer clay onto the flat pad of the earring post. -
Attach posts:
Press the post onto the back of the baked clay leaf. To make it extra secure, add a tiny ball of scrap clay over the post pad and smooth it down to embed the metal. -
Re-bake for security:
Place the earrings back in the oven for another 15-20 minutes to cure the liquid clay and secure the backs permanently. -
Final finish:
Once cool again, inspect your work. If you prefer a matte look like the photo, leave them as is. If you want shine, apply a thin coat of matte or gloss varnish.
Natural Texture Hack
Before cutting shapes, gently roll a piece of canvas fabric or sandpaper over your clay slab. This adds a subtle organic texture to the surface.
Pop these onto a card for a gift or wear them immediately to enjoy your handcrafted botanical accessory
Tiny Flower Studs With Petal Detail
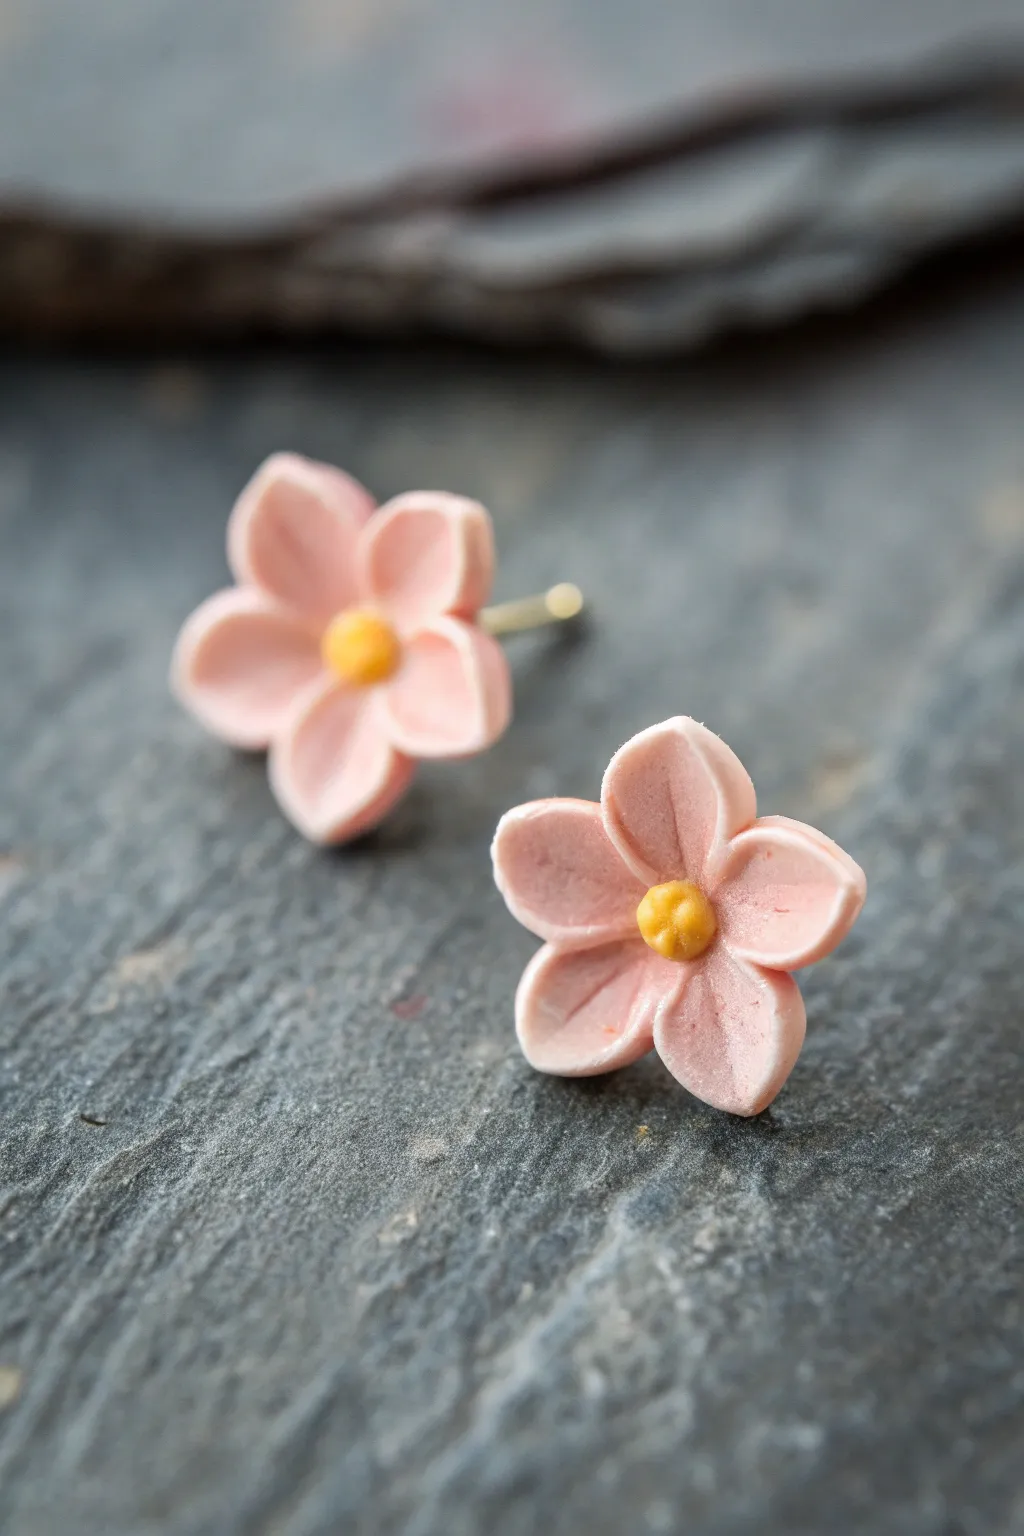
These delicate pink flower studs capture the soft elegance of cherry blossoms in a tiny, wearable format. With their gently cupped petals and textured yellow centers, they add a sweet floral touch to any outfit.
Detailed Instructions
Materials
- Polymer clay (Soft Pink)
- Polymer clay (Golden Yellow or Mustard)
- Small ball tool
- Needle tool or toothpick
- Scalpel or craft knife
- Flat stud earring posts (surgical steel or gold-plated)
- Liquid polymer clay or bake-and-bond
- Gloss or matte varnish (optional)
- Ceramic tile or glass work surface
Step 1: Prepping the Petals
-
Mix your base:
Condition the pink clay thoroughly until it’s soft and pliable. If the pink is too bright, mix in a tiny amount of translucent or white clay to achieve the soft pastel hue seen in the photo. -
Create a log:
Roll the pink clay into a thin, even snake about 3-4mm in diameter. -
Slice segments:
Using your craft knife, cut ten equal segments from the log. These will become the petals for your pair of earrings. -
Form teardrops:
Roll each small segment into a smooth ball between your fingers, then pinch one end slightly to form a fat teardrop shape.
Sticky Situation?
If the tiny petals stick to your fingers, lightly dust your hands with cornstarch. This prevents fingerprints and helps release the clay easily.
Step 2: Assembling the Flower
-
Flatten the petals:
Gently press down on the wide end of each teardrop with your thumb against your finger to flatten them slightly, keeping the pointed end intact. -
Arrange the base:
On your tile, arrange five petals in a circle with their pointed ends meeting in the center. Press them gently together so they stick. -
Indent with tool:
Take your ball tool and press into the middle of each petal. Drag the tool gently toward the center of the flower to create a cupped, dimensional shape. -
Refine the edges:
Use the needle tool to gently pinch or nudge the petal tips if they lost definition during sculpting. -
Repeat for the pair:
Repeat the previous steps with the remaining five petals to create the second flower bloom.
Petal Power Up
Brush a tiny amount of pink pearl mica powder or chalk pastel dust onto the petals before baking for a subtle, shimmering gradient effect.
Step 3: Adding the Center Details
-
Create the center:
Roll two tiny balls of the golden yellow clay. Size them to fit snugly in the depression in the center of your flowers. -
Secure the center:
Add a tiny dot of liquid clay to the middle of the pink bloom, then place the yellow ball on top. -
Texture the pollen:
Using a needle tool, poke the yellow center repeatedly with shallow stippling motions to create a rough, pollen-like texture.
Step 4: Baking and Finishing
-
Bake the pieces:
Bake the flowers according to your clay manufacturer’s instructions (usually 275°F/135°C for 15-30 minutes). I recommend tenting them with foil to protect the light pink color from scorching. -
Cool completely:
Allow the flowers to cool naturally before trying to remove them from the tile. -
Prepare the posts:
Sand the flat pad of your earring posts slightly to create a better bonding surface. -
Attach the hardware:
Apply a drop of strong adhesive or a dab of liquid clay to the back of the flower. -
Secure posts:
Press the earring post firmly onto the back. If using liquid clay, bake again for 15 minutes to set the bond. -
Optional varnish:
For durability, brush a very thin layer of matte varnish over the petals to seal them.
Now you have a charming pair of handmade floral studs ready to wear or gift

TRACK YOUR CERAMIC JOURNEY
Capture glaze tests, firing details, and creative progress—all in one simple printable. Make your projects easier to repeat and improve.
Stamped Line-Art Studs
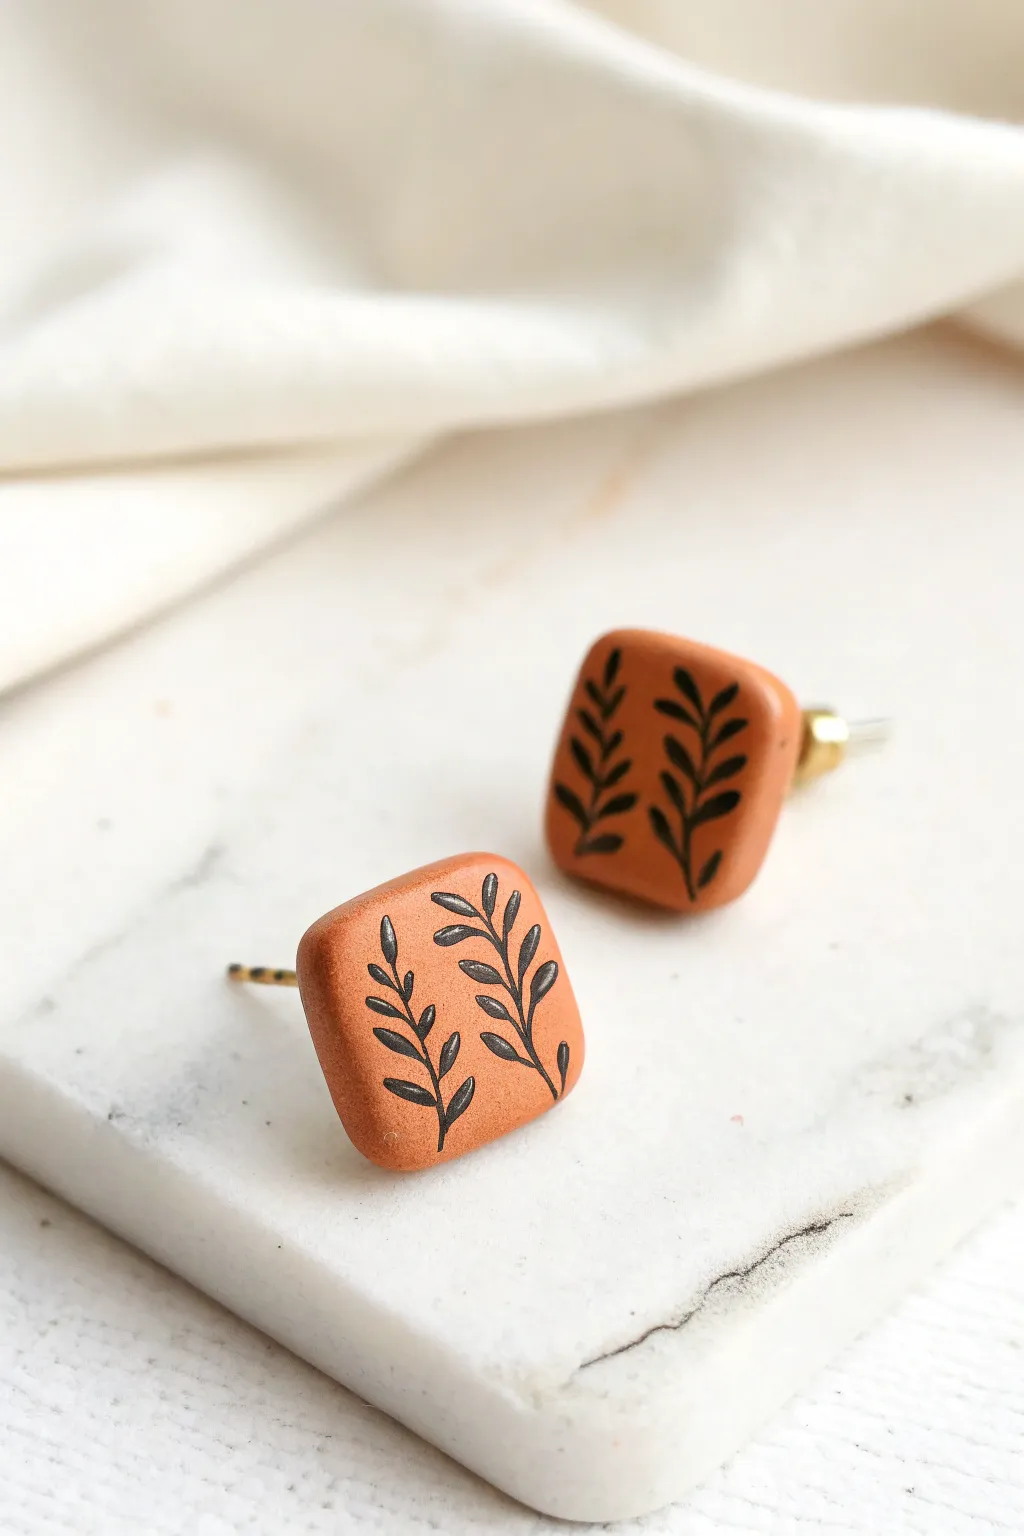
Embrace earthy tones and botanical motifs with these warm terracotta stud earrings. The sleek square shape provides the perfect canvas for a stamped line-art design, creating a piece that feels both modern and naturally grounded.
Step-by-Step
Materials
- Terracotta or warm burnt orange polymer clay
- Square clay cutter (approx. 10-12mm with rounded corners)
- Black acrylic paint
- Rubber stamp with a small branch or leaf design
- Acrylic roller or pasta machine
- Two 1/8 inch depth guides or playing cards
- Tissue blade
- Ceramic tile or baking sheet
- Cotton swab or paper towel
- Earring posts and backs (surgical steel or gold-plated)
- Super glue or liquid polymer clay (to attach posts)
- Fine grit sandpaper (400-800 grit)
- Matte or satin polymer clay varnish (optional)
Step 1: Clay Preparation
-
Condition the Clay:
Begin by working the terracotta polymer clay in your hands until it becomes soft and pliable. This conditioning phase is crucial to prevent cracking later. -
Roll the Slab:
Place your clay between depth guides (or stacks of playing cards) to ensure an even thickness. Roll it out into a smooth slab approximately 1/8 inch thick. -
Check the Surface:
Inspect the clay slab for any air bubbles or lint. If you see bubbles, gently pierce them with a needle tool and smooth over with your finger. If distinct lint appears, use a bit of tape to lift it off.
Stamp Smearing?
If your stamp lines look blurry or too thick, your paint layer is likely too heavy. Dab excess paint onto paper first until the stamp looks almost dry before pressing onto the clay.
Step 2: Adding the Design
-
Prepare the Stamp:
Squeeze a small amount of black acrylic paint onto a palette or scrap piece of paper. Instead of dipping the stamp directly, dab the paint onto the rubber stamp face using a sponge or your finger to ensure a thin, even coat. -
Test the Impression:
Before committing to your main slab, I always recommend doing a quick test stamp on a scrap piece of clay to check how much paint transfers and how hard you need to press. -
Stamp the Clay:
Gently press the inked stamp onto your clay slab. Apply even pressure without squishing the clay down too far. Lift straight up to avoid smearing the fine lines. -
Clean Up Edges:
If the paint smudged slightly outside the lines, wait for it to dry completely, then gently scrape the excess away with a craft knife or a cotton swab dampened with a tiny bit of rubbing alcohol. -
Let the Paint Dry:
Allow the acrylic paint on the clay to dry fully. This usually takes about 10-15 minutes, ensuring the design doesn’t smear when you cut out the shapes.
Level Up: Debossed Look
For texture, press a clean stamp firmly into the clay first to create an indentation. After baking, flow diluted dark paint into the grooves and wipe the surface clean.
Step 3: Cutting and Baking
-
Position the Cutter:
Take your rounded square cutter and position it over the stamped leafy design. Frame the branch so it sits somewhat diagonally or centrally, depending on the look you prefer. -
Cut the Shapes:
Press the cutter firmly down through the clay. Wiggle it very slightly to separate the shape from the surrounding slab, then lift. Repeat for the second earring. -
Smooth the Edges:
Once lifted, carefully smooth the raw edges with your fingertip to remove any sharp ridges left by the cutter. Gentle smoothing now saves time on sanding later. -
Bake:
Place the cut squares on a ceramic tile or baking sheet lined with parchment paper. Bake according to the clay manufacturer’s instructions (typically 275°F/135°C for 30 minutes, but verify your specific brand). -
Cool Down:
Allow the pieces to cool completely in the oven or on a wire rack before handling them further.
Step 4: Finishing and Assembly
-
Light Sanding:
If there are still rough spots on the sides or back, lightly buff them with fine-grit sandpaper under running water. -
Seal the Design:
To protect the acrylic paint from scratching off over time, apply a very thin layer of matte or satin varnish over the front face. Let it dry completely. -
Attach the Posts:
Turn the studs face down. Apply a drop of strong super glue or gel glue to the flat pad of the earring post and press it onto the center of the earring back. -
Secure the Bond:
For extra durability, you can cover the glue pad with a tiny smear of liquid clay or UV resin and cure it again, though high-quality super glue is often sufficient for studs.
Wear your new botanical studs with pride knowing they are completely handmade
Matte-And-Gloss Contrast Studs
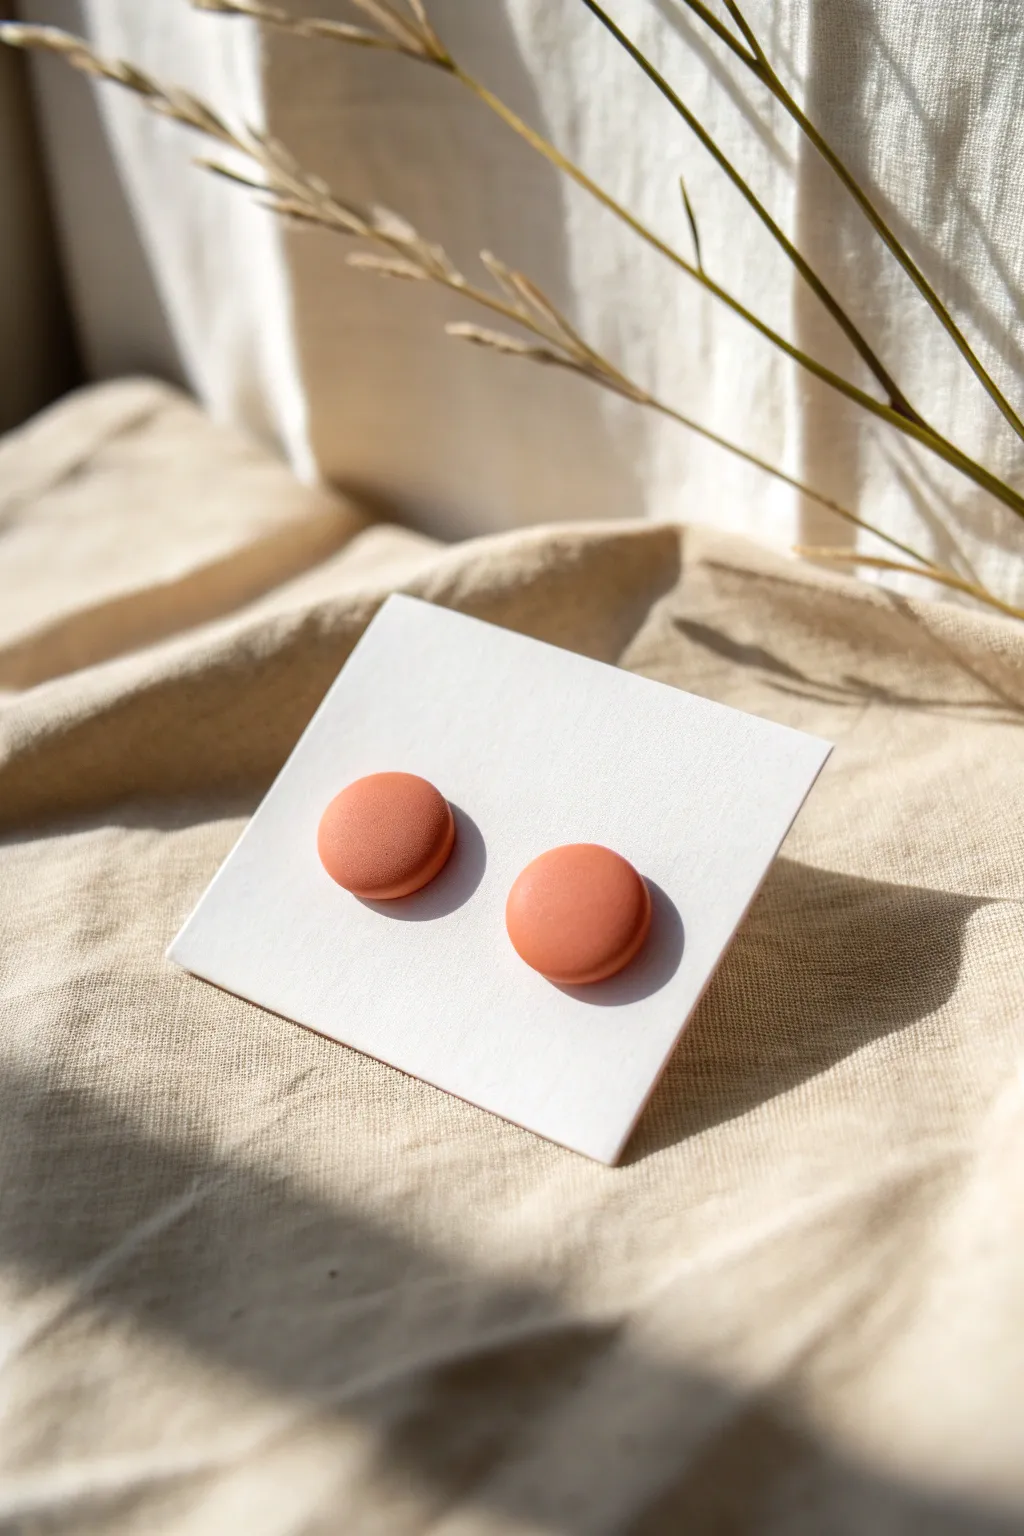
These minimalist stud earrings capture the warmth of terracotta with a velvety smooth finish that feels effortlessly modern. The muted orange tone works perfectly as a subtle pop of color for everyday wear.
Detailed Instructions
Materials
- Terracotta or burnt orange polymer clay
- Circle clay cutter (approx. 10-12mm)
- Acrylic rolling pin
- Ceramic tile or glass work surface
- Fine-grit sandpaper (400, 600, and 1000 grit)
- Hand drill or pin vibe (optional)
- Earring posts and backs (surgical steel or titanium)
- Strong jewelry glue (e.g., E6000 or Loctite Gel)
- Cornstarch or baby powder
- Matte varnish (optional)
Step 1: Conditioning and Shaping
-
Prepare your clay:
Begin by taking a chunk of your terracotta-colored polymer clay. Warm it up in your hands, kneading and squishing it until it becomes soft, pliable, and easy to work with. -
Roll it out:
Place the conditioned clay on your ceramic tile or glass surface. Using your acrylic rolling pin, roll the clay out to an even thickness of about 3mm to 4mm. I find using depth guides helps keep everything uniform. -
Dust the surface:
To prevent sticking, lightly dust the surface of your clay sheet with a tiny pinch of cornstarch or baby powder. Spread it gently with your finger so it covers the area where you’ll be cutting. -
Cut the circles:
Press your circle cutter firmly into the clay. Give it a tiny wiggle before lifting to ensure a clean cut. You will need two circles to create one pair of studs. -
Refine the edges:
Once cut, gently lift the circles. Use your finger to softly tap down any sharp edges left by the cutter, giving the perimeter a slight curve for a more finished, stone-like look.
Step 2: Baking and Sanding
-
Bake the pieces:
Place your clay circles on a parchment-lined baking sheet or a ceramic tile. Bake according to the manufacturer’s specific instructions for your brand of clay, usually around 275°F (130°C) for 30 minutes. -
Cool down completely:
Allow the clay pieces to cool naturally inside the oven or on the counter until they are room temperature. Don’t rush this step, as warm clay is still fragile. -
Start sanding:
Dip your 400 grit sandpaper in a small bowl of water. Gently sand the edges and the top surface of the studs in a circular motion to remove any fingerprints or imperfections. -
Refine the finish:
Move up to the 600 grit and then the 1000 grit sandpaper, continuing the wet sanding process. This creates that ultra-smooth, matte texture that mimics polished stone. -
Dry and buff:
Rinse the studs under water to remove any clay dust and dry them thoroughly with a lint-free cloth or paper towel. Buff them vigorously on a piece of denim or cotton to bring out a natural, subtle sheen.
Smoother Cuts
Place a piece of plastic wrap over the clay before cutting with your circle cutter. This creates a beautifully domed, pillow-like edge instantly, reducing sanding time later.
Step 3: Assembly
-
Prepare the posts:
Take your metal earring posts and roughen the flat pad slightly with sandpaper. This creates texture for the glue to grip onto better. -
Apply adhesive:
Place a small dot of strong jewelry glue onto the back of your clay circle. Be careful not to use too much, or it will ooze out when you press the post down. -
Attach the hardware:
Press the earring post firmly into the center of the glue dot. Hold it there for a few seconds to ensure initial contact is secure. -
Secure the bond:
If you want extra security, you can add a tiny snakeskin-thin layer of liquid polymer clay over the post pad (encasing it) and bake again briefly, but high-quality glue is usually sufficient. -
Let it cure:
Allow the glue to cure fully for at least 24 hours before wearing the earrings. This patience ensures your posts won’t pop off during use.
Gloss Detail
Create the contrast mentioned in the section title by dipping just half the circle into a gloss glaze or UV resin. The mix of matte clay and shiny finish looks incredibly chic.
Enjoy styling these versatile studs with your favorite casual outfits for an effortless touch of earthy elegance
Ombre Gradient Studs

Capture the warmth of a setting sun with this stunning ombre earring set. Through simple color mixing, you’ll transform just two base colors into a seamless five-shade gradient ranging from deep rust to pale peach.
How-To Guide
Materials
- Polymer clay (Deep Red or Rust color)
- Polymer clay (White or Translucent White)
- Small circular clay cutter (approx. 10-12mm)
- Acrylic rolling pin or clay pasta machine
- Tissue blade or craft knife
- Ceramic tile or baking sheet
- Standard oven
- Earring posts (titanium or surgical steel)
- Super glue or jewelry adhesive (e.g., E6000)
- Fine grit sandpaper (optional)
Step 1: Preparing the Gradient
-
Condition the Clay:
Begin by thoroughly kneading your dark clay (rust/terracotta) and your white clay separately. You want them warm and pliable to ensure they mix smoothly without streaking. -
Portion the Base Colors:
Roll both conditioned clay colors into sheets of equal thickness. Using your small circle cutter, cut out 5 circles of white and 5 circles of rust. This ensures you’re working with precise ratios. -
Create Shade 1 (Darkest):
Take 4 of the rust circles. Knead them together into a ball. This will be your pure base color for the darkest earrings. -
Create Shade 2:
Combine 3 rust circles with 1 white circle. Knead thoroughly until the color is completely uniform and no marble streaks remain. -
Create Shade 3 (Middle):
Combine 2 rust circles with 2 white circles. Mix well. This creates the perfect midpoint transition color for your gradient. -
Create Shade 4:
Combine 1 rust circle with 3 white circles. Knead until smooth. You will see the color turning into a soft coral tone. -
Create Shade 5 (Lightest):
Take the remaining 4 white circles and add just a tiny pinch (roughly 1/8th of a circle size) of rust clay. Mixing just a speck of color into the white keeps it from being too stark against the gradient.
Step 2: Cutting and Baking
-
Roll Out the Shades:
Roll each of your five new color balls into flat sheets. Aim for a thickness of about 3mm (or setting 3 on a pasta machine) for a sturdy stud. -
Cut the Shapes:
Using your circular cutter, punch out two circles from each color sheet. If the clay sticks inside the cutter, gently push it out or use a piece of plastic wrap over the clay before cutting for rounded edges. -
Smooth the Edges:
Gently pick up each circle and lightly tap the edges with your fingertip to remove any stray clay bits or fingerprints. -
Prepare for Baking:
Arrange the ten circles on your ceramic tile or baking sheet. I find that baking directly on a glossy ceramic tile leaves a nice smooth back on the earrings. -
Bake:
Bake the clay according to the manufacturer’s instructions for the specific brand you are using. Usually, this is around 275°F (135°C) for 15-30 minutes. -
Cool Down:
Allow the clay pieces to cool completely before removing them from the baking surface to prevent warping.
Clean Color Tip
Always wipe your hands and rolling pin with a baby wipe when switching from the dark rust to the lighter pink shades. Even tiny dark specks will ruin the pale clay.
Step 3: Assembly
-
Sand (Optional):
If you want a truly matte, professional finish, place a sheet of wet/dry sandpaper on a flat surface and gently rub the face of the earrings in a figure-eight motion. -
Clean Surfaces:
Wipe the back of each clay circle with a little rubbing alcohol to remove oils; do the same for the flat pad of your earring posts. -
Glue the Posts:
Apply a small dot of strong jewelry adhesive to the earring post pad. Press it firmly onto the center of the back of the clay circle. -
Set and Dry:
Let the glue cure fully (usually 24 hours) before wearing or packaging the earrings on a display card.
Level Up: Texture
Before cutting your circles, gently press a piece of coarse sandpaper or a texture sponge onto the raw clay sheet to give the studs a stone-like, gritty finish.
Arrange your finished studs in order on a card to show off that beautiful color transition you created
Inlaid Dots And Stripes Studs
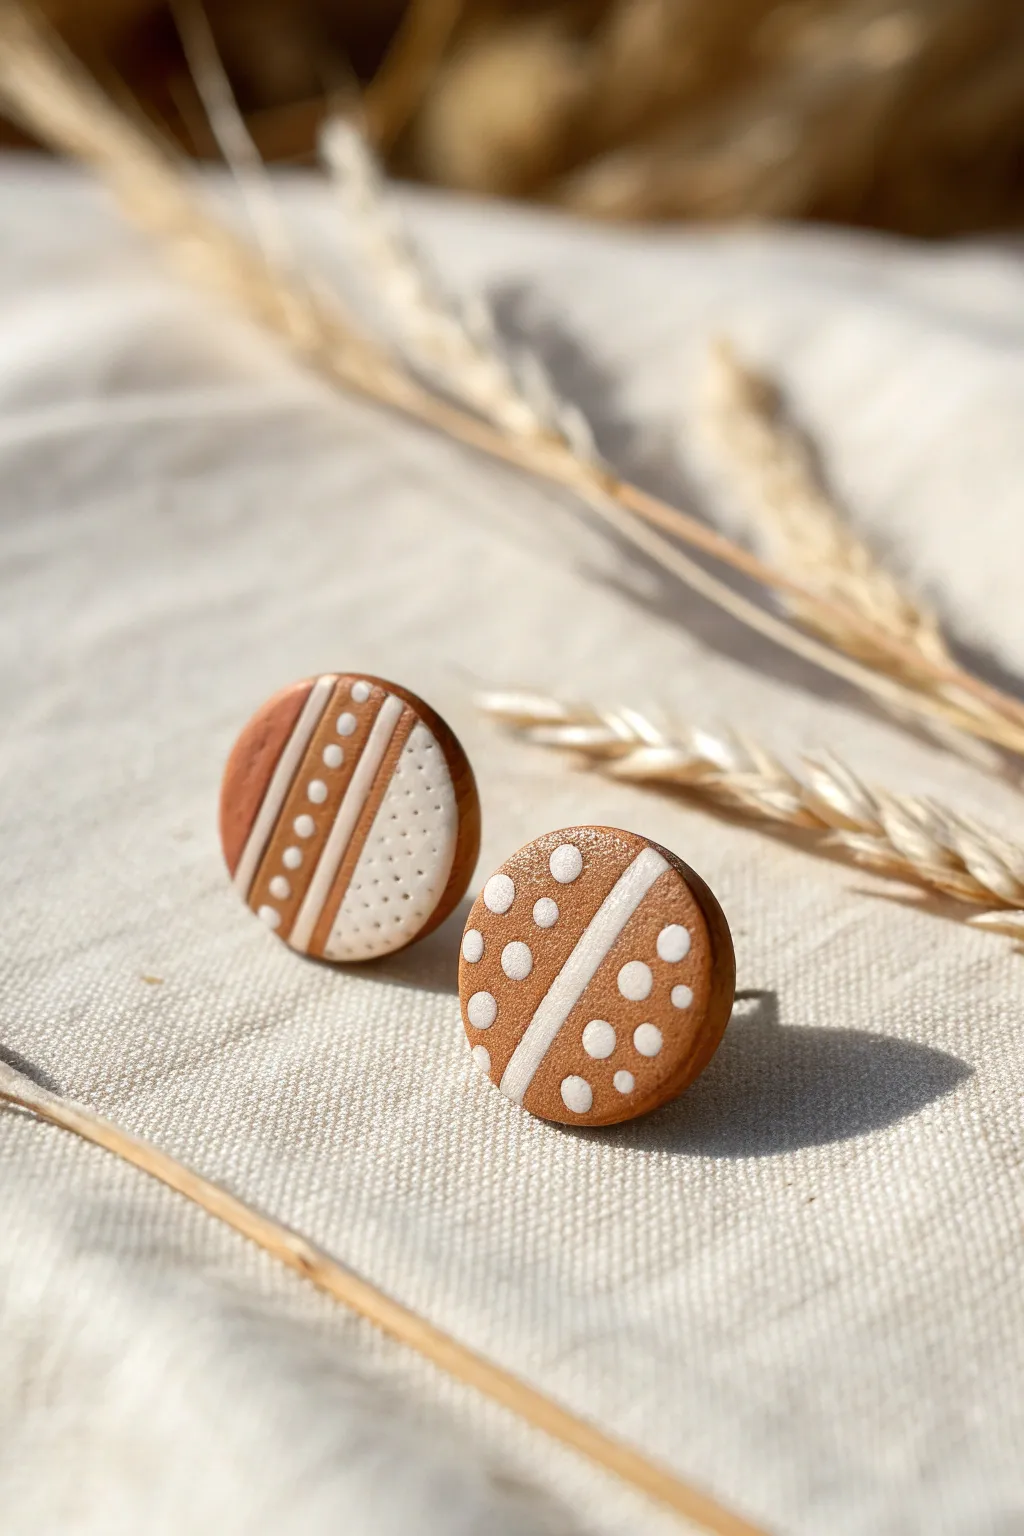
These earthy, terracotta-toned studs feature a delightful mix of geometric precision and organic texture. The crisp white inlays against the warm clay background create a modern boho look perfect for everyday wear.
Detailed Instructions
Materials
- Polymer clay (terracotta or reddish-brown)
- Polymer clay (white)
- Acrylic roller or pasta machine
- Small circular cutter (approx. 10-12mm)
- Tissue blade or X-Acto knife
- Needle tool or toothpick
- Earring posts and backs
- Super glue or jewelry adhesive
- Clay varnish (optional matte finish)
- Fine grit sandpaper
Step 1: Preparing the Base
-
Condition the Clay:
Start by thoroughly conditioning your terracotta polymer clay until it is soft and pliable. Do the same for the white clay, ensuring your hands are clean so the white stays pristine. -
Roll the Sheets:
Roll out the terracotta clay into a slab about 3mm thick. This will be your main base. Roll a smaller piece of white clay to the same thickness.
Clean Cuts Only
To prevent color dragging when slicing your patterned slab, wipe your blade with a baby wipe or alcohol swab between every single cut.
Step 2: Creating the Striped Pattern
-
Cut Strips:
Using your tissue blade, cut thin, even strips from the white clay slab. These should be roughly 1-2mm wide. Create similar strips from the terracotta slab. -
Slice the Base:
Take your main terracotta slab and slice it vertically where you want your stripes to go. Gently separate the pieces. -
Insert White Lines:
Place the thin white strips into the gaps you just created in the terracotta slab. Gently press the cut terracotta sections back against the white strips to close the gaps.
Step 3: Adding Dots and Texture
-
Make Tiny Polka Dots:
Roll a very thin snake of white clay. Slice tiny discs from this snake to create miniature dots. -
Apply Dots:
Position these white dots onto the terracotta sections. Press them gently into the clay so they sit flush with the surface, rather than resting on top. -
Create a Dotted Section:
For the variation with the white panel, you can cut a larger strip of white clay and inlay it next to a terracotta strip. Use a needle tool to prick tiny texture holes into this white section. -
Smooth the Slab:
Once your design is assembled on the slab, place a piece of parchment paper over it and gently roll over the surface with your acrylic roller. This fuses the seams and ensures the inlay is perfectly flat.
Texture Twist
Try pressing coarse sandpaper or a clean toothbrush onto the raw terracotta sections before baking to give the brown clay a stone-like texture.
Step 4: Cutting and Baking
-
Cut the Circles:
Position your circular cutter over the most interesting parts of your patterned slab. Press down firmly to cut out your earring shapes. -
Refine Edges:
Gently lift the circles and smooth the edges with your finger to remove any stray bits of clay. -
Bake:
Bake the pieces according to your clay manufacturer’s instructions (usually 275°F/130°C for 15-30 minutes). I verify my oven temp with a thermometer to prevent scorching the white clay. -
Cool Down:
Let the pieces cool completely before handling them further.
Step 5: Assembly
-
Sand the Face:
Using fine-grit sandpaper, lightly sand the front surface to reveal crisp lines where the white meets the terracotta. Wipe away dust with a damp cloth. -
Seal (Optional):
Apply a thin coat of matte varnish if you want to protect the surface, or leave it bare for a natural stone feel. -
Attach Posts:
Apply a drop of strong jewelry glue to the back of the clay circle and press the earring post firmly into place. Let it cure fully before wearing.
Enjoy styling these versatile geometric studs with your favorite neutral outfits