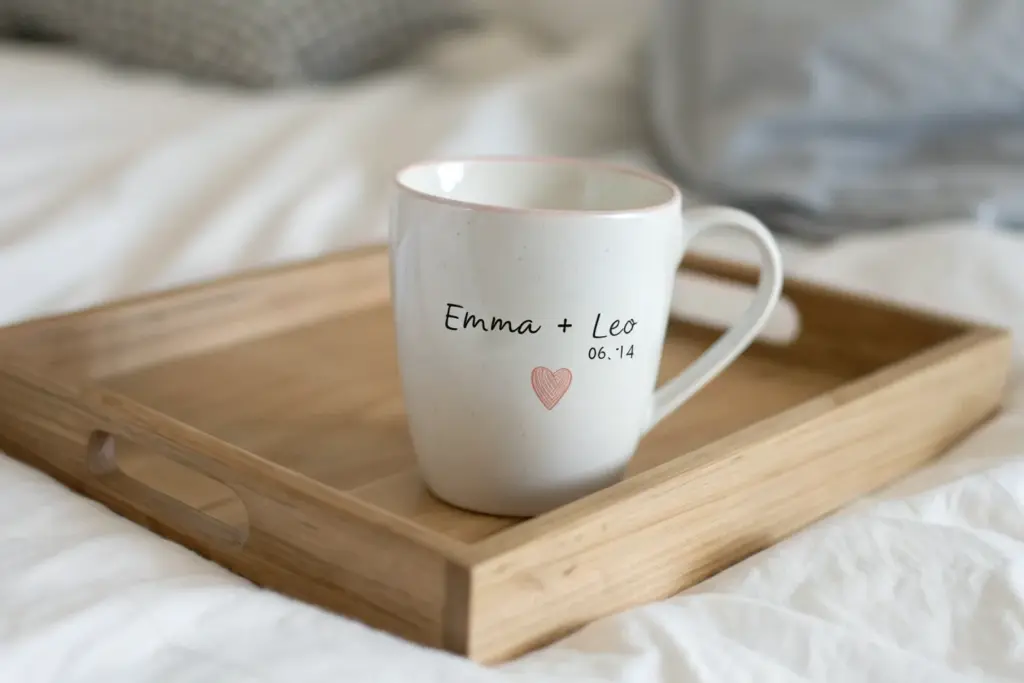
When I’m picking porcelain gifts, I always look for that sweet spot where it feels useful, beautiful, and unmistakably personal. Here are my favorite porcelain gift ideas—from classic anniversary keepsakes to charming little pieces that make everyday moments feel like a celebration.
Matching Espresso Cups for Two
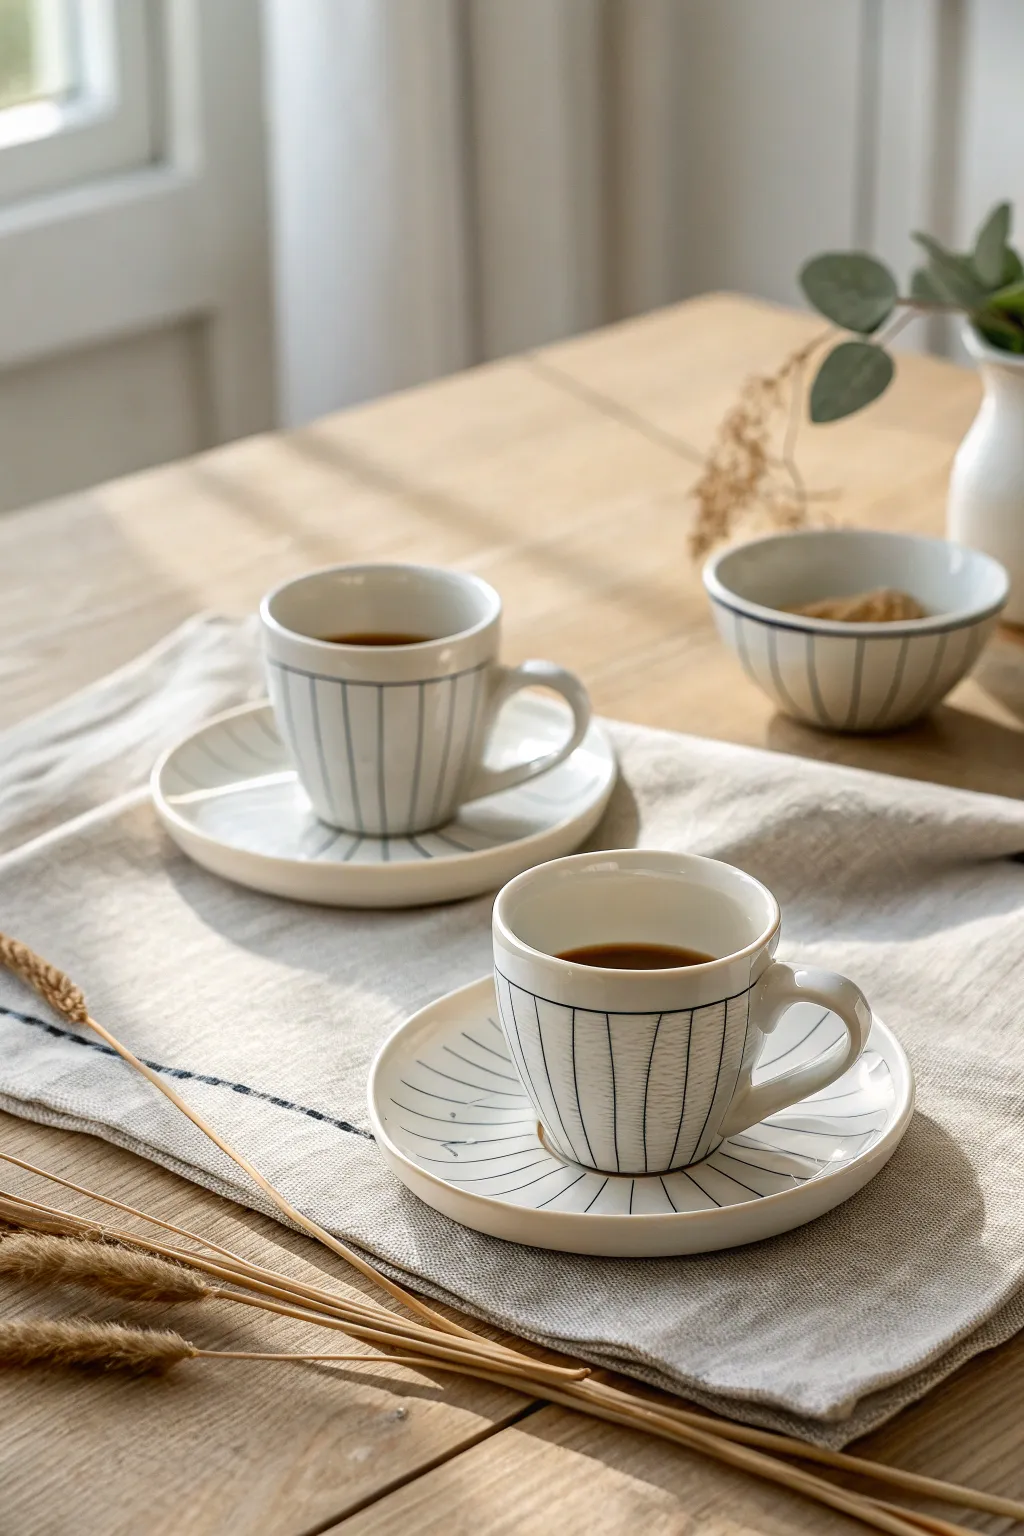
Transform a plain white ceramic espresso set into a cozy, Scandinavian-inspired masterpiece with just a marker and a steady hand. These cups feature delicate vertical lining that varies slightly in thickness, giving them a beautiful, hand-drawn character perfect for slow mornings.
Step-by-Step Tutorial
Materials
- One white ceramic espresso cup and saucer set (matte or satin finish preferred)
- Black porcelain marker or porcelain paint pen (fine tip: 1-2mm)
- Rubbing alcohol
- Cotton pads or paper towels
- Q-tips (for corrections)
- Ruler (optional)
- Pencil (optional)
- Domestic oven (for curing)
Step 1: Preparation & Planning
-
Clean surface:
Before you begin painting, it is crucial to remove any oils or fingerprints from the ceramic. Wipe the entire surface of the cup and saucer (and any matching bowls) thoroughly with rubbing alcohol and a cotton pad. -
Dry thoroughly:
Let the alcohol evaporate completely. Handle the ceramic by the handle or the bottom rim only to avoid transferring new oils from your hands to the painting area. -
Plan your spacing:
Visualize the vertical stripes. You want them evenly spaced but not mechanically perfect. If you’re nervous, lightly mark the top rim at the 12, 3, 6, and 9 o’clock positions with a pencil to act as anchor points, then subdivide those sections.
Step 2: Painting the Cups
-
Prime the marker:
Shake your porcelain marker well and press the nib down on a scrap piece of paper until the ink flows smoothly. Do not press the nib directly onto the cup to start, as it might blot. -
Draw the rim detail:
Start by drawing a single horizontal line that circles the cup just below the rim. I like to rotate the cup slowly with my left hand while holding the pen steady with my right to get a continuous line. -
Start vertical stripes:
Begin drawing your vertical lines from that top rim line down to the bottom of the cup. Apply light pressure for a airy, delicate look. -
Vary the line weight:
Don’t stress about making the lines perfectly straight. A specialized ‘shaky’ hand actually adds charm here; slight wobbles mimic the organic texture seen in the photo. -
Complete the circumference:
Work your way around the cup. If the lines start getting too close or too far apart, adjust the spacing gradually over the next few stripes rather than making a sudden change. -
Add handle details:
Don’t ignore the handle. Add a simple stripe along the outer curve or small horizontal dashes where the handle meets the cup body for continuity.
Ink Flow Tip
Store your porcelain markers horizontally when not in use. If the ink feels dry mid-project, press the nib on paper, not the cup, until flow returns.
Step 3: Designing the Saucer & Bowl
-
Saucer rim line:
Similar to the cup, draw a circular line around the outer edge of the saucer, keeping it just slightly inward from the absolute edge. -
Saucer interior stripes:
Draw lines radiating from the center indentation (where the cup sits) out to your rim line. Treat the saucer like a sunburst pattern. -
Handle intersections:
When lines approach the center indentation, let them stop naturally. They don’t need to touch in the middle, as the cup will hide the center point. -
Clean mistakes:
If a line goes rogue, quickly wipe it away with a damp Q-tip or a bit of rubbing alcohol while the ink is still wet. -
Repeat for bowl:
If you are including a small side bowl, mimic the pattern: a rim line followed by vertical stripes down the exterior.
Mix Up The Pattern
Try alternating line lengths on the saucer—one long line reaching the edge, followed by a shorter line that stops halfway, for a starburst effect.
Step 4: Curing & Finishing
-
Dry time:
Allow the paint to air dry for at least 24 hours. This is vital to ensure the moisture evaporates before baking. -
Load the oven:
Place your decorated pieces into a strictly cold oven. Do not preheat, as thermal shock can crack the ceramic. -
Bake carefully:
Turn the oven on to 160°C (320°F) or the specific temperature indicated on your marker’s brand instructions. Bake for approximately 30 to 90 minutes depending on the manufacturer guidelines. -
Cool down:
Turn the oven off and open the door slightly, but leave the ceramics inside until they are completely cool to the touch.
Now you have a stunning, cohesive coffee set ready to be wrapped or enjoyed immediately


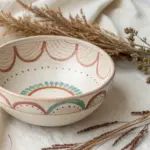
Hand-Painted Porcelain Serving Platter
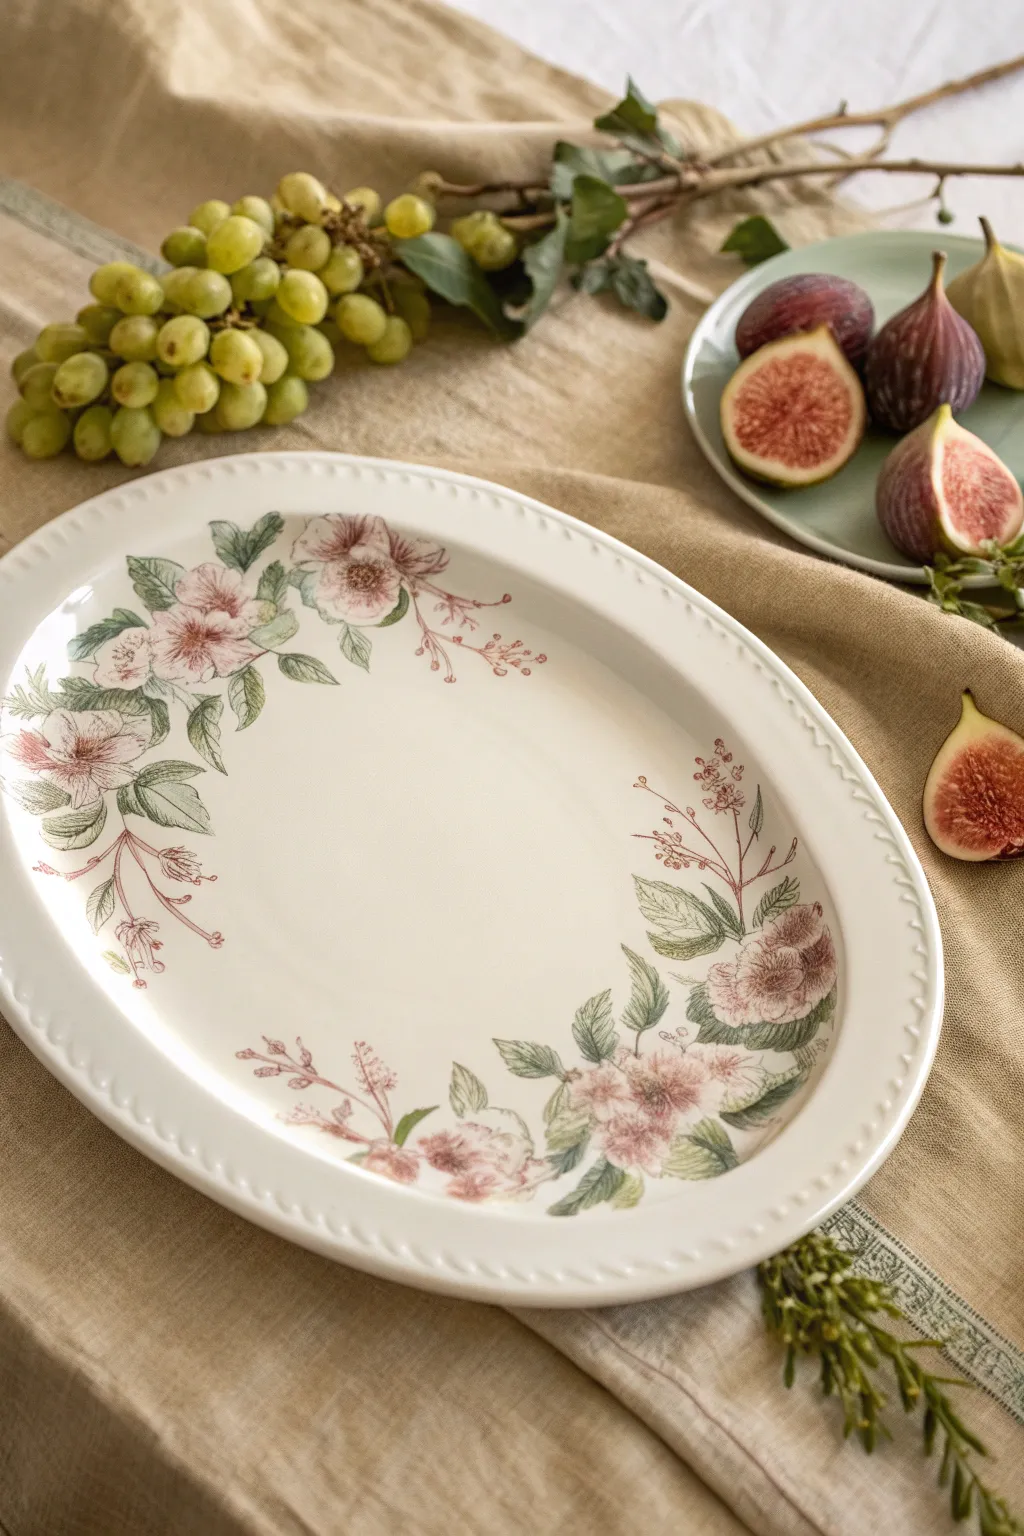
Transform a plain white porcelain platter into an heirloom-quality serving piece with this gentle floral motif. The design features soft pink blooms and trailing greenery that hugs the rim, creating a romantic frame for whatever you choose to serve.
Step-by-Step Guide
Materials
- Oval porcelain platter (approx. 14-16 inches)
- Porcelain paints (rose pink, sage green, olive green, burgundy)
- Fine liner brush (size 00 or 0)
- Small round brush (size 2)
- Small filbert brush (size 4)
- Rubbing alcohol and cotton pads
- Paper palette or ceramic tile
- Pencil for sketching (optional)
- Oven for curing (if using bake-to-set paints)
Step 1: Preparation & Planning
-
Clean surface:
Begin by thoroughly cleaning the platter with soap and water. Once dry, wipe the entire rim area with rubbing alcohol to remove any invisible oils or fingerprints that could repel the paint. -
Visual mapping:
Visualize the oval shape as a clock face. You want your two main floral clusters to sit roughly at the 10 o’clock and 4 o’clock positions, creating an asymmetrical but balanced composition. -
Light sketching:
If you aren’t confident painting freehand, lightly sketch the main flower placement with a regular pencil. The graphite will burn off during the baking process, so don’t worry about erasing perfectly.
Fixing Smudges
Made a mistake? Don’t panic. While the paint is wet, use a damp cotton swab or a rubber clay-shaping tool to wipe away the error cleanly without smearing.
Step 2: Painting the Blooms
-
Base pinks:
Using the filbert brush, mix a touch of rose pink with a tiny drop of water or thinning medium to create a watercolor-like transparency. Paint loose, circular shapes for the open flowers. -
Adding depth:
While the first layer is still slightly tacky, dab a slightly darker, more concentrated pink into the centers of your blooms. Let the color bleed naturally outward for a soft gradient. -
Defined petals:
Switch to your round brush. With the darker pink, define individual petal edges with quick, curved strokes. Keep the touch light; these are wild, delicate flowers, not rigid shapes. -
Center details:
Using the fine liner brush and the burgundy paint, add tiny stippled dots and very thin radiating lines in the center of each flower to create the stamens.
Add Gold Accents
For a luxe upgrade, apply real gold luster or metallic gold porcelain paint to the flower centers and rim edge after the first firing, then bake again at a lower temperature.
Step 3: Adding Greenery
-
Main stems:
Load your liner brush with sage green. Draw thin, trailing stems extending from your flower clusters, following the curve of the platter’s rim. -
Leaf bases:
With the round brush and sage green, press and lift to create the body of the leaves. I like to vary the pressure here to make some leaves look folded or turned. -
Leaf details:
Mix a little olive green into your sage to get a darker shade. Use the liner brush to add veins to the leaves and deeper shadows where the leaves meet the stems. -
Fine sprigs:
Create wispy, thread-like branches extending beyond the main clusters using your thinnest liner brush and a diluted burgundy-brown mix. These add an airy, botanical feel. -
Buds and berries:
Add tiny clusters of unbloomed buds at the ends of the wispy sprigs using the tip of the round brush and a pale pink color.
Step 4: Finishing Touches
-
Review and refine:
Step back and look at the platter from a distance. Add small leaves or tiny dots of color to fill any gaps that feel too empty, ensuring the visual weight is balanced. -
Rim detail (optional):
If your platter has a textured rim like the example, you can leave it white or lightly dry-brush a very pale wash of green over the raised geometric details. -
Drying time:
Allow the paint to air dry completely for at least 24 hours. The surface must be bone dry before you attempt to cure it. -
Baking process:
Place the platter in a cool oven. Set the temperature according to your paint manufacturer’s instructions (usually around 300°F or 150°C). Once the temperature is reached, bake for 30-35 minutes. -
Cooling down:
Turn off the oven and leave the platter inside to cool down gradually with the oven door closed. Removing it too quickly can cause the ceramic to crack.
Once cooled, your custom platter is ready to be gift-wrapped or set on the table for your next gathering.


Porcelain Ring Dish With Initials
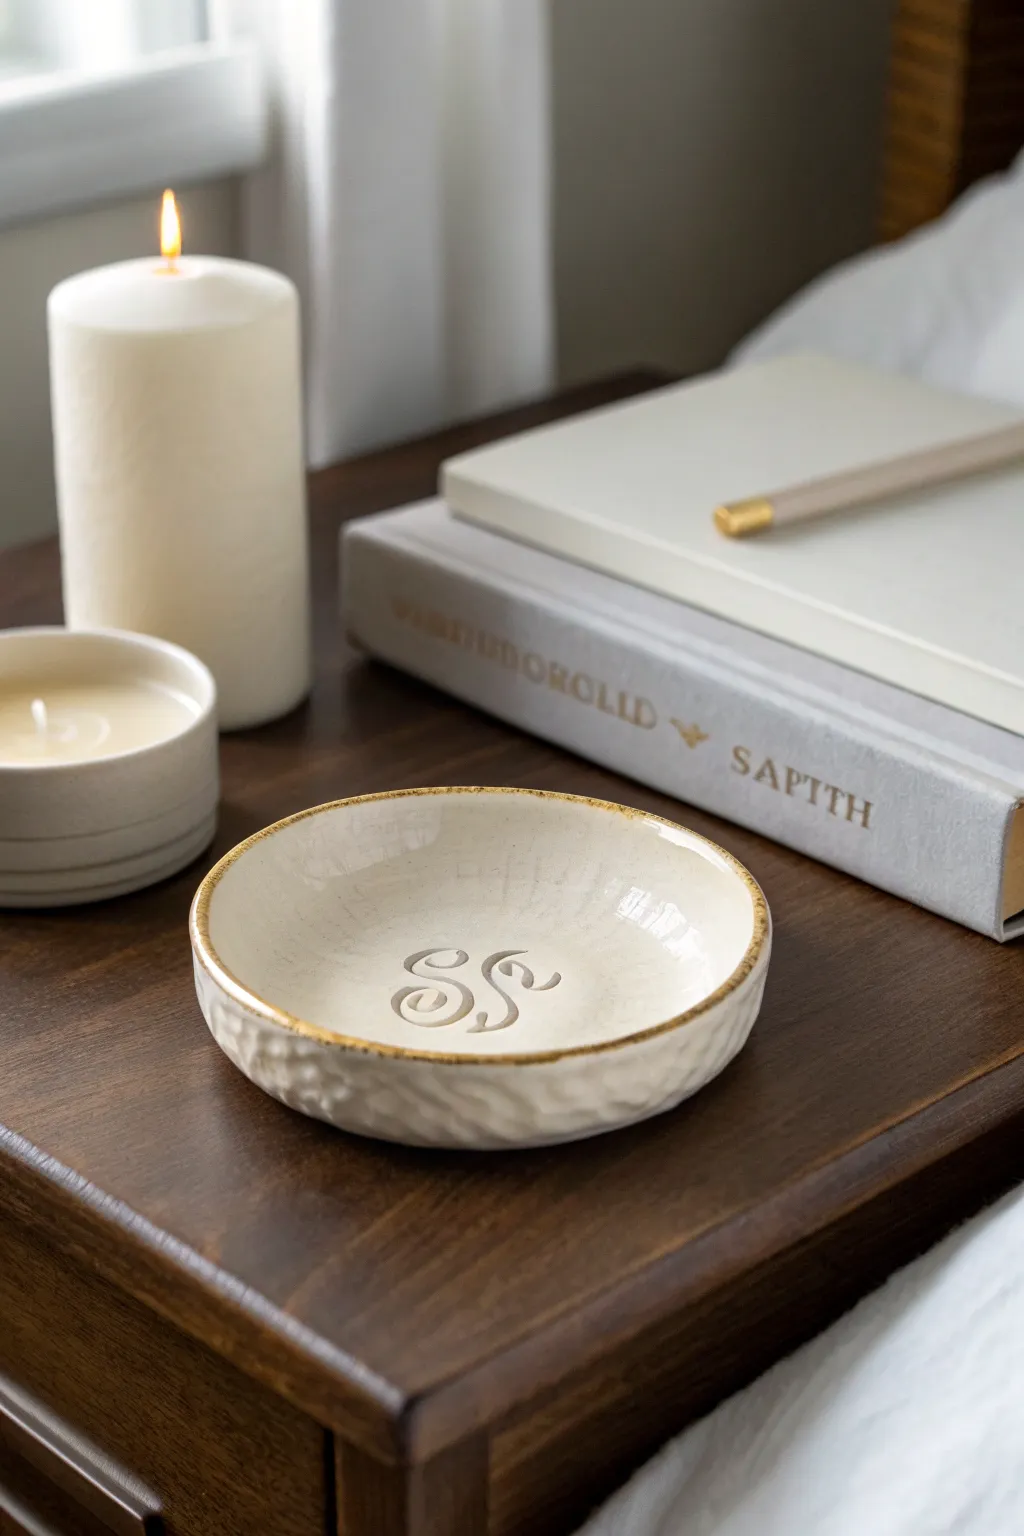
This elegant little ring dish features a creamy white finish with a delicate, raw texture around the exterior rim and a personalized monogram stamped into the center. It’s the perfect size for bedside jewelry storage and makes a thoughtful, heirloom-quality gift.
Detailed Instructions
Materials
- Air-dry white porcelain clay (or polymer clay for easier firing)
- Small rolling pin
- Circular cookie cutter (approx. 3-4 inches)
- Small alphabet stamps (script font is ideal)
- Small bowl of water
- Sponge
- Pottery carving tool or butter knife
- Fine grit sandpaper
- Glossy white glaze or acrylic sealer
- Gold leaf or metallic gold paint (optional for rim)
- Small paintbrush
Step 1: Shaping the Dish
-
Condition the Clay:
Start by taking a handful of your air-dry porcelain clay. Knead it in your hands for a minute until it is soft, pliable, and free of any air bubbles. -
Roll the Slab:
Place the clay on a smooth surface or canvas mat. Roll it out evenly to a thickness of about 1/4 inch. Try to keep the thickness consistent across the entire slab to prevent cracking. -
Cut the Circle:
Press your circular cookie cutter firmly into the rolled clay to create a perfect circle. Remove the excess clay from around the cutter before lifting the circle. -
Form the Curve:
Gently cup the clay circle in your palm. Press your thumbs into the center and slightly lift the edges to form a shallow bowl shape. You can also press it gently into a small bowl to help it hold its form while drying.
Cracks appeared?
If you see hairline cracks while drying, mix a tiny bit of fresh clay with water to make a paste (slip) and fill them in immediately, then smooth.
Step 2: Adding Texture and Detail
-
Texture the Rim:
To mimic the faceted look in the photo, take your carving tool or a butter knife and gently press small, slanted indentations around the exterior wall of the dish. Don’t cut through; just press to create a subtle relief pattern. -
Smooth the Edges:
Dip your finger or a small sponge into water and run it along the top rim. I like to smooth out any sharp edges or crumbles left by the carving tool for a professional finish. -
Stamp the Initials:
Locate the exact center of your dish. Press your alphabet stamps firmly into the clay. If you are using two initials like the ‘SS’ shown, align them carefully so the flourishes connect or complement each other. -
Initial Drying Time:
Let the dish sit undisturbed for about 24 to 48 hours until it is completely bone dry. Flipping it over halfway through can help the bottom dry evenly.
Step 3: Finishing Touches
-
Sanding:
Once dry, use fine-grit sandpaper to gently buff away any remaining rough spots, particularly around the rim and the stamped letters. Wipe away the dust with a barely damp cloth. -
Glazing the Interior:
Apply a coat of glossy white glaze or sealer to the entire surface. If you want the letters to stand out more, make sure the glaze pools slightly in the depressions, or keep it thin for a subtle look. -
Detailing the Rim:
For that warm, vintage feel shown in the image, you can lightly brush a tiny amount of diluted brown paint or gold metallic paint just along the very edge of the rim. -
Final Seal:
Let any paint dry completely, then add a final layer of sealant over the rim detail to protect it from wear. -
Curing:
Allow the final piece to cure according to your sealant or clay manufacturer’s instructions before placing any jewelry inside.
Make it luxe
After the main glaze dries, use a liquid gold leaf pen to trace the inside of the stamped letters for a stunning, high-contrast metallic pop.
Now you have a sophisticated, personalized vessel ready to hold your most treasured rings


Lidded Porcelain Jewelry Box
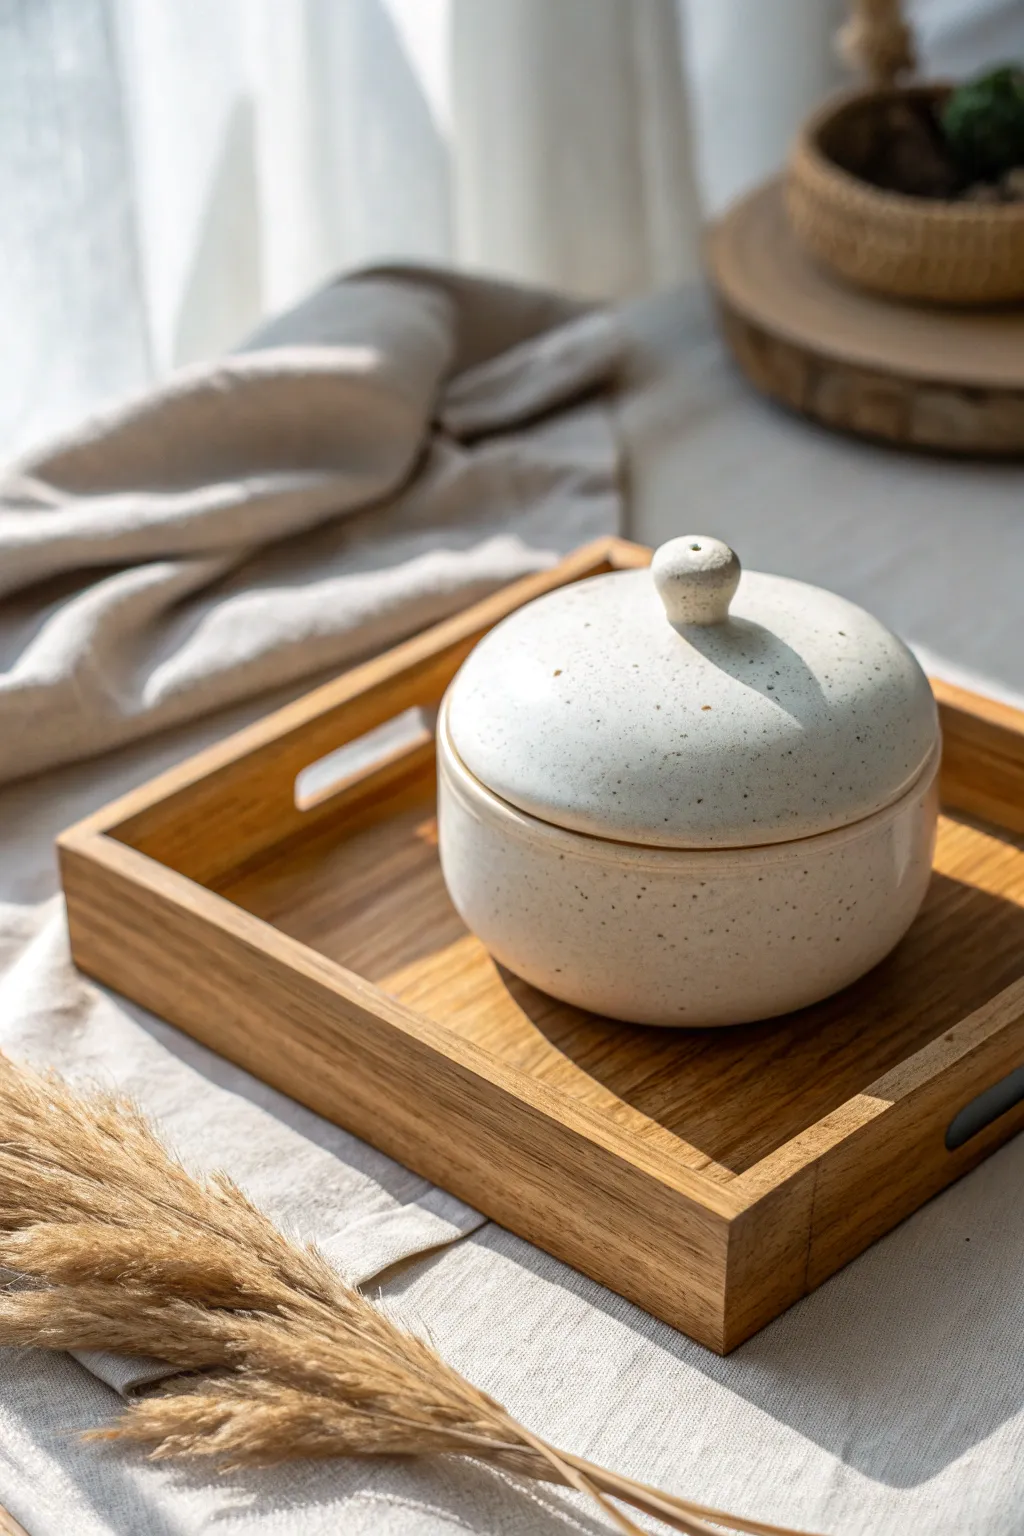
This charming, minimalistic jewelry box features a soothing cream glaze with organic speckles, perfect for keeping small treasures safe. The gentle curve of the lid and the tactile, earthy finish give it a modern farmhouse aesthetic that is deceptively simple to achieve on the wheel.
How-To Guide
Materials
- White stoneware or porcelain clay body (speckled variety preferred)
- Potter’s wheel
- Throwing tools (sponge, wooden rib, needle tool, wire cutter)
- Trimming tools (loop tools)
- Calipers
- Matte cream or white glaze
- Iron oxide wash (if clay isn’t naturally speckled)
- Kiln
Step 1: Throwing the Base
-
Center the clay:
Start with about 1-1.5 lbs of clay. Wedge it thoroughly to remove air bubbles, then slam it onto the wheel head. Wheel wedge and center it into a low, wide puck shape. -
Open the floor:
Open the clay to create a flat floor, leaving about 1/4 inch thickness at the bottom. Compress the floor well with a rib or your fingers to prevent S-cracks later. -
Pull the walls:
Pull the walls up into a short cylinder. For this project, you want the walls to curve slightly outward, creating a gentle bowl-like profile rather than a straight vertical wall. -
Create the gallery:
This is crucial for the lid fit. At the rim, split the clay slightly or push down with your thumb to create a ‘gallery’—a small inner shelf where the lid will sit. Keep this ledge distinct and flat. -
Measure and finish:
Use calipers to measure the exact diameter of the gallery shelf. Write this measurement down or lock the calipers. Clean up the rim with a chamois leather for smoothness, undercut the base with a wooden knife, and wire it off the wheel.
Lid Wobbling?
If the lid rocks after firing, use a little grinding paste and water on the gallery, then twist the lid back and forth to grind them into a perfect fit.
Step 2: Throwing the Lid
-
Center clay for lid:
Use a slightly smaller amount of clay than the base. Center it low and wide, similar to a plate or shallow bowl. -
Shape the dome:
You will be throwing this ‘upside down’ essentially. Open the clay but keep it shallow. Pull the clay out towards your measurement, curving it gently to form the dome shape seen in the photo. -
Match the flange:
Using your calipers set from the base, ensure the rim of your lid matches the gallery diameter exactly. You can create a small vertical flange that will slot into the base, or simply match the width to sit flush. -
Refine the curve:
Use a smooth metal rib to compress the surface of the dome, removing throwing lines to achieve that clean, modern look. Wire off carefully.
Step 3: Trimming and Assembly
-
Dry to leather hard:
Allow both pieces to dry slowly to a leather-hard state. They should be firm enough to handle without deforming but soft enough to carve. -
Trim the base:
Place the base upside down on the wheel (center it and secure with clay lugs). Trim the bottom to create a neat foot ring or a flat bottom, depending on your preference. Smooth the surface with a rib. -
Trim the lid:
Place the lid upside down on the wheel (dome side down). You can trim it inside a chuck or directly on the wheel head if the curve allows. This is where you remove excess weight from the underside. -
Attach the knob:
Flip the lid over so the dome faces up. Score the center of the dome and attach a small ball of clay. Throw or hand-shape this into the small, rounded knob. I prefer shaping it while the wheel spins slowly to keep it perfectly symmetrical. -
Check the fit:
Gently place the lid on the base. It should sit comfortably in the gallery without wobbling. If it’s tight, careful trimming or sanding dried clay later can help.
Gallery Pro-Tip
Make your gallery deeper than you think you need. Glaze thickness can surprisingly reduce the fit, so extra depth ensures the lid still sits securely.
Step 4: Glazing and Firing
-
Bisque fire:
Once bone dry, fire the pieces to bisque temperature (usually cone 04 or 06). Wipe them down with a damp sponge afterwards to remove dust. -
Apply speckles (Optional):
If your clay body is white and lacks natural speckles, flick a Iron Oxide wash onto the bisque ware using a stiff toothbrush to create random, organic spots. -
Glaze application:
Dip or spray a satin or matte cream glaze. Avoid a high-gloss finish to maintain the earthy aesthetic. Make sure to wax the foot of the base and the contact points (the gallery and the rim of the lid) so they don’t fuse together in the kiln. -
Final fire:
Fire to the maturity temperature of your clay and glaze (often Cone 5 or 6 for stoneware). Allow the kiln to cool completely before opening to prevent thermal shock.
Once cooled, your handcrafted porcelain box is ready to be filled with jewelry or simply admired for its quiet elegance.

The Complete Guide to Pottery Troubleshooting
Uncover the most common ceramic mistakes—from cracking clay to failed glazes—and learn how to fix them fast.
Minimal Line-Art Portrait Vase
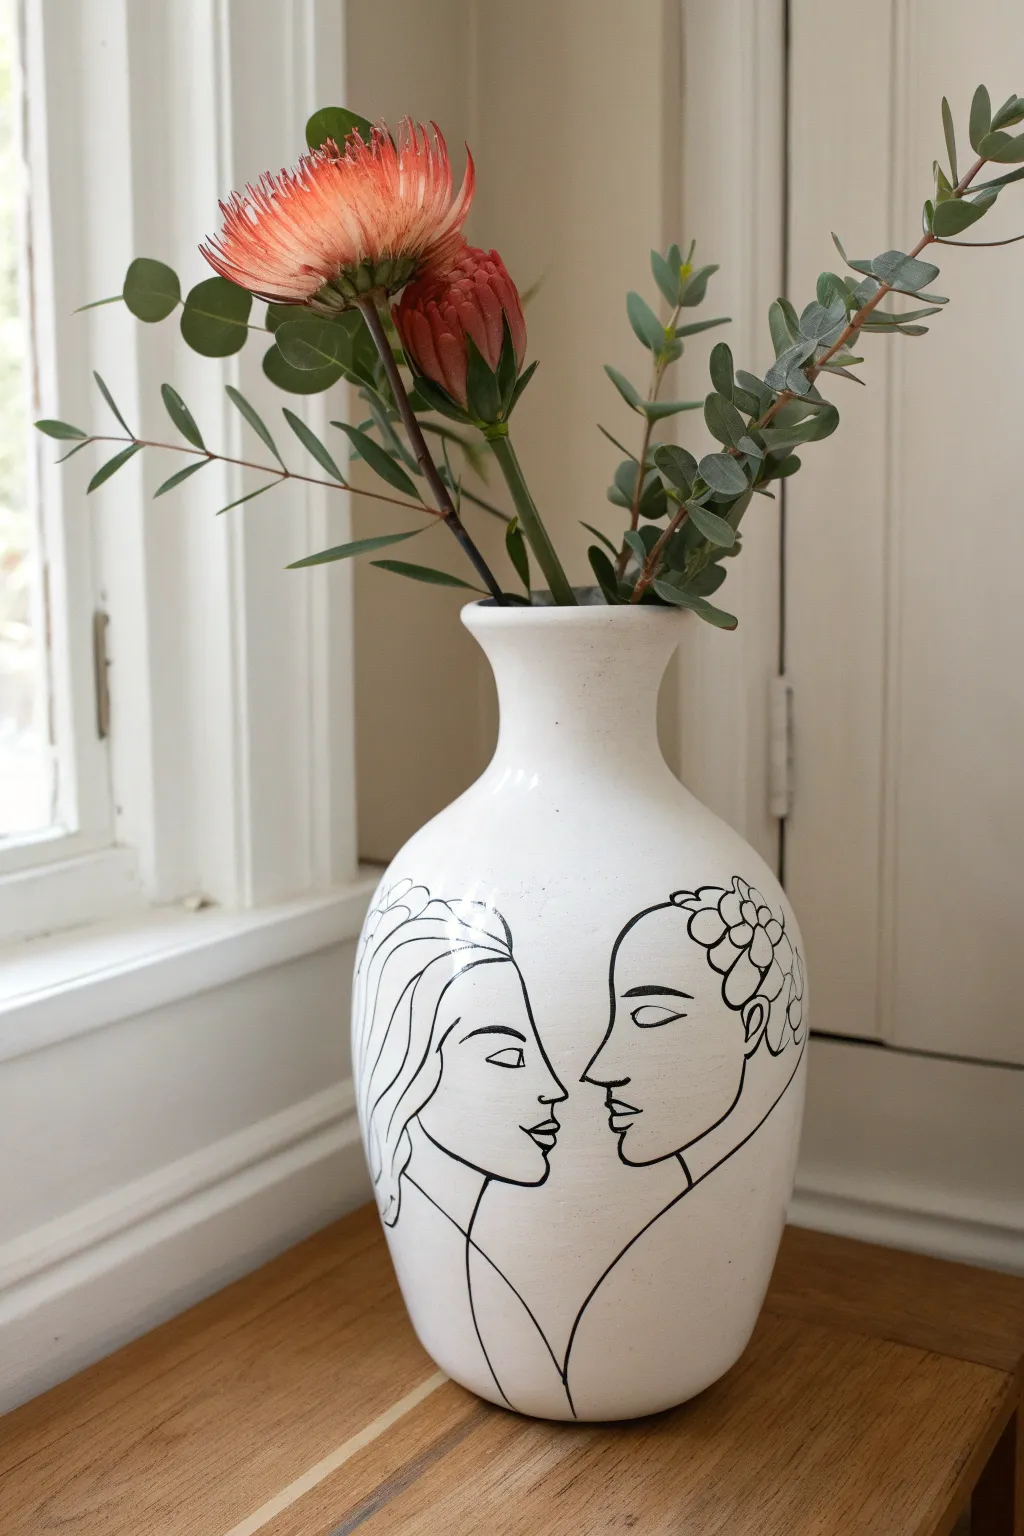
Transform a plain white vessel into a modern statement piece with a continuous-line drawing style. This striking portrait design conveys connection and intimacy using just simple black contours.
Step-by-Step Guide
Materials
- White or cream ceramic vase (smooth finish)
- Black oil-based paint marker (medium tip)
- Black oil-based paint marker (fine tip)
- Graphite pencil (HB or lighter)
- Eraser
- Rubbing alcohol
- Cotton rounds or paper towels
- Q-tips (for detail cleanup)
- Clear spray sealant (matte finish, optional)
- Tracing paper (optional)
Step 1: Assessing and Prepping
-
Surface Cleaning:
Before you begin, wipe the entire surface of the vase down with rubbing alcohol on a cotton round. This removes any finger oils or dust that might prevent the paint marker from adhering properly. Let it dry completely. -
Design Placement:
Visualize where the faces will sit. For a dramatic effect like this, you want the noses to almost touch in the center of the vase’s widest point. Mark a tiny dot in the center as a reference point for the space between the profiles.
Wobbly Lines?
Don’t panic! Rest your pinky finger against the vase surface as a stabilizer while you draw. This creates a pivot point and keeps your hand steady on the curve.
Step 2: Sketching the Base
-
Drafting the First Profile:
Using a light hand, sketch the left profile with your pencil. Start with the forehead, curve in for the eye socket, out for the nose, and trace the lips. Don’t worry about perfection; graphite can be wiped away. -
Drafting the Second Profile:
Sketch the opposing profile on the right side. Aim for symmetry in height, ensuring the chins and foreheads align horizontally with the first face. -
Adding Neck Lines:
Draw long, sweeping curves starting from under the chin down towards the base of the vase. These lines anchor the drawing and create an elegant, elongated feel. -
Detailing the Hair:
Sketch the hair outlines. For the left figure, use flowing, wavy lines. For the right figure, sketch a rounded head shape with simple flower petal shapes near the ‘ear’ area. -
Reviewing the Sketch:
Step back and look at your pencil guide from a distance. If the eyes or proportions look off, simply erase and adjust. It’s much easier to fix now than after applying ink.
Use a Carbon Transfer
Can’t freehand? Draw the design on paper first, tape it to the vase with carbon paper underneath, and trace over it to transfer the perfect guide lines.
Step 3: Inking the Design
-
Activating the Markers:
Shake your medium-tip oil-based paint marker vigorously. Press the tip down on a scrap piece of paper until the ink flows smoothly and consistently. -
Tracing Main Contours:
Begin tracing over your pencil lines with the medium marker. Use confident, steady strokes. I like to start at the top of the forehead and work my way down the profile to maintain a smooth flow. -
Drawing the Eyes:
Switch to the fine-tip marker for the facial features. Draw the eyelids with a simple curved line and a straight lash line suitable for a sleeping or downward gaze. -
Refining the Lips:
Still using the fine tip, carefully outline the lips. Keep the lines crisp and separated slightly to suggest a partially open mouth, rather than coloring them in. -
Inking the Hair:
Switch back to the medium marker for the hair. Focus on the outer silhouette and add just a few internal lines to suggest volume without overcrowding the design. -
The Floral Detail:
For the figure on the right, trace the flower petals carefully. Keep the shapes organic and rounded to contrast with the sharper facial features. -
Handling Mistakes:
If your hand slips while inking, dampen a Q-tip with a tiny bit of rubbing alcohol and immediately wipe away the wet paint. Dry the area before trying again.
Step 4: Finishing Touches
-
Drying Time:
Allow the paint marker to dry completely for at least 24 hours. Oil-based markers need time to cure fully onto the ceramic surface. -
Initial Cure:
For added durability, placing the vase in a cold oven and heating it to 300°F (150°C) for 30 minutes can help bake the paint on, though check your specific marker brand instructions first. -
Removing Pencil Marks:
Once the paint is absolutely dry and cured, take a soft eraser and gently rub away any visible graphite sketch lines that are peeking out from under the ink. -
Final Seal (Optional):
If the vase will be handled frequently, apply a light coat of clear matte spray sealant. Hold the can 12 inches away to avoid drips and do two light coats rather than one heavy one.
Now fill your artistic vessel with dried botanicals or fresh blooms to complete the look
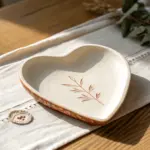
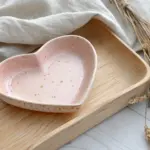
Porcelain Heart Trinket Tray
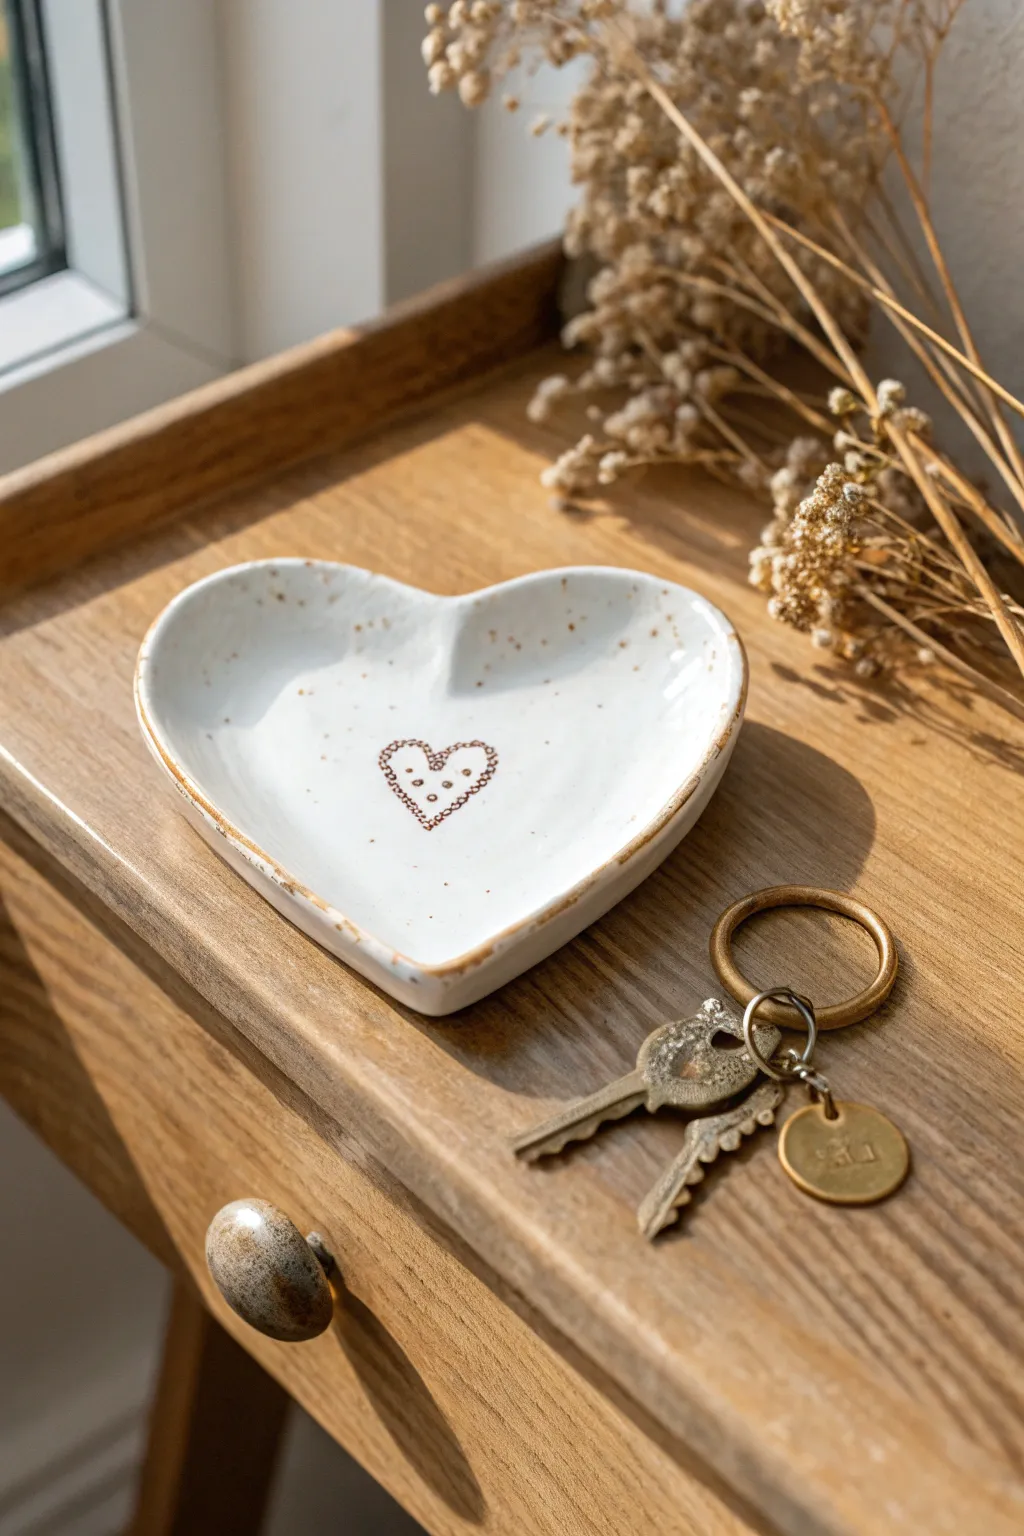
This charming heart-shaped dish features a creamy white glaze with organic speckling and a delicate central motif, perfect for holding keys or rings. Its rustic-edged finish and handcrafted shape make it a thoughtful and personal keepsake.
Step-by-Step
Materials
- White air-dry clay or polymer clay (porcelain finish)
- Heart-shaped cookie cutter (medium size)
- Roller or rolling pin
- Sandpaper (fine grit)
- Brown acrylic paint (burnt umber)
- White gloss glaze or varnish
- Small fine-point paintbrush
- Old toothbrush
- Heart stamp or thin marker (brown)
- Sponge or paper towel
Step 1: Shaping the Clay Base
-
Condition the Clay:
Begin by kneading your white clay until it is soft, pliable, and free of air bubbles. If using air-dry clay, keep your hands slightly moist to prevent cracking. -
Roll the Slab:
Roll out the clay onto a smooth surface to an even thickness of about 1/4 inch. I like to use depth guides or wooden slats on either side to ensure the slab is perfectly level. -
Cut the Shape:
Press your heart-shaped cookie cutter firmly into the clay slab. Wiggle it slightly before lifting to ensure a clean cut, then peel away the excess clay. -
Create the Lip:
Gently lift the clay heart and curve the edges upward with your fingertips to create a shallow bowl shape. Smooth out any fingerprints immediately with a drop of water. -
Dry the Form:
Let the dish dry completely according to your clay’s package instructions. For air-dry clay, this usually takes 24-48 hours; turning it over halfway through helps it dry evenly. -
Sand for Smoothness:
Once fully cured and hard, gently sand the edges and surface with fine-grit sandpaper to remove any rough spots or sharp ridges from the cutting process.
Uneven Drying?
If the edges curl up too much while drying, weigh down the center of the heart gently with a small bag of rice or sand during the first few hours of the drying process.
Step 2: Adding the Details
-
Create the Speckles:
Dilute a small amount of brown acrylic paint with water until it’s quite distinctively runny. Dip an old toothbrush into this mixture. -
Splatter Technique:
Hold the toothbrush over the dish and run your thumb across the bristles to flick tiny specks of paint onto the surface. Aim for a random, organic distribution. -
Apply the Central Motif:
Using a very fine brush dipped in undiluted brown paint, or a specific stamp, create the small heart design in the center. The design in the image uses a dotted outline style for a delicate look. -
Paint the Rim:
Dip a sponge or your finger lightly into the brown paint and gently run it along the very edge of the rim. This creates that rustic, distressed border effect. -
Allow Paint to Set:
Let all the painted details dry completely before moving on to the glazing step to avoid smearing your work.
Step 3: Finishing Touches
-
Apply First Glaze Coat:
Brush a layer of high-gloss varnish or glaze over the entire top surface of the dish. This mimics the look of fired porcelain. -
Check for coverage:
Ensure the glaze covers the rim you painted earlier to seal it in. -
Dry and Repeat:
Allow the first coat to dry until it is no longer tacky. Apply a second coat if you want a deeper, glass-like shine. -
Seal the Bottom:
Once the top is fully cured, flip the dish over and apply a coat of varnish to the bottom to protect surfaces from scratches.
Faux-Ceramic Texture
To get that speckled stoneware look, mix a tiny pinch of dried coffee grounds or black pepper directly into the white clay before rolling it out.
Your beautiful, faux-porcelain tray is now ready to hold your daily treasures


What Really Happens Inside the Kiln
Learn how time and temperature work together inside the kiln to transform clay into durable ceramic.
Interlocking Porcelain Snack Plates
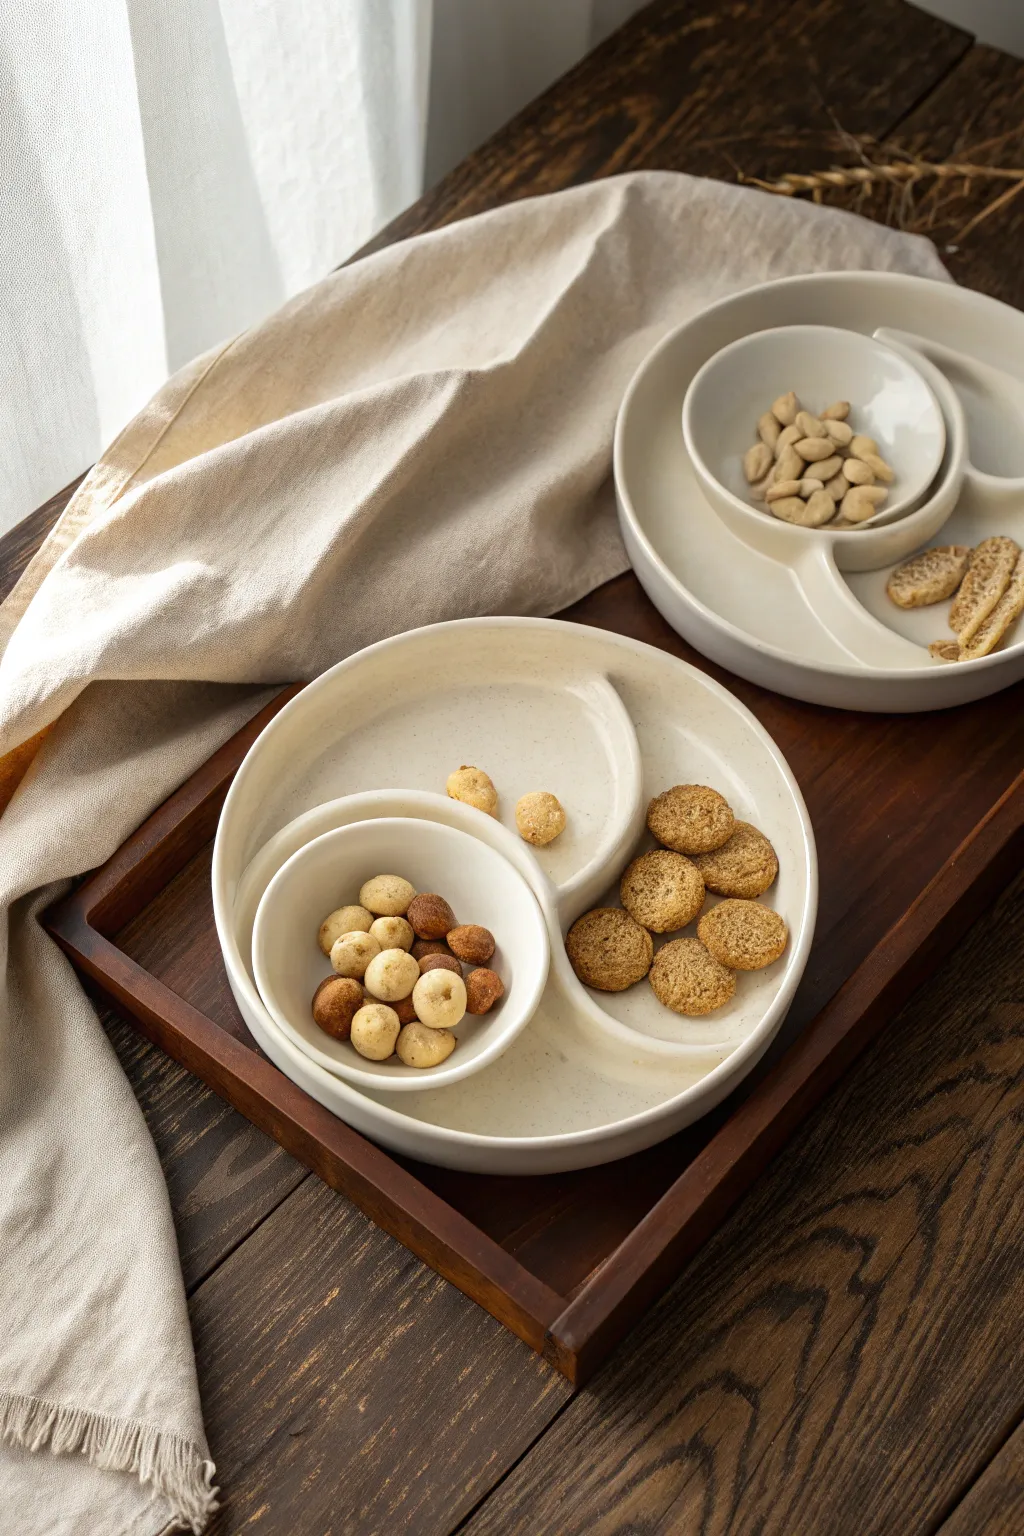
Create a sleek and functional serving duo that mimics the organic curve of a yin-yang symbol. This intermediate pottery project focuses on building interlocking forms that nest perfectly together, finished with a rustic speckled cream glaze.
Detailed Instructions
Materials
- White stoneware clay with fine speckles (or plain stoneware plus grog)
- Pottery wheel
- Throwing tools (sponge, metal rib, wood rib)
- Wire cutter
- Needle tool
- Trimming tools
- Rubber kidney tool
- Satin matte cream glaze
- Kiln
- Bats for the wheel
- Rolling pin (optional for slab approach)
- Calipers (essential for measuring fit)
Step 1: Throwing the Base Forms
-
Prepare the clay:
Begin by thoroughly wedging about 2 pounds of white stoneware clay to remove air bubbles. Divide this into two lumps—one significantly larger (about 1.5 lbs) for the main plate and a smaller one (0.5 lbs) for the dip bowl. -
Center the large plate:
Throw the larger lump onto the wheel bat. Center it low and wide, similar to how you would start a traditional plate or shallow pasta bowl. -
Open and shape the floor:
Open the clay to a diameter of about 8-9 inches, leaving a floor thickness of roughly ¼ inch. Compress the floor well with a wooden rib to prevent cracking later. -
Raise the wall:
Pull up a short, vertical wall, approximately 1.5 inches high. Keep the rim slightly rounded and thick enough to be durable. -
Throw the insert bowl:
Set the large plate aside. Center the smaller lump of clay and throw a small, round bowl. Aim for a diameter of about 3.5 inches and a height that matches the wall of your large plate. -
Measure for fit:
Before cutting the small bowl off the hump, use calipers to measure its exterior curvature. You will need this measurement to alter the large plate in the next phase.
Step 2: Altering and Interlocking
-
Leather hard stage:
Allow both pieces to dry to a stiff leather-hard state. The clay needs to be firm enough to handle without warping but soft enough to cut and reshape. -
Creating the negative space:
Place the small bowl gently against the interior wall of the large plate to visualize the fit. Taking a needle tool, trace the curve of the small bowl onto the floor of the large plate. -
Altering the rim:
This is the crucial aesthetic step. Instead of cutting a hole, create a ‘bay’ for the small bowl. Gently push the wall of the large plate inward at the spot you marked, reforming the circle into a crescent or kidney bean shape. -
Refining the curve:
Use a damp sponge and a rubber kidney to smooth the newly indented wall. The goal is to make the curve perfectly hug the small bowl you threw earlier. -
Trimming the feet:
Flip both pieces over. Trim a clean, defined foot ring on the bottom of the large plate and a matching flat bottom or tiny foot on the small dip bowl. -
Test the nesting:
Place the small bowl into the curve of the large plate. If the fit is too tight, shave away minute amounts of clay from the large plate’s wall until they nest comfortably with a tiny gap for glaze clearance. -
Smooth and sponge:
Run a damp sponge over all rims and altered edges to remove any sharp burrs or finger marks. I find a soft rib is perfect for that final burnishing touch.
Warping Woes?
If the large plate warps away from the small bowl during drying, dry them slowly under plastic. Keep them nested together (with a paper barrier) to maintain the shape.
Step 3: Glazing and Firing
-
Bisque fire:
Load the thoroughly dried pieces into the kiln and bisque fire to Cone 04 (or your clay body’s specific recommendation). -
Clean the bisque:
Wipe down the fired pieces with a damp sponge to remove any kiln dust, which can cause pinholing in your glaze. -
Apply the glaze:
Pour a satin matte cream glaze into the interiors of the bowls, swirling to coat, then pour out. Dip the exteriors or brush the glaze onto the outer walls depending on your setup. -
Enhance the speckle (optional):
If your clay body doesn’t have speckles, you can gently flick a toothbrush loaded with iron oxide wash or a dark brown glaze over the wet cream glaze to create that rustic, speckled vanilla bean look. -
Check the feet:
Ensure the foot rings are completely free of glaze. Use a wax resist before glazing or wipe them meticulously with a sponge afterward. -
Glaze fire:
Fire the kiln to the glaze’s maturity temperature, typically Cone 5 or 6 for stoneware. Ensure the pieces are not touching in the kiln during this final firing.
Add a Handle
Sculpt a small, organic tab handle on the side of the dip bowl. This makes it easier to lift out for refilling without getting fingers in the food.
Once cooled, fill these interlocking beauties with nuts and dips for a sophisticated appetizer display
Porcelain Ornament With Year and Names
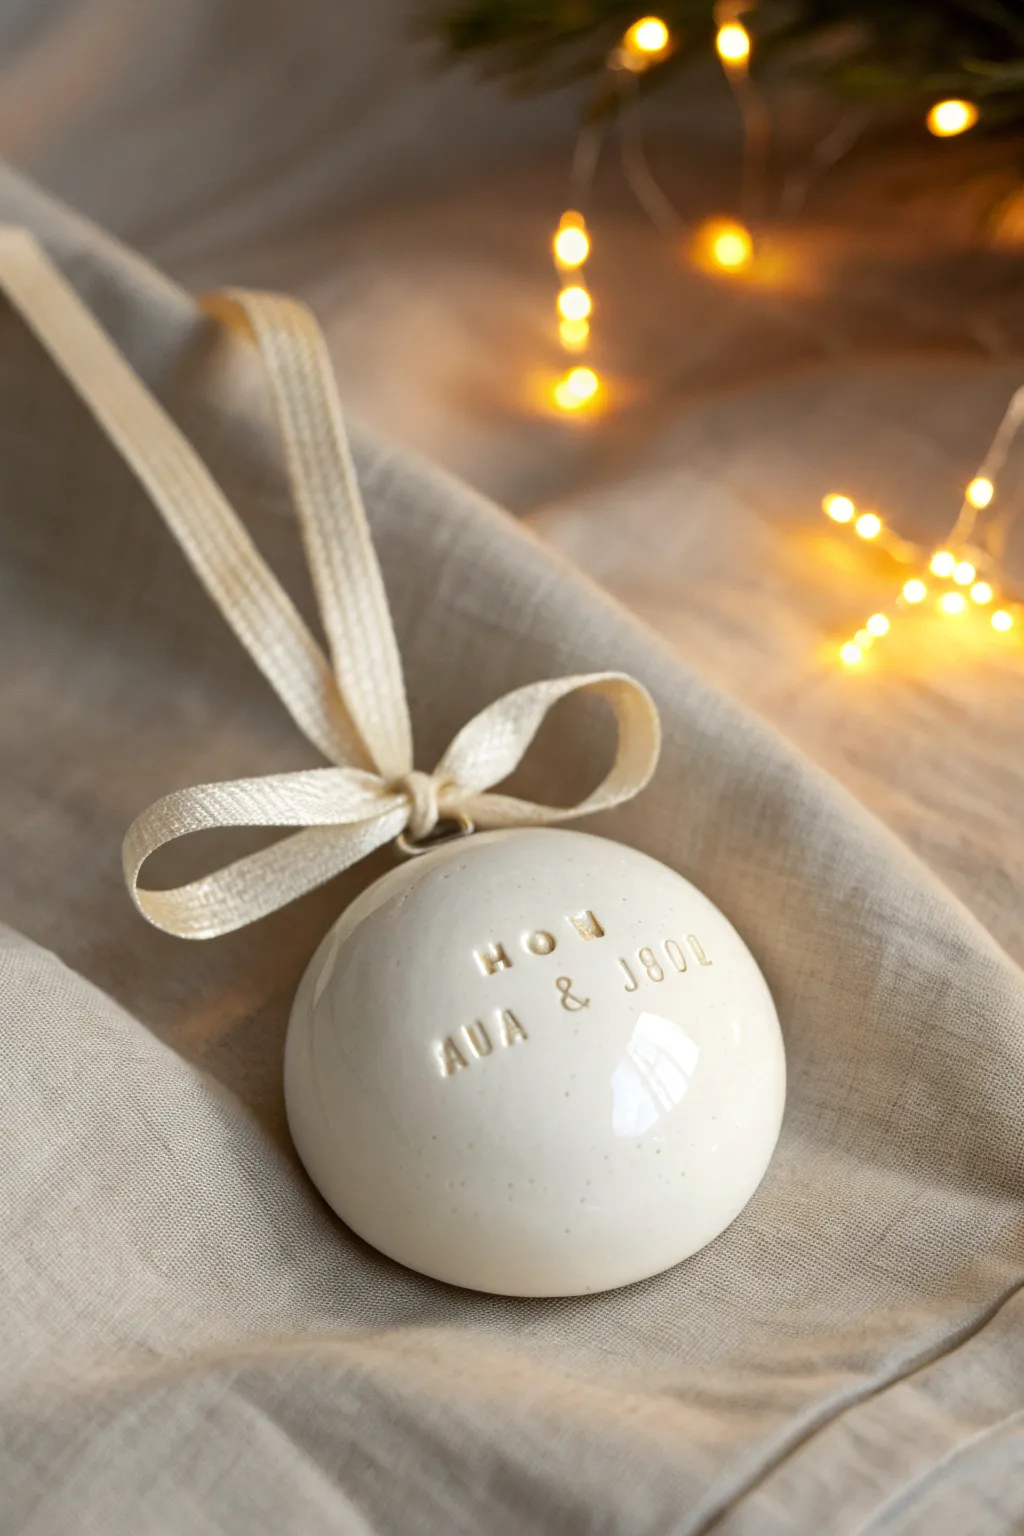
This elegant, minimalist ornament captures special memories with a sleek porcelain finish and delicate stamped lettering. The creamy white surface and customizable text make it a perfect personalized gift for holidays or weddings.
Step-by-Step
Materials
- White polymer clay or air-dry porcelain clay
- Rolling pin (acrylic preferred)
- Small alphabet stamp set
- Round cookie cutter (approx. 2.5–3 inches)
- Small straw or drinking straw (for hole punching)
- Fine-grit sandpaper (400–600 grit)
- Gloss varnish or glaze for clay
- Soft paintbrush
- Cream or ivory colored ribbon (approx. 1/2 inch wide)
- Parchment paper or silicone mat
- Cotton swab and rubbing alcohol (optional, for cleaning)
Step 1: Shaping the Base
-
Condition the clay:
Begin by taking a chunk of your white clay and kneading it thoroughly in your hands until it becomes soft, pliable, and warm to the touch. This prevents cracks later. -
Roll it out:
Place the clay on a smooth surface like parchment paper or a silicone mat. Use your acrylic rolling pin to roll it into a slab about 1/4 inch thick. Aim for an even thickness so the ornament hangs straight. -
Smooth the surface:
Check the surface for any lint or fingerprints. I like to gently run a finger dipped in a tiny bit of water (for air-dry clay) or baby oil (for polymer) over the surface to make it pristine. -
Cut the shape:
Press a round cookie cutter firmly into the clay slab. Give it a tiny wiggle to ensure a clean cut, then lift the cutter away and peel off the excess clay from around the circle. -
Soften the edges:
Before the clay hardens, use your fingertip to very gently smooth the harsh cut edge of the circle, giving it a more rounded, puffed ‘porcelain pillow’ look. -
Create the hanging hole:
Using a straw, punch a hole near the top of the circle. Make sure it isn’t too close to the edge—leave at least 1/4 inch of clay above the hole for strength.
Clean Stamp Impressions
Dust your stamps lightly with cornstarch or dip them in water before pressing into the clay. This prevents the clay from sticking inside the tiny letter crevices.
Step 2: Adding Personalization
-
Prepare your stamps:
Select the letters for your desired names and the year. Arrange them on a table first to check spelling and spacing. -
Stamp the text:
Gently press each letter stamp into the clay. Don’t push all the way through; just deep enough to leave a clear impression. Start with the center letter of each line to help center the text perfectly. -
Clean up imperfections:
If stamping caused the clay to displace or bulge slightly around the letters, gently tap it back down with a flat tool or your finger to keep the surface level.
Step 3: Finishing and Firing
-
Bake or dry:
If using polymer clay, bake according to the package instructions (usually at 275°F for 15-30 minutes). If using air-dry porcelain clay, leave it in a cool, dry place for 24-48 hours until completely hard. -
Cool down:
Allow the ornament to cool completely before handling. It is fragile while warm. -
Sand the edges:
Once hardened, take your fine-grit sandpaper and buff the edges of the ornament. This removes any tiny burrs and gives it that professional, high-end ceramic feel. -
Apply the glaze:
Dip a soft brush into high-gloss varnish. Apply a thin, even coat over the front and sides of the ornament. This mimics the shine of real glazed porcelain. -
Let the glaze cure:
Allow the glaze to dry completely according to the manufacturer’s directions. Avoid touching the surface while it’s tacky to prevent fingerprints. -
Inspect the finish:
Check for any missed spots or dull areas. If you want an extra glassy finish, apply a second thin coat of varnish after the first one is fully dry. -
Attach the ribbon:
Cut a length of cream ribbon about 10 inches long. Thread it through the hole from front to back. -
Tie the bow:
Tie the ribbon ends into a simple, neat knot at the top to form a loop, or tie a small bow directly at the base of the loop as shown in the photo for a decorative touch.
Fixing Stray Lint
If you spot dust or lint in your raw white clay, use a cotton swab dipped in a tiny amount of rubbing alcohol or acetone to gently wipe it away before baking.
Hang your beautiful creation on the tree or wrap it up as a heartfelt gift that will be cherished for years to come.

TRACK YOUR CERAMIC JOURNEY
Capture glaze tests, firing details, and creative progress—all in one simple printable. Make your projects easier to repeat and improve.
Porcelain Keepsake Box With Love Note Tile
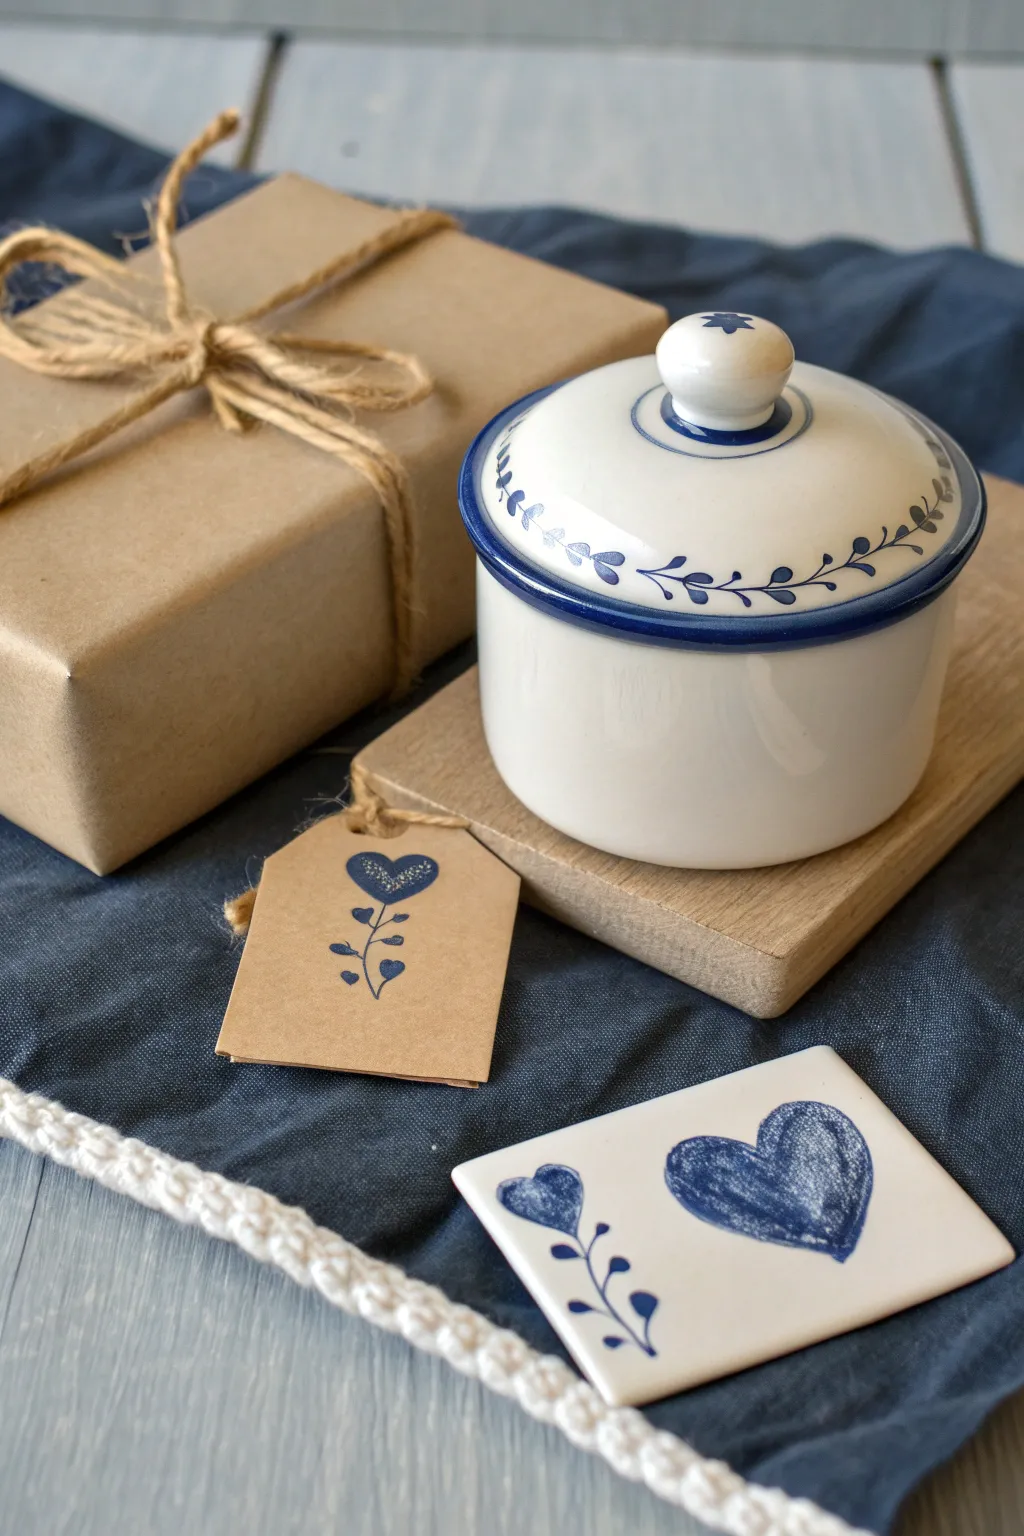
Create a charming, cohesive gift set featuring a delicate porcelain keepsake jar and a matching ceramic love note tile. This project uses simple blue underglaze or porcelain paint to achieve a classic, folk-art inspired look that feels both personal and timeless.
Step-by-Step Guide
Materials
- Small white porcelain lidded jar (sugar bowl style)
- Small square white ceramic tile (approx. 3×3 inches)
- Pebeo Porcelaine 150 paint (Navy Blue or Lapis Blue) OR blue ceramic underglaze if firing
- Fine detail brush (size 0 or 00)
- Small round brush (size 2)
- Rubbing alcohol and cotton pads
- Kraft paper gift tag
- Blue ink pad and heart/flower stamp (or paint and brush for hand-painting)
- Jute twine
- Small wood block or riser (optional for display)
- Oven (for curing paint)
Step 1: Preparing the Surfaces
-
Clean the porcelain:
Before painting, it is crucial to remove any fingerprints or oils. Wipe down the entire surface of the jar, the lid, and the ceramic tile with rubbing alcohol on a cotton pad. -
Dry completely:
Let the alcohol evaporate fully. Avoid touching the areas you plan to paint with your bare hands, as oils can prevent paint adhesion. -
Plan the design:
Sketch your design ideas lightly on a scrap piece of paper first. The jar features a rim pattern of vines, while the tile showcases a large heart and a sprig motif.
Clean Lines Tip
Rest your painting hand’s pinky finger on a dry part of the ceramic to stabilize your brushstrokes for steadier lines on the curved lid surface.
Step 2: Painting the Jar
-
Paint the rim:
Using your size 2 round brush and blue porcelain paint, carefully paint a solid blue line around the outer rim of the lid. If you have a steady hand, you can do this freehand; otherwise, use masking tape as a guide. -
Start the vine:
Switch to your fine detail brush. Paint a thin, wavy line encircling the top curve of the lid, just below the knob. -
Add the leaves:
Along the wavy vine line, paint small, teardrop-shaped leaves. Alternate the direction of the leaves—one pointing up, the next down—to create a rhythmic pattern. -
Paint the knob detail:
Paint a thin blue ring around the base of the lid’s knob. You can add a tiny star or flower motif on the very top center of the knob for an extra detail. -
Clean up edges:
If you make a mistake, use a damp cotton swab or a toothpick to gently scrape away wet paint before it dries.
Step 3: Creating the Love Note Tile
-
Outline the main heart:
On the ceramic tile, use the size 2 brush to paint the outline of a large heart, slightly off-center to the right. -
Fill the heart:
Fill in the heart shape using somewhat scratchy, textured strokes rather than a solid block of color. This gives it a charming, hand-drawn aesthetic. -
Paint the flower sprig:
To the left of the main heart, use the fine detail brush to paint a vertical, slightly curved stem. -
Add sprig details:
Paint a small heart shape at the top of this stem to act as a flower. Add small leaves alternating down the sides of the stem, similar to the pattern on the jar lid. -
Allow to dry:
Let both the jar and the tile dry for at least 24 hours. I usually place them in a dust-free cabinet during this time. -
Bake to set:
Follow the manufacturer’s instructions for your specific paint (typically placing in a cold oven, heating to 300°F/150°C, baking for 35 minutes, and cooling in the oven) to make the design permanent and dishwasher safe.
Creative Twist
Instead of a tile, paint the matching heart design on a small porcelain spoon to pair with the jar if you are using it as a sugar bowl.
Step 4: Finishing Touches
-
Decorate the tag:
Take your kraft paper tag. You can either use a stamp with blue ink to replicate the heart-sprig design, or hand-paint it using a very dry brush and a tiny amount of paint. -
Add glitter (optional):
While the ink or paint on the tag is wet, you can sprinkle a tiny pinch of fine silver glitter onto the heart shape for a subtle sparkle. -
Wrap the gift:
Wrap a separate box in kraft paper. Tie it securely with jute twine, creating a rustic bow. -
Attach the tag:
Thread the painted tag onto the twine tail or tie it directly to the bow center. -
Assemble the set:
arrange the finished jar and the love note tile together, perhaps placing the jar on a small wooden riser to create varied heights for presentation.
Once baked and cooled, your custom porcelain set is ready to be gifted or displayed as a lovely handmade treasure
Porcelain Figurine of an Embrace
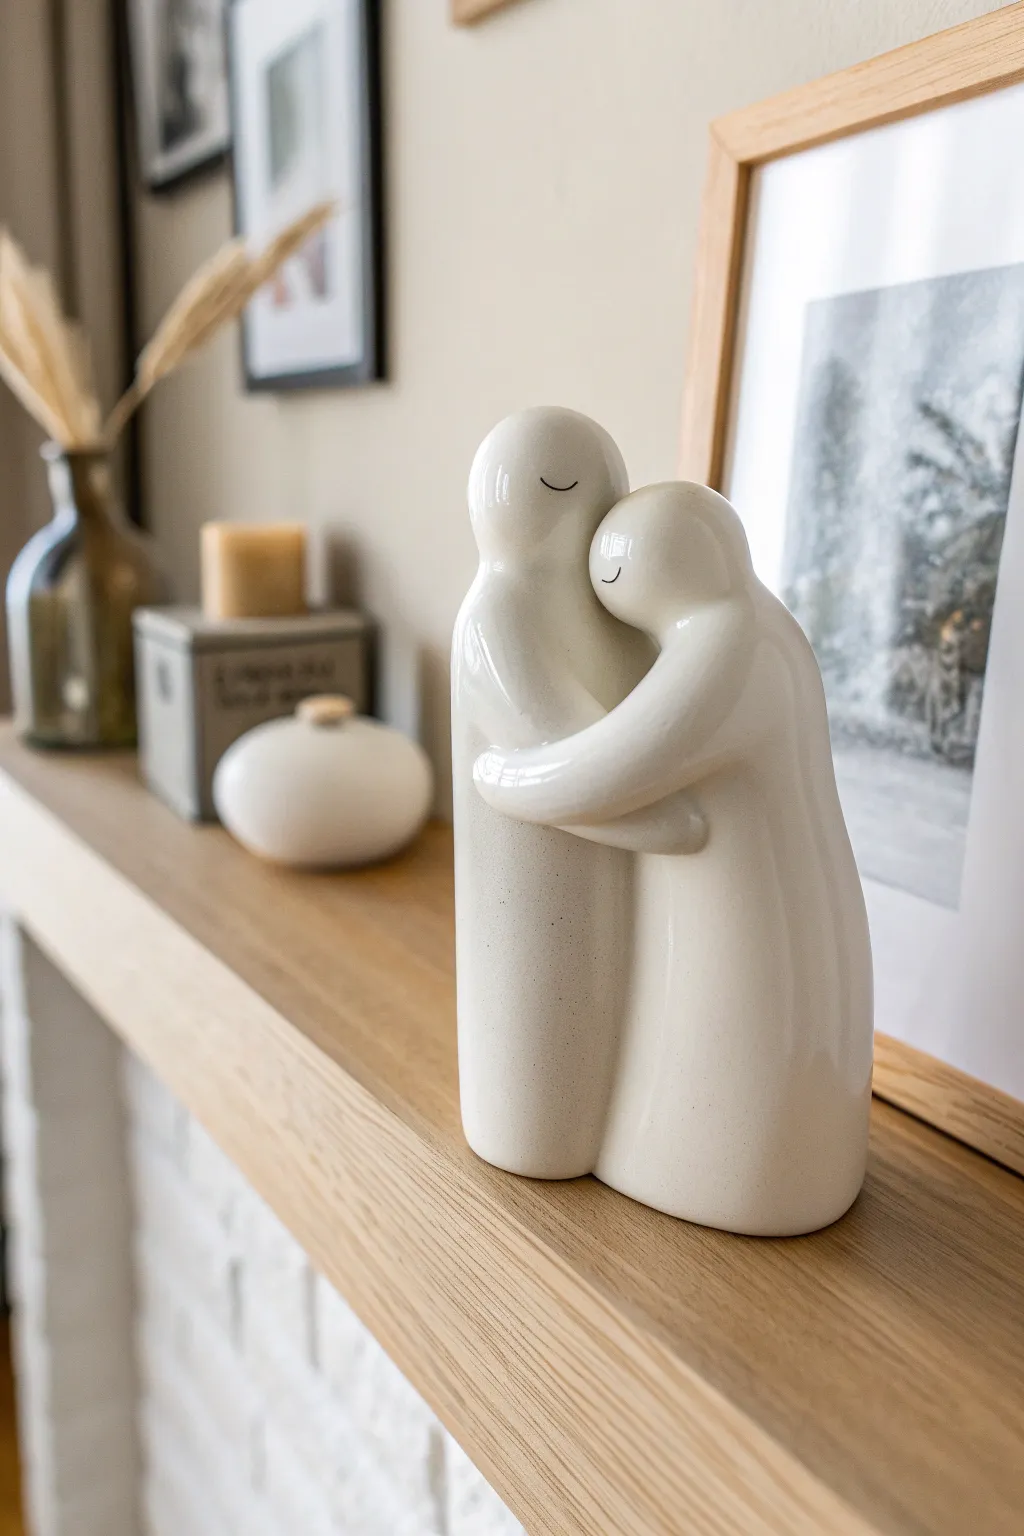
Capture the warmth of a hug with this minimalist clay sculpting project, designed to mimic the smooth, organic look of modern porcelain art. This tutorial guides you through shaping two interlocking figures with soft curves and a glossy white finish that fits perfectly in any contemporary home.
How-To Guide
Materials
- White air-dry clay (porcelain style) or polymer clay
- Aluminum foil (for armature)
- Sculpting tools (wire loop, needle tool)
- Water and a sponge
- Fine-grit sandpaper
- High-gloss white spray paint or ceramic glaze (if firing)
- Fine-tip black marker or acrylic paint pen
- Rolling pin
Step 1: Building the Core and Base Forms
-
Form the armature:
Crumple two pieces of aluminum foil into elongated, upright shapes. One should be slightly taller than the other to represent the two figures. This internal structure saves clay and prevents the sculpture from being too heavy. -
Connect the cores:
Press the two foil shapes together so they lean slightly into one another. The taller figure should be positioned as the one doing the embracing, while the shorter one leans into the chest. -
Prepare the clay:
Condition your clay by kneading it until it is soft and pliable. If using air-dry clay, keep a small bowl of water nearby to keep your hands moist. -
Cover the armature:
Roll out a sheet of clay regarding 1/4 inch thick. Wrap the foil structures completely, smoothing the seams where the clay pieces join. You want a unified, solid-looking mass.
Step 2: Defining the Figures
-
Separate the heads:
Using your thumbs, gently indent the clay near the top to define two distinct rounded head shapes. The taller figure’s head should tilt down, while the shorter figure’s head tilts up to meet it. -
Shape the torsos:
Smooth the clay down the length of the bodies. The look we encounter in the photo is very fluid, so blend the bodies where they touch at the hips and legs, merging them into a single column at the base. -
Add the arm:
Roll a snake of clay for the taller figure’s arm. Attach it starting from the shoulder area, wrapping it gently around the shorter figure’s back/waist area. Blend the shoulder seam completely so it looks like part of the main body. -
Add the hand detail:
At the end of the wrapping arm, flatten the clay slightly to suggest a hand. No need for detailed fingers; a simple mitten shape or rounded end maintains the minimalist aesthetic. -
Refine the embrace:
Add a small amount of clay to the shorter figure’s back to create the impression of the other arm being wrapped around them, but keep the front clean and smooth.
Cracks Appearing?
If using air-dry clay, cracks can happen during drying. Mix a ‘slurry’ of clay and water to fill the crack, let it dry, then sand smooth.
Step 3: Smoothening and Finishing
-
Water smoothing:
Dip your finger or a soft sponge in water (or slip) and run it over the entire sculpture. Eliminate any fingerprints, tool marks, or bumps until the surface feels glass-smooth. -
Initial drying:
Allow the piece to dry completely. For air-dry clay, this may take 24-48 hours. Turn it occasionally to ensure the bottom dries as well. -
Sanding:
Once fully cured, use fine-grit sandpaper to buff away any remaining imperfections. I like to do this gently in circular motions to avoid creating flat spots. -
Wipe down:
Use a slightly damp cloth to remove all sanding dust. The surface must be perfectly clean for the glaze or paint to adhere properly. -
Applying the finish:
Spray the entire piece with high-gloss white spray paint or apply a gloss varnish. Apply several thin coats rather than one thick one to avoid drips. This step creates that classic ‘porcelain’ shine. -
Adding facial features:
This is the most delicate step. Using a fine-tip black marker or a very thin brush with black acrylic, draw two small arched lines for closed eyes on each face. Add a tiny curve for a smile. -
Final seal:
Apply a final clear coat of spray sealant to protect the painted details and unify the gloss finish.
Level Up: Texture
Before drying, use a coarse linen cloth to press a subtle texture onto just the clothing area, leaving the faces smooth for contrast.
Place your finished hugging sculpture on a mantel or bookshelf to add a touch of handcrafted serenity to your space
Framed Porcelain Pebble-Style Couple Art
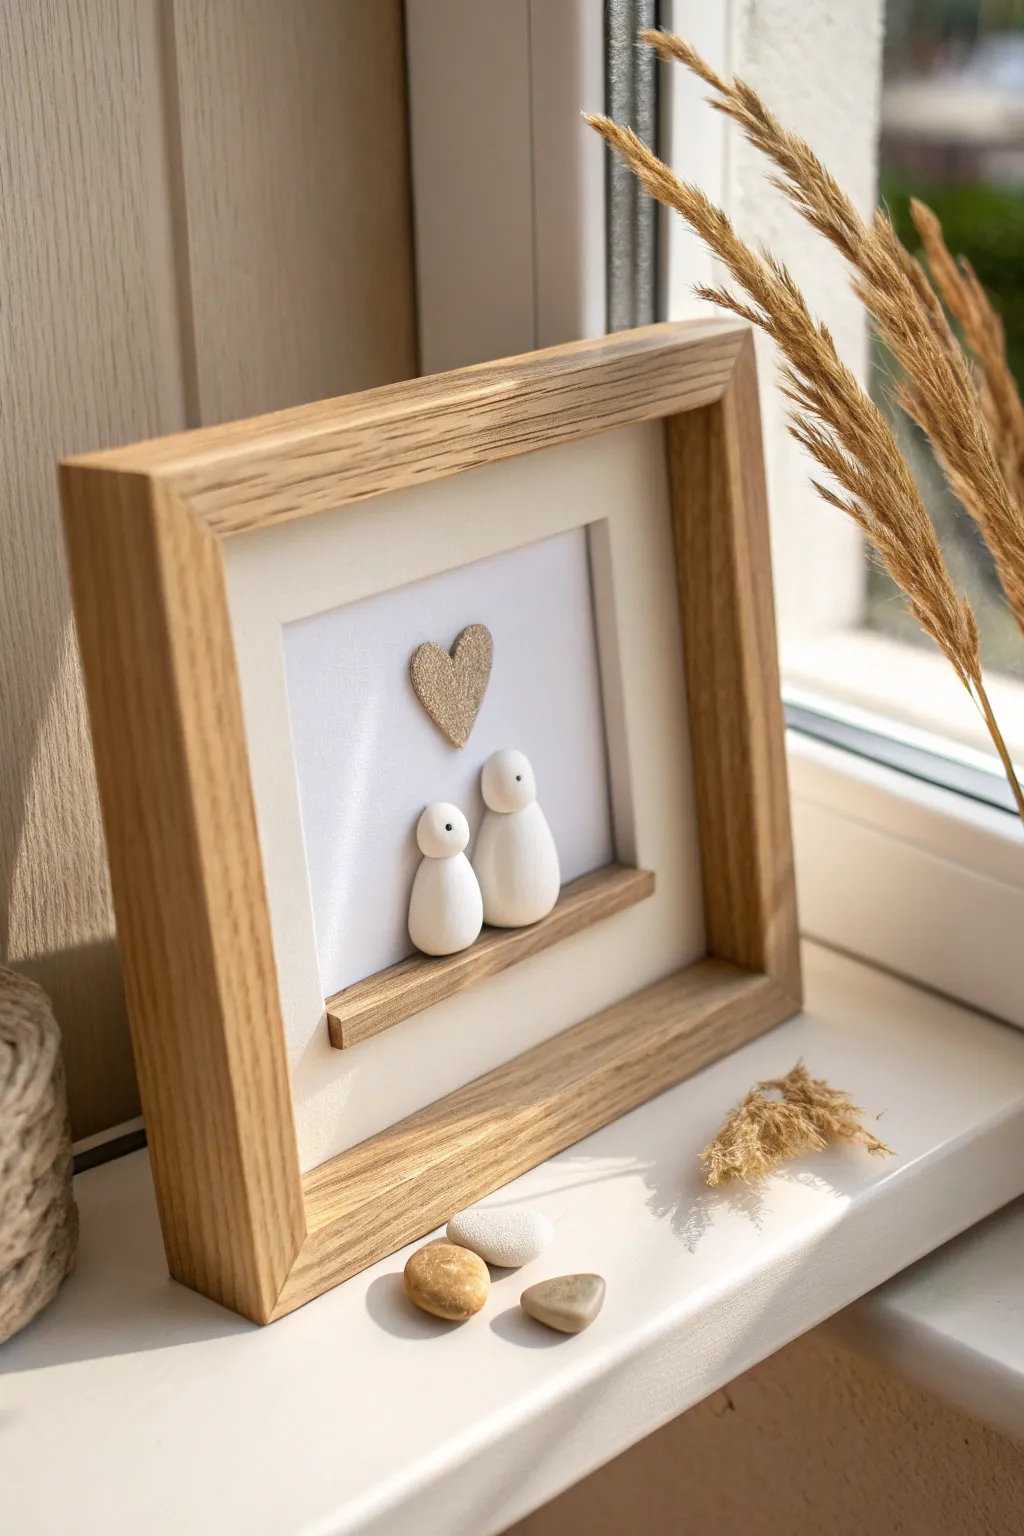
Capture a sweet moment of togetherness with this minimalist pebble-style art piece featuring two handmade porcelain figures. The deep oak frame and textured golden heart create a warm, inviting display that celebrates simple love.
Step-by-Step
Materials
- Deep oak shadow box frame (approx. 8×8 inches)
- White or cream backing cardstock (heavyweight)
- White air-dry porcelain clay or polymer clay
- Small wooden strip (balsa or basswood, approx. 1/4 inch thick)
- Fine grit sandpaper
- Gold glitter cardstock or textured gold fabric
- Strong craft glue (e.g., E6000) or heavy-duty wood glue
- Black acrylic paint and a fine needle tool (for eyes)
- Scissors or a heart punch
- Small craft knife or saw (to cut the wooden ledge)
Step 1: Sculpting the Porcelain Figures
-
Condition the clay:
Begin by kneading your white porcelain or polymer clay until it is soft, pliable, and free of air bubbles. -
Form the larger body:
Roll a ping-pong ball-sized amount of clay into a smooth tear-drop shape to create the body of the larger figure, flattening the bottom so it stands upright. -
Shape the larger head:
Roll a smaller ball of clay for the head and gently press it onto the narrow top of the body, blending the seam slightly if desired or leaving it distinct for a segmented look. -
Create the smaller companion:
Repeat the process to make a slightly smaller figure, ensuring the proportions complement the first one so they look like a pair. -
Smooth the surfaces:
Dip your finger in a tiny bit of water (for air-dry clay) or baby oil (for polymer) to smooth out any fingerprints on your figures. -
Add the eyes:
Using a needle tool or a toothpick, gently create tiny indentations for the eyes on the side of each head so the figures appear to be looking at each other. -
Dry or bake:
Allow the clay to dry completely (24-48 hours for air-dry) or bake according to the package instructions if using polymer clay. -
Detail the eyes:
Once hardened, dip the tip of a toothpick into black acrylic paint and carefully dot the eye indentations.
Clay Smoothness Tip
To get that ultra-smooth porcelain finish on air-dry clay, wait until it’s semi-dry and burnish it gently with the back of a spoon to polish the surface.
Step 2: Preparing the Frame Elements
-
Cut the backing:
Disassemble your shadow box frame and cut the heavy cardstock to fit perfectly inside the back panel. -
Prepare the ledge:
Measure the width of the inner mat opening and cut your small wooden strip to match this length exactly. -
Sand the wood:
Lightly sand the edges of your wooden strip to remove splinters and give it a finished, professional look. -
Create the heart:
Cut a small, slightly asymmetrical heart shape from the gold glitter cardstock or textured fabric; I find a slightly organic shape looks more artistic than a perfect geometric heart.
Step 3: Assembly
-
Mount the ledge:
Using strong craft glue, attach the wooden strip horizontally near the bottom third of the cardstock backing. -
Secure the figures:
Apply a dab of strong glue to the bottom of each porcelain figure and place them on the wooden ledge, positioning them close together. -
Add the heart:
Glue the gold heart onto the backing card, centering it floating above the space between the two figures. -
Let it cure:
Allow the glue to cure fully for several hours while the artwork remains flat on a table. -
Final framing:
Clean the inside of the frame glass, then carefully insert your 3D artwork into the shadow box and secure the back.
Customize the Couple
Add personality by painting tiny details like a bowtie or a necklace on the figures, or sculpt a tiny clay pet to sit beside them on the ledge.
Place your finished piece near a window where the natural light can highlight the textures of the porcelain and gold.
Porcelain Hanging Bud Vase Duo
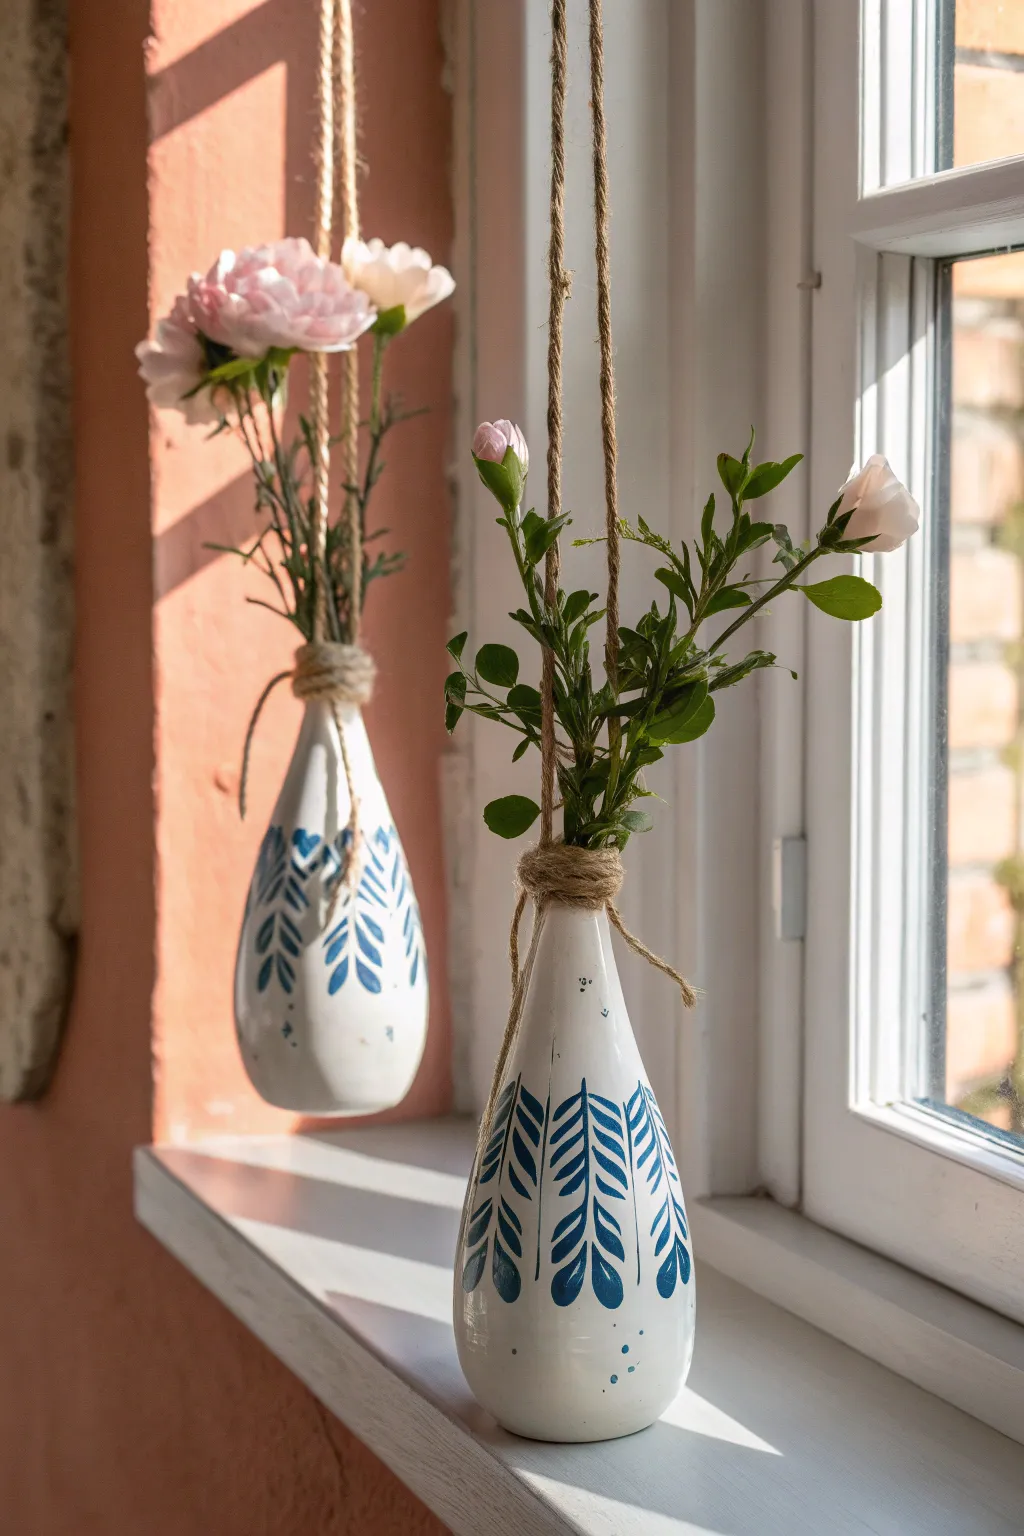
Transform simple white ceramic vessels into charming, rustic wall or window decor with this easy painting and macramé-inspired project. The combination of delicate blue botanical strokes and natural jute twine creates a lovely balance of elegance and earthiness.
Detailed Instructions
Materials
- Two white porcelain or ceramic bud vases (teardrop or bottle shape)
- Blue porcelain paint or ceramic marker (navy or royal blue)
- Fine-point paintbrush (size 0 or 1)
- Rubbing alcohol and cotton pads
- Jute twine or hemp cord
- Scissors
- Oven (if using heat-set paints)
- Clear tape (optional)
Step 1: Painting the Botanical Pattern
-
Clean the Surface:
Before applying any paint, wipe the exterior of both vases thoroughly with rubbing alcohol and a cotton pad. This removes invisible oils or fingerprints that could prevent the paint from adhering properly. -
Plan the Design:
Visualize where your leaf pattern will go. In the example, the design covers the bottom third of the vase. You can lightly mark the upper boundary with a pencil or a piece of masking tape if you want a precise line, though freehand often looks more organic. -
Paint the Stems:
Using your fine-point brush and blue porcelain paint, create vertical, slightly curved lines starting from the base of the vase upward. These will be the central veins for your leaves. -
Add Leave Shapes:
Paint small, almond-shaped leaves branching off the central stems. Press the brush down slightly at the base of the leaf and lift as you pull away to create a tapered point. Vary the angles slightly for a natural look. -
Fill in the Leaves:
Carefully fill in the leaf outlines with the blue paint. Keep the paint application smooth and even, avoiding thick globs that might drip. -
Add Accent Dots:
For extra texture, dab the very tip of your brush around the leaves to create tiny scattered dots. I find this simple addition breaks up the white space beautifully. -
Dry and Cure:
Let the paint dry completely according to the manufacturer’s instructions (usually 24 hours). Once dry, bake the vases in a non-preheated oven if your specific paint requires heat setting to become permanent.
Step 2: Creating the Hanging Assembly
-
Measure the Twine:
Cut two long lengths of jute twine for each vase. The length depends on how low you want them to hang, but 40 inches per piece is a safe starting point (you’ll fold them in half). -
Create the Neck Knot:
Take one piece of twine and wrap it multiple times around the narrowest part of the vase neck. Tie it tightly and secure with a double knot, leaving long tails. -
Secure the wrapping:
To create that thick, rustic collar look seen in the photo, wrap a second piece of twine directly over the first layer, building up bulk. Tie it off securely. -
Establish the Handle:
Identify two long tails on opposite sides of the vase neck. These will become your vertical hanging ropes. Trim away any other short excess tails from the specific knotting process if they stick out. -
Tie the Top Loop:
Bring the two vertical strings together at your desired hanging height. Tie them together in a strong overhand knot to create the loop needed for a hook or nail. -
Double Check Balance:
Before hanging, hold the vase by the top loop to ensure it hangs straight. If it tilts, adjust the knots at the neck slightly to redistribute the weight. -
Final Trim:
Snip off any final stray fibers from the knots for a clean finish. -
Add Florals:
Fill your new hanging vases with water and add fresh stems like small roses, greenery, or dried flowers to complete the look.
Clean Lines Tip
Rest your pinky finger on the vase while painting to stabilize your hand. This acts as an anchor and helps keep your brushstrokes smooth and controlled.
Twine Slipping?
If the twine slips up the smooth ceramic neck, place a tiny dab of hot glue or superglue under the first wrap of twine to anchor it permanently in place.
Now you have a beautiful set of custom vases ready to brighten up any window or corner of your home