
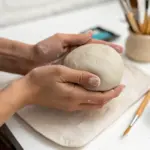
If you’ve been dreaming about making real, functional pottery but you don’t have a wheel, you’re still totally in the game. I teach pottery without a wheel all the time, and these handbuilding ideas are exactly the kind of projects that make people go, “Wait, you made that by hand?”
Classic Pinch Pot Snack Bowls (No Wheel Needed)
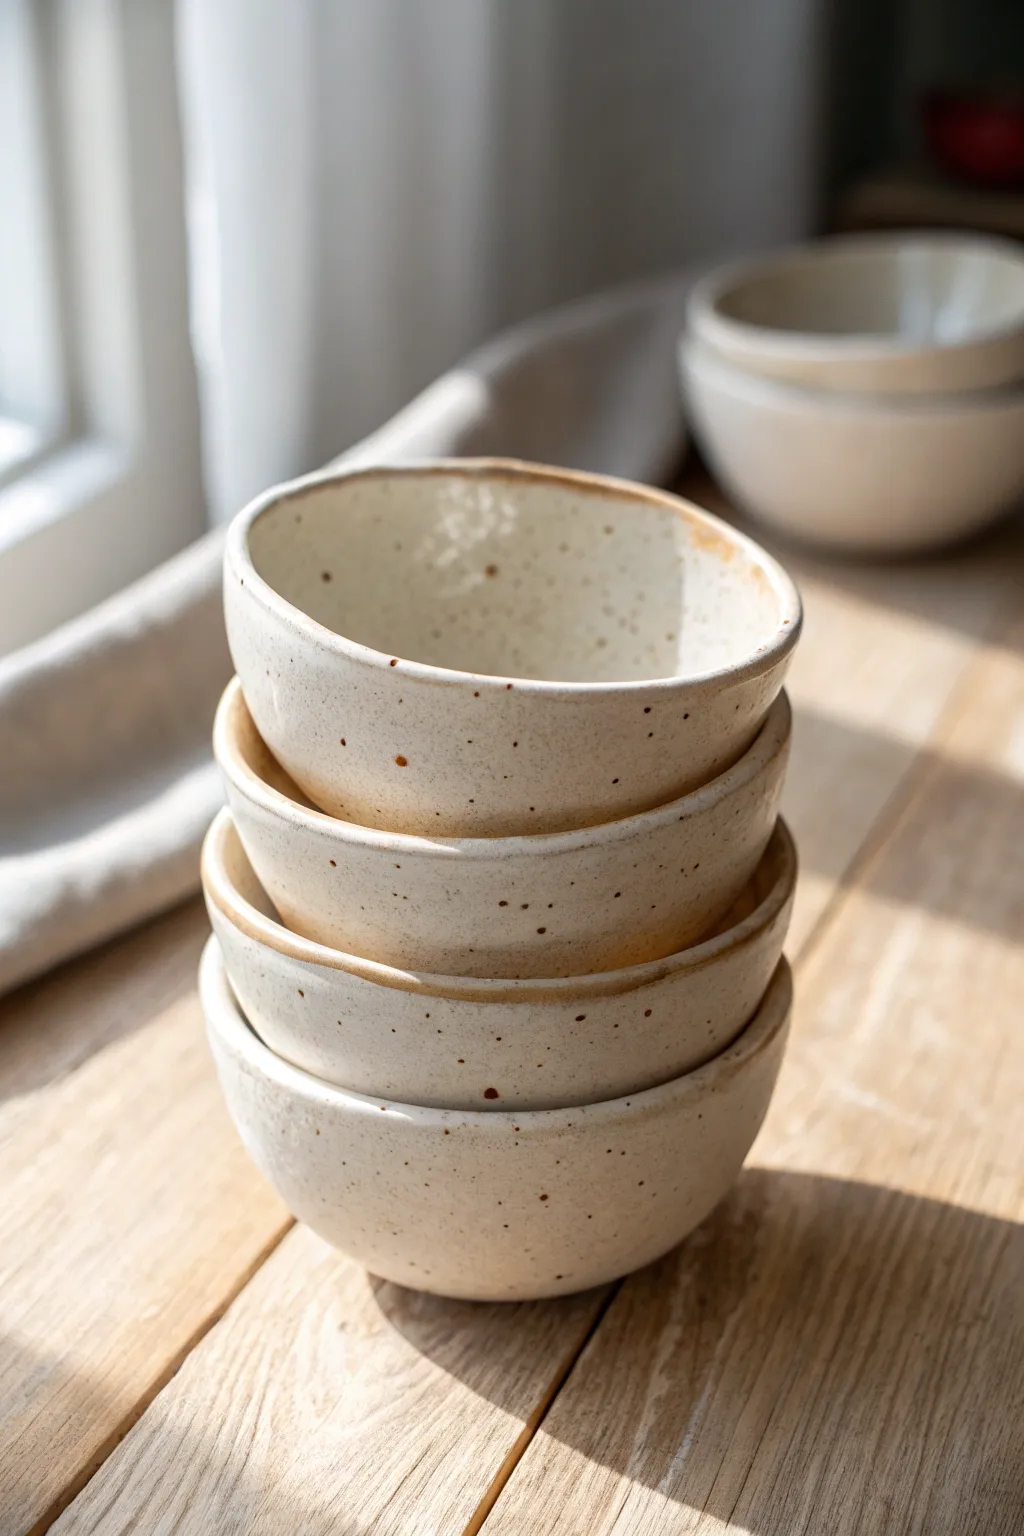
Create a charming set of nesting snack bowls using the most fundamental and satisfying hand-building technique: the pinch pot. These organic, speckled vessels feature a creamy glaze with rustic toasted rims, perfect for holding everything from nuts to dips.
Step-by-Step
Materials
- Speckled stoneware clay (mid-fire or high-fire)
- Small bowl or bucket of water
- Sponge
- Potter’s needle tool
- Wooden rib tool or old credit card
- Metal kidney scraper
- Creamy white stoneware glaze (food safe)
- Soft fan brush for glazing
- Kiln access (or air-dry clay alternatives for decorative use)
Step 1: Forming the Bowls
-
Prepare your clay balls:
Start by wedging your clay to remove air bubbles. Divide the clay into four equal portions, roughly the size of a tennis ball or slightly smaller depending on your desired final size. Roll them into smooth spheres between your palms. -
Establish the opening:
Hold one clay sphere in your non-dominant hand. Press your thumb gently into the center of the ball, pushing down until you are about a quarter-inch from the bottom. Be careful not to push all the way through. -
Pinch the walls:
Begin pinching the clay between your thumb (inside) and fingers (outside). Rotate the ball slightly with each pinch to ensure even thickness. Start from the bottom and work your way up the walls in a spiral motion. -
Shape the curvature:
Aim for a gentle, rounded curve rather than straight vertical walls. Gently flare the rim slightly outward if you want them to nestle into each other easily. -
Standardize the set:
Repeat this process for the remaining three clay balls. While they don’t need to be identical, try to keep the wall thickness consistent across the set so they look cohesive when stacked.
Step 2: Refining the Surface
-
Smooth the exterior:
Once the clay has stiffened slightly (leather hard), use a metal kidney scraper to remove deep finger marks from the outside. I prefer to leave a little texture to maintain that handmade charm, but remove sharp ridges. -
Compress the rim:
This is crucial for durability. Run a damp piece of chamois or a soft sponge over the rim to round it off and compress the clay particles, preventing future cracks. -
Address the bottom:
Tap the bottom of each bowl gently on a flat table to create a stable foot. If needed, use a wooden tool to slightly concave the center of the base so it sits flat without wobbling. -
Final sponge wipe:
Use a slightly damp sponge to wipe down the entire surface, smoothing out any final burrs or rough grainy bits before setting them aside to dry completely.
Uneven Walls?
If one side feels thicker, don’t just pinch that spot. Gently press clay from the thick area toward a thinner area nearby to redistribute the mass evenly.
Step 3: Firing and Glazing
-
Bisque fire:
Once bone dry, fire the bowls in a kiln to the appropriate bisque temperature (usually cone 04) to prepare them for glazing. -
Clean and wax:
Wipe the bisque-fired bowls with a damp sponge to remove dust. Apply wax resist to the bottom foot of each bowl to prevent the glaze from sticking to the kiln shelf. -
Apply the main glaze:
Dip the bowls or use a fan brush to apply a creamy, semi-opaque white glaze. If brushing, apply 2-3 even coats, letting each layer dry to the touch before adding the next. -
Expose the rim:
To achieve the look in the photo, take a damp sponge and carefully wipe the glaze off just the very edge of the rim. This allows the natural clay body to toast and show through during firing. -
Enhance the speckle (optional):
If your clay isn’t naturally speckled, you can flick a stiff toothbrush loaded with iron oxide wash or a dark brown underglaze across the surface for that scattered dot effect. -
Glaze fire:
Load the kiln carefully and fire to the maturity temperature of your clay and glaze (often cone 5 or 6 for stoneware). Allow the kiln to cool completely before unloading.
Make it Nest
To ensure they stack perfectly, make each clay ball progressively slightly smaller (e.g., 200g, 180g, 160g, 140g) so they fit inside one another comfortably.
Stack your finished bowls on the table and enjoy the simple, tactile beauty of your handiwork


Tiny Pinch Pot Bud Vases with Wavy Rims
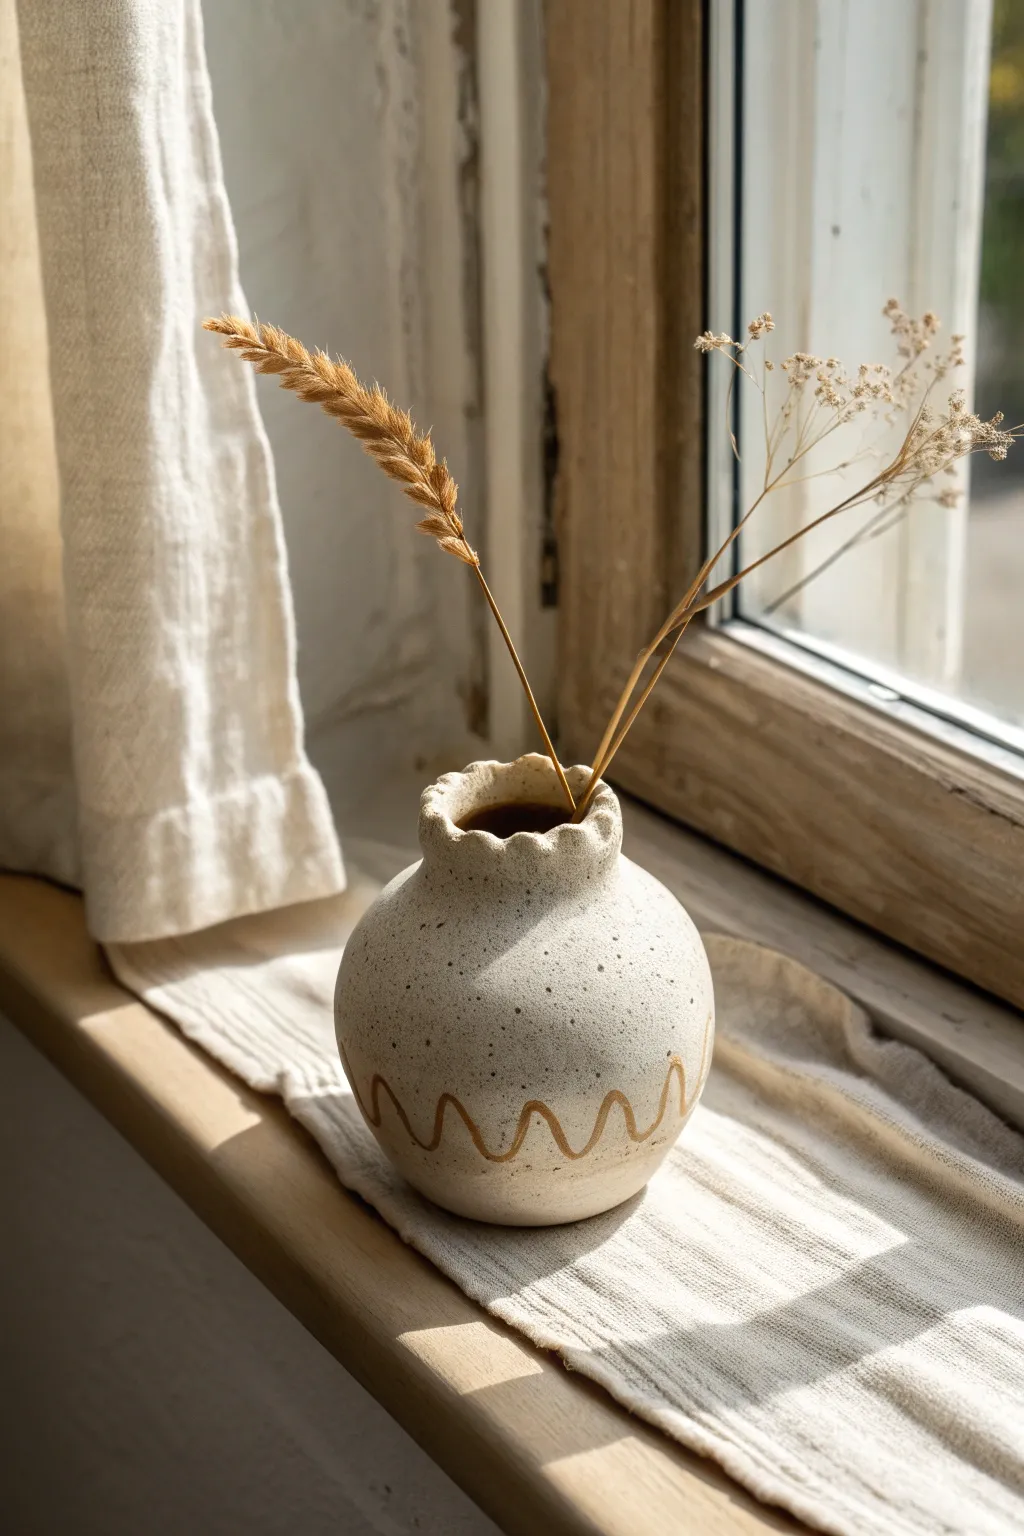
This charming little vessel combines organic earth tones with a playful, scalloped texture that catches the light beautifully. Creating this wheel-free vase is surprisingly simple, relying on basic pinch pot techniques to achieve a rustic, handmade aesthetic perfect for displaying dried stems.
Step-by-Step Guide
Materials
- Speckled Stoneware Clay (or white clay with speckles added)
- Small sponge
- Pointed wooden modeling tool or needle tool
- Loop tool (optional, for trimming)
- Paintbrush (small round size)
- Underglaze (warm brown or ochre)
- Clear matte or satin glaze
- Water cup
- Paddle or wooden spoon
Step 1: Forming the Base Shape
-
Prepare your clay ball:
Start by wedging a piece of speckled clay about the size of a tennis ball to remove air bubbles. Roll it into a smooth, round sphere between your palms. -
Open the pot:
Hold the sphere in one hand and push your thumb deep into the center, stopping about a half-inch from the bottom to leave enough thickness for the base. -
Pinch the walls:
Gently pinch the clay between your thumb and fingers, rotating the ball as you go. Work your way from the bottom up, thinning the walls evenly until they are about a quarter-inch thick. -
Collar the neck:
As you reach the top third of the pot, gently squeeze the clay inward with both hands (collaring) to narrow the opening and create that classic bud vase shoulder. -
Flatten the bottom:
Tap the pot firmly onto your work surface to create a flat, stable base so it won’t rock. -
Refine the curve:
Use a wooden spoon or paddle to gently tap the sides of the belly if you want to round out the form further, or smooth the surface with a damp sponge to remove fingerprints.
Step 2: Creating the Textures
-
Add the scalloped rim:
With the rim slightly moist, use your thumb and forefinger to gently pinch the very edge into a fluted, wavy pattern. I find creating a steady rhythm here works best. -
Smooth the scallops:
Go back over your pinched rim with a slightly damp fingertips to allow the sharp edges to soften, ensuring a pleasant tactile feel. -
Dry slightly to leather hard:
Let the piece sit uncovered until it reaches a leather-hard state—firm enough to handle without deforming, but still cool to the touch. -
Carve the bottom wave:
Using a pointed wooden tool or needle tool, gently incite a continuous squiggly wave line around the bottom third of the vessel. Don’t cut all the way through; just create a shallow groove. -
Clean up burrs:
Wait about 20 minutes for the carved crumbs to dry, then brush them away or smooth them with a very lightly damp sponge.
Consistent Scallops
To make the rim even, use the handle of a paintbrush as a spacer. Press the handle gently into the rim at intervals, then pinch the clay between the indentations.
Step 3: Finishing and Glazing
-
Bisque fire:
Once fully bone dry, fire the piece in a kiln to bisque temperature (usually cone 04) to prepare it for glazing. -
Highlight the carving:
Take your brown or ochre underglaze and paint it into the wavy groove you carved earlier. Wipe away any excess on the surface with a sponge, leaving color only in the recess. -
Glaze application:
Dip the entire vase into a clear matte or satin glaze. This will seal the clay and make the natural speckles pop without adding too much shine. -
Clean the foot:
Wipe the very bottom of the vase completely clean of glaze so it doesn’t fuse to the kiln shelf. -
Final firing:
Fire the vase a second time to the maturation temperature of your specific clay body (e.g., cone 5/6).
Cracking at the Rim?
Pinch pots often crack at the lip if the clay gets too dry while working. Keep a damp sponge nearby and run it over the rim periodically to keep it flexible.
Set your finished vase near a window where sunlight can highlight the subtle textures of the clay.


Easy Coil-Built Vase with Exposed Coils
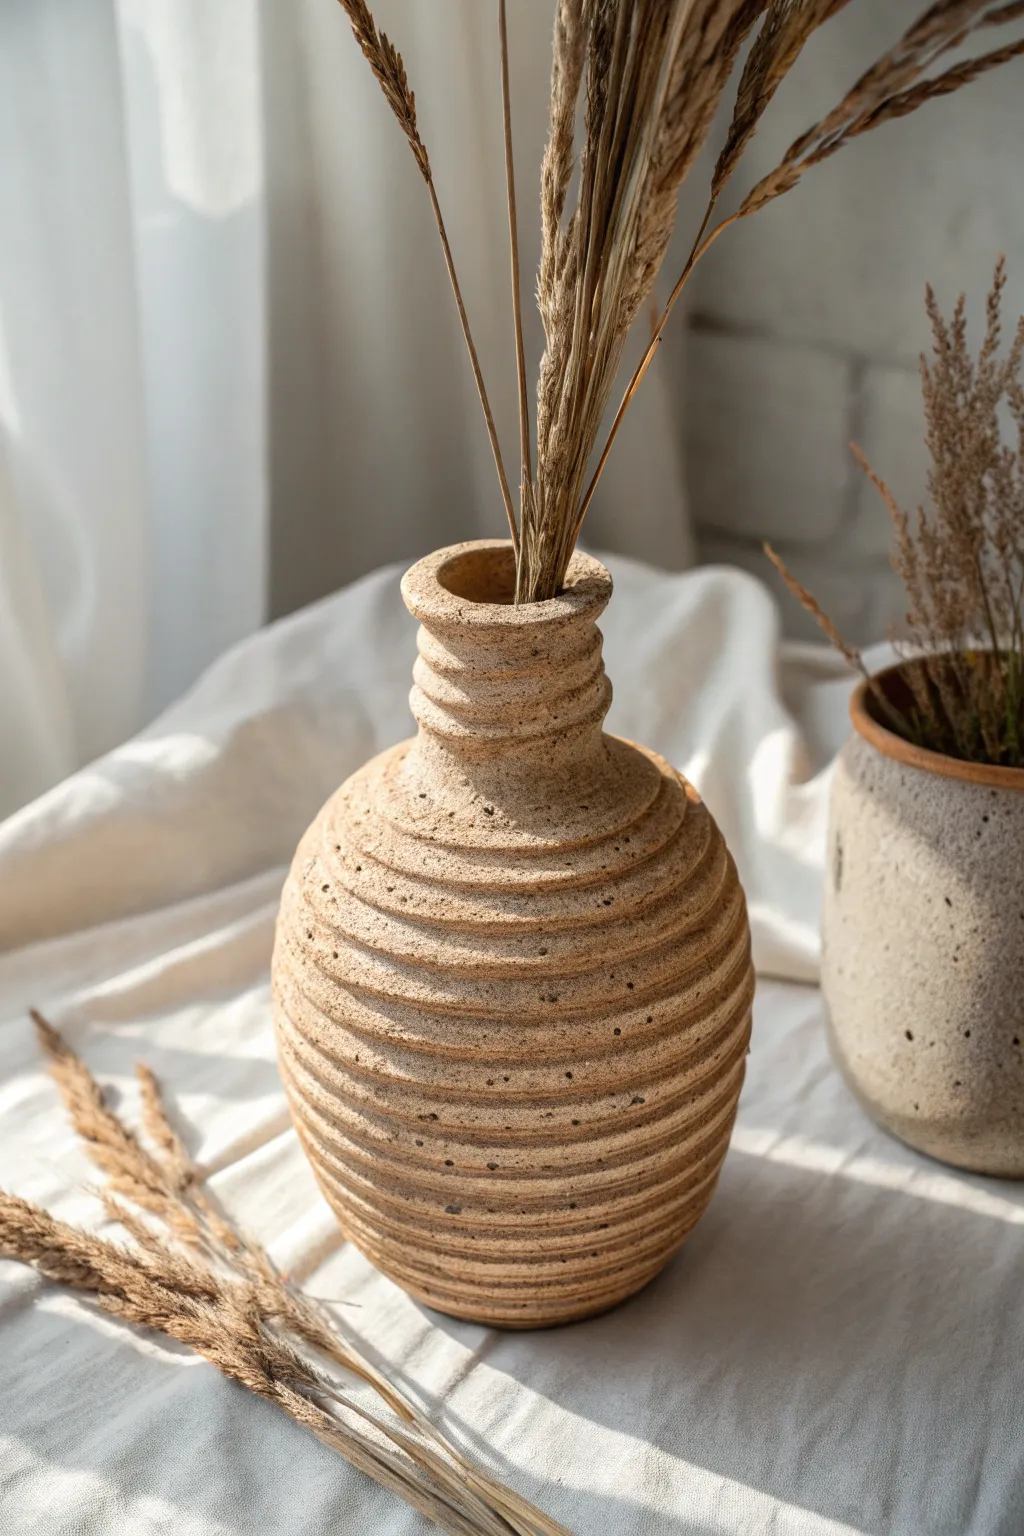
Embrace the organic beauty of hand-building with this textured vase project that mimics the precision of wheel-thrown stripes using simple coil techniques. The finished piece features a warm, sandy finish with distinct horizontal ridges that catch the light beautifully.
How-To Guide
Materials
- Stoneware clay (preferably with grog or speckles)
- Scoring tool (or fork)
- Slip (clay mixed with water)
- Wooden modeling tool
- Metal kidney rib or flexible scraper
- Sponge
- Rolling pin (optional)
- Canvas mat or work surface
- Needle tool
Step 1: Base and Body Construction
-
Prepare the slab base:
Start by flattening a small ball of clay into a disk about 4 inches in diameter. You can use a rolling pin or just pat it out with your palm, aiming for a consistent 1/4 inch thickness. -
Roll your coils:
Roll out several long ropes of clay on your canvas. Try to keep them even in thickness, roughly the size of a thick marker or your index finger. Rolling from the center outwards with flat hands helps prevent flat spots. -
Attach the first coil:
Score the outer edge of your base disk and apply a little slip. Place your first coil on top of the scored edge, trimming the ends to meet flush. -
Build upward:
Continue stacking coils one on top of another. For this bulbous shape, place each new coil slightly further outward than the one below it to expand the form. -
Blend the interior:
After every 3-4 coils, pause to smooth the *inside* of the pot. Support the outside with one hand while using your thumb or a wooden tool to smear the clay downward on the inside, locking the coils together firmly. -
Maintain the texture:
Unlike typical coil pots, do not smooth the outside completely. Leave the distinct roundness of each coil visible to create that ribbed effect. -
Shape the belly:
Once the vase has reached its widest point (about 5-6 inches high), begin placing the coils slightly inward to narrow the form back towards the center.
Uneven Walls?
If one side looks taller, don’t squish it down. Instead, gently pinch the shorter side’s coils slightly thinner to raise them up to match the height.
Step 2: Refining and Finishing
-
Construct the neck:
As the opening gets smaller, stack the coils vertically rather than angled inward to create the straight neck section. A subtle flare at the very top rim adds elegance. -
Refine the ribs:
Using a wet sponge or your finger, gently run along the grooves between the coils on the outside. You want to soften any sharp edges or cracks without erasing the horizontal lines. -
Enhance the texture:
If your coils were totally smooth, you can use a loop tool or the edge of a credit card to deepen the grooves between them, emphasizing the separation. -
Add surface chatter:
To get the sandy, pitted look from the photo, gently tap the surface with a rough stone or a coarse sponge. I find this helps hide any imperfections in the coil joins. -
Clean the rim:
Use a damp chamois or sponge to compress and smooth the topmost rim, ensuring it feels comfortable to the touch. -
Slow drying:
Loosely cover the vase with plastic for the first 24 hours to let the moisture equalize. This prevents the coils from cracking apart as they shrink. -
Firing:
Once bone dry, bisque fire the piece. For the finish shown, apply a matte, speckled tan glaze or a simple clear coat over a speckled clay body and fire to the clay’s maturity temperature.
Two-Tone Effect
Use iron oxide wash in the grooves before glazing. Wipe it back with a sponge so the dark color stays deep in the cracks, highlighting the ribbed texture.
Now you have a timeless, textured vessel ready to hold your favorite dried floral arrangements


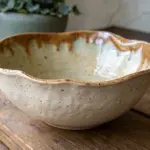
Coiled Fruit Bowl with a Flared Rim (Wheel-Free Height Trick)
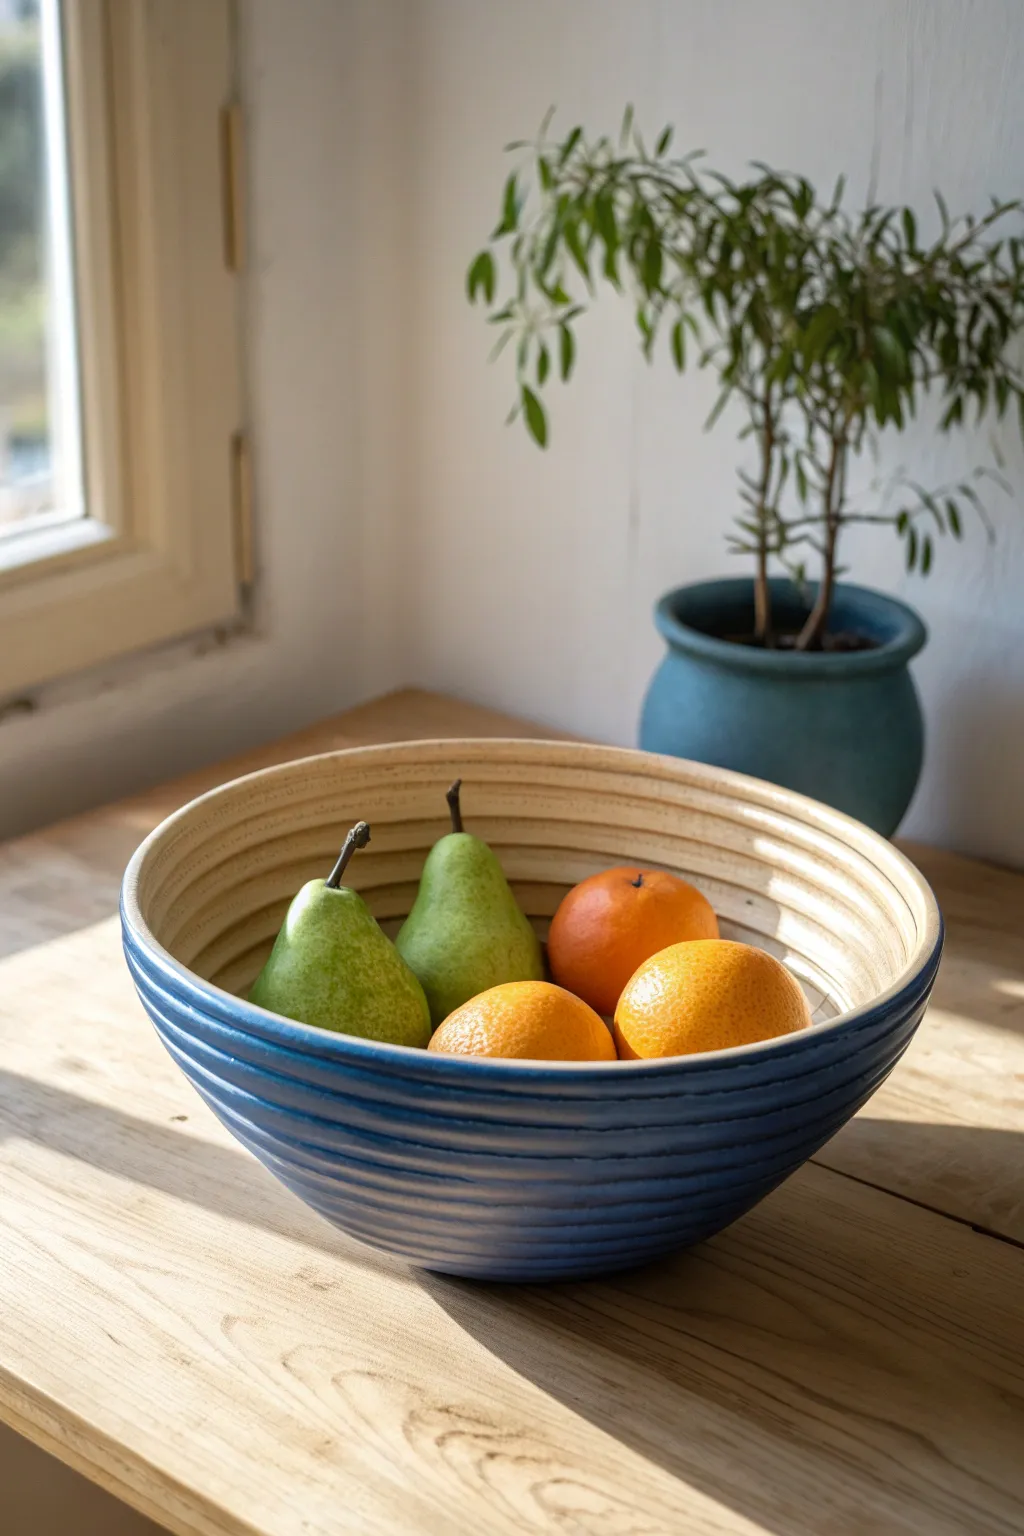
Create a stunning table centerpiece without a pottery wheel using the accessible coil-building technique. This dual-tone bowl features a textured, deep blue exterior that contrasts beautifully with a smooth, natural interior, perfect for holding your seasonal fruits.
Detailed Instructions
Materials
- Stoneware clay (cone 5/6 recommended)
- Clay scoring tool or fork
- Slip (clay mixed with water)
- Flat wooden rib
- Metal rib
- Rolling pin
- Canvas or cloth work surface
- Sponge
- Deep blue underglaze
- Clear transparent glaze
- Medium soft paintbrush
- Kiln (or access to local firing services)
Step 1: Building the Base
-
Roll the slab:
Start by rolling out a ball of clay into a flat slab about 1/4 inch thick. This will serve as the floor of your bowl. -
Cut the circle:
Place a small round template or bowl (approx. 4-5 inches diameter) onto the slab and use a needle tool to cut out a perfect circle. -
Score the edge:
Using your scoring tool or a fork, rough up the outer 1/4 inch of the circle’s top surface. Apply a generous dab of slip to these score marks to act as glue.
Rim Stability Pro-Tip
If your bowl flares out too quickly, the walls might sag. Let the bottom half firm up to ‘leather hard’ before adding the final widest coils.
Step 2: Coiling the Walls
-
Roll your coils:
Take fresh clay and roll out several long, even snakes (coils) approximately the thickness of your index finger. Try to keep them uniform to ensure walls of even thickness. -
Attach the first coil:
Lay the first coil directly on top of the scored edge of your base. Press it down gently but firmly to secure it. -
Blend the interior:
This is crucial for structural integrity: use your thumb or a wooden tool to smear the clay from the coil downward onto the base on the *inside* only. Smooth this connection until the seam disappears. -
Build upward:
Score and slip the top of your attached coil, then add the next snake. As you stack them, position each new coil slightly further outward than the last to create the flaring bowl shape. -
Smooth the inside:
Continue blending the coils downward on the interior after every row. Use a rib tool to scrape and compress the inside wall, making it perfectly smooth and erasing all coil lines. -
Preserve the exterior texture:
Unlike the inside, leave the exterior coil lines visible. Simply press the coils together firmly enough to stick, but don’t smear them flat. This creates the ribbed texture seen in the photo. -
Refine the rim:
Once you reach your desired height, use a damp sponge to gently round off the top rim so it’s pleasant to touch.
Level Up: Gradient Blues
Instead of one solid blue, use a darker blue underglaze on lower coils and a lighter blue on top coils for an ombré effect.
Step 3: Finishing and Glazing
-
Bisque fire:
Allow the bowl to dry slowly under loose plastic for a few days to prevent warping, then fully dry before bisque firing it in the kiln. -
Apply underglaze:
Once out of the bisque firing, apply 2-3 coats of deep blue underglaze to the *exterior only*. Use a brush that can get into the grooves between the coils. -
Wipe back (optional):
If you want to accentuate the texture, I sometimes wipe the exterior gently with a damp sponge to reveal a bit of clay on the high points. -
Glaze the interior:
Pour clear glaze into the bowl, roll it around to coat the entire inside surface, and pour out the excess. -
Glaze the exterior:
Brush a coat of clear glaze over the blue underglaze on the outside to seal it and make the color pop. -
Final fire:
Fire the piece for a second time (glaze firing) according to your clay and glaze manufacturer’s instructions.
Fill your finished bowl with vibrant fruit to contrast against the rich blue texture

What Really Happens Inside the Kiln
Learn how time and temperature work together inside the kiln to transform clay into durable ceramic.
Slab-Built Dinner Plates with Pressed Texture
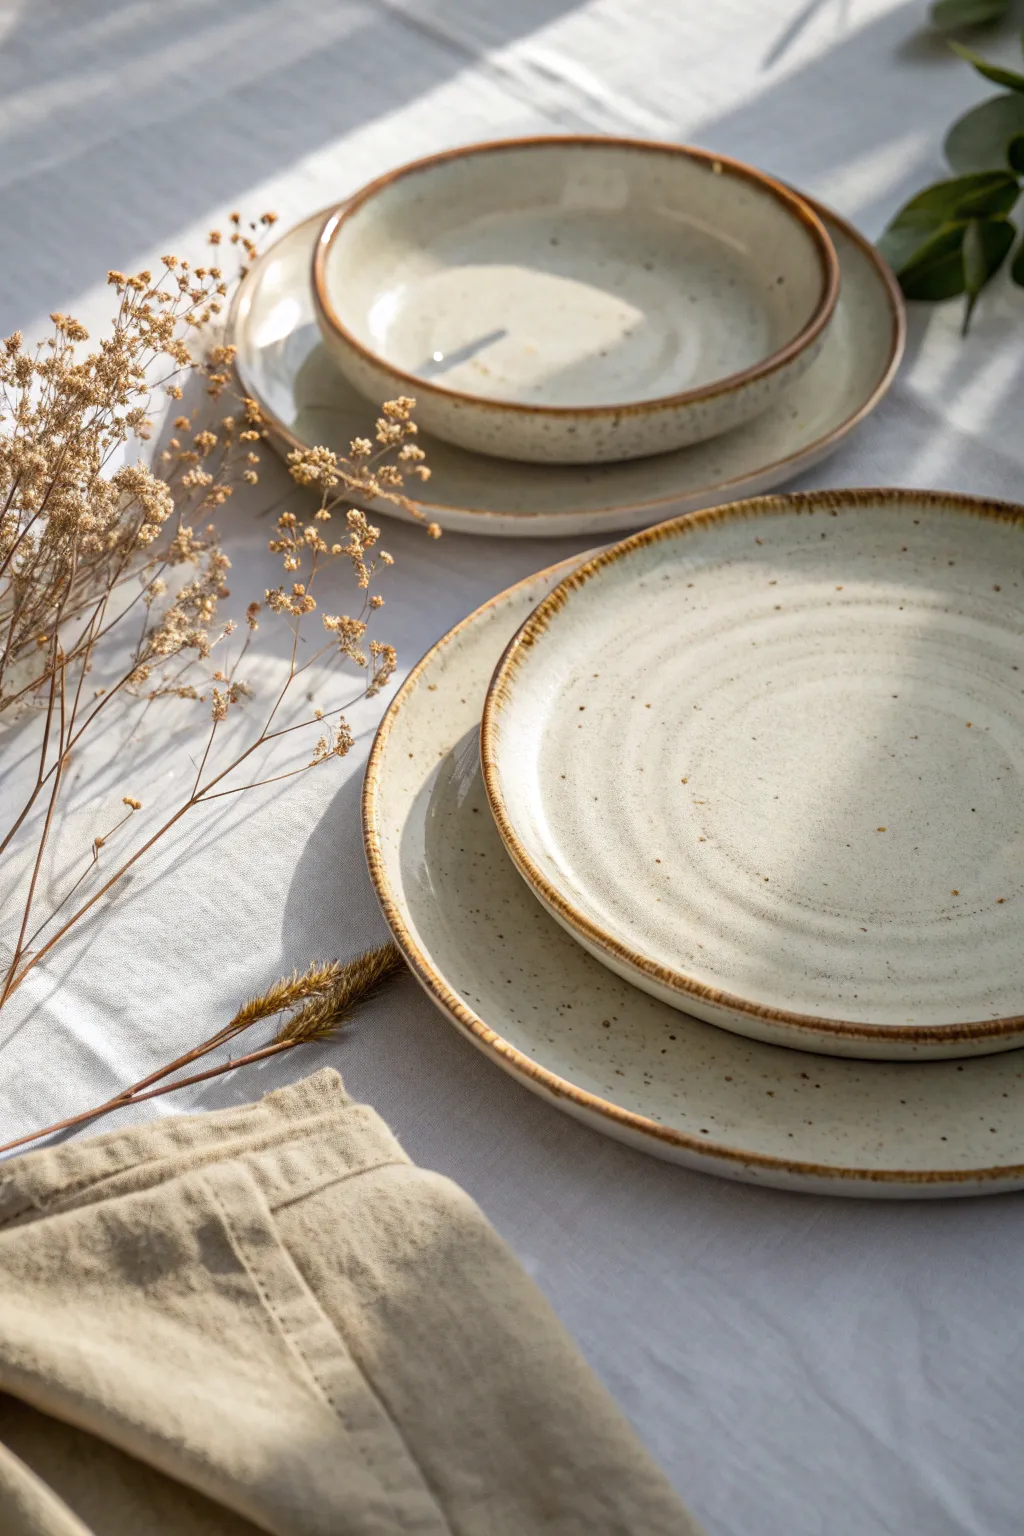
Achieve the organic elegance of wheel-thrown pottery without touching a wheel using simple slab-building techniques. This tutorial guides you in crafting a complete dinner set characterized by its creamy speckled glaze and charmingly distressed brown rims.
Step-by-Step Tutorial
Materials
- Speckled stoneware clay (white or buff)
- Rolling pin
- Two wooden guide strips (thickness slat, approx. 1/4 inch)
- Canvas mat or heavy fabric
- Large circular template (paper or existing plate)
- Small circular template (for the bowl)
- GR Pottery Forms or large plaster molds (optional, but helpful for drying)
- Soft rib tool (rubber or silicone)
- Needle tool or fettling knife
- Sponge
- High-grit sandpaper (for post-bisque)
- Glossy cream or transparent glaze (if clay is naturally speckled)
- Iron oxide wash or dark brown underglaze
Step 1: Preparing the Slabs
-
Wedge the clay:
Start by thoroughly wedging your speckled stoneware clay. This removes air bubbles and aligns the clay particles, making it easier to roll out a smooth, consistent slab. -
Setup rolling station:
Place your canvas mat on a sturdy table to prevent sticking. Position your wooden guide strips on either side of the clay ball to ensure an even thickness. -
Roll the slab:
Using the rolling pin, roll the clay out firmly. Rotate the clay periodically to stretch it evenly in all directions until the rolling pin rests on the guide strips. -
Smooth the surface:
Take your soft rib tool and compress the clay surface on both sides. This aligns the particles to prevent warping and erases the canvas texture, creating that smooth, wheel-thrown appearance.
Warped Plates?
Plates warp if they dry unevenly. Dry them very slowly under loose plastic for the first few days. Placing a weighted bag of rice in the center can help keep them flat.
Step 2: Shaping the Dinnerware
-
Cut the plate shape:
Place your large circular template onto the slab. Using a needle tool, cut vertically around the template for a clean edge. -
Form the rim:
If using a slump mold or a GR Pottery Form, drape the clay over it and gently press the edges down. If working flat, place the circle on a foam pad and use your fingers to gently pinch and lift the rim upwards. -
Add subtle texture:
To mimic the spiral seen in the image, place the plate on a banding wheel (or a lazy susan). Hold a soft rib against the surface while slowly spinning the wheel, creating a very faint spiral indentation from center to edge. -
Create the bowl:
Repeat the rolling and cutting process with the smaller template. Slump this slab inside a shallow bowl lined with cheesecloth to give it a deep, curved shape. -
Refine the edges:
Once the pieces are leather-hard (stiff but still cool to the touch), use a slightly damp sponge to smooth the rims. We want them round and soft, not sharp.
Make it a Set
Create a matching tumbler set. Wrap a rectangular slab around a cylinder template, join the seam, and add a slab base. Finish with the same oxide rim style.
Step 3: Glazing and Finishing
-
Bisque fire:
Allow your pieces to dry completely (bone dry) before loading them into the kiln for a bisque firing (usually cone 04 or 06). -
Sand for smoothness:
After the bisque firing, briefly sand any rough bottoms or edges. Wipe away all dust with a damp sponge. -
Apply the oxide rim:
Dip a small brush or sponge into iron oxide wash or thinned brown underglaze. Gently run this along the very lip of the plate and bowl, letting its natural irregularity create that rustic border. -
Wipe back the rim:
I like to take a clean, damp sponge and wipe the rim immediately after applying the oxide. This leaves stain only in the clay pores, creating a subtle transition rather than a solid line. -
Dip or brush glaze:
Apply your creamy semi-transparent glaze. If dipping, submerge quickly and shake off excess. If brushing, apply 2-3 even coats, staying clear of the foot ring. -
Clean the foot:
Ensure the bottom where the plate touches the shelf is completely free of glaze to prevent sticking. -
Glaze fire:
Fire the kiln to the maturity temperature of your clay and glaze (typically cone 5 or 6 for stoneware). This final firing melts the glaze, bringing out the speckles in the clay body.
Now you have a stunning, durable set of handmade dishes perfect for showcasing your next meal
Slab-Built Mug with a Hand-Pulled Style Handle
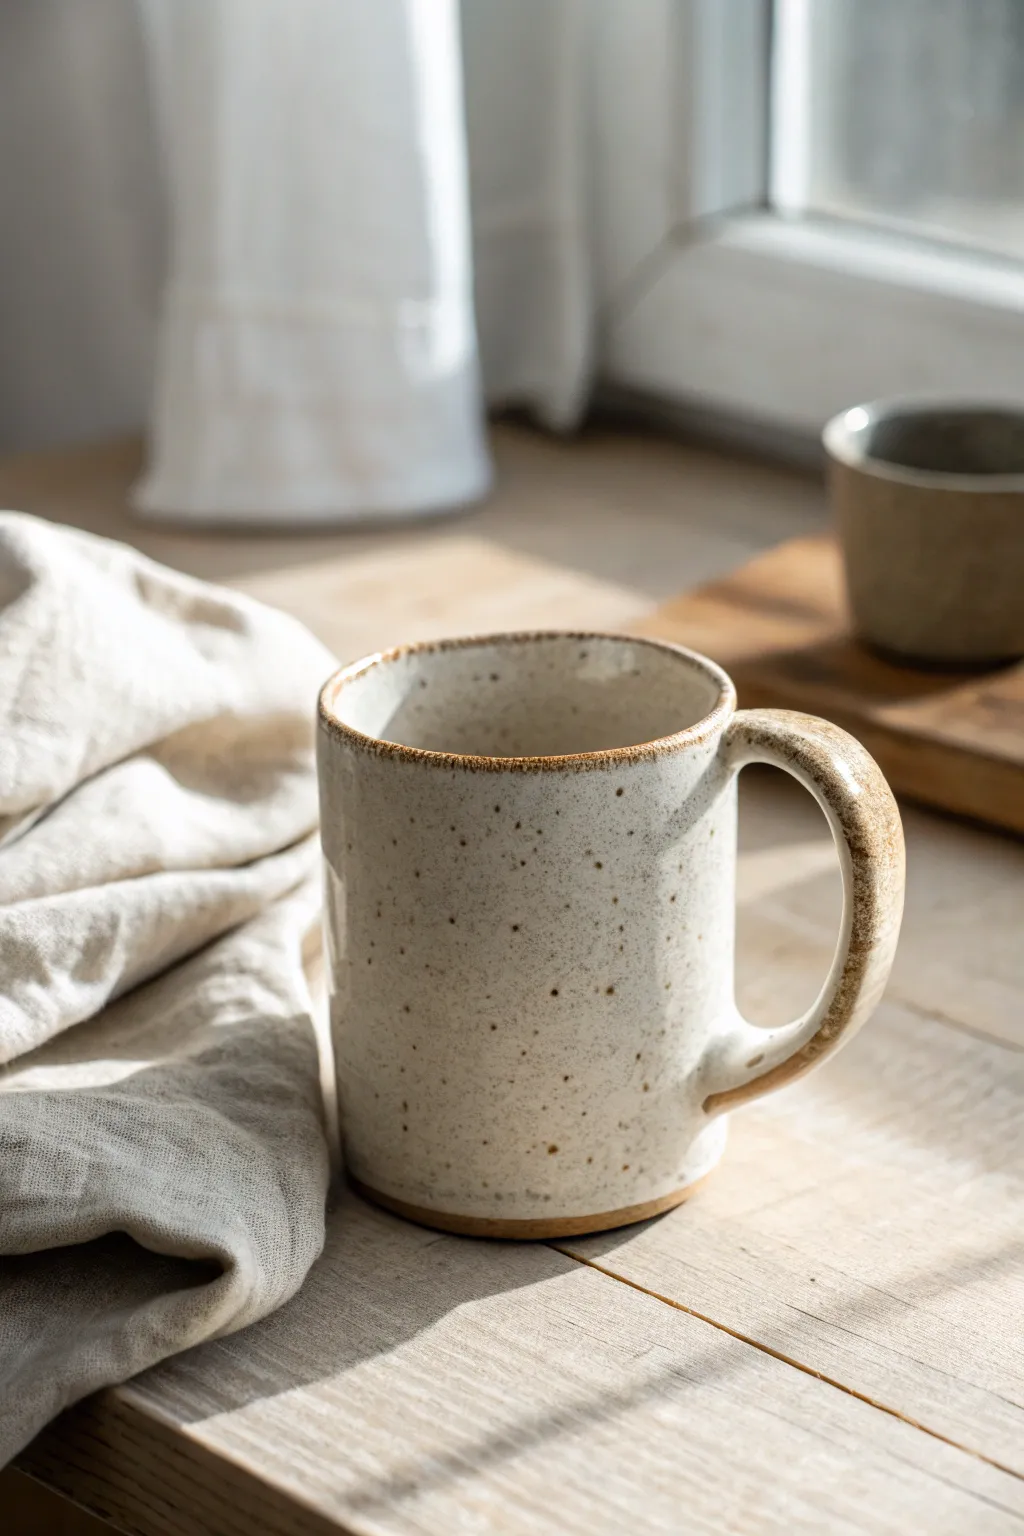
Embrace the beauty of imperfection with this slab-built mug, featuring a warm, speckled cream glaze and a comfortable, earthy handle. This project captures the essence of cozy mornings, combining simple construction techniques with a finish that feels both modern and timeless.
How-To Guide
Materials
- Speckled buff stoneware clay (or white clay with iron speckles)
- Canvas rolling surface
- Rolling pin
- Pottery knife or fettling knife
- Serrated rib tool or fork
- Slip (clay mixed with water)
- Wooden modeling tool
- Sponge
- Ruler
- Rectangle template (approx. 4″ x 10″)
- Circle cutter or template (for the base)
- Creamy matte white glaze (translucent enough to show speckles)
Step 1: Forming the Body
-
Roll the slab:
Begin by wedging your speckled clay to remove air bubbles. Roll it out on your canvas surface until it is an even thickness, slightly thicker than ¼ inch. Flip the clay occasionally as you roll to prevent it from sticking. -
Cut the shapes:
Lay your rectangular template on the slab and cut around it using your fettling knife. Then, cut a circle for the base that matches the intended diameter of your rolled cylinder. -
Bevel the edges:
On the short ends of your rectangle, cut a 45-degree bevel angle. Cut one bevel facing up and the other facing down; this creates a scarf joint where the two ends will overlap seamlessly. -
Score and slip:
Rough up the beveled edges using your serrated rib. Apply a generous amount of slip to these scored areas. -
Create the cylinder:
Gently curve the slab into a tube, aligning the beveled edges. Press them firmly together. Support the wall from the inside with one hand while you smooth the seam on the outside with a wooden tool. -
Attach the base:
Score and slip the bottom edge of your cylinder and the outer edge of your circular base. Press the cylinder onto the base. Use a wooden modeling tool to drag a small amount of clay from the base up onto the wall to stitch them together. -
Smooth the connections:
Run a damp sponge inside and out to clean up the seams. I like to leave the rim slightly uneven to maintain that organic, handmade character.
Step 2: Handle and Finishing
-
Prepare the handle coil:
Roll a thick coil of clay, roughly the thickness of your thumb. Taper it slightly at one end. -
Pull the handle:
Hold the thick end of the coil in one hand. With the other hand wet, gently pull down the length of the clay, milking it to thin it out and create a flat, organic strap shape. Repeat until it’s the desired length and curve. -
Shape on table:
Bend the pulled strap into a ‘C’ shape or ear shape and let it stiffen slightly on the table for about 15-20 minutes until it holds its form. -
Attach the handle:
Score and slip the attachment points on both the mug and the handle ends. Press the handle firmly onto the mug body, ensuring the top attachment is near the rim. -
Reinforce the join:
Use a small coil of soft clay around the attachment points if needed, smoothing it completely so it looks like the handle grows out of the mug. -
Refine the rim:
Before the clay gets too dry, run a piece of chamois or plastic wrap over the rim to compress and round it, ensuring it will be comfortable to drink from.
Clean Seams
To erase the vertical slab seam completely, lightly paddle the outside of the join with a wooden spoon or paddle while supporting the inside. This compresses the clay particles.
Step 3: Glazing and Firing
-
Bisque fire:
Allow the mug to dry slowly under loose plastic for a few days to equalise moisture, then uncover to fully dry bone dry. Fire to bisque temperature (usually cone 04). -
Wax the foot:
Apply wax resist to the bottom of the mug and slightly up the side (about 1/8 inch) to create the bare clay line seen in the image. -
Apply glaze:
Dip the mug into a creamy matte white glaze. Hold it upside down for a few seconds to let excess drip off. The glaze should be thin enough that the iron speckles in the clay will bleed through during firing. -
Wipe the rim:
If you want the rim to be darker like the picture, gently wipe a tiny bit of glaze off the very edge with a sponge, or rely on the glaze ‘breaking’ (thinning out) over the sharp edge. -
Glaze fire:
Fire the mug to maturity (typically Cone 5 or 6 for stoneware). The heat will draw the iron speckles out, creating the beautiful spotted effect.
Rustic Rim
Instead of cutting the rim perfectly flat, gently pinch it between your thumb and forefinger periodically as you rotate the mug. This creates a soft, undulating wave for a relaxed look.
Enjoy your morning coffee knowing your hands shaped every unique curve of this vessel

The Complete Guide to Pottery Troubleshooting
Uncover the most common ceramic mistakes—from cracking clay to failed glazes—and learn how to fix them fast.
Slab-Built Planter Box with Clean Corners (No Wheel Symmetry)
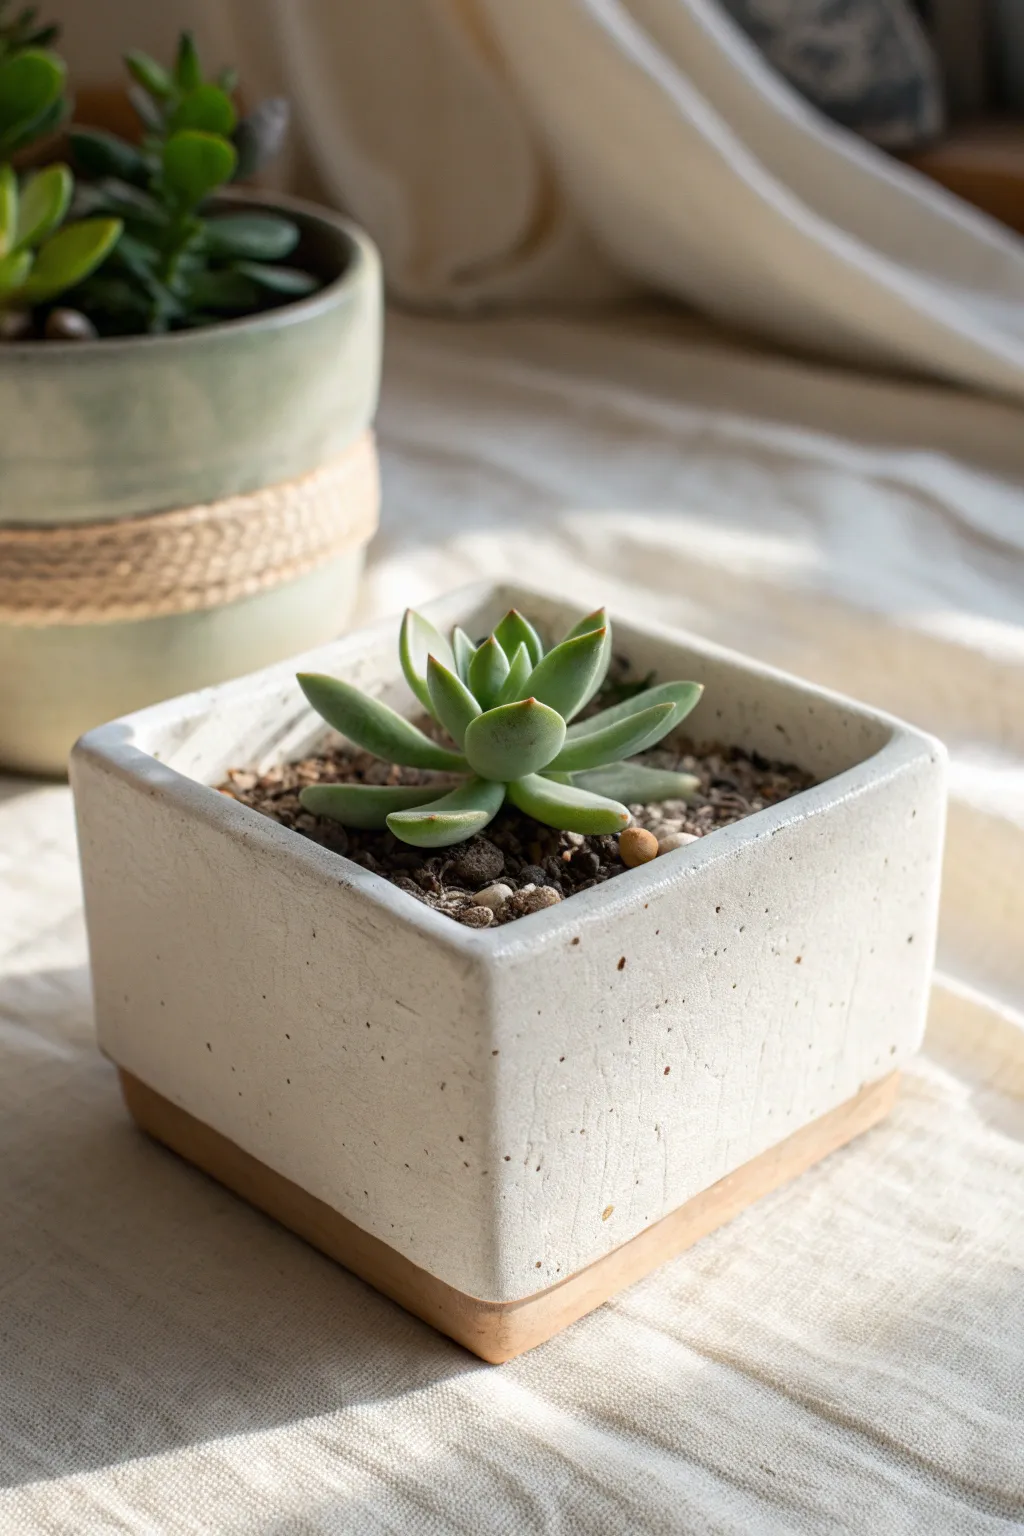
Embrace the crisp lines and modern simplicity of this square succulent planter, built entirely by hand using slab techniques. The design features a textured, creamy white glaze that contrasts beautifully with a raw, unglazed clay base, offering a minimalist aesthetic perfect for any windowsill.
Step-by-Step Guide
Materials
- High-fire stoneware clay (speckled or buff)
- Rolling pin
- Two guide sticks (approx. 1/4 inch thick)
- Canvas mat or cloth
- Fettling knife or X-Acto blade
- Ruler or square tool
- Serrated rib or fork (for scoring)
- Slip (liquid clay)
- Sponge
- Wooden modeling tool
- Matte white or cream glaze
- Wax resist (optional)
Step 1: Preparing the Slabs
-
Roll the clay:
Begin by wedging your clay to remove air bubbles. Place it on your canvas mat between two guide sticks. Roll the clay out until the rolling pin rests on the sticks, ensuring an even thickness of about 1/4 inch throughout. -
Smooth the surface:
Before cutting, take a subtle rubber rib or a slightly damp sponge and compress the clay slab on both sides. This removes the canvas texture and aligns the clay particles to prevent warping later. -
Let it stiffen:
This is crucial: Let the slab sit until it reaches a ‘soft leather-hard’ state. It should be firm enough to hold its shape when lifted but still flexible enough not to crack. -
Measure and cut:
Using your ruler, measure and cut five identical squares. For the size shown in the photo, 4×4 inches is a great starting point. You will need four walls and one base.
Straight Edges Pro-Tip
Place a rigid wooden block inside the box while smoothing the outside. Pressing against this inner support lets you sharpen the corners without collapsing the walls.
Step 2: Assembling the Box
-
Miter the edges:
For those sharp, clean corners seen in the photo, bevel the vertical edges of your four wall pieces at a 45-degree angle. Leave the bottom edges and the base piece flat. -
Score the joints:
Take your serrated rib or specific scoring tool and rough up all the mitered edges where the walls will connect, as well as the bottom edges of the walls and the perimeter of the base square. -
Apply slip:
Dab a generous amount of slip onto the scored areas. It acts as the glue, so insure good coverage without making the clay sodden. -
Construct the walls:
Stand two walls up on the base, pressing the mitered corners together firmly. I find it easiest to attach opposite corners first to establish the square shape. -
Complete the square:
Attach the remaining two walls. Check that the box is square by measuring diagonally from corner to corner; the measurements should be equal. -
Reinforce the interior:
Roll a very thin coil of soft clay. Press this into the interior seams where the walls meet the floor and each other, blending it smooth with a wooden tool to prevent leaks.
Fixing Warped Walls
If walls bow inward while drying, stuff the box gently with crumpled newspaper or foam. This internal support holds the square shape until the clay is leather hard.
Step 3: Refining and Finishing
-
Clean the exterior seams:
On the outside, use a paddle or a flat board to gently tap the walls straight. Smooth the corner seams with a rib so the transition is invisible. -
Soften the rim:
Run a damp sponge or a piece of chamois leather over the top rim. You want to take away the sharp cutting edge while maintaining the square geometry. -
Create the footer line:
To achieve the two-tone look, use a ruler to lightly incise a straight line around the exterior base, about 1/2 inch from the bottom. This will mark where your glazing stops. -
Drill a drainage hole:
Don’t forget the plant’s health. Use a hole cutter tool to punch a drainage hole in the center of the bottom slab. -
Slow drying:
Cover the pot loosely with plastic to let it dry slowly for couple of days. This prevents the corners from cracking due to uneven shrinkage. -
Bisque fire:
Once bone dry, fire the piece to bisque temperature (usually cone 04) to prepare it for glazing. -
Wax and Glaze:
Apply wax resist to the bottom section, up to the line you incised earlier. Dip or brush your matte cream glaze onto the rest of the pot. The wax will repel the glaze, keeping the base raw. -
Final smooth:
After the glaze dries, wipe any stray droplets off the waxed area with a sponge to ensure a crisp line before the final firing.
Once fired, fill your modern planter with gritty soil and a striking succulent to complete the look
Drape Mold Catchall Dish Made from a Slab

This charming catchall dish features a warm, earthy terracotta tone and a distinctive undulating rim created by draping clay over a simple mold. Its organic shape and speckled surface make it perfect for holding delicate jewelry like rings or earrings on your bedside table.
Step-by-Step
Materials
- Red earthenware or terracotta clay (preferably with grog or speckles)
- Rolling pin
- Two guide sticks (approx. 1/4 inch thick)
- Canvas or heavy fabric mat
- Square template (paper or cardstock, approx. 5×5 inches)
- Small bowl or hump mold (for draping)
- Needle tool or fettling knife
- Smoothing rib (rubber or wood)
- Sponge
- Textured fabric or plastic wrap (optional, for texture)
Step 1: Preparing the Slab
-
Wedge the clay:
Begin by wedging a ball of terracotta clay about the size of a grapefruit. This removes air bubbles and ensures the clay has an even consistency throughout. -
Set up your station:
Lay down your canvas mat to prevent sticking. Place your two wooden guide sticks on either side of your working area to ensure an even thickness when rolling. -
Roll the slab:
Place the clay ball between the sticks and flatten it slightly with your palm. Use the rolling pin to roll the clay out until the pin rests on the guide sticks. Roll in multiple directions to stress the clay evenly. -
Smooth the surface:
Take a rubber rib and gently compress the surface of the clay slab. This aligns the clay particles and removes any canvas texture if you prefer a smooth finish.
Step 2: Shaping the Dish
-
Cut the shape:
Place your square paper template onto the slab. Using a needle tool or fettling knife, hold the tool vertical and trace around the template to cut out your square base. -
Refine the edges:
Once cut, run a damp finger or a slightly moist sponge along the sharp cut edges to round them over. This prevents chipping later and gives the piece a finished look. -
prepare the mold:
Select a small bowl or a dedicated hump mold. If the bowl is non-porous, cover it lightly with plastic wrap or a piece of thin fabric to prevent the clay from sticking to it. -
Drape the clay:
Gently lift your clay square and center it over the inverted bowl or mold. Allow the corners to droop down naturally under their own weight. -
Encourage the form:
Lightly press the center of the slab against the bottom of the mold to create a flat base for the dish to sit on. Don’t press too hard, just enough to establish stability. -
Shape the corners:
I like to gently coax the corners downward with my fingers to accentuate the curve. If you want a more dramatic wave, you can pinch the corners slightly, but a natural drape offers that effortless organic look shown in the photo.
Cracking Corners?
If the corners crack while draping, your clay might be too dry. Spray a fine mist of water on the slab or compress the edges more during the rolling phase.
Step 3: Finishing Touches
-
Initial drying:
Let the clay sit on the mold until it reaches a leather-hard state. This usually takes a few hours depending on humidity. It should be firm enough to hold its shape but still cool to the touch. -
Remove from mold:
Carefully lift the dish off the mold. Turn it right-side up and check the shape. If the bottom rounded out slightly during drying, gently tap the dish on a flat surface to re-flatten the foot. -
Smooth the rim:
Inspect the rim one last time. Use a barely damp sponge to smooth away any final roughness or sharp spots that might have appeared during handling. -
Dry slowly:
Place the finished dish loosely under a plastic sheet to dry slowly. This helps prevent warping, especially at the thin corners. Once bone dry, it is ready for the kiln. -
Pattern tip:
The example image shows some natural speckling. If your clay body doesn’t have speckles, you can flick iron oxide wash onto the surface before the final firing to interact with a clear glaze.
Add Some Texture
Before cutting your square, press a piece of lace or burlap into the wet slab. The texture will highlight the curves once the glaze breaks over the high points.
Enjoy the simple beauty of your handmade catchall dish once it emerges from the final firing

TRACK YOUR CERAMIC JOURNEY
Capture glaze tests, firing details, and creative progress—all in one simple printable. Make your projects easier to repeat and improve.
Press Mold Soap Dish with Drainage Grooves
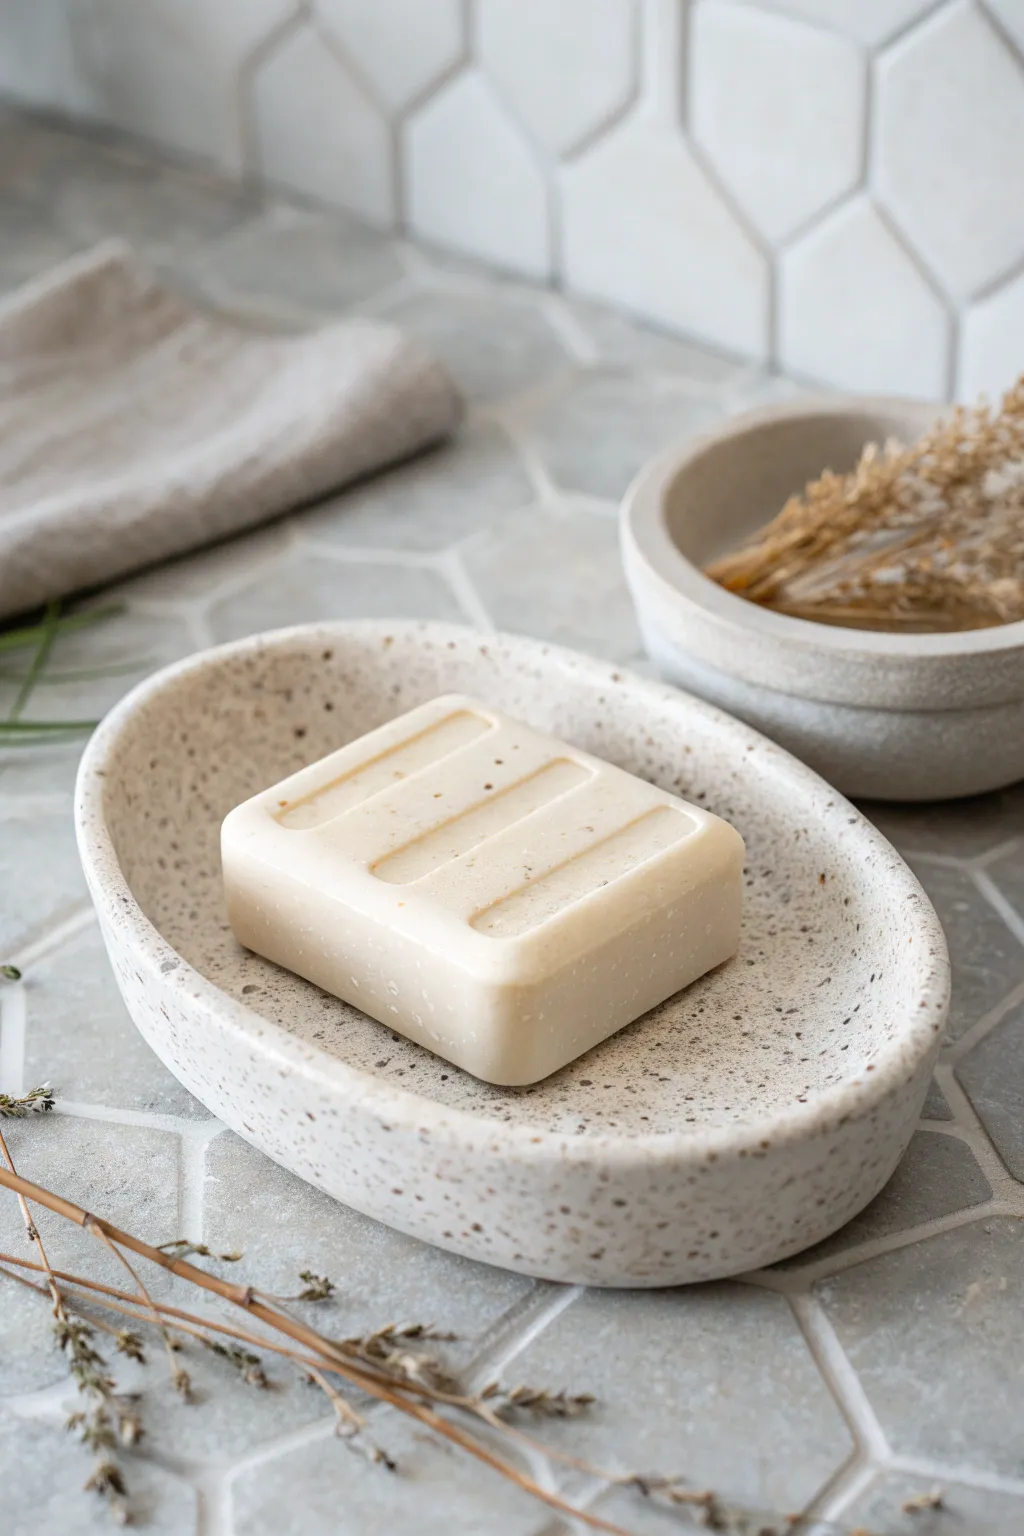
Create a sophisticated, minimalist soap dish without ever touching a pottery wheel using the press mold technique. This project highlights a gorgeous speckled clay body and a smooth, organic oval shape that adds a spa-like feel to any bathroom.
How-To Guide
Materials
- Speckled stoneware clay (white or light grey)
- Oval plaster mold or a thrifted oval bowl (to act as a mold)
- Rolling pin
- Canvas or heavy fabric (for rolling)
- Guide sticks (approx. 1/4 inch thick)
- Rubber kidney rib
- Fettling knife or needle tool
- Sponge
- Cornstarch (release agent)
- Pottery wire
- Clear or satin matte glaze
Step 1: Preparing the Slab
-
Wedge the clay:
Begin by wedging your speckled stoneware clay thoroughly to remove air pockets and ensure an even consistency. -
Set up your workspace:
Lay down your canvas on a flat table. Place your guide sticks on either side of where you will roll the clay to ensure a uniform thickness. -
Roll out the slab:
Using the rolling pin, flatten the clay ball into a smooth slab. Check that it is even by rolling fully along the guide sticks. -
Compress the slab:
Take your rubber kidney rib and firmly smooth the surface of the clay in multiple directions. This compression prevents warping later and aligns the clay particles.
Sticky Situation?
If the clay refuses to release from a non-porous bowl mold, let it dry longer until it shrinks naturally. Never pry it out or you will warp the shape.
Step 2: Molding the Form
-
Prepare the mold:
If using a plaster mold, it’s ready to go. If using a thrifted bowl, create a ‘pounce pad’ with cornstarch and dust the inside lightly so the clay doesn’t stick. -
Drape the clay:
Lift your clay slab carefully and drape it over (for a hump mold) or press it into (for a slump/press mold) your chosen form. The image suggests a press mold technique for that nice internal curve. -
Press into shape:
Starting from the center and working outward, gently press the clay against the mold walls with a sponge or soft rib. Ensure there are no trapped air bubbles between the clay and the mold. -
Trim the excess:
Once the clay is snug in the mold, use your needle tool or fettling knife to cut away the excess clay at the rim. Hold the tool perpendicular to the mold edge for a clean cut. -
Refine the rim:
With the clay still in the mold, run a damp chamois or sponge over the cut rim to soften the sharp edge. I find this step crucial for a professional finish that feels good to the touch.
Step 3: Drying and Finishing
-
Initial drying:
Let the dish sit in the mold until it is leather hard. You’ll know it’s ready when it has pulled away slightly from the edges of the mold. -
Remove from mold:
Gently tip the mold over to release the dish into your hand. Handle it carefully to avoid distorting the oval shape. -
Smooth the exterior:
Use a rib to smooth out any texture marks from the mold or fingerprints on the outside of the dish. -
Sponge finish:
Give the entire piece a final wipe with a slightly damp sponge to expose the beautiful speckles in the clay body. -
Bisque fire:
Allow the piece to dry completely (bone dry) before loading it into the kiln for a bisque firing. -
Glazing:
Apply a clear satin or glossy glaze to the interior and exterior. This allows the natural speckles of the clay to shine through, just like in the reference photo. -
Final fire:
Fire the piece again to the temperature required by your specific clay and glaze combination.
Rim Perfection
For a perfectly level rim, wait until leather hard, flip the dish upside down on a flat board, and gently slide it back and forth to sand the rim flat.
Once fired, place a luxurious bar of soap inside and enjoy the simple elegance of your handmade creation
Leaf-Imprint Spoon Rest (Handbuilt and Wheel-Free)
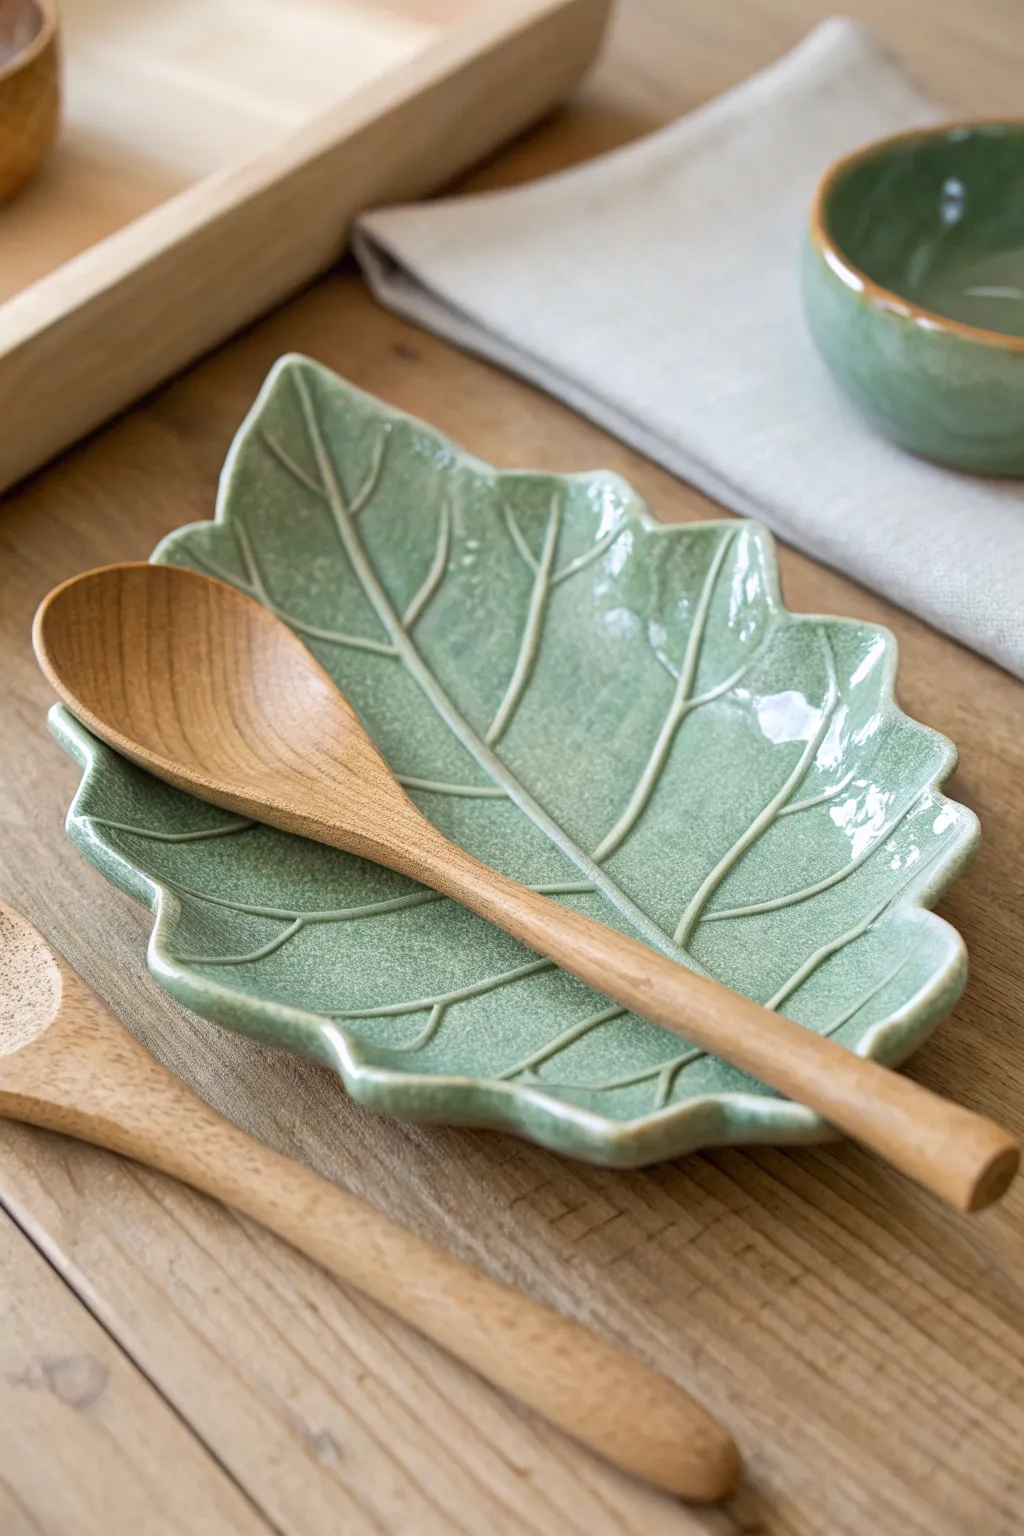
Bring the calming essence of nature into your kitchen with this textured, leaf-shaped spoon rest. Using a real leaf as a template allows you to capture intricate vein patterns directly into the clay without needing any specialized carving tools.
Step-by-Step
Materials
- Low-fire white earthenware clay or stoneware clay
- A large, fresh leaf with prominent veins (like kale, hydrangea, or rhubarb)
- Rolling pin
- Canvas mat or cloth to roll on
- Needle tool or fettling knife
- Small sponge
- Smooth wooden styling tool or back of a spoon
- Celadon or translucent green glaze
- Kiln (or access to a firing service)
Step 1: Prepping the Slab
-
Wedge the clay used:
Begin by thoroughly wedging a ball of clay about the size of a large orange to remove air bubbles and ensure consistency. -
Roll the slab:
Place the clay on your canvas mat. using a rolling pin, roll the clay out evenly until it is approximately 1/4 inch thick. Turn the clay over occasionally to prevent sticking. -
Smooth the surface:
Take a rubber rib or a slightly damp sponge and compress the surface of the clay slab to remove any canvas texture or imperfections.
Step 2: Creating the Leaf Impression
-
Position the leaf:
Place your chosen leaf vein-side down onto the clay slab. The underside of the leaf usually has the most prominent texture, which creates the best imprint. -
Roll the impression:
Gently roll your rolling pin over the leaf one or two times. Apply firm, even pressure to press the veins into the clay without crushing the leaf entirely. -
Cut the shape:
Using a needle tool or fettling knife, carefully trace around the outer edge of the leaf. Hold the tool perpendicular to the table for a clean cut. -
Reveal the texture:
Slowly peel the leaf away from the clay to reveal the intricate vein pattern left behind. I always find this reveal to be the most satisfying part of the process.
Veins aren’t showing?
If the impression is faint, your clay might be too dry or hard. Try misting the slab slightly before rolling the leaf, or use a harder roller (like a pony roller) for more focused pressure.
Step 3: Forming and Refining
-
Smooth the edges:
Dip your finger or a small sponge in water and gently run it along the cut edges of the clay leaf to round them off. Sharp edges can become brittle after firing. -
Create the curve:
Carefully lift the clay leaf and place it onto a shallow curved form, such as a paper plate or a bisque bowl lined with newspaper. This gives the spoon rest its concave shape to hold liquids. -
Add movement:
Gently manipulate the edges of the leaf with your fingers, curling a few tips upward or downward to mimic the natural undulation of a dried leaf. -
Dry slowly:
Cover the piece loosely with plastic needed to slow down the drying process. Let it dry completely to the bone-dry stage, which usually takes a few days depending on humidity.
Level Up: Oxide Wash
Before glazing, wipe a dark iron oxide wash over the bisque and sponge it off the high spots. This will make the vein details pop dramatically under a sheer glaze.
Step 4: Glazing and Firing
-
Bisque fire:
Fire the piece in a kiln to cone 04 (or your clay’s specific bisque temperature) to harden it for glazing. -
Clean the bisque:
Wipe the fired piece with a damp sponge to remove any kiln dust, which can prevent glaze from adhering properly. -
Select the glaze:
Choose a translucent green glaze or a celadon. These types of glazes pool in the recesses of the veins, darkening the pattern while staying lighter on the high points. -
Apply glaze:
Brush on 2-3 coats of glaze, allowing each coat to dry briefly in between. Ensure you get glaze into all the tiny vein impressions. -
Wipe the foot:
Use a sponge to wipe any glaze off the very bottom of the piece where it will touch the kiln shelf. -
Glaze fire:
Fire the piece a second time to the temperature recommended by your glaze manufacturer (typically cone 05/06 for earthenware or cone 5/6 for stoneware).
Now you have a functional piece of botanical art ready to hold your favorite mixing spoon
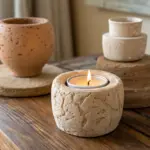
Simple Ring-Stack Handbuilt Candle Holders
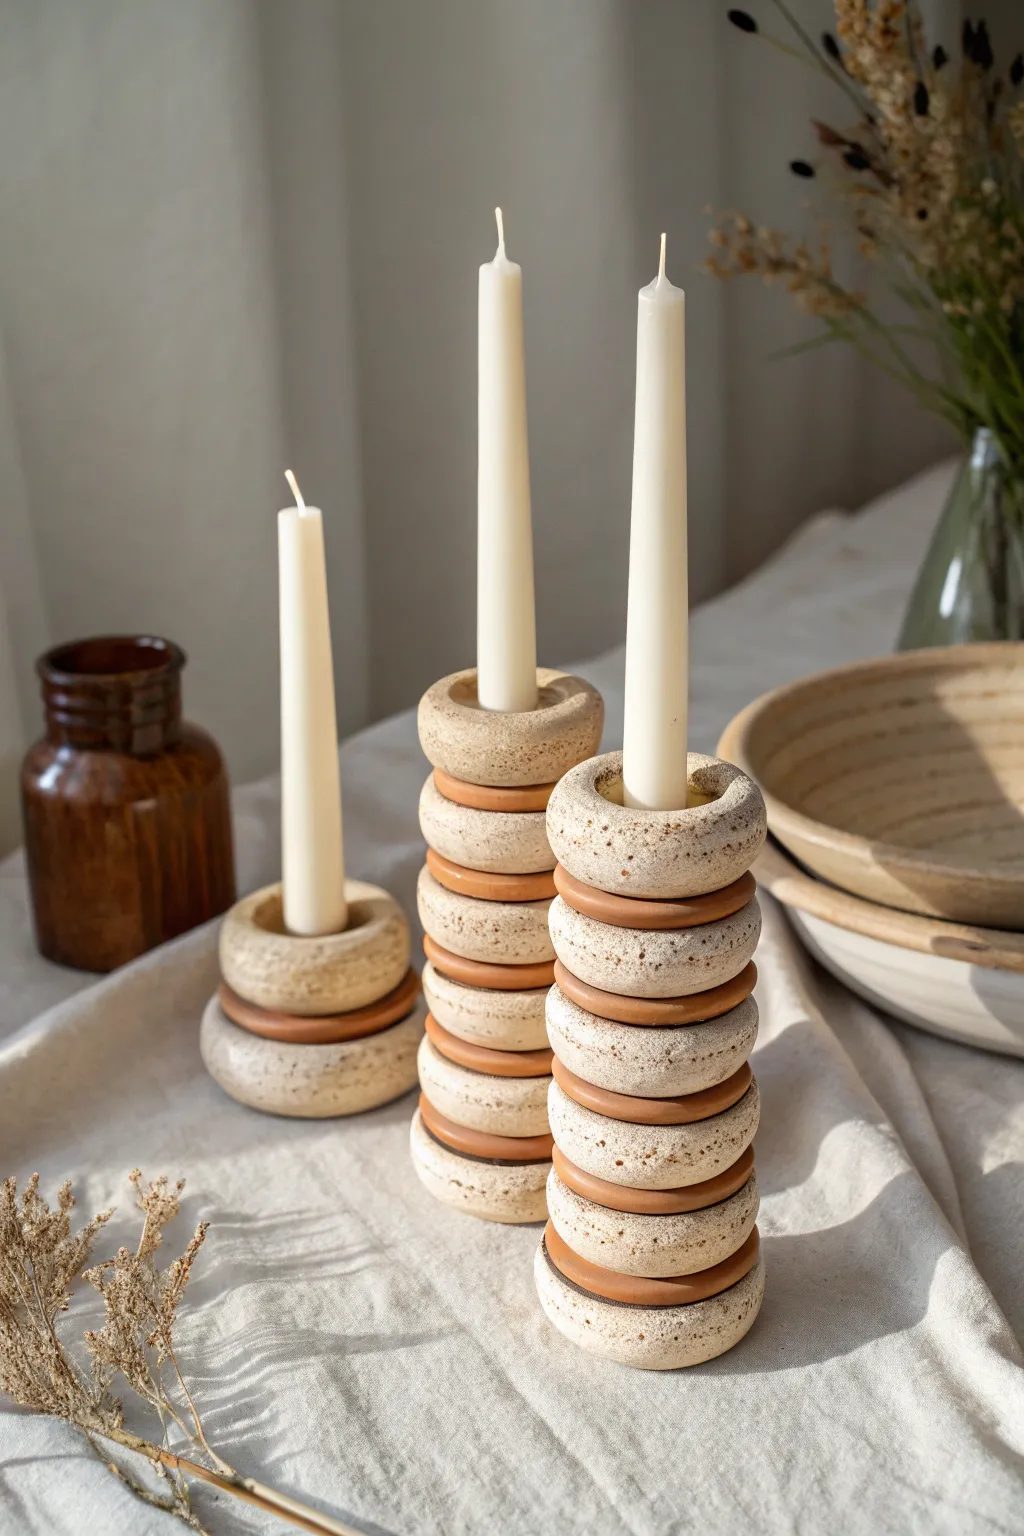
Achieve a modernist, sculptural look with these striking candle holders built entirely by hand, mimicking the precision of a lathe without needing one. The design features alternating thick, textured donut rings and thin, smooth spacer discs to create a satisfying rhythmic stack.
Step-by-Step Tutorial
Materials
- Stoneware clay (smooth or speckled)
- Terra cotta clay (or red iron oxide stain)
- Rolling pin
- Canvas work surface
- Circle cookie cutters (two sizes: one for outer diameter, one for candle fit)
- Needle tool
- Scoring tool or serrated rib
- Slip (liquid clay)
- Sponge
- Standard taper candles for testing fit
Step 1: Forming the Base Components
-
Roll the main slabs:
Start by rolling out a thick slab of your primary stoneware clay. You want this quite chunky, approximately 3/4-inch thick, to give the ‘donut’ rings substantial visual weight. -
Cut the primary rings:
Using your larger circle cutter, punch out several thick discs. The number depends on how tall you want your stack—plan for about 4-6 for a tall holder and 2 for a short one. -
Create the center holes:
Use the smaller circle cutter (sized to your candle width, usually about 7/8-inch) to remove the center of each thick disc. Keep these centers centering! -
Round the edges:
With a damp sponge or your fingers, gently round over the sharp top and bottom edges of each thick ring. You want them to look like soft, organic donuts rather than mechanical gears. -
Roll the accent slabs:
Switch to your terra cotta clay (or color a portion of your stoneware with red iron oxide). Roll this slab much thinner, about 1/4-inch thick. -
Cut the spacer discs:
Cut out circles from the thin accent clay using the same large cutter. You will need one less spacer than the number of thick rings for each holder. -
Pierce the spacers:
Cut the center holes out of these thin discs just like you did for the thick ones. Clean up any burrs with a soft sponge.
Shrinkage Check
Clay shrinks! Use a cookie cutter slightly larger than your candle. If the hole is too big later, you can secure the candle with melted wax, but you can’t stretch fired clay.
Step 2: Assembling the Stack
-
Score the base:
Take one thick ring to act as your base. Score the top surface thoroughly with your serrated rib or needle tool. -
Add the first spacer:
Apply a dab of slip to the scored area and place a thin terra cotta ring on top. Gently press it down to ensure a good bond without squishing the clay out. -
Continue the pattern:
Score the top of the terra cotta spacer, apply slip, and add the next thick stoneware ring. Repeat this alternating pattern (thick, thin, thick) until you reach your desired height. -
Align the column:
Periodically stand back or use a straight edge to ensure your stack is rising perfectly vertically and not leaning to one side. I like to rotate the piece as I build to check every angle. -
Secure the top ring:
Finish the stack with a thick stoneware ring on top. Ensure the rim is smooth and comfortable to touch. -
Create the candle cup:
If your center hole goes all the way through to the table, cut a small circle of clay slab and attach it to the very bottom of the stack to close the hole, creating a floor.
Gradient Stacking
Instead of uniform rings, try graduating the size of the circles from large at the bottom to small at the top for a tapered, lighthouse-style silhouette.
Step 3: Surfacing and Firing
-
Create texture:
Once the clay is leather hard, take a stiff-bristled brush or a toothbrush and tap it against the thick stoneware rings. This creates that lovely stone-like, pitted texture seen in the photo. -
Refine the spacers:
Keep the thin terra cotta spacers smooth to create a visual contrast against the textured rings. Use a slightly damp finger to burnish them if needed. -
Final drying:
Let the candlesticks dry very slowly under loose plastic. Because the wall thickness varies, slow drying prevents the rings from cracking apart. -
Bisque fire:
Fire the pieces to bisque temperature (usually Cone 04) once bone dry. -
Glazing approach:
To replicate the natural look, leave the exterior unglazed or wash it with a very thin oxide wash. You might want to apply a clear glaze just inside the candle hole for easier wax removal later. -
Final firing:
Glaze fire to the maturation temperature of your specific clay body.
Group your finished holders in a trio of varying heights for a centerpiece that feels both ancient and modern
Sgraffito Trinket Tray on a Slab (No Wheel, Big Personality)
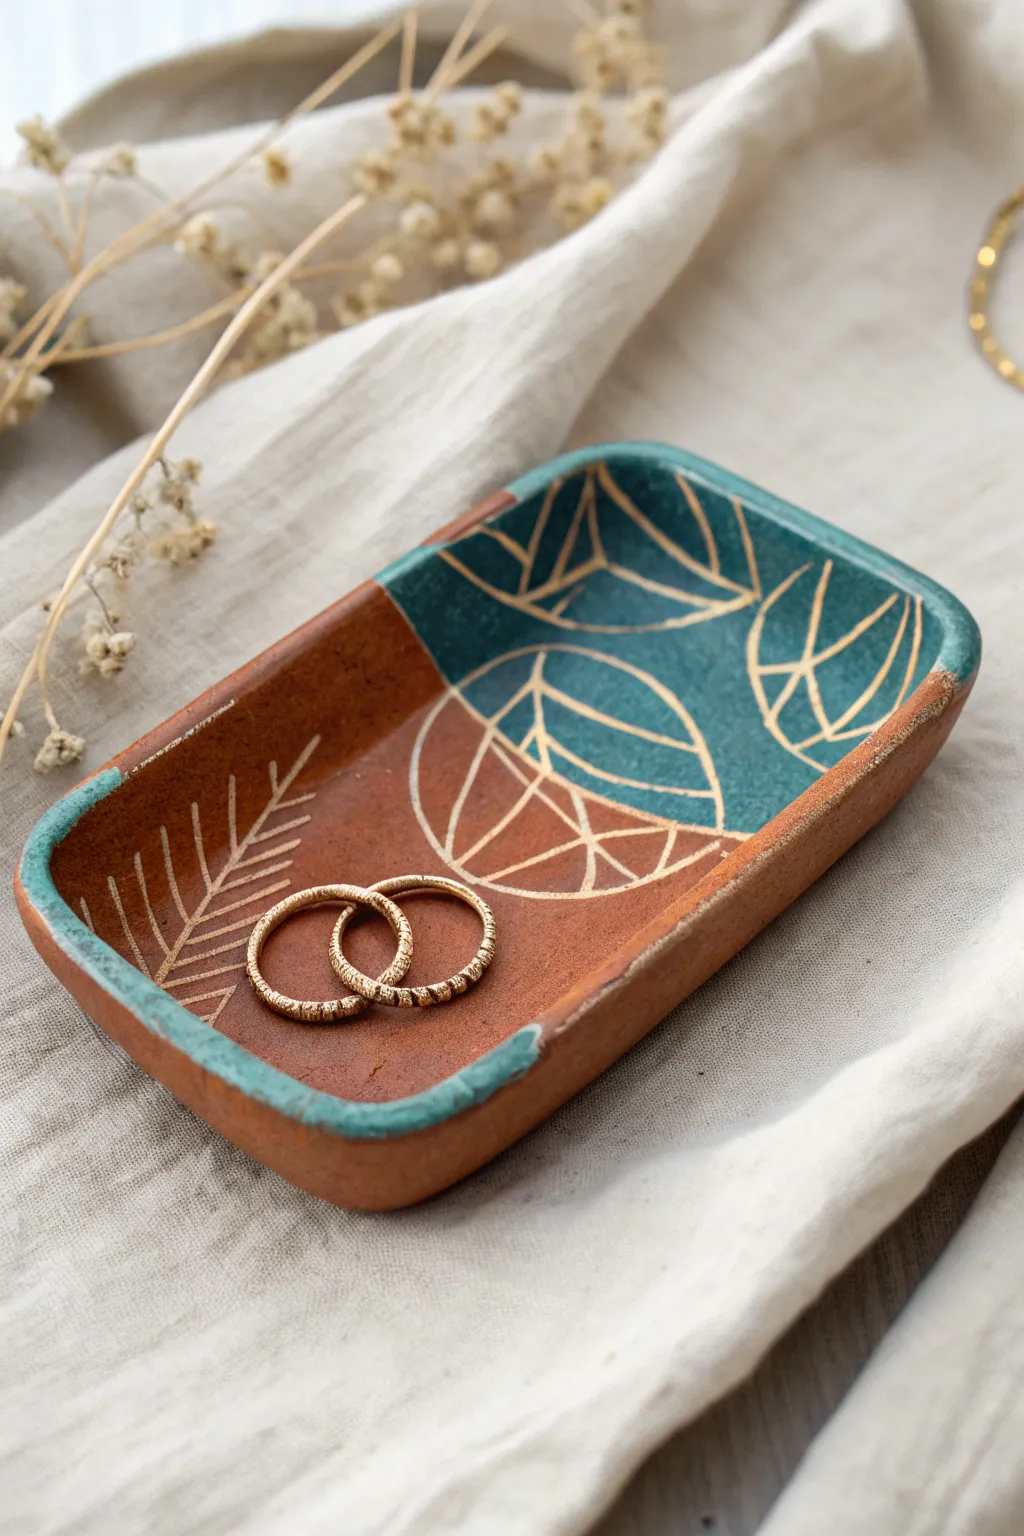
This charming, rectangular trinket tray combines the warmth of raw terracotta with a splash of teal for a modern bohemian look. Using simple slab-building and sgraffito carving techniques, you’ll create a functional piece perfect for holding your favorite rings and small jewelry.
How-To Guide
Materials
- Terracotta clay (low-fire or earthenware)
- Rolling pin
- Two wooden guide strips (approx. 1/4 inch thick)
- Fettling knife or needle tool
- Rectangular paper template (approx. 4×6 inches)
- Small sponge
- Teal or Turquoise underglaze
- Soft synthetic brush
- Sgraffito loop tool or carving needle
- Clear glaze (optional, for food safety, though unglazed works for jewelry)
- Kiln access
Step 1: Slab Building the Form
-
Preparing the clay:
Begin by wedging your terracotta clay thoroughly to remove air bubbles. This ensures a smooth surface for carving later. -
Rolling the slab:
Place the clay between your two wooden guide strips on a canvas surface. Roll the clay out until the rolling pin rests on the guides, ensuring an even thickness of about 1/4 inch. -
Cutting the shape:
Lay your rectangular paper template gently onto the clay slab. Using a fettling knife or needle tool, cut vertically around the template to get crisp, straight edges. -
Creating the walls:
Instead of adding coils, we will pinch the edges up. Gently lift the slab’s edges with your fingertips, pinching slightly to create a raised rim about 1/2 inch high. -
Refining the rim:
Smooth the pinched rim with your fingers to make it uniform. Tap the tray gently on the table to flatten the bottom again if it warped during lifting. -
Softening edges:
Use a slightly damp sponge to wipe the rim and sharp corners. This compresses the clay particles and prevents sharp edges after firing.
Clean Lines
Is the underglaze chipping while you carve? Your clay might be too dry. Try lightly misting it or draping a damp paper towel over it for 15 minutes before trying again.
Step 2: Designing & Carving
-
Leather hard stage:
Let the tray dry slowly until it reaches the ‘leather hard’ stage. The clay should be firm enough to hold its shape but cool to the touch and able to be carved without crumbling. -
Applying underglaze:
Select the upper-right corner and paint a diagonal section with your teal underglaze. Apply 2-3 coats for solid opacity, letting each coat dry briefly in between. -
Painting the rim:
Continue that teal color onto the rim itself in that same diagonal section, giving the piece a dipped look. -
Developing the pattern:
Visualize your design. The reference piece uses organic leaf shapes and radiating lines. Some shapes cross the boundary between the painted and unpainted sections. -
Carving the sgraffito:
Using your loop tool or needle, carve through the teal underglaze to reveal the terracotta clay beneath. I prefer to keep the pressure steady to ensure clean lines. -
Carving the raw clay:
Continue your carving pattern onto the unpainted terracotta section. On this side, you are simply carving texture into the clay body. -
Adding texture detail:
Create the specific leaf veins and geometric patterns seen in the image. Notice how the artist used simple straight lines to create complex geometric leaf forms. -
Rim details:
Don’t forget the rim! Carve small tick marks or continue your lines over the edge to give the piece a finished, intentional look from all angles. -
Cleaning up burrs:
Once the carving is done and the clay is bone dry, use a soft brush or your finger to gently rub away any little clay crumbs (burrs) left from carving.
Gold Accents
After the final firing, apply gold luster to the carved lines or the rim for a metallic pop. This requires a third, very low-temperature firing.
Step 3: Firing
-
Bisque fire:
Load the bone-dry tray into the kiln for a bisque fire (usually Cone 04). This hardens the clay and sets the underglaze. -
Glazing (Optional):
If you want a glossy finish, apply a clear transparent glaze over the entire piece. If you prefer the matte, earthy texture seen in the photo, you can leave it unglazed or only glaze the inside. -
Final fire:
Fire the piece again to the maturation temperature of your specific clay and glaze.
Place your finished tray on a bedside table to add a touch of handmade artistry to your daily routine
Stamp-Textured Tile Coasters Made Without a Wheel
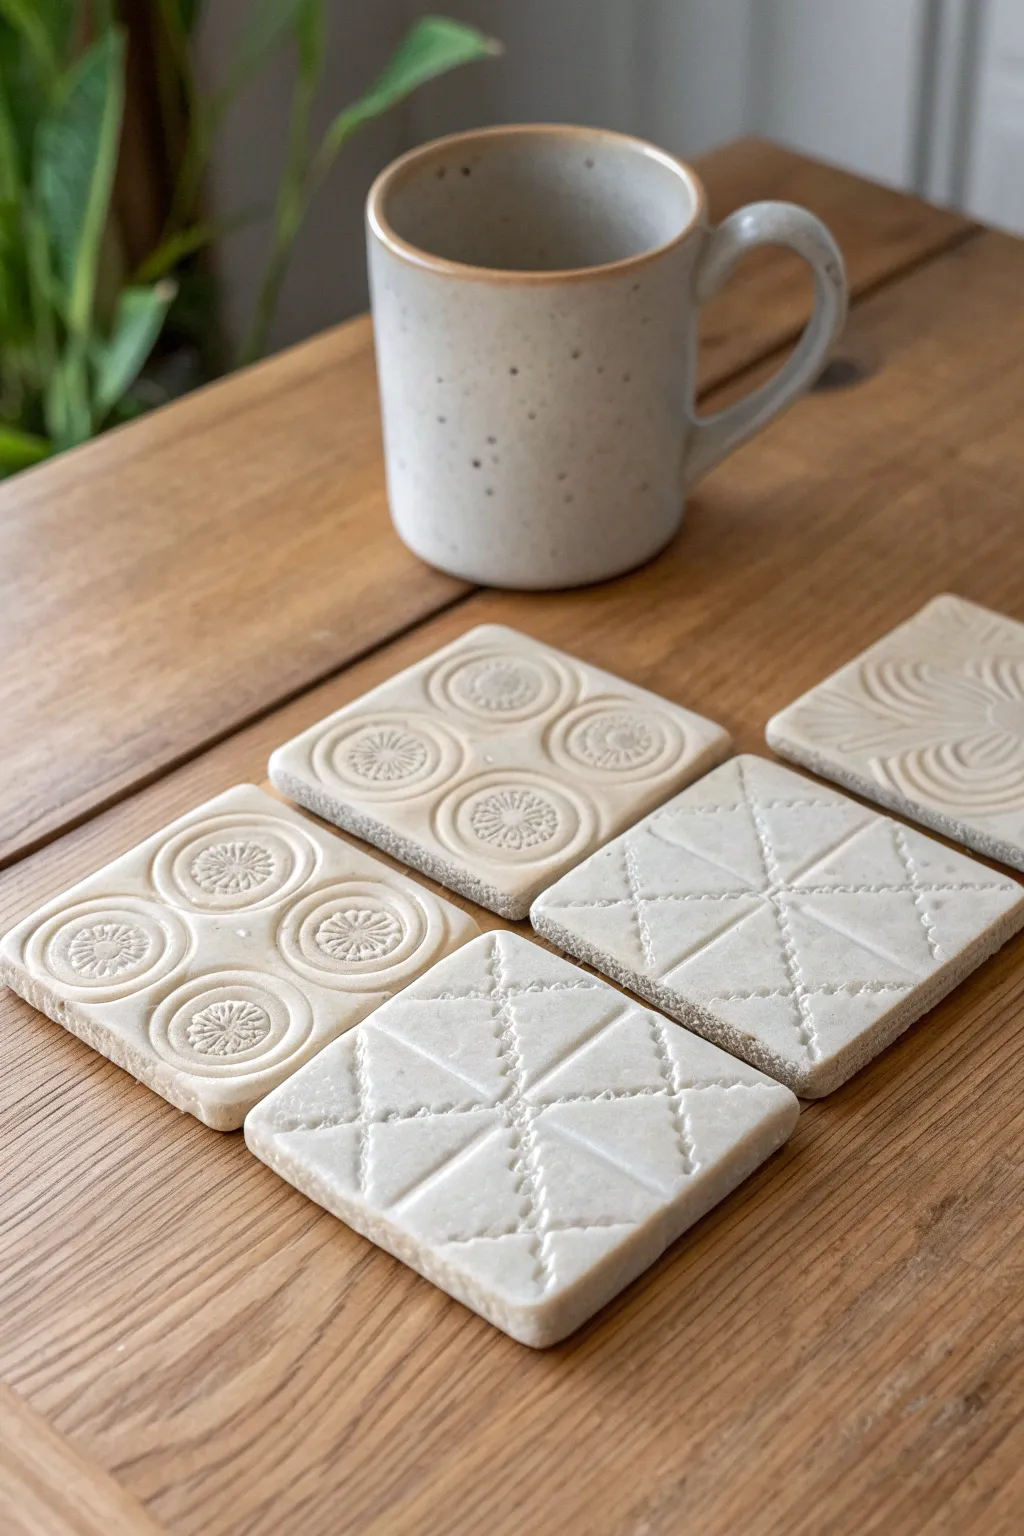
These elegant, creamy white coasters prove you don’t need a potter’s wheel to create functional art. By using simple clay slabs and clever stamping techniques, you can achieve intricate, tactile patterns that look beautifully bespoke on any coffee table.
Detailed Instructions
Materials
- White stoneware clay or air-dry clay (if not firing)
- Rolling pin
- Two wooden guide strips (approx. 1/4 inch thick)
- Square cookie cutter or sharp fettling knife/ruler
- Various stamps (wooden textile stamps, rubber stamps, or found objects)
- Cookie cooling rack or wooden board
- Sponge and water
- Sandpaper (fine grit)
- Clear matte glaze or acrylic sealer (for air-dry clay)
Step 1: Preparing the Slab
-
Wedge the Clay:
Begin by thoroughly wedging your clay to remove any air bubbles. This is crucial for flat pieces like coasters to prevent warping or cracking later. -
Set Up Guides:
Place your two wooden guide strips on your canvas or work surface, spacing them slightly wider than your desired coaster size. -
Roll the Slab:
Place the clay ball between the strips and use your rolling pin to flatten it. Roll until the pin rests on both guide strips, ensuring a perfectly even thickness across the entire slab. -
Smooth the Surface:
Take a slightly damp sponge or a rubber rib and gently compress the clay surface. This removes the canvas texture and prepares a pristine ‘canvas’ for your stamping.
Warp Prevention
To keep coasters perfectly flat, sandwich them between two pieces of drywall (sheetrock) while they dry. The drywall absorbs moisture evenly from both sides.
Step 2: Cutting and Stamping
-
Cut the Squares:
Using a square cookie cutter or a ruler and knife, cut out your coaster shapes. Aim for about 4×4 inches, keeping in mind that clay shrinks during drying and firing. -
Plan Your Design:
Before pressing into the clay, visualize your pattern. The example shows two main styles: a radial four-circle pattern and a geometric diamond grid. -
Stamping the Circles:
For the circular designs, gently press a round stamp into each of the four quadrants of the square. Apply even pressure so the depth is consistent, but don’t push all the way through. -
Creating the Grid:
For the geometric diamond pattern, use a straight edge or a specialized texture roller to press diagonal intersecting lines across the surface. -
Adding Detail:
Enhance the geometric grid by using a small tool to add dotted textures along the lines, mimicking a stitched look. -
Refining Edges:
Once stamped, the edges might have flared out slightly. I find it helpful to gently tap the sides of the coaster against the table to square them back up. -
Smooth the Rim:
Run a damp finger along the top edge of the cut square to soften the sharp corner, making it more durable and pleasant to touch.
Step 3: Drying and Finishing
-
Slow Drying:
Place your finished coasters on a wooden board or a sheet of drywall. Cover them loosely with plastic for the first day to ensure they dry slowly and flat. -
Flip Periodically:
Flat ceramic pieces love to warp. Flip your coasters over once a day during the drying process to ensure air reaches both sides evenly. -
Sanding:
Once bone dry (or fully cured for air-dry clay), gently sand away any burrs or rough spots on the edges. Wear a dust mask for this step. -
Bisque Fire:
If using ceramic clay, fire the pieces to bisque temperature in a kiln. -
Glazing:
Dip or brush a clear, matte, or satin white glaze over the coasters. The glaze will pool slightly in the stamped recesses, highlighting the texture beautifully. -
Final Fire or Seal:
Fire the glaze according to your clay’s instructions. If using air-dry clay, apply two coats of a high-quality acrylic waterproof sealer to protect them from moisture.
Add Cork Backing
Once finished, glue a thin sheet of creative cork or small felt pads to the bottom. This protects delicate table surfaces and prevents sliding.
Now you have a stunning set of textured coasters ready to hold your morning coffee or to give as a thoughtful handmade gift
Slab-Built Wall Pocket Planter for Small Spaces
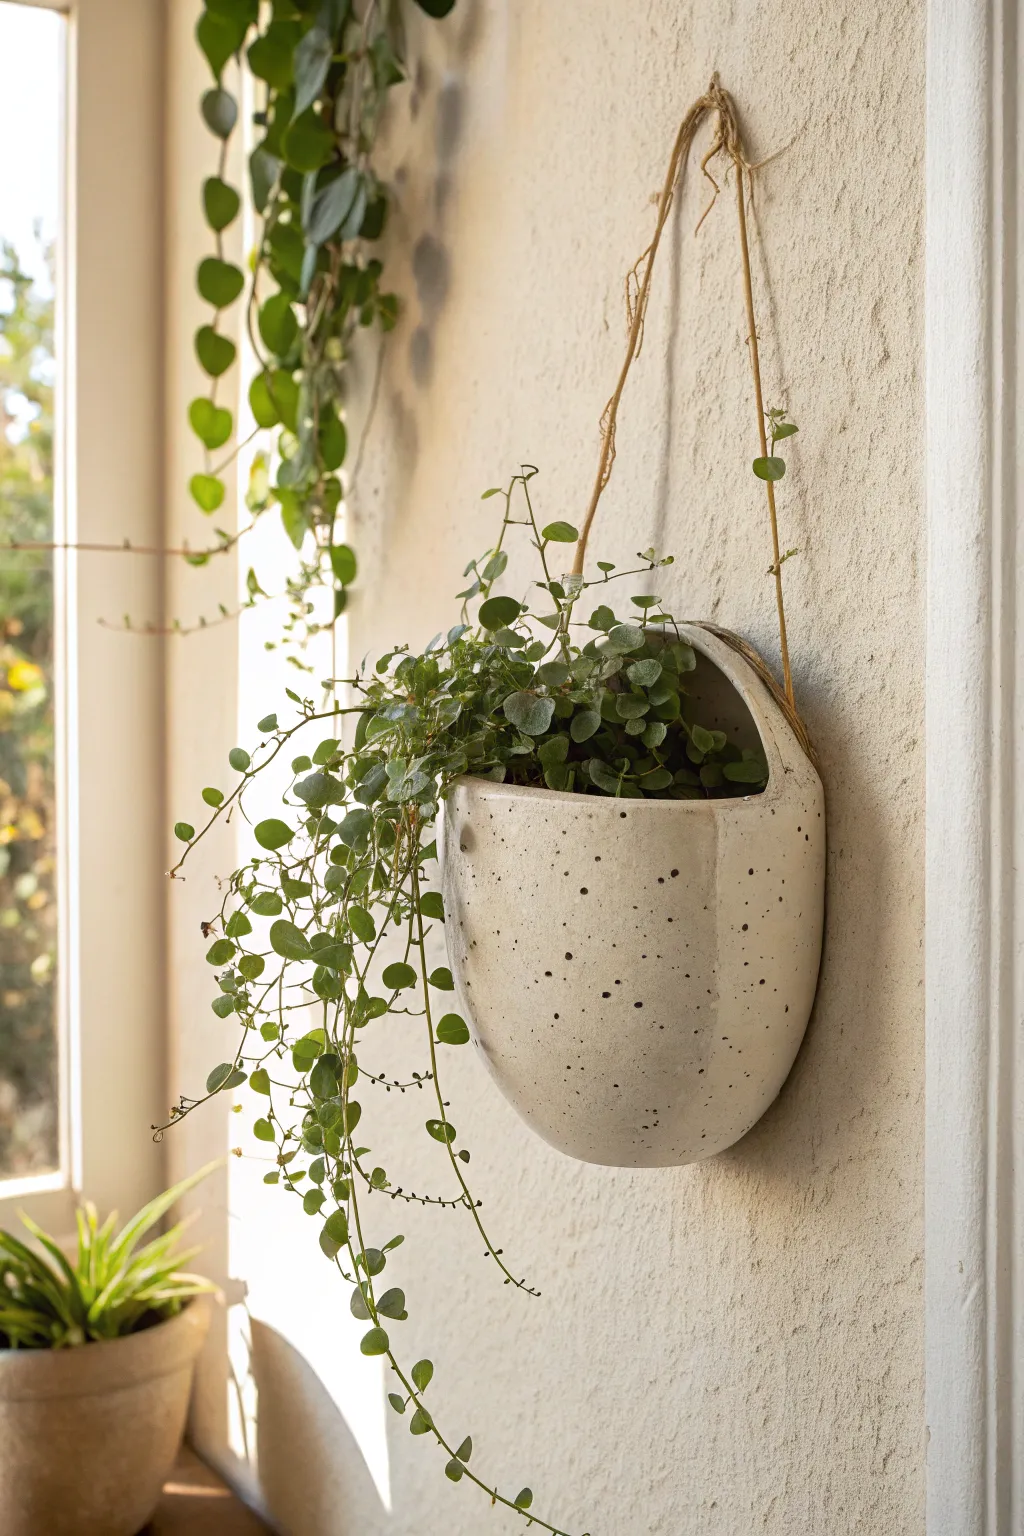
This charming, egg-shaped wall pocket adds a touch of organic elegance to vertical spaces, perfect for trailing vines like creeping wire vine or string of hearts. Its smooth, rounded form and speckled cream glaze create a natural look that mimics a bird’s egg or river stone.
Step-by-Step Guide
Materials
- White stoneware clay (cone 5-6)
- Rolling pin
- Canvas work surface
- Needle tool or fettling knife
- Rib tool (smooth silicone or rubber)
- Scoring tool (or serrated rib)
- Slip (clay and water slurry)
- Balloon or large foam egg form (for shaping)
- Small circle cutter or drill bit (for hanging holes)
- Speckled cream or white glaze
- Natural jute twine
- Sponge
Step 1: Creating the Body
-
Roll the Slab:
Begin by rolling out a medium-sized slab of white stoneware clay on your canvas. Aim for a thickness of about 1/4 inch; too thin and it might warp, too thick and it will be heavy. -
Cut the Shape:
Cut a large oval shape from your slab. The size depends on how big you want the final planter, but an 8-inch by 10-inch oval is a good starting point for a medium pocket. -
Form Carefully:
Gently drape the clay slab over your balloon or foam form to create a concave, cup-like shape. Smooth it down with a rib tool to erase canvas texture, but don’t enclose the form completely; you want a deep bowl shape. -
Firming Up:
Let the clay sit on the form until it reaches a soft leather-hard stage. It needs to hold its curve without collapsing when you remove the support.
Seam Splitting?
If the seam cracks while drying, the clay was likely too dry when joined. Score deeper next time and use vinegar in your slip. For now, fill the crack with soft clay and compress.
Step 2: Constructing the Back
-
Create the Back Plate:
Roll a second, smaller slab of clay. Place your curved front piece onto this slab and trace the outline of the back opening where the two will meet. -
Score and Slip:
Score the edges of both the curved front piece and the flat back piece aggressively. Apply a generous amount of slip to the scored areas. -
Join the Halves:
Press the pieces together firmly to create a seal. Use your thumb or a wooden tool to blend the seam on the outside until it is invisible. -
Refine the Seam:
Run a coil of clay along the interior seam if possible to reinforce it, then smooth the exterior with a rib to create that seamless, egg-like continuity. -
Trim the Opening:
With the pocket now formed, use a fettling knife to cut the angled opening at the top. I like to cut a gentle curve that dips lower in the front to show off the plant.
Textured Touch
Before rolling your slab, lightly press a piece of rough linen or lace into the clay. The glaze will break over the texture, adding depth to the simple form.
Step 3: Finishing Touches
-
Drill Holes:
While the clay is still leather hard, pierce two holes on the upper sides near the back edge for the hanging twine. Make them slightly larger than your twine, as the clay will shrink. -
Smooth Everything:
Use a slightly damp sponge to go over the entire piece, softening the rim of the opening and removing any sharp edges or fingerprints. -
Dry and Bisque:
Allow the planter to dry slowly under plastic to prevent cracking at the seams. Once bone dry, fire it to bisque temperature. -
Glaze Application:
Dip or brush your speckled cream glaze onto the bisque ware. If your glaze doesn’t have speckles, you can flick iron oxide or a darker glaze onto the wet surface with a stiff brush. -
Final Fire:
Fire the piece to the maturity temperature of your clay and glaze (likely cone 5 or 6). Ensure the hanging holes remain clear of glaze. -
String it Up:
Once cool, cut a length of natural jute twine. Thread it through the holes from the outside in, tying secure knots on the inside of the planter.
Hang your new ceramic pocket in a sunny spot and enjoy the floating greenery
Pinch-and-Slab Lidded Box for Tiny Treasures

This charming, speckle-glazed lidded jar is the perfect home for your most precious rings and tiny trinkets. By combining simple slab and pinch techniques, you will create a rustic yet elegant vessel that feels organic and personal.
Detailed Instructions
Materials
- Speckled Stoneware Clay
- Rolling Pin
- Canvas Mat or Cloth (for rolling)
- Needle Tool or Fettling Knife
- Slip (clay mixed with water)
- Scoring Tool (or a fork)
- Rib Tool (wood or metal)
- Sponge
- Straight-edge Ruler
- Clear or White Semi-Opaque Glaze
- Kiln (or access to a firing service)
Step 1: Forming the Base and Walls
-
Roll the Slab:
Begin by wedging your speckled clay to remove air bubbles. Roll it out into a smooth, even slab about 1/4 inch thick on your canvas mat. -
Cut the Components:
Using a needle tool and a straight-edge, cut a long rectangle for the walls (about 2 inches high and 9 inches long) and two circles of the same diameter (about 3 inches) for the base and the lid. -
Join the Walls:
Take the rectangular strip and curve it into a cylinder. Score and slip the short ends where they meet, pressing them firmly together to create a seam. -
Smooth the Seam:
Use your fingers or a modeling tool to blend the clay across the seam on both the inside and outside until the join is invisible. -
Attach the Base:
Score the bottom edge of your cylinder and the outer edge of one clay circle. Apply slip to both scored areas. -
Secure the Bottom:
Press the cylinder onto the base circle. Use a wooden modeling tool to drag clay from the base up onto the wall to stitch them together, then smooth everything out with a damp sponge.
Step 2: Creating the Lid and Features
-
Make the Flange:
Roll a small coil of clay. Score and slip a circle on the *underside* of your lid piece, slightly smaller than the diameter of your box’s opening. -
Attach the Flange:
Press the coil onto the scored ring on the lid’s underside. This inner rim will keep the lid from sliding off the box. -
Refine the Lid Fit:
Test the fit gently on the box base. Shave off excess clay from the coil if it’s too tight, smoothing it into a neat ridge. -
Form the Knob:
Pinch a small ball of clay into a flattened mushroom or button shape for the handle. -
Attach the Handle:
Score the center of the lid’s top and the bottom of your knob. Apply slip and press the knob firmly into place, blending the clay at the join so it feels solid. -
Refine the Edges:
I like to run a damp chamois or sponge over the rim of the box and the edge of the lid to soften any sharpness, giving it that cozy, hand-thrown look.
Warped Lid Fix
If your lid rocks or doesn’t sit flat after drying, gently sand the rim of the box and the underside of the lid on a flat surface before the bisque firing.
Step 3: Drying and Glazing
-
Slow Drying:
Place the lid on the box with a piece of paper towel in between to prevent sticking. Let it dry slowly under loose plastic for a few days to reach the bone-dry stage. -
Bisque Fire:
Fire the piece in a kiln to cone 04 (or your clay’s specific bisque temperature). -
Wax Resist:
Apply wax resist to the bottom of the box and the contact points where the lid meets the jar (the rim and the flange) to prevent the lid from fusing shut during firing. -
Glaze Application:
Dip or brush a clear or semi-opaque white glaze over the entire piece. The speckles in the clay body will show through beautifully. -
Glaze Fire:
Fire the piece again to the maturation temperature of your clay and glaze (typically cone 5 or 6 for stoneware).
Pro Tip: Rustic Rims
Wipe away a tiny bit of glaze from the sharpest edges of the rim and knob before firing. This creates a toasted ‘break’ where the clay body shows through.
Now you have a timeless little vessel ready to hold your daily jewelry or thoughtful gifts
Slip Casting at Home-Style: Matching Tumblers (Zero Wheel Involved)

These sleek, minimalist tumblers prove you don’t need a potter’s wheel to create professional-quality dinnerware. By utilizing slip casting techniques, you’ll achieve consistent, lightweight forms with a striking dipped glaze finish that highlights the raw clay body.
Step-by-Step
Materials
- Plaster mold for a tumbler/cup (single or multi-part)
- Stoneware casting slip (white or speckled)
- Bucket for slip mixing
- Mixing stick or drill with mixer attachment
- Fettling knife
- Synthetic sponge
- Sandpaper (various grits)
- Deep blue matte glaze (cone 5/6 or suitable for your clay)
- Wax resist emulsion
- Soft fan brush
- Kiln access
Step 1: Preparing and Casting the Form
-
Prepare your slip:
Begin by thoroughly mixing your casting slip in a bucket. It should be the consistency of heavy cream and free of any lumps or air bubbles. -
Secure the mold:
Ensure your plaster mold pieces are tightly banded together with heavy-duty rubber bands or straps so slip doesn’t leak out the seams. -
Pour the slip:
Pour the slip into the mold in a steady, continuous stream until it forms a small dome at the very top opening. Do not stop pouring halfway or you may create a line in the clay wall. -
Time the set:
Watch the slip level drop as the plaster absorbs water. Top it off if necessary. Let the slip sit in the mold for about 15-20 minutes to build up the wall thickness. -
Test thickness:
I like to carefully cut a tiny sliver from the spare clay at the top to check if the wall is thick enough (aim for about 3-4mm). -
Drain the excess:
Invert the mold over your slip bucket to drain out the liquid center. Hold it upside down until the dripping stops to ensure a clean interior. -
Drying period:
Leave the mold upside down on slats for about 10-15 minutes, then turn it upright. Let the clay dry until it pulls away slightly from the plaster walls.
Clean Lines Pro-Tip
For a razor-sharp glaze line, use automotive striping tape instead of freehand wax. Apply the tape, wax below it, peel the tape, then dip. This gives a perfect geometric edge.
Step 2: Demolding and Refining
-
Remove the mold:
Carefully undo the straps and pull the plaster mold pieces apart. Avoid touching the rim or body too much as the clay will still be soft and easily warped. -
Trim the spare:
Using a fettling knife, gently slice off the ‘spare’ clay at the top (the extra bit formed by the mold’s pouring gate) to create a flat rim. -
Smooth the seams:
Once the cup reaches leather-hard stage, look for seam lines left by the mold. Use a fettling knife to scrape them flush, then smooth over with a slightly damp sponge. -
Refine the rim:
Round off the sharp edges of the rim with a damp sponge or your finger to make it comfortable for drinking. -
Bisque fire:
Let the tumblers dry completely to the bone-dry stage. Load them into the kiln for a bisque firing (usually around Cone 04).
Wall Thickness Issues?
If your walls are consistently too thin, check your slip age. Old slip loses water and casts slower. Try mixing in a tiny amount of fresh water or extending your casting time by 10 minutes.
Step 3: Glazing and Finishing
-
Apply wax resist:
On your bisque-fired cup, brush a band of wax resist around the bottom third of the exterior and the entire bottom face. This creates the crisp line between the blue glaze and the raw clay base. -
Let wax cure:
Allow the wax resist to dry completely; if it’s still tacky, the glaze might stick to it or create a messy line. -
Dip the interior:
Pour the deep blue glaze inside the cup, roll it around to coat the entire interior surface, and pour the excess back out swiftly. -
Dip the exterior:
Using glazing tongs or a gloved hand, dip the cup straight down into the glaze bucket until the liquid meets your wax line. Hold briefly and pull straight up. -
Clean the resist:
Use a damp sponge to wipe away any droplets of glaze that may be beading up on the waxed area at the bottom. -
Final smooth:
Once the glaze is dry, gently rub the glazed surface with a finger to smooth out any air bubbles or pinholes before firing. -
Glaze fire:
Fire the kiln to the maturity temperature of your clay and glaze (likely Cone 5 or 6). Let the kiln cool completely before unloading.
Now you have a stunning set of tumblers ready for your morning coffee or evening tea
Kurinuki Carved Cup from a Solid Chunk (All Hand, No Wheel)
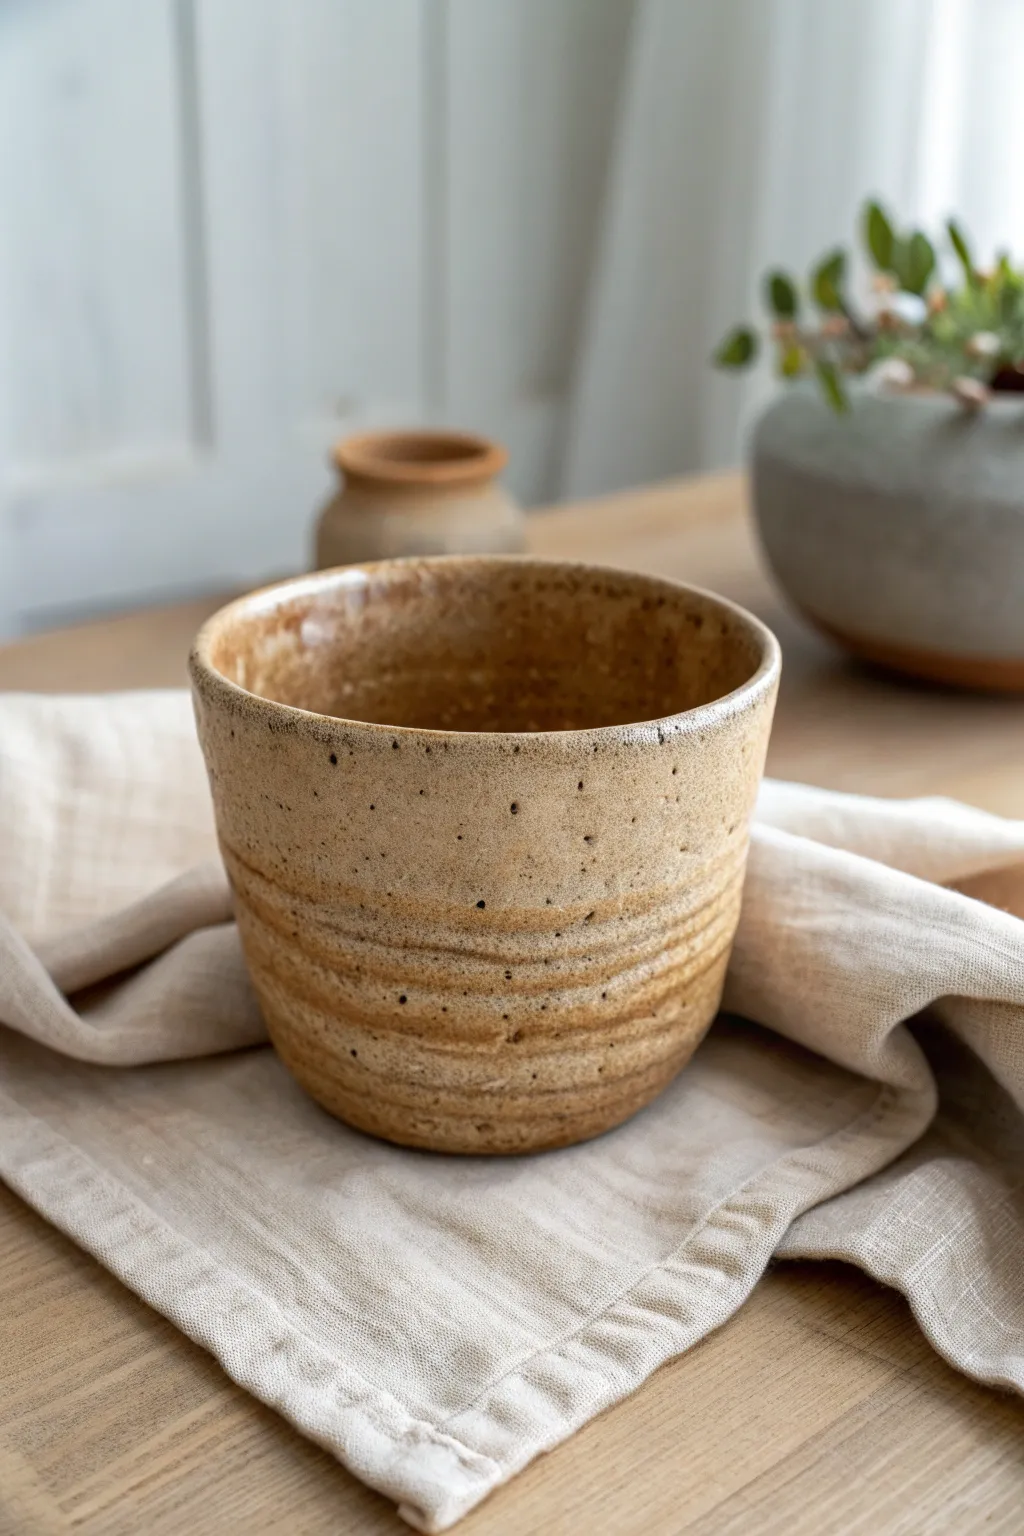
Embrace the meditative art of subtraction with this Kurinuki cup project, where you carve a functional vessel directly from a solid block of clay. The result is a beautifully textured, speckled tumbler with organic ridges that highlight the raw nature of the material.
How-To Guide
Materials
- Speckled stoneware clay (approx. 1-1.5 lbs)
- Wire clay cutter
- Fettling knife or needle tool
- Loop tools (large and small for hollowing)
- Serrated metal rib or scoring tool
- Soft rib (rubber or wood)
- Sponge and water
- Paddle (wooden kitchen spatula works)
- Rolling pin (optional, for flattening bottom)
- Clear or matte transparent glaze
Step 1: Preparation & Shaping the Block
-
Wedge the clay:
Start by thoroughly wedging your clay to remove air bubbles and ensure an even consistency. This is crucial for Kurinuki, as hidden air pockets can ruin your carving later. -
Form the cylinder:
Shape your wedged clay into a solid cylinder or tall block, roughly the height and width you want your final cup to be, plus about 20% to account for shrinkage. -
Establish the texture:
Before hollow out the form, create the exterior texture visible in the image. I like to slowly rotate the block on a banding wheel (or a piece of paper) while dragging a serrated rib or a rough tool horizontally across the surface. -
Deepen the ridges:
To mimic the specific deep grooves shown in the photo, use the side of a loop tool or a wooden modeling tool to carve distinct horizontal bands around the lower half of the cup. -
Refine the shape:
Gently paddle the sides of the block to compress the clay and secure the cylindrical shape, ensuring the top is slightly wider than the base for that classic tumbler silhouette.
Pro Tip: Weighted Comfort
Don’t make the bottom too thin! A Kurinuki cup feels best with a slightly heavier base. Leave the bottom about 1/2 inch thick for stability and a pleasing weight in the hand.
Step 2: Hollowing the Vessel
-
Mark the rim:
Use a needle tool to lightly scribe a circle on the top face of your block. leaving about a 1/4 inch thickness for the rim. -
Begin the excavation:
Using a large loop tool, start carving clay out from the center of the block. Remove clay in small scoops, working your way down towards the bottom. -
Check the depth:
Pause frequently to gauge the thickness. You can use a needle tool to poke the bottom (and patch it later) or simply measure against the outside with your fingers to ensure you don’t carve through the base. -
Thin the walls:
Switch to a smaller loop tool to refine the interior walls. Aim for an even thickness that matches the rim, carefully scraping away excess weight from the inside while supporting the outside. -
Smooth the interior:
Once hollowed, use your fingers or a smoothing tool to compress the interior floor and walls, removing deep tool marks that might trap liquid later.
Step 3: Finishing Touches & Glazing
-
Refine the rim:
Smooth the drinking edge with a damp chamois or a wet sponge. The rim in the example is slightly rounded and organic, not sharp. -
Create the speckle effect:
If your clay isn’t naturally speckled, you can lightly sprinkle granular iron oxide or manganese onto the damp surface and press it in with a rolling pin action before the clay dries. -
drying:
Let the cup dry slowly under loose plastic for a day to equalize moisture, then uncover it to dry completely into the ‘bone dry’ stage. -
Bisque fire:
Fire the piece in a kiln to cone 04 (or your clay body’s bisque temperature). -
Apply glaze:
Dip or brush a transparent matte or satin glaze over the entire piece. This allows the clay body, speckles, and carved texture to show through, exactly like the reference image. -
Final wipe:
Wipe the bottom of the cup clean with a sponge to prevent it sticking to the kiln shelf. -
Glaze fire:
Fire again to the maturity temperature of your clay (likely Cone 5 or 6 for stoneware).
Level Up: Faceted Finish
Instead of horizontal ridges, use a wire cutter or sharp knife to slice vertical facets off the exterior before hollowing. This creates a geometric, jewel-like surface.
Now pour yourself a drink and enjoy the tactile pleasure of a cup that was found within the clay blocks
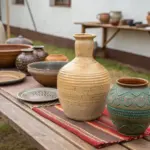
Marbled Clay Slab Dish for a Bold, Modern Look
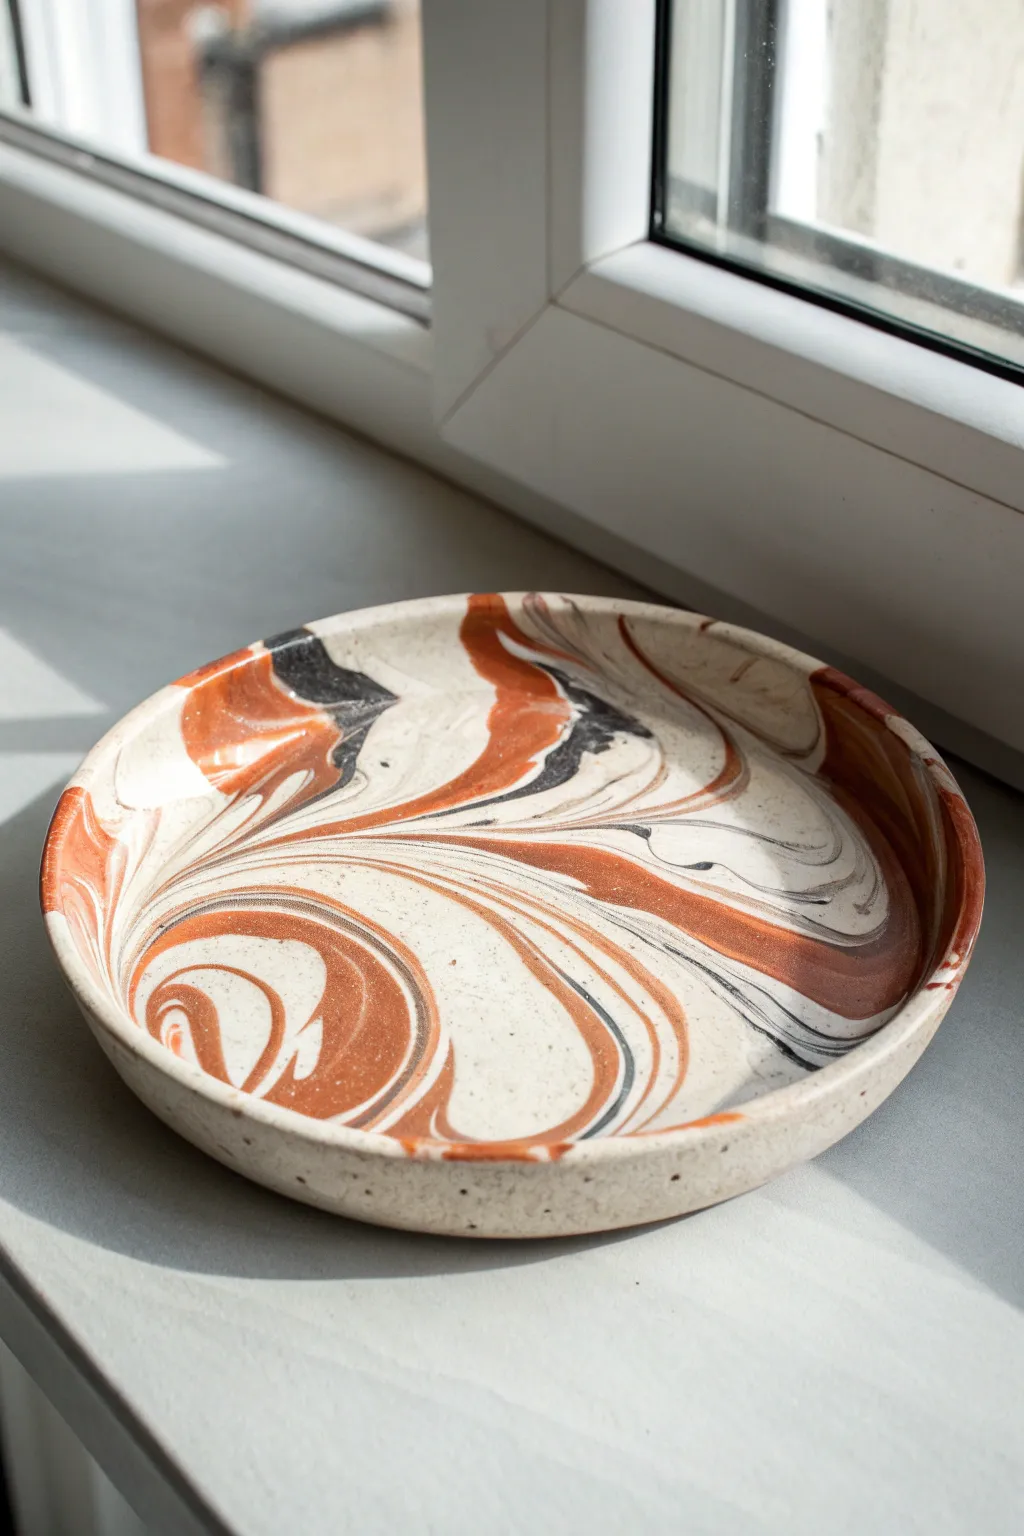
Achieve the sophisticated look of agate or river stone with this beginner-friendly hand-building project that requires absolutely no wheel. By twisting and compressing different clay bodies together, you’ll create a striking, organic pattern where no two dishes ever look exactly the same.
Detailed Instructions
Materials
- White or speckled stoneware clay
- Terracotta or red stoneware clay
- Black or dark grey stoneware clay (or mason stain mixed into white clay)
- Rolling pin
- Wooden guide strips or dowels (approx. 1/4 inch thick)
- Circular template or small plate to trace
- Fettling knife or needle tool
- GR Pottery Form or a simple shallow bowl (for a slump mold)
- Rubber rib tool
- Sponge and water
- Clear matte or satin glaze
Step 1: Preparing the Marble
-
Portioning the clay:
Cut off a large chunk of your white speckled clay (this will be the dominant color). Cut smaller chunks of the terracotta and black clay—aim for a ratio of about 60% white, 30% terracotta, and 10% black to match the reference image. -
Forming coils:
Roll each color of clay into thick, uneven logs or sausages. They don’t need to be perfect; irregular sizes actually help create a more natural, geode-like pattern. -
Twisting the bundle:
Gather the logs together into one thick bundle, alternating the colors so they aren’t all clumped on one side. Holding the ends of the bundle, twist the clay firmly in opposite directions like you are wringing out a towel. -
Fold and repeat:
Fold the twisted log in half onto itself and twist it again. I usually repeat this fold-and-twist motion 2 or 3 times—be careful not to over-twist, or the colors will muddy together into a generic brown. -
Compacting the block:
Slam the twisted clay ball onto your canvas or work surface a few times to compress the layers and remove air bubbles. Shape it into a rough, thick rectangular block or puck.
Step 2: Building the Dish
-
Rolling the slab:
Place your wooden guide strips on either side of the clay block. Using your rolling pin, roll the clay out into a smooth slab. Make sure to roll in different directions to stretch the marble pattern outward. -
Check the pattern:
If the pattern on top looks smudged, you can carefully slice off a very thin layer of clay with a wire cutter to reveal the crisp marbling underneath. Smooth the surface afterward with a rubber rib. -
Cutting the circle:
Place your circular template or an upside-down dessert plate onto the slab. Using your needle tool or fettling knife, cut straight down around the edge to create a clean circle. -
Smoothing the rim:
Run a damp sponge or your finger along the sharp cut edge to round it off. This prevents the rim from being razor-sharp after firing. -
Shaping the lift:
Gently lift your clay circle and place it inside a shallow bowl or atop a plaster slump mold. Press it gently so it takes the curve, creating a slight raised wall. -
Refining the edge:
While it sits in the mold, use a rubber rib to compress the interior surface one last time. This ensures the clay particles are aligned, reducing the chance of cracking as it dries.
Muddy Colors?
If your colors turn brown/grey instead of distinct swirls, you over-kneaded. Stop manipulating the clay the moment you see streaks. Less is more with marbling.
Step 3: Finishing
-
Slow drying:
Let the dish dry to a leather-hard state while still on the mold. Once firm enough to hold its shape, remove it and cover loosely with plastic to let it dry completely slowly. -
Bisque firing:
Fire the piece in a kiln to cone 04 (or your clay’s specific bisque temperature). This prepares the clay for glazing. -
Glazing:
Dip or brush a clear glaze over the entire piece. A matte or satin clear glaze is best here, as it protects the surface but allows the natural clay colors and textures to remain the focal point without distracting shine. -
Final firing:
Fire the piece a final time to the maturity temperature of your clay body (likely cone 5 or 6 for stoneware).
Compatability Check
Ensure all clay bodies have the same shrinkage rate and firing temperature (cone). If they differ significantly, the seams will split apart during drying or firing.
This minimal yet dramatic piece is now ready to hold your jewelry or keys with style
Sculptural Handbuilt Phone Stand That Proves You Don’t Need a Wheel
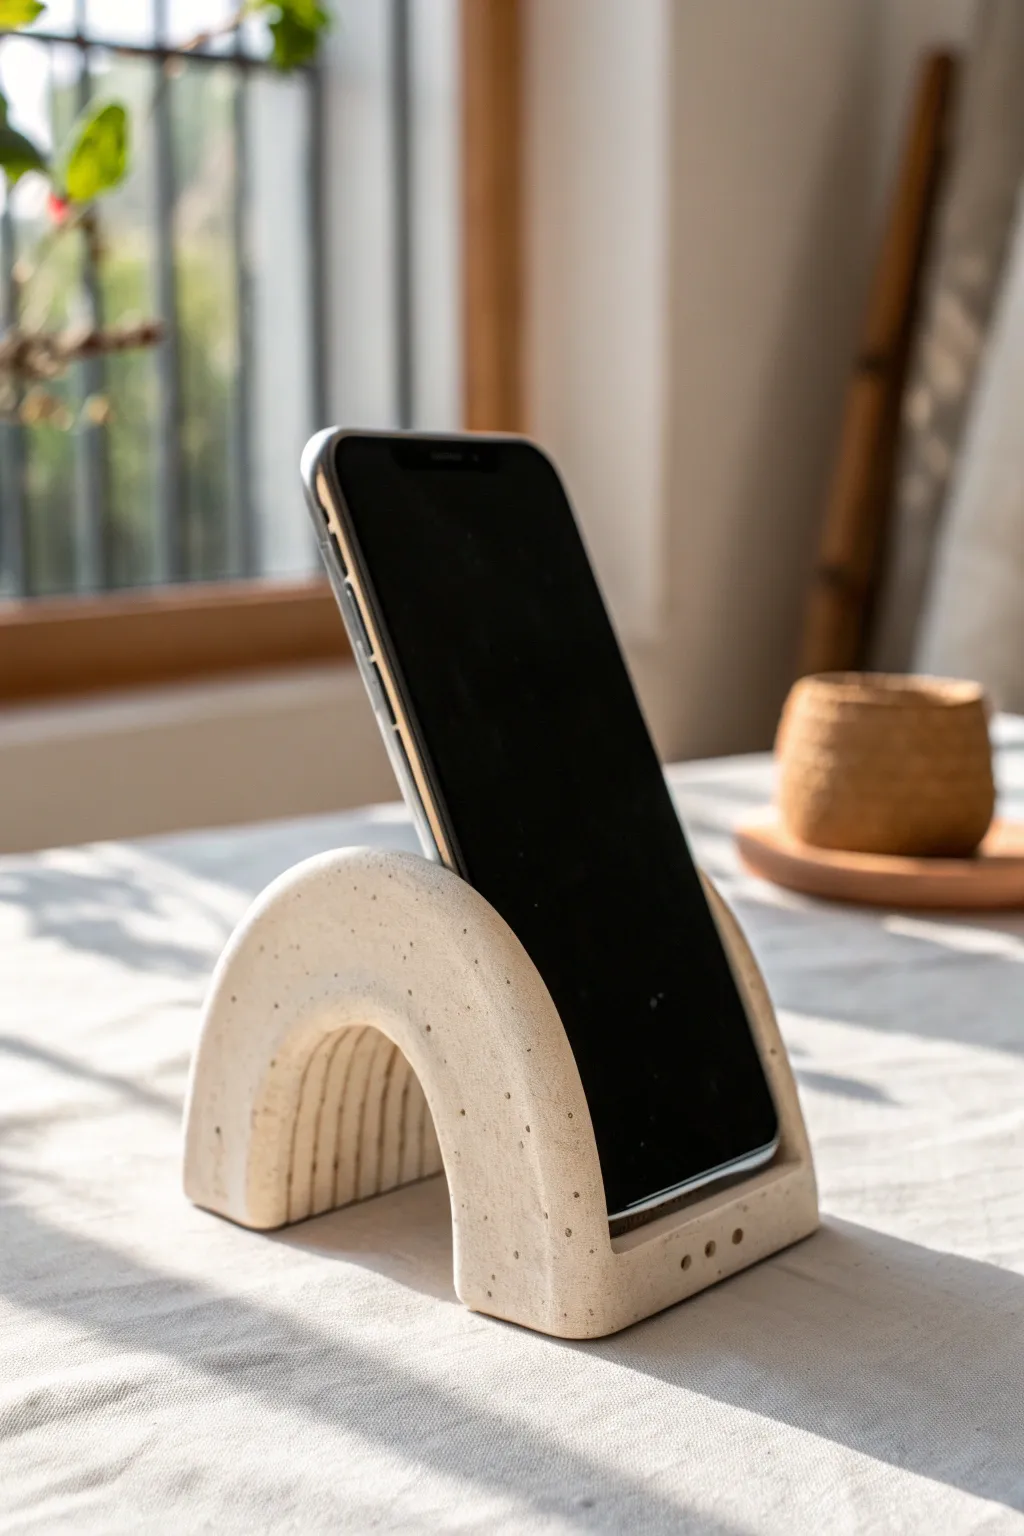
This elegant phone stand uses simple slab-building techniques to create a functional piece of sculpture for your desk. Its modern rainbow-arch shape and speckled finish prove that you can achieve professional ceramic results without ever touching a pottery wheel.
Step-by-Step
Materials
- Speckled Stoneware Clay
- Rolling Pin
- Guide Sticks or Slat Boards (approx. 1/4 inch thick)
- Fettling Knife or Clay Cutter
- Needle Tool
- Slip and Scoring Tool (or serrated rib)
- Cardboard or Heavy Paper (for templates)
- Sponge
- Wooden Rib
- Small Loop Tool (optional, for carving)
Step 1: Preparation and Slab Rolling
-
Prepare your template:
Before touching clay, sketch out your arch shape on cardboard. You’ll need a long rectangular strip that will curve into the main arch (roughly 2.5 inches wide by 10 inches long) and a separate base piece or stop-block. -
Wedge the clay:
Wedging removes air bubbles and homogenizes the moisture. Give your speckled stoneware a good knead until it feels plastic and smooth. -
Roll out the slab:
Place your clay between two guide sticks to ensure an even thickness. Roll the clay out into a long slab, flipping it occasionally to prevent it from sticking to your canvas. -
Compress the slab:
Using a rib tool, gently compress the surface of the clay on both sides. This aligns the clay particles, reducing the chance of warping later, and smooths out the canvas texture.
Slumping Arch?
If your arch collapses while working, stuff the inside curve with crumpled newspaper or a small ball of soft foam. This supports the clay shape from the inside until it becomes leather-hard.
Step 2: Shaping the Form
-
Cut the main strip:
Lay your rectangular template onto the slab. Use your fettling knife to cut a clean strip of clay. This strip will become the main arch of the stand. -
Create the front lip:
Cut a smaller, thicker block or strip of clay to serve as the ‘foot’ or stop that prevents the phone from sliding forward. This needs to be wide enough to support the arch’s base. -
Form the arch:
Gently bend your long strip into a U-shape. If the clay is too soft and slumping, let it firm up for 20 minutes before bending. -
Add detail lines:
While the strip is flat or just after bending, you can use a needle tool or the edge of a credit card to press vertical decorative lines into the inner curve of the arch, mimicking the ridges seen in the reference.
Step 3: Assembly and Refining
-
Score and slip:
Score the bottom edges of your arch deeply with a serrated rib or needle tool. Apply clay slip generously to these scored areas. -
Attach the base connection:
This design requires a sturdy connection at the front. Attach the arch to your front ‘lip’ piece using slip and firm pressure. You may need a small added coil of clay in the seam to reinforce the join. -
Check the angle:
Before the clay sets, test the angle with your phone (carefully!). The arch should lean back slightly to hold the device securely without tipping. -
Smooth the seams:
Using a wooden modeling tool or your finger, blend the clay at the connection points until the seam disappears completely. I find a slightly damp sponge helps smooth these transitions perfectly. -
Add decorative holes:
Use a small hole cutter or the back of a paintbrush to create the three small ventilation accents on the front lip of the stand.
Make It Functional
Carve a small notch or hole in the bottom center of the front lip before firing. This allows you to thread a charging cable through while the phone sits on the stand.
Step 4: Drying and Finishing
-
Slow drying:
Cover the piece loosely with plastic for the first day. This allows the moisture to equalize, preventing the heavy base from drying slower than the thin arch. -
Refine the surface:
Once the clay is leather-hard, use a damp sponge to wipe away any sharp edges or rough spots. This also exposes the beautiful speckles in the stoneware. -
Bisque fire:
Fire the piece in a kiln to bisque temperature (usually cone 04). This hardens the clay and prepares it for the final steps. -
Glazing choice:
To achieve the look in the image, you likely want to leave the clay unglazed on the outside to show off the raw texture, or use a very matte, transparent glaze. If using glaze, wipe the bottom clean. -
Final firing:
Fire the piece to the final temperature required by your specific clay body (e.g., cone 5 or 6 for stoneware) to make it durable and solid.
Now you have a stylish, handmade home for your phone that looks great even when empty