
If you’re new to Sculpey clay (that classic polymer clay you bake at home), the quickest confidence boost is making tiny projects that look adorable even if they’re not perfect. I’m sharing my favorite beginner-friendly ideas that stick to simple shapes—balls, snakes, and little flat pieces—so you can get great results fast.
Smiley Fruit Charms
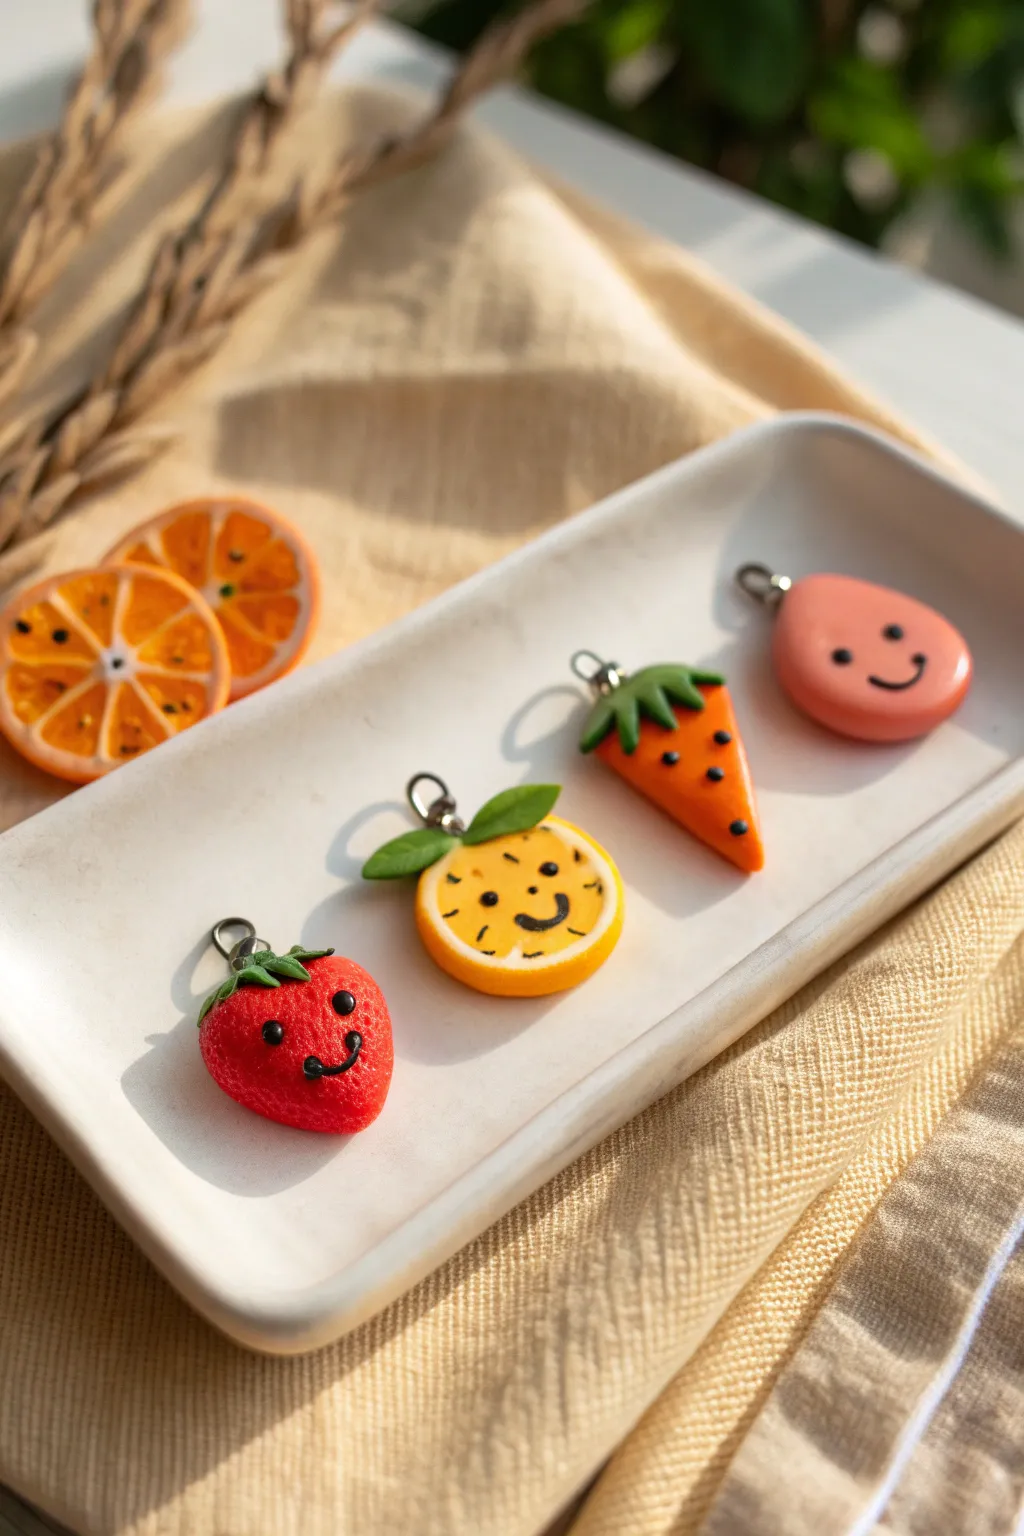
These adorable fruit charms are the perfect beginner project to practice basic shaping and detailing with polymer clay. Featuring a happy strawberry, a sunny orange slice, a cheerful carrot, and a sweet peach, their simple smiles are guaranteed to brighten your day.
Detailed Instructions
Materials
- Polymer clay (red, orange, yellow, pink, green, white, black)
- Clay sculpting tools (needle tool, ball stylus)
- Small metal screw eyes or looped eye pins
- Parchment paper or baking tile
- Rolling pin or pasta machine
- Liquid polymer clay (optional, for adhesive)
- Gloss glaze (optional)
Step 1: Shaping the Bases
-
Condition the reddish clay:
Start with the strawberry. Knead a small ball of red clay until soft, then gently taper one end to create a soft triangular strawberry shape. Flatten the back slightly so it sits nicely. -
Texture the strawberry:
Using a needle tool, poke shallow, tiny holes all over the red surface to mimic strawberry seeds, leaving a smooth space near the center for the face. -
Create the orange slice:
Roll a ball of yellow clay and flatten it into a thick disc. Wrap a thin strip of orange clay around the edge to create the rind, smoothing the seam with your finger. -
Form the carrot:
Shape orange clay into an elongated cone for the carrot. Flatten it slightly like the others for a uniform charm look. -
Mold the peach:
Use pink or peach-colored clay to form a rounded teardrop shape, keeping it smooth and creating a soft curve at the bottom.
Needle Tool Magic
Use a needle tool or toothpick to lift and place the tiny black face pieces. Their natural tackiness will stick to fingers but release easily from metal.
Step 2: Adding Leafy Details
-
Make the strawberry calyx:
Roll a tiny ball of green clay and flatten it. Using an X-acto knife or needle tool, cut small star-like points. Press this onto the top of your strawberry. -
Detail the leaves:
Use the needle tool to press tiny veins into the green leaves to give them a bit of realistic texture. -
Top the orange:
Create two small teardrops of green clay for leaves. Press them together at the top of the orange slice, adding a central vein indentation down the middle of each. -
Crown the carrot:
Form three small green cones and press them onto the wide top of the carrot to create the stems. You can use a dab of liquid clay here if they don’t stick well.
Step 3: Bringing Them to Life
-
Roll the facial features:
Condition a very small amount of black clay. Roll it into an incredibly thin snake—think thread-thin. -
Apply the eyes:
Slice tiny specks from your black snake and roll them into microscopic balls. Press two onto each fruit for the eyes. I find a needle tip helps position these precisely. -
Create the smiles:
Cut small segments of the thin black snake and gently curve them into ‘U’ shapes on your work surface before transferring them onto the faces. -
Add fruit details:
For the orange, you can add tiny black seeds or lines around the perimeter using minuscule bits of black clay or by drawing them on after baking. -
Secure the hardware:
Insert a screw eye or eye pin into the top center of each fruit. If using eye pins, bend the bottom slightly before inserting for better grip.
Create a Bracelet
Make smaller versions of these charms and attach them closely together on a gold chain for a delightful tutti-frutti charm bracelet.
Step 4: Baking and Finishing
-
Prepare for baking:
Place your charms on a parchment-lined baking sheet or a ceramic tile. -
Bake carefully:
Bake according to your clay manufacturer’s instructions—usually around 275°F (130°C) for 15-30 minutes depending on thickness. -
Cool down:
Let the charms cool completely before handling. This hardening phase is crucial for durability. -
Secure the pin:
If a pin feels loose after baking, pull it out, add a drop of superglue, and reinsert it immediately. -
Seal (Optional):
Brush a light coat of water-based gloss glaze over the fruits if you want them to have a shiny, juicy finish.
Once cooled and glazed, these cheerful little fruits are ready to be strung onto necklaces or gifted to a friend


Easy Mushroom Pair
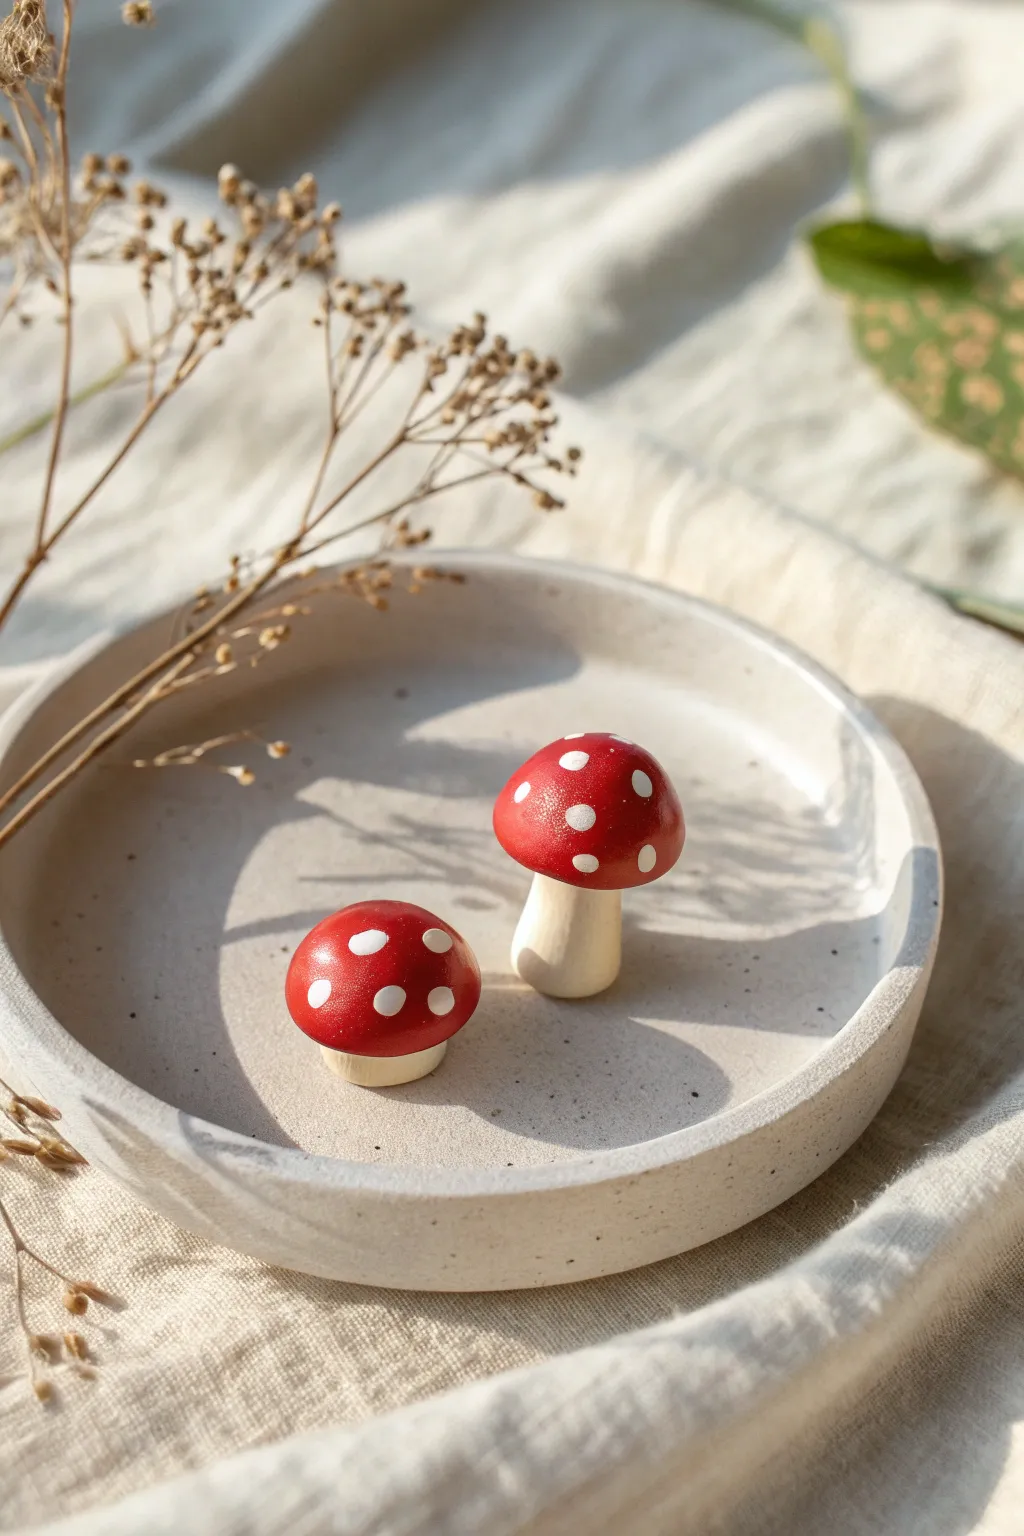
This charming pair of miniature fly agaric mushrooms captures the whimsy of the forest floor with minimal effort. Their bright red caps and natural stems make them a perfect starter project for anyone new to polymer clay.
Step-by-Step Guide
Materials
- White or Beige Polymer Clay (Sculpey/Fimo)
- Red Polymer Clay
- White Acrylic Paint (Liquid)
- Small Dotting Tool or Toothpick
- Clay Blade or Knife
- Baking Sheet or Ceramic Tile
- Oven
- Matte or Satin Varnish (Optional)
Step 1: Creating the Stems
-
Condition the Clay:
Start by taking a small amount of your beige or white clay. Knead it thoroughly in your hands until it becomes soft, warm, and pliable. This conditioning step is crucial to prevent cracks later. -
Form the Base Cylinder:
Roll the conditioned clay into a smooth cylinder about the thickness of a thick crayon. It doesn’t need to be perfectly uniform; organic shapes look more natural. -
Cut to Size:
Using your clay blade, cut two pieces from the cylinder. Make one segment slightly taller (about 1 inch) for the standing mushroom and one very short segment (about 1/4 inch) for the button mushroom. -
Shape the Tall Stem:
Take the taller segment and gently roll it between your fingers, tapering it slightly towards the top so the base is wider. Press the bottom gently onto your work surface to flatten it so it stands upright. -
Smooth the Surface:
Rub your finger lightly over the clay to remove any fingerprints. If the clay feels sticky, I sometimes dust my finger with a tiny bit of cornstarch. -
Prepare the Short Base:
For the smaller mushroom, take the short segment and round off the cut edges. Press it gently to create a squat, rounded nub. This one won’t really have a visible ‘neck’ like the taller one.
Clean Hands, Clean Clay
Red pigment bleeds easily! Always use baby wipes or wash hands thoroughly with soap when switching from red back to light clay to keep your stems pristine.
Step 2: Sculpting the Caps
-
Condition Red Clay:
Clean your hands thoroughly to avoid transferring white clay to the red. Condition a chunk of red polymer clay until soft. -
Divide the Portions:
Separate the red clay into two balls. One should be slightly larger than a marble for the tall mushroom, and one slightly smaller for the button mushroom. -
Shape the Tall Cap:
Roll the larger red ball until smooth. Gently press it into a dome shape by cupping it in your palm and pressing the center with your thumb. -
Refine the Dome:
Ensure the dome is nice and rounded on top, not flat. The underside should be flat or very slightly concave to accept the stem. -
Shape the Button Cap:
Take the smaller red ball and form a similar dome, but make this one slightly rounder and deeper, almost like half a sphere, to mimic a younger mushroom. -
Check Proportions:
Hold the red caps near their respective stems to check the sizing. The caps should be slightly wider than the stems for that classic cartoon mushroom look.
Step 3: Assembly and Baking
-
Connect Cap to Stem:
Place the larger red cap onto the tapered top of the tall stem. Press down gently but firmly to bond the raw clays together. Don’t squash the stem. -
Assemble the Button:
Place the smaller red cap onto the squat base piece. Since this base is short, the cap will sit very close to the bottom, covering most of the beige clay. -
Final Smoothing:
Do a final once-over to smooth out any accidental dents caused during assembly. Ensure both mushrooms stand completely flat. -
Bake:
Place your mushrooms on a ceramic tile or baking sheet. Bake according to your clay package instructions (usually 275°F/135°C for about 15-20 minutes depending on thickness). -
Cool Down:
Allow the mushrooms to cool completely in the oven with the door cracked, or remove them and let them sit until room temperature. Do not paint hot clay.
Texture It Up
Before baking, gently drag a toothbrush over the beige stems. This adds a subtle organic texture that makes the clay look less like plastic and more like nature.
Step 4: Painting the Details
-
Prepare the Paint:
Squeeze a tiny drop of white acrylic paint onto a palette or scrap paper. You want a creamy consistency, not too watery. -
Apply the Spots:
Dip a dotting tool or the blunt end of a toothpick into the paint. Gently touch the tool to the red cap to create spots. -
Vary the Sizes:
Create variation by pressing slightly harder for larger dots and lighter for tiny speckles. Scatter them randomly rather than in a perfect grid. -
Let Dry:
Allow the white paint to dry completely. This usually takes about 10-20 minutes. -
Optional Varnish:
If desired, brush a thin layer of matte or satin varnish over the mushrooms to protect the paint and give the clay a finished, professional sheen.
Place these little fungi in a terrarium or on a shelf for an instant touch of woodland magic


Ladybug and Bee Buddies
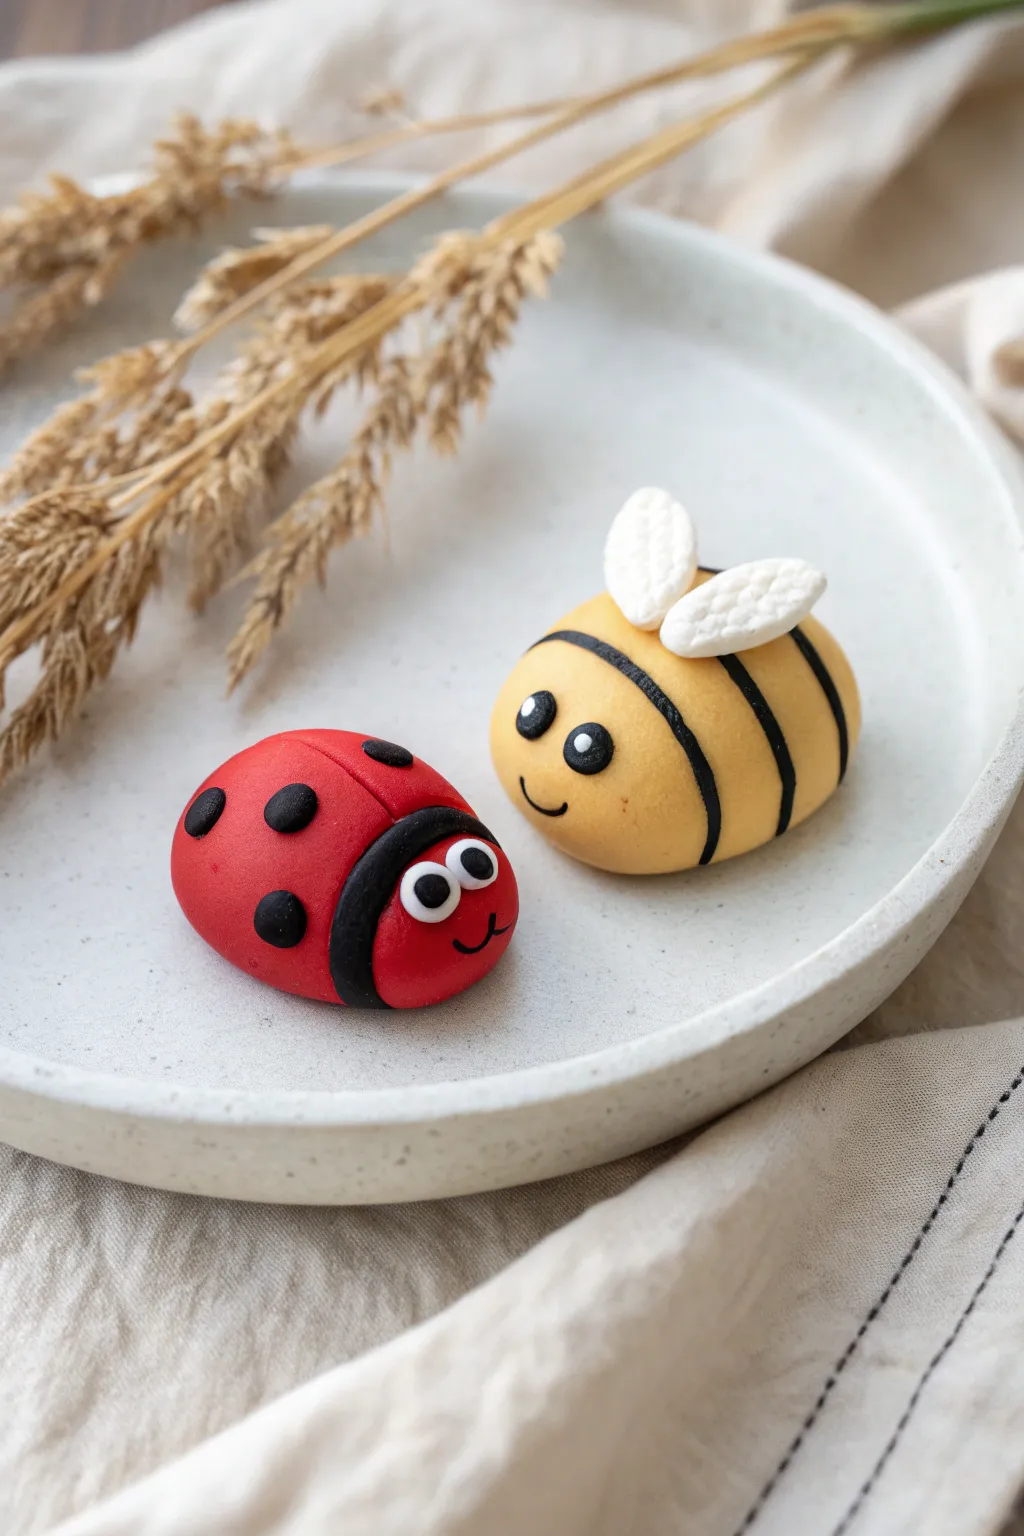
Create a buzzing duo of garden companions with this approachable project that turns simple shapes into adorable characters. With their smooth, rounded bodies and expressive googly-style eyes, this ladybug and bee pair makes for a delightful desk decoration or potted plant accessory.
Step-by-Step
Materials
- Red polymer clay (e.g., Sculpey III or Premo)
- Yellow polymer clay
- Black polymer clay
- White polymer clay
- Clay sculpting tools (needle tool and ball tool)
- Clay roller or acrylic rolling pin
- Craft knife or clay blade
- Baking sheet and parchment paper
- Oven (for curing)
Step 1: Shaping the Bodies
-
Create the core shapes:
Start by conditioning your red and yellow clay until soft and pliable. Roll a walnut-sized ball of red clay for the ladybug and a slightly elongated oval of yellow clay for the bee. -
Flatten the bases:
Gently press the bottom of both shapes onto your work surface to create a flat base so they sit stably without rolling away. -
Smooth the surfaces:
Use your fingertips to gently smooth out any fingerprints on the domes. I find a tiny drop of baby oil can help achieve a glass-like finish here.
Smudged Colors?
Black clay stains easily! Clean your hands and tools thoroughly with a baby wipe or alcohol between handling black and light colors.
Step 2: Detailing the Ladybug
-
Create the centerline:
Using a needle tool or the back of a craft knife, gently press a straight line down the center of the red dome to simulate the division of the wings. -
Form the head section:
Roll a small snake of black clay and flatten it into a strip. Wrap this strip around the front third of the ladybug’s body to create the distinct black head area. -
Add the spots:
Roll tiny balls of black clay and flatten them into discs. Press these firmly onto the red body in a random pattern. -
Create the face base:
Add a slightly thicker, rounded piece of red clay to the front black strip to serve as the face area where the eyes will go.
Secure Wings
To ensure the bee wings don’t pop off after baking, add a drop of liquid polymer clay or ‘Bake & Bond’ underneath them before curing.
Step 3: Detailing the Bee
-
Add stripe indentations:
Use your needle tool to lightly mark where the black stripes will go on the yellow body. -
Create the black stripes:
Roll very thin snakes of black clay. Lay them into the indented grooves you just made and press them flat so they are flush with the yellow surface. -
Shape the wings:
Take white clay and form two teardrop shapes. Flatten them and use a needle tool to press a textured stippling pattern into the surface for a realistic wing look. -
Attach the wings:
Press the pointed ends of the wings together on top of the bee’s back, just behind the front stripe.
Step 4: Making the Faces
-
Form the eye whites:
Roll four small balls of white clay—two for each creature—and flatten them into circles. Press these onto the face areas. -
Add pupils:
Roll tinier balls of black clay and press them into the center of the white circles to bring the eyes to life. -
Add the smiles:
Roll extremely thin, thread-like snakes of black clay. Curve them into small ‘U’ shapes and press them below the eyes for happy mouths.
Step 5: Finishing Up
-
Final inspection:
Check both figures for any dust or lint. You can carefully remove specks with a piece of tape or a baby wipe. -
Bake:
Place your critters on a parchment-lined baking sheet. Bake according to your clay package instructions (usually 275°F for 15-30 minutes per 1/4 inch thickness). -
Cool down:
Let them cool completely in the oven with the door open to prevent cracking from temperature shock.
Once cooled, these little buddies are ready to brighten up your shelf or garden scene


Chunky Animal Head Charms
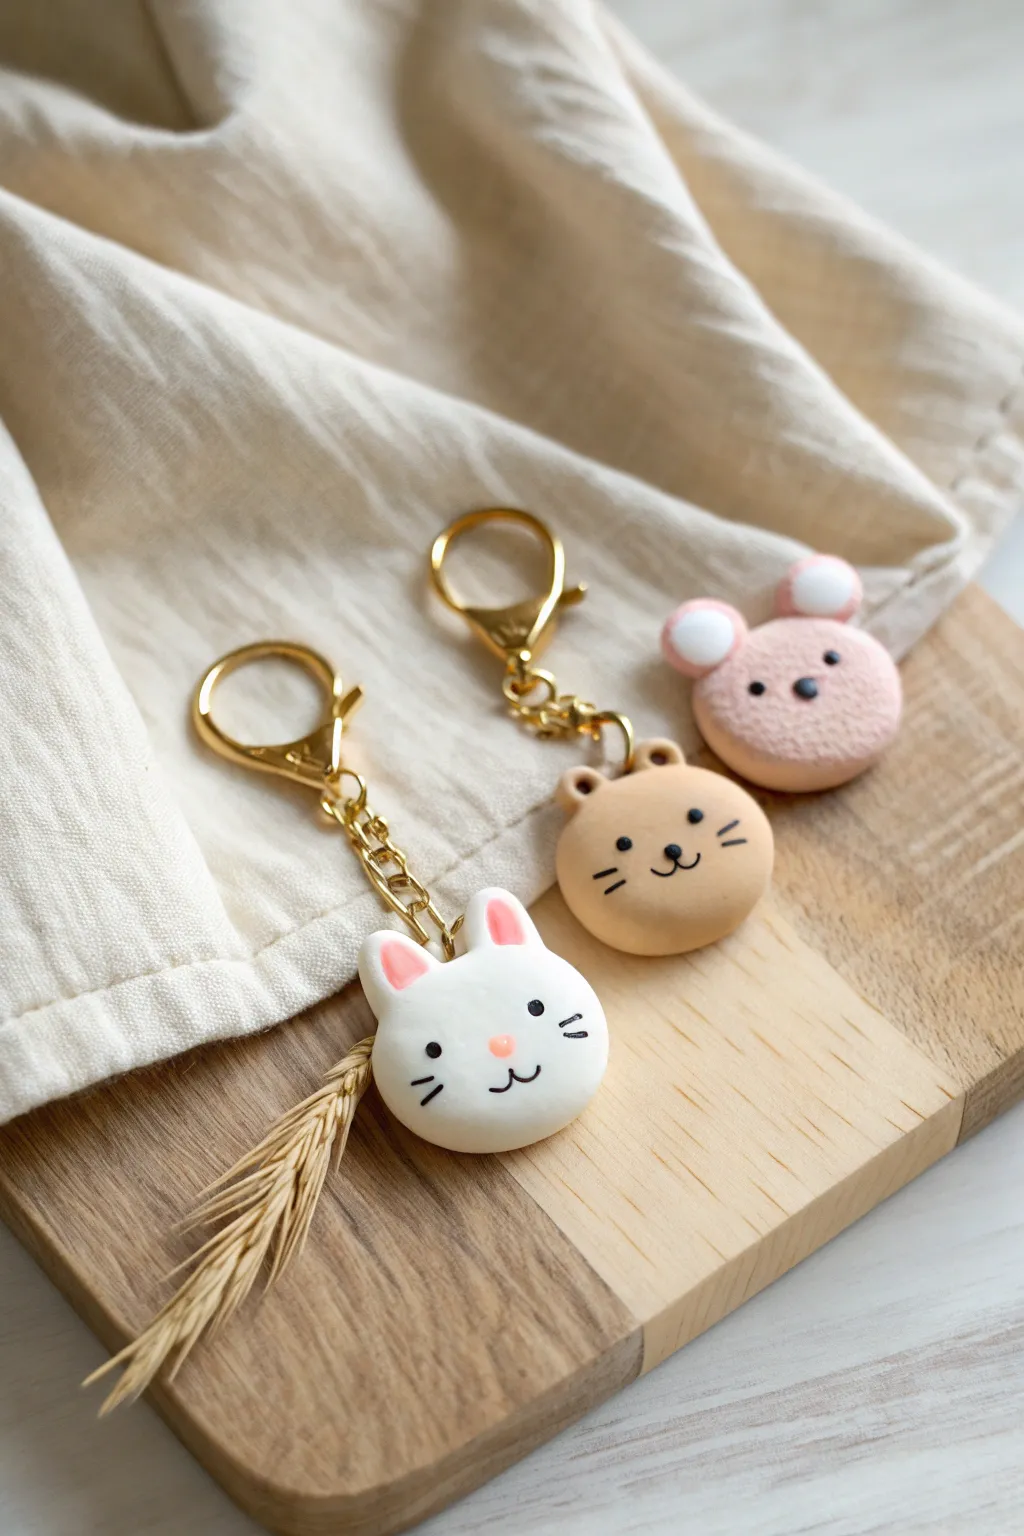
Create a delightful set of kawaii-style animal faces using simple shapes and soft colors. These chunky, durable charms make adorable keychains or bag accessories and are perfect for practicing basic sculpting techniques.
Step-by-Step Tutorial
Materials
- White, tan/beige, and light pink oven-bake clay (Sculpey Premo or Soufflé recommended)
- Black acrylic paint or a fine-tip permanent marker
- Small eye pins (gold or silver)
- Jump rings and keyring attachments
- Dotting tools or a toothpick
- Basic clay sculpting tools (needle tool, small blade)
- Baking sheet and parchment paper
- Gloss glaze (optional)
Step 1: Shaping the Base Heads
-
Condition the clay:
Begin by warming the clay in your hands, kneading it until it is soft and pliable. This prevents cracking later on. -
Form the main sphere:
Roll a piece of white clay into a smooth ball about 1 inch in diameter for the bunny. Repeat with tan clay for the bear and pink for the mouse. -
Flatten into discs:
Gently press each ball down with your palm or an acrylic block to create a thick, rounded disc. You want them to look like puffy macarons, not flat pancakes. -
Smooth the edges:
Use your finger to gently round off any sharp edges created during flattening, ensuring the perimeter is smooth and consistent.
Clean Clay Tip
Keep baby wipes or hand sanitizer nearby. Clean your hands between colors (especially before handling white) to avoid lint or dye transfer.
Step 2: Adding Ears and Features
-
Create bunny ears:
Roll two small logs of white clay and slightly flatten them. Pinch one end of each log to create a teardrop shape. -
Detail the inner ear:
Make smaller, flat teardrops from pink clay and press them onto the white ear shapes. -
Attach ears to head:
Press the pinched ends of the ears onto the top of the white head disc. Use a smoothing tool to blend the seam at the back for durability. -
Make rounded ears:
For the tan bear and pink mouse, roll tiny balls of the matching clay color. Press a smaller dot of contrasting clay (dark brown for the bear, white for the mouse) into the center of each. -
Secure rounded ears:
Press these small ear discs firmly onto the top curves of the respective head shapes. I find a tiny drop of liquid clay helps them stick better if the clay feels dry. -
Insert hardware:
Carefully push a metal eye pin into the top center of each charm, between the ears. Ensure the loop sits flush against the clay.
Step 3: Baking and Facial Details
-
Bake the charms:
Place your creations on a parchment-lined baking sheet. Bake according to your package instructions (usually 275°F/135°C for 15-30 minutes per ¼ inch thickness). -
Cool completely:
Let the charms cool fully before handling. The clay is fragile when hot and hardens as it cools. -
Draw the eyes:
Dip a small dotting tool into black acrylic paint. Simply dot two wide-set eyes onto the face. Alternatively, use a fine permanent marker. -
Add noses and mouths:
Using a very fine brush or marker, draw a tiny ‘w’ shape for the mouth. Add a small pink dot for the bunny’s nose and a black inverted triangle for the bear. -
Whiskers and highlights:
Draw three short, horizontal lines on each cheek for whiskers. You can add tiny white dots to the eyes for a sparkling ‘anime’ look. -
Assemble the keychain:
Once the paint is dry, use pliers to open a jump ring. Loop it through the eye pin and attach your keychain hardware or chain.
Smudged Paint?
If you make a mistake while painting the face, quickly wipe it away with a damp Q-tip or a little rubbing alcohol before it dries.
Now you have a trio of adorable companions ready to hang on your keys or backpack

The Complete Guide to Pottery Troubleshooting
Uncover the most common ceramic mistakes—from cracking clay to failed glazes—and learn how to fix them fast.
Simple Daisy Earrings
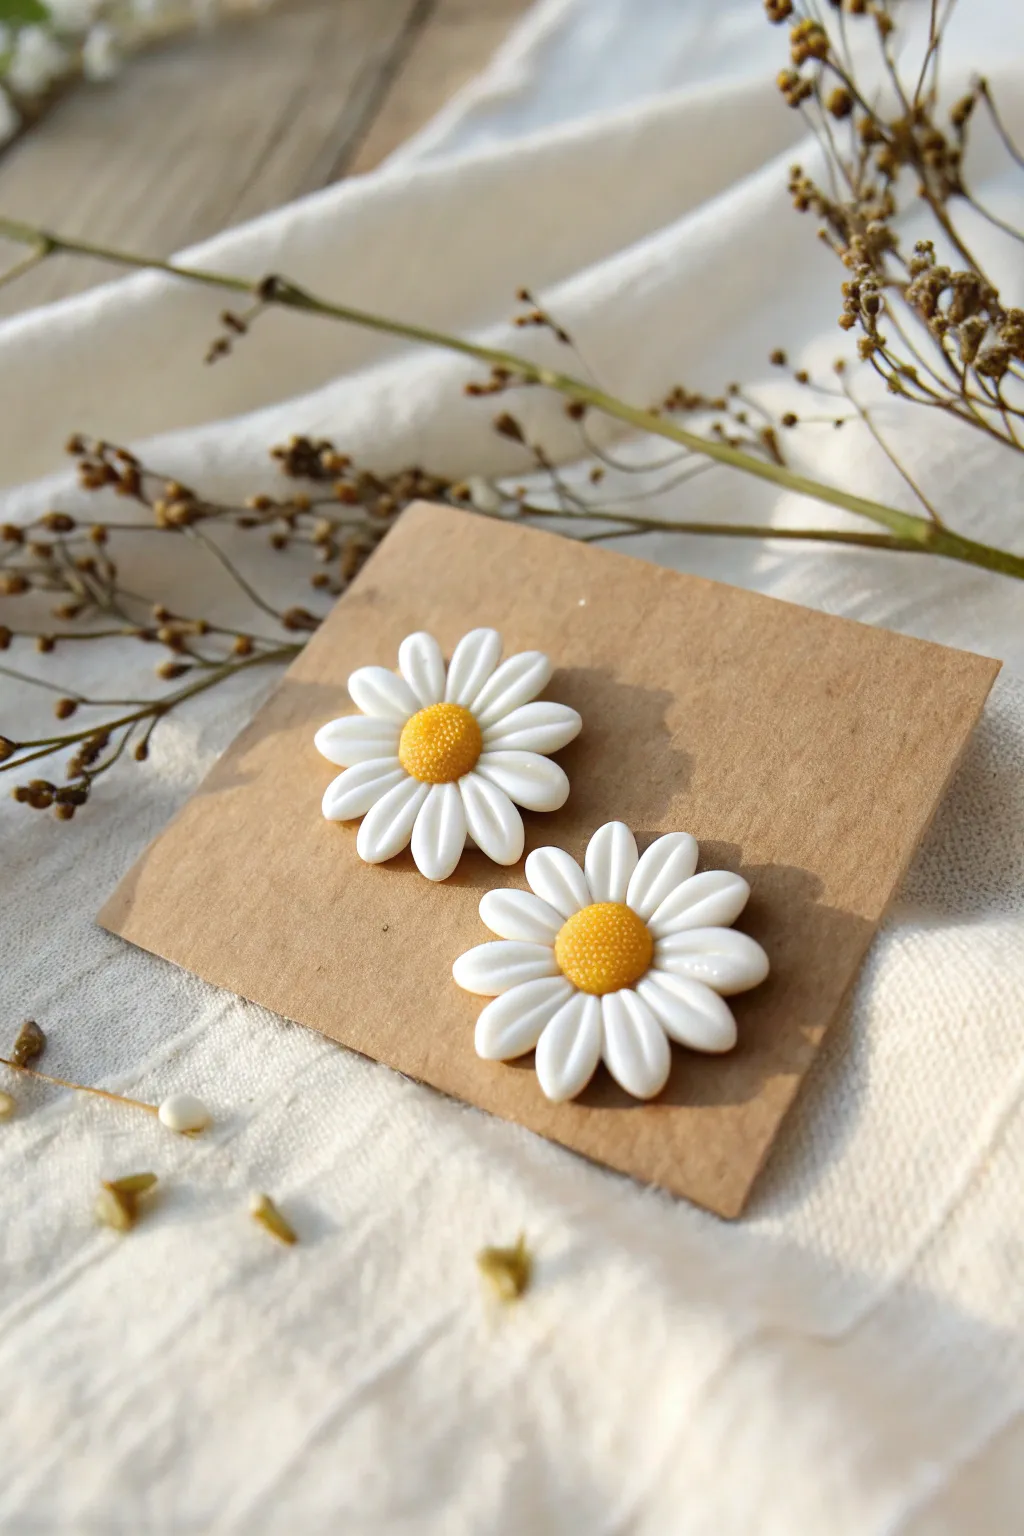
Brighten your jewelry collection with these adorable, cheerful daisy earrings that capture the essence of a sunny day. Their clean white petals and textured yellow centers make them a versatile accessory perfect for any season.
Detailed Instructions
Materials
- White polymer clay
- Yellow polymer clay (sunny or golden yellow)
- Small circle cutter (approx. 1/4 inch or slightly larger)
- Needle tool or toothpick
- Ball tool (small)
- Texturing tool (stiff toothbrush or sandpaper)
- Flat blade or craft knife
- Earring posts and backs
- Super glue or jewelry adhesive
- Oven for baking
Step 1: Shaping the Petals
-
Condition the Clay:
Begin by thoroughly kneading your white polymer clay until it is soft and pliable. This prevents cracks and makes shaping much easier. -
Create a Sheet:
Flatten the conditioned white clay into a sheet about 3mm thick. You can use a rolling pin or a pasta machine on a medium setting. -
Cut the Base Circles:
Using your small circle cutter, punch out two identical circles. These will serve as the base for arranging your petals and ensure your earrings are the same size. -
Roll Petal Sausages:
Take a fresh piece of white clay and roll it into a long, thin log, roughly 2-3mm in diameter. Try to keep the thickness consistent. -
Section the Petals:
Using your blade, slice the log into small, equal segments. Each daisy will need about 10-12 segments. -
Form Teardrops:
Roll each small segment into a ball between your fingers, then gently pinch and roll one side to create a teardrop shape. -
Flatten Petals:
Gently press down on each teardrop to flatten it slightly. Don’t make them paper-thin; they need some durability. -
Assemble the Flower:
Place the petals onto your base circle, with the pointy ends meeting in the absolute center. Arrange them in a circular pattern until the base is covered. -
Add Petal Detail:
Take your needle tool or a toothpick and gently press a line down the center of each petal, starting from the outside edge and moving toward the center, but stop just before the middle.
Step 2: Adding the Center & Baking
-
Make the Center:
Condition a small amount of yellow clay. Roll two small balls that fit perfectly into the center space where your petals meet. -
Flatten the Center:
Place the yellow ball into the center of the flower and gently press it down so it adheres to the white petals. It should look slightly domed, not completely flat. -
Texture the Pollen:
I find this step really brings the flower to life: use a clean stiff toothbrush, sandpaper, or the tip of a needle tool to gently stipple the yellow center, giving it a realistic, fuzzy pollen texture. -
Final Shape Check:
Inspect your daisies. If any petals got squished during assembly, gently nude them back into place with your tool. -
Bake:
Place your daisies on a baking sheet lined with parchment paper. Bake according to your clay package instructions (usually 275°F/130°C for 15-30 minutes). -
Cool Down:
Allow the clay to cool completely inside the oven or on a cooling rack. Do not handle them while hot as the clay is still fragile. -
Attach Hardware:
Once cool, apply a small dot of strong jewelry glue to the flat pad of an earring post. -
Secure the Post:
Press the glued post firmly against the back of the baked daisy. Hold it for a few seconds to ensure a good initial bond. -
Final Cure:
Let the glue cure fully according to the manufacturer’s directions before wearing your new earrings.
Petal Perfection Tip
To ensure all petals are exactly the same size, cut your initial clay rope into measured lengths using a ruler before rolling them into balls.
Level Up: Glossy Finish
After baking, apply a thin layer of UV resin or glossy glaze just to the yellow center for a specialized pollinated look that shines.
Enjoy wearing your new handmade floral studs that bring a permanent touch of spring to your outfit
Swirled Marble Beads

These elegant beads mimic the look of natural stones like rhodonite or pink marble with their soft, swirling patterns. The combination of warm creams, dusty pinks, and earthy reds creates a jewelry piece that feels both organic and sophisticated.
Step-by-Step
Materials
- Polymer clay (white, beige, dusty pink, terracotta/red-brown)
- Acrylic roller or pasta machine
- Tissue blade or clay knife
- Bead piercing pins or toothpicks
- Elastic jewelry cord
- Super glue (gel type)
- Gloss glaze (optional)
- Baking sheet and parchment paper
- Bowl of ice water
- Sandpaper (wet/dry, 400-1000 grit)
Step 1: Preparing the Clay
-
Condition the colors:
Start by kneading each block of clay separately until it is soft and malleable. You will need roughly equal parts of white and beige, and slightly smaller amounts of pink and terracotta. -
Create smooth logs:
Roll each color into a long, thin cylinder snake, roughly 5 inches (12-13 cm) in length. Aim for consistent thickness across all the logs to ensure even mixing later. -
Bundle the snakes:
Gather your clay snakes together into one thick bundle. Twist the bundle gently from both ends, like you are wringing out a towel, to start combining the colors. -
Fold and roll:
Fold the twisted log in half and roll it out again on your work surface until it returns to the original 5-inch length. This is the first step in creating that complex marbling. -
Repeat the twist:
Twist the log again, fold it, and roll it out. Repeat this process 3-5 times. Be careful not to over-twist, as you want distinct streaks of color rather than a muddy brown mix.
Chill Out
If your beads deform when piercing them, pop the rolled spheres in the fridge for 15 minutes before making the holes. The cooler clay holds its shape better against the tool.
Step 2: Forming the Beads
-
Section the log:
Using your tissue blade, slice the marbled log into equal-sized segments. For a standard bracelet, aim for slices about 1/2 inch (1.2 cm) thick. -
Check the pattern:
Examine the cut sides of your sections. Just like cutting into a gemstone, this reveals the internal swirling pattern that will end up on the outside of your bead. -
Roll into spheres:
Pick up a segment and roll it swiftly between your palms using a circular motion. Apply gentle pressure initially, then lighten your touch to smooth out the surface without distorting the round shape. -
Refine the shape:
Place the bead on your work surface and place a flat object, like an acrylic block, on top. Gently move the block in circles to create a perfectly even sphere. -
pierce the holes:
While the bead is still soft, gently insert a bead pin or toothpick through the center. Rotate the pin as you push to prevent flattening the bead. -
Check the exit point:
Watch for the pin to press against the opposite side, but don’t utilize full force to punch through. Instead, remove the pin, flip the bead, and meet the hole from the other side to keep the exit hole neat. -
Touch up:
Smooth away any fingerprints or distortions near the holes with your fingertip. I like to give them one final targeted roll in my palm before baking.
Step 3: Baking and Assembly
-
Bake the beads:
Arrange your beads on a parchment-lined baking sheet. Bake according to your specific clay brand’s instructions (usually 275°F/135°C for 15-30 minutes). -
Quench the beads:
Immediately upon removing them from the oven, drop the hot beads into a bowl of ice water. This ‘shock’ helps cure the clay completely and often improves translucency. -
Sand for smoothness:
Once cool, use wet/dry sandpaper under running water to buff away any fingerprints or rough edges around the holes. Start with 400 grit and move to 1000 for a satin finish. -
String the bracelet:
Thread your finished beads onto the elastic cord. Check the fit around your wrist adding or removing beads as necessary until it sits comfortably. -
Secure the knot:
Tie a surgeon’s knot (looping the elastic twice instead of once) and pull it tight. Apply a tiny dot of gel super glue to the knot for extra security. -
Hide the knot:
Once the glue is dry, trim the excess cord and gently tug the elastic so the knot slides inside the hole of the nearest bead, hiding it from view.
High Shine Finish
For a glass-like look, coat the baked beads in UV resin and cure under a lamp. It deepens the colors and makes the marble pattern pop vividly.
Wear your new bracelet with pride or stack several together for a bohemian layered look


What Really Happens Inside the Kiln
Learn how time and temperature work together inside the kiln to transform clay into durable ceramic.
Terrazzo Dot Studs
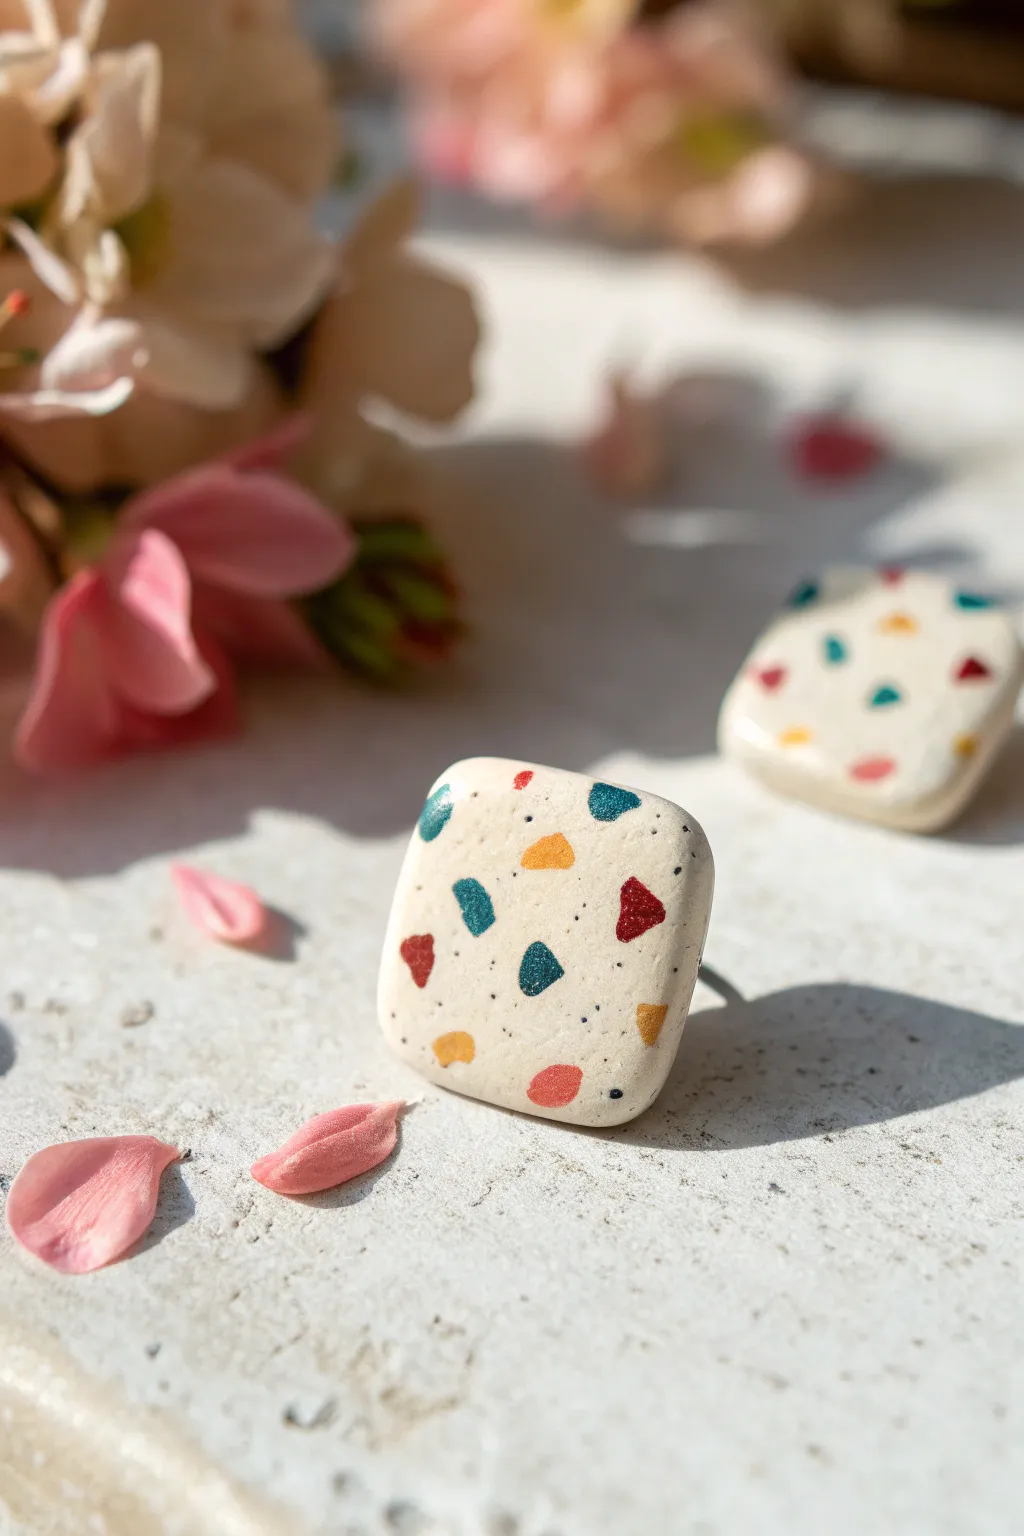
Embrace the fun and colorful world of terrazzo with these delightful square stud earrings. The bright pops of teal, mustard, and red against a speckled stone-like background create a modern accessory that goes with almost everything.
Step-by-Step Guide
Materials
- White or Beige Sculpey polymer clay (for the base)
- Small amounts of teal, mustard yellow, and red polymer clay
- Black polymer clay or black acrylic paint (for speckles)
- Earring stud posts and backs
- Super glue or heavy-duty jewelry adhesive
- Clay roller or pasta machine
- Small square clay cutter (approx. 1 cm)
- Craft knife or scalpel
- Gloss glaze (optional for finish)
- Parchment paper or ceramic tile for baking
- Sandpaper (fine grit)
Step 1: Preparing the Base
-
Condition the base clay:
Start by taking a chunk of your white or beige Sculpey clay. knead it thoroughly in your hands until it becomes soft, warm, and pliable. This ensures there are no air bubbles trapped inside. -
Add the speckles:
If you want that authentic stony look, grate a tiny bit of black clay into very fine dust or crumbs. Mix these tiny specks into your conditioned white clay until they are evenly distributed, mimicking real granite. -
Roll it out:
Place your conditioned speckled clay onto a flat work surface. Use your acrylic roller or pasta machine to flatten it into a sheet about 3mm thick. Try to keep the thickness consistent for durability.
Step 2: Creating the Terrazzo Effect
-
Prep the color chips:
Take your colored clays—teal, mustard yellow, and red—and roll them into very thin, flat sheets, much thinner than your base clay. -
Cut irregular shapes:
Use your craft knife to slice these colorful sheets into random, tiny geometric shapes. You want triangles, trapezoids, and jagged bits of varying sizes. -
Apply the pattern:
Gently pick up the colored fragments with the tip of your knife and place them onto the rolled-out base sheet. Leave some white space between them so the background shows through. -
Embed the design:
Once you like your arrangement, take your roller and gently roll over the entire sheet again. This presses the colored chips flat so they become flush with the surface of the clay. -
Check surface smoothness:
Run your finger lightly over the clay. If you can still feel the edges of the colored chips, roll firmly one more time to seamlessly integrate them.
Smudged Colors?
If your colored chips smear when rolling, the clay might be too warm. Pop the sheet in the fridge for 10 minutes before rolling flat.
Step 3: Cutting and Baking
-
Position the cutter:
Scan your patterned clay sheet for the most visually pleasing areas. Position your square cutter over a section that has a nice balance of colors. -
Punch out shapes:
Press the cutter straight down firmly. Wiggle it slightly to ensure a clean cut, then lift. Cut two squares to create a matching pair. -
Soften the edges:
I like to gently tap the sharp edges and corners with my fingertip to round them off slightly. This gives the finished piece a softer, more professional ceramic look. -
Bake:
Place your squares on a parchment-lined baking sheet or a ceramic tile. Bake according to the instructions on your specific package of Sculpey—usually around 275°F (135°C) for 15-30 minutes. -
Cool down:
Allow the clay pieces to cool completely before handling them. They harden as they cool.
Make it Sparkle
Mix a tiny pinch of gold leaf flakes into the background clay alongside the black specks for an elegant, high-end finish.
Step 4: Assembly
-
Sanding (optional):
If there are any rough spots on the edges, lightly sand them with fine-grit sandpaper under running water. -
Attach the posts:
Flip the squares over. Apply a small dab of strong jewelry glue to the flat pad of an earring post. -
Secure the backing:
Press the glued post firmly onto the center of the back of the clay square. Hold it in place for a few seconds to ensure initial adhesion. -
Seal:
For extra longevity, you can brush a thin layer of satin or gloss glaze over the top surface to make the colors pop, though the matte natural look is lovely too.
Wear your new terrazzo studs with pride and enjoy the artistic flair they add to your outfit
Initial Letter Keychain Tag
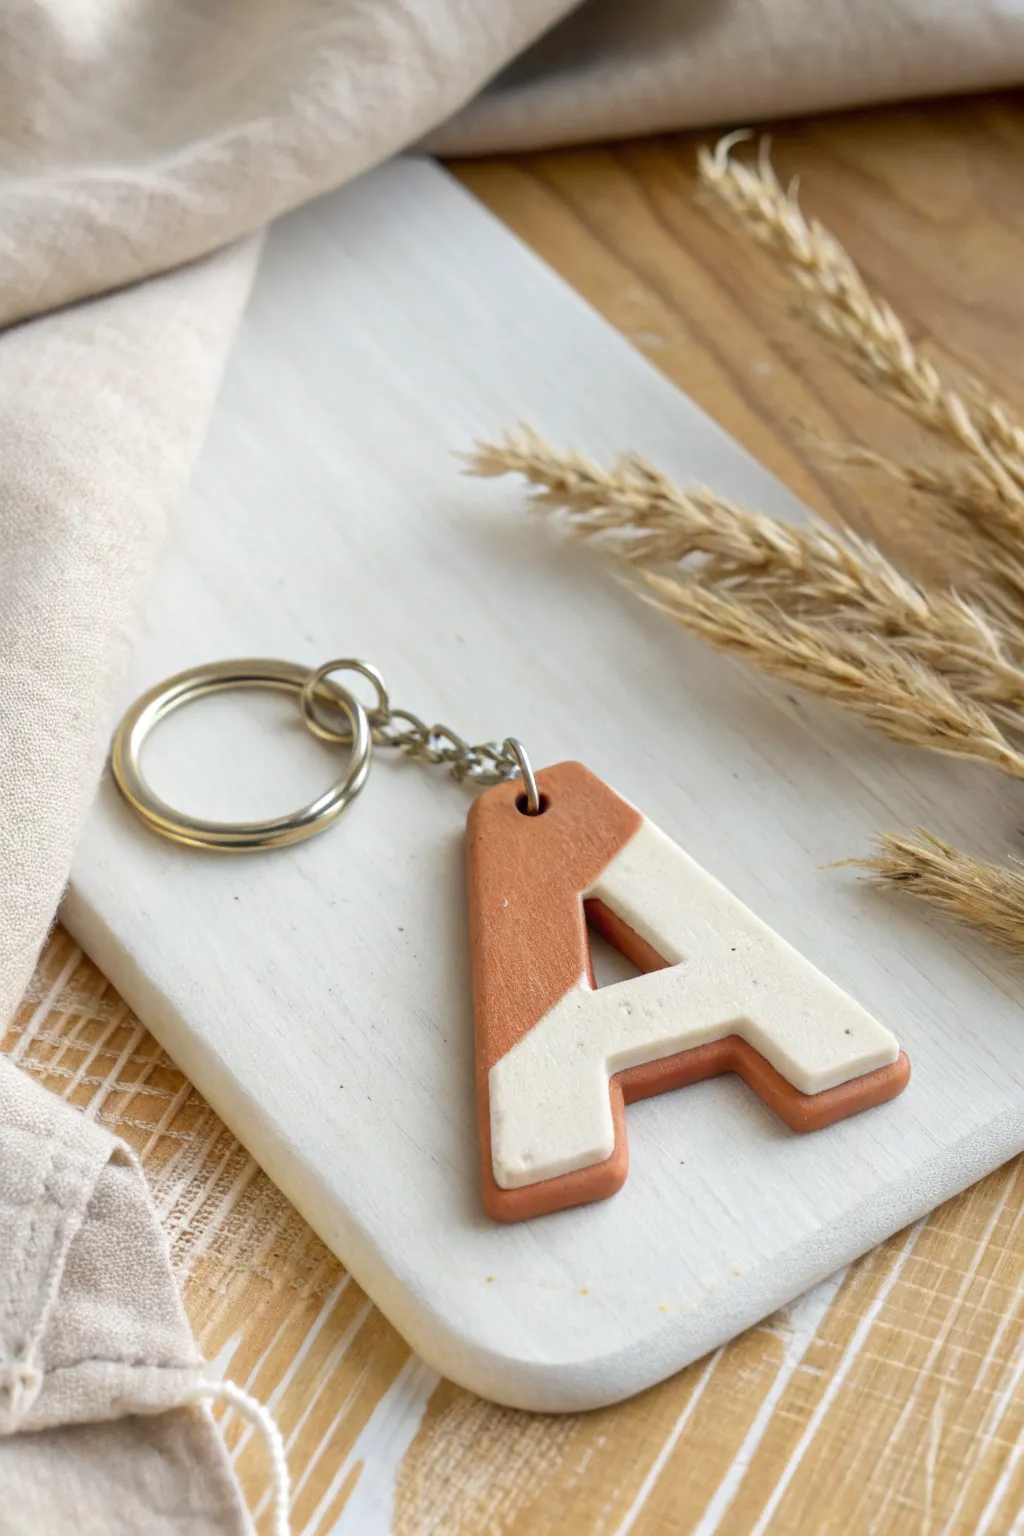
Create a personalized accessory that looks straight out of a boutique with this simple split-color initial keychain. The design features a warm terracotta base contrasted with a speckled cream highlight, perfect for organizing your keys or gifting to a friend.
Step-by-Step Tutorial
Materials
- Terracotta colored polymer clay (e.g., Sculpey Soufflé Cinnamon or similar)
- White or cream polymer clay
- Speckled clay (or black pepper/dried herbs for DIY speckles)
- Letter-shaped cookie cutter (your choice of initial)
- Clay roller or acrylic rolling pin
- Tissue blade or sharp craft knife
- Needle tool or small drill bit
- Jump ring and keychain hardware
- Pliers
- Parchment paper or ceramic tile for baking
- Oven
Step 1: Preparing the Clay Colors
-
Condition the base color:
Start by taking a block of your terracotta-colored clay. Knead it in your hands until it is soft, pliable, and free of cracks. This conditioning step is crucial for strength. -
Create the speckled cream:
If you don’t have pre-speckled clay, mix a small amount of black pepper or dried herbs into your white clay. Knead thoroughly until the specks are evenly distributed. -
Roll out the base:
Roll your conditioned terracotta clay into a sheet approximately 1/4 inch thick. I like to keep this layer substantial so the final keychain feels sturdy. -
Roll out the top layer:
Roll your speckled cream clay into a slightly thinner sheet, about 1/8 inch thick. This will be the decorative top layer.
Step 2: Assembling the Design
-
Cut the shapes:
Use your letter cutter to punch out one ‘A’ (or your chosen letter) from the thick terracotta sheet and one from the thinner cream sheet. -
Slice the diagonal pattern:
Take the thin cream letter and decide on your angle. Use your tissue blade to make a clean, diagonal cut across the letter, removing the top portion. You only need the bottom half for this design. -
Layer the pieces:
Gently pick up the remaining cream section and place it directly on top of the terracotta base letter. Align the bottom edges perfectly. -
Bond the layers:
Use your finger or lightly roll over the surface to press the layers together. Be careful not to distort the shape, just enough pressure to remove air pockets. -
Smooth the edges:
Inspect the sides of your letter. If the layers aren’t perfectly flush on the sides, gently smooth them with your finger to create a seamless transition.
Clean Cuts Only
If your cutter sticks to the clay, dust the clay surface lightly with cornstarch or dip the cutter in water before pressing down. This ensures crisp edges.
Step 3: Finishing and Baking
-
Punch the hole:
Before baking, use a needle tool to create a hole at the top of the letter for the hardware. Make sure the hole is large enough for your jump ring to move freely. -
Bake carefully:
Place your clay piece on parchment paper or a ceramic tile. Bake according to the manufacturer’s instructions on your clay package (usually 275°F for 15-30 minutes depending on thickness). -
Cool down:
Allow the piece to cool completely in the oven with the door cracked, or remove it and let it sit. The clay hardens as it cools. -
Attach hardware:
Once cool, use two pairs of pliers to twist open a jump ring. Loop it through the hole you made in the clay. -
Final assembly:
Thread the keychain ring onto the open jump ring, then twist the jump ring closed securely so there is no gap.
Make It Matte
For a velvety finish, lightly sand the baked piece with fine-grit sandpaper, then buff with a piece of denim or a microfiber cloth.
Now you have a stylish, minimalist keychain ready to organize your day

TRACK YOUR CERAMIC JOURNEY
Capture glaze tests, firing details, and creative progress—all in one simple printable. Make your projects easier to repeat and improve.
Rainbow Arch Pendant
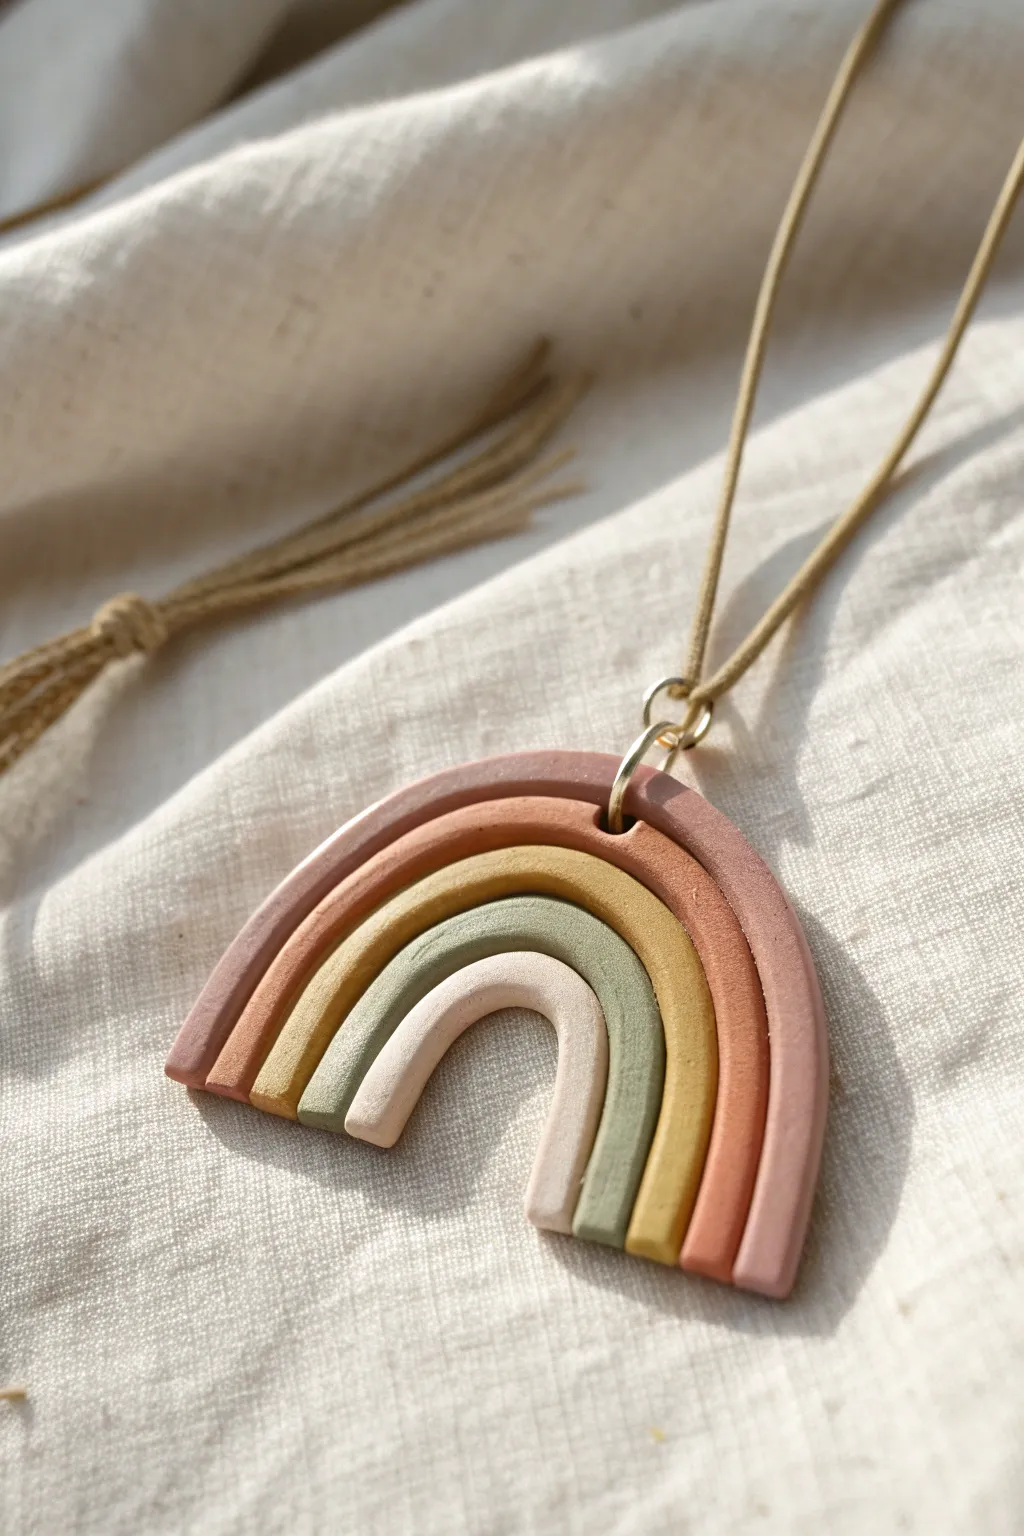
Embrace the earthy tones of this stunning arched pendant, a perfect starter project that looks surprisingly high-end. With its distinct, separated arches and smooth matte finish, this piece brings a touch of modern bohemian style to any outfit.
Step-by-Step Guide
Materials
- Polymer clay (terracotta, brick red, mustard yellow, sage green, and beige)
- Acrylic roller or pasta machine
- Clay knife or tissue blade
- Extruder (optional, for uniform snakes)
- Small metal jump ring (gold or brass)
- Beige suede or leather cord
- Parchment paper or ceramic tile (work surface)
- Oven for baking
Step 1: Prepping the Clay
-
Condition the clay:
Begin by kneading each color of polymer clay separately in your hands until it becomes soft, pliable, and warm. -
Roll out snakes:
Roll each color into a long, even snake or ‘coil.’ Aim for a thickness of about 5-6mm for each strand. Try to keep the pressure consistent so they don’t get lumpy. -
Use an extruder (optional):
If you struggle with hand-rolling perfectly even snakes, I find using a clay extruder with a medium circle disc is a total lifesaver for getting uniform thickness.
Step 2: Forming the Arch
-
Start with the smallest arch:
Take your innermost color (the beige coil) and bend it into a tight U-shape on your ceramic tile or baking paper. -
Layer the second color:
Take the next color (sage green) and gently curve it over the beige arch. Press them together lightly so they adhere, but not so hard that you distort the round shape of the coils. -
Add the middle colors:
Continue this process with the mustard yellow and brick red coils. Ensure each new layer hugs the previous one snugly without gaps. -
Finish with the outer arch:
Place the final terracotta/dusty pink coil on the very outside. At this stage, the ends will be uneven, but that’s perfectly fine. -
Smooth the seams:
Gently run your finger over the front surface to ensure all the coils are level with each other. You can lightly roll over the whole piece with your acrylic roller just once to flatten the top slightly if you prefer a flatter look.
Smooth Operator
To remove pesky lint or dust before baking, dip a Q-tip in rubbing alcohol or acetone and gently wipe the clay surface.
Step 3: Refining and Baking
-
Trim the bottom:
Take your tissue blade or sharp knife and make a clean, straight cut across the bottom of the rainbow to remove the uneven tails. This creates that sharp, professional edge. -
Create the hole:
Using a needle tool or a toothpick, pierce a hole through the top center of the outermost arch. Make sure the hole is large enough for your jump ring to pass through freely. -
Check for fingerprints:
Before baking, look closely for any stray fingerprints. You can gently buff them away with a tiny drop of baby oil or by lightly brushing with cornstarch. -
Bake the piece:
Bake according to your specific clay brand’s package instructions. Usually, this is around 275°F (130°C) for 15-30 minutes depending on thickness. -
Cool down:
Let the pendant cool completely in the oven or on the baking sheet before handling it, as hot clay is fragile.
Texture Twist
Before baking, gently verify the texture; you can press a piece of sandpaper onto the clay surface for a stone-like effect.
Step 4: Assembly
-
Open the jump ring:
Use flat-nose pliers to twist your metal jump ring open sideways (never pull it apart). -
Attach the hardware:
Slide the open jump ring through the hole you created in the clay arch, then twist it closed securely. -
Thread the cord:
Take your beige suede cord and thread it through the jump ring. -
Tie the knot:
Measure the cord to your desired necklace length and tie a secure knot at the ends to finish your wearable art.
You have just created a beautiful, minimalist accessory that adds a handmade touch to your wardrobe
Tiny Heart Studs and Charms
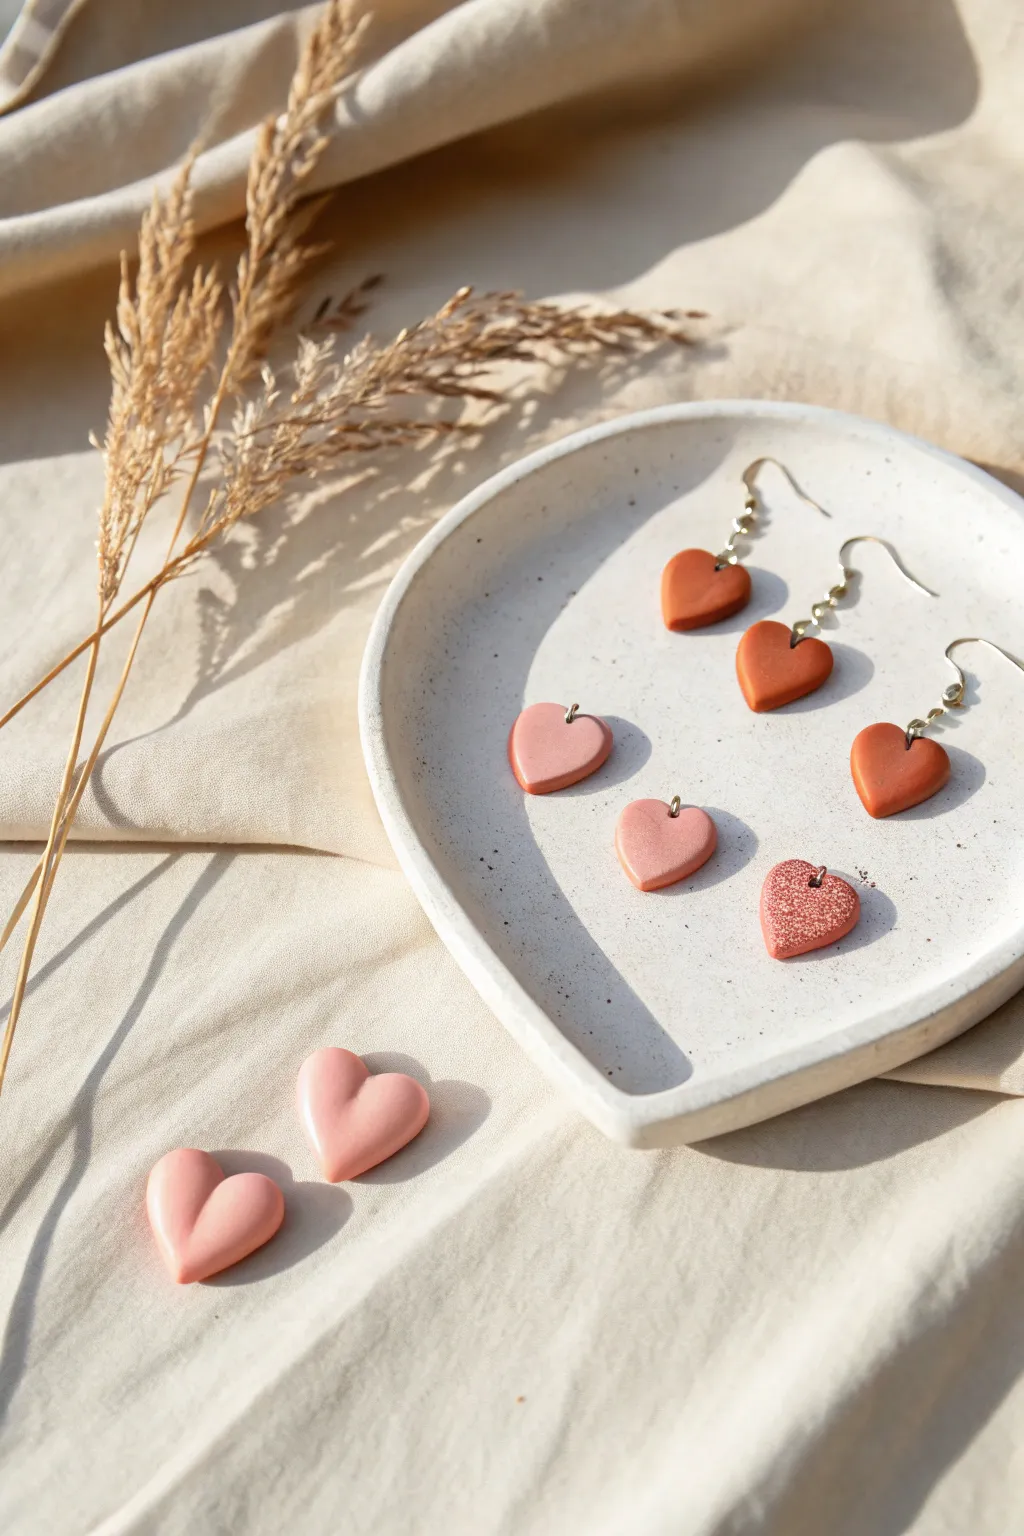
These charming polymer clay hearts are a perfect beginner project, offering a lovely mix of matte textures and warm, earthy tones. Whether you fashion them into tiny stud earrings or assemble them into delicate dangles, they bring a handmade touch of romance to any outfit.
Detailed Instructions
Materials
- Polymer clay (terracotta/rust and pale pink)
- Small heart-shaped cutter
- Rolling pin or pasta machine
- Parchment paper or ceramic tile (work surface)
- Needle tool or toothpick
- Fine-grit sandpaper (400-600 grit)
- Red or pink glitter (optional)
- Jump rings (gold or silver)
- Earring hooks (French wires)
- Jewelry pliers (round nose and flat nose)
- Oven for baking
Step 1: Shaping the Clay
-
Condition the clay:
Start by warming the polymer clay in your hands, kneading it until it becomes soft and pliable. Do this separately for your pink and terracotta colors to avoid cross-contamination. -
Roll it out:
Place the conditioned clay on parchment paper or a smooth tile. Roll it into an even sheet, approximately 3-4mm thick. You want them substantial enough to hold hardware but light enough for ears. -
Cut the shapes:
Using a small heart-shaped cutter, press firmly into the clay sheet to cut out your hearts. If the clay sticks to the cutter, dip the cutter in a little cornstarch first. -
Smooth the edges:
Gently lift the hearts and use your finger to lightly smooth the raw edges where the cutter lifted the clay. This saves sanding time later. -
Add detail (optional):
For the glittery accent heart seen in the set, press a small amount of fine glitter into the surface of a raw clay heart, or mix the glitter directly into a small ball of pink clay before rolling.
Clean Cuts Only
Place a piece of plastic wrap over the clay before using your cutter. This creates a soft, domed pillow effect on the edges rather than sharp, flat cuts.
Step 2: Drilling and Baking
-
Pierce the holes:
For the dangle charms, use a needle tool to poke a hole near the top center of the heart lobes or at the very top center point. Ensure the hole is large enough for your jump rings. -
Refine the hole:
Wiggle the needle slightly to ensure the hole is clean on both the front and back side of the heart. -
Bake the pieces:
Arrange your clay hearts on a parchment-lined baking sheet. Bake according to your specific clay brand’s package instructions—usually around 275°F (135°C) for 15-30 minutes. -
Cool down:
Let the hearts cool completely before handling them. Polymer clay is strongest once it has fully returned to room temperature. -
Sand for finish:
If there are any fingerprints or rough spots, wet-sand the cured pieces gently using fine-grit sandpaper and a little water for a professional, matte finish.
Step 3: Jewelry Assembly
-
Open the jump rings:
Using two pairs of pliers, twist your jump rings open sideways (not pulling them apart outward) to preserve their circle shape. -
Attach the hearts:
Slide the open jump ring through the hole you created in the baked clay heart. -
Add earring hooks:
Before closing the jump ring, slide the loop of your earring hook onto the ring as well. I find holding the jump ring steady with pliers while maneuvering the hook is the easiest method. -
Close the ring:
Twist the jump ring back into a closed position, ensuring the two ends meet perfectly flush so the charm doesn’t slip off. -
Create double-drops:
To recreate the longer earring style shown, simply use a second jump ring or a small length of chain to connect two hearts together vertically before attaching the hook.
Sticky Situation?
If your clay gets too soft and sticky to handle, put it in the fridge for 10 minutes. Cooling it down firms it up, making it easier to drill holes without distortion.
Now you have a stunning set of minimal, earthy jewelry ready to gift or wear.
Mini Planet and Star Set
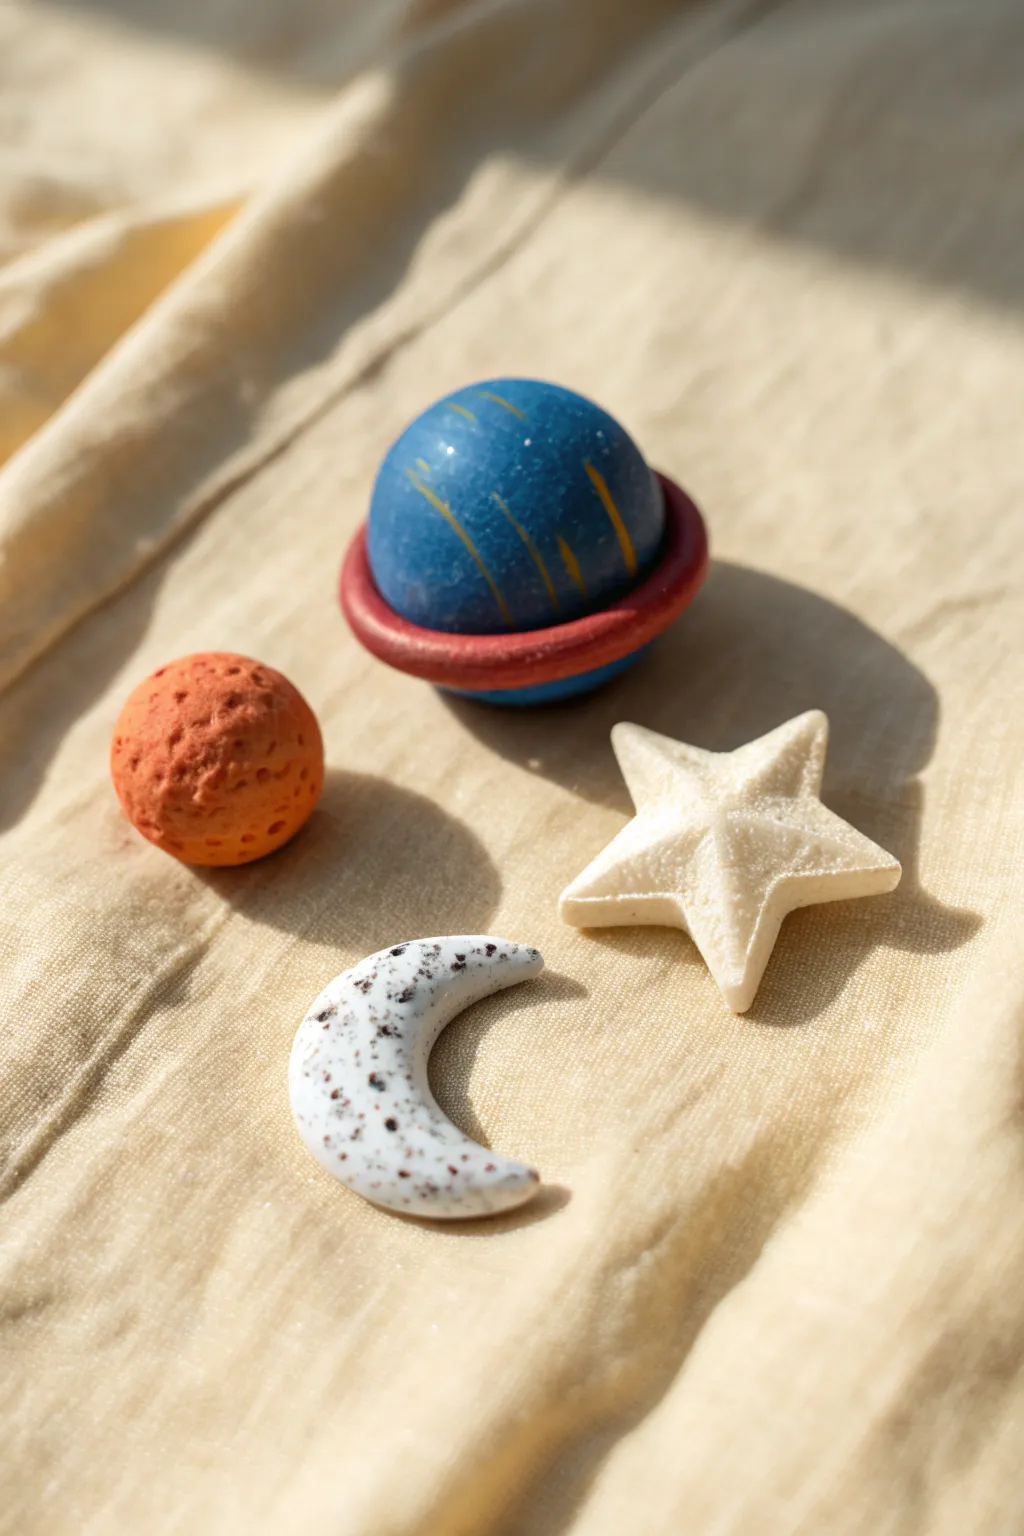
Create your own tiny galaxy with this charming set of celestial bodies, perfect for a beginner’s clay project. You’ll make a textured Mars, a striped gas giant with a ring, a sparkling star, and a speckled moon, all resting on a soft fabric backdrop.
Step-by-Step Guide
Materials
- Polymer clay (Blue, Red, Orange, White)
- Acrylic rolling pin
- Texture tools (or a stiff toothbrush)
- Needle tool or toothpick
- Star cookie cutter (small) or craft knife
- Liquid clay (optional for bonding)
- Black acrylic paint
- Yellow acrylic paint
- Fine detail paintbrush
- Glaze or varnish (glossy and matte)
- Old toothbrush (for speckling)
Step 1: Shaping the Red Planet
-
Mix the color:
Start by conditioning a chunk of orange clay. If it’s too bright, mix in a tiny pinch of brown or red to get that rusty Mars tone. -
Form the sphere:
Roll the clay between your palms until you have a perfectly smooth, round ball about the size of a marble. -
Add planet texture:
Take a stiff toothbrush or a texturing sponge and gently press it all over the surface of the sphere to create a pitted, rocky surface. -
Create craters:
Use the rounded end of a small paintbrush or a ball stylus to press larger indents into the surface for impact craters.
Sticky Situation?
If your clay is getting too soft and sticky while shaping small spheres, pop it in the fridge for 10 minutes to firm it up before detailing.
Step 2: Crafting the Ringed Planet
-
Roll the core:
Condition a piece of blue clay and roll it into a smooth ball. This should be slightly larger than your red planet. -
Create the ring:
Roll a thin snake of red or deep maroon clay. Flatten it gently with your rolling pin until it’s a thin, flat strip. -
Attach the ring:
Wrap the flattened strip around the center of your blue sphere. Trim the excess where the ends meet and gently blend the seam with your finger. -
Secure the ring:
Gently press the ring onto the sphere so it sticks. I like to add a tiny dot of liquid clay underneath if the clay feels dry to ensure a strong bond.
Make it a Mobile
Before baking, carefully insert a small eye pin into the top of each shape. After baking, string them together to create a tiny hanging mobile.
Step 3: Sculpting the Night Sky
-
Make the moon:
Roll a piece of white clay into a log, tapering both ends to points. -
Curve the crescent:
Bend the log into a C-shape. Gently flatten it slightly so it sits stable, and refine the points to be sharp and elegant. -
Cut the star:
Roll out a sheet of white or pearl clay. Use a small star cutter to punch out a shape, or carefully cut a five-pointed star freehand with a craft knife. -
Soften the edges:
Gently tap the sharp cut edges of the star with your finger to round them off slightly, giving it a puffy, soft look. -
Bake everything:
Place all four pieces on a baking tile or parchment-lined tray. Bake according to your clay package instructions (usually 275°F/130°C for 15-30 minutes).
Step 4: Painting and Details
-
Cool the pieces:
Let your clay cool completely before painting. This ensures the paint adheres properly and doesn’t get tacky. -
Paint planet stripes:
Using a very fine brush and yellow paint, carefully add thin, vertical scratch-like stripes to the top half of the blue planet. -
Speckle the moon:
Dip an old toothbrush into slightly watered-down black paint. Run your thumb over the bristles to flick tiny speckles onto the white crescent moon. -
Dry the paint:
Allow the paint to dry fully. Acrylics dry fast, so this should only take a few minutes. -
Add sparkle to the star:
If you used plain white clay for the star, brush on a coat of pearlescent glaze or glitter varnish to make it shimmer. -
Seal the planets:
Apply a coat of gloss varnish to the blue planet to make it look glassy, and leave the red planet matte (or use a matte varnish) to keep its dusty texture.
Arrange your finished celestial family on a soft cloth or display shelf to admire your handiwork
Cute Milk-and-Cookie Charms
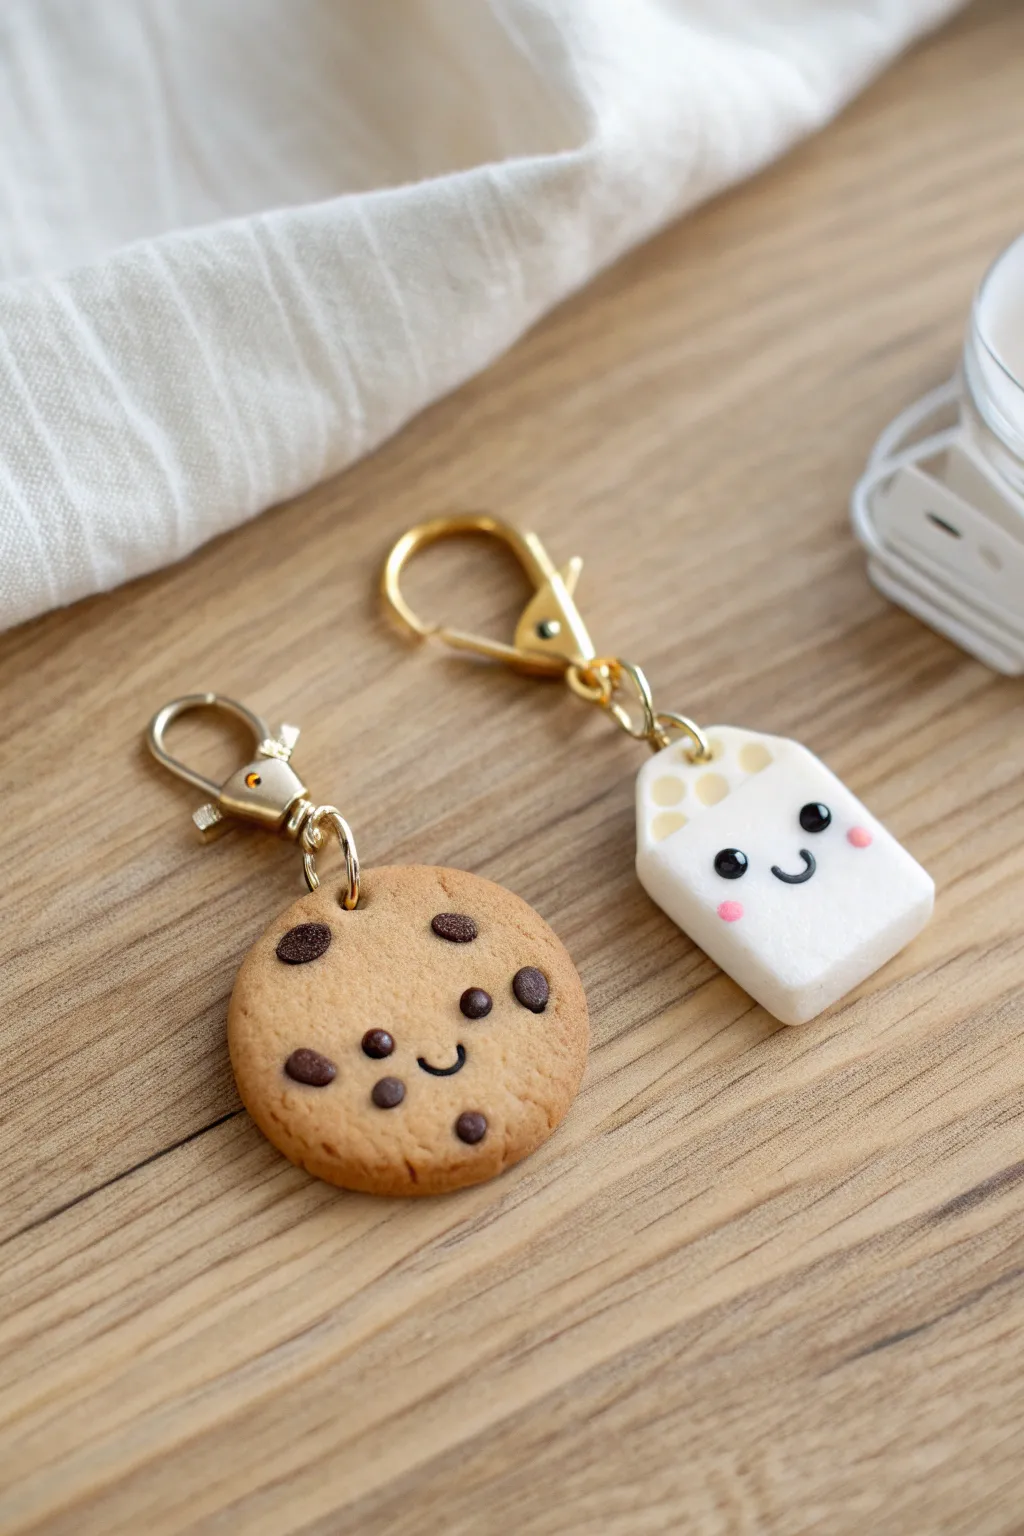
Celebrate the perfect pairing with this adorable duo of Sculpey charms featuring a realistic chocolate chip cookie and a kawaii milk carton. These sweet matching keychains make fantastic gifts for your real-life bestie or a charming addition to your own bag.
Detailed Instructions
Materials
- Polymer clay (tan/light brown, white, dark brown)
- Black acrylic paint
- Pink acrylic paint or soft pastels
- Dotting tool or toothpick
- Small eye screw pins (gold)
- Gold lobster clasp keychains with jump rings
- Sandpaper or a stiff toothbrush (for texturing)
- Craft blade or X-Acto knife
- Rolling pin
- Gloss glaze (optional)
Step 1: Baking the Cookie
-
Mix the dough color:
Start by mixing translucent clay with a bit of tan and yellow to get a realistic ‘baked’ dough color, or simply use a pre-mixed beige polymer clay. -
Shape the base:
Roll a small ball of the tan clay, about the size of a large marble, and flatten it gently into a thick disc. It shouldn’t be perfectly round; slight irregularities look more natural. -
Add texture:
Using a stiff toothbrush or crumpled aluminum foil, gently press into the surface of the disc to create a crumbly, baked texture all over the top and sides. -
Create chocolate chips:
Roll tiny snakes of dark brown clay and cut off very small pieces. Roll these into imperfect little balls or flattened ovals. -
Place the chips:
Press the chocolate chips into the cookie surface. Leave a clear space in the center-bottom area where the face will go later. -
Shade the edges:
For a golden-brown finish, I like to brush a little shaved orange or brown soft pastel dust onto the edges of the cookie using a soft paintbrush.
Texturing Tip
For the most realistic cookie texture, texture the clay *before* adding chips. Then, re-texture slightly around the chips after pressing them in to make them look baked into the dough.
Step 2: Pouring the Milk
-
Form the carton body:
Condition a block of white clay and shape it into a rectangular cuboid. Smooth the sides with your fingers to remove fingerprints. -
Slope the top:
Using your blade, slice two small angled cuts at the top corners to create the gable shape of a milk carton, leaving a flat ridge in the very center. -
Add the seal:
Roll a small strip of white clay, flatten it, and attach it across the top ridge to represent the carton’s sealed opening. -
Detail the top:
Use a small dotting tool to gently impress a few shallow circles on the slanted roof part, mimicking the folded cardboard texture often seen on cartons.
Make it a Necklace
Instead of keychains, string both charms onto a single gold chain, or split them onto two separate chains to create ‘break-apart’ friendship necklaces to share.
Step 3: Faces & Finishing
-
Insert hardware:
Carefully screw a gold eye pin into the top center of the cookie and the milk carton. Remove them, add a dab of liquid clay or strong glue to the threads, and screw them back in for security. -
Bake the charms:
Bake your pieces according to the specific instructions on your package of clay (usually 275°F/135°C for 15-30 minutes). Let them cool completely. -
Paint the eyes:
Dip a large dotting tool into black acrylic paint and stamp two eyes onto each charm. The milk carton’s eyes should be wide-set, while the cookie’s can be closer to the chips. -
Draw the mouths:
Use a very fine detail brush or a toothpick to paint a small U-shaped smile between the eyes. -
Add blushing cheeks:
Dip a smaller dotting tool into pink paint and add tiny rosie cheeks just below and to the outside of the eyes. -
Add highlights:
Once the black paint is dry, add a tiny white dot to the upper corner of each eye to give them a sparkling, kawaii look. -
Attach keychains:
Open the jump ring on your gold lobster clasp using pliers, thread it through the eye pin, and close it securely.
Clip these sweet treats onto your backpack and enjoy the smiles they bring all day long
Pocket-Size Worry Stone
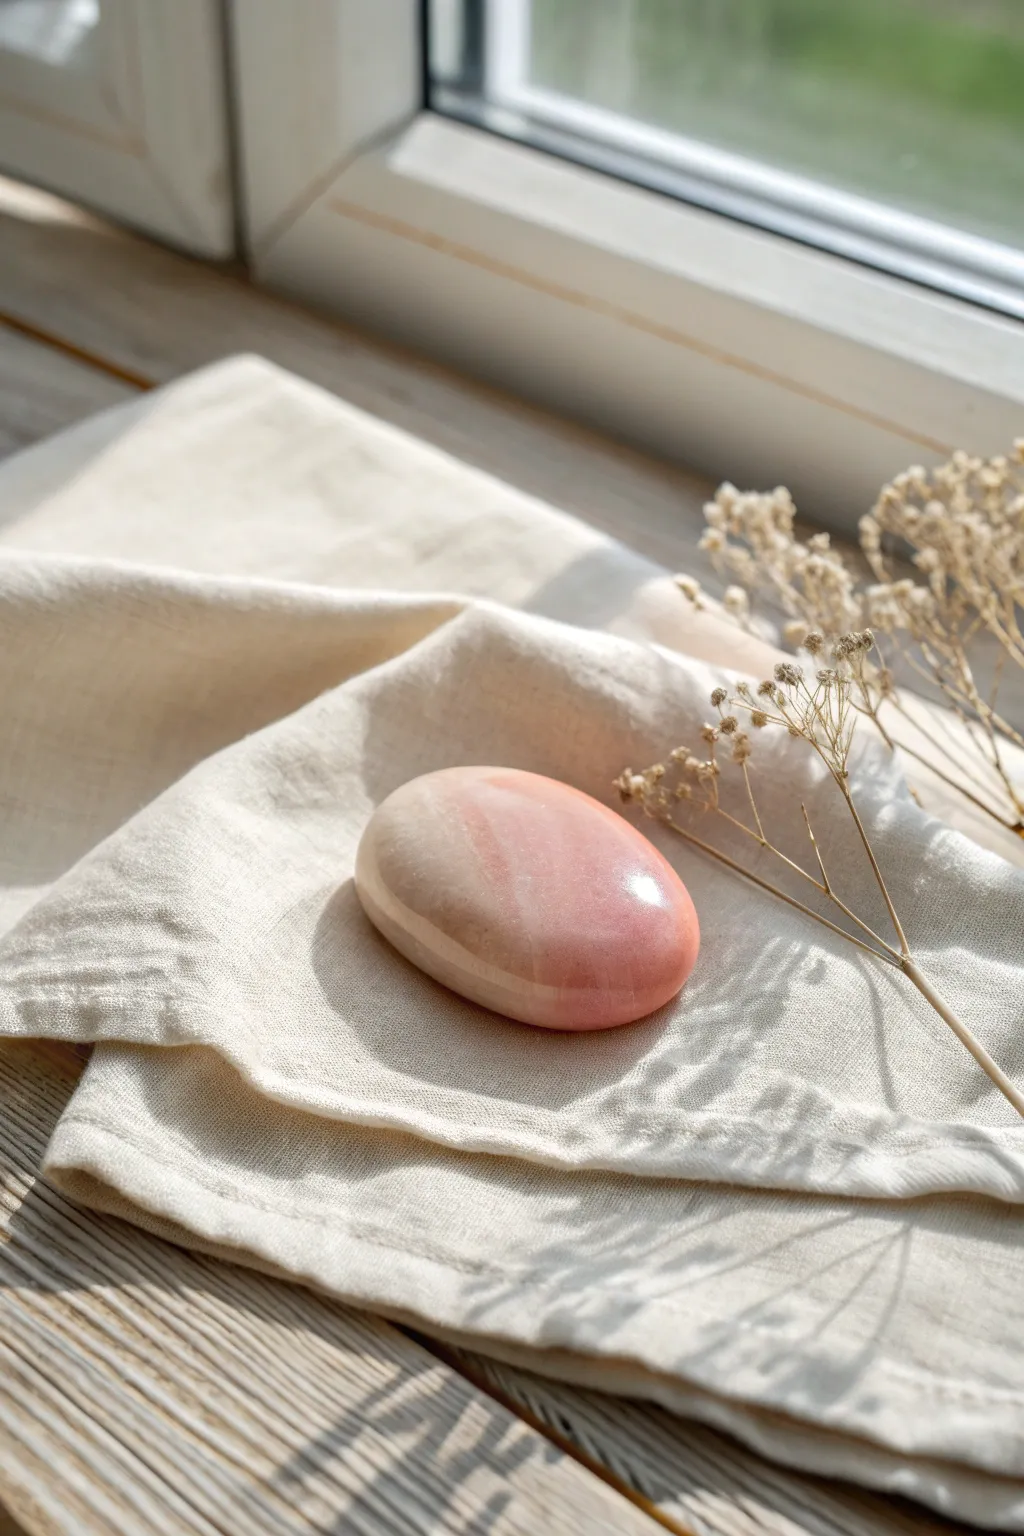
This soothing pocket-sized stone mimics the gentle elegance of rose quartz with subtle marbling and a glass-like finish. It fits perfectly in the palm of your hand, offering a smooth, comforting surface to rub whenever you need a moment of calm.
Step-by-Step Tutorial
Materials
- Translucent Sculpey clay
- White Sculpey clay
- Rose or pink Sculpey clay
- Glass baking dish or smooth ceramic tile
- Wet/dry sandpaper (400, 600, 1000, and 2000 grit)
- Small bowl of water
- Buffing wheel (dremel attachment) or denim cloth
- Gloss glaze (optional)
Step 1: Mixing the Colors
-
Condition the Crystal Base:
Begin by taking a generous chunk of translucent clay and conditioning it in your hands until it is soft and pliable. This transparency is crucial for achieving that realistic, stone-like depth. -
Create the Color Palette:
Divide your translucent clay into three equal portions. Leave the first portion plain. -
Mix the Soft Pink:
Take the second portion of translucent clay and mix in a very tiny pinch of rose clay. You want a barely-there, whisper-soft pink, not a solid color. Knead until fully blended. -
Mix the Milky White:
Take the third portion of translucent clay and mix in a tiny pinch of white clay. This will create the milky opacity often found in natural quartz.
Stone Texture Tip
Add tiny flecks of gold leaf or glitter into the translucent mix before twisting. It mimics mineral deposits for realism.
Step 2: Creating the Marble Effect
-
Form the Ropes:
Roll each of your three mixed clay balls into long, thin snakes about the thickness of a pencil. -
Twist and Combine:
Gather the snakes together and twist them into one large rope. Fold the rope in half and twist again. Repeat this twist-and-fold process about 3-4 times. -
Adding Solid Accents:
For that distinct color block look seen in the photo, add a small, separate snake of plain opaque white clay to one side of your twisted bundle before the final fold. -
Stop Mixing Early:
Be careful not to over-knead at this stage. You want distinct streaks of white, pink, and translucent, not a uniform color. Stop while the separation is still visible.
Level Up: Aromatherapy
Use a porous terracotta clay for the underside of the stone. You can then add a drop of essential oil to the bottom for a scented worry stone.
Step 3: Shaping and Baking
-
Form the Ball:
Roll the marbled clay into a smooth ball between your palms, ensuring there are no air bubbles trapped inside. -
Flatten into an Oval:
Gently press the ball onto your work surface to flatten it. Use your fingers to shape it into a smooth, organic oval. The center should remain slightly domed and thicker than the edges. -
Smooth the Surface:
Run your finger lightly over the surface to erase any fingerprints. I find using a tiny drop of baby oil helps to smooth out the clay perfectly without leaving drag marks. -
Create the Indent:
If you prefer a thumb groove, gently press your thumb into the center of the stone. For the smooth domed look in the photo, skip this step and keep the curve continuous. -
Bake the Clay:
Place your stone on a glass baking dish or ceramic tile. Bake according to the package instructions (usually 275°F or 130°C for 15-30 minutes depending on thickness). -
Cool Down:
Allow the stone to cool completely inside the oven or on the counter before handling. This ensures the clay hardens properly.
Step 4: Polishing for Shine
-
Start Sanding:
Dip your cooled stone and a piece of 400 grit sandpaper into the bowl of water. Sand the entire surface in a circular motion to remove any bumps or unevenness. -
Refine the Finish:
Progress through the remaining grits (600, 1000, then 2000), always keeping the stone and paper wet. The surface should start feeling incredibly smooth to the touch. -
Buff to a Shine:
Dry the stone completely. Use a buffing wheel on a rotary tool or vigorously rub the stone with a piece of denim fabric. The heat from the friction will bring out the translucent depth and a natural sheen. -
Optional Glaze:
For a super-high gloss finish like polished glass, you can apply a thin coat of Sculpey Gloss Glaze, though thorough buffing usually provides the most realistic stone look.
Now you have a serene, hand-polished piece of art to keep in your pocket.