If you love the look of real silver but want that soft, sculptable feel of clay, silver clay jewelry is such a satisfying rabbit hole to fall into. I’m rounding up my favorite silver clay jewelry ideas—starting with the classic, go-to designs and ending with a few playful, studio-style curveballs.
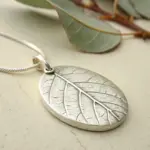
Leaf-Imprint Pendant
Capture the delicate beauty of nature forever with this fine silver pendant, showcasing the intricate vein structure of a real leaf. The result is a highly detailed, organic piece that looks sophisticated yet is surprisingly accessible for beginners to create.
How-To Guide
Materials
- Silver metal clay (approx. 7-10g depending on leaf size)
- Small fresh leaf with prominent veins (e.g., sage, hydrangea, or rose)
- Olive oil or badger balm (release agent)
- Roller or acrylic brayer
- Playing cards or slat spacers (1mm to 1.5mm thick)
- Scalpel or needle tool
- Plastic wrap or texture sheet
- Drinking straw or small shaped cutter (for bail hole)
- Fine sandpaper or sanding sponges (various grits)
- Butane torch and fire brick (or kiln)
- Stainless steel wire brush (soft brass brush works too)
- Burnishing tool or agate burnisher
- Liver of sulfur (optional for patina)
- Sterling silver jump ring and chain
Step 1: Preparation and Impression
-
Select your leaf:
Choose a fresh leaf rather than a dried one, as dried leaves tend to crumble. Look for deep, distinct veins on the backside of the leaf, as this texture will transfer best to the clay. -
Prepare the workspace:
Lay down a non-stick work surface or a laminated card. Lightly coat your hands, the roller, and the work surface with a thin layer of olive oil or balm to prevent sticking. -
Roll the clay:
Take your lump of silver clay and roll it into a smooth ball. Place equal stacks of playing cards (about 3-4 cards high) on either side of the clay to act as depth guides. Roll the clay out into a slab. -
Apply the leaf:
Place your chosen leaf face down (vein side up) ensuring no debris is caught underneath. Now, position the clay slab directly on top of the leaf. I prefer doing it this way so I can press the clay *into* the veins rather than just resting the leaf on top. -
Create the impression:
Roll over the clay-leaf sandwich firmly once, ensuring the clay penetrates the intricate vein structure. Don’t roll back and forth, as this creates ghost images.
Step 2: Shaping and Refining
-
Cut the shape:
Carefully flip the clay over so the leaf is now on top. Using a scalpel or needle tool, trace around the natural edge of the leaf. Keep your blade vertical for a clean edge. -
Add a bail loop:
Decide on the top of your pendant. At the stem end, form a small loop of excess clay paste or simply punch a hole near the top using a drinking straw to accommodate a jump ring later. -
Remove the leaf:
Gently peel the real leaf away from the clay. If it sticks, let it dry slightly; the leaf will usually curl away on its own. -
Dry completely:
Place the clay piece on a warping tray or a warm surface (like a cup warmer) to dry. It needs to be bone dry—no cold spots to the touch. This can take 20 minutes with heat or overnight. -
Refine the edges:
Once bone dry, use fine sanding sponges to smooth the edges where you cut. Be gentle, as the dry clay is brittle like unfired pottery. Do not sand the textured surface.
Clean Edges Only
When refining the dry clay, sand ONLY the edges. If you sustain scratches on the main surface, fill them with a tiny bit of clay paste and water, then dry again.
Step 3: Firing and Finishing
-
Prepare for firing:
Place the dried piece on a fire brick. Dim the lights so you can see the glow color accurately. -
Torch fire:
Ignite your butane torch. Gently heat the piece until the organic binder burns off (you’ll see a small flame). Then, bring the heat up until the piece glows a peachy-orange color. Hold this temperature for 2-3 minutes, moving the torch constantly. -
Cool and brush:
Quench the piece in water or let it air cool. It will look white and matte. Use a stainless steel wire brush with a bit of soapy water to vigorously brush the surface. The white will disappear, revealing shining silver. -
Burnish for shine:
Rub an agate burnisher along the raised veins and the edges of the leaf. This compresses the silver further and creates brilliant highlights that contrast with the textured background. -
Assemble:
Open a sterling silver jump ring using pliers, thread it through your prepared hole, and attach your silver chain.
Folded Leaf Effect
Before drying, gently drape the clay leaf over a rounded object like a dowel or lightbulb. This gives the pendant a natural, wind-blown curve instead of being flat.
Wear your botanical masterpiece with pride, knowing you’ve immortalized a fleeting moment of nature in pure silver.
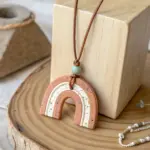
Botanical Coin Necklace
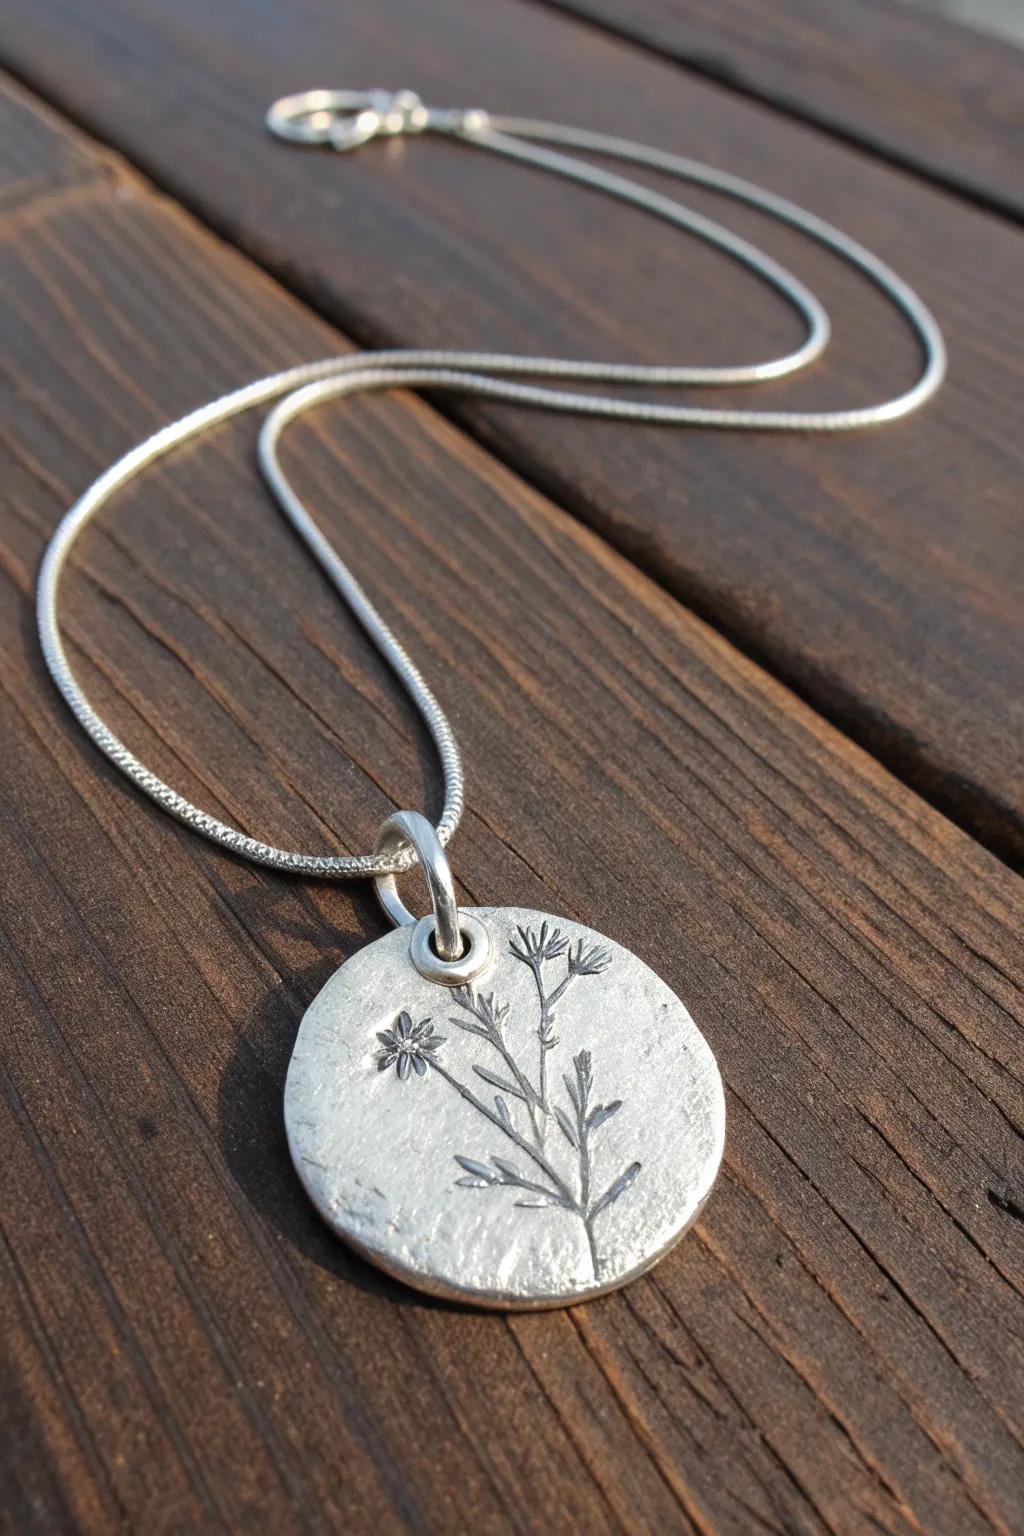
Capture the delicate beauty of wildflowers forever in fine silver with this botanical coin necklace project. Using silver metal clay allows you to impress real or stamp-textured floral designs into a soft surface that transforms into solid metal upon firing.
Step-by-Step
Materials
- Silver metal clay (PMC or Art Clay Silver, approx. 7-10g)
- Small botanical rubber stamp or textures sheet (wildflower design)
- Non-stick work surface or Teflon sheet
- Rolling pin or acrylic roller
- Playing cards or 1.5mm spacers
- Round cutter (approx. 20-25mm) or needle tool
- Small straw or 4mm round cutter (for the bail hole)
- Olive oil or Badger Balm (release agent)
- Sanding sponges (fine and superfine)
- Butane torch or kiln
- Stainless steel brush
- Liver of Sulfur (patina gel)
- Polishing cloth
- Silver jump ring (heavy gauge)
- Snake chain
Step 1: Shaping the Clay
-
Prepare your workspace:
Begin by lightly coating your hands, roller, and work surface with a tiny amount of olive oil or Badger Balm to prevent the clay from sticking. This is a crucial first step for smooth handling. -
Condition the clay:
Take your lump of silver clay out of the package. Knead it quickly and gently in your fingers for just a few seconds to ensure it is pliable and crack-free, then roll it into a smooth ball. -
Roll out the slab:
Place the clay ball on your work surface. Set your spacers (or a stack of 3-4 playing cards) on either side of the clay to act as depth guides. Roll the clay flat until the roller touches the spacers, ensuring an even thickness of about 1.5mm. -
Apply the texture:
Lightly oil your botanical stamp. Press it firmly and evenly into the clay slab. I like to commit to one confident press rather than wiggling it, which can double the image. Peel the stamp away carefully. -
Cut the shape:
Center your round cutter over the best part of the impression. Press straight down to cut the coin shape. If you prefer the organic look shown in the photo, you can gently tap the edges with your finger to soften the perfect circle. -
Create the bail hole:
Use a small straw or a tiny round cutter to punch a hole near the top edge. Make sure there is at least 2mm of clay between the hole and the edge to ensure the pendant is strong enough to hold the jump ring.
Step 2: Refining and Firing
-
Dry completely:
Let the piece dry for at least 24 hours at room temperature, or use a mug warmer or dehydrator to speed up the process. The clay must be bone dry before firing; if it feels cool to the touch, it still contains moisture. -
Sand and refine:
Once dry, use fine sanding sponges to smooth the edges and the back of the pendant. Be gentle around the stamped area so you don’t erase the fine details of the flower stems. -
Reinforce the hole:
Take a tiny drill bit or a small round file and very gently clean up the interior of the bail hole to ensure it’s perfectly round and smooth. -
Fire the piece:
Place the bone-dry piece on a kiln brick. If using a butane torch, dim the lights so you can see the glow. Heat the piece until it glows a peachy-orange color and hold that temperature for the time recommended by your clay manufacturer (usually 2-5 minutes). -
Cool and brush:
Quench the piece in water or let it air cool. The silver will look white and matte. Firmly brush the entire surface with a stainless steel brush to burnish the silver compacting the surface and bringing out the metallic shine.
Stamp Clarity Pro Tip
Before stamping, let the rolled clay sit for 2-3 minutes. If the surface is slightly drier/firmer, it takes a cleaner impression without sticking to the crevices of the stamp.
Step 3: Finishing Touches
-
Apply patina:
Prepare a warm solution of Liver of Sulfur. Dip the pendant for a few seconds until it turns dark gray or black. This oxidization is what makes the floral design pop. -
Highlight the relief:
Rinse and dry the pendant. Use a polishing cloth or a fine sanding sponge to remove the dark patina from the high points of the surface. This leaves the background silver bright while the stamped recesses remain dark. -
Burnish edges:
For that extra professional touch, run the smooth shaft of a steel burnisher along the rim of the coin to give it a mirrored, hardened edge. -
Assemble:
Twist open a heavy-gauge silver jump ring using two pairs of pliers. Thread it through the hole in your pendant and close it securely, ensuring the seam is tight. -
String it up:
Slide your finished organic coin onto a sleek silver snake chain to complete the modern botanical look.
Cracked Edges?
If small cracks appear on the edges while drying, mix a tiny bit of clay dust with water to make paste. Paint this into the cracks with a brush, let dry, and sand smooth.
Now you have a timeless piece of silver art that preserves the spirit of nature around your neck

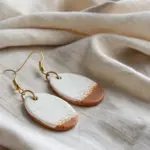
Simple Dangle Disc Earrings
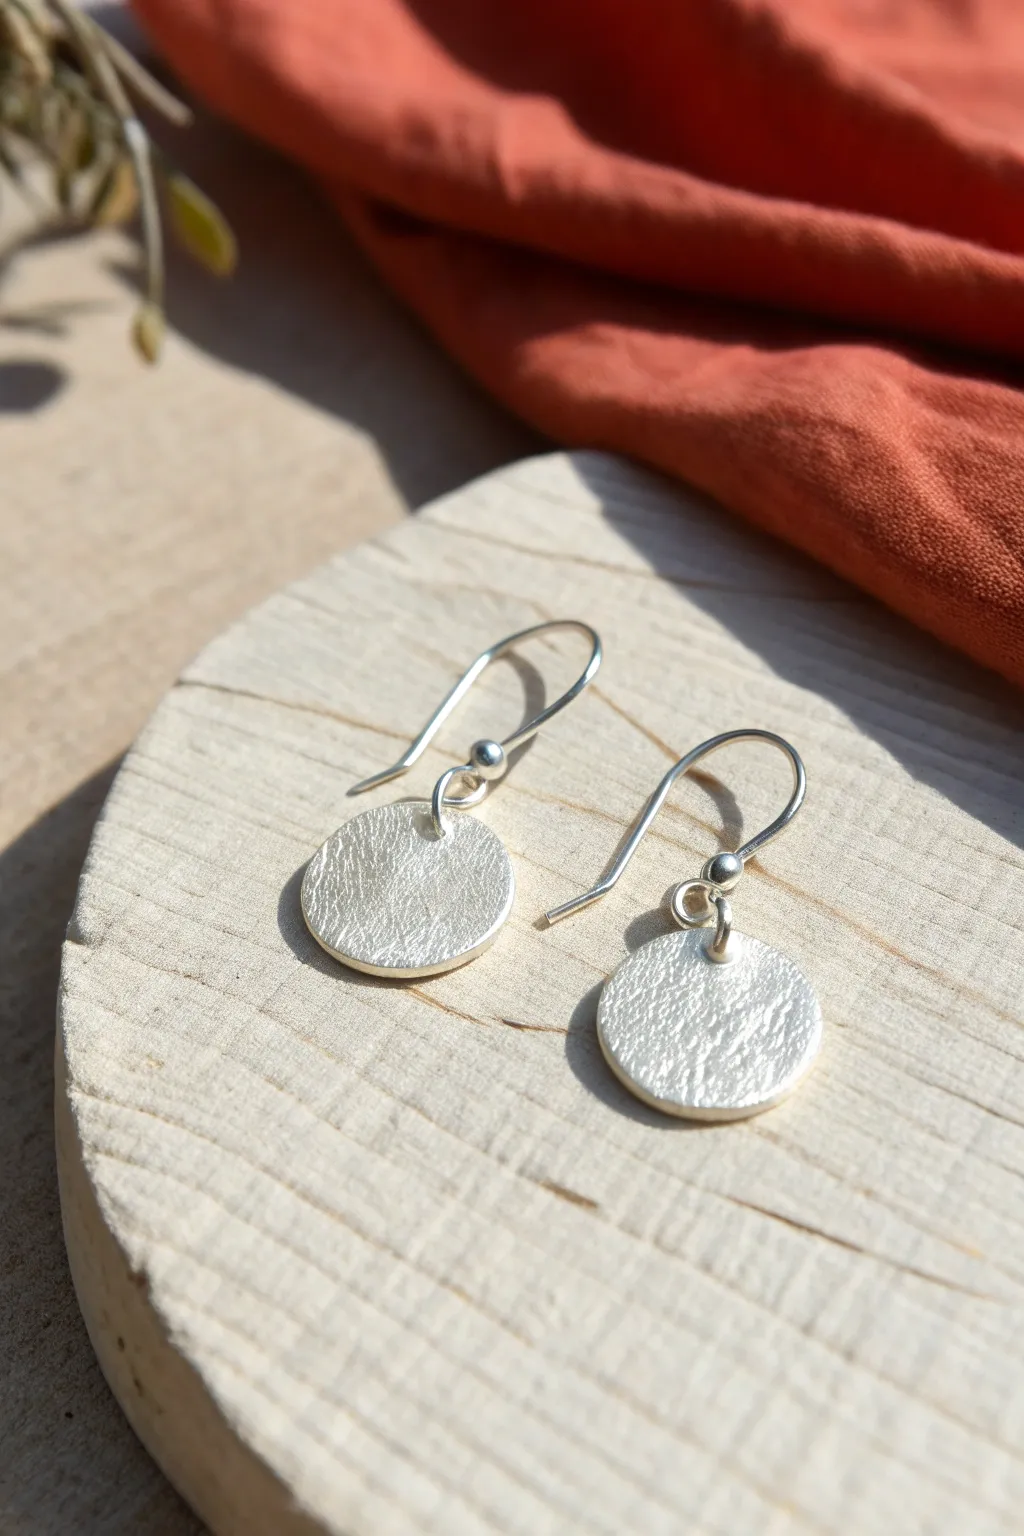
These elegant dangle earrings showcase the stunning simplicity of pure silver, featuring a subtle organic texture that catches the light beautifully. The classic disc shape makes them versatile for everyday wear, while the handcrafted finish adds a sophisticated artisanal touch.
Step-by-Step
Materials
- Silver metal clay (7-10g is sufficient)
- Texture sheet (sandpaper, textured wallpaper, or specialized clay texture mat)
- Clay roller or acrylic brayer
- Playing cards or slat spacers (1mm thick)
- Small circular cutter (approx. 1.5cm diameter)
- Needle tool or small straw
- Badger balm or olive oil (release agent)
- Firing method (torch or kiln)
- Stainless steel wire brush
- Burnishing tool
- 2 Sterling silver jump rings (5-6mm)
- 2 Sterling silver fishhook ear wires with bead detail
- Chain nose pliers
- Flat nose pliers
- Fine grit sanding sponge or sandpaper (600-1200 grit)
Step 1: Shaping the Clay
-
Prepare your workspace:
Begin by setting up a clean, non-stick work surface. Lightly coat your hands, roller, and work surface with a tiny amount of Badger balm or olive oil to prevent the silver clay from sticking. -
Condition the clay:
Take a small lump of silver clay out of the package—about the size of a large marble. Quickly knead it in your fingers for a few seconds to ensure it is pliable and free of cracks. Be swift, as silver clay dries out faster than polymer clay. -
Roll out the slab:
Place your spacer slats or a stack of 3-4 playing cards on either side of the clay. Roll the clay into a smooth slab. The spacers ensure an even thickness, which is crucial for durability. -
Apply texture:
Lightly oil your chosen texture sheet. Place the texture face down onto the clay slab (or the clay onto the texture). Roll over it firmly once with the roller to imprint the pattern deeply. I find a single firm pass works better than rolling back and forth, which can create ‘ghost’ images. -
Cut the shapes:
Position your small circular cutter over the textured clay to capture the most interesting part of the pattern. Press down fermly to cut out two discs. Lift the cutter away carefully. -
Create hanging holes:
While the clay is still wet, use a needle tool or a very small straw to punch a hole near the top edge of each disc. Make sure the hole is at least 2mm away from the edge to prevent breakage, and large enough to accommodate your jump rings after shrinkage (remember, the clay shrinks!). -
Refine edges:
Use a damp paintbrush or a clay shaper tool to gently smooth the edges of your cut discs. You want to remove any sharp burrs left by the cutter without distorting the circle shape.
Make It Sparkle
To get the shimmery ‘diamond dust’ look seen in the photo, use coarse sandpaper or a rough stone as your texture mat. The random pits scatter light beautifully.
Step 2: Drying and Refining
-
Dry the pieces:
Place the discs on a drying warmer or let them air dry for 24 hours. They must be bone dry before firing. You can test this by placing them on a mirror; if condensation appears after a few seconds, they are still damp. -
Pre-fire sanding:
Once fully dry, the clay will feel like plaster. Very gently sand the edges and the back with a fine-grit sanding sponge to make them perfectly smooth. Avoid sanding the textured front to preserve the detail. -
Clean the holes:
Hand-twist a small drill bit or use your needle tool to carefully ream out the hanging holes, ensuring they are clean and round.
Step 3: Firing and Finishing
-
Fire the clay:
Fire the pieces according to your clay manufacturer’s instructions. If torch firing, place the piece on a firing brick and heat until it glows a peachy-orange color, holding that temperature for the recommended time (usually 2-5 minutes). -
Quench and brush:
Once the firing is complete and the pieces have cooled (or been quenched in water if the clay type allows), the silver will look white and matte. Use a stainless steel wire brush to vigorously brush the surface. This burnishes the silver, bringing out the metallic shine. -
Highlight the texture:
For a high contrast look, you can tumble the pieces with steel shot for an hour. Alternatively, use a burnishing tool to rub the high points of the texture, making them sparkle while leaving the recessed areas slightly matte. -
Assemble the finding:
Using two pairs of pliers, twist open a jump ring (don’t pull it apart). Thread it through the hole in your silver disc and the loop on the ear wire. -
Close the ring:
Twist the jump ring back into a closed position, ensuring the ends meet perfectly flush so the disc doesn’t slip off. -
Repeat for the second earring:
Attach the second disc to the other ear wire in the same manner. Give the finished earrings a final buff with a polishing cloth to remove any fingerprints.
Fixing Cracks
If you see hairline cracks in the dry (greenware) stage before firing, make a thick paste of clay and water. Paint it into the crack, let dry, and sand smooth.
You have now transformed a small lump of clay into fine silver jewelry that looks professionally silversmith-made


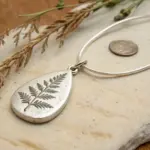
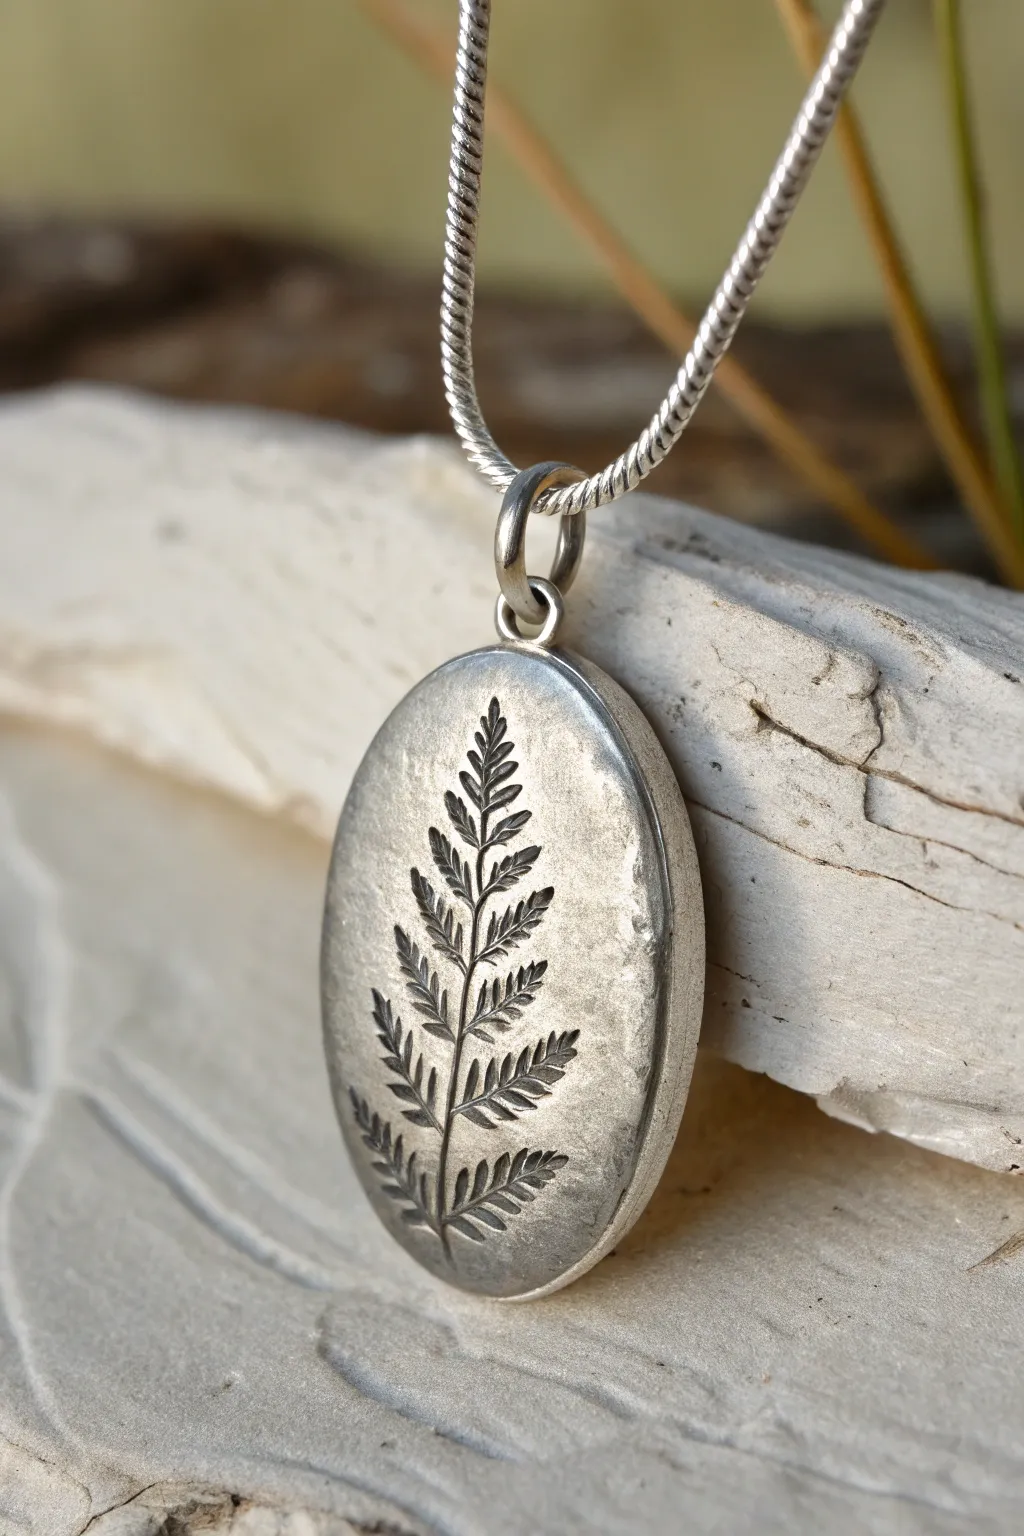
Fern Bar Necklace
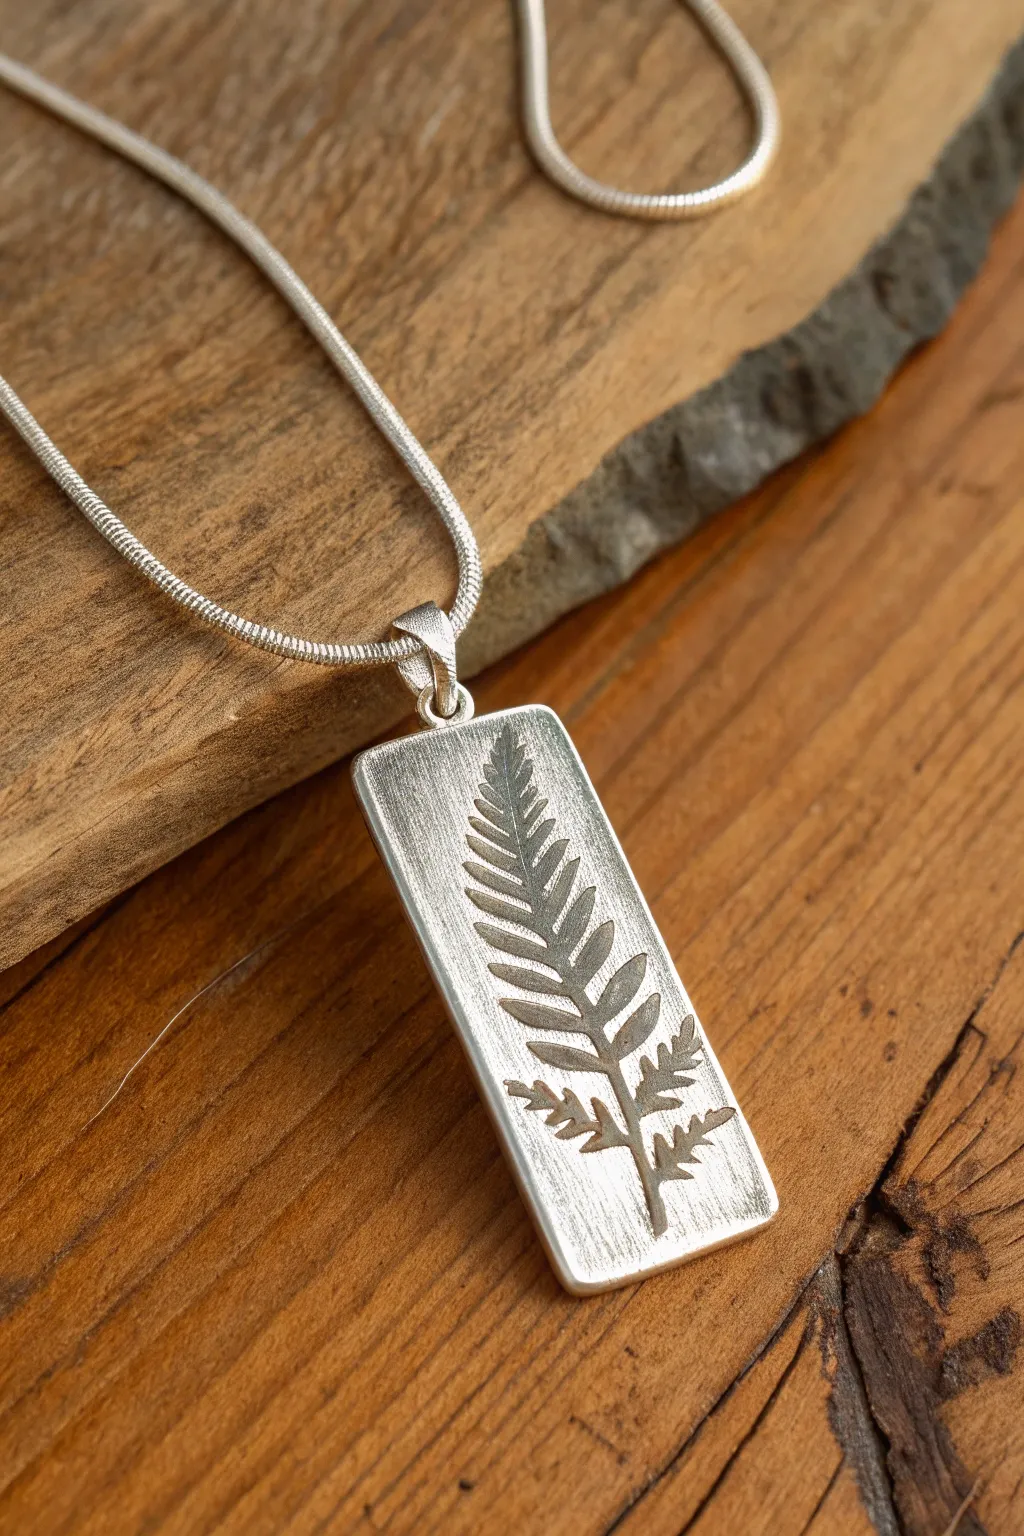
Capture the delicate beauty of nature with this rectangular silver clay pendant featuring a deep, detailed fern imprint. The piece combines a subtle brushed texture with an oxidized finish to make the botanical details pop against the shining silver.
Step-by-Step Tutorial
Materials
- Silver metal clay (e.g., PMC3 or Art Clay Silver, approx. 7-10g)
- Small fresh fern frond (sturdy varieties work best)
- Roller or acrylic brayer
- Playing cards or slat spacers (1mm and 1.5mm)
- Olive oil or Badger balm (release agent)
- Craft knife or tissue blade
- Rectangular template or cutter (approx. 1 inch x 0.5 inch)
- Small paintbrush and water
- Drinking straw or 3mm drill bit
- Butane torch or kiln
- Brass wire brush
- Liver of Sulfur (gel or chunks)
- Polishing sanding pads (various grits)
- Fine silver jump ring and bail
- Snake chain necklace
Step 1: Preparation & Texturing
-
Prepare the workspace:
Set up a non-stick work surface, such as a Teflon sheet or laminated card. Lightly coat your hands, the roller, and the work surface with a tiny amount of olive oil or balm to prevent sticking. -
Condition the clay:
Remove the silver clay from its package. While limiting exposure to air, knead it briefly in your fingers until it feels pliable and smooth, ensuring there are no cracks. -
Roll the base slab:
Place the clay between two stacks of playing cards (about 4-5 cards thick) or 1.5mm spacers. Roll over the clay with your roller to create a distinct, even slab. -
Apply the botanical:
Position your fern frond face-down on the silver slab. I like to gently press the central stem first to anchor it, then smooth out the leaves. -
Imprint the design:
Pass the roller over the fern firmly one time only. Do not roll back and forth, as this can create a ‘ghost’ image. Ensure the plant is pressed flush with the clay surface. -
Remove the plant:
Use tweezers or the tip of your craft knife to carefully lift the fern stem. Peel it away slowly to reveal the clean impression underneath.
Cracked Clay?
If small cracks appear while rolling, your clay is too dry. Dab a tiny drop of water on the crack and smooth immediately with a rubber-tipped tool or your finger.
Step 2: Shaping & Refining
-
Cut the rectangle:
Place your rectangular template over the best part of the fern imprint. Using a needle tool or sharp craft knife, cut strictly vertical straight lines around the template to create the bar shape. -
Add a bail attachment:
You can either drill a hole after firing or add a small loop of fresh clay to the top now. For the style in the photo, shape a small coil of clay into a U-shape and attach it to the top edge using a little water paste. -
Dry the piece:
Allow the clay to dry completely. You can use a food dehydrator, a cup warmer, or let it air dry for 24 hours. It is ready when it feels hard and room temperature to the touch, not cool. -
Refine the edges:
Once bone dry, use a fine grit sanding sponge to gently smooth the sharp edges and corners. Be careful not to sand away the surface texture of the fern.
Double Sided
Don’t waste the back! Place a textured mat or lace underneath the clay when rolling the initial slab. This gives the reverse side a hidden, tactile surprise.
Step 3: Firing & Finishing
-
Fire the silver:
Place the dry piece on a soldering block. Fire with a butane torch, bringing it to a peachy glow and holding that temperature for 2-3 minutes (or strictly follow your brand’s kiln schedule). Allow to cool completely. -
Brush the surface:
Scrub the fired silver vigorously with a brass wire brush and a drop of dish soap. This burnishes the white, matte surface into a shining silver metal. -
Patina the design:
Prepare a hot solution of Liver of Sulfur. Dip the pendant until it turns a dark gray or black. This creates the dark contrast inside the fern leaves. -
Polish for contrast:
Use a polishing pad or fine steel wool to buff the high points of the silver face. This removes the patina from the background rectangle, leaving the darkness only inside the recessed fern imprint. -
Assembly:
Attach a sterling silver bail to the loop you created (or the hole you drilled). Thread your snake chain through the bail to complete the necklace.
Wear your eternal silver fern with pride knowing you preserved a tiny piece of the forest.

The Complete Guide to Pottery Troubleshooting
Uncover the most common ceramic mistakes—from cracking clay to failed glazes—and learn how to fix them fast.
Stacking Rings With Mixed Textures
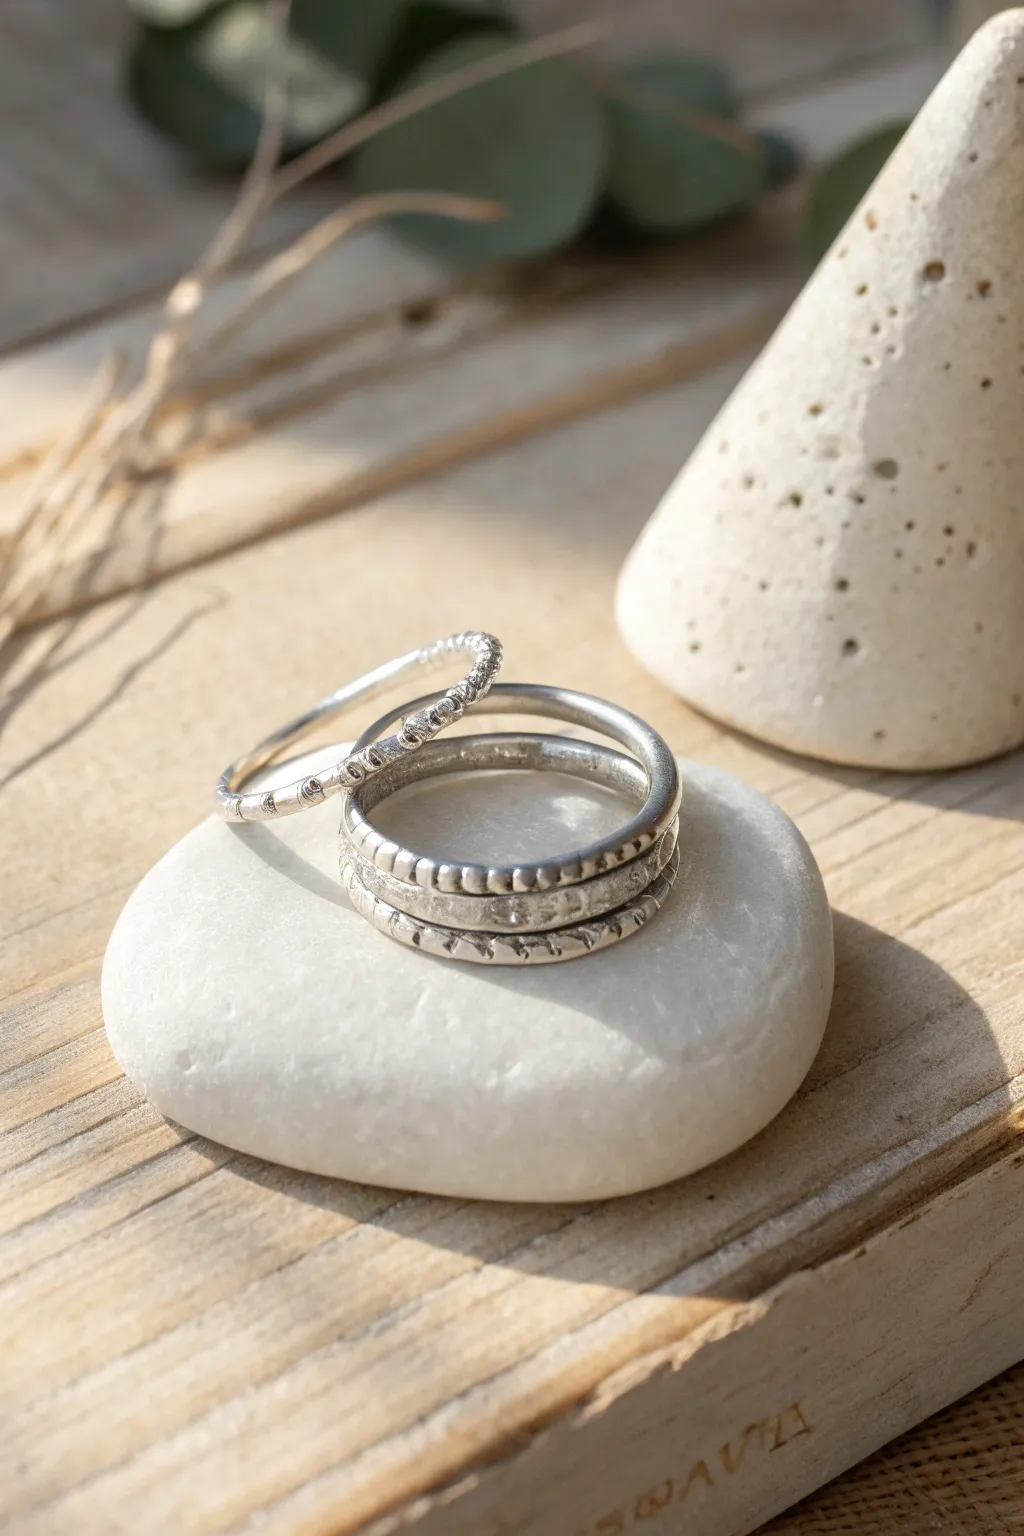
Master the art of creating perfectly coordinated stacking rings using silver metal clay. This project features three distinct bands—a delicate twisted wire look, a beaded classic, and a bold textured foundation—that look beautiful worn singly or piled high together.
How-To Guide
Materials
- Silver metal clay (approx. 10g-15g depending on ring size)
- Ring mandrel (stepped wooden mandrel is best for clay)
- Post-it notes or ring sizing paper
- Rolling pin or acrylic roller
- Playing cards or slate spacers (1mm and 1.5mm thickness)
- Clay shaper or small silicone tools
- Needle tool or craft knife
- Small cup of water and paintbrush
- Extruder (optional for the thin ring)
- Olive oil or Badger balm (release agent)
- Firing equipment (kiln or torch)
- Stainless steel brush
- Burnishing tool
- Fine sandpaper or sanding sponges (400-600 grit)
Step 1: Preparation & Sizing
-
Prepare the mandrel:
Determine your ring size. Because metal clay shrinks during firing (usually around 10-15%, check your specific package), wrap a Post-it note around the mandrel 2-3 sizes larger than your actual finger size. -
Condition the clay:
Rub a small amount of olive oil or balm onto your hands and work surface. Knead the clay briefly until it is pliable and crack-free, keeping it wrapped in plastic when not in immediate use to prevent drying.
Shrinkage Math Tip
To get exact sizing, calculate the inner circumference (Diameter x 3.14), add the shrinkage percentage, and cut your clay strip to that specific length before wrapping.
Step 2: Ring 1: Thin Twisted Band
-
Create the snake:
Roll a very thin snake of clay, or use an extruder with a small round disc to create a uniform coil about 1.5mm thick. Ensure it is long enough to wrap around your sizing paper with a little overlap. -
Twist the pair:
For the twisted look, you can either gently twist a single snake or, for more definition, roll two very fine snakes and twist them together. Gently compress them so they bond. -
Form the ring:
Wrap the twisted coil around the mandrel over the paper. Cut through both ends simultaneously with a blade for a flush join. -
Seal the seam:
Apply a tiny amount of water to the join and smooth the clay together using a silicone tool. The twisting texture makes hiding the seam easier here.
Level Up: Gemstones
Embed fireable cubic zirconia stones into the wider textured band while the clay is wet. Press them deep enough so the girdle of the stone is below the clay surface.
Step 3: Ring 2: Beaded Medium Band
-
Roll the strip:
Roll out a strip of clay approximately 2mm thick. Use spacers or playing cards (about 6 cards high) to ensure an even thickness. -
Texturing:
You can achieve the beaded look by pressing a ball-chain into the center of the strip, or by using a specialized texture plate. Alternatively, use a small dotting tool to impress dents individually along the clay strip. -
Trim to size:
Using a sharp blade or needle tool, trim the top and bottom of the strip so only the central beaded pattern remains. It should be roughly 2-3mm wide. -
Join the band:
Wrap this strip around the mandrel. Like the previous ring, slice through the overlap and use paste (a mushy mix of clay and water) to join the ends securely.
Step 4: Ring 3: Wide Textured Band
-
Roll the base:
Roll a wider strip of clay, roughly 4-5mm wide and 1.5mm thick. This will be the sturdy base of your stack. -
Apply texture:
Before gently lifting the clay, press a rough texture onto the surface. You can use sandpaper, a texture sheet, or even a piece of rough fabric to get that organic, pitted look seen in the bottom ring. -
Carve details:
Once wrapped and joined on the mandrel, use a needle tool to add angled hatch marks or deepen the texture along the edges for a rugged, handmade feel.
Step 5: Refining & Firing
-
Drying:
Allow all three rings to dry completely on the mandrel or carefully slide them off once they are leather-hard. A mug warmer can speed this process up. -
Pre-fire sanding:
Once bone dry, use fine sanding sponges to smooth the insides of the rings and refine the edges. Be gentle with the thin twisted ring as it is fragile in this state. -
Firing:
Fire the rings according to your clay manufacturer’s instructions. Kiln firing is recommended for strength, usually at 1650°F (900°C) for two hours, but torch firing works well for these smaller diameters too. -
Finishing:
After cooling, quench the rings in water. Vigorously brush them with a stainless steel brush and soapy water to reveal the silver shine. -
Polishing:
Use a burnishing tool to highlight the high points of the textures—the tops of the beads and the twists—leaving the recessed areas matte or applying a liver of sulfur patina to darken them.
Enjoy mixing and matching your new custom silver stack to create different looks every day
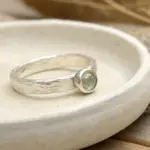
Bezel-Style Stone Accent Pendant
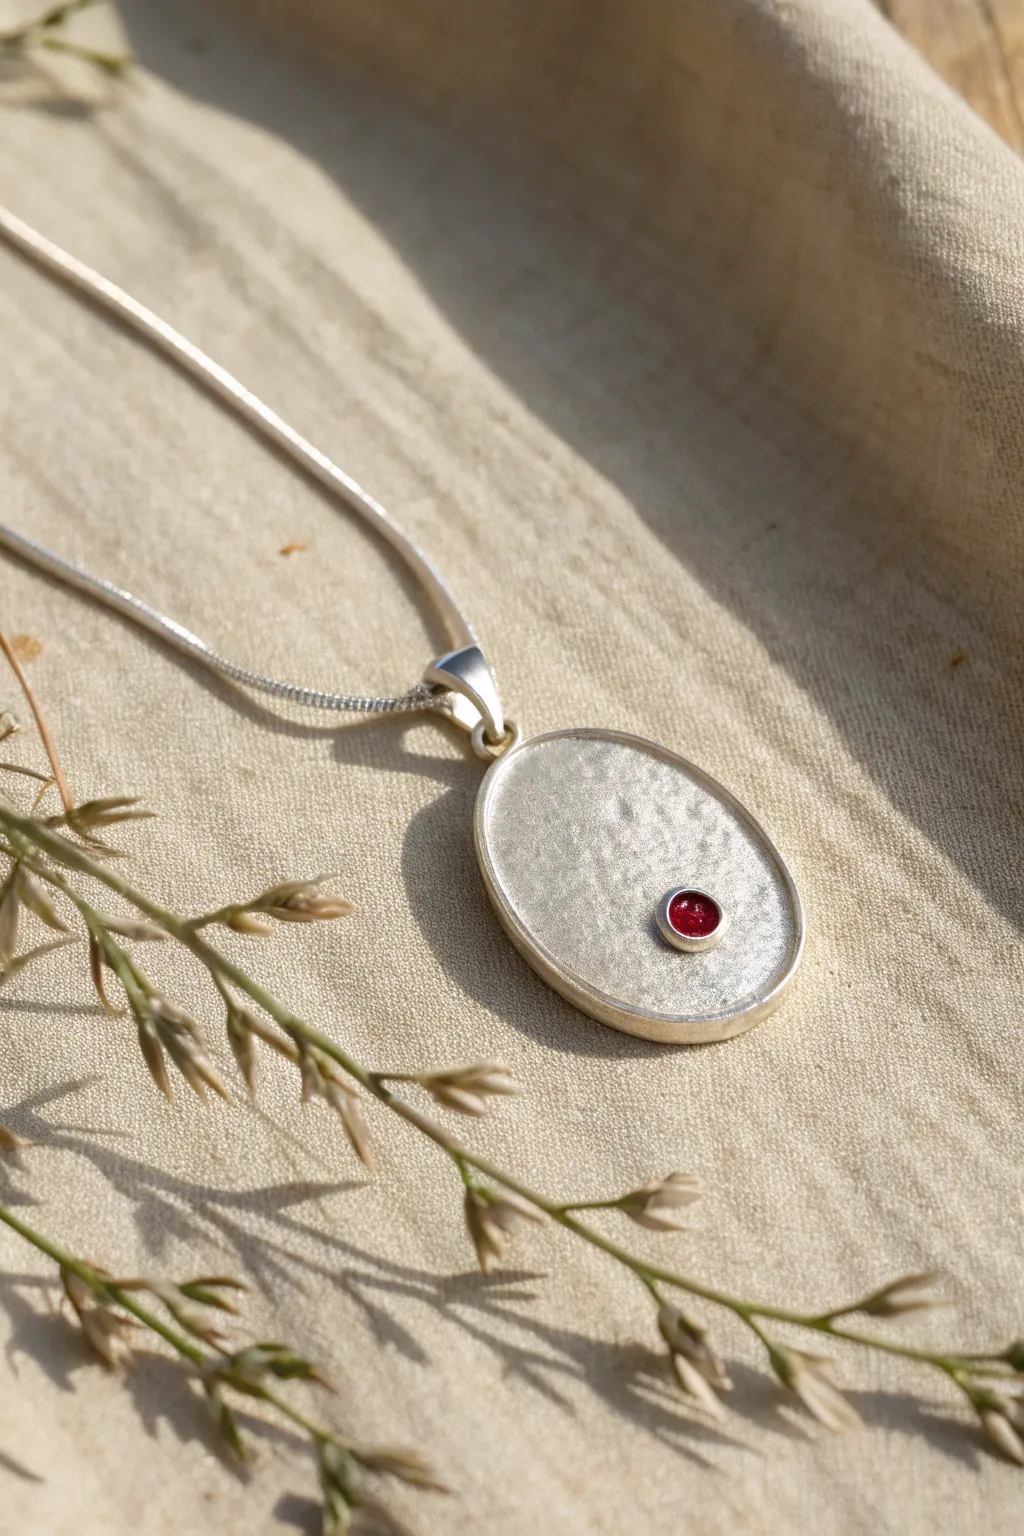
This elegant pendant contrasts a textured, organic silver surface with the sharp pop of a single red gem set in a bezel. Using silver clay allows for easy shaping and texturing without traditional metalsmithing tools.
Step-by-Step Tutorial
Materials
- Silver metal clay (PMC or Art Clay)
- Small round gemstone (synthetic ruby or CZ suitable for firing)
- Round bezel cup (fine silver) or firing-safe bezel wire
- Oval shape cutter (or template and needle tool)
- Textures (sandpaper, textured mat, or sponge)
- Roller and spacers (playing cards or dedicated slats)
- Needle tool
- Refining tools (files, sandpaper)
- Kiln or torch for firing
- Burnisher or tumbler for finishing
- Sterling silver bail
- Sterling silver chain
Step 1: Shaping the Base
-
Roll out the clay:
Begin by conditioning your silver clay and rolling it out to an even thickness. Use spacers or playing cards stacked about 3-4 cards high to ensure the pendant has enough weight and substantial feel. -
Add texture:
Before cutting the shape, gently press a subtle texture onto the clay surface. A piece of coarse sandpaper or a specialized metal clay texture mat works beautifully to create that organic, stippled look seen in the photo. -
Cut the oval:
Use your oval cutter to stamp out the main shape. If you don’t have a cutter, place an oval paper template on the clay and carefully trace around it with a needle tool. -
Refine the edges:
While the clay is still wet, gently smooth the cut edges with a damp finger or a clay shaper to remove any sharpness or burrs.
Step 2: Setting the Bezel
-
Prepare the bezel cup:
Select a fine silver bezel cup that fits your chosen stone perfectly. Since we are firing in place, ensure the stone is kiln-safe. -
Position the accent:
Decide on the placement for your stone. The off-center, lower-right position creates a modern, asymmetrical balance. Press the bezel cup gently into the wet clay to make an indentation. -
Secure the bezel:
Lift the cup, add a tiny dab of silver clay paste (slip) to the indentation, and press the bezel cup back in firmly so it sinks slightly into the surface. Blend the clay around the base of the cup with a fine-point tool to ensure a seamless bond.
Shrinkage Surprise
Silver clay shrinks 8-15% when fired! If your bezel cup protrudes too much after firing, you can carefully sand the height down before setting the stone.
Step 3: Hardware and Firing
-
Attach the bail connector:
You can either drill a hole after firing or attach a small loop of silver wire or a specialized bail connector to the top of the oval while the clay is wet. Use plenty of paste to secure it. -
Dry completely:
Let the piece dry thoroughly. I usually place it on a mug warmer to speed this up, but air drying for 24 hours works too. The clay must be bone dry before firing to prevent cracking. -
Refine dry clay:
Once dry, use fine-grit sandpaper to smooth the edges and the back. Be careful around the texture on the front so you don’t sand it away. -
Fire the pendant:
Fire the piece according to your clay manufacturer’s instructions. A kiln is ideal for sustained temperatures, but a butane torch can work for smaller pieces like this if you are careful to maintain heat.
Double Sided
Before drying, gently press a leaf skeleton or lace into the back of the pendant. This adds a hidden, personal detail for the wearer without affecting the front design.
Step 4: Finishing Touches
-
Brush finish:
After firing, the silver will look white and matte. Brush it vigorously with a brass wire brush and soapy water to burnish the surface and reveal the silver shine. -
Set the stone:
Place your stone into the bezel cup. Use a bezel pusher or burnisher to gently push the metal walls over the stone, working in opposites (north-south, east-west) to keep the stone level. -
Create the satin finish:
To achieve the soft, frosted look in the image rather than a mirror shine, avoid polishing compounds. Instead, lightly buff the surface with fine steel wool or a radial bristle disc. -
Attach the bail:
Open the jump ring on your silver bail and attach it to the loop or hole at the top of the pendant. -
Final assembly:
Thread a sleek silver snake chain through the bail to complete the necklace.
Wear your handcrafted silver pendant with pride or gift it as a truly unique keepsake


What Really Happens Inside the Kiln
Learn how time and temperature work together inside the kiln to transform clay into durable ceramic.
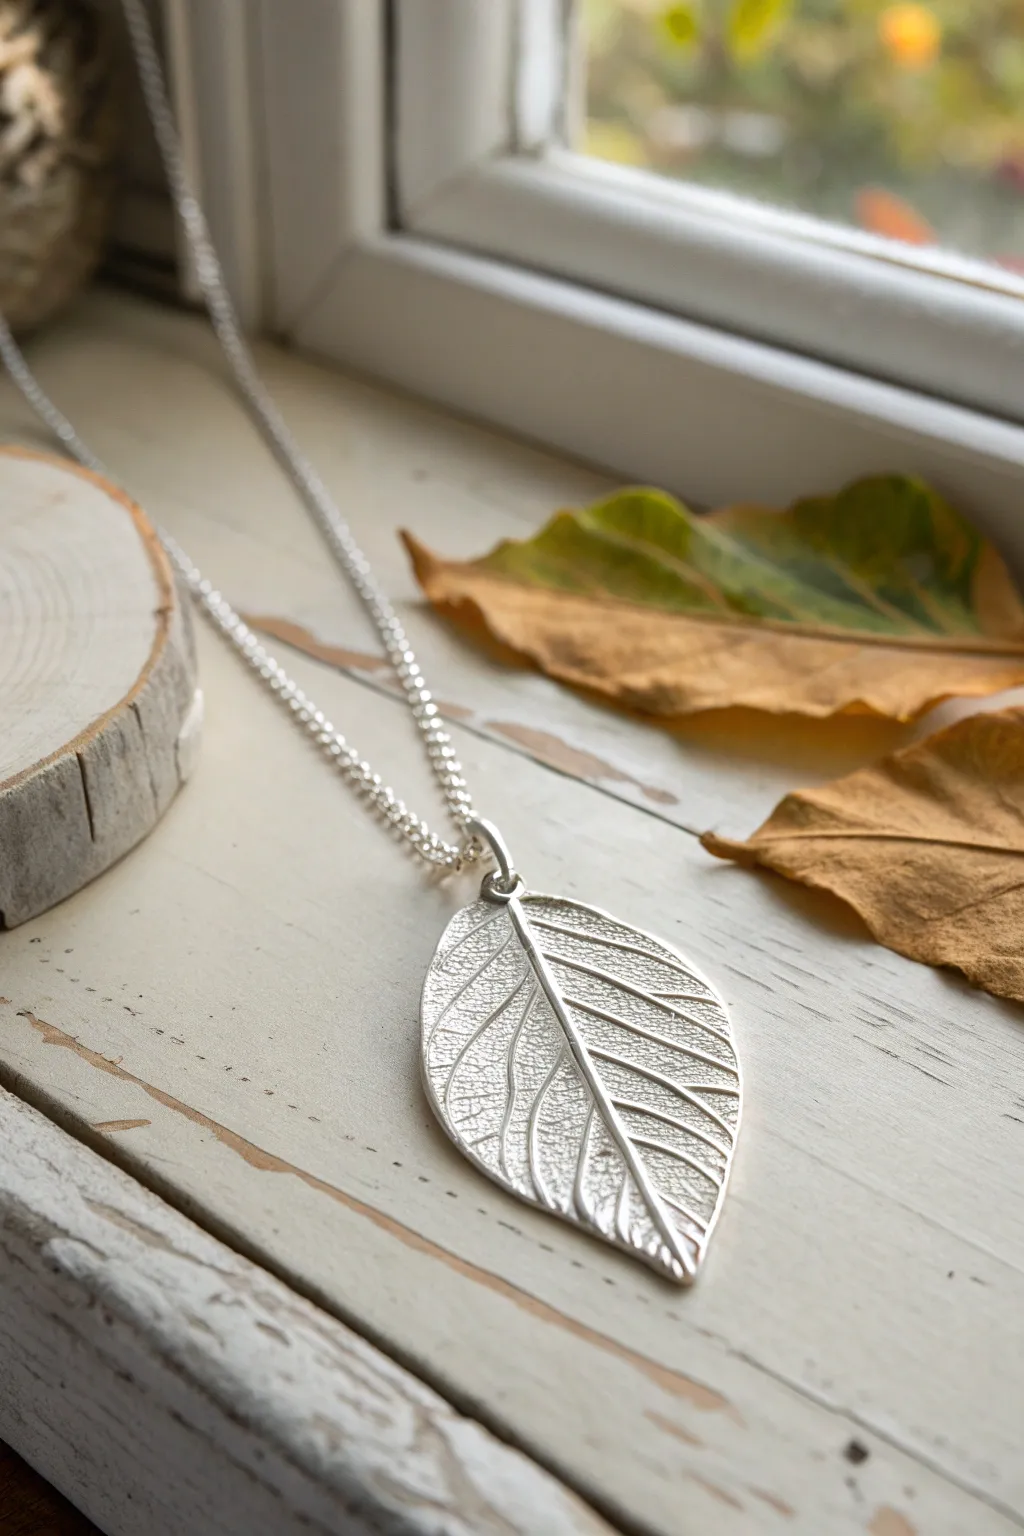
Cutout Silhouette Pendant
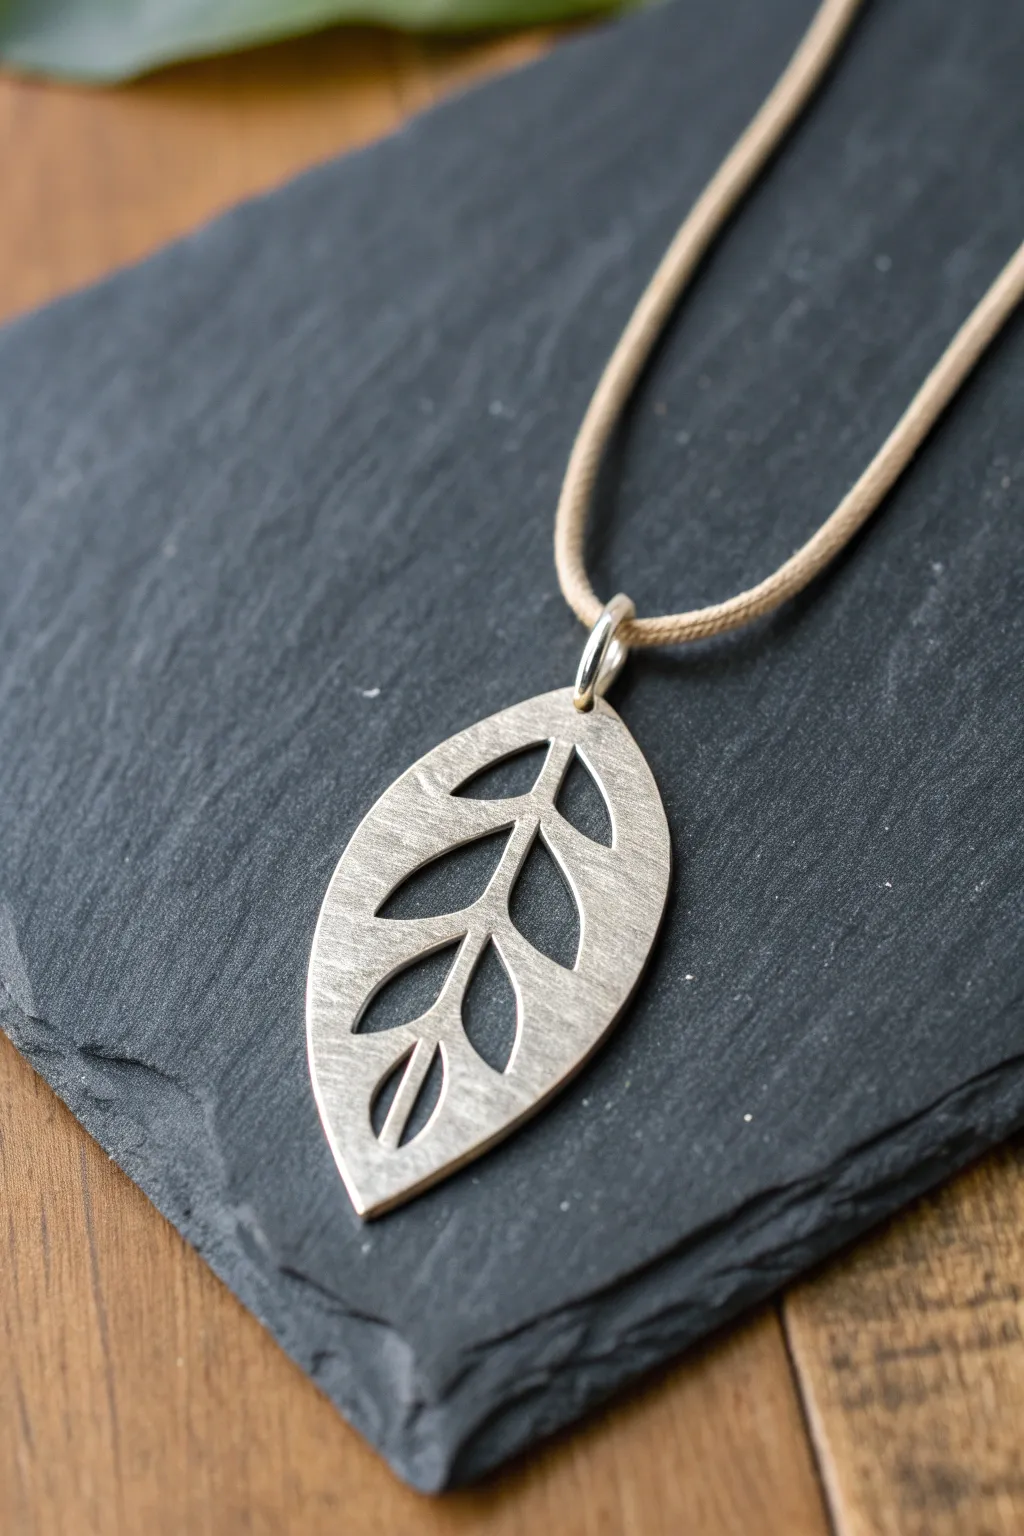
This elegant pendant captures the organic beauty of a leaf using the versatile medium of silver clay. By focusing on negative space and a clean silhouette, you’ll create a sophisticated piece with a soft, matte finish perfect for everyday wear.
Step-by-Step
Materials
- Silver metal clay (approx. 7-10g)
- Leaf shape template or cutter
- Scalpel or fine needle tool
- Rolling pin or acrylic roller
- Playing cards or spacers (1.5mm thickness)
- Olive oil or badger balm (release agent)
- Work surface (Teflon sheet or laminated card)
- Small straw or tubing (for bail loop)
- Sanding sponges (fine and superfine)
- Torch or kiln for firing
- Stainless steel wire brush
- Agate burnisher (optional)
- Jump ring (sterling silver)
- Cord or chain necklace
Step 1: Shaping the Clay
-
Prepare your template:
Begin by drawing a simple leaf shape on a piece of cardstock, roughly 3cm to 4cm long. Sketch the internal ‘veins’ as cutouts, leaving a sturdy central spine and border. Cut this paper template out carefully. -
Prepare the work surface:
Lightly coat your work surface and your hands with a tiny amount of olive oil or balm to prevent the silver clay from sticking. -
Roll the clay:
Take your lump of silver clay and roll it into a smooth ball. Place your spacers (about 3-4 playing cards thick) on either side and roll the clay flat with your acrylic roller for an even thickness. -
Cut the perimeter:
Place your paper template gently onto the rolled clay without pressing it in too deep. Using a sharp scalpel, trace around the outer edge of the leaf shape with a steady hand to create the main silhouette. -
Create the negative space:
With the template still in place as a guide, or by lightly marking the clay through the paper, use your scalpel or a needle tool to carefully excise the internal leaf sections. -
Add the bail loop:
Before the clay dries, shape a small snake of clay into a loop at the top of the leaf stem. Attach it securely using a drop of water and blending the clay seams until invisible. Ensure the hole is large enough for your jump ring. -
Refine the edges:
Dip a fine paintbrush in water and gently run it along all cut edges to smooth out any sharpness or jagged bits left by the scalpel. Aim for a soft, rounded edge.
Step 2: Drying and Refining
-
Dry thoroughly:
Let the piece dry completely. You can leave it for 24 hours at room temperature or use a dehydrator/hot plate for about 20 minutes. It must be bone dry before firing. -
Pre-fire sanding:
Once dry, the clay is in its ‘greenware’ state and is very fragile. Very gently use a fine sanding sponge to smooth the flat surfaces and perfect the curves of your cutouts. -
Check specifically for cracks:
Inspect the point where the bail loop meets the leaf. If you see tiny hairline cracks, fill them now with a dab of clay paste and let dry again.
Repairing breaks
If a thin vein breaks while carving the dry greenware, don’t panic. Apply a tiny drop of water to both broken ends, add a smear of fresh clay paste, press together, and let dry again before sanding.
Step 3: Firing and Finishing
-
Fire the piece:
Fire the pendant using a kiln (following manufacturer instructions typically around 1200°F/650°C) or a butane torch. If torch firing, place the piece on a firing block and heat until it glows a peachy-orange color for the required time (usually 2-3 minutes). -
Cool down:
Allow the silver to cool naturally on the heat-proof brick. Do not quench it in water, as thermal shock can be risky for certain clay types. -
Brush the finish:
The silver will look white and chalky initially. Vigorously brush the entire surface with a stainless steel wire brush to compress the silver and reveal the metallic shine. -
Create a matte texture:
To achieve the specific matte look in the photo, skip high polishing. Instead, rub the surface in a circular motion with a fine-grit sanding sponge or steel wool. This creates a soft, satin texture rather than a mirror finish. -
Burnish the edges:
I like to use an agate burnisher just along the very edges of the leaf and the cutouts to make them gleam slightly more than the flat surfaces, adding subtle dimension. -
Assembly:
Open a sturdy sterling silver jump ring using two pairs of pliers. Thread it through the fired bail loop and close it securely. -
Final touch:
Thread your finished pendant onto a simple beige cord or leather thong to match the understated, natural aesthetic of the design.
Add leaf texture
Before cutting the shape, gently roll the clay over a real skeleton leaf or a texture mat. This imprints delicate veins into the silver surface for a more detailed, organic appearance.
Enjoy wearing a piece of nature that you crafted with your own hands
Hollow Bead Necklace Focal
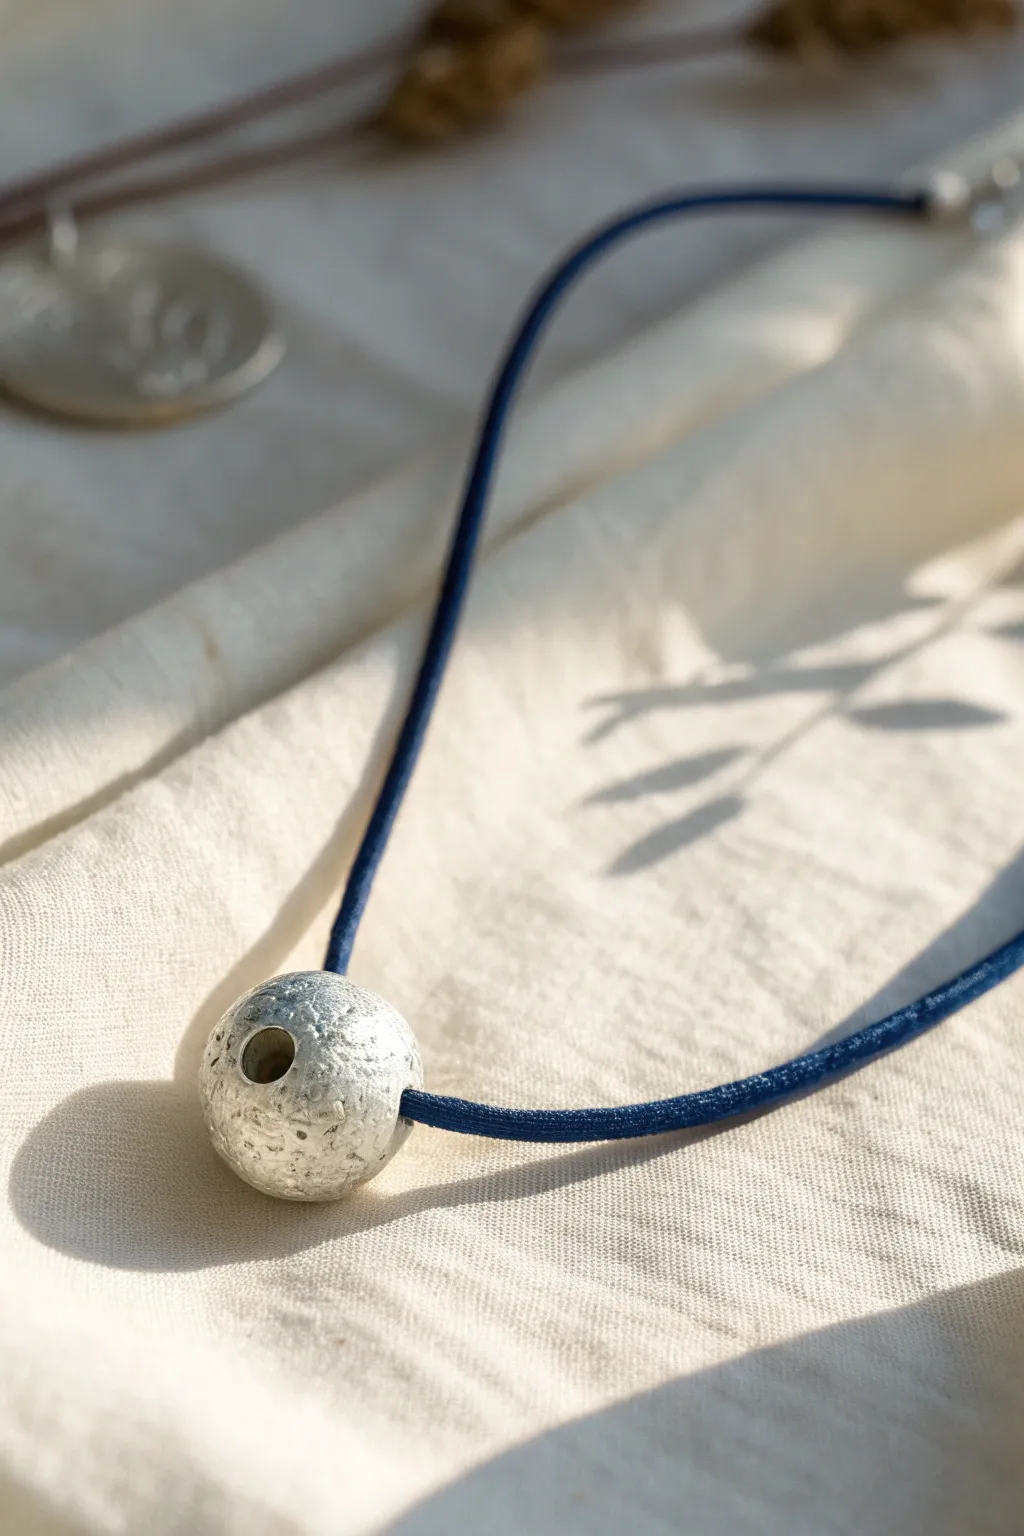
Capture the mystic allure of the moon with this surprisingly lightweight hollow silver bead. Using wood clay as a disappearing core allows you to create a substantial sphere that won’t weigh you down, finished with a rugged, organic texture.
Step-by-Step
Materials
- Silver metal clay (approx. 10-15g)
- Wood clay or cork clay (for the core)
- Small straw or mandrel (approx. 3-4mm)
- Olive oil or badger balm (release agent)
- Texture sponge or stiff brush
- Sandpaper/sanding sponges (various grits)
- Needle tool
- Butane torch or kiln
- Blue fabric cord or leather cord
- Silver polishing cloth
- Water and small paintbrush
Step 1: Creating the Core
-
Form the base:
Take a chunk of wood clay or cork clay about the size of a large marble. Roll it into a smooth, even ball between your palms. -
Create the channel:
While the core is still wet, carefully push your straw or mandrel through the center to create the hole for your cord. Leave the straw inside while it dries to maintain the shape. -
Dry completely:
Let the core dry thoroughly. You can speed this up with a hair dryer or on a mug warmer, but it must be bone dry before adding silver.
Shrinkage Rates
Remember that cork clay shrinks less than silver clay. This can cause cracking during drying. Dry slowly and repair cracks with clay paste.
Step 2: Applying Silver Clay
-
Roll out the clay:
Roll your silver clay into a sheet approximately 1mm thick. Use playing cards or slat spacers to ensure an even thickness. -
Cover the core:
Lightly moisten the dry core with a tiny bit of water. Wrap the silver clay sheet around the core, trimming away excess with a needle tool. -
Seal the seams:
Using a wet paintbrush or rubber shaper, blend the seams where the clay edges meet until they disappear completely. The ball should look seamless. -
Clear the holes:
Locate the holes in your core and carefully pierce the silver clay at those spots. Use a tool slightly larger than your final cord size to ensure shrinkage doesn’t close the hole too much. -
Refine the shape:
Roll the clay-covered ball gently in your hands to smooth out lumps, but don’t worry about perfection; organic is better here.
Darken the Moon
Dip the fired bead in liver of sulfur gel to blacken it, then polish the high spots. This makes the crater texture pop with dramatic contrast.
Step 3: Texturing and Firing
-
Add the crater texture:
This is the fun part. tap a coarse texture sponge or the bristles of a stiff brush all over the surface of the wet clay. I sometimes press harder in random spots to create deeper ‘craters’. -
Dry the silver:
Allow the silver clay to dry completely. It should feel warm, not cool, to the touch when ready. -
Refine the opening:
Once dry, use a small drill bit or round file to gently clean up the rim of the cord holes so they are neat and round. -
Fire the piece:
Fire the bead in a kiln according to your clay brand’s instructions (usually 1650°F/900°C for 2 hours) to fully sinter the silver and burn out the wood core.
Step 4: Finishing Touches
-
Brush firmly:
After cooling, scrub the white firing residue off with a brass brush and soapy water. You’ll see the silver shine through immediately. -
Polish highlights:
Use a polishing cloth or a burnisher to shine the high points of the texture, leaving the recessed ‘craters’ matte white or satin silver for contrast. -
Inspect the interior:
Make sure all ash from the wood core is shaken out of the interior hole. -
String it up:
Thread your blue fabric cord through the bead holes. If the cord frays, wrap the tip in a tiny piece of tape to guide it through.
Wear your celestial creation solo for a minimalist statement or layer it with other silver charms

TRACK YOUR CERAMIC JOURNEY
Capture glaze tests, firing details, and creative progress—all in one simple printable. Make your projects easier to repeat and improve.
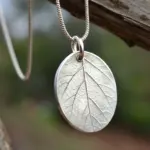
Hidden Bail Botanical Pendant
Capture the delicate details of nature in fine silver with this elegant botanical pendant. Using silver metal clay, you will create a lasting impression of a fern leaf, accentuated by an antiqued patina that highlights every vein and stem.
Step-by-Step Guide
Materials
- Silver metal clay (approx. 10g-15g)
- Small, fresh fern frond or botanical of choice
- Oval cutter or template
- Clay roller and spacers (1.5mm or 3-4 cards thick)
- Small paintbrush and water
- Olive oil or Badger balm (release agent)
- Teflon work surface or playing card
- Needle tool or craft knife
- Fine sandpaper or sanding sponges (various grits)
- Silver jump ring (heavy gauge) for the bail
- Liver of Sulfur (patina solution)
- Polishing cloth and steel wool (0000 grade)
- Small kiln or butane torch
- Agate burnisher (optional)
Step 1: Creating the Impression
-
Prepare the workspace:
Begin by lightly coating your Teflon sheet, roller, and hands with a release agent like olive oil or Badger balm to prevent the clay from sticking. This ensures a smooth workflow, which is crucial when working with quick-drying creative clay. -
Condition the clay:
Take your silver clay out of the package and knead it briefly in your palms. You want to work it just enough to ensure it’s pliable and free of cracks, but try not to overwork it as this can dry it out. -
Roll out the slab:
Place the ball of clay on your work surface. Set your spacers to about 1.5mm thickness on either side. Roll the clay into a smooth, even slab. Check for any air bubbles and gently pierce them with a needle tool if needed. -
Position the botanical:
Select a perfect section of your fern frond. Place it face down onto the clay slab. I often like to curve the stem slightly to give the design a more organic, flowing feel within the oval shape. -
Imprint the design:
Roll over the leaf once firmly with your roller. Do not roll back and forth, as this can create a double image or ghosting effect. You want one solid pass to embed the botanical deep into the clay. -
Cut the shape:
Position your oval cutter over the imprinted fern to frame the composition. Press down firmly to cut the shape. If you don’t have a cutter, place a paper template on the clay and trace around it with a needle tool. -
Remove excess clay:
Carefully peel away the excess clay from around the oval. Immediately wrap this scrap clay in plastic wrap to use for future projects. Gently lift the fern leaf off the clay using tweezers to reveal the detailed impression.
Step 2: Refining and Firing
-
Attach the bail:
Form a small loop or U-shape from a scrap of clay or use a paste to attach a pre-made silver jump ring to the top edge of the oval. If using clay to secure a metal ring, ensure the connection is seamless by blending it with a damp brush. -
Dry the piece:
Let the clay dry completely. You can air dry it for 24 hours or place it on a cup warmer or dehydrator for about 20-30 minutes. The clay must be bone dry before firing to prevent popping. -
Sand and refine:
Once dry, use fine-grit sandpaper or sanding sponges to smooth the edges and the back of the pendant. Be gentle around the bail connection. Do not sand the front face where the texture is. -
Fire the pendant:
Place the piece in a kiln according to the clay manufacturer’s schedule (usually 1200°F-1650°F). Alternatively, place it on a firing brick and fire with a butane torch until it glows a peachy-orange color for the required time (typically 2-3 minutes). -
Cool and brush:
Allow the silver to cool completely. It will look white and matte. Brush it vigorously with a brass wire brush and soapy water to burnish the surface and reveal the silver shine.
Sticky Leaf?
If the leaf pulls up clay when you remove it, try lightly oiling the leaf before pressing. Alternatively, let the clay dry for just a minute after rolling but before removing the leaf to reduce stickiness.
Step 3: Finishing Touches
-
Apply patina:
Prepare a warm Liver of Sulfur solution. Dip the pendant into the solution until it turns a dark gray or black. This oxidizes the recessed areas of the fern to create contrast. -
Neutralize and rinse:
Rinse the pendant in a mixture of water and baking soda to stop the oxidation process, then rinse again with clean water. -
Polish high points:
Use fine steel wool or a polishing pad to buff the raised surface of the pendant. This removes the black patina from the high spots while leaving the dark color deep inside the fern impression. -
Final burnish:
For an extra sheen on the rim or the stem, run an agate burnisher along the edges. Thread a silver chain through the bail to complete your woodland necklace.
Level Up: Double Sided
Use a texture mat on your work surface before rolling out the clay. This will give the back of your pendant a beautiful, professional patterned finish instead of being plain smooth silver.
Wearing your finished botanical pendant brings a quiet touch of the forest to your everyday style.
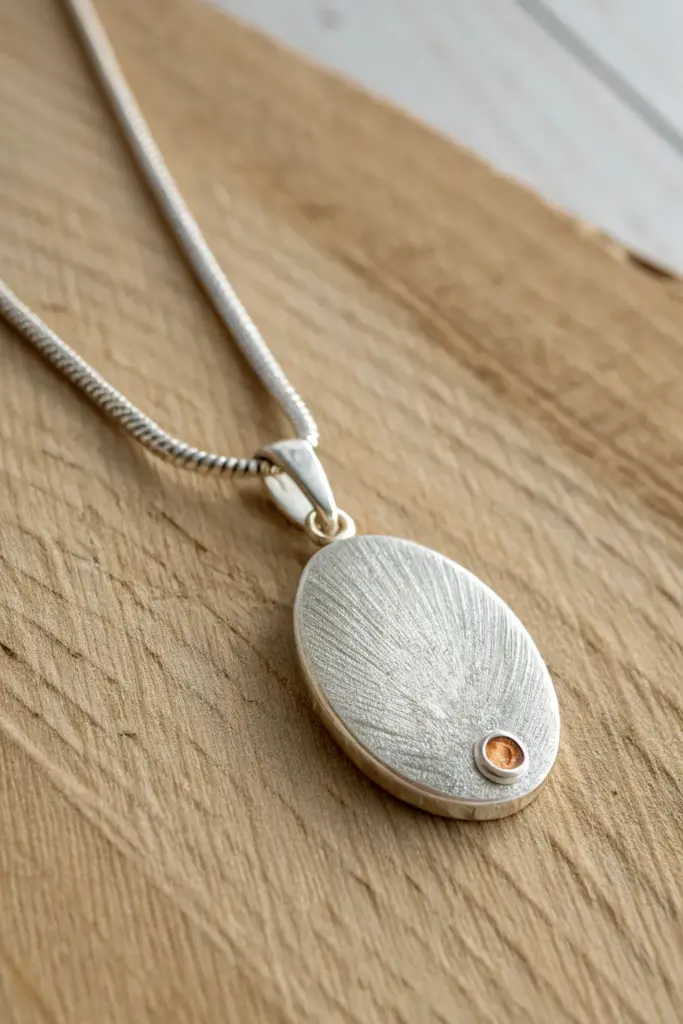
Two-Tone Accent Details

This elegant pendant contrasts the cool shimmer of fine silver with a warm, embedded accent of gold clay. The radial brushed texture catches the light beautifully, creating a sophisticated finish that looks deceptively difficult to achieve.
Step-by-Step Tutorial
Materials
- Silver metal clay (approx. 7-10g)
- Gold metal clay or Gold accent paste (small amount)
- Oval clay cutter
- Small round piping cutter or straw (for the accent)
- Texture sheet or stiff bristle brush
- Clay roller and spacers (3 cards thick)
- Needle tool
- Two-part molding compound (optional, for making a bezel divot)
- Sanding sponges (various grits)
- Agate burnisher
- Stainless steel wire brush (for texturing)
- Torch or Kiln (kiln recommended for mixed metals)
- Sterling silver snake chain
- Jump ring or bail
Step 1: Shaping the Base
-
Roll the Canvas:
Begin by conditioning your silver clay until it is pliable and smooth. Roll it out on a non-stick surface or playing card to a thickness of about 3 cards thick (approximately 0.75mm) to ensure substantial weight. -
Cut the Form:
Use your oval cutter to punch out the main pendant shape. Gently push the clay out of the cutter if it sticks, being careful not to warp the edges. -
Smooth the Edges:
While the clay is still wet, use a damp finger or a clay shaper tool to gently round and neaten the cut edges of the oval, removing any sharp burrs.
Step 2: Creating the Accent
-
Prepare the Bezel Seat:
Choose a spot near the bottom right curve of the oval for your accent. Use the end of a paintbrush handle or a small round cutter to gently impress a shallow circle into the wet silver clay. This creates a ‘seat’ for the gold. -
Form the Bezel Ring:
Take a tiny snake of silver clay and form a very small ring. Place this ring into the indented seat you just created. You can use a drop of water or slip to adhere it securely. -
Add the Gold Core:
Roll a tiny ball of gold metal clay (or use gold accent paste later). Press this ball firmly into the center of the silver ring bezel. Ensure the gold fills the space but sits slightly lower than the silver rim. -
Create the Bail Attachment:
At the top of the oval, attach a pre-made silver clay bail or embed a fine silver wire loop into the back/top edge for hanging later. -
Initial Drying:
dry the piece thoroughly using a hotplate, dehydrator, or air drying for 24 hours. The clay must be bone dry before the next step.
Bonding Issues?
If the tiny bezel ring won’t stick to the base, score firmly with a needle tool and use thick paste (slip) as glue. Apply pressure for 10 seconds.
Step 3: Refining and Firing
-
Refine the Surface:
Once fully dry, use fine-grit sanding sponges to smooth the flat surfaces and edges. Pay special attention to the rim of the bezel, ensuring it is neat and circular. -
Firing the Piece:
Fire the pendant in a kiln according to the manufacturer’s instructions for mixing metals. Usually, this involves a two-stage firing or a specific high-heat schedule to bond both metals. -
Cool and brush:
Allow the piece to cool completely. Brush off the white oxidation layer with a stainless steel brush; the silver will start to shine.
Add a Sparkle
Instead of gold clay, fire the silver bezel empty, then set a small cubic zirconia or semi-precious stone into the hollow after firing.
Step 4: Finishing Touches
-
Create the Radial Texture:
Here is how we get that signature look: take a coarse abrasive pad or a stiff stainless steel wire brush. Brush the fired silver aggressively in outward strokes, starting from the center and moving toward the edges. -
Directional Brushing:
Maintain a ‘sunburst’ pattern with your strokes. Rotate the pendant as you work so all brush lines radiate outward, creating that fiber-like texture seen in the photo. -
Polishing the Bezel:
Use an agate burnisher to highly polish just the rim of the small circle holding the gold. This high-shine ring contrasts beautifully with the brushed matte surface of the main oval. -
Highlighting the Gold:
Burnish the gold center as well to make it pop against the silver. If you used accent paste, follow specific heating instructions to fuse it at this stage if you haven’t already. -
Assembly:
Attach a large silver jump ring or bail to your loop connection at the top. Ensure it moves freely. -
Final Polish:
Thread your finished pendant onto a high-quality silver snake chain to complete the modern, minimalist look.
Wear your mixed-metal pendant with pride knowing you mastered the art of two-tone fusion