I’m always amazed by how a little lump of air dry clay can turn into something you’ll actually use, especially when you keep it small and simple. These small air dry clay ideas are my go-to projects when you want quick wins, cute results, and that satisfying handmade feel without a kiln.
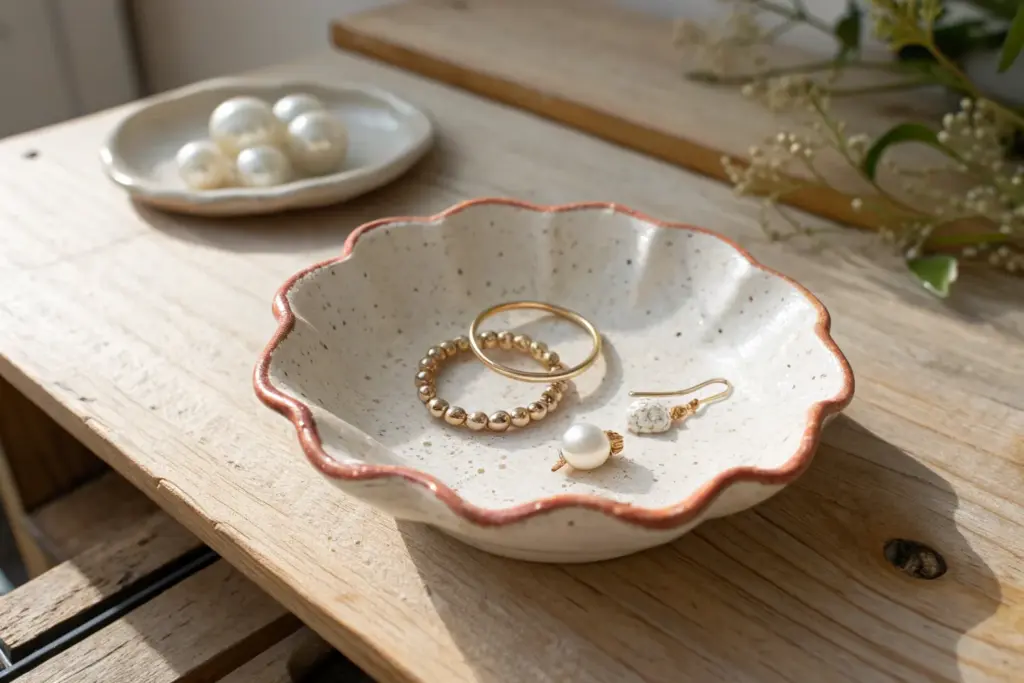
Mini Trinket Dishes
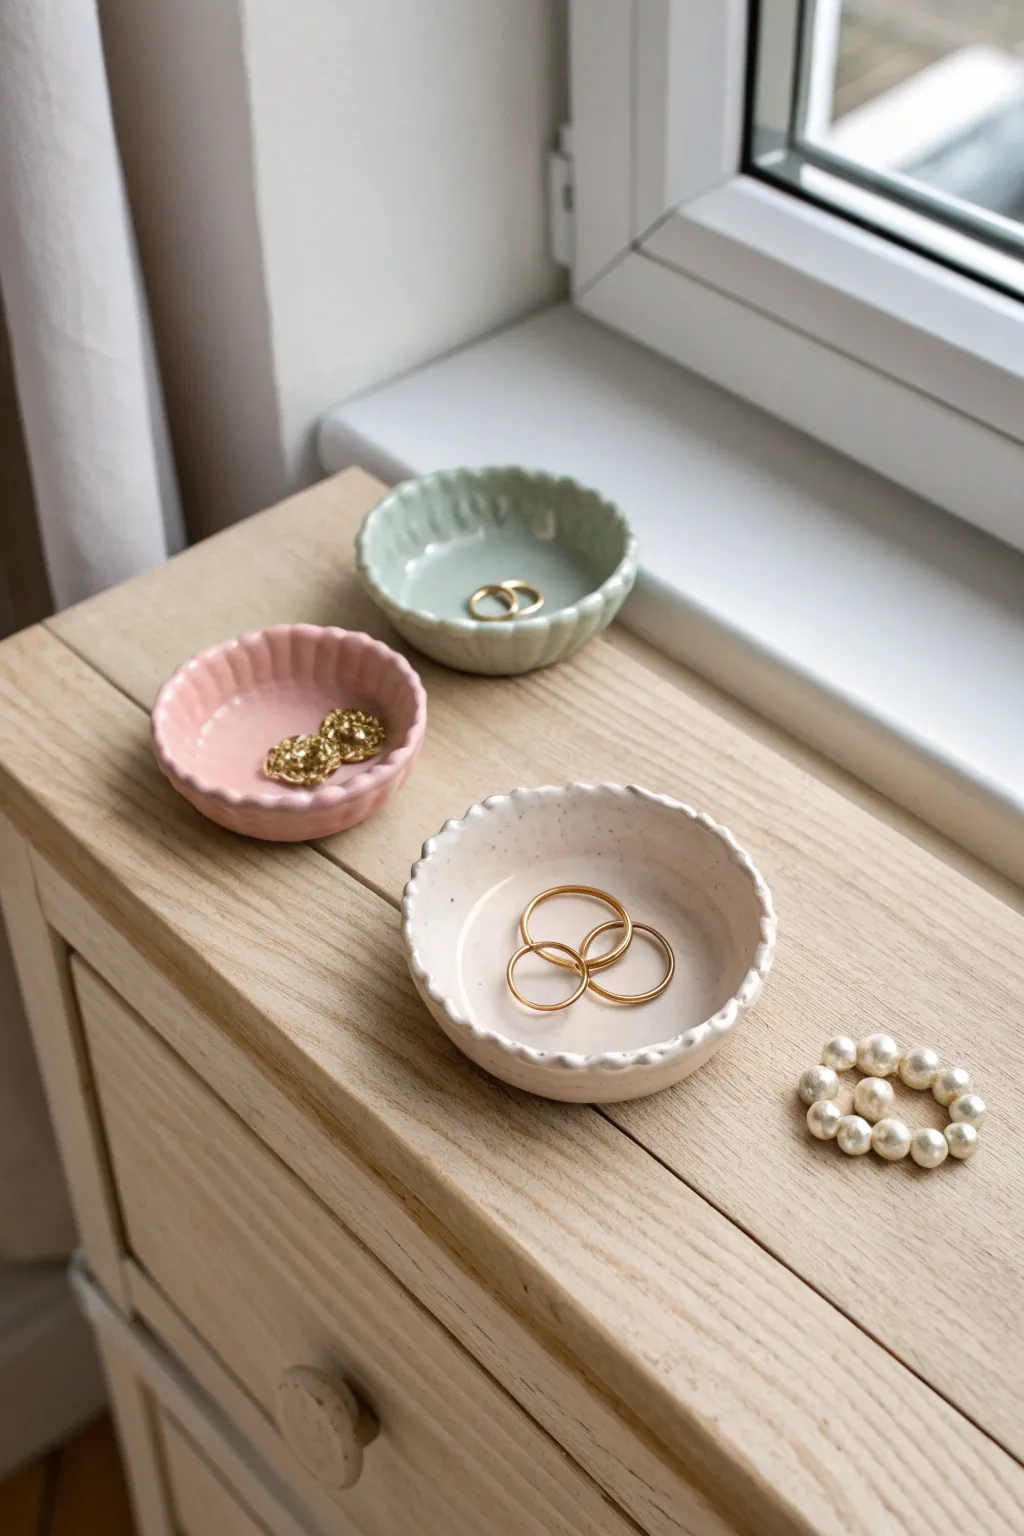
Create a set of charming, vintage-inspired storage spots for your favorite rings and studs with these dainty scalloped bowls. Their fluted edges and soft pastel glazes give them a sophisticated finish that looks beautiful on any nightstand.
Step-by-Step
Materials
- White air-dry clay
- Rolling pin
- Round cookie cutter (approx. 3-4 inches) or a glass
- Modeling tool or the handle of a paintbrush (for fluting)
- Small bowl or sponge (to support shape while drying)
- Sandpaper (fine grit)
- Acrylic paints (pastel pink, mint green, creamy white)
- Speckle medium or brown paint (optional for speckled look)
- Glossy varnish or sealant
- Small paintbrush
- Cup of water
Step 1: Shaping the Clay
-
Prepare your workspace:
Begin by grabbing a chunk of white air-dry clay and kneading it in your hands until it feels soft, warm, and pliable. -
Roll it out:
Use your rolling pin to flatten the clay into an even slab. Aim for a thickness of about 1/4 inch—too thin and it might crack, too thick and it will look chunky. -
Cut the circle:
Press your round cookie cutter or the rim of a glass firmly into the clay slab to cut out a perfect circle. Peel away the excess clay. -
Smooth the edges:
Dip your finger in a little water and run it gently around the raw edge of the circle to smooth out any roughness or loose bits of clay. -
Create the scalloped rim:
This is the signature detail. Use the handle of a paintbrush or a rounded modeling tool. Place it perpendicular against the outer edge of the circle and press inward gently. -
Repeat the pattern:
Move the tool slightly to the left or right and press again. Continue this process all the way around the circumference until you have a decorative, fluted edge. -
Form the bowl shape:
Gently lift the clay circle and place it into the palm of your hand, cupping it slightly to create a shallow curve. You can also press the center down gently with your thumb. -
Refine the flutes:
The curving process might have warped your scallops slightly. Go back around the rim with your tool to redefine those indentations while the clay is curved.
Cracks happen
If small cracks appear as the clay dries, mix a tiny amount of fresh clay with water to make a paste (slip) and fill them in before sanding.
Step 2: Drying and Refining
-
Set to dry:
Place your formed dish into a small bowl or nestle it on a soft sponge to help it hold that curved shape while it dries. Let it sit for 24-48 hours until fully hard and white. -
Sand for smoothness:
Once fully cured, take a piece of fine-grit sandpaper and lightly buff the surface. Focus on the rim to ensure there are no sharp points from the fluting process. -
Dust off debris:
Wipe the dish down with a very slightly damp cloth or a dry brush to remove all the sanding dust before you start painting.
Step 3: Painting and Finishing
-
Mix your colors:
Prepare your palette with soft pastel acrylics. I like to mix a tiny bit of white into my colors to ensure they have that milky, ceramic glaze look. -
Apply the base coat:
Paint the entire dish, front and back, with your chosen color. You may need two thin coats to get an opaque, even finish without brushstrokes showing. -
Add speckles (optional):
For the cream dish, mix a tiny amount of watered-down brown paint. Load a toothbrush or stiff brush and flick the bristles to spray tiny speckles across the surface for a stoneware effect. -
Let the paint dry:
Allow the paint to dry completely. This usually takes about 20-30 minutes for acrylics. -
Seal the deal:
Apply a coat of glossy varnish over the entire piece. This protects the paint and, crucially, gives it the shine of real fired ceramic. -
Final cure:
Let the varnish dry according to the bottle’s instructions before placing any jewelry inside.
Level Up: Gold Rim
For an extra fancy touch, use a gold paint pen or metallic liquid gilding to carefully paint just the very top edge of the scalloped rim.
Now you have a trio of elegant dishes ready to organize your treasures


Leaf-Imprint Tiny Trays
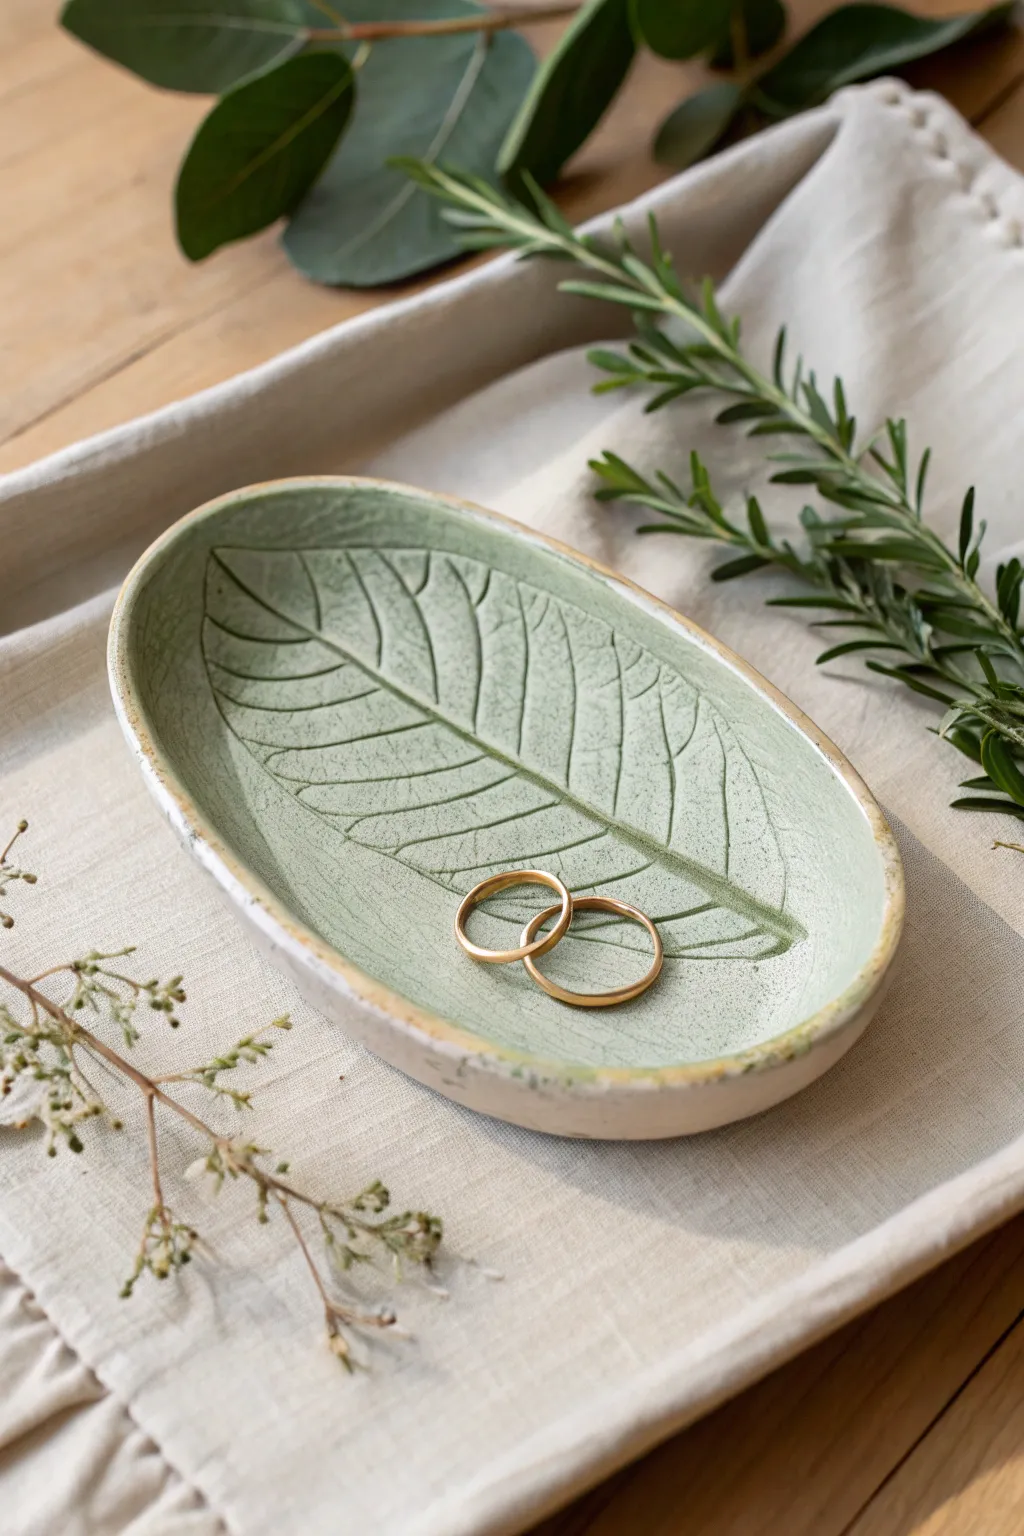
Capture the delicate veins of nature with this elegant air dry clay dish. Featuring a subtle sage green wash and a rustic, natural rim, it makes the perfect resting spot for your most treasured rings.
Step-by-Step Tutorial
Materials
- White air dry clay
- Small rolling pin
- Fresh leaf with prominent veins (like hydrangea or magnolia)
- Craft knife or clay tool
- Small bowl of water
- Fine grit sandpaper
- Sage green acrylic paint
- Water for diluting paint
- Soft paintbrush
- Matte or satin varnish
Step 1: Shaping the Clay
-
Prepare the Clay:
Start by taking a handful of air dry clay, kneading it in your hands until it becomes soft, pliable, and free of cracks. -
Roll it Out:
Place the clay on a smooth surface or canvas mat. Use your rolling pin to flatten it into an even slab, aiming for a thickness of about 1/4 inch (6mm). -
Select Your Leaf:
Choose a fresh leaf that is slightly smaller than you want your final dish to be. Ensure the vein side is facing down against the clay for the best impression. -
Impress the Design:
Gently roll over the leaf with your rolling pin. Apply firm, even pressure to embed the veins deep into the clay without making the slab paper-thin. -
Cut the Shape:
Using a craft knife, carefully cut an oval shape around the leaf imprint. Leave a border of about half an inch around the edge of the leaf. -
Remove the Leaf:
Locate the stem of the leaf and very slowly peel it away from the clay to reveal your detailed impression. -
Form the Curve:
Gently lift the clay oval. Use your fingers to curve the edges upward, creating a shallow bowl shape. You can pinch the ends slightly to mimic the leaf’s natural point. -
Smooth the Edges:
Dip your finger in a little water and run it along the rim of the dish to smooth out any rough cutting marks or jagged bits.
Step 2: Finishing Touches
-
Let it Dry:
Place the dish in a safe, dry spot. Let it air dry for 24-48 hours until it turns a chalky white and feels hard to the touch. -
Sand for Smoothness:
Once fully dry, take your fine grit sandpaper and lightly buff the rim and the underside of the dish to ensure a professional, snag-free finish. -
Prepare a Paint Wash:
Mix a small amount of sage green acrylic paint with water until it has a milky, watercolor-like consistency. This transparency allows the clay texture to show through. -
Apply the Color:
Brush the watered-down paint over the inside of the dish, focusing on the leaf imprint area. The paint will naturally pool in the veins, darkening them slightly. -
Clean the Rim:
If any paint got onto the top rim, quickly wipe it away with a damp cloth or paper towel to keep that beautiful contrast between the green center and the white edge. -
Dry the Paint:
Allow the paint layer to dry completely; since it is a thin wash, this should only take about 15 to 20 minutes. -
Seal the Dish:
Apply a coat of matte or satin varnish over the entire piece to protect the clay from moisture and give it a finished durability.
Fixing Warp
If the edges curl up too much while drying, place a light weight (like a small bag of rice) in the center during the first few hours of drying.
Gilded Edge
For a touch of luxury, paint the very top rim with liquid gold leaf or metallic gold paint after the green wash has dried completely.
Place your new dish on your dresser or bedside table to hold your jewelry safely in style


Small Ring Cone Holders

Create a minimalist jewelry display with this elegant cone and tray set, featuring a natural stone texture. The speckled cream finish provides a sophisticated backdrop that makes gold rings truly shine.
Step-by-Step
Materials
- White air dry clay
- Rolling pin
- Craft knife or scalpel
- Sandpaper (fine grit)
- Small bowl of water
- Acrylic paint (cream/off-white)
- Acrylic paint (brown or black for speckles)
- Old toothbrush or stiff paintbrush
- Clear matte varnish or sealant
- Ruler
- Cardstock or thick paper (for template)
Step 1: Shaping the Cone
-
Prepare the clay:
Take a handful of white air dry clay and knead it well in your hands to activate it. You want it warm and pliable without any cracks. -
Create the basic shape:
Roll the clay into a smooth ball first, then begin rolling it back and forth on your work surface, applying more pressure to one side to form a tapered log. -
Refine the cone:
Stand the tapered log up on its flat end. Gently tap the base against the table to flatten it completely. Smooth the sides upward with your fingers to create a sharp point at the top. -
Adjust the height:
If the cone is too tall or wobbly, slice the bottom with your craft knife to make it shorter and sturdier. Aim for a height of about 3 to 4 inches. -
Smoothing:
Dip your finger in a little water and run it over the surface of the cone to erase any fingerprints or creases. Set this aside to begin drying.
Cracks Appearing?
Make a “slip” by mixing a bit of clay with water until it’s a paste. Fill the cracks, smooth over, and let dry again.
Step 2: Making the Tray
-
Roll out the slab:
Take a larger portion of clay and roll it out with a rolling pin until it is about 1/4 inch thick. Try to keep the thickness consistent. -
Cut the rectangle:
Use a ruler and craft knife to cut a clean rectangle. A 4×6 inch size works well for holding the cone and a few loose rings. -
Create the lip:
Gently pinch the edges of the rectangle upward to create a slight rim. You can also roll thin snakes of clay, attach them to the border with a little water, and smooth them down for a more defined edge. -
Rounding corners:
Use your moistened finger to soften the sharp corners of the rectangle, giving the tray a more organic, stone-like feel. -
Drying:
Place both pieces in a dry, safe spot. Let them air dry completely for 24-48 hours, flipping the tray occasionally to prevent warping.
Make it Luxe
Paint the very tip of the cone or the rim of the tray with metallic gold liquid leaf for a chic, high-end accent.
Step 3: Finishing Touches
-
Sanding:
Once bone dry, use fine-grit sandpaper to gently smooth out any bumps or sharp edges on both the cone and the tray. Wipe away the dust with a slightly damp cloth. -
Base coat:
Paint both pieces with a coat of cream or off-white acrylic paint. I find that applying two thin layers usually looks better than one thick one. -
Creating the speckles:
Dilute a small drop of brown or black paint with water. Dip an old toothbrush into the mixture and run your thumb across the bristles to flick tiny specks onto the clay. -
Controlling the texture:
Practice the speckling technique on a piece of paper first. Vary your distance to create a mix of tiny dots and slightly larger spots for a natural stone look. -
Sealing:
Allow the paint to dry fully. Apply a clear matte varnish or sealant to protect the surface from scratches and moisture.
Now you have a stylish spot to keep your favorite rings safe and organized


Tiny Pinch Pots
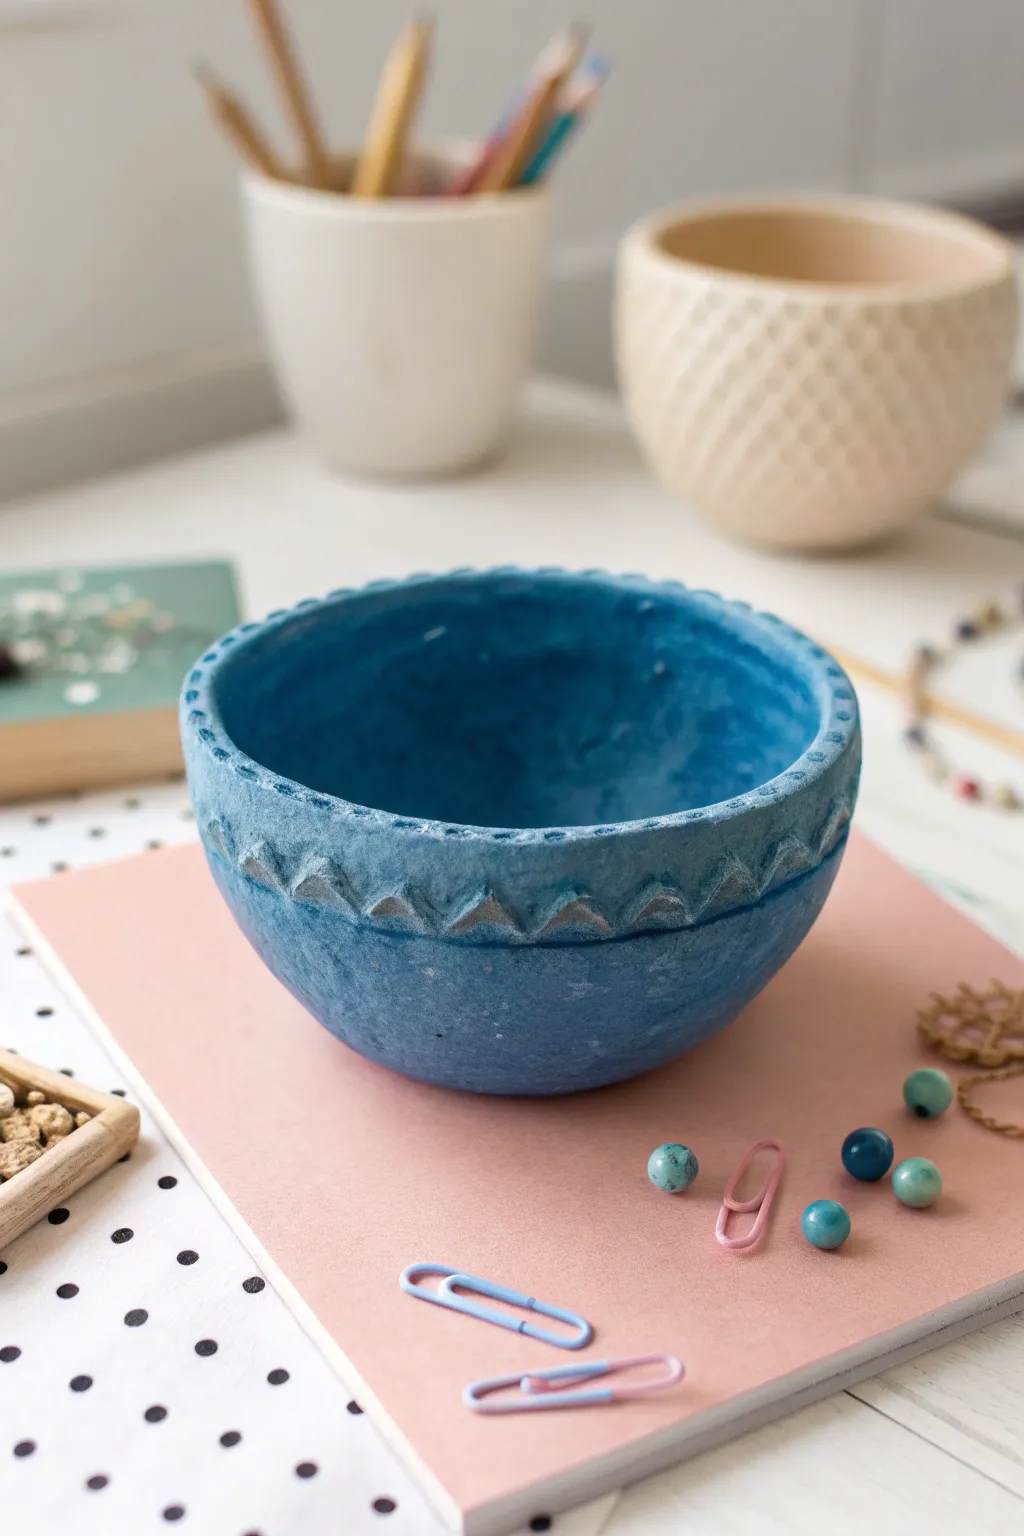
This charming little bowl is made using simple hand-building techniques and features a delightful geometric texture. Its deep blue hue and tactile rim make it a perfect catch-all for desk treasures.
How-To Guide
Materials
- Air dry clay (white or grey)
- Acrylic paint (deep blue, light blue, silver/metallic grey)
- Mod Podge or clear sealant varnish
- Modeling tools (or a toothpick)
- Small paintbrush
- Fine-grit sandpaper
- Bowl of water
- Sponge
Step 1: Forming the Base shape
-
Prepare your clay:
Start with a ball of clay about the size of a tennis ball. Knead it in your hands to warm it up, remove air bubbles, and ensure it’s pliable and smooth. -
Begin the pinch:
Hold the clay ball in one hand and gently press your thumb into the center, stopping about a half-inch from the bottom. This creates the initial well of your pot. -
Shape the walls:
Using a pinching motion with your thumb on the inside and fingers on the outside, gentle squeeze the clay while rotating the ball. Work your way from the bottom up to the rim. -
Even it out:
Continue pinching and turning until the walls are an even thickness, roughly 1/4 inch thick. Aim for a symmetrical bowl shape with a slightly wider opening. -
Refine the rim:
Tap the rim gently against your work surface if you want it perfectly flat, or use your fingers to smooth and round it off for a softer look like the one in the photo. -
Smooth the surface:
Dip your finger or a small sponge in water and run it over the clay to smooth out any fingerprints or cracks. I like to spend a few extra minutes here to get a really professional finish.
Cracks happen!
If small cracks appear while drying, mix a tiny bit of clay with water to make a paste (slip) and fill them in before painting.
Step 2: Adding Texture & Drying
-
Create the triangle band:
About half an inch below the rim, use a modeling tool or the flat edge of a popsicle stick to press a series of small triangles into the clay. These should circle the entire bowl. -
Detail the rim:
Using a toothpick or a small dotting tool, press small indentations around the very top edge of the rim to create a dotted border pattern. -
Initial dry:
Set the pot aside in a cool, dry place. Let it air dry for at least 24-48 hours. Turn it over halfway through the drying process to ensure the bottom dries evenly. -
Sand for perfection:
Once fully dry and hard, take a piece of fine-grit sandpaper and gently sand away any rough spots or sharp edges on the rim or base.
Dry Brushing
When dry brushing texture, use an old, stiff brush. It catches the raised areas better than a soft new one.
Step 3: Painting & Finishing
-
Base coat interior:
Paint the entire inside of the bowl with a deep blue acrylic paint. You may need two coats for full opacity, letting it dry between layers. -
Base coat exterior:
Paint the outside of the bowl with the same deep blue. Ensure you get paint into the recessed triangle textures. -
Add dimension:
Mix a tiny bit of white or light blue into your base color. Using a ‘dry brush’ technique (wipe most paint off your brush), lightly sweep over the textured exterior to highlight the clay’s natural grain. -
Highlight the Pattern:
Using a fine brush and silver or light metallic grey paint, carefully paint inside the triangle indentations. This makes the geometric pattern pop against the blue. -
Paint the rim detail:
Lightly dab a little of the lighter blue or silver onto the dotted texture on the rim to define the edge. -
Seal the piece:
Once all paint is completely dry, apply a coat of Mod Podge or clear acrylic varnish. This protects the paint and gives it a finished sheen.
Place your new textured bowl on your desk to organize clips or simply enjoy its handmade beauty

What Really Happens Inside the Kiln
Learn how time and temperature work together inside the kiln to transform clay into durable ceramic.
Mini Flower Coasters
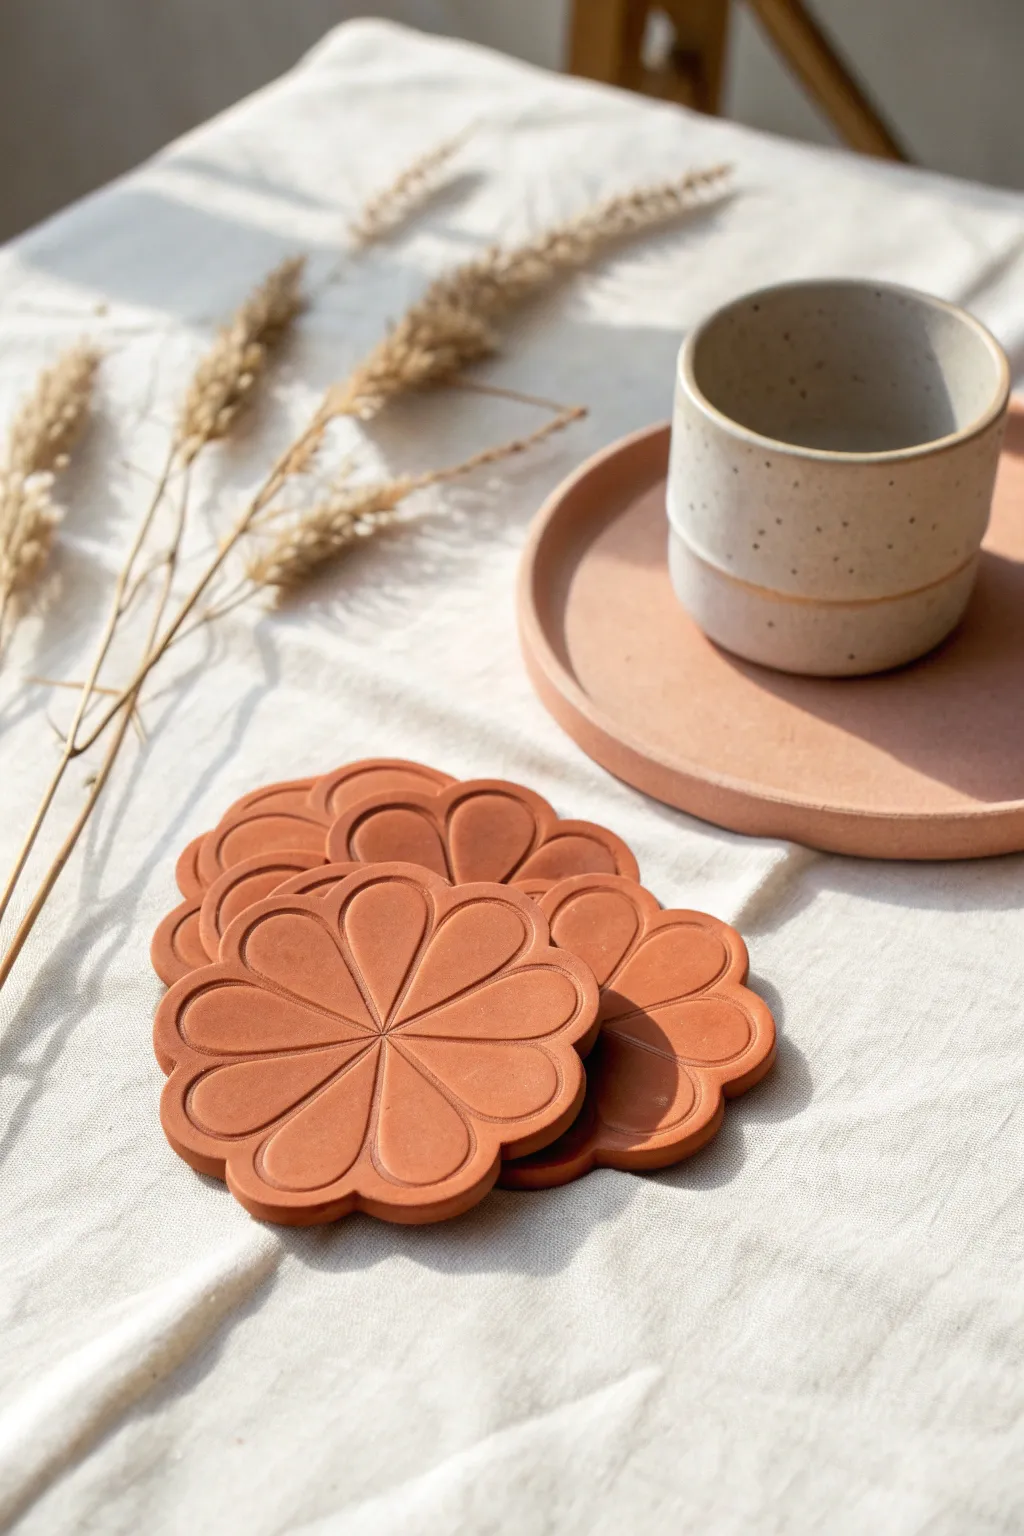
Capture the warmth of earthy tones with these floral-inspired coasters that look like they came straight from a pottery wheel. Their deeply grooved petal design adds a sophisticated tactile element while protecting your surfaces in style.
Step-by-Step Guide
Materials
- Terracotta colored air-dry clay
- Rolling pin
- Two wooden guide strips (approx. 5mm thick)
- Circle cookie cutter (approx. 9-10 cm diameter)
- Parchment paper
- Modelling tool with a small rounded tip or a dull pencil
- Fine grit sandpaper
- Clear matte varnish or sealant
- Small bowl of water
- Soft brush
Step 1: Preparation & Shaping
-
Condition the clay:
Begin by taking a substantial chunk of terracotta air-dry clay and kneading it in your hands. Working the clay warms it up and ensures a crack-free, pliable consistency. -
Set up guides:
Place your parchment paper on a flat work surface. Lay the two wooden guide strips on either side of the paper; these will help your rolling pin maintain an even thickness. -
Roll the slab:
Place the ball resulting from your kneaded clay between the guides. Roll it out smoothly until the rolling pin rests on the wooden strips, creating a perfect, uniform slab. -
Cut the base:
Press your circle cutter firmly into the clay slab. Remove the excess clay from around the circle before lifting the cutter to keep the edges clean. -
Smooth the edges:
Dip your finger lightly in water and run it along the cut edge of the circle. This rounds off the sharp 90-degree angle left by the cutter, giving it a more finished, ceramic look.
Uneven Petals?
If spacing is tricky, lightly mark ‘North, South, East, West’ first, then fill in the diagonals. This ensures 8 evenly sized petals every time.
Step 2: Creating the Design
-
Mark the center:
Find the approximate center of your circle and make a tiny, shallow dot with your modelling tool. This will serve as the anchor point for all your petals. -
Draft the petals:
Very lightly sketch 8 petal shapes radiating from the center using a needle tool or toothpick. Think of slices of a pie, but with rounded outer edges. Drawing lightly allows you to smooth over mistakes if spacing is off. -
Define the grooves:
Using the rounded tip modelling tool, press firmly into your drafted lines. Drag the tool from the center outward to create deep, consistent channels that separate the petals. -
Shape the outer edge:
Where the groove meets the outer edge of the coaster, use your finger or tool to gently indent the rim inward. This transforms the perfect circle into a scalloped flower silhouette. -
Refine the surface:
Check for any clay burrs or crumbs created by the grooving process. Smooth these away carefully with a slightly damp brush or fingertip.
Waterproof Hack
For true waterproofing (essential for cold drinks), use a dishwasher-safe sealant like Mod Podge Dishwasher Safe or a spray acrylic sealer.
Step 3: Finishing Touches
-
Initial drying:
Let the coasters sit on the parchment paper for about 24 hours. Placing a light book on top (with paper in between) during the first few hours can help prevent curling. -
Flip and dry:
Once the top feels dry to the touch, flip the coasters over to allow the bottom to dry completely. This ensures even moisture evaporation. -
Sand the imperfections:
When fully cured (usually 48-72 hours), use fine-grit sandpaper to gently buff the edges and surface. Focus on smoothing any sharp ridges left by the modelling tool. -
Dust off:
Wipe the coaster thoroughly with a dry cloth or soft brush to remove all sanding dust before sealing. -
Apply sealant:
Apply a thin coat of clear matte varnish. This is crucial for coasters, as it prevents water rings from damaging the clay. I prefer doing two thin coats rather than one thick one.
Once sealed and dried, stack your new set on the coffee table for a lovely pop of natural color
Simple Clay Stud Earrings
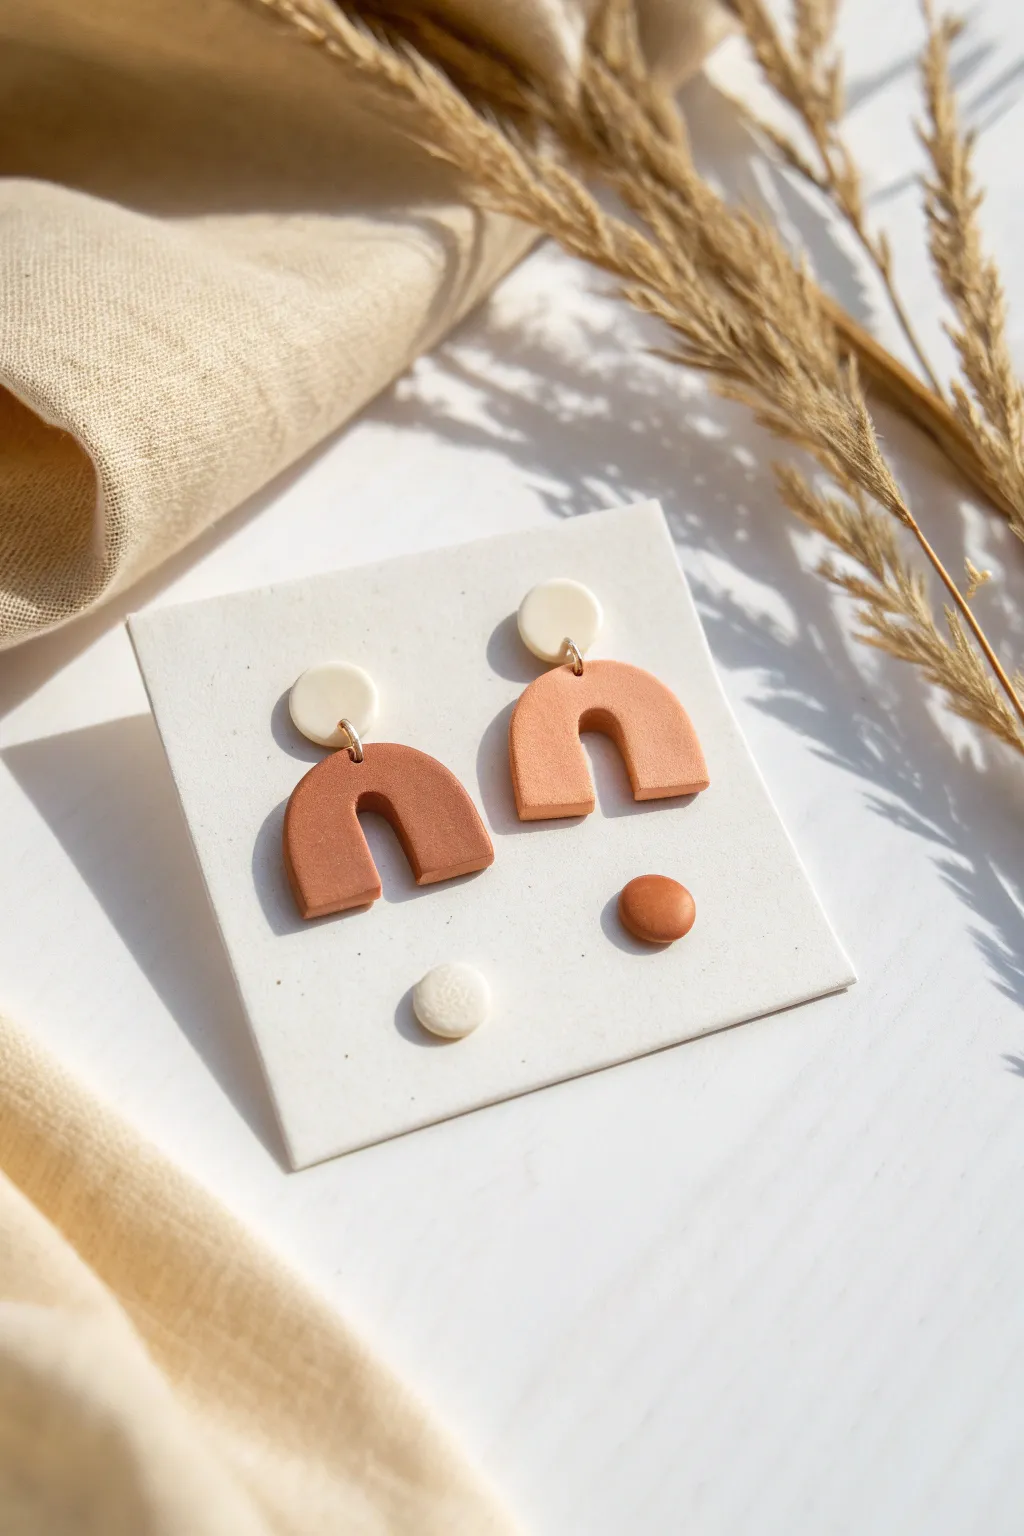
These simple yet striking earrings combine a classic arch shape with warm terracotta tones and creamy neutrals for a modern aesthetic. They are lightweight enough for everyday wear and make a beautiful handmade addition to your jewelry collection.
Step-by-Step
Materials
- Air dry clay (white and terracotta/burnt orange)
- Rolling pin or acrylic roller
- Small round clay cutter (approx. 1cm)
- U-shaped arch clay cutter (approx. 2-3cm width)
- Parchment paper or non-stick craft mat
- Jump rings (gold or silver, 6-8mm)
- Earring posts and backs
- Strong jewelry glue (like E6000)
- Two pairs of jewelry pliers
- Small needle tool or toothpick
- Fine grit sandpaper (optional)
Step 1: Preparing the Clay Components
-
Condition the clay:
Begin by kneading a small amount of white air dry clay until it becomes soft, pliable, and free of cracks. Repeat this process separately with your terracotta-colored clay. -
Roll the white clay slab:
Place the white clay on your parchment paper and roll it out evenly. You are aiming for a thickness of about 3mm—thick enough to be sturdy but thin enough to be lightweight. -
Cut the stud circles:
Using your small round cutter, press firmly into the white slab to cut out two perfect circles. Gently wiggle the cutter to release the clay without warping the shape. -
Roll the terracotta slab:
Clean your roller to ensure no white residue transfers, then roll out the terracotta clay to the exact same thickness as your white pieces for a cohesive look. -
Cut the arch shapes:
Use your U-shaped cutter to punch out two identical arches from the terracotta slab. If you don’t have a cutter, you can freehand cut a U-shape using a craft knife and a paper template. -
Create connection holes:
While the clay is still wet, use a needle tool or toothpick to pierce a small hole near the bottom edge of each white circle and the top center of each terracotta arch. -
Ensure hole placement:
Make sure the holes are close enough to the edge for the jump ring to fit, but not so close that the clay might tear. Ensure the hole is wide enough for your specific jump rings.
Uneven Clay?
If your clay thickness varies, place two playing cards or craft sticks on either side of your dough while rolling. The roller will rest on them, creating a perfect, uniform slab.
Step 2: Finishing and Assembly
-
Dry the pieces:
Lay your clay shapes flat on the parchment paper in a safe, dry area. Let them air dry completely according to package instructions, which usually takes 24-48 hours. I find flipping them halfway through helps prevent curling. -
Sand for smoothness:
Once fully dry, check the edges for any roughness. Gently sand the sides with fine-grit sandpaper to achieve a professional, smooth finish. -
Open the jump rings:
Using two pairs of pliers, twist a jump ring open sideways (never pull it apart outwards) to preserve its circle shape. -
Connect the components:
Slide the open jump ring through the hole in the terracotta arch, and then hook on the white circle stud piece. -
Close the rings:
Use your pliers to twist the jump ring back into a closed position, ensuring the ends meet perfectly so the clay doesn’t slip out. -
Prepare the posts:
Apply a tiny dot of strong jewelry glue to the flat pad of your metal earring post. -
Attach the posts:
Press the glued post firmly onto the back of the white circle component, positioning it slightly above the jump ring hole so the earring hangs correctly. -
Final cure:
Allow the glue to cure fully for the time recommended on the glue tube before attempting to wear the earrings.
Add Texture
Before cutting your shapes, gently press a piece of lace or a textured simple sponge into the wet terracotta clay to give the arches a subtle, stony surface detail.
Now you have a stunning pair of geometric earrings ready to wear or gift to a friend


The Complete Guide to Pottery Troubleshooting
Uncover the most common ceramic mistakes—from cracking clay to failed glazes—and learn how to fix them fast.
Tiny Pendant Charms
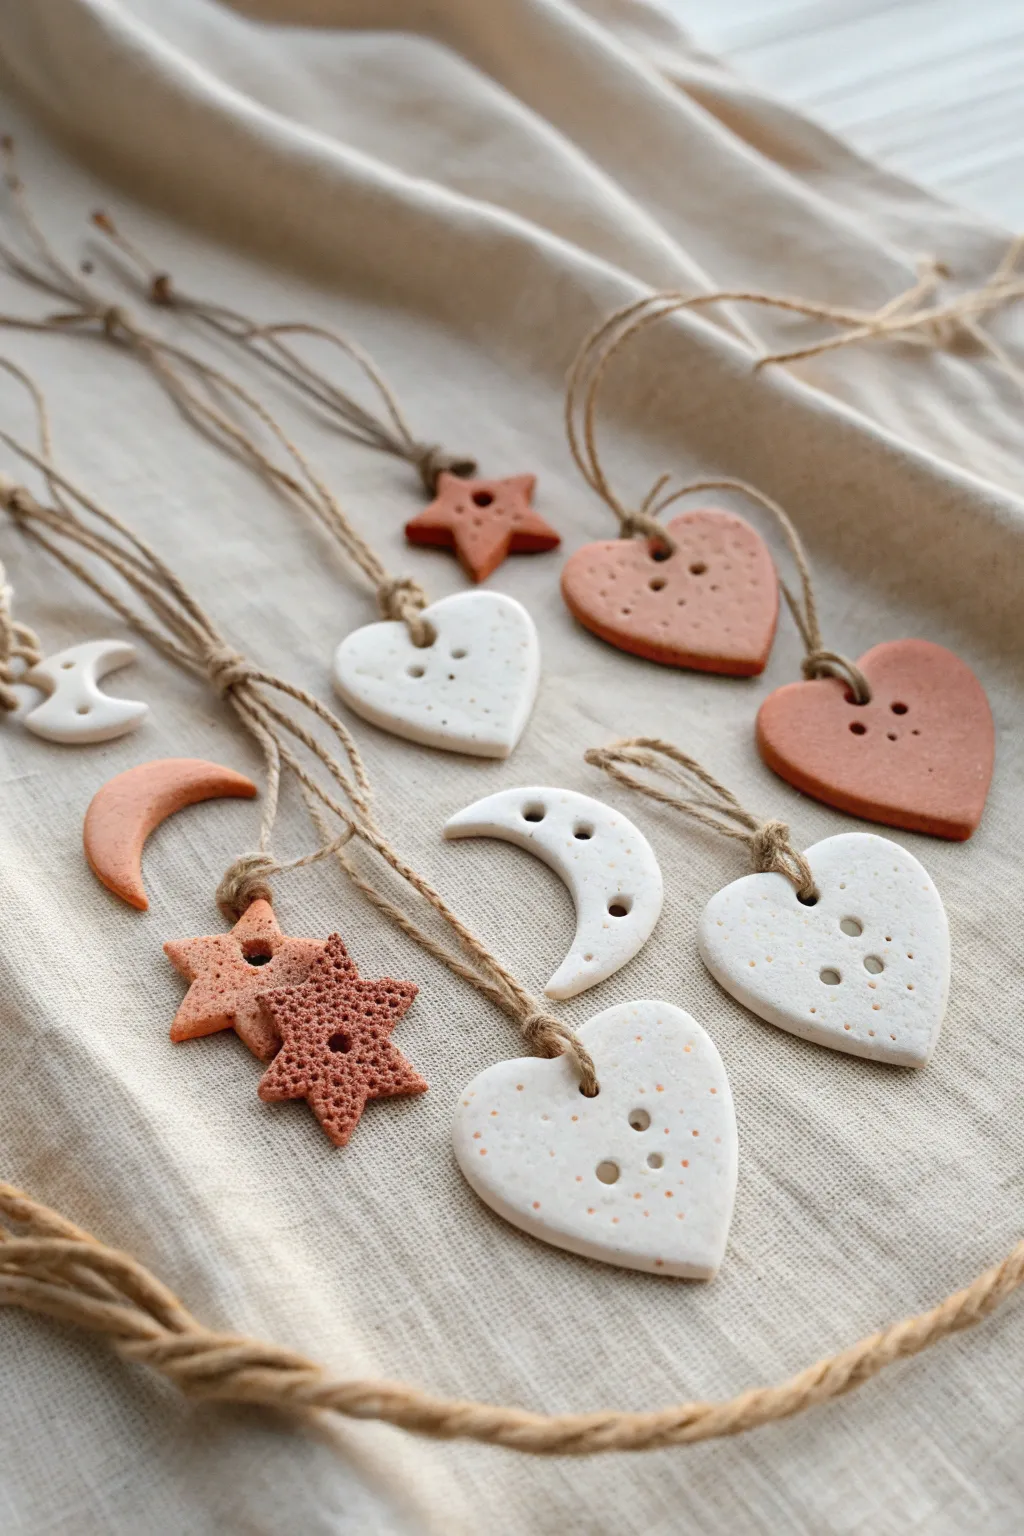
These delicate, earthy pendants combine simple geometric shapes with a natural, speckled finish for a charming bohemian look. Using air-dry clay in terracotta and white tones, you’ll create a collection of hearts, moons, and stars strung on rustic jute twine.
How-To Guide
Materials
- White and terracotta air-dry clay
- Rolling pin
- Small cookie cutters (heart, moon, star) or a craft knife
- Ground black pepper or sand (for speckling)
- Coffee stirrer or small straw
- Needle tool or toothpick
- Fine grit sandpaper
- Jute twine or hemp cord
- Parchment paper
Step 1: Preparing and Cutting the Clay
-
Add texture:
Before rolling, take a small ball of your white air-dry clay and knead in a pinch of ground black pepper or fine sand. This simple addition creates that lovely, organic speckled effect seen in the finished charms. -
Roll it out:
Place your clay on a sheet of parchment paper to prevent sticking. Roll it out evenly until it is approximately 1/4 inch thick. You want it substantial enough to be durable but thin enough to look delicate. -
Cut the shapes:
Use your small cookie cutters to stamp out your shapes. If you don’t have specific cutters for the moons or stars, lightly sketch the shape onto the clay surface with a needle tool first, then carefully cut along the lines with a craft knife. -
Create hanging holes:
While the clay is still soft, use a coffee stirrer or a small straw to punch a clean hole near the top center of each shape. Twist the straw gently as you pull it out to remove the clay core cleanly. -
Add decorative details:
For the decorative dimples seen on the hearts and moons, use the blunt end of a toothpick or a small ball stylus. Press gently into the surface to create a pattern of small indentations without piercing all the way through. -
Smooth the edges:
Dip your finger in a tiny bit of water and run it along the cut edges of your shapes. This softens any harsh corners left by the cutter and gives the piece a professional, finished look.
Cracking Up?
If small cracks appear while drying, mix a tiny bit of fresh clay with water to make a paste and smooth it into the fissures.
Step 2: Drying and Finishing
-
Let them dry:
Arrange your cut shapes on a clean piece of parchment paper in a cool, dry place. I usually flip them over after about 12 hours to ensure both sides dry evenly and to prevent warping. -
Refine the surface:
Once fully cured (usually 24-48 hours depending on humidity), take your fine grit sandpaper and very lightly sand the edges. You can also lightly sand the surface if you want an extra-smooth matte finish. -
Seal (optional):
For longevity, you can brush on a layer of matte varnish. This will slightly darken the terracotta color but protects the clay from moisture.
Scented Charms
Knead a drop of essential oil into the clay before drying to turn these pendants into wearable aromatherapy diffusers.
Step 3: Assembly
-
Cut the twine:
Cut lengths of jute twine or hemp cord, approximately 12-15 inches long depending on how low you want the pendants to hang. -
Thread the pendant:
Fold a piece of twine in half to create a loop at one end. Thread this loop through the hole in your clay charm from front to back. -
Secure with a lark’s head knot:
Pass the two loose ends of the twine through the loop you just pushed through the hole. Pull tight to secure the charm with a classic lark’s head knot. -
Tie the top:
Gather the two loose ends at the top and tie a simple overhand knot to close the necklace loop. -
Add a decorative knot:
To mimic the look in the image, tie a second overhand knot about an inch above the charm itself. This bunches the twine slightly and adds a robust, rustic detail to the hanger.
Now you have a set of charming, rustic ornaments ready to wear or gift.
Stamped Initial Tags
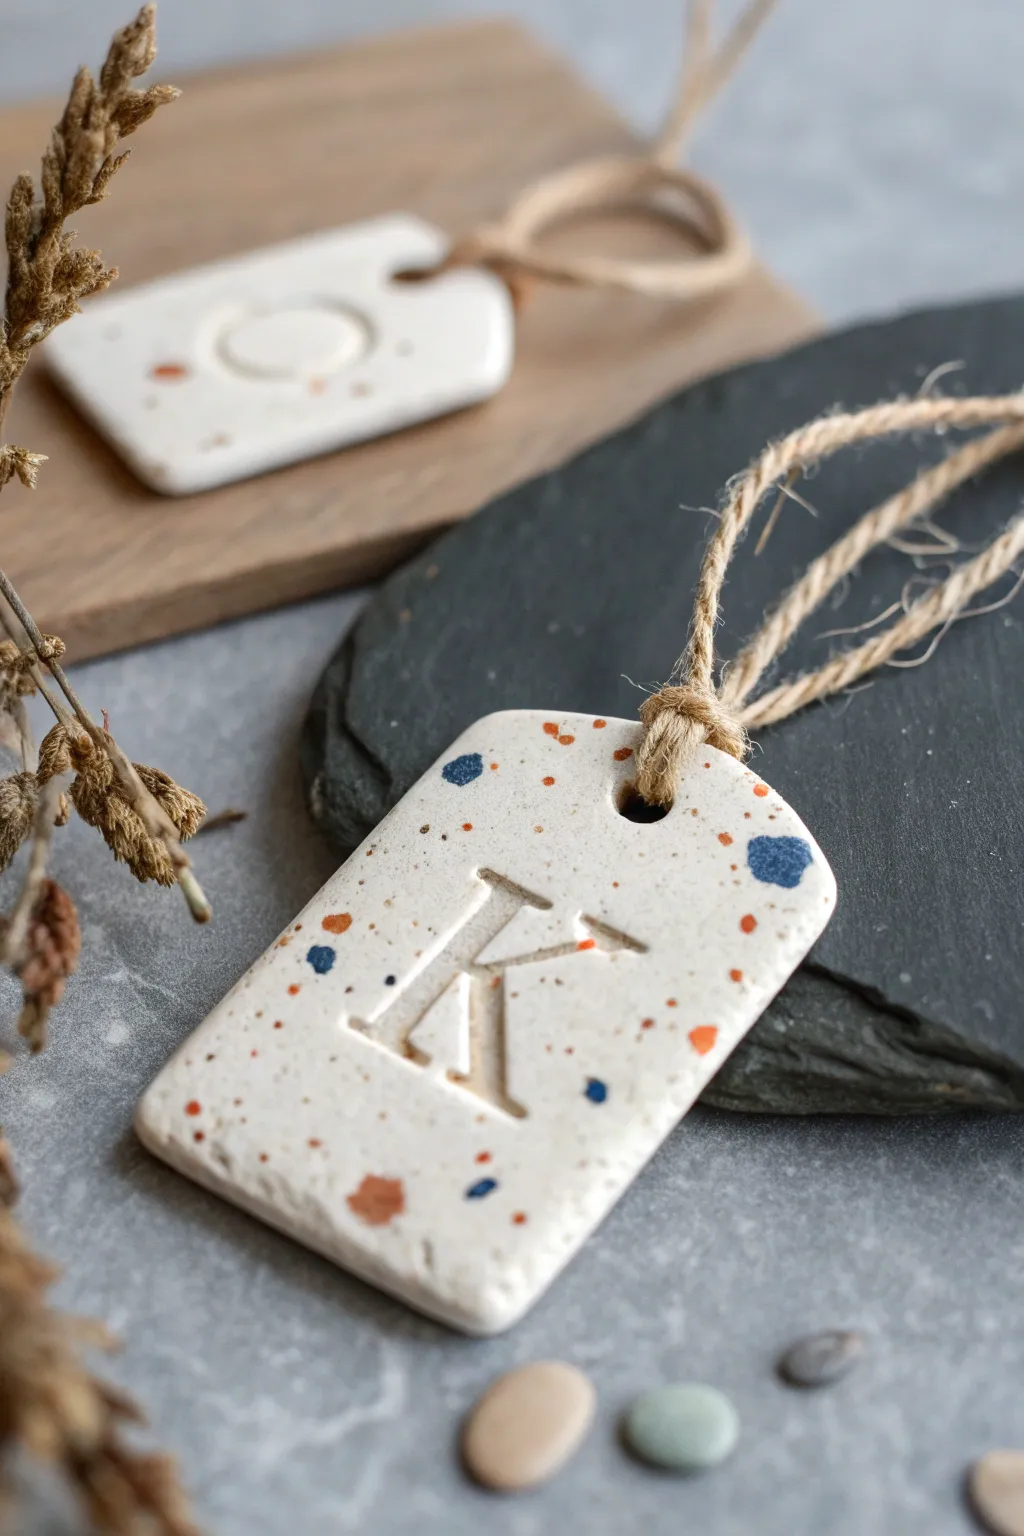
These charming, personalized tags add a rustic yet colourful touch to any gift or place setting. With their terrazzo-inspired speckles and deep letter impressions, they look like high-end ceramic pieces but are surprisingly simple to make at home.
Step-by-Step Tutorial
Materials
- White air dry clay
- Rolling pin
- sharp craft knife or rectangular cookie cutter
- Alphabet stamp set (large serif font)
- Acrylic paints (navy blue, burnt orange/terracotta)
- Fine detail paintbrush or toothpick
- drinking straw or small circular cutter
- Jute twine
- Fine-grit sandpaper
- Acryic varnish (matte or satin) – optional
- Water and sponge
Step 1: Shaping the Clay
-
Condition the clay:
Take a small handful of white air dry clay and warm it up in your hands, kneading it until it is pliable and smooth. -
Roll it out:
Roll the clay onto a smooth surface to an even thickness of about 4-5mm. I find that going too thin makes them brittle, so keep a little chunkiness. -
Cut the rectangle:
Use a sharp craft knife to cut a clean rectangle shape, approximately 3 inches tall by 2 inches wide. Alternatively, a rectangular cookie cutter makes this instant. -
Soften the corners:
Dip your finger in a little water and gently tap and smooth the four sharp corners of the rectangle to create a rounded, organic look. -
Smooth the edges:
Run a damp finger along all the cut edges to remove any jagged bits or crumbs from the cutting process. -
Create the hole:
Press a drinking straw or a small circular cutter near the top center of the tag to create the hole for the twine. twisting the straw as you pull it out helps remove the clay cleanly.
Fixing Cracks
If tiny cracks appear while drying, mix a small amount of fresh clay with water to make a paste (slip) and smooth it over the crack with your finger.
Step 2: Stamping and Decorating
-
Stamp the initial:
Position your large ‘K’ (or chosen letter) stamp in the center of the tag below the hole. Press firmly and evenly, but not so hard that you distort the tag’s shape. -
Prepare the speckles:
Squeeze out small amounts of navy blue and burnt orange acrylic paint onto a palette. -
Apply the pattern:
Using a very fine detail brush or the tip of a toothpick, dab small, irregular spots of paint onto the wet clay. Vary the sizes—some tiny dots, some slightly larger blobs. -
Distribute the colours:
Keep the spacing random. Place a few blue spots near the corners and some orange ones closer to the letter to balance the design. -
Embed the paint:
This is the secret step: gently run your rolling pin over the tag *very lightly* just once. This presses the paint spots into the clay surface so they sit lush, rather than on top.
Level Up: Gold Leaf
Make it festive by painting the inside of the impressed letter with liquid gold leaf or metallic paint after the clay is completely dry.
Step 3: Finishing Touches
-
Let it dry:
Place the tag on a flat surface, like a wire rack or piece of parchment paper, and let it air dry for 24-48 hours. flip it halfway through to ensure even drying. -
Sand the edges:
Once fully hard and white, use fine-grit sandpaper to gently smooth any rough spots on the edges or back of the tag. -
Seal the tag:
For longevity, brush on a thin coat of matte or satin varnish. This protects the clay from moisture and deepens the paint colours slightly. -
Cut the twine:
Cut a length of jute twine, about 8 inches long. -
Thread the hanger:
Fold the twine in half to create a loop. Push the folded end through the tag’s hole from front to back. -
Secure the knot:
Pull the loose ends of the twine through the loop you just pushed through the hole and pull tight to secure it (a lark’s head knot).
Now you have a stash of beautiful custom tags ready to elevate your next wrapping session

TRACK YOUR CERAMIC JOURNEY
Capture glaze tests, firing details, and creative progress—all in one simple printable. Make your projects easier to repeat and improve.
Mini Bud Vases
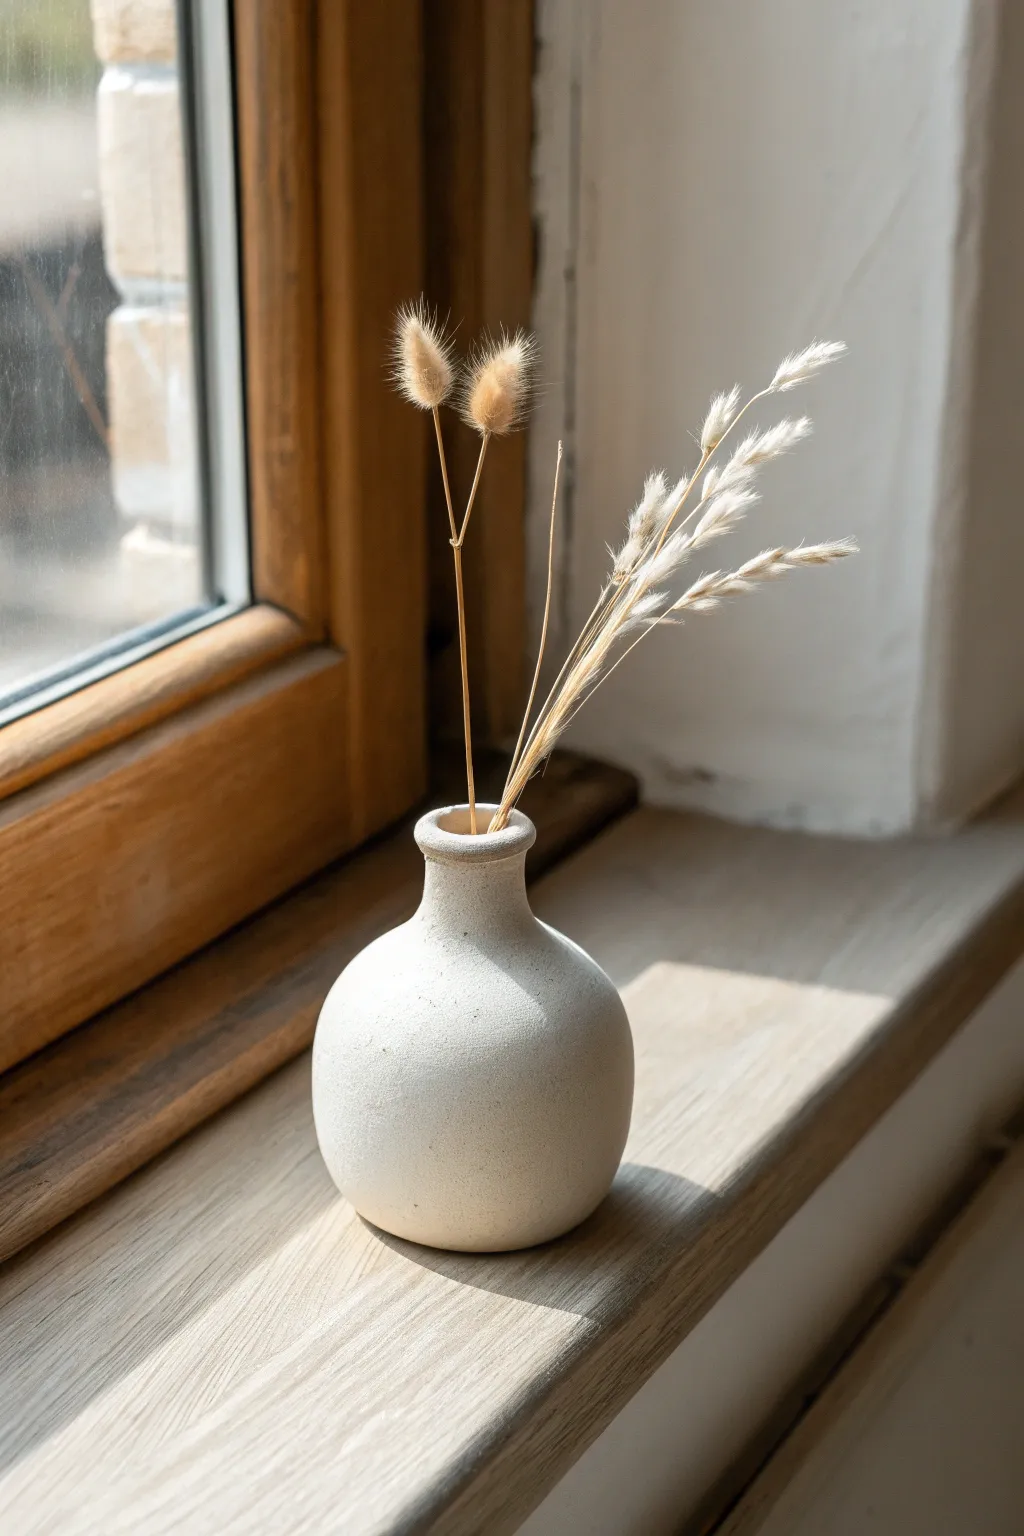
This rustic, petite bud vase mimics the look of carved limestone but is surprisingly lightweight and easy to shape. Its textured matte finish and organic curves make it the perfect vessel for displaying delicate dried grasses on a sunny windowsill.
How-To Guide
Materials
- White or stone-gray air dry clay
- Small rolling pin
- Needle tool or toothpick
- Small bowl of water
- Sponge or textured foam
- Baking soda (optional)
- Fine grit sandpaper
- White acrylic paint (matte)
- Small flat paintbrush
- Dried lagurus or grasses for display
Step 1: Forming the Base
-
Prepare the clay:
Start with a ball of clay roughly the size of a tangerine. Knead it continuously in your hands for about a minute to warm it up and ensure it is pliable without cracking. -
Shape the sphere:
Roll the clay between your palms to create a smooth, round sphere. It doesn’t need to be geometrically perfect; a slightly organic shape adds to the rustic charm. -
Flatten the bottom:
Gently tap the sphere on your work surface to create a flat, stable base. Ensure the vase stands upright without wobbling. -
Create the opening:
Using your thumb or the handle of a paintbrush, press directly into the center of the top of the sphere. Push down about three-quarters of the way through, leaving the bottom thick enough to be sturdy.
Cracking Up?
If you see small cracks forming while the clay dries, mix a tiny bit of fresh clay with water to make a paste (slip) and fill them in before painting.
Step 2: Drafting the Neck
-
Pinch the walls:
Insert your thumb into the hole and use your fingers on the outside to gently pinch and pull the clay upward. Rotate the piece as you go to maintain an even wall thickness. -
Narrow the neck:
As you pull the clay up to form the neck, gently squeeze inward to create a taper. The body should remain bulbous while the neck becomes slender. -
Refine the rim:
At the very top, flare the clay slightly outward to create a distinct rim. Use your finger wetted with a tiny bit of water to smooth the edge so it isn’t sharp or jagged. -
Smooth the body:
Dip your finger in water and run it over the entire surface of the vase to erase any fingerprints or deep cracks. I find using a circling motion helps blend imperfections best.
Step 3: Adding Texture & Finishing
-
Texturizing:
Take a dry sponge or a piece of crumpled foil and gently pat it all over the wet clay surface. This creates a pitted, stone-like texture rather than a smooth ceramic look. -
Dry completely:
Set the vase aside in a dry, room-temperature spot. Let it cure for at least 24-48 hours until it is hard and turns a lighter shade of white or grey. -
Sand imperfections:
once dry, use fine-grit sandpaper to knock down any overly rough ridges on the rim or base, but leave the body texture intact. -
Prepare textured paint:
Mix a teaspoon of baking soda into a small amount of white acrylic paint. This creates a chalky, plaster-like mixture. -
Apply the finish:
Dab the baking soda paint mixture onto the vase using a sponge or brush. Using a stippling (dabbing) motion enhances the faux-stone effect. -
Final drying:
Allow the paint to dry completely, which should happen relatively quickly due to the baking soda. -
Add florals:
Insert two or three stems of dried bunny tails or wild grasses to complete the look.
Water Warning
Air dry clay is not waterproof! This vase is strictly for dried floral arrangements. Do not add water or fresh flowers.
Place your new textured vase in a spot with natural light to highlight the stone-like details you created
Small Photo Holders
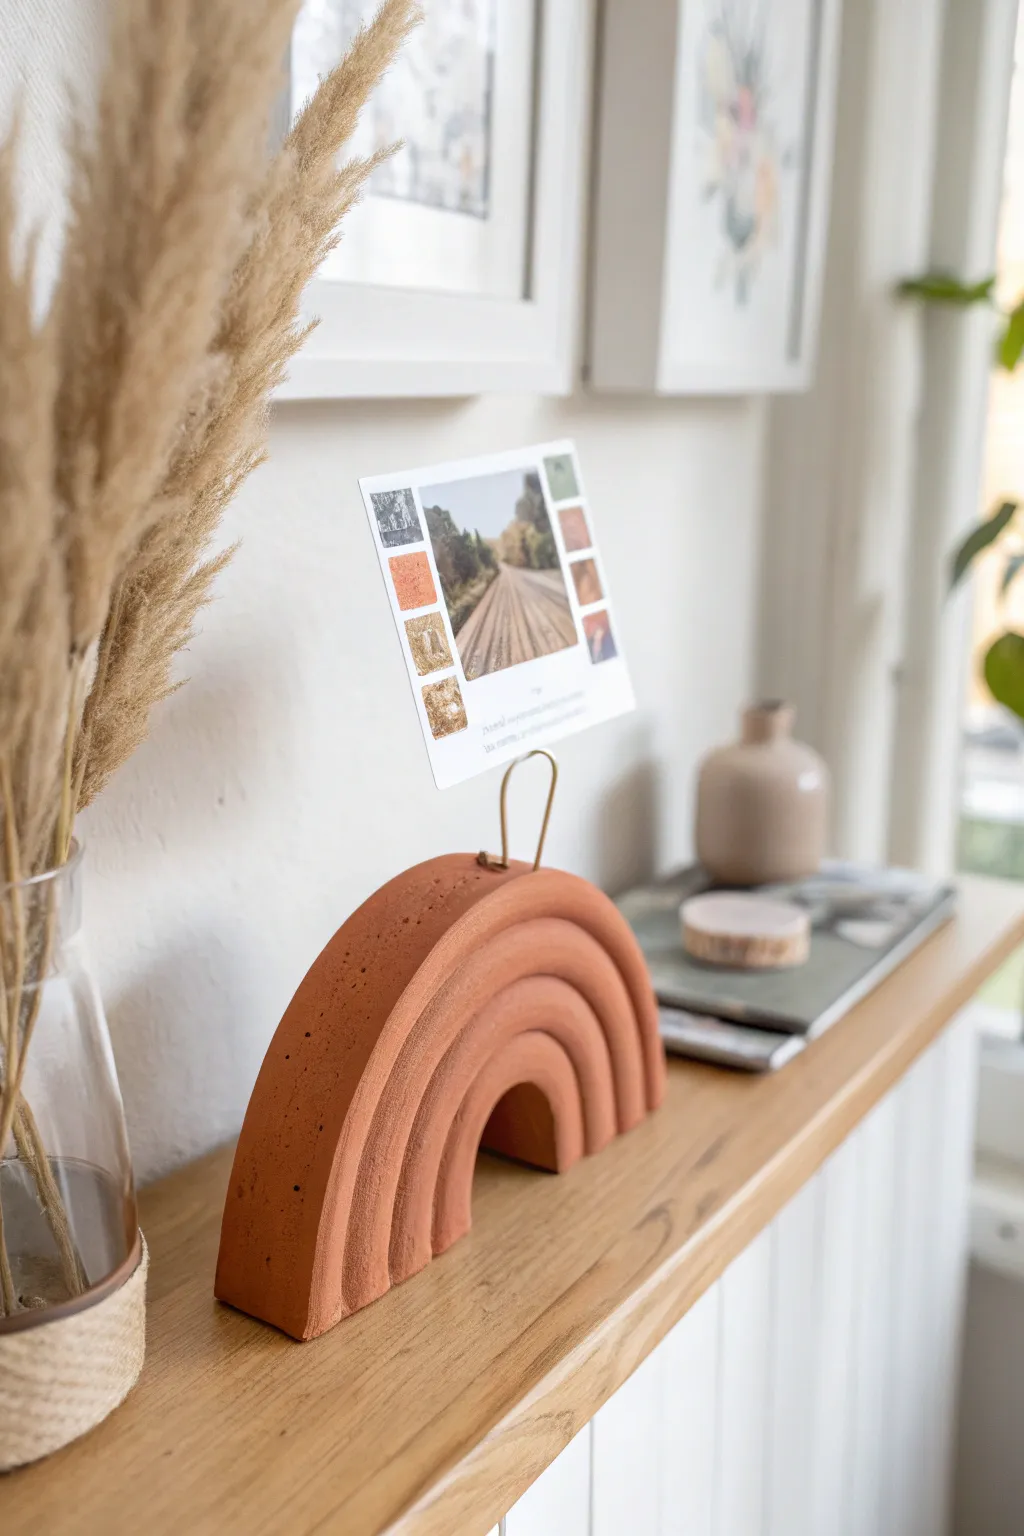
Bring warmth to your shelves with this earthy, terracotta-colored photo holder that mimics a minimalist rainbow. Its robust arched shape and simple wire detail create a modern, grounded way to display your favorite snapshots.
Step-by-Step Guide
Materials
- Terracotta-colored air dry clay (approx. 500g)
- Small rolling pin
- Craft knife or clay cutter
- Gold crafting wire (16 or 18 gauge)
- Round-nose pliers and wire cutters
- Cup of water
- Sponge or fine-grit sandpaper
- Ruler
- Parchment paper or craft mat
Step 1: Shaping the Rainbow
-
Prepare your workspace:
Begin by laying down parchment paper or a craft mat to protect your table and prevent the clay from sticking. This will make it easier to move your rainbow later. -
Create the base coil:
Take a large handful of your terracotta clay and roll it on the surface into a long, thick snake. Aim for an even thickness of about 3/4 inch (2 cm). -
Form the first arch:
Cut a section of the coil to create the smallest, innermost arch. Bend it into a tight ‘U’ shape and place it on your workspace. Smooth the ends so they sit flat. -
Roll subsequent coils:
Roll more clay into snakes of the exact same thickness. Consistency is key here for that uniform look seen in the photo. -
Layer the arches:
Drape the next coil over the first small arch. Gently press them together so they touch without squishing the shape. Trim the ends at the bottom to align perfectly with the first arch. -
Join the seams:
To ensure the rainbow stays together as one solid piece, you need to bond the coils. On the backside, use a modeling tool or your finger to smudge the clay across the seams where the coils touch. -
Complete the form:
Continue adding layers—usually 3 or 4 arches total looks best—until you reach your desired size. Ensure all the bottom edges are trimmed flush so the unit stands up straight. -
Smooth the surface:
Dip your finger in a little water and run it over the front surface and seams to smooth out any cracks or fingerprints. Keep the texture matte and natural. -
Refine the shape:
Use your ruler or a flat tool to gently tap the sides and top, ensuring the curvature is symmetrical and the bottom is perfectly flat.
Step 2: Adding the Hardware
-
Shape the wire holder:
Cut a piece of gold wire about 4 inches long. Using your fingers or round-nose pliers, bend it into an elongated loop or paperclip shape. -
Insert the wire:
While the clay is still wet, carefully push the two ends of your wire loop into the very top center of the outermost arch. Push it down about an inch for stability. -
Secure the hold:
Once inserted, pinch the clay slightly around the wire entry points to ensure it holds firmly as it dries. Make sure the loop stands straight up.
Cracks Appearing?
Mix a tiny amount of fresh clay with water to make a paste (slip). Fill any cracks with this mixture and smooth it over with your finger.
Step 3: Drying and Finishing
-
Initial drying:
Let the piece sit undisturbed in a cool, dry place. Avoid direct sunlight which can cause cracks. I usually rotate the piece after 12 hours to help the bottom dry evenly. -
Patience is key:
Allow at least 24 to 48 hours for the clay to fully harden. The color will lighten slightly as the moisture evaporates. -
Sanding imperfections:
Once fully dry, take a piece of fine-grit sandpaper and gently buff any rough spots or sharp edges, particularly around the bottom base. -
Optional sealing:
If you want to protect the finish, apply a coat of matte varnish. However, leaving it raw preserves that lovely earthy texture. -
Display:
Slide a photo or postcard into the gold wire clip and place your new decor piece on a shelf.
Wire Stability Tip
Put a tiny dab of superglue on the wire tips before inserting them into the wet clay. This acts as an internal anchor once the clay shrinks and dries.
This simple yet striking project proves that minimalistic designs often make the biggest impact
Mini Incense Holders
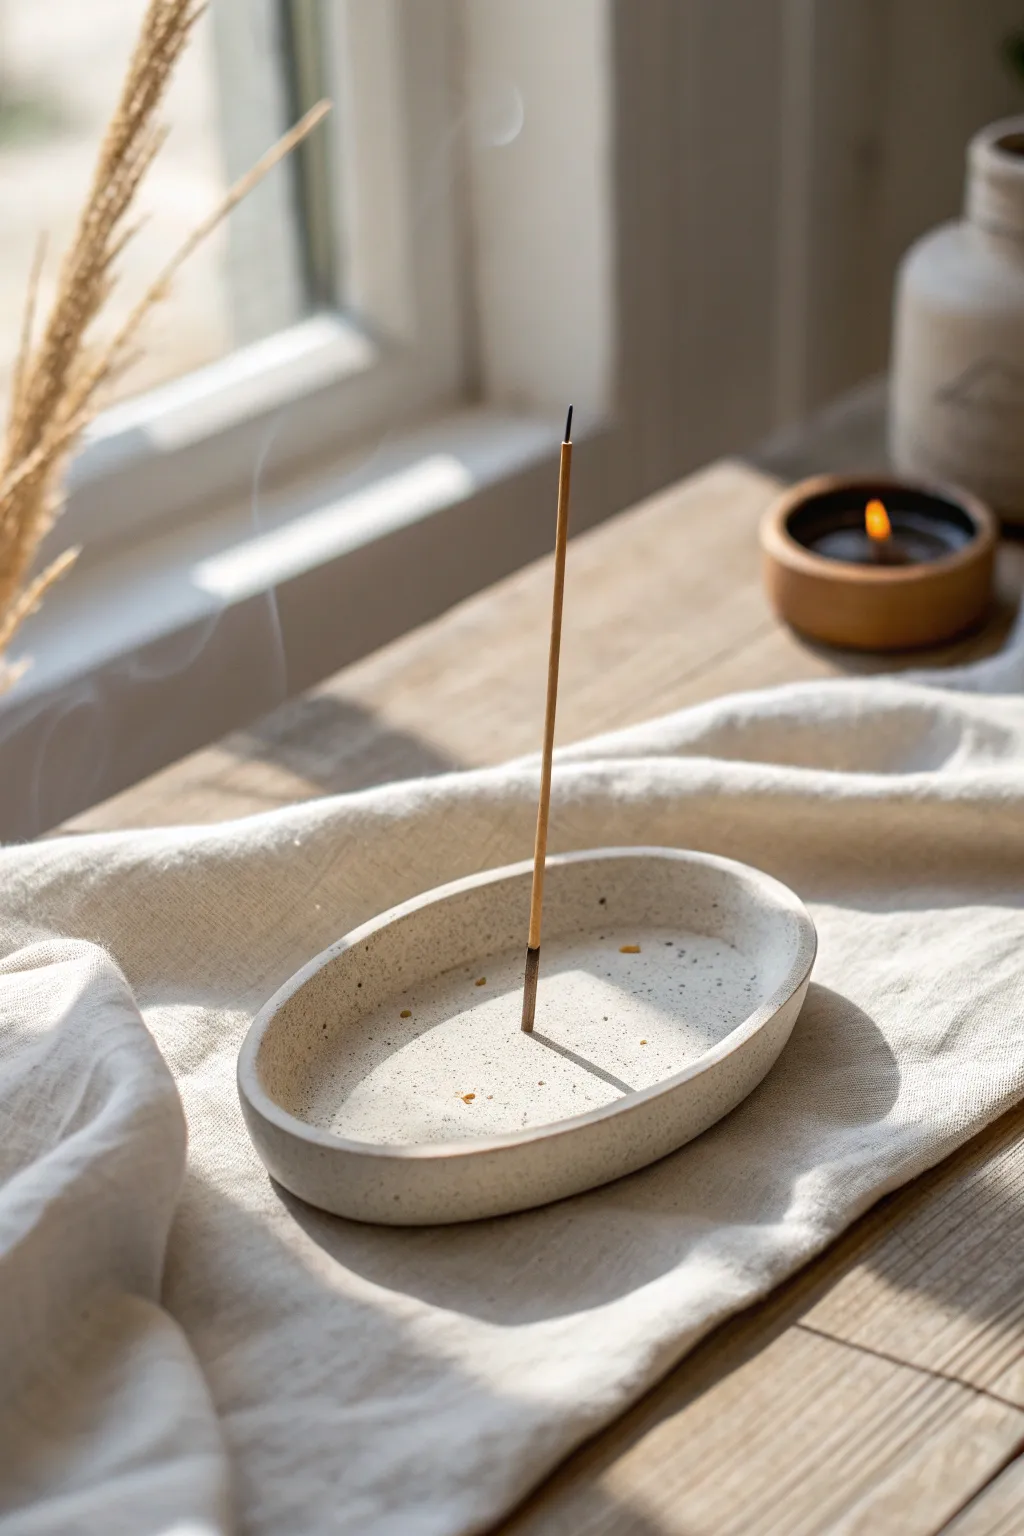
Embrace minimalist serenity with this sleek, boat-shaped incense holder featuring a raised rim and a natural speckled finish. Its clean lines and neutral stone-like texture make it a sophisticated addition to any meditation space or coffee table.
Step-by-Step
Materials
- White or stone-colored air dry clay
- Rolling pin
- Craft knife or clay cutter
- Small bowl of water
- Sponge
- Incense stick (for sizing)
- Fine sandpaper (220 grit)
- Faux stone acrylic paint or ‘speckle’ top coat (optional)
- Matte varnish
- Parchment paper
Step 1: Shaping the Base
-
Preparation:
Begin by kneading a ball of air dry clay in your hands until it feels warm and pliable. This conditioning helps prevent cracks later on. -
Rolling out:
Place the clay on a sheet of parchment paper and roll it out until it is an even slab, approximately 1/4 inch thick. Try to maintain a uniform thickness for even drying. -
Cutting the shape:
Using a craft knife, freehand cut a long oval shape from the slab. You can also create a paper template first if you want perfect symmetry, but an organic shape adds charm. -
Smoothing edges:
Dip your finger or a damp sponge into water and gently run it along the cut edges of the oval to remove any sharpness or burrs.
Cracking Up?
If you see tiny cracks forming while drying, mix a small paste of clay and water (slip) and fill them in immediately, then smooth over with a damp finger.
Step 2: Building the Rim
-
Creating the coil:
Roll a separate piece of clay into a long, thin snake or coil. It should be long enough to wrap around the entire perimeter of your oval base. -
Scoring surfaces:
Use your knife or a needle tool to scratch tiny hash marks (scoring) along the top edge of the base and one side of your clay coil. This rough texture acts like velcro for the clay. -
Applying slip:
Dab a small amount of water or liquid clay (slip) onto the scored areas to create a sticky bond. -
Attaching the rim:
Place the coil onto the edge of the base, pressing down gently to secure it. If the coil is too long, cut the excess and blend the two ends together seamlessly. -
Blending the seam:
Using a modeling tool or your finger, drag clay from the coil down onto the base on the inside, and from the base up onto the coil on the outside. The goal is to make the seam disappear completely. -
Refining the height:
Pinch the wall gently to shape it upwards, creating a shallow basin. I find using a damp sponge here helps create that perfectly smooth, rounded lip shown in the photo.
Mix It Up
Knead dried used coffee grounds or cracked black pepper directly into the wet clay before rolling. This creates a natural, embedded texture without needing paint.
Step 3: Finishing Touches
-
Making the holder:
Roll a very small ball of clay and press it firmly into the center of the boat. Blend the edges of this small mound into the base so it sits securely. -
Creating the hole:
Take an actual incense stick and press it into the center mound at a slight angle. Verify the angle allows the ash to fall inside the boat, not on the table. -
Drying:
Let the piece dry in a cool, draft-free spot for 24-48 hours. Turn it over halfway through to ensure the bottom dries evenly. -
Sanding:
Once fully dry and chalky white, sand the entire piece with fine-grit sandpaper to remove fingerprints and achieve a professional, stone-smooth finish. -
Start the speckle effect:
If your clay wasn’t pre-speckled, mix a tiny amount of black or dark brown acrylic paint with water on an old toothbrush. -
Flicking paint:
Run your thumb across the toothbrush bristles to flicker a fine mist of dark droplets over the white clay. Keep the spray random and light. -
Sealing:
Finish with a coat of matte varnish to protect the clay and the paint from ash stains, giving it that finished ceramic look.
Light your favorite scent and watch the smoke drift beautifully over your handmade creation
Tiny Plant Pot Toppers
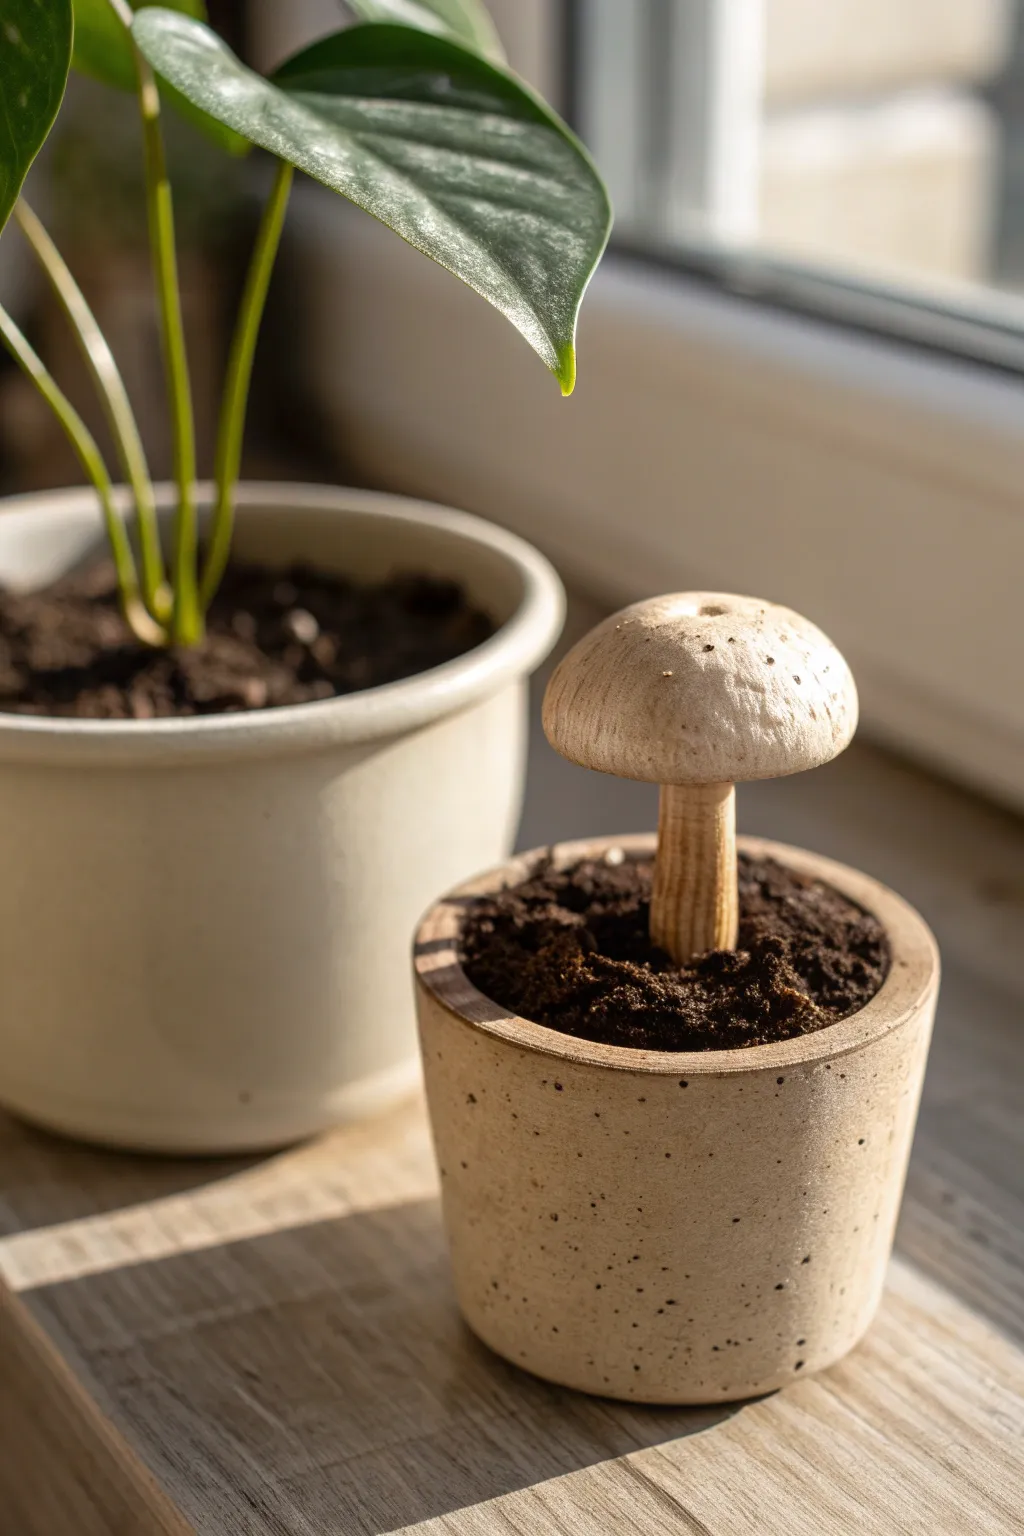
Bring a touch of the forest floor indoors with this charming clay project that mimics the texture of carved wood and natural stone. This tiny potted mushroom is a delightful, low-maintenance companion for your real houseplants.
How-To Guide
Materials
- White or beige air dry clay
- Small roller (acrylic or rolling pin)
- Craft knife or scalpel
- Modeling tools (needle tool and ball tool)
- Acrylic paints (burnt umber, ochre, cream, black)
- Old toothbrush (for speckling)
- Fine grit sandpaper
- Matte varnish or sealant
- Dried coffee grounds or real potting soil
Step 1: Sculpting the Pot
-
Roll the base:
Start by conditioning a ping-pong ball sized amount of clay. Roll it into a smooth ball, then flatten the bottom against your work surface so it stands upright. -
Create the walls:
Use your thumb to press into the center of the ball, pinching and turning to widen the opening. Aim for a simple, cylindrical tumbler shape with slightly thick, straight walls. -
Refine the rim:
Flatten the top rim by gently pressing the pot upside down onto your table. If the sides bulge out, roll the pot gently on its side to straighten them back up. -
Smooth the surface:
Dip your finger in a little water and smooth out any fingerprints or cracks on the exterior. Let this base dry completely, usually for 24 hours.
Uneven Speckles?
If your toothbrush creates large blobs instead of fine mist, test spray on a paper towel first. The paint needs to be quite watery and the bristles shouldn’t be dripping wet.
Step 2: Creating the Mushroom
-
Form the stem:
Roll a small snake of clay about the thickness of a pencil. Cut it to your desired height, keeping in mind that insertion into the soil will hide the bottom half. -
Texture the stem:
Using a needle tool or craft knife, scratch vertical lines up and down the stem to imitate fibrous wood grain. Vary the depth of these lines for realism. -
Shape the cap:
Roll a sphere of clay slightly larger than a marble and flatten the bottom to create a dome shape. I find gently pressing the center of the underside with a ball tool helps create the perfect socket for the stem. -
Attach stem to cap:
Score the top of the stem and the underside of the cap. Apply a dab of water or clay slip, then press them firmly together. Smooth the join slightly, or leave it rough for a rustic look. -
Dry vertical:
To prevent flattening, prop the mushroom upright to dry.Sticking the stem into a piece of floral foam or a ball of scrap clay works wonders.
Make it a Trio
Create a woodland scene by making three mushrooms of varying heights and cap shapes—one button, one tall/thin, and one wide/flat—to cluster together in a wider pot.
Step 3: Painting & Finishing
-
Sand the pot:
Once the pot is fully dry, sanding is key. Use fine-grit sandpaper to smooth the exterior walls until they feel like honed stone. -
Base coat the mushroom:
Mix a diluted wash of cream and a tiny dot of ochre paint. cover the entire mushroom. The thin paint should settle darker in the texture lines you carved. -
Wood grain details:
Dry brush a very light amount of burnt umber closely along the stem’s vertical grooves to enhance the wooden effect. -
Pot base color:
Paint the pot a warm, sandy beige. You want an even, opaque coat here to cover the raw clay color. -
Speckling technique:
Dilute some dark brown or black paint with water. Dip an old toothbrush into it, hold it near the pot, and flick the bristles with your thumb to spray tiny speckles over the surface. -
Seal everything:
Apply a coat of matte varnish to both the pot and mushroom to protect the paint and eliminate any unnatural clay chalkiness.
Step 4: Assembly
-
Fill the pot:
Fill your clay pot with real potting soil or dried coffee grounds (which look convincingly like dirt and smell great). -
Planting:
Gently push the stem of your finished mushroom into the soil until it stands stable and upright.
Now you have a permanent piece of nature study to brighten your desk or windowsill
Mini Wall Mobile Pieces
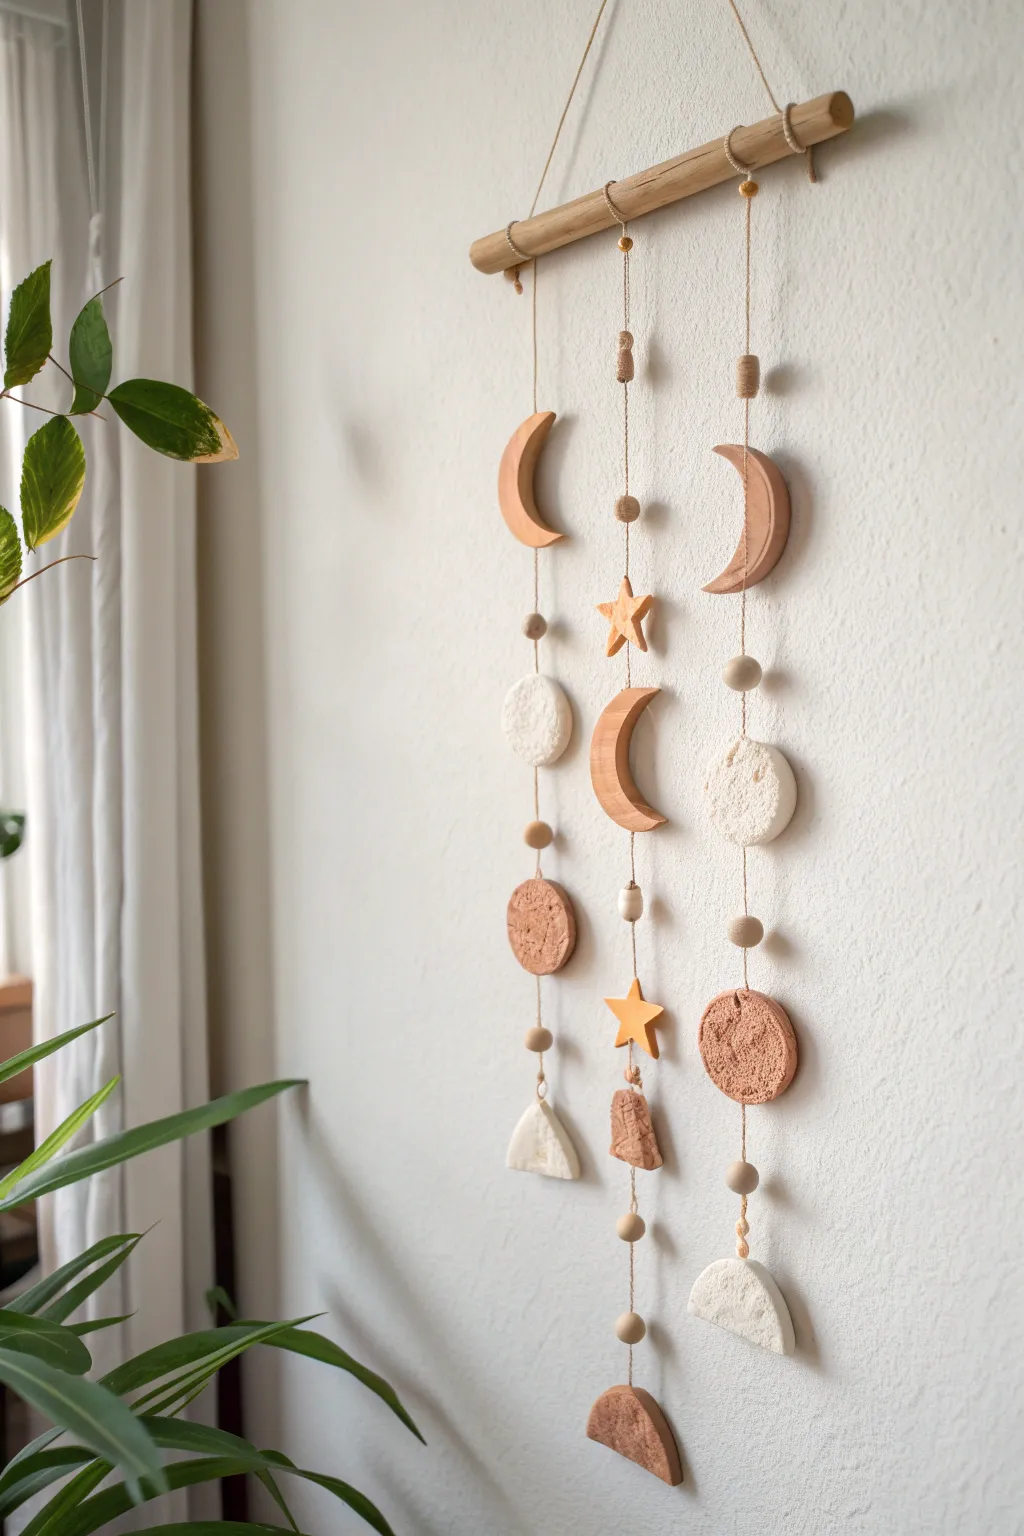
Bring a touch of cosmic calm to your walls with this earthy, textured mobile featuring phases of the moon and twinkling stars. Using air-dry clay in natural terracotta and white tones creates a warm, organic feel perfect for a nursery or living space.
Detailed Instructions
Materials
- Air-dry clay (terracotta/red and white)
- Wooden dowel or branch (approx. 12 inches)
- Jute twine or heavy hemp cord
- Rolling pin
- Cookie cutters (crescent moon, star, circle)
- Craft knife
- Texturing tools (sponge, toothbrush, or crumpled foil)
- Sandpaper (fine grit)
- Wooden beads (assorted sizes)
- Straw or toothpick (for poking holes)
- Scissors
Step 1: Shaping the Celestial Bodies
-
Prepare the terracotta clay:
Begin by conditioning a chunk of terracotta-colored air-dry clay. Knead it in your hands until it is pliable and warm, which helps prevent cracking later on. -
Roll the slabs:
Roll out the clay on a smooth surface to an even thickness of about 1/4 inch. If you want a uniform look, place two magazines or wooden rulers on either side of the clay to guide your rolling pin. -
Cut the terracotta shapes:
Using your cookie cutters or a craft knife, cut out three crescent moon shapes, one circle, and one star. Smooth the raw edges gently with a damp fingertip to remove any burrs. -
Prepare the white clay:
Clean your rolling pin and surface thoroughly, then repeat the conditioning and rolling process with the white air-dry clay. -
Create textured white shapes:
Before cutting, press a textured sponge or a crumpled ball of aluminum foil into the surface of the white clay slab to create a crater-like moon texture. -
Cut the white pieces:
Cut out two circles and two semi-circles (you can cut a circle and slice it in half) from the textured white clay. Cut one additional small triangle or irregular geometric shape if desired for the bottom layer. -
Pierce the holes:
Use a straw or a toothpick to poke holes in each piece for stringing. Most pieces need a hole at the top and bottom, but the bottom-most pieces only need a single top hole. Make sure the holes are large enough for your twine.
Prevent warping
Clay curls as water evaporates unevenly. Dry pieces on a wire rack for airflow, or place a light book on top once they are ‘leather hard’ to keep them flat.
Step 2: Drying and Refining
-
Let them dry:
Lay all pieces flat on a clean board or wire rack. Let them dry completely for 24-48 hours. I find flipping them over halfway through the drying process helps keep them perfectly flat. -
Sand the edges:
Once fully cured and hard, use fine-grit sandpaper to gently smooth the edges of the shapes, particularly the untextured terracotta moons, for a clean professional finish. -
Prepare the hanger:
Take your wooden dowel or branch. Cut three long lengths of jute twine (about 30 inches each) and tie them onto the dowel using a lark’s head knot or a simple double knot, spacing them evenly.
Pro Tip: Clean edges
Dip your finger in a little water and run it along the cut edges immediately after cutting. This smooths the clay before it dries, saving you sanding time later.
Step 3: Assembly
-
Plan the layout:
Arrange your clay pieces and wooden beads on a table below the dowel to finalize the order. Reference the image: mix the moons, stars, and textured circles to balance the visual weight. -
String the first column:
Start with the left string. Thread the twine through a top bead, then down through the top hole of a terracotta moon and out the bottom hole. Tie a knot underneath the piece (or loop through a bead) to secure it in place. -
Continue adding elements:
Add a few inches of space, tie a knot, add a bead, and attach a white textured circle. Repeat for the bottom shape, ending with a secure double knot. -
Complete the other strands:
Repeat the stringing process for the middle and right strands. Vary the heights of the items slightly so they don’t line up perfectly straight, creating a more organic, flowing look. -
Add the hanging loop:
Cut a final piece of twine and tie it to both ends of the wooden dowel to create a triangle hanger for the wall. -
Final trim:
Trim any excess twine tails from your knots at the bottom of the mobile for a tidy appearance.
Hang your new celestial creation near a window to catch the shifting light throughout the day