When I’m working with soft clay, I love projects that start with just a few simple shapes and still come out ridiculously cute. Here are my go-to easy ideas you can finish fast, even if you’re brand new to clay.
Round Panda Mini Figure
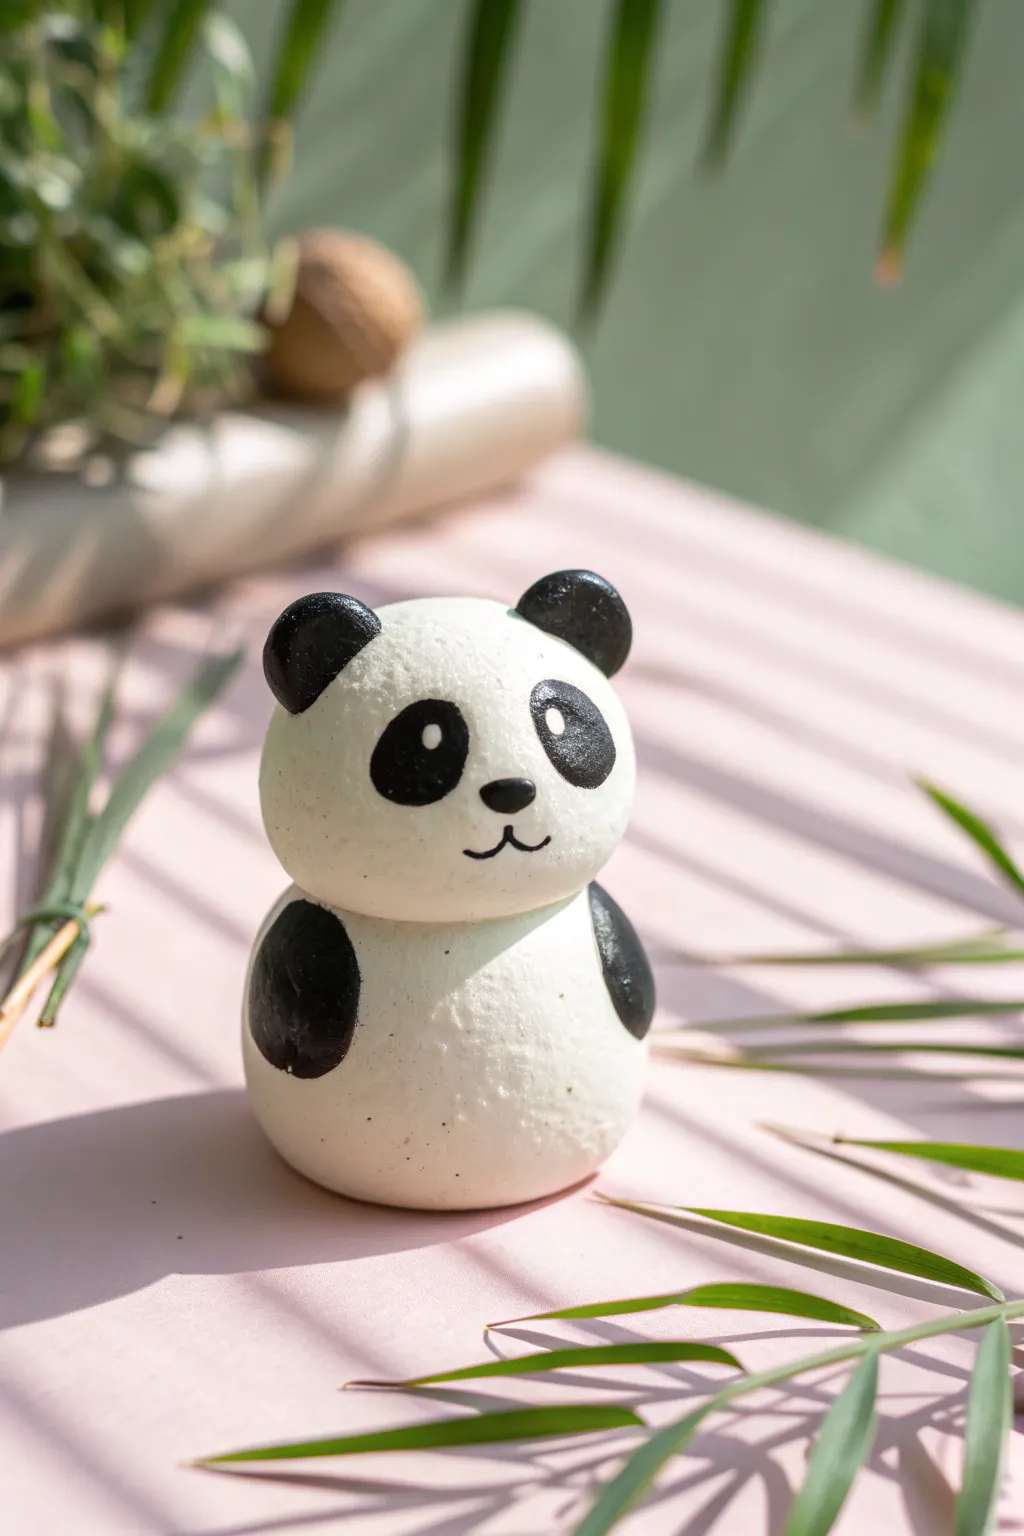
This adorable round panda figurine is the perfect beginner project for soft clay enthusiasts, featuring a charming stacked-sphere design. With its minimalist features and smooth, matte finish, it makes for a sweet desk companion or a tiny gift.
Step-by-Step
Materials
- White soft air-dry clay (or polymer clay)
- Black soft air-dry clay (or black acrylic paint)
- Clean work surface (mat or parchment paper)
- Water in a small cup (for smoothing)
- Small round tool or dotting tool
- Fine-point paintbrush (if painting details)
- Toothpick or short wire (for internal structure)
- Matte varnish (optional)
Step 1: Shaping the Body
-
The base sphere:
Start by taking a chunk of white clay roughly the size of a golf ball. Roll it firmly between your palms until you have a smooth, even sphere. -
Flattening the base:
Gently tap the bottom of the sphere against your work surface. This creates a small flat spot so your panda will sit upright without rolling away. -
Creating the head:
Take a slightly smaller amount of white clay for the head. Roll this into a second smooth sphere. It should be just slightly smaller than the body piece to give it that cute, chubby look. -
Connecting the parts:
Insert a toothpick or a small piece of wire halfway into the top of the body sphere. Add a tiny dab of water (if using air-dry clay) to the area around the toothpick. -
Stacking:
Push the head sphere onto the exposed toothpick until it sits snugly on top of the body. Gently press them together to ensure a good bond, smoothing the seam slightly with your finger if needed.
Cracks Appearing?
If you see tiny cracks forming as the clay dries, dip your finger in water and gently massage the clay in circles to fill them in. Repeat until smooth.
Step 2: Adding Black Details
-
Preparing the ears:
Pinch off two very small, pea-sized pieces of black clay. Roll them into balls. -
Attaching the ears:
Press the black balls onto the top left and right sides of the head. Flatten them slightly against the head curve so they look like rounded nubs rather than sticking up like antennas. -
Making the arms:
Roll two slightly larger pieces of black clay into teardrop shapes. These will be the arms. -
Attaching the arms:
Press the teardrops onto the sides of the body sphere, about halfway down. Smooth the edges so they look integrated into the body shape.
Bamboo Snack
Make a tiny green cylinder from clay and place it in the panda’s lap or hand. Use a needle tool to scratch vertical lines for a bamboo texture.
Step 3: Face & Finish
-
Eye patches:
If using black clay for eyes, flatten two small ovals and press them onto the face. I find spacing them slightly wide apart increases the cuteness factor. -
Painting alternative:
Alternatively, if you prefer precision, wait for the white clay to dry completely and paint the black eye patches with acrylic paint. -
Adding the shine:
Use a white paint pen or a tiny dot of white clay to add a ‘catchlight’ reflection in the upper corner of each black eye patch. This brings the character to life. -
Nose and mouth:
Roll a microscopic ball of black clay for the nose and place it between the eyes. Use a fine tool or paint to create the small anchor-shaped mouth underneath. -
Drying:
Let the figure sit undisturbed in a dry, well-ventilated area for at least 24 hours. The clay will lighten as it dries. -
Optional protection:
Once fully cured, you can brush on a coat of matte varnish to protect the clay from dust and moisture without making it too shiny.
Now you have a charming little panda friend ready to brighten up your shelf


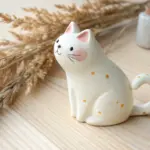
Blob-Body Kitty With Tiny Paws
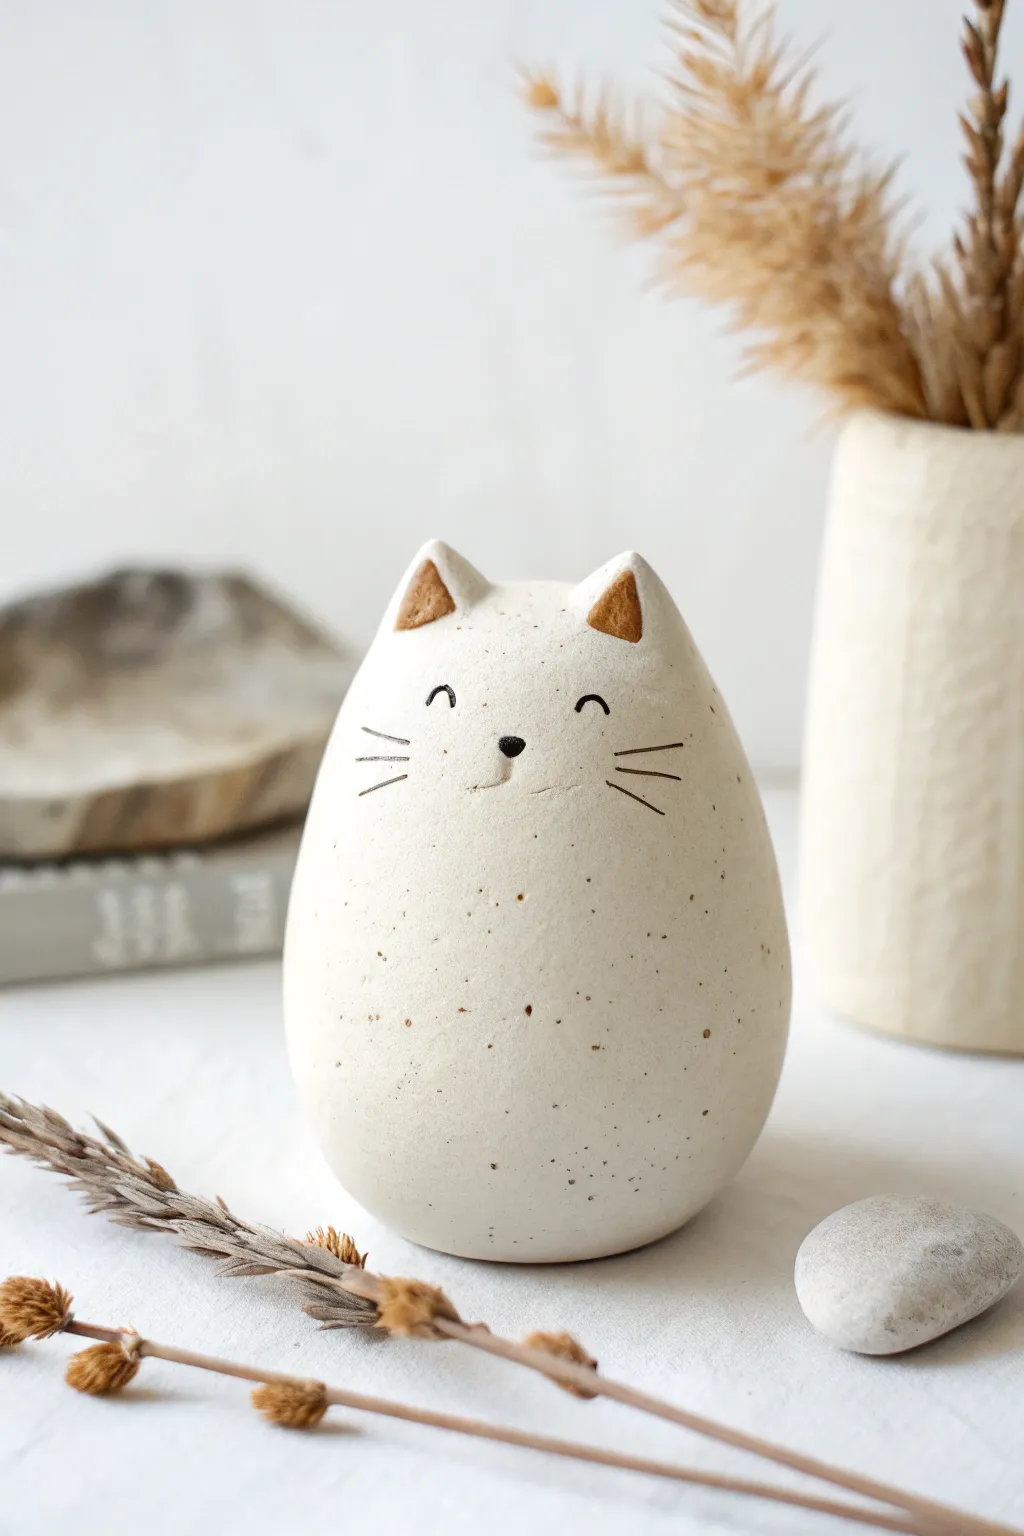
This minimalist kitty figurine combines a simple egg-shaped form with charming, rustic details to create a piece that looks like high-end pottery. The secret to its organic feel is the faux-speckle effect, which transforms basic white clay into something earthy and special.
Detailed Instructions
Materials
- White polymer clay or air-dry clay (approx. 100g)
- Small amount of brown clay (or brown acrylic paint)
- Black acrylic paint
- Fine-point paintbrush or toothpick
- Old toothbrush (for speckling)
- Tan/Light brown acrylic paint (diluted)
- Needle tool or toothpick
- Aluminum foil (optional, for core)
- Smooth work surface
Step 1: Forming the Body
-
Condition the clay:
Start by kneading your white clay until it is soft, pliable, and free of any cracks. Warm clay is much easier to smooth later on. -
Roll the main shape:
Create a smooth ball of clay, then gently roll it between your palms into an elongated egg shape. The bottom should be slightly wider than the top to give it a sturdy base. -
Flatten the base:
Tap the rounded bottom of your egg shape onto your work surface firmly. This creates a flat area so the cat stands upright without wobbling. -
Refine the silhouette:
Run your wet finger (for air-dry clay) or a bit of baby oil (for polymer) over the surface to remove fingerprints. Aim for a distinct, smooth curve that tapers gently toward the top of the head.
Uneven Surface?
If your air-dry clay dries with cracks or bumps, mix a tiny bit of clay with water to make a ‘slip’ paste. Brush this into the cracks and smooth it out with your finger before painting.
Step 2: Sculpting the Features
-
Pinch the ears:
At the very top of the tapered end, gently pinch two small triangles of clay upward to form the ears. I find it helpful to pinch them slightly forward to create a cute, attentive expression. -
Smooth the ear transitions:
Use a modeling tool or your finger to smooth the base of the ears back into the head so they look like one continuous piece rather than attached lumps. -
Dent the inner ears:
Press the rounded end of a paintbrush handle or a small ball tool into the center of each triangle ear to create a small hollow. -
Add the inner ear color:
If using polymer clay, press tiny triangles of brown clay into these hollows. If using air-dry clay, you will paint this area later, so just leave the indentation smooth. -
Create the nose indentation:
Very lightly press a tiny spot in the center of the face where the nose will go. This slight depression helps guide your painting later. -
Let it dry or bake:
Follow the instructions for your specific clay type. If using air-dry clay, let it sit for at least 24 hours. For polymer, bake according to the package directions and let it cool completely.
Make it a Set
Create a whole family by varying the sizes! Try making a tall, thin cat and a small, round kitten to sit next to this one. You can curve their bodies slightly so they nestle together.
Step 3: Decoration & Painting
-
Paint the faux speckles:
Dilute a small amount of tan or light brown paint with water. Dip an old toothbrush into the mixture and run your thumb across the bristles to flick tiny splatters of paint onto the white body. Practice on paper first to control the spray. -
Dry the texture:
Allow the speckles to dry completely. This layer gives the piece that convincing stoneware pottery look. -
Paint the inner ears:
If you didn’t use colored clay earlier, paint the inside of the triangular indentations with a warm brown acrylic paint. -
Paint the nose:
Using a very fine brush or the tip of a toothpick, dab a small, inverted black triangle onto the nose indentation you made earlier. -
Draw the eyes:
Paint two small, upward-curving arches for the eyes. Positioning them slightly far apart adds to the sweet, innocent character of the face. -
Add whiskers:
With an extremely light touch, paint three thin lines on each cheek. Vary the length slightly so the middle whisker is the longest. -
Paint the mouth:
Add a tiny, subtle curved line extending downward from the nose to the left or right to suggest a quirky little smirk. -
Seal the piece:
Once all paint is bone-dry, apply a matte varnish. A glossy finish might look too plastic, while matte preserves the natural, ceramic aesthetic.
Now you have a serene little desk companion that brings a calming, handcrafted vibe to your space


Bunny Head Charm With Long Ears
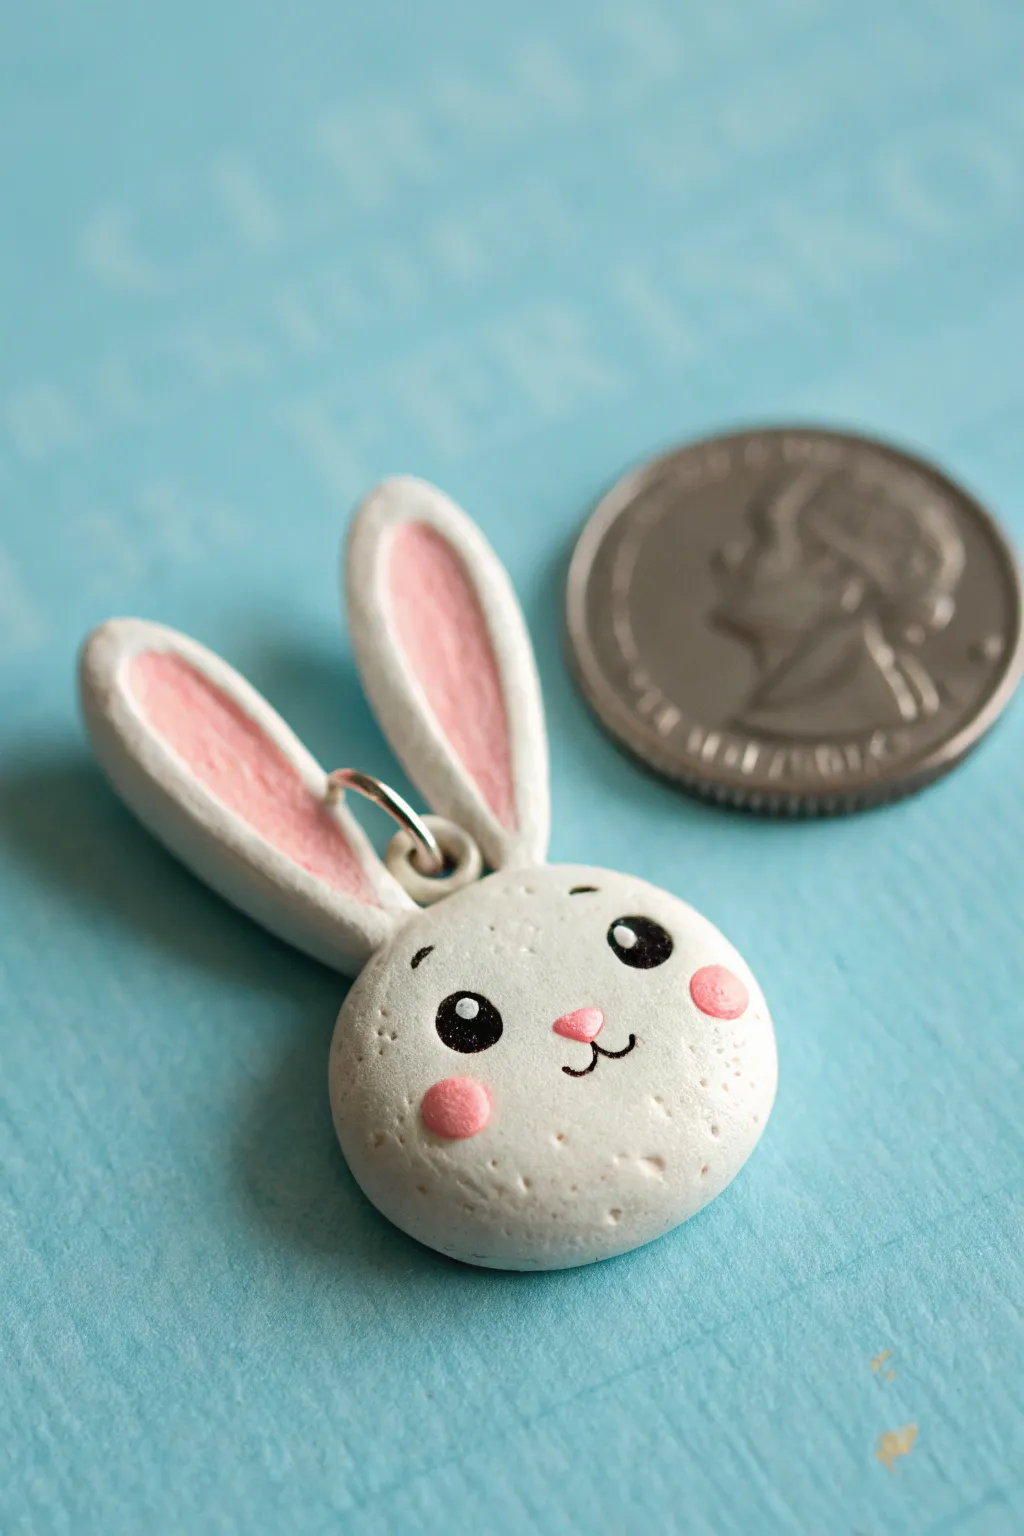
Hop into crafting with this adorable bunny head charm featuring wonderfully oversized ears and a sweet, kawaii expression. This miniature project is perfect for beginners and makes a delightful addition to necklaces, keychains, or zipper pulls.
How-To Guide
Materials
- White polymer clay (or air-dry clay)
- Soft pink pastel chalk or pink acrylic paint
- Black acrylic paint
- White acrylic paint
- Small eye screw pin
- Fine detail paintbrush (000 size)
- Dotting tool or toothpick
- Clay roller or smooth pen
- Craft knife or clay blade
- Matte or glossy varnish (optional)
Step 1: Shaping the Base
-
Condition the clay:
Begin by taking a small amount of white clay and kneading it in your hands until it becomes soft, pliable, and free of cracks. -
Form the head:
Roll a ball of clay roughly the size of a large marble (about 1 inch in diameter). Flatten it slightly into a thick disc shape, smoothing the edges to keep them rounded like a pebble. -
Texture check:
Inspect the surface for any dust or fingerprints; gently buff them out with your fingertip. A tiny bit of baby oil can help smooth polymer clay if it’s stubborn.
Sticky Situation?
If your white clay is picking up lint or dust, use a piece of clear scotch tape to dab the clay surface before baking. It lifts debris instantly without ruining the shape!
Step 2: Creating the Ears
-
Portion the ear clay:
Roll two smaller balls of white clay, each about half the size of the head. Ensure they are equal in volume. -
Roll out coils:
Roll these balls into elongated teardrop or log shapes. Flatten them gently with your finger or a roller to create the long, paddle-like ear shape. -
Color the inner ears:
Scrape a little pink pastel chalk into a dust. Use a small, dry brush or your finger to rub this pink dust into the center of each flattened ear. Alternatively, paint a pale pink oval after baking. -
Attach the ears:
Press the narrow bottom end of the ears firmly onto the top of the head. Because the ears are long, you might want to blend the clay slightly at the connection point on the back for extra strength. -
Insert the hardware:
Take your small metal eye screw. Dip the threaded end in a tiny bit of liquid clay or strong glue (if using air-dry) and screw it into the top of the head, right between the ears.
Step 3: Baking and Painting
-
Bake or dry:
If using polymer clay, bake according to the package instructions (usually 275°F/135°C for 15-30 minutes). If using air-dry clay, let it sit for 24-48 hours until fully hardened. -
Cool down:
Allow the charm to cool completely before painting. Painting on warm clay can make the acrylics get tacky and clump. -
Paint the eyes:
Using black acrylic paint and a dotting tool, place two small, solid circles for the eyes. Space them widely apart for that cute ‘kawaii’ look. -
Add eye highlights:
Once the black is dry, dip a toothpick in white paint and add a tiny white dot to the upper left corner of each eye to bring them to life. -
Draw the mouth and nose:
Use your finest detail brush to paint a tiny pink rounded triangle for the nose. Then, use black paint to draw a very thin ‘w’ shape directly underneath for the mouth. -
Add rosy cheeks:
Apply two soft pink circles under the eyes using a dotting tool or a q-tip with a very small amount of paint. I prefer to use a ‘dry brush’ technique here so the cheeks look soft rather than solid. -
Seal the charm:
Once all paint is completely dry, apply a coat of matte or glossy varnish to protect your details from scratching off.
Make it Sparkle
Mix a tiny pinch of white iridescent glitter into the clay before sculpting. It gives the bunny a texture that looks like shimmering snow or sugar frosting.
String a chain through the loop and wear your handmade bunny buddy with pride


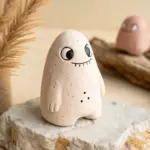
Tiny Dino With Spiky Back
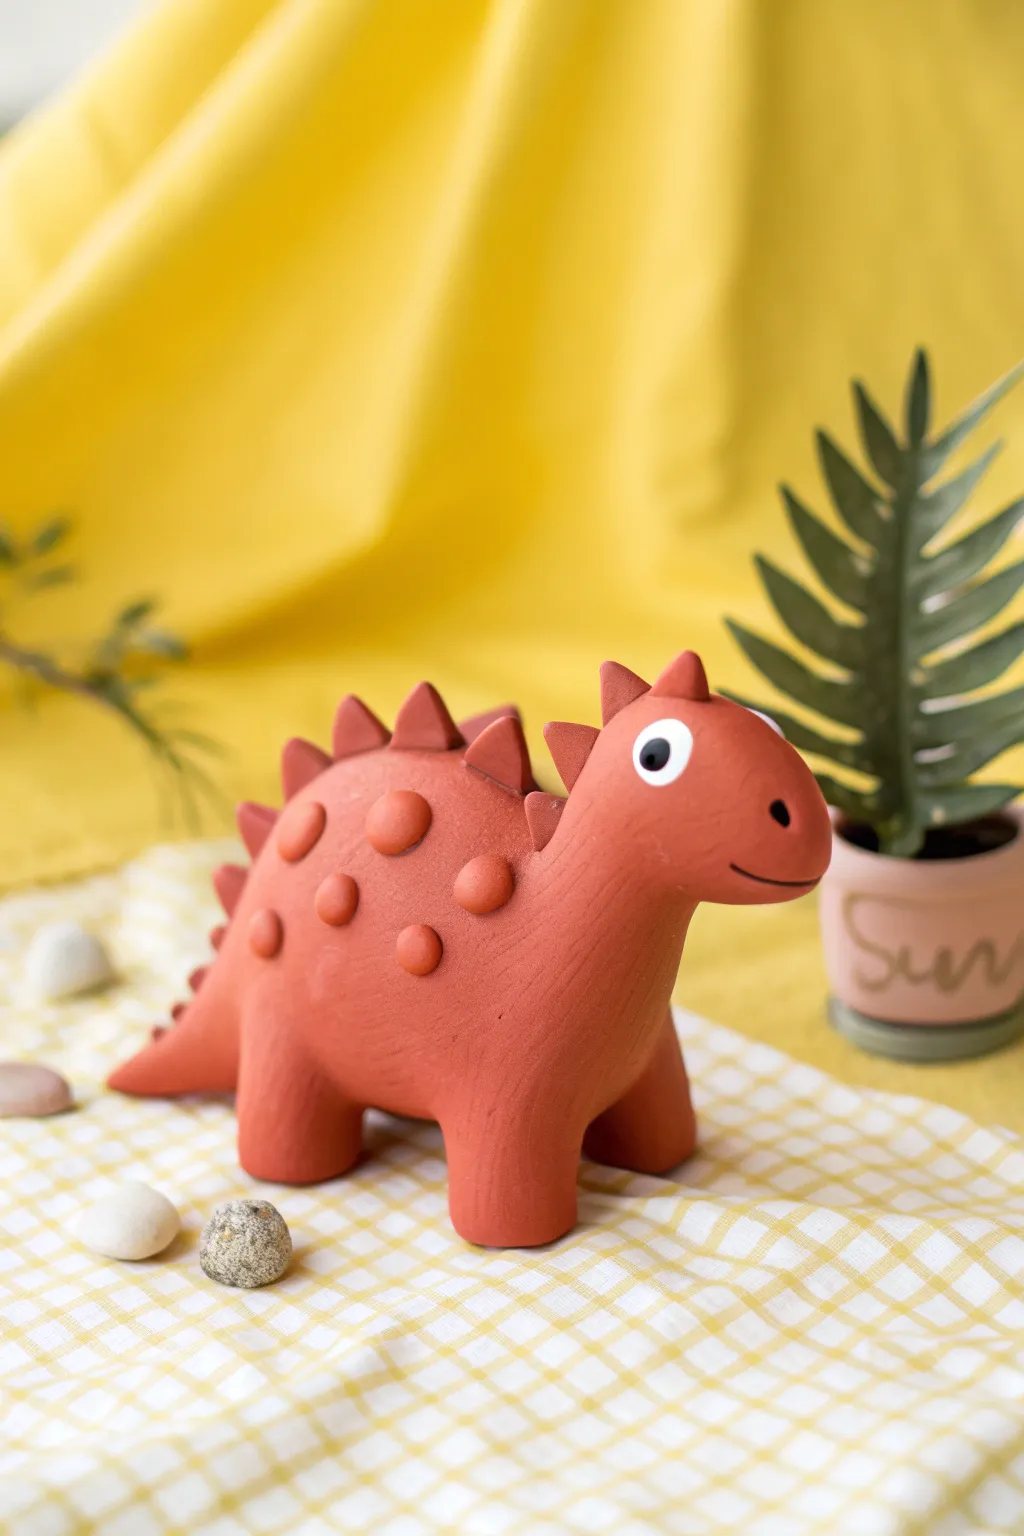
This charming little dinosaur brings a warm, earthy touch to any shelf with its terracotta-colored finish and adorable spiky silhouette. It features a playful mix of geometric spikes and round bumps, making it a perfect beginner sculpting project that looks surprisingly sophisticated.
Detailed Instructions
Materials
- Soft air-dry clay or polymer clay (terracotta or reddish-brown color)
- White clay (tiny amount for the eye base)
- Black clay or acrylic paint (for the pupil)
- Clay sculpting tools (specifically a smoothing tool and a needle tool)
- Small ball tool or rounded end of a paintbrush handle
- Rolling pin (optional)
- Water (for smoothing air-dry clay) or baby oil (for polymer clay)
Step 1: Forming the Body
-
Create the main shape:
Start with a large ball of your terracotta-colored clay. Roll it into a smooth sphere to remove any cracks, then gently elongate it into a thick sausage shape. -
Define the head and tail:
Pinch and drag one end of the clay to form a tapering tail. On the opposite end, mold a rounded, slightly upright shape to form the head and neck, merging it smoothly into the body. -
Shape the legs:
Roll four equal-sized smaller cylinders of clay for the legs. They should be stout and sturdy to support the dino. -
Attach the legs:
Press the legs firmly onto the bottom of the body. Use your smoothing tool or finger to blend the seams completely so the clay looks like one continuous piece. -
Stance check:
Set the dinosaur down on your work surface and gently press down to flatten the bottoms of the feet, ensuring the figure stands stable and level.
Keep it Clean
Terracotta clay can stain your hands. Wash hands before handling white clay for the eyes to keep them bright and clean.
Step 2: Adding Details
-
Prepare the spikes:
Flatten a small sheet of clay and cut out or hand-shape about 8–10 small triangles. Make them varying sizes, with the largest ones for the center of the back. -
Attach the spine spikes:
Arrange the triangular spikes in a single row running from the top of the head down the spine to the tail. Press them gently into the back to adhere them. -
Blend the spikes:
I find it helpful to use a small tool to drag a tiny bit of clay from the base of each spike down into the body, securing them firmly so they don’t fall off later. -
Make the decorative bumps:
Roll several tiny balls of terracotta clay. These will be the texture bumps on the dinosaur’s side. -
Apply the bumps:
Press these small clay balls onto the side of the body. Flatten them slightly as you press so they look like raised domes rather than marbles stuck on the side. -
Sculpt the face:
Using a needle tool or small ball tool, poke a small indentation for the nostril near the front of the snout. -
Create a smile:
Use a curved tool or the edge of a spoon handle to impress a small, gentle curve for the mouth.
Make it a Planter
Before drying, use a large tool to hollow out a hole in the dinosaur’s back (skip the spikes there) to hold a tiny air plant.
Step 3: Finishing Touches
-
Make the eye white:
Take a very small piece of white clay, roll it into a ball, and flatten it into a disc. Press this onto the side of the head. -
Add the pupil:
Place a tiny speck of black clay in the center of the white disc. Alternatively, if you are using paint, wait until the clay is dry to paint this dot. -
Final smooth:
Look over the entire piece. Use a damp finger (for air-dry) or a tiny bit of oil (for polymer) to buff away any fingerprints. -
Texture refining:
If you want a rustic look like the photo, you can lightly tap the surface with a toothbrush or stiff brush to give it a subtle skin texture before curing. -
Curing or Drying:
Follow the instructions for your specific clay type. Bake if using polymer clay, or let air-dry for at least 24-48 hours in a draft-free spot.
Once dry, your prehistoric pal is ready to guard your desk plants or simply look cute on a windowsill

The Complete Guide to Pottery Troubleshooting
Uncover the most common ceramic mistakes—from cracking clay to failed glazes—and learn how to fix them fast.
Mini Octopus With Coil Tentacles
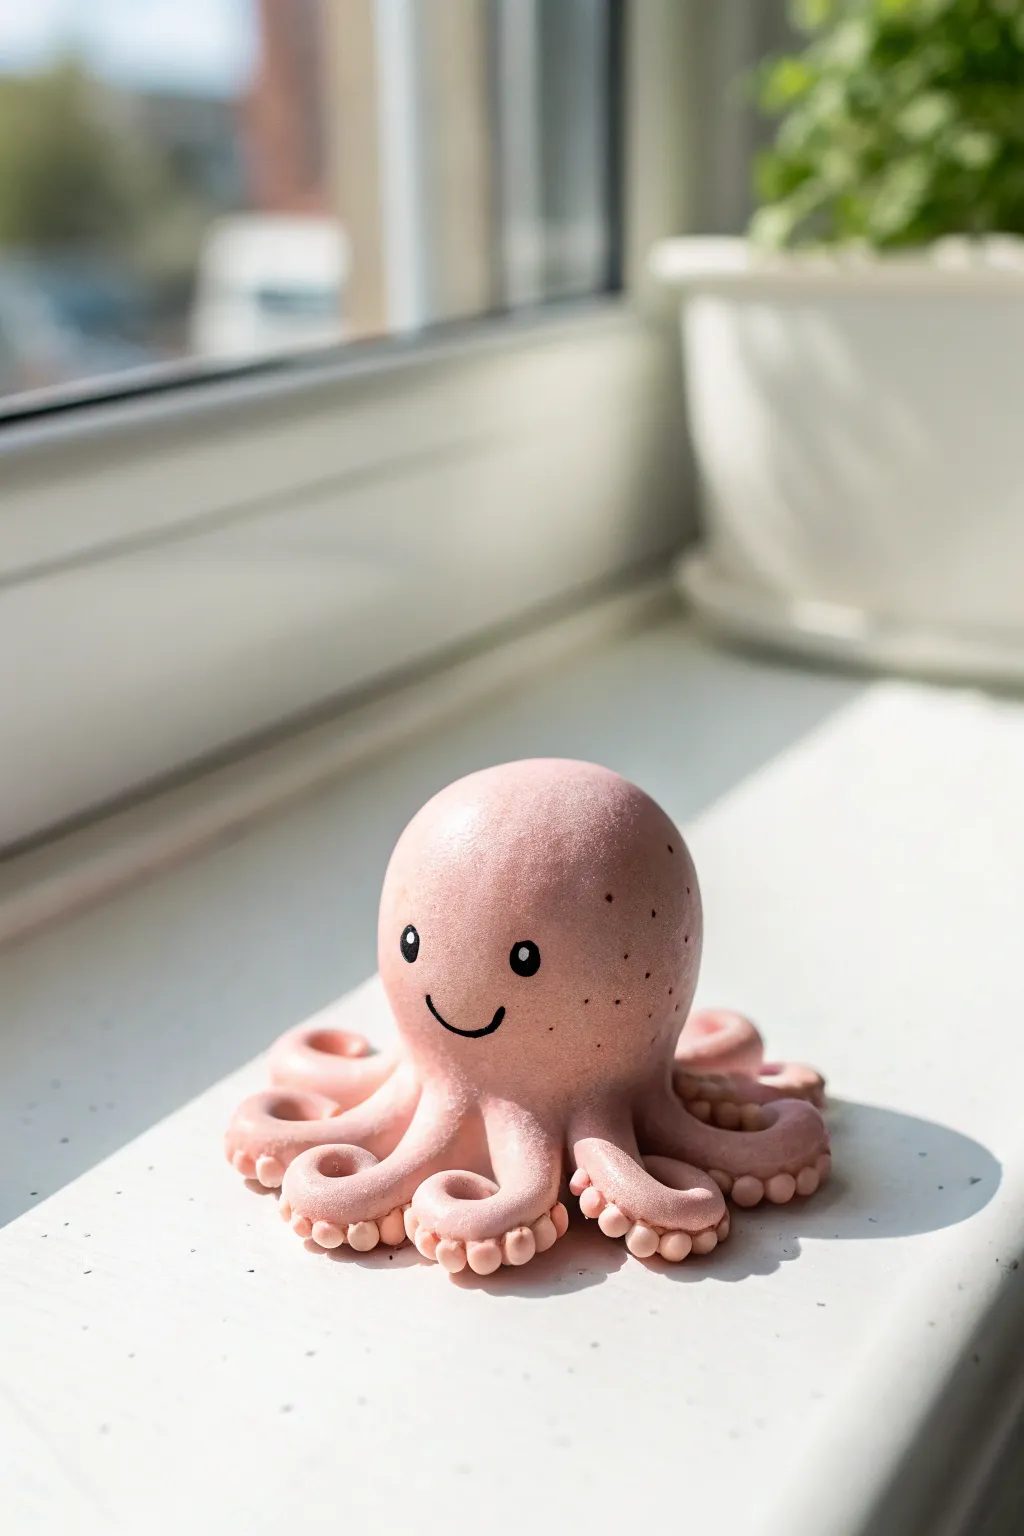
This charming little octopus brings a splash of seaside whimsy to any desk or shelf with its smooth, rounded head and playfully curled tentacles. The soft, dusty pink finish and detailed suction cups give it a professional look that is surprisingly simple to achieve with basic clay techniques.
Step-by-Step Guide
Materials
- Polymer clay or air-dry clay (dusty pink/mauve)
- Black acrylic paint or fine-tip black marker
- White acrylic paint
- Small dotting tool or toothpick
- Needle tool or pin
- Rolling pin or smooth round object
- Gloss varnish (optional)
Step 1: Shaping the Base
-
Prepare the Clay:
Start by conditioning your pink clay in your hands until it is soft, pliable, and free of cracks. Warm clay is much easier to smooth later on. -
Form the Head:
Roll a ping-pong ball sized amount of clay into a smooth sphere. Gently flatten the bottom just enough so it can sit securely without rolling away, but keep the top perfectly round. -
Create Tentacle Logs:
Take smaller pieces of clay and roll them into tapered logs or ‘snakes’ about 2-3 inches long. You will need eight of these, with one end slightly thicker than the other. -
Attach the Tentacles:
Press the thicker end of each tentacle onto the underside of the head sphere. Arrange them in a circle, blending the seams upward into the head so they look like one continuous piece. -
Curl the Tips:
Take the tapered end of each tentacle and gently roll it inward to create a spiral coil. Vary the tightness of the curls slightly to give the octopus a natural, organic movement.
Step 2: Adding Details
-
Make Suction Cups:
Roll tiny balls of the same pink clay, roughly the size of a pinhead. You will need quite a few of these to cover the visible tops of the curled tentacles. -
Attach and Texture:
Press the tiny balls gently onto the curled parts of the tentacles. Use a small dotting tool or the blunt end of a toothpick to press an indentation into the center of each ball, turning them into little donut-shaped suckers. -
Refine the Shape:
Look over your creation and smooth out any fingerprints. I find using a tiny bit of baby oil on my finger helps glide over imperfections without altering the shape. -
Bake or Dry:
If using polymer clay, bake according to the package instructions (usually 275°F for 15-30 minutes). If using air-dry clay, let it sit undisturbed for at least 24 hours.
Smooth Seams
For invisible seams where tentacles fully join the head, drag a modeling tool across the join to pull clay from the base down onto the leg, then smooth.
Step 3: Bringing It to Life
-
Paint the Features:
Once the clay is fully hardened, use a fine paintbrush or marker to draw two small black circles for eyes and a simple U-shape for the smile. -
Add Highlights:
Dip a pin or the very tip of a toothpick into white acrylic paint. Place a tiny white dot in the upper corner of each black eye to create a lively ‘sparkle’ effect. -
Create Texture Speckles:
Mix a tiny amount of black or dark brown paint with water to make a thin wash. Dip an old toothbrush or stiff brush into it and use your thumb to flick a very fine mist of speckles onto the head for texture. -
Seal (Optional):
For durability and a polished look, apply a thin coat of matte or satin varnish over the entire piece, or spot-gloss just the eyes to make them shine.
Color Shift
Mix two shades of pink clay together but stop before they fully blend. This marbling creates a beautiful, natural stone-like effect for the skin.
Place your finished octopus on a sunlit windowsill to enjoy its happy little face every day
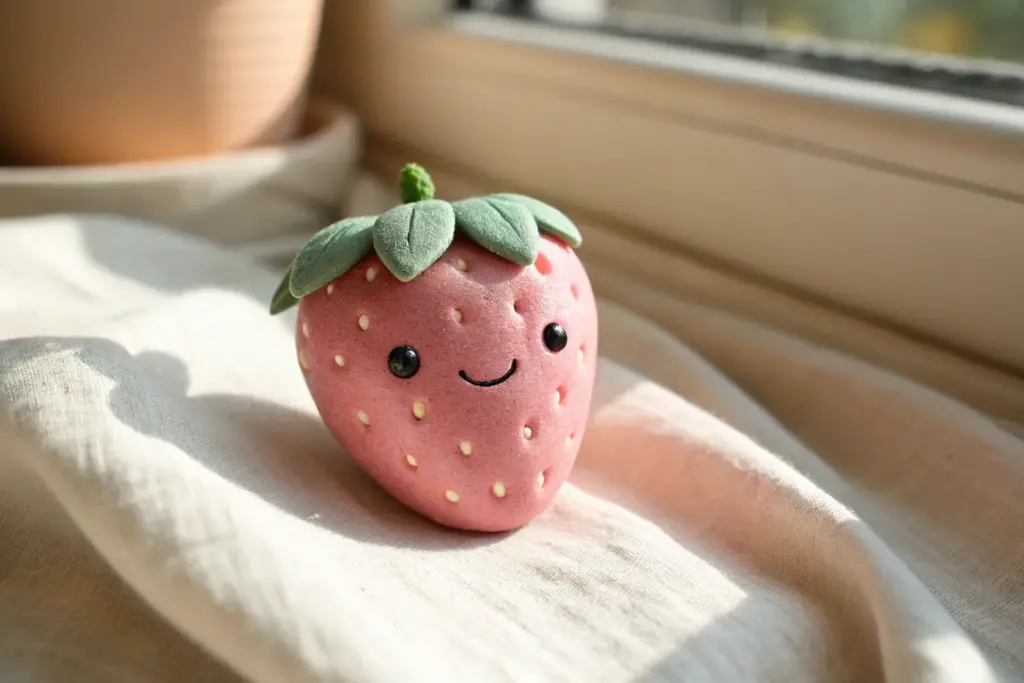
Smiling Strawberry With Seed Dots
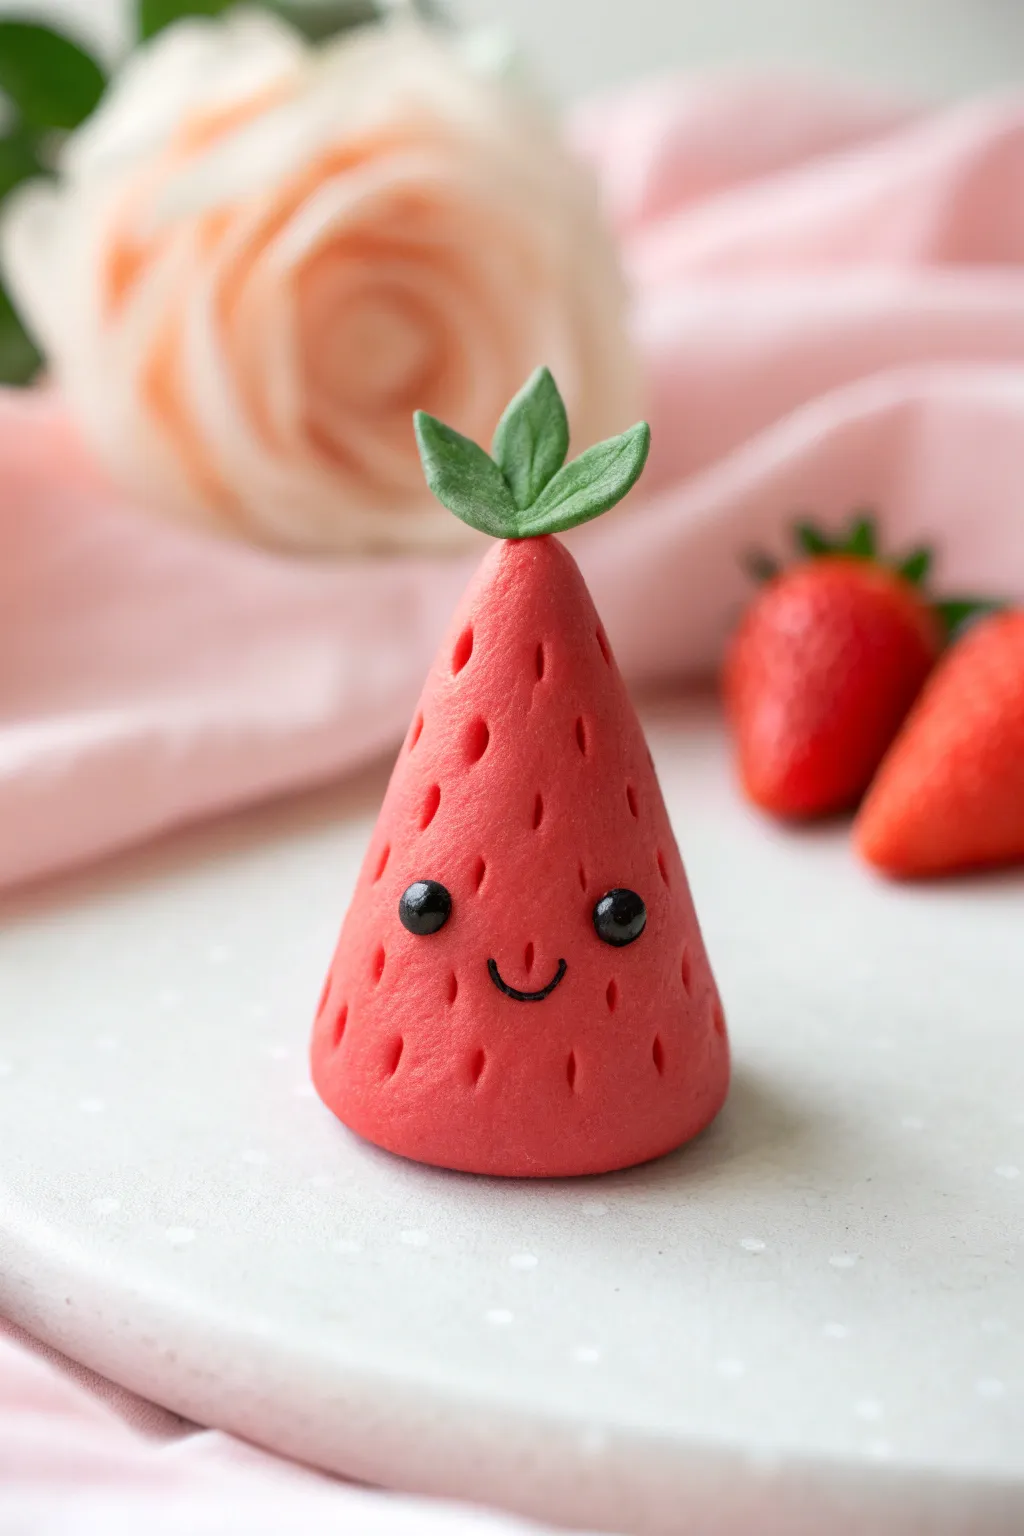
This adorable strawberry figurine features a unique conical shape that gives it a whimsical, cartoonish personality. With its tiny indented seeds and sweet smiling face, it makes for a delightful desk companion or a cute handcrafted gift.
Detailed Instructions
Materials
- Red soft air-dry clay or polymer clay
- Green soft air-dry clay or polymer clay
- Black clay (tiny amount) or black acrylic paint
- Fine-point needle tool or toothpick
- Small ball tool (optional)
- Black fine-liner pen (if not using clay for mouth)
- Smooth work surface
Step 1: Shaping the Berry Body
-
Condition the Clay:
Start by taking a golf-ball-sized amount of red clay and kneading it in your hands until it is warm, soft, and pliable. This prevents cracks from forming later. -
Roll a Ball:
Roll the red clay between your palms to create a completely smooth sphere. Check for any seams or lines and smooth them out with your fingertip. -
Form the Cone:
Place the ball on your work surface. Using the flat of your palm, gently roll just the top half of the ball back and forth while applying slight pressure to taper it into a cone shape. -
Flatten the Base:
Once you have a tall, rounded cone shape, pick it up and gently tap the bottom against your table to create a flat, stable base so it stands upright on its own. -
Refine the Shape:
Smooth out the sides with your fingers to ensure the transition from the wide base to the narrow tip is even and rounded, rather than sharp.
Uneven Seeds?
If your seed indentations look messy, try pressing the tool in at a consistent angle (about 45 degrees) rather than straight in. This creates uniform, teardrop-shaped shadows.
Step 2: Adding Texture and Leaves
-
Create Seed Indentations:
Take your needle tool or toothpick. Starting from the top and working your way down, press gently into the clay to create small, vertical oval indentations mimic strawberry seeds. -
Space the Seeds:
Leave a clear, smooth area in the lower middle section of the cone—this is where the face will go. Distribute the other seeds randomly but evenly around the rest of the berry. -
Make the Leaf Base:
Take a small pea-sized amount of green clay. Flatten it into a small disk that will sit on top of the strawberry cone. -
Shape Individual Leaves:
Pinch three small teardrop shapes from the green clay. Flatten them slightly to look like leaves. -
Texture the Leaves:
Use your needle tool to gently score a central vein down the middle of each green leaf for a realistic touch. -
Attach the Greenery:
Press the three leaves together at their bases onto the very tip of the red cone. I like to curve the tips upward slightly to give the strawberry a perky, fresh look.
Blush it Up
Use a soft brush and a tiny amount of pink soft pastel chalk dust to brush dainty pink cheeks right under the eyes for extra kawaii appeal.
Step 3: Bringing It to Life
-
Mark Eye Position:
In the smooth facial area you reserved earlier, use a tool to verify where you want the eyes to sit. They should be wide-set for optimal cuteness. -
Create Eye Sockets:
Press slightly with a small ball tool or the end of a paintbrush to create two shallow divots where the eyes will go. This helps the eyeballs stay secure. -
Form the Eyes:
Roll two extremely tiny balls of black clay. Make sure they are identical in size. -
Attach the Eyes:
Place the black balls into the sockets you created and press them gently so they flatten slightly but remain protruding and round. -
Draw the Smile:
Roll a microscopic ‘snake’ of black clay and curve it into a ‘U’ shape for the mouth. Press it gently between the eyes. -
Alternative Mouth Option:
If rolling a thin clay mouth is too difficult, simply wait for the red clay to dry or harden completely, then draw the small smile on with a fine-point black marker. -
Final Smooth:
Give the entire piece a once-over. Smooth out any fingerprints on the red body very lightly without disturbing the texture you’ve added.
Now your sweet strawberry friend is ready to brighten up your shelf


What Really Happens Inside the Kiln
Learn how time and temperature work together inside the kiln to transform clay into durable ceramic.
Watermelon Slice With Blush Cheeks

This adorable watermelon slice brings a splash of summer sweetness to your desk or shelf. With its chunky prism shape and cheerful blushing face, it is a perfect beginner project for mastering clean geometric clay forms.
Step-by-Step Tutorial
Materials
- Soft air-dry clay or polymer clay (Pink, White, Light Green, Black)
- Clay rolling pin or smooth acrylic roller
- Sharp crafting blade or clay knife
- Needle tool or toothpick
- Small ball tool (optional)
- Glaze or varnish (optional for shine)
Step 1: Forming the Base Shape
-
Prepare the pink clay:
Start by conditioning your pink clay until it is soft and pliable. Roll it into a smooth ball to remove any air bubbles or cracks. -
Shape the prism:
Gently press the ball against your work surface to flatten the bottom. Use your fingers and a flat tool to shape the sides into a triangular prism. You want a thick wedge shape, not a flat triangle. -
Refine the edges:
Use your blade or a smoothing tool to make the faces of the triangle flat and the edges relatively sharp. The top point should be slightly rounded, not razor-sharp.
Keep it Clean
Red and green can easily stain white clay. Wash hands thoroughly or use baby wipes between colors to keep that middle rind layer bright white.
Step 2: Adding the Rind Layers
-
Roll out the white layer:
Clean your roller or surface to avoid color transfer. Roll a small piece of white clay into a thin, even sheet, about 2-3mm thick. -
Attach the white rind:
Place the pink wedge onto the white sheet so the bottom sits flush. Trim the excess white clay with your blade so it matches the footprint of the pink wedge perfectly. -
Create the green layer:
Roll out a piece of light green clay into a sheet slightly thicker than the white layer. This will face the bottom, so durability helps here. -
Assemble the bottom:
Press the white-bottomed wedge onto the green clay. Again, carefully trim the excess green clay flush with the sides of the wedge using a sharp blade for a clean, straight cut. -
Smooth the seams:
Gently run your finger along the join lines between pink, white, and green to ensure they are bonded, but be careful not to smudge the colors together.
Make it a Magnet
Before the clay dries or bakes, firmly press a strong round magnet into the back of the wedge so it sits flush for a cute fridge decoration.
Step 3: Creating the Face & Details
-
Make the seeds:
Take tiny pinched amounts of black clay and roll them into extremely small teardrop shapes. You will need about six to eight seeds depending on your preference. -
Place the seeds:
Press the seeds flat against the front face of the watermelon. Arrange them symmetrically near the top and sides, leaving the bottom center open for the face. -
Form the eyes:
Roll two small balls of black clay. Flatten them slightly and press them onto the lower center of the pink section, spacing them apart for a cute wide-set look. -
Add eye highlights:
This is crucial for the ‘kawaii’ look. Roll two microscopic specs of white clay and place one in the top corner of each black eye. -
Shape the smile:
Roll a very thin snake of black clay. Cut a tiny U-shape segment with your blade. I find using a needle tool helps transfer this delicate piece onto the face between the eyes. -
Apply blush cheeks:
Mix a tiny bit of red into your pink clay (or use a darker pink). Roll two small circles and flatten them. Place these right under the eyes on the outer edges. -
Final smoothing:
Check the entire piece for fingerprints. Lightly buff them out with a drop of baby oil on your finger or simply smooth gently. -
Dry or Bake:
If using polymer clay, bake according to package instructions. If using air-dry clay, let it sit in a dry, ventilated area for 24-48 hours.
Now you have a sweet summer slice that looks good enough to eat
Pencil Topper Animal Head

Transform a plain pencil into a charming writing companion with this simple soft clay project. This cream-colored teddy bear head features a sweet, minimal expression that adds a touch of warmth to any desk setup.
How-To Guide
Materials
- Soft air-dry clay (cream or off-white)
- Black clay (very small amount)
- Wooden pencil (unpainted or natural wood finish preferred)
- Small ball tool or round-tipped stylus
- Pointed sculpting tool or toothpick
- Craft glue (PVA or super glue)
- Rolling pin or smooth surface for pressing
Step 1: Shaping the Head
-
Prepare the base:
Start by kneading a golf-ball-sized amount of cream-colored soft clay until it is smooth and pliable. -
Form the sphere:
Roll the clay between your palms to create a perfect sphere, ensuring there are no cracks on the surface. -
Create the pencil hole:
Before the clay hardens, carefully push the eraser end of your pencil into the bottom of the sphere. -
Secure the fit:
Push the pencil in deep enough to be stable—about an inch—and gently twist it back out. If you leave it in to dry, the clay might shrink and crack, so I prefer removing it to apply a drop of glue later.
Smooth Operator
To remove fingerprints from soft clay before it dries, lightly brush the surface with a tiny amount of water or baby oil on your fingertip.
Step 2: Adding Features
-
Make the ears:
Pinch off two pea-sized balls of the same cream clay for the ears. -
Flatten the ears:
Gently press these small balls flat against your work surface to create thick, circular discs. -
Attach the ears:
Press the discs onto the top sides of the head. Smooth the seam where the ear meets the head using your finger or a sculpting tool to ensure a strong bond. -
Indent the ears:
Use a ball tool or the rounded end of a paintbrush to press a gentle indentation into the center of each ear. -
Add ear details:
Take tiny, tiny specs of fresh cream clay, roll them into balls, and flatten them into the indentations you just made for a subtle texture detail. -
Form the snout area:
Roll a very small ball of cream clay and flatten it into a slight oval shape. -
Place the snout:
Press this oval onto the lower center of the face, blending the edges softly so it looks like part of the head rather than a stuck-on piece.
Make it a Party
Create a whole set of woodland animals by changing the ear shapes—pointy ears for a fox, long ears for a bunny—and using different clay colors.
Step 3: Creating the Expression
-
Prepare the eyes:
Pinches two minuscule amounts of black clay and roll them into tiny beads for the eyes. -
Position the eyes:
Press the black beads into the clay face, spacing them evenly above the snout. Push them in slightly so they sit flush with the surface. -
Add a highlight:
Using a needle tool or toothpick, add the tiniest speck of white clay (or white paint later) to the black eyes for a ‘sparkle’ effect, though plain black works for a minimal look too. -
Make the nose:
Create a tiny, soft triangular shape from black clay for the nose. -
Attach the nose:
Place the nose at the very top center of the muzzle area you created earlier. -
Draw the mouth:
Use a sharp tool or knife to gently impress a vertical line straight down from the nose. -
Final assembly:
Put a dab of craft glue on the end of your pencil and re-insert it into the hole you made in the beginning. -
Drying:
Stand the pencil upright in a jar or cup and let the clay dry completely according to package instructions (usually 24 hours).
Now you have a cute desktop buddy to cheer you on while you work or study

TRACK YOUR CERAMIC JOURNEY
Capture glaze tests, firing details, and creative progress—all in one simple printable. Make your projects easier to repeat and improve.
Cute Face Fridge-Style Magnets Set
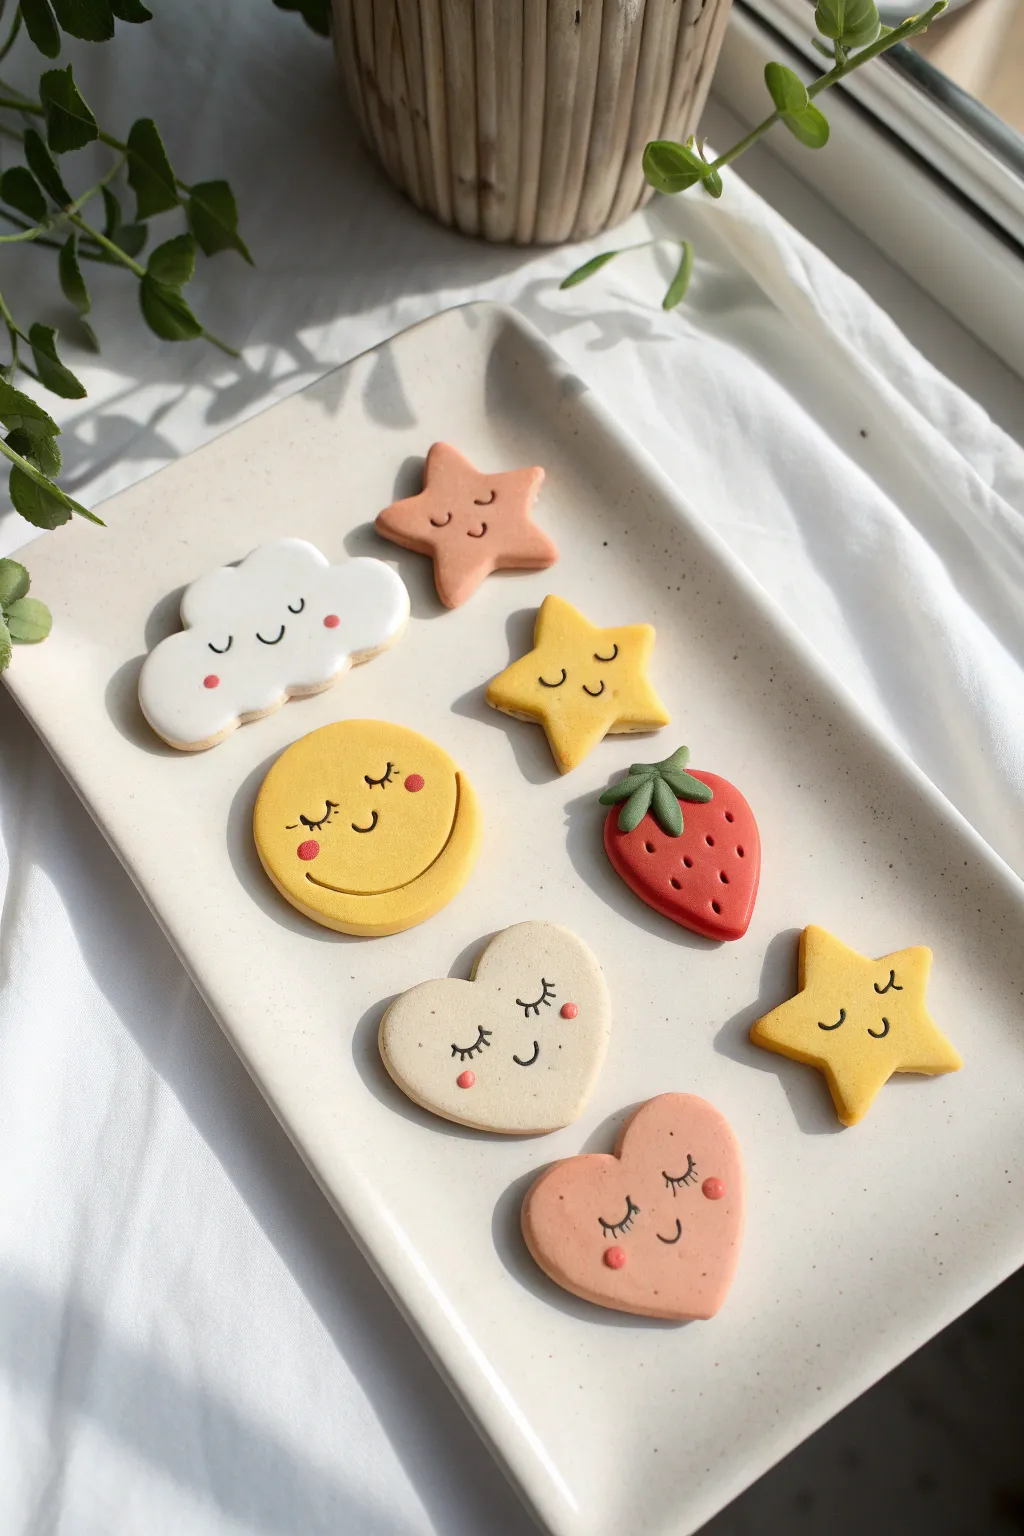
Add a touch of charm to your fridge with this set of adorable clay magnets featuring sweet, sleeping faces. These smooth, pastel shapes—from dreamy clouds to a blushing strawberry—are perfect for beginners looking to practice clean lines and facial details.
Step-by-Step Guide
Materials
- Polymer clay or air-dry clay (White, Yellow, Peach, Red, Green, Cream)
- Acrylic rolling pin
- Cookie cutters (Cloud, Circle, Star, Heart, Strawberry/Teardrop)
- Needle tool or toothpick
- Ball stylus tool (small)
- Black acrylic paint or fine-tip black marker
- Pink chalk pastel (for blush)
- Small magnets
- Strong craft glue (E6000 or similar)
- Baking sheet and parchment paper (if using polymer clay)
Step 1: Shaping the Base Forms
-
Condition the clay:
Begin by kneading your clay until it is soft and pliable. If you are mixing custom colors, like the muted peach tone for the stars, blend white with a tiny dot of orange or red clay until completely uniform. -
Roll out the slab:
Use your acrylic rolling pin to flatten the clay into a slab about 1/4 inch thick. Aim for an even thickness so all your magnets will sit flush against the fridge later. -
Cut out shapes:
Press your cookie cutters firmly into the clay to create your shapes. You’ll need a white cloud, a yellow circle for the sun, a red strawberry shape, two cream/peach hearts, and three stars in varying warm tones. -
Smooth the edges:
Once cut, gently run your finger along the cut edges of each shape to soften them. This removes any sharp ridges and gives the pieces that soft, pillowy look. -
Add strawberry details:
For the strawberry, shape a small piece of green clay into a flat star-like cap and press it onto the top of the red shape. Roll a tiny stem and attach it to the center of the leaves.
Keep it Clean
Keep wet wipes handy while working. Wiping your hands and tools between colors prevents the dreaded transfer of red clay lint onto your pristine white clouds.
Step 2: Adding Facial Features
-
Indent the eyes:
Before baking or drying, use your needle tool to very gently mark where the eyes and mouth will go. I find sketching lightly into the soft clay helps guide the paint later. -
Sculpt the sun’s smile:
For the sun specifically, you can use a larger curved tool or the side of a straw to impress a wide, curved smile directly into the clay for a dimensional look. -
Texture the strawberry:
Use a small needle tool to poke shallow holes across the surface of the strawberry to mimic seeds. Keep them random but evenly spaced. -
Dry or bake:
If using polymer clay, bake according to the package instructions (usually 275°F for 15-30 minutes). If using air-dry clay, let the pieces sit undisturbed for 24-48 hours until fully hardened.
Fixing Smudges
If you mess up drawing a face, don’t panic! A q-tip dipped in rubbing alcohol (for polymer clay) or a little water (for sealed paint) can usually wipe away the fresh mistake.
Step 3: Painting and Finishing
-
Draw the sleepy eyes:
Once the shapes are completely hard and cool, use a fine-tip black marker or a very thin brush with black paint to draw the ‘U’ shaped sleepy eyes. For the hearts and sun, add tiny lashes flicking outward. -
Add the smiles:
carefully paint a small, simple curve for the mouths on the cloud, stars, and hearts. Keep the lines thin and delicate. -
Apply rosy cheeks:
Scrape a little pink chalk pastel into a powder. Use a dry brush or your finger to gently dab a soft circle of pink onto the cheeks of the cloud, sun, and hearts. Alternatively, paint small pink dots. -
Strawberry seeds:
If you want the strawberry seeds to stand out, you can leave them indented or add tiny dots of darker red or black paint into the seed holes. -
Seal the surface:
To protect the face details, apply a thin coat of matte varnish. This will keep the marker from smudging and give the clay a professional finish. -
Attach magnets:
Flip the dried pieces over. Apply a dab of strong craft glue to the back of each shape and press a magnet firmly into the glue. -
Final cure:
Let the glue cure completely according to the manufacturer’s instructions before sticking them to your fridge.
Now you have a charming collection of sleepy friends ready to hold up your grocery lists and photos.
Animal Butt Planter Pal
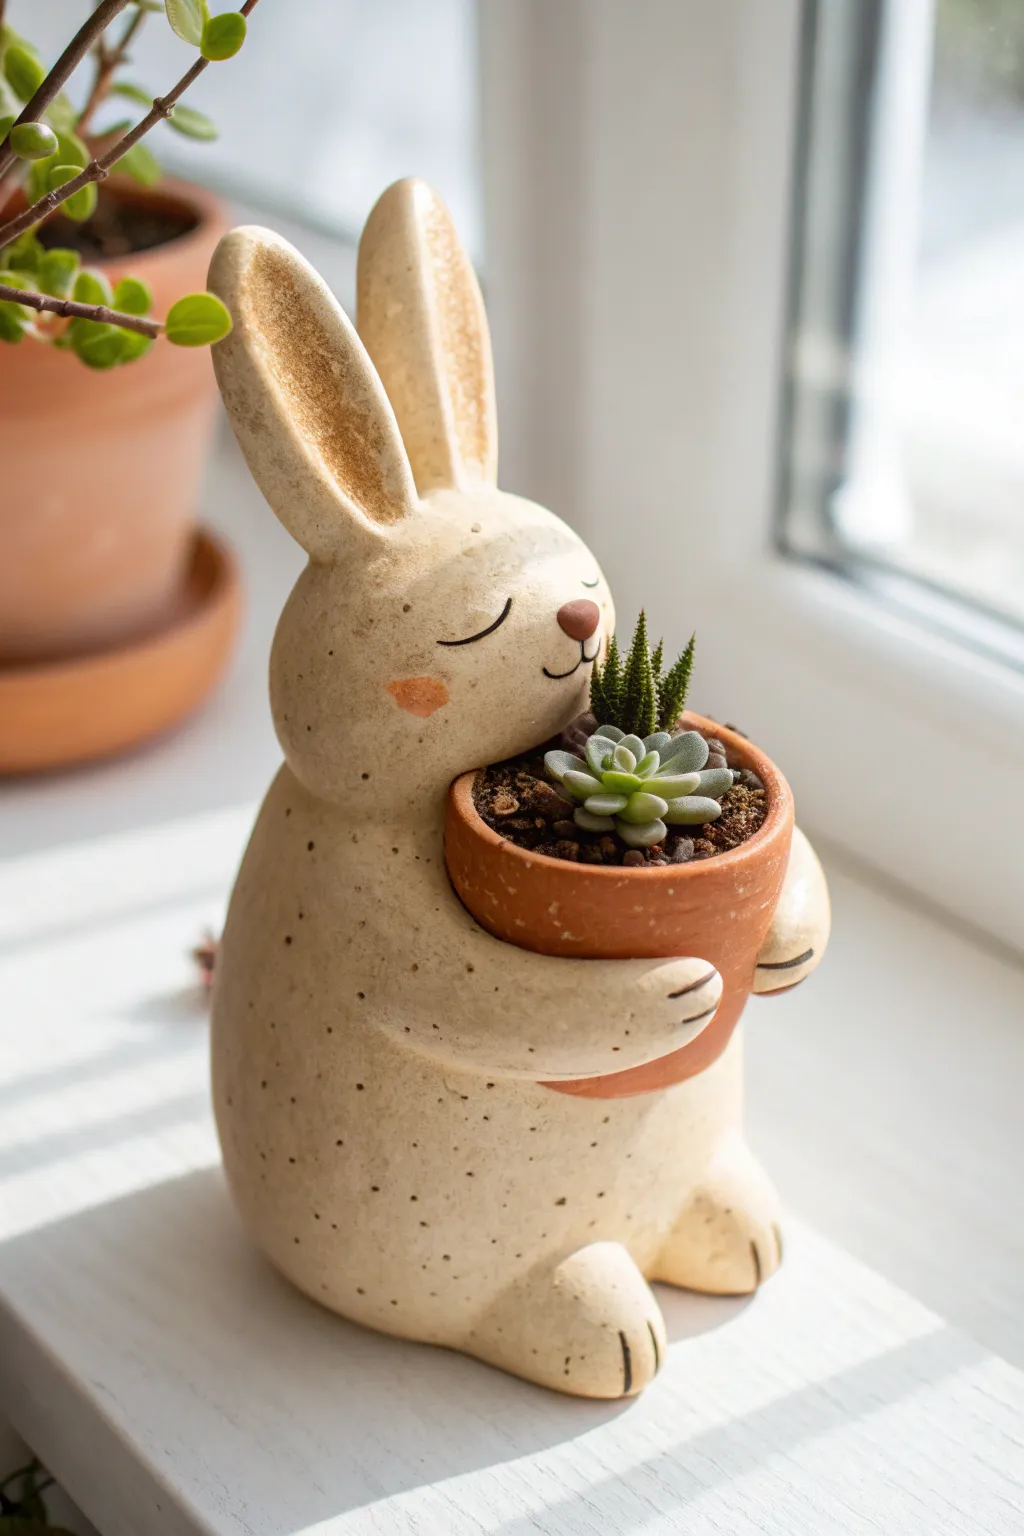
This adorable project features a sweet, speckled bunny lovingly clutching a tiny terracotta pot. With its calm, closed eyes and soft texture, it makes a perfect windowsill companion for your favorite succulents.
How-To Guide
Materials
- Air-dry clay or polymer clay (beige/cream)
- Small terracotta pot (2-inch diameter)
- Acrylic paints (brown, pink, black)
- Fine-grit sandpaper
- Aluminum foil
- Toothbrush or stiff bristle brush
- Mod Podge or matte varnish
- Clay tools (needle tool, smoothing tool)
- Water (for smoothing)
Step 1: Forming the Body Base
-
Create the core:
Start by crumpling a tight ball of aluminum foil into a pear shape. This will be the armature for the bunny’s body, saving clay and reducing weight. -
Cover with clay:
Roll out a thick sheet of your beige clay. Wrap it completely around the foil armature, smoothing the seams together until you have a seamless, pear-shaped body. -
Shape the base:
Gently tap the bottom of the pear shape against your work surface to flatten it. This ensures the bunny sits stable and doesn’t wobble. -
Position the pot:
Take your actual terracotta pot and press it gently into the front of the bunny’s belly to create an indentation. Leave the pot there temporarily to guide the arm placement.
Step 2: Sculpting the Features
-
Attach the head:
Roll a smaller ball of clay for the head. Slightly flatten the bottom and attach it to the top of the body. Blend the clay at the neck seam downward so the head feels integrated, not just balanced on top. -
Form the feet:
Roll two small ovals of clay for the feet. Press them onto the bottom front of the body. Use a needle tool or knife to impress three small lines for toes on each foot. -
Create the arms:
Roll two sausage shapes for arms. Attach them starting at the shoulder area and curve them around the terracotta pot you positioned earlier. The ‘hands’ should look like they are holding the pot. -
Refine the paws:
Like the feet, use your needle tool to mark little toe lines on the hands clutching the pot. Once positioned, carefully remove the pot so it doesn’t get stuck while the clay dries. -
Sculpt the ears:
Shape two long, flattened teardrop shapes for ears. Attach them to the top of the head. I like to hollow out the inner ear slightly with a modeling tool to give them depth. -
Add texture:
To mimic the stone-like texture in the photo, gently tap a toothbrush or stiff bristle brush all over the surface of the clay. This stippling effect breaks up the smoothness.
Hold Tight!
Make sure to test the fit of your terracotta pot frequently while sculpting the arms. The clay shrinks slightly when drying, so a loose fit is better than a tight one.
Step 3: Finishing Touches
-
Dry the piece:
Let your sculpture dry completely. If using air-dry clay, this may take 24-48 hours. If using polymer, bake according to package instructions. -
Apply the speckles:
Mix a watery brown paint. Dip a toothbrush into it and flick the bristles with your thumb to splatter tiny brown speckles all over the bunny. Practice on paper first to control the spray. -
Paint the ears:
Use a dry brush technique with light brown paint to darken the insides of the ears, giving them a warm, shadowed look. -
Draw the face:
Using a very fine brush or a black paint pen, draw two downward curves for sleepy eyes and a small curved mouth. Paint a small brown nose just above the mouth. -
Add blush:
Dilute a tiny bit of terracotta or pink paint and dab it on the cheeks for a rosy glow. -
Seal the work:
Once all paint is dry, coat the bunny with a matte varnish to protect it from moisture. -
Final assembly:
Place your succulent-filled terracotta pot back into the bunny’s arms to complete the look.
Cracking Up?
If you see small cracks forming as the air-dry clay dries, mix a tiny bit of fresh clay with water to make a paste (slip) and fill the cracks, then smooth over.
Now you have a charming little guardian for your smallest plants
Mini “Critter Stack” Totem
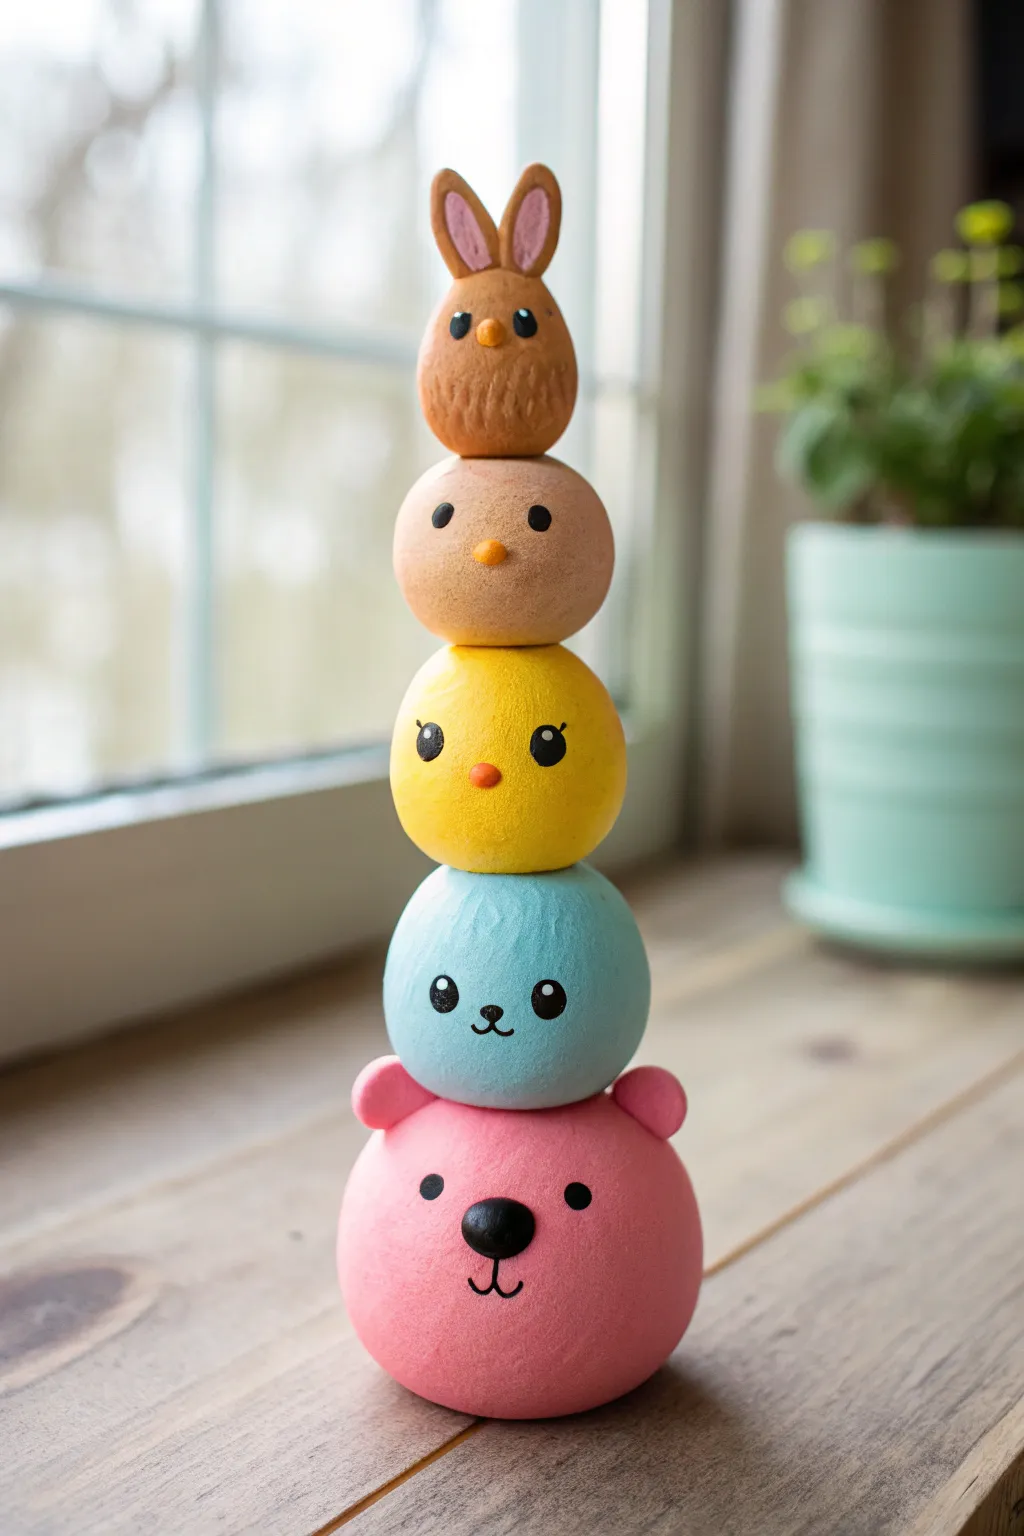
This adorable totem pole of kawaii characters is a delightful challenge in balance and charm. With its pastel palette and simple spherical shapes, it’s a perfect way to practice making consistent forms that personality to a cute vertical display.
Detailed Instructions
Materials
- Soft air-dry clay (white)
- Acrylic paints (pink, light blue, bright yellow, beige, brown, black, white)
- Small foam balls (optional, for lightweight cores)
- Clay sculpting tools (needle tool, smoothing tool)
- Paintbrushes (medium flat, fine detail round)
- Strong craft glue or clear tacky glue
- Toothpicks or a thin wooden dowel (for internal structure)
- Matte varnish or sealant
Step 1: Sculpting the Shapes
-
Proportion the clay:
Begin by dividing your clay into five portions, ranging from largest to smallest. The bottom sphere should be the biggest to support the stack, getting progressively smaller as you move up. -
Roll the spheres:
Roll each portion of clay into a smooth, tight ball. You want these to be slightly flattened on the top and bottom (like a macaron) so they stack easily without rolling away. -
Shape the bear ears:
For the largest ball (the base), make two small semi-circles of clay. Attach them to the top sides to form the bear ears, smoothing the seams so they look like one solid piece. -
Create the blue critter ears:
The second largest sphere needs tiny, barely-there triangular ears. Pinch small bits of clay and attach them high on the sides of the head. -
Form the bunny ears:
For the smallest, top sphere, roll two elongated teardrop shapes. Flatten them slightly and attach them securely to the very top, smoothing the join downwards. -
Add texture (optional):
If you want the textured look of the top bunny shown in the photo, use a needle tool to gently scratch short, fur-like vertical lines all over the clay surface before it dries. -
Dry with support:
Insert a toothpick vertically through the center of each ball while the clay is still wet to create a guide hole. Allow all pieces to dry completely, usually 24-48 hours depending on brand.
Use a Dowel Tool
To prevent fingerprints while painting, stick each clay head onto a skewer or toothpick. This lets you paint the whole sphere at once without touching wet paint.
Step 2: Painting the Base Colors
-
Bear base coat:
Paint the bottom bear sphere a soft, strawberry pink. You will likely need two coats for opaque coverage. -
Middle layers:
Paint the second sphere a light sky blue and the third sphere a bright, sunny yellow. -
Top layers:
Paint the fourth sphere a warm beige or tan. For the top bunny, mix a medium brown shade. Ensure you paint the ears of each respective animal to match their body color. -
Bunny ear details:
Once the brown is dry, mix a lighter pink and paint the inner oval shapes of the bunny’s tall ears.
Make it a Photo Holder
Before the top bunny dries, insert a coiled wire note holder into the center of its head. Now your cute totem doubles as a functional photo or memo clip.
Step 3: Detailing and Assembly
-
Bear face:
Using a fine detail brush and black paint, draw a large oval nose in the center of the pink face. Add two small, wide-set vertical ovals for eyes and a small ‘anchor’ shape for the mouth. -
Blue face details:
For the blue tier, paint two circular black eyes with tiny white highlights. Add a small ‘w’ mouth and a tiny triangular nose. -
Beaks and noses:
For the yellow and tan chicks, you can use a tiny dot of orange paint for the beaks, or ideally, glue on a tiny cone of clay painted orange for a 3D effect. Add simple black dot eyes. -
Internal structure:
Cut a wooden dowel or a long toothpick to the height of your stack. Apply glue to the dowel and slide your dried clay spheres onto it using the pre-made holes. -
Secure the stack:
Add a dab of strong glue between each layer where the spheres touch to prevent them from spinning. -
Seal:
Finish the project with a coat of matte varnish to protect the paint and give the clay a soft, professional finish.
Place your finished totem near a window or on a shelf for an instant touch of cheerfulness