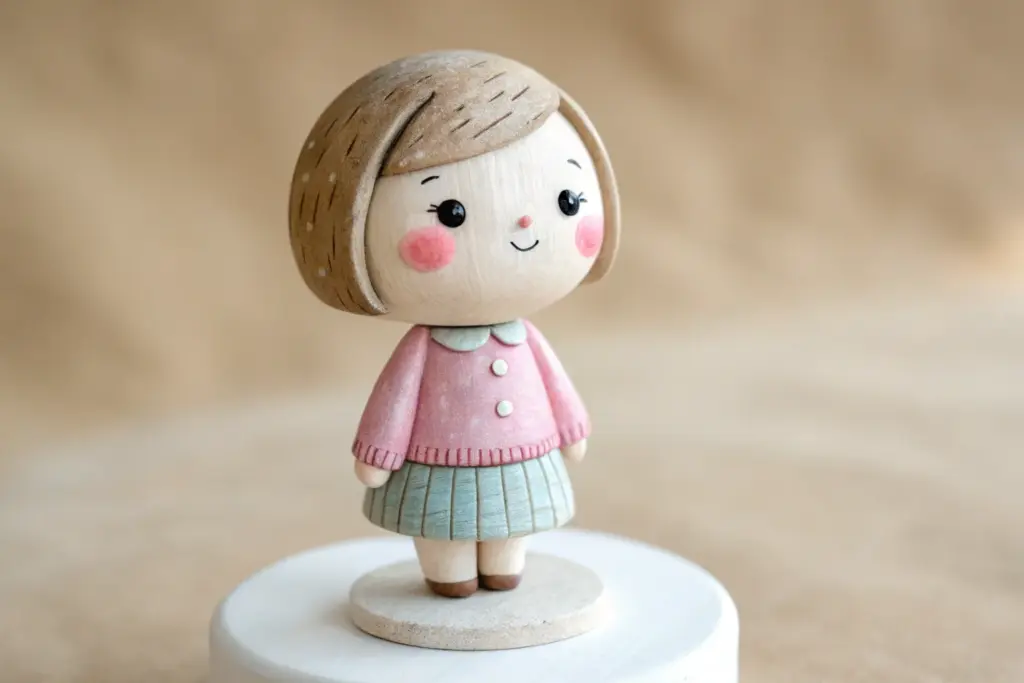
Whenever I want quick, colorful wins, I reach for super clay—that smooth, air-dry stuff that stays cute and puffy without fuss. These ideas lean into its lightweight feel, mixable colors, and perfectly rounded shapes you can make in one cozy crafting session.
Chunky Kawaii Animal Minis
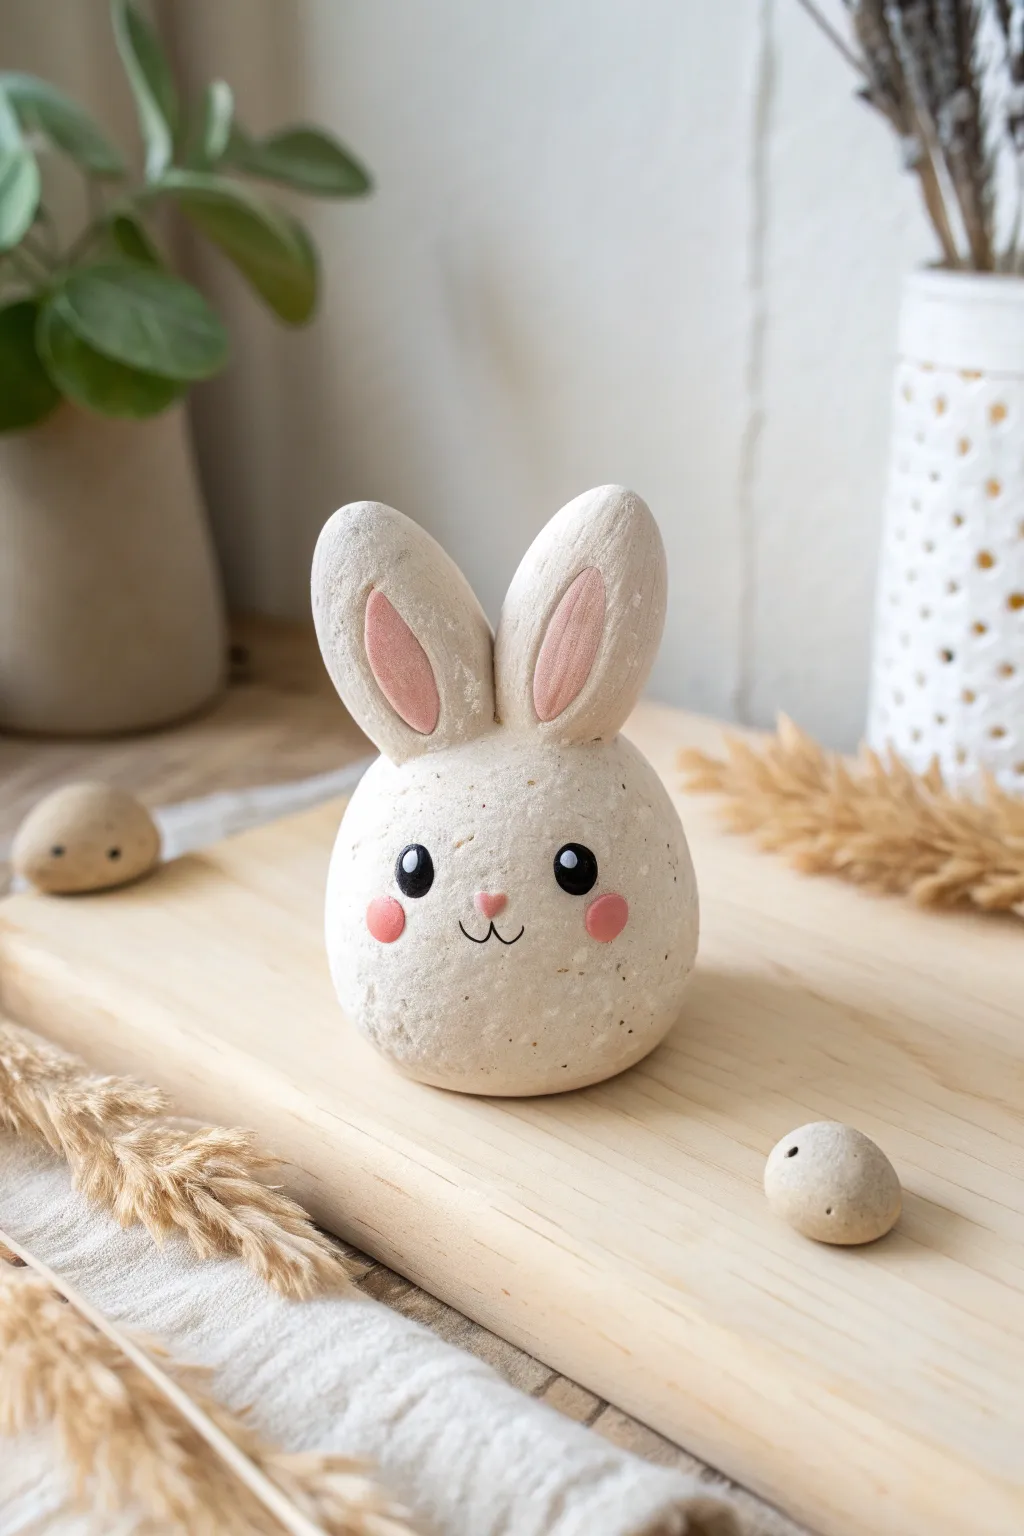
Create this adorably rotund bunny figurine with a textured faux-stone finish that adds a touch of rustic charm to any shelf. Its simple, egg-like shape and sweet expression make it a perfect beginner project for kawaii enthusiasts.
Step-by-Step Guide
Materials
- Air-dry clay (white or light grey)
- Acrylic paints (white, black, soft pink, beige/sand)
- Old toothbrush or stiff bristle brush
- Fine detail paintbrush (size 0 or 00)
- Medium flat brush
- Water cup and paper towel
- Clay sculpting tools (or a toothpick)
- Fine-grit sandpaper
- Matte varnish (optional)
Step 1: Sculpting the Base
-
Form the body:
Start with a ball of air-dry clay roughly the size of a tennis ball. Roll it between your palms until it is smooth, then gently taper the top slightly to create a very subtle egg shape. The bottom should be flattened so it sits sturdily. -
Smooth the surface:
Dip your finger in a tiny bit of water and rub away any cracks or seams on the clay body. You want a very smooth canvas for the stone effect later. -
Shape the ears:
Take two smaller pieces of clay, each about the size of a grape. Roll them into teardrop shapes, then flatten them gently with your thumb to create the bunny ears. -
Attach the ears:
Score (scratch hatch marks into) the bottom of the ears and the top of the head where they will attach. Add a dab of water or clay slip, press the ears firmly onto the head, and use a tool to smooth the clay seams together so they look like one solid piece. -
Refine the shape:
Check the ears from different angles to ensure they are symmetrical. You can give them a slight curve for personality. -
Dry thoroughly:
Let the sculpture air dry completely. This usually takes 24-48 hours depending on the brand and humidity. Flip it occasionally so the bottom dries too.
Uneven Speckles?
If you accidentally splatter a large blob of paint instead of fine mist, quickly dab it gently with a damp paper towel to lift it before it dries.
Step 2: Creating the Stone Texture
-
Sand imperfections:
Once bone dry, use fine-grit sandpaper to gently remove any fingerprints or rough bumps. Wipe away the dust with a barely damp cloth. -
Base coat:
Paint the entire bunny with a mix of white and a tiny drop of beige acrylic paint. You want an off-white, creamy stone color. Let this layer dry. -
Prepare the speckle mix:
Dilute a small amount of dark brown or black paint with water until it is quite runny/inky. -
Apply the speckles:
Dip an old toothbrush into the watery paint. Hold it near the bunny and run your thumb across the bristles to flick tiny droplets onto the surface. Practice on paper first to control the spray. -
Add variance:
I like to do a second pass with a slightly lighter grey speckle for depth. Let the speckles dry completely before moving to the face.
Nature Accessories
Make tiny matching ‘pebble’ eggs using leftover clay and the same speckling technique to arrange around your bunny’s base.
Step 3: Painting the Kawaii Details
-
Paint the inner ears:
Mix a soft, muted pink color. Using a small brush, paint the interior oval shape of the ears, leaving a border of the speckled stone texture visible around the edges. -
Add they eyes:
Using a detail brush and black paint, create two oval eyes widely spaced on the face. Paint slowly to keep the edges crisp. -
Add eye highlights:
Once the black is dry, use the tip of a toothpick or a very fine brush to add a single white dot near the top of each eye for that sparkling look. -
Paint the nose and mouth:
Paint a tiny, inverted pink triangle for the nose between the eyes. Use a fine liner brush with black paint (thinned slightly for flow) to draw the ‘W’ mouth shape connecting to the nose. -
Rosy cheeks:
Mix a slightly brighter pink than the ears. Paint two small circles directly underneath the outer corners of the eyes for the blush. -
Seal the work:
Protect your painting with a coat of matte varnish. Avoid glossy finishes as they will ruin the natural stone look.
Now you have a charming little stone companion ready to brighten up your desk workspace


Round Fruit and Veggie Keychains
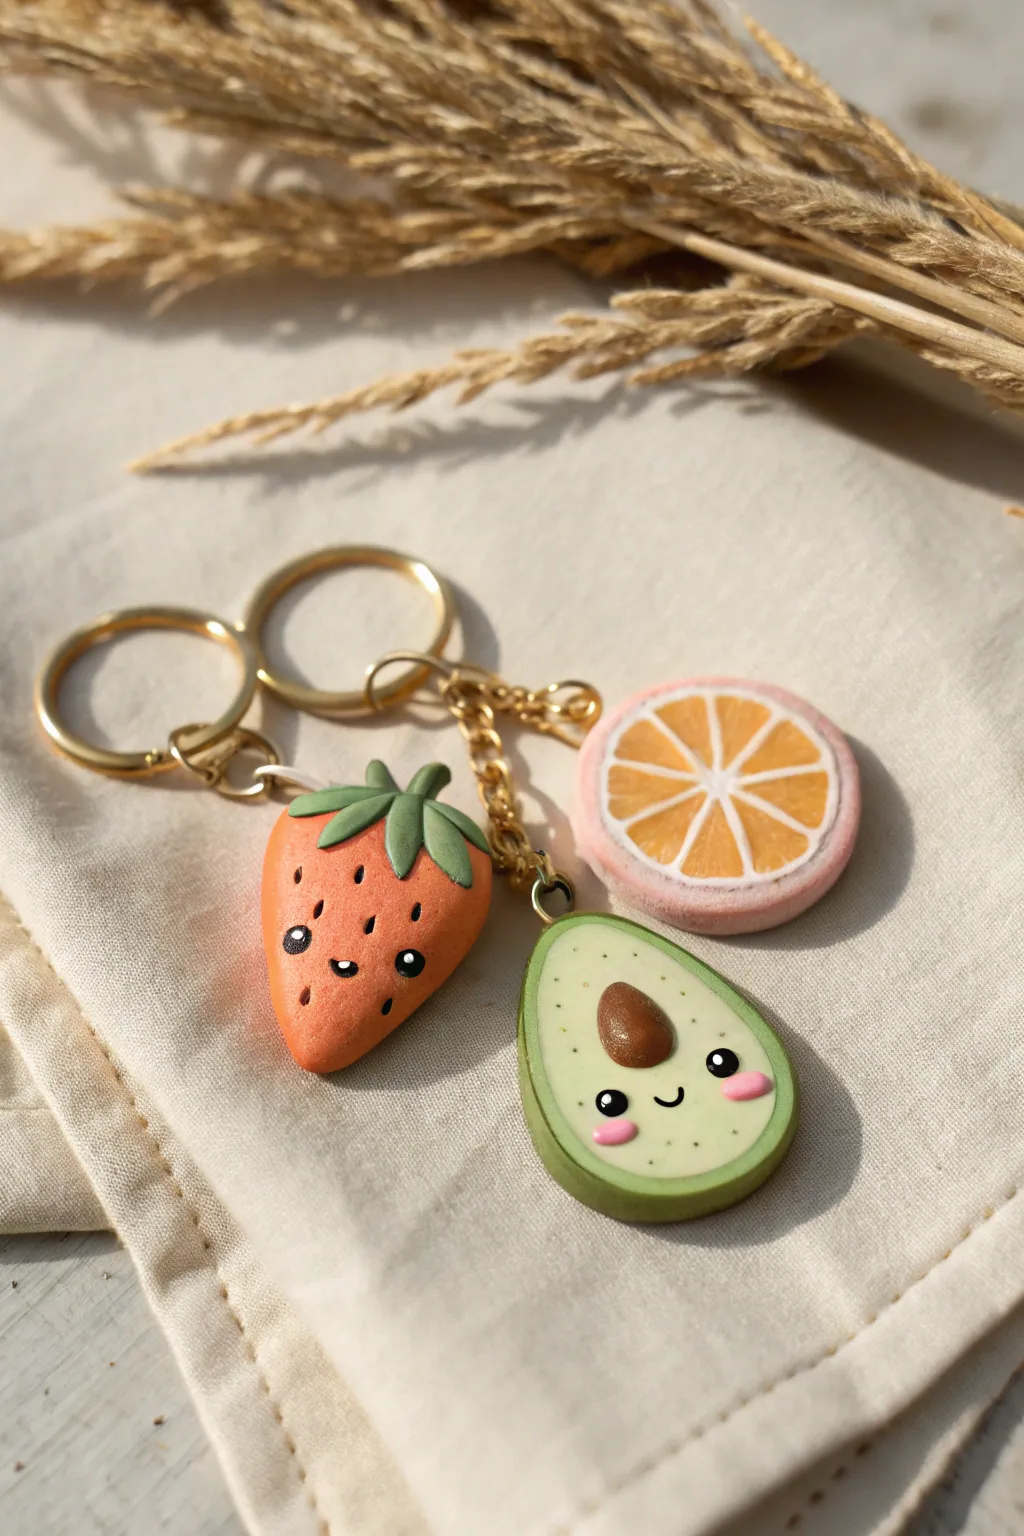
Brighten up your keys with this adorable set of smiling fruit charms featuring a jaunty strawberry, a happy avocado, and a zesty citrus slice. These polymer clay creations use simple shapes and cheerful faces to bring a touch of whimsy to your everyday carry.
How-To Guide
Materials
- Polymer clay (orange, pink, white, green, dark green, brown/black)
- Clean working surface or ceramic tile
- Rolling pin or acrylic roller
- Detail needle tool or toothpick
- Small circle cutter (approx. 1 inch)
- Blade or craft knife
- Gold screw eye pins (3)
- Gold keychain rings and jump rings
- Jewelry pliers
- Black acrylic paint or fine-tip black marker
- High-gloss glaze or UV resin (optional)
- Oven for baking
Step 1: Sculpting the Strawberry
-
Shape the base:
Start by conditioning a chunk of orange or reddish-orange clay. Roll it into a smooth ball, then gently taper the bottom half to create a rounded cone or strawberry shape. Flatten it slightly so it isn’t too bulky. -
Add the leaves:
Roll out a small piece of dark green clay. Use a blade to cut out a star shape or individual teardrop shapes for the calyx. Press these gently onto the top, wide end of your strawberry. -
Create texture:
Using your needle tool or a toothpick, press tiny indentations all over the orange surface to mimic seeds. Make them shallow but distinct. -
Prepare for hardware:
Insert a screw eye pin into the center top of the strawberry, right through the green leaves. Ensure it goes in straight.
Smooth Moves
Before baking, use a bit of baby oil on your finger to gently rub away any fingerprints or lint on the clay surface.
Step 2: Crafting the Avocado
-
Form the skin:
Take dark green clay and roll it into a thick sheet or snake. Shape it into a teardrop outline that will serve as the outer shell. -
Fill the center:
Roll a ball of pale green clay into a matching teardrop shape. Fit it snugly inside your dark green outline, smoothing the edges so they bond together seamlessly. -
Add the pit:
Roll a small ball of brown clay. Press it gently into the lower, wider part of the pale green teardrop. I like to flatten the pit slightly so it doesn’t protrude too much. -
Hardware insertion:
Just like with the strawberry, carefully screw an eye pin into the very top point of the avocado.
Level Up: Glossy Finish
Coat the fruit flesh (but not the skin or crust) with UV resin or gloss glaze for a juicy, realistic wet look.
Step 3: Slicing the Citrus
-
Make the segments:
Create a ‘cane’ technique by rolling a log of orange clay. Wrap this log in a thin sheet of white clay. Cut this log into 8 equal pie-slice wedges. -
Assemble the wheel:
Arrange the wedges in a circle so the white sides touch, forming the pith lines. You should see a starburst pattern of white lines separating the orange segments. -
Wrap the rind:
Roll a thin strip of pink clay (for a pink grapefruit look) or orange clay. Wrap this strip around the entire circumference of your assembled wedges to hold them together. -
Slice and secure:
If your cane is long, slice a neat coin off the end. Insert your eye pin into the ‘rind’ at the top edge.
Step 4: Baking and Finishing
-
Bake the batch:
Place all three charms on a ceramic tile or baking sheet. Bake according to your specific brand of clay’s instructions (usually 275°F/135°C for 15-30 minutes). -
Cool down:
Let the pieces cool completely before handling. They are fragile while warm. -
Paint the faces:
Using a fine detail brush and black acrylic paint, or a very fine marker, draw cute faces on the strawberry and avocado. Two wide-set eyes and a tiny ‘u’ mouth work best. -
Add the blush:
Dip a toothpick in pink paint and dab tiny cheeks next to the smiles. For the eyes, add a tiny white dot for a ‘highlight’ to make them look alive. -
Assembly:
Once dry, use jump rings to attach your fruit charms to the gold keychain ring. Use pliers to twist the jump rings securely closed.
Enjoy carrying your miniature fruit salad wherever you go


Happy Face Fridge Magnets
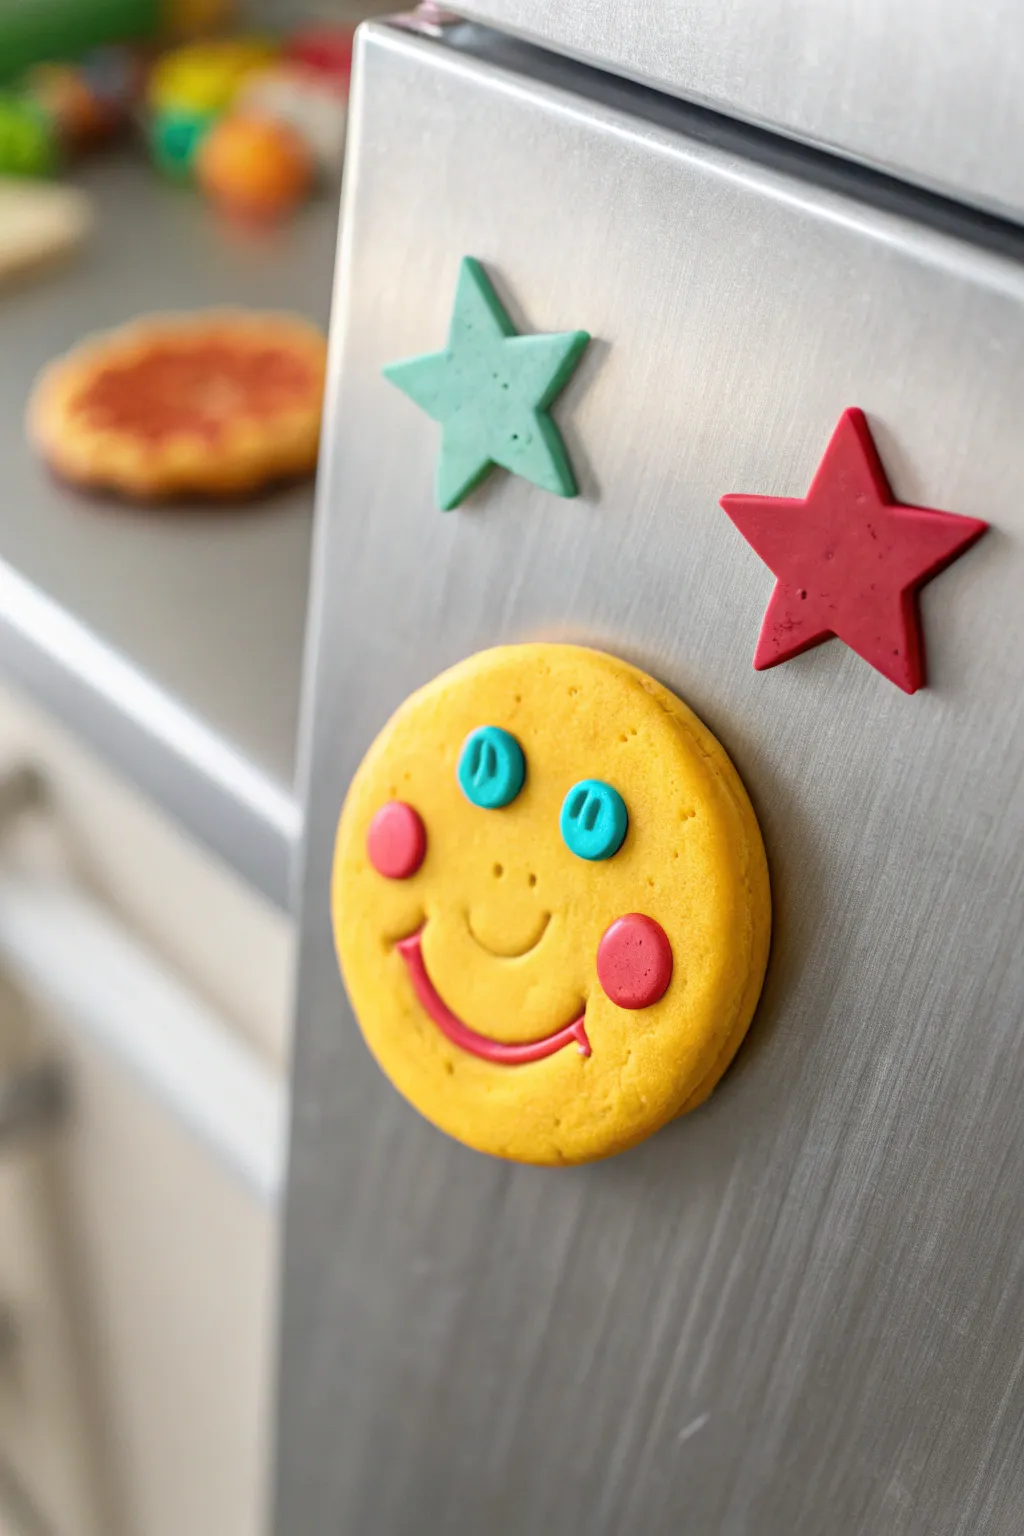
Brighten up your kitchen with these incredibly cheerful magnets made from modeling clay. The chunky, handmade look adds a wonderful touch of warmth to any stainless steel appliance.
Step-by-Step
Materials
- Bright yellow polymer or air-dry clay
- Teal or light blue clay
- Pink clay
- Red clay
- Green clay (for star)
- Deep red clay (for star)
- Round cookie cutter (approx. 2-3 inches)
- Star cookie cutter
- Small round piping tip or straw (for eyes)
- Clay sculpting tools (needle tool/ball tool)
- Strong craft glue (E6000 or similar)
- Round ceramic magnets
- Rolling pin
- Parchment paper
Step 1: Shaping the Base
-
Condition the clay:
Start by kneading your yellow clay until it is soft and pliable. This prevents cracks from forming later on. -
Roll it out:
Roll the yellow clay into a smooth slab about 1/4 inch thick. You want it substantial enough to hold the magnet but not too heavy. -
Cut the circle:
Use your round cookie cutter to punch out a perfect circle. Smoothing the edges gently with your finger removes any sharp cutting lines.
Uneven Surface?
If fingerprints are visible on your raw clay, lightly brush them with a tiny amount of baby oil (for polymer) or water (for air-dry) to smooth them out.
Step 2: Creating the Face Features
-
Make the eyes:
Take two small balls of teal blue clay and flatten them slightly into discs. -
Add detail to eyes:
Press these discs onto the upper half of the yellow circle. Use a needle tool to press two small vertical lines into each eye, giving them a cute button-like appearance. -
Form the cheeks:
Roll two small balls of pink clay. Check that they are equal in size before proceeding. -
Attach the cheeks:
Press the pink balls onto the face, positioning them wider than the eyes to create a rosy-cheeked look. -
Sculpt the smile:
Roll a very thin snake or ‘coil’ of red clay. It should be thin enough to look like a drawn line. -
Place the smile:
Curve the red coil into a wide ‘U’ shape and press it firmly onto the yellow face, connecting the area between the two pink cheeks. -
Add the nose:
Using a needle tool or toothpick, poke two tiny holes in the center of the face for nostrils. -
Create the dimple:
Use a curved sculpting tool to impress a subtle curved line just above the red mouth to emphasise the smile.
Textured Finish
Before baking, gently press a piece of sandpaper or a textured sponge onto the clay surface to give it a matte, stone-like texture instead of a shiny one.
Step 3: Making the Stars
-
Roll colored clay:
Roll out your green and deep red clay to the same 1/4 inch thickness as the face. -
Cut the shapes:
Use your star cutter to create one green star and one red star. Soften the points just a touch so they aren’t sharp.
Step 4: Finishing Up
-
Bake or dry:
If using polymer clay, bake according to package instructions (usually 275°F for 15-30 minutes). If using air-dry clay, leave it in a safe spot for 24-48 hours. -
Cool down:
Allow the pieces to cool completely. I like to let them sit for an extra hour to ensure the surface is hard before gluing. -
Attach the magnets:
Apply a dab of strong craft glue to the back of each clay piece. -
Secure the backing:
Press a round ceramic magnet into the glue. Let the adhesive cure fully overnight before sticking them to your fridge.
Now you have a cheerful set of magnets ready to hold up your grocery lists and photos


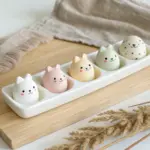
Mini Desk Buddy Critters
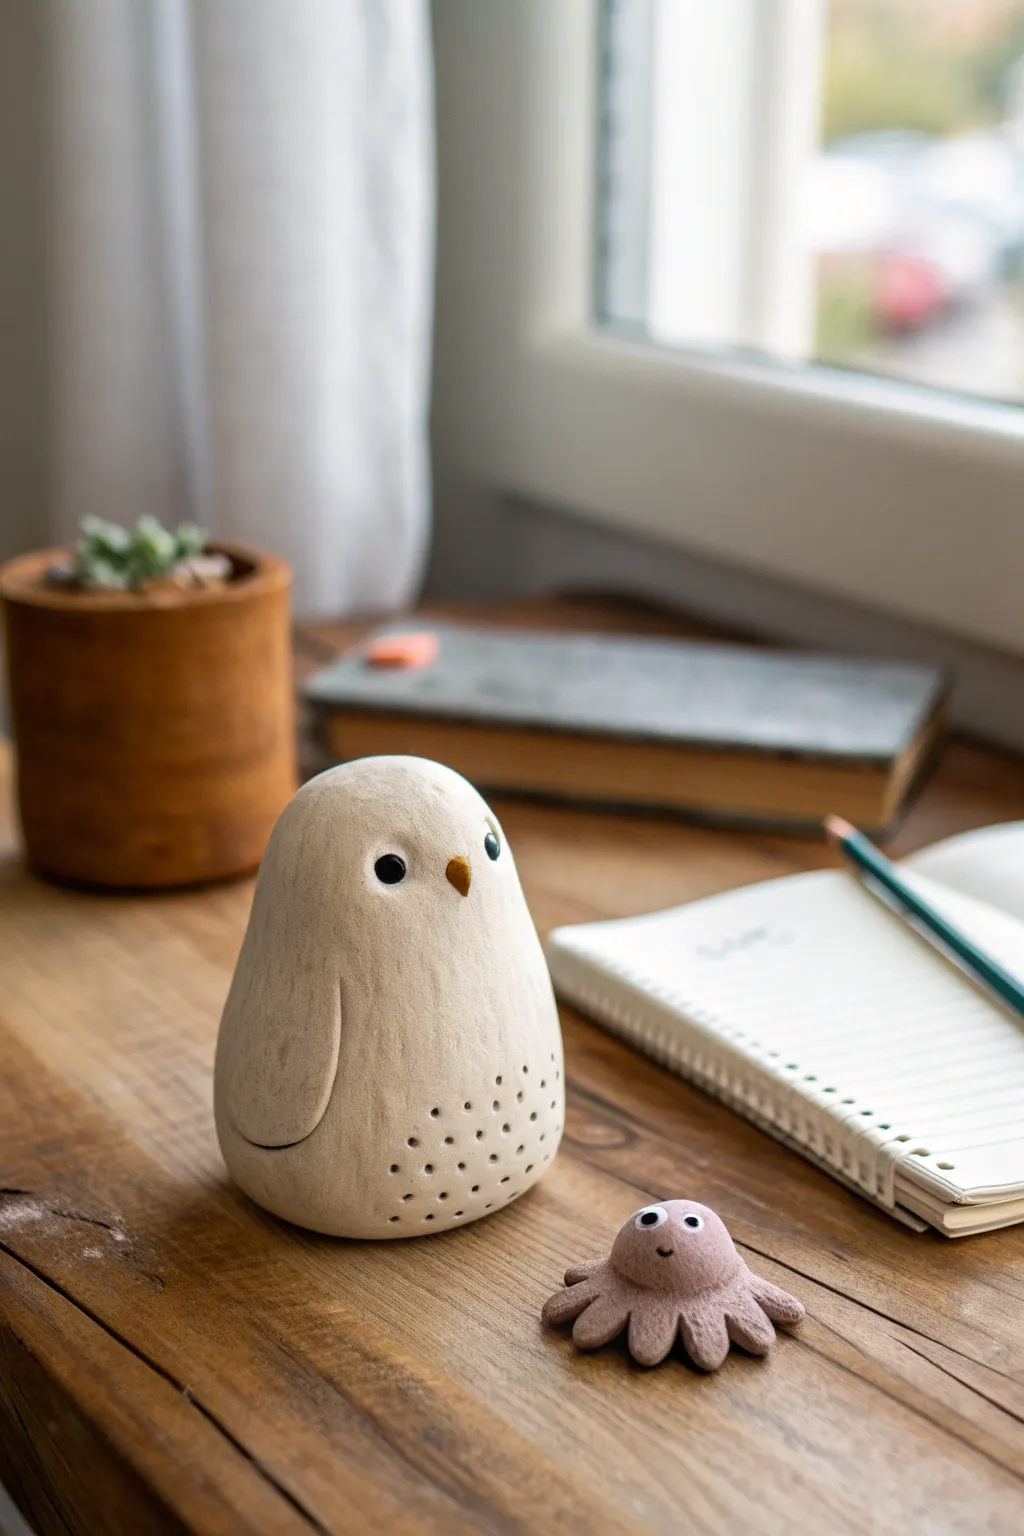
Brighten up your workspace with these adorable, minimalist clay companions. You’ll sculpt a serene, cream-colored owl with delicate stippled details and a tiny, lavender octopus friend to keep him company.
How-To Guide
Materials
- Polymer or air-dry clay (Cream/Off-White)
- Polymer or air-dry clay (Lavender/Dusty Pink)
- Small amount of black and white clay (for eyes/beak)
- Mustard yellow or gold clay (for owl beak)
- Sculpting needle tool or toothpick
- Small ball stylus tool
- Smooth work surface (ceramic tile or silicone mat)
- Clear matte varnish (optional)
Step 1: Sculpting the Zen Owl
-
Establish the Base Body:
Start with a generous handful of cream-colored clay. Roll it into a smooth ball, then gently taper the top half to create a rounded egg shape. Flattten the bottom firmly against your work surface so the owl sits upright without tipping. -
Refine the Head Shape:
Using your thumbs, slightly define the head area from the body, keeping the transition very subtle and organic. The silhouette should remain smooth and uninterrupted, like a river stone. -
Add the Wings:
Take two smaller pieces of the same cream clay and flatten them into teardrop shapes. Press these onto the sides of the body, curvature facing forward. I find it helps to blend the back edge of the wing into the body while leaving the front edge slightly raised for dimension. -
Create the Vertical Texture:
Using a needle tool or a stiff bristled brush, very lightly drag vertical lines down the entire body of the owl to simulate a wood-carved texture. Keep the pressure incredibly light; you want subtle scratches, not deep gouges. -
Detail the Belly:
With a needle tool or the tip of a toothpick, poke a series of small, random holes near the bottom front of the owl. Cluster them more densely at the bottom and let them fade out as you move upward. -
Sculpt the Face:
Roll two tiny balls of black clay and press them into the face area for eyes. Roll a tiny cone of mustard yellow clay for the beak and attach it centrally between the eyes. -
Add the Highlights:
Place a microscopic dot of white clay onto each black eye to bring the expression to life. For a whimsical touch, you can add a small dot of teal or green clay near one eye as shown in the inspiration.
Texturing Tip
To get that ‘ceramic’ look on the owl, use an old toothbrush to gently stipple the surface before adding the deep needle holes.
Step 2: Crafting the Tiny Octopus
-
Form the Octopus Body:
Take a walnut-sized amount of lavender or dusty pink clay. Roll it into a smooth, slightly flattened dome shape. -
Create the Tentacles:
Pinch the bottom edge of the dome and pull out 6-8 small protruding nubs. Round these nubs with your fingers so they look like short, chubby legs rather than long tentacles. -
Define the Legs:
Use a sculpting tool to press indentations between each leg, ensuring they look distinct from one another but connected at the center. -
Add a Friendly Face:
Create the eyes using white flat circles topped with tiny black pupils. Use the smallest ball tool or a needle to scribe a tiny, curved smile right between the eyes.
Make it Functional
Insert a small neodymium magnet inside the clay body before sealing the bottom to turn your critters into cute paperweight note-holders.
Step 3: Finishing Touches
-
Final Surface Smoothing:
Before baking or drying, check for any accidental fingerprints. I like to lightly brush the surface with a tiny bit of baby oil (if using polymer clay) to smooth out any unwanted texture. -
Bake or Dry:
Follow the manufacturer’s instructions for your specific clay. For polymer clay, ensure your oven temperature is precise to prevent scorching the light cream color. -
Seal the Project:
Once fully cured and cooled, apply a thin coat of matte varnish if desired. This isn’t strictly necessary, but it helps protect the delicate painted details and keeps dust off the textured surface.
Now you have a pair of delightful new colleagues ready to keep your desk company

The Complete Guide to Pottery Troubleshooting
Uncover the most common ceramic mistakes—from cracking clay to failed glazes—and learn how to fix them fast.
Name Plate With Puffy Letters
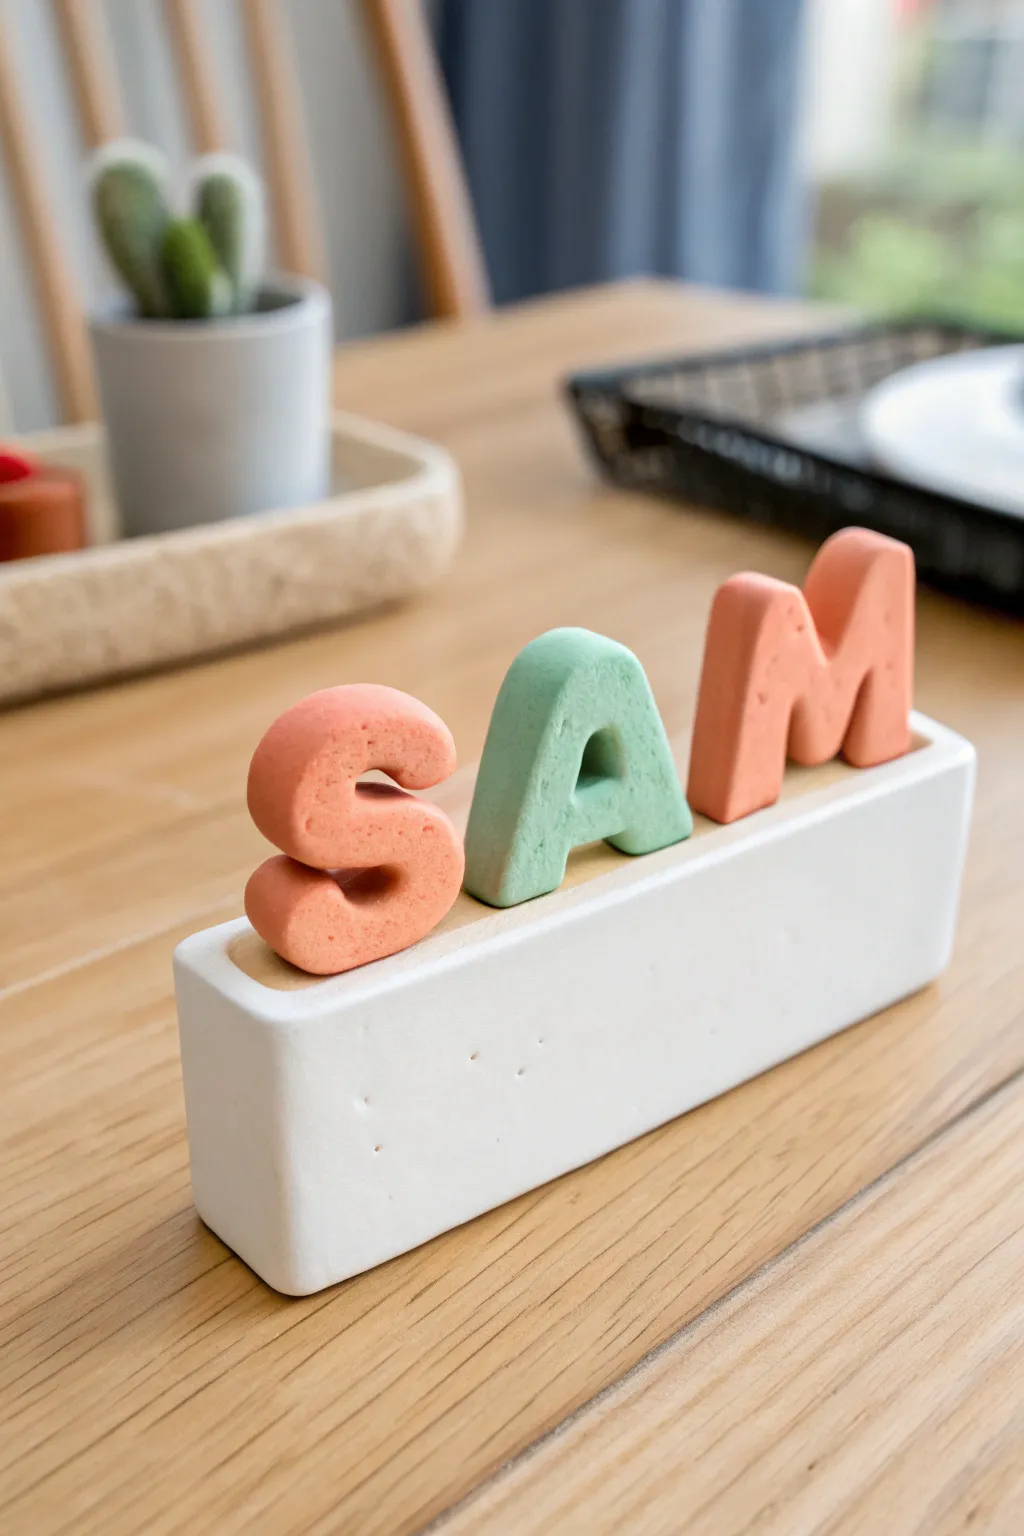
Create a charming, customized desk accessory with smooth, marshmallow-like letters nestled in a minimalist base. This project combines the soft, matte texture of air-dry super clay with a clean, modern design that brightens up any workspace.
Step-by-Step
Materials
- White lightweight super clay (air-dry)
- Salmon pink super clay
- Mint green super clay
- Coral or dark peach super clay
- Rolling pin or smooth cylinder
- Rectangular clay cutter or ruler
- Plastic sculpting tools
- Fine-grit sanding sponge (optional)
- Small bowl of water
- Cardstock or paper for templates
Step 1: Crafting the Base
-
Prepare the White Clay:
Start by kneading a large portion of white super clay until it is pliable and smooth. You want to eliminate any air bubbles or cracks before shaping. -
Shape the Rectangle:
Form the clay into a thick rectangular block. Use a flat surface to tap the sides and ends, creating sharp, straight edges. Aim for dimensions approximately 6 inches long by 1.5 inches wide and high. -
Create the Groove:
While the base is still soft, use a ruler or a long sculpting tool to gently impress a shallow, flat channel along the top center. This is where your letters will eventually sit. -
Detail the Surface:
To give the base a handmade pottery feel, you can add tiny, random pinpricks or subtle indentations on the side using a needle tool, just like in the reference image. -
Initial Drying:
Set the base aside on a piece of parchment paper to begin drying. It needs to firm up slightly so it doesn’t warp when you add the letters later.
Step 2: Sculpting the Letters
-
Mix Your Colors:
Prepare your colored clays. If the colors are too vibrant, kneel in a tiny amount of white clay to achieve those soft, pastel ‘S’, ‘A’, and ‘M’ tones shown in the photo. -
Roll the S-Shape:
Take the salmon pink clay and roll it into a thick, even snake. gently curve it into an ‘S’ shape. Use your fingers to blunt the ends so they look soft and rounded rather than sharp. -
Form the A-Shape:
Using the mint green clay, form a thick triangle shape. Use a small round tool to punch out the center triangle, smoothing the inner edges with your finger dipped in a drop of water. -
Form the M-Shape:
With the coral clay, roll a thick snake and bend it into an ‘M’. Ensure the legs of the letter are thick and sturdy enough to stand upright. -
Flatten and Smooth:
Gently press each letter flat against your work surface so they have a uniform thickness. The front and back should be flat, while the sides remain rounded and puffy. -
Size Check:
Hold the letters up against your white base (without pressing them in yet) to ensure they fit comfortably within the length of the stand.
Fixing Cracks
If tiny cracks appear as the white base dries, mix a small amount of fresh white clay with water to make a paste and fill them in.
Step 3: Assembly and Finishing
-
Prepare the Letter Base:
Roll a very thin, flat strip of beige or light brown clay. This will act as a ‘carpet’ inside the groove of your white base, adding a subtle color contrast. -
Insert the Strip:
Lay this thin colored strip into the groove you created on the white base, trimming any excess that hangs over the edges. -
Position the Letters:
Apply a tiny dab of water or clay glue to the bottom of each letter. Press the ‘S’, ‘A’, and ‘M’ firmly into the groove on top of the beige strip. -
Secure the Backs:
If the letters feel wobbly, use a sculpting tool to gently blend a tiny bit of clay from the back of the letter downward into the groove to anchor them. -
Smooth Imperfections:
Dip your finger in water and run it over the white base one last time to smooth out any fingerprints or accidental dents. -
Final Cure:
Allow the entire piece to dry completely for at least 24-48 hours. Super clay shrinks slightly as it dries, which will tighten the bond between the pieces.
Make It Glossy
After the clay is fully dry, coat the puffy letters with a layer of UV resin or glossy varnish to make them look like hard glazed candy.
Place your finished name plate on a shelf or desk to add a soft pop of color to your room.
Mini Trinket Dish With Sprinkles
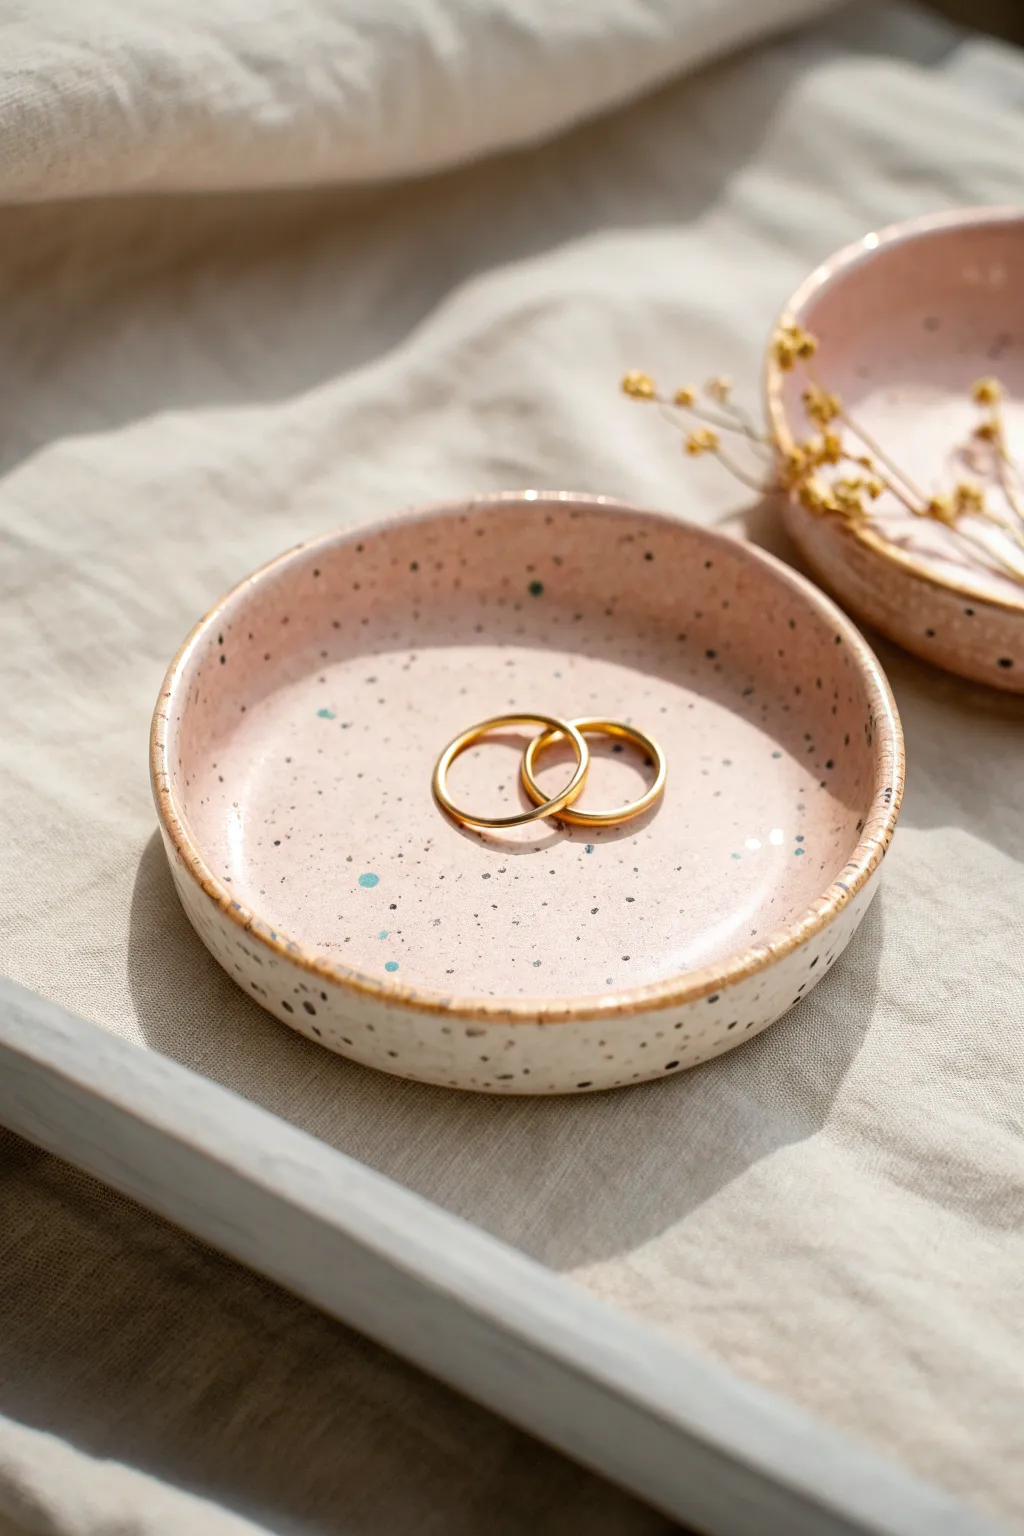
These charming little dishes feature a soft pink glaze effect dotted with playful speckles, perfect for holding your favorite rings or earrings. The organic, handcrafted look is achieved with simple clay techniques and a bit of acrylic paint magic to mimic expensive stoneware.
Step-by-Step Guide
Materials
- Air-dry clay (white)
- Acrylic rolling pin
- Circle cutter or a small bowl (approx. 4 inches)
- Small bowl for molding (slump mold)
- Sandpaper (fine grit)
- Pale pink acrylic paint
- Teal or dark green acrylic paint
- Dark grey or black acrylic paint
- White acrylic paint
- Old toothbrush or stiff bristle brush
- Small round paintbrush
- Glossy varnish or glaze (polyurethane or resin)
- Palette or paper plate
- Cup of water
Step 1: Shaping the Clay Base
-
Condition the Clay:
Start by taking a handful of white air-dry clay and kneading it in your hands until it feels soft, warm, and pliable. -
Roll it Out:
Place the clay on a clean, flat surface. Use your acrylic roller to flatten the clay to an even thickness of about 1/4 inch. If you want a more rustic feel, don’t worry about making it perfectly smooth. -
Cut the Shape:
Press your circle cutter or place an upside-down bowl onto the clay and trace around it with a knife to cut out a clean circle. -
Smooth the Edges:
Dip your finger in a little bit of water and run it along the cut edge of the clay circle to smooth out any roughness or sharp corners. -
Form the Curve:
To give the dish its shape, gently lift the clay circle and place it inside your molding bowl. Press it down lightly so it takes on the curved form. -
Refine the Rim:
While in the mold, use your thumb to gently press the rim outward slightly if you want a more open shape, ensuring the wall thickness looks consistent. -
Let it Dry:
Set the mold aside and let the clay dry completely. This usually takes 24-48 hours depending on humidity. I like to flip it out of the mold halfway through so the bottom dries evenly.
Splatter Control
Practice your toothbrush flicking technique on a piece of scrap paper first. The distance of the brush from the paper changes the spray size.
Step 2: Painting and Speckling
-
Surface Prep:
Once bone dry, take your fine-grit sandpaper and gently sand away any imperfections on the rim or surface. Wipe away the dust with a slightly damp cloth. -
Mix the Base Color:
Mix white acrylic paint with a very small drop of red or pink to create a soft, pastel pink. You want it to be opaque but delicate. -
Apply the Base Coat:
Paint the entire inside of the dish with your pink mixture. Apply 2-3 thin coats for full coverage, letting each layer dry in between. -
Paint the Outside:
For the exterior, mix a bit more white into your pink (or use plain white) to create a subtle contrast, painting the bottom and outer walls. -
Prepare the Splatter Paint:
Dilute a small amount of teal or dark green paint with water on your palette until it has an inky consistency. -
First Splatter Layer:
Dip an old toothbrush into the watered-down teal paint. Hold it over the dish and run your thumb across the bristles to flick tiny specks onto the pink surface. Go lightly at first. -
Add darker Speckles:
Repeat the process with watered-down dark grey or black paint. Aim for a mix of tiny dots and slightly larger splashes to create organic variation. -
Detail the Rim:
Using a small round brush and a brownish-gold paint tone, carefully paint a thin, uneven line along the top rim to mimic the look of fired pottery glaze.
Cracking Clay?
If small cracks appear while drying, mix a tiny bit of fresh clay with water to make a paste and smooth it into the cracks, then sand when dry.
Step 3: Sealing and Finishing
-
Dry the Paint:
Allow the paint and splatter work to dry completely. The splatter droplets can be thicker, so give them extra time. -
Apply Varnish:
Brush on a coat of high-gloss varnish over the entire dish. This gives it that shiny, ceramic-like finish and protects the paint. -
Final Cure:
Let the varnish cure according to the manufacturer’s instructions before placing any jewelry inside.
Now you have a stunning, faux-ceramic dish ready to display your treasures


What Really Happens Inside the Kiln
Learn how time and temperature work together inside the kiln to transform clay into durable ceramic.
Color Swirl Marbled Super Clay Shapes
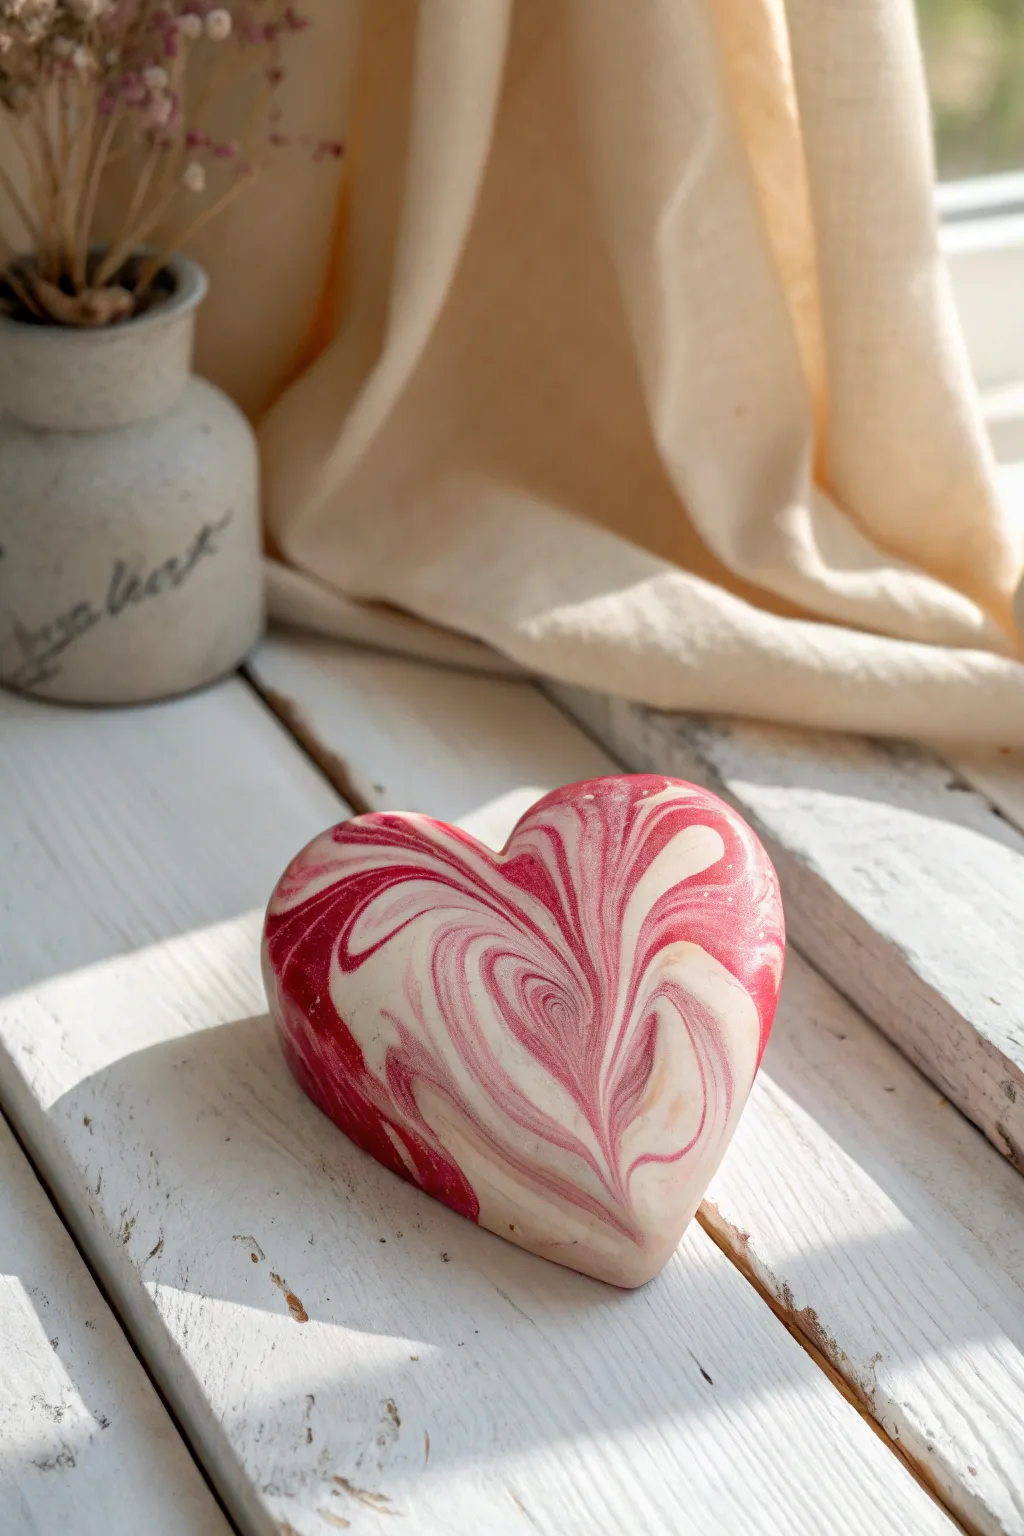
Capture the romance of classic marble with this stunning super clay heart project. By swirling deep red and creamy white clays together, you’ll create a unique, organic pattern that looks high-end but is surprisingly simple to achieve.
Step-by-Step Guide
Materials
- Super clay or air-dry modeling clay (white)
- Super clay or air-dry modeling clay (deep red or magenta)
- Rolling pin (acrylic preferred)
- Heart-shaped cookie cutter (large)
- Smooth work surface (ceramic tile or silicone mat)
- Plastic wrap (optional, for smoothing edges)
- Fine-grit sandpaper (400-600 grit)
- Gloss varnish or clear sealant (optional)
- Soft brush for varnish
Step 1: Preparing the Clay
-
Condition the white clay:
Begin by taking a generous amount of white clay—about the size of a lemon. Knead it thoroughly in your hands until it becomes soft, warm, and pliable. This conditioning step prevents cracks later. -
Condition the red clay:
Take a smaller portion of the deep red clay, roughly one-third the amount of the white clay. Knead this separately until it matches the softness of the white clay. -
Create clay logs:
Roll the white clay into a thick log, about 4 inches long. Do the same with the red clay, making it the same length but naturally thinner.
Muddy Colors?
If your colors turn pink instead of marbling, you over-mixed. Next time, twist and fold only 3-4 times maximum. Stop while the lines are still distinct.
Step 2: Creating the Marble Effect
-
Combine the colors:
Place the red log alongside the white log and twist them together like a candy cane. This is the start of your color integration. -
Fold and roll:
Fold the twisted log in half, bringing the two ends together. Roll this doubled log on your work surface to smooth it back into a single cylinder shape. -
Repeat the twist:
Twist the new log again. The more you twist, the finer the lines will be. For the bold swirls seen in the photo, stop before the colors blend too much. -
Form a ball:
Once you are happy with the striations, gently squish the log into a smooth ball. Ensure the swirled lines are visible on the surface. -
Check the pattern:
Look at your clay ball. If the pattern looks too blocky, you can give it one more gentle twist, but be careful not to over-mix into pink.
Step 3: Shaping and Finishing
-
Flatten the clay:
Place the marbled ball on your work surface. Use your palm to flatten it slightly, then use the rolling pin to roll it to a thickness of about 0.5 to 0.75 inches. -
Position the cutter:
Hover your heart cutter over the slab of clay. Look for the most attractive area of swirling—often right in the center—to frame your heart. -
Cut the shape:
Press the cutter firmly straight down. I usually wiggle it very slightly before lifting to ensure a clean separation from the surrounding clay. -
Soften the edges:
Remove the excess clay. If the edges of the heart are sharp or jagged, gently tap them with your fingertip to round them over slightly, mimicking a smooth stone. -
Smooth imperfections:
Dip your finger in a tiny drop of water (if using water-based clay) and lightly smooth out any fingerprints or surface wrinkles. -
Initial drying phase:
Let the heart sit undisturbed for 24 hours in a cool, dry place. Flip it over gently halfway through so the bottom can air out. -
Full cure time:
Allow another 24-48 hours for the clay to fully harden. The heart should feel lightweight and sound distinct when tapped against the table. -
Sanding:
Once fully dry, take your fine-grit sandpaper and very gently buff any rough spots on the sides or back to achieve a professional finish. -
Sealing the piece:
Apply a thin coat of gloss varnish to make the marble colors pop and protect the surface from moisture.
Pillowy Edges
Before cutting, lay a sheet of plastic wrap over the clay slab. Press the cutter *through* the plastic. This creates perfectly rounded, pillowy edges instantly.
Place your beautiful marbled heart on a shelf or gift it to someone special to enjoy the timeless swirl design
Lightweight Beads for Chunky Jewelry
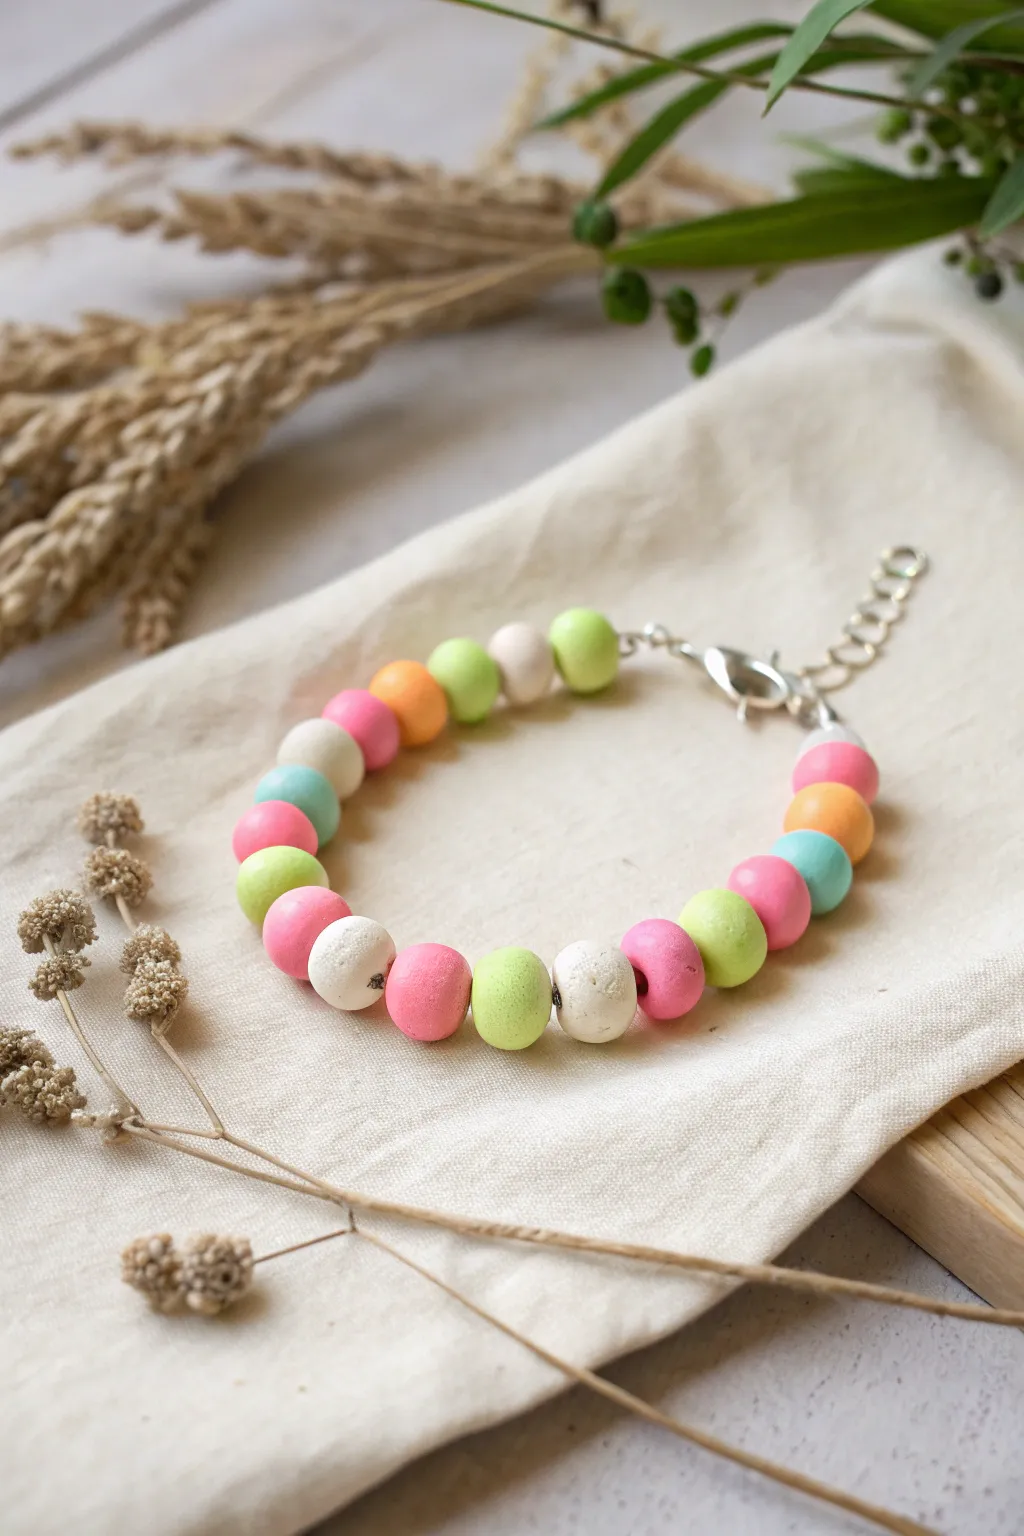
Create a delightfully lightweight, chunky statement piece using airy super clay. These soft pastel beads have a matte, textured finish that feels modern yet handcrafted, perfect for adding a splash of color to any outfit without the weight of traditional stones.
Step-by-Step
Materials
- Super clay (lightweight air-dry clay) in pink, lime green, light blue, peach, white, and cream
- Beading awl or thick toothpick
- Flexible jewelry wire or beading elastic
- Silver crimp beads
- Silver lobster clasp
- Silver extension chain and jump rings
- Jewelry pliers (round nose and flat nose)
- Sandpaper or a rough stone (optional for texture)
- Clear matte varnish (optional)
Step 1: Creating the Beads
-
Prepare your palette:
Begin by selecting your clay colors. You’ll need small amounts of pink, lime green, light blue, peach, white, and a creamy beige. Knead each color individually until it is soft and conditioned. -
Mix custom shades:
If your colors feel too vibrant, mix a tiny pinch of white clay into the neon colors to achieve that soft, candy-colored pastel aesthetic shown in the photo. -
Portion the clay:
Pinch off equal-sized pieces of clay, aiming for chunks about the size of a large pea or small marble. You will need roughly 18-20 pieces depending on your wrist size. -
Roll spheres:
Roll each piece of clay between your palms to form a smooth ball. Don’t worry about making them perfectly spherical; a little organic variation adds to the charm. -
Add texture:
To mimic the stone-like texture seen in the reference, gently tap the surface of the wet clay beads with a piece of sandpaper or a rough stone. This removes the plastic shine. -
Pierce the holes:
While the beads are still soft, use your beading awl or specific tool to pierce a hole directly through the center. Gently twist the tool as you push through to prevent squashing the bead. -
Refine the openings:
Once the tool pierces the other side, insert it from the opposite direction to ensure the hole is clean and wide enough for your hardware. -
Allow to dry:
Place your beads on a clean, flat surface to dry. Super clay usually takes about 24 hours to fully cure, though the surface will feel dry sooner.
Step 2: Assembly
-
Plan the pattern:
Lay out your dried beads on a bead board or towel. The pattern in the image is random but balanced—try not to put two of the same color right next to each other. -
Prepare the wire:
Cut a length of beading wire about 9 inches long. This gives you plenty of extra room to work with the clasps. -
Secure the first end:
Thread a crimp bead onto one end of the wire, followed by a jump ring attached to the lobster clasp loop. Feed the wire back through the crimp bead. -
Crimp firmly:
Use your flat nose pliers to flatten the crimp bead tightly, securing the clasp. Trim the excess short tail of wire. -
String the beads:
Begin threading your clay beads onto the wire. Enjoy the rhythm of sliding these lightweight spheres into place. -
Check the fit:
Wrap the strand around your wrist occasionally to check the length. Remember the clasp and chain will add about an inch to the final length. -
Add the final hardware:
Once strung, thread a final crimp bead onto the end, followed by the jump ring attached to your extension chain. -
Secure the loop:
Pass the wire back through the crimp bead and into the last clay bead for security. Pull everything taut so there are no gaps between beads. -
Final crimp:
Flatten the final crimp bead with your pliers and trim the remaining wire flush against the bead.
Clean Edges Solution
If your bead holes look ragged after drying, use a small hand drill or a round file to gently clean up the openings for a professional finish.
Sticky Situation?
If the clay sticks to your needle tool, dip the tip in a tiny bit of cornstarch or baby powder before piercing the bead to ensure a smooth exit.
Wear your new bracelet stacked with others or alone as a simple statement of handmade joy

TRACK YOUR CERAMIC JOURNEY
Capture glaze tests, firing details, and creative progress—all in one simple printable. Make your projects easier to repeat and improve.
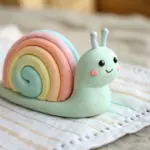
Puffy Wall Charms and Mini Hangings
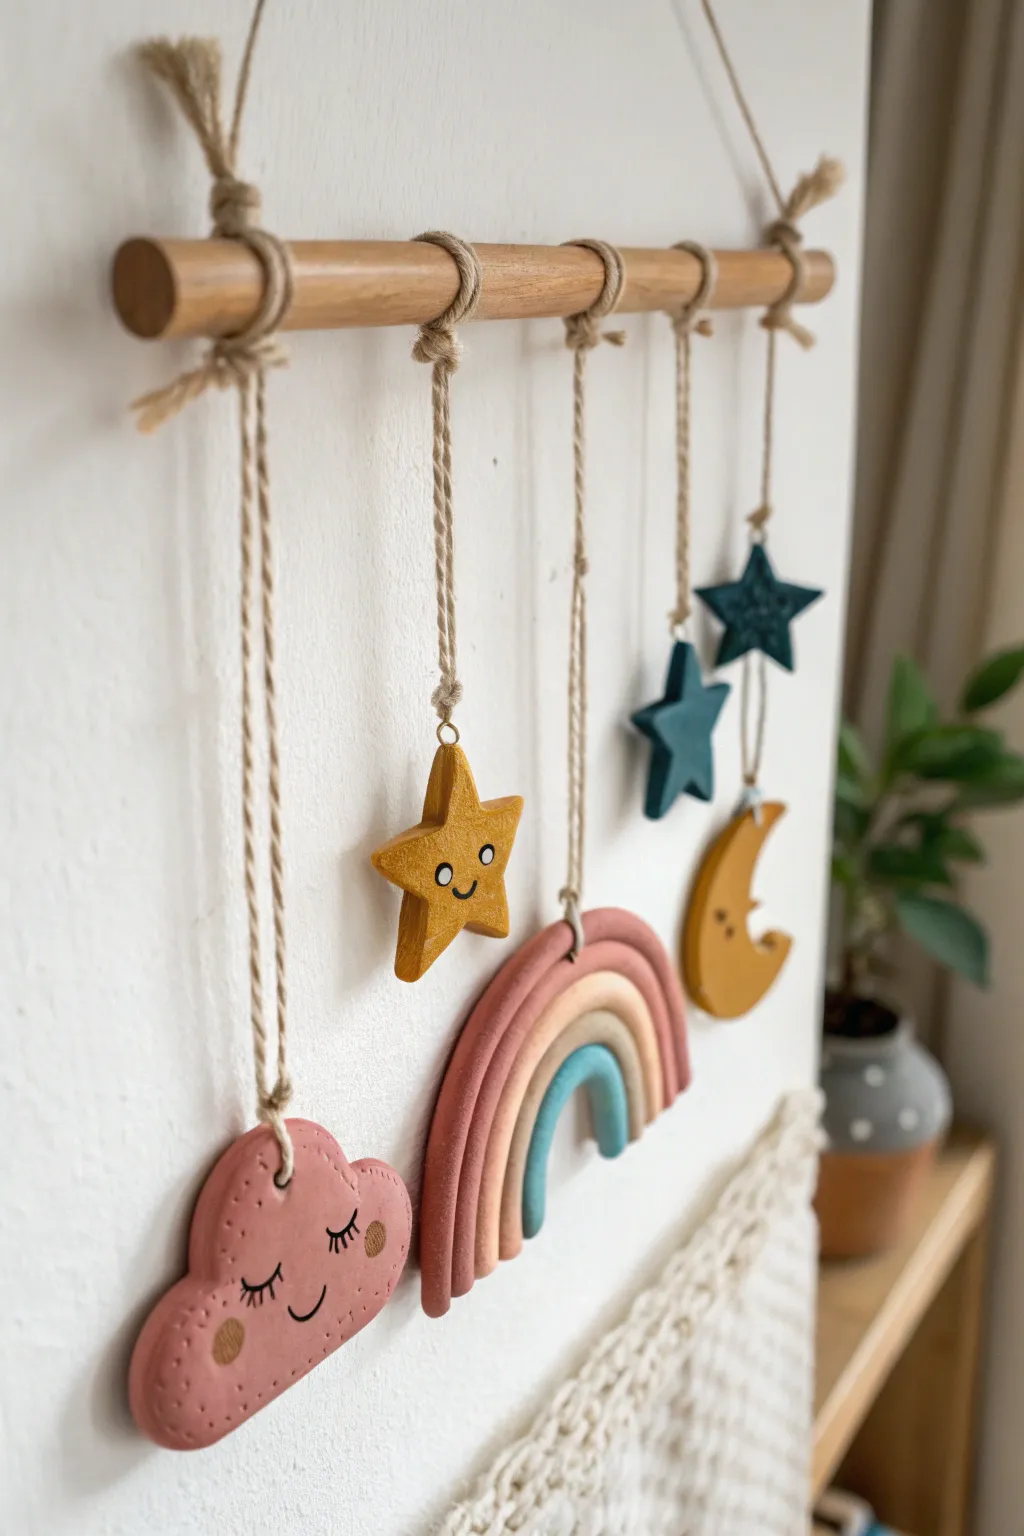
Bring a touch of celestial magic to your walls with this charming mobile featuring soft, friendly shapes like a sleepy cloud and smiling star. The muted, earthy tones and natural jute twine give it a sweet, handcrafted feel perfect for a nursery or cozy corner.
How-To Guide
Materials
- Air-dry clay (or polymer clay)
- Acrylic paints (dusty pink, mustard yellow, teal, muted blue, warm terracotta)
- Wooden dowel (approx. 12 inches long)
- Jute twine or hemp cord
- Rolling pin
- Cookie cutters (cloud, star, moon) or a craft knife
- Toothpick or skewer
- Fine-point black paint pen or liner brush
- Fine-grit sandpaper
- Matte varnish (optional)
Step 1: Shaping the Charms
-
Roll out the clay:
Start by conditioning your clay until it is soft and pliable, then roll it out onto a smooth surface to an even thickness of about 1/4 inch. Thicker charms look puffier and more high-quality. -
Cut the shapes:
Using cookie cutters or a craft knife, cut out your main shapes: a fluffy cloud, a crescent moon, and three varying sizes of stars. Smooth any rough edges with a little water on your fingertip. -
Create the hanging holes:
Before the clay starts to dry, use a toothpick or skewer to poke a hole through the top of each charm. Make sure the hole is wide enough for your jute twine to pass through easily. -
Form the rainbow:
For the rainbow charm, roll four thin snakes of clay. Arch them nested together to form the rainbow shape, trimming the ends so they are flush. Gently press the snakes together so they adhere as one unit. -
Add a rainbow loop:
Since you can’t easily poke a hole through the top of the rainbow, form a small loop of wire or a tiny clay u-shape and embed it securely into the top center arch for hanging later. -
Add texture details:
I like to use a needle tool to add tiny stippled dots to the cheeks of the cloud or the tips of the stars for a bit of tactile interest. -
Dry completely:
Let all your clay pieces dry according to package directions. Air-dry clay usually takes 24-48 hours. Flip them halfway through so the backs dry evenly.
Smooth Surface Secret
Use a little water on your finger to smooth out the clay edges before drying. This minimal effort saves you lots of sanding time later.
Step 2: Painting and Finishing
-
Sand for smoothness:
Once fully dry, lightly sand any rough edges or bumps with fine-grit sandpaper to get a professional, clean finish. -
Base coat colors:
Paint the cloud a dusty pink, the prominent star and moon in mustard yellow, and the smaller stars in teal and deep blue. Use two coats if necessary for opaque coverage. -
Paint the rainbow:
Carefully paint each arc of the rainbow in a different complementary color—terracotta, beige, mustard, and blue work beautifully together. -
Draw the faces:
Using a fine-point black paint pen, draw sleepy eyelashes and a smile on the cloud. Add wide-set eyes and a simple smile to the yellow star and moon. Keep the lines thin for a delicate look. -
Add rosy cheeks:
Dip a cotton swab or small brush into diluted terracotta paint and gently dab circles onto the cloud’s cheeks for a blush effect.
Help! Clay Curled Up
If flat pieces curl while drying, they dried unevenly. Next time, dry them on a wire rack or flip them over every few hours.
Step 3: Assembly
-
Prepare the dowel:
Cut a long piece of jute twine to serve as the main hanger. Tie it securely to both ends of your wooden dowel, leaving enough slack for it to hang from a hook. -
String the charms:
Cut five lengths of twine, varying from short to long. This staggered look creates visual balance. Thread a piece of twine through each clay charm and secure with a knot. -
Attach to the dowel:
Tie the loose end of each charm’s twine onto the wooden dowel. Arrange them so the lengths vary, perhaps keeping the rainbow or largest piece lower and central. -
Secure the knots:
Wrap the twine around the dowel a couple of times for a rustic look before knotting tightly. You can add a dab of glue to the knots to ensure they don’t slip. -
Final adjustment:
Slide the strings along the dowel to space them out evenly. Trim any excess twine ends for a tidy appearance.
Hang your new mobile in a spot with good light to enjoy the gentle movement of your handmade art