Whenever you’re craving a creative win, super easy clay ideas are my favorite way to make something adorable without overthinking it. These projects are all about simple shapes, quick details, and that satisfying “I made this!” feeling—perfect for air-dry clay or polymer clay.
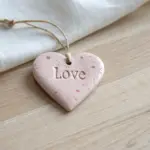
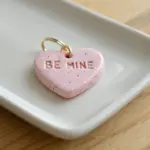
Mini Heart Keychain Charm
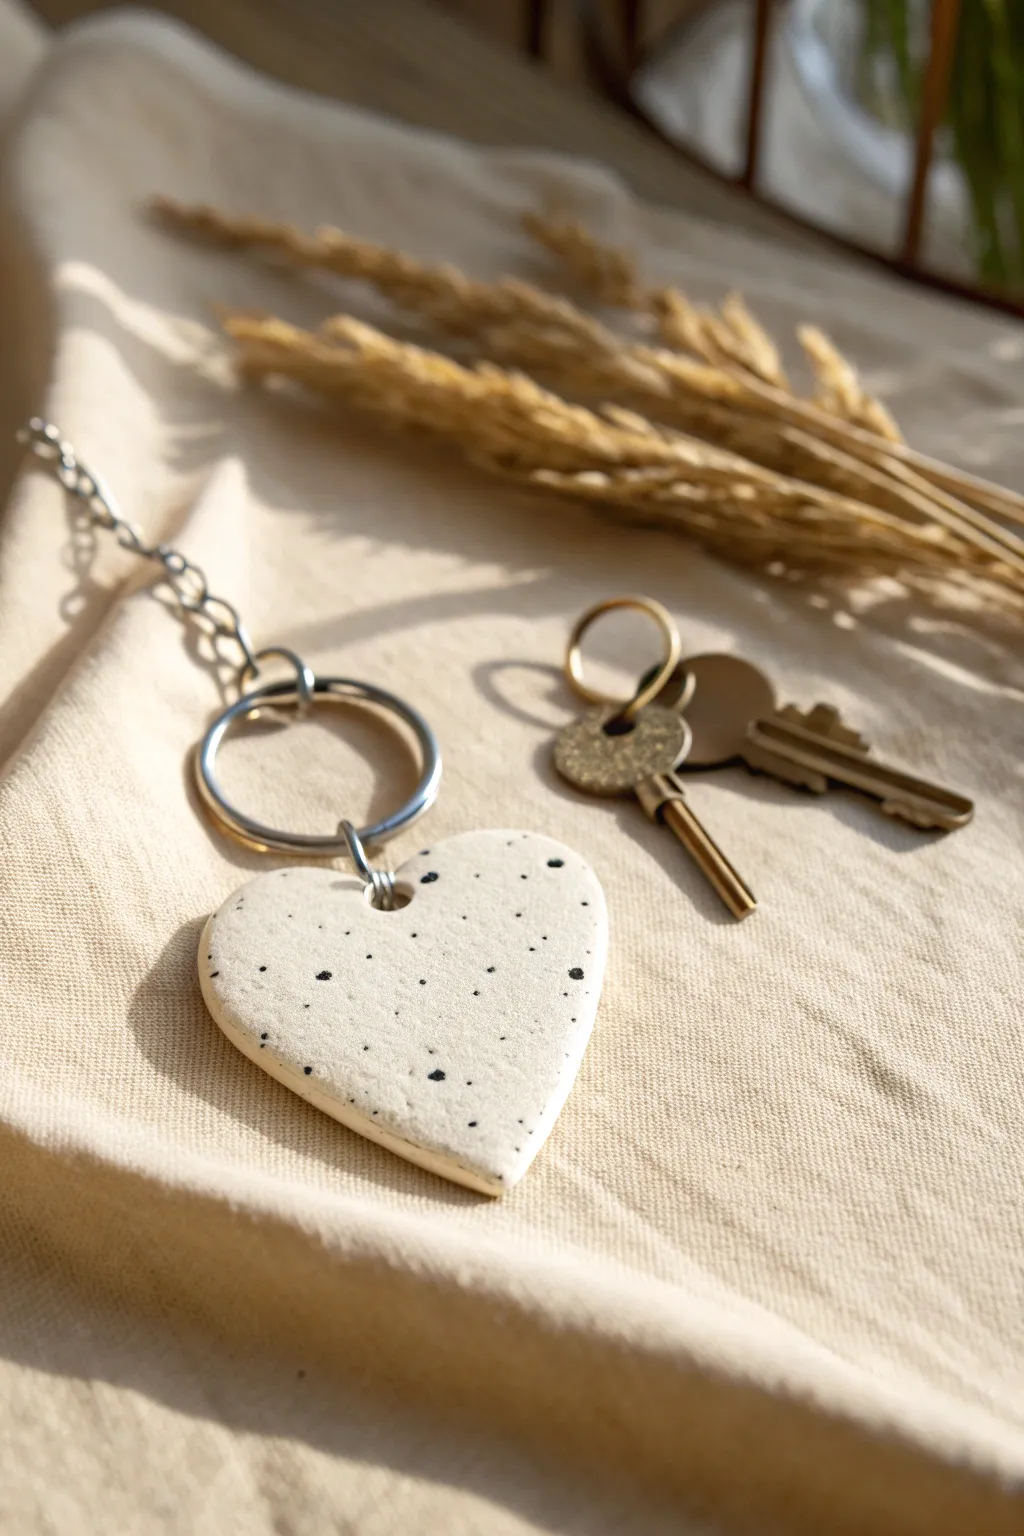
Create a charming minimalist accessory with this speckled clay heart keychain project. It features a natural stone look and a sturdy silver chain, making it perfect for gifting or adding a personal touch to your own keys.
Step-by-Step Guide
Materials
- Polymer clay (white or cream)
- Black acrylic paint or black pepper (for speckles)
- Rolling pin or smooth glass jar
- Heart-shaped cookie cutter
- Sandpaper (fine grit)
- Jump rings (silver)
- Chain link keychain attachment
- Jewelry pliers
- Small drill bit or toothpick
- Oven (for baking)
- Baking sheet
- Parchment paper
Step 1: Preparing the Clay
-
Condition the clay:
Start by taking a chunk of your white or cream polymer clay. Knead it thoroughly in your hands until it becomes soft, warm, and pliable. This conditioning step prevents cracks later on. -
Add texture:
To achieve that trendy speckled effect, flatten the clay slightly and sprinkle a tiny pinch of ground black pepper or coarse black embossing powder onto it. Alternatively, you can mix in tiny flecks of black clay. -
Incorporate the speckles:
Fold the clay over the speckles and knead again. Repeat the folding and kneading process until the black specks are evenly distributed throughout the white clay. -
Roll it out:
Place the clay on a smooth surface or a piece of parchment paper. Use a rolling pin to roll the clay out into a slab. Aim for a thickness of about 1/4 inch (6mm) to ensure the keychain is durable but not too heavy.
Clean Cuts
Use a piece of plastic wrap over the clay before pressing your cutter down. This creates a pillowed, rounded edge instead of a sharp, flat one.
Step 2: Shaping and Refining
-
Cut the heart shape:
Position your heart-shaped cookie cutter over the smoothest part of the rolled clay. Press down firmly and evenly to cut out the heart shape. -
Release the shape:
Gently wiggle the cutter to release the clay from the surrounding material, then lift the heart shape. If rough edges appear, smooth them gently with your finger. -
Create the hole:
While the clay is still soft, use a toothpick or a small straw to punch a hole at the top center of the heart. Make sure the hole isn’t too close to the edge to prevent breaking; leave at least 3-4mm of clay above it. -
Smooth the surfaces:
Inspect the front and back for fingerprints. Lightly brush over the surface with a tiny bit of cornstarch or water if needed to smooth out any imperfections.
Step 3: Baking and Finishing
-
Bake the clay:
Place your clay heart on a baking sheet lined with parchment paper. Bake it in the oven according to the specific temperature and time instructions on your package of polymer clay. -
Cool down:
Once baking is complete, remove the tray from the oven. Let the heart cool completely on the tray before handling it, as hot clay can be fragile. -
Sand edges:
I like to take a piece of fine-grit sandpaper to the edges once it’s fully cooled. Gently sand the sides and the area inside the hole to ensure everything is perfectly smooth. -
Accentuate the speckles (Optional):
If you want bolder spots, you can dip a stiff toothbrush in diluted black acrylic paint and flick it over the baked surface for a splattered paint effect. Let this dry completely before moving on.
Glaze It Up
For a ceramic look, coat the baked heart with a layer of glossy UV resin or polyurethane varnish. It adds shine and protects the speckles.
Step 4: Assembly
-
Open the jump ring:
Take a large silver jump ring and use two pairs of jewelry pliers to twist it open. Avoid pulling the ends apart; twist them sideways to maintain the circle shape. -
Attach the heart:
Thread the open jump ring through the hole you created in the clay heart. -
Add the chain:
Before closing the ring, slide the end link of your keychain chain onto the jump ring. -
Secure the closure:
Use your pliers to twist the jump ring back into a closed position. Ensure the two ends meet perfectly flush so the heart doesn’t slip off. -
Final check:
Give the keychain a gentle tug to make sure all connections are secure and the chain hangs freely.
Now you have a stylish, handmade accessory ready to organize your keys or decorate a bag


Flat-Cut Polymer Clay Earrings
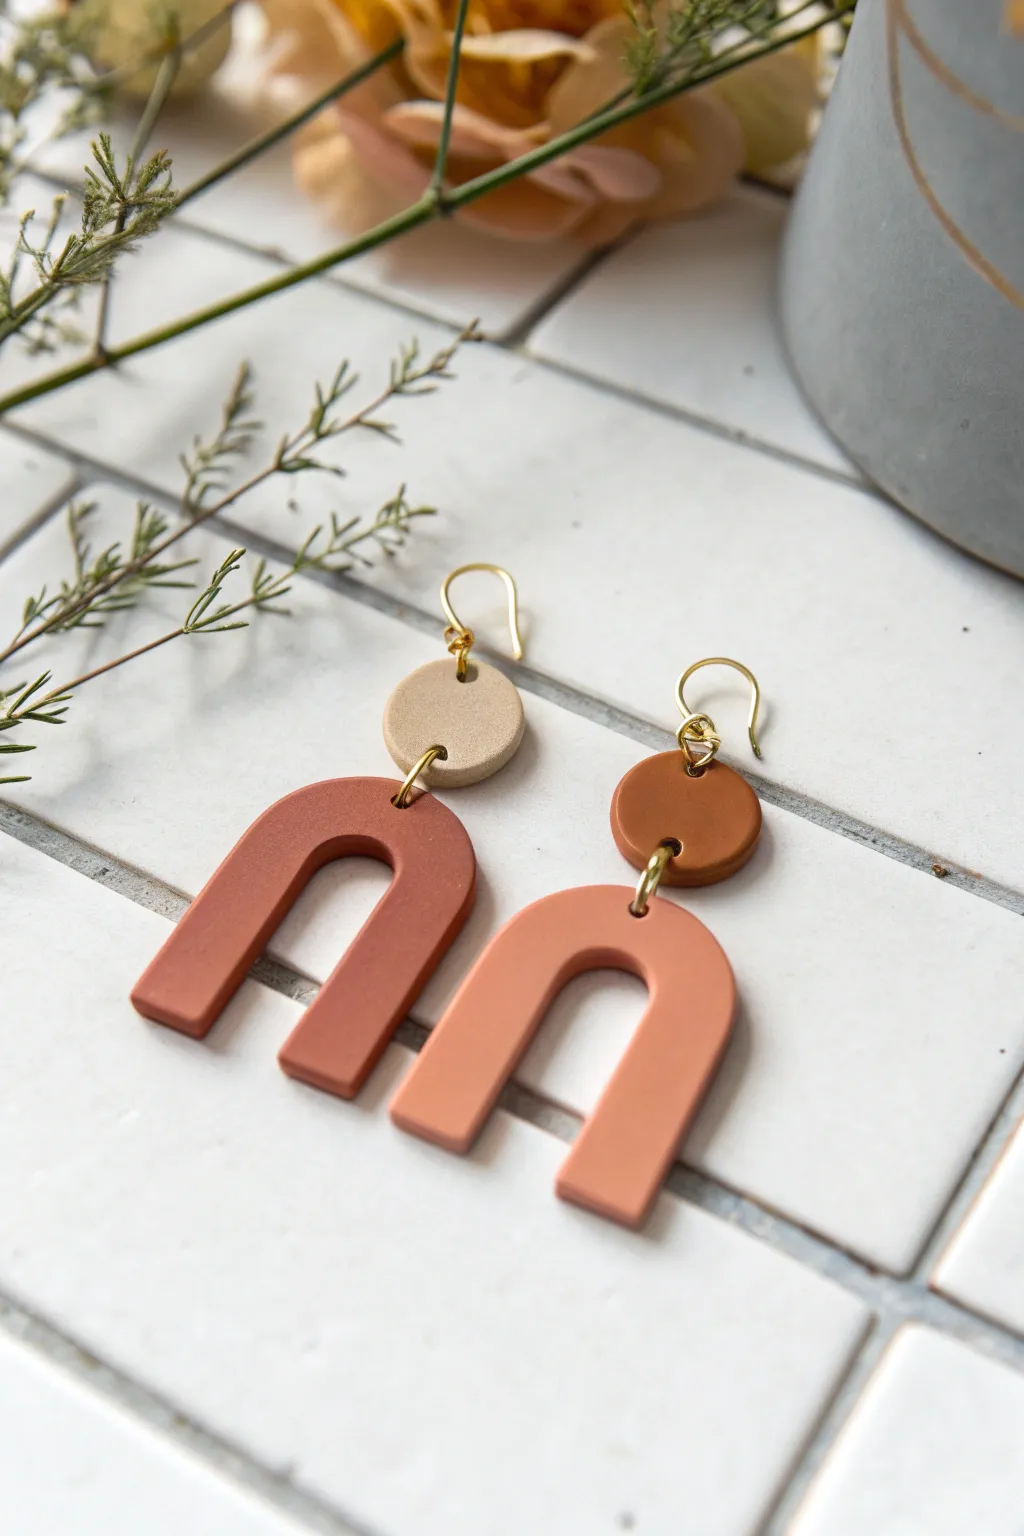
Create a stunning pair of modern, minimalist earrings using a simple flat-cut technique that yields professional results. These arches combine earthy terracotta and beige tones for a warm, bohemian aesthetic that pairs perfectly with any outfit.
Step-by-Step
Materials
- Polymer clay (terracotta, beige, peach, and rust colors)
- Acrylic rolling pin or pasta machine
- U-shaped clay cutter (medium size)
- Small circle clay cutter (approx. 10-12mm)
- Parchment paper or ceramic tile work surface
- Pin drill or needle tool
- Jump rings (gold, approx. 6mm)
- Earring hooks (gold)
- Jewelry pliers (flat nose and round nose)
- Fine-grit sandpaper (optional)
- Oven
Step 1: Preparing the Clay
-
Condition the clay:
Start by warming the polymer clay between your hands to condition it. Roll and knead each color separately until it is soft, pliable, and free of air bubbles or cracks. -
Roll out slabs:
Using your acrylic roller or finish setting on a pasta machine, roll the clay into even slabs. Aim for a thickness of about 3mm—this ensures the earrings are sturdy but essentially weightless. -
Smooth the surface:
Gently wipe the surface of the clay with a finger or a baby wipe to remove any fingerprints or lint before cutting.
Clean Cuts Pro Tip
Place a sheet of plastic cling wrap over the clay slab before pressing your cutters down. This creates a beautifully rounded, domed edge rather than a sharp, flat cut.
Step 2: Cutting Shapes
-
Cut the arches:
Press the U-shaped cutter firmly into your terracotta and peach slabs. Wiggle slightly to separate the clay from the surface, then lift. Repeat for minimal waste. -
Cut the circles:
Use the small circle cutter on the beige and rust clay slabs to create the top components. You will need two arches and two circles for a complete set. -
Clean edges:
Before baking, use a fingertip dipped in a tiny bit of cornstarch or water to gently smooth any rough edges left by the cutters.
Step 3: Assembly Prep & Baking
-
Pierce holes:
Using a needle tool or pin drill, poke a hole at the very top center of each arch and near the bottom edge of each circle. Add another hole at the top of the circle for the earring hook. -
Check alignment:
I like to lay the pieces out on the baking tile exactly how they will hang to ensure the holes line up correctly. -
Bake carefully:
Transfer your shapes to a baking sheet lined with parchment paper. Bake according to your clay package instructions (usually 275°F/135°C for 15-30 minutes). -
Cool down:
Let the pieces cool completely inside the oven with the door cracked, or remove and let sit at room temperature. Do not handle them while hot as they can warp.
Make it Textured
Before cutting shapes, gently press a piece of sandpaper, canvas, or a rubber stamp into the raw clay slab to add subtle surface texture.
Step 4: Final Assembly
-
Sand edges (optional):
If you notice any sharp spots after baking, lightly sand the edges under running water with fine-grit sandpaper for a polished finish. -
Open jump rings:
Using two pairs of pliers, twist a jump ring open sideways (never pull it apart outwards) to preserve its circle shape. -
Connect pieces:
Thread the open jump ring through the top hole of the arch and the bottom hole of the circle component, then twist it closed securely. -
Attach hooks:
Open the loop at the base of your earring hook using the same twisting motion. Thread it through the top hole of the circle clay piece. -
Secure closure:
Twist the earring hook loop back into a closed position, ensuring there is no gap for the clay to slip through. -
Repeat:
Follow the same assembly steps for the second earring to complete your mismatched yet cohesive set.
You now have a chic pair of handmade statement earrings ready to wear or gift

Cute Face Magnets
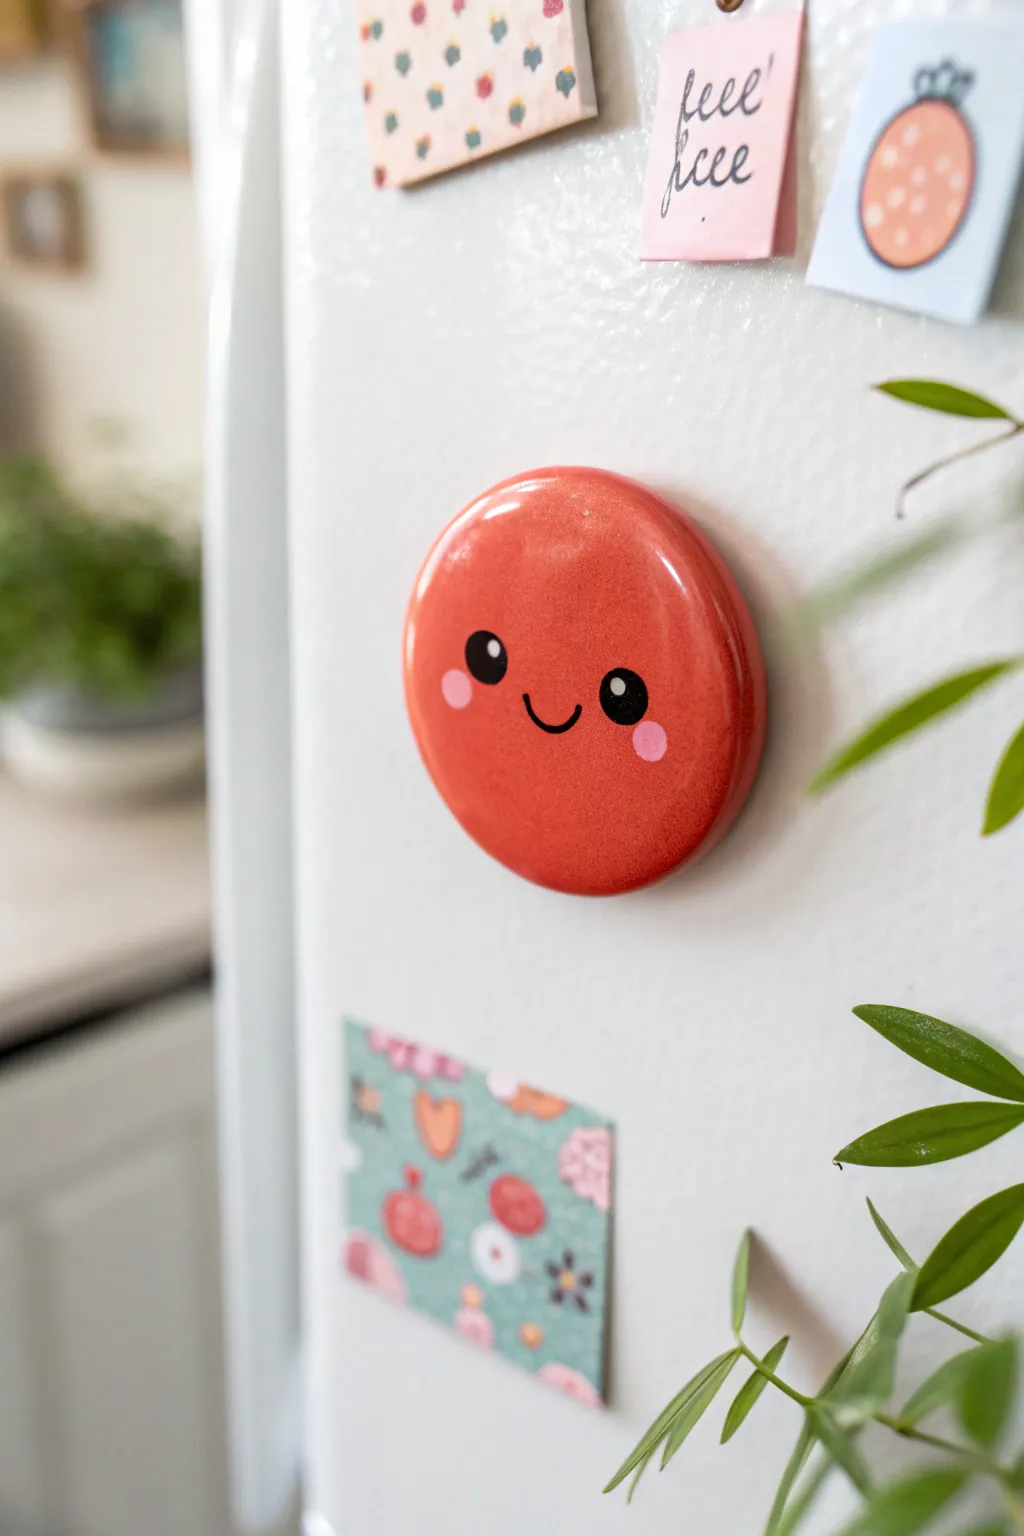
Brighten up your kitchen with this adorable, glossy red magnet that smiles back at you every time you reach for a snack. With its simple round shape and classic kawaii expression, this easy clay project adds a pop of personality to any magnetic surface.
Step-by-Step Guide
Materials
- Polymer clay (bright red)
- Acrylic paint (black and pink)
- High-gloss glaze or UV resin
- Small round magnet
- Strong craft glue (E6000 or similar)
- Circle cookie cutter (approx. 1.5 – 2 inches)
- Acrylic roller or rolling pin
- Parchment paper or ceramic tile work surface
- Fine-point paintbrush or dotting tool
- Clean flat brush (for glazing)
Step 1: Shaping the Base
-
Condition the clay:
Begin by taking a chunk of bright red polymer clay and kneading it in your hands until it becomes soft, warm, and pliable. This conditioning step is crucial to prevent cracks later on. -
Roll it out:
Place the conditioned clay on your parchment paper or tile. Using your acrylic roller, roll the clay out into an even slab. Aim for a thickness of about 1/4 inch so the magnet feels substantial but not too heavy. -
Cut the circle:
Press your circle cutter firmly into the clay. Give it a tiny wiggle to ensure it separates cleanly from the excess clay, then lift the cutter away. -
Smooth the edges:
Gently lift your clay circle. Dip your finger in a tiny bit of water (or baby oil) and run it along the cut edge to smooth out any sharpness or seams from the cutter. -
Soften the dome:
To get that nice, puffy button look, gently press around the perimeter of the face with your thumb, slightly beveling the edges downward so it isn’t a sharp cylinder shape.
Sticky Finger Prints?
If you see fingerprints on your raw clay before baking, lightly brush them with a little cornstarch or baby oil to buff them out completely.
Step 2: Baking and Cooling
-
Bake carefully:
Place your clay circle on a baking sheet lined with parchment paper. Bake according to your specific brand’s package instructions—usually around 275°F (135°C) for 15–20 minutes per quarter inch of thickness. -
Let it cool:
Remove the clay from the oven and let it cool completely on the tray. It needs to be room temperature before we start painting to ensure the paint adheres properly.
Step 3: Adding Personality
-
Paint the eyes:
Using a dotting tool or the back end of a small paintbrush dipped in black acrylic paint, stamp two solid black circles for the eyes. Ideally, place them slightly lower than the center line for maximum cuteness. -
Paint the smile:
With an extremely fine-point brush and black paint, draw a small ‘U’ shape between the eyes. Keep the line thin and delicate. -
Add rosy cheeks:
Mix a tiny drop of red with white to make pink, or use pink acrylic paint. Using a slightly larger dotting tool or brush end, dab two pink circles just outside and slightly below the eyes. -
Add eye highlights:
Once the black eye paint is dry to the touch, take a toothpick or a very fine tool dipped in white paint. Add a tiny white dot to the upper right corner of each black eye pupil. This spark of life is essential. -
Dry completely:
Allow all the paint to dry thoroughly. If the paint is wet when you glaze, it will smear and ruin the expression.
Variation Idea
Try making a whole set of emotions! Make one winking, one surprised with an ‘O’ mouth, and one sleeping to create a mood board on your fridge.
Step 4: Finishing Touches
-
Apply the glaze:
Coat the front and sides of the magnet with a high-gloss glaze or a layer of UV resin. I prefer doing this in a thick, single coat to get that smooth, glass-like finish shown in the photo. -
Cure or dry:
If using resin, cure it under a UV lamp. If using air-dry gloss varnish, set it in a dust-free area to dry for several hours until hard and tack-free. -
Attach the magnet:
Flip the red disc over. Place a dab of strong craft glue (like E6000) in the center of the back. -
Secure the backing:
Press your round magnet into the glue. Let the adhesive cure for at least 24 hours before sticking it to your fridge to ensure it doesn’t slide off under the weight of the clay.
Once the glue is fully set, your cheerful new friend is ready to hold up your grocery lists and favorite photos


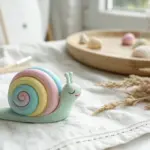
Tiny Animal Buddy Figurines
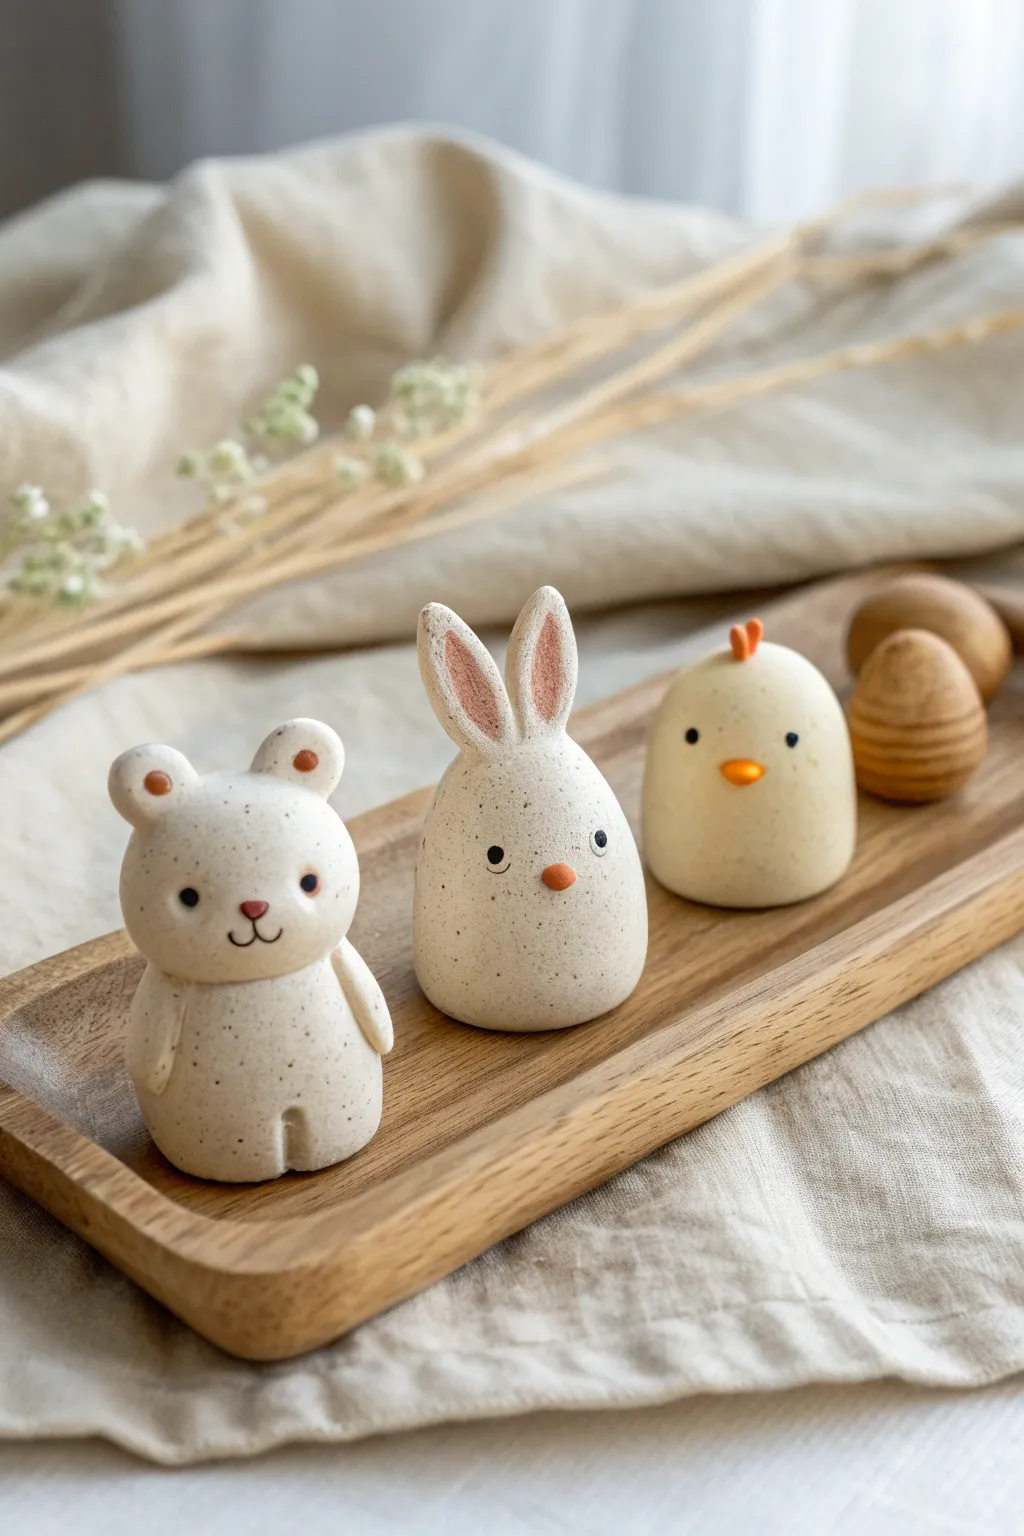
Create a charming set of minimalist animal friends that look like tiny stones but are surprisingly lightweight. This trio—a rotund bear, an egg-shaped bunny, and a little chick—features a lovely speckled finish that adds instant texture and character.
Detailed Instructions
Materials
- White polymer clay or air-dry clay
- Speckled clay (like granite or sandstone effect) OR fine black pepper/ground coffee
- Paints (black, terracotta-orange)
- Small dotting tool or toothpick
- Fine detail paintbrush
- Rolling pin
- Clean work surface
Step 1: Preparing the Speckled Dough
-
Mix your base:
Start by conditioning your white clay until it is soft and pliable. If you bought pre-speckled clay, you are ready to go. -
Create custom speckles:
If using plain white clay, flatten it out and sprinkle a tiny pinch of fine black pepper or used ground coffee grounds onto it. Fold the clay over and knead thoroughly until the specks are evenly distributed. I find pepper gives that perfect subtle ‘stone’ look. -
Divide the portions:
Split your clay into three equal-sized lumps for the bodies, keeping a small amount aside for ears and arms.
Stone Effect
Don’t over-knead if using real granite-effect clay! The speckles can sometimes muddy together. If using pepper, wash your hands immediately after to avoid eye irritation.
Step 2: Sculpting the Bear
-
Shape the bear body:
Take the first lump and roll it into a smooth cylinder that is slightly wider at the bottom than the top. Gently tap the bottom on your table to flatten it so it stands upright. -
Add the feet definition:
At the very bottom front center, use a modeling tool or the side of a toothpick to press a small vertical indentation. This suggests two feet without needing to attach separate pieces. -
Form the ears:
Roll two tiny balls of clay for the ears. Press them gently onto the top of the head, flattening them slightly. Use a rounded tool to make shallow dimples in the center of each ear. -
Attach the arms:
Roll two small sausage shapes for arms. Attach them vertically to the sides of the body, blending the top seam into the shoulder area so they look seamless.
Fixing Cracks
If you see tiny cracks forming while air-drying clay cures, smooth a drop of water over them with your finger. For baked clay, fill cracks with soft clay and re-bake briefly.
Step 3: Sculpting the Bunny & Chick
-
Form the bunny body:
Roll the second lump into a smooth egg shape, slightly tapered at the top. -
Make the bunny ears:
Create two long, teardrop shapes. Flatten them slightly and attach them to the top of the head. Carefully blend the clay at the attachment point so the ears stand up straight. -
Shape the chick:
Roll the final lump into a shorter, rounder egg shape—almost a gumdrop shape. Tap the bottom to flatten it. -
Add the chick’s comb:
Take a microscopic bit of clay, tint it orange (or paint it later), and form a tiny crest to place on top of the chick’s head.
Step 4: Finishing Details
-
Bake or dry:
If using polymer clay, bake according to package instructions (usually 275°F/135°C for 15-30 minutes). If using air-dry clay, let the figures sit undisturbed for 24-48 hours until fully hardened. -
Paint the inner ears:
Mix a soft terracotta or pinkish-brown paint. Carefully paint inside the dimples of the bear’s ears and the center of the bunny’s tall ears. -
Add noses and beaks:
Use the same terracotta color to paint a small oval nose on the bear and bunny. For the chick, paint a small diamond shape for the beak. -
Paint the eyes:
Using black acrylic paint and a dotting tool (or the head of a pin), place two wide-set eyes on each animal. Keep them horizontally aligned with the noses. -
Draw the mouths:
With an ultra-fine brush or a fine-tip permanent marker, draw a tiny ‘w’ shape for the mouths of the bear and bunny. -
Seal the work:
Once the paint is completely dry, brush on a coat of matte varnish to protect your new friends and seal in those speckles.
Group your little stone-look creatures on a shelf or tray for an adorable minimalist display

The Complete Guide to Pottery Troubleshooting
Uncover the most common ceramic mistakes—from cracking clay to failed glazes—and learn how to fix them fast.
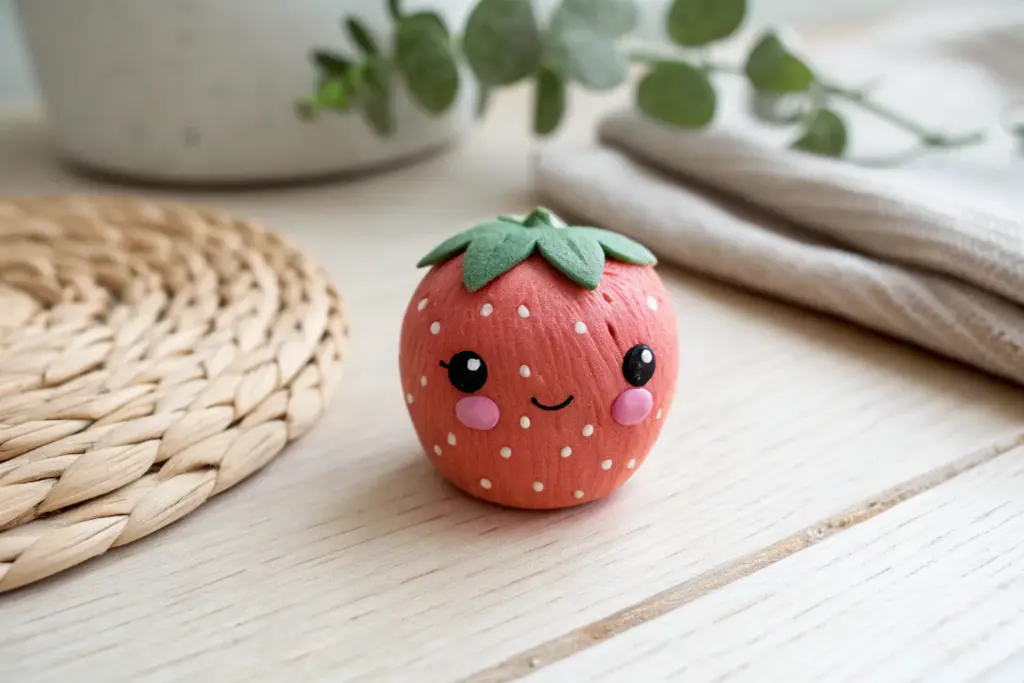
Fruit With Kawaii Faces
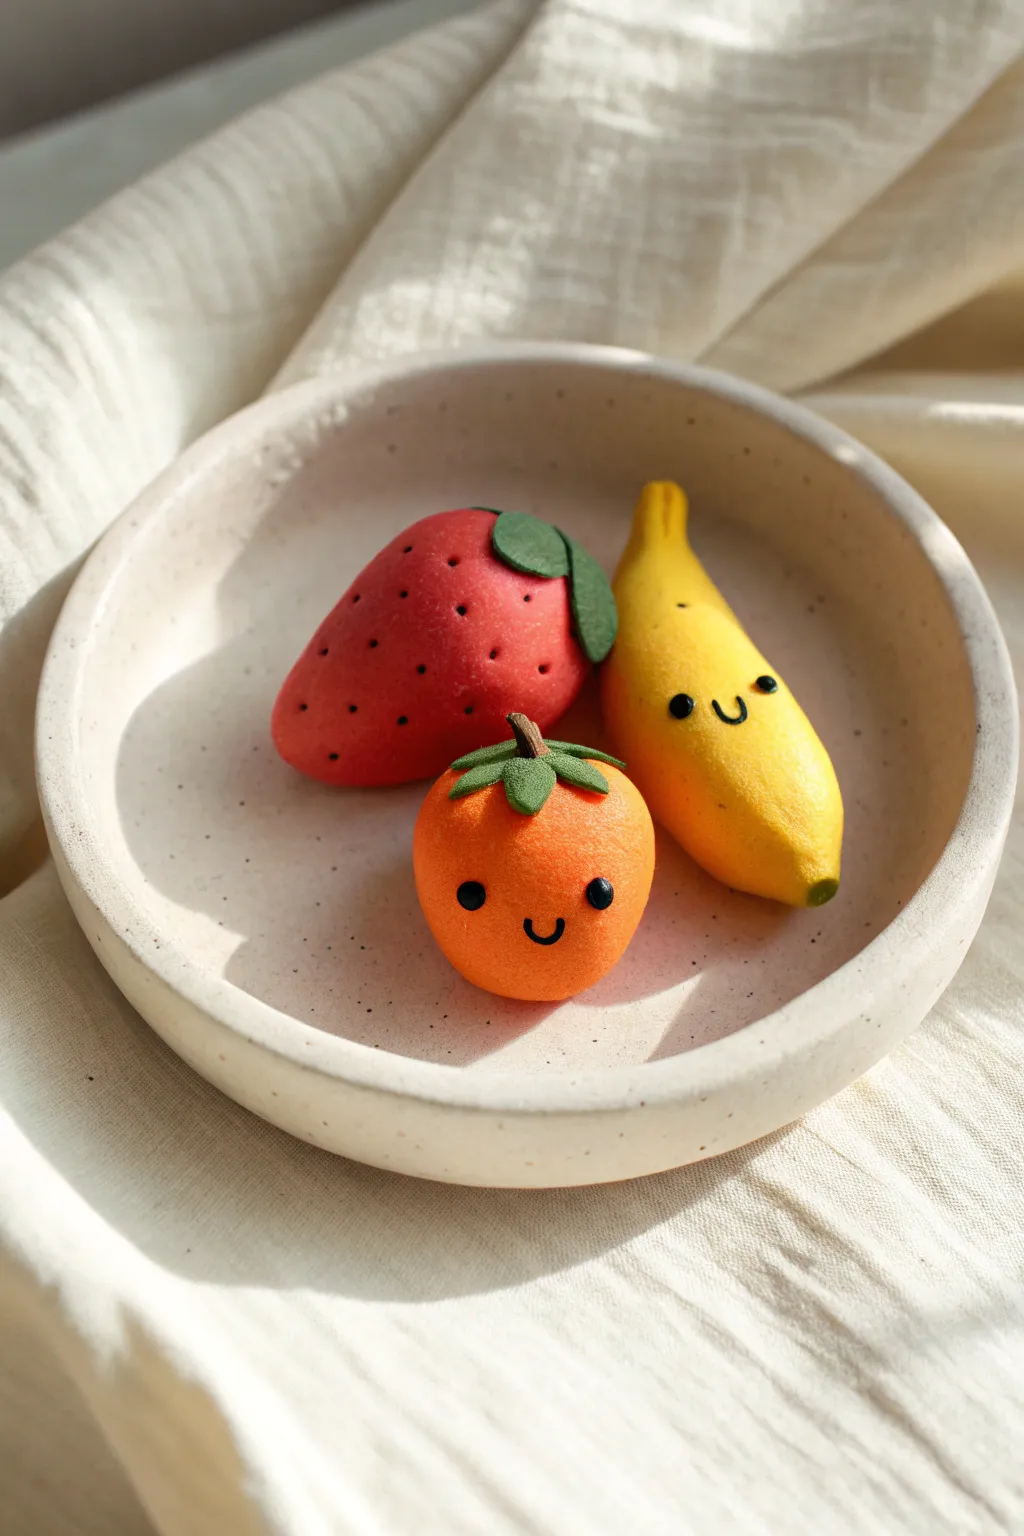
Bring a touch of sweetness to your space with these adorable, smile-inducing clay fruits. This project focuses on shaping three classic fruits—a strawberry, banana, and orange—and giving them charming little personalities with simple, hand-painted faces.
Step-by-Step Tutorial
Materials
- Polymer clay or air-dry clay (Red, Yellow, Orange, Green, Brown, Black)
- Clay sculpting tools (needle tool, ball stylus)
- Black acrylic paint or fine-tip permanent marker (if not using black clay for faces)
- Small paintbrush
- Parchment paper or silicone mat (work surface)
- Rolling pin (optional)
- Clear matte or glossy varnish (optional)
Step 1: Shaping the Banana
-
Form the base:
Start by conditioning a piece of yellow clay until it’s soft and pliable, rolling it into a smooth log about 2 inches long. -
Curve the shape:
Gently taper both ends of the log, making the top stem slightly narrower than the bottom, then bend the entire piece into a gentle crescent moon shape. -
Define the stem:
Using your fingers, pinch the top end to create a distinct stalk, flattening the very tip slightly to look like where it was pulled from the bunch. -
Add texture:
If you want a realistic touch, use a needle tool to drag very faint vertical lines down the length of the banana to suggest the peel’s ridges. -
Add the end detail:
Take a tiny speck of green or brown clay and press it onto the bottom tip of the banana for that realistic ripening spot.
Clean Hands, Clean Clay
Baby wipes are essential! Wipe your hands thoroughly when switching colors, especially before handling the yellow banana, to avoid smudging darker pigments onto lighter clay.
Step 2: Crafting the Strawberry
-
Mold the berry:
Roll a ball of red clay and then gently flatten the sides into a rounded triangle or guitar-pick shape, keeping it plump and 3D. -
Create seeds:
Using a needle tool or a small dotting tool, press tiny indentations all over the surface of the strawberry to mimic seeds. -
Make the leaves:
Flatten a small piece of green clay and use a craft knife or blade to cut out a simple 3- or 4-petaled leaf shape. -
Attach the greenery:
Press the green leaf shape onto the top (wider end) of the strawberry, gently curving the tips so they hug the fruit’s curve.
Blush for Rush
Brush a tiny amount of pink pastel chalk dust onto the ‘cheeks’ underneath the eyes before baking to give your fruit friends an extra sweet, rosy glow.
Step 3: Constructing the Orange
-
Roll the sphere:
Condition a piece of orange clay and roll it into a perfectly smooth, round ball. -
Texture the skin:
I prefer to gently roll the ball over a piece of sandpaper or tap it lightly with a toothbrush to give it that pitted citrus skin texture. -
Form the stem cap:
Make a tiny star shape out of green clay for the calyx and place a miniscule cylinder of brown clay in the center for the stem. -
Assemble top detail:
Place the green star and brown stem onto the top center of the orange, pressing down gently to secure them.
Step 4: Bringing Them to Life
-
Bake or dry:
Review your manufacturer’s instructions to either bake your polymer clay or let your air-dry clay harden completely before proceeding. -
Position the faces:
Decide where the ‘front’ of each fruit is. -
Make the eyes:
Roll incredibly tiny balls of black clay and press them onto the fruit for eyes, or alternatively, paint small dots using black acrylic paint. -
Create the smiles:
Roll a microscopic ‘snake’ of black clay and curve it into a ‘U’ shape for the mouth, pressing it between the eyes. If painting, use a very fine brush to draw a simple smile. -
Seal (optional):
Once fully cured and dry, protect your artwork with a light coat of matte varnish to prevent the paint from chipping.
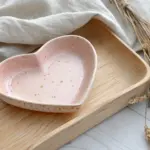
Arrange your finished trio in a small trinket dish for the perfect desk accessory
Clay Suncatcher Shapes
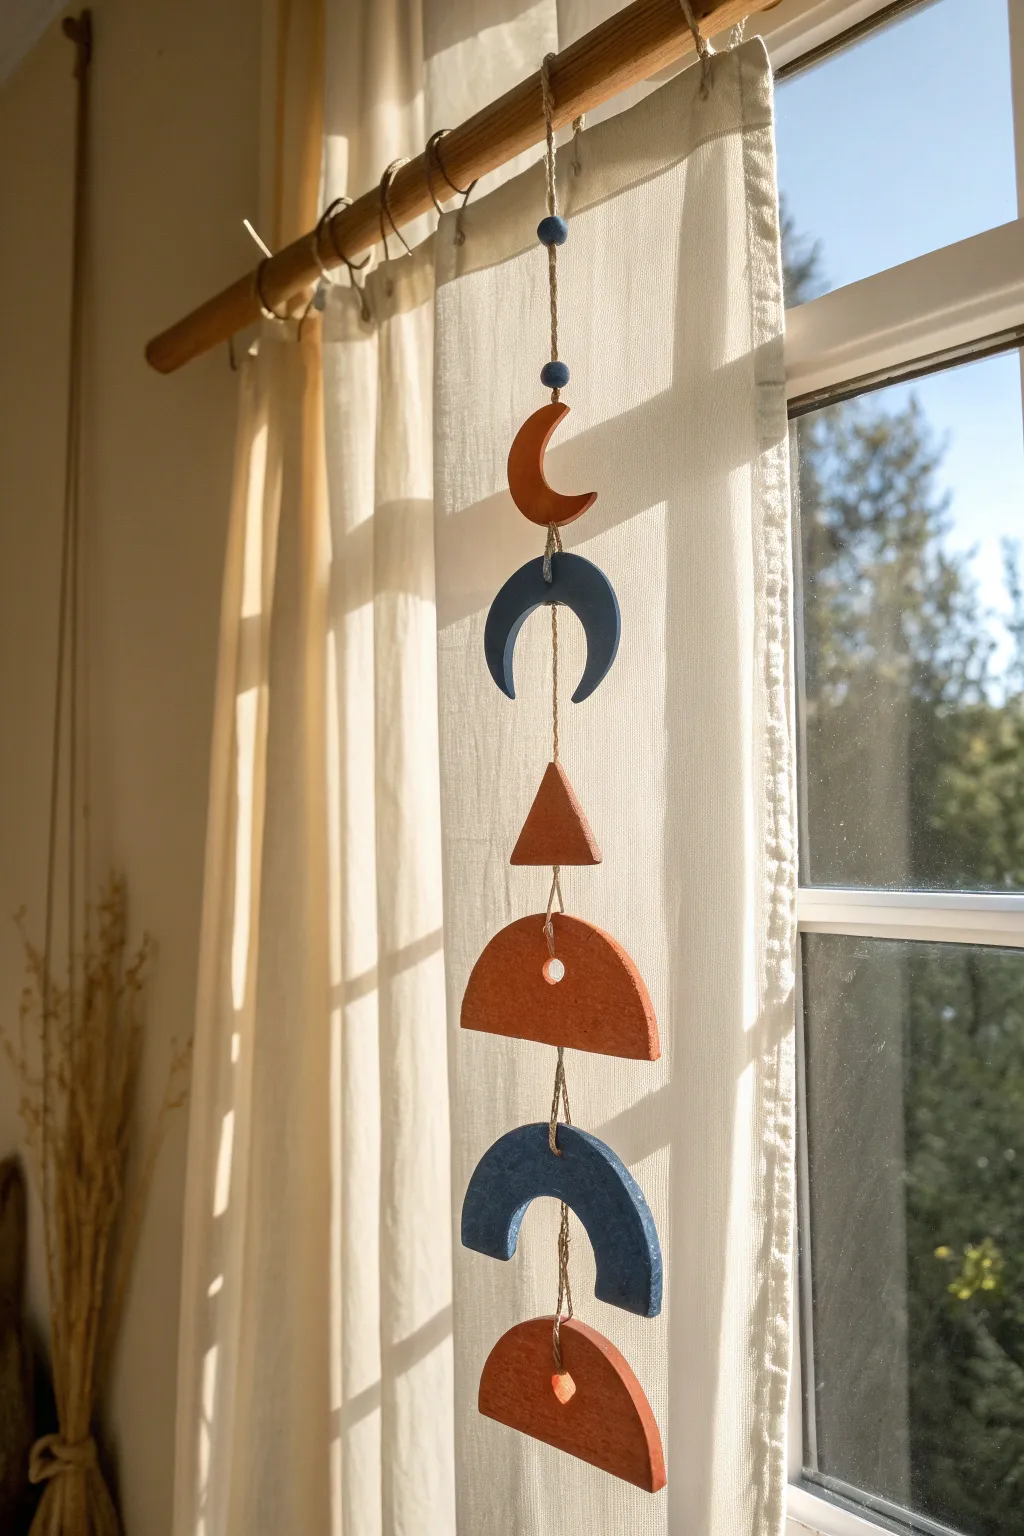
Bring a touch of celestial charm to your window with this earthy, geometric clay wall hanging. Featuring a mix of terracotta and midnight blue shapes like crescent moons and arches, this mobile catches the light beautifully while adding a modern bohemian vibe to any room.
Step-by-Step Guide
Materials
- Air-dry clay or polymer clay (white or pre-colored)
- Rolling pin
- Clay knife or craft blade
- Cookie cutters (circle and moon shapes, optional)
- Straw or skewer (for poking holes)
- Sandpaper (fine grit)
- Acrylic paints (terracotta orange, deep navy blue)
- Paintbrushes
- Jute twine or hemp cord
- Small wooden beads (blue or natural)
- Scissors
- Parchment paper or craft mat
Step 1: Shaping the Clay
-
Prepare your workspace:
Lay down parchment paper or a craft mat on a flat surface to prevent the clay from sticking while you work. -
Roll out the slab:
Take a large chunk of clay and roll it out until it is about 1/4 inch thick. Try to keep the thickness consistent so all pieces dry at the same rate and look uniform. -
Cut the crescent moons:
Cut out two crescent moon shapes. You can use a dedicated moon cutter, or use a round circle cutter twice—once to make the circle, and again to cut a bite out of it to form the crescent. -
Create the triangle:
Cut a simple equilateral triangle, roughly 1.5 to 2 inches wide at the base. -
Form the semi-circles:
Cut out two semi-circle shapes. The easiest way is to cut a full circle and slice it perfectly in half, or use a knife to trim a straight edge on a round piece. -
Cut the arch:
Create an arch shape similar to a rainbow. You can cut a large semi-circle and then use a smaller cutter or knife to remove the inner section. -
Smooth the edges:
Dip your finger in a little bit of water and gently run it along the cut edges of every piece to smooth out any roughness or jagged bits.
Smooth Surface Secret
To get perfectly flat pieces without sanding, dampen your fingertip and smooth the clay surface *before* dragging your knife through it.
Step 2: Drying and Refining
-
Pierce the hanging holes:
Using a straw or a skewer, poke holes in each piece used for connecting them. For the moons, triangle, and bottom semi-circle, you need a hole at the top and bottom center. For the arch, poke holes through the center of the arch thickness. -
Check hole placement:
Double-check that your holes are not too close to the edge, or the clay might break under the weight of the mobile. -
Let it dry completely:
Allow the clay pieces to dry fully according to your package instructions. For air-dry clay, I usually leave them for 24-48 hours, flipping them halfway through to prevent warping. -
Sand for a professional finish:
Once bone dry, take fine-grit sandpaper and gently buff out any remaining uneven spots on the edges or surfaces.
Step 3: Painting and Assembly
-
Paint the terracotta pieces:
Paint the top moon, the triangle, the middle semi-circle, and the bottom semi-circle with a warm terracotta acrylic paint. You may need two coats for opaque coverage. -
Paint the navy pieces:
Paint the second moon and the arch shape in a deep navy blue. Let all paint dry completely. -
Start the stringing process:
Cut a long length of jute twine. Tie a loop at the top for hanging, leaving a long tail for threading. -
Add decorative beads:
Thread two small wooden beads onto the top of the twine near your hanging loop to add a polished touch. -
Connect the shapes:
Begin tying the shapes together. Thread the twine through the top hole of the first terracotta moon, knot it securely, then thread through the bottom hole. Leave an inch or two of space, knot again, and attach the blue moon. -
Continue the pattern:
Follow the pattern shown: Orange Moon -> Blue Moon -> Orange Triangle -> Orange Semi-Circle -> Blue Arch -> Orange Semi-Circle. Make sure to tie knots beneath each hole to keep the shapes suspended at the right intervals. -
Secure the final piece:
Tie a secure double knot below the final bottom semi-circle and trim any excess twine for a clean finish.
Textured Touch
Before drying, press a clean sponge or piece of canvas fabric into the damp clay to give it a stone-like texture that catches sunlight.
Find a sunny spot near a window to hang your new creation and enjoy the play of light and shadow