If you love projects that are cute, quick, and practically weightless, super light clay is about to be your new go-to. In my studio, I grab foam clay when I want small, colorful makes that come together fast without fancy tools.
Super Light Clay Mini Animal Figurines
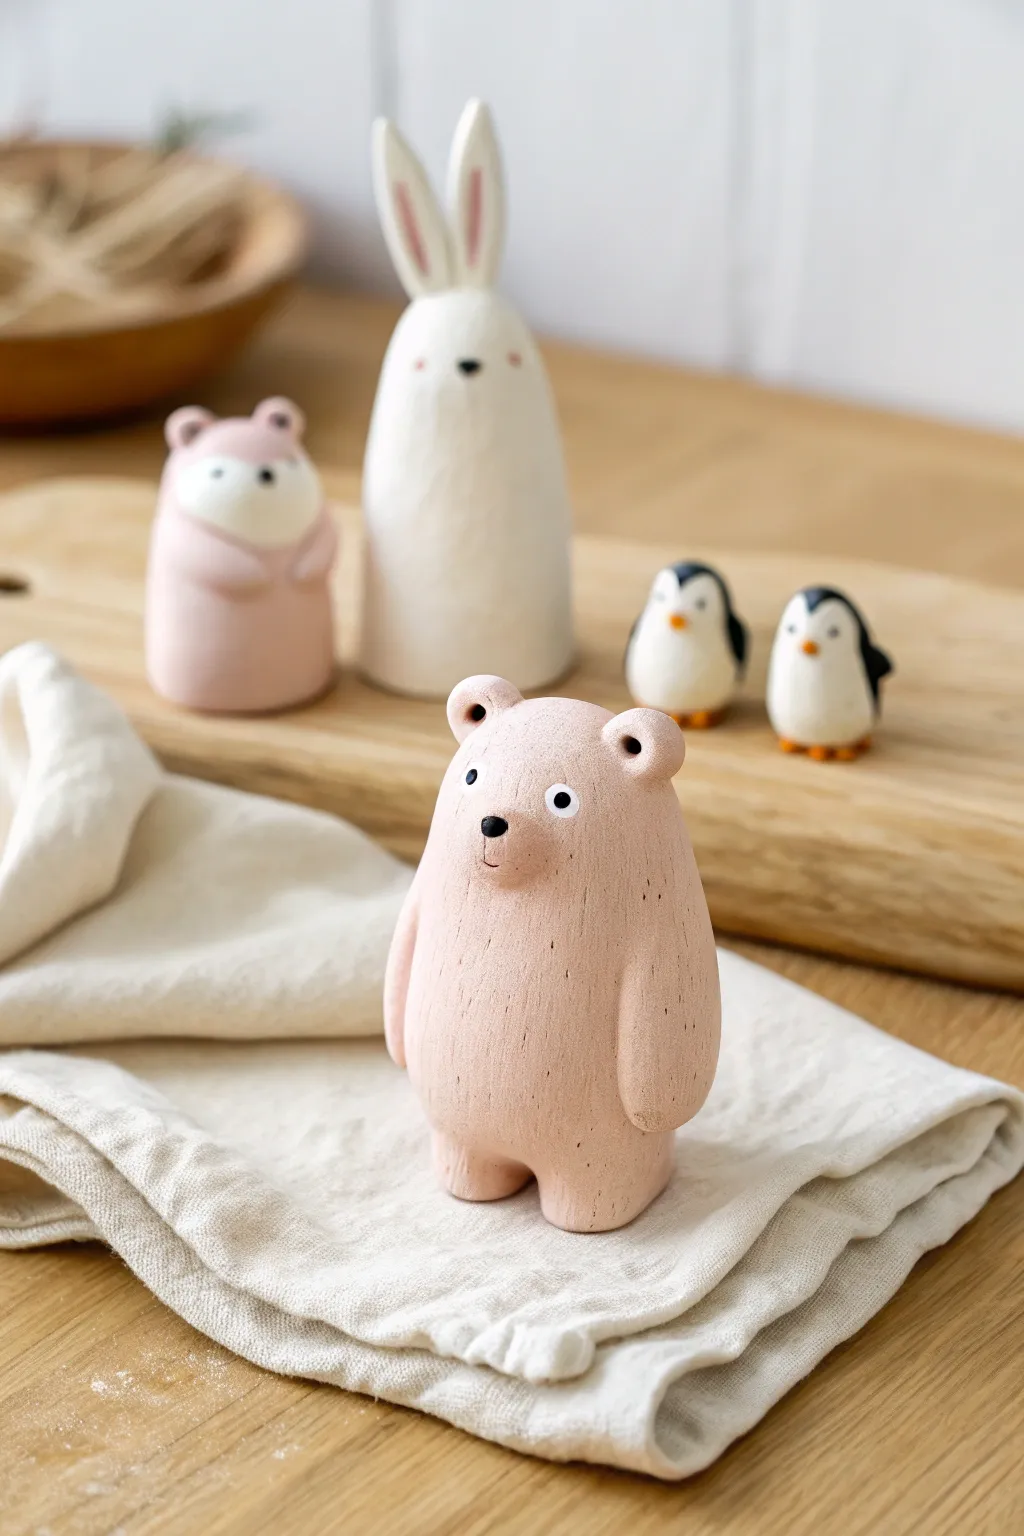
These charming, minimalist animal figurines are perfect for beginners working with super light air-dry clay. Their smooth, matte finish and simple shapes make them an approachable project that results in a delightful family of forest creatures.
Step-by-Step Tutorial
Materials
- Super light air-dry clay (white, pale pink, black, orange/yellow)
- Small sculpting tools (ball stylus, needle tool)
- Matte sealant or varnish (optional)
- Toothpicks (for internal structure)
- Clean work surface or silicone mat
Step 1: Sculpting the Pink Bear
-
Create the Body Base:
Start with a generous ball of pale pink clay. Roll it between your palms to smooth out any cracks, then gently shape it into an elongated egg shape, slightly flatter on the bottom so it stands upright on its own. -
Form the Legs:
Instead of adding separate legs, use your thumb or a rounded modeling tool to gently push up into the bottom center of the egg shape. This creates a subtle division representing two stubby legs while keeping the figure solid and stable. -
Add Arms to the Sides:
Roll two smaller sausage shapes of pink clay for the arms. Press them vertically against the sides of the body, blending the top seam by the shoulder into the main body so they look integrated rather than just stuck on. -
Shape the Ears:
Pinch off two tiny balls of pink clay. Press them gently onto the top of the head area. Use a medium ball stylus to create a small indentation in the center of each ear, which helps bond the clay and adds dimension. -
Face Details:
For the snout, add a tiny flattened oval of pink clay to the center of the face. Press a minuscule black clay ball onto the top of this snout for the nose. Use a needle tool to scratch a tiny vertical line below the nose for the mouth. -
Eyes and Texture:
Place two small white clay circles for eyes, topping them with tiny black dots for pupils. Finally, I like to use a needle tool to add very subtle vertical texture lines sporadically over the body to mimic fur texture.
Cracking Clay?
If you see tiny cracks forming while rolling, your clay might be too dry. Knead in a tiny drop of water or baby lotion to restore elasticity before shaping.
Step 2: Crafting the Tall White Rabbit
-
Shape the Tall Body:
Take a large portion of white clay and roll a tall cone shape with a rounded top. Smooth the bottom flat so it stands reliably. -
Elongated Ears:
Roll two long teardrop shapes for the ears. Flatten them slightly. If the clay is soft, you might need to insert short pieces of toothpick into the head to anchor these tall ears securely. -
Ear Details:
Mix a tiny amount of pink clay into white to get a very pale pink. Press thin strips of this into the center of the white ears for the inner ear detail. -
Minimalist Face:
Keeping it simple works best here. Add a tiny black triangle nose near the middle of the face and two small black dots for eyes. Add pink blush cheeks if desired.
Pro Tip: Seamless Blending
To attach limbs without visible seams, use a very small amount of water on your finger or a blending tool to smooth the clay edges together until they vanish.
Step 3: Making the Tiny Penguins
-
Body Composition:
Roll a small ball of white clay for the belly and a slightly larger, flattened piece of black clay. Wrap the black clay around the back and sides of the white ball to create the tuxedo look. -
Beak and Feet:
Use orange clay to make a tiny triangle beak and press it onto the face. Create two small flat orange ovals for feet and attach them underneath the body slightly poking out. -
Wings and Eyes:
Add small black teardrop shapes to the sides for wings. Finish with two wide-set black eyes on the white face area.
Let your little menagerie dry completely for 24 hours before moving them to their new display spot.


Super Light Clay Keychain Toppers
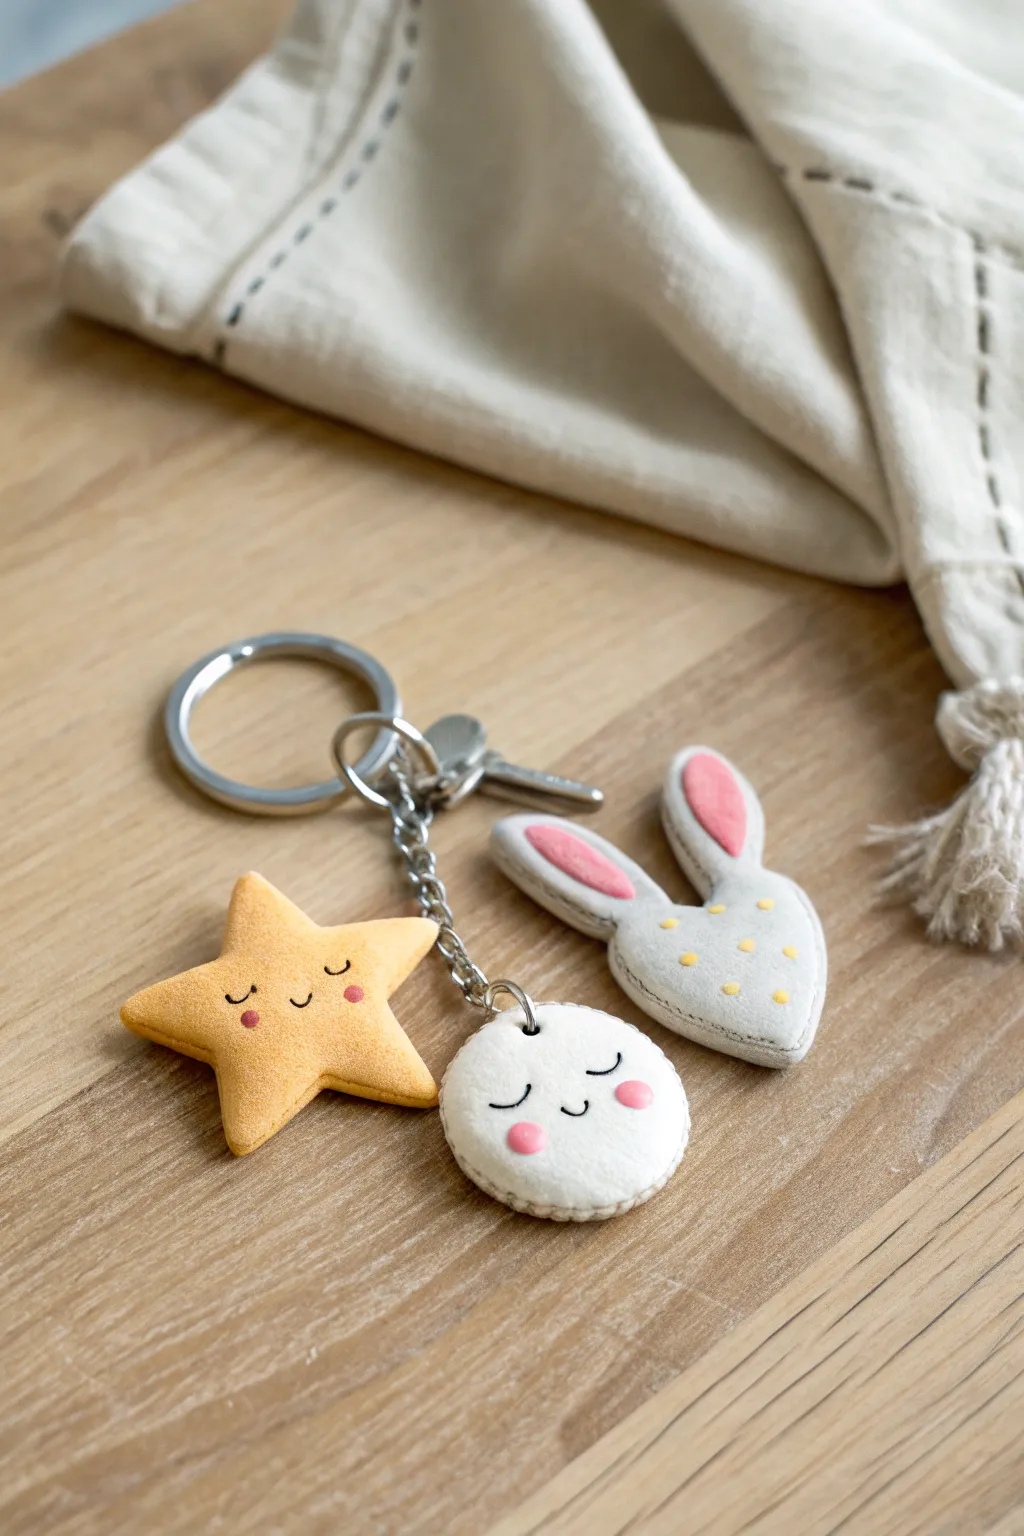
Create a whimsical set of keychain companions that captures the magic of a sleepy sky. These simplified, kawaii-style shapes—a star, a moon-like round face, and a sweet bunny—are perfect beginners’ projects using super light air-dry clay.
Step-by-Step Guide
Materials
- Super light air-dry clay (white, yellow, grey/pale blue, pink)
- Rolling pin or smooth round object
- Cookie cutters (star, circle, heart) or a craft knife
- Pointed sculpting tool or toothpick
- Black fine-tip marker or gel pen
- Eye pins (silver)
- Keychain ring and chain
- Jump rings
- Pies
- Strong craft glue (optional)
Step 1: Shaping the Star
-
Roll the base:
Start by conditioning a small ball of yellow clay until it is smooth and pliable. Roll it out to a thickness of about 5-6mm; you want it slightly puffy, not paper-thin. -
Cut the shape:
Use a small star-shaped cookie cutter to punch out your form. If you don’t have a cutter, print a small star template, place it over the clay, and trace around it carefully with a craft knife. -
Soften the edges:
Gently tap the edges of the star with your fingertip to round them off. This removes the sharp ‘cut’ look and gives it a softer, pillow-like appearance. -
Add the hardware:
While the clay is still wet, insert a silver eye pin into the top point of the star. Ensure it goes in straight and deep enough to be secure.
Step 2: Crafting the Round Face
-
Form the circle:
Take a portion of white clay and roll it into a sphere, then flatten it gently into a thick disc, similar to a macaron shell. -
Create texture:
Using a toothpick or a texture tool, gently indent a line around the circumference of the circle to mimic a seam or decorative edge. -
Secure the pin:
Just like with the star, carefully push an eye pin into the top center of the white circle.
Smoother Surfaces
Before drying, dip your finger in water and gently rub the clay surface. This erases fingerprints and creates that flawless, professional finish.
Step 3: Sculpting the Bunny Heart
-
Shape the head:
Mix a tiny amount of black clay into white to create a very pale grey, or use pre-mixed light grey clay. Shape this into a soft heart shape for the bunny’s face. -
Make the ears:
Roll two small logs of grey clay, tapering one end of each to a point. Flatten them slightly to form the ears. -
Add pink details:
Take two tiny pieces of pink clay, roll them into thin teardrops, and press them into the center of the grey ears for the inner ear detail. -
Assemble the bunny:
Attach the ears to the top lobes of the heart shape. You can use a tiny dab of water or slip if the clay isn’t sticking well on its own. -
Decorative dots:
Roll tiny distinct balls of yellow clay and press them gently onto the bunny’s face for a polka-dot effect. -
Insert hardware:
Insert the final eye pin between the bunny’s ears.
Loose Eye Pins?
If an eye pin feels loose after drying, pull it out, add a drop of super glue or strong craft glue to the stem, and reinsert it for a permanent hold.
Step 4: Finishing Touches
-
Drying time:
Allow all three charms to dry completely. This usually takes 24-48 hours depending on humidity; flip them halfway through to ensure even drying. -
Draw the faces:
Once fully hardened, use a fine-tip black marker to draw the sleepy eyes (two small crescents curving down) and a small smile on the star and round charm. -
Add rosy cheeks:
Mix a tiny bit of pink paint or use a pink marker to dab small, round cheeks onto the star and round face. I like to blend the edges slightly with a cotton swab for a soft look. -
Stitch details:
If you want to mimic the fabric look in the inspiration, use a thin grey marker to draw small dashed lines around the edges of the bunny shape. -
Assembly:
Use pliers to open split rings or jump rings. Attach each charm to the chain links of your main keyring.
Now you have a charming set of accessories ready to brighten up your keys or backpack


Super Light Clay Kawaii Face Magnets
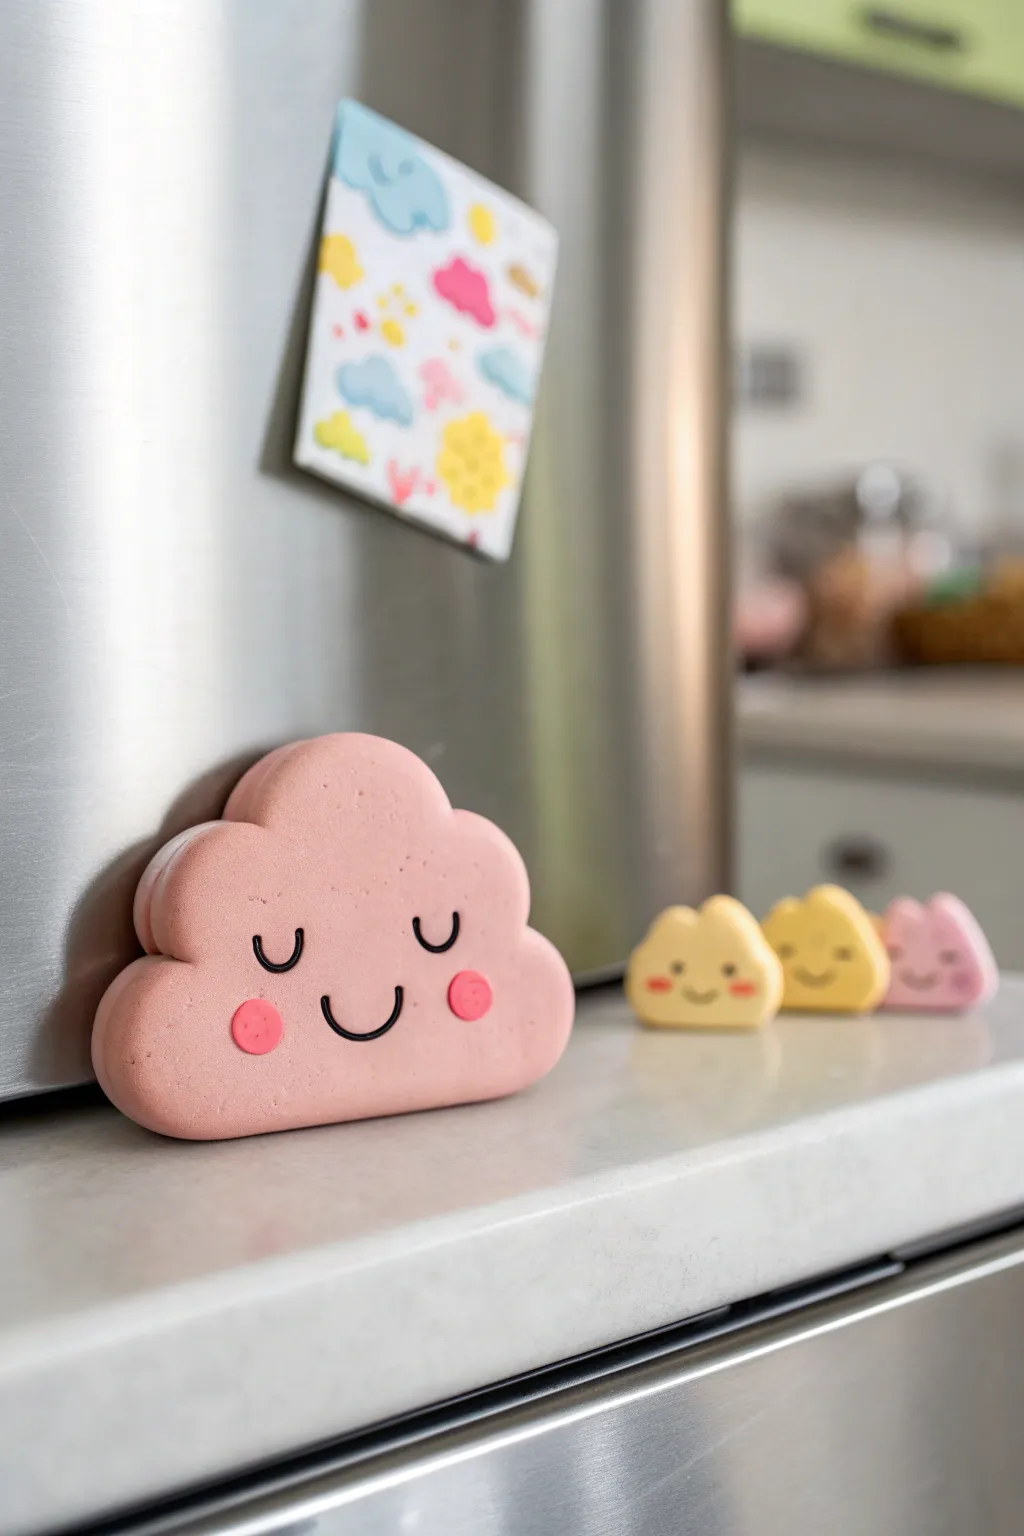
Bring a touch of sky-high cuteness to your kitchen with these pastel cloud magnets. Crafted from super light clay, these pillowy soft shapes feature sweet, sleeping expressions that add charm to any magnetic surface.
How-To Guide
Materials
- Super light clay (pastel pink, yellow, black)
- Strong craft magnets (round or rectangular)
- Clay rolling pin or acrylic roller
- Small round cutter or circle piping tip (for cheeks)
- Clay tools (needle tool, smooth modeling tool)
- Craft glue
- White gel pen (optional for highlights)
- Parchment paper or silicone mat
Step 1: Shaping the Base
-
Prepare the Clay:
Start by taking a generous amount of pastel pink super light clay. Knead it thoroughly between your fingers to warm it up, ensuring it’s smooth and free of any air bubbles. -
Roll the Slab:
Place the kneaded clay onto your parchment paper or silicone mat. Using your roller, flatten the clay into a slab that is roughly 1/2 inch thick; you want it chunky and pillowy. -
Form the Cloud:
You can either use a cloud-shaped cookie cutter or, for a more organic look, shape it by hand. To hand-shape, pinch the perimeter to create fluffy bumps—one large bump at the top and two or three smaller ones on the sides. -
Softening Edges:
Once the general outline is formed, use your finger or a smooth modeling tool to gently round over all the sharp edges. The goal is a seamless, puffy look, like a marshmallow. -
Embedding the Magnet:
Flip the cloud over to the back. Press your magnet firmly into the wet clay until it sits flush with the surface. If the clay feels dry, add a tiny dot of glue before pressing it in to ensure a permanent bond.
Step 2: Adding the Face
-
Roll Facial Features:
Take a tiny pinch of black clay—truly a minuscule amount. Roll it into an extremely thin snake, as thin as a thread. -
Cut Eye Segments:
Cut two small, equal lengths from your black thread. These will become the sleeping eyes. -
Shape the Eyes:
Curve the black threads into ‘U’ shapes. Carefully place them onto the center of the cloud face using a needle tool or tweezers to position them symmetrically. -
Create the Smile:
Cut a slightly longer piece of the black clay thread. Curve this into a wider smile shape and place it centrally just below the eyes. -
Secure the Expression:
Once you are happy with the placement, very gently press the black lines into the pink base so they adhere without flattening completely.
Clay Cracking?
If you see tiny cracks forming as you shape the cloud bumps, dip your finger in water and smooth them out immediately. Super light clay heals easily while wet.
Step 3: Finishing Touches
-
Make the Cheeks:
Switch to a slightly darker pink clay (or mix a little red into your base pink). Roll this out very thinly. -
Cut Cheek Circles:
Use a small circle cutter, a straw, or a round piping tip to punch out two identical circles. -
Attach Cheeks:
Place these pink circles on either side of the smile. Press them gently to bond them to the cloud face. -
Optional Highlights:
If you want extra sparkle, wait for the clay to surface-dry slightly, then dot a small white highlight on each cheek using a white gel pen. -
Final Smoothing:
Give the entire piece one last check. If you see fingerprints, lightly brush them away with a drop of water on your fingertip. -
Drying Time:
Let the magnet dry completely flat for at least 24 hours. I like to flip it over halfway through the drying process so the back hardens evenly around the magnet.
Make It Stormy
Create a whole weather set! Use grey clay for a storm cloud and attach small yellow clay lightning bolts dangling from the bottom on short strings.
Once dry, pop your cheerful cloud onto the fridge to brighten up your daily routine


Super Light Clay Mini Succulent Pots
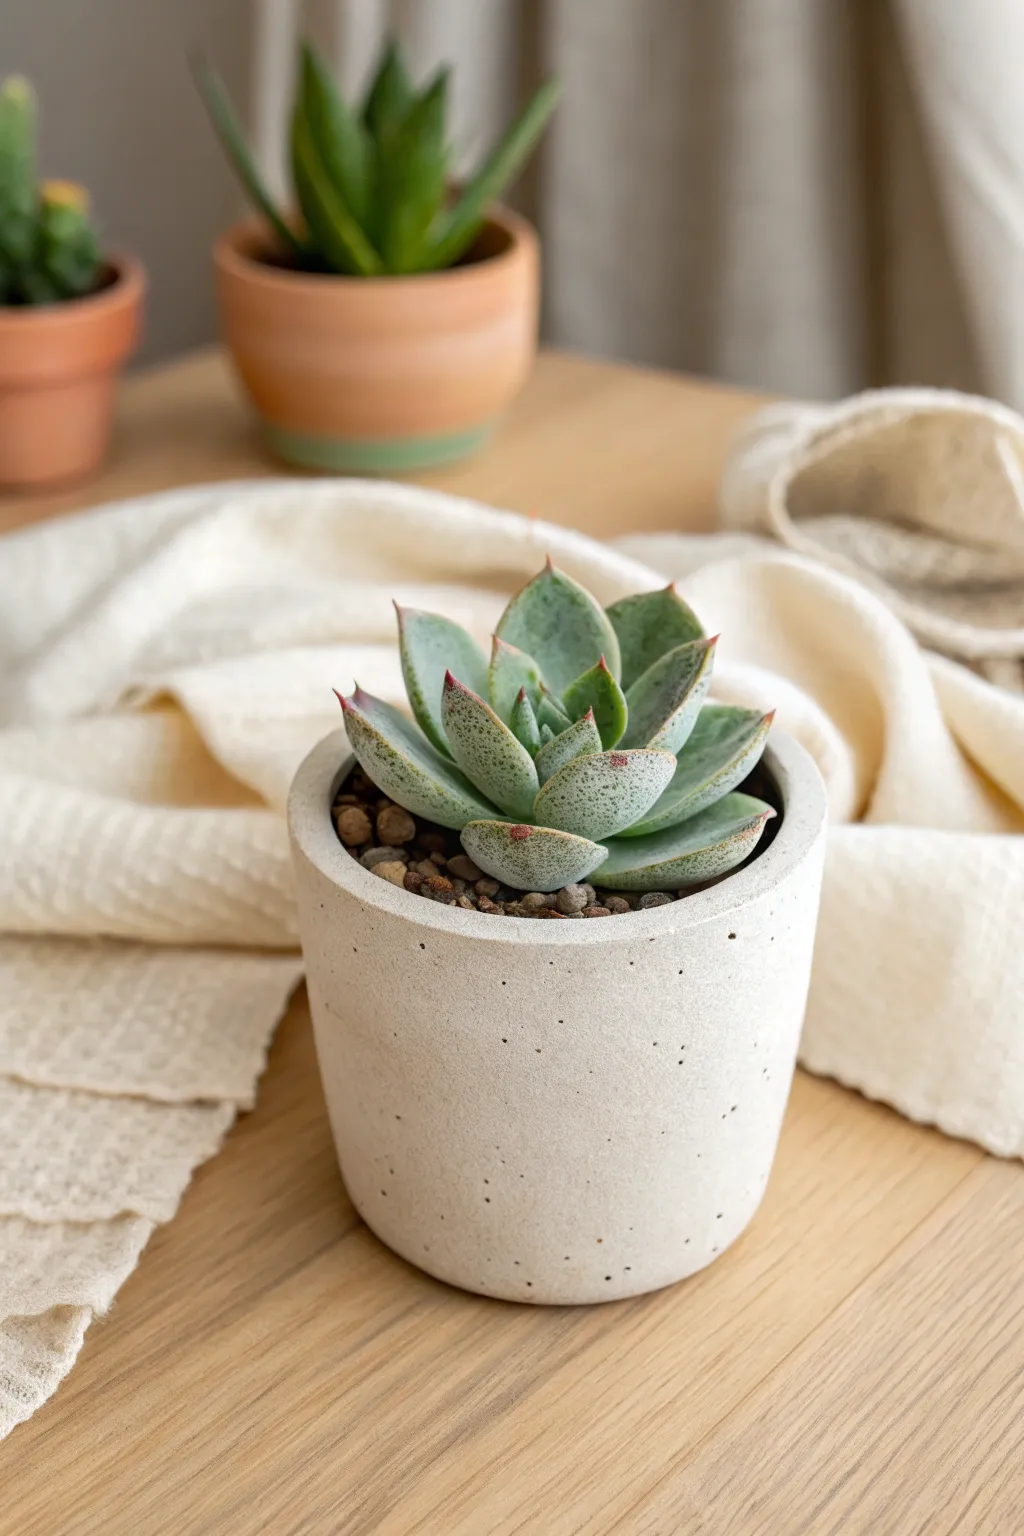
Create a remarkably realistic potted succulent that requires zero sunlight or water. By combining super light clay with simple texturing techniques, you’ll craft a minimalist stone-look vessel and a soft, powdery echeveria plant.
Step-by-Step
Materials
- Super light clay (white for the pot, pale green/blue for leaves)
- Acrylic rolling pin
- Small round cookie cutter or cup (for pot base)
- Toothbrush or crumpled foil (for texturing)
- Small scissors or craft knife
- Soft pastels (dark red/brown and darker green)
- Soft paintbrush
- Fine-grit sandpaper
- Small pebbles or extra brown clay (for soil)
Step 1: Crafting the Faux Concrete Pot
-
Prepare the clay base:
Start with a large ball of white super light clay. If you want a more authentic concrete grey tone, knead in a tiny speck of black clay until fully incorporated. -
Shape the vessel wall:
Roll the clay into a thick, flat strip about 1/4 inch thick. The height of the strip will determine the height of your pot. -
Create the base:
Roll out a separate circular piece of clay using your cutter. This will form the bottom of the pot. -
Assemble the cylinder:
Wrap the long strip around the circular base, pressing the edges together firmly. Smooth the vertical seam with a little water on your finger until it disappears completely. -
Apply concrete texture:
While the clay is still damp, gently press a clean toothbrush or a ball of crumpled aluminum foil all over the exterior surface. Do this lightly to create a porous, stone-like texture without deforming the shape. -
Refine the rim:
Use your fingers to blunt the top edge of the pot so it isn’t sharp; concrete pots usually have a slightly rounded or flat, thick rim.
Collapsing Walls?
If your pot walls sag while drying, insert a cardboard tube or toilet paper roll wrapped in parchment paper inside the pot to support the shape while it hardens.
Step 2: Creating the Echeveria Succulent
-
Mix the leaf color:
Take white clay and mix in a very small amount of green and a tiny dot of blue to achieve that distinctive pale, sea-foam succulent shade. -
Form the leaf teardrops:
Roll about 15-20 small teardrop shapes in varying sizes. You will need smaller ones for the center and larger, broader ones for the outer layers. -
Flatten and shape:
Gently flatten each teardrop between your thumb and forefinger. Pinch the pointed tip slightly to give it that characteristic sharp succulent end. -
Curve the leaves:
Press your thumb into the center of each flattened leaf to give it a slight cup shape, curving the edges upward. -
Add pastel shading:
Before assembling, scrape a little distinct red or reddish-brown soft pastel into a powder. Use a dry brush to dust just the very tips of the leaves to mimic sun-stress coloration. -
Construct the rosette center:
Start with the smallest 3 leaves. Press their bases together in a tight cluster, tips facing up. -
Add middle layers:
Attach the medium-sized leaves around the center cluster, slightly overlapping them. I find it helpful to place them in the gaps between the previous row’s leaves. -
Finish with outer leaves:
Attach the largest leaves at the bottom, angling them slightly more open and flat to create the full rosette shape.
Step 3: Final Assembly
-
Fill the pot:
Fill the bottom half of your dried pot with scrap clay or foil to save material. Top it with a layer of brown clay textured to look like soil. -
Plant the succulent:
Press your assembled clay succulent firmly into the ‘soil’ center. Ensure it sits securely. -
Add top dressing:
Sprinkle tiny real pebbles or roll tiny balls of brown and grey clay to act as decorative gravel around the base of the plant. -
Final speckling:
To enhance the ‘concrete’ realism, dip an old toothbrush in watered-down grey acrylic paint and flick tiny specks onto the white pot.
Textural Depth
Mix actual fine sand into your white clay before shaping the pot. It adds genuine grit and sparkle that mimics stone perfectly once dried.
Place your everlasting succulent on a sunny windowsill or desk for a touch of greenery that never fades.

The Complete Guide to Pottery Troubleshooting
Uncover the most common ceramic mistakes—from cracking clay to failed glazes—and learn how to fix them fast.
Super Light Clay Pencil Topper Characters
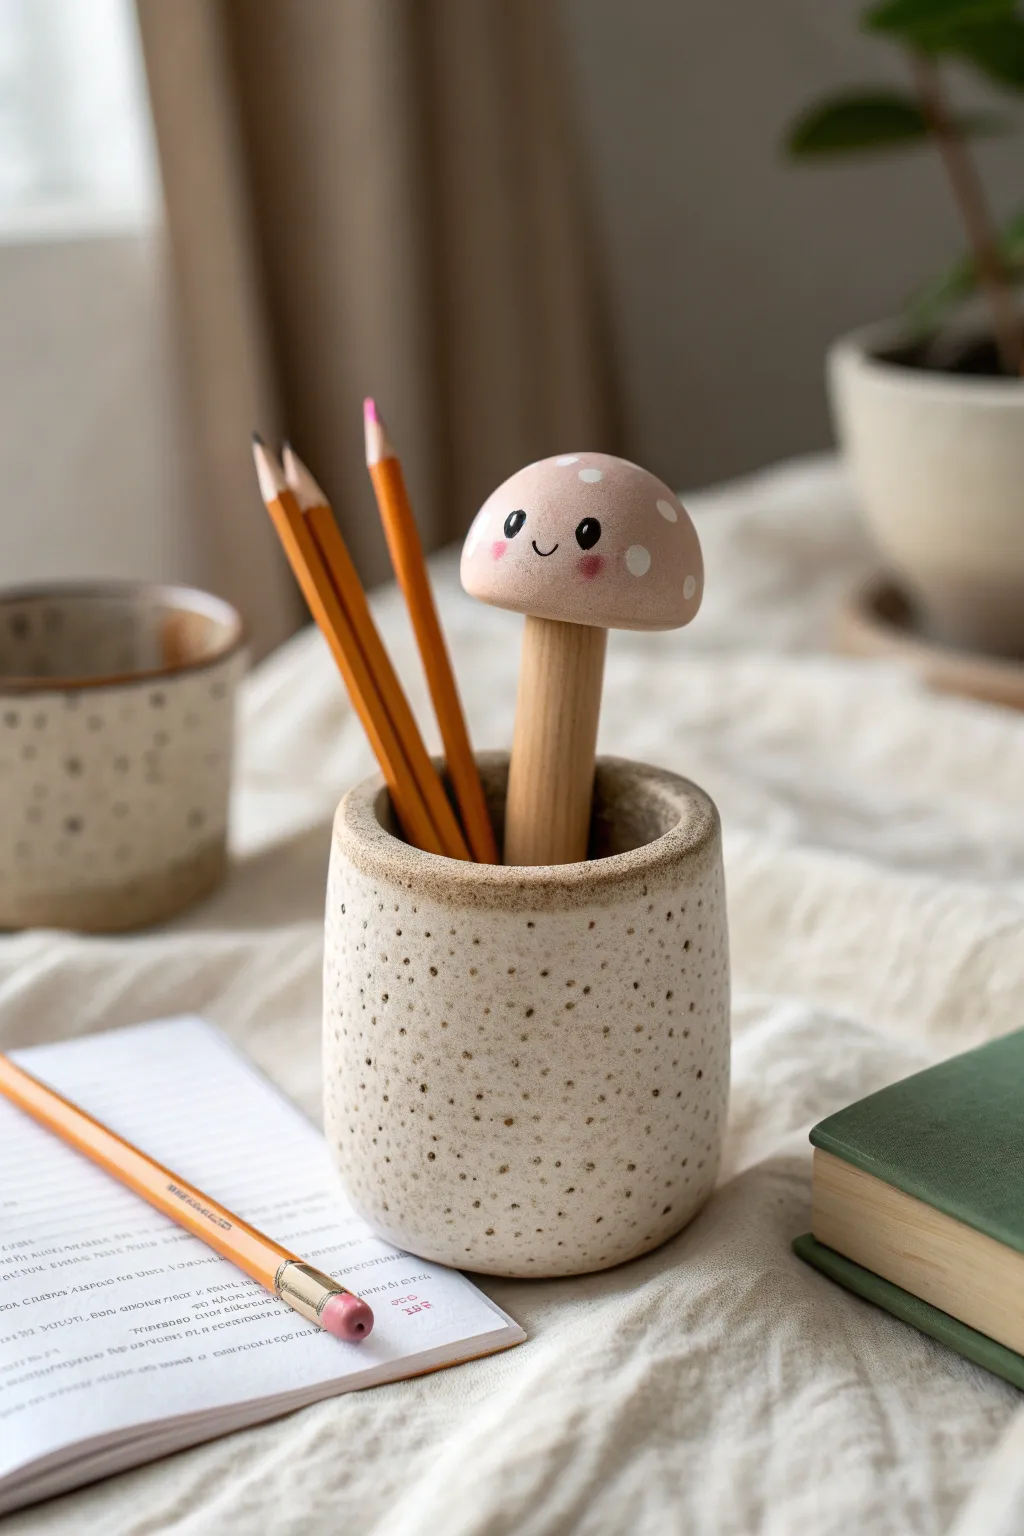
Brighten up your desk with this adorable mushroom character perched atop a wooden dowel or pencil. With its blushing cheeks and simple dotted cap, this super light clay project brings a touch of woodland whimsy to your workspace.
Step-by-Step Tutorial
Materials
- Super light clay (pale pink)
- Super light clay (white)
- Wooden dowel or unsharpened pencil (natural wood finish)
- Acrylic paint (black and pink)
- Fine detail paintbrush or dotting tool
- Strong craft glue or hot glue
- Clean work surface (silicone mat recommended)
Step 1: Shaping the Cap
-
Prepare the clay:
Take a walnut-sized amount of pale pink super light clay. Knead it gently in your hands until it feels soft, pliable, and free of any cracks. -
Form a ball:
Roll the clay between your palms to create a perfectly smooth sphere. Spending an extra moment here ensures a seamless finish later. -
Flatten the base:
Place the sphere on your work surface and gently press down to flatten the bottom, creating a hemisphere or dome shape. -
Refine the curve:
Pick up the dome and smooth the edges with your thumb, rounding out the top so it looks like a classic mushroom cap. -
Create the connection point:
Use the end of your wooden dowel or pencil to press an indentation into the center of the flat bottom of the cap. Twist it slightly to make enough room for the wood to fit snugly later.
Step 2: Adding Details
-
Mix the colors:
If you don’t have pre-colored light pink clay, mix a tiny dot of red or pink clay into a larger ball of white clay until the color is uniform. -
Make the dots:
Take a very small amount of white clay and roll it into tiny, rice-sized balls. You will need about 5-7 of these. -
Flatten the dots:
Press each tiny white ball flat between your fingers to create thin, circular wafers. -
Apply the pattern:
Gently press the white circles onto the pink cap. Place them randomly, letting some sit near the top and others near the rim for a natural look. -
Smooth the surface:
Lightly roll the entire cap between your palms again. This embeds the white dots into the pink clay so they lay flush with the surface rather than sticking out.
Clay Won’t Stick?
If the white dots keep falling off the pink cap, lightly dab the back of the dot with a damp finger or a tiny drop of water before pressing it down. This acts as a slip to bond the clay layers.
Step 3: Assembly and Painting
-
Attach the stem:
Place a small drop of craft glue into the indentation you made earlier. Insert the wooden dowel or pencil firmly. -
Let it cure:
Allow the clay to dry completely. Super light clay usually takes 24 hours to fully air dry, though the surface will feel dry sooner. -
Paint the eyes:
Using a fine detail brush or a toothpick dipped in black acrylic paint, create two small oval eyes slightly wide-set on the cap. -
Add the smile:
Paint a tiny, shallow ‘U’ shape between the eyes for a sweet, subtle smile. -
Add eye highlights:
Once the black paint is dry, use a pin or the very tip of a brush to add a microscopic white dot to the top corner of each black eye. -
Blush the cheeks:
Dilute a tiny bit of pink paint with water or use a dry-brush technique to dab soft, rosy cheeks just below the eyes.
Make a Forest Family
Make a whole set by varying the cap shapes—try a tall, skinny cap or a wide, flat one. You can also swap colors to make a classic red toadstool or a fantasy blue mushroom.
Now you have a cheerful companion ready to help with your next writing session
Super Light Clay Photo Holder Pebbles
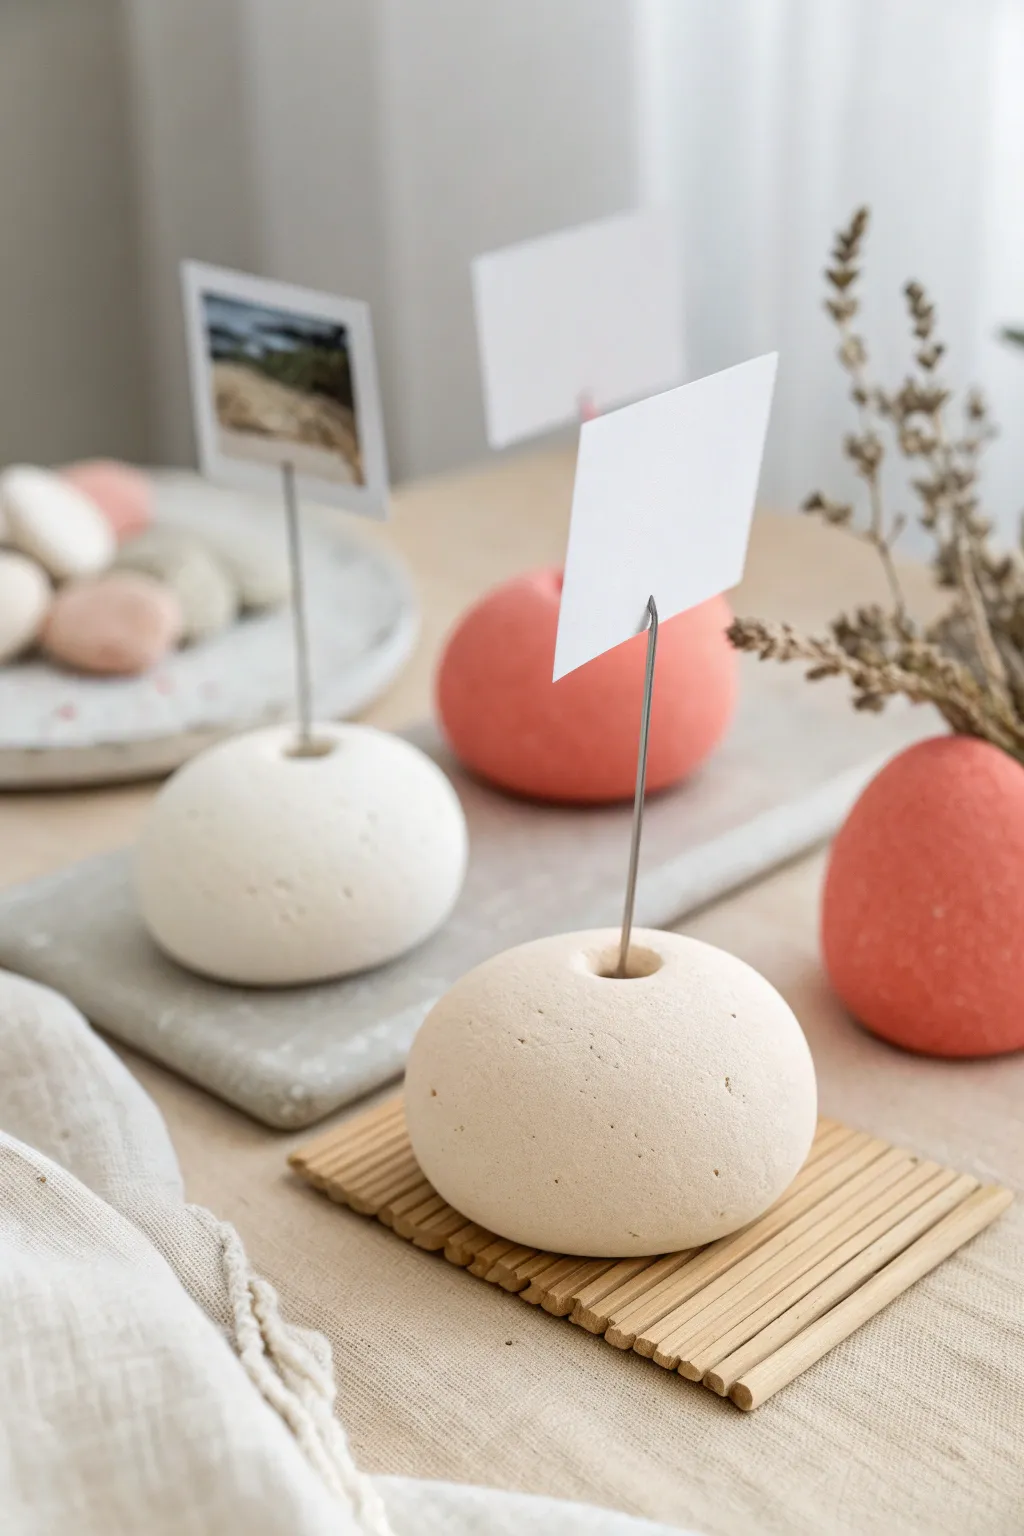
These charming photo holders mimic the organic look and feel of smooth river stones, adding a minimalist, nature-inspired touch to your desk or mantel. Made from super light clay, they are surprisingly airy and easy to shape, perfect for displaying your favorite polaroids or place cards.
Step-by-Step Guide
Materials
- Super light air-dry clay (white)
- Acrylic paint (burnt sienna, coral, or terra cotta for colored stones)
- Thick crafting wire or memo clip holders
- Wire cutters
- Needle nose pliers
- An old toothbrush or stippling sponge
- Fine-grit sandpaper (optional)
- Clear matte varnish (optional)
Step 1: Preparing the Clay
-
Portioning:
Start by grabbing a handful of white super light clay. You want a ball roughly the size of a tangerine for a stable base. -
Tinting (Optional):
If you want to create the coral or terra cotta colored pebbles seen in the background, mix a very small drop of acrylic paint into your white clay now. Knead it thoroughly until the color is completely uniform and streak-free. -
Conditioning:
Knead the clay in your hands for a minute or two. The warmth of your palms helps make the texture pliable and smooths out any initial cracks.
Step 2: Shaping the Pebble
-
Forming a Ball:
Roll the clay firmly between your palms to create a smooth, tight sphere. -
Flattening the Base:
Place the sphere on your work surface and gently press down on the top with the palm of your hand. You want to flatten the bottom so it sits stable without wobbling, while keeping a nice rounded dome on top. -
Refining the Shape:
Use your fingers to gently smooth out the sides. Real pebbles aren’t perfectly symmetrical, so don’t worry if it’s slightly lopsided—that adds to the natural charm.
Wire Wobble Fix
If the wire feels loose after the clay dries, pull it out, add a drop of superglue to the end, and reinsert it. This locks it permanently in place.
Step 3: Adding Texture and Hardware
-
Texturing:
To get that realistic gritty stone look, take an old toothbrush or a stiff stippling sponge and gently tap it all over the surface of the clay. This removes the artificial smoothness of the clay. -
Adding Imperfections:
For extra realism, poke a few tiny, shallow holes with a toothpick or needle tool to mimic natural pitting found in rocks. -
Cutting the Wire:
Cut a piece of crafting wire to your desired height, usually about 3-4 inches long. -
Creating the Clip:
Using needle nose pliers, curl one end of the wire into a double loop or spiral. This is where the photo will slide in. Alternatively, you can buy pre-made memo clips to skip this step. -
Inserting the Wire:
Push the straight end of the wire directly into the center of your clay pebble. Insert it deep enough (at least halfway down) so it won’t topple over when holding a photo. -
Securing the Wire:
Gently pinch the clay around the entry point of the wire to close any gaps and ensure a tight hold.
Weight Hack
Super light clay is very airy. To keep holders stable in a draft, hide a coin or small flat rock inside the bottom of the clay ball while shaping it.
Step 4: Finishing Touches
-
Drying:
Set your pebbles aside in a dry, airy spot. Super light clay can take 24-48 hours to fully cure depending on the thickness. -
Checking Stability:
Once the outer shell feels dry (after a few hours), check that the wire is still standing straight. Adjust carefully if needed before the core hardens. -
Sanding (Optional):
If you have any sharp ridges or fingerprints after drying, lightly go over the surface with fine-grit sandpaper. -
Sealing (Optional):
For durability, apply a coat of clear matte varnish. Avoid glossy finishes if you want to maintain the natural stone appearance.
Place your finished pebbles on a wooden mat or tray to complete the serene, handcrafted vignette


What Really Happens Inside the Kiln
Learn how time and temperature work together inside the kiln to transform clay into durable ceramic.
Super Light Clay Trinket Pinch Bowls
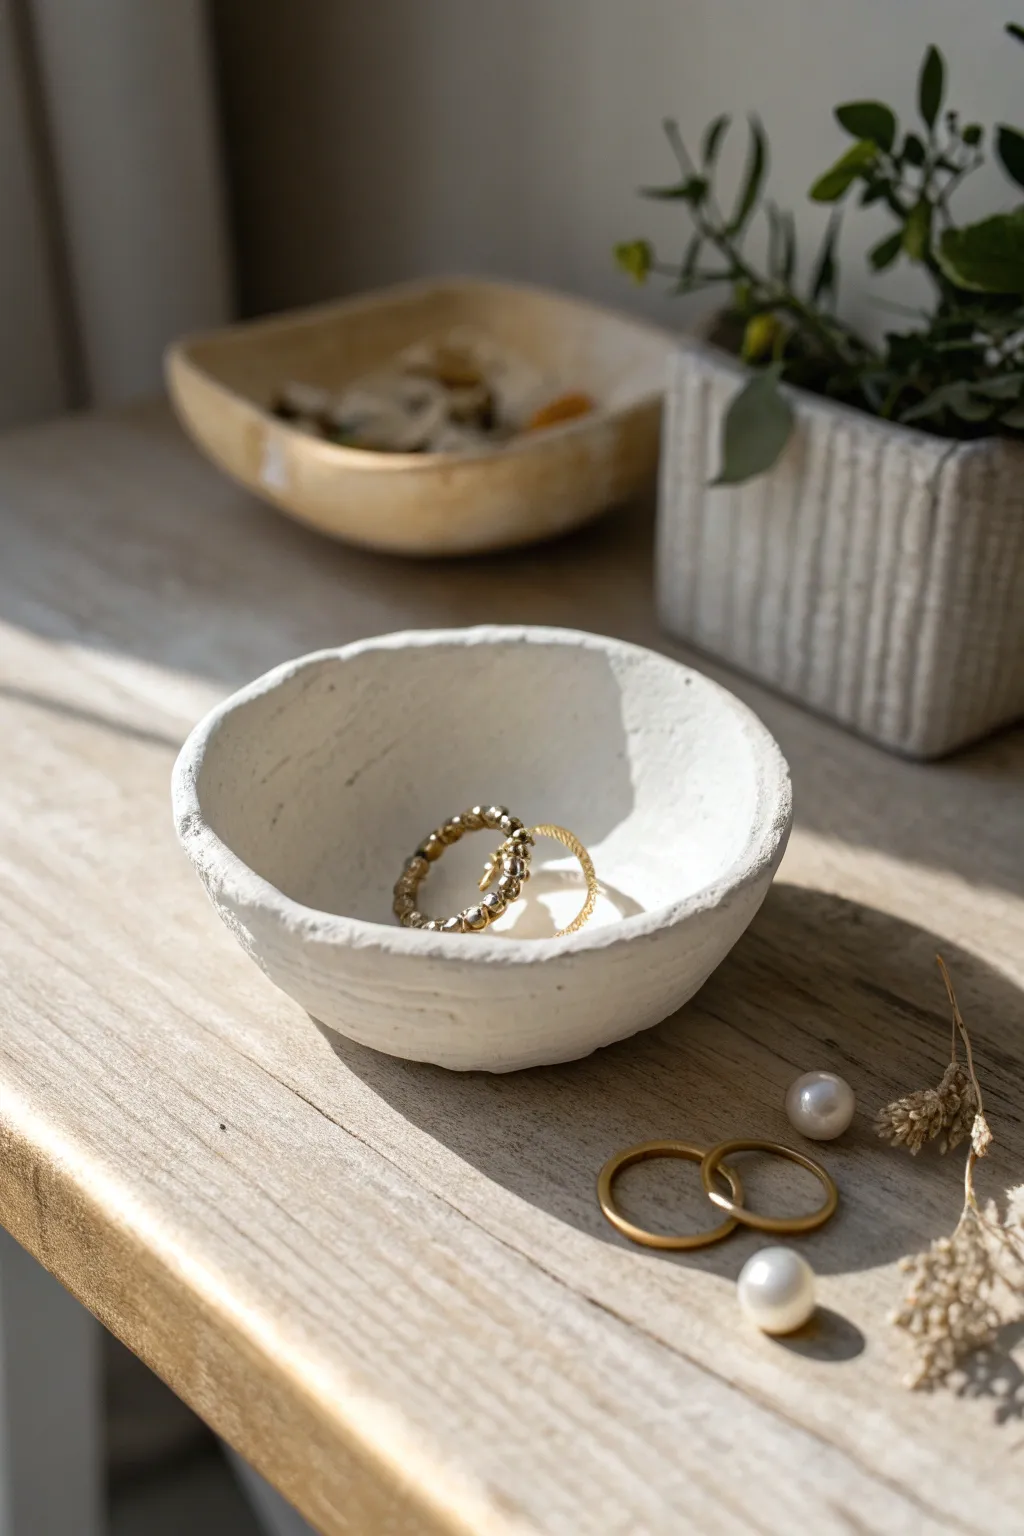
Embrace the imperfect beauty of handcrafted pottery without a kiln using this super light clay project. This petite trinket dish features a raw, organic texture and a matte white finish that looks surprisingly high-end.
Step-by-Step Tutorial
Materials
- White super light clay (air-dry)
- Small bowl of water
- Sponge or textured fabric scrap
- Rolling pin or smooth glass jar
- Sandpaper (fine grit)
- White acrylic paint (optional, for a seal)
- Matte varnish (optional)
Step 1: Shaping the Base
-
Condition the clay:
Start by taking a lump of super light clay about the size of a golf ball. Knead it in your hands for a minute to warm it up and ensure it’s pliable and free of air bubbles. -
Create a sphere:
Roll the clay between your palms until you have a smooth, round ball. Try to smooth out any major creases now, as they are harder to fix later. -
Begin the pinch potting:
Hold the sphere in one hand and gently press your thumb into the center, stopping about a half-inch from the bottom. This indention will be the interior of your bowl. -
Pinched walls:
Using your thumb on the inside and fingers on the outside, gently pinch and rotate the clay. Move slowly around the circumference, thinning the walls as you go. -
Even thickness:
Aim for a consistent thickness of about 1/4 inch throughout the walls. Don’t worry about being perfectly symmetrical; the organic look is part of the charm. -
Flatten the bottom:
Once the general shape is formed, gently tap the bottom of the bowl on your work surface to create a flat base so it sits stable.
Natural Texture Hack
Press a crumpled ball of aluminum foil gently against the drying clay exterior. This creates realistic rocky pitting instantly without tools.
Step 2: Texturing and Refining
-
The lip edge:
The bowl in the reference has an uneven, slightly jagged rim. Instead of smoothing the top edge perfectly, lightly pinch it here and there to create subtle waves. -
Adding texture:
Take a slightly damp sponge or a piece of coarse fabric and dab it against the exterior walls. This removes the fingerprints and adds that stone-like, matte texture. -
Creating horizontal lines:
If you want to mimic the subtle horizontal grooves seen in the image, lightly drag a fingernail or a dull tool around the outside circumference. -
Refining the inside:
Smooth the interior with a drop of water on your finger. I find that a perfectly smooth inside contrasts beautifully with a rougher exterior. -
Final shaping check:
Look at the bowl from all angles. If it has slumped, gently push the walls back up. Super light clay is forgiving and holds its shape well once positioned.
Gilded Edges
Mix gold mica powder with a tiny bit of varnish and paint just the very rim of the bowl for a subtle, luxurious finish.
Step 3: Drying and Finishing
-
Air drying:
Set the bowl aside in a dry, room-temperature spot. Let it dry completely for 24 to 48 hours. Flip it over halfway through the process to ensure the bottom dries evenly. -
Sanding imperfections:
Once fully rigid, you can use fine-grit sandpaper to gently knock back any sharp points on the rim that feel too jagged, though keeping some roughness preserves the style. -
Optional painting:
The clay itself is white, but for a more unified, chalky look like the photo, apply a thin coat of white acrylic paint. -
Sealing the surface:
Since super light clay can remain slightly spongy or porous, applying a matte varnish is a good idea if you plan to store metal jewelry in it. -
Final cure:
Allow any paint or varnish to cure fully before placing your rings inside. Your minimalist vessel is now ready.
Place your favorite rings inside and enjoy the simple elegance of your handmade creation
Super Light Clay Lightweight Ornaments
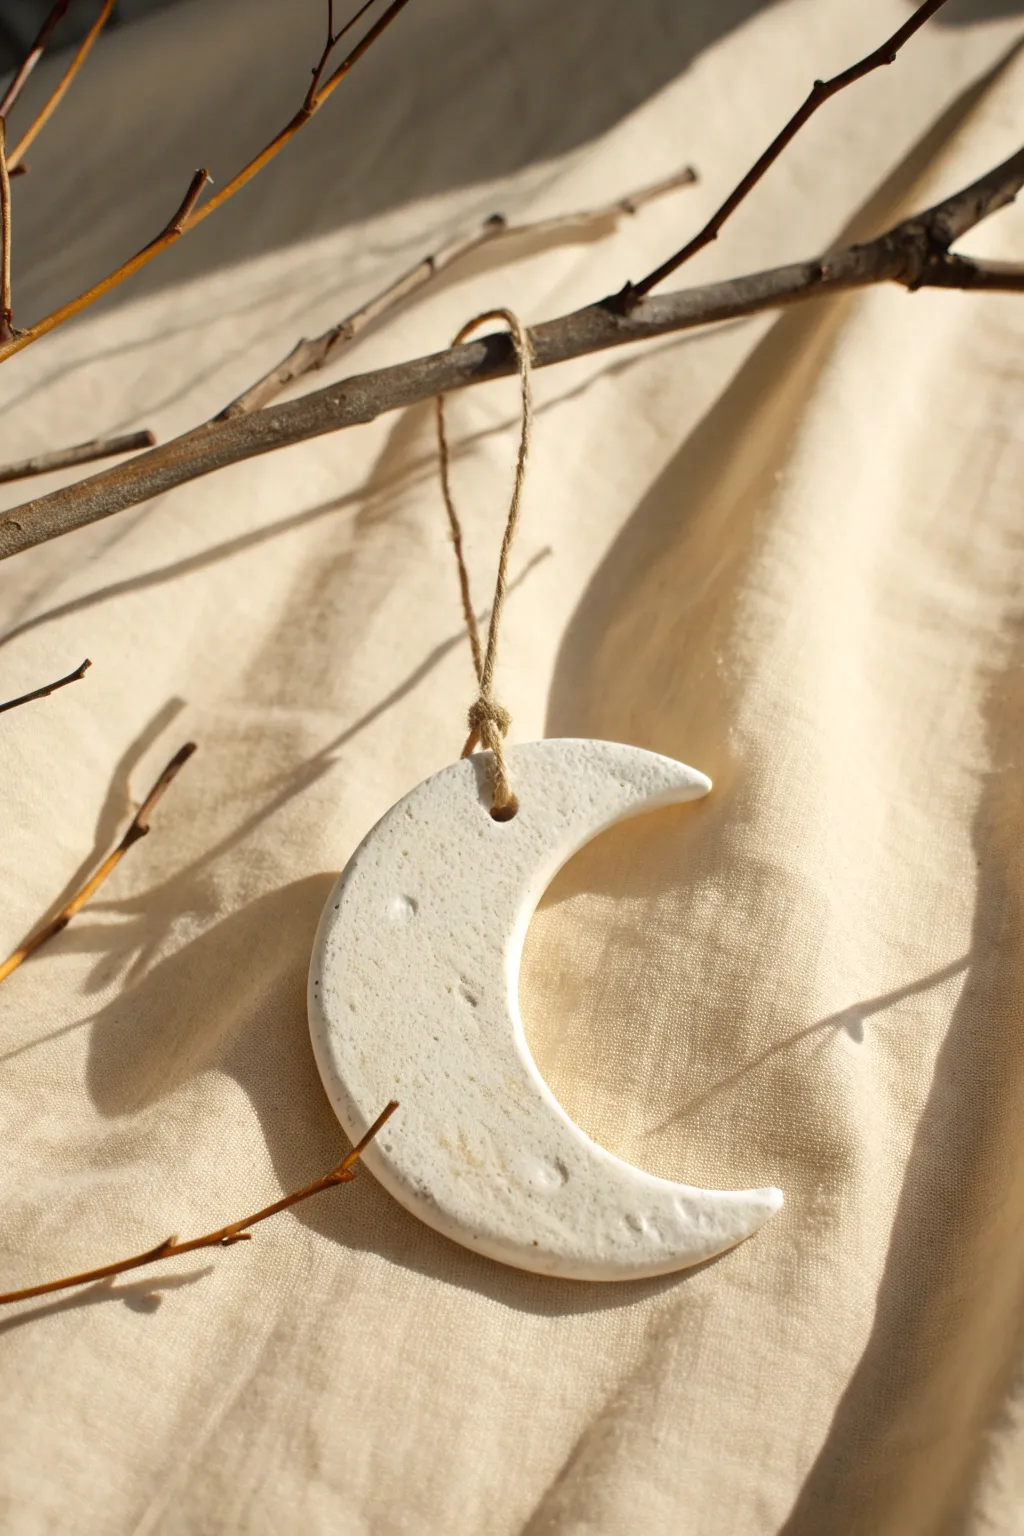
Capture the magic of the night sky with this minimalist crescent moon ornament, perfect for adding a touch of celestial charm to your decor. Crafted from super light clay, it mimics the look of textured stoneware without the weight, making it ideal for delicate branches.
Step-by-Step
Materials
- Super light air-dry clay (white)
- Rolling pin or smooth glass jar
- Circle cutter (cookie cutter or glass rim)
- Smaller circle cutter (or small jar)
- Fine-grit sandpaper
- Wooden skewer or toothpick
- Jute twine or hemp cord
- Stiff-bristled toothbrush or crumpled foil (for texturing)
- Parchment paper
Step 1: Shaping the Base
-
Prepare the Clay:
Start by taking a handful of white super light clay and kneading it gently in your hands to warm it up and ensure it is pliable and smooth. -
Roll it Out:
Place the clay on a sheet of parchment paper to prevent sticking. Use a rolling pin to flatten the clay into an even slab, aiming for a thickness of about 1/4 inch (6mm). -
Cut the Outer Circle:
Using your larger circle cutter or the rim of a drinking glass, press firmly into the clay to cut out a perfect circle. -
Remove Excess Clay:
Peel away the excess clay from around the circle and set it aside for future use, keeping the circle centered on your parchment. -
Create the Crescent:
Place your smaller circle cutter over the clay round, offsetting it to the side to create a crescent moon shape. Press down to cut. -
Separate the Shapes:
Gently remove the smaller inner circle piece. You should now have a distinct crescent shape remaining on the paper. -
Smooth the Edges:
Dip your finger in a tiny bit of water and run it along the sharp cut edges of the moon to soften and round them slightly for a more organic look.
Too Puffy?
If your clay puffs up and loses the crater definition while drying, simply press the texturing tools into it again while it’s in the ‘leathery’ semi-dry stage.
Step 2: Texturing and Refining
-
Add Stony Texture:
To give the moon that realistic, porous stone appearance, take a stiff toothbrush or a ball of crumpled aluminum foil and gently tap it all over the surface of the moist clay. -
Create Craters:
For a bit more detail, use the rounded end of a paintbrush handle or a small sculpting tool to press a few larger, shallow indentations into the surface, mimicking moon craters. -
Make the Hanging Hole:
Using a wooden skewer, pierce a hole near the top center of the crescent shape. Make sure the hole is wide enough to accommodate your twine later, swirling the skewer slightly to enlarge it. -
Check the Back:
Carefully lift the moon to check the back side. Since the texture pressing might have flattened it, quickly gently tap the texture tool on the back as well if desired. -
Initial Drying:
Let the clay sit on the parchment paper in a safe, dry spot. Super light clay can start to set quickly on the outside. -
Flip for Even Drying:
After about an hour, carefully flip the moon over to allow the bottom side to breathe and dry evenly, preventing curling. -
Full Cure:
Leave the ornament to dry completely for at least 24 hours. It will feel incredibly light and somewhat foam-like when fully cured.
Step 3: Finishing Touches
-
Sand Imperfections:
Once fully dry, check the edges for any rough spot or burrs. Gently smooth these away with fine-grit sandpaper if necessary. -
Prepare the Twine:
Cut a length of jute twine, approximately 8-10 inches long. -
Looping the Cord:
Fold the twine in half to create a loop, and thread the folded end through the hole in the moon from front to back. -
Secure the Knot:
Pass the loose ends of the twine through the loop you just pushed through the hole (a lark’s head knot) or simply tie a secure knot at the base of the hole. -
Tie the Loop:
Bring the two loose ends of the twine together at the top and tie a simple overhand knot to create the hanger.
Speckled Stone Effect
Knead a tiny pinch of black pepper or dried used coffee grounds into the white clay before rolling to create an authentic, speckled mineral look instantly.
Now hang your celestial creation on a decorative branch or by a window to enjoy its serene vibe

TRACK YOUR CERAMIC JOURNEY
Capture glaze tests, firing details, and creative progress—all in one simple printable. Make your projects easier to repeat and improve.
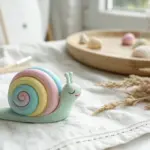
Super Light Clay Mini Rainbow Arches
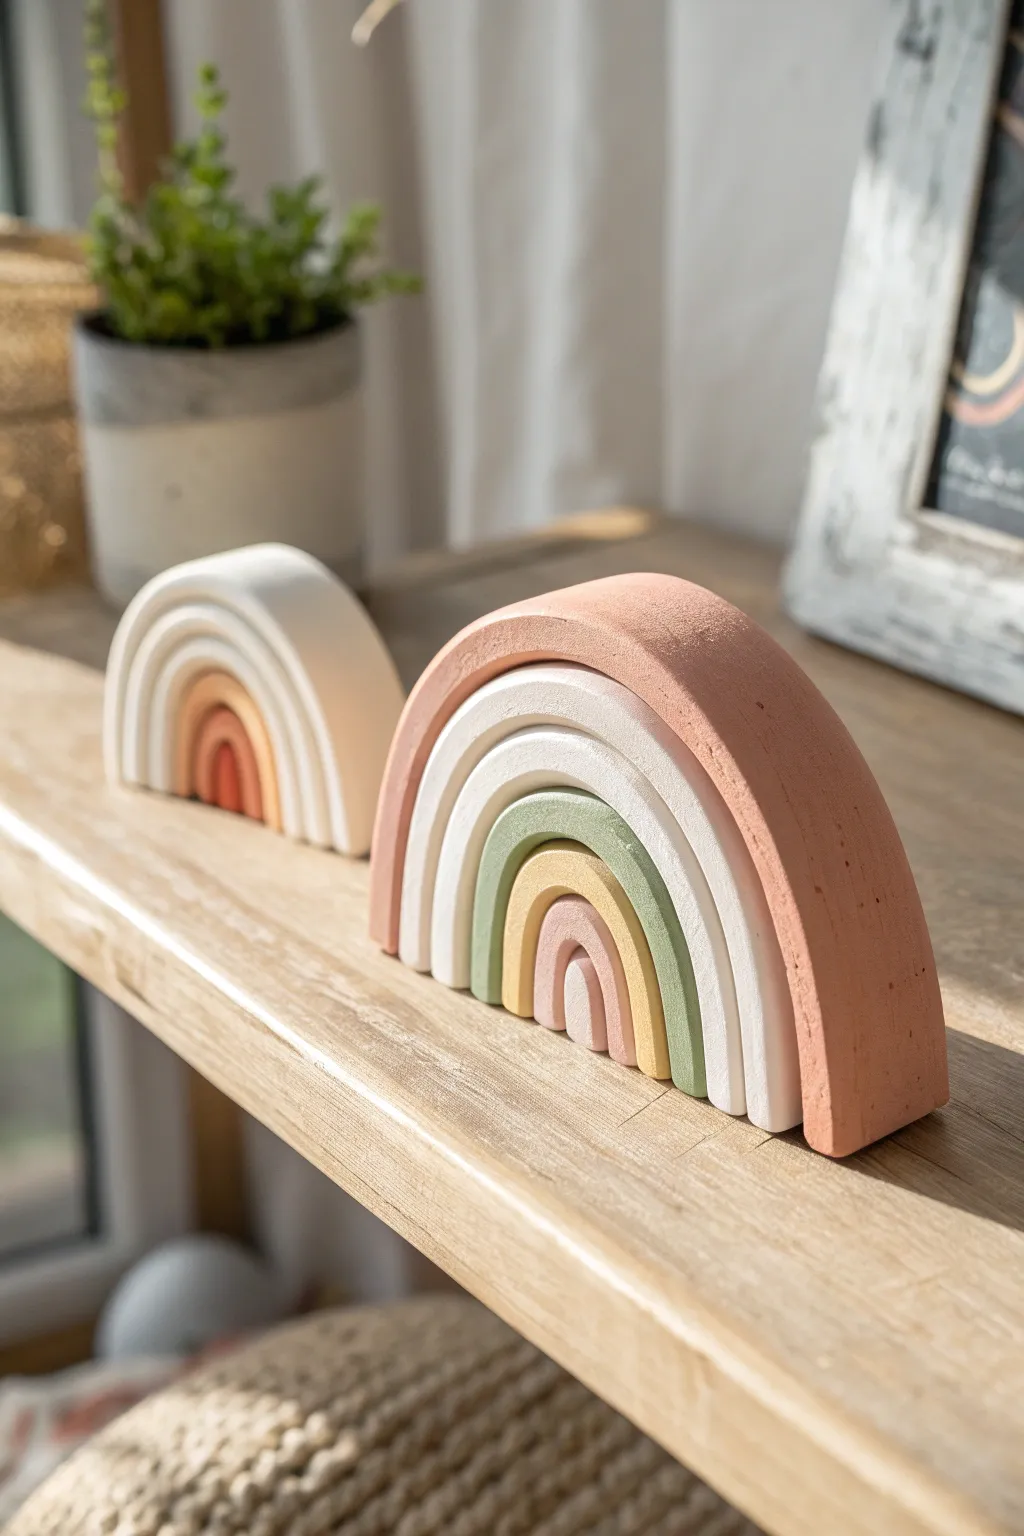
Create these minimalist, boho-inspired rainbow arches that add a touch of calm to any nursery or shelf. Made from super light clay, they feature a lovely matte finish and muted, earthy tones that look expensive but are surprisingly simple to craft.
How-To Guide
Materials
- Super light air-dry clay (white)
- Acrylic paints (terracotta, sage green, mustard yellow, dusty pink, white)
- Rolling pin
- Sharp knife or clay cutting tool
- Ruler
- Fine-grit sandpaper (optional)
- Parchment paper or silicone mat
- Small bowl of water
Step 1: Mixing and Tinting
-
Prepare your palette:
Begin by deciding on your color palette. For the foreground rainbow, you will need five distinct colors: terracotta, a creamy off-white, sage green, mustard yellow, and dusty pink. -
Tint the clay:
Take a large handful of white super light clay. Add a very small drop of terracotta acrylic paint into the center. Knead the clay thoroughly until the color is uniform. Repeat this process for the green, yellow, pink, and off-white bands, creating separate balls of colored clay for each. -
Adjust the saturation:
If the colors are too bright, knead in more white clay to mute them down. The goal is a soft, chalky pastel look rather than vibrant primary colors.
Clean Cuts Pro Tip
For ultra-clean edges when trimming the bottom, let the clay dry for about 30 minutes first. It becomes slightly firmer and drags less against the knife blade.
Step 2: Shaping the Arches
-
Roll the outer band:
Start with your largest color (terracotta). Roll the clay into a long, even snake or log shape. Aim for a thickness of about 3/4 inch to ensure the rainbow stands up stably. -
Form the first arch:
Curve the terracotta log into a clean U-shape on your parchment paper. Use your ruler to flatten the bottom edges so they are perfectly straight and level with the table surface. -
Flatten the faces:
Gently press a flat object, like a book or a wide ruler, against the front and back of the arch to flatten the rounded log into a more rectangular cross-section. This gives it that modern, blocky look in the photo. -
Roll the second band:
Clean your hands or switch surface areas to avoid color transfer. Roll out the off-white clay into a snake of the same thickness. -
Fit the bands together:
Place the white snake inside the terracotta arch. Press it gently against the inner curve so they adhere slightly, but don’t squish them out of shape. Trim the bottom of the white clay to match the terracotta’s flat base. -
Continue the sequence:
Repeat this process for the remaining colors: sage green, mustard yellow, dustry pink, and finally a tiny central arch of white. Work from the outside in to maintain the proper shape. -
Verify leveling:
Stand the rainbow up on a hard surface to check if it wobbles. If it does, slice a thin layer off the entire bottom with a sharp knife to create a perfectly flush base.
Go Textured Level Up
Before the clay dries, gently press a piece of canvas fabric or fine sandpaper onto the front surface to imprint a realistic, stone-like texture.
Step 3: Refining and Drying
-
Separate for drying:
Here I prefer to gently separate the arches just a tiny bit before drying. This prevents them from fusing permanently if you want them to be a stackable toy, though keeping them together acts as a single decorative statue. -
Smooth the surface:
Dip your finger in a little bit of water and run it over any cracks or fingerprints on the clay. Super light clay responds well to a tiny bit of moisture for smoothing. -
Let it cure:
Allow the project to dry for at least 24 to 48 hours. Turn the arches over halfway through the drying time to ensure the underside gets air exposure. -
Sand for perfection:
Once fully dry and hardened, use fine-grit sandpaper to gently buff the flat faces of the arches. This removes any final bumps and enhances that stone-like texture. -
Dust off:
Wipe away any sanding dust with a dry cloth. Your rainbow is now ready to display.
Set your new creation on a sunny windowsill and enjoy the soft color palette
Super Light Clay Bead-and-Ball Garlands
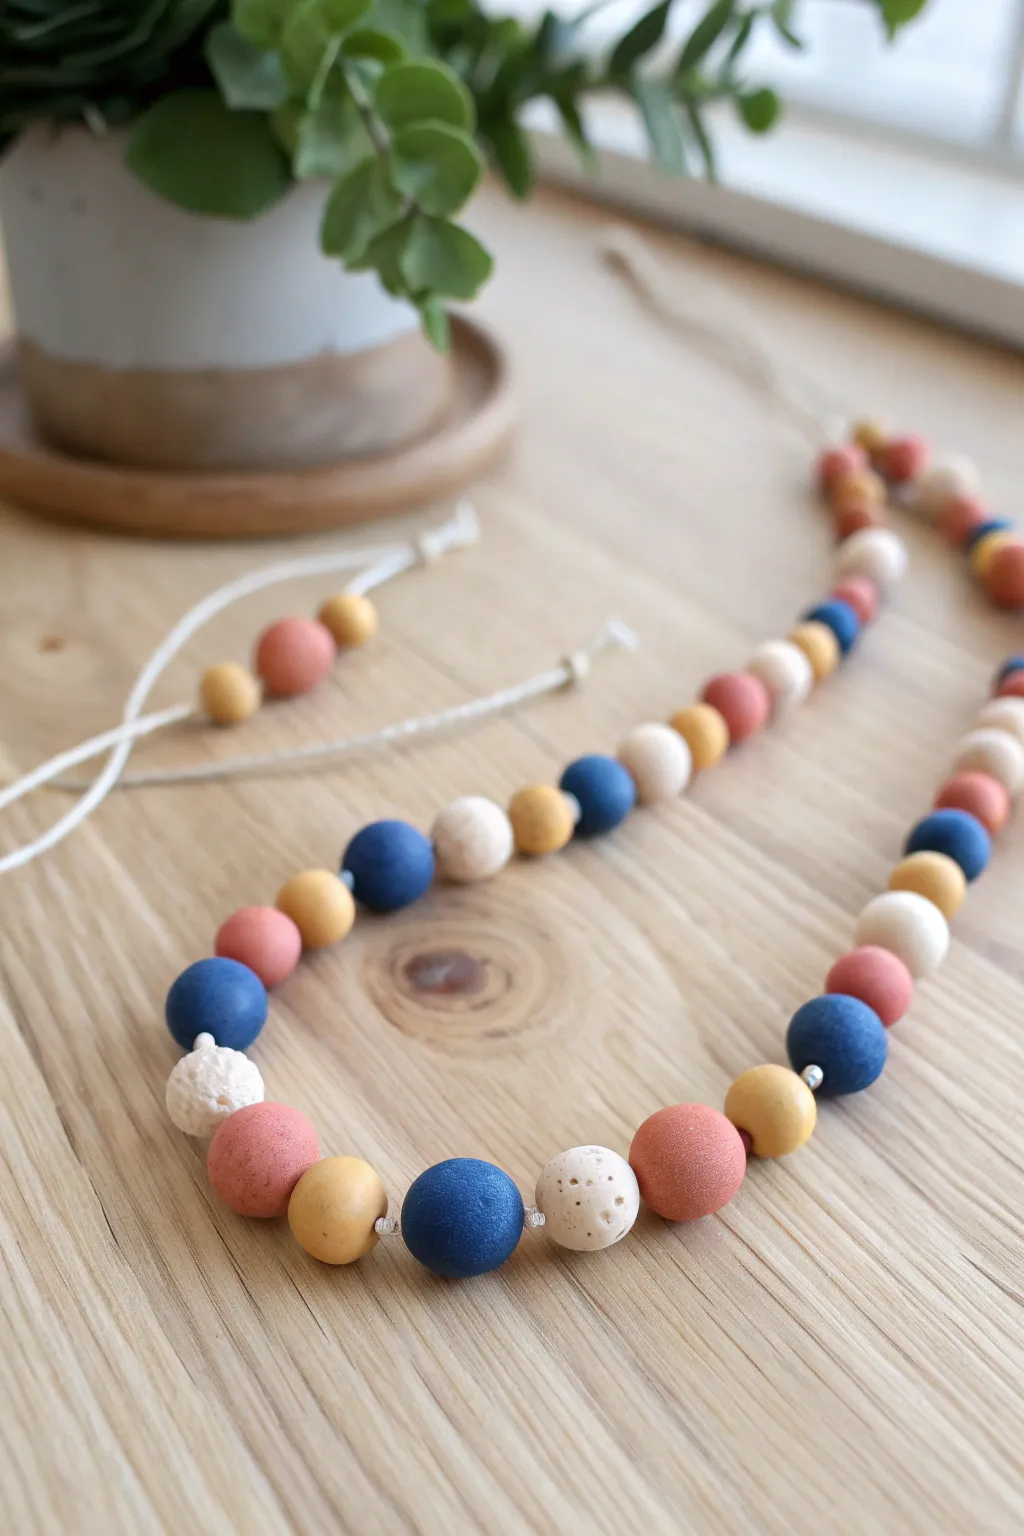
Bring a touch of organic warmth to your decor with this simple hand-rolled garland featuring a palette of soothing matte colors. The combination of smooth surfaces and textured, speckled clay creates a modern, bohemian aesthetic perfect for draping over vases or styling on shelves.
Step-by-Step Tutorial
Materials
- Super light air-dry clay (white)
- Acrylic paints (Terracotta/Coral, Mustard Yellow, Navy/Indigo)
- Fine-tipped textured tool (or a stiff toothbrush)
- Toothpicks or a bamboo skewer
- Thin white cord or waxed cotton thread (approx. 1.5mm thickness)
- Parchment paper or non-stick craft mat
- Small bowl with water (for smoothing)
- Clear matte varnish (optional)
Step 1: Prepping and Coloring the Clay
-
Divide your clay:
Start by taking your white super light clay and dividing it into four equal-sized portions. Keep three portions wrapped in plastic or a damp cloth to prevent them from drying out while you work. -
Create the navy color:
Flatten the first ball of clay into a small pancake. Add a pea-sized drop of navy blue acrylic paint into the center. Fold the clay over the paint to enclose it. -
Mix until uniform:
Knead the clay thoroughly, stretching and folding it repeatedly until the color is completely solid and uniform without streaks. Add more paint incrementally if you want a deeper indigo shade. -
Create coral and mustard:
Repeat the mixing process with two other clay portions, using terracotta paint for one and mustard yellow for the other. Wash your hands between colors to prevent muddiness. -
Create the speckled white:
For the final white portion, leave it unpainted initially. To achieve the speckled look seen in the photo, you can mix in tiny bits of dried brown clay crumbs, black pepper, or use a stiff brush to fleck brown paint onto the clay before the final kneading.
Smooth Moves
If your clay cracks while rolling, dip your finger in water and smooth it over the fissure. Super light clay loves moisture and heals instantly.
Step 2: Forming the Beads
-
Pinch off clay portions:
From each colored block of clay, pinch off small pieces roughly the size of a large gum ball or a small grape. Aim for consistency, but slight size variations add to the handmade charm. -
Roll into spheres:
Place a piece of clay between your palms and roll in a circular motion. Apply gentle but firm pressure until you have a perfectly smooth sphere. Repeat for all colors. -
Texture the white beads:
Take your white spheres and gently roll them over a textured surface, or lightly tap them with a toothbrush or a crumpled foil ball to give them that porous, stone-like texture visible in the image. -
Pierce the holes:
While the beads are still soft, carefully push a bamboo skewer or toothpick through the center of each bead. Rotate the skewer as you push to prevent deforming the sphere. -
Check the hole size:
Ensure the hole is wide enough for your specific cord. Light clay shrinks slightly as it dries, so I always wiggle the skewer to make the hole just a tiny bit larger than necessary. -
Dry the beads:
Slide the beads off the skewer and lay them on parchment paper. Let them air dry completely for 24-48 hours. Turn them occasionally so the bottoms dry evenly.
Step 3: Stringing the Garland
-
Prepare the cord:
Cut a length of white cord approximately 3 to 4 feet long (or your desired length). Tie a secure knot at one end, leaving a small loop if you plan to hang it, or just a knot to act as a stopper. -
Plan your pattern:
Lay your dried beads out on the table to finalize your pattern. The image uses a repeating sequence: Navy, Speckled White, Coral, Mustard, Navy, Speckled White, Coral, Mustard. -
Thread the beads:
Thread the other end of the cord through your first bead. If the cord frays, wrap a small piece of tape around the tip to create a makeshift needle. -
Add spacer knots (optional):
In the smaller garland shown in the background, there are knots between beads. If you want this look, tie a simple overhand knot in the cord immediately after stringing a bead, before adding the next one. -
Continue patterning:
String the rest of your beads according to your planned sequence. Push them gently together so they sit snugly but allow the garland to remain flexible. -
Secure the end:
Once all beads are strung, tie a finishing knot securely against the last bead. Trim any excess cord, or tie a final loop to match the starting end.
Scent It Up
Turn this into a diffuser garland! Because the clay is porous, you can add drops of essential oil to the porous white beads for a subtle room fragrance.
Now you have a stylish, lightweight decor piece ready to style on your coffee table or hang on a wall hook
Super Light Clay Shell Diorama Scenes
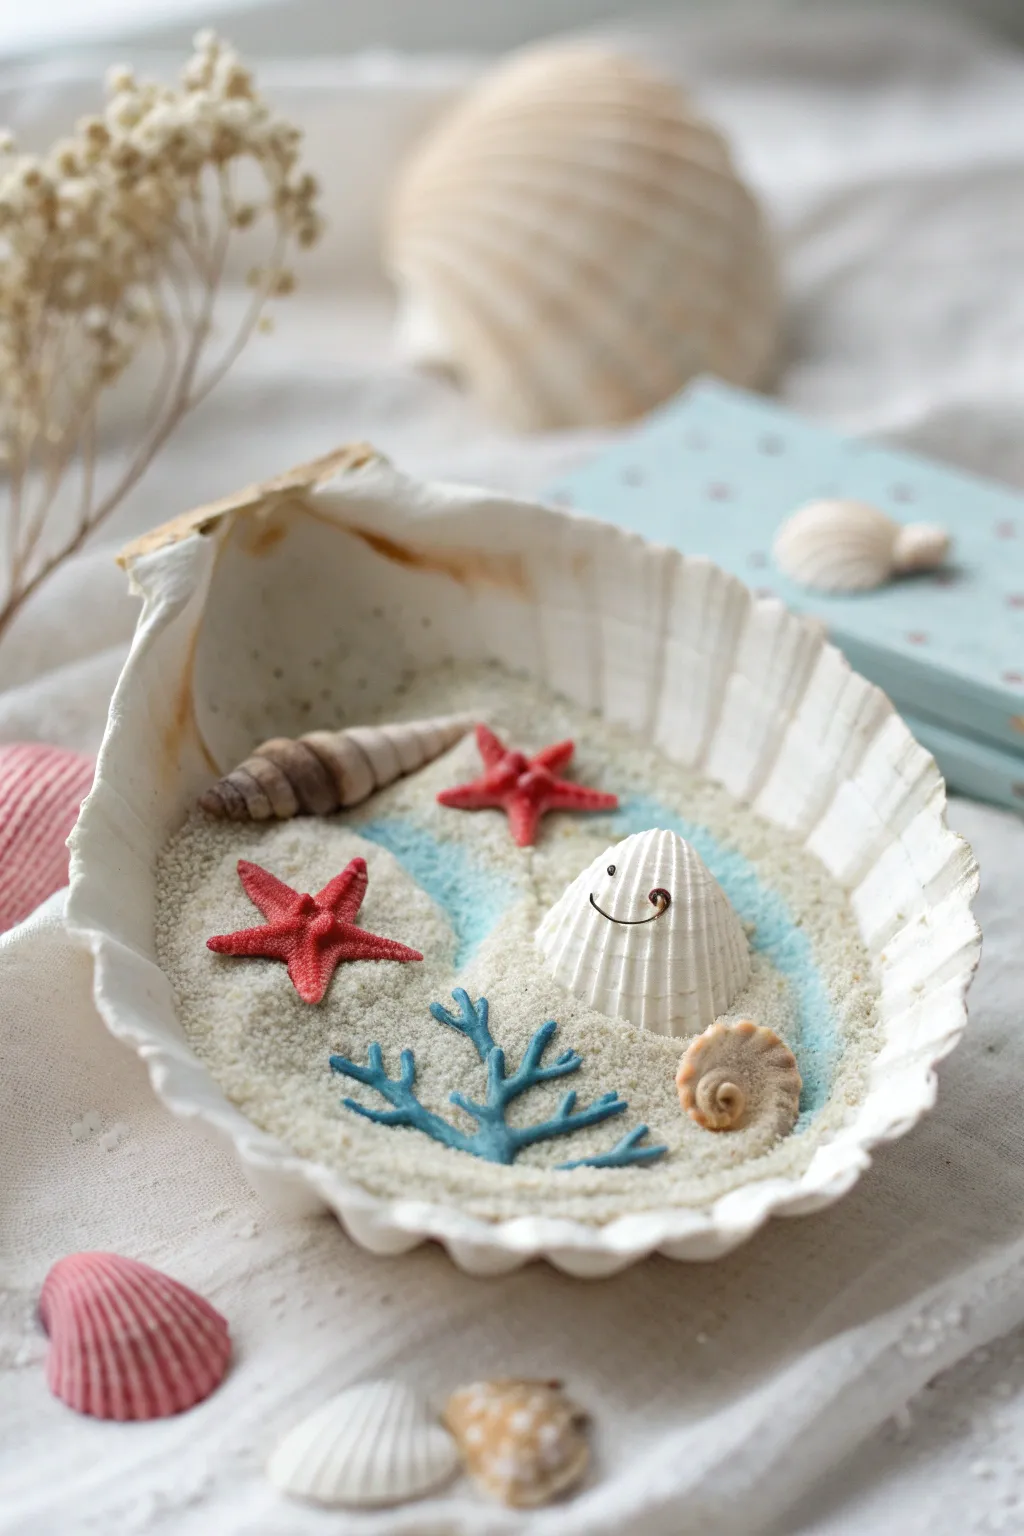
Capture the essence of a serene beach day inside a large scallop shell using soft, airy clay. This charming diorama features miniature sand ripples, vibrant starfish, and a whimsical little character that brings the tiny scene to life.
Step-by-Step
Materials
- Large, clean white scallop shell (approx. 4-5 inches)
- Super light air-dry clay (white, beige/sand, red, blue, brown)
- Fine decorative sand (natural beige)
- Light blue pigment powder or chalk pastel (optional, for water effect)
- Craft glue or tacky glue
- Fine-tipped black marker or black acrylic paint
- Sculpting tools (needle tool, ball stylus)
- Small paintbrush
- Small piece of thin wire (optional for character smile)
Step 1: Preparing the Seascape Base
-
Clean the Canvas:
Begin by ensuring your large scallop shell is thoroughly cleaned and dried. If there are any rough edges on the bottom, you might want to sand them slightly so it sits stable on a table. -
Create the Sand Dune:
Take a generous amount of beige clay—or mix white clay with a tiny dot of brown—to create the base. Press this firmly into the bottom of the shell, smoothing it out to create a gentle slope. -
Texture the Beach:
While the clay is still fresh, sprinkle a layer of fine decorative sand over the top. Press it gently into the clay so it sticks. Alternatively, you can texture the clay itself by stippling it with an old toothbrush. -
Add Water Effects:
To mimic the gentle shoreline seen in the image, lightly dust a curving path through the center with crushed blue chalk pastel or pigment powder. This creates the illusion of shallow water washing onto the sand.
Glue Woes?
If clay pieces won’t stick to the sand layer, clear a tiny spot of sand away to expose the base clay underneath, or use a stronger gel superglue for instant hold.
Step 2: Sculpting the Miniature Sea Life
-
Form the Starfish:
Roll two very small balls of red clay. Flatten them slightly and use a needle tool or craft knife to pull out five points from the center of each, shaping them into stars. -
Detail the Starfish:
Use a needle tool or a toothpick to poke tiny dots along the arms of your starfish for realistic texture. Gently bend the tips of the arms upward so they look like they are crawling over the sand, rather than lying flat. -
Shape the Spiral Shell:
Mix brown and white clay to get a marbled tan color. Roll it into a tapered snake, skinny at one end and thicker at the other. -
coil the Shell:
Starting from the thickest end, roll the snake up tightly to half its length, leaving the tail extended to create that classic spiral seashell shape seen on the left side of the diorama. -
Create the Blue Coral:
Roll thin snakes of blue clay. Join them together in a branching structure, resembling a piece of staghorn coral. I find it easiest to build this flat on a non-stick surface first before moving it to the shell. -
Make the Tiny Snail:
Using a tiny amount of tan clay, roll a very small spiral, similar to how you made the larger shell but much smaller and flatter, to sit near the bottom right.
Step 3: The Whimsical Shell Character
-
Sculpt the Character Body:
Take a ball of white clay and shape it into a rounded cone or mound. Use a heavily serrated tool or the edge of a ruler to press vertical ridges all around it, mimicking the texture of a cockle shell. -
Give it a Face:
Use a dotting tool to indent two small eye sockets. If you are using wire for the mouth, bend a tiny piece into a U-shape and press it into the clay. Otherwise, wait for the clay to dry to draw the face. -
Position the Figures:
Apply a small dab of glue to the bottom of each sculpt. Place the white character slightly off-center to the right, sitting proudly on the sand. -
Arrange the Red Starfish:
Glue the two red starfish onto the scene. Place one near the back center and one closer to the front left for a balanced composition. -
Add Remaining Details:
Secure the brown spiral shell on the left side and nestle the blue coral branches near the front center. Place the tiny tan snail shell near the bottom right edge.
Pro Texture Tip
For the most realistic coral, gently prick the blue clay surface with a stiff brush or needle tool before it dries to make it look porous and organic.
Step 4: Final Touches
-
Refine the Sand:
If any glue squeezed out or if the clay placement disturbed your sand, sprinkle a pinch more fine sand over the gaps to conceal the mechanics. -
Paint the Expression:
Once the white shell character is dry to the touch, use a fine-tipped marker to dot the eyes black. If you didn’t use wire, draw a simple, happy curved line for the mouth.
Now you have a permanent slice of summer displayed beautifully on your shelf
Super Light Clay Wearable Pins and Badges
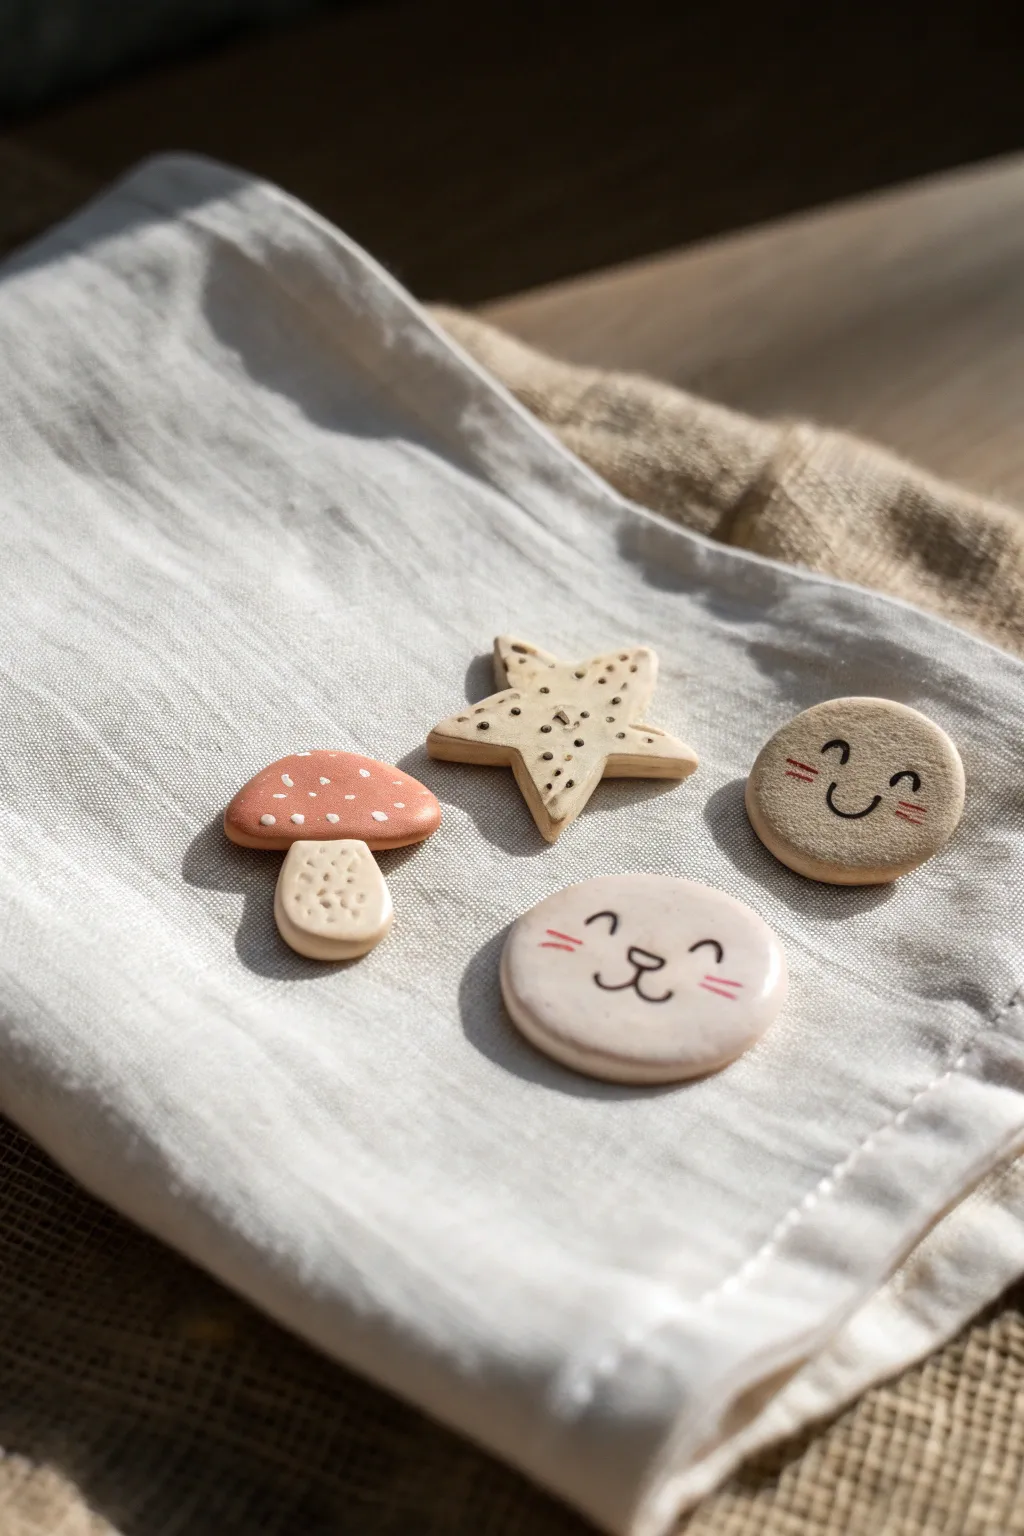
Create a charming collection of nature-inspired touches for your tote bag or denim jacket with just a few pinches of clay. This set features a sweet mushroom, a textured star, and two minimalist friendly faces that capture a warm, handcrafted aesthetic.
Detailed Instructions
Materials
- Super light air-dry clay (white, beige/tan, terra cotta/pink)
- Acrylic rolling pin
- Small round cutter (approx. 1 inch)
- Needle tool or toothpick
- Fine-point black permanent marker or acrylic paint pen
- Small detail paintbrush
- Pink acrylic paint or chalk pastel (for cheeks)
- Pin backs or badge clips
- Super glue or E6000 craft glue
- Matte varnish (optional)
Step 1: Shaping the Mushroom
-
Create the cap shape:
Pinch off a small ball of terra cotta or soft pink clay. Roll it smooth and then flatten it slightly into a semi-circle or dome shape to form the mushroom cap. -
Form the stem:
Take a smaller piece of beige or white clay and roll it into a short, thick cylinder. Round the bottom edge slightly so it looks organic rather than perfectly cut. -
Join the pieces:
Press the stem gently into the center of the flat side of the cap. Since super light clay sticks to itself well when fresh, you likely won’t need glue, but a tiny dab of water can help bond them. -
Texture the stem:
Using your needle tool or a toothpick, press tiny, random indents all over the mushroom stem to give it an earthy, porous texture. -
Add cap details:
Roll extremely tiny dots of white clay between your fingers. Press these randomly onto the colored cap to create the classic toadstool spots, flattening them flush with the surface.
Smooth Surface Secret
Before drying, gently rub the surface of your clay with a drop of water on your finger. This erases fingerprints and creates the porcelain-smooth finish seen in the photos.
Step 2: Crafting the Star
-
Roll and cut:
Roll out a slab of beige or tan clay to about 1/4 inch thickness. Use a small star cutter or freehand cut a five-point star shape with a craft knife for a more rustic look. -
Soften the edges:
Gently tap the points and edges of the star with your fingertip to round them off. I find this makes the final piece look more polished and durable. -
Add surface texture:
Use the tip of a toothpick to poke small, shallow holes across the entire surface of the star. Try to keep the spacing somewhat random but balanced. -
Detail the center:
Use a slightly larger tool or the back of a paintbrush to make a singular, slightly larger indentation right in the center of the star.
Make Them Magnets
Instead of pin backs, glue small neodymium magnets to the back. Use them to hold photos on your fridge for an adorable kitchen upgrade.
Step 3: Making the Friendly Faces
-
Create the base:
Roll two balls of beige or pale pink clay. Flatten them gently with your palm or rolling pin until they are smooth, even discs about the size of a large coin. -
Smooth the perimeter:
Inspect the edges of your discs. If there are any cracks or rough spots, smooth them out with a tiny bit of water on your finger. -
Dry the pieces:
Let all four clay pieces (mushroom, star, and two discs) dry completely. This usually takes 24 hours depending on humidity; flip them halfway through for even drying.
Step 4: Finishing Touches
-
Paint the expressions:
Once fully dry, use a fine-point black marker to draw the faces. For the first disc, draw two curved U-shapes for closed happy eyes and a simple smile. For the second (the cat), add a small nose, mouth, and whiskers. -
Add blushing cheeks:
Dip a dry brush into a tiny amount of pink paint (or use chalk pastel dust) and gently dab rosy cheeks onto the smiling faces. -
Enhance the star:
If you want the star’s texture to pop, you can do a light wash of watered-down brown paint over it, then wipe the surface clean so the dark color stays only in the holes. -
Attach the hardware:
Flip the pieces over. Apply a strong adhesive like super glue or E6000 to the flat pad of a pin back. -
Secure the backing:
Press the pin back firmly onto the center of the clay piece. Let the glue cure fully according to the manufacturer’s instructions before wearing.
Pin these cuties on a canvas pouch or gift them to a friend for an instant smile
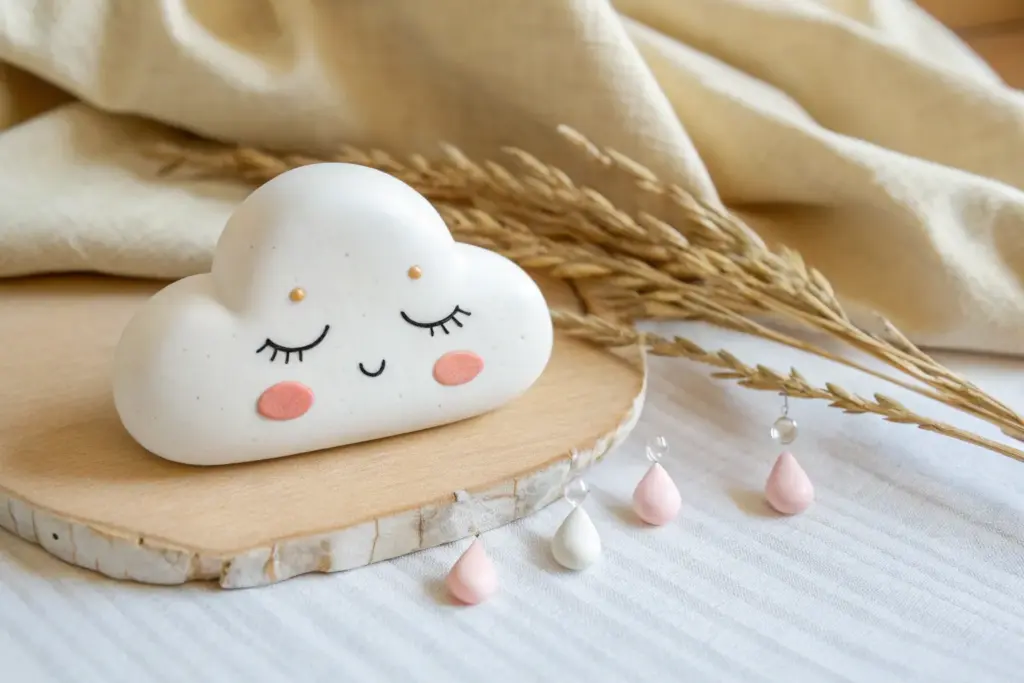
Super Light Clay Floating Cloud Mobiles
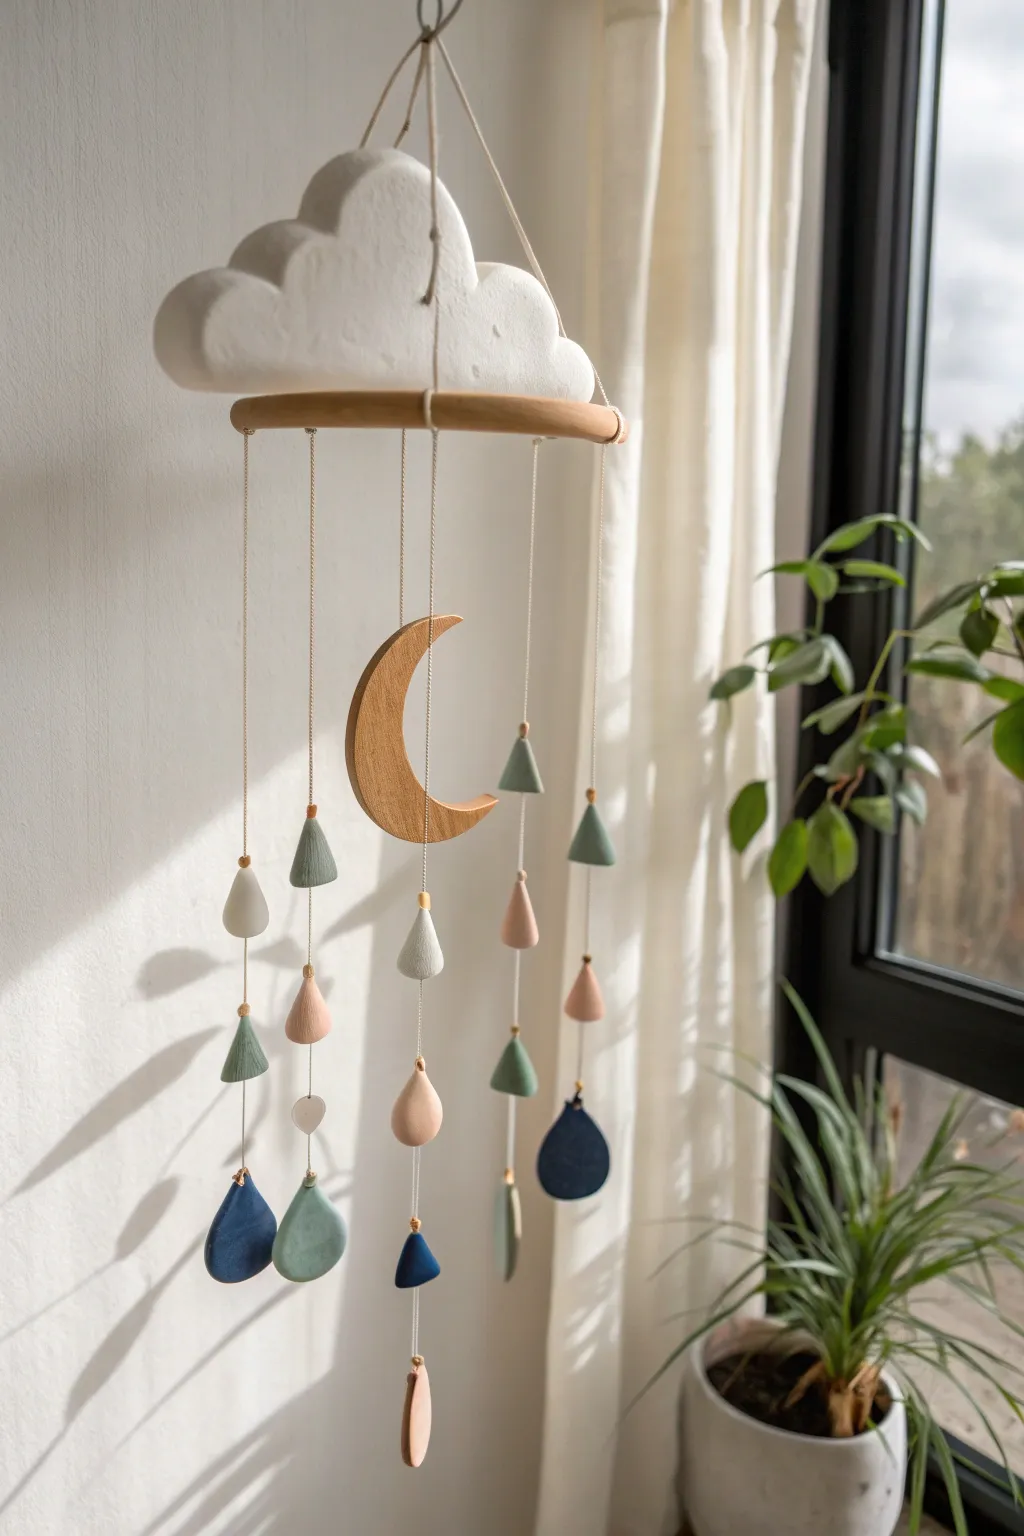
This whimsical mobile brings a touch of serenity to any nursery or bedroom corner with its soft textures and calming color palette. Featuring a fluffy clay cloud and cascading raindrops in muted earth tones, it creates a gentle, floating display that catches the light beautifully.
How-To Guide
Materials
- White super light air-dry clay (large pack)
- Colored super light clay (navy blue, sage green, blush pink, light grey)
- Wooden embroidery hoop (inner ring only, approx 6-8 inches) or wooden craft ring
- Wooden crescent moon charm (approx 3-4 inches)
- Cotton or nylon creative cord (off-white or light beige)
- Sculpting tools or a craft knife
- Sandpaper (fine grit)
- Aleene’s Tacky Glue or strong craft glue
- Large needle (to thread cord through clay)
- Scissors
Step 1: Sculpting the Elements
-
Form the main cloud:
Take a large handful of white super light clay. Roughly shape it into an oblong, puffy cloud form about 6-7 inches wide. Don’t worry about perfect smoothness yet; the texture adds character. -
Refine the cloud shape:
Using your thumbs, press gentle indentations along the top edge to create the ‘bumpy’ cumulus look. Smooth the bottom edge flat so it looks like it’s resting on air. Poke a hole vertically through the center for the main hanging cord. -
Create the raindrops:
Pinch off small pieces of your colored clays. You will need about 12-15 pieces. Roll them into balls first, then pinch one end to create a tapered teardrop shape. -
Make cone shapes:
For variety, sculpt a few pieces into sharp cones rather than rounded drops. Mix up the colors here—try a sage green cone and a grey one. Aim for sizes ranging from 1 to 1.5 inches tall. -
Pierce the clay pieces:
While the clay is still wet, use your large needle to carefully poke a hole vertically through every raindrop and cone, from top to bottom. This is crucial for threading later. -
Dry completely:
Lay all your clay pieces on a clean, flat surface. Super light clay dries somewhat spongy, usually taking 24-48 hours depending on thickness. Flip them occasionally for even drying.
Hole Closure Fix
If holes shrink while drying, don’t force a needle through dry clay—it tears. Use a tiny drill bit or twist the needle very slowly instead.
Step 2: Assembly and Balance
-
Prepare the wooden ring:
Cut four equal lengths of cord, about 10 inches each. Tie them equidistantly around your wooden ring. Bring the loose ends together at the top and knot them tightly to form a hanging pyramid. -
Mount the cloud:
Thread the knotted top of your cords through the hole in your white clay cloud. The cloud should rest right on top of the knot, concealing it inside or underneath. -
Hang the moon:
Cut a fresh piece of cord, about 12 inches long. Thread it through the center of the cloud (alongside the hanging cords) and tie your wooden moon to the bottom so it dangles centrally within the ring. -
String the raindrops:
Cut 5-6 long strands of cord (varying lengths from 15 to 25 inches). Tie one end of each cord securely to the wooden ring, spacing them out evenly. -
Thread the beads:
Using your needle, thread the dried clay raindrops and cones onto the hanging cords. To keep them in place at different heights, tie a thicker knot underneath each clay piece. -
Create variation:
I like to vary the pattern on each string—put a grey drop high up, a blue one low down, and mix the shapes. Aim for a staggered effect so they don’t all line up horizontally. -
Secure the knots:
Once you are happy with the placement, add a tiny dot of craft glue to the retaining knots to ensure they don’t slip over time. -
Final trim:
Trim any excess cord dangling from the bottom of your lowest raindrops for a clean finish.
Add a Little Sparkle
Mix a small amount of fine glitter into the white clay before shaping the cloud to make it shimmer subtly when the sunlight hits it.
Hang your new mobile near a window and watch the gentle shadows dance across the room