Whenever I want a garden to feel instantly warm and collected, I reach for terracotta pots—they’ve got that earthy, handmade vibe baked right in. Here are my favorite terracotta garden ideas that go way beyond “one pot, one plant,” and turn simple clay into real garden features.
Terracotta Pot Groupings in Threes
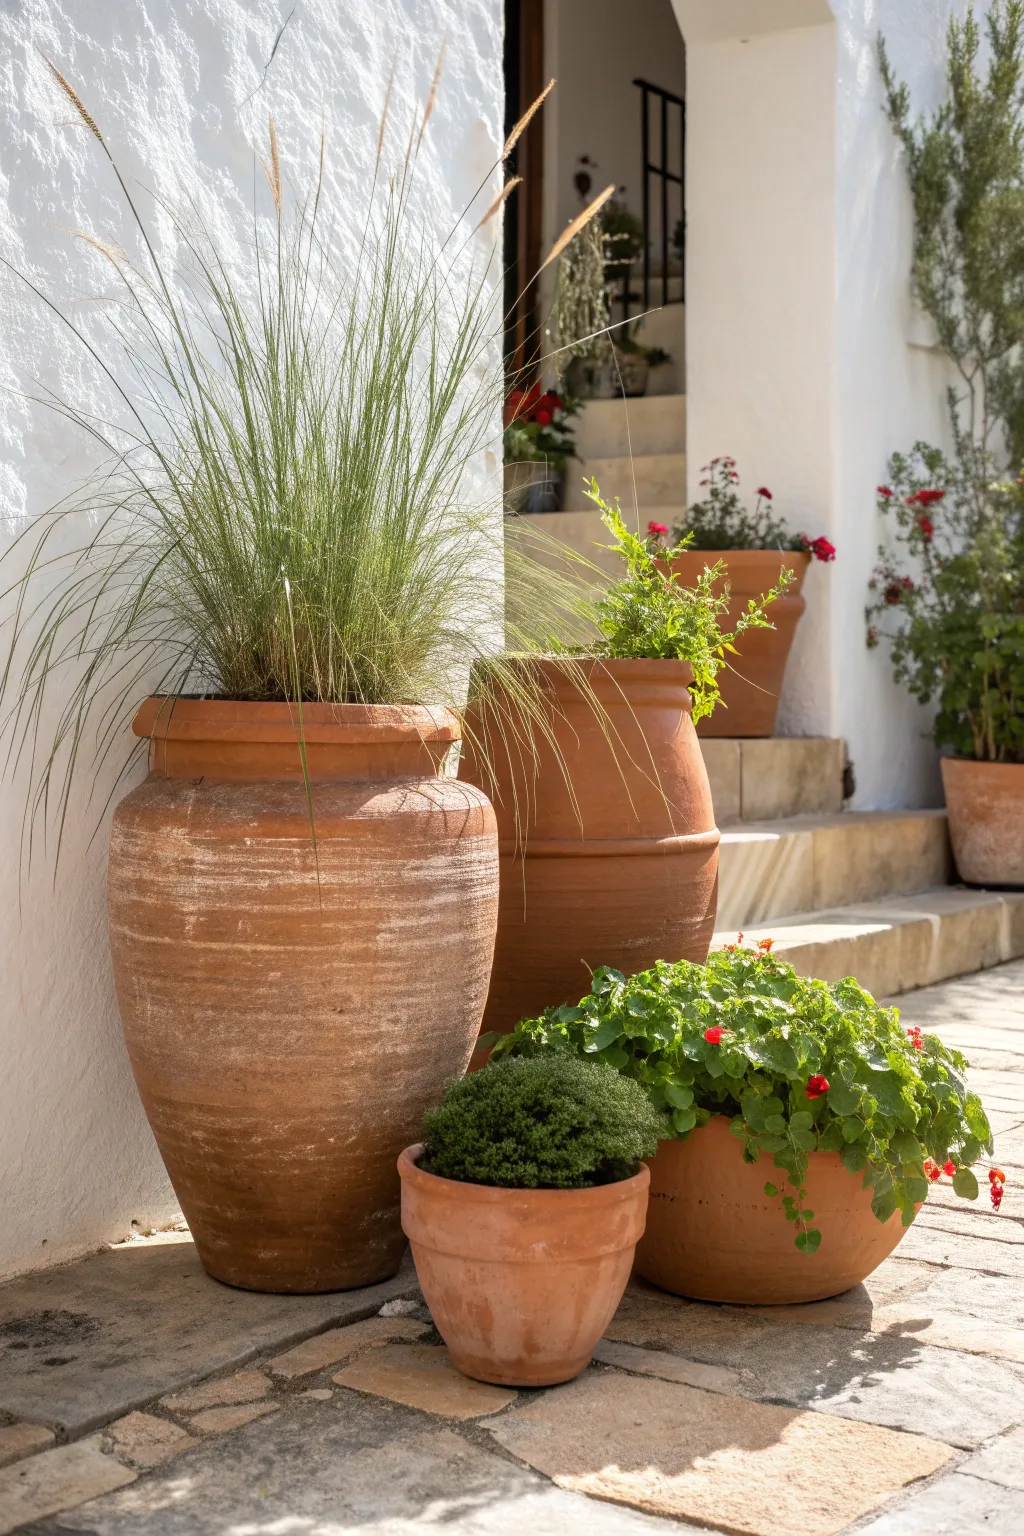
This project centers on creating a stunning visual hierarchy using varied terracotta shapes to frame an entryway or garden corner. The combination of tall, rustic urns and low, wide bowls creates a balanced composition that feels both curated and effortlessly Mediterranean.
Step-by-Step Tutorial
Materials
- One large terracotta olive jar (approx. 30-36 inches tall)
- One medium terracotta urn (approx. 24-28 inches tall)
- One low terracotta bowl planter (12-14 inch diameter)
- One small standard terracotta pot (6-8 inches)
- Tall ornamental grass (e.g., Feather Reed Grass or Miscanthus)
- Trailing flowering plant (e.g., Red Verbena or Geraniums)
- Dense mounding shrub (e.g., Boxwood or Hebe)
- Potting soil mix
- Gravel or drainage stones
- Pot feet or risers (optional)
Step 1: Setting the Stage
-
Select the location:
Choose a spot near a white or light-colored wall to make the terracotta color pop. A corner near stairs or an entryway, as shown in the image, provides natural architectural lines to follow. -
Clean the surface:
Sweep the paving stones or patio floor thoroughly. If your ground is uneven, use small stone shims to ensure the large pots will sit flat without wobbling. -
Position the anchor pot:
Place the largest olive jar first. Position it slightly away from the wall to allow the tall grass to sway freely without brushing against the stucco. -
Add the secondary urn:
Place the medium-sized urn slightly behind and to the right of the large jar. This staggering creates depth, making the grouping look like a collection rather than a line-up.
Step 2: Planting the Tall Elements
-
Prepare drainage:
Fill the bottom 2-3 inches of the large and medium urns with gravel or broken pottery shards to ensure water doesn’t pool at the deep roots. -
Fill with soil:
Add potting mix to the large olive jar until it is about 8 inches from the rim. Lightly tamp it down to remove large air pockets. -
Plant the grass:
Remove your ornamental grass from its nursery container. Tease the roots gently before placing it in the center of the large jar. -
Top up and secure:
Fill the rest of the jar with soil, pressing firmly around the base of the grass clump. Leave about an inch of space at the top for watering. -
Plant the medium urn:
Repeat the planting process for the medium urn. In the image, this pot is either empty or holds a simpler, lower-profile plant that doesn’t compete with the tall grass, or perhaps a young shrub.
Wobbly Pots?
If your large urns rock on uneven paving stones, slide thin wooden shims or slate chips under the base until stable. A wobbly pot is prone to cracking in high winds.
Step 3: Layering the Foreground
-
Position the low bowl:
Place the wide terracotta bowl in front of the two taller urns, slightly to the right. It should overlap the base of the medium urn visually. -
Plant the varied greens:
Fill the bowl with soil and plant your flowering trailer (like red verbena or geraniums). Arrange them so the blooms cascade slightly over the rim, softening the hard clay edge. -
Place the smallest pot:
Set the small standard pot in the immediate foreground, to the left of the low bowl and in front of the massive olive jar. -
Plant the mound:
Plant a dense, low-growing shrub like a small boxwood or thyme ball in this small pot. The tight, round shape contrasts beautifully with the wild, vertical lines of the grass behind it.
Aged Patina Look
To age new pots fast, rub plain yogurt or buttermilk on the exterior before planting. This encourages moss and lichen growth for that old-world Italian villa vibe.
Step 4: Finishing Touches
-
Clean the pots:
Brush off any loose soil from the exterior of the terracotta. The natural white efflorescence (salt deposits) on the pots adds character, so don’t scrub too hard—just remove the dirt. -
Arranging the background (optional):
If you have steps nearby, place 1-2 additional pots with red flowering plants (like geraniums) on higher steps to draw the eye upward and connect the scene. -
Initial watering:
Water all plants thoroughly until water begins to trickle from the drainage holes. This settles the soil and helps stabilize the heavier pots.
Enjoy the interplay of textures as the tall grasses catch the breeze above the sturdy terracotta forms


One Big Statement Terracotta Planter

Create a stunning Mediterranean focal point by giving massive terracotta pot a weathered, old-world patina before planting a delicate olive tree. This project transforms a standard large planter into a timeless architectural element that looks like it has been sun-baking in Tuscany for decades.
Step-by-Step Guide
Materials
- Large, heavy-duty terracotta planter (urn shape with rim details)
- Small olive tree (Olea europaea)
- White wash or lime wash paint
- Water
- Clean rags or sponge
- Sandpaper (medium grit)
- Potting soil mix for Mediterranean plants
- Gravel or drainage stones
- Trowel
- Garden Gloves
Step 1: Creating the Aged Patina
-
Prepare the surface:
Begin by wiping down your large terracotta pot with a damp cloth to remove any warehouse dust or oils. The surface needs to be clean but slightly porous for our aging technique to take hold properly. -
Mix your whitewash:
In a bucket, dilute your white paint or lime wash with water. I usually aim for a 50/50 ratio, creating a milky, translucent liquid rather than an opaque paint. -
Initial application:
Dip a rag or sponge into the mixture and wring it out slightly. Rub the wash over the exterior of the pot in circular and random motions. Don’t try to be perfect; irregularity is key to the aged look. -
Highlight the details:
Pay special attention to the decorative rim and the beaded detail around the pot’s shoulder. Allow extra wash to settle into the grooves and crevices here to accentuate the texture. -
Wipe back:
While the wash is still wet, take a clean, dry rag and wipe off the excess from the raised, smooth areas of the pot. You want the terracotta orange to show through strongly in the center, leaving the white haze mostly near the edges and details. -
Distress the finish:
Once the wash is dry to the touch, take your sandpaper and gently scuff specific areas. Focus on the belly of the pot where natural wear would occur and on the raised beads of the rim decoration. -
Create water marks:
For added realism, you can flick a bit of clean water onto the surface and let it drip down, then lightly dab it. This mimics rain patterns and mineral deposits found on truly old pots.
Step 2: Planting the Tree
-
Prepare drainage:
Place a generous layer of gravel or drainage stones at the very bottom of the pot. Olive trees hate having wet feet, and this ensures excess water can escape easily. -
Add first soil layer:
Fill the pot about halfway with your Mediterranean potting mix. This soil should be well-draining, perhaps mixed with a little sand or perlite. -
Position the tree:
Gently remove the olive tree from its nursery container. Tease the roots out slightly if they are pot-bound, then place the root ball into the center of your statement planter. -
Check the depth:
Ensure that the top of the root ball sits a few inches below the rim of the terracotta pot. You need this space to water without overflowing. -
Backfill:
Fill the remaining space around the root ball with more potting soil. Press down firmly with your hands to eliminate air pockets and stabilize the slender trunk. -
Top dressing:
Smooth out the soil surface. While optional, you can add a thin layer of grit or darker compost on top to give it a neat, finished appearance. -
Initial watering:
Water the tree thoroughly until you see water starting to trickle from the drainage hole. This settles the soil and helps the tree establish itself in its new, elegant home.
Natural Moss Hack
To accelerate the aged look, mix plain yogurt with moss in a blender and paint it onto the terracotta. Keep it moist in a shady spot for a few weeks to grow real green patina.
Level Up: Underplanting
Don’t leave the soil bare! Plant trailing rosemary or creeping thyme around the base of the olive tree. It adds greenery that spills over the edge, softening the look.
Step back and enjoy the instant history and Mediterranean charm you have added to your entryway
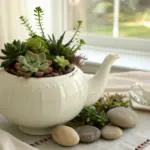

Terracotta Herb Pots on an Outdoor Table
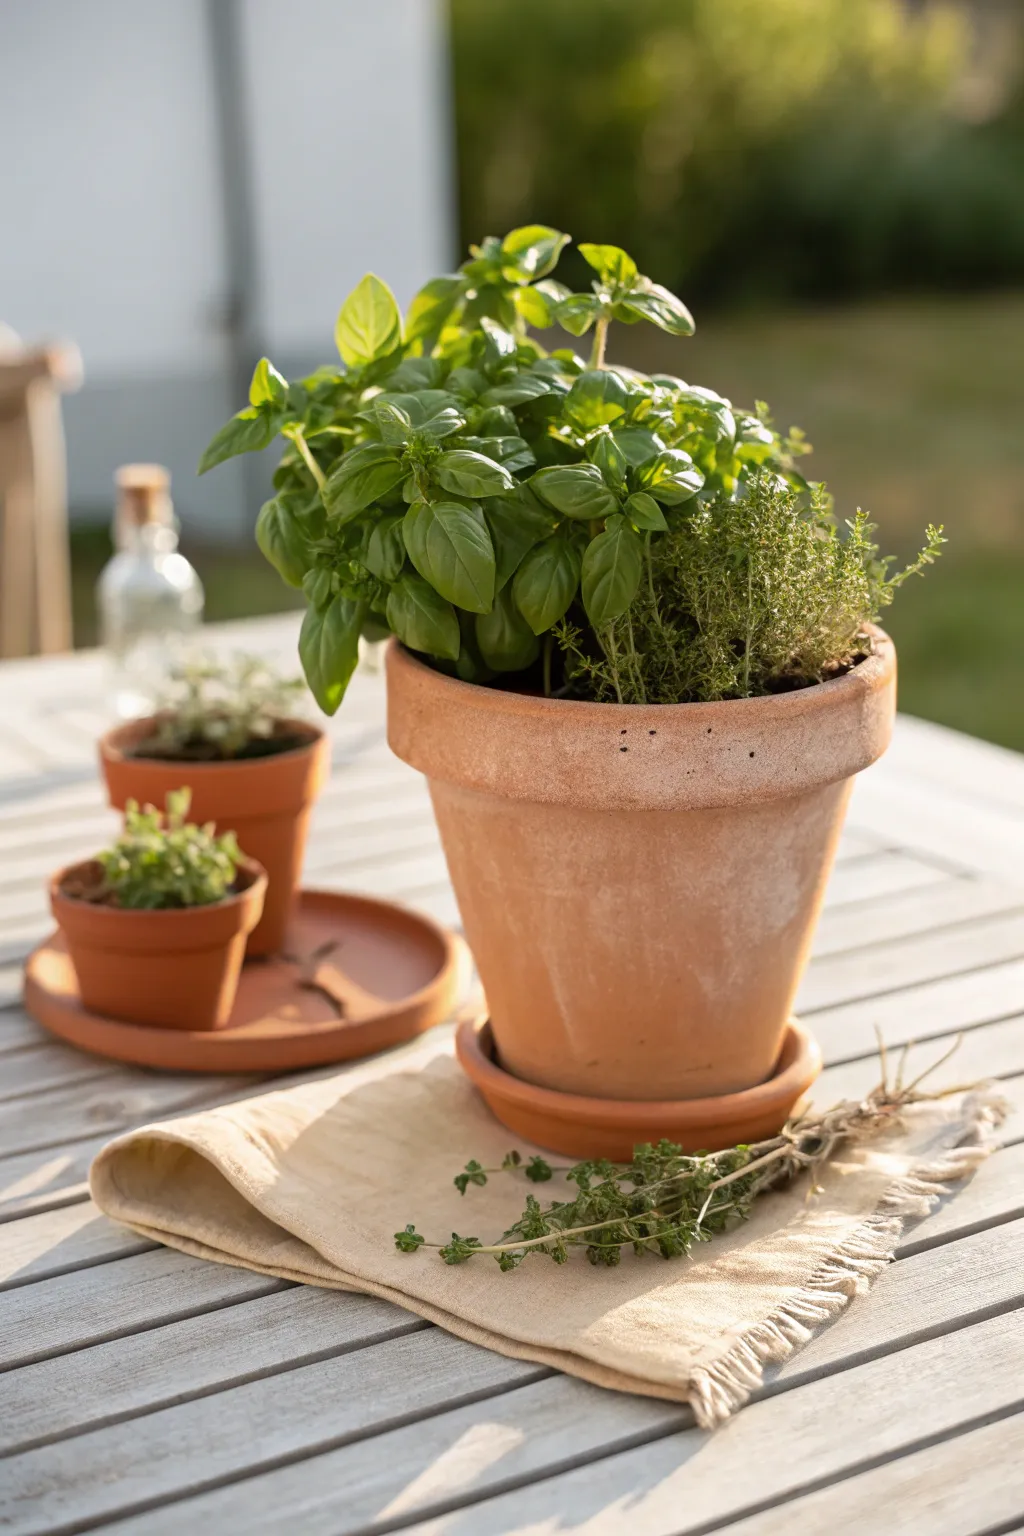
Bring the rustic charm of a Mediterranean garden to your patio with this beautifully styled terracotta herb arrangement. Combining fresh basil and thyme in weathered clay pots creates a functional centerpiece that smells as good as it looks.
Detailed Instructions
Materials
- 1 Large terracotta pot (approx. 8-10 inch diameter)
- 1 Large matching terracotta saucer
- 1 Medium terracotta pot (approx. 6 inch)
- 1 Small terracotta pot (approx. 3 inch)
- 1 Large round terracotta saucer (for the smaller pots)
- High-quality potting mix
- Perlite or vermiculite (for drainage)
- Small gravel or pottery shards
- 1 Basil plant (large and bushy)
- 1 Thyme plant (creeping or upright)
- 1 Small herb start (oregano or marjoram)
- Small beige linen napkin or placemat
- Fresh herb cuttings for styling
- Glass bottle (optional prop)
Step 1: Preparing the Vessels
-
Soak the pots:
Before planting, submerge your new terracotta pots in a bucket of water for at least 30 minutes. Terracotta is porous and will wick moisture away from your new plants if dry. -
Create drainage layers:
Place a few pottery shards or a small layer of gravel over the drainage hole of each pot. This prevents soil from washing out while ensuring water can freely escape. -
Mix the soil:
In a separate container, mix your potting soil with a handful of perlite. Herbs generally dislike ‘wet feet,’ and this extra aeration helps keep roots healthy. -
Weathering check:
For the specific look in the photo, your pots should have a slightly dusty, matte finish. If they look too new, you can lightly sand the exterior or rub a little garden lime on the rim.
Sun-Kissed Lighting
To replicate the photo’s glow, photograph your arrangement during ‘golden hour’—the last hour before sunset when light is soft.
Step 2: Planting the Main Arrangement
-
Fill the large pot:
Add your soil mix to the large pot until it is about two-thirds full. Press it down gently to remove large air pockets. -
Position the basil:
Remove the basil from its nursery container. Gently tease the roots outward. Place it on the left side of the large pot, allowing the leaves to spill slightly over the edge. -
Add the thyme:
Nestle the thyme plant into the right side of the pot next to the basil. The varying textures—large, soft basil leaves versus tiny, woody thyme stems—create the visual interest seen in the photo. -
Backfill and secure:
Carefully fill in the gaps around the root balls with more soil mix. Press down firmly around the base of the stems, leaving about an inch of space below the rim for watering. -
Water immediately:
Give this main pot a thorough watering until you see moisture seeping out of the bottom drainage hole.
Level Up: Aged Patina
Blend plain yogurt and moss in a blender. Paint this mixture onto the pots and leave them in a shady, damp spot for 2 weeks to grow instant moss.
Step 3: The Supporting Players
-
Plant the medium pot:
Fill the medium-sized pot with soil and plant your secondary herb, perhaps sage or oregano. Ensure it sits straight and centered. -
Plant the tiny pot:
Take the smallest starter herb and plant it in the tiny 3-inch pot. This little accent piece adds scale to the grouping. -
Water the smaller pots:
Water these gently. I find a small watering can with a narrow spout works best here to avoid washing soil over the rim.
Step 4: Styling the Scene
-
Set the table foundation:
Choose a spot on a slatted wooden outdoor table that receives lovely afternoon light. Lay down a folded beige linen napkin or placemat slightly askew. -
Main pot placement:
Place the large saucer on the back corner of the napkin, and set the heavy basil-thyme pot onto it. -
Arranging the trio:
Place the large flat saucer to the left of the main pot. Arrange the medium and small pots onto this shared saucer create a tiered effect. -
Add the cuttings:
Take a few sprigs of thyme or rosemary and tie them loosely with twine. Lay this bundle casually on the front of the napkin. -
Final touch:
Place a vintage glass bottle in the background to catch the light, completing the tranquil garden tableau.
Enjoy the fresh scents and ready-to-use ingredients right at your fingertips whenever you dine outside


Terracotta Pots Lining Garden Steps
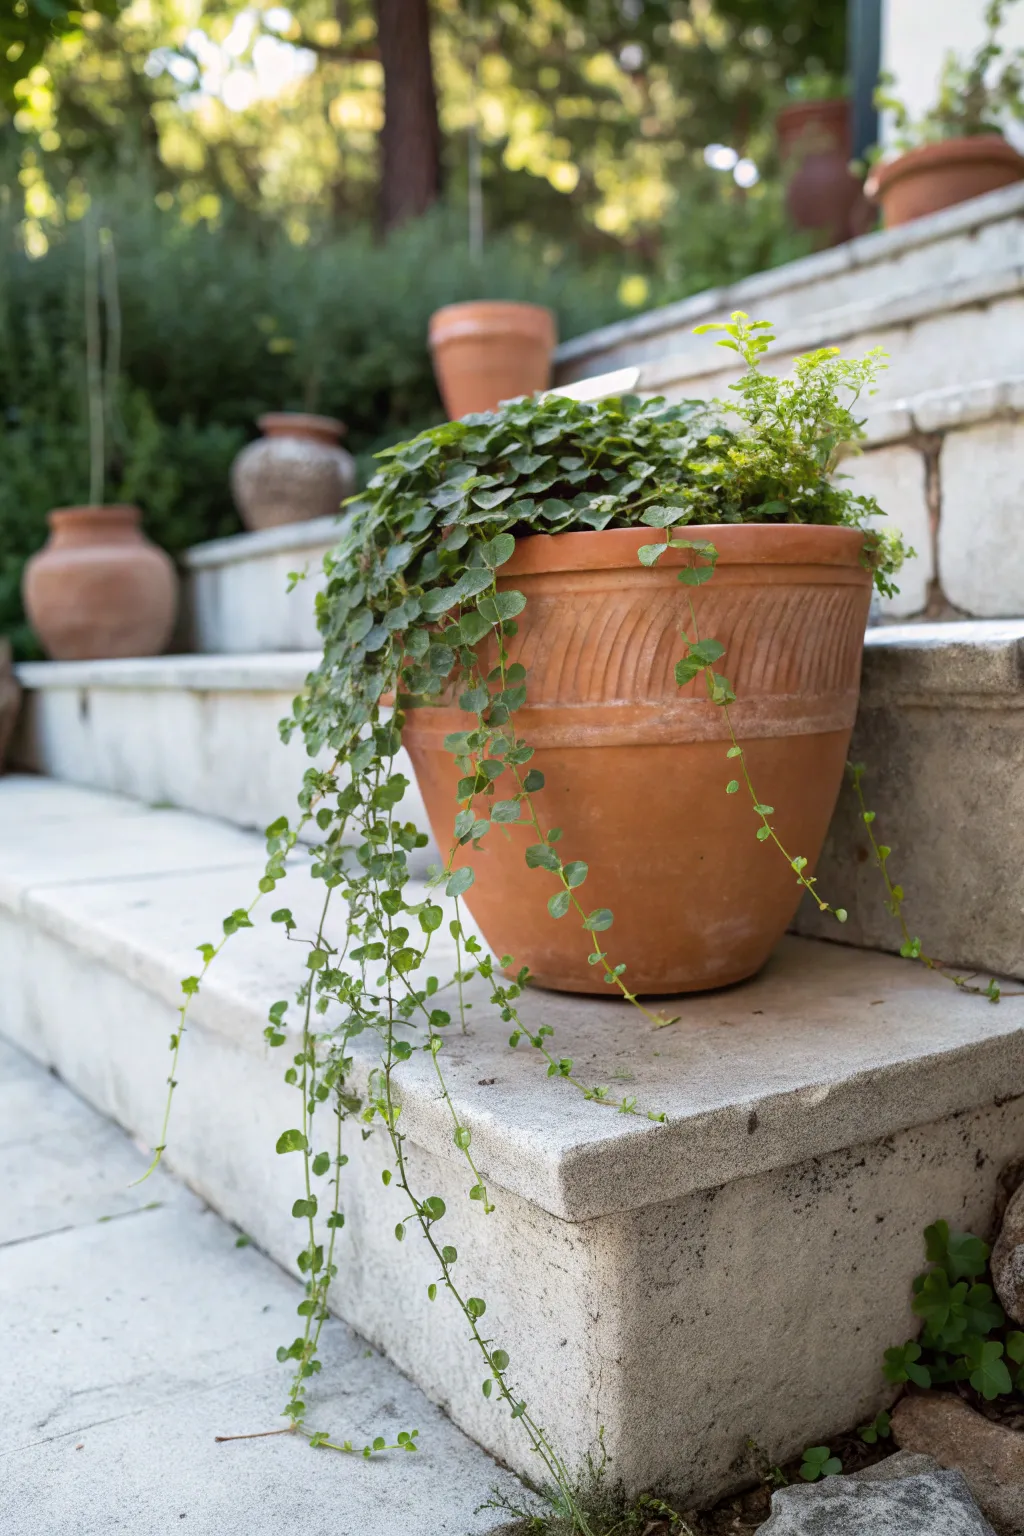
Transform distinct terracotta pots into a lush, flowing feature by creating a deliberate arrangement along garden stairs. This project focuses on potting spilling greenery to soften hard stone edges while building a rhythm with matching clay vessels.
How-To Guide
Materials
- Large terracotta pot (approx 16-18 inch diameter) with rim detail
- Smaller terracotta pots (various sizes for background)
- Creeping Jenny (Lysimachia nummularia) or similar trailing plant
- Potted ivy or wire vine (Muehlenbeckia)
- Quality potting soil mix
- Perlite or drainage stones
- Slow-release fertilizer granules
- Watering can
- Garden trowel
- Pruning shears
Step 1: Preparing the Main Vessel
-
Soak the terracotta:
Before adding soil, soak your large terracotta pot in a tub of water for about 30 minutes. This prevents the porous clay from immediately wicking moisture away from your new plants’ roots. -
Create drainage protection:
Place a curved shard of broken pottery or a small piece of mesh screen over the central drainage hole. This keeps the soil inside while allowing excess water to escape freely. -
Build the base layer:
Add a two-inch layer of drainage material, such as gravel or perlite, to the bottom of the pot to ensure roots don’t sit in stagnant water. -
Fill with soil mix:
Fill the pot about two-thirds full with your quality potting mix. I like to mix in a handful of slow-release fertilizer at this stage to feed the plants throughout the season.
Moisture Magic
Terracotta dries out quickly. Consider lining the inside walls with a coffee filter or landscape fabric before adding soil to retain extra moisture.
Step 2: Planting the Greenery
-
Position the trailing vines:
Take your trailing plant (like Creeping Jenny or wire vine) and gently loosen its root ball. Position it near the front edge of the pot where it will drape over the stairs. -
Add volume in the center:
Place a slightly taller, bushy plant in the center or back of the pot to create immediate volume and hide the soil surface. -
Fill the gaps:
Add additional soil around the root balls, firming it down gently with your fingertips to eliminate large air pockets without compacting the soil too much. -
Water deeply:
Water the newly potted arrangement thoroughly until water begins to trickle out of the drainage hole at the bottom. -
Arrange the vines:
Manually drape the long tendrils over the side of the pot. Gently tease them apart so they hang naturally down the face of the stone step rather than clumping together.
Step 3: Staging the Scene
-
Select the landing spot:
Choose a wide, stable step for your main pot. Ensure the stone surface is level so the heavy pot won’t rock or tip over. -
Place the main focal point:
Set your planted pot on the chosen step, rotating it until the trailing vines cascade over the edge of the stair, creating that beautiful visual connection between levels. -
Clean the surrounding stone:
Brush away any loose soil or debris from the step surface around the pot to keep the look focused on the clean lines of the terracotta and the stone. -
Position background pots:
Place your empty or simpler terracotta pots on the steps above and behind the main planter. Stagger them slightly left or right to create depth without blocking the path. -
Establish the background rhythm:
Ensure the background pots are visible but slightly out of focus relative to the main planter, creating a sense of a larger garden collection. -
Final grooming:
Snip off any broken leaves or yellowing stems from the transport process to give the arrangement an instantly established and healthy appearance.
Mix Your Tones
Don’t just use new pots! Mix in a few aged, white-washed, or mossy terracotta pots in the background layers to add instant history to your steps.
Enjoy the view as your new garden arrangement softens the path and invites guests to explore the levels above

The Complete Guide to Pottery Troubleshooting
Uncover the most common ceramic mistakes—from cracking clay to failed glazes—and learn how to fix them fast.
Wall-Mounted Terracotta Vertical Garden
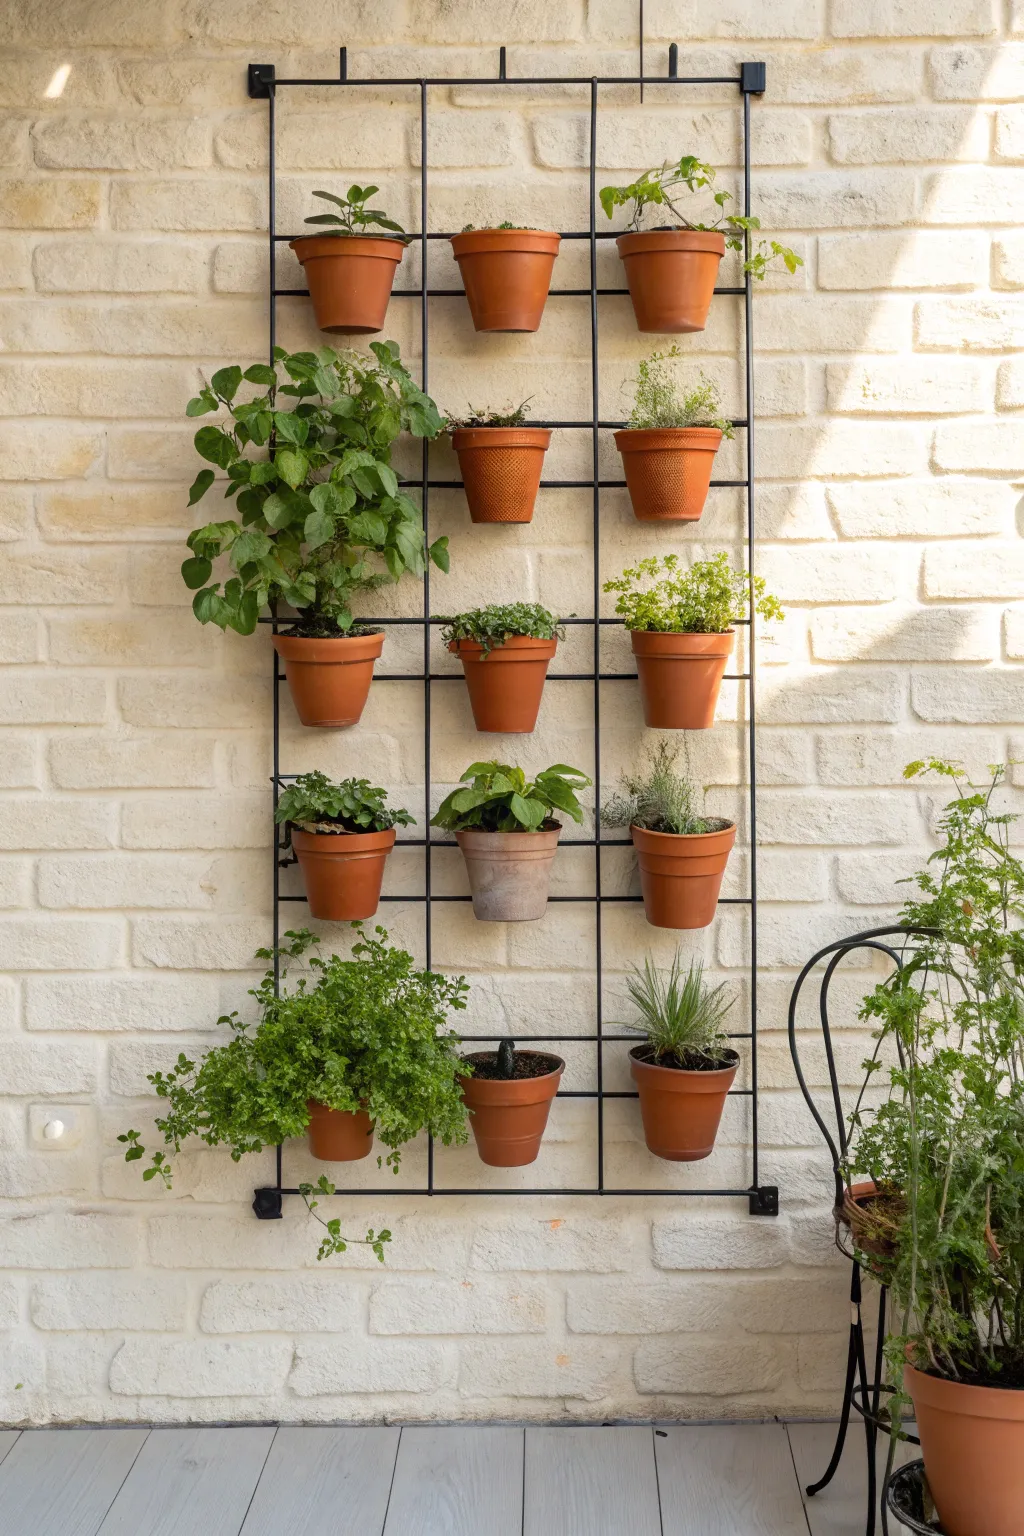
Transform a plain exterior wall into a living tapestry of texture and aroma with this grid-style vertical garden. By combining a stark black metal trellis with the classic warmth of terracotta, you create a modern yet rustic display perfect for herbs and trailing plants.
Step-by-Step Tutorial
Materials
- Black metal wire grid panel (approx. 2ft x 4ft)
- Wall mounting hooks or brackets (black)
- Masonry drill bit (if mounting on brick)
- Power drill
- Wall anchors and screws
- 12-15 Small terracotta pots (4-5 inch diameter)
- Pot clips or sturdy metal S-hooks
- Potting soil mix
- Assorted herbs (Mint, Thyme, Oregano, Basil, etc.)
- Level
- Tape measure
Step 1: Mounting the Grid Structure
-
Measure and mark:
Hold your wire grid against the wall to determine the ideal placement. Ensure it is centered and at a height where you can easily reach the top pots for watering. Use a level to ensure it is perfectly straight, then mark the spots for your four mounting brackets with a pencil. -
Drill pilot holes:
If you are installing onto a brick wall like the one shown, switch to a masonry bit. Carefully drill pilot holes at your marked locations, being mindful to drill into the brick itself or the mortar depending on your anchor type. -
Install anchors:
Tap your wall anchors into the drilled holes until they are flush with the surface. This ensures a secure hold for heavy, soil-filled pots. -
Attach the brackets:
Screw the mounting brackets into the anchors securely. I like to double-check the stability by giving them a firm wiggle before proceeding. -
Hang the grid:
Slot the metal grid onto the mounted brackets. Ensure it sits evenly and doesn’t rattle; if it feels loose, you may need to tighten the mounting screws or add small rubber spacers behind the grid.
Step 2: Preparing the Pots
-
Check for drainage:
Ensure every terracotta pot has a drainage hole. If not, carefully drill one using a masonry bit, applying low pressure to prevent cracking. -
Select your plants:
Choose a variety of plants with different growth habits. Pick trailing plants like ivy or creeping thyme for the bottom rows and upright herbs like basil or rosemary for the middle. -
Fill with soil:
Fill each pot about one-third full with high-quality potting mix. Terracotta is porous, so a mix that retains some moisture without becoming waterlogged is ideal. -
Plant the greenery:
Gently remove your plants from their nursery containers. Loosen the root balls slightly and place them into the terracotta pots, filling in the sides with more soil. Press down gently to eliminate air pockets. -
Water thoroughly:
Water each pot deeply before hanging. This helps settle the soil and ensures the plants are hydrated for their move.
Soak Your Terracotta
Before planting, soak new terracotta pots in a bucket of water for 30 minutes. This prevents the dry clay from immediately wicking all the moisture out of your new soil.
Step 3: Arranging the Display
-
Attach pot clips:
Attach a metal pot clip to the rim of each terracotta pot. These clips are designed to hook directly onto wire mesh. Alternatively, you can use sturdy S-hooks looped through a wire wrapped under the pot rim, though clips are much more secure. -
Start from the bottom:
Begin hanging your pots on the bottom row of the grid. This prevents the grid from becoming top-heavy and swinging out while you work. -
Create a pattern:
Space the pots evenly. In the example, there is a grid pattern of roughly three pots across. Leave an empty grid square or two between pots to allow plants room to breathe and grow. -
Balance the weight:
As you move up the rows, try to distribute heavier plants evenly across the left and right sides to keep the trellis balanced. -
Adjust for sunlight:
Place sun-loving herbs near the top row where they might get more light, and shade-tolerant plants lower down where they might be shaded by the pots above them. -
Final check:
Step back and assess the arrangement. Swap pots around until you are happy with the mix of textures and shades of green.
Uneven Water Flow?
If top pots drip muddy water onto lower plants, place small saucers inside the pot clips under the top rows, or rearrange so water-loving plants are at the bottom.
Enjoy your beautiful new living wall as it grows lusher with every season
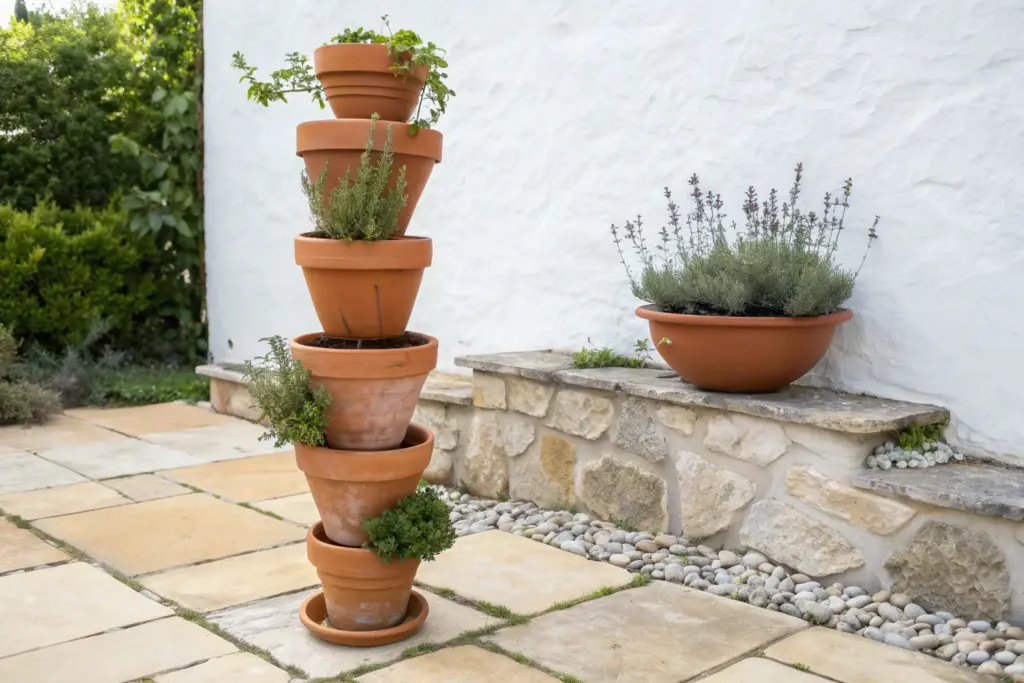
Tiered Terracotta Pot Tower
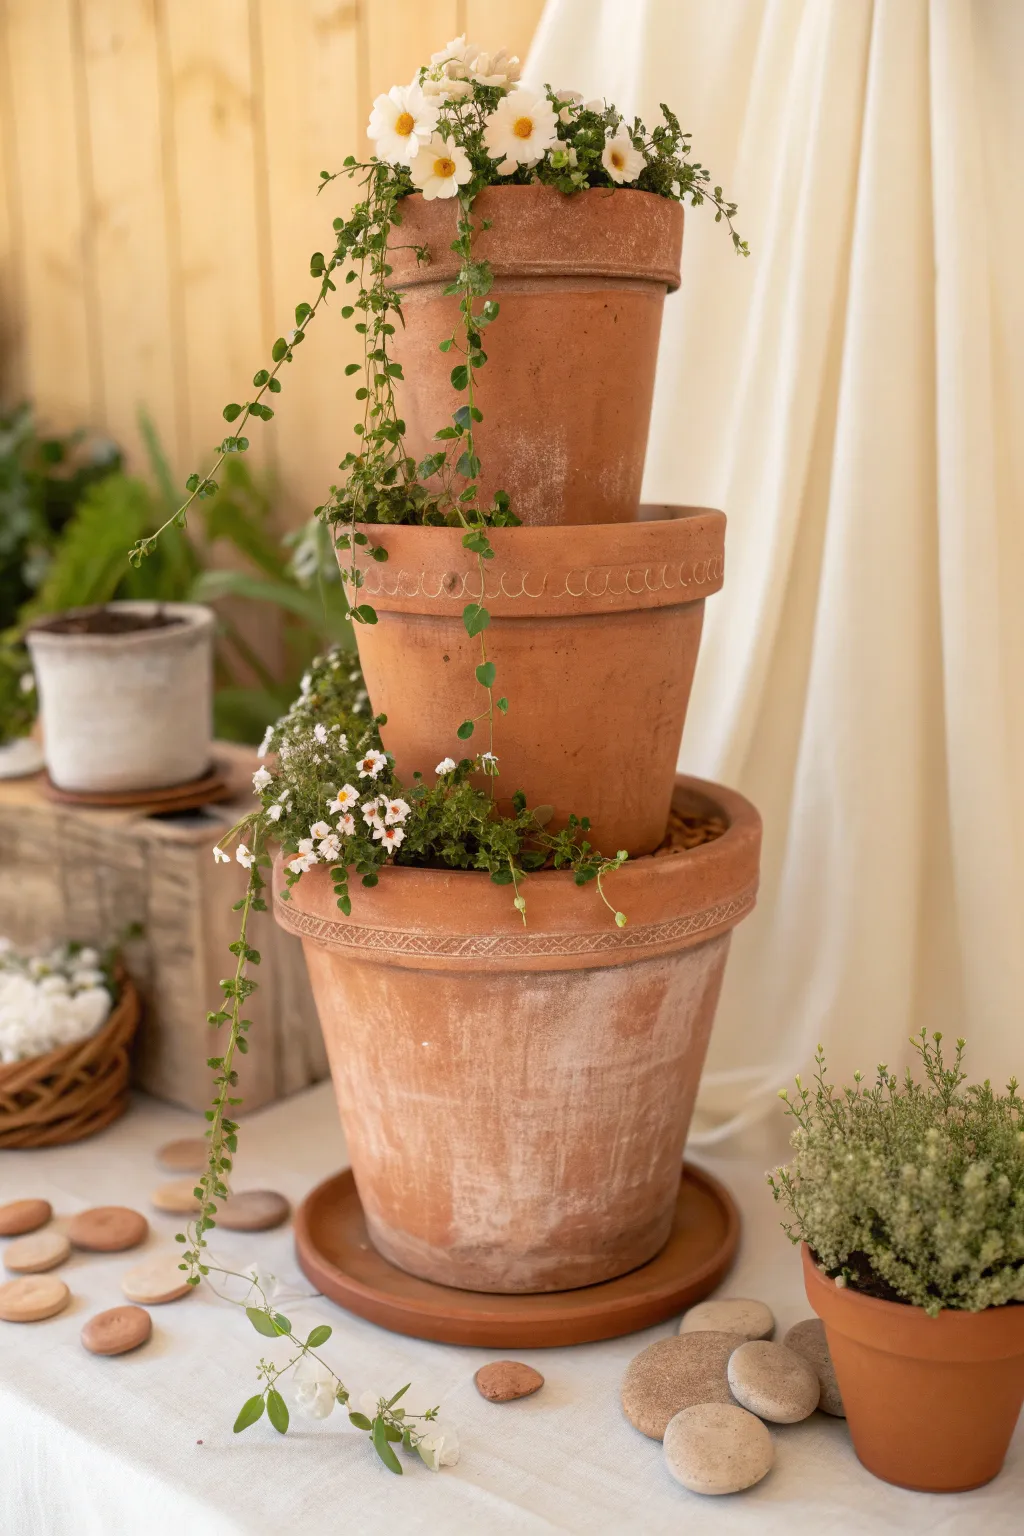
Elevate your vertical garden game with this charming stacked planter tower that brings height and drama to any corner. The natural weathering of the terracotta combined with cascading vines creates effortless cottage-core elegance.
Step-by-Step
Materials
- 1 Large terracotta pot (approx. 12-14 inch)
- 1 Medium terracotta pot (approx. 8-10 inch, ideally with decorative rim)
- 1 Small terracotta pot (approx. 6 inch)
- 1 Large terracotta saucer (to fit the largest pot)
- Potting soil mix
- Small plastic plant nursery pots (to use as internal supports)
- Assorted trailing plants (like creeping jenny or ivy)
- Small white flowering plants (like bacopa or alyssum)
- Trowel
- Watering can
Step 1: Planning the Foundation
-
Select your spot:
Before you begin assembly, choose the final location for your tower. Once filled with soil and stacked, this structure becomes quite heavy and difficult to move without disassembling. -
Prepare the base:
Place the large terracotta saucer on a stable, flat surface. Center your largest pot on top of the saucer to ensure it sits evenly. -
Create the first internal support:
Take an empty plastic nursery pot and place it upside down in the very center of the large terracotta pot. This creates a pedestal for the next tier to sit on, reducing the total weight. -
Fill the base layer:
Using your trowel, fill the space around the upside-down plastic pot with soil. Pack it in firmly until it is level with the top of the plastic pot, creating a stable surface.
Step 2: Building the Tower
-
Stack the second tier:
Place the medium-sized pot directly onto the soil-covered, upside-down nursery pot. Center it carefully and wiggle it slightly to settle it into the soil for stability. -
Check for straightness:
Step back to view the tower from a distance. Ensure the medium pot isn’t leaning; adjust the soil beneath it if necessary to get it perfectly upright. -
Add the second support:
Similar to the first layer, place a smaller upside-down plastic pot inside the medium terracotta pot. This will support the final top tier. -
Backfill the middle layer:
Fill the annular space (the ring-shaped gap) around the internal support with potting soil. Leave about an inch of space from the rim for watering later. -
Place the top tier:
Set your smallest pot onto the support in the middle tier. Since this is the crowning piece, ensure it is perfectly centered and stable before moving on. -
Fill the top pot:
Fill the smallest top pot almost to the brim with potting soil, as this one doesn’t need an internal support structure.
Stability Secret
For windy areas, drive a piece of rebar or a sturdy bamboo stake through the drainage holes of all three pots deep into the ground before filling with soil.
Step 3: Planting and Styling
-
Arrange the trailing vines:
I like to start planting from the top down. Take your longest trailing vine (like the creeping plant shown) and plant it near the edge of the top pot so it spills over the side. -
Add floral accents up top:
Plant the white flowering plants (such as bacopa) next to the vine in the top pot to create a full, blooming crown. -
Populate the middle ring:
In the exposed ring of soil in the middle pot, plant smaller clumps of white flowers and greenery. Focus on the front-facing side if the tower will be against a wall. -
Create the cascading effect:
In the middle tier, tuck a trailing plant on the opposite side of the top tier’s vine. This alternating placement helps balance the visual weight of the greenery. -
Fill the bottom ring:
Plant the exposed soil ring of the bottom pot. Use low-growing varieties here so they don’t obscure the decorative rim of the pot above. -
Water carefully:
Gently water each tier, starting from the top. Let the water trickle down slowly to settle the soil without washing it out over the edges. -
Clean the terracotta:
Wipe away any wet soil or mud splashes from the outside of the pots with a damp cloth to reveal that beautiful clay texture. -
Style nature’s touch:
Gently manipulate the long vines to drape artistically over the lower pots, securing them loosely if needed to guide their growth downward.
Uneven Stacking?
If a pot wobbles, the soil beneath isn’t compacted enough. Remove the pot, pack more soil firmly around the support, and use a small level to ensure flat placement.
Enjoy the lush, layered look of your new vertical garden centerpiece


What Really Happens Inside the Kiln
Learn how time and temperature work together inside the kiln to transform clay into durable ceramic.
Aged Terracotta Patina Styling
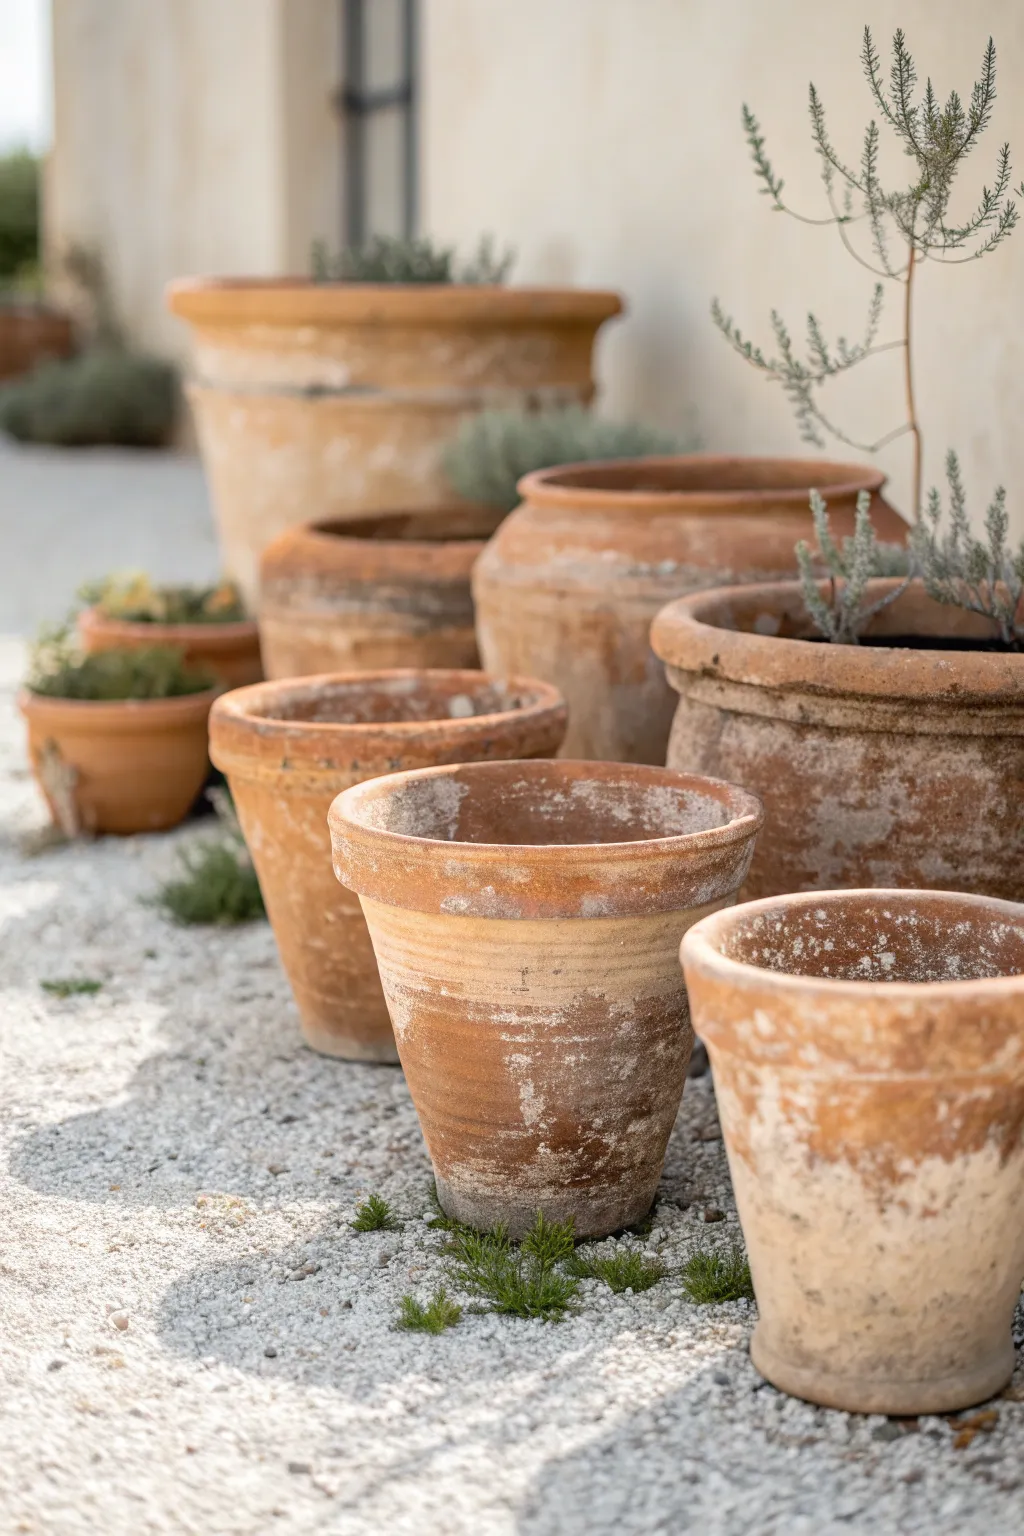
Transform inexpensive, bright orange terracotta pots into seemingly ancient garden relics with this faux-aging technique. By layering garden lime and yogurt, you’ll create a crusty, weathered patina that mimics decades of mineral buildup and outdoor exposure in just a few days.
Detailed Instructions
Materials
- New terracotta pots (various sizes)
- Plain yogurt (full fat works best)
- Garden lime (hydrated lime)
- Moss spores or a handful of live moss (optional)
- Foam brush or cheap bristly paintbrush
- Mixing bowl
- Water spray bottle
- Fine-grit sandpaper (100-120 grit)
- Matte clear sealer (spray can)
- Plastic drop cloth
Step 1: Preparation & Base Coat
-
Soak the Pots:
Begin by submerging your new terracotta pots in a bucket of water for about 15 minutes. This saturation prevents the dry clay from instantly sucking all the moisture out of your aging mixture, giving you more working time. -
Create the Slurry:
In your mixing bowl, combine one cup of plain yogurt with one cup of garden lime. It should feel like a thick pancake batter. If it’s too crumbly, add a splash of water; if it’s too runny, add more lime. -
Add Texture (Optional):
For a greener, living patina, I like to crumble a small handful of dry moss or add moss spores directly into this yogurt mixture. This encourages actual growth later on. -
Initial Application:
Using a foam brush, slather a thick irregular coat of the mixture all over the exterior of the damp pot. Don’t worry about being neat—the messier and thicker the application, the more authentic the aging will look.
Uneven Results?
If the patina flakes off in huge chunks, your pot was likely too dry before painting. Mist the bare spot heavily with water and re-apply a fresh patch of mixture.
Step 2: Distressing & Curing
-
Partial Drying phase:
Set the coated pots aside on a plastic drop cloth in a cool, shaded area. Let them sit for about an hour until the mixture is tacky but not fully hardened. -
Wipe Back:
Take a damp rag and gently wipe away some of the mixture, focusing on the raised rims and the center of the pot’s belly where natural wear would occur. You want to reveal peeks of the orange clay beneath. -
Layering Up:
Dab a second, thinner layer of the lime mixture onto specific areas to create ‘crusty’ buildup spots. This mimics the uneven mineral deposits seen on the large pots in the reference photo. -
The Long Cure:
Move the pots to a humid, shady spot outdoors (or cover loosely with a plastic bag). Let them cure for at least 2-3 days. The yogurt acids react with the lime and clay to bond the finish. -
Mist Occasionally:
If you added moss to the mix, mist the pots with water once a day during the curing process to keep the spores viable.
Step 3: Finishing Touches
-
Sand for Smoothness:
Once fully dry, the surface might feel too rough. Take your fine-grit sandpaper and lightly buff the surface. This knocks down sharp ridges and blends the white patina into the clay for a softer look. -
Dry Brush Detail:
If the pots look too uniformly white, dip a dry bristly brush into a tiny amount of garden soil or brown craft paint. Wipe most of it off, then lightly drag it over the crevices to create dirt shadows. -
Seal the Look:
If these pots are going indoors or on a porch where you don’t want flaking, spray them with two light coats of matte clear sealer. Skip this step if you are aiming for living moss growth outdoors.
Level Up: Mud Wash
Before sealing, smear wet garden soil over the entire dried lime finish, let it sit for 5 minutes, then rinse off. It stains the white lime a realistic earthy tan.
You now have a collection of planters that carry the charm of an old Italian villa garden.
Rustic Crate Terracotta Pot Shelving
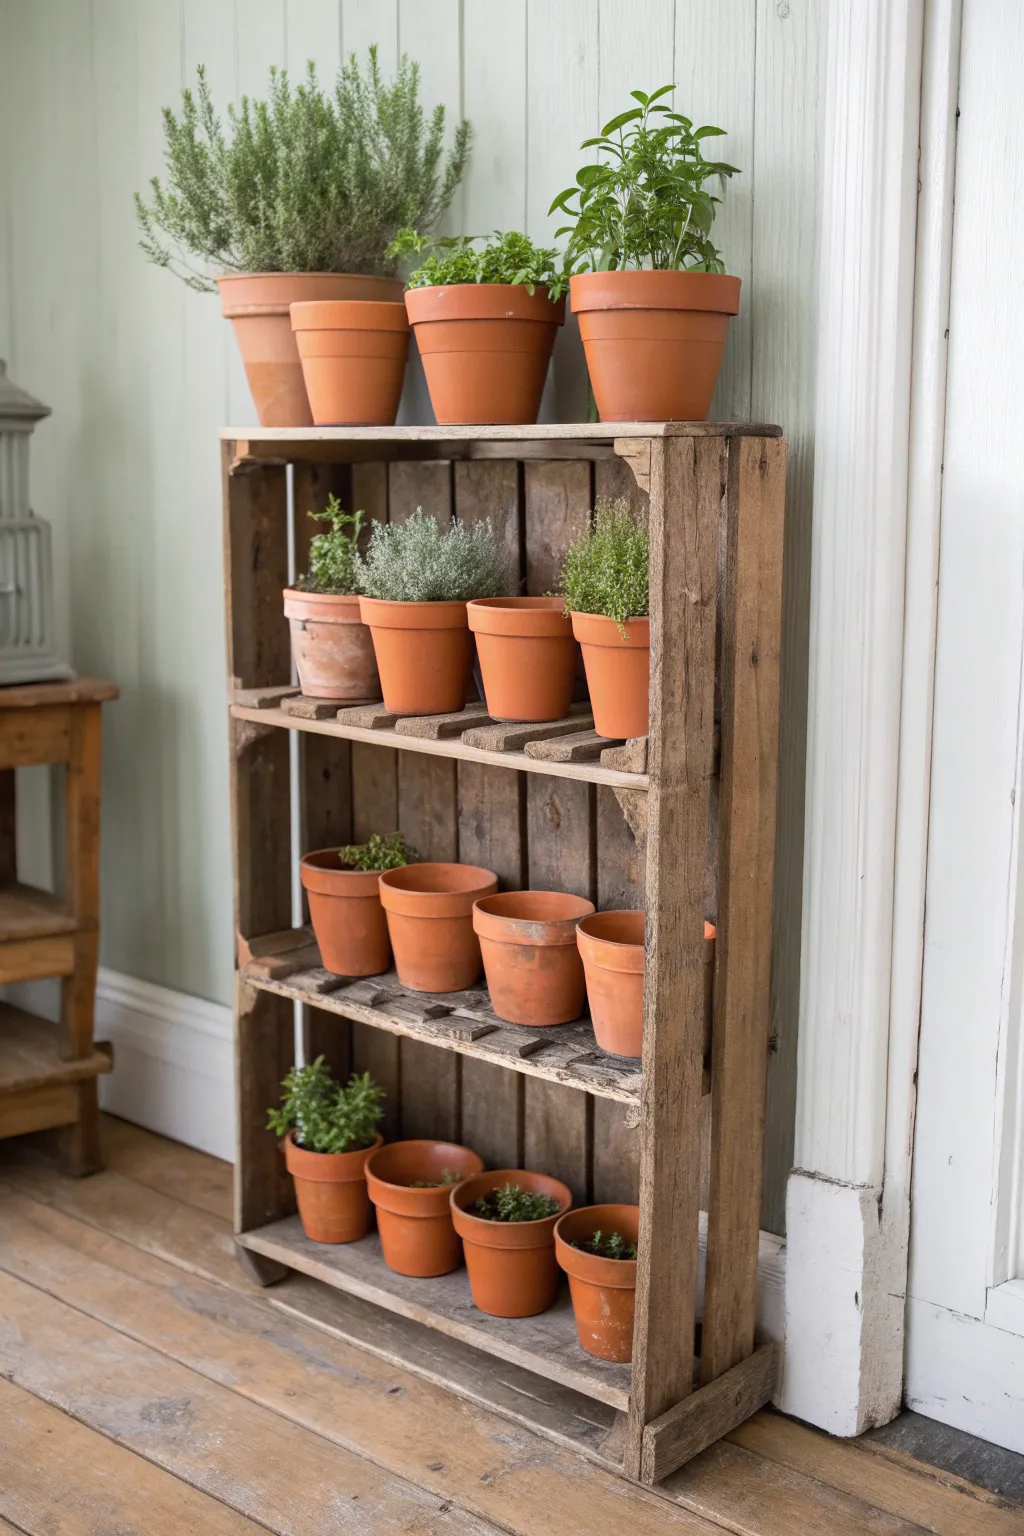
Transform humble wooden crates and old timber into this charming, farmhouse-style vertical garden. This project perfectly frame, rustic terracotta pots, creating a warm, organized display for your kitchen herbs or small indoor plants.
How-To Guide
Materials
- 2-3 vintage wooden apple crates (deep style)
- Reclaimed pallet wood or 1×4 timber planks
- Measuring tape
- Pencil
- Hand saw or jigsaw
- Medium-grit sandpaper (80-120 grit)
- 1 ½ inch wood screws
- Drill with pilot bit
- Wood glue
- Matte wood stain or wax (optional)
- Clean rag
- Terracotta pots in varying sizes (4-inch to 6-inch)
- Potting soil
- Assorted herbs (rosemary, thyme, mint)
Step 1: Planning and Prep
-
Source Your Base:
Begin by finding sturdy wooden crates. Vintage apple crates work best for that authentic aged look, but new crates can be distressed to match. Ensure they are the same width for stable stacking. -
Assess the Condition:
Inspect your wood for loose nails or splinters. I usually tap any protruding nail heads back in with a hammer and remove any dangerous staples. -
Measure Shelf Inserts:
Measure the interior width of your crates. You will need to cut your reclaimed timber or pallet wood to this exact length to create the internal shelves shown in the middle sections. -
Cut the Shelves:
Using your saw, cut the planks to size. For the slatted shelf look shown in the image, you may need two or three narrow strips per shelf level rather than one solid piece. -
Rough Sanding:
Give all surfaces a quick pass with medium-grit sandpaper. The goal isn’t to make it smooth like fine furniture, but to remove snagging splinters while keeping the rough-sawn character.
Aged Patina Hack
To age new terracotta quickly, rub plain yogurt on the exterior and leave it in a shady, damp spot for a week to encourage moss growth.
Step 2: Assembly
-
Stack the Structure:
Stack your crates vertically to test the height. Decide if you want them permanently joined. In the image, the unit acts as one tall tower. -
Join the Crates:
To secure them, apply a bead of wood glue where the crates meet. Clamp them together, then drive screws through the bottom of the upper crate into the top frame of the lower crate for a hidden hold. -
Install Shelf Supports:
Measure the height for your internal shelves. Cut small scrap blocks of wood (cleats) to act as shelf supports. Glue and screw these into the inner side walls of the crates at your desired height. -
Place the Slats:
Lay your cut shelf planks onto the supports. Leave a small gap between the slats for drainage and airflow, mimicking the crate’s original construction style. -
Secure the Shelves:
Screw the shelf slats down into the supports so they don’t tip when you place heavy pots on them. -
Add a Top Board (Optional):
If the top of your stack looks uneven, cut a final piece of timber to create a smooth top shelf surface, slightly overhanging the front edge.
Wobbly Pots?
If your crate slats are uneven and pots rock, use small shims of wood or adhesive felt pads under the pot bases to level them out.
Step 3: Finishing Touches
-
Distress New Wood:
If you used new timber for the shelves, beat it with a chain or hammer lightly to match the texture of the vintage crates. -
Unified Finish:
Apply a matte wood wax or a diluted grey-brown stain to any fresh cuts or new wood so they blend seamlessly with the aged exterior. -
Wipe Down:
Once dry, wipe the entire unit with a clean rag to remove excess dust. -
Prepare the Pots:
Before planting, soak your new terracotta pots in water for 30 minutes. This prevents the dry clay from wicking moisture away from your new plant roots. -
Planting:
Fill your pots with soil and your chosen herbs. Place taller plants like rosemary on top for height, and smaller bushier plants like thyme on the lower shelves. -
Arrangement:
Position the pots on the shelves. Stagger them slightly so each plant gets adequate light and the display feels balanced but casual.
Now you have a stunning, rustic focal point that brings life to any corner of your home

TRACK YOUR CERAMIC JOURNEY
Capture glaze tests, firing details, and creative progress—all in one simple printable. Make your projects easier to repeat and improve.
Half-Buried Terracotta Pot Path Edging
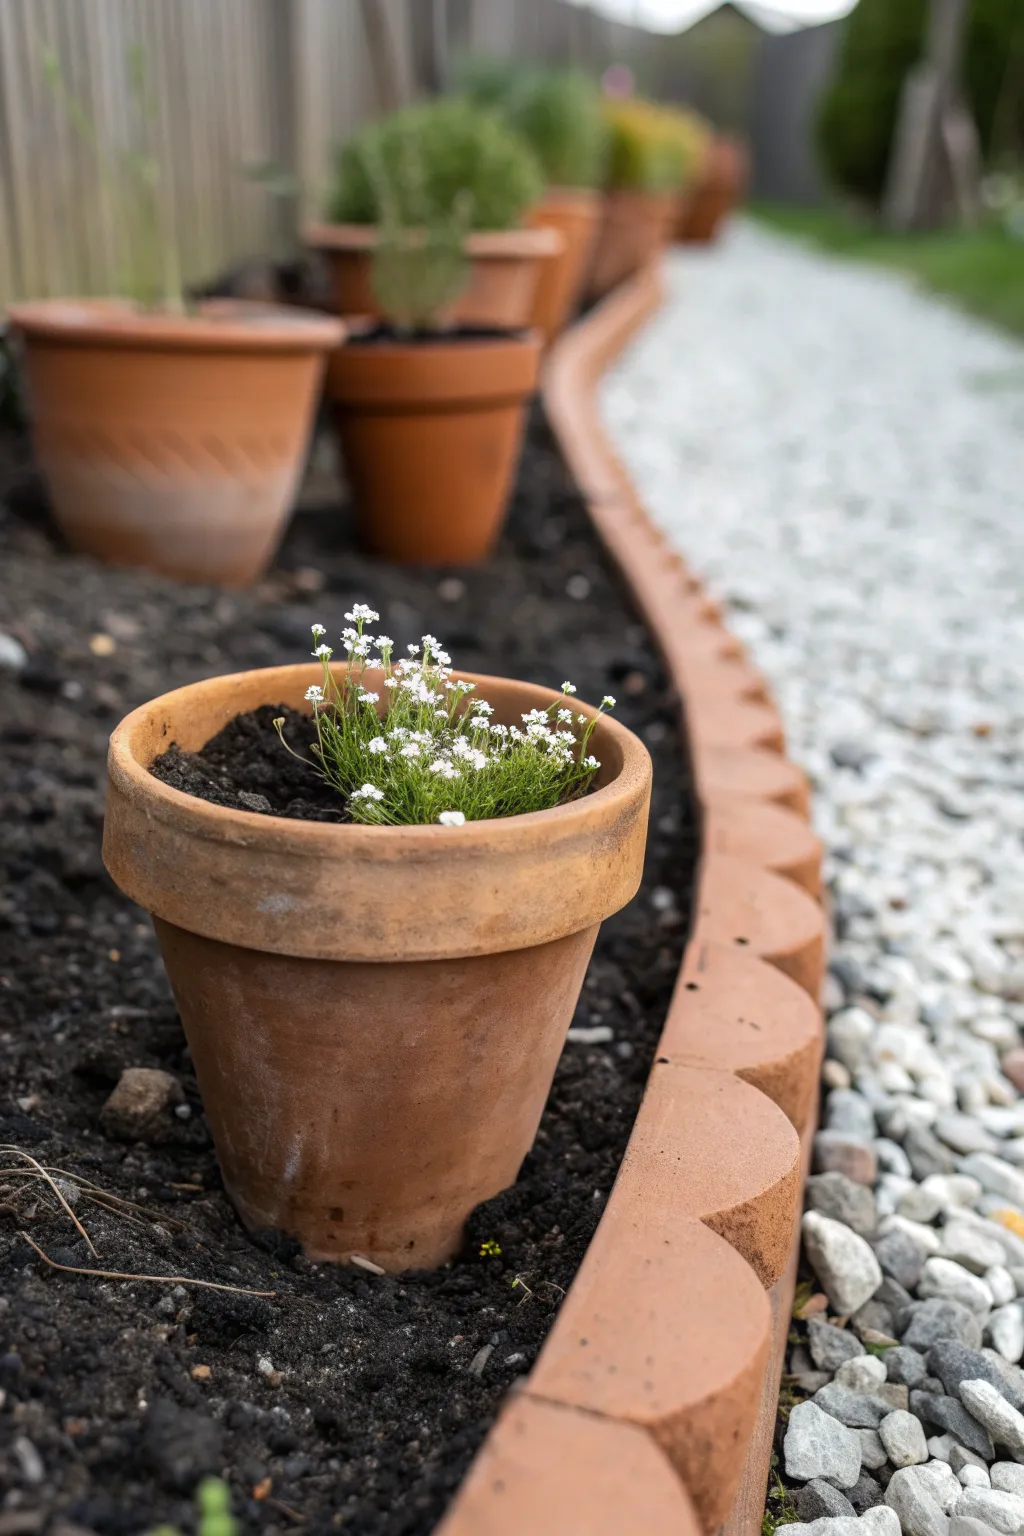
Transform a simple garden border into a charming focal point by combining classic terracotta scalloped edging with partially buried pots. This project creates a delightful rhythm along a pathway, softening the transition between gravel and garden bed with rustic texture and pops of delicate white blooms.
Step-by-Step
Materials
- Terracotta scalloped path edging tiles (approx. 6-8 inches high)
- Standard terracotta pots (various sizes, 6-inch and 8-inch)
- Garden spade or edging tool
- Hand trowel
- Rubber mallet
- Small block of wood
- Potting soil mixed with garden compost
- Small flowering plants (e.g., Sweet Alyssum or Lobelia)
- Gravel or crushed stone (for drainage)
- Garden gloves
Step 1: Preparing the Ground
-
Define the Line:
Decide on the curve of your path. Use a garden hose or a line of string to mark out exactly where the border between your garden bed and the gravel path will sit. -
Dig the Trench:
Using your spade, dig a narrow trench along your marked line. The trench should be about half the height of your scalloped edging tiles. Make it slightly wider than the tiles to allow for adjustments. -
Level the Base:
Run your trowel along the bottom of the trench to create a flat, compacted surface. This ensures your edging sits straight and doesn’t wobble over time.
Weathering tip
To age new terracotta instantly, rub plain yogurt on the exterior before planting. This encourages moss growth for an antique look.
Step 2: Installing the Scalloped Edging
-
Position the First Tile:
Place your first scalloped terracotta tile into the trench at one end. Ensure the curved ‘hump’ is facing upwards and the flat side is against the gravel path. -
Align and Secure:
Set the subsequent tiles snugly against one another. I find it helpful to wiggle each one slightly into the dirt base to find its seat before moving to the next. -
Tap into Place:
To get them perfectly level, place a small block of wood on top of the tile and gently tap it with a rubber mallet. Never strike the terracotta directly to avoid cracking. -
Backfill the Gravel Side:
On the path side, push the existing gravel up against the tiles. If needed, add a little extra gravel to conceal the base of the terracotta, creating a clean, crisp line. -
Backfill the Garden Side:
Pack garden soil firmly against the back of the tiles. Use your fist or the handle of your trowel to tamp it down, ensuring the edging acts as a sturdy retaining wall.
Step 3: Planting the Sunken Pots
-
Plan Pot Placement:
Set your empty terracotta pots on the soil surface first to visualize the layout. Stagger them slightly for a natural look, keeping smaller pots closer to the front edge. -
Dig Planting Holes:
Dig a hole for your main featured pot. It should be deep enough to bury the bottom third of the pot, which helps stabilize it and retains moisture. -
Add Drainage:
Toss a handful of gravel into the bottom of the hole before setting the pot in. This prevents the drainage hole from getting clogged with dense mud. -
Nestle the Pot:
Place the empty pot into the hole and twist it back and forth until it feels solid. Backfill around the exterior base with soil so it looks like it’s rising naturally from the earth. -
Repeat for Background Pots:
For the larger pots in the background, you can bury them slightly less deep or simply nestle them into the surface soil to create varying heights.
Level up: Night mode
Tuck small solar-powered spotlights into the soil behind the scalloped edge to illuminate the curved silhouette at night.
Step 4: Final Touches
-
Fill with Soil:
Fill your secured pots with fresh, high-quality potting mix. Leave about an inch of space from the rim to allow for watering. -
Plant the Blooms:
Gently tease the roots of your Sweet Alyssum or small flowers and plant them into the center of the pots. Firm the soil around the base of the stems. -
Water In:
Water the plants thoroughly, and give the soil around the edging a light soak to help it settle and compact further. -
Clean Up:
Brush off any loose dirt from the rims of the pots and the top of the scalloped edging to reveal that warm terracotta color.
Now you have a structured yet rustic garden border that beautifully frames your plants and pathway
Terracotta Saucer Birdbath Stack
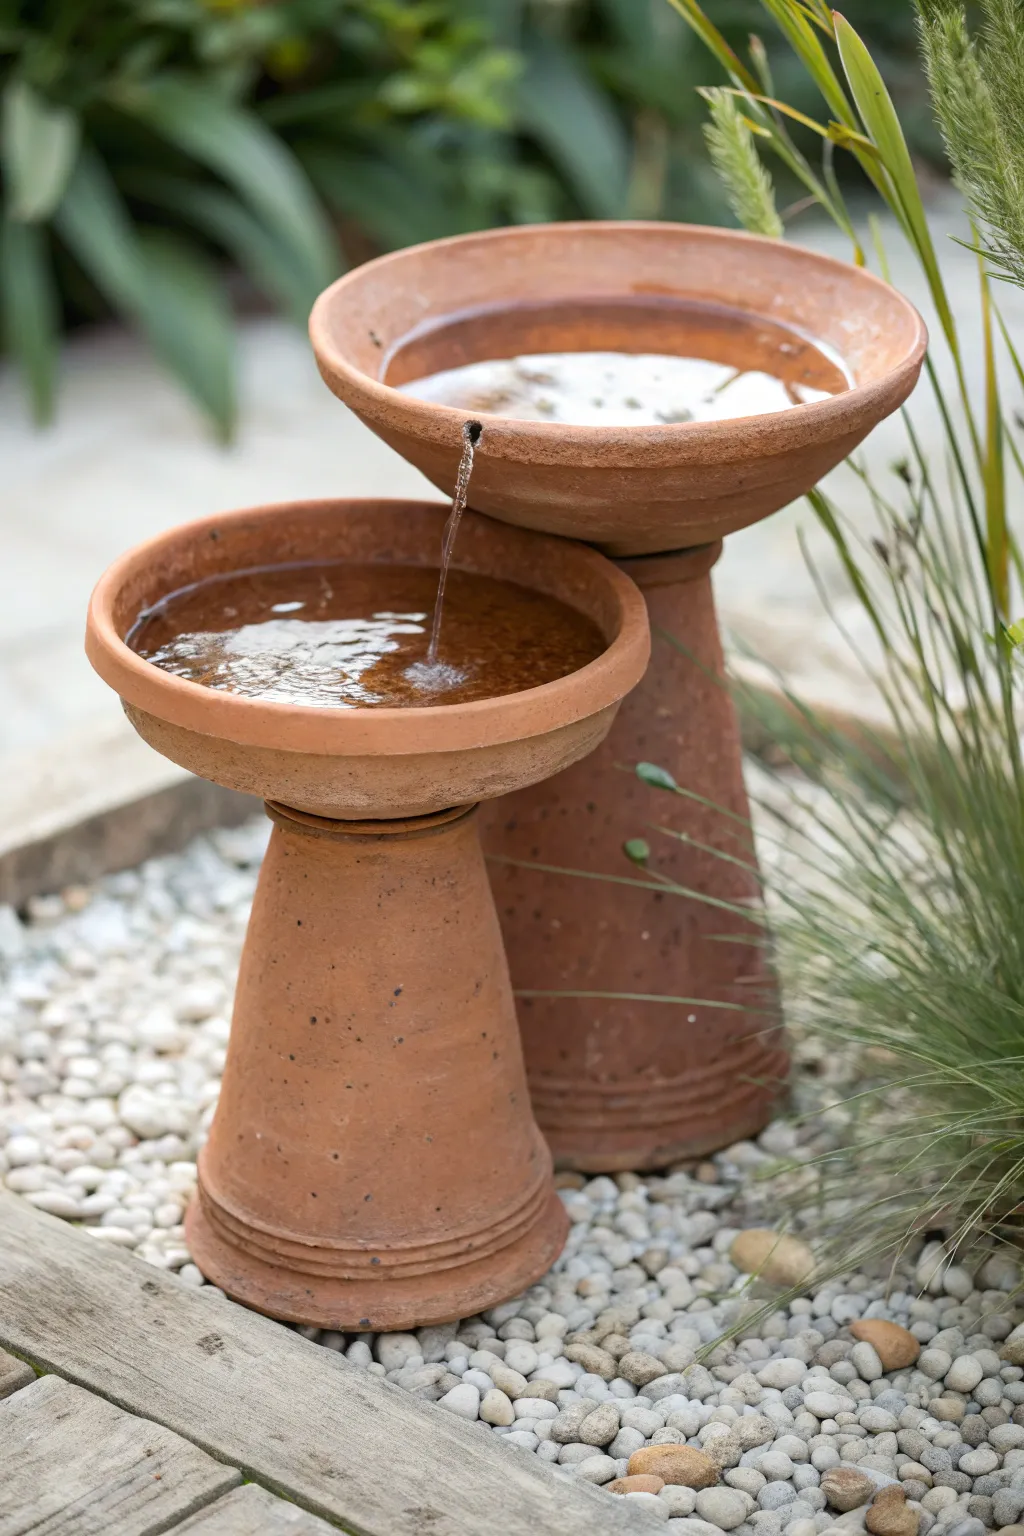
Transform simple garden pots into a soothing water feature that local birds will adore. This two-tiered fountain uses the classic warmth of terracotta to create a gentle, trickling display that fits perfectly in any garden corner.
How-To Guide
Materials
- 1 large terracotta pot (tall, tapered style)
- 1 medium terracotta pot (shorter, tapered style)
- 1 large terracotta saucer (to fit the large pot)
- 1 medium terracotta saucer (to fit the medium pot)
- Submersible water pump (small, low voltage)
- Clear plastic tubing (compatible with pump)
- Masonry drill bit
- Power drill
- Round metal file or sandpaper
- Silicone sealant (waterproof)
- Pea gravel or river stones
Step 1: Preparation & Drilling
-
Soak the terracotta:
Before you begin drilling, fully submerge your pots and saucers in water for at least an hour. Soaking the clay softens it slightly, which dramatically reduces the chance of cracking or chipping while you work. -
Mark your holes:
On the larger saucer, you’ll need two holes: one in the center for the water tube to come up, and a small notch or hole near the rim for water to pour out. Mark these spots clearly with a pencil. -
Drill the center hole:
Place the large saucer on a scrap piece of wood. Using a masonry bit, carefully drill a hole through the center mark. Go slowly and let the drill do the work—don’t press too hard. -
Create the spout:
For the pour spout, drill a small hole near the edge of the large saucer’s rim. Alternatively, you can use the side of the drill bit or a round file to create a ‘V’ notch in the rim itself, which guides the water cleanly downward. -
Drill the base pots:
Turn the taller pot upside down. If it doesn’t already have a drainage hole, drill a central hole in the bottom (which is now the top). Do the same for the shorter pot so the tubing could potentially pass through or sit flat.
Leak Patrol
Terracotta naturally absorbs water. To keep water levels higher for longer, spray the inside of the saucers with a clear, matte masonry sealer before assembly to waterproof the clay.
Step 2: Assembly & Installation
-
Prepare the location:
Choose a spot in your garden and level the ground. I prefer to lay down a bed of pea gravel first; this helps with drainage and provides a stable, attractive base for the fountain. -
Position the pump:
This fountain design often works best with a reservoir buried underneath, but for a simpler version shown here, the pump can hide inside the tall base pot if you run the cord out a notch at the bottom. -
Connect the tubing:
Attach your clear plastic tubing to the pump outlet. Thread the other end of the tubing up through the bottom of the tall inverted pot and out through the hole you drilled in its base. -
Seal the top saucer:
Thread the tubing through the center hole of the large saucer. Apply a ring of waterproof silicone sealant around the tube where it meets the saucer to make it watertight. Let this cure according to the package instructions. -
Stack the tall tower:
Place the large saucer on top of the tall inverted pot. Ensure it sits level. The tubing should now be sticking up slightly into the bowl of the saucer. Trim the tubing so it’s flush or just barely visible above the water line. -
Position the lower tier:
Place the shorter inverted pot next to the tall one. Position it so that the spout or hole you made in the upper saucer is directly above the center of where the lower saucer will sit. -
Add the lower saucer:
Place the medium saucer on top of the shorter pot. You don’t need any tubing here; this bowl simply catches the water falling from above. Make sure it’s perfectly centered to catch the flow.
Solar Power Upgrade
Swap the standard plug-in pump for a solar-powered pump kit. This eliminates the need for trailing extension cords and lets you place your fountain in any sunny spot in the garden.
Step 3: Finishing Touches
-
Check the flow alignment:
Before filling, double-check the alignment. The water should pour from the top notch directly into the lower bowl. Adjust the position of the shorter pot as needed. -
Fill with water:
Fill both saucers with clean water. If you are using a hidden reservoir system, fill that too. Ensure the pump is fully submerged. -
Test the pump:
Plug in the pump and watch the water flow. It might take a moment to push the air out of the tube. Adjust the pump’s flow rate setting if the splash is too vigorous or too weak. -
Secure the components:
Once you are happy with the positioning, you can use a dab of silicone between the pots and saucers to secure them in place, preventing them from being knocked over by wind or animals. -
Camouflage the base:
Surround the base of your pots with decorative river stones or larger white pebbles as seen in the photo. This hides any exposed cords and integrates the fountain into your landscaping. -
Maintenance check:
Keep an eye on water levels, especially on hot days, as terracotta is porous and water evaporates quickly. Top it up regularly to keep the pump running smoothly.
Listen to the gentle splash of water and enjoy the new focal point in your tranquil garden retreat.
Upside-Down Terracotta Pot Mushrooms
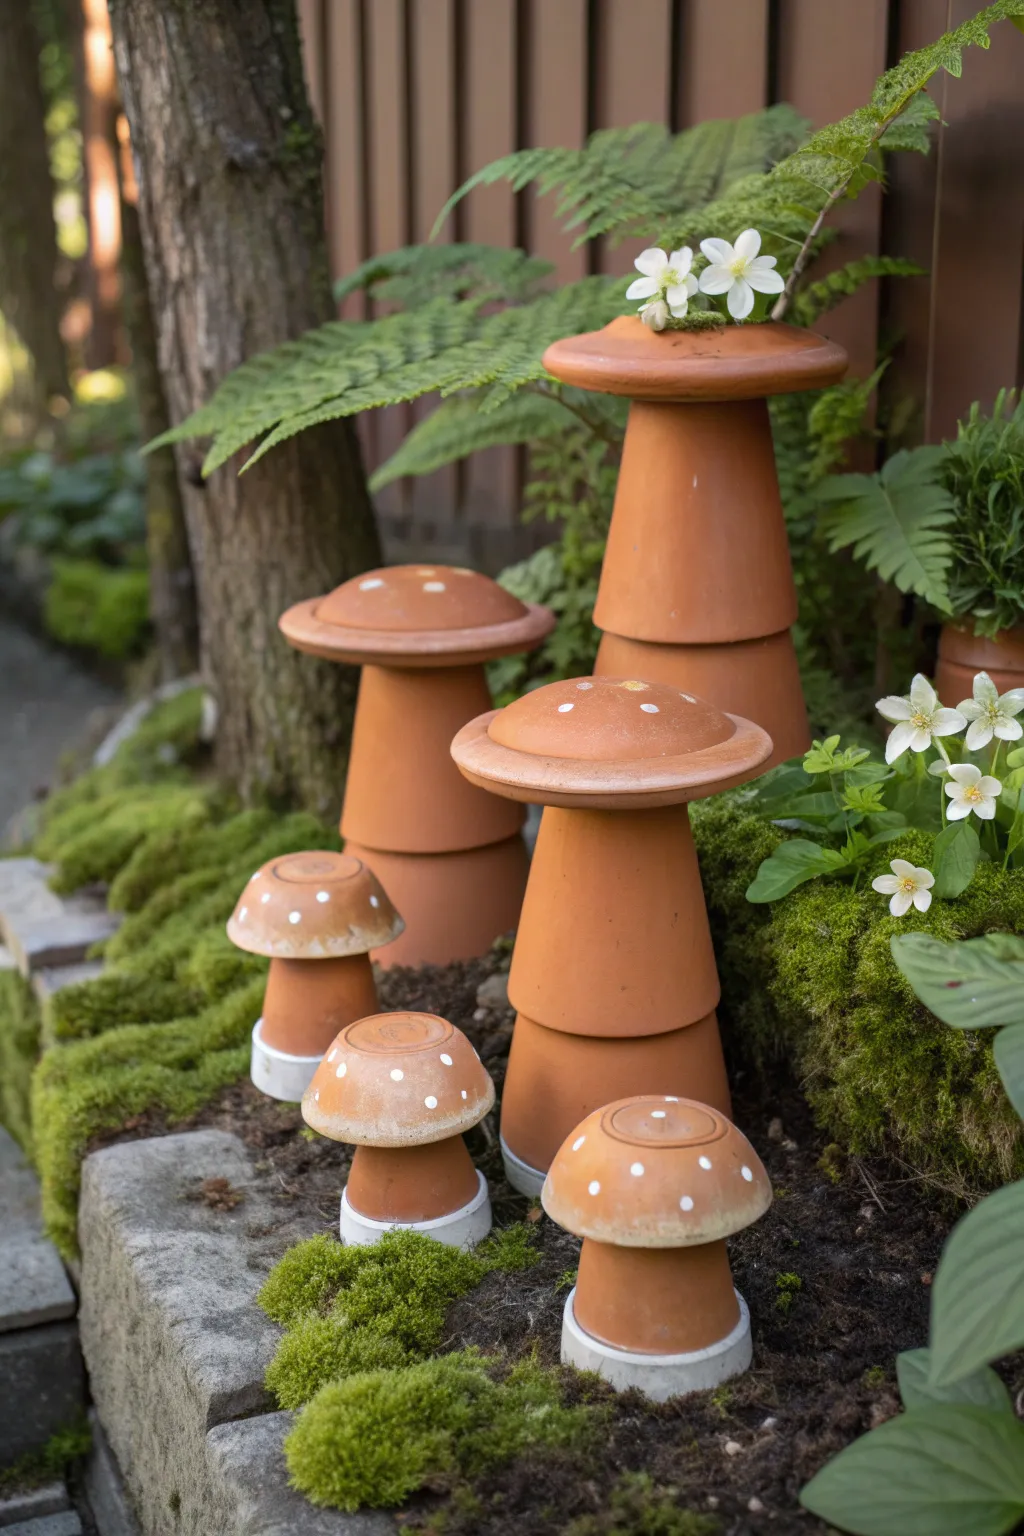
Transform standard plant pots into a charming woodland scene with these easy-to-assemble terracotta mushrooms. Ranging from tiny buttons to towering toadstools, this project uses simple stacking techniques and minimal painting to create an enchanting garden feature that weathers beautifully over time.
Step-by-Step
Materials
- Terracotta pots (various sizes, 2-3 standard sizes per large mushroom)
- Terracotta saucers (sized slightly wider than the pot bases)
- White acrylic craft paint
- Small round paintbrush or sponge dauber
- Strong outdoor adhesive (e.g., E6000 or construction adhesive)
- Small white saucers or shallow bowls (optional, for bases of small mushrooms)
- Clear outdoor sealant
- Damp cloth
- Sandpaper (medium grit)
Step 1: Preparing the Clay
-
Clean surface:
Begin by thoroughly wiping down all your pots and saucers with a damp cloth to remove any dust or sticker residue. The adhesive won’t bond well to dusty clay. -
Dry completely:
Allow the terracotta to dry fully. Since terracotta is porous, even a little moisture can trap water under the glue, so give it an hour in the sun if possible. -
Test stacking:
Experiment with your arrangement before gluing. For the tall mushrooms, try stacking two pots of the same size rim-to-rim, or a smaller pot upside down on top of a larger upside-down pot to create a tapered stem. -
Rough the edges:
Use a bit of sandpaper to lightly scuff the rims and bases where the pots will connect. This creates a better ‘tooth’ for the glue to grab onto.
Wobbly Mushrooms?
If your saucer cap isn’t sitting flat, use small shims of clay or cardboard to level it while the glue dries, then caulk the gap with more adhesive.
Step 2: Building the Stems
-
Base layer:
For the smallest mushrooms, you might just use a single small pot turned upside down. For the shortest ones shown with white bases, glue a small pot upside down into a small, white-painted saucer. -
Stacking tall stems:
For the taller mushrooms, apply a generous bead of strong adhesive to the bottom rim of your base pot. -
Connecting the pots:
Place the second pot upside down onto the first one. You can stack them rim-to-rim for a unique shape, or place the second pot normally (right-side up) then flip the whole stack later, but the image shows tapered stacks which are often achieved by stacking upside-down pots of decreasing size. -
Curing time:
Let the stems cure for at least 2-4 hours before adding the heavy saucers on top. I prefer to let them sit overnight if I have the time, just to be safe.
Step 3: Adding the Caps
-
Selecting saucers:
Choose a terracotta saucer for each stem. The saucer should be inverted to act as the mushroom cap. Ensure it overhangs the top of the stem by at least an inch or two for that classic mushroom silhouette. -
Apply adhesive:
Squeeze a thick ring of adhesive onto the flat bottom of the topmost upside-down pot in your stem stack. -
Secure the cap:
Center the inverted saucer on top of the glue ring. Press down firmly to seat it. -
Weight it down:
Place a heavy object, like a brick or a large rock, on top of the saucer while the glue dries to ensure a tight, gap-free bond.
Pro Tip: Instant Age
Rub plain yogurt onto the unpainted terracotta parts to encourage moss growth. Leave them in a shady damp spot for a few weeks for a lush, ancient look.
Step 4: Decoration & Details
-
Adding spots:
Once fully constructed and dry, use a small round brush or a sponge dauber to add white polka dots to the caps. Variation is key here; make some dots larger and others tiny. -
Natural weathering:
For the weathered look in the photo, you can lightly sand the painted dots once dry to make them look worn. Alternatively, wash a very diluted white paint over the orange clay and wipe it back immediately. -
Base details:
If you want the white-dipped look seen on the smaller mushrooms in the foreground, paint the bottom rim of the stem with a solid band of white paint. -
Optional planting:
Notice the tallest mushroom has a hollow top? If you use a pot instead of a saucer for the cap, you can fill it with soil and plant a small flower inside. -
Sealing:
Spray the entire sculpture with a clear matte outdoor sealant. This protects the paint from rain and helps the glue hold up against temperature changes.
Nestle your new terracotta family into a bed of moss or ground cover to complete the magical effect
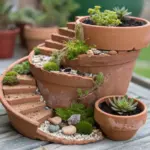
Broken Terracotta Pot Mini Garden
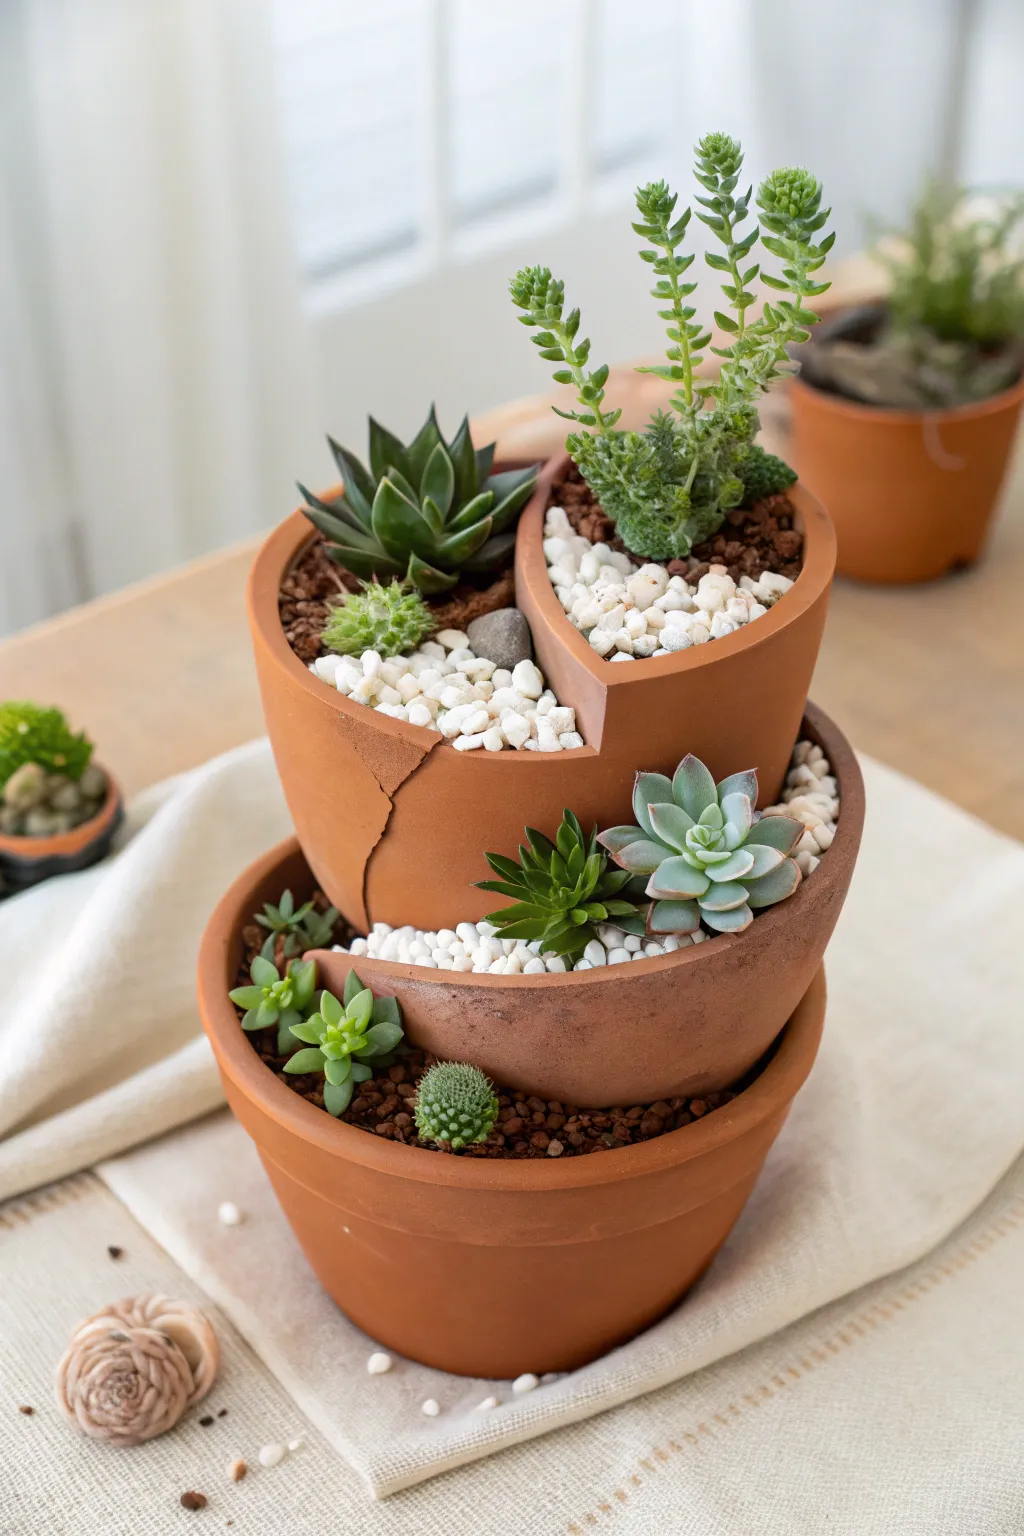
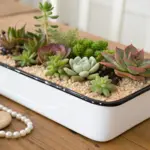
Transform accidental breakage into art with this tiered succulent display using stacked terracotta fragments. This clever arrangement creates multiple levels for housing diverse succulents, turning a few simple pots into a sculptural vertical garden.
Step-by-Step Guide
Materials
- One medium terracotta pot (base)
- Two broken terracotta pots (or intentional shards)
- Cactus/succulent soil mix
- White decorative pebbles
- Small gravel or pumice for drainage
- Assorted succulents (e.g., Echeveria, Sedum, Crassula)
- Small hammer (optional)
- Protective eyewear (if breaking pots)
- Gloves
Step 1: Planning the Structure
-
Prepare the base:
Start with your intact medium-sized terracotta pot. Ensure it is clean and has a clear drainage hole at the bottom. -
Select your shards:
Gather your broken pot pieces. You need larger, curved sections that can act as retaining walls. If you are starting with whole pots, carefully tap them with a hammer to create large, clean breaks. -
Dry fit the arrangement:
Place the largest broken shard inside the base pot to test the fit. It should sit securely against one side, creating a second level. Then, position a smaller shard above that to visualize the third tier.
Shard Safety Tip
Terracotta breaks with razor-sharp edges. Always wear gloves when handling shards, and consider lightly sanding the very sharpest exposed edges with sandpaper.
Step 2: Building the Foundation
-
Fill the base:
Add a layer of gravel or pumice to the bottom of the base pot for drainage, then fill it about two-thirds full with cactus soil. -
Insert the first tier:
Press your largest curved shard into the soil toward the back of the pot. Angle it slightly backward so it can hold soil without tipping forward. -
Secure the wall:
Pack more soil tightly behind and in front of the base of this shard to lock it into place. The soil level inside this new ‘pocket’ should be higher than the base level. -
Create the top tier:
Insert the second, smaller shard into the soil of the middle tier. I find positioning it slightly off-center creates a more natural, winding staircase look. -
Final soil fill:
Fill the top tier with soil. Ensure all levels have enough depth for root systems, adding more soil as needed to stabilize the walls.
Fairy Garden Upgrade
Tuck tiny weatherproof figurines like miniature houses, benches, or mushrooms into the pebbles to transform your succulent tower into a whimsical fairy landscape.
Step 3: Planting and Decorating
-
Plant the top level:
Start at the top with your tallest or most trailing succulents, like the Sedum shown in the image. Dig a small hole, insert the root ball, and firm the soil. -
Fill the middle tier:
In the middle section, plant a medium-sized focal succulent, such as an Echeveria rosette. Position it slightly forward so it peeks over the rim. -
Populate the base:
Add smaller, creeping succulents or tiny cacti in the lowest level. Use the nooks and crannies created by the shards to tuck in small pups. -
Add surface texture:
Carefully pour white decorative pebbles over the exposed soil surface of each tier. This not only looks polished but helps keep soil in place during watering. -
Clean up details:
Use a small brush to sweep any stray soil or dust off the succulent leaves and the terracotta rims. -
Water carefully:
Give the arrangement a very light water to settle the soil, aiming the spout at the base of the plants to avoid washing away your new pebble layer.
Place your new vertical garden in a sunny spot and enjoy the rugged charm of your reclaimed pottery creation
Spilled Terracotta Pot Flower “Pour”
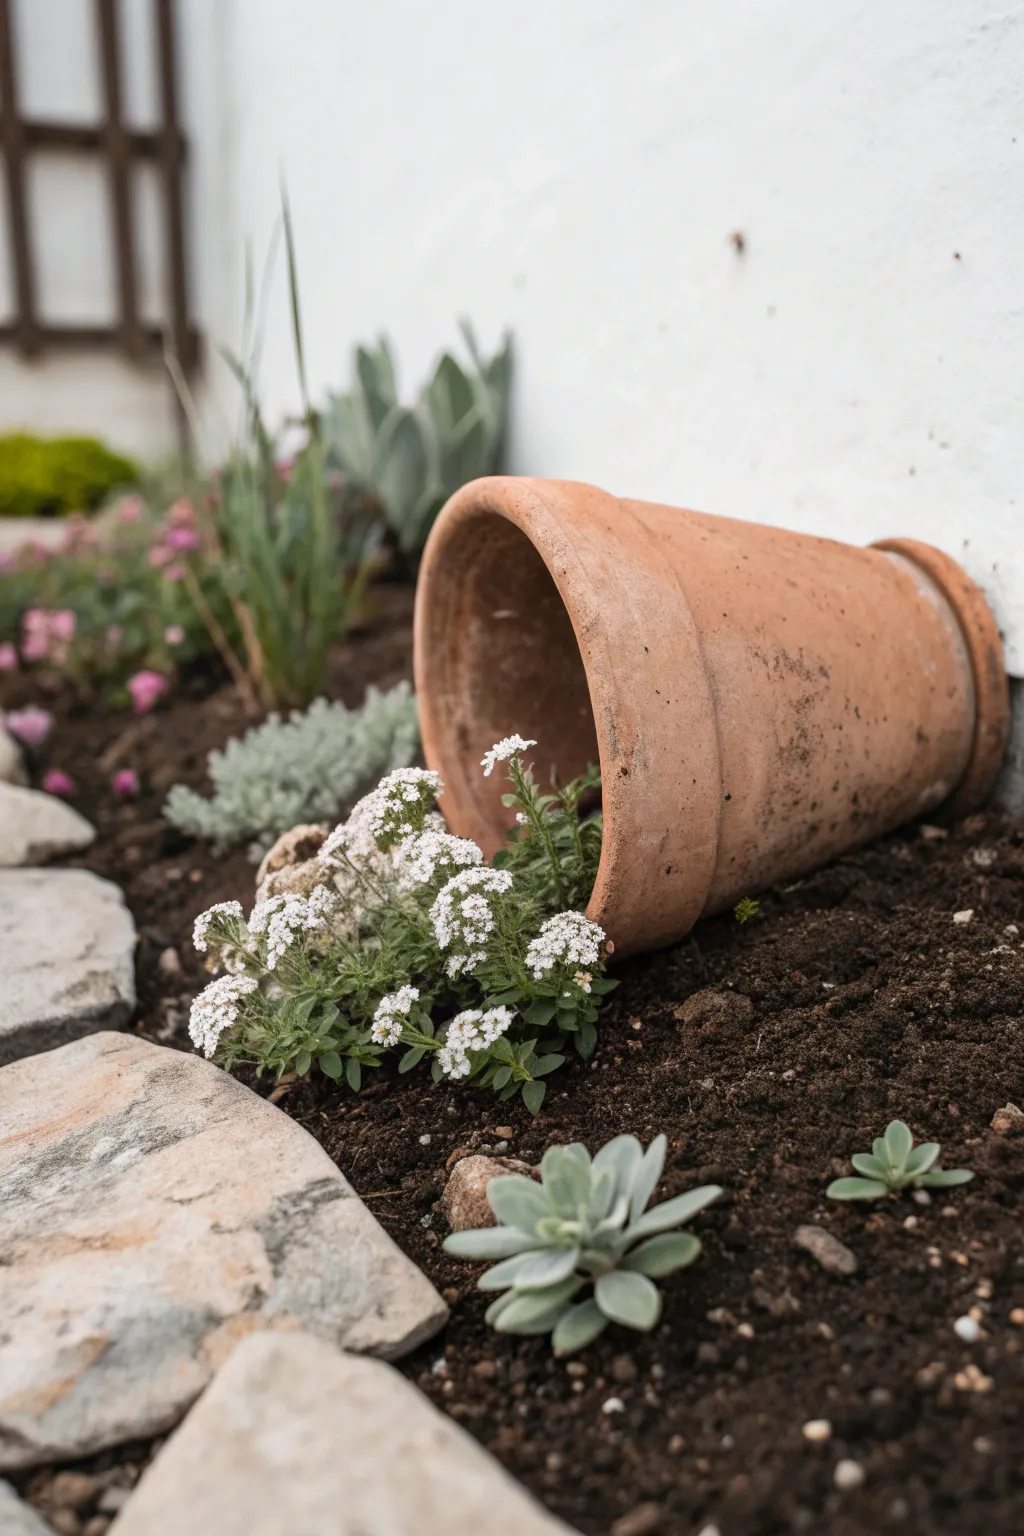
Create a whimsical garden feature that mimics a dropped pot of flowers, spilling its contents in a cascade of living blooms. This playful landscaping trick adds movement and visual interest to garden borders, using the charming simplicity of terracotta and low-growing ground cover.
How-To Guide
Materials
- Medium-sized terracotta pot (8-10 inch diameter)
- Small white alyssum bedding plants (or similar creeping flowers)
- Potting soil mixed with slow-release fertilizer
- Small hand trowel
- Garden spade
- Several flat landscaping stones or pavers
- Small succulent plugs (like echeveria or sedum)
- Watering can with a fine rose attachment
Step 1: Preparing the Ground
-
Select the location:
Choose a spot in your garden bed that receives enough sunlight for your chosen flowers (alyssum loves full sun to partial shade) and is easily visible. -
Clear the area:
Remove any weeds, debris, or large rocks from a roughly 2×2 foot square area where you plan to install the feature. -
Loosen the soil:
Use your trowel to churn up the existing soil, breaking up any hard clumps to ensure good drainage and root penetration. -
Create a depression:
Dig a shallow, curved trench or divot where the pot will rest; this should be slightly deeper than the side of the pot so it looks partially buried. -
Test the fit:
Place the terracotta pot on its side into the depression. Wiggle it back and forth until about one-third of the pot’s side is sunk into the earth.
Step 2: Planting the ‘Spill’
-
Anchor the pot:
Once you are happy with the angle, pack soil firmly around the buried side of the pot to prevent it from rolling or shifting during watering. -
Backfill the pot:
Fill the bottom half of the tipped-over pot with your quality potting mix, creating a continuous ramp of soil that flows out of the pot mouth and onto the ground. -
Shape the flow:
Mound extra potting soil on the ground in front of the pot, shaping it into a widening triangle or fan shape to mimic liquid spilling. -
Plant inside the rim:
Take your first alyssum plant and tuck it deeply inside the pot’s mouth, angled outward. This is crucial for hiding the plastic nursery pot shape and creating a seamless look. -
Establish the cascade:
Plant 2-3 more alyssum plugs directly at the rim where the soil meets the lip of the pot. -
Fanning out:
Continue planting the alyssum in your prepared soil fan, placing them slightly further apart as you move away from the pot to create a natural, drifting effect. -
Initial watering:
Gently water the newly planted alyssum immediately, focusing on settling the soil around the roots without washing away your careful mounding.
Soil Stability Trick
If your pot is large and the soil spills out too easily, bury a small flat rock or shard of pottery halfway inside the rim to act as a dam, holding the internal soil in place.
Step 3: Adding Landscape Details
-
Define the border:
Place flat landscaping stones along the edge of your garden bed. I like to stagger them slightly to keep the look organic rather than rigid. -
Secure the stones:
Press the stones firmly into the soil so they don’t wobble when stepped near. -
Add texture:
In the bare soil patches around the spilling flowers, dig small holes for your succulent plugs. -
Planting succulents:
Nestle the succulents (like the echeveria shown) into the soil, keeping their leaves above the dirt line to prevent rot. -
Finishing touches:
Smooth out the surrounding dark soil with your hand or a small rake to remove footprints and give the scene a polished, intentional appearance.
Level Up: Color Contrast
Instead of white alyssum, use bright blue lobelia or creeping phlox to create a vibrant ‘water’ effect spilling onto the dark soil.
Step back and enjoy the charming illusion of your spilled pot, which will only look better as the flowers grow lush and full.
Terracotta Pot Succulent Wreath
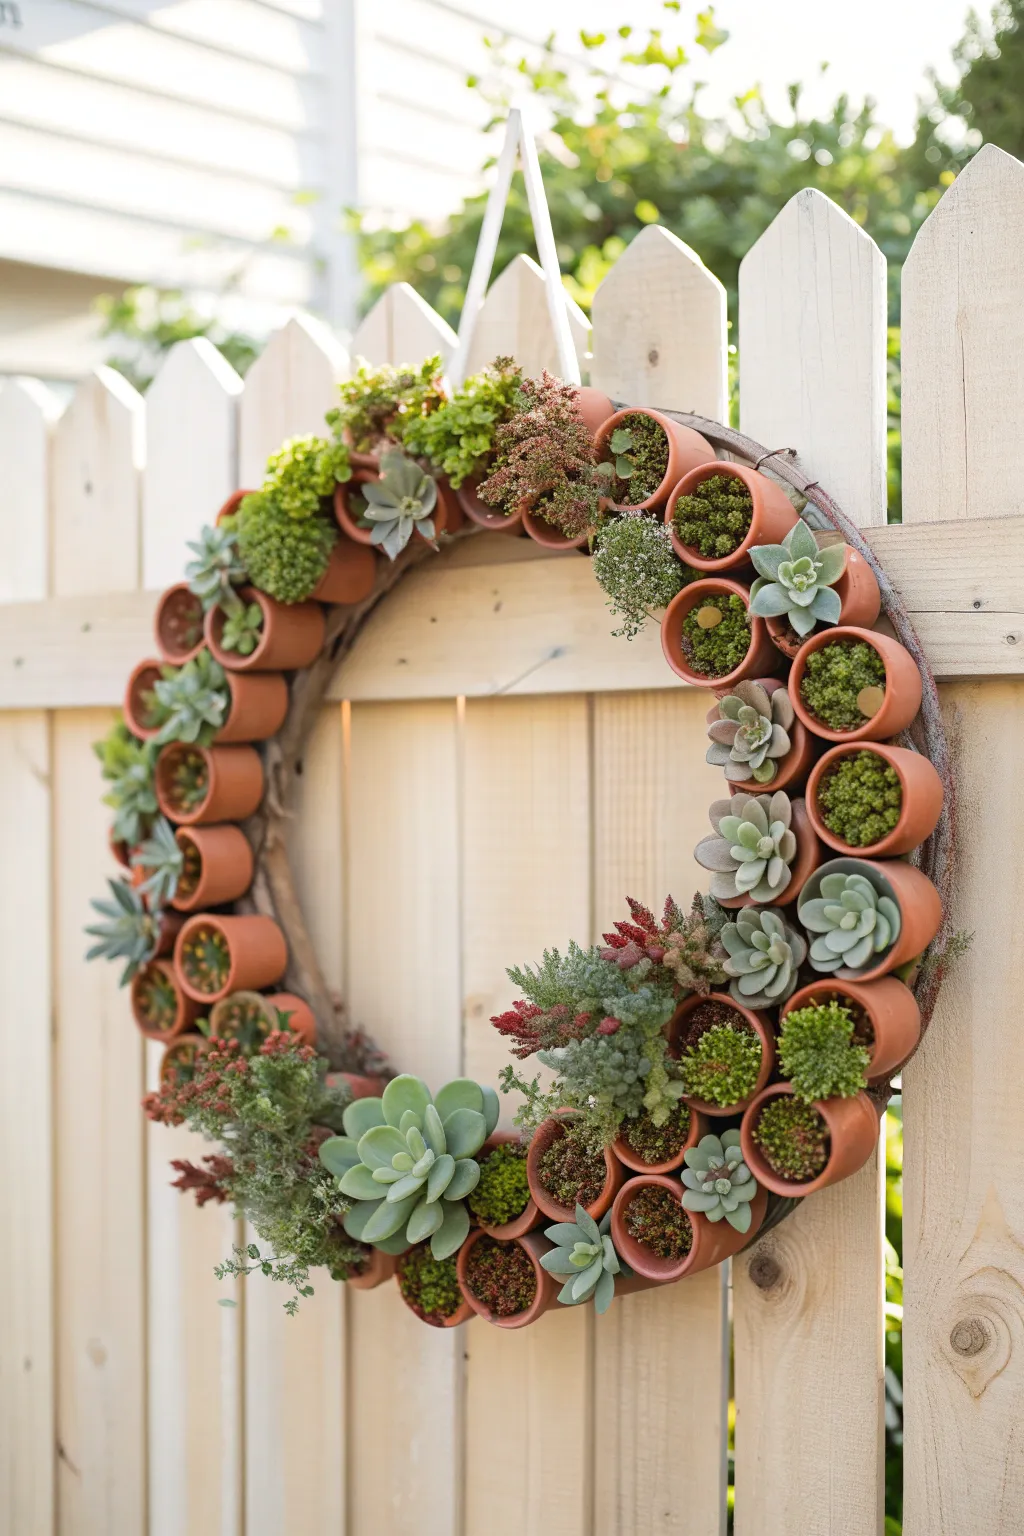
Bring a rustic, living charm to your garden fence or patio wall with this unique wreath constructed entirely of miniature terracotta pots. Filled with a diverse mosaic of succulents, sedums, and moss, this circular planter creates a stunning focal point that grows more beautiful with time.
Step-by-Step Tutorial
Materials
- Wire wreath frame (12-16 inch diameter)
- 20-30 miniature terracotta pots (2-inch size)
- Floral wire or strong zip ties
- Hot glue gun and glue sticks (heavy duty)
- Succulent potting soil
- Sheet moss or sphagnum moss
- Assorted small succulents (rosettes, sedum, trailing varieties)
- Wire cutters
- Burlap ribbon or strong twine for hanging
Step 1: Preparing the Frame
-
Select your foundation:
Begin with a sturdy wire wreath frame. A flat wire frame works best as it provides a stable back for the pots to rest against. -
Wrap the base (optional):
If your wire frame feels slippery or too thin, I like to wrap it loosely with burlap ribbon or floral tape first. This gives the glue and wire something extra to grip onto.
Weight Warning
Terracotta is heavy! Ensure your hanging hardware (nails, hooks) is rated for substantial weight, especially after watering.
Step 2: Attaching the Pots
-
Initial pot placement:
Lay your wreath frame flat on a work surface. Arrange a test layer of your terracotta pots around the ring to gauge how many you will need. Aim for a mix of angles—some facing straight out, others slightly tilted inward or outward for a natural look. -
Wire through the drain holes:
Take a length of floral wire and thread it through the drainage hole of a pot. Wrap the wire tightly around the metal wreath frame and twist it securely at the back. -
Secure with adhesive:
For extra stability, apply a dab of heavy-duty hot glue where the pot touches the frame or neighboring pots. This prevents them from wobbling while the plants establish roots. -
Build the circle:
Continue wiring and gluing pots around the entire frame. Nestle them close together so they support one another. Vary the tilt of the pots slightly as you go to create visual interest and pockets for trailing plants. -
Fill the gaps:
Once the primary ring is done, check for any large gaps. You can wire smaller pots into these spaces or plan to fill them later with large clumps of moss.
Loose Soil?
If soil spills when you tilt it, pack more sphagnum moss tightly over the soil surface to act as a barrier cap.
Step 3: Planting the Wreath
-
Create soil pockets:
Fill each miniature pot about halfway with succulent potting soil. Press it down gently to create a firm base. -
Prepare the succulents:
Remove your succulents from their nursery containers. Gently shake off excess soil from the roots so they can fit into the small terracotta openings. -
Plant the rosettes:
Start with your largest rosette succulents (like Echeveria). Place one in a prominent pot, tucking the roots into the soil. I prefer to place these at irregular intervals as focal points. -
Add texture with sedum:
Fill surrounding pots with texture-rich plants like creeping sedum or burro’s tail. These fill the space beautifully and spill over the edges. -
Secure plants with moss:
After placing a succulent, tuck small pieces of damp sphagnum moss around the base of the stem. This acts like a plug to hold the soil in and keeps the plant secure while vertical. -
Fill the voids:
Inspect the wreath for empty spaces between the terracotta pots themselves. Tuck clumps of moss or small succulent cuttings directly into these crevices to hide the wire frame completely.
Step 4: Finishing Touches
-
Clean and hydration:
Use a soft brush to sweep away loose soil from the terracotta rims and succulent leaves. Mist the entire wreath lightly with water to settle the soil and hydrate the moss. -
Attach the hanger:
Loop a sturdy piece of white ribbon, twine, or wire through the top of the frame structure. Ensure it is centered so the wreath hangs straight. -
Acclimatize:
Lay the wreath flat in a bright, shaded area for about a week. This allows the roots to anchor slightly before you hang it vertically.
Hang your living masterpiece on a sunny fence and enjoy watching the textures fill in as the season progresses
Stacked Terracotta Pot Fountain Look
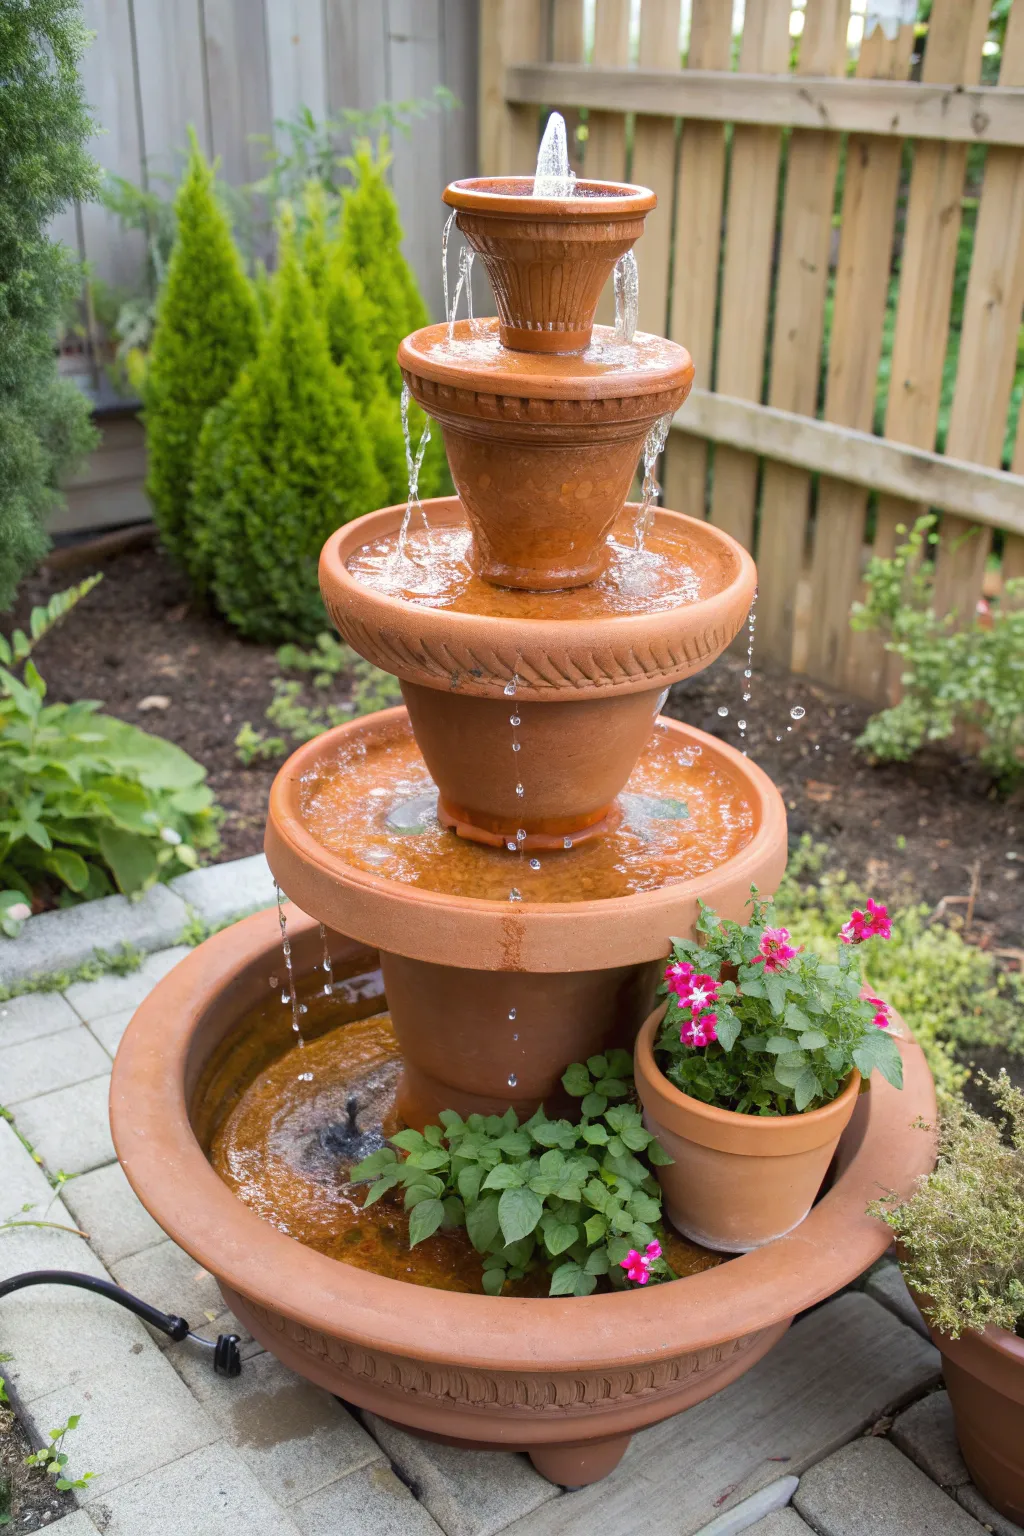
Transform simple clay pots into a soothing water feature that adds rustic charm and the gentle sound of flowing water to your garden. This stacked design creates a beautiful cascading effect that requires only a few basic supplies and an afternoon to assemble.
Step-by-Step
Materials
- 1 Large terracotta bowl (approx. 18-20 inches)
- 3 Terracotta pots in graduated sizes (e.g., 14″, 10″, 6″)
- 3 Terracotta saucers in graduated sizes (corresponding to pots)
- Submersible fountain pump (rated for your lift height)
- Clear vinyl tubing (to fit pump outlet)
- Clear silicone sealant or waterproof plumber’s putty
- Drill with masonry bit
- Round file
- Small pebbles or rocks (for stabilization/decoration)
- Water
- Outdoor extension cord (if needed)
- Small potted plants (impatiens, creeping jenny) for decoration
Step 1: Preparation & Drilling
-
Soak the Pots:
Before drilling, soak all your terracotta pots and saucers in water for at least an hour. This softens the clay slightly and prevents it from cracking or chipping under the pressure of the drill. -
Mark Center Points:
Turn your saucers upside down. Find the exact center of each saucer and mark it clearly with a pencil. You need a central hole for the tubing to pass through the entire structure. -
Drill Drainage Holes:
Using a masonry bit slightly larger than your vinyl tubing, carefully drill a hole through the center of each saucer. Go slowly and let the drill do the work to avoid cracking the clay. -
Enlarge Pot Bottoms:
Check the drainage holes in the bottom of your pots. If they aren’t large enough to easily feed the pump’s power cord or the tubing through, use the masonry bit or a round file to gently enlarge them. -
File the Edges:
Notch the rim of the large base pot (which will be upside down) with a round file. This creates a small channel for the pump’s power cord to exit the fountain without making the base wobbly.
Step 2: Base Assembly
-
Position the Pump:
Place your large terracotta bowl where you want the final fountain to sit. Place the submersible pump in the center of the bowl and attach your length of vinyl tubing. -
Add the First Support:
Invert the largest terracotta pot and place it over the pump inside the bowl. Thread the tubing up through the drainage hole in the bottom of this inverted pot. -
Seal the Cord:
Ensure the power cord runs out through the notch you filed earlier. You can dab a little silicone here later if you want a watertight seal, but gravity usually holds it steady. -
Leveling:
Check that the inverted pot is level. If the bowl bottom is rounded, create a flat surface using flat river stones or slate pieces under the inverted pot’s rim.
Water Flow Woes?
If water dribbles down the underside of the saucers instead of falling cleanly, apply a thin line of clear silicone under the lip of each saucer to break the surface tension
Step 3: Stacking the Tiers
-
Place the First Saucer:
Thread the tubing through the drilled hole of your largest saucer. Place this saucer right-side up on top of the inverted base pot. I find adding a ring of silicone sealant between the pot and saucer adds crucial stability. -
Second Tier Support:
Invert the medium-sized pot. Thread the tubing through its drainage hole and place it upside down into the center of the large saucer you just installed. -
Second Tier Saucer:
Thread the tubing through the medium saucer and place it on top of the medium inverted pot. Again, ensure everything looks centered and level before proceeding. -
Top Tier Assembly:
Repeat the process with the smallest inverted pot and the smallest saucer. Leave enough vinyl tubing extending out the very top to create a gentle bubbler effect. -
Trim the Tubing:
Once stacked, trim the vinyl tubing so it sits just below or even with the rim of the top saucer. Apply a final bead of silicone around the tube at the top hole to prevent water from leaking back down the center pipe.
Solar Upgrade
Swap the electric pump for a solar-powered kit. This removes the need for cords and lets you place your fountain in any sunny spot in the garden without worrying about outlets
Step 4: Finishing Touches
-
Cure Time:
Let the silicone sealant cure fully according to the manufacturer’s instructions (usually 24 hours) before filling with water to ensure strong bonds. -
Fill and Test:
Fill the bottom bowl and all saucers with water. Plug in the pump. You may need to adjust the flow rate on the pump trigger to get the perfect trickle without splashing. -
Decorate with Plants:
To match the image, nestle a small terracotta pot with blooming flowers (like pink impatiens) into the lowest water basin. You can prop it up on a brick if the water is too deep. -
Add Greenery:
Tuck water-loving foliage like creeping jenny or ivy directly into the water of the bottom bowl to soften the edges and hide the pump housing.
Listen to the tranquil sounds of your new handmade fountain as birds and butterflies stop by to say hello
Terracotta Pot Rain Chain
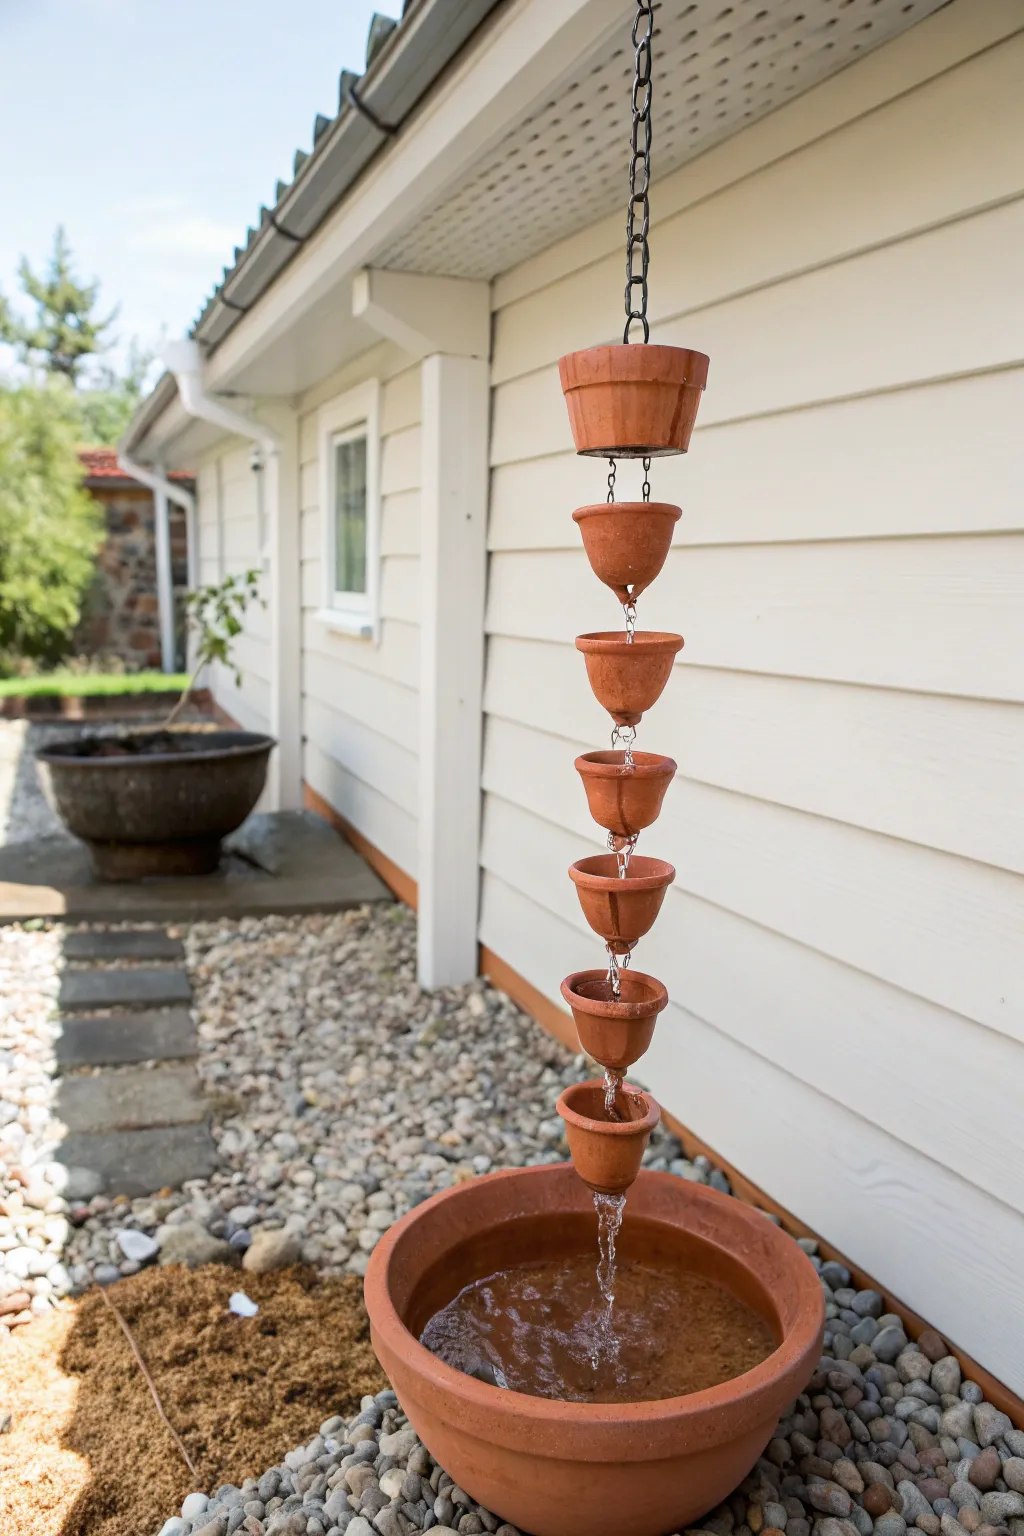
Transform a standard downspout into a mesmerizing water feature using simple terracotta pots. This functional sculpture guides rainwater down through a series of suspended vessels, creating a soothing sound and a beautiful focal point for your garden.
Detailed Instructions
Materials
- One large terracotta saucer or low bowl (approx. 12-14 inches)
- 7-9 small terracotta pots (approx. 2-3 inches diameter)
- One medium terracotta pot (approx. 4 inches diameter) for the top
- Medium-gauge galvanized wire or copper chain
- Needle-nose pliers
- Wire cutters
- Wait of river rocks or decorative pebbles
- Power drill with masonry bit (optional)
- S-hook or gutter clip
- Metal washers (optional, for spacing)
Step 1: Preparing the Pots
-
Check drainage holes:
Inspect all your small pots and the one medium pot. The drainage holes need to be large enough for your chain or wire to pass through easily, but small enough that a stopper or knot won’t slip through. -
Enlarge holes if needed:
If I find the standard drainage holes are too tight for the chain, I carefully widen them using a power drill and a masonry bit. Go slow to avoid cracking the clay. -
Clean everything up:
Wipe down the pots with a damp cloth to remove any warehouse dust or sticker residue. This ensures a clean look once the water starts flowing.
Weight Wait
Don’t skip the bottom anchor! A loose rain chain can swing violently in storms and shatter against the house wall. Burying the end in heavy rocks is crucial.
Step 2: Looking the Chain
-
Measure the drop:
Measure the distance from your roof gutter or eaves down to the ground. This tells you exactly how much chain or wire you will need. -
Prepare the top connection:
Attach a sturdy S-hook or a dedicated rain chain gutter clip to the top of your chain. This will be the main anchor point. -
Attach the top pot:
Thread the chain through the large medium pot first. Secure it by creating a bulky wire knot or placing a large washer and cross-bar inside the pot so it hangs securely at the very top.
Mossy Patina
Brush the outside of your pots with plain yogurt before hanging. This encourages moss to grow on the clay, giving your rain chain an ancient, secret garden look.
Step 3: Assembling the Cascade
-
Create the first link:
About 4-6 inches below the top pot, create a stop on your chain. If using link chain, you can use a horizontal piece of thick wire through a link; if using straight wire, twist a loop to create a resting point. -
Thread the first small pot:
Slide the first small terracotta pot onto the chain. Let it rest on the stop you just created. It should hang straight without tilting excessively. -
Establish spacing:
Determine the spacing for the next pot. You want the water to drip from the bottom of one pot directly into the center of the next. Usually, a 2-inch gap between the bottom of one pot and the rim of the next works well. -
Repeat the process:
Create another stop on the chain at your measured distance and thread the next small pot. Continue this rhythm all the way down the line. -
Check alignment:
Periodically lift the chain to ensure the pots are hanging vertically aligned. If they twist too much, the water might splash out rather than flow down. -
Secure the bottom:
Once you have threaded the final pot, trim any excess chain, leaving a tail of about 6 inches to anchor it into the basin.
Step 4: Setting the Basin
-
Position the saucer:
Place your large terracotta saucer directly under the gutter opening on the ground. It needs to be level to hold water evenly. -
Anchor the chain:
Place the tail of the chain into the center of the saucer. You can attach a heavy weight or a large stone to the end of the chain to keep it taut in high winds. -
Fill with stones:
Fill the saucer with river rocks or pebbles. This hides the chain anchor, prevents the water from splashing mud, and stabilizes the basin.
Step 5: Final Installation
-
Hang the assembly:
Climb up and hook the top of the rain chain onto your gutter outlet. Ensure the water flow is directed straight into the top, larger pot. -
Test the flow:
Use a garden hose on a gentle setting to simulate rain. Watch how the water travels from pot to pot and adjust the angles or spacing if you see excessive splashing.
Now you can enjoy the tranquil sight and sound of water cascading through your handcrafted clay fountain whenever it rains