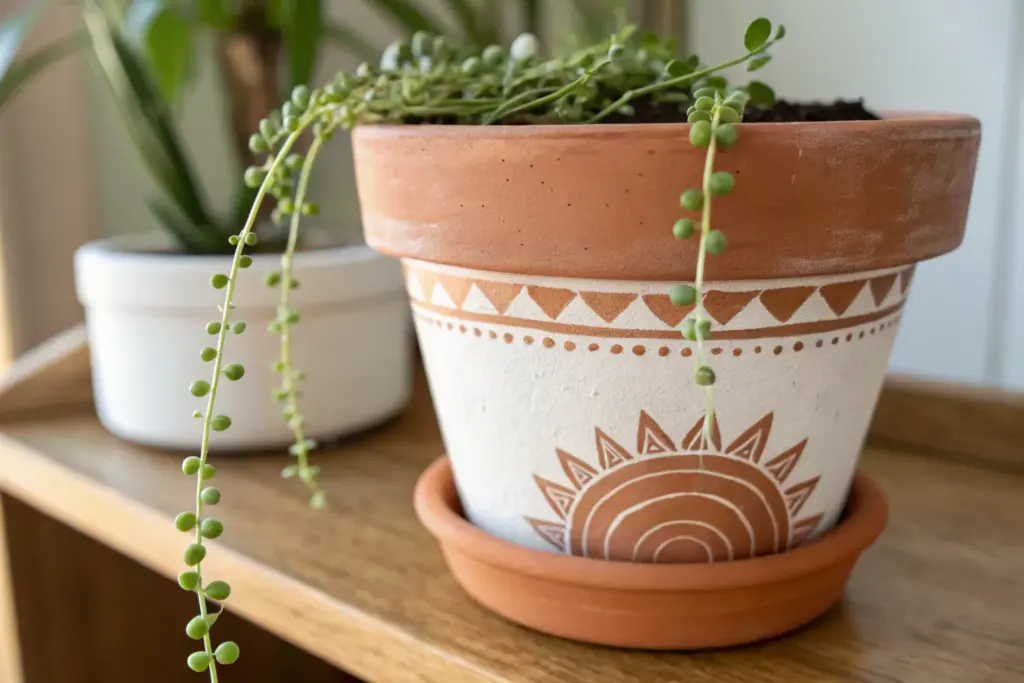
I love how a plain orange terracotta pot is basically a blank canvas sitting right on your windowsill. These decorating ideas are my go-to ways to turn everyday pots into pieces that feel personal, playful, and totally you.
Painted Color-Block Pots With Simple Words
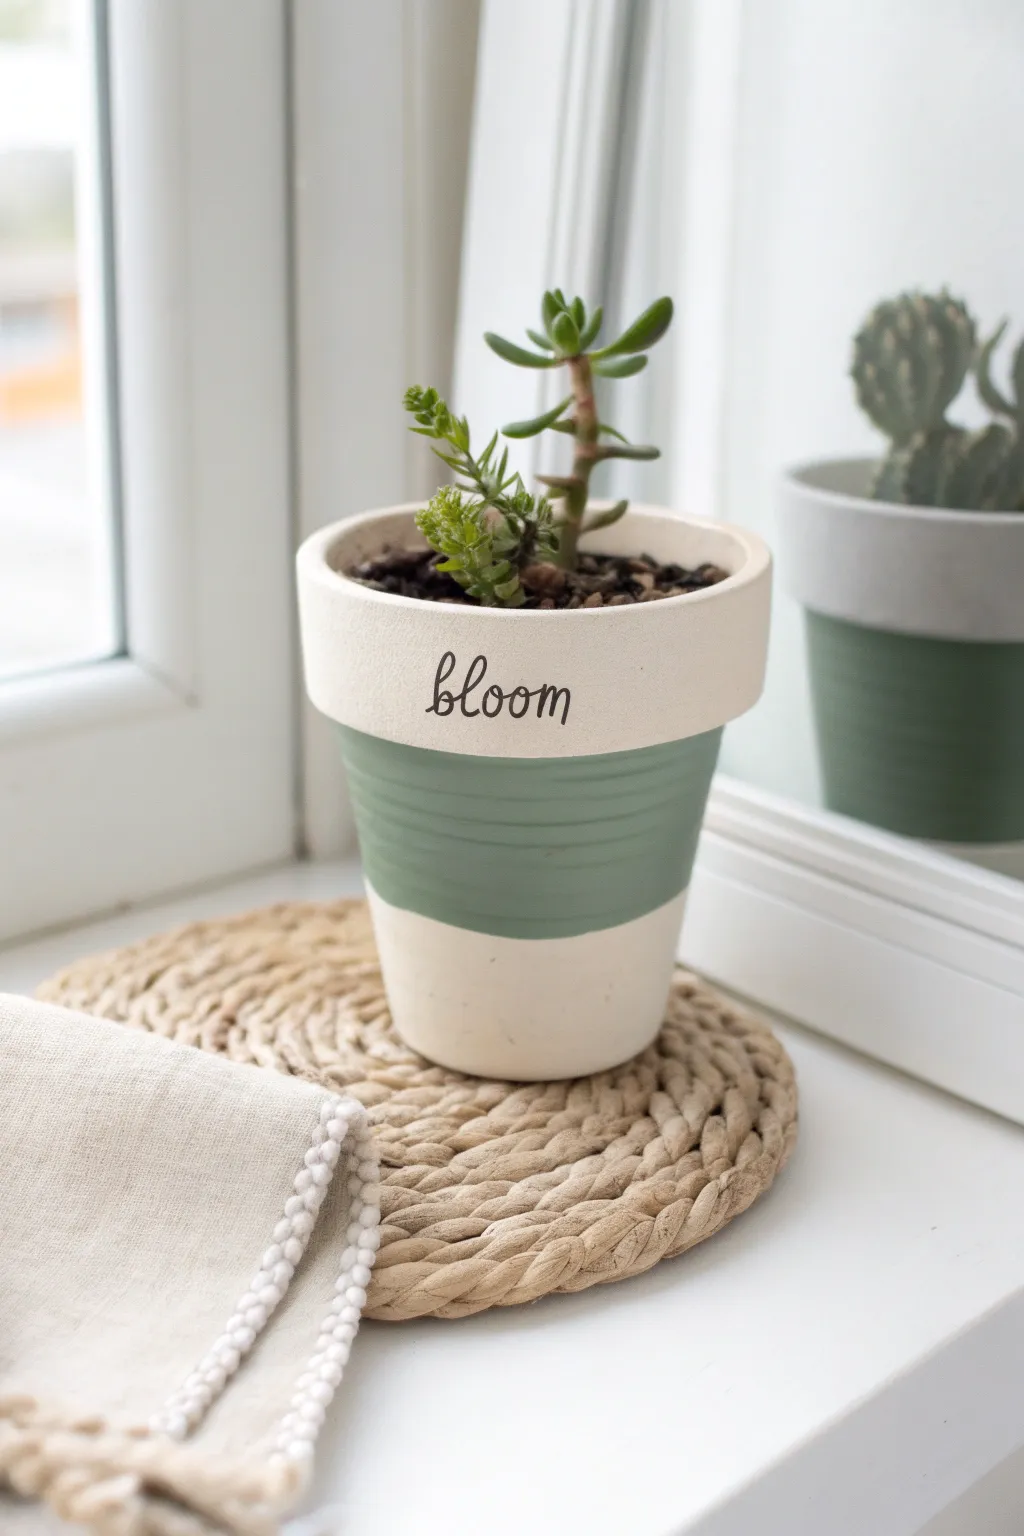
Bring a touch of modern minimalism to your windowsill with this sage green color-blocked planter. Featuring clean lines and sweet hand-lettered script, this quick project transforms a basic vessel into a custom home for your favorite succulent.
Step-by-Step Guide
Materials
- Small terracotta pot (approx. 4-inch diameter)
- White or cream acrylic craft paint (matte finish)
- Sage green acrylic craft paint (matte finish)
- Painter’s tape or masking tape (1-inch width)
- Fine grit sandpaper (optional)
- Flat paintbrush (medium size)
- Small paintbrush or foam brush
- Fine-point black permanent marker or paint pen
- Clear matte sealer spray
- Pencil and eraser
Step 1: Preparation and Base Coat
-
Clean the pot:
Begin by thoroughly wiping down your terracotta pot with a damp cloth to remove any dust or manufacturing residue. Let it dry completely before starting. -
Smooth the surface:
If your pot feels particularly rough to the touch, give it a quick, gentle sanding with fine-grit sandpaper. This helps the paint glide on smoother, though I usually skip this unless the texture is very coarse. -
Paint the base color:
Using your flat paintbrush, apply a coat of the white or cream paint to the entire exterior of the pot. Don’t forget to paint just inside the top rim where the soil line will be visible. -
Let it dry:
Allow the first coat to dry for about 20 minutes. It should feel dry to the touch. -
Apply a second coat:
Apply a second layer of the cream paint to ensure solid, opaque coverage so no orange clay shows through. Let this layer dry fully for at least an hour.
Crisp Lines Secret
Before applying the green paint, brush a tiny amount of the base cream paint over the tape edges. This seals the tape, meaning any bleed is the base color and invisible.
Step 2: Creating the Color Block
-
Mark your lines:
Decide where you want your green band to sit. For the look in the photo, you want a wide band in the middle, leaving the top rim and the very bottom base cream. -
Apply the top tape:
Place a strip of painter’s tape horizontally around the pot, just under the rim. Press the edges down firmly with your thumbnail to prevent paint bleed. -
Apply the bottom tape:
Place a second strip of tape around the bottom portion of the pot. The space exposed between the two tape lines will become your green stripe. -
Paint the green stripe:
Load your brush with sage green paint. Apply the paint to the exposed middle section. -
Focus on the edges:
When painting near the tape, stroke away from the tape edge rather than into it. This helps minimize the chance of paint seeping underneath. -
Add a second green coat:
Once the first green coat is dry to the touch, apply a second coat for a rich, uniform color. -
Remove the tape:
Carefully peel off the painter’s tape while the second coat of green paint is still slightly tacky. Pulling at a 45-degree angle usually gives the crispest line.
Step 3: Lettering and Finishing
-
Dry completely:
Allow the pot to cure for several hours. The surface needs to be rock-hard before you write on it. -
Draft the text:
Lightly sketch the word ‘bloom’ in cursive on the cream-colored rim using a pencil. Center the word relative to how the pot will sit. -
Ink the text:
Trace over your pencil lines carefully with a fine-point black permanent marker or paint pen. Use slow, deliberate strokes to keep the script flowing smoothly. -
Make adjustments:
If you want the downstrokes of the letters to look like calligraphy, go back and slightly thicken the downward lines of each letter. -
Erase guidelines:
Once the ink is totally dry, gently erase any visible pencil marks. -
Seal the pot:
Take the pot to a well-ventilated area and apply a light coat of clear matte sealer spray. This protects your paint job from water damage when you water your plant.
Rough Surface Fix
If the terracotta texture makes your marker skip or bleed, dab a tiny bit of matte varnish on the area first. Let it dry to create a smooth surface for writing.
Now you have a charming custom vessel ready to showcase your favorite small plant


Soft Ombre Fade From Rim to Base
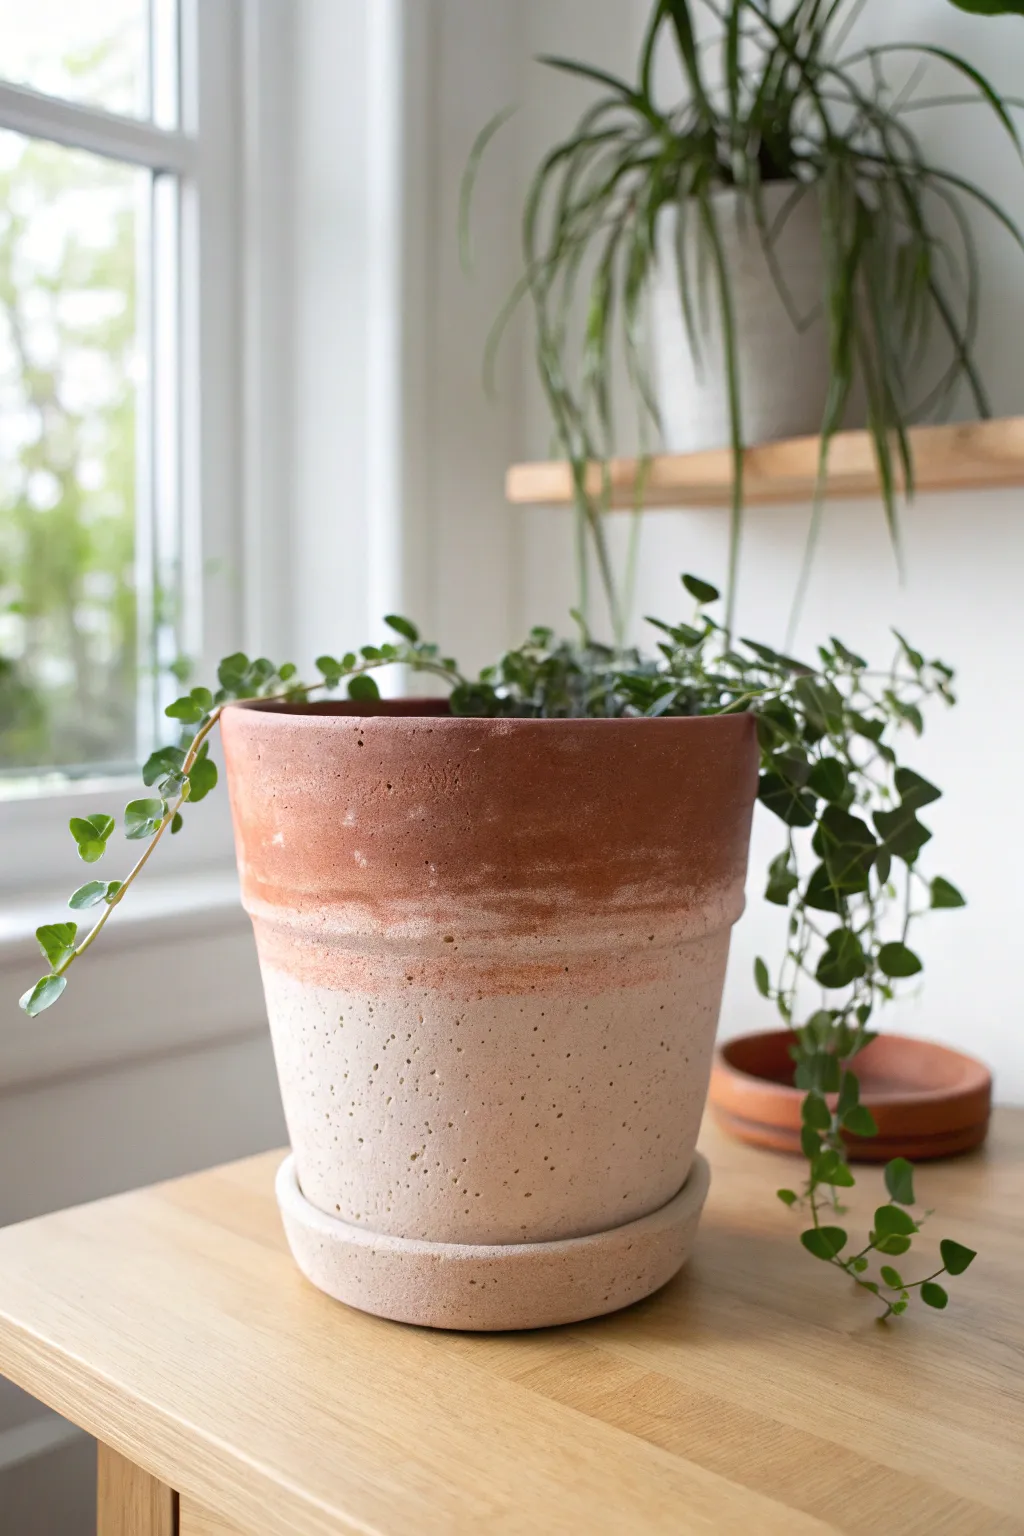
Transform a plain clay pot into a piece of modern, airy decor with this subtle ombre technique. By layering diluted paint over natural terracotta, you can create a soft sunrise effect that looks like it has weathered beautifully over time.
Step-by-Step
Materials
- Standard terracotta pot with matching saucer
- White or cream acrylic paint (matte finish)
- Small bowl for mixing
- Water
- Wide, soft-bristle paintbrush or foam brush
- Paper towels or a clean rag
- Cardboard or drop cloth (for surface protection)
Step 1: Preparation
-
Clean the surface:
Start by wiping down your terracotta pot and saucer with a damp cloth to remove any dust or sticker residue. Let the clay dry completely before you begin painting; moisture in the clay can affect how the paint absorbs. -
Mix your wash:
In your small bowl, squeeze out a generous dollop of white acrylic paint. Gradually add water and stir until you achieve a consistency similar to heavy cream or thin yogurt. You want it opaque enough to cover, but thin enough to blend easily. -
Set up your workspace:
Place your cardboard or drop cloth on a flat surface. Set the pot upside down on a jar or can if you want easier access to the rim, though painting it right-side up works perfectly fine too.
Sponge It Smooth
If brush strokes look too harsh, use a damp kitchen sponge to dab the transition line. The porous texture of the sponge mimics the clay’s surface perfectly for a seamless fade.
Step 2: Applying the Base Wash
-
Start from the bottom:
Dip your wide brush into the diluted white paint. Begin painting at the very bottom of the pot, applying a solid, thick coat around the base. This area should remain the most saturated white. -
Paint the saucer:
While you have the heavy paint on your brush, coat the entire outer rim and sides of the saucer. I like to paint the inside rim too, just in case the pot doesn’t cover it completely. -
Feather upwards:
Once the bottom third is heavily coated, don’t reload your brush. Instead, use the paint already on the pot and drag your brush strokes upward towards the middle band of the pot. -
Dry brush technique:
As your brush runs out of paint, continue making upward strokes into the middle section. The texture of the clay will start to show through, creating that initial distressed look.
Reverse Dip Dye
Instead of white, try a dark navy or charcoal grey on the bottom for a moody, grounded look. The dark base can make green foliage pop even more dramatically.
Step 3: Creating the Ombre Fade
-
Dilute the paint further:
Add a few more drops of water to your paint mixture to make it very runny, almost like a watercolor wash. -
Apply the transition layer:
Apply this watery mix to the middle section of the pot, slightly overlapping with your solid white bottom section. The water will help reactivate the edge of the thicker paint, blurring the line. -
Wipe back exposing some clay:
Immediately take your paper towel or rag and gently dab at the wet paint in the middle section. This lifts some pigment and reveals the orange clay underneath, which is crucial for the transition. -
Approach the rim:
Using a nearly dry brush with just a hint of dirty water from your mix, lightly flick upward strokes towards the rim. You want the paint to basically disappear before it hits the top edge. -
Handling the top rim:
Leave the top 1-2 inches of the pot completely unpainted. This raw terracotta grounds the design and provides the dark contrast needed for the ombre effect. -
Blend the critical zone:
Focus on the area where the white wash meets the raw clay. Use a damp rag to smudge this line horizontally so there is no hard stop—it should look like a dusty fade.
Step 4: Finishing Touches
-
Assess the gradient:
Step back and look at the pot from a distance. If the bottom doesn’t look white enough, apply a second coat of undiluted white paint to just the bottom two inches to strengthen the brightness. -
Add texture:
To mimic the aged look in the image, dip an old toothbrush or stiff brush into the paint and flick tiny speckles onto the transition area. This breaks up any smoothness and adds organic character. -
Dry completely:
Let the pot sit for at least an hour. Terracotta is porous and holds moisture, so it might feel cool to the touch until it’s fully dry. -
Final saucer check:
Ensure the saucer matches the bottom of the pot. If the pot’s base is bright white, the saucer should be too. Apply another coat if needed. -
Plant:
Pot your favorite trailing plant, brush off any loose soil from the rim, and enjoy your new custom creation.
Your beautifully faded pot is now ready to bring a touch of warm, rustic charm to your windowsill


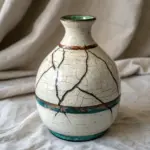
Distressed Whitewash for Rustic Cottage Style
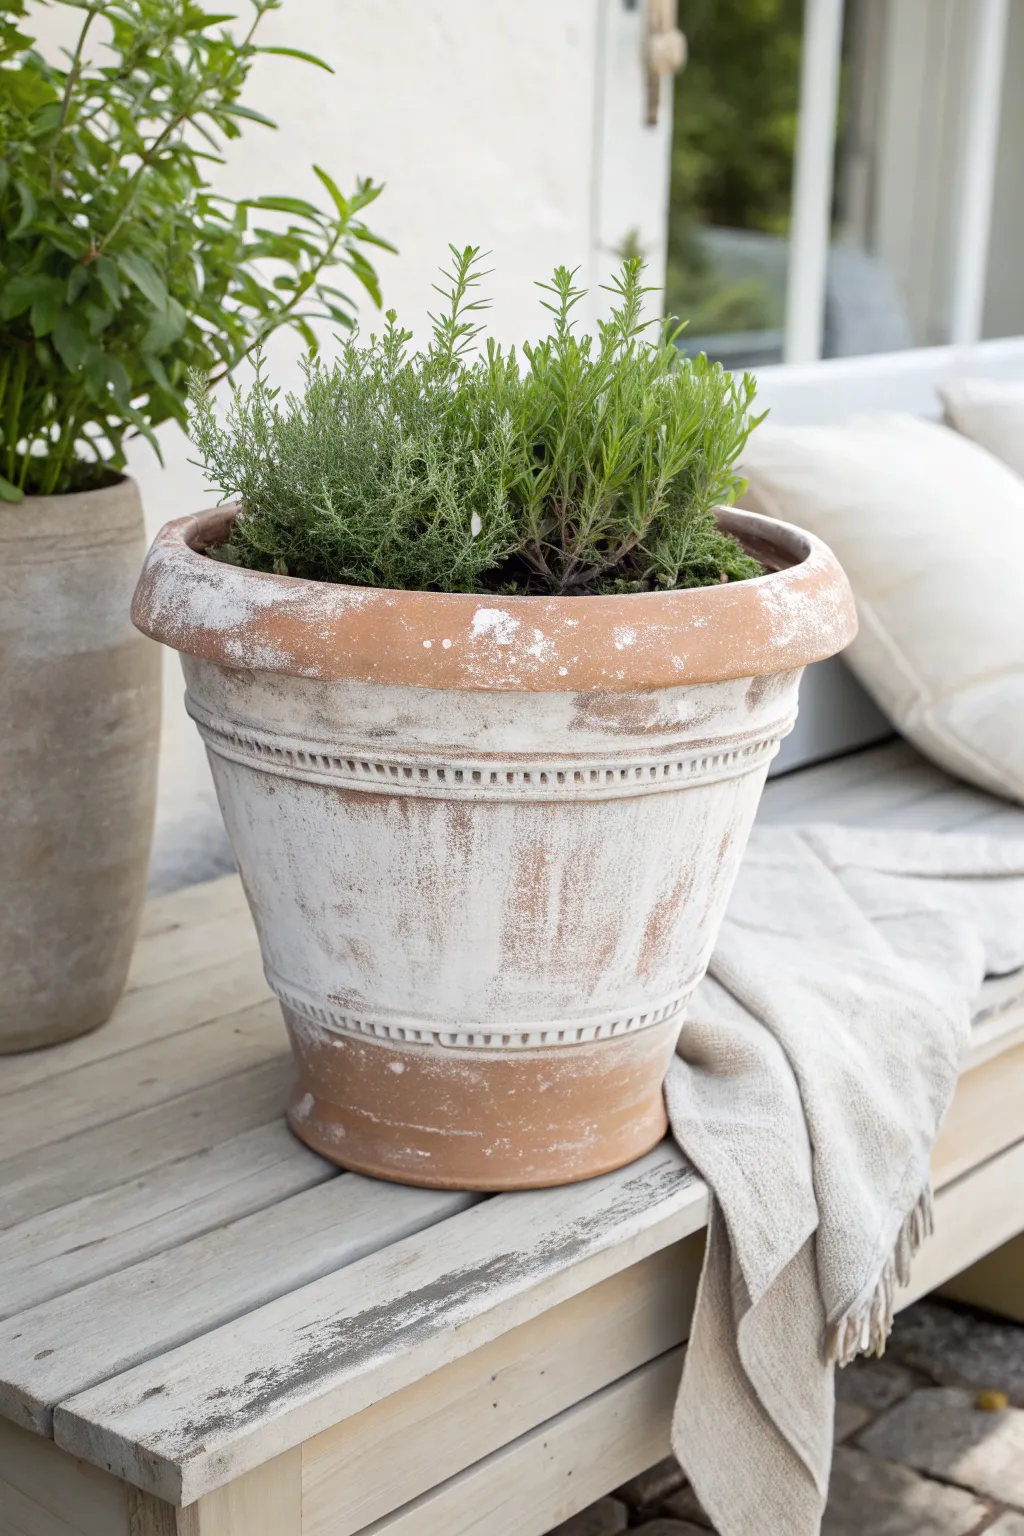
Transform a standard terracotta planter into a charming, age-worn vessel that looks like it has been weathering in a French cottage garden for decades. This heavy distressed finish highlights the pot’s texture while softening the bold orange clay tones.
Detailed Instructions
Materials
- Large terracotta pot with rim details
- White or cream chalk paint (or matte acrylic)
- Water used for thinning
- 2-inch chip brush or stiff-bristled brush
- Lint-free rags or paper towels
- Medium-grit sandpaper (100-150 grit)
- Mixing container
- Drop cloth
- Clear matte sealer spray (optional)
Step 1: Preparation and Mixing
-
Clean the Surface:
Begin by thoroughly wiping down your terracotta pot with a damp cloth to remove any dust, dirt, or oils. Let it dry completely before starting. -
Prepare the Workspace:
Set up your drop cloth on a flat, stable surface. Place the pot at a comfortable height, as you will need access to all sides. -
Mix the Wash:
In your mixing container, combine your white chalk paint with water. I prefer a ratio of about 2 parts paint to 1 part water for this specific look. -
Test Consistency:
Stir the mixture well. You are aiming for a consistency similar to heavy cream—thick enough to cover, but thin enough to be semi-translucent when spread.
Natural Patina Tip
Rub a handful of garden soil over the dry painted surface and wipe it off. Steps like this stain the bright white paint slightly, adding instant grimy authenticity.
Step 2: Applying the Base Coat
-
Initial Application:
Dip your chip brush into the paint mixture. Start applying the paint to the body of the pot using random, cross-hatch strokes rather than straight lines. -
Focus on the Center:
Apply a heavier coat to the middle barrel section of the pot, allowing the paint to sit thicker in any grooves or indentations. -
Feather the Edges:
As you move toward the top rim and the very bottom base, lighten your touch. Use a ‘dry brush’ technique here, wiping most paint off the brush before applying, so more orange clay shows through. -
Work in Sections:
Apply the paint in manageable sections. Because terracotta is porous, the paint will soak in and dry relatively quickly. -
Wipe Back:
Immediately after painting a section, take a damp rag and gently wipe away some of the wet paint. This pushes pigment into the texture while revealing the clay on the high points.
Level Up: Moss Effect
Mix a tiny amount of moss-green acrylic paint into your glazing water. Dab this faintly near the base or under the rim to mimic early algae growth.
Step 3: Distressing and Detailing
-
Add Texture Layers:
Once the first layer is touch-dry, go back with undiluted chalk paint. Dab this thicker paint sporadically onto the middle section to create areas of opaque white buildup. -
Highlight the Ridge:
If your pot has a decorative ridge or band like the one shown, dab extra white paint into the recesses of the pattern. -
Wipe the Ridge:
Quickly wipe across the top of that decorative ridge with your rag, leaving the white paint deep in the crevices but exposing the raised details. -
Rim Treatment:
Paint the top rim very sparsely. You want this area to look the most worn, as if it has been handled frequently over the years. -
Let it Dry:
Allow the pot to dry completely. This usually takes about an hour, but chalk paint on terracotta dries quite fast.
Step 4: Final Weathering
-
Sanding for Age:
Take your medium-grit sandpaper and vigorously sand specific areas. Target the top rim, the bottom base, and any raised bands to simulate natural wear patterns. -
Softening the Transition:
Lightly sand the main body of the pot to soften distinct brush strokes and blend the white areas into the exposed clay. -
Dust Removal:
Use a dry brush or cloth or blow on the pot to remove all the sanding dust from the surface and crevices. -
Assess the Look:
Step back and look at the pot. If it looks too white, sand more. If it looks too orange, dab on a little more watered-down paint and wipe back again. -
Sealing (Optional):
If the pot will be outdoors in harsh weather, spray it with a matte clear sealer. However, leaving it unsealed allows it to continue weathering naturally over time.
Now you have a beautifully aged vessel ready to house your favorite herbs or blooms.


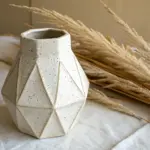
Speckled “Terrazzo” Look With Paint Flicks
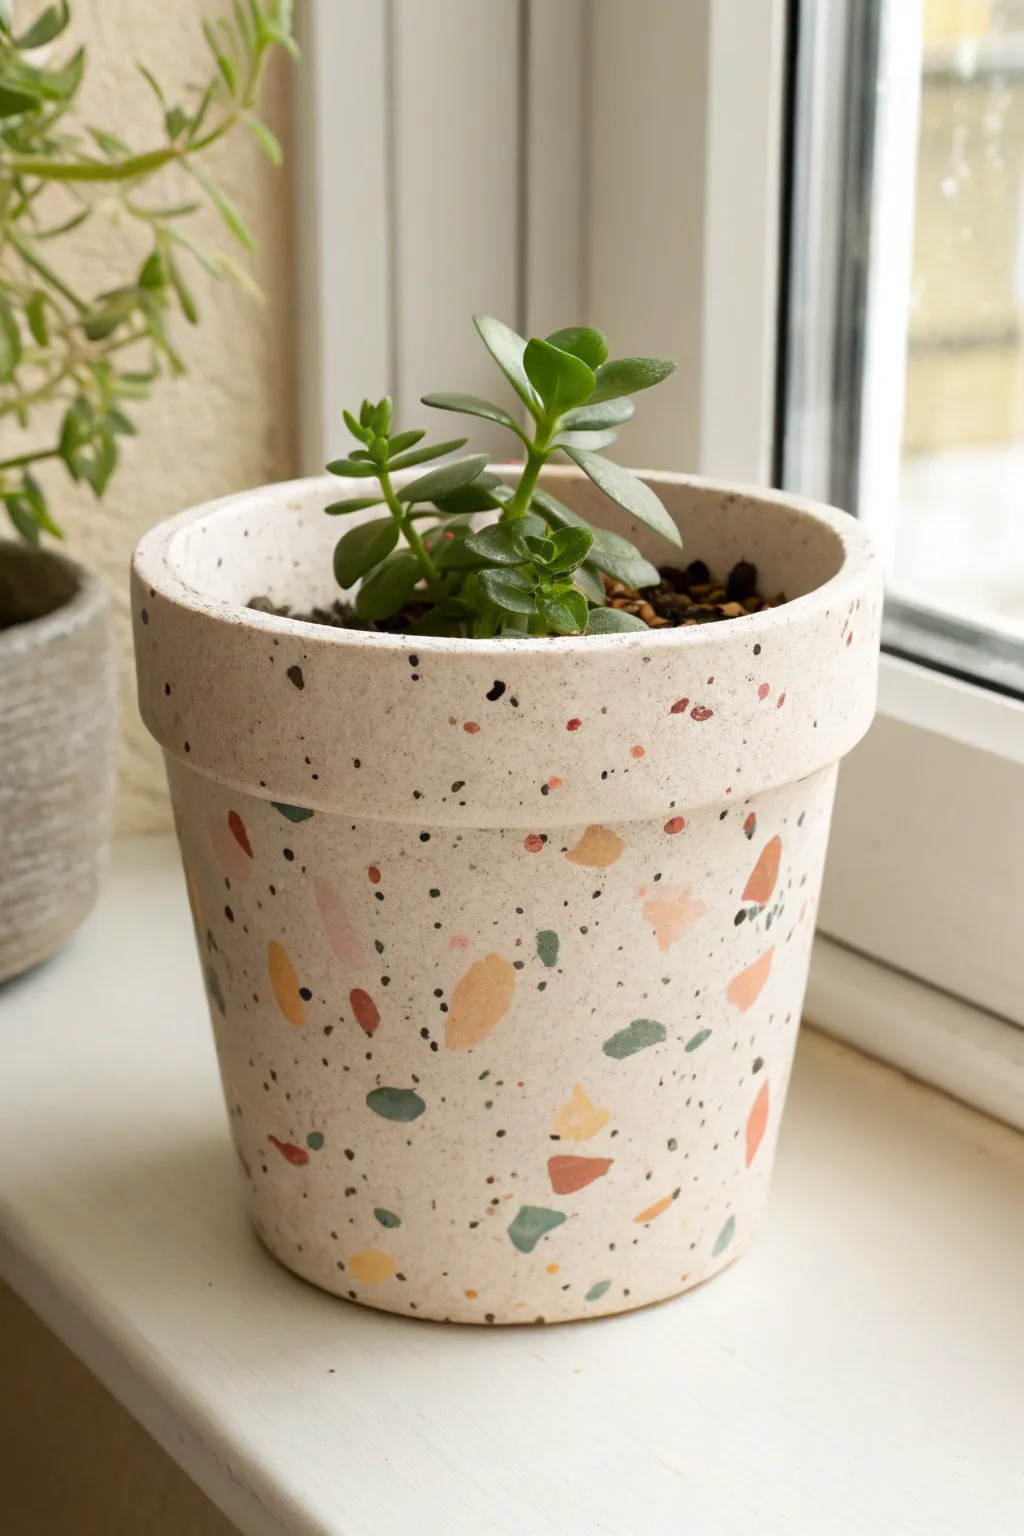
Transform a plain planter into a trendy piece of decor with this faux terrazzo technique. By layering irregular painted shapes with fine splatters, you can mimic the sophisticated look of stone composite using simple acrylics.
Step-by-Step Guide
Materials
- Terracotta pot (clean and dry)
- White or cream acrylic paint (matte)
- Acrylic paints in muted tones (mustard yellow, terracotta orange, sage green, blush pink)
- Black acrylic paint
- Medium flat paintbrush
- Small round detail brush
- Old toothbrush or stiff bristle brush
- Palette or paper plate
- Clear matte sealer spray
- Water cup and paper towels
- Drop cloth or newspaper
Step 1: Base Coat Preparation
-
Clean the surface:
Before you begin, wipe down your terracotta pot with a damp cloth to remove any dust or debris. Let it dry completely to ensure the paint adheres properly. -
Mix the base color:
Pour out a generous amount of your cream or white acrylic paint. If you want a warmer tone like the one in the photo, mix in a tiny drop of yellow or brown to create an off-white, stone-like hue. -
Apply the first layer:
Using a medium flat brush, paint the entire exterior of the pot, including the rim and just inside the top edge. Don’t worry if it looks streaky at first; terracotta absorbs paint quickly. -
Let it dry:
Allow the first coat to dry for about 15-20 minutes. It should feel dry to the touch before you proceed. -
Apply the second layer:
Paint a second coat of your base color to get solid, opaque coverage. If you can still see the orange clay underneath, a third coat might be necessary for that perfect clean canvas.
Natural Stone Texture
Mix a teaspoon of baking soda into your base coat paint. This creates a gritty, stone-like texture that makes the faux terrazzo look incredibly realistic.
Step 2: Creating the Terrazzo Stones
-
Select your palette:
Pour small amounts of your muted accent colors—mustard, sage, terracotta, and blush—onto your palette. You want these colors to look earthy and natural. -
Paint the first shape color:
Dip your small round brush into the first color, perhaps the mustard yellow. Paint random, irregular geometric shapes around the pot. I like to keep them slightly angular rather than perfectly round to mimic chipped stone. -
Add spacing variety:
Place your shapes at varying distances. Some can be clustered near the bottom, others near the rim. Leave plenty of negative space for the other colors. -
Layer in the second color:
Rinse your brush and switch to the terracotta orange. Paint similar irregular blobs in the open spaces. Vary the size so some ‘stones’ are large and others are tiny chips. -
Introduce cool tones:
Now use the sage green or teal paint. Adding a cool tone balances the warm yellows and oranges nicely. Paint these shapes randomly, turning the pot as you go to ensure even distribution. -
Fill gaps with the lightest shade:
Finally, use the blush pink or a light beige to fill in any large empty areas. These lighter shapes add depth and make the pattern feel more complex. -
Dry the shapes:
Let all your painted shapes dry completely. This step is crucial because wet paint might smear during the next splattering phase.
Step 3: The Speckled Finish
-
Prepare the splatter paint:
Mix a small amount of black acrylic paint with a few drops of water. You want an inky consistency—runny enough to fly off bristles, but thick enough to stay opaque. -
Protect your workspace:
Lay down extra newspaper or take the project outside. The splattering technique can get messy quickly. -
Load the tool:
Dip an old toothbrush or a stiff brush into the watered-down black paint. Tap off any huge drips onto a paper towel first. -
Flick the specks:
Hold the brush near the pot and run your thumb across the bristles to flick a fine mist of black specks onto the surface. Aim for even coverage over both the white background and the colored shapes. -
Add larger accent dots:
If the splatter is too fine, dip the handle end of a paintbrush into the black paint and manually dot a few larger black spots here and there for variety. -
Seal the deal:
Once everything is bone dry (give it at least an hour), take the pot to a well-ventilated area and spray it with a clear matte sealer. This protects your artwork from water damage when you water your plants.
Splatter Control
If you get a splatter that is too big or smudged, wait for it to dry completely, then paint over just that spot with your base color paint.
Your stylish new planter is now ready to give your favorite succulent a beautiful home

The Complete Guide to Pottery Troubleshooting
Uncover the most common ceramic mistakes—from cracking clay to failed glazes—and learn how to fix them fast.
Decoupage With Floral Paper for Instant Charm
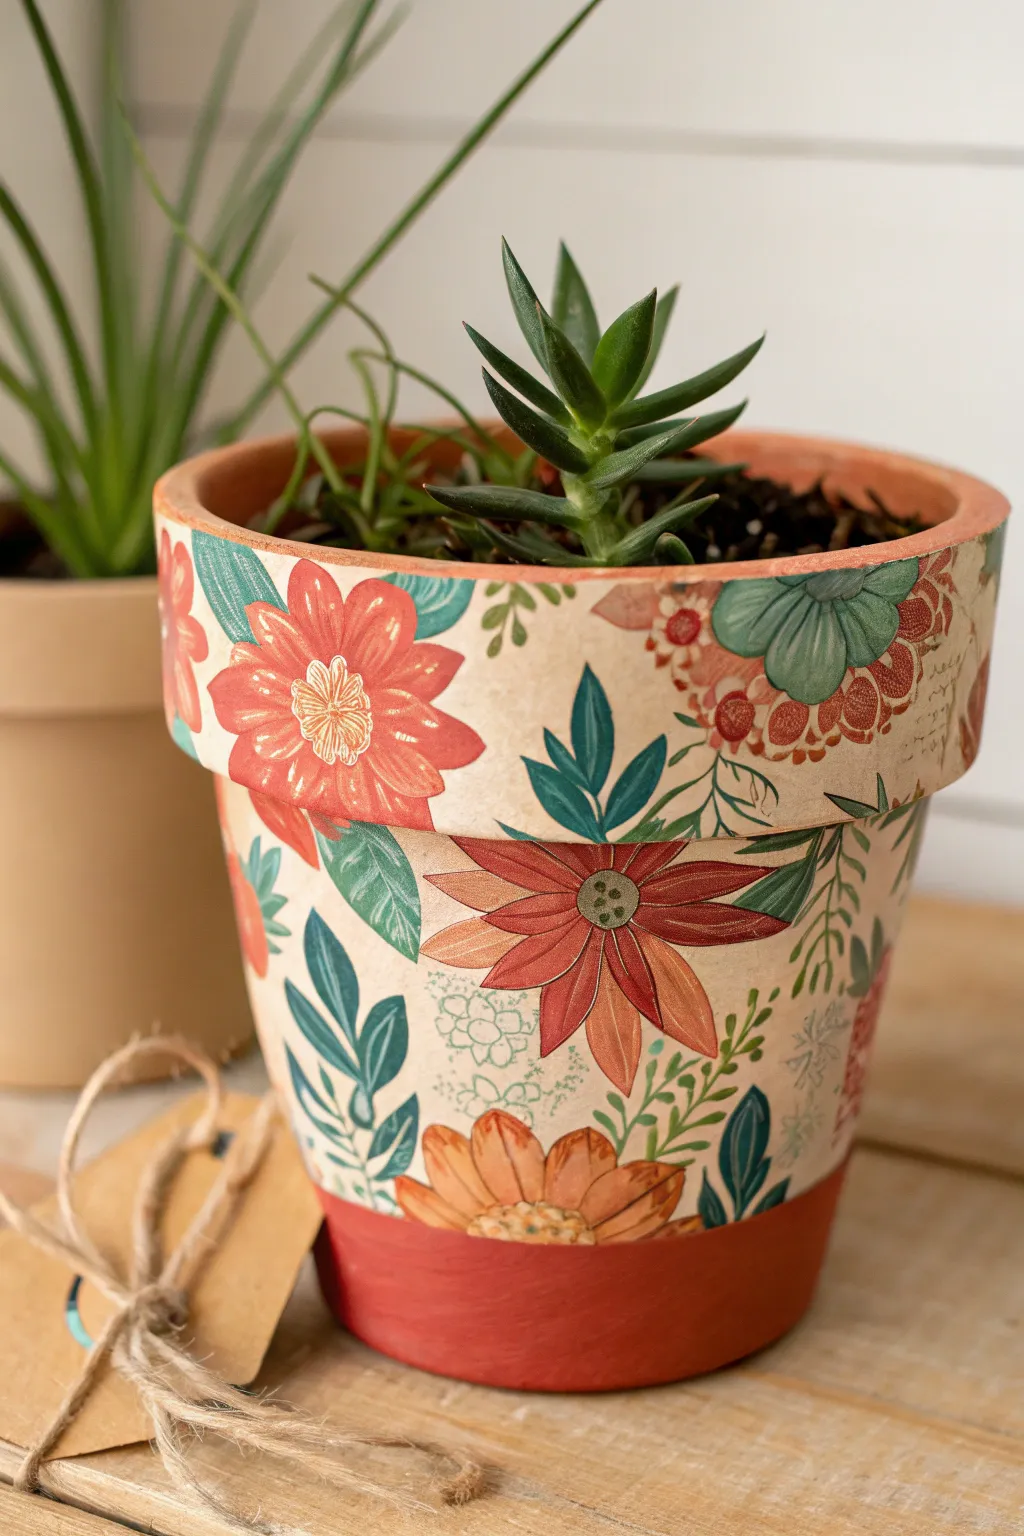
Transform a plain terracotta pot into a charming vintage-style planter using floral paper and simple decoupage techniques. This project features vibrant red and orange blooms against a cream background, accented by a bold painted base.
How-To Guide
Materials
- Standard terracotta pot (clean and dry)
- Floral decoupage paper, patterned tissue paper, or napkins (must have red/orange flowers and cream background)
- Mod Podge (Matte or Satin finish)
- Acrylic paint in Terracotta/Reddish-Orange (for the base)
- Acrylic paint in Cream/Off-White (optional, for priming)
- Flat paintbrush (medium size)
- Foam brush
- Scissors
- Clear acrylic sealer spray (outdoor or satin finish)
- Small piece of sandpaper (fine grit)
Step 1: Preparation and Base Coat
-
Clean surface:
Ensure your terracotta pot is completely clean and free of dust or price sticker residue. Wipe it down with a damp cloth and let it dry fully. -
Prime the background (optional):
If your floral paper is very thin or translucent, paint the main body and rim of the pot with a cream or off-white acrylic paint. This ensures the paper’s colors pop rather than getting muddied by the dark terracotta underneath. -
Dry thoroughly:
Allow the primer coat to dry completely before moving on. -
Paint the base accent:
Using a flat brush and the reddish-orange terracotta paint, create a solid band of color at the very bottom of the pot. Follow the natural groove or line of the pot just above the base to keep your line straight. -
Paint the inner rim:
Paint the top edge and about one inch inside the top rim with the same color or leave it natural terracotta if you prefer the rustic look shown in the inspiration.
Step 2: Applying the Design
-
Prepare the paper:
Take your floral paper. If using a multi-ply napkin, peel away the back white layers so you are left with only the single printed sheet. -
Rough cutting:
Tear or cut the paper into manageable sections. For the rim, cut long rectangular strips. for the main body, you can use larger wrap-around pieces or individual floral motifs. -
Apply adhesive to the rim:
Using a foam brush, apply a thin, even layer of Mod Podge to the outer rim of the pot. -
Place rim paper:
Gently press your paper strip onto the wet rim. Smooth it out with your fingers from the center moving outward to remove air bubbles. -
Fold over edges:
Wrap the excess paper over the top lip of the pot and smooth it down into the inner rim. -
Apply adhesive to body:
Apply Mod Podge to the main section of the pot, working in sections so the glue doesn’t dry out before you place the paper. -
Position body paper:
Carefully lay your floral paper onto the curves. The paper will naturally want to wrinkle on a tapered pot; I find making small relief cuts (tiny slits) in the paper helps it overlap smoothly without bulky creases. -
Match the base line:
Ensure the bottom edge of your paper meets the painted red base line cleanly. You can overlap slightly and trim later, or carefully tear the paper for an organic edge before glowing. -
Smooth the surface:
Using your fingers or the foam brush, gently smooth out all wrinkles. Be very gentle if using napkins, as they tear easily when wet.
Wrinkle Rescue
If you get stubborn bubbles while the paper is wet, prick them with a sharp pin and gently press the air out with your finger to flatten it.
Step 3: Sealing and Finishing
-
Top coat:
Once the paper application is dry to the touch, apply a generous coat of Mod Podge over the entire exterior of the pot to seal the paper. -
Second coat:
Let the first coat dry for 20 minutes, then apply a second coat for durability. -
Final dry time:
Allow the pot to cure for at least 24 hours. -
Waterproof seal:
Take the pot to a well-ventilated area and spray it with a clear acrylic sealer. This is crucial if you plan to put a live plant inside, as moisture can seep through terracotta and lift the paper.
Pro Tip: Saran Wrap Trick
Place a piece of plastic wrap over the wet paper while smoothing. This lets you press harder to remove wrinkles without ripping delicate napkins.
Now you have a beautifully customized pot ready for your favorite succulents or herbs
Fabric-Wrapped Pots for Cozy Texture
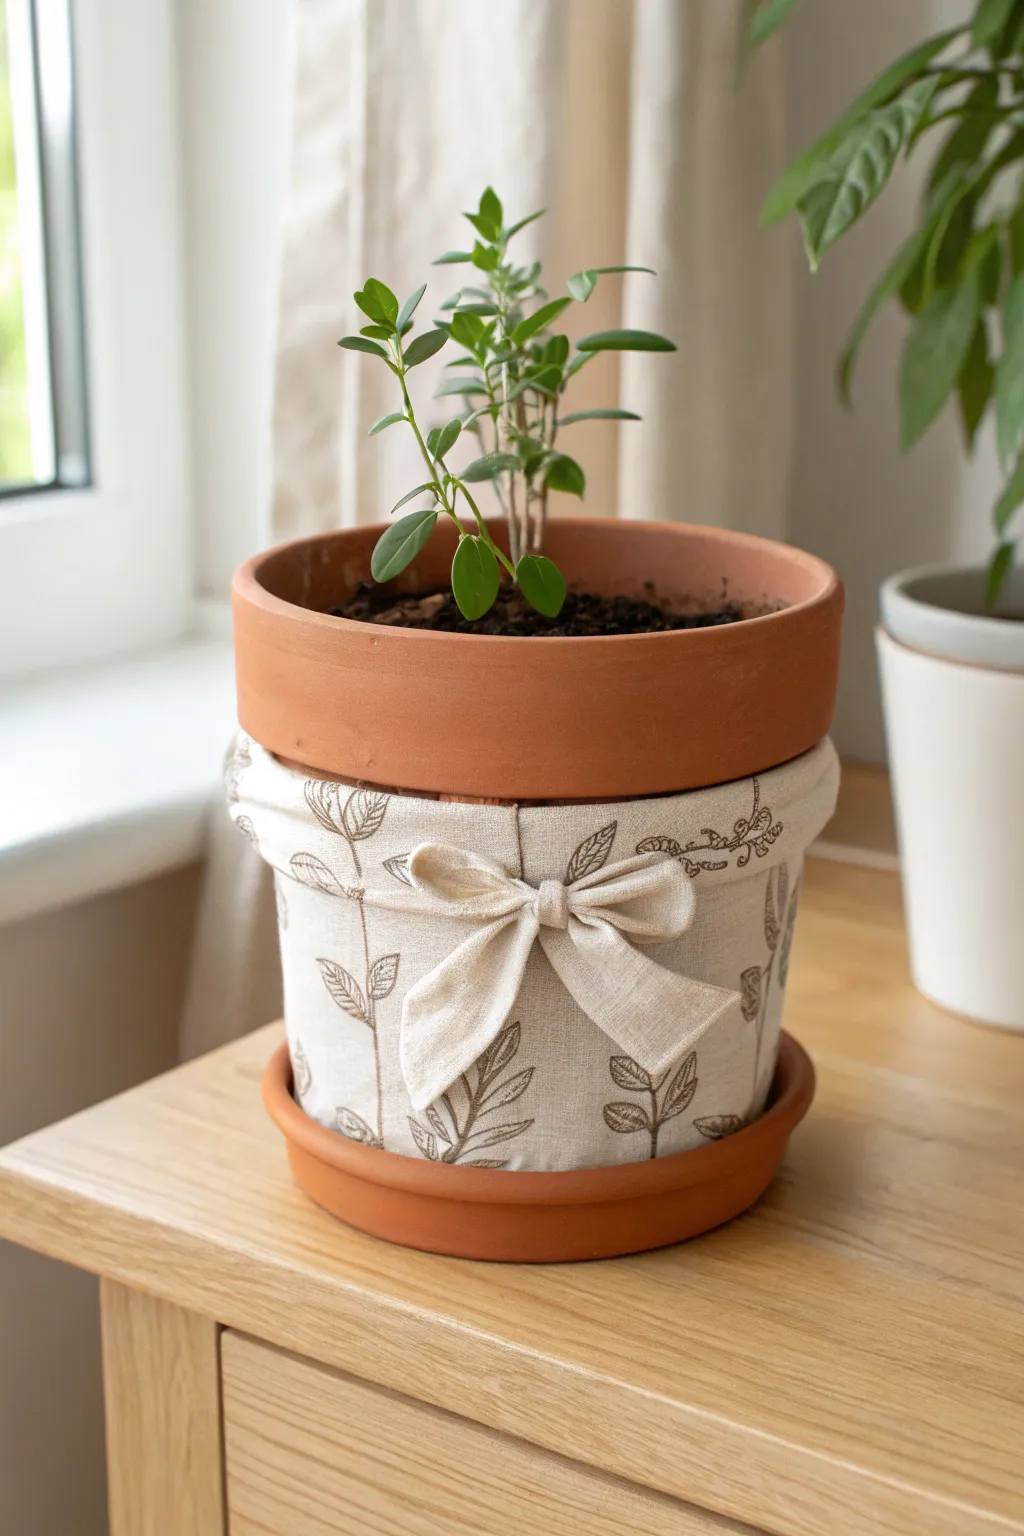
Transform a standard terracotta planter into a charming accent piece with a simple fabric wrap. This project uses a natural linen textile with a delicate leaf print to add softness and texture, perfect for warming up a windowsill garden.
Detailed Instructions
Materials
- Standard terracotta pot (clean and dry)
- Matching terracotta saucer
- Beige linen or cotton fabric with leaf print
- Fabric scissors
- Measuring tape
- Mod Podge (matte finish) or craft glue
- Foam brush
- Hot glue gun and glue sticks
- Iron and ironing board
- Ruler
- Pencil or fabric marker
Step 1: Preparation
-
Measure the circumference:
Start by measuring the circumference of your pot just below the rim where the fabric will start. Then, measure the circumference at the bottom of the pot. -
Measure the height:
Measure the vertical height of the area you want to cover, from under the heavy rim down to just above the bottom edge. -
Draft the pattern:
Because pots are tapered, a simple rectangle won’t fit smoothly. On a piece of paper or directly on the fabric, draw a slight arc shape. The top curve length should match your top circumference plus 1 inch, and the bottom curve should match the bottom circumference plus 1 inch. -
Add hem allowance:
Add about 0.5 inches to the top and bottom of your drafted shape to allow for a clean, folded hem.
Wrinkle Rescue
If the fabric buckles due to the pot’s taper, make tiny vertical slits in the bottom hem allowance before gluing. This helps the fabric overlap smoothly.
Step 2: Creating the Wrap
-
Cut the main panel:
Cut your fabric piece following the pattern you created. I find using freshly sharpened fabric scissors makes a huge difference in getting clean edges here. -
Press the hems:
Fold the top and bottom edges over by 0.5 inches toward the wrong side of the fabric. Press them flat with a hot iron to create crisp, finished edges. -
Prepare the bow strip:
Cut a separate long strip of the same fabric, approximately 2 inches wide and 12-15 inches long, depending on how large you want your bow. -
Press the bow strip:
Fold the long raw edges of the strip inward so they meet in the middle, then fold the strip in half again to hide the raw edges. Press flat with the iron. -
Secure the strip:
Run a very thin line of fabric glue or use hem tape inside the folded strip to keep it closed and neat.
Step 3: Assembly
-
Apply adhesive to the pot:
Using a foam brush, apply a thin, even layer of Mod Podge to the body of the terracotta pot, staying below the rim. -
Position the fabric:
Carefully place the center of your fabric panel against the glue. Smooth it out with your fingers, working from the center toward the back to remove air bubbles. -
Seal the seam:
Where the fabric meets at the back, fold one raw edge under for neatness, apply a little extra glue, and overlap the ends. -
Tie the bow:
Take your prepared fabric strip and tie it into a standard bow. Adjust the loops until they look symmetrical and plump. -
Trim bow tails:
Trim the ends of the bow tails at an angle or into a V-shape for a professional look. -
Attach the decoration:
Apply a dab of hot glue to the back of the bow’s knot. -
Final placement:
Press the bow firmly onto the front center of the fabric-wrapped pot. -
Protect the fabric:
If this pot will be near water often, consider brushing a final coat of matte Mod Podge over the fabric to seal it, though leaving it raw preserves the linen texture.
Rustic Edge
Skip the hemming step and carefully fray the edges of your linen strip before gluing for a shabby-chic, farmhouse aesthetic.
Place your favorite green plant inside and enjoy the gentle touch of fabric against the terracotta


What Really Happens Inside the Kiln
Learn how time and temperature work together inside the kiln to transform clay into durable ceramic.
Chalkboard Label Bands for Herbs and Gifts
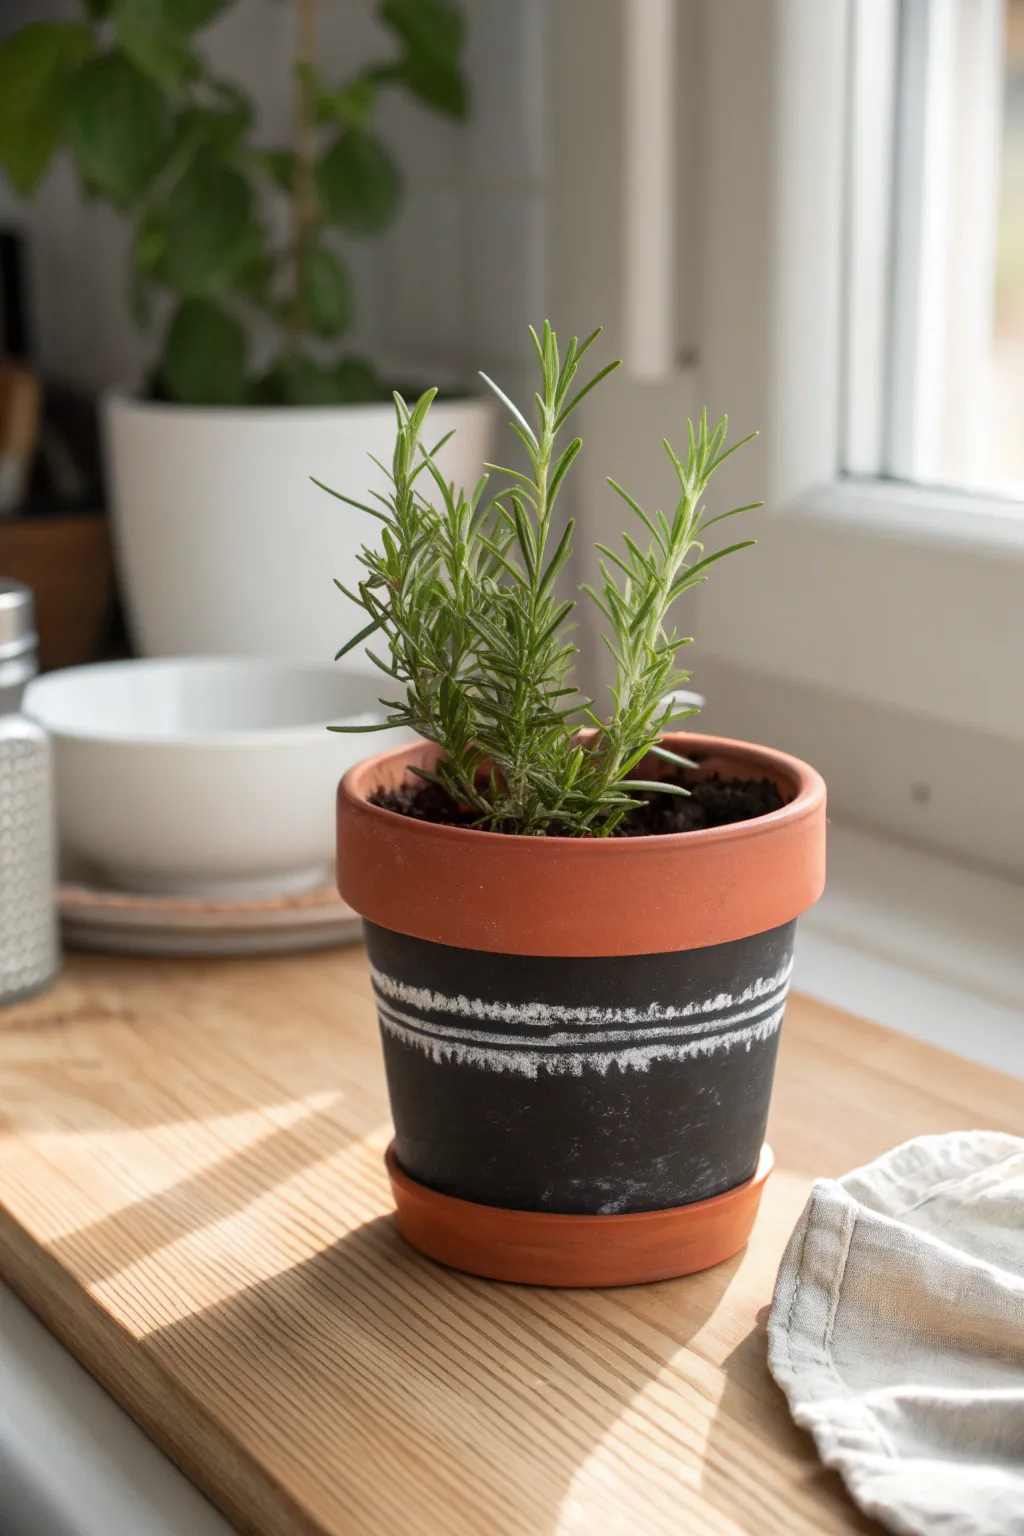
Transform a basic terracotta pot into a modern, functional herb planter with this high-contrast chalkboard design. The matte black band creates a striking backdrop for chalk details and provides the perfect canvas for labeling your rosemary or basil. It’s a quick project that adds a personalized touch to any kitchen windowsill.
Step-by-Step Guide
Materials
- Terracotta pot and matching saucer
- Black chalkboard paint
- Painter’s tape or masking tape
- Flat paintbrush (medium size)
- White chalk marker or stick of chalk
- Damp cloth or sponge
- Newspaper or drop cloth
Step 1: Prepping the Pot
-
Clean the surface:
Before you begin, wipe down your terracotta pot with a damp cloth to remove any dust or debris. Let it dry completely so your tape will stick properly. -
Tape the rim:
Apply a strip of painter’s tape just under the lip of the pot’s top rim. Press the tape down firmly all the way around to create a sharp, clean line where the terracotta meets the paint. -
Protect the bottom (optional):
If you want to keep the very bottom edge unpainted like the example, add a second line of tape near the base. Alternatively, you can simply paint carefully down to the bottom edge.
Paint bleeding under tape?
If your lines aren’t crisp, scrape away excess paint with a craft knife once dry, or use a damp cotton swab to wipe mistakes while wet.
Step 2: Painting the Base
-
First coat application:
Using your flat paintbrush, apply a generous layer of black chalkboard paint to the body of the pot below your tape line. Use horizontal strokes that follow the curve of the pot for the smoothest finish. -
Let it dry:
Allow the first coat to dry for about an hour. Terracotta is porous and will soak up the first layer quickly. -
Apply second coat:
Paint a second layer of chalkboard paint to ensure full, opaque coverage. I prefer to brush vertically this time to cross-hatch the texture and eliminate brushstrokes. -
Remove tape:
While the second coat is still slightly tacky, carefully peel away the painter’s tape. Removing it now helps prevent the dry paint from chipping along the edge. -
Curing time:
Let the pot sit overnight or for at least 24 hours. Chalkboard paint needs to cure fully before you can write or draw on it.
Use Liquid Chalk Pens
For sharper, brighter white lines that won’t smudge as easily when you water the plant, swap standard chalk for a fine-tip liquid chalk marker.
Step 3: Adding the Design
-
Season the surface:
Take a piece of white chalk and rub the side of it over the entire painted black area, then wipe it off with a dry tissue. This ‘seasons’ the surface and gives it that authentic dusty chalkboard look. -
Draw the center lines:
Using your chalk or chalk marker, draw two parallel horizontal lines around the middle of the black band. Don’t worry if they aren’t perfectly straight; the handmade look adds charm. -
Fill the center:
Use the side of your chalk to loosely shade in the space between your two parallel lines. You want a textured, scratchy fill rather than a solid white block. -
Add vertical scratches:
Go over your shaded center area with short, vertical strokes. These little perpendicular scratches create the detailed ‘etched’ pattern seen in the inspiration piece. -
Create the outer dashes:
Draw short, horizontal dash marks above the top line and below the bottom line. Space them somewhat irregularly to mimic a primitive or tribal pattern. -
Plant and enjoy:
Place your herb plant inside the pot. The porous terracotta is excellent for moisture-loving herbs like rosemary, and now it looks stylish too.
You now have a chic, custom planter ready to brighten up your kitchen counter
Face Planters Where the Plant Becomes “Hair”
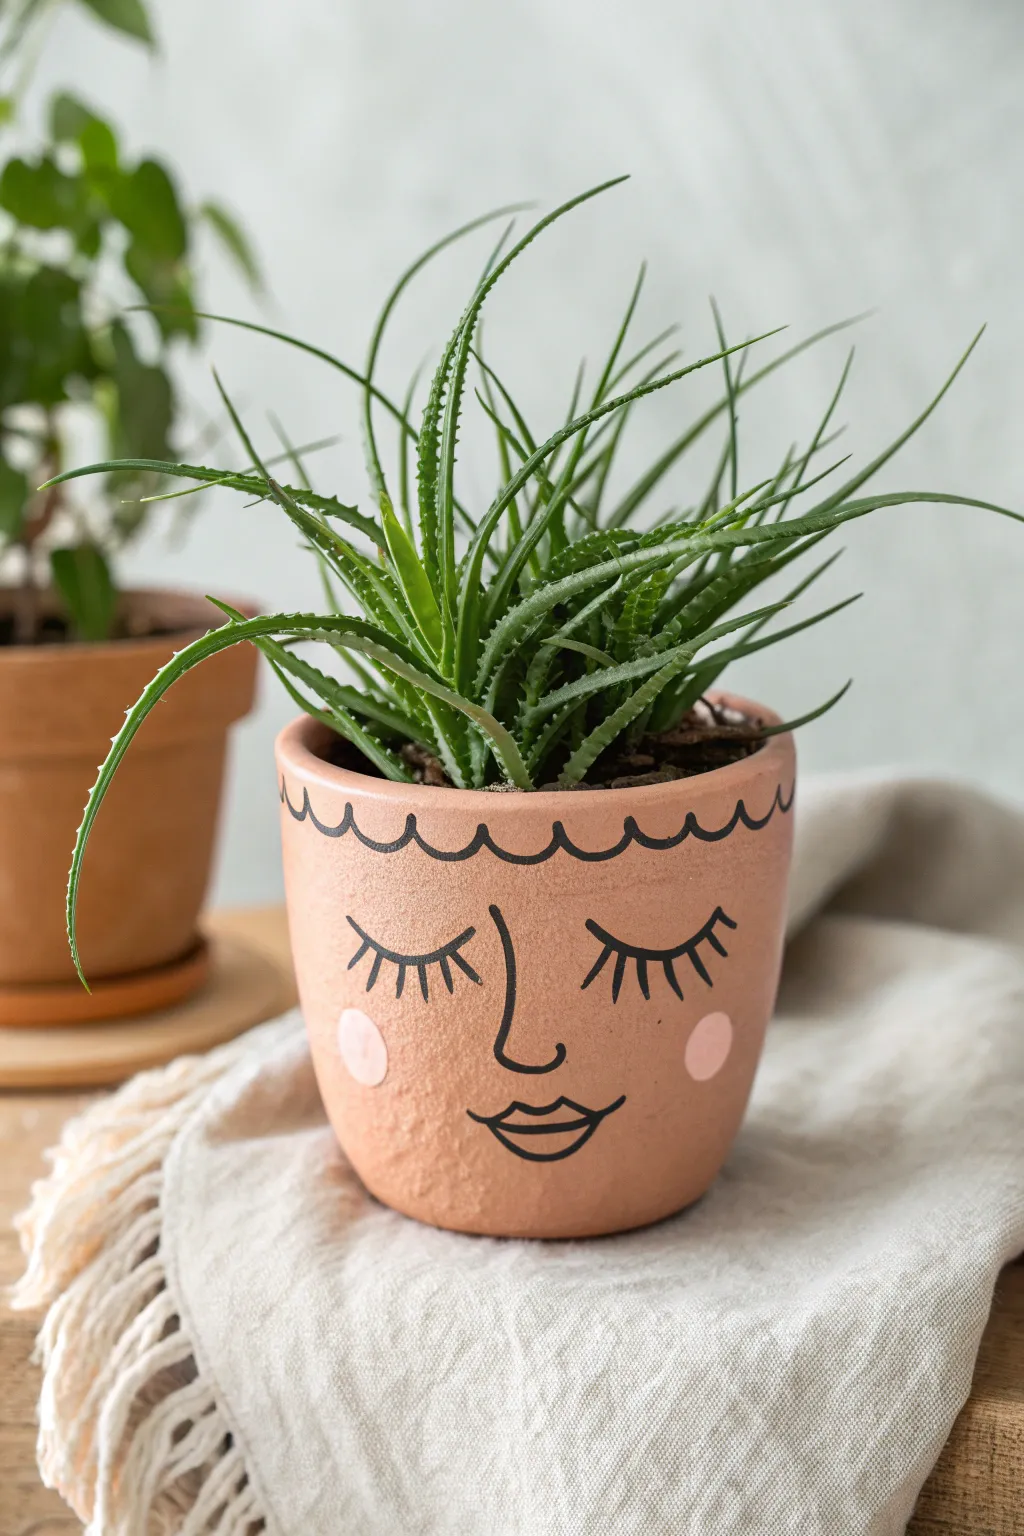
Transform a plain terracotta pot into a sweet, sleeping character with just a paint marker and a steady hand. The aloe’s spiky leaves create the perfect wild hairdo for this serene face, making it look like she just woke up from a nap. It’s a minimalist design that adds maximum personality to your shelf.
Step-by-Step
Materials
- Standard terracotta pot (size to fit your plant)
- Black oil-based paint marker (medium tip)
- Pink craft acrylic paint
- Small round paintbrush or sponge dauber
- Pencil with a good eraser
- Spiky plant like Aloe or Haworthia
- Potting soil
Step 1: Preparation & Sketching
-
Clean the Surface:
Before starting, wipe down your terracotta pot with a damp cloth to remove any dust or red clay residue. Let it dry completely so the marker adheres properly. -
Establish the Hairline:
Using a pencil, lightly sketch a wavy line around the upper rim of the pot. This scallop pattern acts as the figurine’s hairline or forehead fringe. -
Locate the Features:
Imagine a centerline running vertically down the front of the pot to help you place the nose symmetrically. Sketch a simple ‘L’ shape or gentle curve for the nose profile right in the middle. -
Draft the Eyes:
On either side of the nose bridge, lightly draw two downward-curving arcs for the closed eyelids. Try to keep them level with each other. -
Add the Lashes:
Sketch small vertical ticks coming off the bottom of the eyelid arcs. Making the center lashes slightly longer than the outer ones adds a cute illustrative style. -
Place the Mouth:
Below the nose, draw a small mouth. A simple almond shape with a line through the middle works perfectly for a relaxed, sleeping expression. -
Mark the Cheeks:
Finally, lightly circle two spots on the outer cheeks where the pink blush will go. This ensures you leave room for them before inking.
Oops! Uneven Eyes?
If you mess up the symmetry, dampen a Q-tip with rubbing alcohol to erase the oil marker before it cures. Wipe the terracotta clean and try again.
Step 2: Painting & Inking
-
Shake the Marker:
Shake your black oil-based paint marker vigorously to mix the pigment. Press the tip on a scrap piece of paper until the ink flows smoothly. -
Ink the Hairline:
Trace over your pencil scallops along the rim. Go slow to keep the curves smooth and connected. -
Define the Nose:
Draw the nose line with a confident stroke. I find that pulling the pen towards me helps keep the line steady. -
Outline the Eyes:
Trace the main arc of the eyelids. Lift the pen cleanly at the end of each curve. -
Detail the Lashes:
Add the eyelashes with quick, light flicks of the marker. Variation in length makes them look more natural and hand-drawn. -
Ink the Lips:
Outline the mouth shape and add the center line. Ensure the lines connect fully at the corners. -
Paint the Cheeks:
Dip your small brush or sponge dauber into the pink acrylic paint. Dab off excess paint onto a paper towel first. -
Apply the Blush:
Press the pink paint gently onto the circled cheek areas. You want a solid circle, but translucent coverage is okay for a watercolor look. -
Cleanup:
Once the black ink is fully dry, gently erase any visible pencil marks. Be careful not to smudge the pink paint if it’s still tacky.
Make It Glossy
Add tiny white dots to the pink cheeks with a paint pen, or use a high-gloss varnish on just the lips to make the character look like she’s wearing makeup.
Step 3: Finishing Touches
-
Seal the Design (Optional):
If this pot will live outdoors, you may want to brush a matte sealer over the painted face to protect it from water damage. -
Add the Plant Hair:
Pot your spiky plant directly into the container. Arrange the leaves so they stand tall and wild, completing the character’s fun hairstyle.
Step back and smile at your new leafy friend as she enjoys her permanent nap

TRACK YOUR CERAMIC JOURNEY
Capture glaze tests, firing details, and creative progress—all in one simple printable. Make your projects easier to repeat and improve.
Animal-Themed Pots With Simple Painted Features
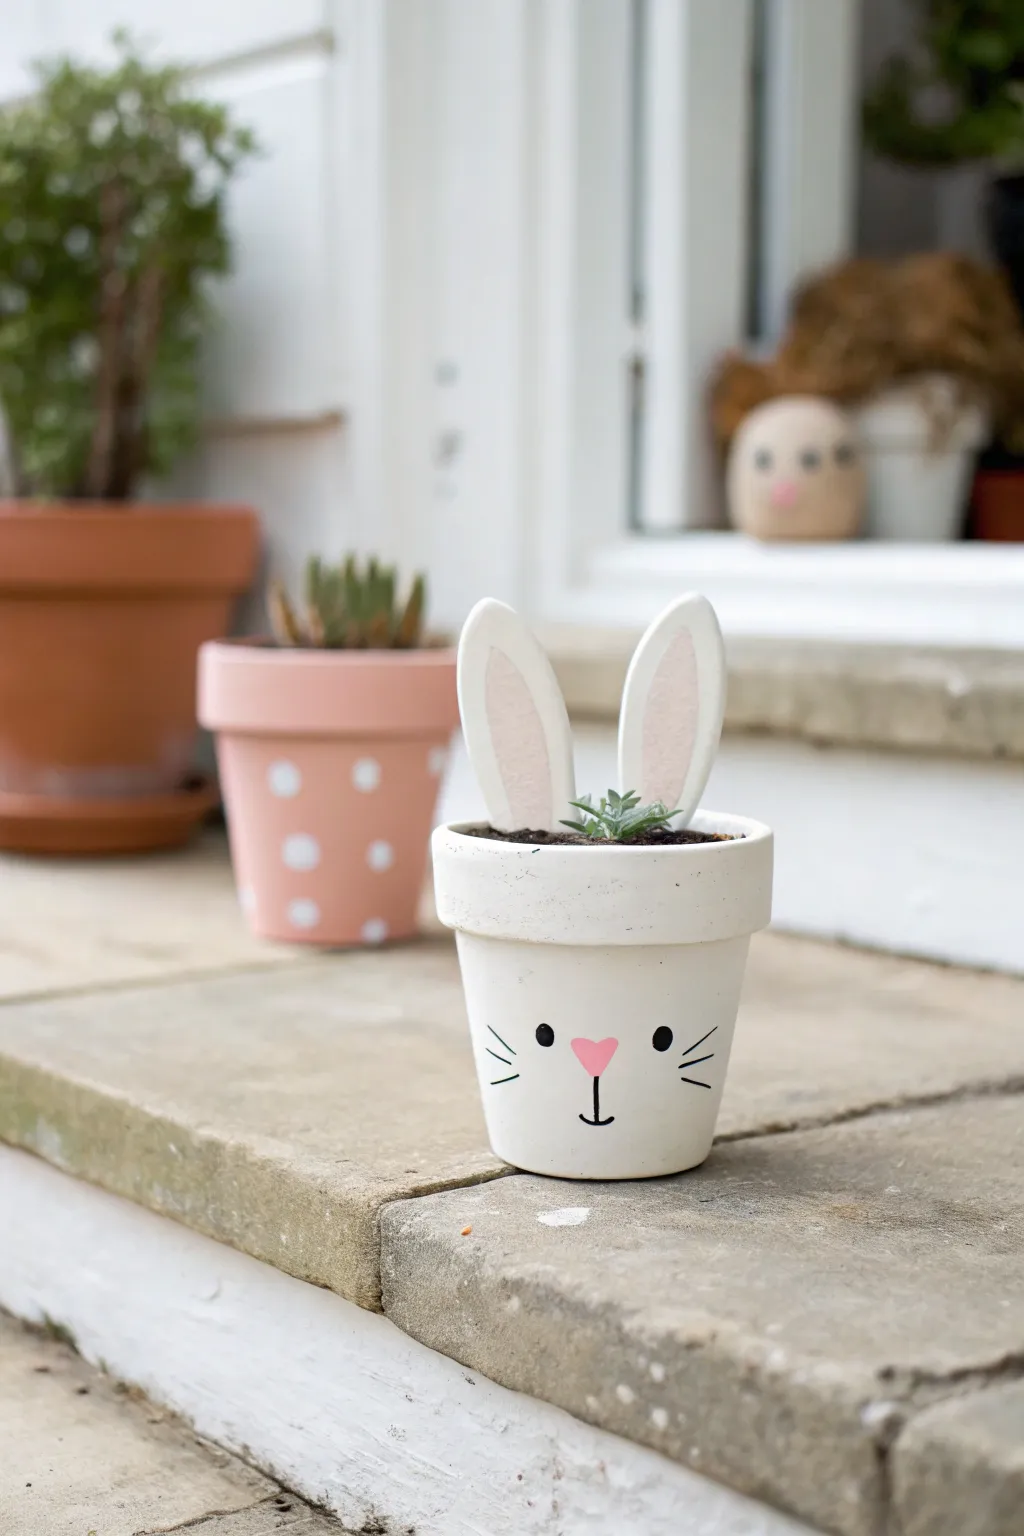
Transform a standard terracotta pot into an adorable bunny companion for your succulents, complete with perky ears and a sweet, simple face. This minimalist design uses crisp white paint and basic shapes to create a charming character perfect for spring decor or a kid’s room.
How-To Guide
Materials
- Small terracotta pot (approx. 3-4 inches)
- White acrylic craft paint
- Pink acrylic craft paint
- Black acrylic craft paint or paint marker
- Wooden spoon craft shapes or stiff white craft foam
- Strong craft glue or hot glue gun
- Flat paintbrush (medium width)
- Fine detail paintbrush or fine-tip black permanent marker
- Potting soil
- Small succulent or plant of choice
- Clear matte sealant spray (optional)
Step 1: Preparing the Base
-
Clean the surface:
Before painting, wipe down your terracotta pot with a damp cloth to remove any dust or manufacturing residue. Let it dry completely so the paint adheres properly. -
Apply the first coat:
Using a flat paintbrush and white acrylic paint, cover the entire exterior of the pot. Don’t forget to paint the top inch of the inner rim where the soil line will stop. -
Let it dry:
Allow the first coat to dry fully. Touching it too soon can lift the paint and create texture issues. -
Add a second coat:
Apply a second layer of white paint to ensure solid, opaque coverage. Terracotta is porous and tends to soak up the first layer, so this second pass gives you that clean, bright finish.
Uneven Whiskers?
If painting fine lines is tricky, use a black paint pen instead of a brush. The firm tip offers much more control than bristles.
Step 2: Crafting the Ears
-
Select your material:
For the ears, you can cut shapes from stiff white craft foam or use pre-made wooden spoon craft shapes available at hobby stores. The wooden shapes work best for durability. -
Paint the ears white:
Coat your chosen ear shapes with white paint on both sides. I find it easiest to paint one side, let it dry, flip, and do the other. -
Add inner ear detail:
Mix a very small amount of pink paint with white to create a soft pastel pink. Paint a smaller, elongated oval shape in the center of each ear to mimic the inner ear. -
Dry completely:
Set the ears aside to dry thoroughly while you work on the pot’s face.
Adding Texture
For a fuzzy look, cut the inner ear shapes out of pink felt and glue them onto the white ears instead of painting them.
Step 3: Painting the Face
-
Paint the nose:
Using the same pink mixture or straight pink paint, create a small, inverted heart shape in the center of the pot’s body. Place it slightly lower than the halfway mark for a cute proportion. -
Draw the mouth:
With a fine detail brush and black paint (or a black permanent marker for easier control), draw a small vertical line down from the point of the heart nose. Add a small ‘u’ shape specifically under that line to form the mouth mouth anchor. -
Add the eyes:
Paint two small black oval dots on either side of the nose. Keep them wide-set for a sweeter expression. -
Add whiskers:
Using a very light touch, draw three short, straight lines extending horizontally from each cheek area. Quick, confident strokes prevent shaky lines. -
Seal (Optional):
If this pot will live outdoors or gets handled often, spray the entire painted surface with a clear matte sealant to protect your work.
Step 4: Assembly
-
Fill with soil:
Fill your sunny little pot with succulent-appropriate potting soil, leaving a little room at the top. -
Plant the greenery:
Tuck your small succulent into the center of the soil. -
Insert the ears:
Push the bottom ends of your painted ear shapes into the soil behind the plant. Angle them slightly outward for a realistic look. -
Secure if needed:
If the ears feel loose in the soil, you can glue a small toothpick or skewer to the back of each ear to give them a longer stake for stability.
Enjoy your new hopping little friend on a windowsill or desk