If you’re itching for fresh thrown pottery ideas, the wheel is basically an endless idea machine—one good cylinder can turn into a dozen different projects. Here are my favorite wheel-thrown forms and fun twists, starting with the classics and building toward the more “how did you make that?” pieces.
Simple Snack and Cereal Bowls
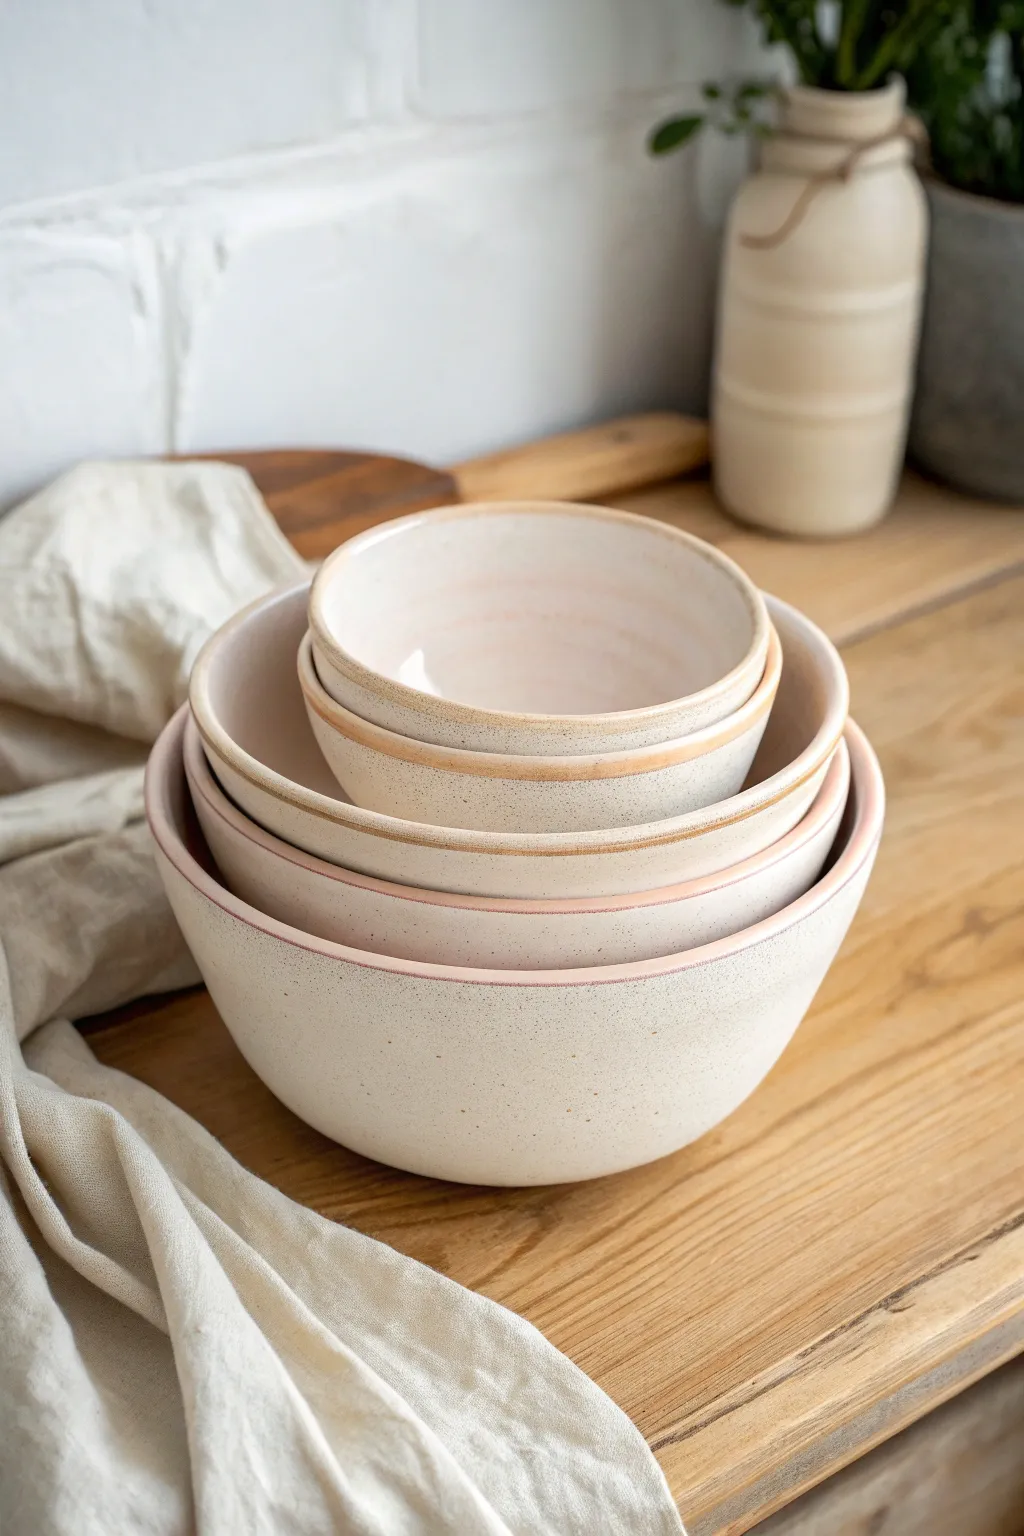
These charming nesting bowls combine a minimalist silhouette with a soft, tactile finish perfect for cozy mornings. The project features a creamy, speckled exterior paired with a delicate blush rim, creating a set that is as functional as it is beautiful.
Step-by-Step Tutorial
Materials
- Speckled warm-tone stoneware clay (e.g., Laguna Speckled Buff)
- Potter’s wheel
- Throwing tools (sponge, wire cutter, needle tool)
- Wooden rib and metal rib
- Trimming tools (loop tool)
- Bat system or wooden bats
- Creamy matte white glaze
- Blush pink or coral dipping glaze
- Wax resist
- Kiln
Step 1: Planning and Throwing
-
Weigh your clay:
Since these are nesting bowls, precision is key right from the start. Weigh out four balls of speckled clay in graduating sizes: 1 lb, 1.5 lbs, 2 lbs, and 2.5 lbs. Wedging them thoroughly to remove air bubbles is crucial for smooth throwing. -
Center the first ball:
Start with the smallest ball (1 lb). Slam it onto the wheel head and center it using steady pressure and water. The clay needs to be perfectly centered to ensure an even rim later. -
Open and widen:
Open the clay down to about a 1/4 inch from the bat. Pull the floor open to create a gentle curve rather than a flat bottom, as these bowls have a continuous rounded profile. -
Pull the walls:
Pull the walls upward and slightly outward. Aim for a simple, hemispherical shape. The rim should remain slightly thicker than the walls to prevent chipping during use. -
Refine the curve:
Use a wooden rib inside the bowl to compress the clay and define that smooth, continuous curve. I like to support the outside with a sponge while doing this to maintain the wall thickness. -
Finish the rim:
Using a chamois or a small strip of plastic, compress the rim to make it rounded and smooth. This softness is essential for the comfort of a cereal bowl. -
Repeat for remaining bowls:
Repeat the throwing process for the 1.5 lb, 2 lb, and 2.5 lb balls. As you throw each larger bowl, use caliper measurements of the previous bowl’s exterior to ensure the next one is wide enough to nestle it inside. -
Drying:
Wire the bowls off the bats and let them dry to a leather-hard state. This usually takes a day or two depending on humidity.
Step 2: Trimming and Bisque
-
Center for trimming:
Invert your leather-hard bowl onto the wheel head. Secure it with small clay lugs or use a grip bat. Tap it until it spins perfectly true. -
Trim the foot:
Using a sharp loop tool, trim away the excess clay from the bottom. These bowls benefit from a small, defined foot ring that lifts the curve slightly off the table. -
Smooth the exterior:
Run a metal rib over the exterior while the wheel spins to remove any throwing lines and burnish the speckles slightly. Keep the surface texture minimal. -
Bisque fire:
Allow the bowls to dry completely until bone dry. Load them into the kiln for a bisque firing (typically Cone 04 or 06).
Rim Technique
To get a clean, visible band of color at the rim, let the main exterior glaze dry completely before doing the final rim dip. A quick 2-second hold is all you need.
Step 3: Glazing
-
Prepare the bottoms:
Wipe the bisque ware with a damp sponge to remove dust. Apply wax resist to the foot ring and the very bottom center to prevent sticking to the kiln shelf. -
Interior liner glaze:
Pour the blush pink glaze into the interior of the bowl, swirl it quickly to coat the entire inside, and pour out the excess. Wipe any drips off the rim immediately. -
Coat the exterior:
Hold the bowl by the foot comfortably. Dip the exterior into the creamy matte white glaze just up to the rim. You want the white to meet the pink right at the edge. -
Create the rim accent:
This is the signature detail: Dip just the very rim (about 1/4 inch) back into the blush pink glaze or a slightly darker coral. This creates that lovely layered band of color seen in the photo. -
Clean up:
Check the foot ring one last time to ensure no glaze has adhered to the wax. Sponge off any stray droplets. -
Glaze fire:
Load the kiln carefully, ensuring bowls aren’t touching. Fire to the maturity temperature of your clay and glaze (likely Cone 5 or 6 for stoneware). -
Sand the bottom:
Once cooled and unloaded, use high-grit sandpaper to smooth the unglazed foot ring so it won’t scratch your table.
Variation Idea
Try using a darkly colored clay body, like chocolate or black stoneware, underneath. The white glaze will break beautifully over the texture for high contrast.
Enjoy using your perfectly nesting set for everything from mise en place to morning granola


Straight-Sided Tumblers
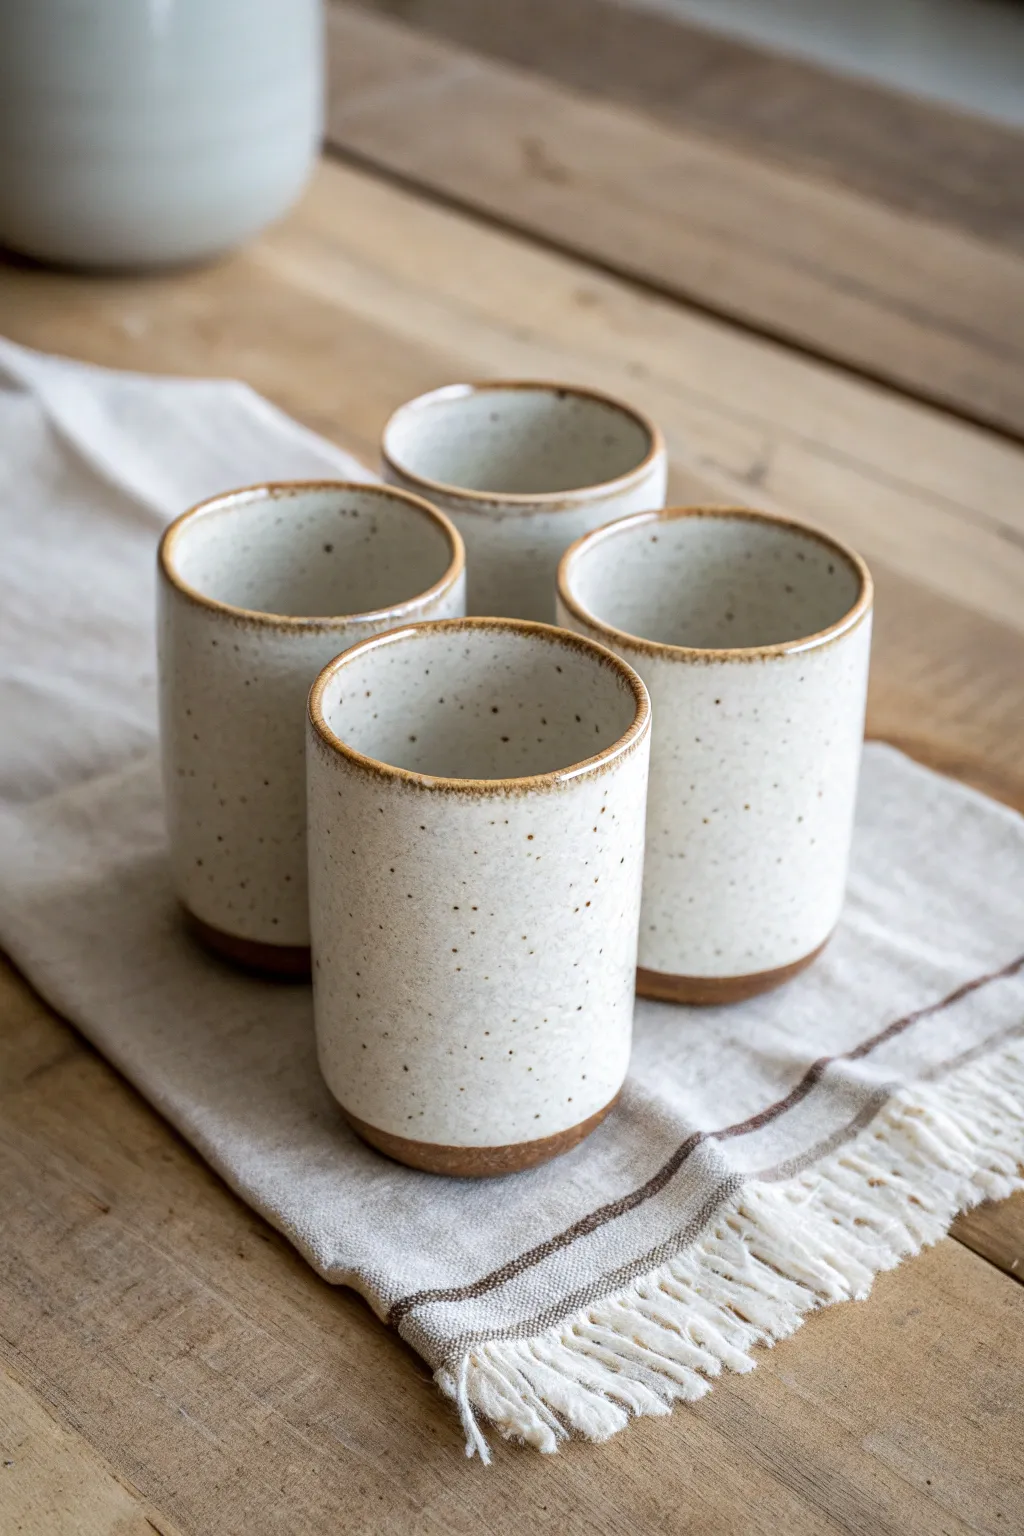
These elegant, handleless tumblers feature clean lines and a comforting weight that fits perfectly in the hand. The design relies on the subtle contrast between a creamy, speckled glaze and the raw warmth of exposed stoneware at the rim and base.
How-To Guide
Materials
- Speckled buff stoneware clay (or red stoneware)
- Pottery wheel
- Throwing bucket and sponge
- Wire cutting tool
- Wooden throwing ribs
- Metal kidney rib
- Loop trimming tools
- Wax resist
- Satin matte white glaze
- Medium paintbrush
- Kiln
Step 1: Throwing the Cylinder
-
Center the clay:
Begin with about 1 pound of well-wedged stoneware clay. Secure it to the wheel head and center it using steady pressure and water until it spins perfectly smooth without wobbling. -
Open the form:
Push your thumbs into the center of the mound, leaving about a 1/4-inch thickness for the floor. Pull the clay outward to establish the interior width of your tumbler, roughly 3 inches across. -
Compress the base:
Before pulling up the walls, use your finger or a sponge to compress the floor. This step is crucial for preventing S-cracks later during firing. -
Pull the walls:
Using a steady lifting motion with fingertips inside and outside the clay, pull the walls upward. Aim for an even cylinder, keeping the thickness consistent from bottom to top. -
Refine the shape:
For that classic tumbler look, I prefer to keep the sides very straight. Use a wooden throwing rib against the outside while pushing gently from the inside to remove finger marks and straighten the profile. -
Address the rim:
Compress the rim with a piece of chamois leather or your sponge. Give it a slightly rounded, smooth edge, which will be comfortable against the lips since this area will remain unglazed. -
Undercut the base:
Use a wooden knife tool to trim a small undercut at the very bottom of the wall where it meets the wheel head. This creates a guideline for trimming later. -
Cut off and dry:
Slide your wire tool underneath the pot to release it. Lift it carefully onto a ware board and let it dry to a ‘leather hard’ state.
Uneven Glaze Line?
If your wax resist line at the base is shaky, use a banding wheel. Spin the wheel while holding your brush steady in one spot against the pot for a perfect circle.
Step 2: Trimming and Finishing
-
Center for trimming:
Once leather hard, place the tumbler upside down on the wheel. Center it and secure it with small coils of clay (lugs). -
Trim the foot:
Using a sharp loop tool, remove the excess clay at the base. To match the image, create a distinct bottom curve that transitions smoothly into the straight wall, leaving a clean, unglazed band area. -
Smooth the texture:
Before removing the pot from the wheel, run a metal kidney rib over the trimmed area to compress the grog and smooth out any rough tool marks. -
Bisque fire:
Allow the tumblers to dry completely until bone dry, then load them into the kiln for a bisque firing (usually Cone 04 or 06).
Step 3: Glazing
-
Apply wax resist:
This is the defining step for this style. Paint a band of wax resist around the bottom 1/2 inch of the exterior. Also, carefully paint a thin line of wax along the very top rim to keep the clay exposed there. -
Mix the glaze:
Ensure your satin white glaze is mixed thoroughly. If you want the speckled effect shown in the project without using speckled clay, you can mix a small amount of granular ilmenite into the glaze. -
Dip the tumbler:
Hold the tumbler by the waxed foot area or use glazing tongs. Dip it swiftly into the bucket, holding it there for just 3 seconds to get an even coat. -
Clean and refine:
Once the glaze is dry on the surface, wipe away any droplets that beaded up on the waxed areas with a damp sponge. -
Final firing:
Fire the pieces to the final temperature required by your clay body and glaze (typically Cone 5 or 6 for stoneware).
Level Up: Texture
Before the clay dries, gently press a rough linen cloth against the cylinder walls. The glaze will break beautifully over this subtle texture.
Now you have a stunning set of modern tumblers ready for your morning coffee or evening tea


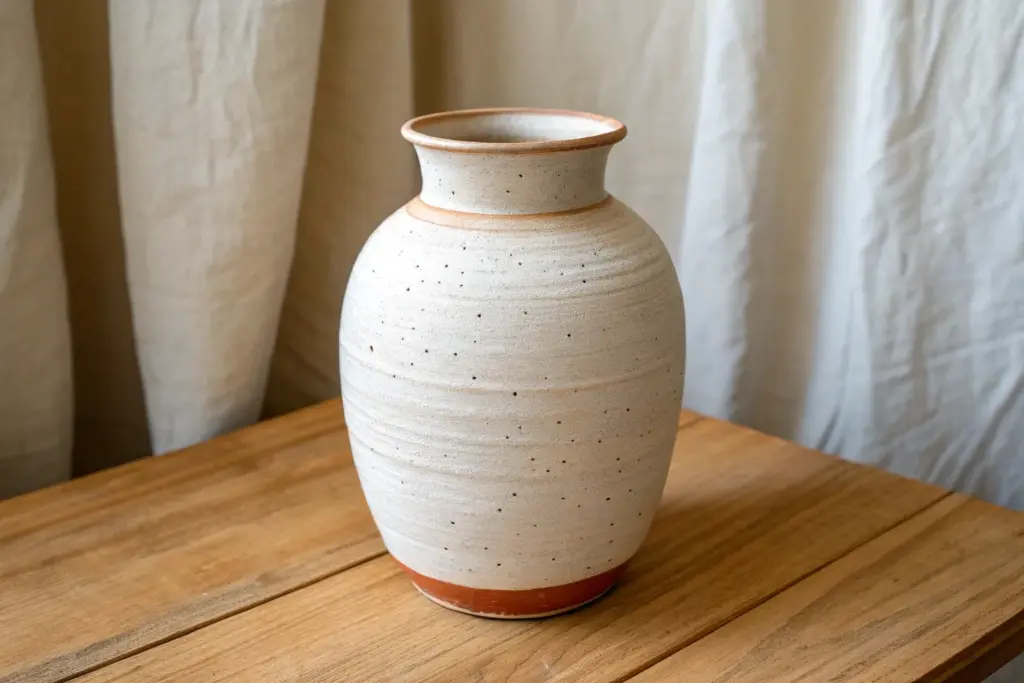
Bud Vases for Tiny Blooms
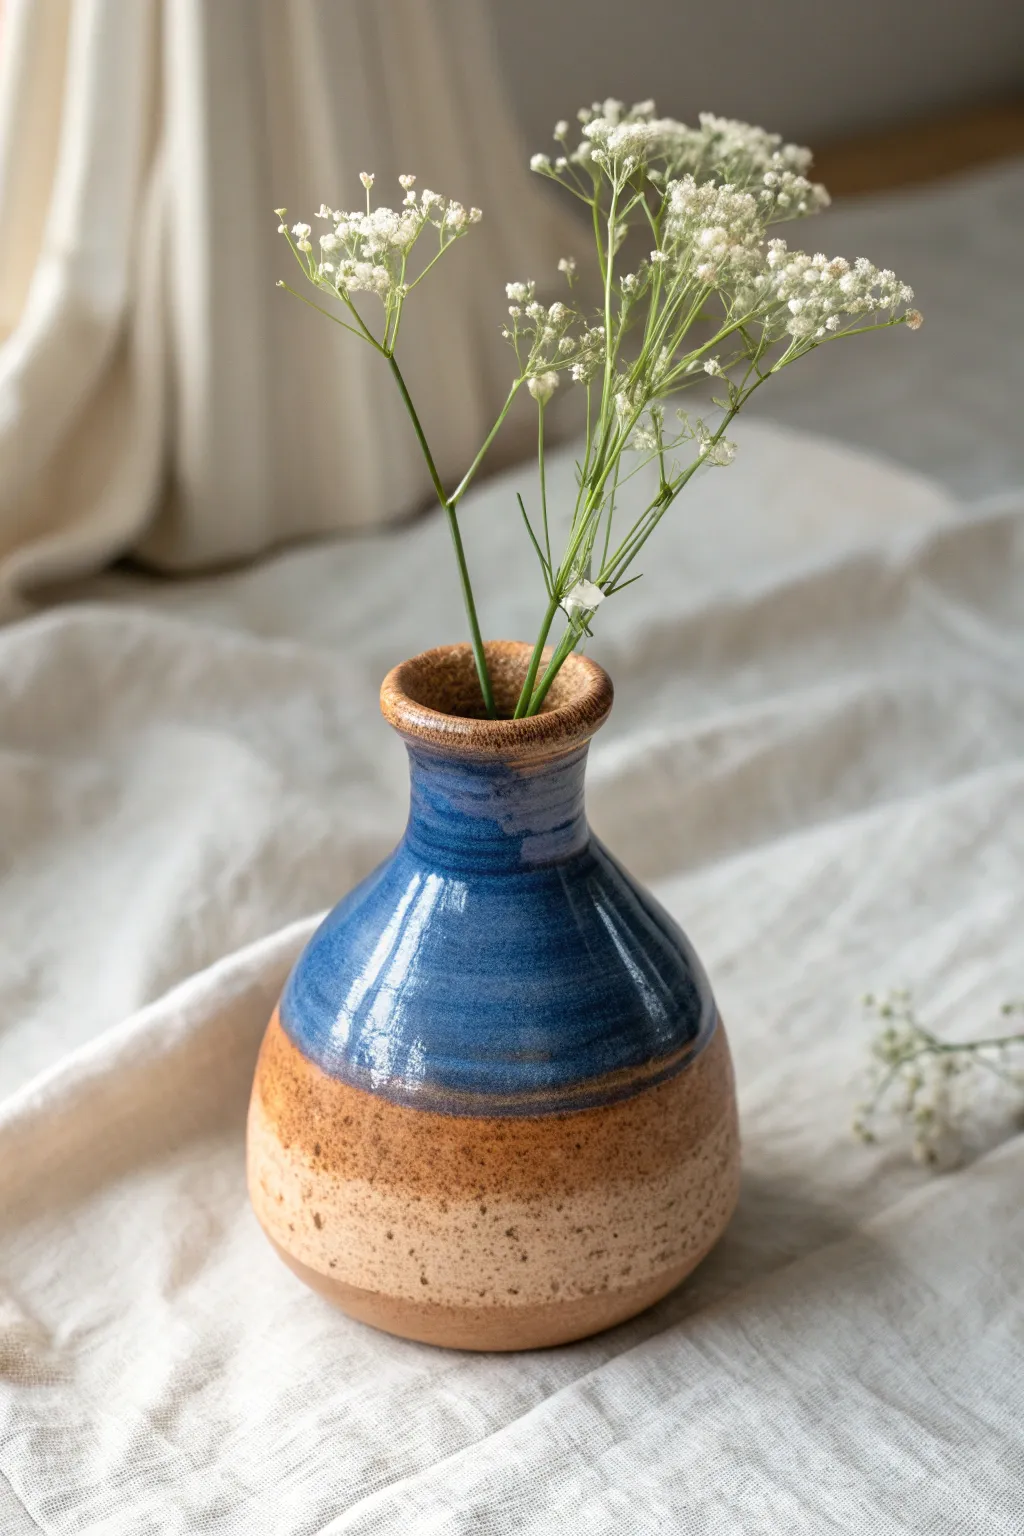
This charming bud vase features a comforting, earthy aesthetic where a glossy ocean blue glaze meets warm, speckled stoneware. Its classic bottle shape with a gentle belly and flared rim makes it perfect for displaying delicate stems like baby’s breath or dried grasses.
Detailed Instructions
Materials
- Speckled Stoneware Clay (approx. 1 lb)
- Potter’s Wheel
- Throwing sponge
- Needle tool
- Wire cutter
- Wooden rib tool
- Metal kidney scraper
- Trimming tools
- Glossy Blue Glaze (e.g., Floating Blue or Cobalt)
- Clear Glaze (optional, if clay body isn’t vitrified)
- Wax resist
- Sponge for glazing
Step 1: Throwing the Form
-
Prepare and Center:
Begin by wedging your speckled clay thoroughly to remove air bubbles. Slam the ball onto the wheel head and center it into a low, wide mound rather than a tall cone to prepare for a stable base. -
Opening the Floor:
Open the clay down to about a quarter-inch from the bat. Compress the floor with your sponge or a wooden tool to prevent S-cracks later. This is crucial for small vases where the bottom is hard to reach. -
Pulling the Walls:
Pull the walls up into a cylinder. Since this is a bud vase, keep the diameter relatively narrow, roughly 3-4 inches wide. Aim for even thickness from bottom to top. -
Shaping the Belly:
From the inside, gently push the clay outward while supporting the outside with a rib or your hand. Create a rounded ‘belly’ in the bottom two-thirds of the form, similar to a teardrop shape. -
Collaring the Neck:
Wet your hands slightly and gently squeeze the top third of the cylinder inward to narrow it. This ‘collaring’ creates the transition from the belly to the neck. Move slowly to avoid twisting the clay. -
Refining the Neck:
Pull the neck upward slightly to elongate it. I personally like to use the flat edge of a wooden tool here to ensure the neck is perfectly vertical and smooth. -
Flaring the Rim:
At the very top, use your thumb or forefinger to gently gently flair the lip outward. This creates a soft, rolled rim that balances the visual weight of the belly. -
Undercutting:
Use a wooden knife tool to undercut the base, creating a bevel. This lifts the form visually and makes it easier to wire off later.
Collaring Success
When collaring the neck, speed up the wheel slightly. The centrifugal force fights you, so faster rotation helps keep the clay moving upward and center rather than buckling.
Step 2: Trimming and Bisque
-
Drying to Leather Hard:
Allow the vase to dry slowly under plastic until it reaches a leather-hard state. The rim should be firm enough to support the weight of the pot when upside down. -
Trimming the Foot:
Center the pot upside down on the wheel. Trim excess clay from the bottom curve to match the interior shape. Carve a small foot ring to give the vase a defined bottom. -
Smoothing:
Run a smooth rib or a slightly damp sponge over the trimmed areas to compress the clay pores and remove grog trails. -
Bisque Fire:
Bone dry the piece completely, then load it into the kiln for a bisque firing (usually around Cone 04).
Step 3: Glazing Technique
-
Waxing the Bottom:
Apply wax resist to the foot ring and about 1/4 inch up the side of the base. This ensures no glaze drips will fuse your pot to the kiln shelf. -
Resisting the Lower Body:
For this specific two-tone look, we want to keep the bottom third unglazed to show the speckled clay. Apply wax resist up to the ‘shoulder’ area where the blue glaze will stop, or simply use a steady hand. -
Interior Glazing:
Pour your blue glaze inside the vase, swirl it quickly to coat the entire interior, and pour it out immediately. -
Exterior Dipping:
Hold the vase by the foot (or using tongs) and dip the top two-thirds into the blue glaze. Aim for an organic, slightly wavy line where the glaze meets the raw clay. -
Cleaning the Line:
If you didn’t use wax on the body, use a damp sponge to wipe away any glaze that dripped below your intended line. You want a clear transition between the blue and the bare clay. -
Rim Emphasis:
The rim often thins out during firing. You can gently dab a tiny bit of extra glaze on the very edge of the lip to ensure it breaks a beautiful brown-gold color like in the photo. -
Final Fire:
Load the glazed vase into the kiln for the final glaze firing (e.g., Cone 6). Ensure the bare clay section is clean before firing.
Uneven Drying?
If the thin neck dries much faster than the thick belly, wrap a small strip of damp paper towel around the rim while the rest dries under loose plastic to even moisture.
Once cooled, fill your new handmade vessel with a few sprigs of dried flowers for an instant rustic centerpiece


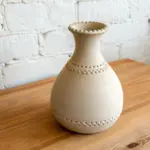
Mini Pinch-Neck Bottles
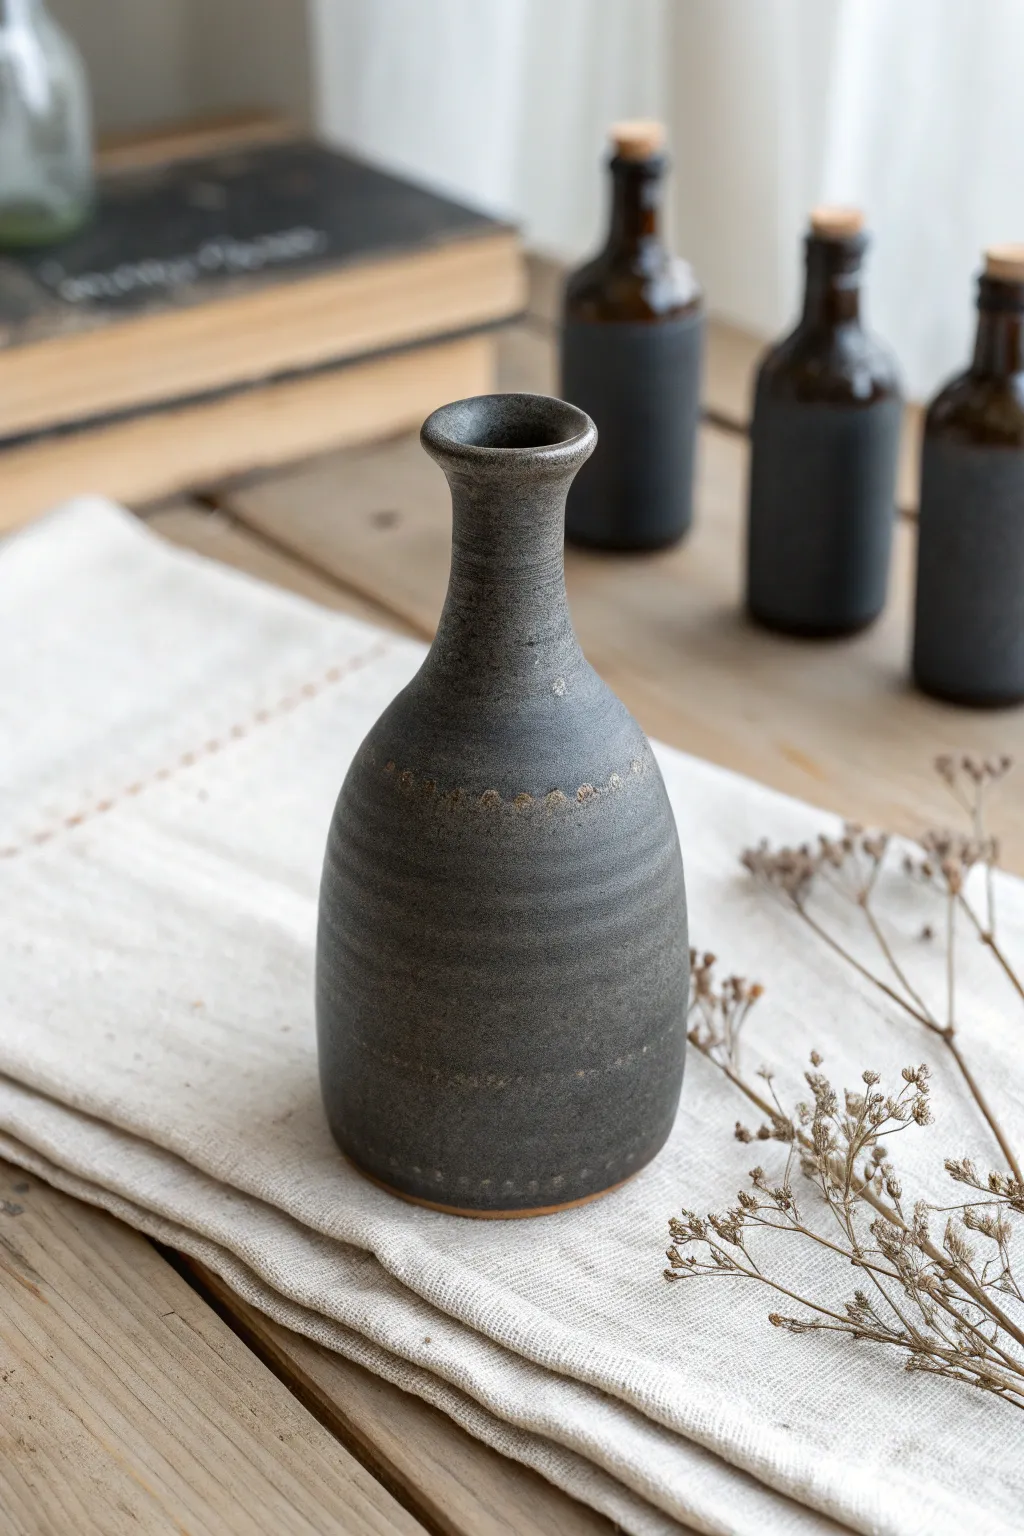
This elegant little bottle features a dramatic, narrow neck rising from a sturdy, rounded base, perfect for displaying single stems of dried flowers. Its textured matte charcoal finish gives it a rustic yet modern aesthetic that sits beautifully on any mantelpiece.
Step-by-Step Tutorial
Materials
- Stoneware clay (approximately 1-1.5 lbs)
- Pottery wheel
- Throwing sponge
- Pin tool
- Rib tool (metal or wood)
- Wire cutter
- Wooden modeling tool (for texture)
- Matte black/charcoal glaze
- Oxide wash (optional for variation)
Step 1: Throwing the Form
-
Center the Clay:
Begin by wedging your clay thoroughly to remove air bubbles. Secure the ball of clay to the wheel head and center it using firm pressure and high wheel speed. -
Open the Form:
Open the center of the clay, leaving about a half-inch thick floor at the bottom. Compress the floor well with your sponge to prevent cracking later. -
Pull the Cylinder:
Slow the wheel down slightly. Pull up the walls to create a cylinder, aiming for an even thickness. Don’t worry about the narrow neck just yet. -
Shape the Belly:
Use a rib tool or your fingers inside the cylinder to push the belly out gently. Create a rounded curve near the bottom while keeping the top section relatively straight. -
Begin Collaring:
This is the signature move for this project. With the wheel spinning at a medium pace, encircle the upper third of the cylinder with your hands, using wet thumbs and forefingers to gently squeeze or ‘collar’ the clay inward. -
Elongate the Neck:
As the clay moves inward, the walls will thicken. Do a small pull on just the neck section to thin it out and extend the height. I find it helpful to use just two fingers for this delicate work. -
Refine the Neck Profile:
Repeat the collaring and pulling process until you achieve a slender, tapered neck that transitions smoothly from the rounded body. -
Flare the Rim:
At the very top, gently press outward with a fingertip or the handle of a tool to create a distinct, flared rim. Smooth the lip with a piece of chamois or a wet sponge.
Twist Trouble
If the neck starts twisting while collaring, your wheel is too slow or your hands are too grippy. Add water, speed up the wheel slightly, and reduce hand friction immediately.
Step 2: Texturing and Trimming
-
Remove from Wheel:
Use your wire cutter to slice the bottle from the wheel head. Carefully lift it off and set it aside to dry to a leather-hard state. -
Trim the Foot:
Once leather hard, center the bottle upside down on the wheel (you may need a chuck or a thick coil to support the narrow neck). Trim away excess weight from the bottom and crave a neat foot ring. -
Apply Shoulder Texture:
While the clay is still leather hard, use a small wooden tool or the edge of a jagged stick to press divots around the ‘shoulder’ where the body meets the neck. Even spacing creates that rhythmic pattern. -
Create Base Texture:
Repeat a similar row of pressed divots around the very bottom edge of the vase to mirror the texture at the shoulder. -
Bisque Fire:
Allow the piece to dry completely until it is bone dry. Load it into the kiln for a bisque firing.
Step 3: Glazing
-
Apply Wax Resist:
Wax the bottom of the foot ring to prevent glaze from sticking to the kiln shelf. -
Dip the Glaze:
Dip the entire bottle into a matte charcoal or iron-rich black glaze. Hold it upside down for a few seconds after dipping to let excess glaze drip off. -
Highlight the Texture:
Before the glaze dries completely, you can gently rub the raised areas of the texture with a damp sponge. This thins the glaze on the high points, allowing the clay body color to show through slightly after firing. -
Final Firing:
Fire the piece to the temperature recommended for your specific clay body and glaze combination (likely Cone 6 or 10).
Rustic Variations
Try layering a rutile wash over the shoulder texture before the final glaze. This adds a metallic or golden sheen that breaks beautifully over the stamped marks.
Place a few sprigs of dried baby’s breath inside to complete the sophisticated look

The Complete Guide to Pottery Troubleshooting
Uncover the most common ceramic mistakes—from cracking clay to failed glazes—and learn how to fix them fast.
Planters With Thrown Saucers
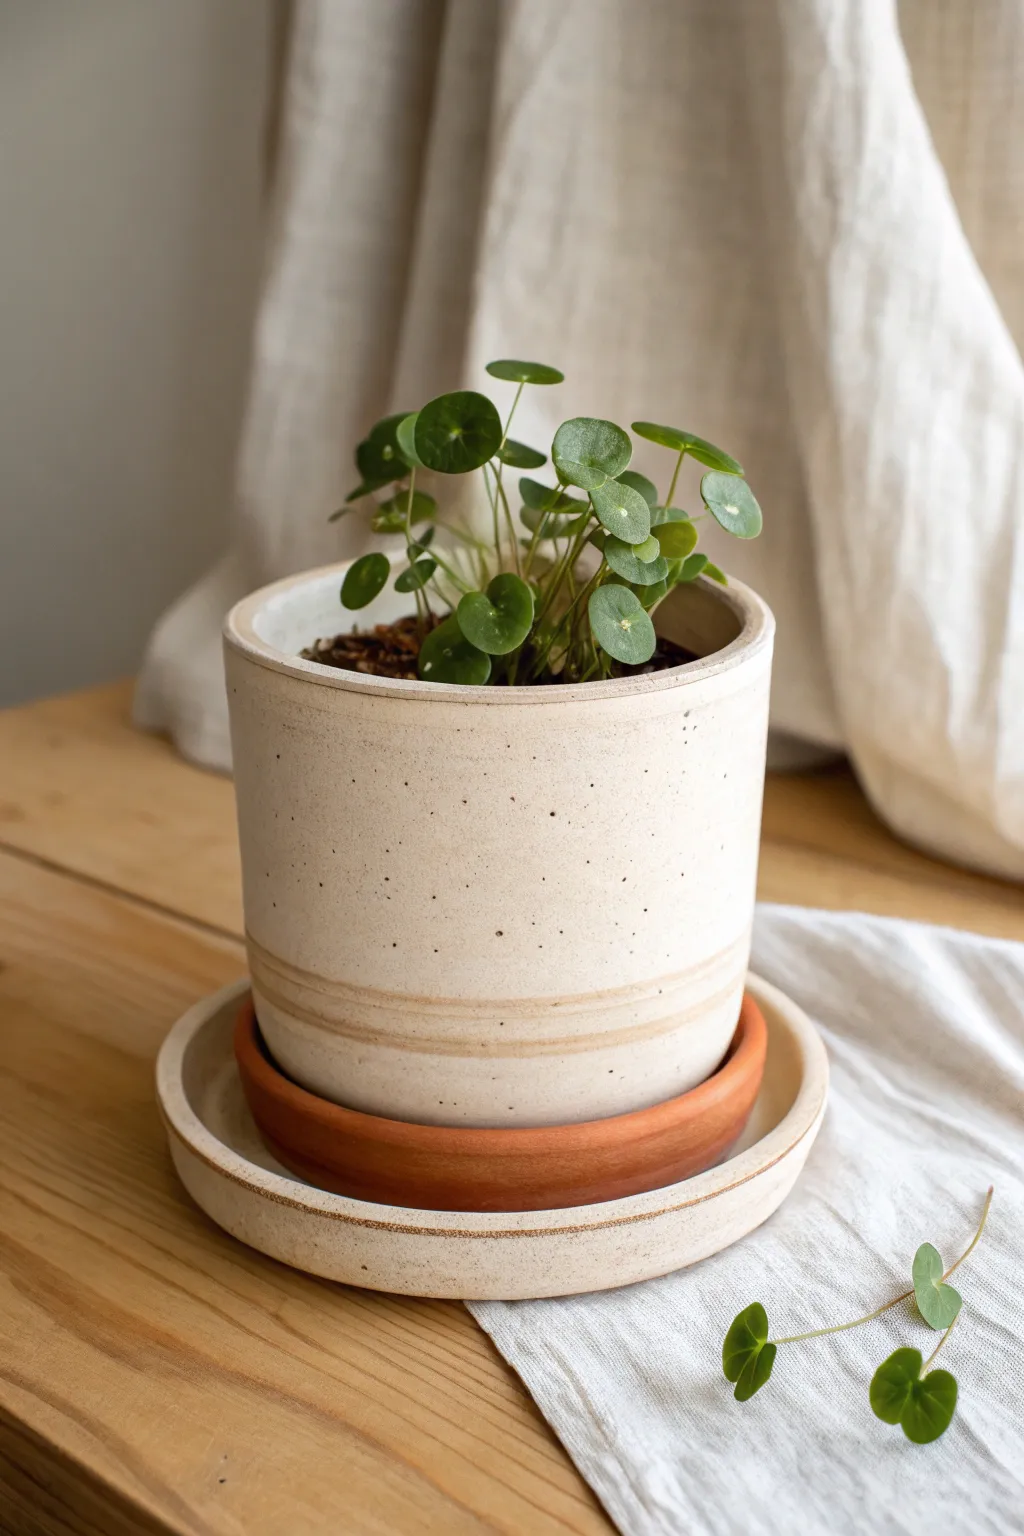
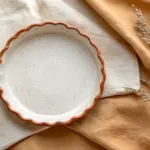
Elevate your plant display with this sophisticated cylindrical vessel featuring a unique double-saucer design. The speckled cream glaze pairs beautifully with exposed clay accents, creating a modern yet earthy home for your favorite Pilea.
Step-by-Step
Materials
- Stoneware clay (speckled or smooth)
- Pottery wheel
- Throwing tools (sponge, rib, needle tool, wire)
- Trimming tools
- Creamy satin-matte glaze (speckled)
- Warm terracotta-colored underglaze or slip (optional)
- Kiln
Step 1: Throwing the Cylinder
-
Center and open:
Start with about 2-3 lbs of clay. Center it firmly on the wheel head. Open the clay down to the bat, leaving about a 1/4-inch floor thickness. -
Pull the walls:
Pull the walls straight up to create a vertical cylinder. Aim for a height of about 5-6 inches and a width of roughly 5 inches. Keep the walls even from bottom to top. -
Refine the shape:
Use a metal or wooden rib to smooth the outside walls, ensuring they are perfectly straight and perpendicular to the wheel head. This sharp, modern profile defines the look. -
Detail the rim:
Compress the rim with a chamois or your sponge to round it off slightly. A clean, defined rim prevents future chipping. -
Cut underneath:
Use a wooden knife tool to undercut the base slightly, creating a small shadow line. Wire the pot off the bat and set aside to firm up to leather-hard.
Wobbly Walls?
If your straight cylinder walls start to warp during firing, your clay might be too thin or uneven. Leave walls slightly thicker at the bottom for structural support.
Step 2: Creating the Saucer Set
-
Throw the main saucer:
Center a smaller ball of clay (about 1 lb). Flatten it into a wide disk, pulling up a short rim about 1/2 inch high. Ensure the diameter is about an inch wider than your cylinder. -
Throw the inner accent saucer:
Throw a second, slightly smaller saucer that fits snugly just inside the rim of the main saucer, or size it to sit perfectly under the pot’s foot. This creates the layered effect seen in the photo. -
Refine the saucer lips:
Compress the rims of both saucers. For the main outer saucer, gently flare the rim outward slightly to catch water overflow effectively.
Step 3: Trimming and Carving
-
Trim the cylinder:
Once leather-hard, center the cylinder upside down. Trim the bottom flat. I invite you to carve two shallow horizontal grooves near the base—about an inch up—to create the decorative banding seen in the image. -
Add drainage:
Flip the pot over and use a hole cutter or drill bit to create a central drainage hole in the bottom. -
Trim the saucers:
Trim the bottoms of both saucers. Ensure they sit perfectly flat so they don’t rock when stacked.
Make it Match
Mix some of the dried clay trimmings into your white glaze. It creates custom specks that perfectly match the clay body color of the unglazed accents.
Step 4: Glazing and Finishing
-
Bisque fire:
Load all three pieces (pot, inner saucer, outer saucer) into the kiln for a bisque firing. -
Apply wax resist:
Wax the foot of the cylinder and the carved horizontal bands if you want the raw clay to show through. Also wax the bottom of the saucers. -
Glaze the main pieces:
Dip the cylinder and the large outer saucer into your creamy, speckled satin-matte glaze. Wipe back any glaze that touched the waxed banding cleanly. -
Glaze the accent saucer:
For the inner saucer (the reddish-brown one), apply a terracotta-colored glaze or underglaze to create that striking visual contrast. -
Final fire:
Fire all pieces to the maturity temperature of your clay and glaze (likely Cone 5/6 or Cone 10).
Once cooled, stack your set, pot your plant, and enjoy the clean lines of your new creation
Berry Bowls With Drain Holes
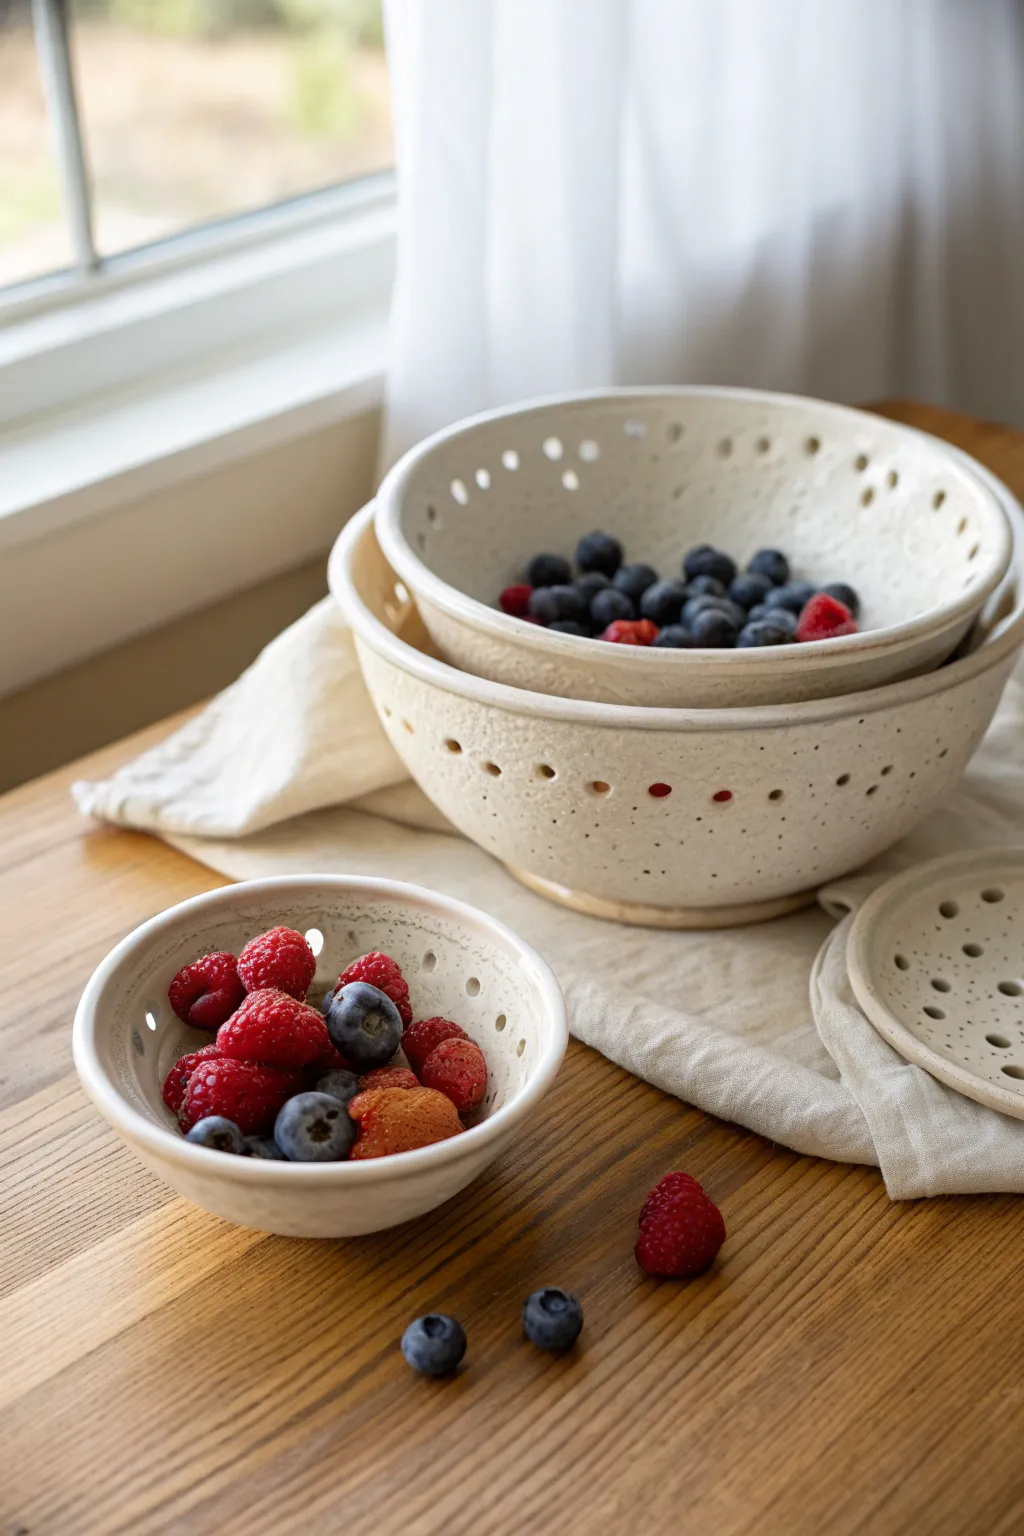
These charming, rustic berry bowls combine the elegance of hand-thrown pottery with the practicality of a kitchen colander. Featuring a soft, speckled cream glaze and a whimsical pattern of drainage holes, this nesting set is perfect for washing and serving fresh summer fruit.
Step-by-Step Guide
Materials
- Speckled buff stoneware clay (approx. 3-4 lbs total)
- Pottery wheel
- Throwing sponges and bucket
- Pin tool or needle tool
- Wire clay cutter
- Hole cutters (various sizes, 4mm to 8mm)
- Wooden throwing ribs
- Trimming tools
- Cream or oatmeal matte glaze
- Kiln
Step 1: Throwing the Bowls
-
Prep the clay:
Begin by wedging your speckled buff clay thoroughly to remove air pockets. Divide the clay into three balls of descending weight (e.g., 2 lbs, 1.5 lbs, and 0.75 lbs) to create the nesting sizes seen in the photo. -
Center the clay:
Start with the largest ball. Throw it forcefully onto the wheel head and center it using steady pressure and water. Ensure the base is wide enough to support a generous bowl shape. -
Open and pull:
Open the clay and compress the floor well to prevent cracks later. Pull the walls upward and outward to form a classic hemispherical bowl shape. Aim for a slightly thicker wall than usual, perhaps 1/4 inch, to maintain structural integrity when you punch holes later. -
Refine the rim:
Use a chamois or a wet sponge to round off and compress the rim. A sturdy rim is crucial for colanders as they get handled frequently. -
Throw the saucer:
With a smaller amount of clay (about 0.5 lbs), throw a shallow plate or saucer. This will sit underneath the bowl to catch drips after washing fruit. Give it a slightly raised gallery or rim to keep water contained. -
Wire off:
Run your wire cutter under each piece and carefully remove them from the wheel using bat pins or by sliding them onto a ware board. Repeat the throwing process for the medium and small bowls.
Step 2: Trimming and Piercing
-
Leather hard stage:
Allow the bowls to dry slowly until they reach a leather-hard state. They should be firm enough to handle without deforming but soft enough to cut easily. -
Trim the foot:
Center each bowl upside down on the wheel. Trim a clean, distinct foot ring on the bottom. This elevates the bowl, allowing water to drain even if it’s sitting on a flat surface. -
Plan the pattern:
While the bowl is still inverted or holding it gently, lightly visualizing your hole placement. The image shows a random scatter of holes near the rim in the larger bowl, and organized concentric circles in the smaller ones. -
Punch the holes:
Using a sharp hole cutter tool, punch holes through the walls. I like to support the clay wall with my other hand on the inside to prevent the clay from warping as the tool pushes through. -
Vary hole sizes:
For the organic look in the photo, alternate between a larger (8mm) and smaller (4mm) hole cutter, creating a ‘confetti’ effect around the upper third of the bowl. -
Clean the holes:
Once the clay dries a bit more to a stiff leather hard, use a dry sponge or a small smoothing tool to clean up the ‘burrs’ or rough edges left by the hole cutter. Smooth holes are essential for food safety and ease of cleaning.
Stubborn Burrs?
If the clay burrs inside the holes are hard to remove, wait until the piece is bone dry. Gently sanding the holes with a piece of dry scouring pad usually knocks them right off.
Step 3: Glazing and Firing
-
Bisque fire:
Load the bone-dry bowls into the kiln and bisque fire them to Cone 04. This renders the clay durable enough for glazing. -
Wax the foot:
Apply wax resist to the foot ring of each bowl and the saucer. This prevents glaze from fusing the pot to the kiln shelf. -
Glaze application:
Dip the bowls into a cream or oatmeal matte glaze. Ensure the glaze covers the inside and outside evenly. The speckled clay body will burn through this lighter glaze, providing those lovely dark spots. -
Clear the holes:
Check every single hole. If glaze has filled them, gently blow it out or use a pin tool to clear the opening. A clogged hole won’t drain! -
Final firing:
Fire the kiln to the maturity temperature of your clay and glaze (likely Cone 5 or 6 for stoneware). Once cooled, sand the foot ring smooth if necessary.
Add Handles
Before drying, attach two small, pulled loop handles to the rim of the largest bowl. This mimics vintage enamel colanders and makes carrying the heavy bowl easier.
Enjoy using your new handmade set on a sunny morning to rinse fresh berries for breakfast


What Really Happens Inside the Kiln
Learn how time and temperature work together inside the kiln to transform clay into durable ceramic.
Lidded Jars With Gallery Fit
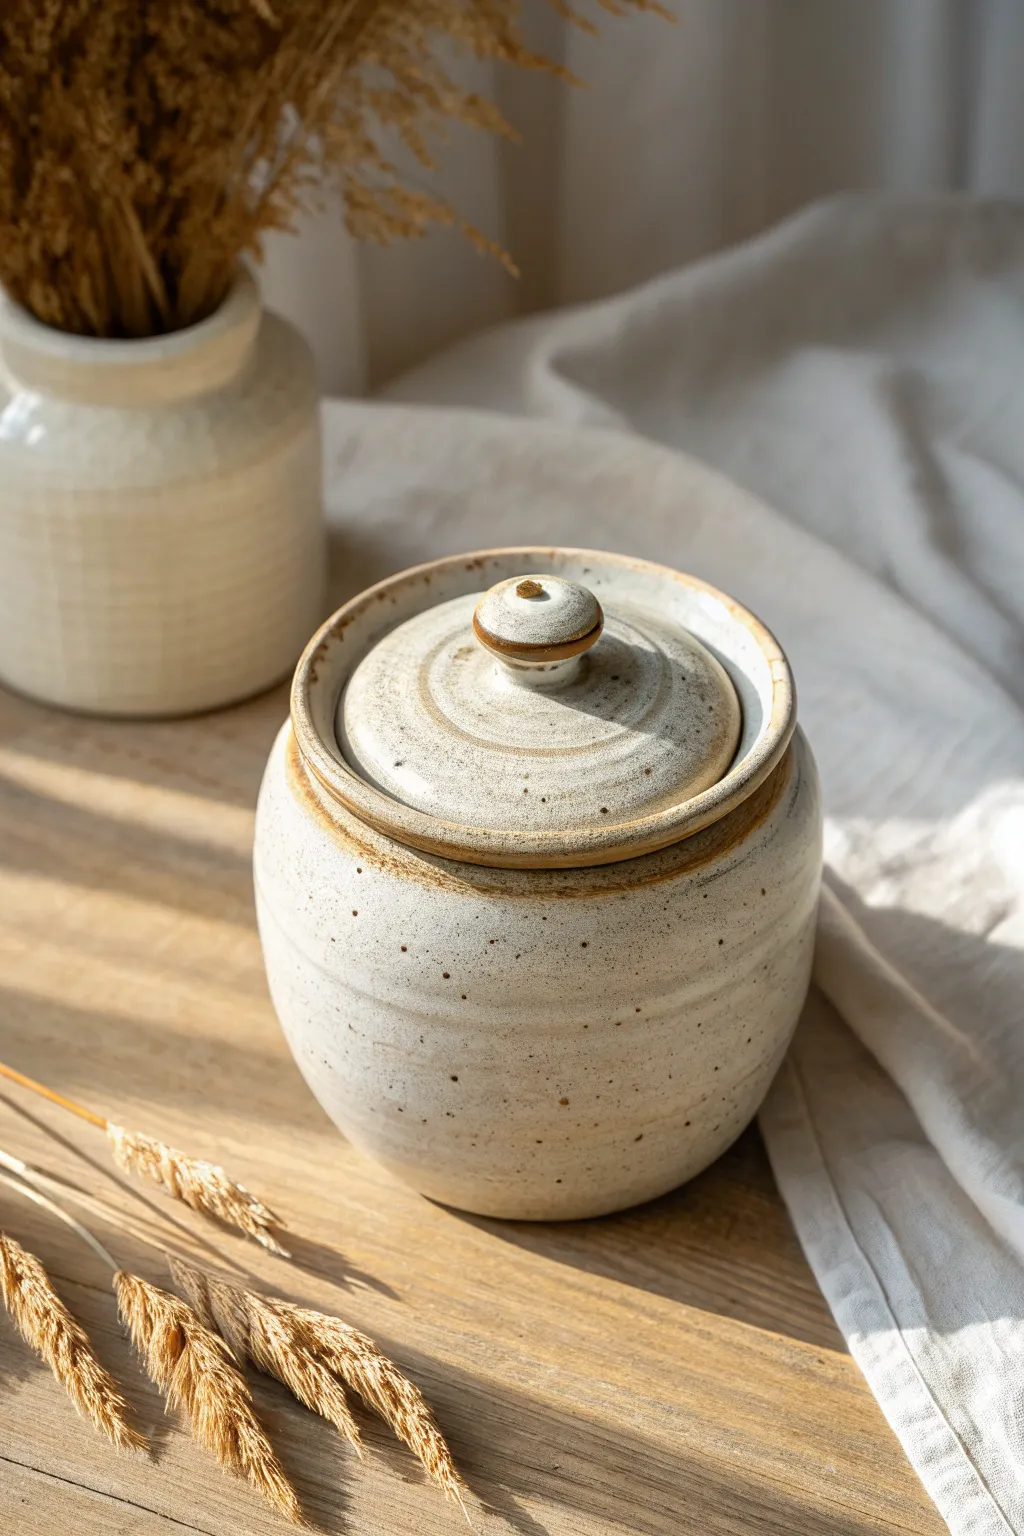
Embrace the charm of natural textures with this rustic, speckled lidded jar. The warm, creamy glaze sits comfortably on a lightly grooved form, with a gallery-fit lid that offers a satisfying, snug closure for your kitchen treasures.
Step-by-Step Guide
Materials
- Speckled Stoneware Clay (2-3 lbs)
- Pottery Wheel
- Loop tool for trimming
- Wooden throwing ribs
- Needle tool
- Wire cutter
- Calipers
- Sponge
- Creamy White/Oatmeal Satin Glaze
Step 1: Throwing the Body
-
Center and Open:
Begin by wedging about 1.5 to 2 lbs of speckled clay. Center it firmly on the wheel head and open the clay to a flat interior bottom, roughly 3.5 inches wide. -
Pull the Walls:
Pull the walls upward into a cylinder first, keeping the thickness consistent. Once you have height, gently belly out the middle section using inside pressure to create that soft, rounded curve seen in the image. -
Create the Gallery:
This is crucial for the gallery fit. At the rim, instead of simply rounding it off, split the rim or push it downwards and inwards to create a distinct shelf (the gallery) inside the neck. This shelf needs to be flat and perfectly circular to support the lid. -
Refine the Profile:
Use a wooden rib on the exterior to smooth the curve. Leave subtle throwing rings or slight grooves near the top and bottom third for visual texture—I find these catch the glaze beautifully later. -
Measure the Gallery:
Before removing the pot, use your calipers to measure the exact *inside* width of the gallery shelf where the lid will sit. Lock the calipers at this measurement. -
Cut and Dry:
Wire cut the pot from the wheel and set it aside to stiffen to a leather-hard state.
Wobbly Lid Syndrome?
If the lid rocks after trimming, put a dab of grinding paste on the gallery shelf, place the lid on, and twist back and forth to grind them into a perfect match.
Step 2: Creating the Lid
-
Throw the Lid Off the Hump:
Using remaining clay, center a hump on the wheel. You’ll be throwing the lid upside down (knob side down inside the hump, or flat side up—for this specific style, throwing right-side up as a bowl form is often easier). -
Shape the Lid Structure:
Throw a shallow, slightly domed disk. The key is the flange. You need to create a ridge underneath that will fit *inside* the pot’s gallery. -
Check the Fit:
Use the locked calipers to check the diameter of your lid’s flange. It should match the measurement of the gallery shelf, perhaps just a hair smaller to account for shrinkage and glaze thickness. -
Form the Knob:
If you throw the lid as a closed form or right-side up, pull a small, button-like knob in the center. Give it a slightly undercut neck so it’s easy to grip. -
Refine the Lid Surface:
Use a rib to spiral the clay on the top surface of the lid, creating concentric circles that radiate from the knob.
Step 3: Trimming and Finishing
-
Trim the Base:
Once the jar body is leather hard, center it upside down on the wheel. Trim the bottom to create a neat foot ring, removing excess weight from the lower curve. -
Trim the Lid:
Trim the underside of the lid to remove excess weight and sharpen the flange that will sit in the gallery. -
Test the Fit:
Gently place the lid onto the jar. It should sit flush without wobbling. If it’s too tight, carefully sand or sponge the edge of the lid while it’s still greenware. -
Bisque Fire:
Let both pieces dry completely (slowly, to prevent warping) and bisque fire them according to your clay body’s specifications.
Gallery Depth
Make your gallery shelf slightly deeper than the lid’s flange thickness. This ensures the lid sits on the gallery shelf, not hovering above the rim.
Step 4: Glazing
-
Wax the Contact Points:
Apply wax resist to the foot ring of the jar, the underside of the lid where it touches the gallery, and the gallery shelf itself. This prevents the lid from fusing to the jar in the kiln. -
Apply Glaze:
Dip the jar and lid into a creamy, satin-matte white or oatmeal glaze. A glaze that breaks well over texture is ideal to highlight the iron speckles and the throwing rings. -
Clean Up:
Sponge off any stray drops of glaze from the waxed gallery area. A clean gallery ensures a perfect fit after firing. -
Final Fire:
Fire to cone 6 (or your clay’s maturity temperature). The heat will draw out the iron speckles through the creamy glaze.
Once cooled, your jar is ready to hold tea, sugar, or simply sit beautifully on your shelf
Butter Dishes With Thrown Bases
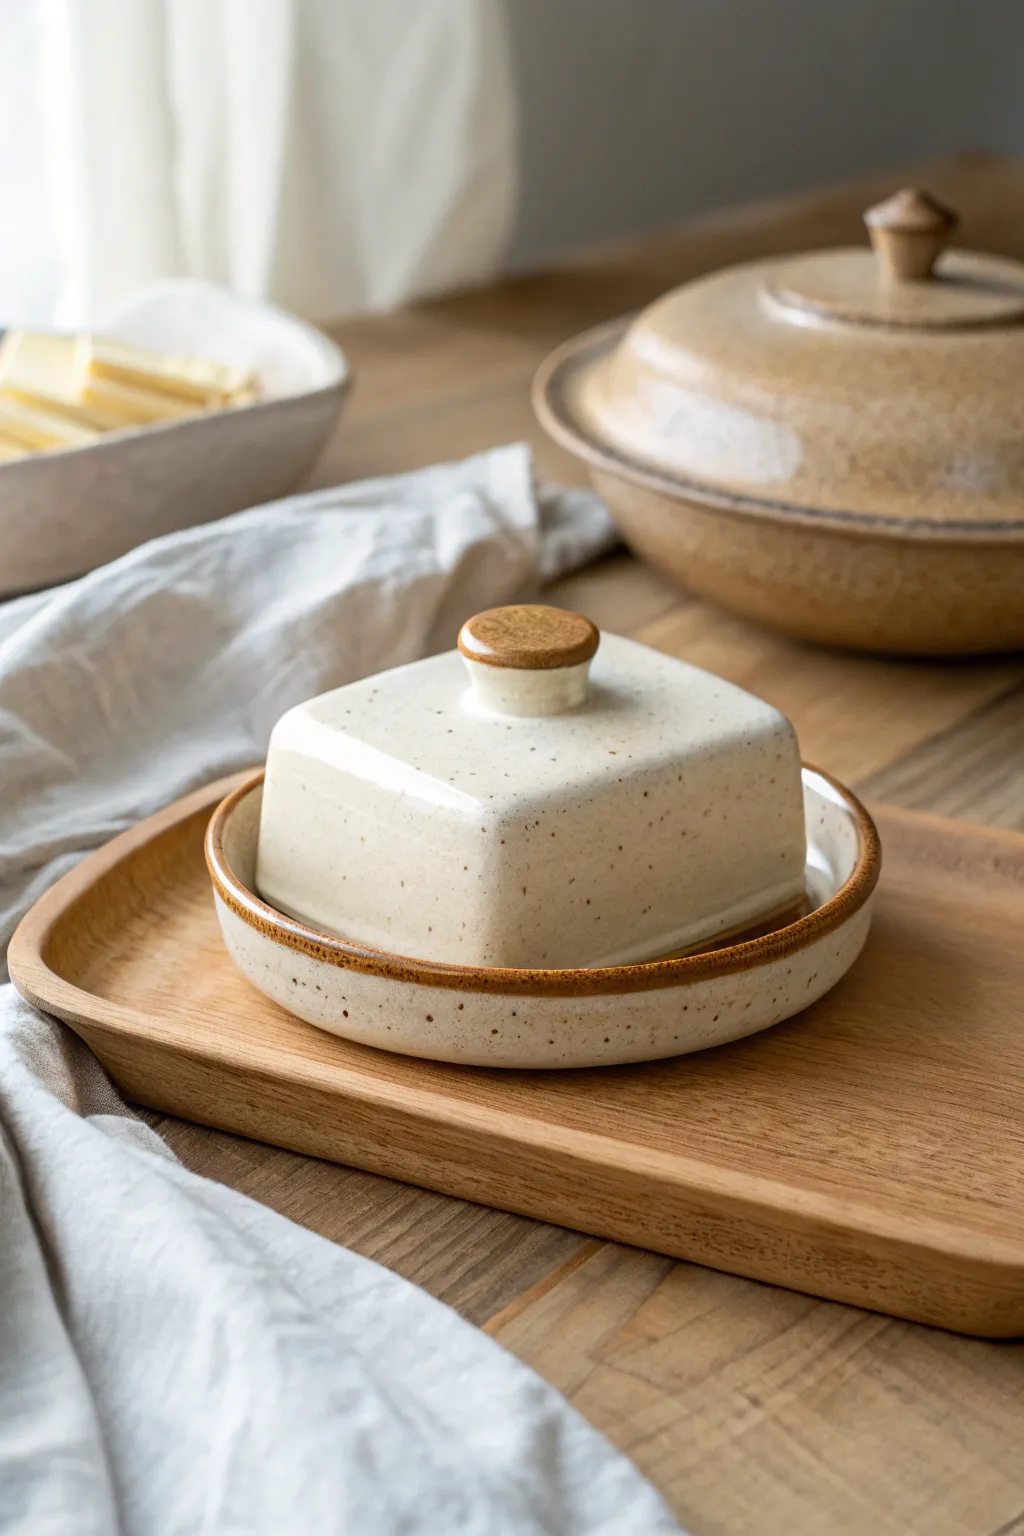
This charming butter dish combines the clean lines of a slab-built lid with the classic feel of a wheel-thrown base, all tied together by a warm, speckled cream glaze. Its compact shape fits a standard square butter block, while the honey-brown accents add a cozy, rustic touch perfect for farmhouse kitchens.
Step-by-Step
Materials
- Speckled clay body (stoneware recommended)
- Pottery wheel
- Rolling pin and canvas or slab roller
- Needle tool
- Ribs (metal and soft rubber)
- Small wooden throwing bat
- Fettling knife
- Scoring tool or serrated rib
- Slip
- Satin cream/white glaze
- Liquid wax resist
Step 1: Throwing the Base
-
Center and open:
Start with about 1 lb of speckled clay. Center it low and wide on the wheel head. Open the clay to creating a flat floor about 5-6 inches in diameter, compressing it well to prevent S-cracks later. -
Raise the rim:
Pull up a short, vertical wall, roughly 1 inch high. This doesn’t need to be tall, just enough to catch the lid and hold any melted butter. -
Shape the gallery (optional but helpful):
You can create a small inset gallery if you want the lid to sit recessed, but for the style in the photo, a simple flat floor with a vertical rim works perfectly. Just ensure the floor is perfectly flat. -
Refine the lip:
Compress the rim with a chamois or soft plastic to make it rounded and durable. This edge will be exposed and unglazed later, so take time to smooth it. -
Wire off:
Cut the base from the bat with a wire tool and set it aside to stiffen to leather hard.
Clean Lines
For a super crisp line on the exposed rim, wipe the clay with a damp sponge immediately after waxing. The water swells the clay slightly, creating a barrier that stops glaze running.
Step 2: Building the Lid
-
Roll the slab:
Roll out a slab of matching clay to approximately 1/4 inch thickness. Compress the slab on both sides with a rib to align the particles. -
Measure the base:
Measure the *interior* diameter of your thrown base. Your lid needs to sit just inside the rim, leaving a small gap for movement. -
Drape or build:
Cut a square of clay slightly larger than your measurements. Gently drape this over a square slump mold if you have one. If building by hand, cut four low walls and a square roof, beveling the edges at 45 degrees. -
Soften the shape:
Once assembled, gently paddle the corners and walls to create that soft, pillow-like square shape seen in the image. You want it to look organic, not sharp and boxy. -
Create the knob:
Roll a small ball of clay (about walnut size). Flatten the bottom and gently pinch the top to create a flared mushroom shape. It should feel comfortable to grip. -
Attach the knob:
Score and slip the center of the lid roof and the bottom of your knob. Press them firmly together. Clean up the connection point with a small brush or modeling tool so it looks seamless.
Make it yours
Try altering the knob shape! A looped strap handle or a geometric cube knob can completely change the modern/rustic vibe of the piece.
Step 3: Trimming and Assembly
-
Trim the base:
Once leather hard, center the base upside down on the wheel. Trim a clean, shallow foot ring. Since the clay is speckled, smooth the trimmed area with a rib to push any grog back into the surface. -
Check the fit:
Place the leather-hard lid onto the base. It should sit relatively flat. If it rocks, gently sand or rasp the bottom edge of the lid until it sits flush. -
Bisque fire:
Dry both pieces slowly to prevent warping, especially where the lid walls meet the roof. Bisque fire to your clay body’s specifications (usually Cone 04).
Step 4: Glazing
-
Wax accents:
Apply wax resist to the very top face of the knob and the outer rim of the base (approx. 1/4 inch). This exposes the raw toasted clay color after firing. -
Wax the contact points:
Don’t forget to carefully wax the foot ring of the base and the bottom edge of the lid where it will touch the kiln shelf. -
Apply glaze:
Dip both pieces into a satin cream or white glaze. A satin finish works best to highlight the iron speckles in the clay without looking too shiny or plastic. -
Clean it up:
Wipe away any glaze droplets from your waxed areas with a damp sponge. The wax resists the glaze, but cleaning ensures a sharp line. -
Final fire:
Glaze fire to maturity (likely Cone 5 or 6). Be careful not to over-fire if your clay is prone to bloating.
Fill your new dish with a fresh block of butter and enjoy the simple pleasure of handmade tableware.

TRACK YOUR CERAMIC JOURNEY
Capture glaze tests, firing details, and creative progress—all in one simple printable. Make your projects easier to repeat and improve.
Ring Holders and Catch-All Cups
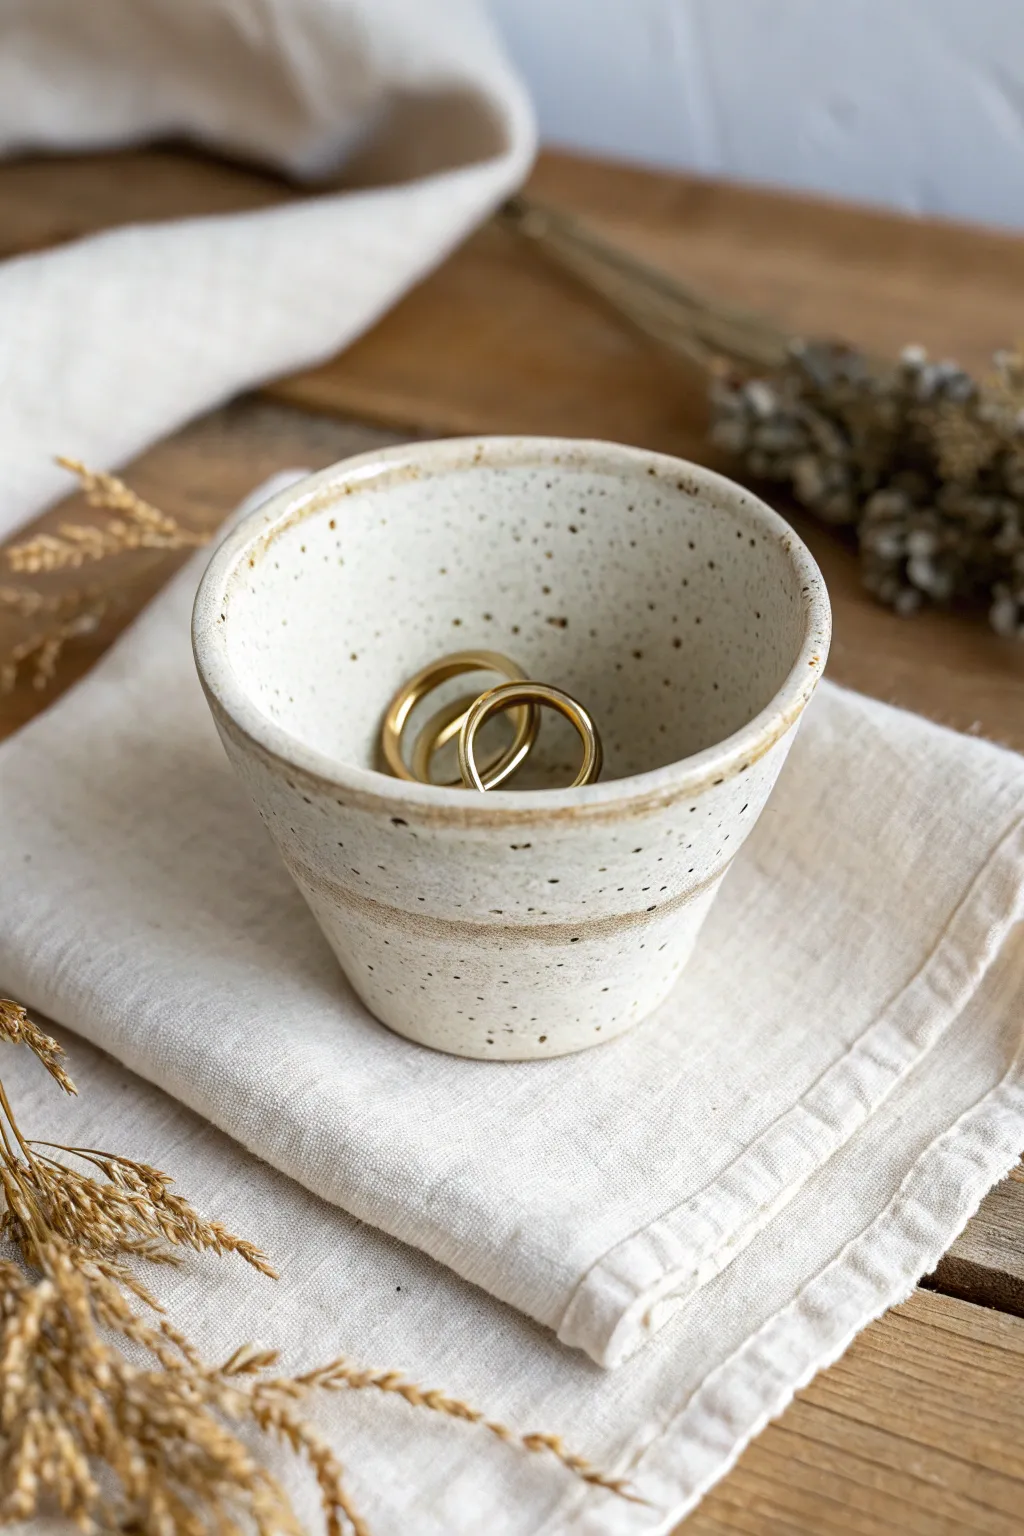
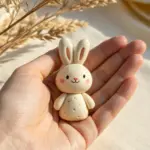
This charming, petite vessel serves as the perfect catch-all for your daily jewelry. Featuring a creamy, speckled glaze and warm, unglazed accents, its simple tapered form highlights the natural beauty of the clay body.
Step-by-Step Guide
Materials
- Speckled stoneware clay (approx. 1 lb)
- Pottery wheel
- Small basin of water
- Sea sponge
- Wooden ribs
- Needle tool
- Wire cutter
- Trimming tools
- White or cream speckled glaze (glossy or satin)
- Wax resist
- Brush for wax
Step 1: Throwing the Form
-
Center the clay:
Start by slapping your ball of speckled stoneware onto a clean bat. Engage the wheel and use your palms to center the clay into a low, wide mound rather than a tall cone, as we are making a small object. -
Open the vessel:
Press your thumbs into the center of the mound to open it, leaving about a half-inch of thickness at the bottom. Pull the floor out until it is approximately 2.5 to 3 inches wide to create a stable base. -
Compress the floor:
Use a damp sponge or your fingertips to compress the floor of the pot. This is crucial for preventing S-cracks later during the drying process, especially inside a small cup like this. -
Pull the walls:
Slow the wheel down slightly. Pinch the clay at the base between your finger and thumb (or sponge) and gently pull the walls upward. Keep your hand movement steady. -
Shape the taper:
Aim for a V-shape. Apply slightly more pressure from the outside at the bottom, and slightly more pressure from the inside as you move up to the rim, allowing the clay to flare out gently. -
Refine the contour:
Use a wooden rib against the interior to smooth the curve and remove throwing lines. Support the outside with your hand or a sponge to maintain that clean, angled silhouette. -
Detail the rim:
I like to use a small strip of chamois leather or a very wet sponge to compress the rim, making it smooth and rounded. Slightly flare the very top edge outward for a welcoming opening.
Wobbly Wheels?
If the rim feels uneven while throwing, use a needle tool to trim the very top strip of clay while the wheel spins. This re-levels the height instantly.
Step 2: Trimming and Finishing
-
Leather hard drying:
Wire the pot off the bat and let it dry to a leather-hard state. It should be firm enough to handle without deforming but still cool to the touch and able to be carved. -
Secure for trimming:
Place the pot upside down on the wheel head. Center it perfectly, then secure it in place using three small lugs of soft clay. -
Trim the foot:
Using a sharp trimming tool, carve away excess clay from the bottom to create a neat foot ring. Mirror the interior curve on the outside. -
Carve the accent band:
About one-third of the way up from the bottom, use a small loop tool to carve a shallow, decorative groove or shelf. This will serve as a glazing guideline later. -
Bisque fire:
Once bone dry, load the piece into the kiln for a bisque firing (usually to Cone 04 or 06, depending on your clay).
Iron Speckles
The ‘peppered’ look comes from iron pyrite in the clay body burning through the glaze. Don’t use a heavy opaque white, or you’ll hide these beautiful spots.
Step 3: Glazing
-
Clean the bisque:
Wipe the fired pot down with a damp sponge to remove any kiln dust. Let it dry for a few minutes. -
Wax the accents:
Apply wax resist to the bottom foot and carefully paint a line of wax along the rim if you want that raw clay edge shown in the photo. Also, wax the small carved band area if you want that exposed. -
Dip the glaze:
Stir your speckled white glaze thoroughly. Using dipping tongs, submerge the cup completely for 3-4 seconds. Lift it out and let the excess drip off. -
Clean the resist areas:
Once the glaze is powdery to the touch, use a damp sponge to wipe any glaze beads off the waxed areas (rim and foot) to ensure clean, sharp lines. -
Final fire:
Load the kiln for the glaze firing, ensuring the pot doesn’t touch any others. Fire to the maturity temperature of your clay and glaze (typically Cone 5 or 6).
Once cooled, your durable little dish is ready to keep your favorite rings safe and sound
Soap Dishes With Thrown Rims
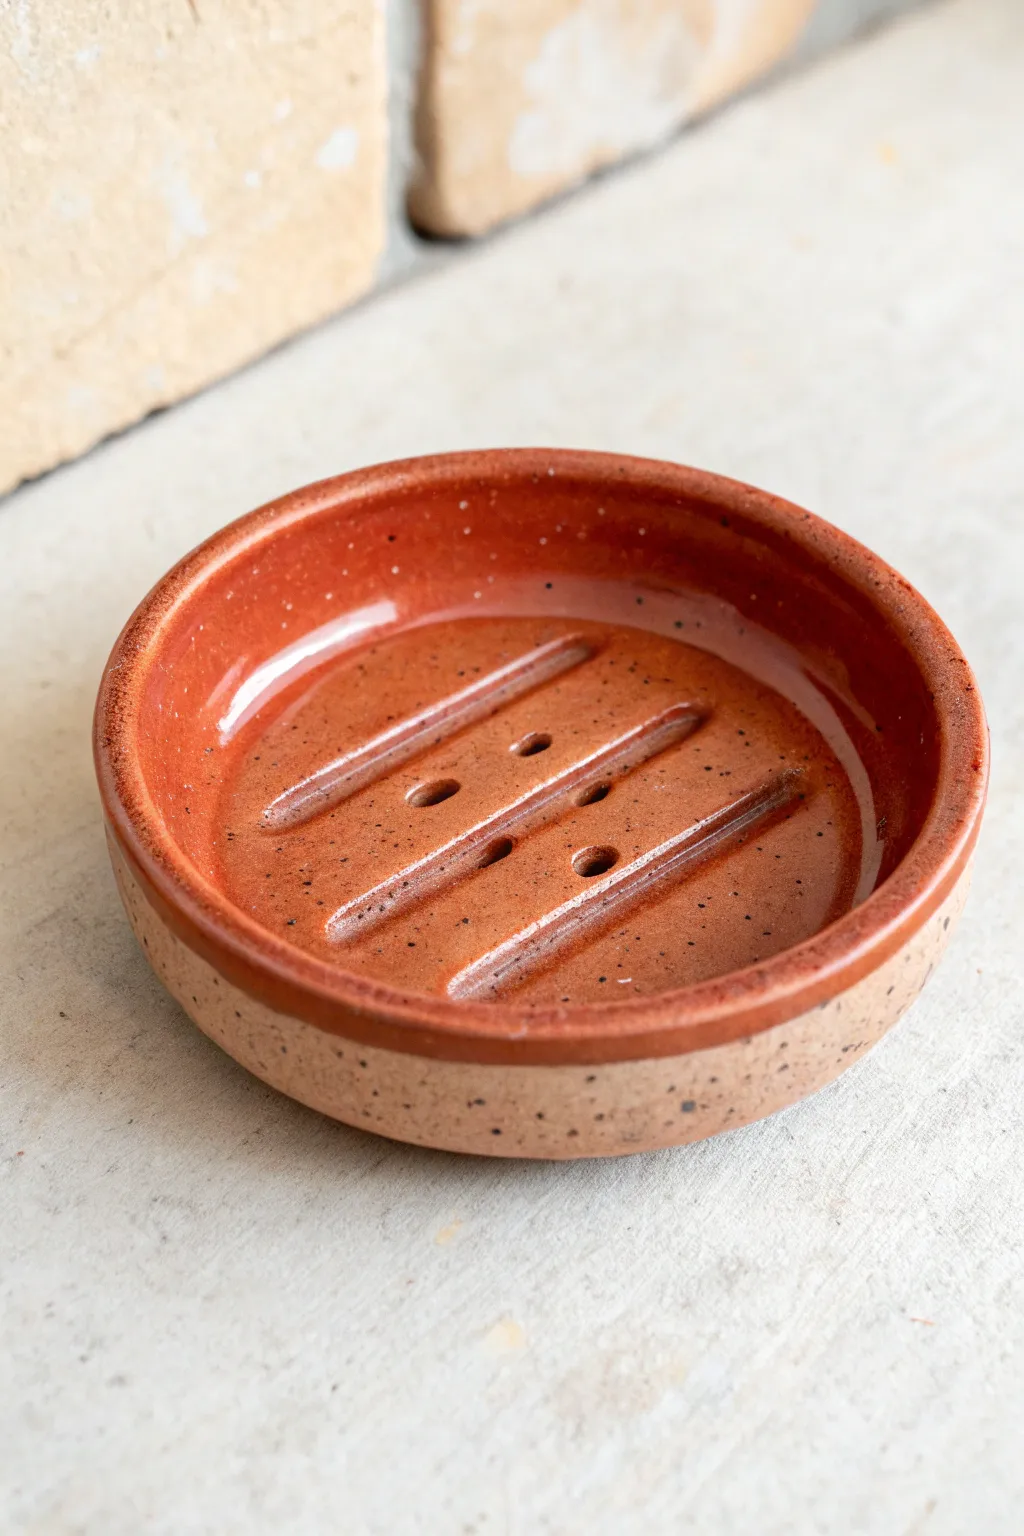
This charming, rustic soap dish features a warm terracotta glaze on the interior and raw, speckled clay on the exterior. Its raised ridges and drainage holes ensure your soap stays dry, making it as functional as it is beautiful.
Detailed Instructions
Materials
- Speckled Stoneware Clay (250-300g)
- Pottery Wheel
- Throwing Sponge
- Needle Tool
- Wire Clay Cutter
- Carving or trimming tool (loop tool)
- Small drill bit or hole punch tool
- Terracotta or rust-colored glossy glaze
- Wax resist
- Kiln
Step 1: Throwing the Form
-
Center the clay:
Start with a well-wedged ball of speckled clay, centering it low and wide on the wheel head. You are aiming for a puck shape rather than a tall cone. -
Open the base:
Open the clay all the way down, leaving a generous floor thickness of about 1/2 to 3/4 of an inch. This thickness is crucial because you will need to carve into it later without breaking through the bottom. -
Compress the floor:
Use a sponge or rib to thoroughly compress the floor. This prevents S-cracks and creates a smooth surface for your future carving work. -
Pull the walls:
Pull up a short, vertical wall. Since this is a soap dish, the wall only needs to be about an inch high. Keep the rim slightly thick and rounded for durability. -
Refine the shape:
Use a rib to clean up the outside profile, creating a straight, vertical side. Ensure the transition from the floor to the wall on the inside is a crisp 90-degree angle or a gentle curve, depending on your preference. -
Cut off:
Run your wire tool under the pot to release it from the bat, then set it aside to dry to a leather-hard state.
Warped Rim?
If your rim warps while carving the interior, try carving when the clay is slightly firmer, almost hard-leather-hard. Soft clay distorts easily under hand pressure.
Step 2: Carving & Detailing
-
Center for trimming:
Once leather hard, flip the dish over and center it on the wheel. Secure it with lugs of clay. -
Trim the exterior:
Trim away excess weight from the bottom and clean up the exterior walls to reveal the beautiful speckled texture of the clay body. -
Flip and secure:
Flip the pot right-side up. I find it helpful to use a foam bat or clay lugs to hold it gently in place so I don’t warp the rim. -
Carve the ridges:
Using a loop tool, carve two or three parallel channels into the floor of the pot. Leave raised ridges between the channels to elevate the soap. -
Smooth the ridges:
Use a damp sponge or your finger to smooth any sharp edges created by the carving tool. The ridges should be soft and rounded. -
Add drainage holes:
Using a small hole punch or drill bit, create three small holes in the central channel or spaced between ridges. This allows water to drain away completely. -
Clean up burrs:
Once the clay is bone dry, lightly check the holes and ridges again to sandpaper away any sharp burrs or clay crumbs.
Smooth Ridges
Run a damp chamois specifically over the carved ridges after trimming. This compresses the clay and ensures the soap won’t get snagged on rough ceramic edges.
Step 3: Glazing & Firing
-
Bisque fire:
Fire the piece to cone 04 (or your clay body’s bisque temperature). -
Apply wax resist:
Paint liquid wax resist carefully along the exterior wall, stopping exactly at the rim’s edge. Also wax the entire bottom of the dish. -
Pour the glaze:
Pour your rust or terracotta-colored glaze into the interior of the dish. Swirl it quickly to coat the floor, ridges, and inner walls, then pour the excess out. -
Clean the rim:
Check the rim where the glaze meets the raw clay. If any glaze dripped over, wipe it away with a damp sponge for a crisp, clean line. -
Clear the holes:
Double-check that the drainage holes aren’t clogged with glaze. If they are, use a needle tool to clear them out before firing. -
Final fire:
Fire the piece to maturity (likely cone 5/6 for stoneware) to melt the glaze and vitrify the exposed clay.
Enjoy using your custom soap dish, knowing those ridges will keep your soap dry and lasting longer
Taper Candle Holders
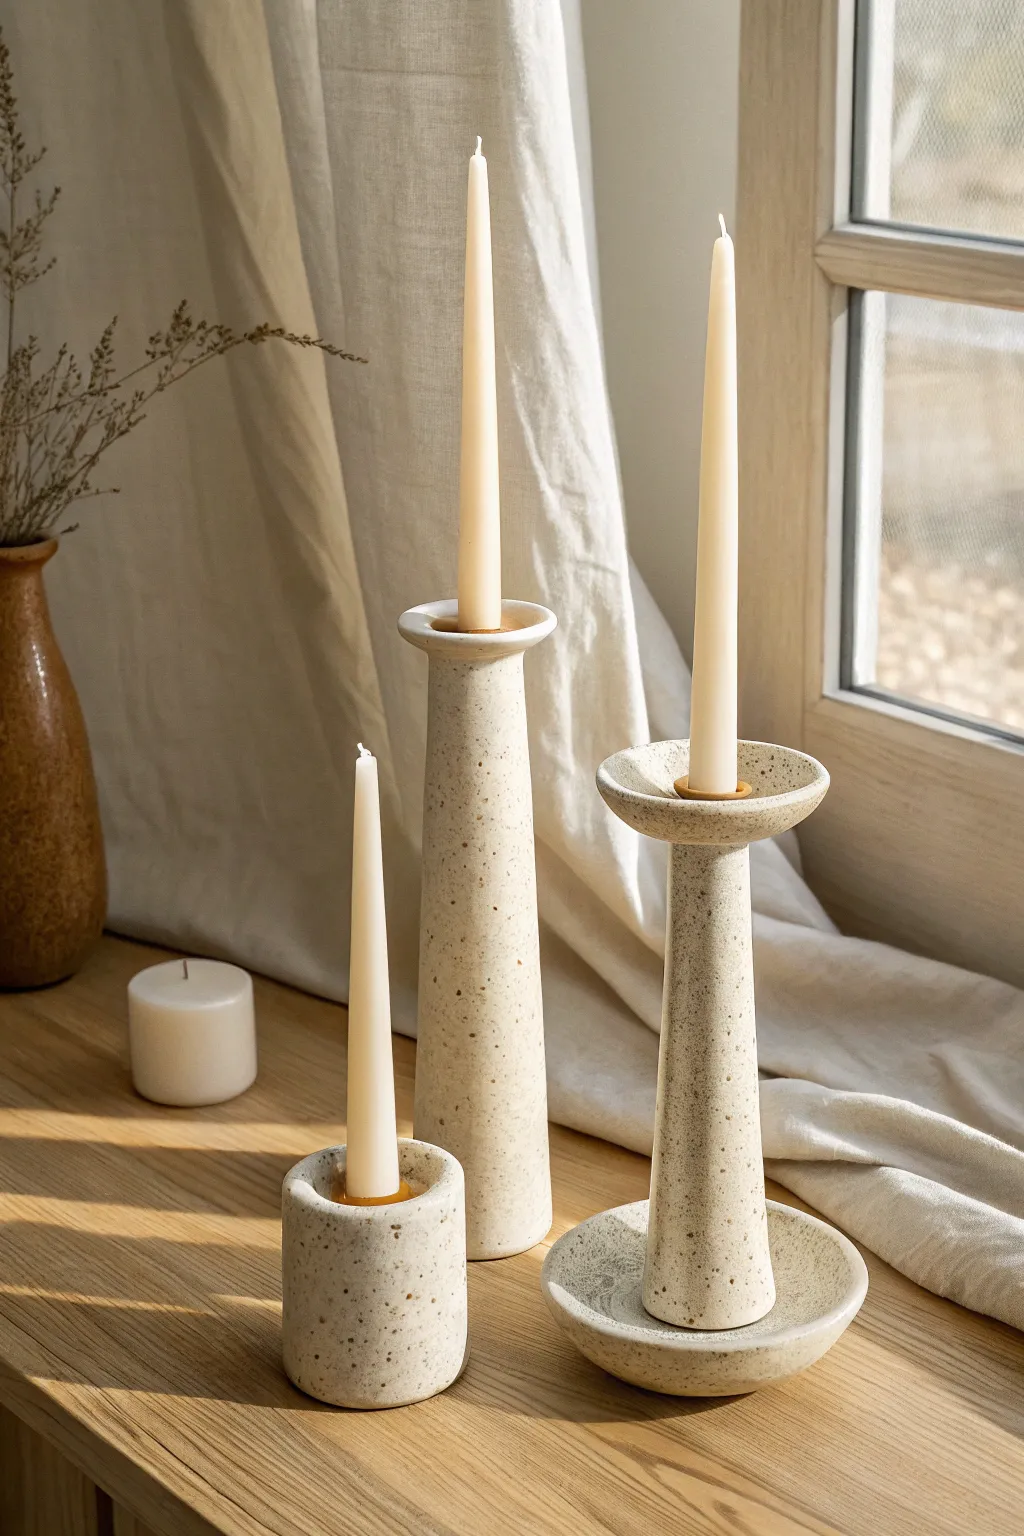
Bring warmth and elegance to your table with this set of three distinct wheel-thrown candle holders. The speckled stoneware adds a lovely, earthy texture that perfectly complements the minimalist forms of the taper, pillar, and goblet-style holders.
Step-by-Step
Materials
- Speckled Stoneware Clay (2.5 lbs total)
- Pottery Wheel
- Throwing Sponge
- Needle Tool
- Wire Clay Cutter
- Narrow Wood or Metal Rib
- Trimming Tools
- Calipers or Ruler
- Standard Taper Candle (for sizing)
- Small Sponge on a Stick (Xiem tool)
Step 1: Preparation & Throwing the Tall Cylinder
-
Prepare clay:
Wedge about 1 pound of speckled clay thoroughly. Divide the remaining clay into two smaller balls (approx. 0.75 lb each) for the other holders. -
Center the clay:
Secure the 1-pound ball to the wheel head. Center it into a narrow, tall cone shape rather than a wide puck, as this will help achieve the height needed for the tallest holder. -
Open the clay:
Create the opening, but do not go all the way to the bat. Leave a very thick base (at least an inch or more) to provide weight and stability. -
Pull the walls:
Pull the clay upward into a narrow cylinder. Aim for a slightly tapered shape that is wider at the base and narrows gently toward the top neck. -
Form the flange:
At the very top rim, use your thumb to gently flair the clay outward, creating a flat, horizontal flange about an inch wide. This acts as a wax catcher. -
Create the socket:
While the wheel spins slowly, use your finger or a specialized candle cup tool to check the inner diameter of the opening. It should be just slightly larger than your standard taper candle (about 7/8 inch) to account for shrinkage.
Shrinkage Math
Make the candle hole about 15% wider than your candle. A standard 7/8″ taper needs a wet clay hole closer to 1″ to fit after firing.
Step 2: Throwing the Goblet & Low Holder
-
Start the goblet holder:
Center a 0.75 lb ball. This piece is thrown in two parts: a catch dish and a stem, or efficiently as one piece if you are comfortable throwing off the hump, but we’ll do one piece here. Center tall. -
Shape the base dish:
Open the clay and immediately spread the bottom outward to form a shallow bowl or dish shape. This will be the base. -
Pull the stem:
From the center of your dish, pull the remaining bulk of clay upward into a stem. This is tricky; you are essentially pulling a cylinder from inside a bowl. -
Form the cup:
At the top of the stem, flair the rim out to create a cup shape, similar to the first holder but perhaps more rounded. Ensure the candle socket depth is at least 1 inch. -
Throw the low cylinder:
Center your smallest ball of clay. Open it and pull a simple, short cylinder with thick walls. Keeping the walls thick allows you to trim it into a perfect geometric shape later. -
Dry generally:
Wire all pieces off the bat and let them dry to a solid leather-hard state. This is crucial for the extensive trimming these shapes require.
Wobbly Candles?
If your finished uneven hole makes candles lean, melt a few drops of beeswax into the bottom of the holder before inserting the taper.
Step 3: Trimming & Finishing
-
Mount for trimming:
Center the tall cylinder upside down on the wheel. You may need a chuck or a tall Giffin Grip arrangement to hold it steady. -
Refine the profile:
Trim the exterior walls to sharpen the shape. I prefer to use a sharp flat tool here to remove throwing distinct lines and achieve that smooth, modern matte look shown in the image. -
Trim the goblet base:
Flip the goblet-style holder upside down. Trim the underside of the catch-dish to give it a clean foot ring and reduce weight. -
Final socket check:
Before bone dry, gently test your actual candle in the sockets. If they are too tight, carefully carve a little clay out with a loop tool. -
Sponge smooth:
Wipe down all surfaces with a slightly damp sponge to expose the grog or speckles in the clay body. -
Fire and glaze:
Bisque fire the pieces. For the finish, apply a clear matte glaze to let the natural speckles show through, or leave the exterior raw if your clay is vitrified, glazing only the inside of the candle cup for easy cleaning.
Arrange your trio on a mantle or tablescape and enjoy the cozy glow.
Altered-Rim Wavy Bowls
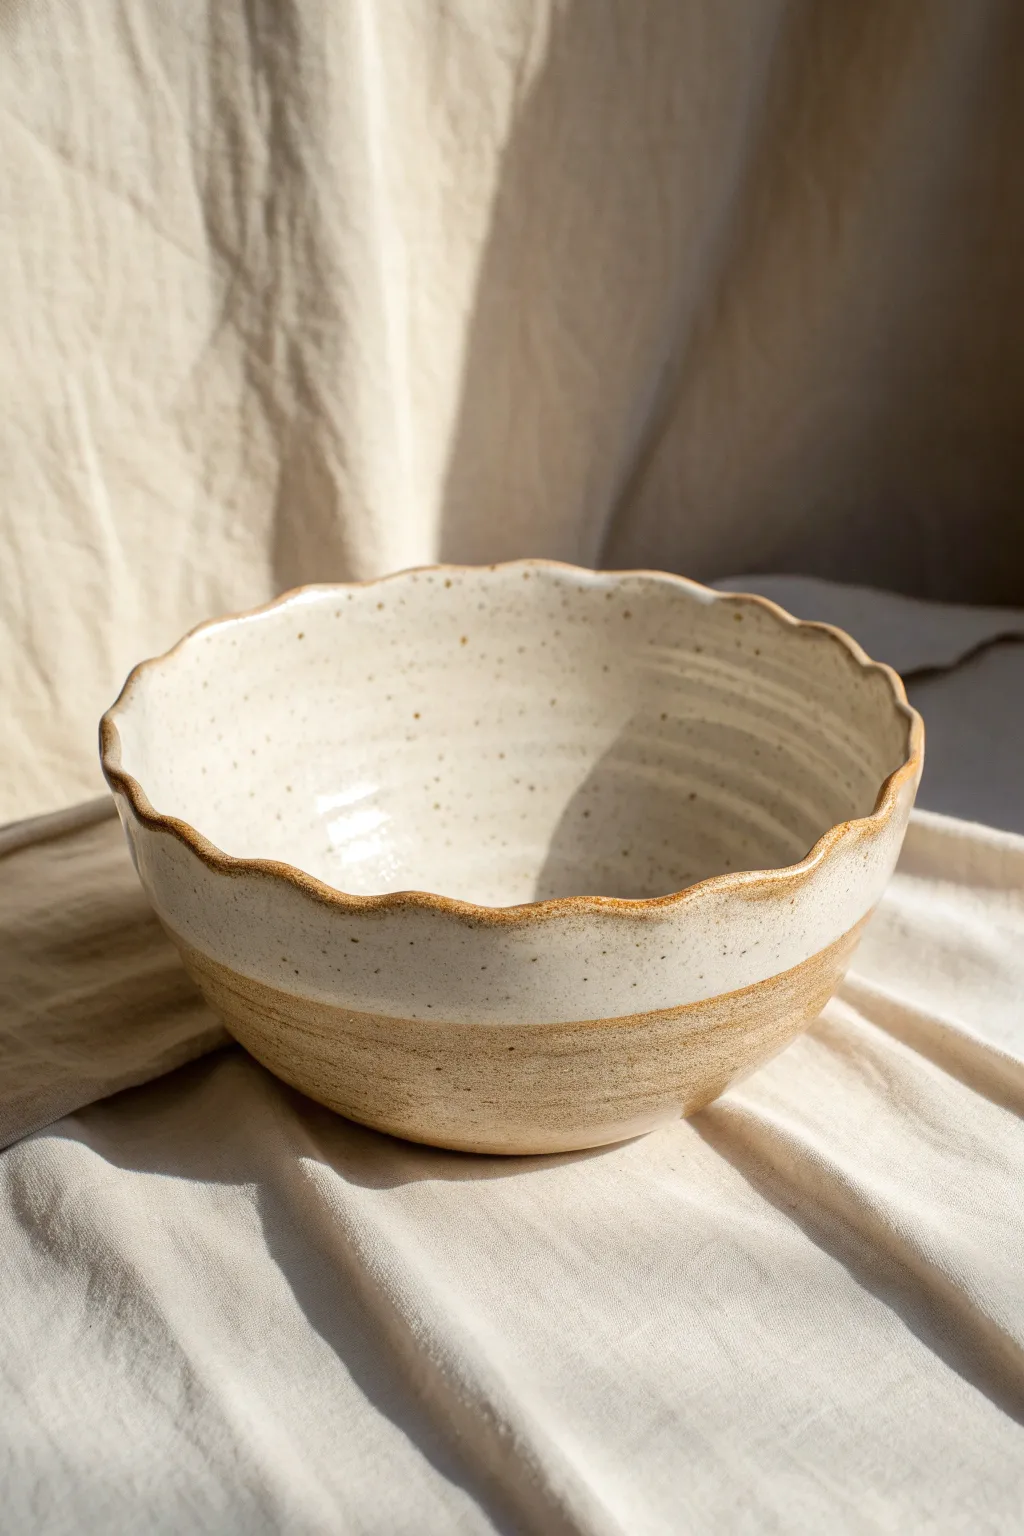
This charming, rustic bowl features a gently undulating rim and a dipped glaze effect that highlights the natural beauty of speckled clay. It combines a classic thrown form with a simple hand-altering technique to create a piece that feels organic and beach-inspired.
Detailed Instructions
Materials
- Speckled buff stoneware clay (approx 1.5 – 2 lbs)
- Pottery wheel
- Throwing sponge
- Wooden throwing ribs
- Wire cutter
- Trimming tools
- Chamois cloth or thin plastic strip
- White or cream speckled gloss glaze
- Wax resist (optional)
Step 1: Throwing the Base Form
-
Center the clay:
Begin by firmly slamming your ball of speckled clay onto the wheel head. Cone it up and down a few times to ensure the clay particles are aligned, then center it low and wide. -
Open the floor:
Open the centered mound, establishing a curved floor rather than a flat one, as this is a bowl. Compress the bottom well with your fingers or a rib to prevent future cracking. -
Pull the walls:
Pull the clay upward and outward to create a V-shape. Aim for a generous curve that widens significantly at the top. The walls should be even, but leave the rim slightly thicker than usual to support the altering process. -
Refine the curve:
Use a kidney-shaped wooden rib on the interior to maximize the bowl’s curve and remove excess slurry. This compresses the clay and gives that smooth, professional interior surface. -
Smooth the exterior:
Lightly run a straight rib or sponge up the outside to clean off throwing lines, though leaving subtle spiral ridges (as seen in the photo) adds nice tactile texture.
Wet Clay Tip
Don’t alter the rim if the clay is too wet and floppy. Use a heat gun or torch for a minute to stiffen the rim slightly before pushing the waves in.
Step 2: Altering the Rim
-
Slow the wheel:
Bring the wheel to a complete stop. This altering technique happens while the pot is stationary or by manually turning the wheel head. -
Mark the intervals:
Visualise or lightly mark 8 to 10 points around the rim where you want your waves to be. Spacing them evenly is key for a symmetrical look. -
Create the scallop:
Place one finger from your left hand inside the rim and two fingers from your right hand on the outside (flanking the left finger). Gently push out with the inside finger while pressing in with the outside fingers. -
Repeat around the rim:
Rotate the wheel slightly and repeat this push-pull motion at your next marked interval. Continue until the entire rim has a consistent wavy pattern. -
Refine the edge:
Take a damp chamois or a thin strip of plastic and gently run it over the newly waved rim to smooth out any sharp edges created by your fingers. This ensures the finished bowl is comfortable to touch. -
Wire off:
Run your wire cutter under the base of the bowl and carefully lift it off the wheel onto a ware board. Let it dry to leather hard.
Make it Yours
Try dipping the rim in a second, contrasting glaze color about an inch deep. The waves will distort the glaze line, creating a beautiful melting effect.
Step 3: Trimming and Glazing
-
Trim the foot:
Once leather hard, flip the bowl over and center it on the wheel. Trim away excess weight from the bottom and carve a neat foot ring. This defines where the glaze line will eventually stop. -
Bisque fire:
Allow the bowl to dry completely until bone dry, then load it into the kiln for a bisque firing (usually to Cone 04 or 06). -
Wax the exterior base:
Before glazing, apply wax resist to the bottom third of the exterior and the foot ring. This will create the crisp line between the bare clay and the glazed top section seen in the reference image. -
Pour the interior:
Pour your white speckled glaze into the bowl, roll it around to coat the entire interior and rim, and pour the excess back out effectively. -
Dip the exterior:
Hold the bowl by the foot (which is waxed) and dip the rim down into the glaze bucket. Submerge it until the glaze reaches your wax line, then lift it out. The wax should repel the glaze, but wipe away any stray drips with a sponge. -
Glaze fire:
Load the glazed bowl into the kiln for the final glaze firing (match the temperature to your clay and glaze, often Cone 5 or 6 for stoneware).
Now you have a stunning, functional bowl ready for your morning cereal or a hearty soup
Fluted and Faceted Vases
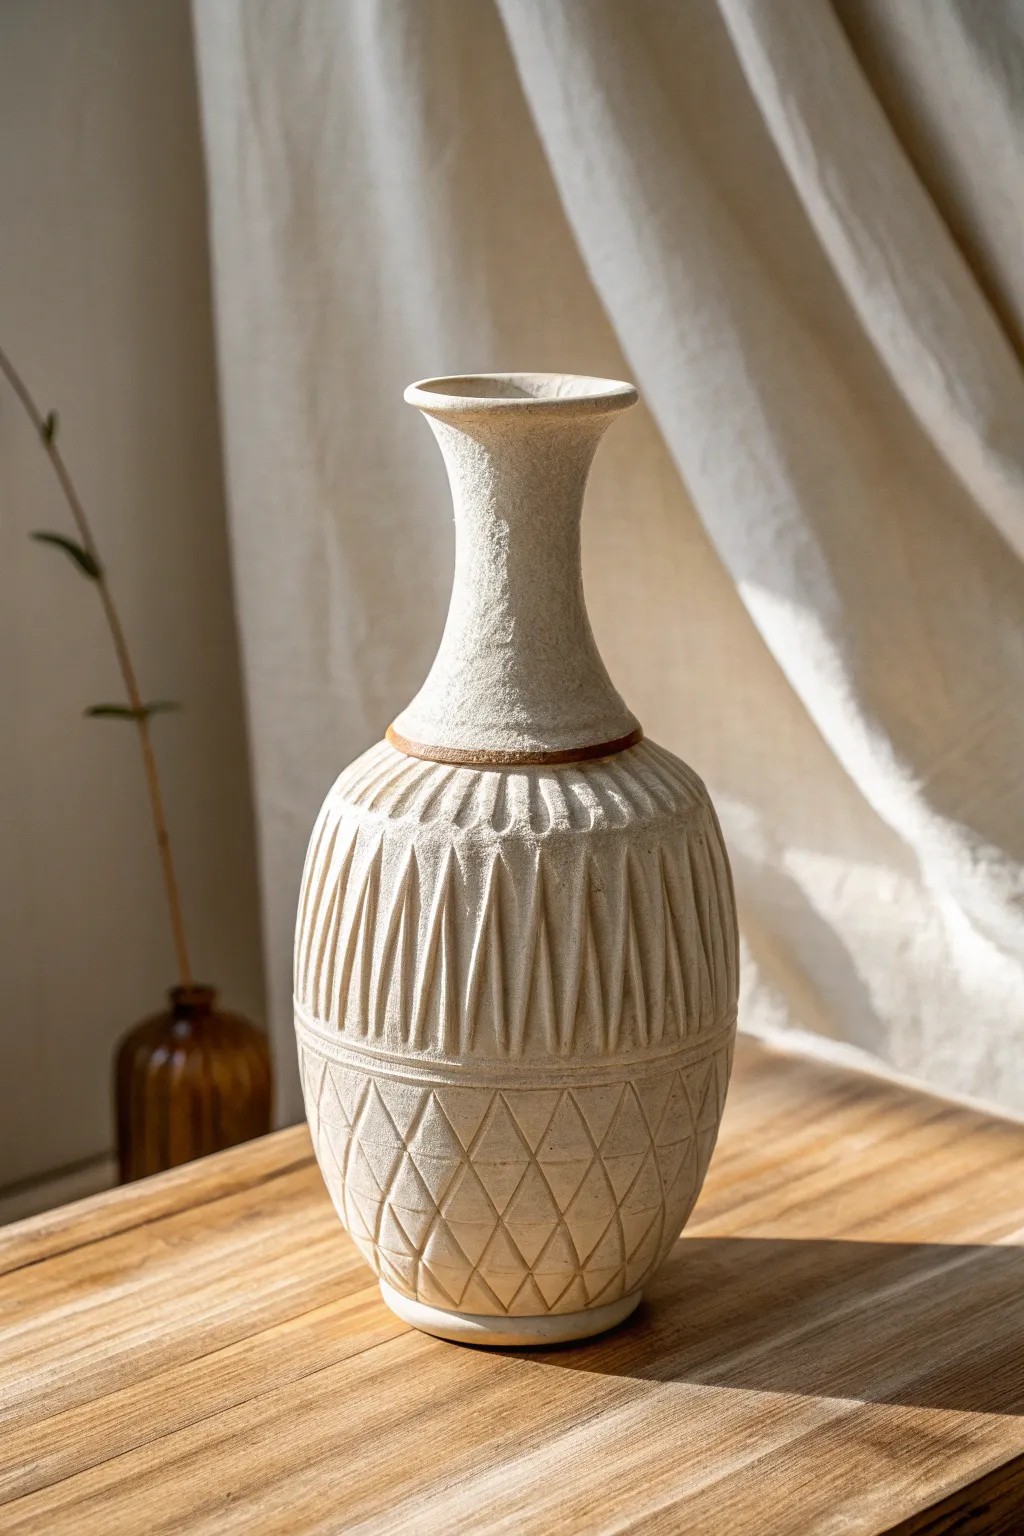
This elegant textured bottle combines structured geometry with a soft, natural finish, featuring a distinct division between vertical fluting and diamond faceting. The dual-textured surface catches light beautifully, emphasizing the transitions between the crisp carved lines and smooth clay body.
Step-by-Step
Materials
- Stoneware clay (buff or white)
- Pottery wheel
- Throwing tools (sponge, ribs, wire cutter)
- Small loop tool or carving tool
- Fettling knife
- Measuring tape or calipers
- Ruler
- Clear matte or satin glaze
- Banding wheel
Step 1: Throwing the Form
-
Center and open:
Begin with about 3-4 pounds of wedged stoneware clay. Center it firmly on the wheel head and open the clay, establishing a flat floor about 3.5 to 4 inches wide. -
Pull the cylinder:
Pull the walls up into a tall, even cylinder. Keep the walls slightly thicker than usual—approximately 3/8 of an inch—especially in the bottom two-thirds where you will be carving later. -
Shape the belly:
Use a rib inside the pot to belly out the form gently. You want a distinct shoulder that tapers inward, but keep the bottom section relatively vertical to accommodate the geometric carving. -
Collar the neck:
Gradually collar in the top third to form a long, slender neck. Colar slowly to avoid buckling the clay. I find it helpful to compress the clay after every collaring pass to keep the wall thickness consistent. -
Refine the rim:
Flare the rim slightly outward for a classic trumpet shape. Smooth it with a chamois for a professional finish. -
Define the sections:
Before removing from the wheel, use a wooden tool to press a subtle horizontal line where the neck meets the shoulder. This will act as a natural stopping point for your glaze or carving later.
Keep it Sharp
Carving when the clay is too wet creates ragged edges. Wait until the clay peels away in long, satisfying ribbons rather than sticky chunks for the cleanest facets.
Step 2: Carving the Texture
-
Leather hard stage:
Let the vase dry to a firm leather-hard state. It needs to be stiff enough to hold its shape under the pressure of a carving tool but soft enough to cut cleanly. -
Mark the grid:
Place the pot on a banding wheel. Create a horizontal guide line around the belly, effectively splitting the main body into two specific zones: the upper shoulder and the lower base. -
Upper vertical fluting:
Starting at the horizontal midline, use a small U-shaped loop tool to carve vertical flutes upward toward the neck. Start the cut deep and taper off as you reach the shoulder line, creating arrow-like points at the top. -
Spacing the flutes:
Work symmetrically around the pot. Aim for about 20-24 vertical flutes, keeping the spacing consistent. The negative space between cuts forms raised ridges. -
Marking the diamonds:
For the lower section, lightly pencil a diamond grid pattern below the horizontal midline. Ensure the points of the diamonds align roughly with the ridges of the flutes above for visual continuity. -
Carving the lower section:
Use a straight-edge carving tool or a sharp knife to carve out the diamond recesses. Instead of deep gouges, think of slicing flat facets to create a relief effect. -
Refine the transition:
Clean up the horizontal band separating the flutes and diamonds. You can deepen this groove slightly to clearly separate the two distinct patterns. -
Smoothing:
Once carved, use a slightly damp sponge or a soft brush to soften any sharp burrs or clay crumbs. Don’t over-wet the clay, as you want to preserve the crisp lines.
Step 3: Finishing
-
Bisque fire:
Allow the vase to dry completely, which may take longer than usual due to the varying thickness. Bisque fire to your clay body’s recommended temperature (usually Cone 06/04). -
Glazing strategy:
Apply a wax resist to the neck and the thin horizontal band between the textures if you want to leave them raw like the example image. This highlights the natural clay color. -
Glaze application:
Dip or spray a matte white or cream glaze over the textured body. A breaking glaze works wonderfully here, as it will pool slightly in the flutes and thin out over the sharp ridges, accentuating the carving. -
Final firing:
Glaze fire the piece to maturity (Cone 5/6 or 10, depending on your clay). Ensure the bottom is wiped clean before loading the kiln.
Dual-Tone Effect
Rub a dark oxide wash (like iron or manganese) into the carved lines before glazing, then sponge it off the high points to dramatically increase the contrast.
Place your finished vase near a window where the shifting daylight can play across the beautiful ridges you’ve created
Chattering Texture Foot Rings
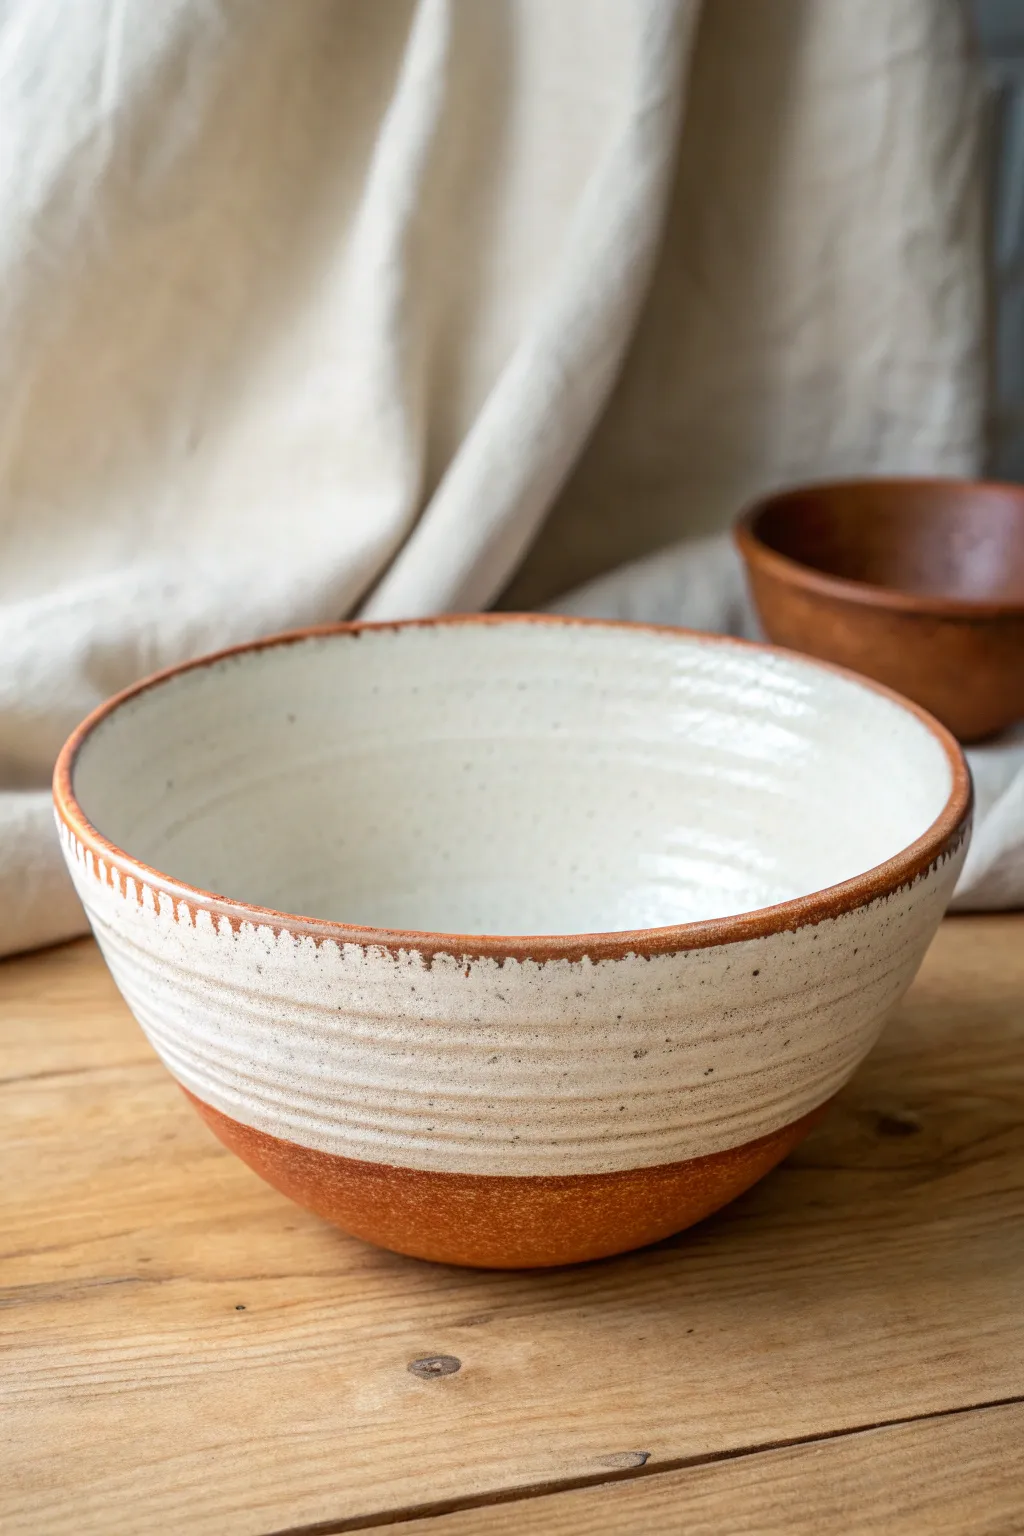
This rustic, thrown bowl balances raw, warm clay with a smooth, creamy white glaze, featuring tactile ridges that catch the light beautifully. The subtle grooved texture and exposed clay foot create a grounded, organic feel perfect for everyday use.
Step-by-Step Guide
Materials
- Red stoneware or terracotta clay body
- Pottery wheel
- Throwing tools (sponge, wire cutter, needle tool)
- Ribs (metal and wooden)
- Loop trimming tools (large and small)
- Chattering tool (optional, or a flexible metal rib)
- White or cream satin-matte glaze
- Wax resist
- Glazing brushes or dipping tongs
- Kiln
Step 1: Throwing the Form
-
Prepare and Center:
Wedge about 1.5 to 2 lbs of red stoneware clay thoroughly to remove air bubbles. Center the clay on your wheel head with firm, steady pressure, ensuring a wide, stable base. -
Open the Clay:
Open the centered mound, pulling the floor out until it reaches your desired width—aim for about 5-6 inches for a cereal-sized bowl. Compress the floor well with a wooden rib to prevent S-cracks later. -
Pull the Walls:
Begin pulling the walls upward. Instead of smoothing them perfectly, allow your fingertips to leave slight spiral ridges as you lift the clay. This creates the foundational texture seen on the bowl’s exterior. -
Shape the Curve:
As you pull, gently push the walls outward from the inside to create a generous, open curve. Keep the rim slightly thickened for durability. -
Refine the Rim:
Use a shammy or a small piece of plastic to smooth and round the rim while the wheel spins slowly. A darkened, slightly compressed rim adds a nice visual frame.
Step 2: Trimming and Texturing
-
Drying to Leather Hard:
Allow the bowl to dry until it is leather hard—firm enough to hold its shape but soft enough to carve. I like to let it sit under loose plastic overnight so the moisture evens out. -
Center for Trimming:
Place the bowl upside down on the wheel head. Use simple tap centering or lugs of clay to secure it in place. -
Define the Foot:
Using a sharp loop tool, trim away excess clay from the bottom third of the bowl to reveal the curve. Define a distinct foot ring that elevates the bowl about a half-inch off the table. -
Enhance the Grooves:
While the wheel is spinning at a moderate speed, use a trimming tool or a chattering tool to accentuate the horizontal ridges on the lower exterior. If you want the specific ‘chattered’ look, hold a flexible metal tool loosely against the clay so it vibrates and skips, creating a rhythmic pattern. -
Clean Up:
Smooth any sharp burrs with a damp sponge, but be careful not to wash away your texture. Run a finger over the foot ring to ensure it is smooth and won’t scratch a table surface.
Chatter Matters
For better chattering texture, hold your tool at a 90-degree angle to the pot and increase wheel speed. A springy metal tool works best to get that rhythmic ‘skipping’ effect.
Step 3: Glazing and Finishing
-
Bisque Fire:
Load the bone-dry bowl into the kiln and bisque fire it to cone 04 (or your clay body’s specific bisque temperature). -
Wax the Foot:
Apply wax resist to the bottom foot and up the side of the bowl, stopping exactly where you want the raw clay to show. The line should be organic but generally horizontal. -
Prepare the Glaze:
Mix your creamy white glaze thoroughly. It should be the consistency of heavy cream to ensure it breaks nicely over the texture without obscuring it. -
Pour or Dip:
Pour the glaze inside the bowl, swirl it to coat the entire interior, and pour out the excess. Immediately dip the exterior down to your wax line. The wax will repel the glaze, leaving that crisp separation line. -
Touch Up:
Once dry, use a damp sponge to wipe any stray droplets of glaze off the waxed area or the foot ring. -
Glaze Fire:
Load the bowl into the glaze kiln and fire to the maturity temperature of your clay and glaze (likely cone 5 or 6 for stoneware).
Rim Variation
Try dipping just the rim in a second, darker glaze (like a tenmoku or iron oxide wash) to create a contrasting band that frames the white interior.
Enjoy using your new bowl for breakfast or serving, knowing the texture will remind you of the making process
Marbled Clay Swirlware Pots
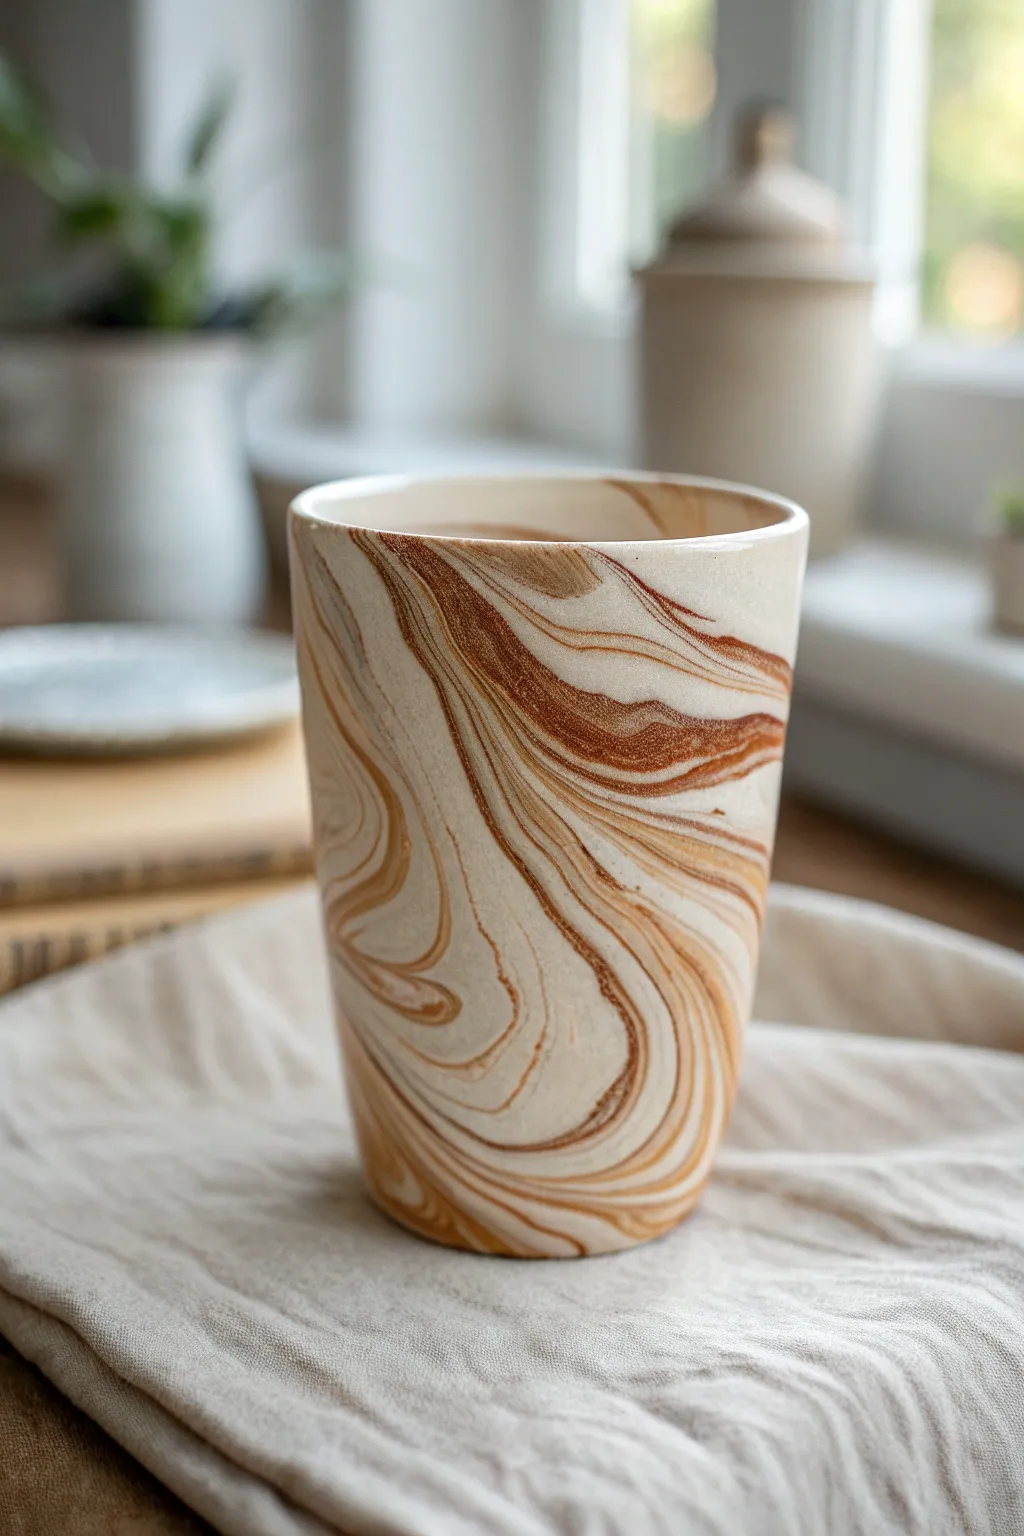
Create a stunning coffee tumbler that mimics the patterns of sedimentary rock or cream swirling into coffee. This project uses the nerikomi technique combined with wheel throwing to achieve organic, one-of-a-kind striations in warm earth tones.
Step-by-Step Tutorial
Materials
- White stoneware clay body (cone 6)
- Red or brown stoneware clay body (cone 6)
- Potter’s wheel
- Wire cutter
- Rib tool (metal and wooden)
- Sponge
- Needle tool
- Trimming tools
- Clear glossy glaze
- Kiln
Step 1: Preparing the Marbled Clay
-
Wedge separately:
Begin by thoroughly wedging about 1 pound of white stoneware and 0.5 pounds of red/brown stoneware separately to remove air bubbles. Keeping them separate at first is crucial to control the final mix. -
Slice and stack:
Cut both clay balls into thick slices or chunks. Stack them in an alternating pattern—sandwiching layers of brown between thicker layers of white. -
Slight wedge:
Wedge the stacked clay together very briefly. Only do this for 3-5 turns. If you over-wedge, the colors will blend into a muddy solid rather than distinct swirls. You want to see distinct chunks of color. -
Form the ball:
Gently pat the marbled mass into a round ball, preparing it for the wheelhead. Try to align the layers somewhat vertically if possible, as this helps create upward swirls during the pull.
Uneven Drying?
Since two different clays shrink differently, slow down drying. Keep the finished pot under plastic for 2-3 days before uncovering to prevent cracks.
Step 2: Throwing the Form
-
Center carefully:
Slam the ball onto the wheelhead. Center the clay using steady pressure, but avoid coning up and down excessively, as this will muddy your marbling lines. -
Open the clay:
Open the centered clay to create the floor. Compress the floor well with your fingers or a flat tool to prevent S-cracks later. -
First pull:
Slowly pull up the walls. As you pull, the spinning motion will twist the clay layers, causing the striations to spiral beautifully around the form. -
Shape the tumbler:
Aim for a tall, cylinder shape with slightly tapered walls. Use a sponge to keep the clay lubricated but avoid using too much water, which can smear the surface pattern. -
Refine the rim:
Use a chamois or your sponge to compress and smooth the rim. I find a slightly thickened rim feels better to drink from.
Step 3: Revealing the Pattern
-
Rib the surface:
This is the secret step: take a metal rib and scrape the outer surface of the pot while the wheel turns slowly. This removes the ‘slurry’ (muddy water) that obscures the sharp lines of the marbling. -
Cut off:
Run a wire cutter underneath the pot to separate it from the wheelhead. -
Drying:
Allow the tumbler to dry to a leather-hard state. Marbled clay can sometimes dry unevenly due to different shrinkage rates, so cover it loosely with plastic if your environment is very dry.
Level Up: Gold Vein
Apply gold luster over one of the prominent dark swirl lines for a ‘kintsugi’ effect. Fire a third time at a very low cone (usually 018) to set it.
Step 4: Trimming and Finishing
-
Trim the foot:
Center the leather-hard piece upside down on the wheel. Use a sharp trimming tool to carve a clean foot ring. Trimming also reveals the interior grain of the clay, making the pattern pop even more on the bottom. -
Smooth edges:
Run a smooth stone or the back of a spoon over any sharp grog that might have been dragged up during trimming. -
Bisque fire:
Fire the piece to cone 04 (or your clay’s bisque temperature). -
Glaze application:
Dip the entire tumbler into a clear glossy glaze. A transparent glaze is essential here to showcase the clay body’s natural pattern without hiding it. -
Final wipe:
Wipe the foot ring clean with a damp sponge to prevent it from sticking to the kiln shelf. -
Glaze fire:
Fire to cone 6 (or the maturation temperature of your specific stonewares) to finish the piece.
Enjoy the surprise of seeing exactly how the kiln heat intensifies those beautiful earth-toned swirls