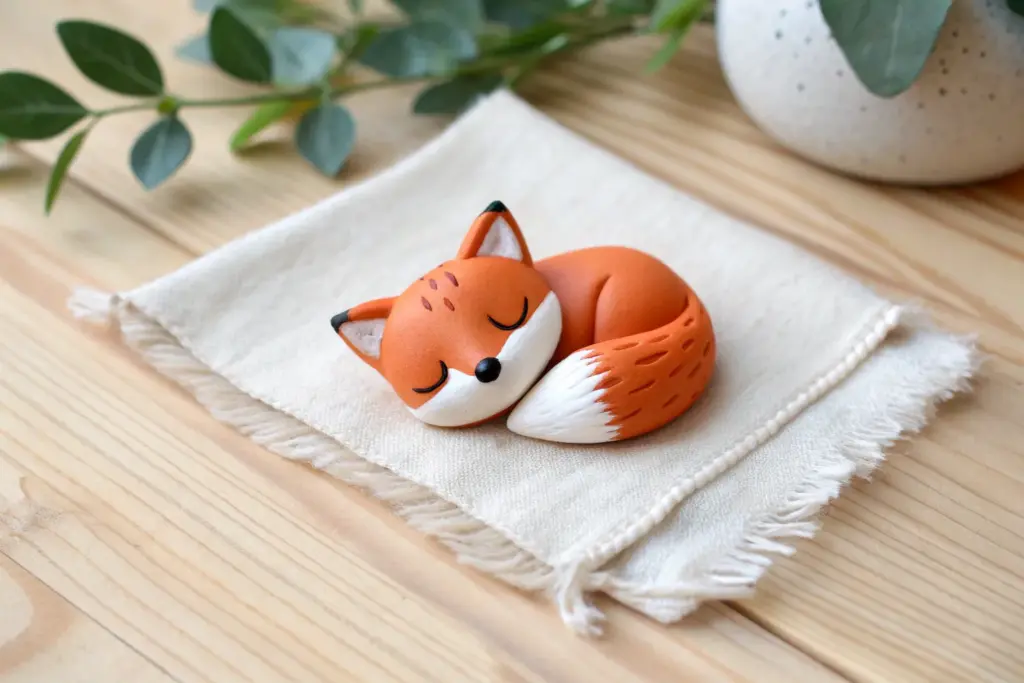
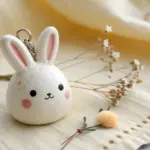
If you love making little worlds, tiny clay sculptures are the quickest way to get that big burst of joy from a teeny lump of clay. I pulled together these tiny clay sculpture ideas to give you cute, beginner-friendly minis you can finish in a cozy afternoon.
Tiny Cat Figurines With Big Expressions
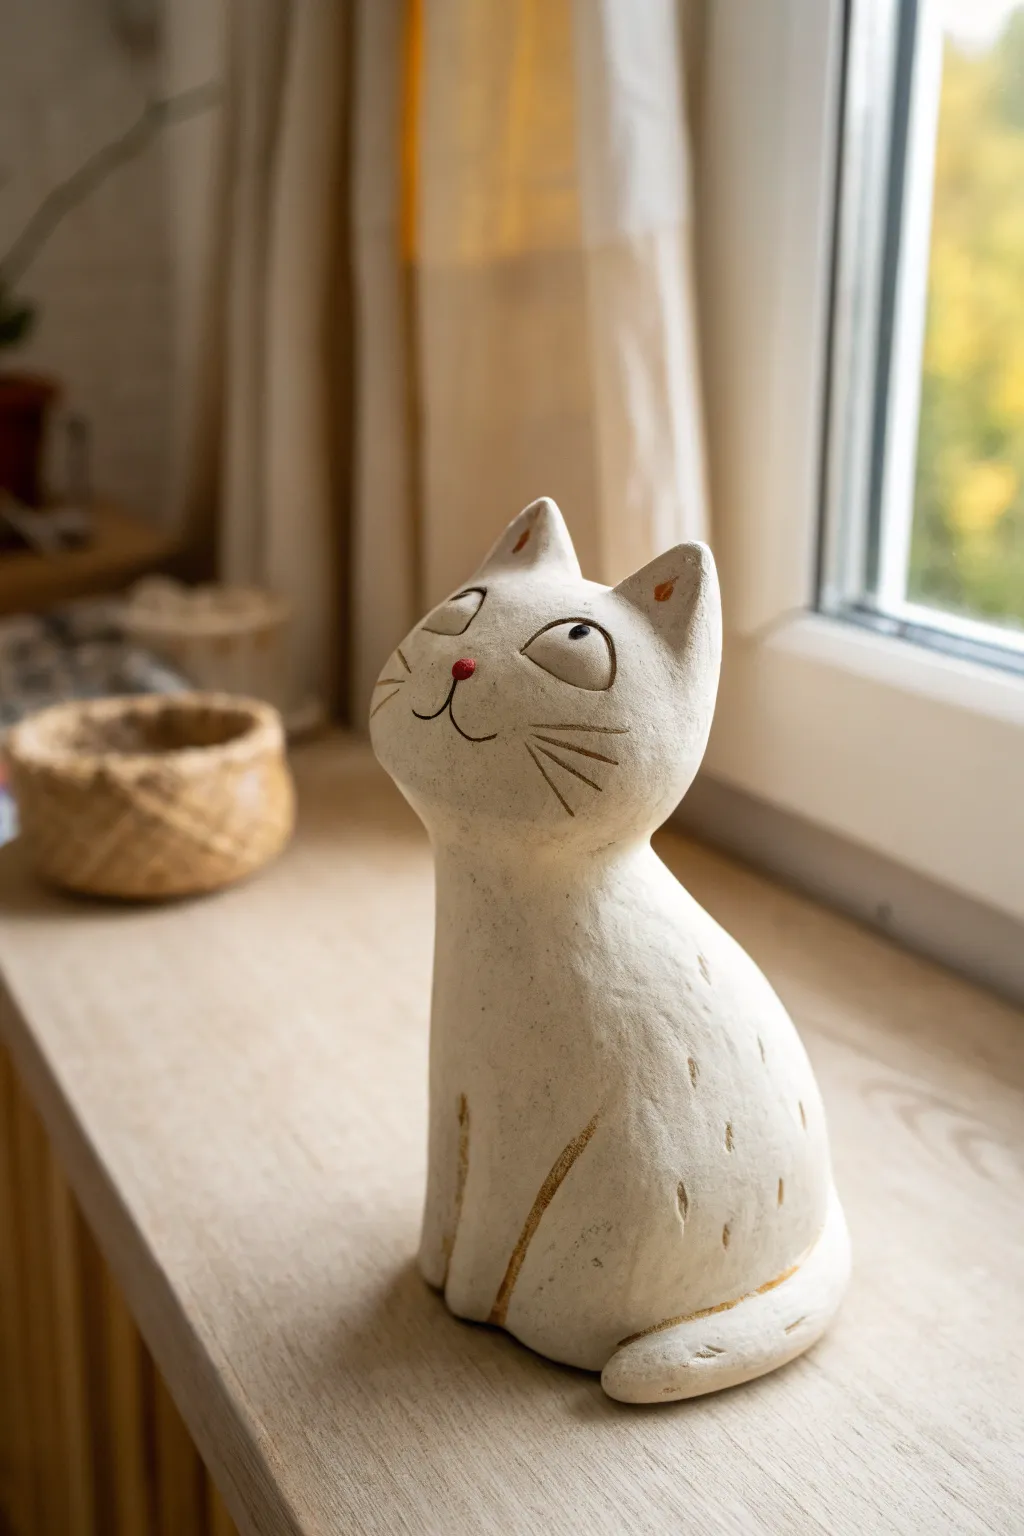
This charming, hand-built clay figurine captures the essence of a cat daydreaming by a window. With its upward gaze and textured markings, it brings a serene yet playful presence to any shelf or sill.
Step-by-Step Guide
Materials
- Air-dry clay or polymer clay (white or cream)
- Clay sculpting tools (needle tool, small loop tool)
- Rolling pin
- Small bowl of water (for smoothing)
- Acrylic paints (gold or burnt sienna, bright red, black)
- Fine detail paintbrush
- Matte varnish or sealant
- Sandpaper (fine grit)
Step 1: Shaping the Base Form
-
Roll the body:
Start with a racquetball-sized lump of clay and roll it into a smooth cone shape. This will be the cat’s seated body. Tap the bottom gently on your work surface to flatten it so the figure stands stably. -
Form the head:
Roll a slightly smaller ball of clay for the head. Gently press it into an oval shape, keeping it nice and rounded. -
Attach head to body:
Score the top of the body cone and the bottom of the head with a needle tool. Apply a dab of water (or liquid clay if using polymer) and press the pieces together firmly. Blend the clay at the neck seam until smooth. -
Create the chest curve:
Using your thumb, gently smooth the front of the sculpture to create a continuous, elegant curve from under the chin down to the base, giving the cat that proud, seated posture.
Step 2: Adding Details and Features
-
Sculpt the ears:
Pinch two small triangles of clay for the ears. Attach them to the top of the head, ensuring they are well-blended at the base. Gently press into the center of each ear with a modeling tool to create depth. -
Define the tail:
Make a long, thin coil of clay. Wrap it around the base of the cat’s body, blending the starting point at the back and leaving the tip slightly raised or curled against the side. -
Carve the paws:
Use a needle tool or small knife to lightly vertically score the front base of the body, suggesting the front legs and paws without fully sculpting them separately. -
Add texture marks:
Using a small carving tool, make random, short dash marks all over the body. These simulate fur texture and give the piece a rustic, handmade look. -
Final smoothing:
Dip your finger in water and run it over any harsh fingerprints, but be careful not to erase your intentional texture marks.
Clean Lines
To get crisp, carved lines for the whiskers, let the clay firm up slightly (about 30 minutes) before using your needle tool. It prevents dragging.
Step 3: Expression and Finishing
-
Carve the face:
I prefer to do this while the clay is still pliable. Use a needle tool to scratch in the whiskers and the mouth line. Carve two large oval outlines for the eyes. -
Sculpt the nose:
Roll a tiny speck of clay into a ball and press it firmly onto the face at the junction of the whiskers. -
Dry the sculpture:
Let the piece dry completely according to your clay package instructions. For air-dry clay, this usually takes 24-48 hours. -
Paint the details:
Once dry, use a fine brush to paint the nose a bright berry red. Fill in the carved whiskers and fur texture marks with a diluted gold or burnt sienna paint to act as a wash. -
Highlight the eyes:
Paint the carved eye shapes white if they aren’t already, then add small black dots for pupils, positioned high in the oval to make the cat look upward. -
Seal the work:
Apply a coat of matte varnish to protect the clay and paint, giving it a finished ceramic look.
Rustic Patina
After painting the gold/brown accents, wipe the surface quickly with a damp cloth. This leaves paint only in the recesses for an antique look.
Place your little feline on a sunny windowsill where it can gaze at the sky


Mini Frogs on Lily Pads
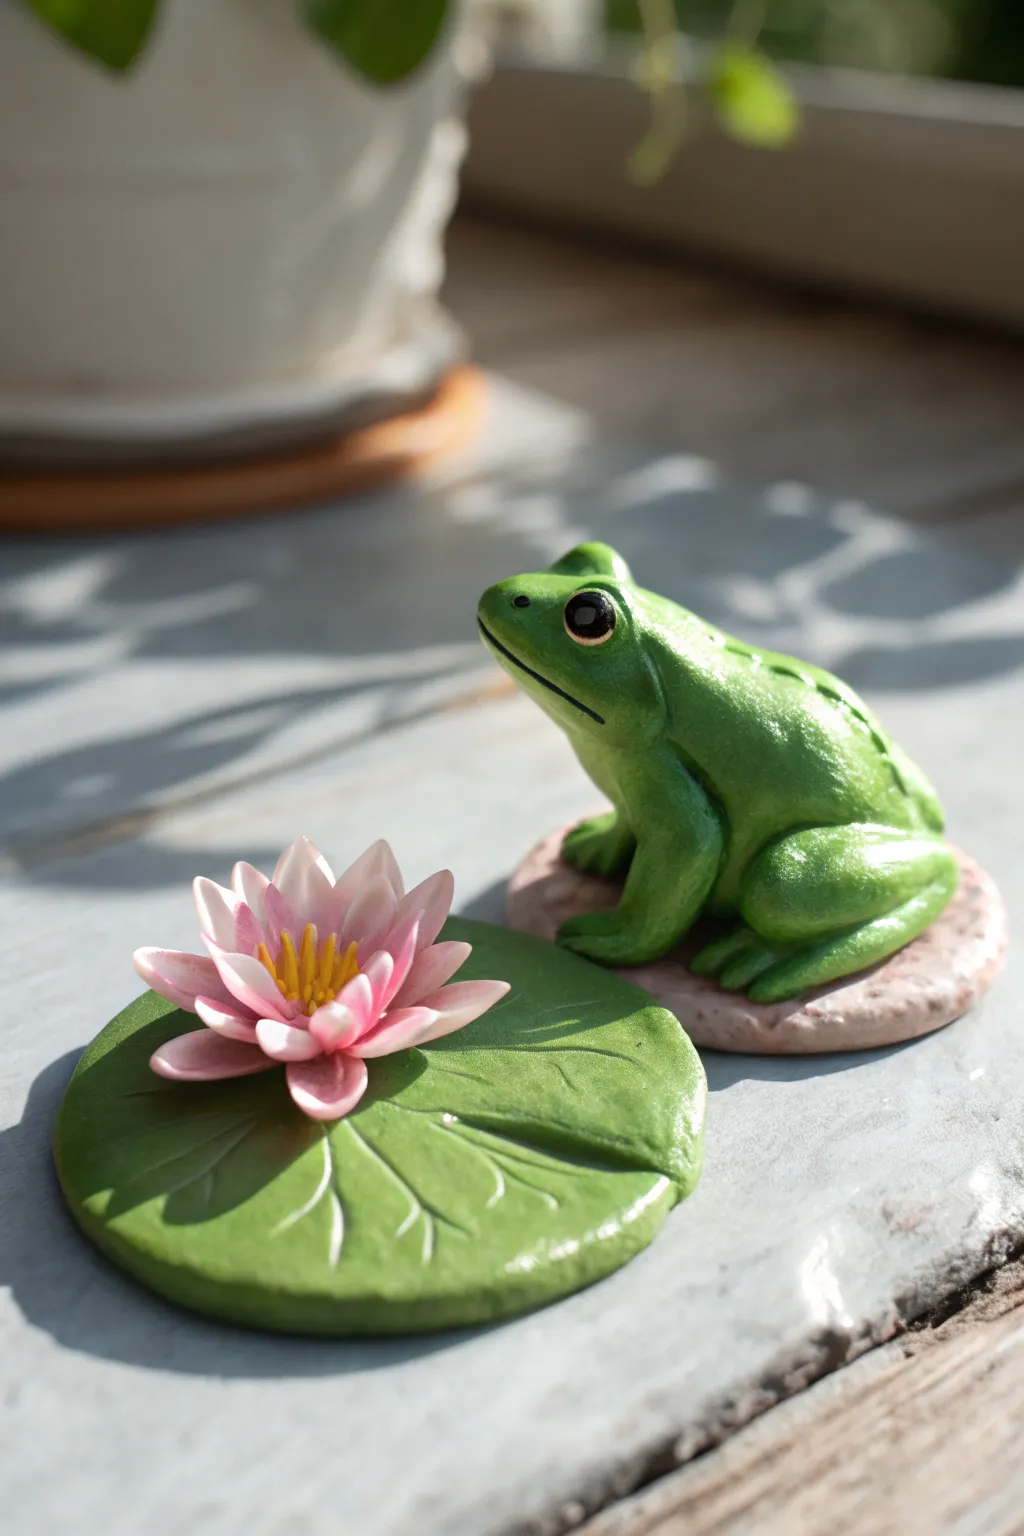
Bring a touch of the pond to your shelf with this charming duo featuring a glossy green frog and a delicate pink water lily. The glossy finish gives the amphibian a wet, lifelike appearance while the matte lily pad provides a lovely textural contrast.
Step-by-Step
Materials
- Polymer clay (Green, Pink, Yellow, White, Beige/Grey)
- Sculpting tools (needle tool, ball stylus)
- Acrylic rolling pin
- Gloss glaze or UV resin
- Small paintbrush
- Aluminum foil (optional, for frog armature)
- Baking sheet and parchment paper
- Black acrylic paint or clay for the eyes
Step 1: Sculpting the Frog
-
Form the Body:
Start with a ball of bright green clay about the size of a walnut. Shape it into a slightly elongated oval, tapering one end for the head and leaving the back end rounded for the body. -
Shape the Hind Legs:
Roll two smaller sausages of green clay. Bend them into a ‘V’ shape to create the thigh and calf. Press the thick thigh part against the back side of the body, blending the seam thoroughly so it looks like one piece. -
Add Front Legs:
create two thinner logs for the front arms. Attach these under the chest area, positioning them so the frog looks like it is propping itself up. -
Detail the Toes:
Use a needle tool or small knife to gently separate the ends of the legs into toes. There’s no need for extreme detail here, just distinct separation. -
Refine the Face:
Use a ball stylus to press indentations where the eyes will go. Roll two tiny balls of black clay (or paint them later) and press them into the sockets. Add a very thin strip of green clay over the eye for an eyelid. -
Create the Rock Base:
Mix beige and white clay to create a marbled stone look. Flatten it into a smooth, irregular disc. Gently press your frog onto this base so it sits securely.
Sticky Situation?
If your clay gets too soft and sticky while shaping the tiny petals, pop the clay in the fridge for 10 minutes to firm it up before continuing.
Step 2: Crafting the Lily Pad
-
Roll the Leaf:
Take a portion of dark green clay and roll it into a flat, circular slab about 3mm thick. It doesn’t need to be a perfect circle; organic shapes look better. -
Cut the Notch:
Use a craft knife to cut a small triangular notch out of one side of the circle to give it that classic Pac-Man lily pad shape. -
Texture the Veins:
With a needle tool, lightly score lines radiating from the center of the pad to the edges to mimic leaf veins. Soften any harsh ridges with your finger.
Step 3: Blossoming the Water Lily
-
Prepare Petals:
Mix pink and white clay to get a gradient of soft pinks. Roll many tiny teardrop shapes, pressing them flat to create petals. -
Assemble the Outer Layer:
Arrange the largest pink petals in a circle directly onto the green lily pad, slightly overlapping them. -
Build the Volume:
Add a second, slightly smaller layer of petals inside the first ring, curving them upward slightly to create a cup shape. -
Add the Center:
Roll tiny yellow snakes for the stamens. Cluster them in the very center of the pink petals to finish the flower.
Texture Twist
Before baking, gently dab the ‘rock’ base with a crumpled piece of aluminum foil or a stiff toothbrush to give it realistic stone texture.
Step 4: Finishing Touches
-
Bake:
Place both pieces on parchment paper and bake according to your clay manufacturer’s instructions (usually 275°F/135°C for 15-30 minutes). -
Cool Down:
Let the pieces cool completely before handling. I like to leave them in the oven with the door cracked open to prevent thermal shock cracks. -
Glazing:
Apply a coat of gloss glaze or UV resin specifically to the green skin of the frog to make it look wet. Leave the rock and the lily pad matte for contrast.
Now you have a serene little pond scene that needs no water to thrive.


Pocket-Size Turtles With Patterned Shells
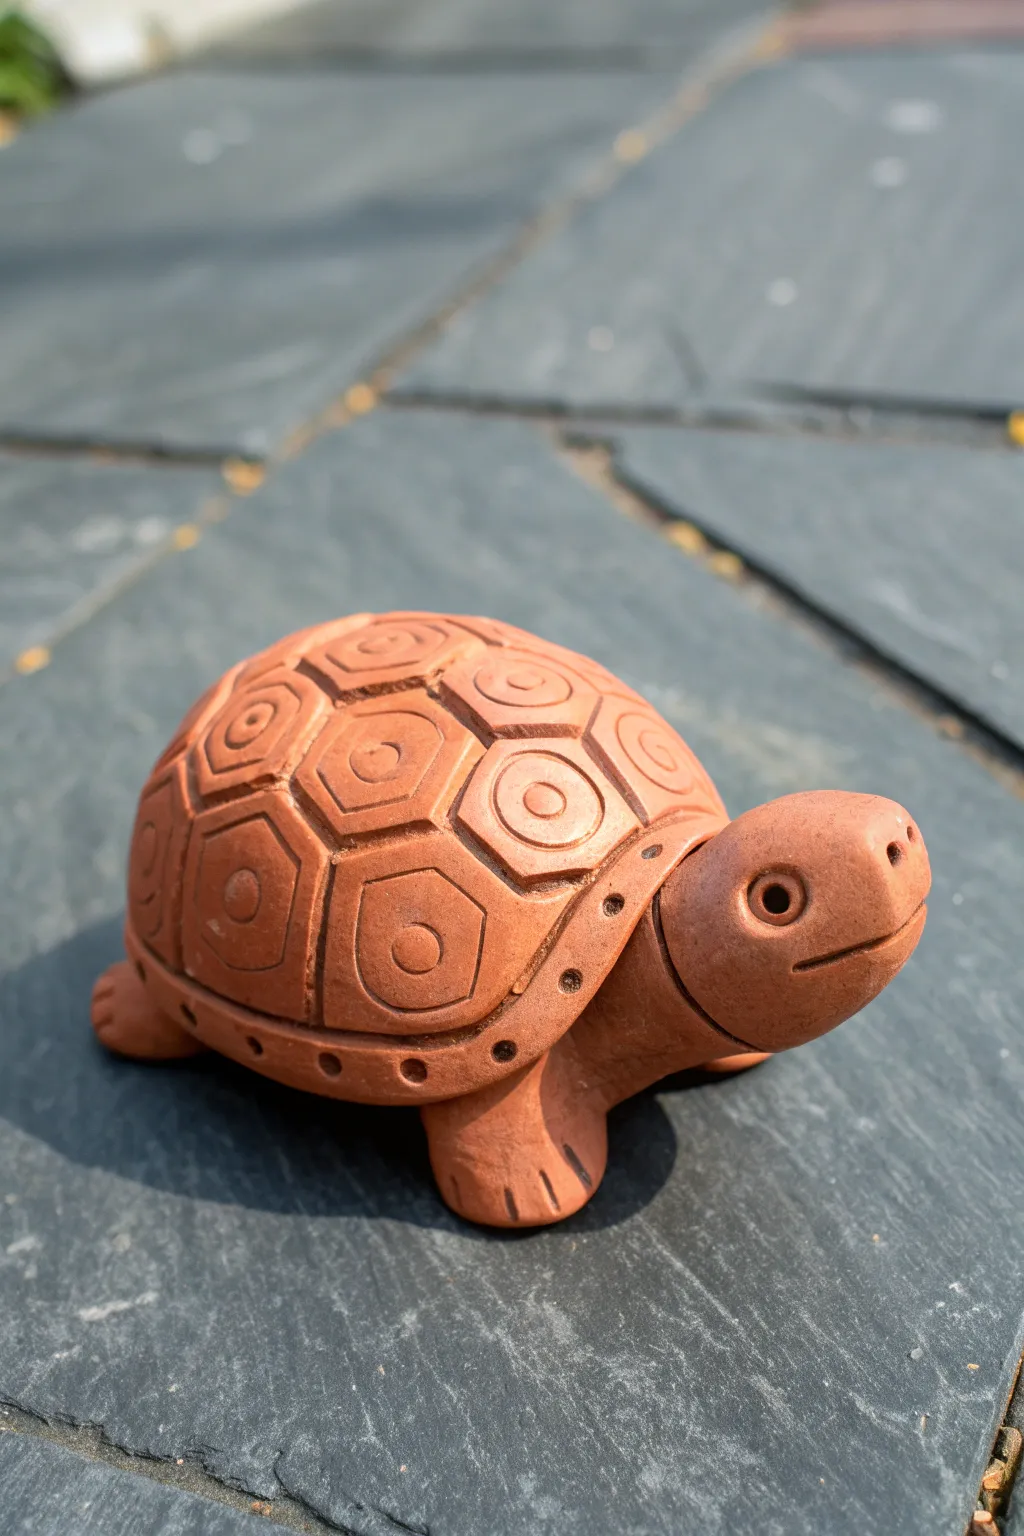
This charming little turtle sculpture mimics the warm, earthy tones of traditional terra cotta pottery with charming geometric details. Its sturdy, rounded shape and intricate shell patterning make it a delightful addition to any desk or garden pot.
Detailed Instructions
Materials
- Terra cotta colored polymer clay (or air-dry clay)
- Clay sculpting tools (needle tool, small ball stylus)
- Smooth work surface (ceramic tile or glass)
- Acrylic roller
- Small hexagon cutter (optional, but helpful)
- Drinking straw or small tube tool
- Sandpaper (fine grit)
Step 1: Forming the Body
-
Prepare the clay:
Begin by conditioning your terra cotta clay until it is soft and pliable. Use your hands to warm it up, rolling it back and forth to ensure there are no air bubbles trapped inside. -
Create the shell base:
Roll a large ball of clay, roughly the size of a golf ball. Flatten the bottom against your work surface and gently dome the top with your palm to create a smooth hemisphere for the shell. -
Shape the head:
Roll a smaller ball of clay for the head. Gently elongate it slightly into a rounded oblong shape. I like to smooth the connection point with my thumb as I press it firmly against the front of the shell base so it adheres well. -
Add the legs:
Create four small, equal-sized cylinders for the legs. Flatten the tops slightly and press them underneath the four corners of the shell, blending the clay upwards into the body for a secure hold. -
Define the toes:
Take your needle tool or a thin knife tool and press two or three lines into the front of each foot to simulate claws or toes.
Step 2: Sculpting the Details
-
Outline the shell rim:
Use a needle tool or a clay shaper to etch a horizontal line going all the way around the bottom edge of the shell, creating a distinct rim or border. -
Add rim texture:
Using a small tool with a hollow circular end (like a tiny straw or the back of a small paintbrush), press shallow circular indentations evenly spaced along the rim you just defined. -
Draft the shell pattern:
Lightly sketch a hexagon pattern onto the dome of the shell. Start with one hexagon in the very center, then surround it with six others. You can use a small hexagon cutter to lightly imprint the shape or draw it freehand. -
Deepen the lines:
Once you are happy with the placement, go over your sketched lines with a sculpting tool to create deep, beveled grooves. This separation makes the scutes (shell plates) look distinct and raised. -
Center details:
In the center of each hexagonal scute, gently press a small circle using a ball stylus or a small tube tool. This creates the decorative ‘bullseye’ look seen in the reference.
Cracked Clay?
If you see cracks forming while sculpting, your clay might be too dry. Massage in a drop of baby oil or clay softener to restore elasticity before continuing.
Step 3: Finishing Touches
-
Create the eyes:
On the head, use a medium ball stylus to press two deep sockets for the eyes on either side. Inside these sockets, place a tiny ball of clay or simply define the pupil by pressing a smaller tool into the center. -
Add the mouth:
Use a thin blade or needle tool to carve a wide, gently curving smile line. Pressing slightly deeper at the corners gives the turtle a friendly expression. -
Refine the nostrils:
Poke two very small holes at the very front of the snout for nostrils. -
Smooth the surface:
Check the sculpture for fingerprints. You can dip your finger in a little baby oil (for polymer clay) or water (for air-dry clay) and gently rub away any unwanted marks. -
Final hardening:
Bake the sculpture according to your polymer clay package instructions, or let it dry for 24-48 hours if using air-dry clay.
Natural Texture
After baking, wipe a diluted dark brown acrylic wash over the shell and immediately wipe it off. Ideally, paint remains in the grooves, making the pattern pop.
Now you have a sturdy little tortoise friend ready to guard your succulents or sit peacefully on your windowsill


Tiny Mushrooms in a Little Cluster
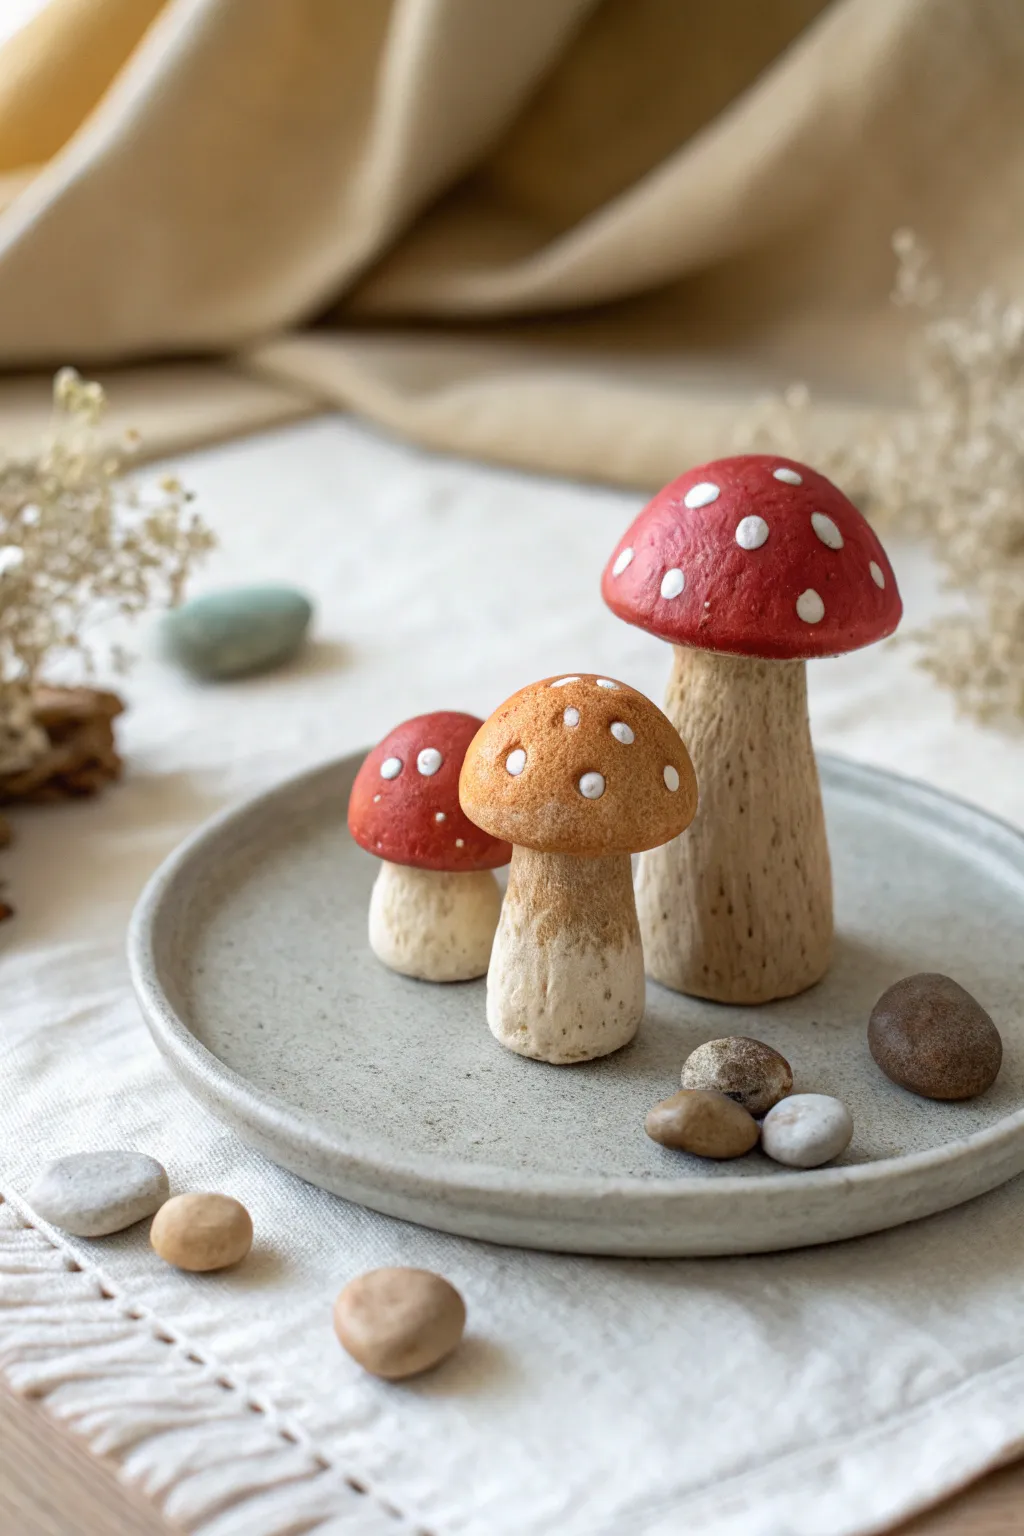
Create your own miniature forest floor with this charming cluster of three clay mushrooms, featuring earthy stems and vibrant dotted caps. This project plays with texture and simple shapes to build a rustic, organic display piece perfect for a desk or shelf.
Step-by-Step
Materials
- Polymer clay (white, beige, red, and burnt orange)
- Acrylic paints (dark brown, cream, white)
- Fine-grit sandpaper
- Sculpting tools (needle tool, small ball stylus)
- Small paintbrush
- Aluminum foil (for bulking)
- Matte varnish or sealant
- Old toothbrush (for texturing)
Step 1: Shaping the Stems
-
Core construction:
Begin by rolling three small balls of aluminum foil into elongated, slightly tapered cylinders. These will serve as the lightweight cores for your mushroom stems, saving clay and reducing baking time. -
Covering the cores:
Roll out a sheet of beige polymer clay to about 1/8 inch thickness. Wrap the clay around your foil armatures, smoothing the seams completely so the join is invisible. -
Shaping the base:
Gently press the bottom of each stem onto your work surface to flatten it so the mushrooms can stand upright independently. Shape the top of the stems slightly narrower to fit under the caps. -
Adding texture:
Using a needle tool, lightly drag vertical lines down the length of the stems to mimic organic bark patterns. You don’t need to be precise; irregularity looks more natural here. -
Stippling details:
Take an old toothbrush or a stiff brush and tap it gently around the base of the stems to create a mossy, dirt-like texture where the mushroom meets the ground.
Natural Texture Hack
Before baking, gently roll the raw clay stems over a real piece of rough bark or a textured rock. This transfers an authentic organic pattern instantly.
Step 2: Sculpting the Caps
-
Forming the dome:
For the largest mushroom, roll a ball of red clay. Press your thumb into the center to create a hollow dome shape, ensuring the walls are relatively even in thickness. -
Fitting the cap:
Place the red dome onto the tallest stem to check the fit. If it sits too loosely, add a small dab of fresh clay or liquid clay adhesive to the top of the stem before pressing the cap firmly in place. -
Creating the medium cap:
Mix a small amount of yellow or translucent clay into the red clay (or use a burnt orange shade) to create a variation in color. Form a slightly flatter, wider dome for the medium-sized mushroom. -
The tiny companion:
Create the smallest cap using the standard red clay, making this one rounder and tighter like a button mushroom, and attach it to the shortest stem. -
Surface detailing:
Before baking, gently press a textured sponge or very fine sandpaper over the tops of the caps to remove fingerprints and give them a stone-like, matte finish.
Turn It Into a Scene
After baking, glue your mushrooms onto a slice of wood or a small ceramic dish. Add dried moss or sculpting sand around the base to permanently set the scene.
Step 3: Finishing Touches
-
Baking:
Bake the mushrooms according to the manufacturer’s instructions for your specific brand of polymer clay. Let them cool completely before handling. -
Applying the wash:
Dilute a small amount of dark brown acrylic paint with water. Brush this wash over the stems, letting it settle into the needle-tool grooves. -
Wiping back:
Immediately wipe the surface of the stems with a damp paper towel or cloth. The dark paint will remain in the crevices, highlighting the texture, while the high points return to beige. -
Painting the dots:
Using a very fine detail brush or a small ball stylus, apply dots of white acrylic paint to the caps. I find it looks best to vary the size of the dots slightly for a less mechanical appearance. -
Protective coat:
Once the paint is fully dry, apply a thin layer of matte varnish to seal the paint and protect your sculpture from dust.
Now you have a delightful little fungi family ready to brighten up any corner of your home

The Complete Guide to Pottery Troubleshooting
Uncover the most common ceramic mistakes—from cracking clay to failed glazes—and learn how to fix them fast.
Mini Succulent Rosettes
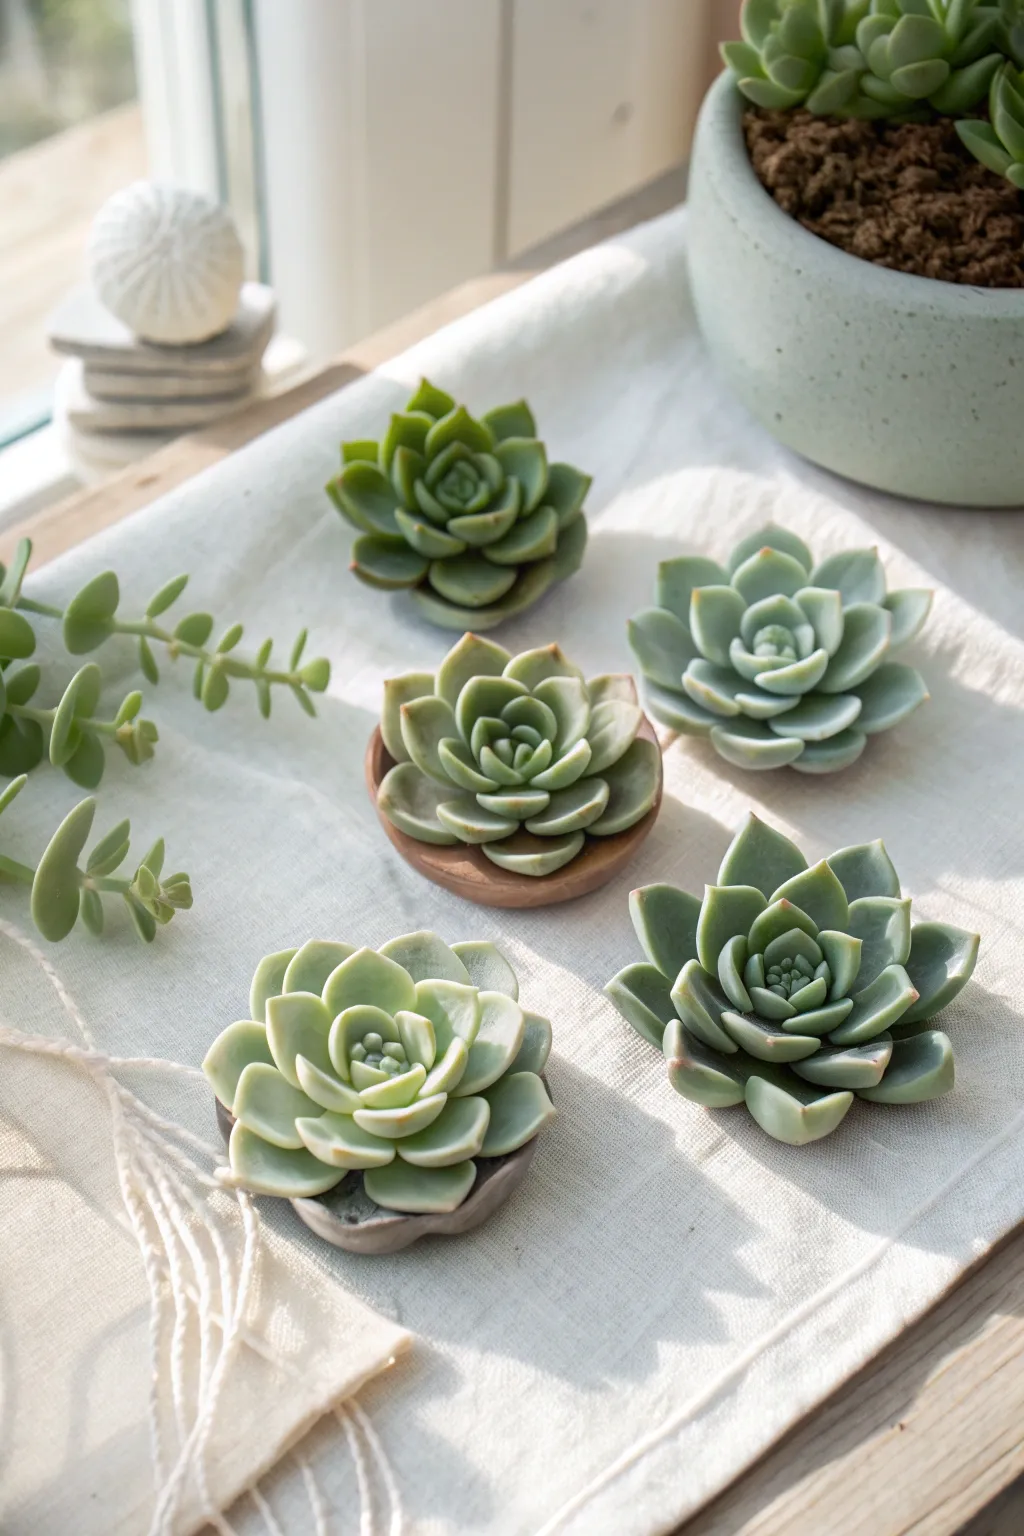
Create a stunningly realistic indoor garden that never needs watering with these miniature clay succulent sculptures. By layering individually shaped leaves and applying soft pastel shading, you can mimic the delicate, powdery finish of real echeveria rosettes.
How-To Guide
Materials
- Polymer clay (translucent white, leaf green, and a touch of brown)
- Soft pastels (dark green, burgundy, pink)
- Small paintbrush (for pastels)
- Needle tool
- Ball stylus tool (small)
- X-acto knife or clay blade
- Baking tile or parchment paper
- Gloss or satin varnish (optional, for ‘dew’ drops)
Step 1: Mixing and Prep
-
Create the base color:
Begin by conditioning your polymer clay. Mix a large portion of translucent white with a small amount of leaf green to create a muted, jade-like tone. The translucency is key for that fleshy succulent look. -
Marbling for realism:
Once mixed, take a tiny speck of brown clay and fold it partially into a small section of your green mix. Don’t over-blend; you want very subtle streaks to imitate natural plant variegation. -
Prepare the core:
Roll a small ball of green clay, about the size of a pea, and flatten the bottom slightly. This will be the center bud of your rosette.
Step 2: Sculpting the Leaves
-
Shape teardrops:
Roll several tiny teardrop shapes from your green clay. For the innermost leaves, these should be quite small, roughly 3-4mm in length. -
Flatten and form:
Gently press each teardrop flat between your fingers. Use the ball stylus to concave the center slightly, giving the leaf a spoon-like curve. -
Pinch the tips:
For echeveria styles, gently pinch the pointed end of the teardrop to create a distinct, sharp tip. -
Attach the center whorl:
Attach three small leaves to your center core, arranging them so they overlap in a tight triangle formation. They should stand almost vertically. -
Scale up:
Made slightly larger teardrops for the next layer. Flatten and curve them as before, but ensure these are wider than the first set. -
Build the second layer:
Press this new set of leaves around the center bud, placing each new leaf in the gaps between the previous layer’s leaves. -
Expand the rosette:
Continue this pattern, increasing the size of the leaves for each subsequent ring. As you move outward, angle the leaves more openly rather than vertically. -
Final outer leaves:
For the largest, outermost row, curve the leaves downward slightly to mimic a fully opened bloom resting on soil.
Fingerprint Eraser
Before adding pastel, lightly brush the unbaked clay with a tiny amount of baby oil or clay softener. This smooths out accidental fingerprints for a pro finish.
Step 3: Shading and Finishing
-
Shave the pastels:
Using your blade, scrape a small amount of dark green, burgundy, and pink pastel into fine powder piles. -
Apply depth:
With a dry paintbrush, dust the very deep center of the rosette with the dark green powder to create shadowy depth. -
Blush the tips:
I like to dip the brush into the pink or burgundy powder and very gently tap it onto the pointy tips of the outer leaves. This recreates sun-stress coloration. -
Create a base (optional):
If you want a mounted look like the photo, shape a small disc of brown clay to act as a wooden coaster or soil patch and press the finished rosette onto it. -
Make the vines:
For variety, roll a thin snake of green clay. Attach tiny flat ovals in pairs along the vine to create the ‘String of Nickels’ or trailing plant shown on the left. -
Bake:
Place your creations on a ceramic tile and bake according to your clay package instructions (usually 275°F/135°C for 15-30 minutes). -
Cool and verify:
Let the pieces cool completely before handling so the thin leaves harden fully.
Dew Drop Detail
After baking and cooling, apply tiny pinpoint dots of UV resin or high-gloss dimensional glaze to a few leaves to simulate fresh morning dew.
Arrange your colony of succulents on a sunny windowsill where they will look fresh forever
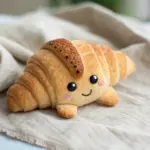
Cute Tiny Toast and Egg Characters
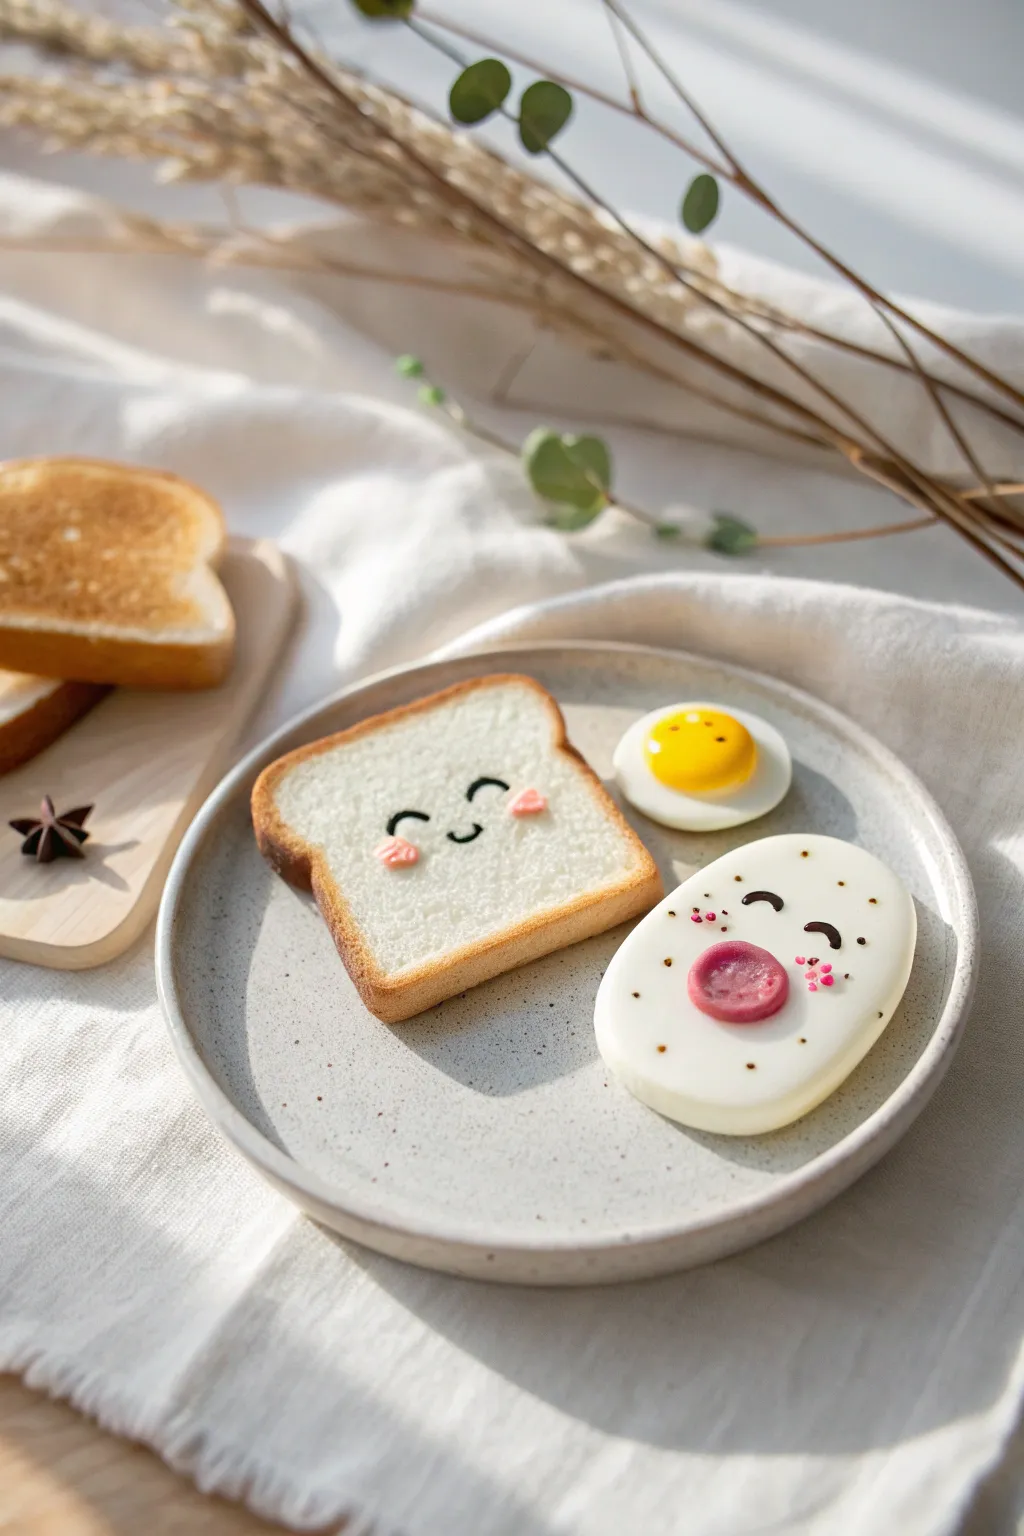
Brighten up your morning—or at least your desk—with this adorable trio of breakfast friends made from polymer clay. This project features a happy slice of toast, a cheerful sausage (or large egg), and a tiny sunny-side-up egg companion, all displayed on a speckled clay plate.
Detailed Instructions
Materials
- White, yellow, brown/tan, and pink polymer clay
- Translucent liquid polymer clay (optional but recommended)
- Black acrylic paint or a fine-tip black permanent marker
- Soft pastel chalks in golden brown, orange, and reddish-brown
- Small paintbrush (for shading)
- Dotting tool or toothpick
- Clay blade or craft knife
- Texture tool (toothbrush or stiff bristle brush)
- Small circle cutter
- Gloss varnish or UV resin
- Rolling pin or pasta machine
Step 1: Sculpting the Happy Toast
-
Mix the bread color:
Start by mixing white clay with a tiny speck of yellow and brown to create a soft, warm off-white bread dough color. -
Shape the slice:
Roll the clay into a ball, then flatten it into a square slab about 5mm thick. Gently indent the top edge to create the classic ‘M’ shape of a bread loaf. -
Add the crust:
Roll a thin snake of tan or light brown clay. Carefully wrap this strip around the entire perimeter of your white bread slab, blending the seam underneath so it’s hidden. -
Texture the surface:
Take a clean toothbrush or a texture tool and gently tap the entire white surface of the bread. This mimics the aerated texture of a real slice. -
Toast it up:
Shave some golden brown and orange soft pastels into a powder. Using a dry brush, gently dust the edges of the bread and the crust to give it a convincing baked look. I like to concentrate the darker color on the very corners.
Step 2: Making the Cheerful Sausage & Egg
-
Form the large oval:
Take a piece of white clay and roll it into a smooth, flattened oval shape. This will be the base for the laughing character. -
Add the meat:
Mix a pinkish-red clay color. Roll a small ball, flatten it into a disk, and press it firmly into the center of the white oval to create a slice of sausage or ham. -
Texture the meat:
Use a needle tool to add tiny texture marks or dots onto the pink circle so it doesn’t look too smooth and plastic. -
Sculpt the small egg:
Roll a small ball of white clay and flatten it into an irregular circle. It shouldn’t be perfect; real eggs aren’t. -
Add the yolk:
Roll a tiny ball of yellow clay and press it onto the center of the small white circle. Press gently so it stays domed. -
Arrange the plate:
If you are making the plate shown, roll out gray or beige speckle clay into a large circle and lift the edges. Place your toast, sausage character, and small egg onto the plate.
Fixing Smudges
If dust gets on your white clay egg while working, use a q-tip dipped in a tiny bit of rubbing alcohol or acetone to gently wipe the surface clean before baking.
Step 3: Bringing Them to Life
-
Add rosy cheeks:
For the toast, make two tiny flattened hearts or ovals from pink clay and press them onto the bread face area. -
Add freckles:
For the sausage character, use a needle tool to add tiny pink clay dots on the cheeks for a freckled look. -
Bake the clay:
Bake your creations according to the temperature and time instructions on your specific package of polymer clay. Let them cool completely. -
Draw the faces:
Once cool, use a fine black marker or black paint on a toothpick to draw the eyes and mouths. Give the toast happy squinting eyes and a smile. Give the sausage character wide, laughing eyes. -
Add highlight dots:
For the tiny egg yolk, add a minuscule dot of white paint to simulate a light reflection. -
Apply the finish:
Coat only the ‘wet’ parts—the yellow yolk and the pink sausage meat—with gloss glaze or UV resin. Leave the bread and egg whites matte for a realistic texture contrast.
Realistic Toasting
Layer your pastel shading! Start with a light yellow chalk, then move to orange, and finish with brown just on the very edges. This creates a rich, realistic gradient.
Now you have a permanently delicious breakfast set that will look sweet on any shelf


What Really Happens Inside the Kiln
Learn how time and temperature work together inside the kiln to transform clay into durable ceramic.
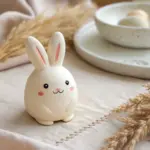
Tiny Penguins and Ducks With Round Bodies
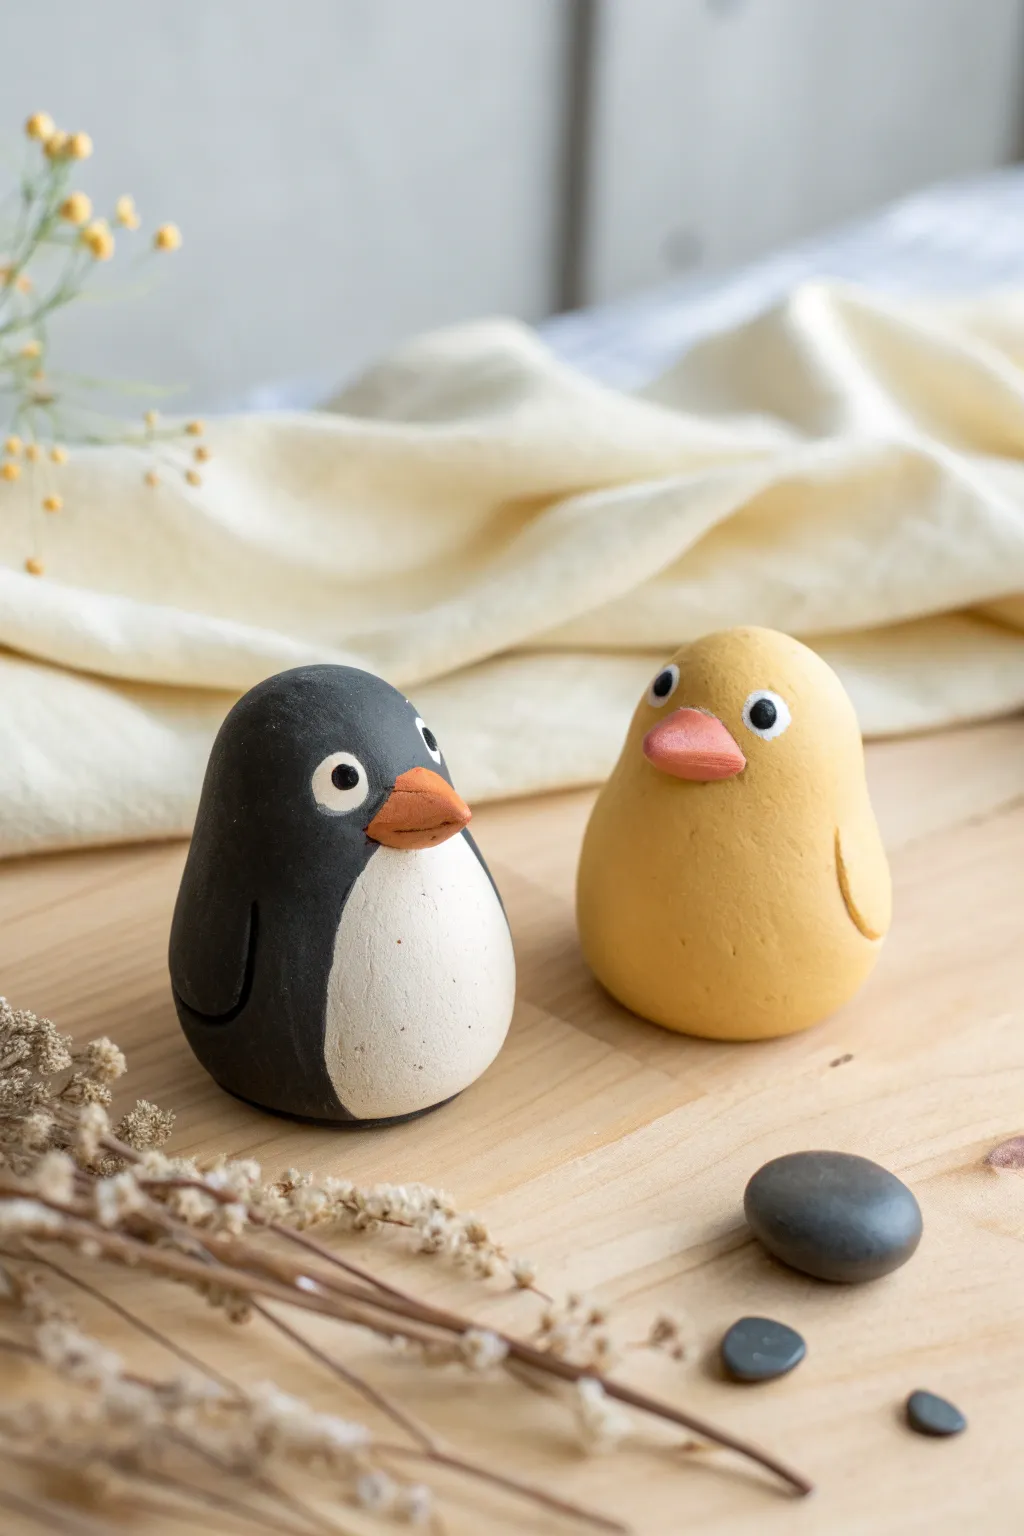
These simple, round-bodied figurines—a stoic penguin and a cheerful duck—are full of personality despite their minimalist shapes. Using just a few basic clay colors, you’ll sculpt smooth, egg-like forms to create a charming pair of desktop companions.
Step-by-Step Tutorial
Materials
- Polymer clay (Black, White, Yellow, Orange)
- Clean crafting surface or mat
- Small dotting tool or toothpick
- Craft knife or scalpel
- Tracing tool (optional)
- Needle tool
- Oven for baking (if using polymer) or Air Dry environment
- Soft-bristle brush (for smoothing fingerprints)
Step 1: Shaping the Penguin Base
-
Create the core:
Start by conditioning a chunk of black clay until it’s pliable, then roll it into a smooth ball about the size of a walnut to form the main body mass. -
Taper the form:
Gently roll the top half of the ball between your fingers to narrow it slightly, creating a soft egg shape that is wider at the bottom for stability. -
Prepare the tummy:
Roll a smaller ball of white clay and flatten it into a thin, oval disk. It needs to be proportionally sized to cover the front belly area without wrapping around the sides. -
Attach the white patch:
Press the white oval onto the lower front of the black body. Use your thumb to smooth the edges downwards, blending the clay so it doesn’t look like a sticker but rather part of the body. -
Form the wings:
Make two small, identical teardrop shapes from black clay. Press them flat. -
Secure the wings:
Attach the wings to each side of the body, curving them slightly forward to follow the roundness of the penguin’s belly.
Dirty Clay Fix
White and yellow clay pick up dust easily. Keep a scrap piece of ‘waste clay’ nearby to roll in your hands periodically, cleaning off dust before handling light colors.
Step 2: Sculpting the Duck
-
Form the yellow body:
Condition a piece of yellow clay similar in size to your penguin. Roll it into a ball and then shape it into a pear-like form, keeping the bottom heavy and round. -
Refine the posture:
Tap the bottom of the yellow pear gently on your work surface to flatten the base so the duck sits cleanly without wobbling. -
Create subtle wings:
Roll tiny balls of yellow clay and press them into flat semi-circles. -
Blend the wings:
Press these semi-circles onto the sides of the duck. Instead of smoothing them completely, leave the back edge slightly raised to suggest a folded wing.
Make a Scene
Create a small ‘ice floe’ base from white clay for the penguin, or a tiny blue puddle for the duck to sit in, turning individual figures into a vignette.
Step 3: Adding Faces and Details
-
Make the beaks:
Using orange clay, create two small triangular cones. For the duck, flatten the cone slightly to make a wider bill; keep the penguin’s beak sharper and more triangular. -
Attach the beaks:
Press the beaks firmly into the center of the ‘face’ area on each figure. I like to use a tiny bit of liquid clay here if the pieces aren’t sticking well. -
Detail the beaks:
Use a knife or needle tool to gently impress a horizontal line across the center of the duck’s bill to separate the top and bottom jaw. -
Create eye sockets:
Create the white parts of the eyes by rolling tiny white balls and flattening them onto the head above the beak. The penguin’s eyes should be slightly larger and more animated. -
Add the pupils:
Roll minuscule balls of black clay. Place these onto the white eye circles. Position them slightly off-center or looking at each other to give the characters an interactive expression. -
Smooth the surface:
Before baking or drying, check for fingerprints. Lightly brush over the clay with a tiny amount of baby oil or cornstarch to smooth out any imperfections.
Step 4: Finishing Up
-
Check stability:
Give both figures a gentle tap on the table one last time to ensure their flat bases are perfectly level before the hardening process. -
Bake or Dry:
Follow the manufacturer’s instructions for your specific clay type. If baking, tent them with foil to prevent the pale yellow and white clay from scorching.
Set your new clay friends on your desk or shelf where their round presence can add a little calm to your day
Mini Snails With Swirly Shells
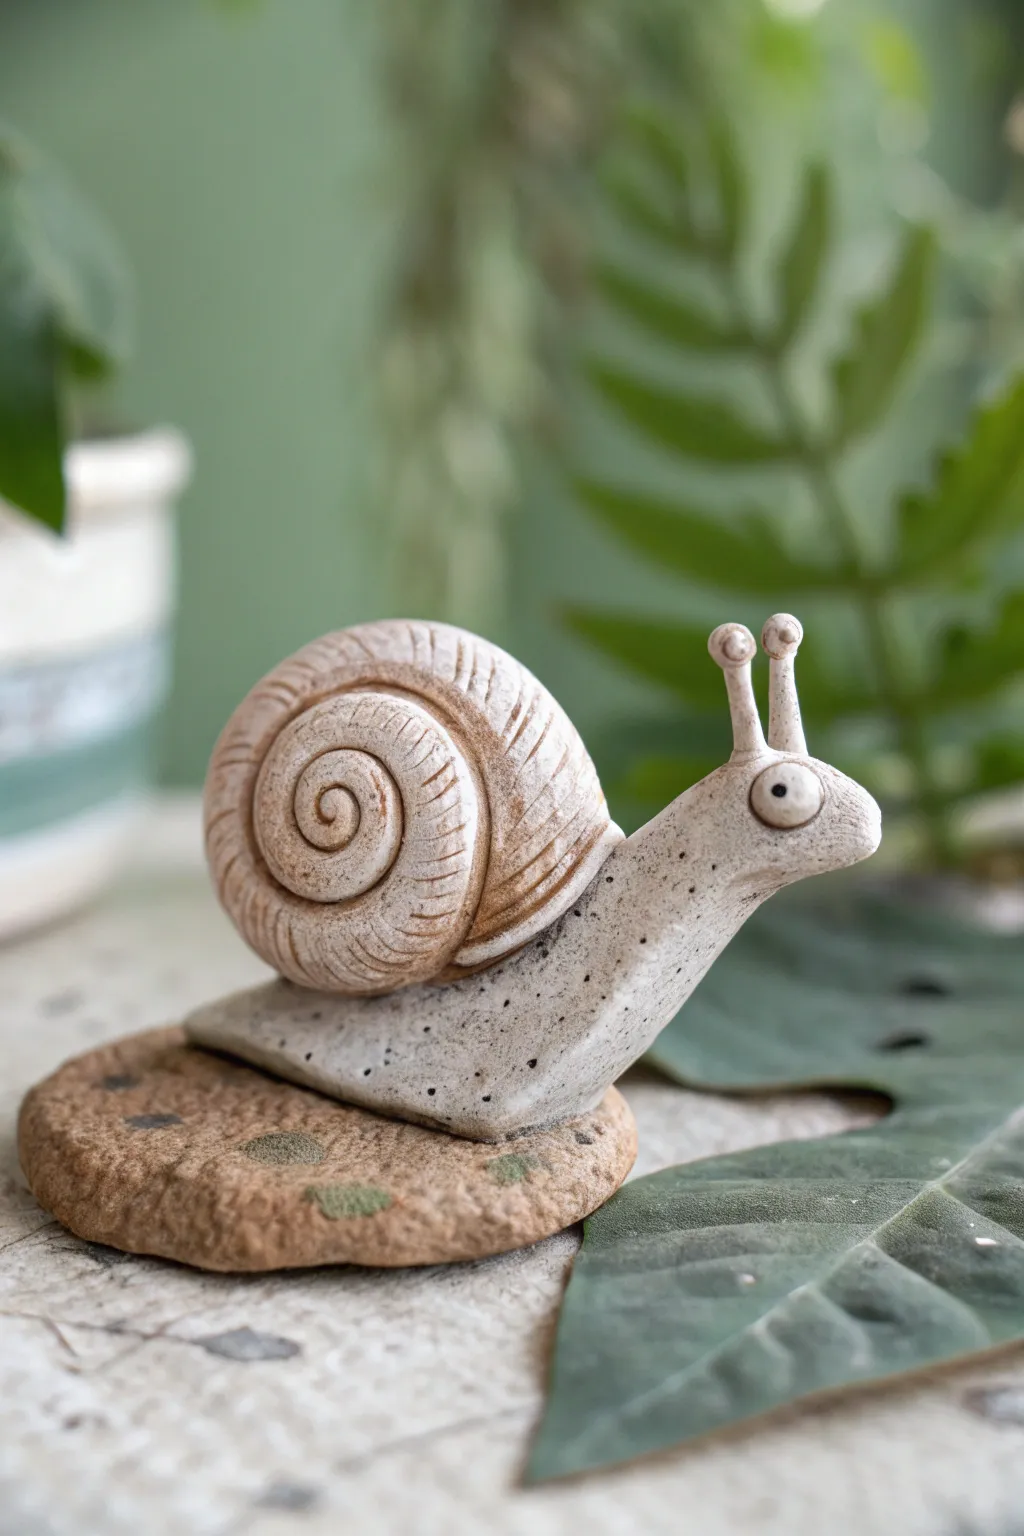
Create a charming companion for your houseplants with this beautifully textured clay snail. Featuring an earthy, speckled finish and a mesmerizing spiral shell, this little sculpture sits atop its own faux-stone base.
Step-by-Step
Materials
- Polymer clay (white or light beige)
- Polymer clay (brown or terracotta)
- Acrylic paints (dark brown, black, cream, moss green)
- Texture tools (needle tool, toothbrush, or stiff brush)
- Ball stylus tool
- Small paintbrush
- Clear matte varnish
- Aluminum foil (optional, for core)
Step 1: Sculpting the Body
-
Condition the Clay:
Begin by kneading a chunk of white or light beige polymer clay until it is soft and pliable. If you want the speckled look baked right in, mix in a tiny amount of black pepper or black embossing powder now. -
Form the Base Shape:
Roll the clay into a thick log shape, tapering one end slightly to form the tail. The other end should be blunter and angled upwards to create the neck and head area. -
Shape the Head:
Gently pinch and pull the thicker end upwards. With your thumb and forefinger, smooth the transition from the body to the neck so it creates a gentle, organic curve. -
Add the Eye Stalks:
Roll two small, thin cylinders of clay. Attach them to the top of the head, blending the clay at the base downward with a sculpting tool so they don’t look like they were just stuck on. -
Create the Eyes:
Roll two tiny balls of clay and place them on top of the stalks. Flatten them slightly. Use a needle tool to poke a small hole in the center of each for the pupil. -
Texture the Skin:
Using a stiff toothbrush or a texture sponge, gently press against the snail’s body to give it a porous, stone-like skin texture rather than a smooth finish.
Natural Texture Hack
Before baking, gently press a real leaf into the wet clay base to imprint authentic vein patterns onto your faux stone.
Step 2: Creating the Shell
-
Roll the Coil:
Using a mix of white and a touch of brown clay (for a marbled effect), roll out a long, tapered snake. One end should be quite thick, tapering down to a thin point. -
Make the Spiral:
Starting with the thin end, roll the snake tightly inward upon itself to create a classic snail shell spiral. Keep the shape tight and flat on the sides. -
Carve the Ridges:
Before attaching, use a needle tool or knife to carve shallow, vertical lines across the spiral coil. These ridges mimic natural growth lines and add great visual interest. -
Mount the Shell:
Place the shell onto the back of the snail body. Press it down firmly but carefully to bond the clay. I like to double-check that the shell is centered so the snail doesn’t tip over.
Step 3: The Stone Base
-
Form the Rock:
Take a ball of brown or grey clay and flatten it into an irregular oval disc. It should be slightly larger than the snail’s footprint. -
Add Rock Texture:
Press a crumpled ball of aluminum foil or a real stone against this clay disc to give it realistic rocky divots and bumps. -
Assemble and Bake:
Place your finished snail on top of the rock base. Press gently to adhere them together. Bake according to your clay package instructions (usually 275°F/135°C for 15-30 minutes).
Level Up: Glossy Shell
Use high-gloss varnish on JUST the shell while keeping the body and base matte. This contrast makes the snail look slimy and realistic.
Step 4: Painting & Finishing
-
Apply a Wash:
Once cool, water down some dark brown acrylic paint until it’s very thin. Brush this over the entire shell and wipe it off quickly with a paper towel. The dark paint will stay in the carved ridges. -
Speckle the Body:
Dip a toothbrush in diluted black or grey paint. Run your thumb over the bristles to flick tiny speckles onto the snail’s body, enhancing that stone-ware look. -
Paint the Eyes:
Use a fine-point brush to paint the pupils black and add a tiny white reflection dot if desired for extra life. -
Detail the Base:
Dab bits of moss green paint onto the rock base to simulate moss growth. Use a dry brush technique for a soft, natural appearance. -
Seal the Work:
Finish with a coat of clear matte varnish to protect the paint and give the sculpture a unified, ceramic-like sheen.
Now you have a quiet, adorable friend ready to live in your favorite flower pot

TRACK YOUR CERAMIC JOURNEY
Capture glaze tests, firing details, and creative progress—all in one simple printable. Make your projects easier to repeat and improve.
Tiny Whales and Sea Friends
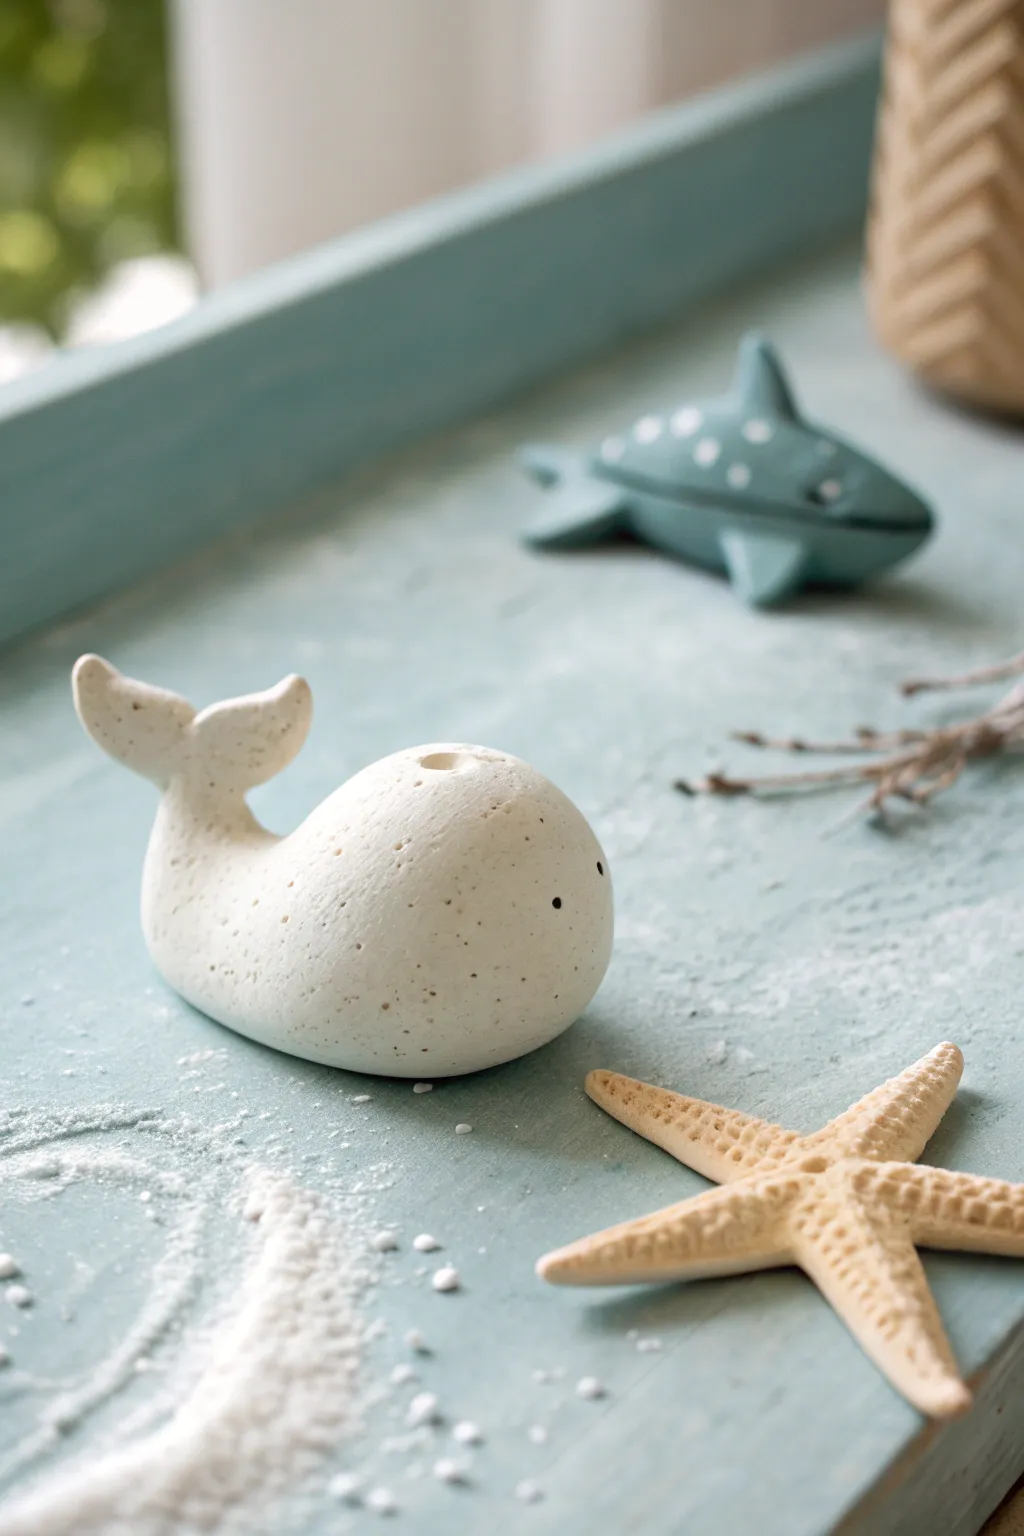
This minimalist whale sculpture captures the serene spirit of the ocean with its smooth, rounded form and delicate speckled texture. Its tiny spout and gentle curve make it a charming addition to any nautical display or shelf.
Step-by-Step Tutorial
Materials
- White polymer clay (or air-dry clay)
- Black pepper or dried vanilla bean specks
- Modeling tools (or a toothpick)
- Small rolling pin
- Sandpaper (fine grit)
- Black acrylic paint
- Fine-point paintbrush or needle tool
- Matte varnish (optional)
Step 1: Prepping and Shaping
-
Condition the Clay:
Begin by kneading a walnut-sized ball of white polymer clay until it is soft and pliable. If you want that natural, speckled stone look, mix in a tiny pinch of ground black pepper or vanilla bean specks now. -
Form the Body:
Roll the clay into a smooth ball, then gently roll one side against your palm to create a teardrop shape. This larger rounded end will be the head, and the tapered end will become the tail. -
Flatten the Base:
Press the teardrop shape gently onto your work surface to create a flat bottom. This ensures your whale sits intentionally and doesn’t roll over. -
Smooth the Surface:
Using your thumb, gently rub out any fingerprints. The charm of this piece relies on a very smooth, stone-like finish.
Drooping Tail?
If the tail sags while sculpting, prop it up with a small wedge of scrap clay or folded foil while you work. You can bake it with the support in place.
Step 2: Creating the Tail
-
Curve the Tail:
Gently lift the tapered end of the teardrop and bend it upwards. You want a soft, gradual curve rather than a sharp angle. -
Split the Flukes:
Use a modeling tool or a knife to make a small cut down the center of the tail’s tip. Gently pull the two sides apart to form the flukes. -
Shape the Flukes:
Flatten each fluke slightly between your fingers, rounding off the tips to look like soft petals. Smooth the connection point where the tail meets the body so it looks seamless. -
Add Texture (Optional):
For added realism, you can gently pinch the very edges of the tail to make them slightly thinner than the base.
Make a Pod
Make a tiny baby whale using a marble-sized amount of grey clay and place it alongside the parent for a cute family display.
Step 3: Adding Details
-
Create the Blowhole:
Press a small ball-stylus tool or the blunt end of a paintbrush into the top center of the head to create the blowhole indentation. -
Refine the Shape:
Check the silhouette from all angles. The transition from the heavy body to the lifted tail should be fluid. -
Final Smoothing:
Give the entire piece one last check for lint or dust. I find a drop of baby oil on a finger helps smooth polymer clay perfectly before baking.
Step 4: Baking and Finishing
-
Bake the Clay:
Place your whale on a baking sheet lined with parchment paper. Bake according to your specific clay package instructions (usually 275°F/135°C for 15-30 minutes). -
Cool Down:
Let the sculpture cool completely in the oven with the door open. Sudden temperature changes can sometimes cause cracks. -
Add the Eyes:
Dip a toothpick or a very fine needle tool into black acrylic paint. Dot two tiny eyes low on the sides of the head, keeping them symmetrical. -
Enhance Texture:
If you didn’t add pepper earlier, you can flick a toothbrush with watered-down brown or grey paint lightly over the surface for a speckled granite effect. -
Seal (Optional):
To protect the paint and give it a finished look, apply a thin coat of matte varnish. Avoid glossy finishes if you want to maintain the natural stone appearance.
Now you have a peaceful little ocean dweller ready to sit quietly on your desk
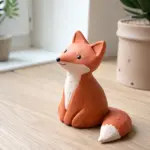
Mini Gnomes With Oversized Hats
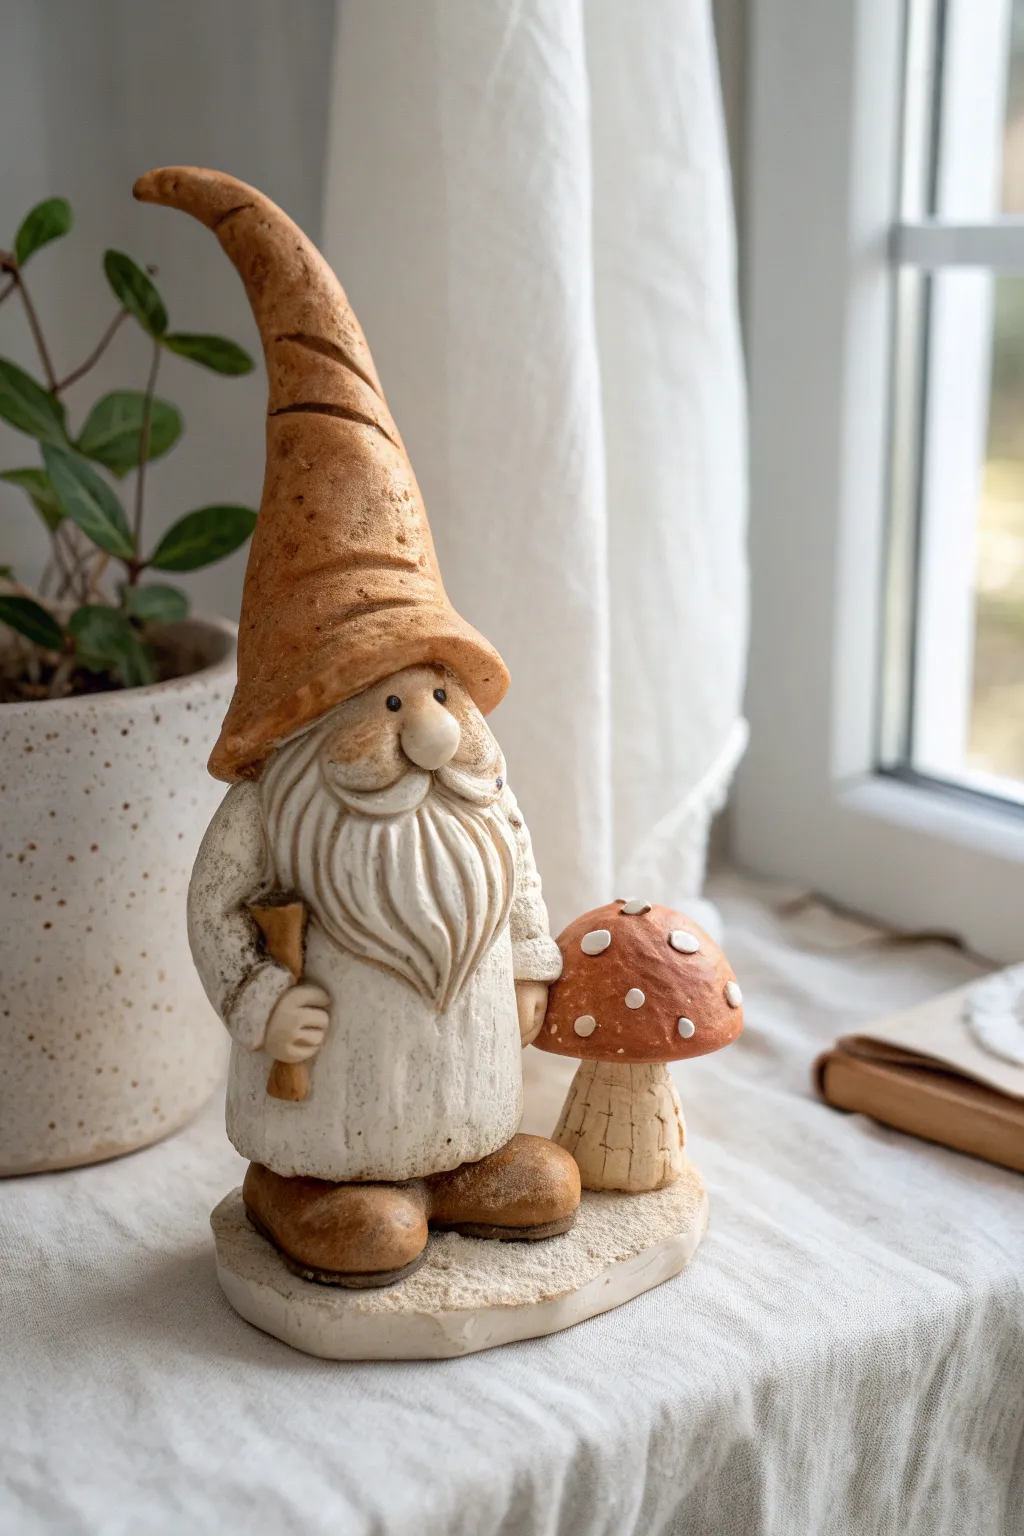
Create a charming rustic companion that looks like it stepped right out of a fairytale forest. This project captures the texture of carved wood using polymer or air-dry clay, featuring a tall, curved hat and a sweet mushroom sidekick.
Detailed Instructions
Materials
- Polymer clay (white, beige, or grey as a base)
- Acrylic paints (burnt sienna, cream, white, terracotta red, brown)
- Sculpting tools (needle tool, small ball tool, clay knife)
- Aluminum foil (for armature)
- Texture sponge or stiff bristle brush
- Matte varnish or sealant
Step 1: Forming the Base & Body
-
Build the armature:
Crumple a small piece of aluminum foil into a cone shape for the gnome’s body and a smaller, thinner cone for the hat structure to save on clay and reduce weight. -
Cover the body:
Roll out a sheet of your base clay (about 1/4 inch thick) and wrap it around the body foil armature. Smooth the seams with your fingers until you have a solid, chubby cylinder shape. -
Create the texture:
Before adding details, use a stiff bristle brush or a texture sponge to dab the surface of the coat. This gives it that rough, stone or wood-carved appearance rather than being perfectly smooth. -
Add the feet:
Roll two oval shapes for the shoes. Flatten the bottoms slightly so the gnome stands securely on his own. Attach these to the bottom front of the body, blending the clay where they touch the coat.
Hat Tip Prevention
If the tall hat keeps sagging while you work, insert a toothpick through the body and into the hat’s core for invisible internal support.
Step 2: Sculpting the Head & Hat
-
Shape the face:
Attach a small ball of clay for the head. Add a smaller button nose right in the center. Don’t worry about eyes yet; the hat will cover most of the forehead. -
Attach the beard:
Create a flat teardrop shape of clay and attach it below the nose. Use a needle tool or knife to carve deep, flowing grooves to simulate hair strands. Make sure the beard flows over the top of the coat. -
Form the tall hat:
Wrap clay around your foil hat armature. Elongate the tip and give it a playful curve to the side. The base of the hat should flare out slightly. -
Position the hat:
Place the hat securely over the head, pulling the brim down until it touches the nose. Add a few horizontal creases in the hat cone to make it look worn and soft. -
Add arms:
Roll two small sausages of clay for arms. Attach them to the sides of the body. You can pose one hand gripping a small clay stick or staff if you like.
Step 3: The Mushroom & Base
-
Make the base platform:
Flatten a uniform slab of clay into an organic oval shape large enough to hold both the gnome and his mushroom. Texture the top surface to look like sandy ground. -
Sculpt the mushroom stem:
Form a thick, sturdy stalk for the mushroom. Use a knife to score vertical lines up the stem for a fibrous texture. -
Add the mushroom cap:
Create a dome shape and attach it to the stem. Add tiny, flattened discs of clay for the white spots, pressing them gently so they adhere but remain raised. -
Assembly:
Press the finished gnome and mushroom firmly onto the base plate. Use a little liquid clay or water (depending on your clay type) to bond them securely. Bake or dry according to package instructions.
Mossy Makeover
After painting, apply small patches of glue and sprinkle fine green flocking powder or dried tea leaves on the base for a realistic mossy forest floor effect.
Step 4: Painting & Finishing
-
Base coat:
Once fully cured, paint the entire sculpture with a watered-down cream or light grey acrylic wash to get into the crevices. -
The hat and shoes:
Paint the hat in a warm terracotta or burnt orange. I like to sponge the paint on to keep the texture visible. Paint the shoes a dark, earthy brown. -
Dry brushing:
Dip a dry brush into white or light cream paint. Wipe most of it off on a paper towel, then lightly brush over the beard and coat texture. This highlights the raised ‘carved’ grooves. -
Mushroom details:
Paint the mushroom cap a rusty red, carefully painting around the white clay spots (or painting them white afterward). Paint the stem beige. -
Final touches:
Use a tiny dot of black paint for the eyes peeking out under the hat brim. Seal the entire piece with a matte varnish to protect the finish.
Your little guardian is now ready to watch over your windowsill or bookshelf
Tiny Fairy Houses on Pebbles
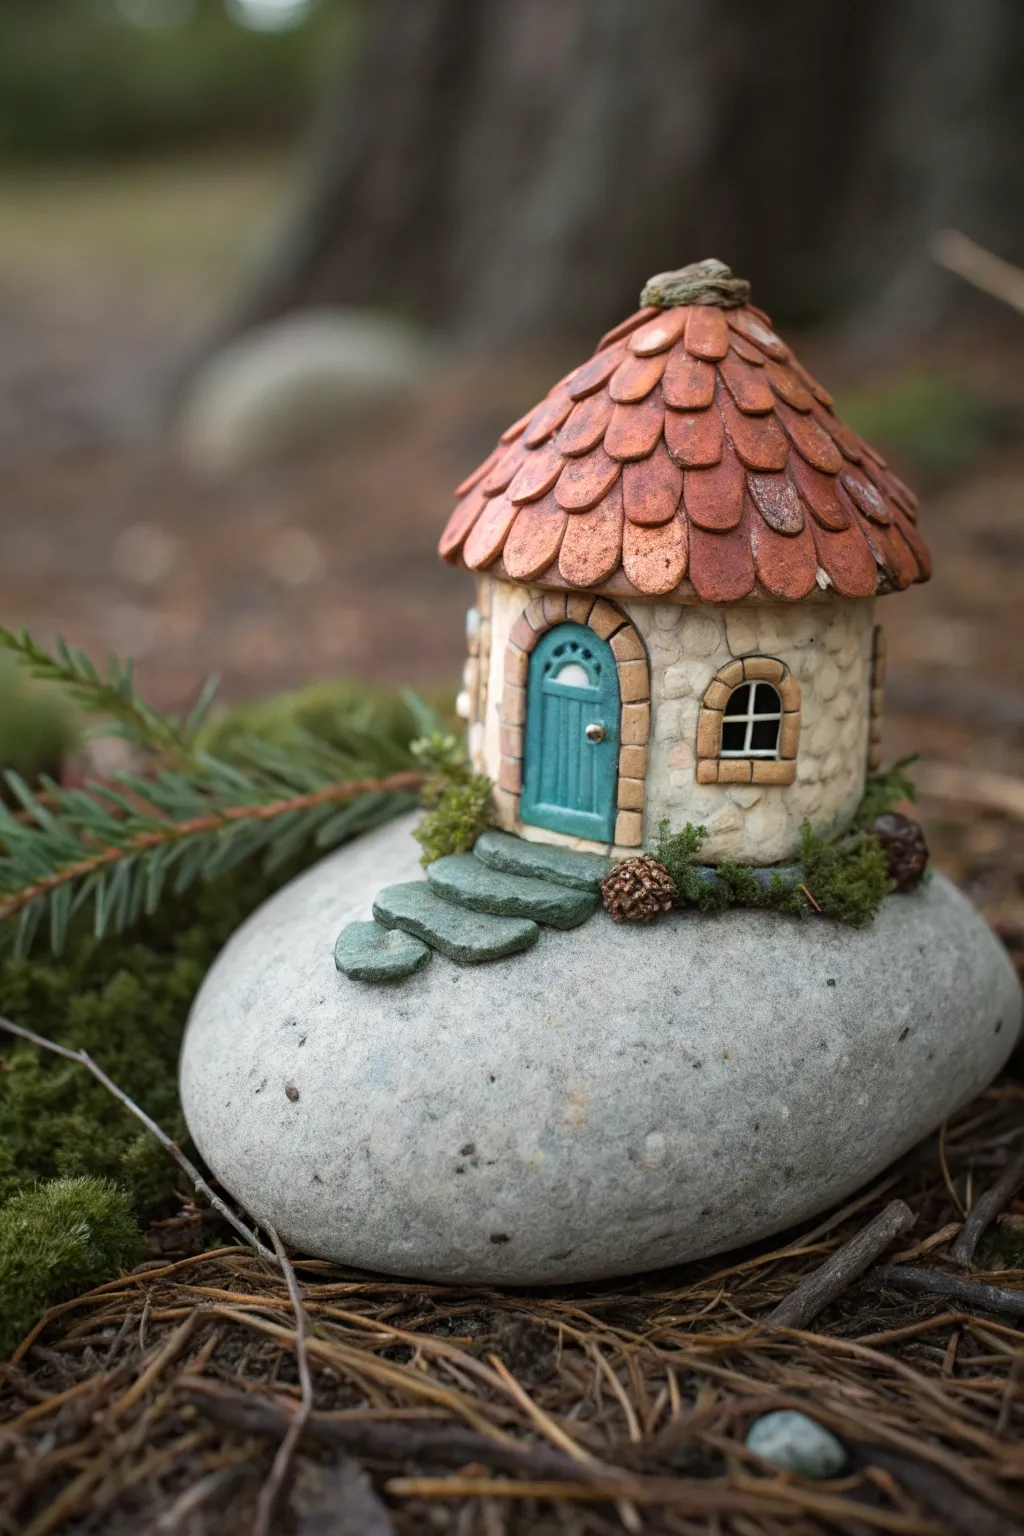
Transform a smooth river rock into an enchanting miniature dwelling with this delightful polymer clay project. This tiny fairy house features a textured stone façade, a scaling terracotta roof, and mossy details that seem to grow right out of the pebble base.
Step-by-Step Guide
Materials
- Smooth river stone (palm-sized, flat top preferred)
- Polymer clay (white, terracotta/brick red, teal, grey, dark brown, green)
- Liquid polymer clay (Bake & Bond)
- Sculpting tools (needle tool, ball stylus, craft knife)
- Aluminum foil
- Acrylic paints (black, brown, white)
- Small stiff paintbrush
- Gloss glaze (optional for the door)
- Textured sponge or toothbrush
Step 1: Base Construction
-
Prep the stone:
Begin by washing and drying your river stone thoroughly to ensure no dust interferes with adhesion. Apply a thin layer of liquid polymer clay or Bake & Bond to the area where the house will sit. -
Form the core:
Crumple a small piece of aluminum foil into a cone or gumdrop shape. This will be the interior support for your house to save clay and reduce weight. -
Wrap the walls:
Roll out a sheet of white or light grey clay. Wrap this around the foil core, smoothing the seams together and blending the bottom edge firmly onto the stone surface. -
Texturize the stone:
Use a small ball stylus to gently press irregular shapes into the white clay walls to mimic stonework. Alternatively, press a textured sponge or toothbrush against the clay for a rough, stucco look.
Clay Won’t Stick?
If the clay keeps lifting off the smooth stone, apply a thin layer of PVA glue or liquid clay and let it get tacky before pressing your base layer down again.
Step 2: Architectural Details
-
Create the door:
Roll a small oval of teal clay and flatten it. Press it onto the front of the house. Use a needle tool to score vertical lines for wood planks and add a tiny silver clay ball for the doorknob. -
Build the archway:
Roll a thin snake of beige or light brown clay. Flatten it slightly and wrap it over the top of the door. Use your knife to mark horizontal lines, creating a brick or stone arch effect. -
Add a window:
Create a small arch shape from black clay and place it on the side wall. Frame it with a beige clay snake similar to the door, then add thin strips of white clay across the black center to form window panes. -
Form the steps:
Mix a little grey and green clay for a slate look. Shape three flat, irregular oval pads and stack them leading up to the door, pressing them firmly onto the river stone base.
Step 3: Roofing and Landscaping
-
Prepare the roof cone:
Place a cone of scrap clay over the top of your house walls to support the shingles. Ensure it has a nice peak. -
Make the shingles:
Roll out a thin sheet of terracotta or brick-red clay. Use a small round cutter (or a straw tip) to punch out many small circles, or hand-cut small U-shapes. -
Apply the roof tiles:
Starting at the bottom edge of the roof, press a row of tiles around the circumference. Overlap the next row slightly on top of the first, staggering the seams. Continue until you reach the peak. -
Cap the peak:
Place a small blob of clay at the very tip to cover the final tile seams. You can texture this to look like a chimney cap or a decorative finial. -
Add nature’s touch:
Take small bits of green clay and rough them up with a needle tool or stiff brush to create a moss texture. Press these patches around the base of the house and near the steps to hide any gaps. -
Pinecones and pebbles:
I like to roll tiny brown teardrops and score them in a cross-hatch pattern to make miniature pinecones. Scatter these near the moss.
Night Light Trick
Use a translucent or glow-in-the-dark clay for the window panes instead of black. After charging in the sun, your heavy stone cottage will look like someone is home at night.
Step 4: Finishing Touches
-
Shading wash:
Before baking, you can brush on a very small amount of soft pastel powder to shade the roof tiles. Alternatively, wait until after baking to apply an acrylic wash. -
Bake the project:
Bake the entire piece (stone included) according to your clay package instructions. The stone can handle the heat, but let it cool down inside the oven to prevent cracking. -
Antique the details:
Once cool, mix a watery wash of black or brown acrylic paint. Brush it over the stone walls and roof, then quickly wipe away the excess with a paper towel. This stays in the crevices to make the textures pop.
Place your finished cottage in a potted plant or on a bookshelf for a hidden touch of magic
Pocket Dragons With Simple Spikes
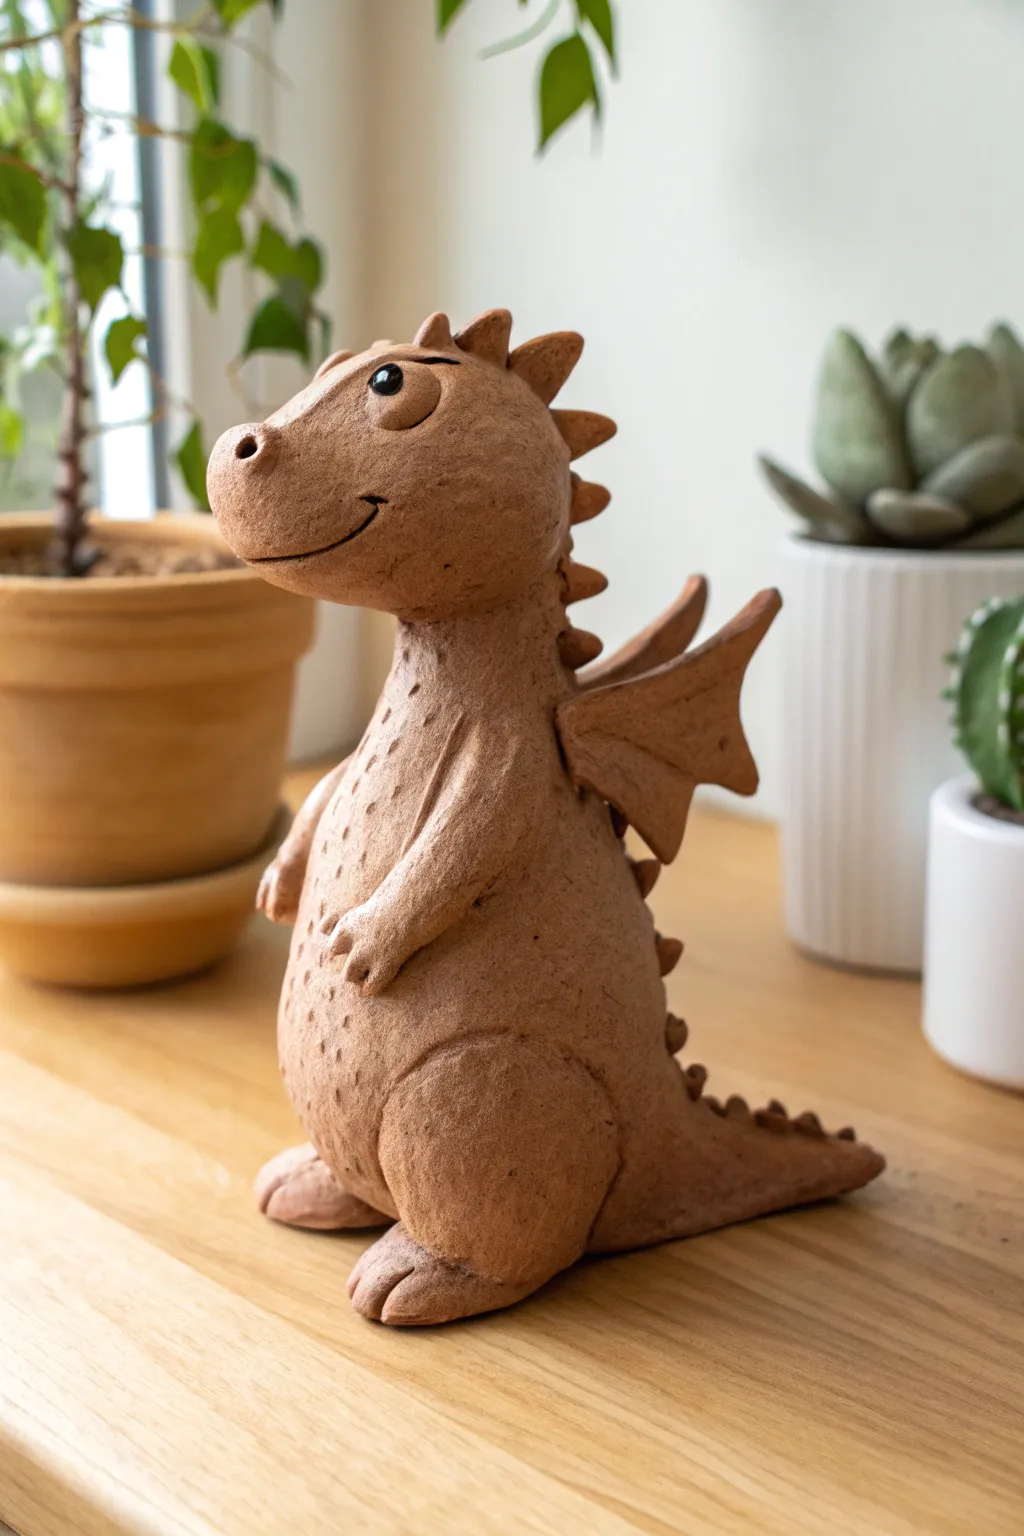
This charming little sculpture captures the warmth of natural clay with a friendly, cartoonish design. Featuring a distinct terracotta finish and whimsical proportions, it’s a perfect desk companion that balances simple shapes with expressive details.
Step-by-Step Tutorial
Materials
- Terracotta-colored polymer clay (or air-dry clay)
- Small rolling pin
- Modeling tools (ball styluses, rubber shapers)
- Needle tool or toothpick
- Small black glass bead (for the eye)
- Texture sponge or toothbrush
- Aluminum foil (for the core)
- Acrylic paint (black and white for eye details, if not using beads)
Step 1: Forming the Body Structure
-
Create the core:
Crumple a piece of aluminum foil into a pear shape to form the main body’s core. This saves clay and keeps the sculpture lightweight. Aim for a shape about 2-3 inches tall. -
Cover the core:
Roll out a sheet of your terracotta clay to about 1/4 inch thickness. Wrap this sheet smoothly around your foil armature, pressing seams together and smoothing them out until invisible. -
Shape the torso:
Massage the clay form to define a chubby belly and a slightly narrower neck area. The finish should be matte, but smooth away any fingerprints. -
Add the head:
Roll a separate ball of clay for the head, slightly elongated into a snout shape. Attach this firmly to the top of the body, blending the clay downwards at the neck joint to secure it.
Cracking Seams?
If you see cracks where limbs join the body, use a drop of baby oil (for polymer) or water (for air-dry) on your finger to smooth and re-bond the clay connection.
Step 2: Adding Limbs and Texture
-
Add the legs:
Form two thick, short ovals for the legs. Press these onto the lower sides of the body. Use a modeling tool to blend the back edge of the leg into the body so it looks integrated, not just stuck on. -
Define the feet:
Before the legs harden, use a knife or needle tool to press two or three indentations into the front of each foot to create toes. -
Form the arms:
Roll two smaller sausage shapes for the arms. Attach them higher up on the body, bending them slightly at the ‘elbow’ so the hands rest against the belly. Add tiny indentations for fingers. -
Attach the tail:
Roll a cone of clay for the tail. Attach the thick end to the lower back of the dragon, blending the seam thoroughly. Curve the tip slightly to the side for a relaxed pose. -
Texturize the skin:
Using a clean toothbrush or a texture sponge, gently tap over the entire surface of the dragon (avoiding the face) to create a subtle, pitted skin texture. -
Add belly details:
With a needle tool, poke shallow, random dots across the belly area to differentiate the chest scales from the rest of the skin.
Realism Trick
Before baking or drying, dust the deepest creases (like under the arms or wing folds) with a tiny bit of darker brown pastel powder to add instant shadow depth.
Step 3: Sculpting the Face and Wings
-
Sculpt the snout:
Use a ball tool to press indentations for nostrils at the tip of the snout. Use a needle tool to carve a long, curving smile line. -
Insert the eye:
Press a small black glass bead into the side of the head for the eye. If you don’t have beads, you can sculpt a small flat circle of clay here. -
Define the eye socket:
Roll a tiny, thin snake of clay and wrap it over the top of the eye to create an eyelid/brow ridge. Blend the top edge into the head. -
Create the wings:
Flatten two triangular pieces of clay. Use a tool to press lines into them to mimic bat-wing webbing. Pinch one corner to make an attachment point. -
Attach the wings:
Press the wings onto the back of the dragon. I like to score the clay slightly at the attachment point first to ensure a strong grip. -
Form the spikes:
Roll many tiny cones of clay. Starting from the top of the head and working down the spine to the tail tip, attach them in a row. Make the head spikes slightly larger than the tail spikes. -
Final refinement:
Look over the whole piece. Smooth any accidental tool marks and ensure the dragon stands stable on its own without tipping.
Set your dragon aside to cure according to your specific clay’s instructions and enjoy your new pocket-sized guardian
Micro Worlds in Bottle-Cap Scenes
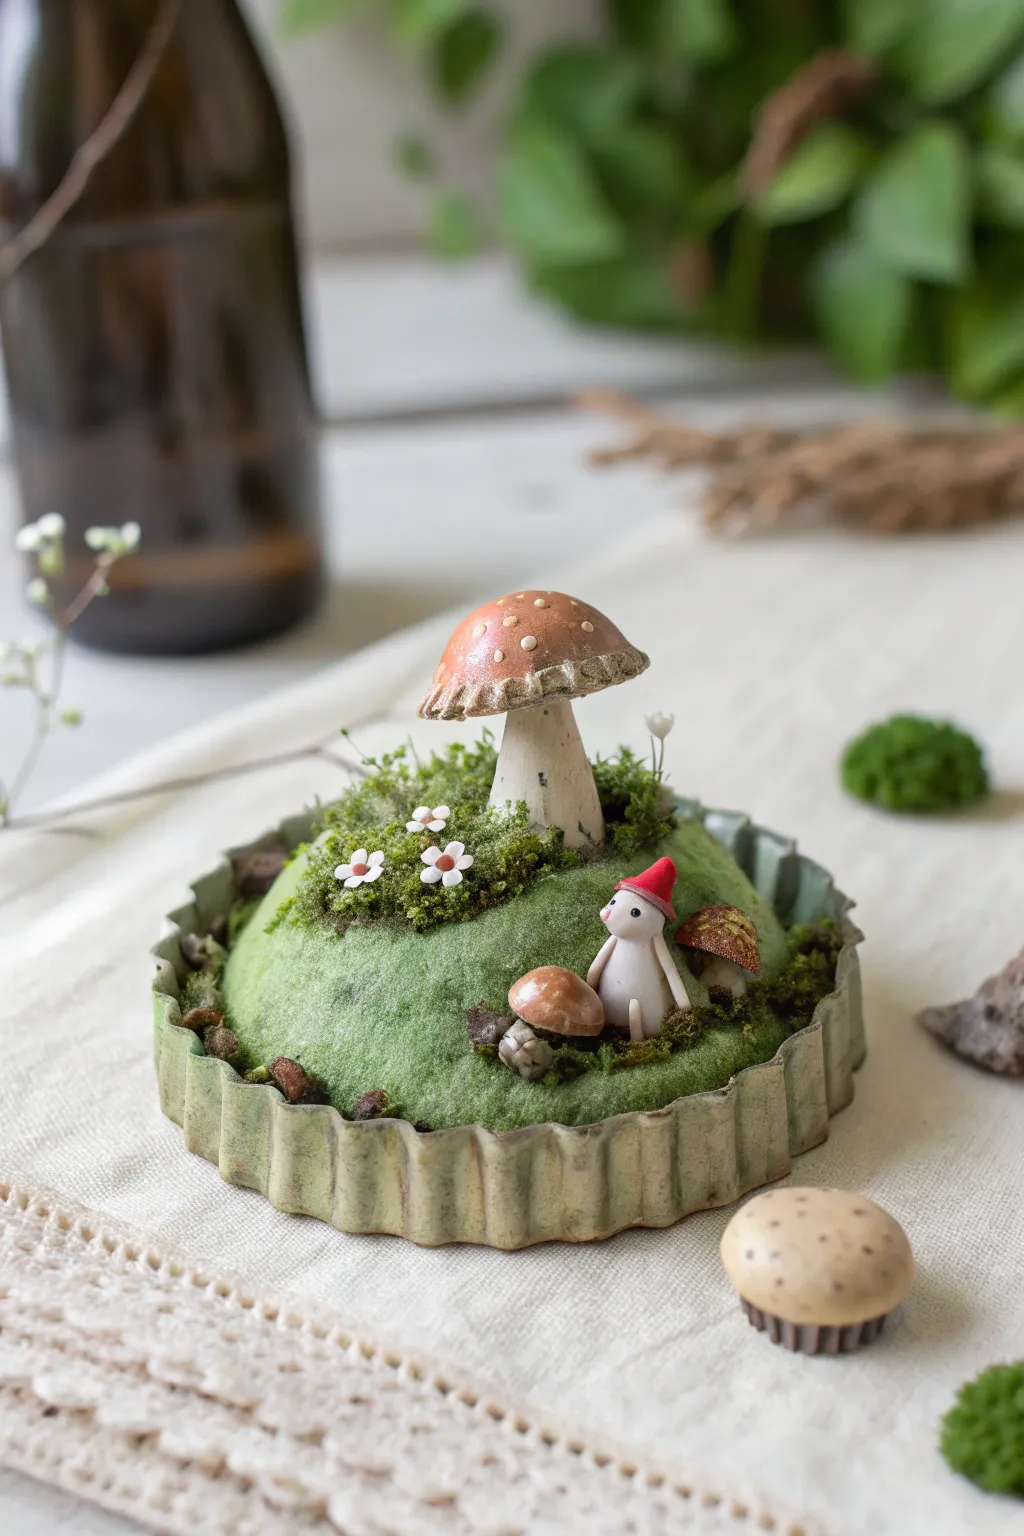
Create a whimsical forest scene captured within a vintage fluted tart tin or bottle cap. This tiny diorama features a prominent clay mushroom, a tiny gnome-like creature, and lush mossy details for a captivating micro-world.
Detailed Instructions
Materials
- Small metal tart tin or large fluted bottle cap
- Air-dry clay or polymer clay (white)
- Aluminum foil (for armature)
- Acrylic paints (olive green, beige, red, white, brown)
- Fine-tipped paintbrush
- Green wool roving or green flocking powder
- Dried moss bits
- Strong craft glue (e.g., tacky glue)
- Needle felting needle (optional, if using wool)
- Sculpting tools or toothpicks
Step 1: Preparing the Base and Terrain
-
Prepare the Tin:
Clean your metal tart tin thoroughly. If it’s too shiny, give it a base coat of light beige mixed with a touch of olive green acrylic paint to create an aged, vintage look. Let it dry completely. -
Form the Hill Base:
Crumple a small ball of aluminum foil to form a dome shape that fits snugly inside the tin. This saves clay and keeps the sculpture light. -
Cover with Clay:
Roll out a sheet of white clay and drape it over the foil dome. Smooth the edges down into the rim of the tin, ensuring the dome shape is even and rounded. -
Texture the Ground:
While the clay is still soft, gently press a textured sponge or stiff brush onto the surface to create an earthen texture. This will help your moss or flocking adhere later. -
Initial Coloring:
Once the clay dome is pressed in place, paint the entire surface with an earthy green acrylic paint. This acts as an underpainting for your grass layer.
Step 2: Sculpting the Residents
-
Sculpt the Main Mushroom Stem:
Roll a thick cylinder of white clay for the mushroom stem. Curve it slightly for a natural look and flare the base so it stands well. Press it securely into the center of your hill. -
Form the Mushroom Cap:
Create a dome shape for the cap. Use a sculpting tool or toothpick to create vertical indentations around the rim, mimicking the gills underneath. Attach this to your stem. -
Create the Tiny Creature:
Roll a small, smooth oval of clay for the body. Use a very small ball for the head. Fashion a tiny pointed cone for a hat and attach it to the head. -
Add Creature Details:
Add tiny clay sausages for arms. Position the creature so it sits naturally on the slope of the hill. I find using a needle tool helps to blend the seams where limbs attach without squashing the shapes. -
Smaller Mushrooms:
Sculpt two or three much smaller mushroom shapes to accompany the main one. Place these near the creature to create a cozy cluster. -
Drying Time:
Allow all clay elements to dry or bake according to your specific clay’s package instructions. Ensure they are hard before proceeding to paint.
Loose Mushroom?
If the mushroom wobbles after baking, remove it gently, add a drop of superglue into the indentation on the hill, and press it back in for a invisible, permanent fix.
Step 3: Painting and Assembly
-
Paint the Mushroom Cap:
Paint the large mushroom cap a warm, brownish-red. Add white dots using the very tip of a toothpick for that classic toadstool look. -
Detail the Stem:
Wash the stem with a diluted brown paint to settle into the textures, wiping away the excess to leave an aged effect. -
Paint the Creature:
Paint the creature’s body white and the hat a vibrant red. Use a fine-point marker or the tiniest brush tip to add two black dots for eyes and a pink dot for the nose. -
Apply the Grass Layer:
Coat the green painted hill with craft glue. If using wool roving, gently needle-felt or press a thin layer of green wool over the surface for a soft, mossy texture. Alternatively, sprinkle green flocking powder heavily over the glue. -
Add Moss Accents:
Glue tiny bits of real dried moss around the base of the mushroom and near the rim of the tin to add realistic variation in texture. -
Tiny Flowers:
Roll incredibly tiny balls of white clay and flatten them into flower shapes, or use pre-made paper punch flowers. Glue three or four of these into the mossy areas. -
Final Touches:
For a final bit of realism, dry-brush a tiny amount of brown paint on the edges of the tin to enhance the rusted, antique aesthetic.
Magic Dust
Mix a pinch of superfine iridescent glitter into your white paint for the flower centers or mushroom dots to give the scene a magical, morning-dew sparkle.
Place your finished micro-world on a shelf where the light catches those tiny details and enjoy your miniature garden