
Valentine’s projects are my favorite excuse to go all-in on hearts, sweet pastel color palettes, and tiny, giftable details. If you’ve got some polymer clay and a cozy afternoon, you can turn classic love-day motifs into jewelry, charms, and keepsakes that actually get used.
Mini Heart Stud Earrings in Pink and Red

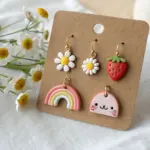
These tiny, puffy heart earrings are the perfect subtle nod to Valentine’s Day, featuring a mix of deep red, soft pink, and white. Their high-gloss resin finish gives them a professional, candy-like appearance that elevates simple polymer clay into jewelry-quality pieces.
Step-by-Step Tutorial
Materials
- Polymer clay (Deep Red, Baby Pink, White)
- Small heart-shaped cutters (approx. 5-7mm)
- Stainless steel stud earring posts
- UV resin (or two-part epoxy resin)
- UV lamp (if using UV resin)
- Super glue or E6000 jewelry glue
- Ceramic tile or glass work surface
- Pasta machine or acrylic roller
- Clean detail brush or toothpick
- Wet wipes or rubbing alcohol
- Sandpaper (optional, fine grit)
Step 1: Shaping the Hearts
-
Condition the clay:
Begin by thoroughly kneading your red, pink, and white polymer clay separately until each is soft and pliable. This conditioning step is crucial to prevent cracks later on. -
Roll out sheets:
Roll each color into a slab. For stud earrings, you want a medium thickness—roughly 2mm to 3mm is ideal. If you have a pasta machine, a middle setting works best; otherwise, use an acrylic roller with depth guides. -
Cut the shapes:
Press your small heart cutter firmly into the clay. For the set shown, you will need two red hearts, one pink, and one white heart. Wiggle the cutter slightly before lifting to ensure a clean release. -
Smooth the edges:
Gently gently stroke the edges of each cut heart with your fingertip to round them off slightly. This removes the sharp ‘cookie cutter’ look and gives the edges a softer, more finished appearance. -
Clean the surface:
Before baking, inspect the hearts for any dust or fingerprints. A light wipe with a little baby oil or rubbing alcohol on a brush can smooth out imperfections instantly.
Step 2: Baking and Assembly
-
Bake the pieces:
Place your clay hearts on a ceramic tile and bake according to your specific clay brand’s package instructions. Usually, this is around 275°F (135°C) for 15-30 minutes. -
Cool down:
Allow the pieces to cool completely on the tile. Do not attempt to move them while they are hot, as the clay is still fragile at this stage. -
Sand the backs (optional):
If the backs of your hearts aren’t perfectly flat, briefly rub them against a piece of fine-grit sandpaper placed on a flat surface to create a level bonding area. -
Attach the posts:
Apply a tiny dot of super glue or strong jewelry adhesive like E6000 to the flat pad of the earring post. Press this firmly onto the back of the cooled clay heart. -
Let glue set:
Allow the glue to cure fully before moving to the resin step. This ensures the post won’t slide around while you are trying to apply the gloss finish.
Clean Edges Trick
Before baking, place a sheet of cling wrap over your clay slab. Press your cutter down *through* the plastic. This creates naturally rounded, bevelled edges on your hearts without manual smoothing.
Step 3: Resin Glazing
-
Prepare for resin:
Stick the posts of the earrings into a piece of scrap clay, a foam block, or a dedicated earring stand. This holds the hearts level and horizontal, preventing the resin from dripping off one side. -
Apply the first drop:
Squeeze a small drop of UV resin directly onto the center of the first heart. It’s better to start with too little than too much to avoid overflow. -
Spread to edges:
Using a toothpick or a fine detail brush, gently drag the resin from the center out toward the edges. The goal is to cover the entire surface right up to the rim without going over the side. -
Creation of the dome:
Surface tension is your friend here. Add tiny amounts of resin until you achieve a nice, rounded dome effect. I like to get eye-level with the piece to check the curve. -
Pop bubbles:
If you see any tiny air bubbles trapped in the resin, pass a lighter flame quickly over the surface (don’t hold it there!) or use your needle tool to pop them. -
Cure the resin:
If using UV resin, place the stand under your UV lamp for 2-4 minutes until the surface is rock hard and non-tacky. If using epoxy, cover the pieces with a dust dome and wait 24 hours. -
Final inspection:
Check the edges once cured. If there are any sharp resin bits that dripped, you can carefully file them away, but careful application usually avoids this.
Add Sparkle
Mix a tiny pinch of ultra-fine holographic glitter into your UV resin before doming or embed a tiny rhinestone into the wet resin corner for a glamorous, sparkling variation.
Pair these glossy little hearts with a matching card for a truly heartfelt handmade gift


Marbled Heart Pendant Necklace
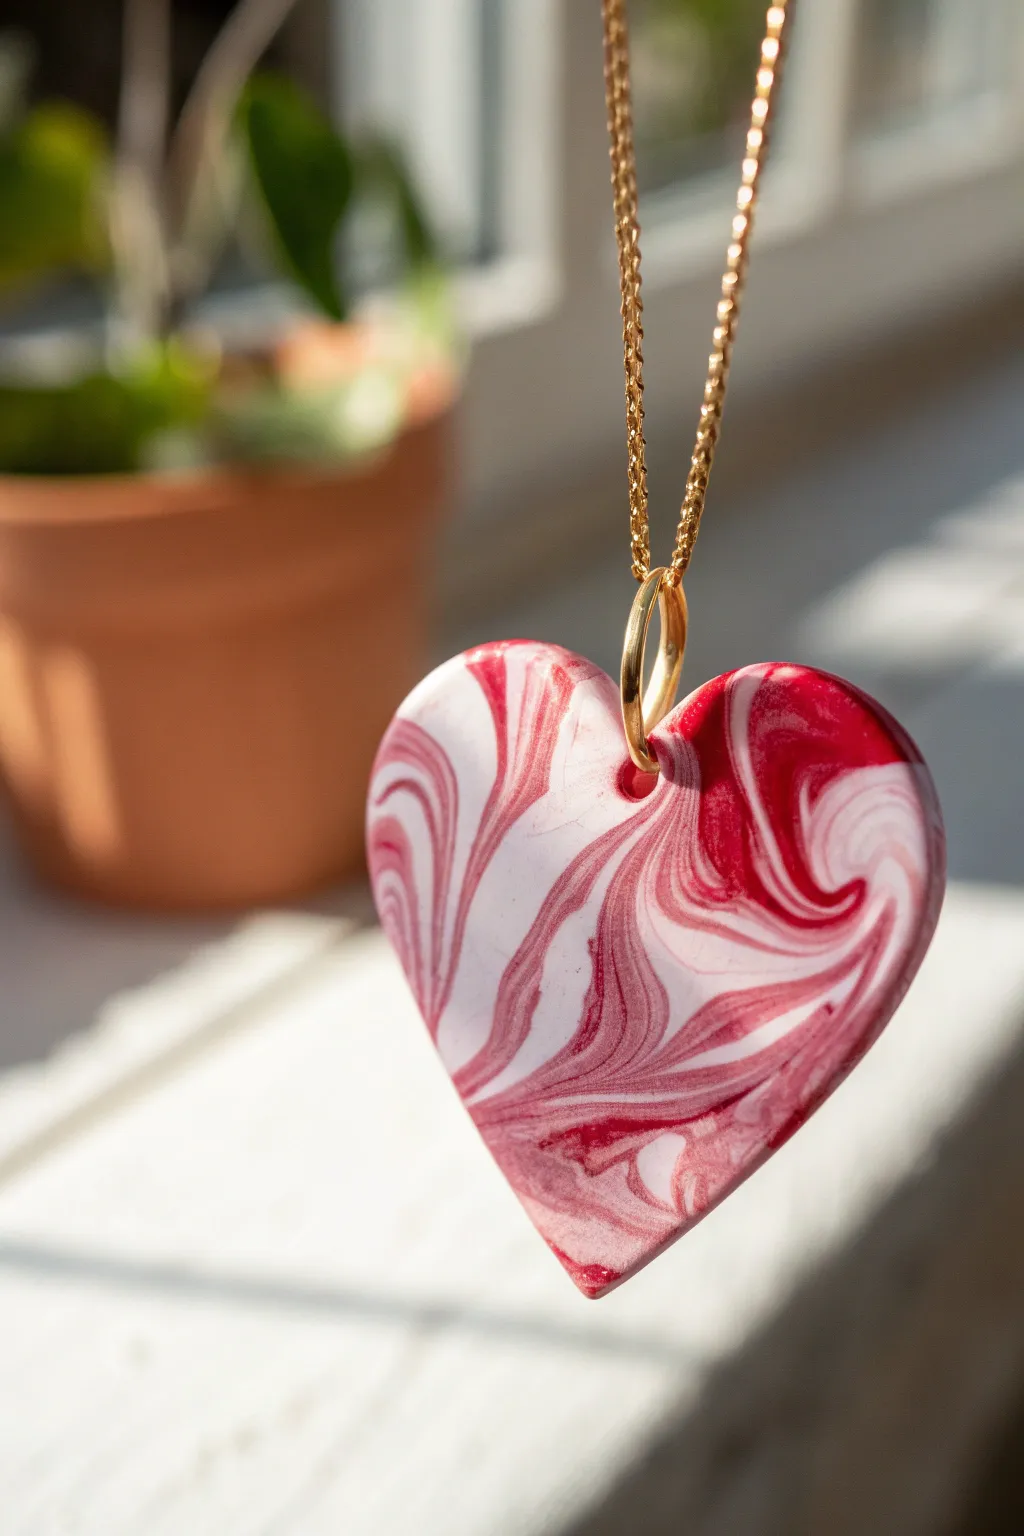
Capture the fluid beauty of love with this striking red and white marbled heart pendant. The swirling patterns mimic the look of natural stone while keeping the lightweight versatility of polymer clay, making it a perfect handmade gift for Valentine’s Day.
How-To Guide
Materials
- White polymer clay (approx. 1/2 block)
- Red polymer clay (approx. 1/4 block)
- Translucent polymer clay (optional, for depth)
- Acrylic rolling pin or clay machine
- Heart-shaped clay cutter (medium size)
- Clay blade or craft knife
- Small jump ring (gold)
- Gold chain
- Hand drill or needle tool
- Glossy polymer clay glaze or UV resin
- Soft paintbrush
- Oven baking tray and cardstock
Step 1: Preparing the Clay
-
Conditioning:
Begin by thoroughly conditioning your white and red clay separately. Knead them warm in your hands until they are soft and pliable, ensuring there are no air bubbles trapped inside. -
Forming logs:
Roll the white clay into a thick log, about 3 inches long. Roll the red clay into a much thinner log, like a snake, roughly the same length as the white one. -
Combining colors:
Twist the red snake gently around the white log. If you are using translucent clay, you can add a very thin snake of that as well to create a quartz-like depth.
Step 2: Creating the Marble Effect
-
Twisting:
Grip the combined clay log at both ends and twist in opposite directions. Keep twisting until the red stripes look very thin and diagonal, almost like a candy cane. -
Folding:
Fold the twisted log in half on itself. Twist the new, doubled log again. This layering process helps distribute the color randomly. -
Rolling into a ball:
Once you have a tight twist, roll the entire piece into a smooth ball between your palms. This compresses the layers together. -
Flattening:
Use your acrylic roller to flatten the ball into a sheet. Aim for a thickness of about 4-5mm—you want the pendant to feel substantial, not flimsy. -
Checking the pattern:
Examine the swirls. If the marbling isn’t intricate enough for your taste, fold the sheet, roll it into a ball again, and re-flatten. Don’t overdo it, or the colors will turn pink.
Keep it clean
White clay picks up everything! Wipe your work surface, tools, and hands with a baby wipe or alcohol before handling the white clay to keep it pristine.
Step 3: Shaping and Refining
-
Selection:
Look at your clay sheet and find the area with the most pleasing swirl pattern. I usually look for a spot where the red creates dynamic curves against the white. -
Cutting:
Press your heart-shaped cutter firmly into the chosen spot. Give it a tiny wiggle to ensure it cuts all the way through, then lift it out. -
Smoothing edges:
Gently rub the edges of the heart with your finger to smooth out any harsh lines or burrs left by the cutter. The edges should look rounded and soft. -
Drilling the hole:
Using a needle tool, pierce a hole near the top center of the heart (at the dip between the lobes) or slightly off to one side on a lobe, depending on how you want it to hang. Ensure the hole is wide enough for your jump ring.
Muddy colors?
If your swirl turned into a solid pink blob, you likely over-mixed. Stop sooner next time! The goal is distinct streaks, not a uniform blend.
Step 4: Baking and Assembly
-
Baking:
Place the heart on a piece of cardstock on your baking tray (this prevents shiny spots on the back). Bake according to your clay package instructions, usually at 275°F (130°C) for 30 minutes per 1/4 inch of thickness. -
Cooling:
Allow the piece to cool completely in the oven or on a wire rack before handling. Polymer clay is fragile while hot. -
Glazing:
Apply a thin layer of gloss glaze or UV resin to the front and sides of the heart to give it that polished, ceramic-like shine seen in the photo. Let it dry or cure completely. -
Attaching hardware:
Open your gold jump ring using pliers—twist it sideways, don’t pull it apart. Slide it through the hole in the heart. -
Adding the chain:
Before closing the jump ring, slide your gold chain through it. Twist the jump ring back until the ends meet perfectly flush.
Now you have a stunning, one-of-a-kind stone effect pendant ready to wear or gift


Heart Keychains With Personalized Initials
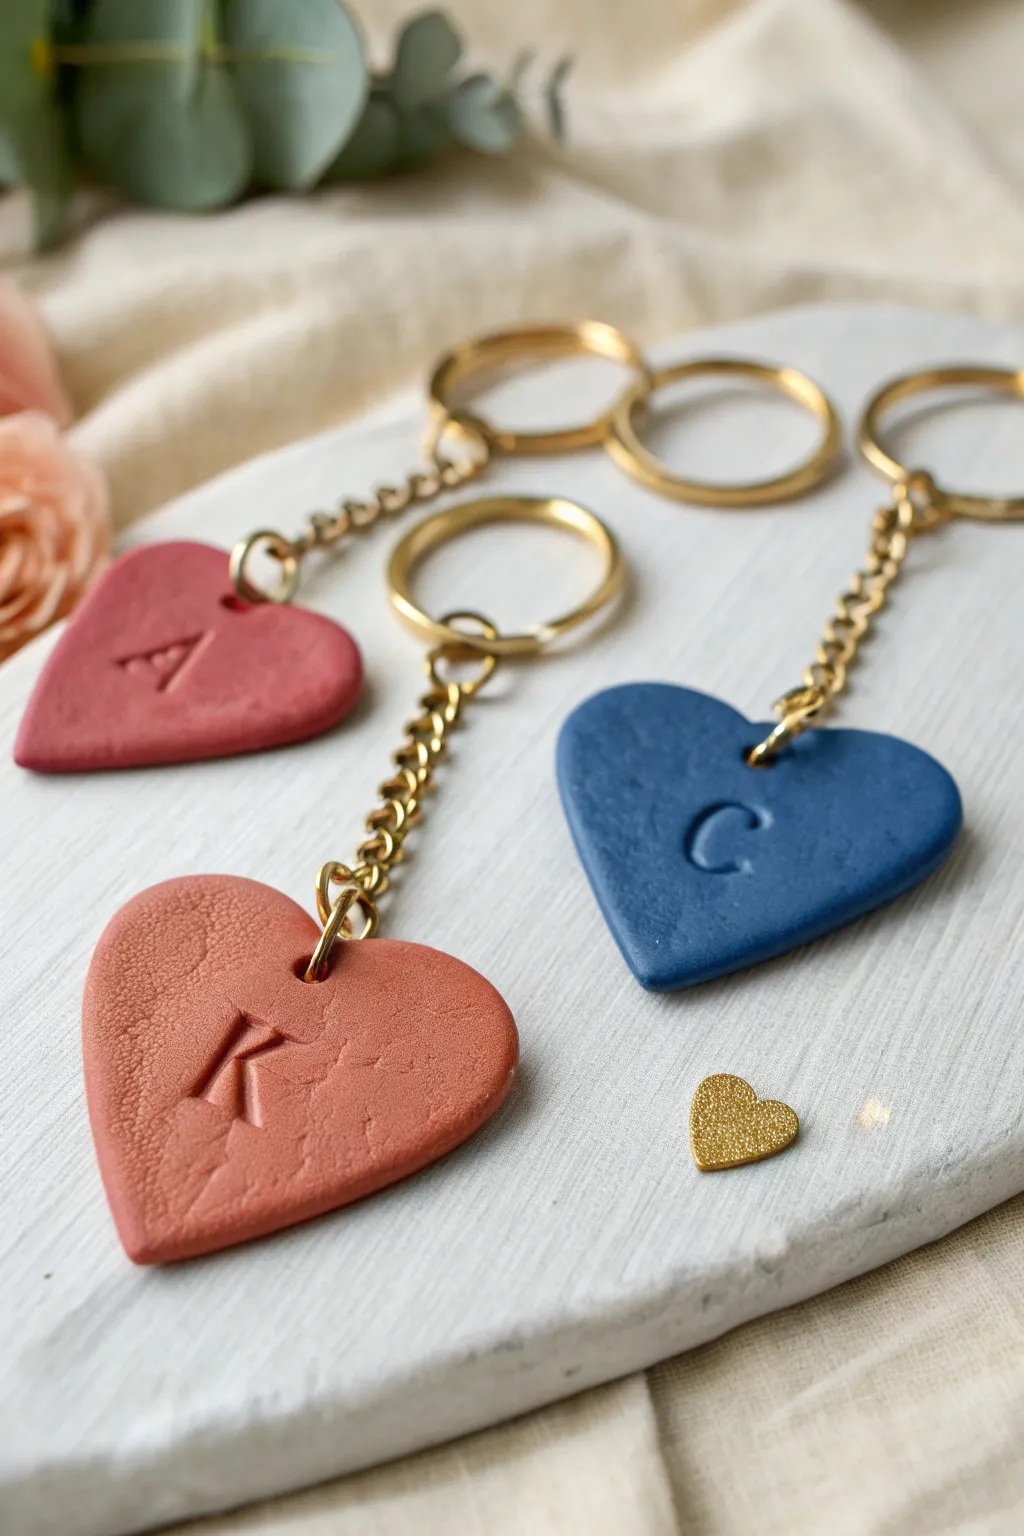
These charming polymer clay keychains make the perfect personalized Valentine’s gift, featuring a soft matte texture and classic indented initials. Their sturdy design and elegant gold hardware give them a professional finish that looks store-bought but carries the warmth of a handmade treasure.
Step-by-Step Tutorial
Materials
- Polymer clay (matte red, terracotta, and denim blue)
- Acrylic roller or pasta machine
- Heart-shaped cookie cutter (approx. 2 inches)
- Letter stamp set (small sans-serif font)
- Texture sponge or coarse sandpaper (optional)
- Metal jump rings (gold or brass finish)
- Keychain rings with chains (gold or brass finish)
- Jewelry pliers (flat nose and round nose)
- Small round cutter or piercing tool (for the hole)
- Baking sheet with parchment paper
- Oven
Step 1: Prepping the Clay Base
-
Condition the clay:
Begin by warming a block of polymer clay in your hands, kneading it until it is soft and pliable. This conditioning step is crucial to prevent cracks later on. -
Roll it out:
Using an acrylic roller or a pasta machine, flatten the clay into a slab. You want a thickness of about 1/4 inch (6mm) so the keychain feels substantial and durable. -
Add subtle texture:
For that organic, stone-like surface seen in the image, gently press a coarse texture sponge or a piece of sandpaper onto the surface of the clay slab before cutting. -
Cut the shapes:
Press your heart-shaped cutter firmly into the clay. Give it a tiny wiggle to ensure a clean separation from the surrounding clay, then lift the cutter away. -
Smooth the edges:
Lift the clay heart gently. Run your fingertip lightly along the cut edges to smooth down any sharp ridges or loose bits left by the cutter.
Fixing Fingerprints
If you notice fingerprints after baking, don’t worry. Lightly sand the surface with fine-grit sandpaper and buff with a denim cloth to restore the matte finish.
Step 2: Personalizing and Baking
-
Position the stamp:
Select your desired initial from the letter stamp set. Hover it over the center of the heart to ensure your placement is visually balanced. -
Make the impression:
Press the stamp straight down into the clay with firm, even pressure. You want a distinct indentation, but be careful not to push all the way through the slab. -
Create the hardware hole:
Using a small piercing tool or a very small round cutter, punch a hole near the top center of the heart. Ensure it isn’t too close to the edge to prevent tearing. -
Inspect for lint:
Give the piece a final check. If you see any dust or fingerprints, I like to lightly dab them away with a bit of rubbing alcohol on a Q-tip. -
Bake the hearts:
Place your hearts on a parchment-lined baking sheet. Bake according to your brand of clay’s instructions—usually around 275°F (135°C) for 30 minutes for this thickness. -
Cool down:
Allow the hearts to cool completely on the baking sheet. They will be slightly soft when hot but will harden fully as they reach room temperature.
Paint Fill Magic
Make the initial pop by painting the indented letter with acrylic paint. Wipe the surface immediately with a wet wipe, leaving paint only in the recessed groove.
Step 3: Assembly
-
Open the jump ring:
Grasp a gold jump ring with two pairs of pliers. Twist the ends away from each other (front to back) to open the ring without distorting its round shape. -
Thread the heart:
Slide the open jump ring through the hole you created in the baked clay heart. -
Attach the chain:
Loop the bottom link of the keychain hardware onto the same jump ring. -
Close the ring:
Use your pliers to twist the jump ring ends back toward each other until they meet perfectly flush, ensuring the heart doesn’t slip off. -
Make a mini heart charm:
If you have scrap clay, you can make a tiny contrasting heart (like the gold glitter one shown) using the smallest cutter you have and baking it alongside the main pieces.
Attach these to your keys or wrap them up as thoughtful gifts for your friends.


Love Letter Envelope Dangle Earrings
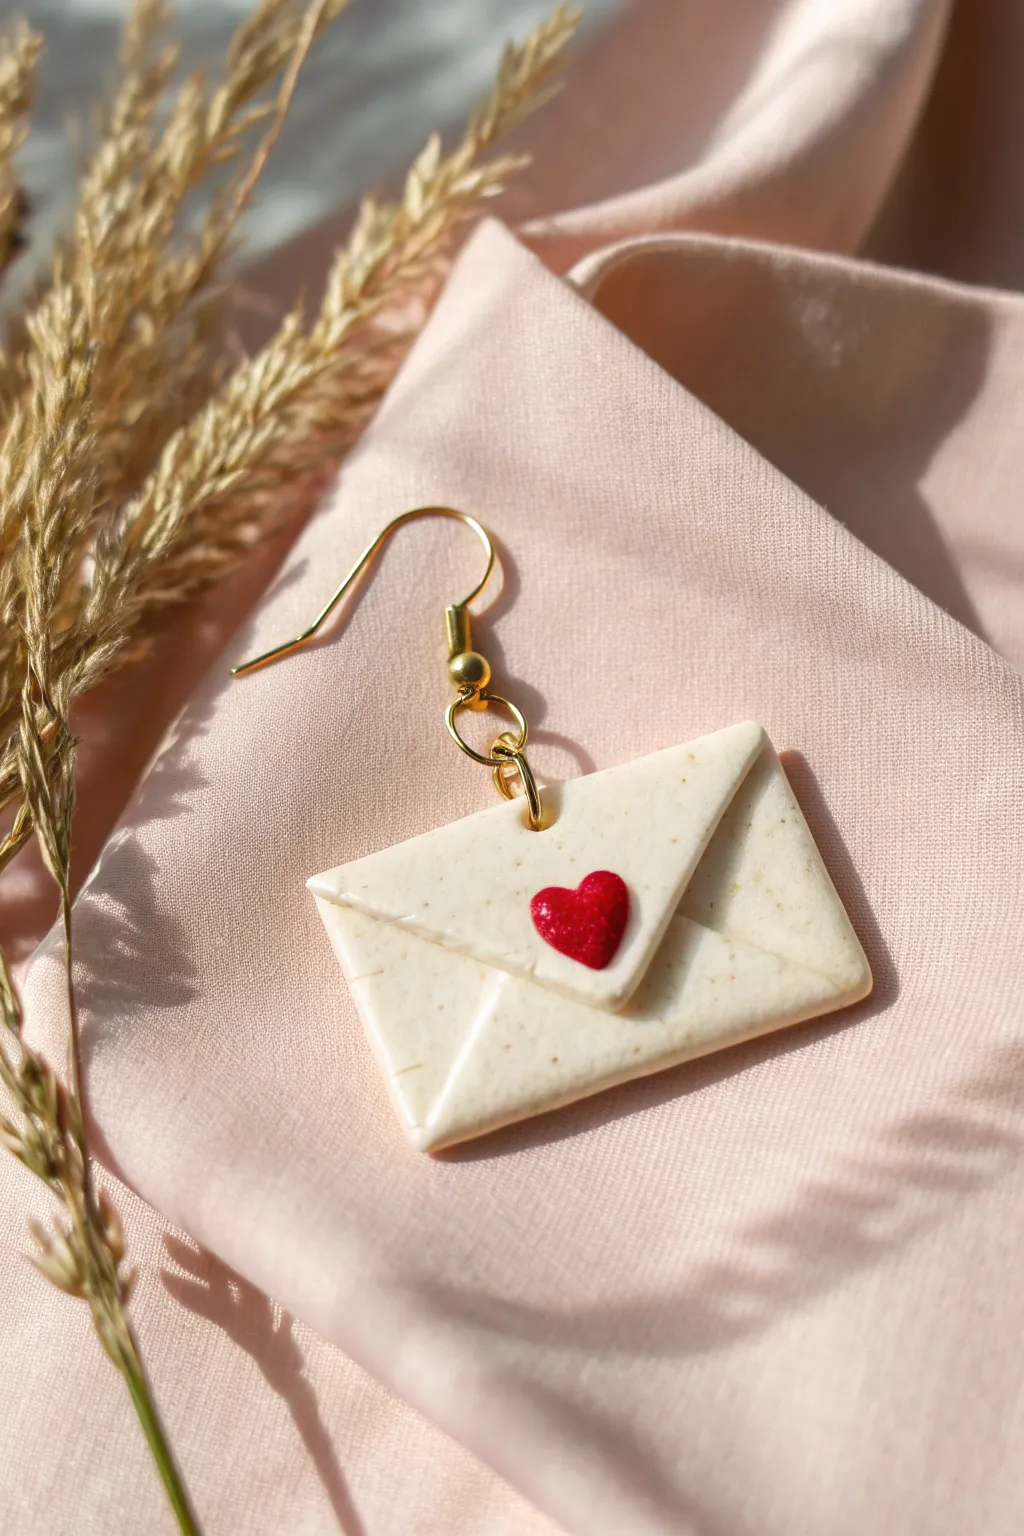
These charming dangle earrings evoke the romance of handwritten notes, featuring a miniature envelope design complete with a tiny red heart seal. The speckled beige clay gives them a lovely natural paper look, making them a subtle yet sweet accessory for Valentine’s Day.
How-To Guide
Materials
- Polymer clay in speckled beige (or granite)
- Polymer clay in red
- Rolling pin or pasta machine
- Sharp craft knife or tissue blade
- Small heart cutter (optional) or needle tool
- Two gold jump rings (4mm or 5mm)
- Two gold fishhook ear wires
- Jewelry pliers (flat nose and round nose)
- Small hand drill or needle tool (for piercing)
- Baking sheet and parchment paper
- Oven
Step 1: Shaping the Envelope Base
-
Condition the Clay:
Begin by thoroughly conditioning your speckled beige polymer clay until it is soft and pliable. Warm clay prevents cracking later on. -
Roll the Sheets:
Roll the beige clay out into a flat, even sheet. Aim for a thickness of about 2mm—thick enough to be sturdy but light enough for earrings. -
Cut Rectangles:
Using your craft knife or tissue blade, cut out two identical rectangles. These should be roughly 1 inch wide by 0.75 inches tall, though you can adjust the size to your preference. -
Indent the Flap Lines:
Take your craft knife and very lightly score lines to mimic the back of an envelope. Draw a ‘V’ shape starting from the top corners meeting in the center, and angled lines from the bottom corners meeting the ‘V’. -
Create the Top Flap:
Cut a small triangle out of the same beige clay sheet. This triangle should fit perfectly over the top section of your rectangle to create a raised, realistic envelope flap. -
Attach the Flap:
Gently press this triangle onto the top of the rectangle, aligning the top edge. Ensure it blends slightly but retains a distinct edge to look like folded paper.
Step 2: Adding the Heart Seal
-
Prepare Red Clay:
Condition a very small amount of red polymer clay. You only need a tiny pinch for the seals. -
Shape the Hearts:
Roll two tiny balls of red clay. Flatten them slightly and use a needle tool to indent the top center and shape the bottom into a point, creating a heart. Alternatively, use a micro heart cutter if you have one. -
Place the Seal:
Press the tiny red heart firmly onto the tip of the triangle flap where it meets the center of the envelope. This acts as the ‘wax seal’ for your love letter. -
Texture the Heart (Optional):
For a little extra detail, you can gently tap the surface of the red heart with an old toothbrush or sandpaper to give it a matte texture.
Sticky Fingerprints?
Before baking, lightly brush the clay surface with a tiny bit of rubbing alcohol or cornstarch. This smooths out any accidental fingerprints.
Step 3: Finishing and Assembly
-
Pierce the Hole:
Using a needle tool, carefully poke a hole at the very top center of the envelope flap. Make sure the hole is wide enough for your jump ring but not too close to the edge. -
Bake:
Place your clay envelopes on a parchment-lined baking sheet. Bake according to your specific clay brand’s instructions (usually 275°F/135°C for 15-30 minutes). I generally bake for the full 30 minutes to ensure durability. -
Cool Down:
Let the pieces cool completely inside the oven or on a wire rack. Polymer clay is strongest once it has fully cooled. -
Open Jump Rings:
Using two pairs of pliers, twist your gold jump rings open laterally (front-to-back, not pulling apart). -
Attach Hardware:
Thread an open jump ring through the hole you created in the clay envelope. -
Connect Ear Wire:
Add the loop of the fishhook ear wire onto the jump ring before closing. Ensure the earring faces forward by checking the orientation of the ear wire loop. -
Close the Ring:
Use the pliers to twist the jump ring back into a closed circle, ensuring the ends meet flush so the hardware doesn’t slip off.
Glaze The Heart
After baking, apply a drop of UV resin or glossy glaze just to the red heart. It makes the ‘wax seal’ pop and look shiny against the matte paper.
Wear your new love letters with pride or gift them to someone special to carry a little message of affection

The Complete Guide to Pottery Troubleshooting
Uncover the most common ceramic mistakes—from cracking clay to failed glazes—and learn how to fix them fast.
Cupid Arrow Through a Heart Charm
Capture the sweetness of Valentine’s Day with this rustic, textured clay heart pierced by Cupid’s arrow. The charming terracotta finish and delicate white detailing create a timeless keepsake perfect for gifting or hanging as seasonal decor.
Step-by-Step Guide
Materials
- Polymer clay (terracotta or reddish-pink)
- Polymer clay (white)
- Heart-shaped cookie cutter (medium size)
- Texture tools (sandpaper or stiff bristle brush)
- Acrylic paint (white)
- Fine detail paintbrush or toothpick
- Jute twine or rustic string
- Clay roller or pasta machine
- Craft knife or scalpel
- Needle tool or piercer
- Oven for baking
Step 1: Shaping the Base
-
Prepare the Clay:
Condition your terracotta or reddish-pink polymer clay by kneading it until it is soft and pliable. Use a roller to flatten it into a sheet about 1/4 inch thick. I prefer a slightly thicker slab for this project as it gives the ornament a more substantial, ceramic look. -
Cut the Shape:
Press your heart-shaped cookie cutter firmly into the clay sheet. Remove the excess clay from around the cutter before lifting the heart shape to ensure clean edges. -
Smooth the Edges:
Gently run your finger along the cut edges of the heart to soften the sharpness left by the cutter. You want it to look hand-molded rather than mechanically cut. -
Add Texture:
To achieve that stony, matte look seen in the photo, gently press a piece of coarse sandpaper or use a stiff bristle brush over the entire surface of the heart. This removes the plastic shine typical of polymer clay. -
Create the Hanging Hole:
Use a straw or a clay piercing tool to punch a hole near the top center of the heart, right in the cleavage of the shape. Ensure the hole is large enough to thread your jute twine through later.
Clean Clay Pro-Tip
White clay picks up lint easily! Clean your hands and workspace thoroughly with a baby wipe before handling the white clay for the arrow to keep it pristine.
Step 2: Crafting the Arrow
-
Roll the Shaft:
Take a very small amount of white polymer clay and roll it into a thin, even snake. This will be the shaft of the arrow. -
Attach the Shaft:
Lay the thin white snake diagonally across the heart. Press it down ever so slightly so it adheres to the textured surface. -
Form the Arrowhead:
Flatten a tiny ball of white clay into a triangle shape. Use your craft knife to cut a ‘V’ shape into the base of the triangle to define the barbs. Attach this to the lower left end of the shaft. -
Sculpt the Fletching:
For the feathers (fletching) at the top right, flatten another small piece of white clay into a rounded rectangle shape. Attach it to the upper end of the shaft. -
Detail the Feathers:
Using a craft knife or needle tool, press diagonal lines into the fletching clay to mimic the texture of feathers. Make sure these indentations are deep enough to see but don’t cut all the way through. -
Connect the Arrow:
Ensure the arrow looks like one continuous piece piercing through the unseen depth of the heart, although for this surface design, it rests comfortably on top.
Level Up: Scented Hearts
Mix a drop of essential oil (like rose or vanilla) into the clay during the conditioning phase. The porous texture will hold a subtle scent for a sensory gift.
Step 3: Finishing Touches
-
Pre-Bake Detailing:
Before baking, dampen a small brush or toothpick with white acrylic paint. Gently tap small clusters of dots onto the terracotta surface around the arrow to create a speckled, starry effect. -
Bake the Clay:
Place your heart on a ceramic tile or baking sheet lined with parchment paper. Bake according to your clay manufacturer’s specific instructions (usually around 275°F or 130°C). -
Cool Down:
Let the piece cool completely inside the oven or on a wire rack. Do not handle it while hot, as the clay is still fragile. -
Seal (Optional):
If you want to protect the paint dots, apply a very thin layer of matte varnish. Avoid glossy finishes to maintain the rustic aesthetic. -
Add the Hanger:
Cut a length of jute twine or rustic string. Fold it in half and feed the loop through the hole you made earlier. -
Secure the Loop:
Pass the loose ends of the twine through the loop and pull tight to create a lark’s head knot. Tie the ends together at the top to complete the hanger.
Hang your lovely creation on a branch display or tie it to a gift box for a heartfelt handmade touch.
Tiny Faux Chocolate Box Charms
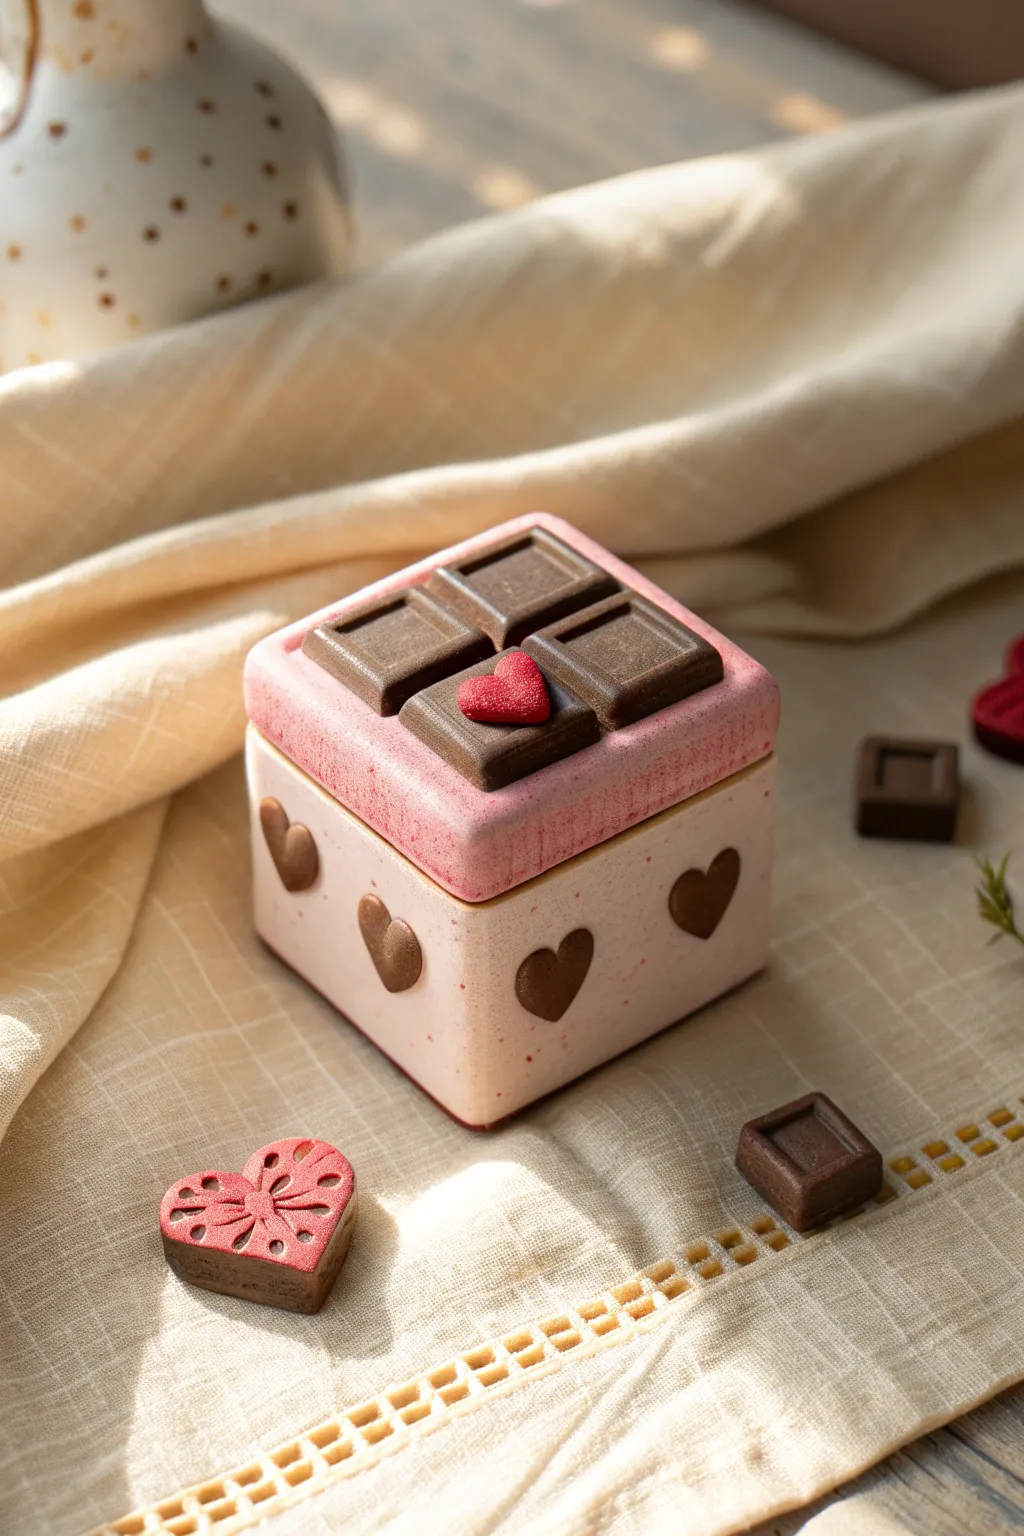
These adorable miniature boxes look good enough to eat with their convincing cake-like texture and rich chocolate toppings. Perfect for holding tiny trinkets or giving as a keepsake, this project combines simple slab building with delightful realistic detailing.
How-To Guide
Materials
- Polymer clay (pale pink, deep brown, bright red)
- Square clay cutter (approx. 1.5 – 2 inches)
- Liquid polymer clay (translucent or Bake & Bond)
- Soft pastel chalks (red/pink tones)
- Old toothbrush or stiff bristle brush
- Detail needle tool
- Small heart cutters (various sizes)
- Acrylic roller or pasta machine
- Ceramic tile or glass work surface
- Sharp tissue blade
- Sandpaper (fine grit, optional)
- Gloss glaze (optional)
Step 1: Building the Box Base
-
Prepare the walls:
Condition your pale pink clay until soft and pliable. Roll it out into a slab about 3-4mm thick using your pasta machine on a medium setting or an acrylic roller with depth guides. -
Cut the panels:
Using your square cutter or a template and blade, cut out five identical squares. Four will become the walls and one will be the base. -
Texture the surface:
Before assembling, lightly tap the surface of all five squares with an old toothbrush or stiff bristle brush. This creates a realistic sponge cake texture. Be careful not to distort the square shape as you texture. -
Assemble the box:
Place the base square on your baking tile. Apply a thin line of liquid clay to the edges. Stand up the four wall panels, pressing the seams gently together. Smooth the internal seams with a clay tool for stability. -
Add side hearts:
Roll out a thin sheet of deep brown clay. Use a tiny heart cutter to create four hearts. Attach one to the center of each side wall using a dot of liquid clay, pressing gently so they look embedded.
Clean Cuts
Chill your rolled clay sheets in the fridge for 10 minutes before cutting. This firms up the clay, preventing the drag and distortion that happens with softer warm clay.
Step 2: Crafting the Chocolate Lid
-
Create the lid base:
Cut another square of pale pink clay, slightly larger than your box walls to create a subtle overhang. Texture the edges with your toothbrush to match the base. -
Shade the edges:
Shave a small amount of reddish-pink pastel chalk into a powder. Use a soft brush to dust this powder around the top edges and corners of the lid to simulate a baked, strawberry effect. -
Form the chocolate squares:
Condition deep brown clay and roll it to about 3mm thick. Cut four small squares that fit neatly on top of the lid with a small gap between them. -
Detail the chocolate:
Take a smaller square cutter or a blunt tool and impress a square indentation into the center of each brown square to mimic molded chocolate segments. -
Arrange the topping:
Apply liquid clay to the top of the pink lid. Arrange the four chocolate squares in a grid pattern. I usually like to place them slightly askew or perfectly aligned depending on the style I want. -
Add the central heart:
Mold a small heart from bright red clay. Texture it heavily with your needle tool or toothbrush to give it a sugary, velvet-like appearance. Place this heart in the center where the four chocolate squares meet.
Scrap Candy
Use your leftover brown clay to make tiny separate chocolate squares. Mix with translucent liquid clay to create a ‘chocolate sauce’ drizzle for extra decadence.
Step 3: Baking and Finishing
-
Prepare for baking:
Check your box for any fingerprints and smooth them out. Ensure the lid fits correctly but bake the pieces separately—place the lid next to the box on the tile so they don’t fuse together. -
Bake the clay:
Bake according to your manufacturer’s instructions, usually at 275°F (130°C) for 30 minutes. Tent with foil to prevent the light pink clay from browning. -
Cool down:
Allow the pieces to cool completely in the oven before removing them. This helps prevent thermal shock cracks. -
Optional glazing:
If you want the chocolate segments to look melted and shiny, brush them with a polymer clay gloss glaze. Keep the pink cake parts matte for contrast.
Fill your new realistic faux-sweet box with tiny treasures or gift it to a Valentine.


What Really Happens Inside the Kiln
Learn how time and temperature work together inside the kiln to transform clay into durable ceramic.
Heart Ring Dish With Glittery Accents
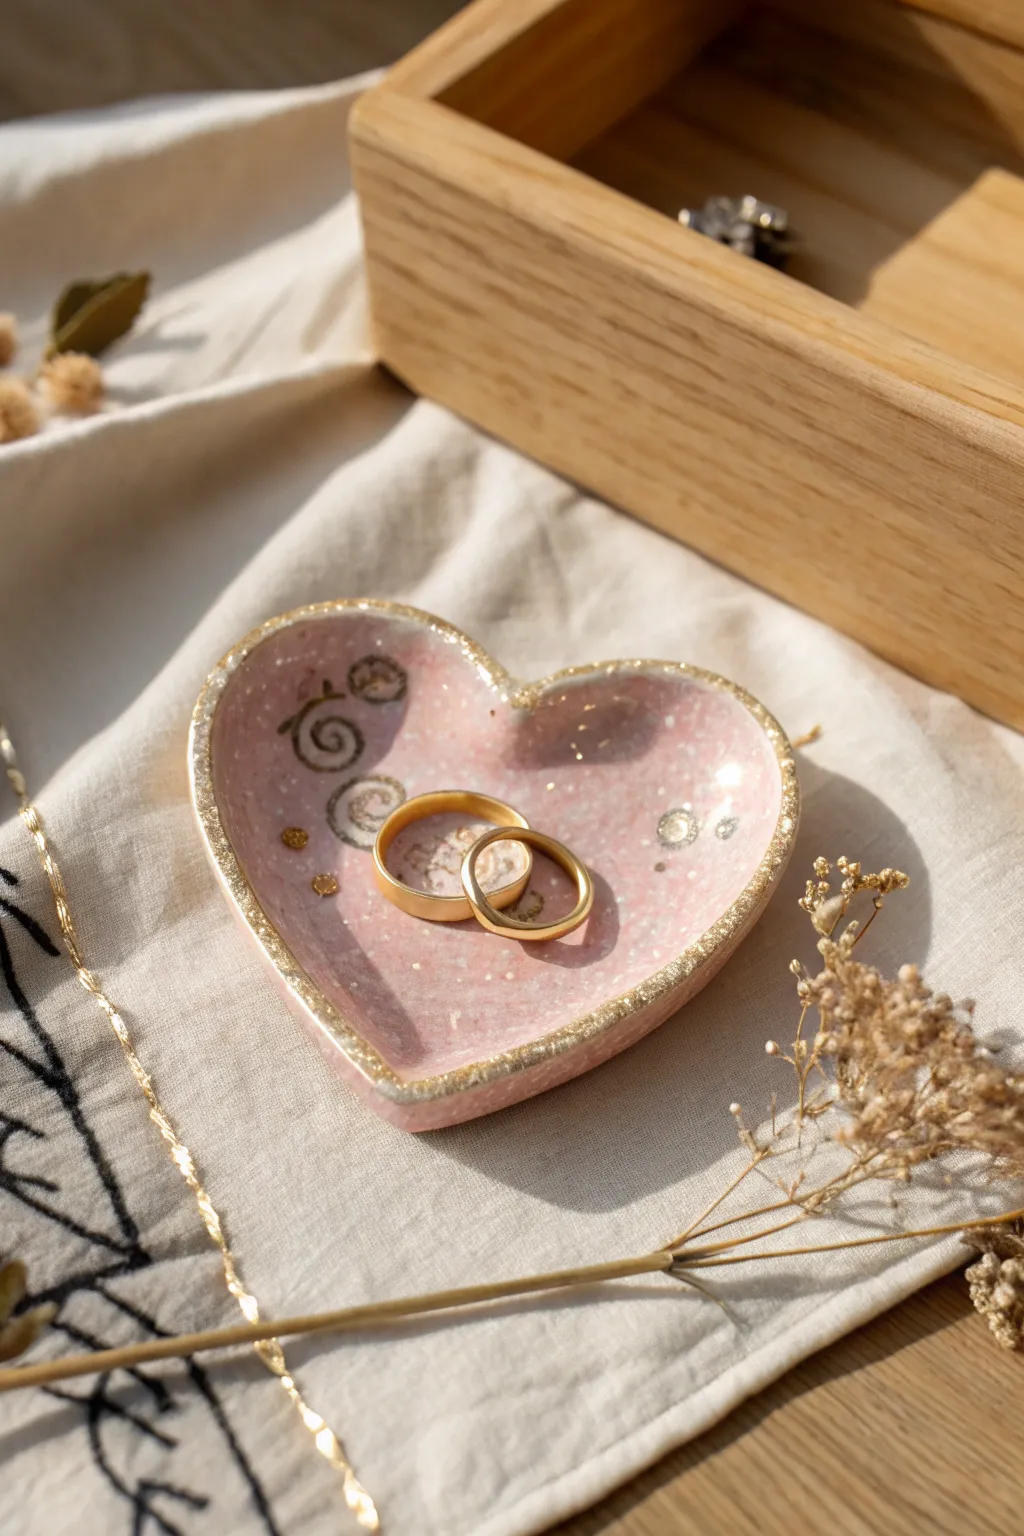
This sweet, speckled pink heart dish is the perfect resting place for your most treasured rings. With its delicate gold scrollwork details and a glamorous gilded rim, it adds a touch of romance to any bedside table.
Step-by-Step Guide
Materials
- Pink polymer clay (pre-speckled or mix in pink glitter)
- Translucent liquid polymer clay (optional, for smoothing)
- Heart-shaped cookie cutter (approx. 3-4 inches)
- Acrylic rolling pin or pasta machine
- Small rubber stamp with swirl/scroll design
- Gold metallic acrylic paint or gold leafing pen
- Fine detail paintbrush
- Gold leaf flakes and sizing (adhesive) OR gold mica powder
- Glossy polymer clay glaze or UV resin
- Sandpaper (fine grit)
- Oven-safe bowl or curved form (to shape the dish)
Step 1: Preparing the Clay Base
-
Condition the Clay:
Begin by thoroughly kneading your pink polymer clay until it is soft and pliable. If you want that specific speckled look from the photo but don’t have effect clay, mix in a pinch of fine pink or iridescent white glitter and some faux granite clay particles. -
Roll It Out:
Using your acrylic roller or pasta machine, roll the clay out into a slab that feels sturdy but elegant—aim for a thickness of about 1/4 inch (6mm). You want it thick enough to hold its shape but thin enough to look delicate. -
Cut the Heart:
Place your heart-shaped cookie cutter firmly onto the clay slab to cut out your shape. If the edges are a bit jagged, gently smooth them down with your fingertip or a silicone smoothing tool so the rim is nice and rounded.
Step 2: Adding Details & Shaping
-
Texturing the Surface:
Before the clay is baked, you can lightly press a texture sponge onto the surface to give it a stone-like pitted texture, or leave it smooth if you prefer. -
Applying the Swirls:
To get the embossed look for the scroll designs, gently press your swirl stamp into the raw clay on the left side of the heart. Don’t press too deep; you just want a clear impression to guide your painting later. -
Shaping the Concave Curve:
Carefully lift your clay heart and drape it inside a shallow, oven-safe bowl or onto a curved baking form. Gently press the center down so the edges curve upward, creating the ‘dish’ shape that will hold the jewelry. -
The First Bake:
Place the bowl with your clay heart into your oven. Bake according to the manufacturer’s instructions for your specific brand of clay—usually around 275°F (130°C) for 30 minutes. Let it cool completely in the bowl so it retains the curve.
Stamp trick
Dust your swirl stamp with a little cornstarch or water before pressing it into the clay. This acts as a release agent and prevents the stamp from pulling up pieces of your smooth clay surface.
Step 3: Gilding and Finishing
-
Painting the Swirls:
Once cool, take your fine detail brush and the gold metallic paint. Carefully trace inside the stamped impressions you made earlier. I like to do two thin coats here to make the gold really pop against the pink. -
Adding Floating Accents:
Dip a toothpick or a very fine dotting tool into the gold paint and add tiny random dots and small circles around the right side of the heart to balance the design. -
Gilding the Edge:
For that luxurious rim, use a gold leafing pen or brush on gold paint along the very top edge of the dish. Make the line slightly uneven and organic rather than perfectly straight for a handmade feel. -
Applying Gold Leaf (Optional):
If you want extra sparkle like the photo, dab tiny spots of sizing (glue) on the rim and press small flakes of real gold leaf onto the tackiness. Brush away the excess with a dry, fluffy brush. -
Sealing the Dish:
To protect the gold paint and give the clay a ceramic-like shine, apply a coat of glossy glaze or UV resin over the entire inside surface. This also prevents the metal from tarnishing over time. -
Final Cure/Dry:
Allow the glaze to air dry completely or cure the resin under a UV lamp. Your dish is now ready to hold treasures.
Make it marble
Twist a small snake of translucent clay and a snake of white clay into your pink base before rolling. Stop kneading halfway through for a gorgeous, milky pink marble effect.
Place this lovely little dish on your vanity to keep your daily jewelry safe and stylish
Heart Mosaic Pendant From Scrap Clay
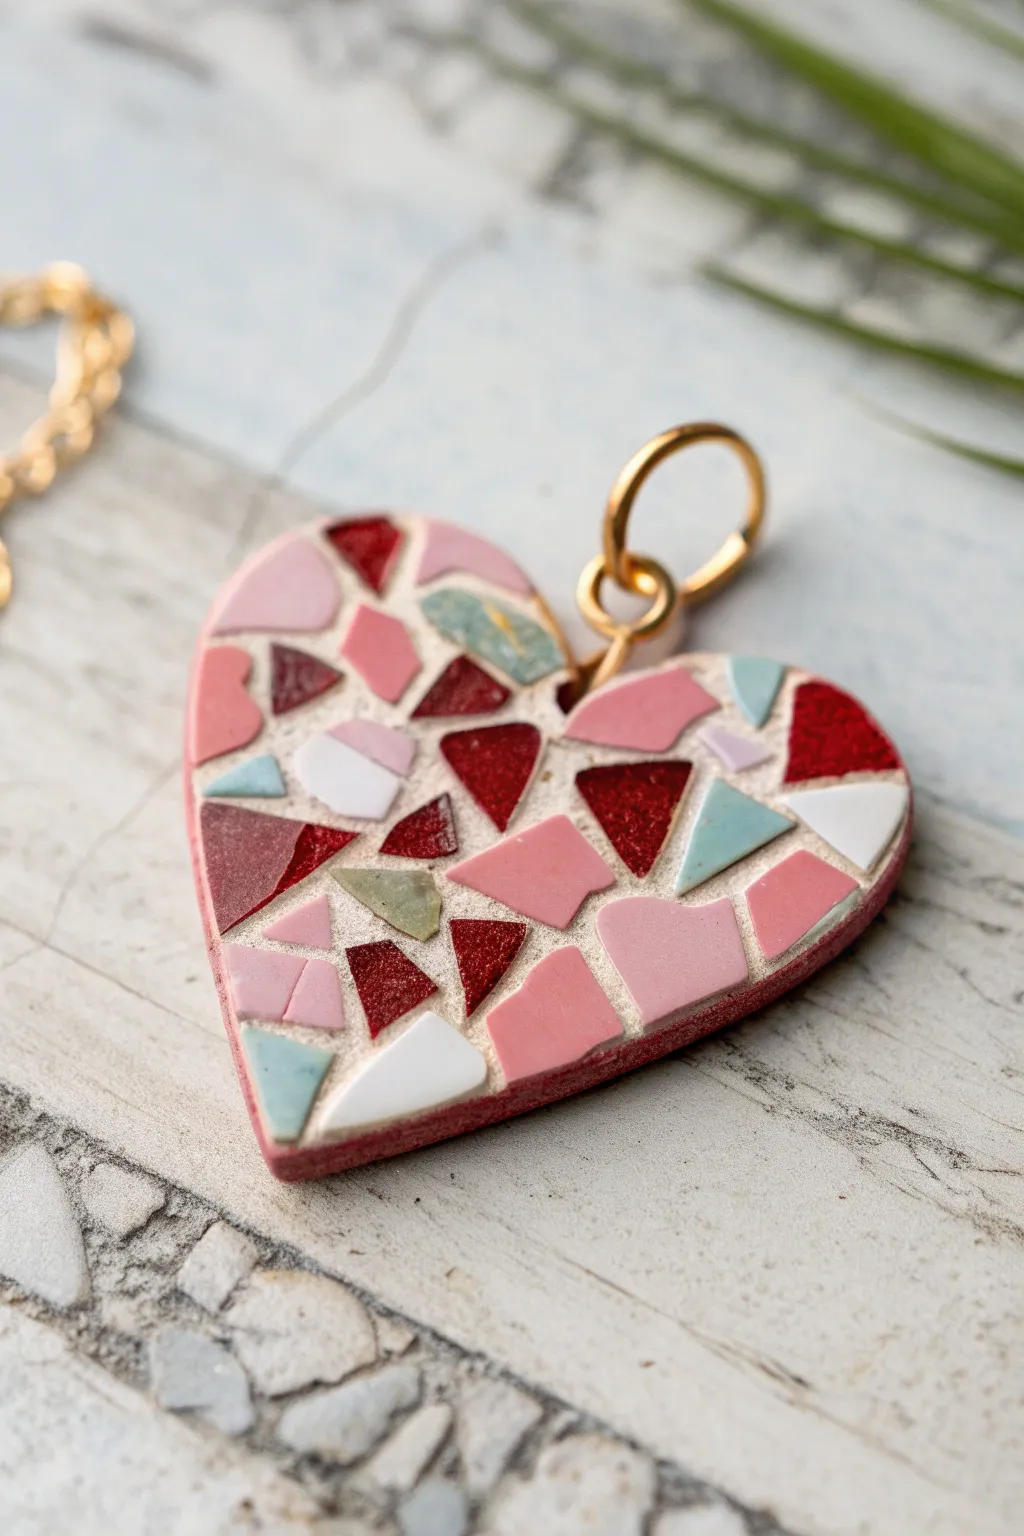
Turn your leftover polymer clay bits into a stunning piece of jewelry with this beginner-friendly terrazzo-style mosaic pendant. The finished piece features a charming arrangement of irregular shards in romantic pinks, reds, and soft pastels, perfect for a heartfelt Valentine’s gift.
How-To Guide
Materials
- Polymer clay (various scrap colors: red, pink, white, mint green)
- Polymer clay (base color, e.g., dusty rose or beige)
- Acrylic rolling pin
- Heart-shaped clay cutter
- X-acto knife or tissue blade
- Small jump ring (gold)
- Pliers
- Hand drill or needle tool
- Parchment paper or ceramic tile
- Fine-grit sandpaper (optional)
- UV resin or gloss varnish (optional for shine)
Step 1: Preparing the Mosaic Shards
-
Gather your scraps:
Collect your polymer clay scraps in your chosen color palette. For this project, you’ll want a mix of deep reds, soft pinks, bright whites, and a touch of mint or light blue for contrast. -
Flatten the scraps:
Take each scrap color individually and roll it out into a very thin sheet using your acrylic roller or pasta machine on a thin setting. The thinner the sheet, the easier it will be to create delicate shards. -
Create the shards:
Use your X-acto knife or tissue blade to chop the thin sheets into small, irregular geometric shapes. Aim for triangles and trapezoids of varying sizes, keeping them roughly between 2mm and 5mm.
Grout Line Trick
To make the ‘grout’ lines pop, texturing the base clay with an old toothbrush before adding shards helps the pieces grip and adds realistic stone texture.
Step 2: Assembling the Base
-
Condition the base clay:
Take your base color clay (a dusty rose works beautifully to tie the colors together) and condition it until it is soft and pliable. -
Roll the foundation:
Roll out the base clay to a medium thickness, about 3mm to 4mm. This needs to be sturdy enough to act as the pendant backing. -
Cut the heart shape:
Press your heart-shaped cutter firmly into the base slab to cut out your pendant shape. Don’t remove it from the tile or parchment paper yet to avoid warping.
Step 3: Applying the Mosaic
-
Placement strategy:
Using tweezers or the tip of your knife, gently pick up your colored shards and place them onto the heart base. Leave small gaps between the pieces to let the base color show through, mimicking grout lines. -
Vary the pattern:
I like to start near the center and work outward, ensuring I don’t put two identical colors right next to each other. Mix the sizes so large red triangles sit near tiny white specs. -
Embed the pieces:
Once the heart is fully covered to your liking, place a piece of parchment paper over the design. Use your acrylic roller to gently roll over the top. This presses the shards flat into the base clay, creating a smooth, unified surface.
Smudged Colors?
If your shard colors smear while rolling them flat, wipe the surface with a baby wipe or a Q-tip dipped in rubbing alcohol before baking to clean it up.
Step 4: Finishing Touches
-
Refine the edges:
If the rolling process distorted the heart shape, use your cutter to cut the shape one more time for a clean, crisp edge. -
Add the hole:
Use a needle tool or toothpick to poke a hole near the top of one of the heart’s lobes. Ensure the hole is large enough for your jump ring. -
Bake the piece:
Bake the pendant according to the manufacturer’s instructions for your specific brand of clay (usually 275°F/135°C for 15-30 minutes). -
Cool and sand:
Let the piece cool completely. For a matte look like the photo, lightly sand the surface with fine-grit sandpaper to remove any fingerprints and give it a stone-like texture. -
Attach hardware:
Open your gold jump ring using two pairs of pliers. Slide it through the hole you created and close it securely.
Now you have a unique, handmade pendant ready to wear or gift to someone special

TRACK YOUR CERAMIC JOURNEY
Capture glaze tests, firing details, and creative progress—all in one simple printable. Make your projects easier to repeat and improve.
Stamped Heart Tokens for Lunchbox Notes
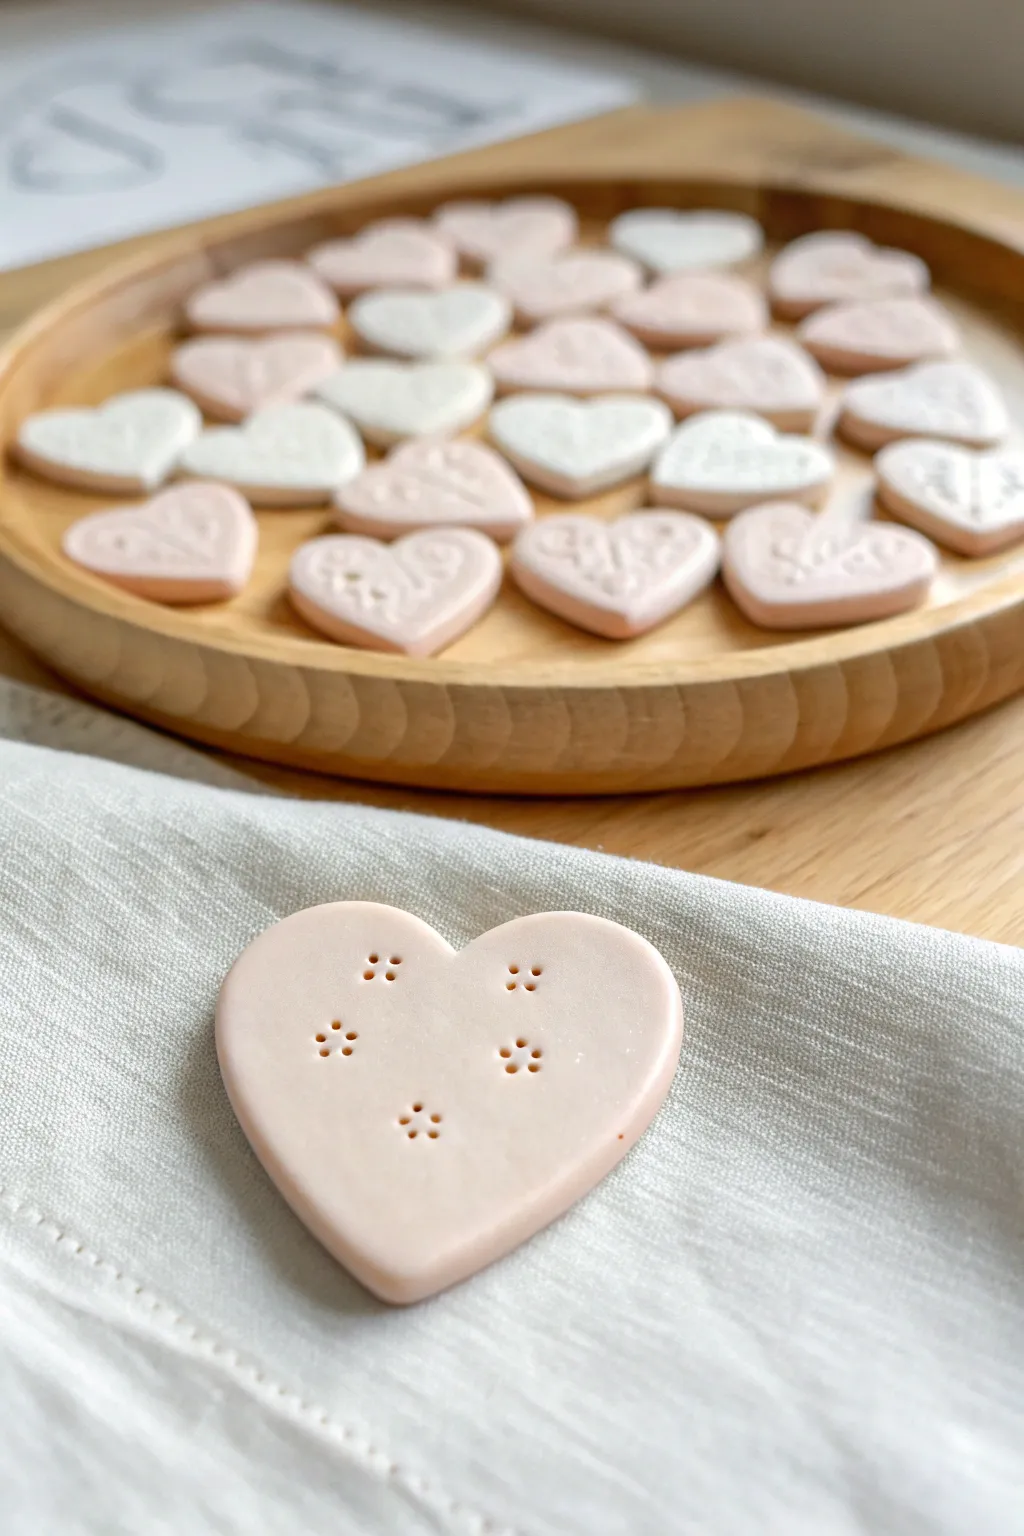
These charming clay hearts act as durable little love notes perfect for tucking into lunchboxes or pockets. With their soft matte finish and delicate imprinted patterns, they offer a tactile reminder of affection that lasts far longer than a paper note.
Step-by-Step Guide
Materials
- Polymer clay (pale pink and white)
- Small heart-shaped cookie cutter (approx. 1.5 – 2 inches)
- Acrylic rolling pin or clay pasta machine
- Parchment paper or ceramic tile
- Small round piping tip (or a specialized clay hole punch tool)
- Sandpaper (fine grit, 400-600)
- Oven
- Baking sheet
Step 1: Preparing the Clay
-
Condition the clay:
Start by warming the polymer clay in your hands. Knead and fold it repeatedly until it becomes pliable, soft, and free of cracks. -
Create custom shades:
To achieve the soft, milky pink seen in the example, mix a small amount of pink clay with a larger amount of white clay. Knead them together until the color is completely uniform without any swirls. -
Roll it out:
Place your clay on a piece of parchment paper to prevent sticking. Use your acrylic roller to flatten the clay into a sheet about 1/4 inch thick. Aim for an even thickness so they bake uniformly.
Clean Imprints
To keep your simple stamping tool from sticking to the soft clay, dip the tip into a little cornstarch or water before pressing it into the heart.
Step 2: Shaping and Stamping
-
Cut the shapes:
Press your heart-shaped cutter firmly into the clay sheet. Wiggle it slightly to ensure a clean separation from the surrounding clay, then lift the cutter. -
Smooth the edges:
Gently run your finger around the cut edge of each heart. This softens the sharp cut lines and gives the token a more finished, stone-like appearance. -
Prepare your stamping tool:
Locate a tool with a small, circular hollow tip such as the end of a very small piping tip, a coffee stirrer, or a specialized clay tool. Ensure the tip is clean. -
Plan your design:
The example features a delicate five-dot flower pattern. Visualize where you want these clusters to sit on the heart’s surface before pressing down. -
Imprint the pattern:
Press your circular tool gently into the clay to create distinct rings. Instead of piercing all the way through, apply just enough pressure to leave a clear indentation. -
Create floral clusters:
Arrange four or five small circular impressions in a tight circle to mimic flower petals. Repeat this motif across the heart, spacing them out randomly for a playful look. -
Check for lint:
Inspect the surface closely. If any dust or lint has settled on the clay, carefully lift it off with a piece of tape or smooth it out with a finger dipped in a tiny bit of baby oil.
Step 3: Baking and Finishing
-
Transfer to baking sheet:
Move your parchment paper with the hearts onto a dedicated baking sheet. Ensure the hearts aren’t touching each other. -
Bake the clay:
Bake according to your specific clay manufacturer’s instructions—usually around 275°F (135°C) for 15-30 minutes depending on thickness. I prefer to use an oven thermometer to ensure the temperature is exact, preventing scorching. -
Cool completely:
Remove the tray from the oven and let the pieces cool fully. They will be slightly soft when hot but will harden as they return to room temperature. -
Sand the surface:
Once cool, lay a sheet of fine-grit sandpaper on a flat surface. Place the heart face down and rub it gently in circular motions to ensure the top is perfectly flat and smooth. -
Clean up:
Wipe away any sanding dust with a slightly damp cloth or a baby wipe to reveal the clean, matte finish.
Fixing Fingerprints
If you notice fingerprints on your unbaked hearts, lightly brush the surface with a tiny amount of baby oil or clay softener to smooth them away instantly.
Now you have a handful of delightful, durable tokens ready to surprise your loved ones
Pink Ombre Heart Hoops
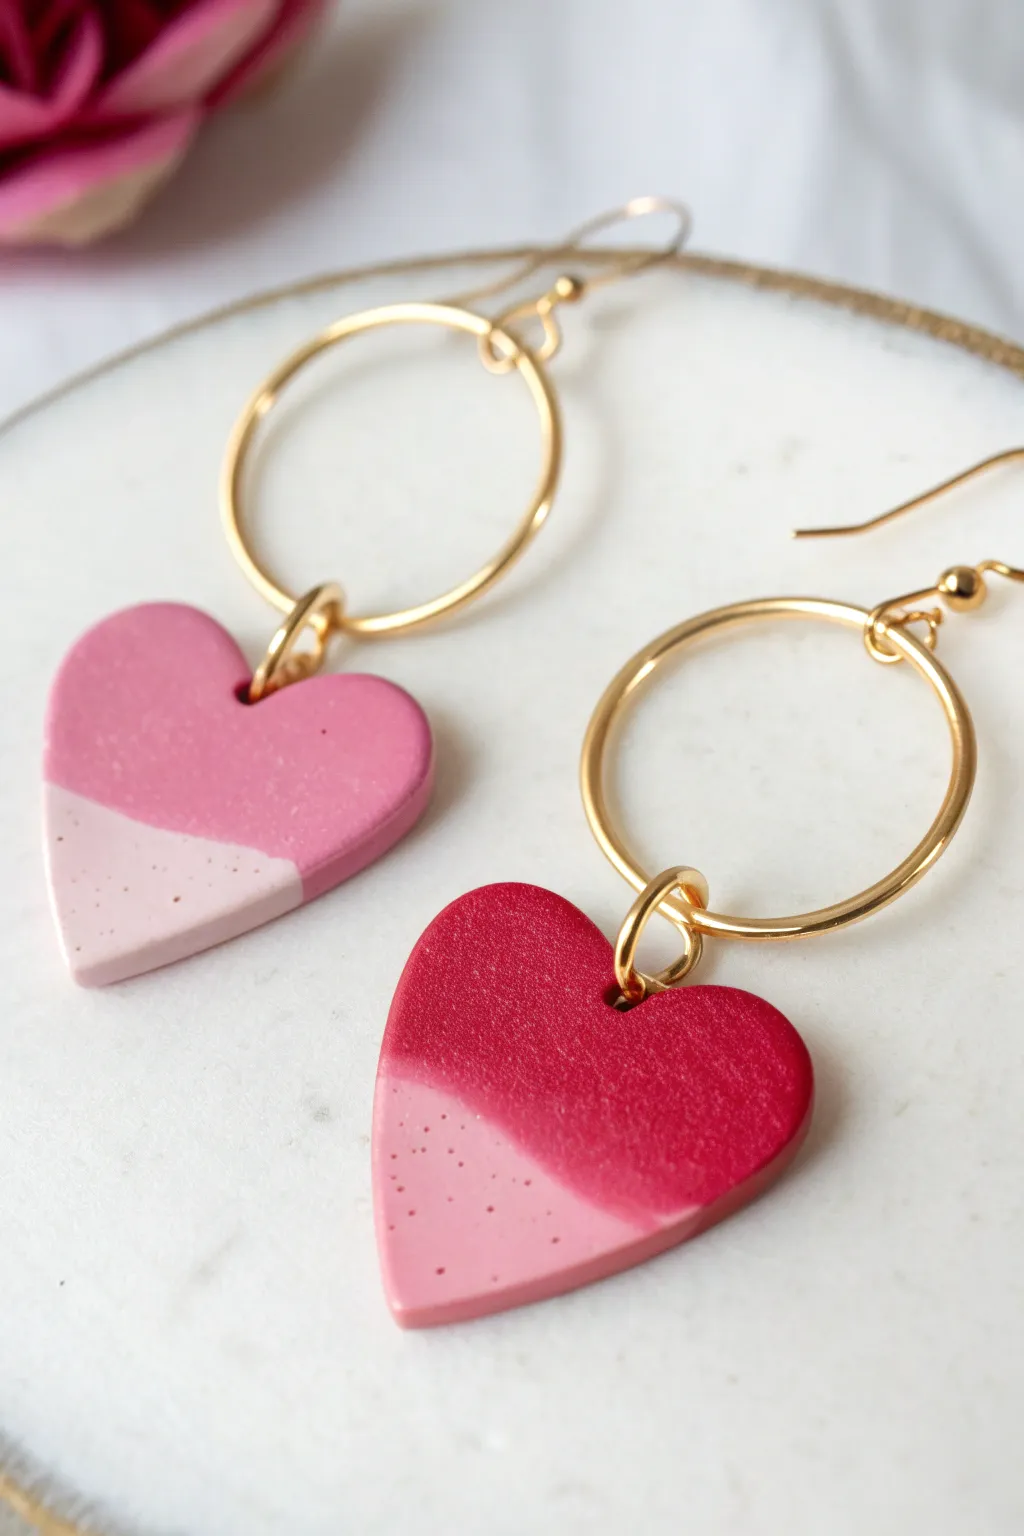
These sweet earrings feature a delightful two-tone design, blending a deep berry red or vibrant pink with a soft, speckled blush pink. The modern gold hoop finding adds a touch of elegance to the charming handmade clay hearts.
Detailed Instructions
Materials
- Polymer clay in deep pink/berry red
- Polymer clay in pale blush pink
- Polymer clay with granite/speckle effect (or black pepper/glitter)
- Heart-shaped clay cutter (approx. 1 inch)
- Acrylic rolling pin or pasta machine
- Tissue blade or X-Acto knife
- Hand drill or pin vibe
- Gold hoop earrings (20-30mm) with loop attachment
- Gold jump rings (6-8mm)
- Earring hooks (gold)
- Jewelry pliers (flat nose and round nose)
- Ceramic tile or baking sheet
- Oven
- Fine grit sandpaper (optional)
Step 1: Preparing the Clay
-
Condition the dark clay:
Begin by taking your deep pink or berry red polymer clay. Knead it thoroughly in your hands until it becomes soft, pliable, and warm. -
Mix the speckled light clay:
Take the pale blush pink clay. To achieve the speckled look seen in the photo, mix in a very small amount of granite-effect clay. Alternatively, I like to mix in a tiny pinch of cracked black pepper or fine glitter for texture. -
Roll out sheets:
Roll both the dark pink and the speckled light pink clays into sheets of equal thickness. Aim for about 3mm to ensure the earrings are sturdy but lightweight.
Uneven Seams?
If the clay separates at the seam after baking, apply a tiny amount of liquid polymer clay to the gap and rebake for 10 minutes to fuse it perfectly.
Step 2: Constructing the Ombre Slab
-
Cut diagonal edges:
Use your tissue blade to cut a straight, diagonal line across both clay sheets. You want the angles to match so they fit together like puzzle pieces. -
Join the colors:
Place the cut edge of the dark pink clay against the cut edge of the light pink clay. Press them gently together on your work surface so they adhere. -
Smooth the seam:
Gently roll over the seam with your acrylic roller. Do this lightly to bond the two colors without distorting the straight line too much. You want a clean, sharp division rather than a blended gradient. -
Check the thickness:
Ensure the joined slab is uniform in thickness. If the seam is bumpy, you can place a piece of parchment paper over it and rub gently with your finger to smooth it out.
Step 3: Cutting and Baking
-
Position the cutter:
Place your heart cutter over the clay slab. Position it so the diagonal seam runs through the lower half of the heart, giving you a mix of about 60% dark pink and 40% light pink. -
Cut the shapes:
Press the cutter down firmly. Give it a little wiggle before lifting to ensure a clean cut. Repeat for the second earring, trying to mirror the angle if possible. -
Smooth the edges:
Gently pick up the clay hearts. Use your finger to smooth any rough edges left by the cutter, paying attention to the bottom point and the top curves. -
Pierce the holes:
Use a needle tool or toothpick to poke a hole in the center of the ‘V’ at the top of the heart. Make sure the hole is big enough for your jump ring but not too close to the edge. -
Bake carefully:
Place the hearts on a ceramic tile or baking sheet lined with parchment paper. Bake according to the manufacturer’s instructions for your specific brand of clay—usually around 275°F (130°C) for 30 minutes. -
Cool down:
Allow the clay pieces to cool completely in the oven before removing them. This helps prevent cracking and ensures strength.
Make it Shine
Coat the finished hearts with a thin layer of UV resin or glossy polyurethane varnish for a high-shine, ceramic-like finish that makes the colors pop.
Step 4: Assembly
-
Sand if necessary:
Once cool, check the edges one last time. If there are any sharp bits, lightly buff them away with fine-grit sandpaper or a denim scrap. -
Open the jump rings:
Using two pairs of pliers, twist a jump ring open sideways (never pull it apart). Hook it through the hole you made in the clay heart. -
Attach to the hoop:
Before closing the jump ring, loop it onto the small attachment ring on your gold hoop finding. Close the jump ring securely using the pliers. -
Add the ear wire:
Finally, attach the ear wire hook to the top of the gold hoop finding using the hoop’s loop or an additional small jump ring if needed.
Wear these romantic hoops to add a splash of color to your Valentine’s Day outfit or gift them to a friend who loves blush tones
Minimalist Heart Pins for Jackets and Bags
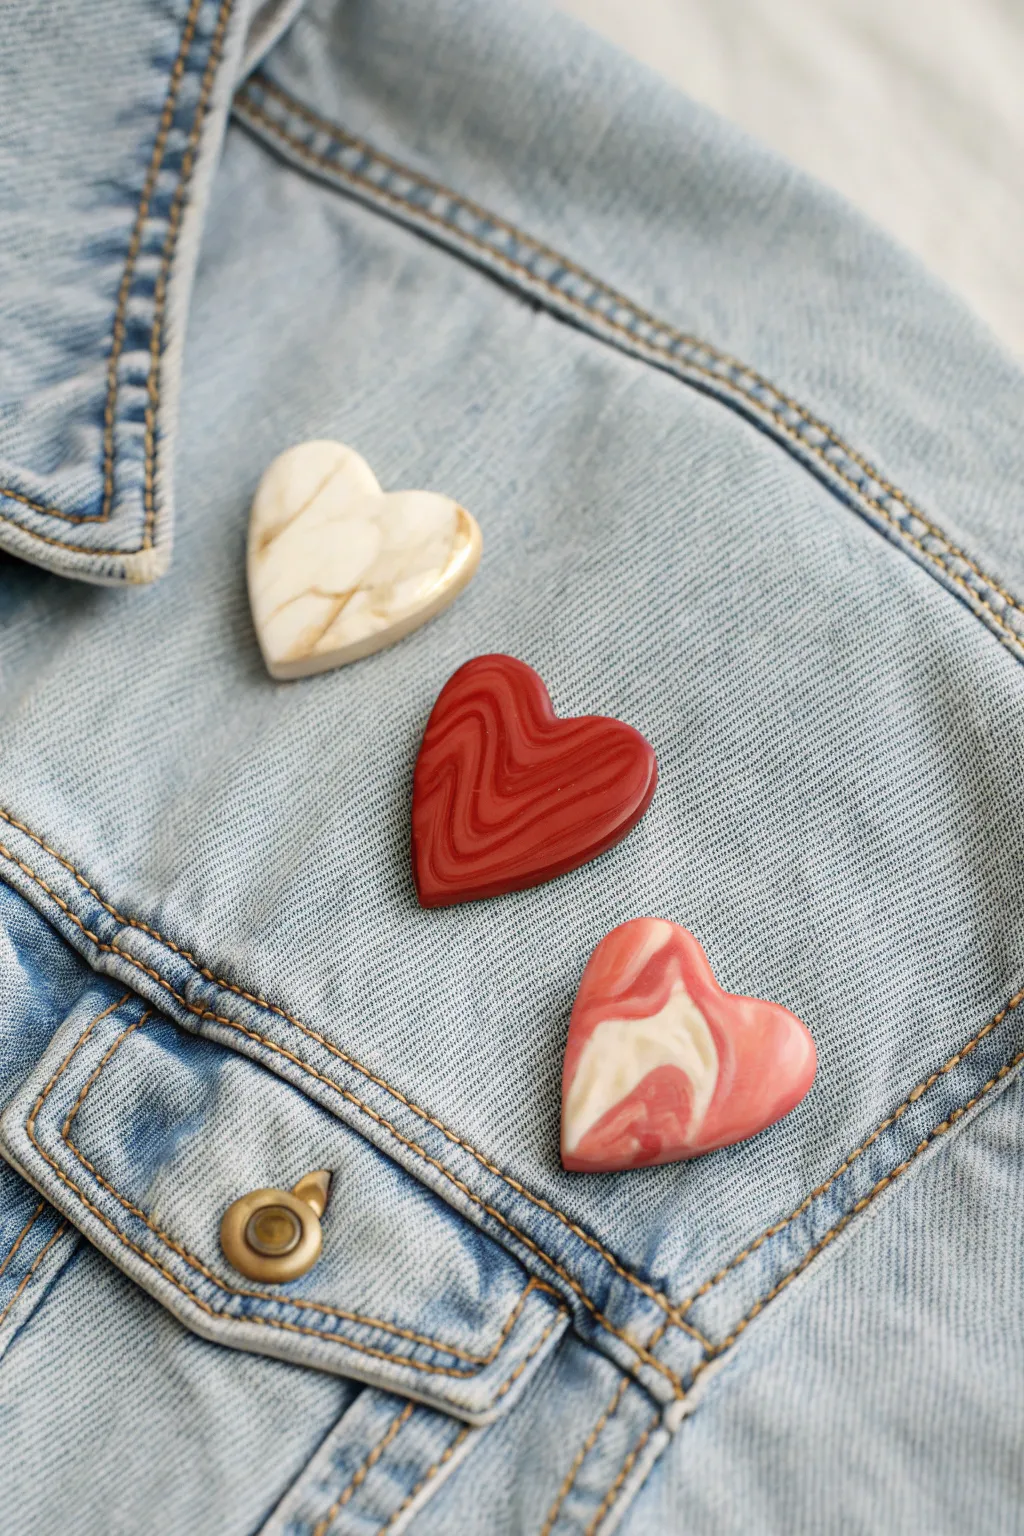
Add a touch of timeless romance to your denim jacket or tote bag with these elegant polymer clay heart pins. Using simple marbling techniques, you can create three distinct faux-stone and patterned looks that feel modern yet classic.
Step-by-Step
Materials
- Polymer clay (White, translucent, deep red, light pink/peach, gold/tan)
- Acrylic rolling pin or clay machine
- Heart-shaped clay cutter (medium size)
- Tissue blade or sharp craft knife
- Pin backs or brooch findings
- Strong craft adhesive (like E6000) or heavy-duty superglue
- Fine grit sandpaper (400-1000 grit)
- Ceramic tile or baking sheet
- Resin or gloss glaze (optional for finish)
Step 1: Creating the Marbled Effects
-
Condition the Clay:
Begin by thoroughly conditioning each color of clay in your hands until it becomes soft and pliable. This is crucial to prevent cracking later. -
Create the Gold-Veined White Heart:
Take a larger chunk of white clay and a very thin snake of gold or tan clay. Wrap the gold snake loosely around the white lump. -
Twist and Fold:
Twist the white and gold clay together, then fold it in half. Repeat this twist-and-fold motion just 2-3 times to keep the veins distinct; over-mixing will just create a blended beige. -
Create the Red Ripple Heart:
For the middle heart, take two shades of red (one deep, one slightly lighter) and layer thin sheets of them firmly together. -
Indent and Slice:
Press the blunt side of your blade or a knitting needle into the red stack to create deep indentations, then use your tissue blade to shave off the top layer, revealing a rippled wood-grain pattern underneath. -
Create the Swirled Pink Heart:
For the third pin, take chopped bits of pink, white, and translucent clay. Squeeze them together into a chaotic ball. -
Roll Smooth:
Roll this chaotic ball into a smooth snake, twist it tightly, and then ball it up again. This creates soft, fluid swirls like agate.
Sticky Situation?
If your clay is sticking to the cutter, dip the cutter in a bit of cornstarch or water before pressing down for a clean release.
Step 2: Shaping and Baking
-
Roll Out Sheets:
Roll out each of your three patterned clay lumps into a slab roughly 1/8 to 1/4 inch thick. A pasta machine helps keep the thickness uniform, but a rolling pin works fine too. -
Cut the Hearts:
Position your heart cutter over the most attractive part of the pattern on each slab. Press down firmly to cut the shape. -
Smooth the Edges:
Before baking, gently run your finger along the cut edges of the hearts to smooth down any rough clay burrs or sharp corners. -
Bake:
Place your clay hearts on a ceramic tile or baking sheet lined with parchment paper. Bake according to your specific clay brand’s package instructions (usually around 275°F/135°C for 30 minutes). -
Cool Down:
Let the hearts cool completely on the baking surface. Do not attempt to move them while hot, as they are fragile until fully cured and cooled.
Step 3: Assembly and Finishing
-
Sand and Buff:
Once cool, dip your sandpaper in water and gently sand the edges and surface of the hearts for a professional, smooth stone finish. -
Clean Surface:
Wipe the backs of the hearts with a little rubbing alcohol to remove any clay residue or finger oils, ensuring a strong bond for the glue. -
Apply Glue:
Place a small dab of strong adhesive onto the flat pad of your pin back. -
Attach the Pin:
Press the pin back firmly onto the center of the clay heart. I like to give it a little wiggle to settle the glue and remove air bubbles. -
Cure Time:
Let the glue cure undisturbed for at least 24 hours before pinning them to your favorite denim jacket.
Gloss It Up
Finish the baked hearts with a thin coat of UV resin or polyurethane gloss varnish to make the marbling colors pop and shine like real gems.
You can mix and match these sweet accessories on different outfits or gift them to friends for a handmade token of love
Candy Sprinkle Heart Cabochons
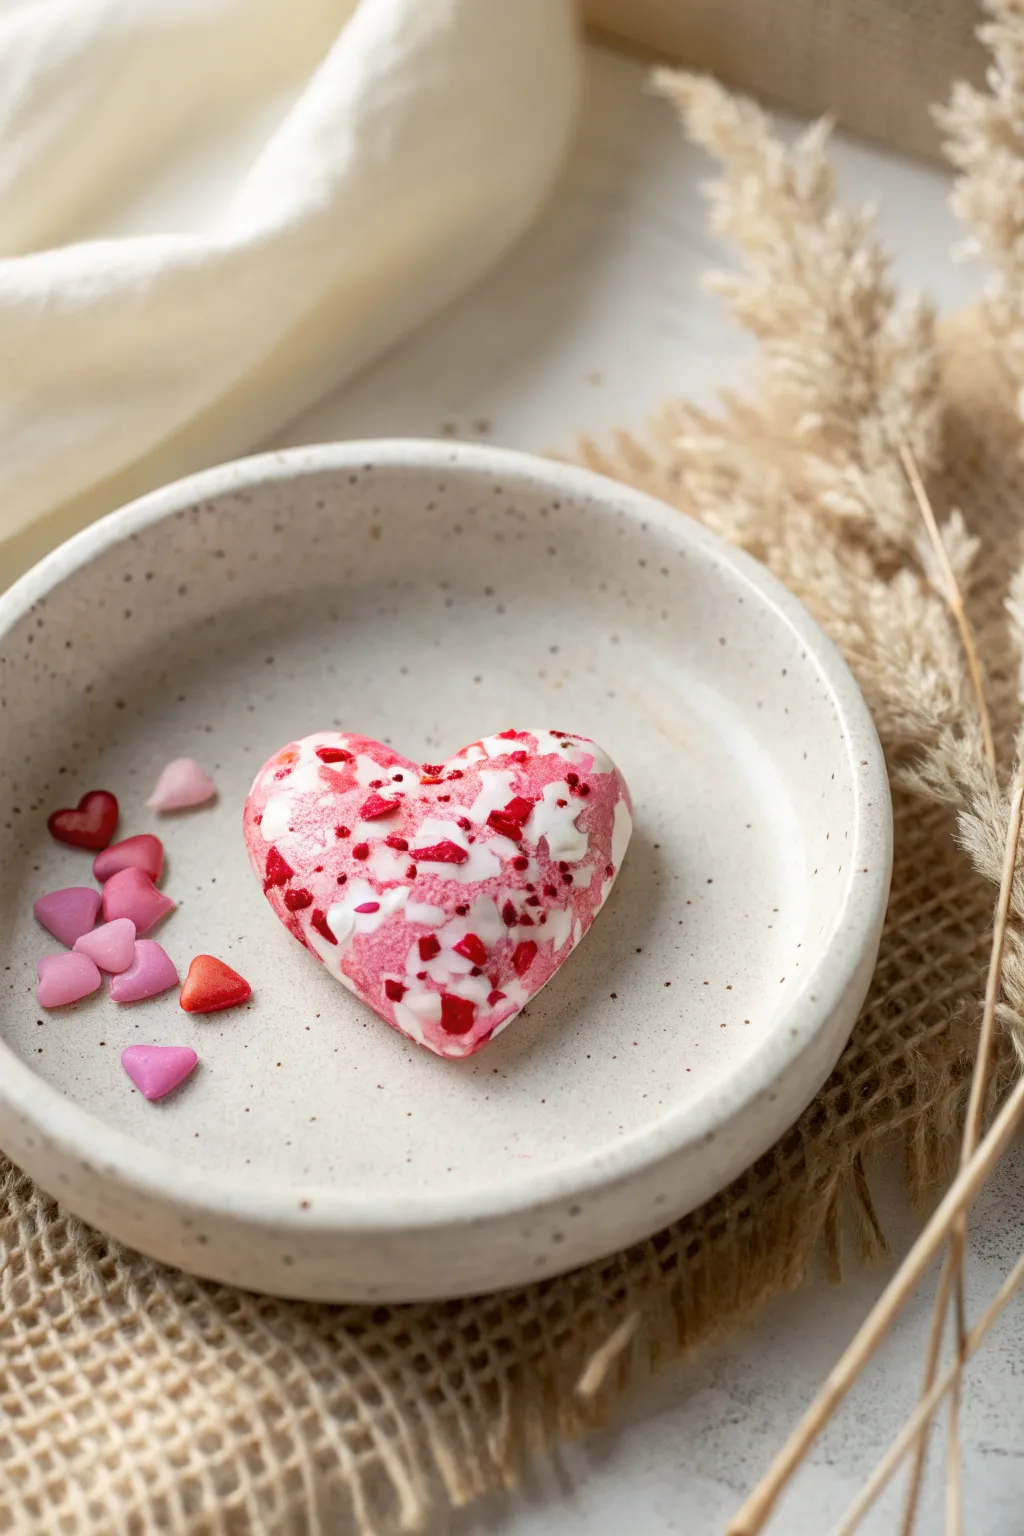
Create these deceptive sweet treats that look good enough to eat but are designed to last forever. With a glossy marbled finish and vibrant red speckles, these faux candy hearts make perfect cabochons for jewelry or fridge magnets.
Step-by-Step Guide
Materials
- White polymer clay
- Pink polymer clay
- Red polymer clay (baked and crumbled) or red glitter flakes
- Liquid polymer clay (translucent or white)
- Heart-shaped clay cutter
- Acrylic roller or pasta machine
- Glossy polyurethane varnish or UV resin
- Small paintbrush
- Baking tile or parchment paper
- Sandpaper (fine grit, optional)
- Oven
Step 1: Preparing the ‘Sprinkles’
-
Bake the red clay:
Before starting the main heart, roll out a very thin sheet of red polymer clay and bake it according to the package instructions until fully cured. -
Create the crumbs:
Once the red sheet has cooled, crumble it into tiny irregular pieces using your fingers or chop it finely with a craft blade. These will be your red candy sprinkles. -
Alternative option:
If you don’t want to bake clay first, you can substitute the clay crumbs with chunky red glitter or pre-made polymer clay sprinkles for a similar effect.
Clean Cuts Every Time
Place a piece of cling wrap over the clay before using your cutter. This naturally bevels the edges, creating a perfect puffy finish without needing to smooth it manually.
Step 2: Marbling the Base
-
Condition the clays:
Thoroughly condition your white and pink clay blocks separately until they are soft and pliable. -
Combine colors:
Roll both colors into snakes and twist them together like a candy cane. -
Create the marble:
Fold the twisted snake in half and roll it out again. Repeat the twist, fold, and roll process 3-4 times. Stop before the colors blend completely; you want distinct streaks of white and pink. -
Form a ball:
Roll your marbled clay into a smooth ball, ensuring there are no air bubbles trapped inside. -
Flatten the sheet:
Use your acrylic roller to flatten the ball into a thick slab, about 1/4 inch thick. This thickness gives the cabochon a nice, domed feel.
Make It Functional
Before baking, press a strong neodymium magnet into the back of the heart. Once baked, glue it in place for an instant Valentine’s magnet.
Step 3: Shaping and Decorating
-
Cut the heart:
Press your heart-shaped cutter firmly into the most attractive part of your marbled slab. -
Soften the edges:
Gently gently run your finger along the top edge of the cut heart to round it off slightly, removing the sharp ‘cookie cutter’ look so it resembles a smooth candy. -
Apply adhesive:
Brush a very thin layer of liquid polymer clay over the surface of the heart. I find this acts perfectly as the ‘glue’ for our sprinkles. -
Add the sprinkles:
Sprinkle your prepared red clay crumbs over the wet surface. Press them down very lightly so they embed slightly into the liquid clay. -
Add white accents:
For extra depth, you can smear tiny bits of white liquid clay or extremely soft white clay on top to look like melted frosting patches.
Step 4: Baking and Finishing
-
Bake the piece:
Place your heart on a ceramic tile or parchment-lined baking sheet. Bake according to your clay brand’s instructions (usually 275°F/130°C for 15-30 minutes). -
Cool down:
Allow the heart to cool completely before handling. It will be slightly soft when hot but hardens as it cools. -
Sanding (optional):
If there remain any rough fingerprints on the sides, lightly sand them with fine-grit wet/dry sandpaper. -
Glazing:
Apply a coat of glossy polyurethane varnish or UV resin to the entire surface. This is crucial for achieving that wet, candy-coated look seen in the photo. -
Final cure:
Let the varnish dry completely or cure the massive resin layer under a UV lamp until hard and non-tacky.
Enjoy your sweet, inedible creation as a charming addition to your craft collection
Rosebud Beads for Romantic Charm Jewelry

Capture the essence of romance with this delicate bracelet featuring hand-sculpted polymer clay rosebuds nestled between textured white beads and natural wood accents. The soft mauve and cream palette makes it a subtle yet stunning accessory perfect for a Valentine’s Day gift or a personal treat.
How-To Guide
Materials
- Polymer clay (dusty rose/mauve, white, translucent)
- Small wooden beads (approx. 6mm, light natural finish)
- Gold spacer beads (small, round)
- Beading wire or strong elastic cord
- Crimp beads and crimp covers (if using wire)
- Gold jump rings and lobster clasp
- Extension chain (gold)
- Needle tool or toothpick
- Clean ceramic tile or baking sheet
- Sandpaper or texturing tool (optional)
Step 1: Sculpting the Rosebuds
-
Prepare the Clay:
Condition your dusty rose polymer clay until soft. pinched off pea-sized amounts for each rose you intend to make; for this design, you will need about four or five buds. -
Form the Center:
Take a tiny amount of the rose clay and roll it into a small cone or teardrop shape. This will be the tight center of your flower. -
Create First Petals:
Flatten a small balls of clay into thin, rounded discs roughly the size of your pinky nail. Wrap one disc tightly around the center cone so it overlaps itself. -
Layering Petals:
Add two or three more flattened discs around the center, overlapping them slightly and curling the edges outward just a bit to mimic a blooming rose. -
Refining Shape:
Gently pinch the base of the rose to secure the petals together. Use a craft knife to slice off the excess clay at the bottom, creating a flat surface for the bead hole. -
Drilling the Hole:
Carefully pierce the side of the rose base with a needle tool. Ensure the hole is wide enough for your stringing material, wiggling it gently to prevent distortion.
Squashed Roses?
If your petals keep smashing while you work, try letting the clay ‘rest’ in the fridge for 5 minutes before piercing the bead hole to firm it up slightly.
Step 2: Creating Textured White Beads
-
Mixing Texture:
Mix white polymer clay with a tiny amount of translucent clay and perhaps some salt or coarse sand to create that stone-like, pitted texture seen in the photo. Alternatively, use a toothbrush to texture the surface. -
Rolling Beads:
Roll this mixture into small, consistent spheres, aiming for a size slightly smaller than your rosebuds. -
Adding Holes:
Pierce the center of each white bead with your needle tool. I find twisting the needle as you push through helps keep the bead round. -
Baking:
Arrange all your clay beads on a ceramic tile or parchment-lined baking sheet. Bake according to your clay manufacturer’s instructions (usually 275°F/135°C for 15-30 minutes) and let them cool completely.
Step 3: Assembly
-
Layout Design:
Lay out your beads on a bead board or soft cloth. Place the roses and white textured beads in the center, separated by small gold spacer beads. -
Add Wood Accents:
Flank the central floral section with the smooth wooden beads on either side until you reach your desired bracelet length. -
Stringing:
Cut a length of beading wire. Secure one end with a crimp bead and a jump ring attached to the lobster clasp. -
Threading Beads:
Thread your beads onto the wire, following your layout pattern. Ensure the gold spacers sit snugly between the larger beads to add that touch of shine. -
Finishing the Ends:
Once all beads are strung, add a final crimp bead and pass the wire through a jump ring attached to the extension chain. -
Securing:
Loop the wire back through the crimp bead and a few adjacent beads or spacers. Pull tight (but not stiff) and flatten the crimp bead with pliers. -
Final Polish:
Trim any excess wire close to the beads. If desired, cover the flattened crimps with gold crimp covers for a professional finish.
Petal Realism
For ultra-realistic petals, gently thin the very edges of your clay discs with your finger before wrapping them. Thinner edges look more like real flowers.
Now you have a charming piece of wearable art that celebrates love and craftsmanship
Heart-Shaped Photo Frame Magnet Mini
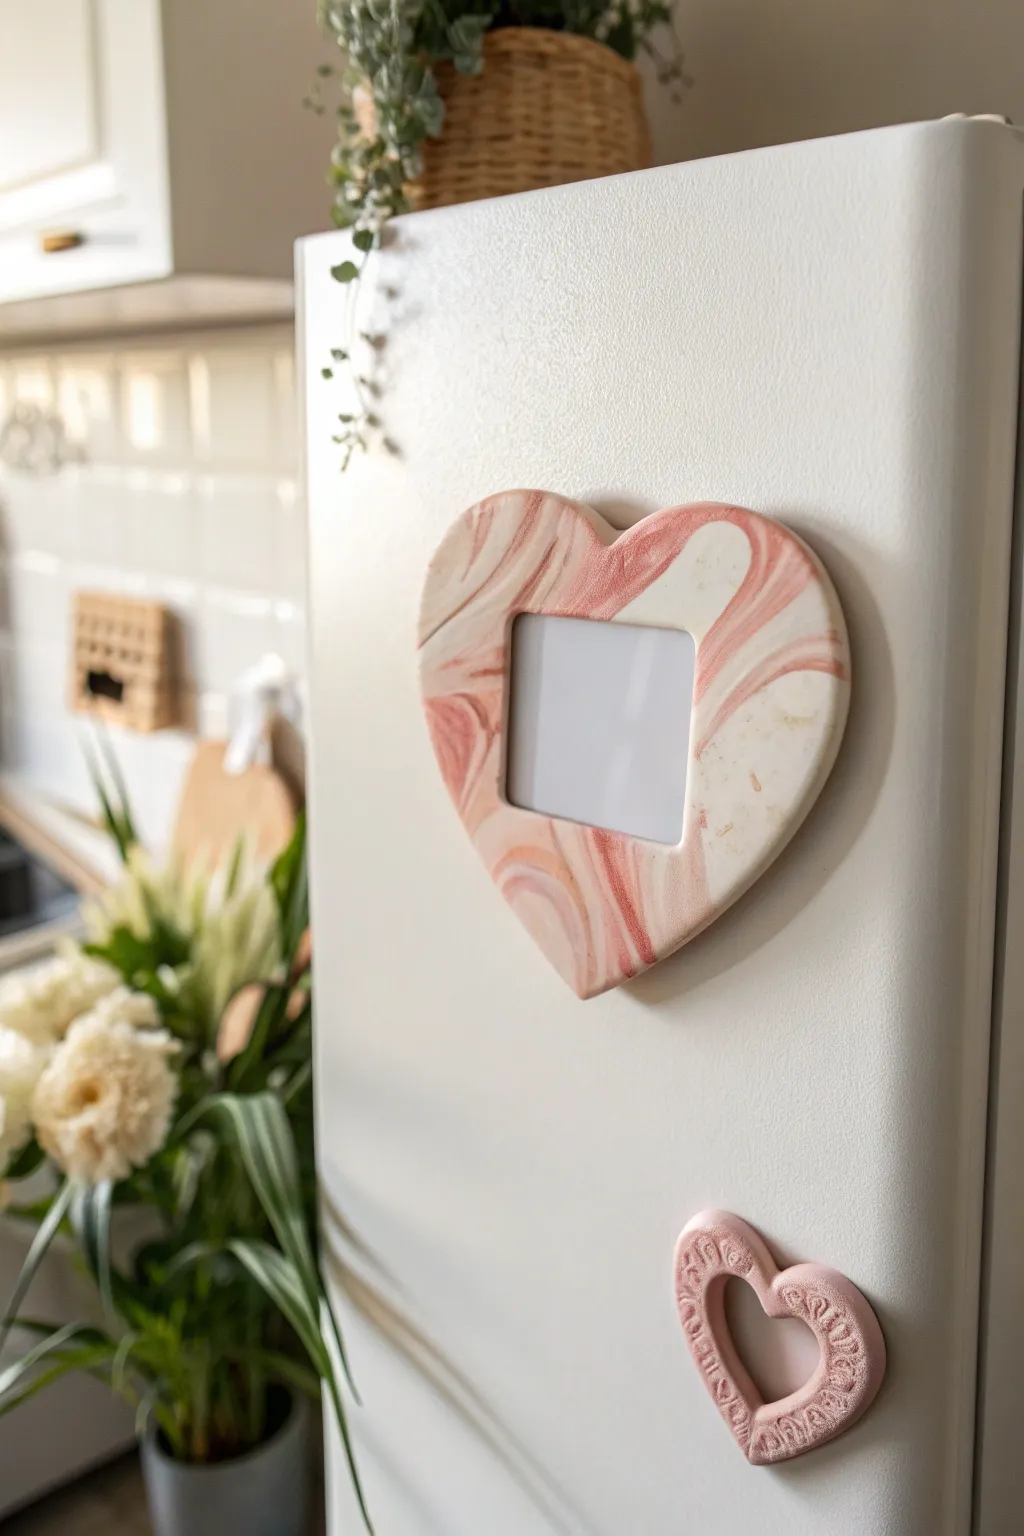
Add a touch of romance to your kitchen with this charming heart-shaped magnetic frame, featuring a soft pink and white marble effect. It’s the perfect way to display a cherished mini-snapshot on your fridge or locker.
Detailed Instructions
Materials
- White polymer clay
- Pink or rose-colored polymer clay
- Heart-shaped cookie cutter (medium/large)
- Square cutter (small) or craft knife
- Acrylic rolling pin or pasta machine
- Magnets (round or tape)
- Strong craft glue (e.g., E6000) or superglue
- Gloss glaze or polyurethane varnish (optional)
- Clean work surface (tile or silicone mat)
Step 1: Creating the Marble Effect
-
Condition the clay:
Begin by thoroughly conditioning both the white and pink polymer clay separately until they are soft and pliable. You’ll want about twice as much white clay as pink to achieve the light, airy look shown in the photo. -
Create logs:
Roll each color into a long, snake-like log. The white log should be slightly thicker than the pink one. -
Twist together:
Place the two logs side by side and twist them together like a candy cane. Keep twisting until the lines become thin and tight. -
Fold and roll:
Fold the twisted log in half and roll it into a ball. Then, roll it out into a log again. Repeat this folding and rolling process one or two more times, but be careful not to over-mix, or the colors will blend into a solid light pink instead of distinct swirls. -
Form the slab:
Roll the marbled ball into a flat sheet about 1/4 inch thick using your acrylic roller or pasta machine. I like to rotate the clay occasionally to ensure the marble pattern stretches nicely in all directions.
Step 2: Shaping the Frame
-
Cut the outer heart:
Place your heart-shaped cutter on the most attractive part of your marbled slab. Press down firmly to cut out the main shape. -
Smooth the edges:
Gently lift the heart and use your finger to smooth any rough edges left by the cutter. -
Cut the inner window:
Use a small square cutter to remove the center of the heart, creating the window for your photo. If you don’t have a square cutter, you can carefully cut a square freehand using a craft knife. -
Create the backing space (optional):
If you want the photo to sit flush, flip the heart over and use a slightly larger square object to gently impress a shallow indentation on the back, creating a recess for the photo to sit in later. -
Bake:
Place your clay frame on a ceramic tile or baking sheet lined with parchment paper. Bake according to your brand of clay’s specific instructions (usually around 275°F/135°C for 15-30 minutes). -
Cool down:
Allow the piece to cool completely in the oven or on a wire rack before handling. It will be slightly flexible when hot but hardens as it cools.
Muddy Colors?
If your marble pattern looks too blended or muddy, stop folding immediately. The more you manipulate the clay, the more the colors merge. Stop when distinct streaks are still visible.
Step 3: Finishing Touches
-
Sand and buff:
Once cool, use fine-grit sandpaper to smooth any sharp edges or fingerprints. A quick buff with a soft cloth can bring out the shine. -
Seal (optional):
For a glossy finish like the one in the photo, apply a thin coat of polymer clay glaze or polyurethane varnish. Let it dry completely. -
Attach the magnets:
Flip the heart over and apply a small dab of strong craft glue to the back. Press your magnets firmly into the glue. -
Prepare your photo:
Print a small photo and trim it so it is slightly larger than the square window opening. -
Assemble:
Secure the photo to the back of the frame using tape or a small piece of cardstock glued to the edges, ensuring the image is centered in the window.
Make it Sparkle
Mix a pinch of translucent clay or pearl mica powder into the white clay before marbling. This adds a subtle, elegant shimmer that catches the light beautifully.
Now your custom frame is ready to showcase a sweet memory right on your refrigerator door
Hidden Message Hearts With Layered Cutouts
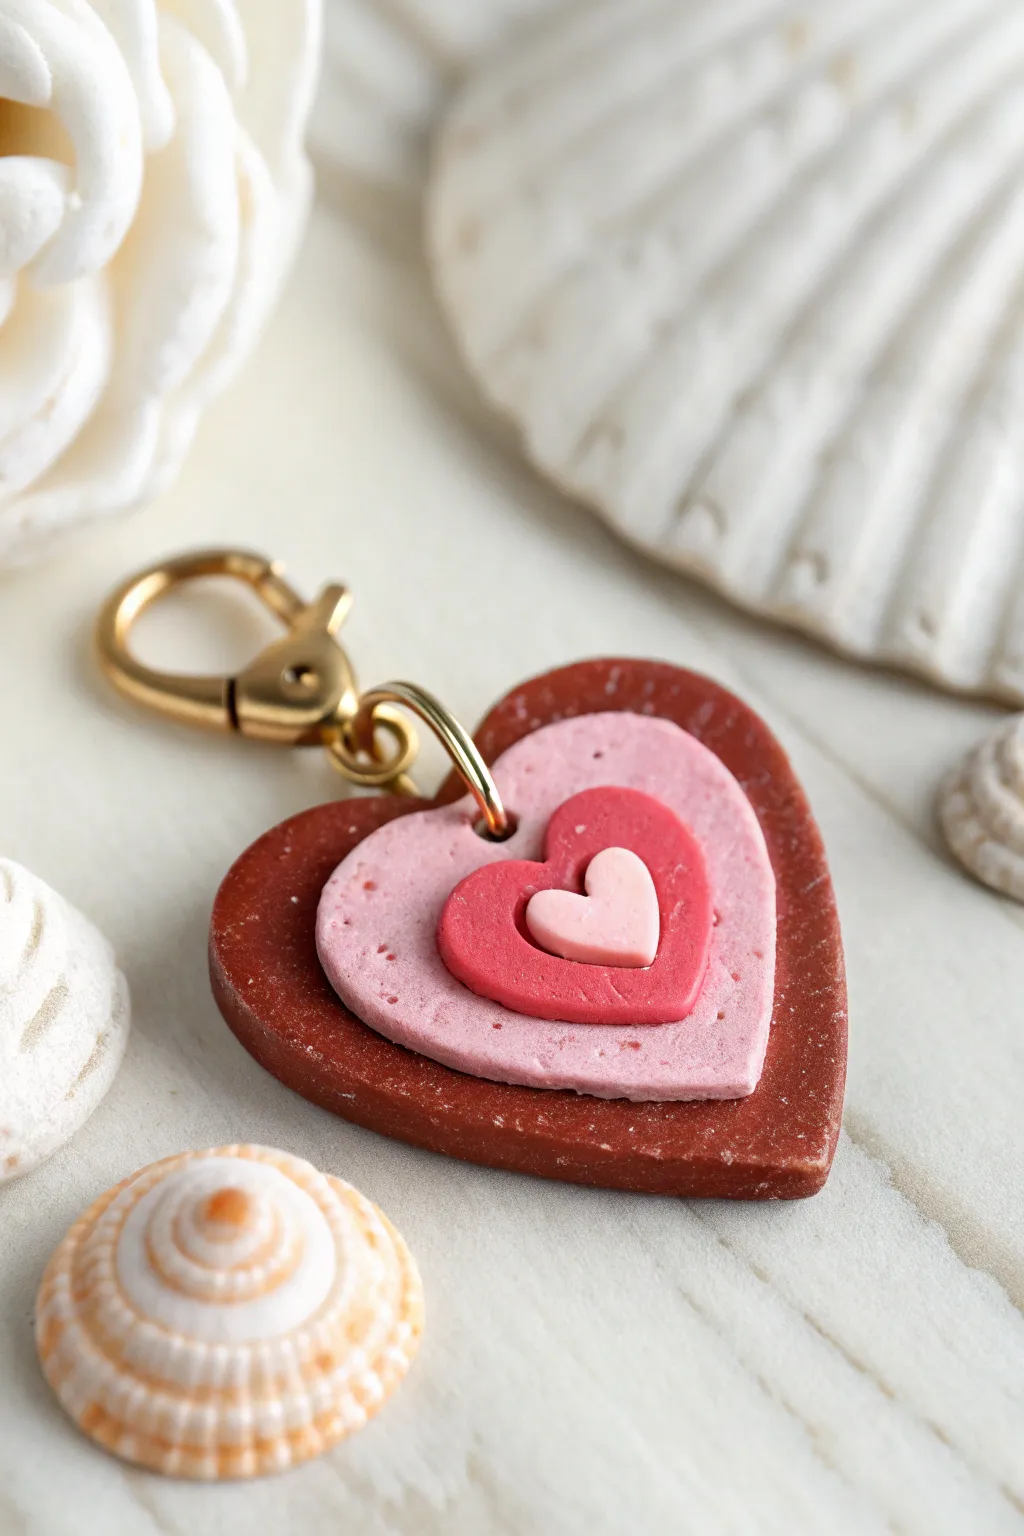
Create a stunning dimensional charm featuring layers of stacked hearts in graduating sizes and shades of red and pink. This polymer clay project mimics a classic cookie-cutter style with a charmingly textured finish perfect for Valentine’s Day gifting.
Step-by-Step Guide
Materials
- Polymer clay in dark brick red (glitter or stone effect)
- Polymer clay in pale pink (stone effect)
- Polymer clay in bright red
- Polymer clay in baby pink
- Set of graduating heart-shaped cookie cutters (4 sizes)
- Acrylic roller or pasta machine
- Gold lobster clasp keychain finding
- Gold jump ring (large enough for the clay thickness)
- Needle tool or toothpick
- Smooth ceramic tile or baking sheet
- Jewelry pliers
- Oven for baking
Step 1: Preparing the Clay
-
Condition the base clay:
Begin by taking your dark brick red clay—I prefer using a mesmerizing stone-effect or glitter clay for the base—and kneading it in your hands until it becomes soft and pliable. -
Roll the base layer:
Using your acrylic roller or pasta machine, roll the dark red clay into a sheet approximately 3-4mm thick. You want this base layer to be sturdy since it holds the hardware. -
Condition remaining colors:
Repeat the conditioning process for the pale pink, bright red, and baby pink clays. Roll each of these into slightly thinner sheets, around 2mm thickness, as they are purely decorative layers.
Sticky Situation?
If the clay sticks to your work surface or cutter, try placing the clay sheet on a piece of parchment paper before cutting, or dip your cutter in cornstarch first.
Step 2: Cutting and Stacking
-
Cut the largest heart:
Use your largest heart cutter to punch a shape from the thick dark red sheet. Leave the clay inside the cutter for a moment to transport it safely to your baking tile. -
Smooth the edges:
Gently rub your finger along the cut edges of the large heart to smooth out any harsh lines or burrs left by the cutter. -
Create the hole:
Use a needle tool or toothpick to pierce a hole near the top center of one distinct lobe of the heart. Ensure the hole is large enough to accommodate your gold jump ring, wiggling the tool slightly to widen it. -
Cut the second layer:
Take the second-largest cutter and press it into the pale pink clay sheet. -
Attach the second layer:
Place the pale pink heart directly onto the center of the large red base. Press down gently but firmly to ensure the raw clay bonds together without trapping air bubbles. -
Cut the third layer:
Using the third-largest cutter, cut a heart from the bright red clay sheet. -
Position the third layer:
Center this bright red heart on top of the pale pink layer. I like to offset the angle just slightly if I’m going for a whimsical look, but perfectly centered works best for this classic design. -
Add the final tiny heart:
Use your smallest cutter (or hand-cut a tiny heart if you lack a cutter small enough) from the baby pink clay and place it in the very center of the stack.
Step 3: Baking and Assembly
-
Texture check:
Inspect the surface for fingerprints. If you find any, lightly brush them away with a bit of cornstarch or baby oil on your fingertip. -
Bake the piece:
Bake the clay stack according to your clay manufacturer’s specific instructions (usually 275°F/135°C for 15-30 minutes). Use an oven thermometer to ensure accuracy. -
Cool down:
Allow the heart charm to cool completely on the baking surface before handling. Moving it while hot can warp the shape. -
Open the jump ring:
Using two pairs of jewelry pliers, grip the gold jump ring on either side of the split. Twist one hand forward and the other backward to open the ring sideways (never pull it apart). -
Install hardware:
Slide the open jump ring through the hole you created in the clay base. -
Add the clasp:
While the jump ring is still open, hook the loop of the gold lobster clasp onto it. -
Close the ring:
Use your pliers to twist the jump ring back into a closed position, ensuring the two ends meet perfectly flush so the clasp doesn’t slip off.
Liquid Clay Bond
For extra security, put a tiny drop of liquid polymer clay (like Bake & Bond) between each heart layer before baking to ensure they fuse permanently.
Clip this adorable layered heart onto your keys or bag for a sweet touch of handmade romance