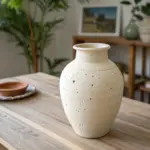
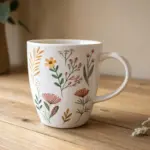
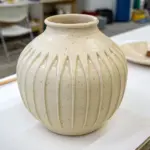
If you love wide mouth vases, you already know they’re gorgeous—and a little chaotic when stems decide to flop and wander. These ideas are my go-to flower-support hacks and styling looks so your arrangement feels lush, balanced, and totally on purpose.
Chicken Wire Nest Inside the Mouth
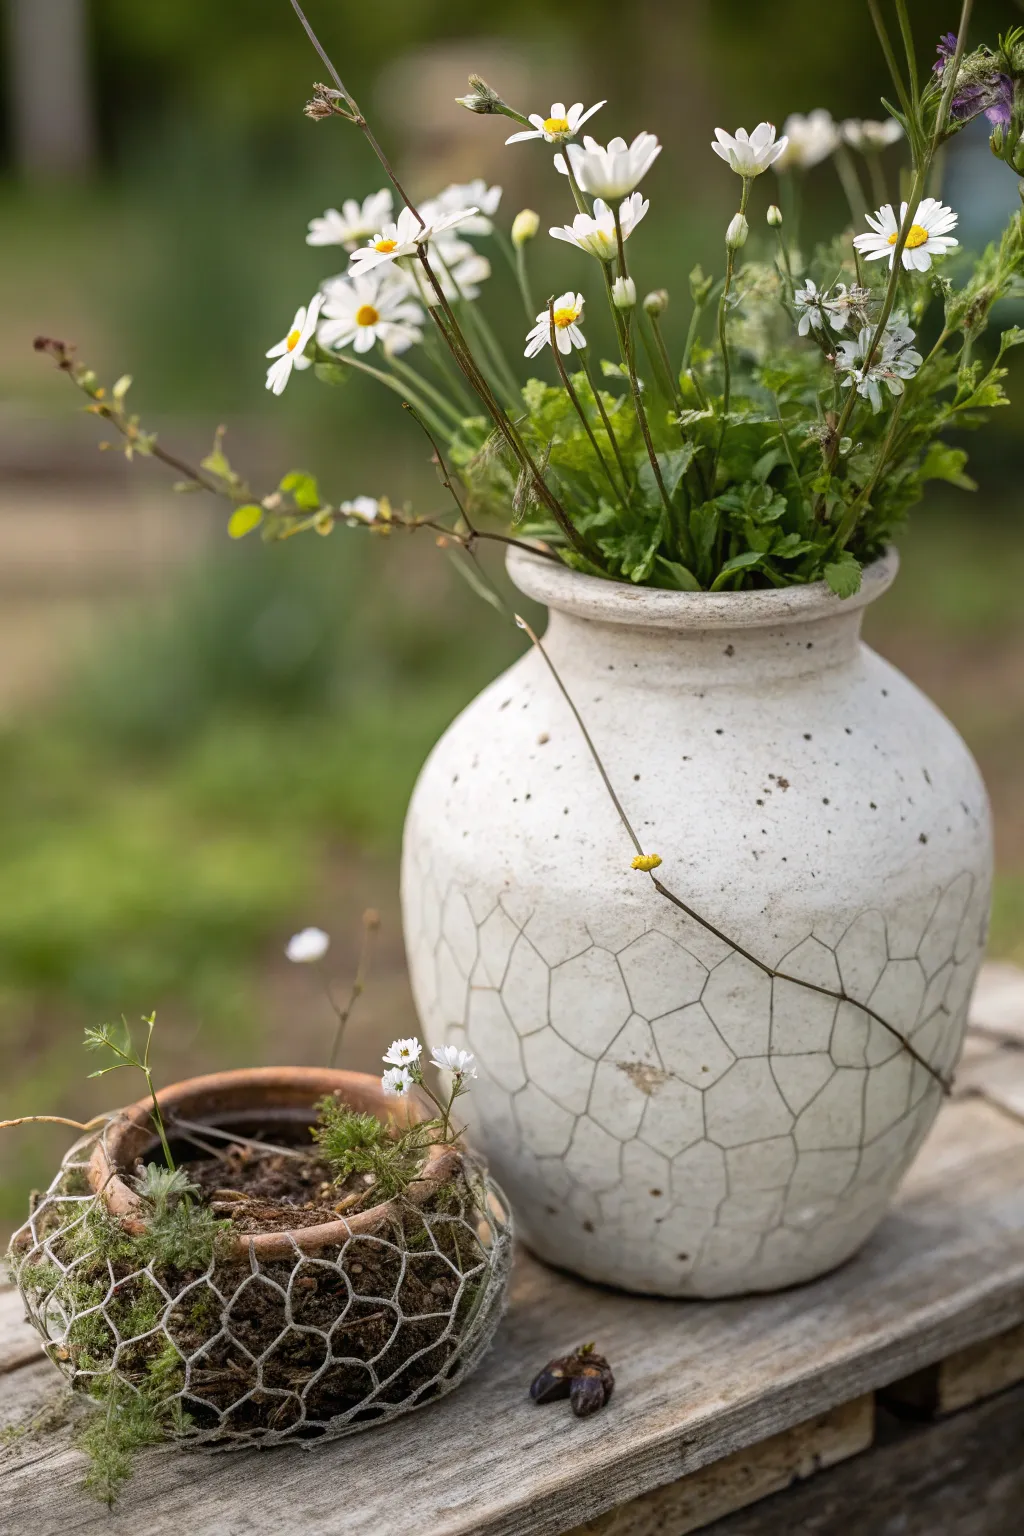
Learn to transform a plain ceramic vase into a rustic masterpiece featuring a unique faux-finish chicken wire pattern. This project combines clever painting techniques with actual wire elements to create a charming, farmhouse-style vignette that looks beautifully aged.
How-To Guide
Materials
- Wide-mouth ceramic vase (white or cream base)
- Small terracotta pot
- Chicken wire mesh (small gauge)
- Wire cutters
- Fine-grit sandpaper
- Grey fine-tip permanent marker or painting pen
- Graphite pencil
- Clear matte varnish spray
- Spaghnum moss or faux moss
- Potting soil
- Hot glue gun or floral wire
- Thin, dried vine or twig
- Artificial or fresh daisies
Step 1: Creating the Faux Chicken Wire Vase
-
Clean the surface:
Begin by thoroughly cleaning your white ceramic vase with warm soapy water to remove any oils or dust. Let it dry completely. -
Sketch the pattern:
Using a graphite pencil, lightly sketch a hexagonal chicken wire pattern directly onto the vase’s surface. Don’t worry about being perfectly geometric; a slightly organic, hand-drawn look adds to the aged charm. -
Trace the lines:
Go over your pencil sketches with a fine-tip grey permanent marker or painting pen. Keep your hand loose to mimic the uneven texture of old wire. -
Soften the lines:
Before the ink fully sets (if using a paint pen), or using a very lightly damp cloth (if using marker), tap the lines gently to blur them slightly. This prevents the pattern from looking too stark and new. -
Add aging details:
I like to add tiny ‘kinks’ or twists at the intersections of the hexagons to represent where the wire would actually be twisted together. -
Simulate a crack:
Draw a darker, jagged line across one section of the vase to simulate a stress fracture or deep crackle, adding character to the piece. -
Clean mistakes:
If you make a mistake with the pattern, quickly wipe it away with a damp cloth or a bit of rubbing alcohol before it becomes permanent. -
Seal the design:
Once you are happy with your faux wire pattern, take the vase to a well-ventilated area and spray it with a clear matte varnish to protect your artwork. -
Attach the twig accent:
Take a thin, dried vine or long twig. Drape it diagonally across the front of the vase, following the general direction of your ‘crack’ or pattern. -
Secure the twig:
Use a tiny dot of hot glue or clear craft adhesive to secure the twig in place, making it look like a wayward vine growing over the pot.
Uneven Lines?
Don’t stress if your drawn hexagons aren’t perfect! The goal is an organic, aged look. Slight wobbles actually make the faux wire look more realistic and less like a stencil.
Step 2: Crafting the Wire-Wrapped Planter
-
Measure the wire:
Wrap a piece of real chicken wire mesh around the circumference of your small terracotta pot to determine the length needed. -
Cut the mesh:
Using wire cutters, snip the mesh, leaving about an inch of overlap. Wear work gloves to protect your hands from sharp edges. -
Form the basket:
Mold the wire tightly around the pot, folding the bottom edges underneath the base to create a secure ‘cup’ shape. -
Secure the back:
Twist the cut ends of the wire together at the back of the pot using pliers. Bend any sharp points inward so they don’t snag. -
Weather the pot:
Lightly sand the rim of the terracotta pot to reveal some texture and give it a used, garden-worn appearance. -
Fill the planter:
Fill the terracotta pot with potting soil. Add small plants or tuck in generous amounts of moss around the edges, letting it poke through the wire mesh holes. -
Final assembly:
Place both vessels on a wooden board. Arrange tall daisies in the large vase and set the small wire-wrapped pot in the foreground for a harmonious display.
Level Up: Rust Effect
Mix a tiny amount of burnt sienna paint with water. Dab this ‘rust water’ sporadically over your drawn wire lines or the real wire mesh for an authentic antique finish.
You have perfectly captured the quiet beauty of a country garden with these textured vessels


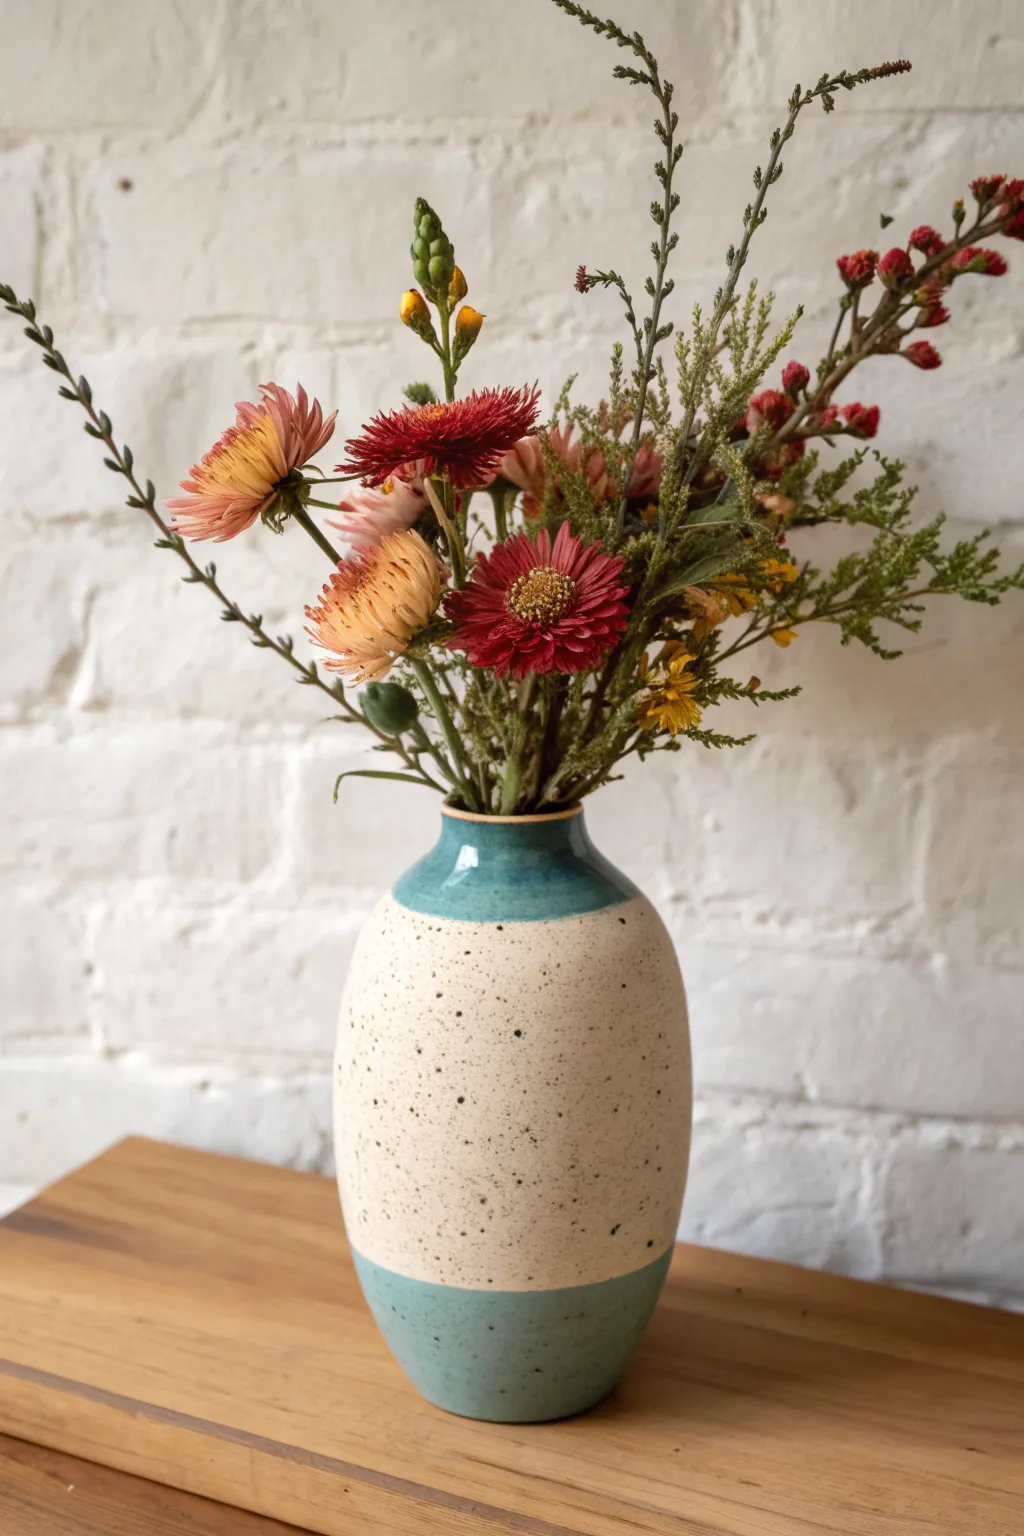
Build a Greenery Framework First
Transform a simple rustic vase into a stunning botanical display by mastering the art of the greenery framework. This approach uses the natural drape of eucalyptus and dried stalks to create a supportive structure before any focal flowers are added.
Detailed Instructions
Materials
- Speckled ceramic vase with a flared neck and wide mouth
- Silver dollar eucalyptus branches
- Willow eucalyptus (or narrow-leaf variety) branches
- Dried tall stalks or grasses
- Red gerbera daisies or asters (preserved or fresh)
- Pink globe amaranth or billy buttons
- Dried filler flowers (pink/beige tones)
- Floral shears
Step 1: The Greenery Foundation
-
Prepare the stems:
Begin by stripping the lower leaves off your eucalyptus branches. You want about 4 to 5 inches of bare stem at the bottom to ensure the water stays clean and the vase fits everything comfortably. -
Insert the drape:
Select your longest willow eucalyptus branch. Place this on the right side of the vase, angling the stem so the leafy end cascades dramatically downwards towards the table surface. This creates the asymmetrical shape seen in the image. -
Build the left side:
Take a fuller branch of silver dollar eucalyptus, which has rounder leaves. Place this on the left side, allowing it to fan out horizontally rather than drooping down, creating visual balance. -
Create the structural grid:
Insert shorter, sturdier cuts of greenery into the center of the vase. Cross their stems underwater to form a natural mesh or grid; this hidden tangle will hold your more delicate flowers in place later. -
Add vertical height:
Insert the dried tall stalks or grasses near the back left. These should stand significantly higher than the rest of the arrangement to draw the eye upward.
Step 2: Adding Texture and Color
-
Place the primary focal flowers:
Cut one red flower (like a gerbera or aster) shorter than your tall grasses but taller than the base greenery. Nest it slightly left of center so it rests comfortably against the silver dollar eucalyptus. -
Add potential movement:
Add a second red flower stem at a slightly different height and angle to avoid a stiff, soldier-like appearance. Usually, I turn the bloom slightly towards the viewer. -
Introduce texture:
Take your dried beige or soft pink filler flowers. Clump a few stems together and insert them near the center-right to bridge the gap between the focal flowers and the cascading greenery. -
Insert spherical accents:
Add the globe amaranth or billy buttons. Because these heads are small, group them in twos or threes. Place one cluster low near the rim and another slightly higher near the red flowers for depth. -
Fill the gaps:
Look at the arrangement from a few feet away. If you see any large empty spaces in your framework, tuck in small sprigs of leftover greenery or fern-like filler to hide the mechanics. -
Adjust the flow:
Gently manipulate the cascading willow eucalyptus on the right. If it feels too stiff, carefully massage the stem with warmth from your hands to encourage a deeper curve. -
Final height check:
Ensure the tallest dried stalks at the back aren’t leaning too far forward. They should act as a backdrop, framing the negative space behind the colorful blooms.
Use the lip
A flared neck vase is tricky. Let the heavy greenery stems rest firmly on the rim’s edge; their weight will leverage the cut ends up, creating a tighter grid inside.
Floppy flowers?
If your focal flowers keep spinning or sinking, recut the stem at a sharp angle and wedge it directly into the ‘V’ created by two crossed eucalyptus branches.
Step back and admire the organic, sweeping lines of your new lasting arrangement


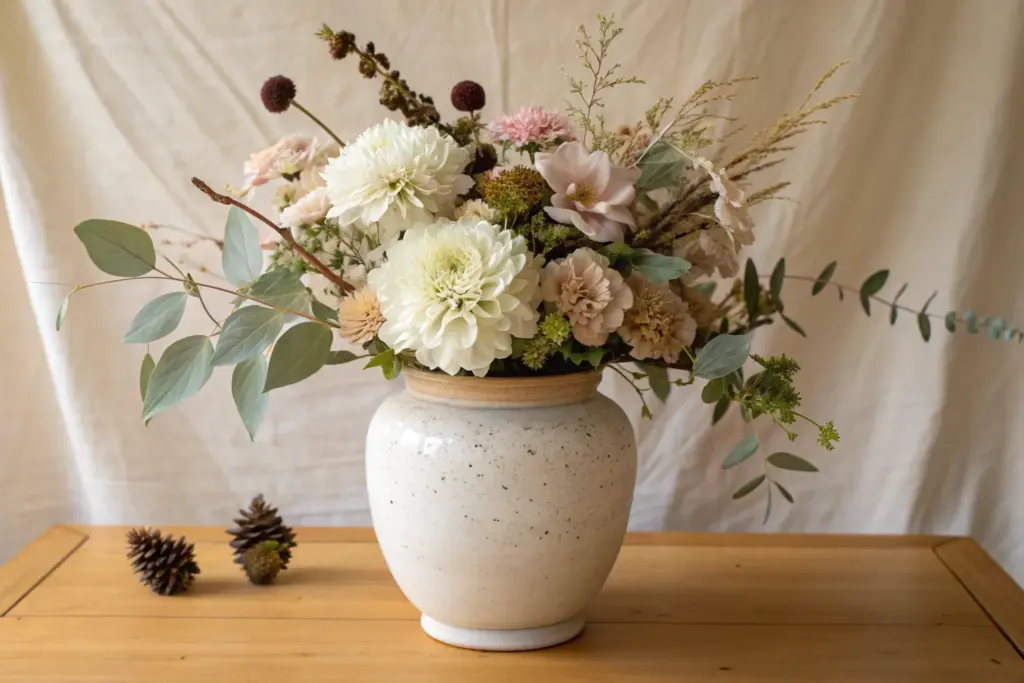
Go for a Big Bloom Dome
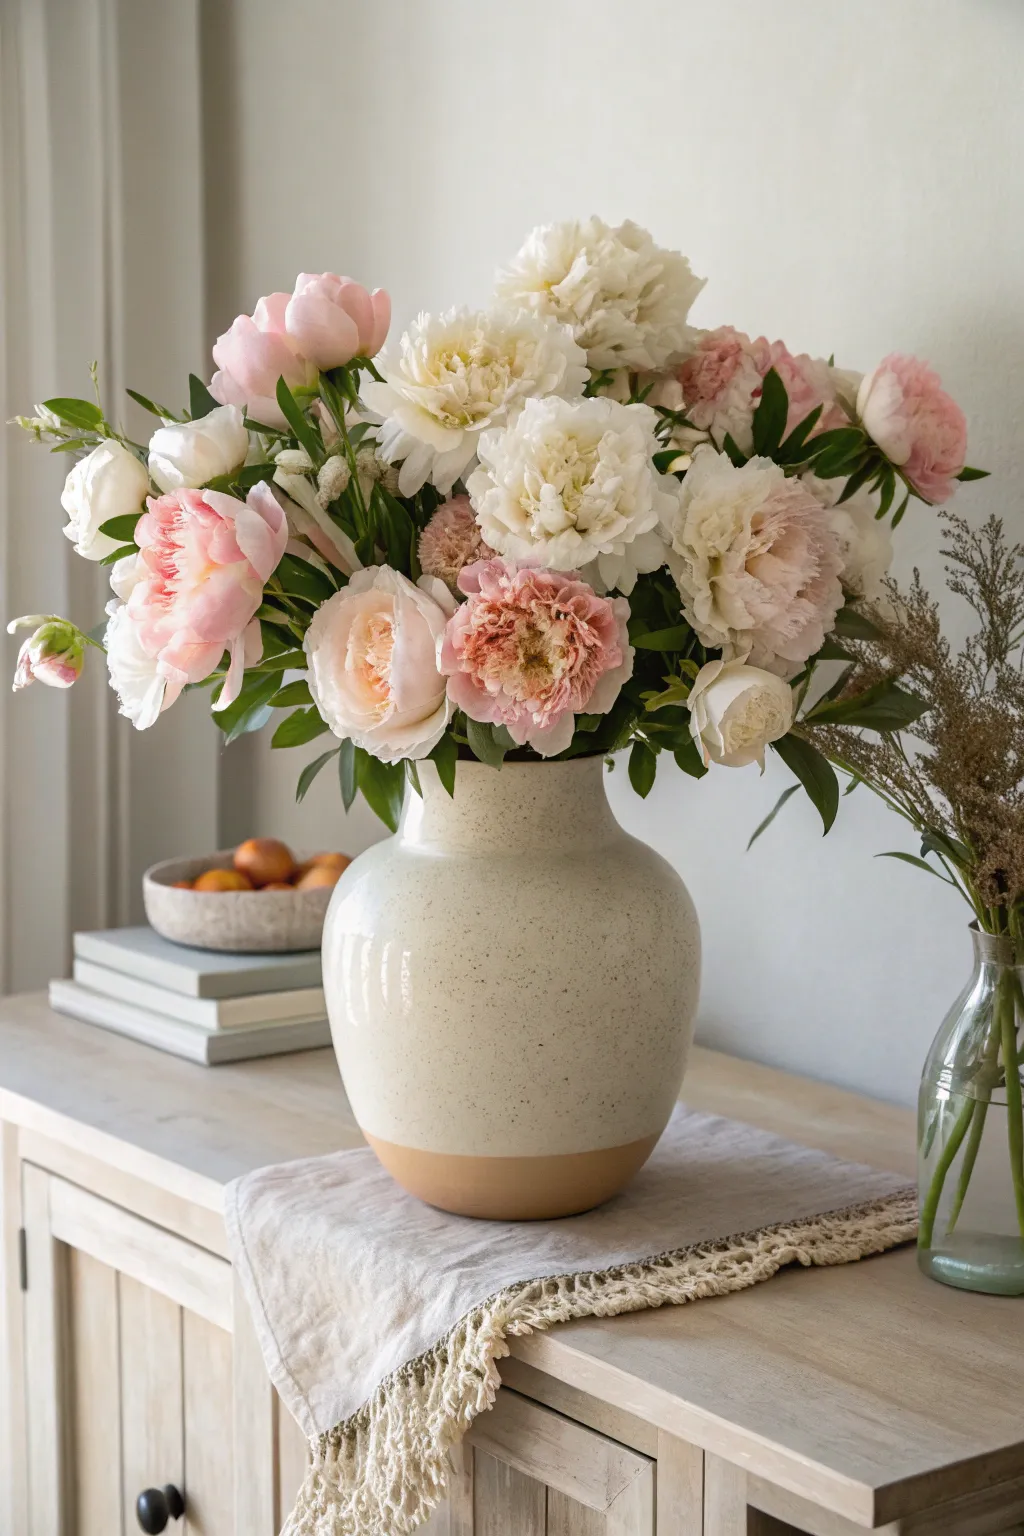
Transform a wide-mouth vase into a showstopping centerpiece by creating a lush, hemispherical arrangement of massive peonies. This technique maximizes the volume of your blooms, creating a cloud-like effect that feels opulent and garden-fresh.
Step-by-Step Tutorial
Materials
- Large, wide-mouth ceramic vase (two-tone beige/cream)
- Chicken wire or a large flower frog
- Floral tape (optional)
- Floral shears
- 15-20 Peony stems (mix of ‘Sarah Bernhardt’, cream, and white varieties)
- Warm water
- Flower food
Step 1: Preparation and Structure
-
Prep the vase:
Begin by cleaning your wide-mouth ceramic vase thoroughly with warm soapy water to remove any bacteria that could shorten the life of your blooms. -
Create the mechanics:
Because the vase mouth is wide, the stems need support to stand upright. Cut a piece of chicken wire roughly twice the size of the opening. -
Form the ball:
Gently crumple the chicken wire into a loose ball shape and insert it into the vase. It should fit snugly. Alternatively, you can create a grid with floral tape across the mouth, but chicken wire offers better multi-directional support for heavy peony heads. -
Add water:
Fill the vase about two-thirds full with lukewarm water mixed with flower food. I find peonies open up faster and more fully in slightly warmer water. -
Process the stems:
Strip all leaves from the lower two-thirds of the peony stems. Leave only the leaves near the bloom head to add fullness to the dome shape later.
Step 2: Building the Dome
-
Establish the perimeter:
Select your largest, most open blooms. Cut these stems slightly shorter and place them around the rim of the vase, angling them outward almost horizontally. -
Secure the rim layer:
Ensure the leaves of these perimeter flowers rest just above the vase lip, effectively hiding the mechanics (wire or tape) and softening the edge. -
Add the center peak:
Choose a tall, strong stem for the very center. Cut it so the bloom sits about 6-8 inches above the rim flowers. Insert it straight down into the middle of your wire structure. -
Fill the bridge:
Now you need to connect the rim to the peak. Cut stems at graduating lengths—longer than the rim stems but shorter than the center stem. -
Mix colors:
As you insert these bridging stems, alternate between the blush pinks, creamy whites, and deeper pink varieties to create a balanced, speckled color palette rather than blocks of color. -
Check for gaps:
Step back and look at the arrangement from all sides. The goal is a seamless semi-circle. If you see a hole, fill it with a smaller bud or a bloom that hasn’t fully opened yet. -
Adjust the facing:
Gently rotate individual blooms so their ‘faces’ are pointing outward and upward, ensuring the best side of the flower is visible.
Opening Tight Buds
Peonies stubborn? Dip the heads (just the petals!) in a bowl of warm water and gently massage the head with your thumb to loosen the sap sealing the petals.
Step 3: Final Touches
-
Leaf manipulation:
Tuck any unruly leaves back into the arrangement or snip them off if they are creating dark shadows or interrupting the flow of the petals. -
Add texture (optional):
If your arrangement feels too uniform, you can tuck in a few sprigs of filler greenery deep between the blooms, though a true ‘bloom dome’ usually relies solely on the flowers. -
Placement:
Place the heavy vase on a sturdy surface. I like to lay down a linen runner first to catch any falling pollen or water droplets.
Drooping Heavy Heads
If a heavy bloom droops, your stem is likely too long or the wire support isn’t dense enough. Recut the stem shorter or add a second layer of chicken wire.
Enjoy the dramatic presence this lush dome of blooms brings to your space
Low Bowl-Style Centerpiece
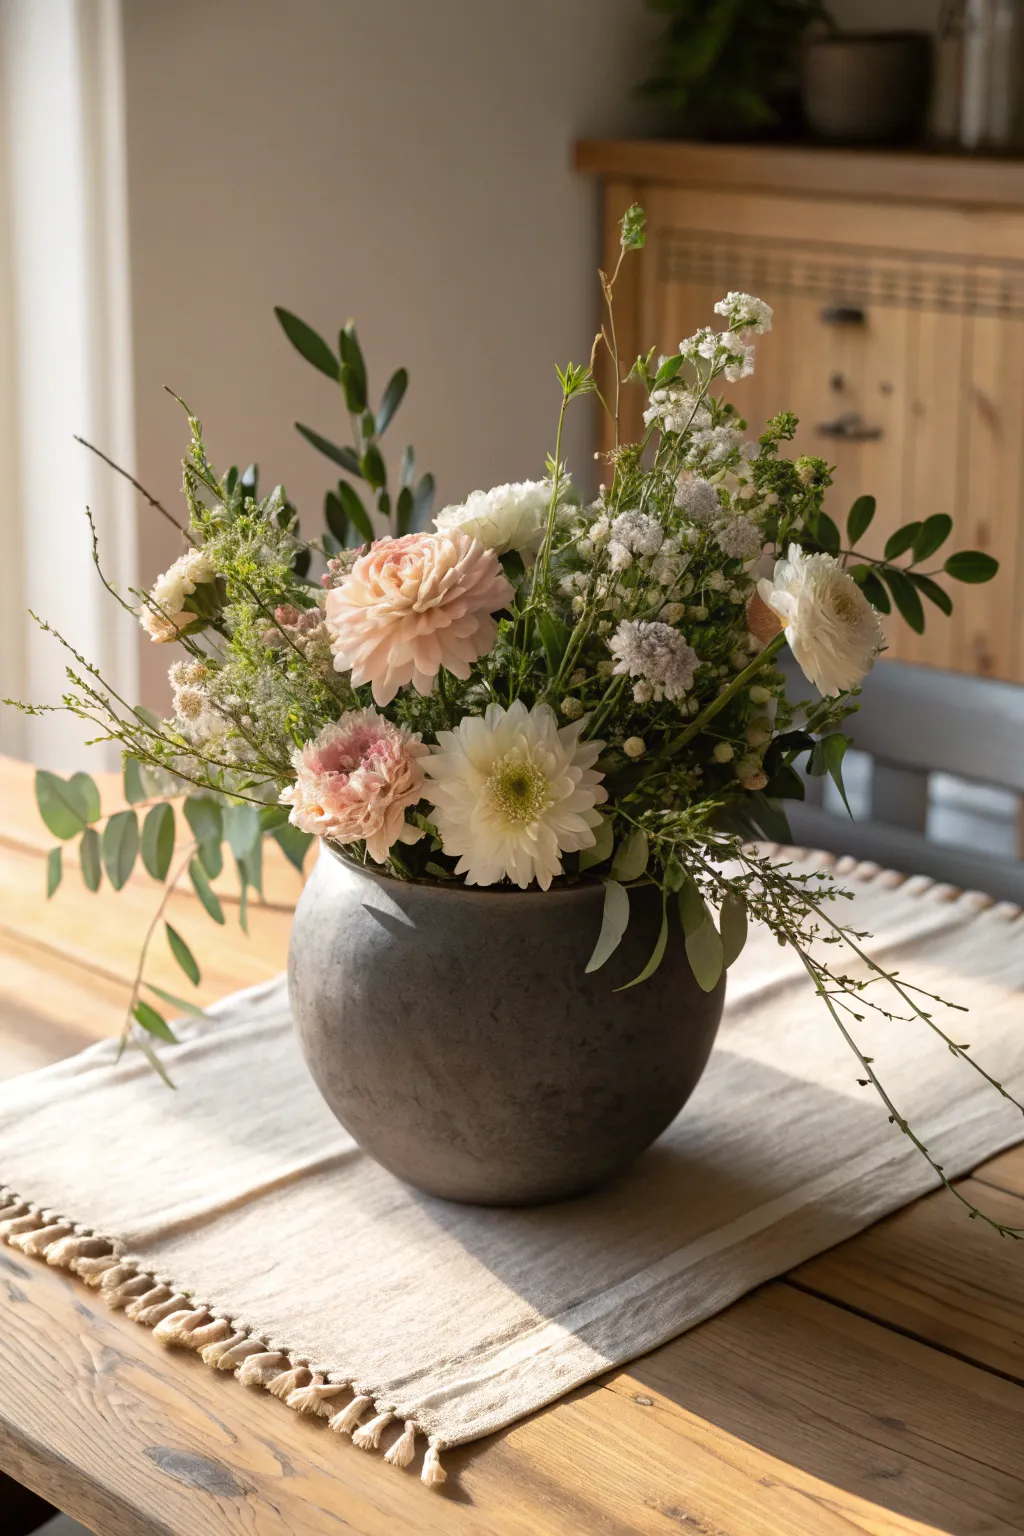
This arrangement embraces a natural, garden-gathered aesthetic by pairing delicate pastels with sculptural greenery in a substantial ceramic vessel. The wide mouth allows for an open, airy composition that feels effortless yet sophisticated, perfect for a sunny dining table.
How-To Guide
Materials
- Wide-mouth ceramic bowl vase (charcoal or dark grey, approx. 6-8 inch opening)
- Chicken wire or a large flower frog (kenzan)
- Floral tape
- Floral shears
- 3-4 Stems of pale pink Dahlia or Ranunculus
- 2-3 Stems of white Scabiosa or Pincushion flower
- 3-4 Stems of white Lisianthus or Spray Roses
- Filler flowers: White Waxflower or Baby’s Breath
- Greenery: Eucalyptus (silver dollar or seeded)
- Greenery: Olive branches or similar broad-leaf stems
- Greenery: wispy grasses or Queen Anne’s Lace for texture
Step 1: Preparation & Mechanics
-
Prepare the mechanics:
Because this is a wide-mouth vase, stems will flop without support. Cut a piece of chicken wire about twice the size of the opening and mold it into a loose ball shape. -
Secure the structure:
Place the chicken wire ball inside the vase. It should fit snugly but not be crushed flat. If needed, secure it with a cross of waterproof floral tape over the mouth of the vessel. -
Hydrate:
Fill the vase with cool, fresh water mixed with flower food until it is about three-quarters full. -
Prep the stems:
Strip all foliage that will fall below the water line to prevent bacterial growth. Recut all stems at a 45-degree angle immediately before placing them.
Flopping Stems?
If stems slide or spin despite the wire, insert a thick woody stem (like a branch cut-off) horizontally through the wire matrix to create a tighter grid for delicate stems to rest against.
Step 2: Establishing the Shape
-
Asymmetrical base:
Start with your heavier greenery branches like the olive or broad-leaf stems. Place one extending high to the back right, and another draping low over the front left rim. -
Add movement:
Insert the eucalyptus stems, allowing them to hang loosely over the sides. The goal is to break the hard line of the vase rim. -
Create depth:
Add a few shorter greenery stems deep into the center of the wire to cover the mechanics and create a dark background for the blooms.
Level Up: Foraged Finds
Make it unique by adding dried pods, berries, or sculptural twigs from your own yard. A few dried brownish elements beautifully complement the grey vase and soft pinks.
Step 3: Adding the Focal Flowers
-
Place the primary bloom:
Take your largest pale pink Dahlia or Ranunculus. Position it slightly off-center and low, facing forward. This anchors the arrangement. -
Add secondary height:
Place a white Scabiosa or Pincushion flower slightly higher and behind your focal bloom to start drawing the eye upward. -
Cluster for impact:
Group a second pink bloom near the first one but at a different angle. I prefer clustering because it mimics how flowers grow in nature. -
Balance the colors:
Insert the white Lisianthus or spray roses on the opposite side of the focal cluster to balance the color distribution without making it symmetrical.
Step 4: Details & Finish
-
Incorporate texture:
Fill in the gaps with the Waxflower or Baby’s Breath. These should be cut shorter and tucked in to add volume without overpowering the main blooms. -
Add airy elements:
Take your wispiest stems—like the grasses or Queen Anne’s Lace—and let them float high above the other flowers. They should extend well past the main shape. -
Check the profile:
Spin the vase slowly. Ensure the arrangement looks good from the sides, even if it is meant to be viewed primarily from the front. -
Make final adjustments:
Pull a few greenery stems slightly further out if the arrangement looks too tight. The look should be loose and ‘breathe’. -
Clean up:
Wipe any water drips off the exterior of the ceramic bowl before placing it on your table runner.
Enjoy the serene and organic feel this centerpiece brings to your space

The Complete Guide to Pottery Troubleshooting
Uncover the most common ceramic mistakes—from cracking clay to failed glazes—and learn how to fix them fast.
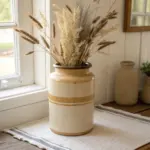
Tall Vase, Wide Mouth Leaning Lines
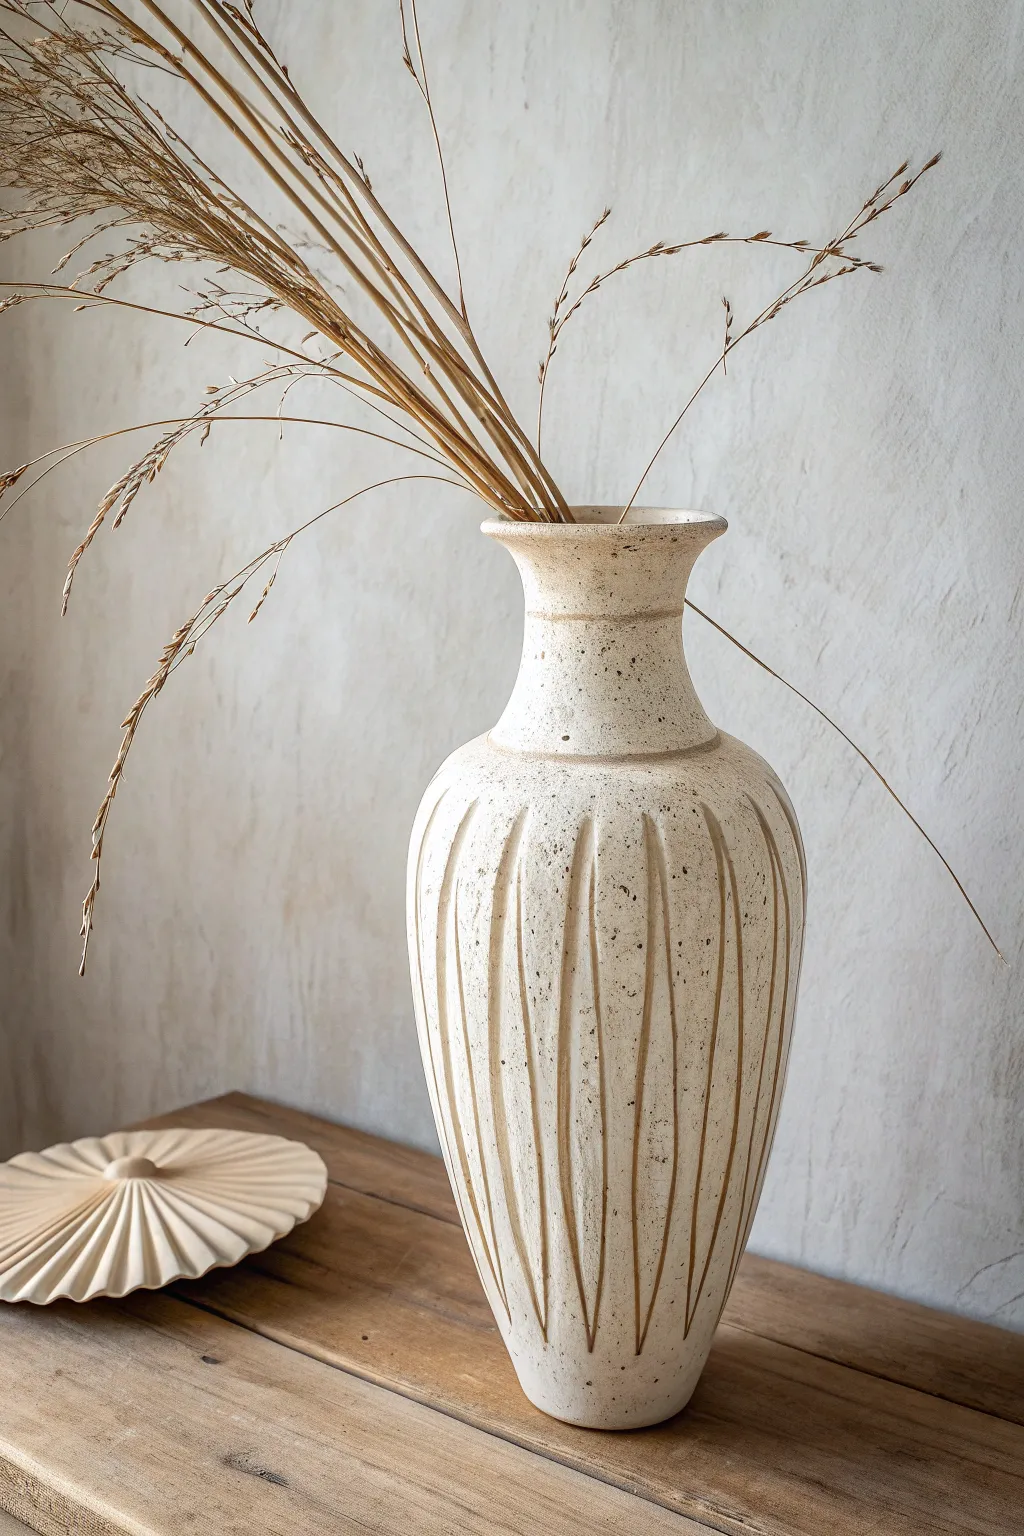
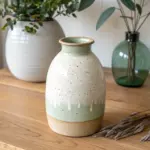
Transform a plain glass or ceramic vessel into a rustic, high-end decor piece that mimics the look of hand-thrown speckled stoneware. This project uses texture mediums and paint to create distinct vertical ribs and a earthy, organic finish.
Step-by-Step
Materials
- Tall glass or ceramic vase (thrifted is fine)
- White primer spray paint
- Baking soda
- Acrylic paint (warm cream/off-white)
- Acrylic paint (dark brown or espresso)
- Mod Podge or clear craft glue
- Hot glue gun and glue sticks
- Medium flat paintbrush
- Old toothbrush
- Matte clear sealant spray
Step 1: Preparation & Structure
-
Clean the surface:
Before starting, verify your vase is completely clean and dry. Wipe it down with rubbing alcohol to remove any oils or sticker residue, which ensures your base coat sticks properly. -
Apply primer base:
Take the vase to a well-ventilated area and apply a thin, even coat of white primer spray paint. This gives your glue and texture something to grip onto, especially if your original vase is slippery glass. -
Mark your guidelines:
Once the primer is dry, lightly stick four pieces of painter’s tape vertically around the vase to divide it into quadrants. This helps spacing. You can also lightly mark vertical lines with a pencil where you want your ribs to go. -
Create the ribs:
Using a hot glue gun, carefully draw vertical lines from the bottom of the vase up towards the neck. Taper the lines so they fade out just before hitting the neck curve, rather than going all the way to the rim. -
Refine the shape:
While the glue is warm but not scalding, you can gently press it down with a wet finger if a line stands up too high. The goal is a subtle raised ridge, not a bulky drip. -
Clean up threads:
After all the vertical ribs are applied and hardened, go over the vase and pull off any wispy ‘spider web’ strings of hot glue.
Glue Gun Troubles?
If your hot glue lines look too wobbly, let them cool, slice off the mistakes with a craft knife, and re-apply. High-temp glue usually self-levels better than low-temp glue.
Step 2: Texture & Color Application
-
Mix the texture paint:
In a disposable cup, mix your warm cream acrylic paint with baking soda. Start with a 1:1 ratio. You want a thick, frosting-like consistency that will hide the smooth gloss of the hot glue. -
Apply the first texture coat:
Brush the baking soda mixture over the entire vase, covering the hot glue lines completely. Use horizontal brush strokes on the neck and vertical strokes on the body to follow the form. -
Let it cure:
Allow this thick layer to dry completely. It needs to be hard to the touch, which might take an hour or two depending on humidity. -
Apply the second coat:
Add a second layer of the texture paint. I like to stipple this layer slightly (pouncing the brush up and down) to create that rough, stone-like surface between the ribs. -
Carve the details:
While the second coat is tacky but starting to dry, use a slightly damp brush or a toothpick to gently run closely along the sides of the hot glue ribs. This defines them and ensures they don’t look like buried lumps. -
Create the speckles:
Dilute a small amount of dark brown paint with water so it is fluid. Dip an old toothbrush into this mixture. -
Splatter technique:
Hold the toothbrush about 6 inches from the vase and run your thumb across the bristles to flick tiny specks of paint onto the surface. Rotate the vase to get even coverage. -
Highlight the ribs:
Using a very dry brush with a tiny amount of the un-diluted brown paint, gently dry-brush just the tops of the vertical ribs to make the dimension pop.
Step 3: Finishing Touches
-
Seal the work:
Because baking soda paint can be fragile and crumbly, seal the entire vase with a matte clear spray sealant. Apply two light coats. -
Style the interior:
If you plan to use fresh flowers, insert a smaller water-tight glass cylinder inside. Since this is a faux-finish, it is best suited for dried arrangements to avoid water damage to the exterior. -
Arrange the florals:
Insert tall, dried ornamental grasses or wheat stalks. Let them fan out naturally to complement the ‘leaning lines’ of your new textured vase.
Pro Tip: Tinting
Add a drop of grey or beige to your white baking soda mix. Pure white can look too stark; a slightly ‘dirty’ off-white looks more like authentic ceramic stoneware.
Place your new artisan-style vase on a console table and enjoy the warmth of its textured finish
Let It Spill Over the Edge
This handmade ceramic vase combines the natural beauty of speckled clay with a vibrant pop of teal glaze. The wide mouth allows for generous floral arrangements that spill gracefully over the edges, creating a relaxed and organic centerpiece.
How-To Guide
Materials
- Speckled Stoneware Clay (e.g., Laguna Speckled Buff)
- Pottery wheel
- Throwing tools (sponge, needle tool, rib, wire cutter)
- Trimming tools
- Kiln
- Wax resist
- Teal/Turquoise gloss glaze
- Clear matte glaze (optional)
- Glaze brushes or tongs for dipping
- Bucket of water
Step 1: Throwing the Form
-
Prepare the clay:
Begin by wedging about 2-3 pounds of speckled stoneware clay to remove air bubbles and ensure consistency. -
Center on the wheel:
Throw the clay onto the wheel head and center it firmly. Since this vase has some height, a strong, centered base is crucial. -
Open and lift:
Open the clay and begin pulling up the walls. Aim for a cylinder initially, keeping the walls even in thickness from bottom to top. -
Shape the belly:
Using a rib tool on the outside and your hand on the inside, gently push the belly of the vase outwards to create a rounded, oval shape. I find it helpful to start this curve from the bottom third. -
Collar the neck:
Slowly collar the top third of the clay inward to narrow the neck. Do this gradually to avoid buckling the clay walls. -
Flare the rim:
Once the neck is defined, gently flare the rim outward again to create the wide mouth that will eventually support your stems. -
Refine the surface:
Use a metal or wooden rib to smooth the exterior, compressing the clay and removing excess slip to reveal the texture. -
Cut from wheel:
Use a wire cutter to slice underneath the vase, then carefully transfer it to a ware board to dry to leather-hard.
Step 2: Trimming and Bisque
-
Center for trimming:
Once leather-hard, place the vase upside down on the wheel. Secure it with clay lugs or a chuck if the neck is narrow. -
Trim the foot:
Trim away excess weight from the bottom and carve a neat foot ring. This lifts the form slightly and gives it a professional finish. -
Smooth the exterior:
Use a damp sponge to smooth any trimming marks or rough spots. This is your last chance to perfect the shape before firing. -
Bisque fire:
Load the bone-dry vase into the kiln and bisque fire it to cone 04 (or according to your clay body’s specifications).
Uneven Glaze Lines?
If dipping creates wavy lines you don’t like, establish your glaze boundaries first with masking tape or wax resist for a razor-sharp geometric edge.
Step 3: Glazing
-
Clean the bisque:
Wipe the fired vase with a damp sponge to remove any dust that might interfere with glaze adhesion. -
Apply wax resist:
Paint a band of wax resist around the middle section of the vase if you want a super crisp line, or simply rely on careful dipping for a more organic look. -
Dip the top:
Hold the vase by the foot and dip the top section (rim and neck) into your teal glaze. Hold it there for 3 seconds, then pull it out and shake off excess drips. -
Dip the bottom:
Once the top is dry to the touch, flip the vase and dip the bottom section into the same teal glaze, creating a matching band at the base. Ensure you leave the middle section unglazed to show off the raw speckles. -
Clean the foot:
Wipe the very bottom (the foot ring) completely clean of glaze so it doesn’t fuse to the kiln shelf. -
Glaze interfere:
If you dripped any teal glaze onto the raw clay middle section, scrape it off gently with a knife or wipe with a sponge for a clean finish. -
Glaze fire:
Place the vase back in the kiln for the final glaze firing, typically to cone 5 or 6 for stoneware. This creates the durable, waterproof finish.
Go Matte
For a different texture, apply a clear matte glaze over the central ‘raw’ section. It intensifies the speckles while keeping the surface smooth.
Fill your new vessel with wild blooms and enjoy the contrast of vibrant glaze against natural clay

What Really Happens Inside the Kiln
Learn how time and temperature work together inside the kiln to transform clay into durable ceramic.
Try a Monochrome Flower Mix
Embrace the elegance of subtle tonal shifts with this arrangement that blends creamy whites, soft peaches, and dried natural textures. By mixing fresh blooms with dried grasses, you achieve a sophisticated, long-lasting display that perfectly suits the organic feel of a speckled wide-mouth vessel.
Detailed Instructions
Materials
- Wide-mouth stoneware vase (white/creamy speckle)
- Chicken wire or a large floral frog (kenzan)
- Floral tape (clear or green)
- Floral shears
- 3-4 Peach/Blush Garden Roses
- 3-4 White Ranunculus
- 2-3 Large Blush Peonies or Dahlia (focal flowers)
- Tall dried grasses (like Pampas or Reed Grass)
- Greenery stems (Italian Ruscus or similar)
- Dried seed pods (Scabiosa pods or Poppy pods)
- Dried bunny tails or similar textural grasses
- Queen Anne’s Lace or Ammi Majus (for airy filler)
- Pale pink Spray Roses or Waxflower
Step 1: Preparing the Foundation
-
Prepare the mechanics:
Since this is a wide-mouth vase, stems will flop without support. Cut a piece of chicken wire, crumple it explicitly into a ball shape, and insert it inside the vase. It should fit snugly. -
Secure the structure:
Use floral tape to create a small ‘X’ over the mouth of the vase if the chicken wire feels loose. This ensures your heavy focal flowers stay exactly where you place them. -
Add water:
Fill the vase about two-thirds full with fresh, cool water mixed with floral food.
Pro Tip: Reflexing Roses
Gently fold back the outer petals of your roses (‘reflexing’) to make them look twice as large and give them that lush, garden-grown appearance instantly.
Step 2: Establishing Height and Shape
-
Insert tall grasses:
Begin by placing your tallest dried grass stems in the back left quadrant. Let them fan out naturally to establish the arrangement’s highest point. -
Add structural greenery:
Place a few stems of Ruscus or similar greens on the opposing side—the right—to create an asymmetrical triangle shape. Allow some leaves to spill over the rim. -
Incorporate wispy elements:
Tuck in a few stems of Queen Anne’s Lace or tall, airy dried fillers near the back to add volume without heaviness.
Level Up: Ombré Effect
Try arranging your flowers in a subtle gradient, starting with pure white on the left and fading into deep peach or dusty apricot on the right for visual flow.
Step 3: Placing the Focal Flowers
-
Anchor with the largest bloom:
Cut your largest blush peony or garden rose quite short so the head sits just above the vase rim. Place this front and slightly off-center to ground the design. -
Layer secondary blooms:
Add the peach garden roses at varying heights. I like to keep one tucking in low near the focal flower and another floating slightly higher to draw the eye upward. -
Group the ranunculus:
Cluster two or three white ranunculus together on the right side. Grouping them creates a stronger visual impact than scattering them individually. -
Create depth:
Ensure that not all flower heads are facing directly forward. Turn a few slightly to the side or tuck them deeper into the arrangement to create a sense of three-dimensional depth.
Step 4: Adding Texture and Detail
-
Insert seed pods:
Place the Scabiosa or poppy pods in the mid-ground. Their dark or textured centers provide a necessary contrast to the soft petals. -
Fill with dried textures:
Weave stems of bunny tails and fluffy dried grasses in between the fresh flowers. These bridge the gap between the lush blooms and the rustic vase. -
Add delicate accents:
Use the smaller spray roses or waxflower to fill any visible gaps where the chicken wire might show, particularly around the base. -
Extend the lines:
Add a final long, swooping stem of greenery or a dried branch extending out to the right to balance the height of the left-side grasses. -
Check all angles:
Spin the vase slowly. While this is a front-facing arrangement, ensure the sides look finished and no stems are crossing awkwardly.
Enjoy the gentle calm your new monochrome floral masterpiece brings to the room
One Statement Stem With Space
Embrace the elegance of negative space with this minimalist display featuring a single, dramatic statement branch housed in a textured, wide-mouth vessel. This project focuses on balance and simplicity, creating a serene focal point that celebrates the raw beauty of natural elements.
Step-by-Step Tutorial
Materials
- A wide-mouth ceramic vase (speckled cream or matte white finish)
- One large dried branch (willow, curly hazel, or similar)
- Pruning shears or heavy-duty floral scissors
- Floral frog (kenzan) or chicken wire (optional, for stability)
- Newspaper or drop cloth (for trimming)
- Dried ornamental grass or fern (optional, for table styling)
Step 1: Selecting the Vessel
-
Choose the right vase:
Begin by selecting a vessel that has a wide mouth but a tapered neck. The vase in the image has a lovely speckled, organic stoneware texture which contrasts beautifully with the stark lines of a branch. -
Clean the interior:
Ensure the inside of the vase is clean and dry. Since we are using a dried branch, you won’t need water, but any residue inside could cause mold over time.
Branch Won’t Stay Put?
If the branch keeps spinning in the wide mouth, wedge a few smaller, trimmed twig pieces into the gap between the main stem and the vase rim to lock it tight.
Step 2: Preparing the Branch
-
Find your statement piece:
Look for a branch that has a strong main line but interesting offshoots. The goal is a piece that stretches upward and outward, mimicking a tree’s natural reach. -
Assess the height:
Hold the branch next to your vase to gauge the height. A good rule of thumb is for the branch to be at least 1.5 to 2 times the height of the vase. -
Trim the base:
Using your pruning shears, cut the bottom of the branch at a slight angle. This helps it sit securely against the bottom edge of the vase. -
Remove lower twigs:
Strip away any small twigs or buds that would fall below the rim of the vase. You want a clean ‘trunk’ emerging from the wide mouth. -
Edit the upper structure:
Step back and look at the branch’s shape. Snip off any wayward twigs that cross over each other awkwardly or disrupt the main flow of the line.
Shadow Play
Position this arrangement near a window with harsh direct light. The complex shadows cast by the bare branch become a secondary piece of art on the wall.
Step 3: Arranging the Stem
-
Check stability:
Place the branch into the vase. Let it lean naturally against the rim. Because wide-mouth vases can be tricky, the branch might want to flop over. -
Secure the base (if needed):
If the branch is too heavy or the mouth is too wide, I find using a small ball of chicken wire inside the vase helps hook the bottom of the stem in place. -
Find the best angle:
Rotate the branch until it presents its most dynamic side. You want the arc of the branch to reach out into the empty space, creating movement. -
Verify the lean:
Ensure the branch leans dramatically but feels balanced. It should look like it’s stretching towards a light source.
Step 4: Styling the Scene
-
Position the vase:
Place the vase on a wooden surface where the light can cast shadows through the branch structure. -
Add a secondary element:
If you have a second, smaller vase (like the round one in the background), place it slightly behind and to the right to create depth. -
Use books for elevation:
Stack a couple of books under the secondary vase or nearby to vary the visual heights in your vignette. -
Incorporate texture:
Lay a small sprig of dried fern or ornamental grass on the table surface near the base of the main vase to echo the natural textures. -
Final adjustment:
Do one last check of the shadows. Rotate the main vase slightly if the shadow cast by the branch distracts from the composition.
Now step back and appreciate the quiet, sculptural beauty of your new arrangement

TRACK YOUR CERAMIC JOURNEY
Capture glaze tests, firing details, and creative progress—all in one simple printable. Make your projects easier to repeat and improve.
Cluster Mini Bouquets Together
Bring the golden hour indoors with this textured arrangement that mixes preserved blooms with wild, airy grasses. The speckled ceramic vessel anchors the warm pink, yellow, and tan tones, creating a cozy cottage-core aesthetic perfect for any side table.
Step-by-Step Guide
Materials
- Speckled cream ceramic vase (bottle or teardrop shape)
- Dried Strawflowers (pink and yellow hues)
- Craspedia (Billy Balls) – preserved or dried
- Dried ornamental grasses (Miscanthus, Pampas, or similar beige plumes)
- Dried Wheat or Oats stems
- Small dried thistles or seed pods
- Tall sturdy accent stems (like dried scabiosa pods or poppy heads)
- Floral shears or sharp scissors
- Optional: Floral tape or rubber band (for clustering)
Step 1: Preparation and Foundation
-
Select your vessel:
Choose a vase with a rustic, handmade feel. A speckled cream glaze works best to complement the warm tones of the dried florals without stealing the show. -
Sort your stems:
Lay out all your dried materials on a clean surface. Group them by type: focal flowers (strawflowers, ranunculus), textural fillers (grasses, wheat), and accents (craspedia, tall pods). -
Clean the stems:
Strip away any lower leaves or straggly bits from the bottom two-thirds of all stems. This keeps the inside of the vase clutter-free and makes arranging easier. -
Assess stem heights:
Hold stems up against the vase to gauge height. You generally want the arrangement to be about 1.5 to 2 times the height of the vase itself for good proportion.
Step 2: Creating the Grass Backdrop
-
Start with the grasses:
Take your fluffiest dried grasses and wheat stems. Arrange a cluster of these in your hand first slightly fanned out. -
Position the backdrop:
Place this bundle into the back right quadrant of the vase. These stems should lean slightly to the right, creating a sweeping asymmetrical line. -
Establish height:
Add a few taller, wispy grass stems or wheat stalks reaching upward to define the highest point of the arrangement. -
Fill the void:
If the grasses feel too sparse, add a few more stems of dried oats or bunny tails to bulk up that right-hand side without making it too heavy.
Drooping Stems?
If dried heads are too heavy for their brittle stems, reinforce them by carefully taping a piece of floral wire along the stem with brown floral tape.
Step 3: Adding Color and Focal Points
-
Place the main focal flower:
Take your largest pink strawflower or dried ranunculus. Trim it so it sits just above the vase rim and nestle it slightly left of center. -
Add secondary colors:
Insert a yellow strawflower or aster directly underneath or beside the pink focal bloom. This creates a dense spot of color low in the arrangement. -
Introduce texture with Craspedia:
Take two or three Billy Balls (Craspedia) and cut them to different lengths. Place one low near the yellow flower and another higher up to draw the eye upward. -
Cluster the mini-bouquet:
I like to think of the colorful flowers as their own ‘mini bouquet’ within the vase. Ensure their heads are close together rather than scattered evenly.
Scent Boost
Tuck a few sprigs of dried lavender or eucalyptus deep into the center bundle. It adds a subtle, relaxing fragrance without altering the visual color palette.
Step 4: Final Touches and Fine Tuning
-
Insert tall accents:
Place a few tall, thin stems—like scabiosa pods or lone tall grasses—rising out of the left side. This balances the visual weight of the heavy grasses on the right. -
Add depth:
Tuck a medium-height terra cotta or rust-colored preserved flower behind the main pink bloom to add dimension and shadow. -
Check the profile:
Spin the vase slowly. While this style is often front-facing, ensure there are no gaping holes visible from the sides. -
Adjust the lean:
Gently nudge the stems so they fan out naturally. The grasses should feel windswept to the right, while the flowers anchor the left. -
Final trim:
If any grass tips look broken or awkward, give them a tiny slanted snip to clean up the silhouette.
Now you have a timeless, textured display that requires zero water and captures the warmth of a late summer field
Dried Stems With a Big Fan Shape
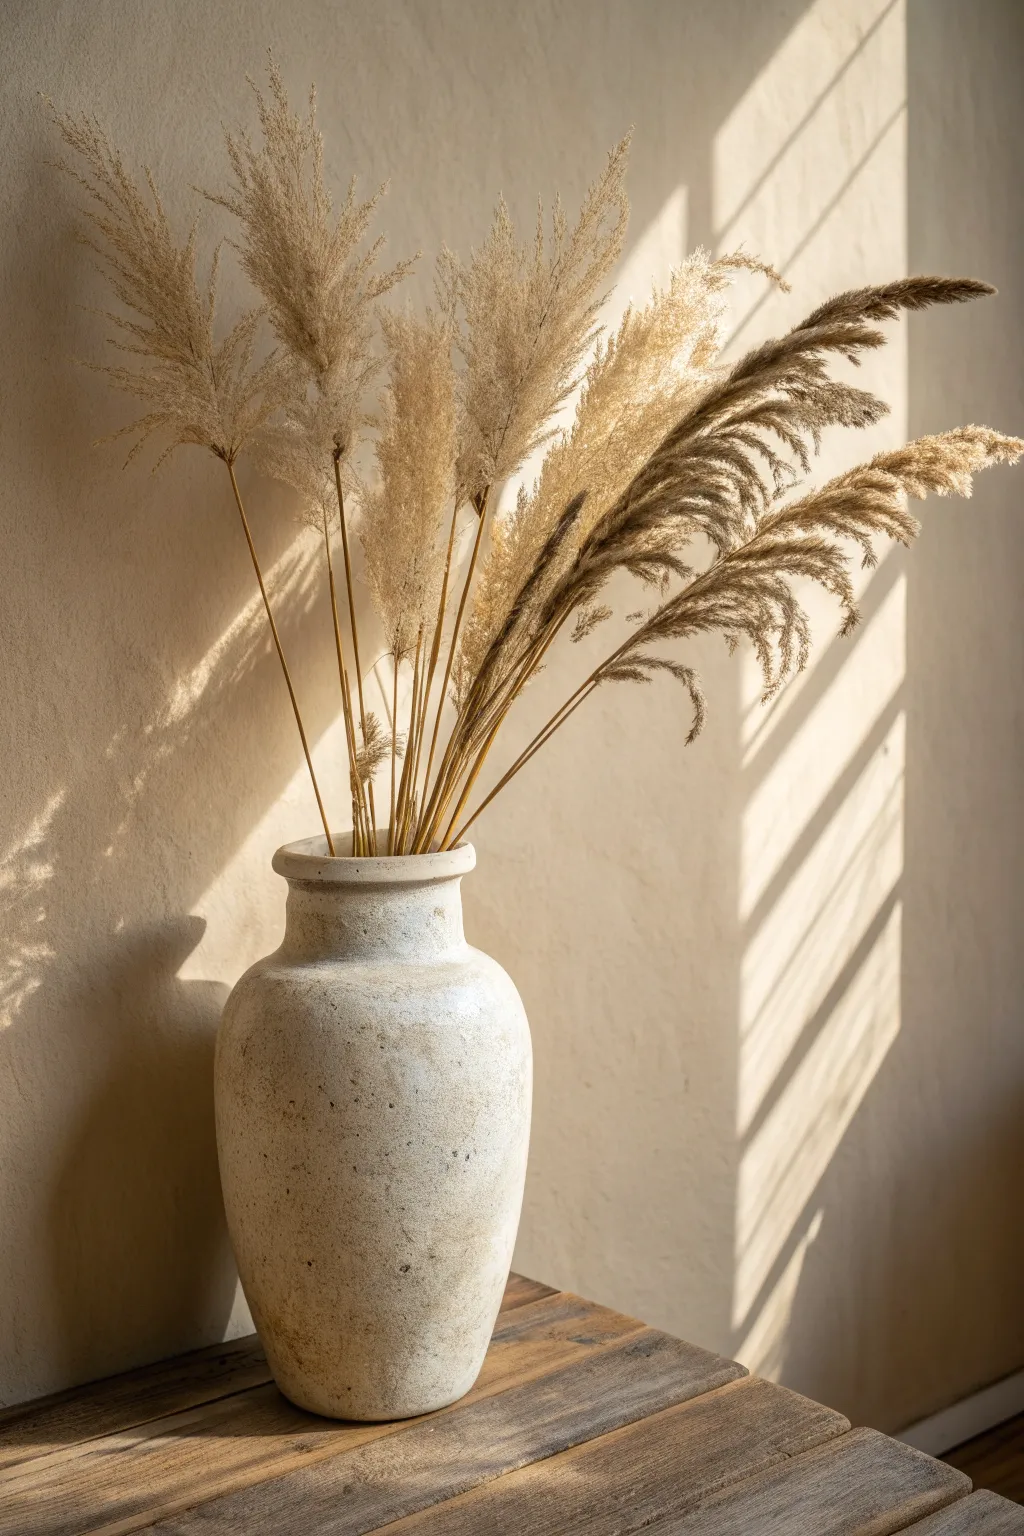
Enhance your minimalist decor with this striking dried floral arrangement that plays with light and texture. By carefully layering different varieties of pampas grass and reeds, you will create a sculptural, fan-like shape that feels both organic and architectural.
Detailed Instructions
Materials
- Tall, textured ceramic vase (stone or speckled beige finish)
- 3-5 stems of large, fluffy Pampas grass (Cortaderia selloana)
- 5-7 stems of thin Reed grass (Phragmites australis) or Miscanthus
- Floral shears or sharp scissors
- Hairspray (strong hold, unscented)
- Floral tape or rubber bands (optional)
- Sand or pebbles (for adjusting stem height)
Step 1: Preparing the Vase and Stems
-
Stabilize the base:
Begin by inspecting your ceramic vase. If the mouth is very wide and the stems are heavy, pour a layer of sand or small pebbles about two inches deep into the bottom to provide weight and stability. -
Shake it out:
Take your pampas grass stems outside. Gently shake each stem to remove loose shedding and fluff up the plumes that might have been compressed during shipping or storage. -
Initial trim:
Hold the main stems up against the vase to gauge the height. You want the lowest plumes to clear the rim of the vase by at least 4-6 inches. -
Cutting to size:
Using your floral shears, cut the stems at an angle. I prefer to cut them slightly longer than I think I need initially, as you can always trim more later. -
Seal the plumes:
To prevent future shedding, lightly mist the fluffy heads of the pampas grass with strong-hold hairspray from about 12 inches away. Let them dry completely before arranging.
Step 2: Creating the Fan Shape
-
Place the anchor stems:
Start with your tallest, straightest reed grass stems. Place two or three in the center of the vase to establish the vertical height of the arrangement. -
Angle the sides:
Insert the fluffier pampas grass stems on the left and right sides of the central reeds. Angle them outward drastically to begin forming the wide ‘fan’ silhouette. -
Check the spread:
Step back to ensure the stems naturally want to lean away from the center. If they keep falling inward, you may need to crisscross the stems inside the vase to lock them in place. -
Layering forward:
Add a few shorter, thinner reeds in front of the main fan. This adds depth so the arrangement doesn’t look completely flat when viewed from an angle. -
Filling the gaps:
Identify any large empty spaces between the central reeds and the outer pampas. Fill these with the remaining medium-height stems. -
Create asymmetry:
Don’t aim for perfect symmetry. Allow the heavy, drooping heads of the pampas grass to lean further to the right (or left) to mimic a wind-swept look.
Pro Tip: Height Hack
If a stem is too short for your wide vase, insert the bottom into a plastic straw or tape it to a skinny bamboo skewer to artificially lengthen it.
Step 3: Final Styling
-
Assess the balance:
Look at the arrangement from a distance. The total height of the florals should generally be about one-and-a-half to two times the height of the vase itself. -
Micro-adjustments:
Gently pull individual stems upward or push them deeper to refine the silhouette. The goal is an airy, breathable shape, not a dense bundle. -
Lighting placement:
For the dramatic look seen in the reference, place your vase near a window where sunlight will hit it from the side, casting long shadws against the wall. -
Shadow play:
Rotate the vase slowly until the shadows on the wall behind visually extend the arrangement, creating a double-impact visual effect.
Troubleshooting: Floppy Stems
If your pampas droops too much, wire a thin floral wire along the back of the stem to the spine of the plume to give it invisible structural support.
Now step back and enjoy the simple, organic elegance this piece adds to your room tone.
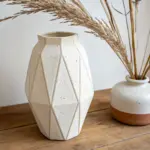
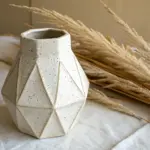
Make a Clay Insert Ring to Narrow It
Transform a plain, wide-mouthed vessel into a striking two-toned vase with a custom-fitted terracotta neck. This project combines the clean look of matte white paint with the organic warmth of air-dry clay to create a narrow opening perfect for delicate stems.
How-To Guide
Materials
- Wide-mouth glass or ceramic vase (cylinder shape works best)
- Air-dry clay (terracotta or white)
- White textured spray paint or chalk paint
- Rolling pin
- Sharp crafting knife
- Sandpaper (fine grit)
- Terracotta acrylic paint (if using white clay)
- Small paintbrush
- Matte clear sealant spray
- Water and a small sponge
Step 1: Creating the Clay Insert
-
Prepare the Clay:
Take a generous handful of air-dry clay and knead it until it creates a pliable, smooth consistency. If the clay feels dry or cracks easily, wet your hands slightly while working it. -
Roll a Slab:
Roll the clay out on a flat surface into a slab that is roughly half an inch thick. Ensure the thickness is even, as this will become the visible rim of your vase. -
Cut the Base Circle:
Place your wide-mouth vase upside down on the clay slab and trace around the rim with a knife. Carefully cut out this circle; this disc will sit directly on top of your vase opening. -
Create the Opening:
Find the center of your clay circle and cut a smaller hole, about 1-2 inches in diameter. This new opening will be the ‘narrow mouth’ for your flower stems. -
Form the Neck Wall:
Roll a separate snake of clay and flatten it into a long rectangular strip. Attach this strip vertically around the inner edge of your center hole to build up a short neck, blending the seams with a little water and your thumb. -
Shape the Rim:
Thicken the top edge of your new neck by adding a small coil of clay. Smoothen it with wet fingers to create that rounded, chunky lip seen in the image. -
Dry Fit the Insert:
Before the clay hardens, gently place the ring onto your vase to ensure it sits flush with the rim. If it overlaps too much, trim the outer edges now. -
Let it Cure:
Remove the clay piece carefully and set it aside to dry completely. This usually takes 24-48 hours depending on humidity; turn it over occasionally for even drying.
Seamless Blending Tip
Use a wet sponge to wipe the clay constantly while shaping. This ‘burnishing’ creates a super smooth surface that looks like fired ceramic once painted.
Step 2: Texturing and Painting
-
Prep the Vase Body:
While the clay dries, clean your glass or ceramic vase thoroughly with rubbing alcohol to remove oils. -
Apply the Base Coat:
Spray the main body of the vase with a white textured spray paint. I find that doing several light mists prevents drips and builds a better ‘stone-like’ surface than one heavy coat. -
Build Texture:
Once the first coat is tacky, apply a second layer. If you are using chalk paint instead of spray, stipple the paint on with a sponge to mimic the rough texture shown in the photo. -
Sand the Clay:
Once your clay insert is bone dry, use fine-grit sandpaper to smooth out any harsh fingerprints or sharp edges on the rim, giving it a refined, wheel-thrown look. -
Paint the Insert:
If you didn’t use terracotta-colored clay, paint the dried clay piece with terracotta acrylic paint. Use a dry-brush technique slightly to enhance natural variations. -
Seal the Clay:
Air-dry clay is porous, so apply a matte clear sealant to the insert. This protects it from incidental moisture from the flowers. -
Join the Pieces:
Place the finished clay ring onto the top of the white vase. You can secure it with strong clear glue if you want a permanent bond, or leave it removable for easier cleaning. -
Add the Base Rim Detail:
To mimic the image perfectly, paint a very thin, matching terracotta strip at the absolute bottom edge of the white vase to tie the design together.
Cracking Issues?
If small cracks appear as the clay dries, mix a tiny bit of fresh clay with water to make a paste (slip) and fill in the cracks, then sand smooth.
Pop in your favorite dried wildflowers or grasses and enjoy the balance of modern texture and earthy tones
Use a Coil Flower Cage Insert
Transform a simple glass vessel into a stunning imitation stoneware piece featuring organic horizontal ribs and a speckled finish. This project perfectly mimics the look of hand-thrown pottery without the need for a kiln, creating an elegant home for your floral arrangements.
Step-by-Step Guide
Materials
- Wide-mouth glass vase (clear)
- Air-dry clay (white or light grey)
- Textured spray paint (stone effect)
- Matte cream or off-white acrylic paint
- Dark brown or black acrylic paint (for speckles)
- Rolling pin
- Clay sculpting tools (or a plastic fork)
- Old toothbrush
- Water in a small cup
- Fine-grit sandpaper
- Sponge brush
- Sealing spray (matte finish)
Step 1: Preparing the Structure
-
Clean surface:
Begin by thoroughly cleaning your glass vase with soapy water or rubbing alcohol to remove any oils. This ensures the clay adheres properly to the smooth surface. -
Roll out clay sheets:
Take a large chunk of air-dry clay and roll it out into a flat, even sheet, approximately 1/4 inch thick. You may need to do this in sections depending on the size of your vase. -
Wrap the vase:
Carefully wrap the clay sheet around the glass vase. Press it firmly against the glass to remove air pockets. -
Seal the seams:
Where the clay edges meet, wet your finger with a little water and smooth the joint until it disappears. This creates a continuous surface. -
Shape the rim:
Fold the excess clay at the top over the rim of the vase and smooth it down into the inside neck. This hides the glass edge completely and gives the illusion of thick pottery.
Clay Cracking?
If small cracks appear as the clay dries, don’t panic. Mix a small amount of fresh clay with water to create a paste (slip) and fill in the cracks, then smooth over.
Step 2: Texturing and Drying
-
Create the ribs:
Using a clay sculpting tool (or the handle of a spoon), gently press horizontal grooves around the circumference of the vase. Start from the bottom and work your way up to create a spiral or stacked ring effect. -
Soften the lines:
Dip your finger in water and lightly run it over the grooves you just made. You want to soften any sharp ridges so they look like hand-thrown pottery marks rather than sharp cuts. -
Dry completely:
Set the vase aside in a dry, room-temperature area. Allow it to dry for at least 24-48 hours. The clay will lighten significantly when it is fully dry. -
Smooth imperfections:
Once dry, use fine-grit sandpaper to gently buff away any unwanted rough patches or fingerprints, being careful not to sand down your intentional rib texture.
Step 3: Painting and Finishing
-
Apply texture base:
Spray the entire vase with a stone-effect spray paint. This adds a gritty, realistic ceramic feel. Let this coat dry according to the can’s instructions. -
Base coat painting:
Using a sponge brush, dab on your matte cream acrylic paint. I like to apply this layer somewhat unevenly to let a bit of the stone texture hinder the paint, enhancing the depth. -
Dry the paint:
Allow the cream base coat to dry completely before moving to the detailing step. -
Prepare splatter mix:
In a small container, mix a drop of dark brown or black acrylic paint with a fair amount of water until it is very runny and ink-like. -
Add speckles:
Dip an old toothbrush into the runny dark paint. Hold it near the vase and run your thumb across the bristles to flick tiny speckles onto the surface. Rotate the vase to get even coverage. -
Seal the work:
Once all paint is bone dry, spray the entire piece with a matte clear coat. This protects the clay from moisture and gives the surface a unified, non-shiny finish. -
Add the insert:
Place your coil flower cage insert into the neck of the vase. This unseen mechanism will hold your ranunculus stems upright and spaced out perfectly as shown in the photo.
Aged Patina
For a vintage look, rub a diluted brown paint wash into the grooves, then wipe the high points clean with a damp cloth before sealing.
Now you have a custom, high-end looking vase ready to showcase your favorite seasonal blooms
Create a Still-Life Mix With Fruit and Greens
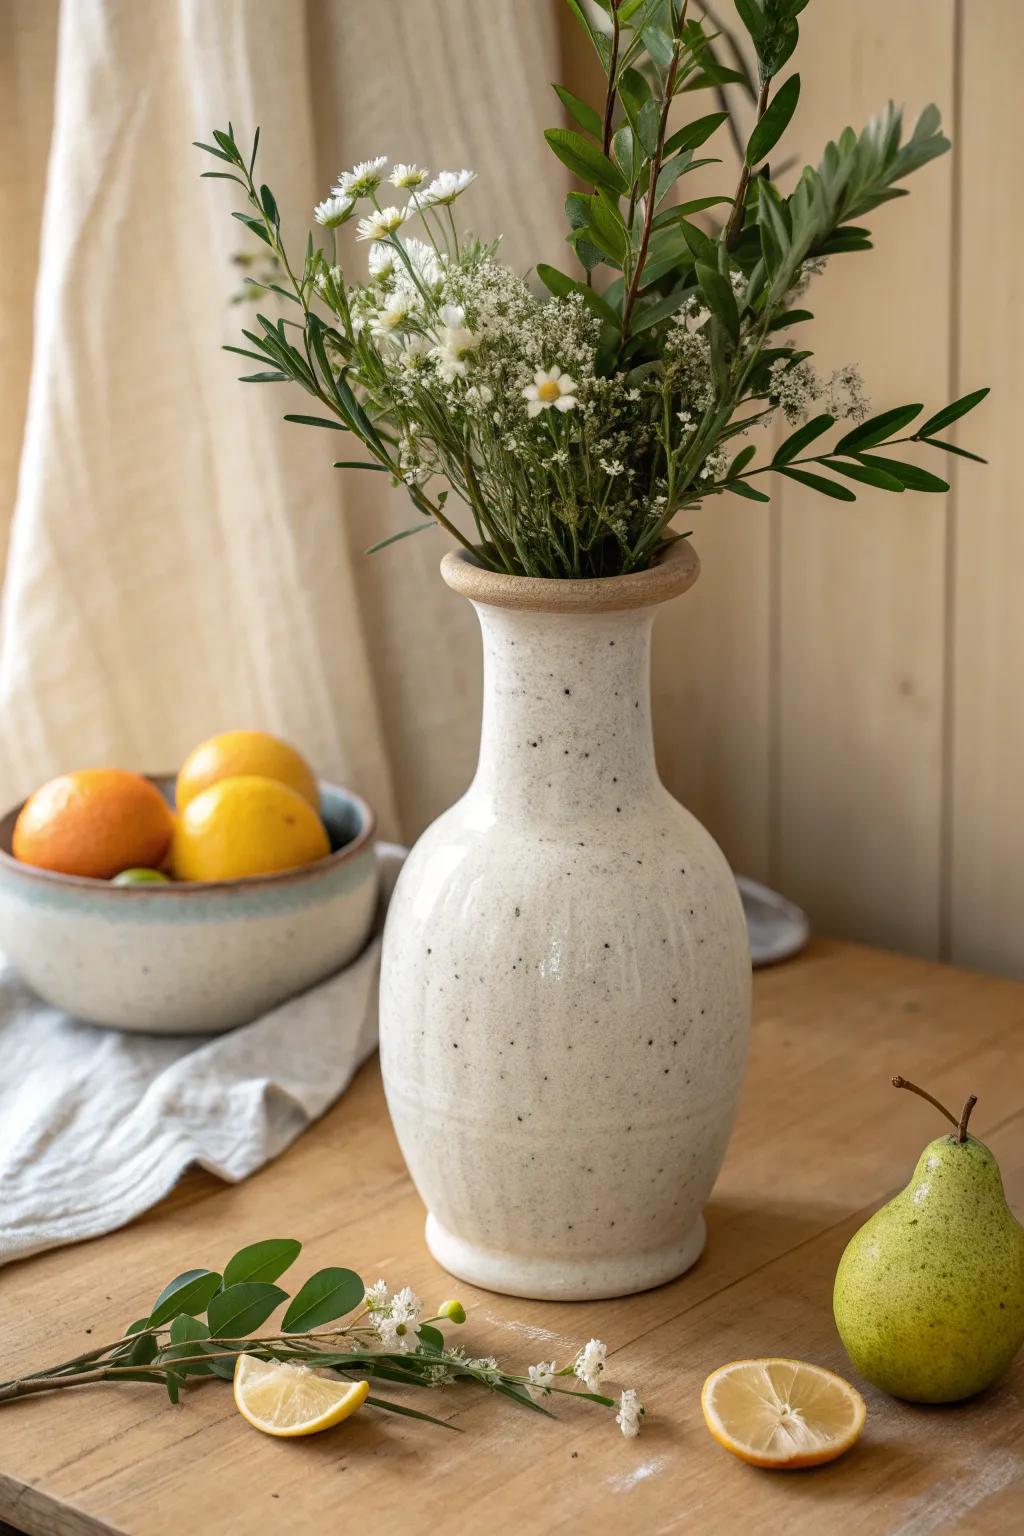
Transform a simple tabletop into a painterly scene by combining the organic textures of speckled ceramic with the vibrant freshness of citrus and wildflowers. This arrangement captures the essence of a sun-drenched cottage kitchen, focusing on the interplay between a tall, wide-mouthed vase and casual fruit placement.
How-To Guide
Materials
- Tall speckled ceramic vase (wide mouth, cream/white)
- Small ceramic bowl (matching or complementary tone)
- Fresh white wildflowers (chamomile or aster)
- Baby’s breath or similar delicate filler
- Green foliage stems (olive, eucalyptus, or ruscus)
- Fresh oranges (3-4)
- Fresh pear (green)
- Fresh lemon (for slicing)
- Wooden cutting board or tabletop surface
- Beige linen or cotton cloth
- Sharp knife
- Flower shears
Step 1: Setting the Scene
-
Prepare the surface:
Begin with a clean wooden table or place a wood-finish board down as your base. The warmth of the wood is crucial for grounding the pottery. -
Drape the fabric:
Take your beige linen cloth and drape it casually in the background, slightly to the left. Allow natural folds to form—don’t pull it tight—to create vertical lines that mimic the height of the vase. -
Position the main vessel:
Place the tall speckled vase slightly off-center to the right. This will be the anchor of your composition. -
Add the secondary vessel:
Set the shallow ceramic bowl to the left of the vase, slightly further back. This creates depth and prevents the arrangement from looking flat.
Keep it Fresh
To keep cut citrus looking fresh for a longer display, brush a tiny amount of lemon juice or clear gelatin on the exposed flesh to prevent drying out.
Step 2: Arranging the Flora
-
Establish height:
Select your tallest green foliage stems. Trim their ends at an angle and insert them into the center of the vase. You want them to reach upward to create a vertical line. -
Add volume:
Layer in the baby’s breath or filler flowers around the central greens. I like to fluff these stems a bit before inserting them to ensure they fill the mouth of the vase adequately. -
Insert focal flowers:
Cut your white wildflowers (like chamomile) to varying lengths. Place some high up near the structural greens and others lower down, resting just above the vase rim. -
Create movement:
Add a few stems of greenery that lean slightly to the right, following the natural curve of the leaves. This guides the eye outward. -
Check the balance:
Step back and ensure the bouquet feels full but airy. The stems should look gathered and meadow-picked, not stiffly arranged.
Step 3: Styling the Fruits
-
Fill the bowl:
Place two large oranges and one lemon inside the shallow bowl. Ensure the brightest orange skin is facing forward to catch the light. -
Position the pear:
Set a green pear on the table to the right of the vase, closer to the viewer. Its curvaceous shape echoes the lines of the pottery. -
Slice the garnish:
Using a sharp knife, cut a lemon into thick, round slices. Make sure the cuts are clean to show off the internal structure. -
Place the slices:
Lay two lemon slices flat on the wooden surface in the foreground. Position one near the pear and one slightly left of center. -
Add the final touch:
Take a snip of greenery and a small sprig of white flowers. Lay them casually on the table near the left lemon slice, as if they just fell from the bouquet.
Color Contrast
Try swapping the oranges for pomegranates in the autumn. The deep reds create a stunning, moody contrast against cream speckled pottery.
Enjoy the peaceful ambiance this natural, gathered arrangement brings to your space