Clay lanterns are my favorite kind of “quick win” project because a simple shape plus a few cutouts instantly turns into cozy, dramatic light. Here are my go-to easy clay lantern ideas that feel totally doable, even if you’re more of a handbuilder than a wheel person.
Classic Pierced Cylinder Lantern
This rustic, unglazed lantern brings a warm, earthy touch to any space with its simple form and repetitive pattern. The staggered holes create a mesmerizing play of light, perfect for casting gentle shadows on a cozy evening.
Detailed Instructions
Materials
- Terracotta clay (or air-dry clay with a terracotta finish)
- Rolling pin
- Canvas or heavy fabric (to roll clay on)
- Rectangular paper template (height and circumference approx. 12″ x 15″)
- Craft knife or needle tool
- Slip (clay and water mixture)
- Scoring tool or old fork
- Circular clay cutters (various small sizes, approx 1/2″ to 3/4″)
- Large cylindrical form (like a mailing tube or large PVC pipe) wrapped in newsprint
- Sponge
- Smoother rib tool
Step 1: Preparing the Slab
-
Roll out the clay:
Begin by wedging your terracotta clay to remove air bubbles. On a canvas-covered surface, roll out a large slab of clay to an even thickness of about 1/4 inch. Keep the pressure consistent so the walls of your lantern will be uniform. -
Smooth the surface:
Use a rib tool to compress the clay slab on both sides. This aligns the clay particles, making it stronger and giving you that nice, smooth finish before you start cutting. -
Cut to size:
Place your rectangular paper template onto the slab. Using a craft knife and a straight edge, cut out the rectangle that will become the body of your cylinder. Save the excess clay for the base later.
Clean Cuts Pro Tip
When punching holes, twist the cutter gently as you pull it out rather than just yanking. This helps release the clay plug cleanly and reduces the cleanup needed on the edges later.
Step 2: Creating the Pattern
-
Mark your grid:
Before rolling it into a cylinder, lightly mark horizontal guidelines across the slab to ensure your hole pattern stays straight. I find it helpful to barely graze the surface so the lines disappear during smoothing. -
Punch the first row:
Using your circular cutter, punch out a row of holes along the top guideline. Space them evenly, leaving about an inch of clay between each hole. -
Stagger the second row:
Move to the next guideline down. Position these holes so they sit directly below the gaps of the first row, creating a staggered, honeycomb-like effect. -
Complete the pattern:
Continue this staggered pattern all the way down the slab. You can vary hole sizes slightly near the bottom for visual weight, or keep them uniform for a clean look. -
Clean up edges:
Once all holes are punched, let the slab stiffen slightly until it’s ‘leather hard’. Then, gently smooth the edges of each hole with a damp sponge or fingertip to remove any sharp burrs.
Make It Glow
For a magical effect, vary the hole sizes! Use three different diameter cutters and mix them randomly within your staggered rows to create a ‘starry night’ light projection.
Step 3: Assembling the Cylinder
-
Prepare the join:
On the two vertical edges of your slab, score the clay (scratch it up) and apply slip. Beveling these edges at a 45-degree angle can create a cleaner seam. -
Form the cylinder:
carefully lift the slab and wrap it around your newsprint-covered cylindrical form. Bring the scored edges together. -
Seal the seam:
Press the seam firmly to bond firmly. Use a wooden modeling tool to blend the clay across the join line so it disappears, then smooth it over with a rib. -
Create the base:
Roll out a small piece of leftover clay. Place your cylinder on top of it and trace around the bottom gently. -
Attach the base:
Score and slip the bottom edge of the cylinder and the outer edge of the base circle. Press them together firmly and blend the clay upwards from the base onto the wall to secure it. -
Final smooth:
Give the entire piece a final wipe with a slightly damp sponge to remove any fingerprints or guide marks. Pay extra attention to the rim. -
Dry slowly:
Cover the lantern loosely with plastic to let it dry very slowly. This prevents warping or cracking, especially around the many holes. -
Finish:
Once bone dry, fire the piece in a kiln according to your clay’s instructions. If using air-dry clay, allow it to cure completely before sealing.
Place a pillar candle or LED light inside and enjoy the beautiful patterns created by your handiwork


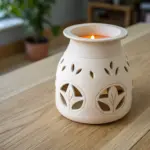
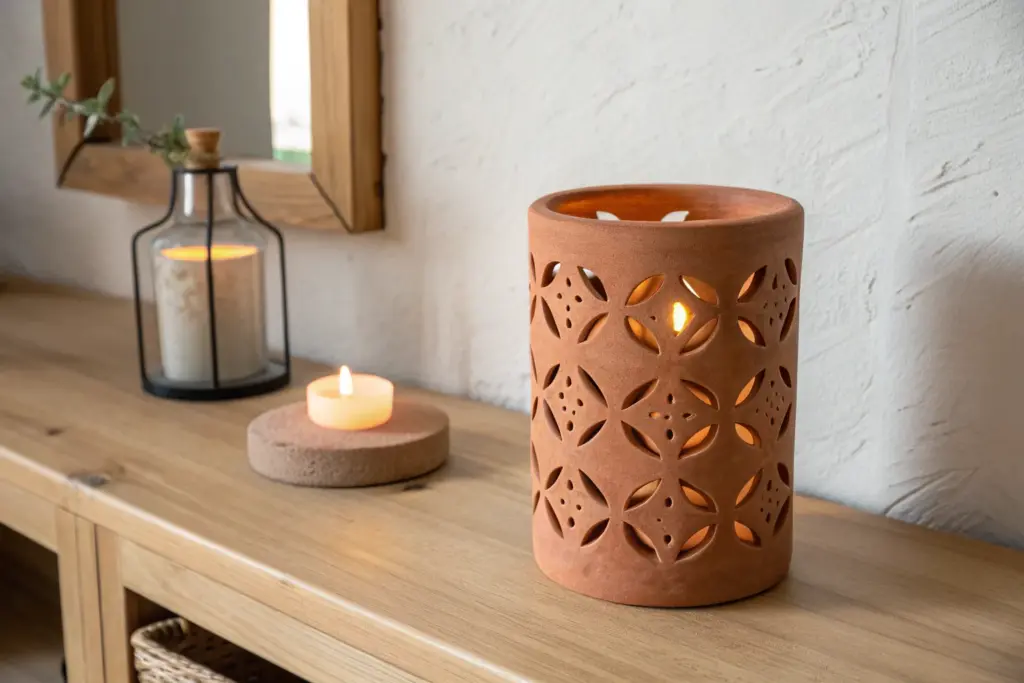
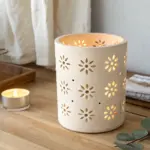
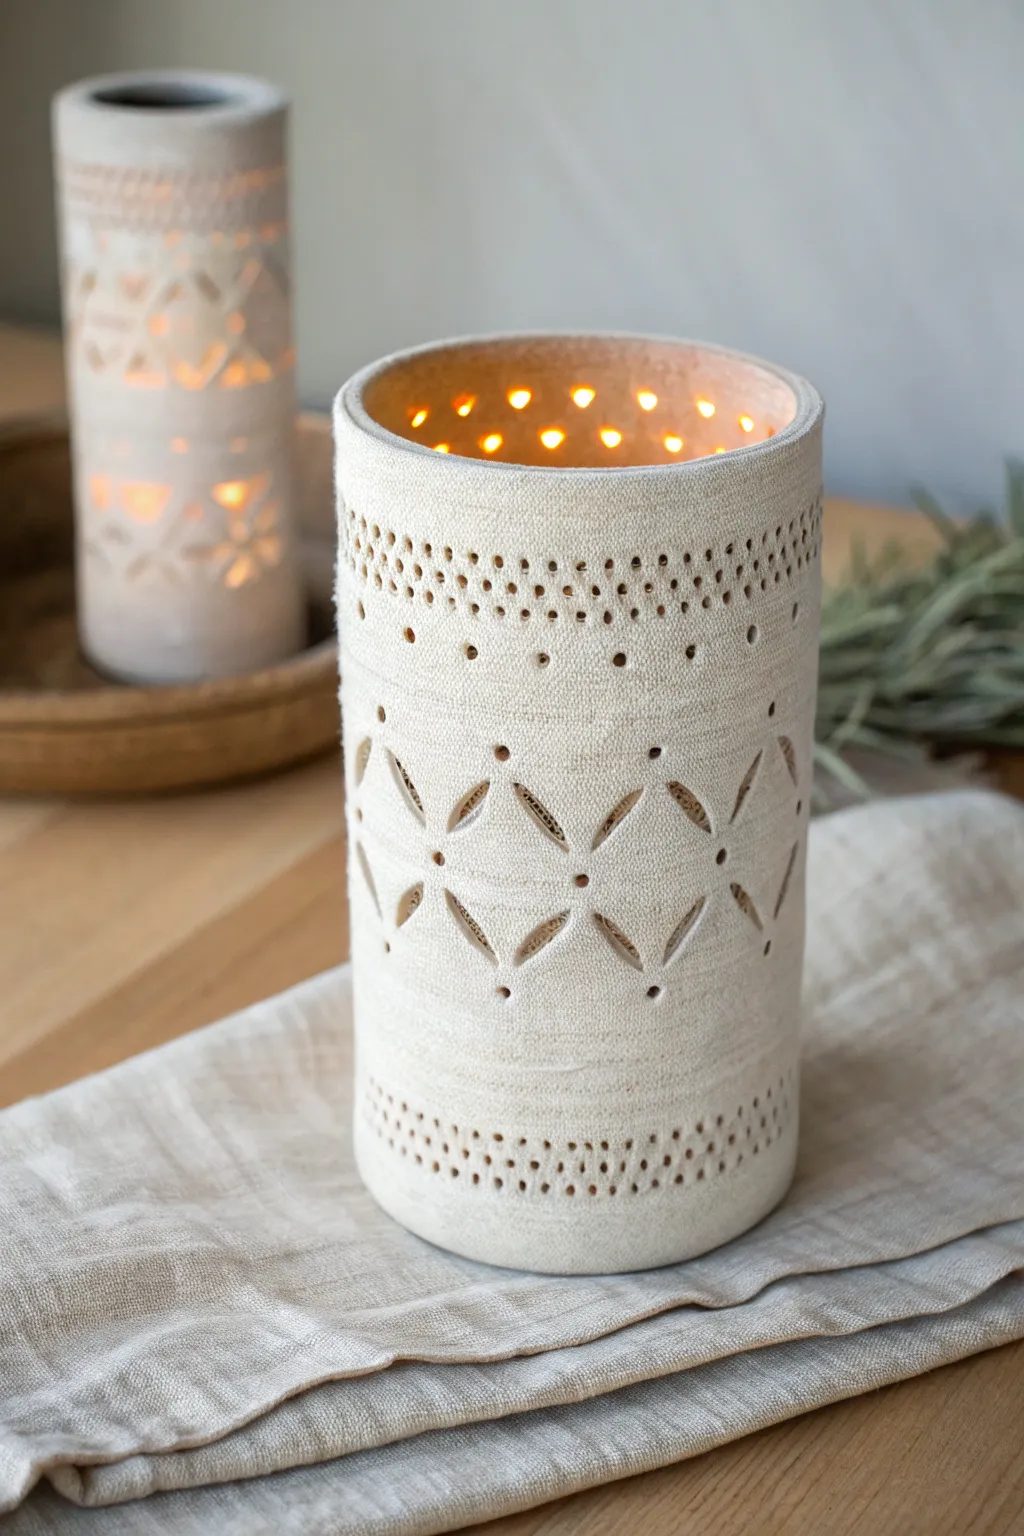
Simple Punched-Dot Pattern Lantern
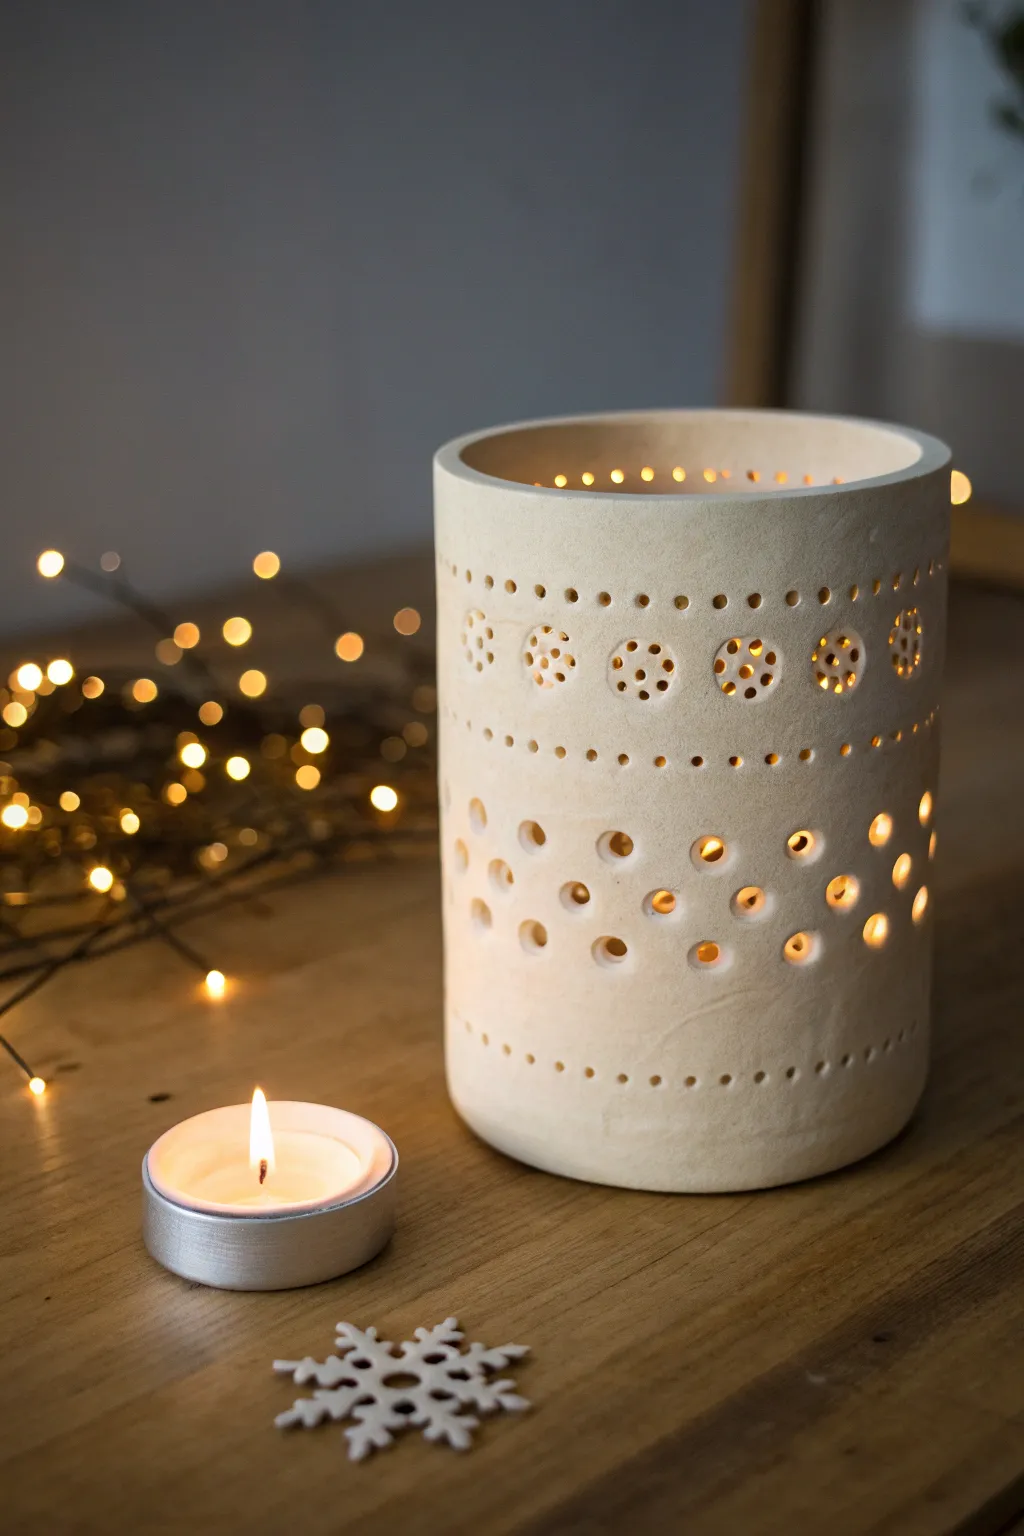
Illuminate your evenings with this charming cylindrical lantern, featuring a delicate pattern of punched dots and floral-inspired rosettes. Its natural, unglazed finish gives it a warm, organic glow perfect for cozy settings.
Step-by-Step
Materials
- Air-dry clay (white or cream)
- Rolling pin
- Parchment paper or canvas mat
- Cylindrical form (glass jar, PVC pipe, or sturdy cardboard tube)
- Craft knife or fettling knife
- Slip (clay mixed with water)
- Straws (various sizes)
- Wooden skewers
- Small circular cookie cutter (optional, for marking rosette placement)
- Sponge
- Sandpaper (fine grit)
Step 1: Preparing the Clay Slab
-
Roll out the clay:
Begin by kneading your air-dry clay to remove air bubbles. Roll it out on parchment paper or a canvas mat until you have a consistent slab about 1/4 inch thick. Aim for a long rectangular shape. -
Measure the cylinder:
Wrap a piece of string or paper around your chosen cylindrical form to find the circumference. Add about half an inch to this measurement to account for the seam overlap. -
Cut the rectangle:
Using your measurements, cut a precise rectangle from the clay slab with a craft knife and a straight edge. Reserve the excess clay. -
Create the base:
Place your cylindrical form on the remaining scrap clay and trace around it. Cut out this circle to serve as the bottom of your lantern.
Clean Cuts Every Time
Twist your straw or tool as you pull it out of the clay. This twist-and-lift motion cuts a cleaner hole and prevents the clay from deforming.
Step 2: Creating the Patterns
-
Plan the rosette row:
While the rectangle is still flat on your work surface, lightly mark a horizontal line where you want the main floral band to sit. I find using a ruler prevents the pattern from drifting. -
Punch the center holes:
Using a skewer or small straw, punch the center dot for each rosette, spacing them evenly across the marked line. -
Complete the flowers:
Surround each center hole with a ring of 6-8 identical small holes to create the petal effect. Keep the spacing tight but don’t let the holes merge. -
Add decorative borders:
Above and below your rosette band, use a very small tool like a toothpick or fine skewer to punch straight lines of tiny dots, acting as a frame. -
Create the lower pattern:
For the bottom half of the lantern, switch to a slightly larger straw. Punch a random or staggered grid pattern of larger circles to allow more light to filter through the base. -
Clean the holes:
Gently smooth over the punched areas with your finger to remove any sharp clay crumbs pushed up by the tools.
Step 3: Assembly and Finishing
-
Wrap the form:
Carefully lift your clay rectangle and wrap it around the cylindrical form. I suggest wrapping the form in a layer of paper first to prevent sticking. -
Score and slip the seam:
roughen the two edges that will meet (scoring) and apply a dab of clay-water mixture (slip). Press the edges together firmly to create the cylinder. -
Blend the seam:
Use a modeling tool or your finger to smooth the seam inside and out until it is invisible. -
Attach the base:
Score and slip the bottom edge of the cylinder and the edge of your circular base. Press the cylinder onto the base and smooth the connection point. -
Refine the rim:
Smooth the top rim of the lantern with a damp sponge to ensure it is level and comfortable to handle. -
Dry slowly:
Let the lantern dry on the form for a few hours until it holds its shape, then carefully slide the form out. Allow it to finish drying completely away from direct heat. -
Sand for perfection:
Once fully dry and hard, use fine-grit sandpaper to buff away any burrs around the holes or rough spots on the surface.
Sagging Walls?
If the clay slumps while you work, let the slab sit for 15-20 minutes to firm up (leather hard) before wrapping it around the form.
Place a tea light inside and watch your beautiful patterns dance on the walls


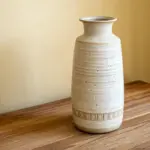
Star and Moon Cutout Lantern
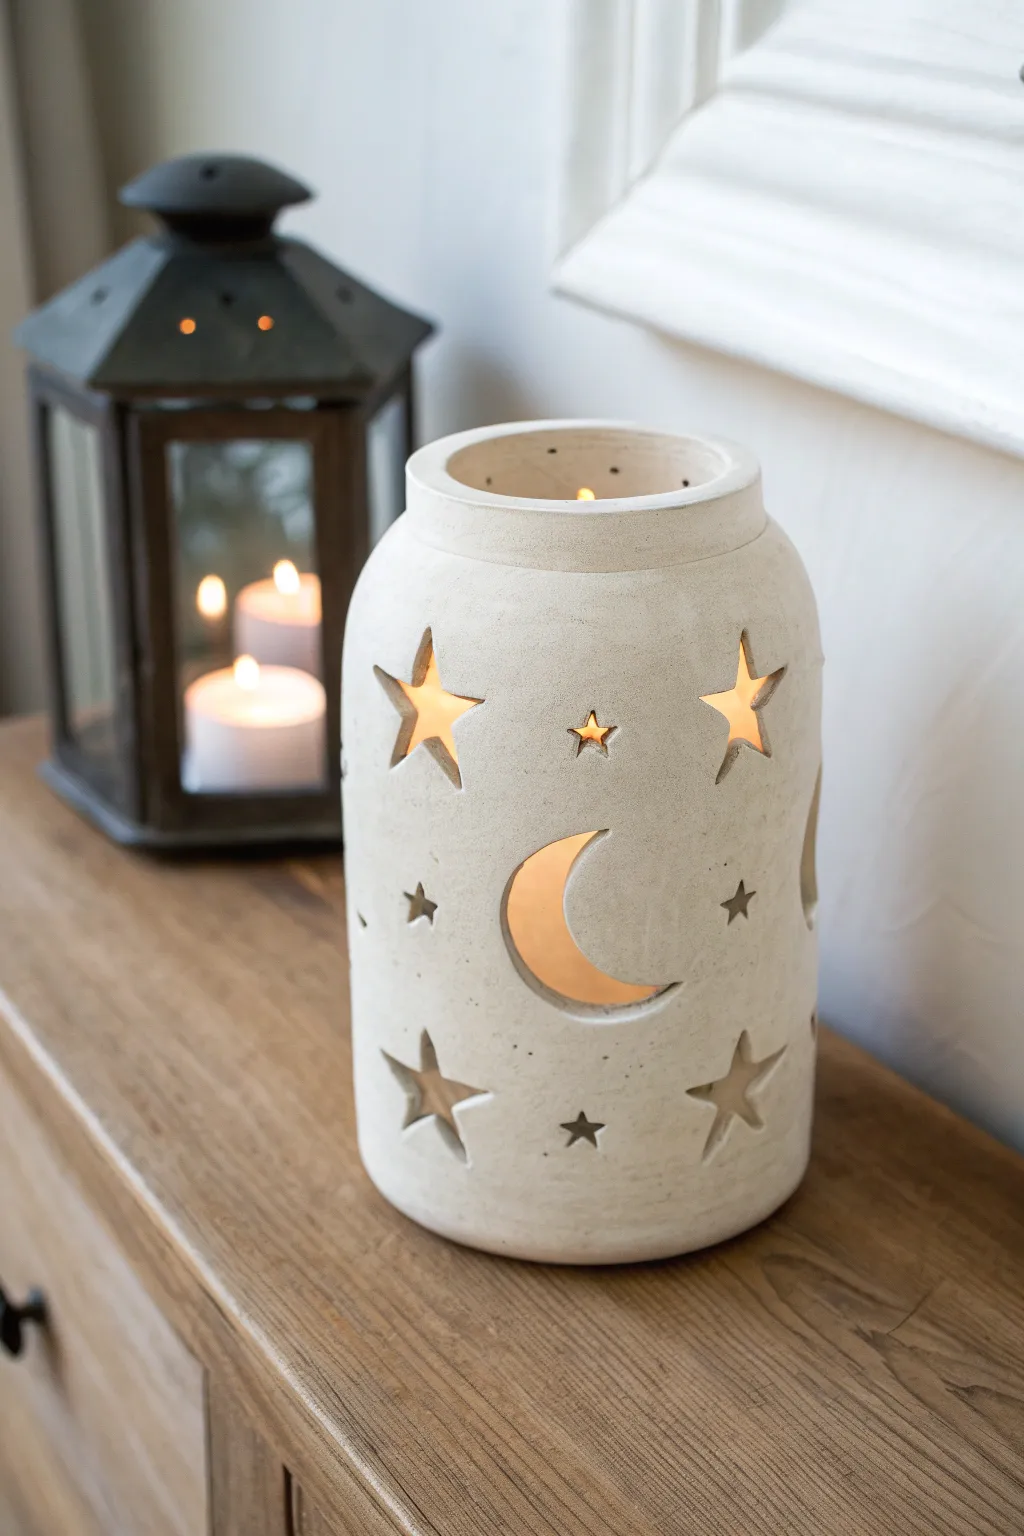
Bring the night sky indoors with this charming clay lantern featuring whimsical star and crescent moon cutouts. Its matte, stone-like finish and soft inner glow create a cozy atmosphere perfect for any mantle or bedside table.
How-To Guide
Materials
- White or light grey air-dry clay (approx. 1kg)
- Rolling pin
- Large glass jar or cylindrical vase (for a mold)
- Parchment paper
- Craft knife or scalpel
- Star-shaped cookie cutters (small and medium)
- Moon-shaped cookie cutter (or paper template)
- Sponge and water
- Medium grit sandpaper
- Matte sealant spray (optional)
- Tea light or LED candle
Step 1: Creating the Base Form
-
Prepare your mold:
Select a large glass jar or vase that has the cylindrical shape you desire for your lantern body. Wrap the jar completely in parchment paper and tape it securely; this step is crucial so the clay doesn’t stick to the glass. -
Roll the slab:
Take a large chunk of air-dry clay and knead it briefly to remove air bubbles. Roll it out on a flat surface into a large, rectangular slab about 1/4 inch thick. Aim for an even thickness to prevent cracking later. -
Size the slab:
Measure the height and circumference of your wrapped jar. Cut the clay slab into a rectangle that matches the height and is just long enough to wrap around the jar with a slight overlap. -
Wrap the form:
Carefully lift the clay slab and wrap it around the jar. Where the ends meet, score the edges (scratch cross-hatch marks) and dab a little water on them, then press them together firmly to create a seam. -
Smooth the seam:
Using your fingers or a modeling tool, blend the clay across the seam until it disappears and the cylinder looks seamless. I find dipping my finger in a tiny bit of water helps smooth out any stubborn lines.
Cracks Appearing?
If small cracks appear while drying, mix a small amount of clay with water to make a paste (slip) and fill them in. Smooth over with a damp finger immediately.
Step 2: Shaping and Detailing
-
Form the tapered neck:
To recreate the jar-like silhouette in the photo, gently press the top inch of the clay inward towards the jar’s neck. Add a separate, thick coil of clay around the top rim to create that distinct, raised lip. -
Create the bottom:
Place the wrapped jar onto a fresh piece of rolled clay. Trace around the bottom, cut out the circle, and attach it to the cylinder base using the score-and-slip method, blending the edges upward. -
Initial drying:
Let the clay sit on the mold for about 1-2 hours until it is leather-hard—firm enough to hold its shape but soft enough to cut easily. -
Remove the mold:
Very carefully slide the glass jar out from the center. If the parchment paper stays inside, gently peel it away from the clay walls.
Add Color Depth
dilute some grey or beige acrylic paint with water (a wash) and brush it over the textured surface, then wipe it back with a rag to highlight the stone texture.
Step 3: Carving the Night Sky
-
Plan the layout:
Lightly sketch your design onto the clay surface with a needle tool. Place a large crescent moon prominently in the center, surrounded by stars of varying sizes. -
Cut the moon:
Using a craft knife (or a cutter if you have one), carefully cut out the crescent moon shape. Support the clay wall from the inside with your other hand to prevent it from collapsing under pressure. -
Punch out stars:
Use star-shaped cookie cutters for the larger stars. Press them gently through the wall, then push the cut piece out. For tiny stars or irregular shapes, freehand them with your craft knife. -
Add texture:
To mimic the stone-like texture in the image, lightly dab the exterior with a dry, coarse sponge or a crumpled ball of aluminum foil. This removes the ‘perfect’ smooth look of fresh clay. -
Refine the edges:
Dip your finger or a small paintbrush in water and smooth the sharp edges of every cutout. This gives the piece a professional, finished look rather than a sharp, jagged one.
Step 4: Finishing Touches
-
Final dry:
Allow the lantern to dry completely. This usually takes 24-48 hours depending on humidity. Rotate it occasionally so it dries evenly. -
Sand and smooth:
Once fully dry and chalky white, take medium-grit sandpaper and gently sand away any rough bumps on the rim or the main body. -
Seal (Optional):
If you want to protect the finish, spray a light coat of matte varnish. This preserves the raw clay look while making it easier to dust later. -
Light it up:
Place a tea light or a small battery-operated pillar candle inside to see your celestial patterns glow.
Enjoy the peaceful ambiance of your handmade celestial lantern.


Leaf Cutout Garden Lantern
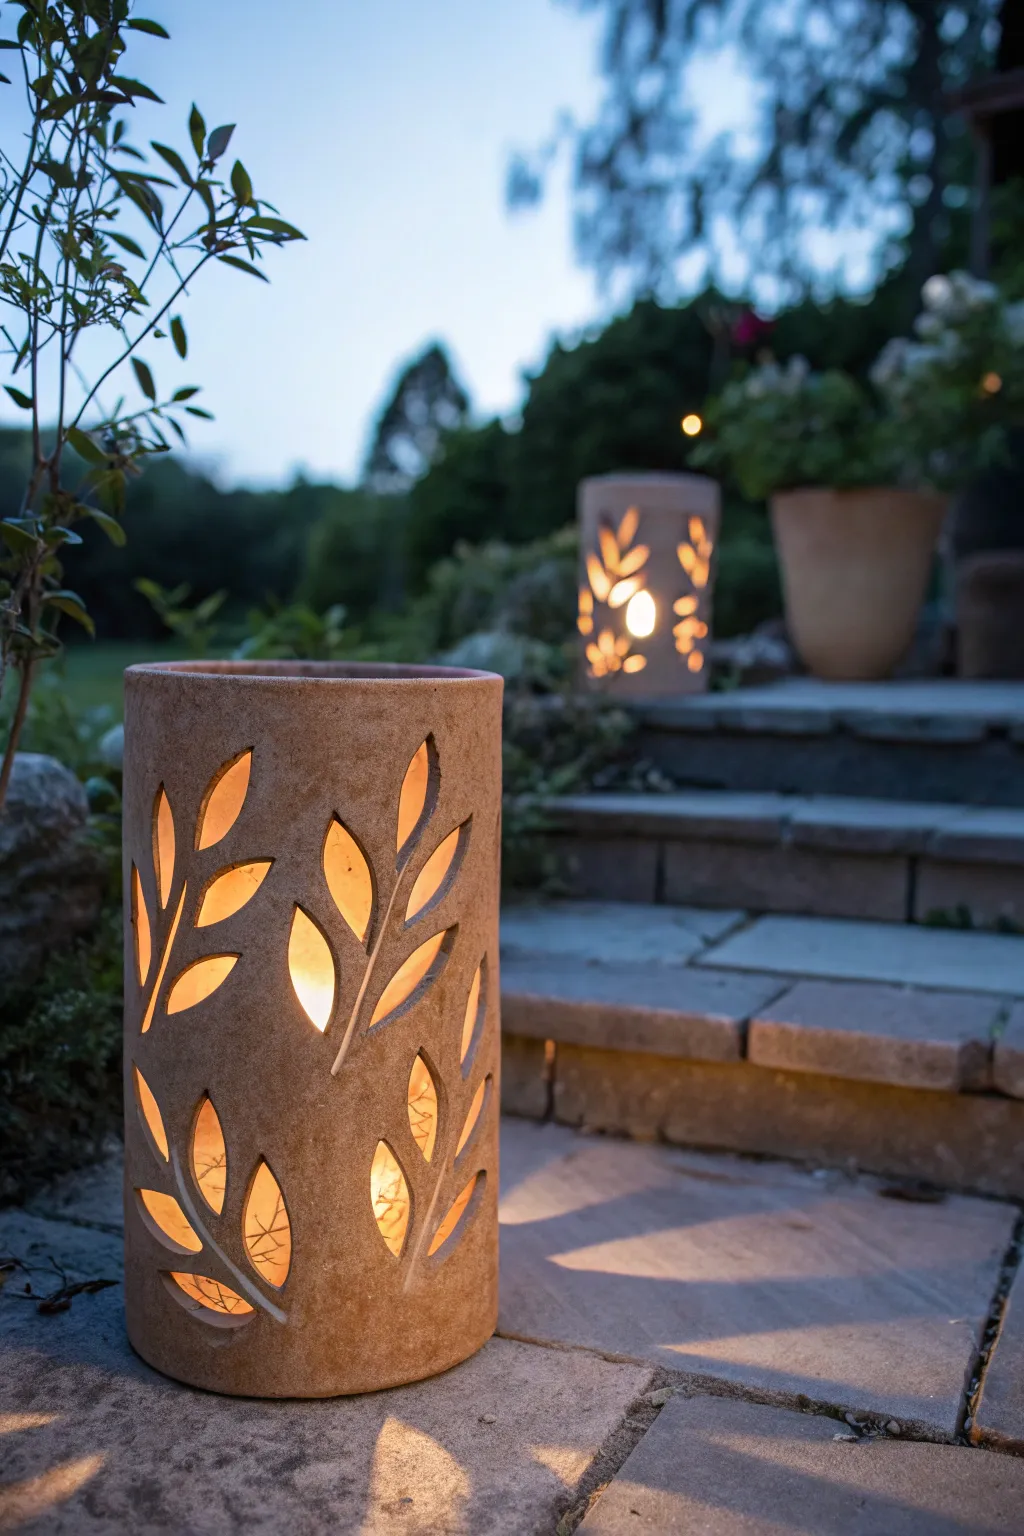
Brighten your evening garden path with these rustic, cylindrical lanterns featuring elegant leaf cutouts. The warm terracotta clay combined with flickering candlelight creates a cozy, inviting atmosphere perfect for dusk gatherings.
Step-by-Step
Materials
- Terracotta pottery clay (or air-dry clay for indoor use)
- Rolling pin
- Two wooden guide strips (approx. 1/4 inch thick)
- Cylindrical form (like a PVC pipe, mailing tube, or large glass jar)
- Newspaper or parchment paper
- Fettling knife or X-Acto knife
- Needle tool
- Leaf template (cardstock) or real leaves
- Slip (clay mixed with water)
- Scoring tool or old fork
- Sponge
Step 1: Preparing the Cylinder
-
Roll the slab:
Begin by wedging your clay to remove air bubbles. Place the clay between two wooden guide strips on a canvas or cloth surface. Roll the clay out into a long rectangle until it is an even thickness, using the guides to keep it consistent. -
Wrap the form:
Take your chosen cylindrical form and wrap it in a layer of newspaper or parchment paper; this prevents the clay from sticking to the mold. Measure the circumference of your form to know how long your clay slab needs to be. -
Trim the clay:
Cut your rolled clay slab into a clean rectangle that matches the height you want for your lantern and is long enough to wrap around the form with a slight overlap for joining. -
Form the cylinder:
Carefully lift the clay slab and wrap it around your paper-covered form. Bring the two short ends together. -
Score and slip:
At the overlap, score both meeting surfaces with a fork or scoring tool to roughen them up. Apply a generous amount of slip to the scored areas. -
Seal the seam:
Press the overlapping ends firmly together. Smooth the seam both inside and outside using your fingers or a rib tool so the joint becomes invisible. I find using a slightly damp sponge helps blend the clay seamlessly here.
Step 2: Carving the Design
-
Stiffen the clay:
Let the clay dry slightly until it reaches a ‘leather-hard’ state. It should be firm enough to hold its shape but soft enough to cut. This usually takes a few hours depending on humidity. -
Remove the form:
Once the clay can support its own weight, gently slide the cylindrical form out. Peel away the newspaper carefully from the inside. -
Plan placement:
Lightly trace your leaf designs onto the exterior using a needle tool. You can use cardstock templates or trace around real leaves for an organic look. Arrange them in a flowing, upward pattern. -
Cut the shapes:
Using a sharp fettling knife or X-Acto blade, carefully cut along your traced lines. Hold the blade perpendicular to the surface for clean, straight edges. -
Remove cutouts:
Gently push the cut clay pieces inward or outward to remove them. Be careful not to warp the cylinder’s shape while applying pressure. -
Clean the edges:
Once the clay has dried a bit more (but isn’t bone dry), go back with a damp sponge or a soft brush to smooth any sharp jagged edges left by the knife.
Clean Cuts Matter
Wait until the clay is truly leather-hard before cutting. If it’s too wet, the knife will drag and deform the leaves; too dry, and it may crack or chip.
Step 3: Finishing Touches
-
Smooth the rim:
Run a damp sponge along the top rim of the cylinder to ensure it is level and smooth to the touch. -
Dry slowly:
Place a light sheet of plastic over the lantern to let it dry slowly and evenly. This prevents the large clay slab from warping or cracking as it shrinks. -
Final drying:
After a day or two, remove the plastic and let it dry completely to the bone-dry stage. The clay will become lighter in color and chalky. -
Fire or seal:
If using traditional pottery clay, fire it in a kiln according to the clay’s specifications. If using air-dry clay, apply a waterproof sealant once fully dry to protect it from moisture.
Make it Glow
Paint the interior with a metallic gold or copper acrylic paint after firing. This reflects the candlelight beautifully and adds a warm, luxe glow at night.
Place a tealight or LED candle inside and watch your garden path come alive with dancing leaf shadows

The Complete Guide to Pottery Troubleshooting
Uncover the most common ceramic mistakes—from cracking clay to failed glazes—and learn how to fix them fast.
Geometric Triangle Cutout Lantern
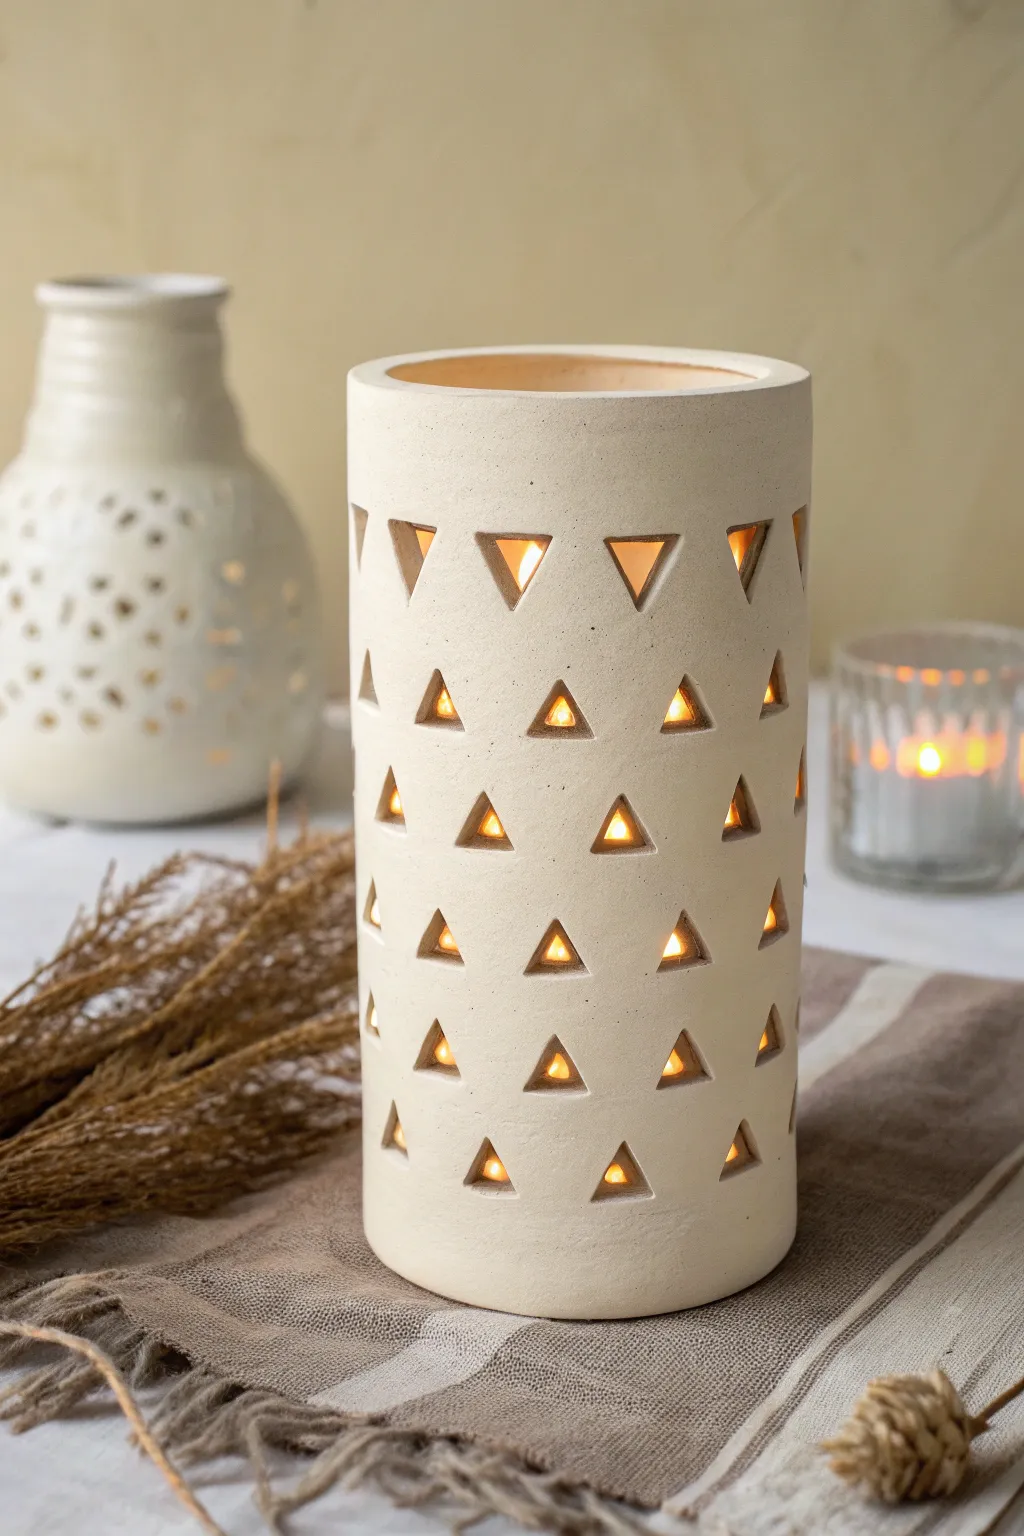
This minimalist tube lantern combines modern geometry with warm, ambient light. Its repeating triangle pattern creates a stunning playful effect when a candle flickers inside, making it a perfect centerpiece for cozy evenings.
Step-by-Step Tutorial
Materials
- White or cream air-dry clay (or kiln-fire stoneware clay)
- Wide PVC pipe or sturdy cardboard tube (approx. 4-5 inches diameter)
- Rolling pin
- Parchment paper or canvas mat
- Small triangle cookie cutter (approx. 0.75 inch)
- Craft knife or needle tool
- Sponge and water
- Acrylic rolling strips or wooden slats (approx. 0.25 inch thick)
- Flexible ruler
- Clear matte varnish (optional)
Step 1: Preparing the Clay Slab
-
Work surface setup:
Begin by laying down parchment paper or a canvas mat to prevent sticking. Place your thickness guides or wooden slats on either side of your workspace to ensure an even slab. -
Roll the clay:
Take a large chunk of your white clay and knead it briefly to remove air bubbles. Roll it out into a long rectangular slab, aiming for a consistent 1/4-inch thickness. -
Measure the tube:
Wrap a flexible measuring tape around your PVC pipe or cardboard form to find the circumference. Add about half an inch to this measurement for the overlap seam. -
Cut the rectangle:
Using a craft knife and a ruler, trim your clay slab into a clean rectangle. The length should match your circumference measurement, and the height should be about 8-10 inches, depending on how tall you want your lantern. -
Smooth the surface:
I usually take a slightly damp sponge and gently wipe the surface of the clay slab now to remove any canvas texture or rolling pin marks before cutting.
Slumping Cylinder?
If your clay is too soft and the cylinder droops after removing the tube, let it dry on the form longer. For air-dry clay, you can leave the form inside until it’s fully hard.
Step 2: Creating the Pattern
-
Plan the grid:
Lightly press your ruler into the clay to create faint horizontal guidelines about 1.5 inches apart. This will help keep your rows of triangles straight. -
Cut the first row:
Starting near the top edge, use your small triangle cutter to punch out shapes. For the top row, orient the triangles pointing downward. -
Cut subsequent rows:
Move down to the next row. For the rest of the body, orient the triangles pointing upward. Stagger them so each triangle sits between two triangles from the row above or below it. -
Clean the edges:
Carefully lift away the cut-out clay pieces. If the edges of the holes look rough, dip your finger in water and gently smooth them inside the cutout.
Step 3: Assembly and Finishing
-
Prepare the form:
Wrap your PVC pipe or tube in a layer of parchment paper. This is a crucial step to ensure the clay slides off easily later. -
Form the cylinder:
Carefully lift your clay slab and wrap it around the prepared tube. Bring the two short ends together. -
Score and slip:
Roughen the overlapping edges with a needle tool (scoring) and apply a little water or clay slip. Press the edges firmly together to create a seam. -
Blend the seam:
Use a modeling tool or your finger to smooth the seam on the outside until it’s invisible. Be gentle so you don’t distort the nearby triangle cutouts. -
Create the base:
Roll out a small separate piece of clay. Stand your cylinder on it and trace around the bottom. Cut out this circle. -
Attach the base:
Score and slip the bottom edge of your cylinder and the edge of the circle base. Press them together and smooth the joint seamlessly. -
Allow to stiffen:
Let the clay sit on the form for a few hours until it is leather-hard. This prevents it from collapsing when you remove influence of the tube. -
Remove the form:
Gently slide the PVC pipe or cardboard tube out. Peel away the parchment paper from the inside. -
Final drying:
Let the lantern dry completely for 24-48 hours away from direct sunlight to prevent cracking. If using kiln clay, fire it now. If using air-dry clay, apply a matte varnish for protection.
Level Up: Color Pop
Before rolling your cylinder, gently sponge a contrasting colored slip or acrylic paint onto the inside surface. The color will peek through the triangles for a dimensional look.
Place a tea light or LED candle inside and enjoy the warm geometric shadows dancing on your walls
Slab-Built Box Lantern With Windows
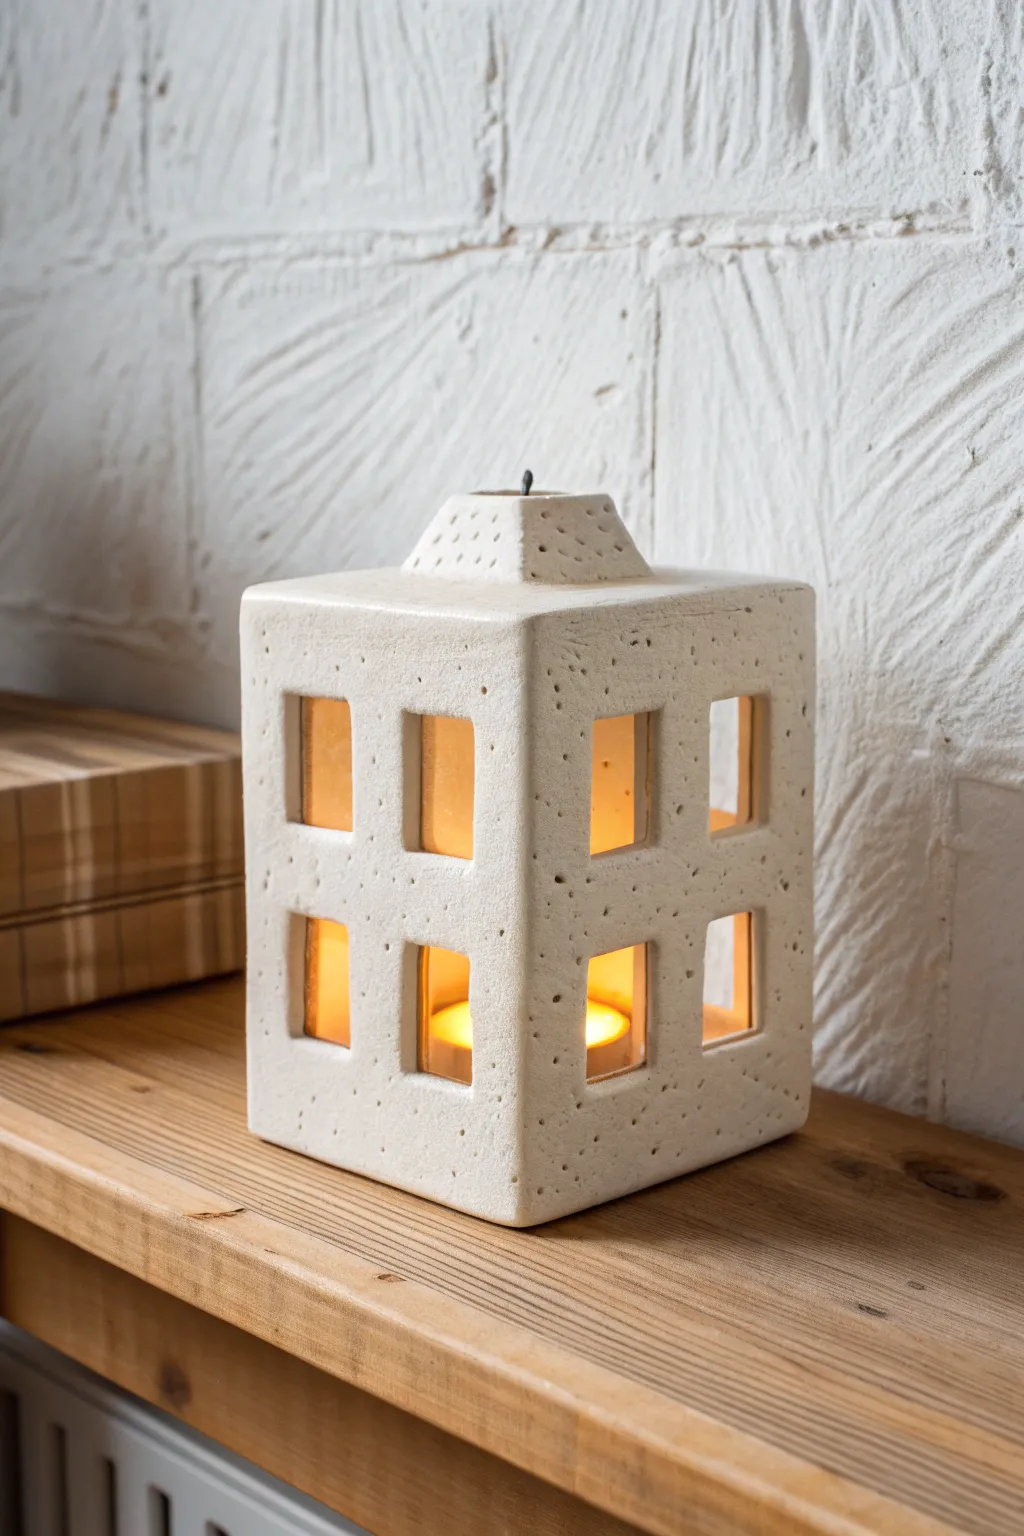
This charming architectural lantern combines the simplicity of slab building with a warm, speckled finish that mimics weathered stone. The geometric cut-outs allow candlelight to spill out softly, creating a cozy atmosphere on any shelf or mantelpiece.
Step-by-Step Guide
Materials
- White stoneware clay with grog or speckles
- Rolling pin
- Guide strips (approx. 1/4 inch thick)
- Ruler and set square
- Fettling knife or needle tool
- Square cookie cutters (optional) or scalpel
- Slip and scoring tool
- Wooden paddle
- Sponge
- Matte white or cream glaze
Step 1: Preparing the Slabs
-
Roll the clay:
Begin by rolling out your clay on a canvas board. Use guide strips on either side of your rolling pin to ensure an even thickness of about 1/4 inch across the entire slab. -
Smooth the surface:
Before cutting, run a flexible rib tool gently over the clay surface to compress particles and smooth out any canvas texture. -
Measure and cut walls:
Using a ruler and needle tool, cut four identical rectangular panels for the walls. A size of roughly 4×6 inches works well, but you can adjust based on your desired height. -
Cut the base:
Cut a square base piece that matches the width of your wall panels plus the thickness of the clay.
Step 2: Creating the Windows
-
Plan the layout:
While the slabs are flat and leather-hard, lightly trace two rows of two squares on each wall panel. Ensure even spacing between the ‘panes’ for structural integrity. -
Excise the clay:
Carefully cut out these squares using a sharp scalpel or X-Acto knife. I prefer to cut slightly inside my traced lines and then smooth the edges for a cleaner look. -
Bevel the edges:
For a refined finish, use a wet finger or a small sponge to soften the sharp interior corners of your window cut-outs.
Slumping Slabs?
If walls buckle during assembly, the clay is too wet. Let slabs dry to a ‘leather hard’ state (firm like cheddar cheese) before standing them up vertical.
Step 3: Assembly
-
Miter or butt joint:
Decide on your joinery. For this project, a simple butt joint works fine, or miter the long edges of your wall panels at a 45-degree angle for a seamless corner. -
Score and slip:
Rough up the edges you plan to join with a serrated tool and apply a generous amount of slipping clay. Press the first wall firmly onto the base. -
Construct the box:
Attach the remaining walls, ensuring each corner is vertically straight. Use a wooden paddle to gently tap the outside of the joints to compress them. -
Reinforce the interior:
Roll thin coils of clay and press them into the interior seams of the box to strengthen the structure.
Clean Corners Pro-Tip
Don’t just rely on slip! After joining corners, run a slightly damp paintbrush down the seam to smooth it perfectly. It hides the joint line better than a sponge.
Step 4: The Roof and Texture
-
Form the pyramid:
Cut four small triangles to form a low pyramid roof. Leave a small opening at the very top for heat to escape. -
Attach the roof:
Score and slip the roof pieces onto the top rim of your box lantern. Smooth the seams so the transition looks solid. -
Texturizing:
Using a needle tool or stiff brush, poke small, random holes all over the surface. This mimics the porous look of the lantern in the photo and adds character. -
Initial drying:
Cover the piece loosely with plastic for a day or two to let the moisture even out, preventing warping.
Step 5: Firing and Glazing
-
Bisque fire:
Once bone dry, fire the piece to bisque temperature (usually cone 04) to prepare it for glazing. -
Apply glaze:
Dip or brush on a matte white or cream glaze. If you used speckled clay, the iron spots will burn through nicely; if not, choose a glaze with speckles added. -
Wipe back texture:
Before the glaze dries completely, gently wipe a damp sponge over the textured ‘pockmarks’ so the glaze pools in the recesses but thins on the high points. -
Final firing:
Fire onto your glaze temperature (often cone 5 or 6). Once cool, place a tealight inside to illuminate.
Enjoy the gentle flicker of light through your handmade architectural lantern


What Really Happens Inside the Kiln
Learn how time and temperature work together inside the kiln to transform clay into durable ceramic.
Pinch Pot Orb Luminary Lantern
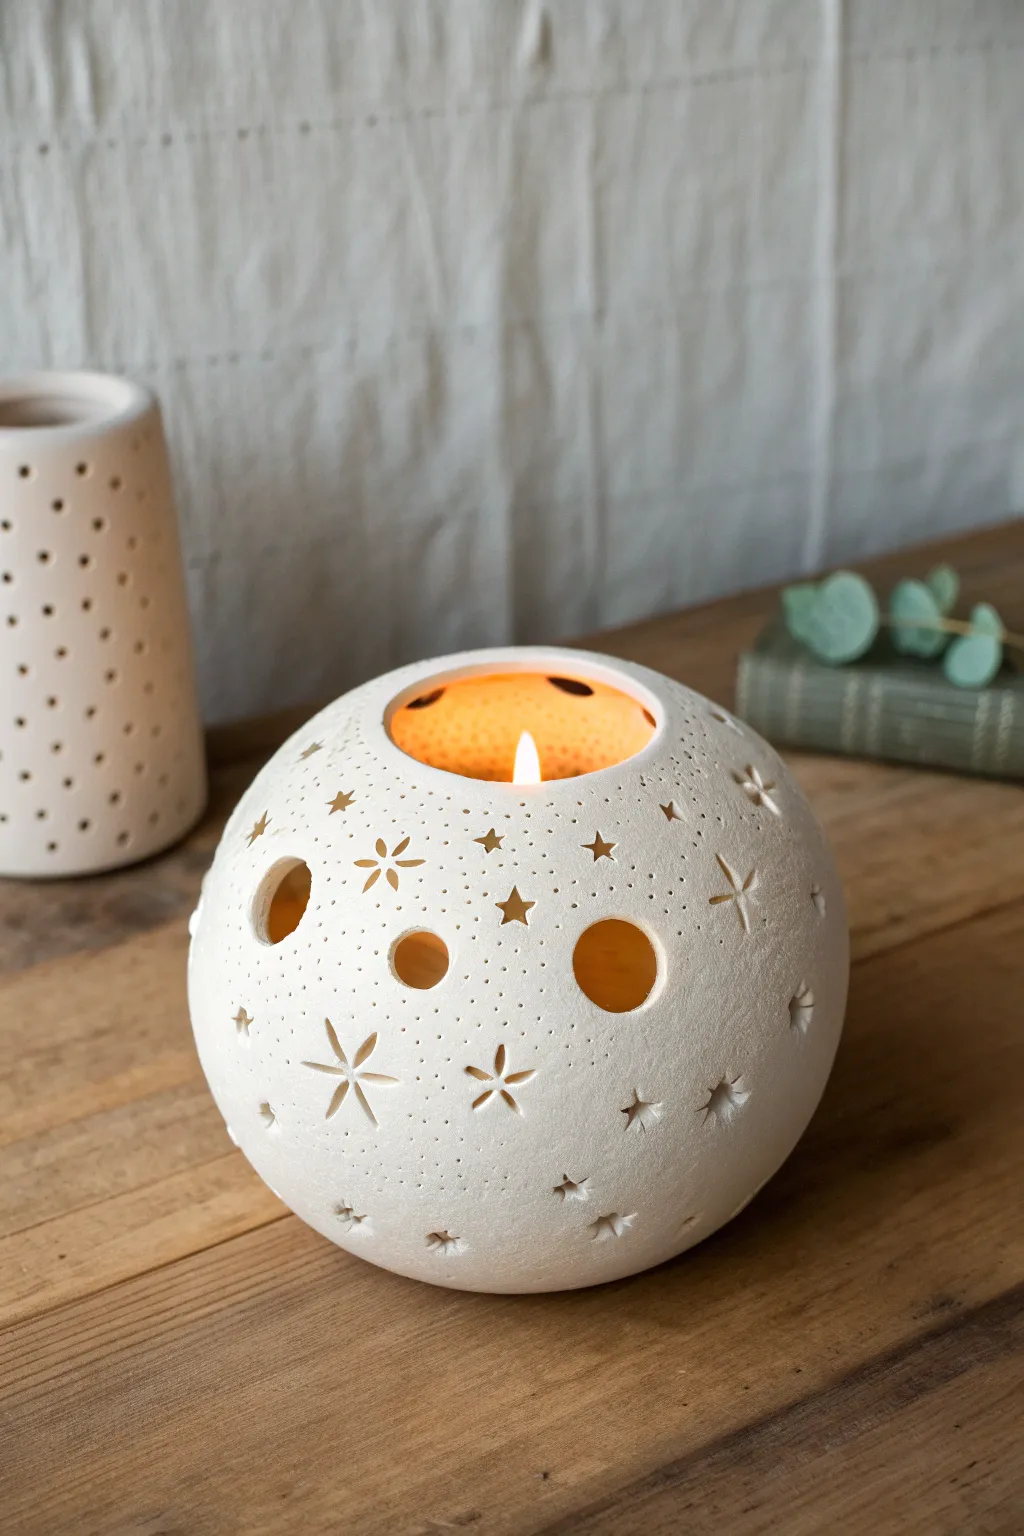
Bring the magic of the night sky into your home with this delicate orb lantern. Created using a simple pinch pot technique, this project gleams with pierced stars, floral motifs, and tiny pinholes that cast enchanting shadows when lit.
How-To Guide
Materials
- White creative paper clay or air-dry clay
- Rolling pin
- Small bowl (for shaping support)
- Circular cookie cutters or bottle caps (various small sizes)
- Star-shaped cutters (mini)
- Needle tool or toothpick
- Small knife or clay scalpel
- Sponge and water
- Fine-grit sandpaper
- LED tealight candle
Step 1: Forming the Sphere based on Pinch Pots
-
Prepare the clay:
Start with two equal-sized balls of white clay, each about the size of a large orange. Knead them briefly to ensure they are smooth and free of air bubbles. -
Create the first pinch pot:
Take one ball and push your thumb into the center, stopping before you break through the bottom. Gently pinch and turn the clay between your thumb and fingers to widen the opening. -
Refine the wall thickness:
Continue pinching upward until you have a bowl shape with even walls, roughly 1/4 inch thick. Repeat the entire process with the second ball of clay to make a matching bowl. -
Join the halves:
Score the rims of both bowls (scratch cross-hatch marks) and dab on a little water or slip. Press the rims together firmly to seal them into a hollow sphere. -
Smooth the seam:
Using your thumb or a modeling tool, drag clay across the seam to blend the two halves completely. Roll the sphere gently on your work surface to round out any lumpy areas. -
Create the top opening:
Use a large circular cutter or a knife to cut a neat hole in the very top of the sphere. This will be the chimney for heat and the access point for your candle.
Fixing Cracks
If hairline cracks appear during drying, mix a tiny amount of fresh clay with water to make a paste (slip) and fill the crack. Smooth it over and let dry again.
Step 2: Designing the Night Sky
-
Initial smoothing:
Before cutting, wipe the surface with a slightly damp sponge to remove fingerprints and ensure a pristine matte finish. -
Plan your large circles:
Using small circular cutters or pen caps, punch out a few random ‘moons’ around the upper half of the sphere. Space them out generously to leave room for other details. -
Carve the stars:
Use mini star cutters to punch shapes between the circles. If you don’t have cutters, I find a sharp clay scalpel works well to carefully carve small freehand 5-point stars. -
Add floral bursts:
Create snowflake or flower patterns by pressing a thin blade or needle tool into the clay to make radiating teardrop slits, arranging them in a circle around a central point. -
Create the galaxy dust:
Take a needle tool and pierce tiny holes all over the remaining empty spaces. vary the density—clustering some together like the Milky Way looks fantastic when lit. -
Clean up the edges:
Once the clay has stiffened slightly (leather hard), go back and gently smooth the rough edges inside the cutouts with a damp brush or your finger.
Step 3: Finishing and Lighting
-
Dry partially:
Let the orb dry slowly away from direct heat or drafts to prevent cracking. Covering it loosely with plastic for the first day helps equalize moisture. -
Flatten the base:
While it’s still slightly pliable, gently tap the bottom of the sphere on the table to create a small flat spot so it sits stable and won’t roll away. -
Full cure:
Allow the piece to dry completely for 24-48 hours until it is bone dry and turns a chalky white color. -
Sand for perfection:
Use fine-grit sandpaper to buff away any remaining bumps or seam lines on the exterior for a professional, smooth look. -
Light it up:
Place a battery-operated LED tealight inside immediately to test the glow. Real candles can be used if you used kiln-fired ceramic clay, but stick to LEDs for air-dry clay.
Add Glow Color
Line the inside of the dried lantern with colored tissue paper or translucent vellum using a decoupage glue. The light will shine through in soft hues.
Enjoy the cozy, speckled light your new handmade lantern casts across the room
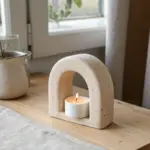
Teardrop Pinch Lantern With Cutouts
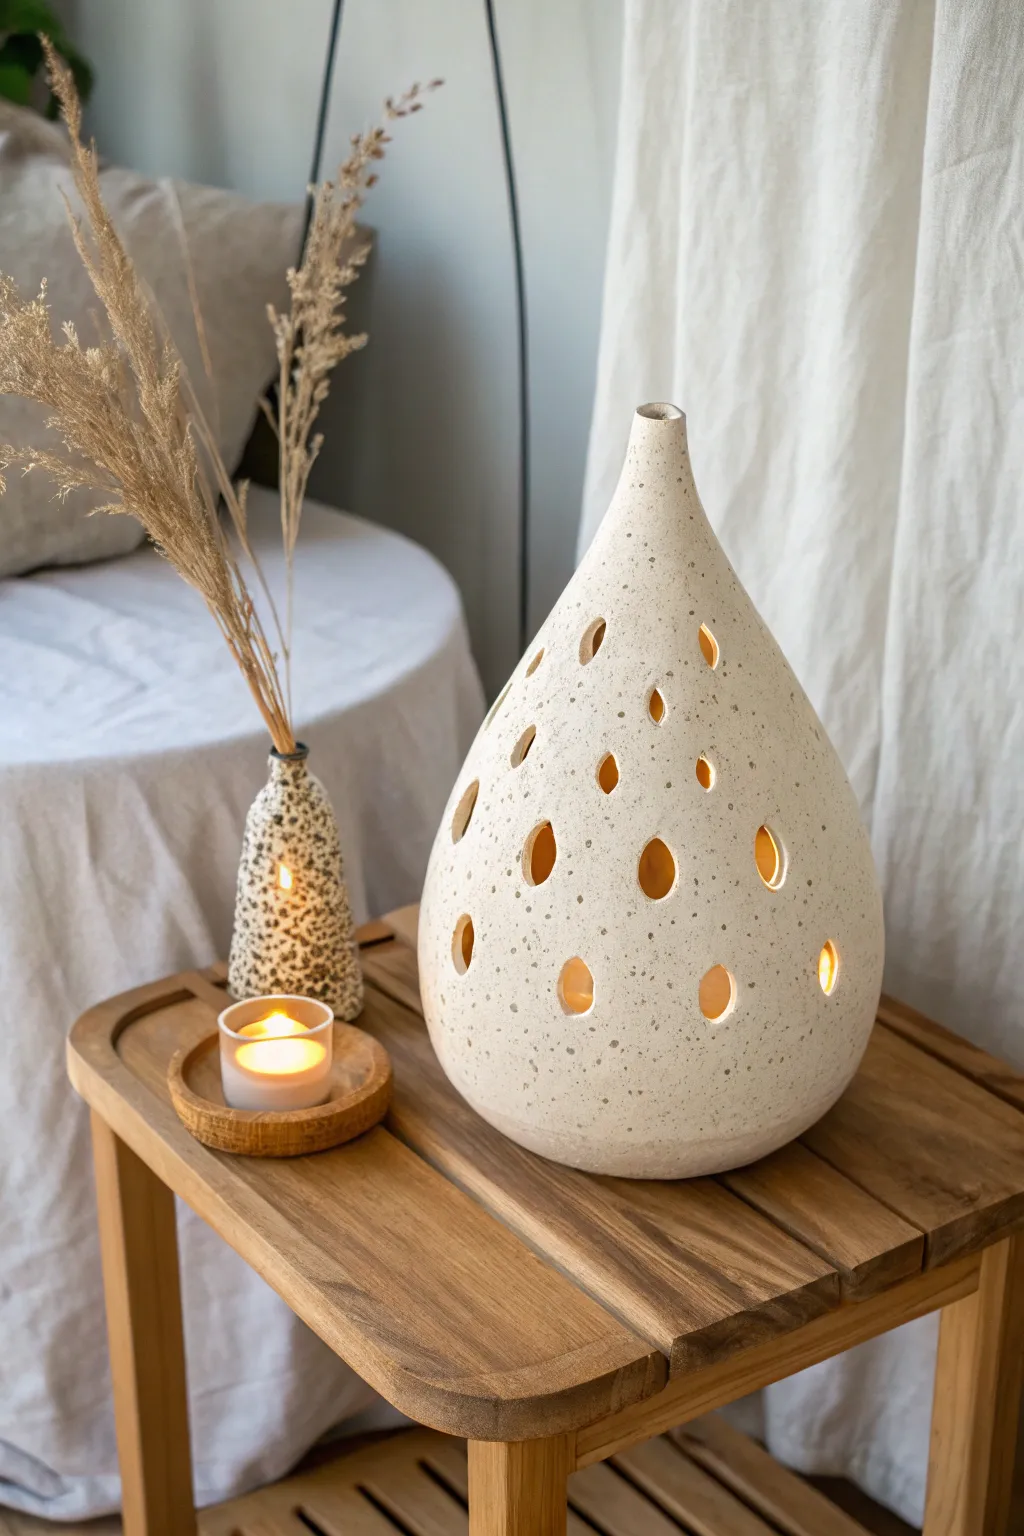
This elegant lantern achieves a modern, organic look with its smooth teardrop shape and perfectly spaced cutouts that cast a warm, inviting glow. The speckled clay body adds a natural texture that looks beautiful even when unlit.
Step-by-Step Tutorial
Materials
- White or cream-colored air-dry clay or polymer clay
- Speckled clay additive (or sand/black pepper for texture)
- Small teardrop-shaped cookie cutter (approx. 1 inch)
- Rolling pin
- Sponge
- Small bowl of water
- Craft knife or needle tool
- Flexible rib tool
- Fine-grit sandpaper
- Matte spray sealer (optional)
- Battery-operated LED candle
Step 1: Forming the Base
-
Prepare the clay body:
Begin by conditioning your white clay until it is soft and pliable. If you are using plain clay, knead in a small amount of speckled additive, sand, or even coarse black pepper to achieve that stone-like texture seen in the photo. -
Create the initial pinch pot:
Roll the clay into a large, smooth ball about the size of a grapefruit. Push your thumb into the center to open it up, gently pinching the walls while rotating the ball to create a wide, deep bowl shape. -
Elongate the form:
Continue pinching and pulling the walls upward, but start to angle your hands inward as you go higher. You want to transition the shape from a bowl at the bottom to a narrower cone at the top. -
Refine the teardrop shape:
Use a flexible rib tool or a damp sponge to smooth the outside walls. Gently collar the neck of the lantern inward until you have a graceful, tapered peak with a small opening at the very top. -
Check symmetry:
Place the lantern on a flat surface and spin it slowly. Tap the bottom gently against the table to flatten it slightly so it sits securely without wobbling. -
Let it firm up:
Allow the clay to dry to a ‘leather-hard’ state—it should be firm to the touch but still have moisture. This prevents the lantern from collapsing when you cut the holes.
Slumping Walls?
If your teardrop starts to sag while shaping, loosely stuff the inside with crumpled newspaper or plastic wrap to support the walls until the clay stiffens.
Step 2: Detailing and Finishing
-
Plan the cutouts:
Before cutting, you might want to lightly mark the positions of your holes. Visualize a staggered pattern where rows alternate, creating a balanced look all around the curve. -
Cut the teardrop shapes:
Using a small metal decorative cutter or a sharp craft knife, carefully punch or slice out the teardrop shapes. Be gentle to avoid warping the surrounding clay wall. -
Clean the edges:
Dip a small brush or your finger in water and smooth the raw edges of every cutout. Sharp or rough edges can look unfinished once the light shines through them. -
Refine the surface:
Once all holes are cut, give the entire exterior one last wipe with a slightly damp sponge to remove fingerprints and ensure the speckles show clearly. -
Dry completely:
Let the lantern dry fully according to your clay manufacturer’s instructions. Air-dry clay may take 24-48 hours; baking clay will need oven time. -
Sand for perfection:
Once fully cured or dry, use fine-grit sandpaper to buff away any remaining rough spots, paying special attention to the rim and the base. -
Seal the piece:
Spray the interior and exterior with a matte clear coat to protect the surface from dust and moisture without making it look glossy. -
Light it up:
Place a battery-operated candle or LED string lights inside to enjoy the warm patterns cast by your new handmade lantern.
Color Wash
For a rustic finish, dilute brown acrylic paint with water and brush it over the dry lantern, then wipe it back immediately. The paint will stay in the speckles/holes.
Enjoy the cozy atmosphere your handcrafted clay lantern brings to any corner of your home

TRACK YOUR CERAMIC JOURNEY
Capture glaze tests, firing details, and creative progress—all in one simple printable. Make your projects easier to repeat and improve.
Texture-Imprint and Pierced Lantern
This elegant lantern combines the rustic charm of fabric textures with delicate cutouts to create a stunning play of light. By imprinting clay with real linen and piercing geometric patterns, you’ll craft a centerpiece that glows beautifully from within.
How-To Guide
Materials
- Light-colored stoneware clay or air-dry clay (smooth body)
- Rough linen or canvas fabric remnant
- Rolling pin
- Cylindrical mold (PVC pipe, sturdy cardboard tube, or large glass jar)
- Newspaper or paper towel
- Fettling knife or craft knife
- Small round punch or straw
- Teardrop or petal-shaped clay cutter (small)
- Needle tool
- Scoring tool (or fork)
- Slip (clay and water mixture)
- Sponge
Step 1: Preparing the Textured Slab
-
Roll the base slab:
Begin by rolling out your clay on a flat surface to an even thickness of about 1/4 inch. Ensure the slab is large enough to wrap around your chosen cylindrical mold with a slight overlap. -
Apply the fabric texture:
Lay your piece of rough linen or canvas fabric directly onto the clay slab. Smooth it out with your hands to remove wrinkles. -
Imprint the pattern:
Using your rolling pin, roll firmly over the fabric. This presses the weave into the soft clay, transferring that lovely textile look. I find rolling in one consistent direction gives the cleanest impression. -
Remove the fabric:
Carefully peel the fabric away from the clay to reveal the texture. Check that the impression is deep enough to be visible but hasn’t compromised the slab’s integrity. -
Cut to size:
Measure the height and circumference of your mold. Use a ruler and fettling knife to cut a precise rectangle from your textured slab that fits those dimensions.
Step 2: Piercing the Design
-
Mark horizontal guides:
Lightly trace two parallel lines near the top rim and two near the bottom rim using a needle tool to guide your border patterns. Keep these faint so they don’t distract from the texture. -
Punch the borders:
Using a small round tool or a straw, punch a series of small holes between your guide lines to create the dotted borders at the top and bottom. -
Plan the central motif:
Determine the spacing for your main floral pattern. You can lightly mark the center points for each flower shape to ensure they wrap evenly around the cylinder. -
Cut the petal shapes:
Use your teardrop or petal-shaped cutter to punch out the designs. Arrange four cutouts in a cluster to create the four-pointed star or flower look seen in the example. -
Add detail accents:
Use a smaller tool or the needle tool to poke single holes between the petal clusters, connecting the design elements visually. -
Clean the edges:
Once the clay has stiffened slightly (leather hard is best for this), gently smooth the rough edges of your cutouts with a damp sponge or soft brush.
Clean Cuts Hack
If your clay drags when lifting the cutters, place a piece of plastic wrap over the clay before pressing the cutter down. This creates softer customized edges.
Step 3: Forming and Finishing
-
Prepare the mold:
Wrap your cylindrical mold in a sheet of newspaper or paper towel. This prevents the clay from sticking to the mold and allows the clay to shrink slightly as it dries. -
Lift the slab:
Carefully lift your decorated slab. If it feels too floppy, let it sit for 10-15 minutes to firm up just enough to handle without warping the holes. -
Shape the cylinder:
Wrap the slab around the prepared mold, bringing the two short ends together. -
Score and slip:
Score (scratch) the creating edges where they will join. Apply a generous amount of slip to the scored areas. -
Seal the seam:
Press the edges together firmly to create a seam. Smooth the seam on the inside of the cylinder. On the outside, try to blend it gently without destroying your fabric texture. -
Refine the rim:
Check the top rim of the cylinder. If it’s uneven, trim it gently with your knife or smooth it with a damp sponge for a polished look. -
Dry slowly:
Remove the mold once the clay can support its own weight. Let the lantern dry slowly under loose plastic to prevent cracking, especially around the delicate cutouts.
Gilded Interior
After firing or drying, paint the inside with gold acrylic or gold luster. When the candle is lit, it will reflect a warm, metallic glow through the holes.
Once fired or fully cured, place a tea light inside to see your beautiful patterns come to life in the dark
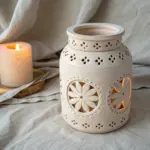
Easy Mandala Cutout Lantern
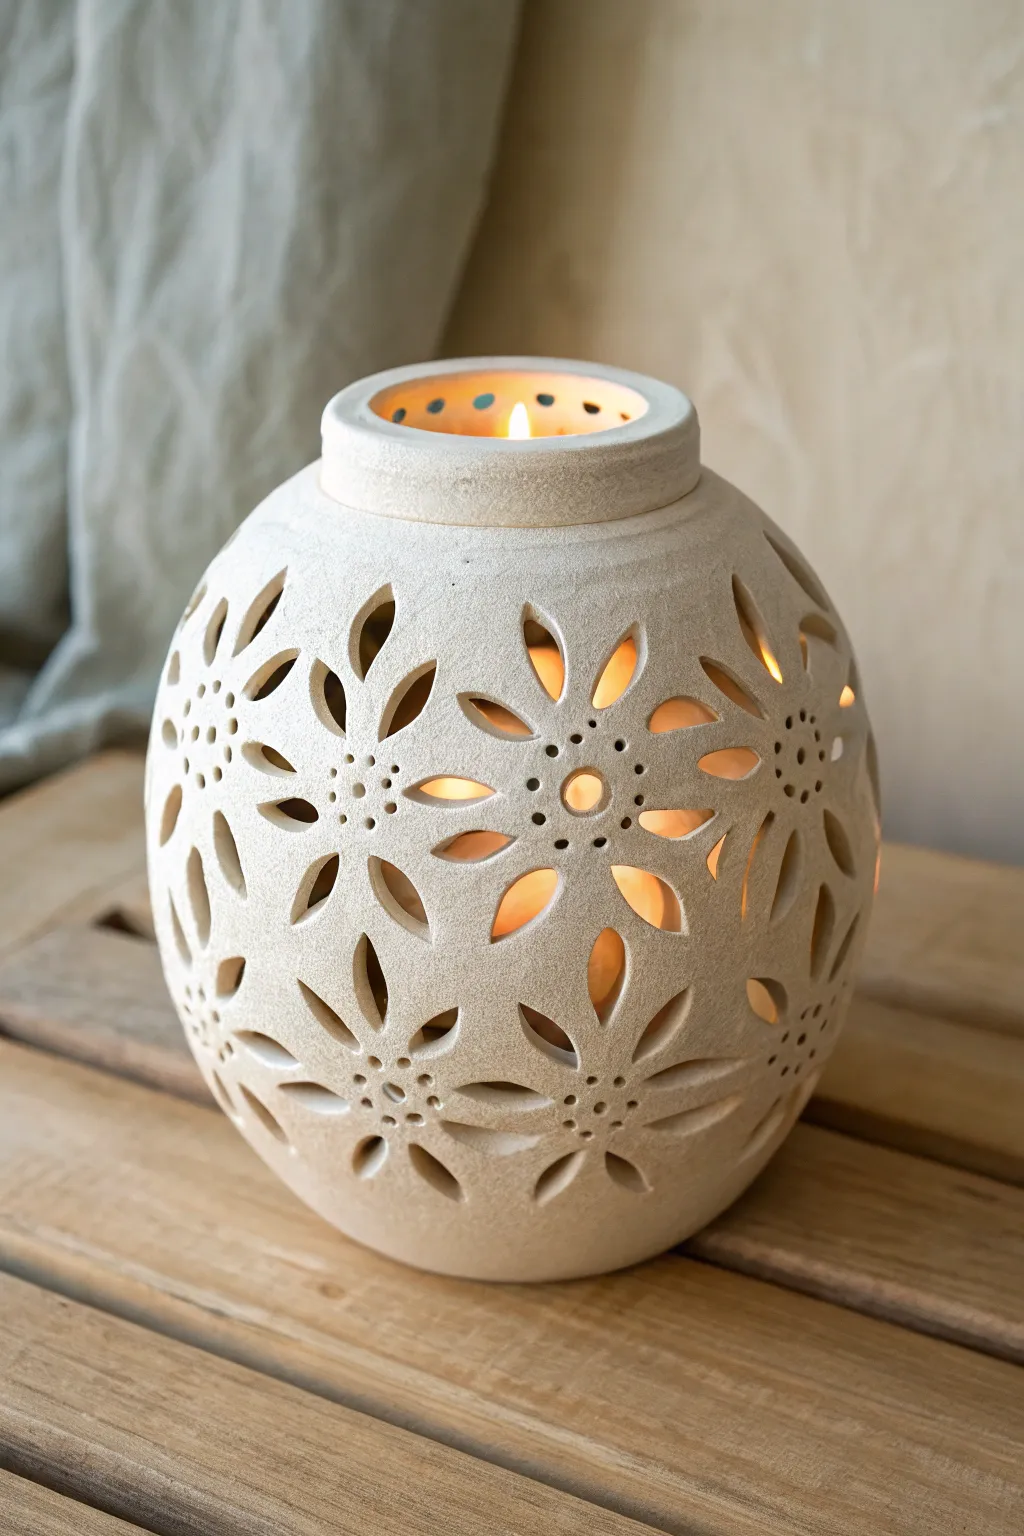
Let maximum warmth shine through this beautifully rounded luminary, featuring radiating flower petals carved directly into the clay body. The natural textured finish and repeating floral mandala pattern create a stunning play of light and shadow perfect for cozy evenings.
Step-by-Step Guide
Materials
- White stoneware or earthenware clay (groggy texture preferred)
- Medium round balloon
- Rolling pin
- Canvas mat or slab roller
- Needle tool
- Small circle cutter (approx. 1/8 inch or straw)
- Leaf-shaped cutter (or X-Acto knife)
- Fettling knife
- Sponge
- Slip and scoring tool
- Potter’s ribs (wood and flexible metal)
- Tea light or LED candle
Step 1: Forming the Sphere Base
-
Prepare the Slabs:
Begin by rolling out a substantial slab of clay to an even thickness of about 1/4 inch on your canvas mat. -
Inflate the Support:
Blow up your balloon until it reaches the desired size of your lantern, knotting it securely. -
Drape the Clay:
Gently lift your clay slab and drape it over the balloon. You may need two semi-circle slabs joined at a seam if one slab isn’t large enough. -
Smooth the Form:
Using your hands or a wooden rib, smooth the clay against the balloon to remove air pockets and shape it into a sphere, leaving an opening at the top. -
Create the Collar:
Roll a thick coil of clay and attach it to the top opening. Flatten it slightly to create a finished rim like the one in the photo. -
Let it Set:
Allow the clay to stiffen to a ‘leather hard’ state. This is crucial; if it’s too soft, the balloon might distort the shape when you cut. -
Remove the Balloon:
Pop or untie the balloon and carefully remove it through the top opening once the form can support its own weight.
Slumping Issues?
If the sphere collapses when you remove the balloon, the clay wasn’t leather-hard yet. Patience is key—wait until the clay is firm to the touch but cold.
Step 2: Carving the Mandala Pattern
-
Mark the Centers:
Lightly scratch evenly spaced points around the belly of the pot where the centers of your flowers will go. -
Punch the Centers:
Use your small circle cutter or a straw to punch out the center dot, then create a ring of small dots around it to form the flower’s pistil. -
Plot the Petals:
Lightly trace petal shapes radiating outward from your center dots using a needle tool first to ensure spacing is correct. -
Cut the Petals:
With a sharp fettling knife or X-Acto blade, carefully cut out the petal shapes. Leave enough clay between cuts so the structure remains strong. -
Clean the Edges:
Wait until the clay is bone dry, then use a slightly damp sponge or a sanding pad to smooth the sharp edges of your cutouts.
Step 3: Finishing Touches
-
Texture the Surface:
If you want that sandy look from the photo, gently pat the exterior with a textured sponge or bristle brush before firing. -
Firing:
Bisque fire the piece according to your clay body’s instructions. -
Glazing (Optional):
For the matte, stone-like finish shown, you can leave the outside unglazed or apply a matte transparent wash. I prefer leaving the raw clay for that organic feel. -
Final Fire:
Complete the final glaze firing if you applied any finish.
Diffuse the Light
After firing, glue a sheet of translucent vellum or tracing paper to the inside of the jar. This softens the candlelight and hides the bulb.
Place a flickering tea light inside and enjoy the mesmerizing shadows cast by your handcrafted lantern
Swirl Carve and Dot Lantern
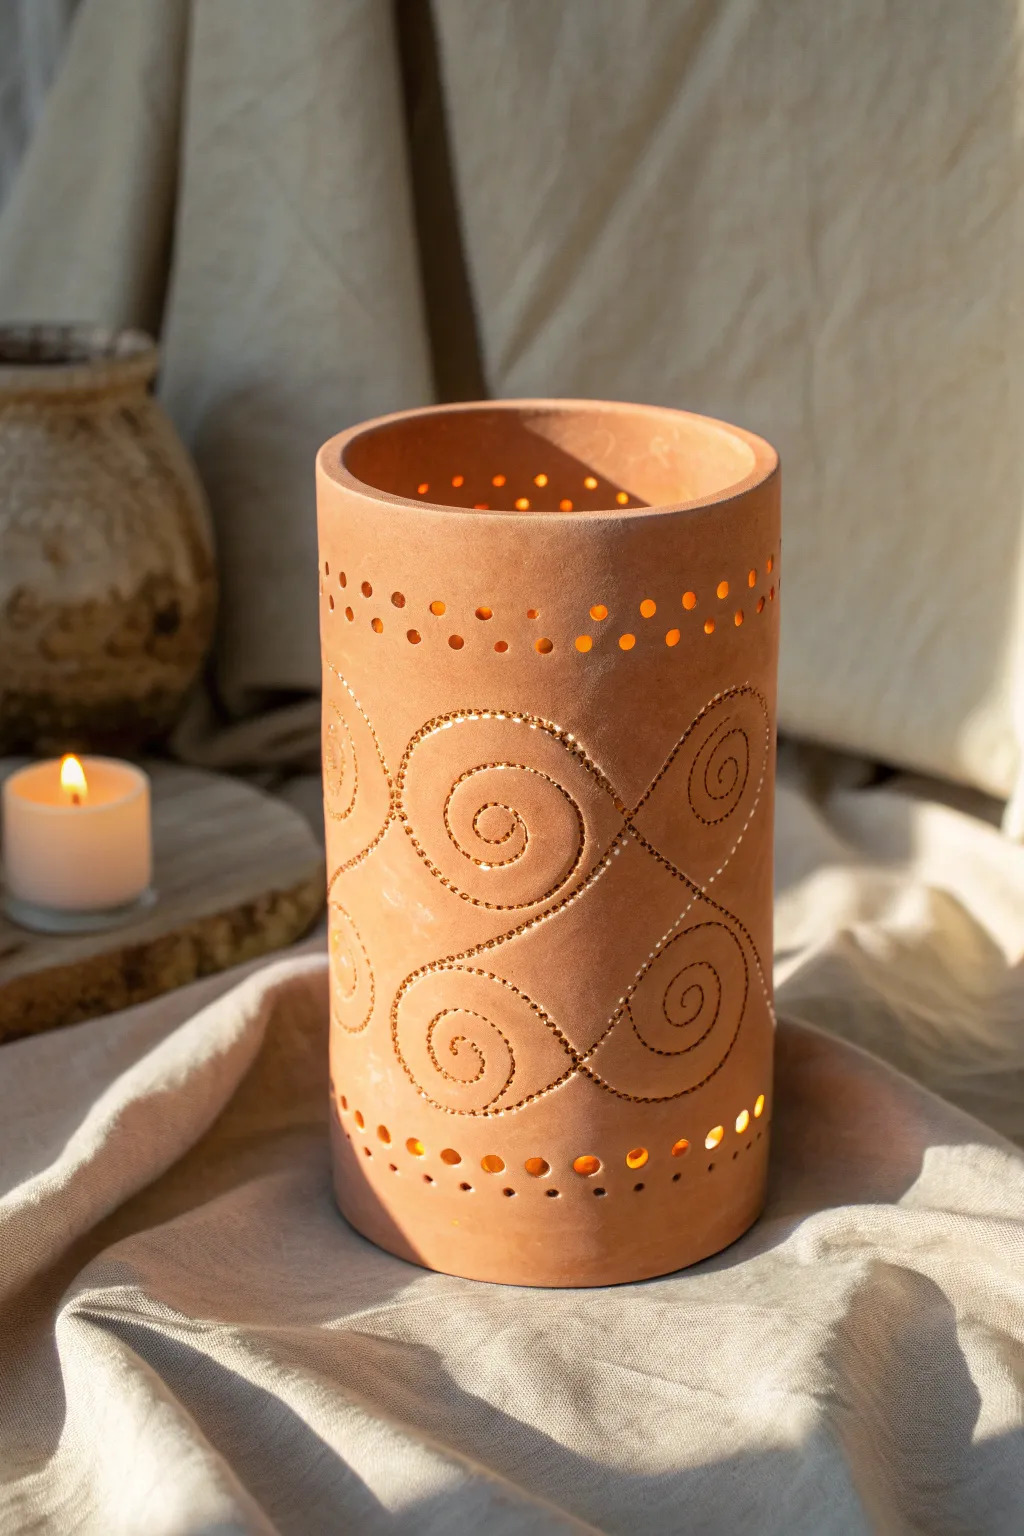
Bring a warm, earthy glow to your space with this cylindrical clay lantern featuring elegant carved swirls and piercing accents. The light shines beautifully through the dotted patterns, casting intricate shadows that create a cozy atmosphere.
Detailed Instructions
Materials
- Air-dry clay or kiln-fire clay (terracotta color)
- Rolling pin
- Canvas mat or non-stick surface
- Cylindrical mold (like a large glass jar or PVC pipe)
- Newspaper or parchment paper
- Needle tool or toothpick
- Small circular hole cutter or straw
- Sponge
- Bowl of water
- Ruler
- Sharp knife or clay cutting tool
- Scoring tool (or fork)
- Slip (clay mixed with water)
Step 1: Forming the Cylinder
-
Prepare the slab:
Begin by rolling out your clay on a canvas mat to a uniform thickness of about 1/4 inch. Ensure the slab is large enough to wrap around your chosen cylindrical mold with a slight overlap. -
Cut to size:
Measure the height you want for your lantern (about 6-8 inches works well) and cut a clean rectangle from the slab. You can use your ruler as a guide to ensure straight edges. -
Prepare the mold:
Wrap your cylindrical mold in a layer of newspaper or parchment paper. This crucial step prevents the clay from sticking to the form and helps it slide off easily later. -
Wrap the clay:
Carefully lift your clay slab and wrap it around the mold. Bring the two short ends together until they touch. -
Join the seam:
Score both touching edges with a scratching tool, apply a dab of slip, and press them firmly together. Smooth the seam inside and out with your fingers until it disappears completely.
Collapsing clay walls?
If the cylinder sags while carving, put the mold back inside! If the clay is too soft, let it sit for 30 more minutes to stiffen before trying again.
Step 2: Designing the Pattern
-
Let it firm up:
Allow the clay to dry slightly on the mold until it reaches a ‘leather-hard’ state. It should be firm to the touch but still carveable without collapsing. -
Mark the guide lines:
Using a needle tool, lightly sketch a wave pattern that travels around the middle of the lantern cylinder. Draw large, looping spirals above and below this central wave base to create the S-curve motifs. -
Refine the swirls:
Go back over your sketched lines, deepening the groove slightly to define the spiral shapes clearly. I find creating a consistent depth here makes the final dotting much easier to follow.
Step 3: Carving and Piercing
-
Pierce the swirls:
Using a needle tool, poke small, distinct holes along the spiral lines you just carved. Space them evenly, about 1/8 inch apart, following the curve all the way to the center of each swirl. -
Create the upper border:
Near the top rim, use a slightly larger hole cutter or a straw to punch a row of larger circular holes around the circumference. -
Add detail dots:
Beneath the large upper holes, add two rows of tinier dots using the needle tool to create a delicate border that frames the top edge. -
Mirror the bottom:
Repeat the border process at the bottom of the lantern: one row of large holes near the base, followed by two rows of tiny dots above them. -
Smooth the edges:
Once all holes are punched, take a barely damp sponge and gently wipe the surface to remove any clay burrs or crumbs created by the piercing tools. -
Remove the mold:
Carefully slide the cylinder off the mold. If you used newspaper, peel it away gently from the inside.
Level Up: Inner Glow
Paint the inside of the lantern with metallic gold acrylic paint before sealing. When lit, the gold interior will reflect the candlelight beautifully.
Step 4: Finishing
-
Final smooth:
Check the interior for any rough bits of clay pushed through from the holes and smooth them down with your finger or a tool. -
Dry slowly:
Place the lantern in a draft-free area to dry slowly. Cover loosely with plastic if necessary to prevent distinct cracking. -
Fire or seal:
If using kiln clay, bisque fire it according to manufacturer instructions. If using air-dry clay, allow it to fully cure and then seal it with a matte varnish for durability.
Place a tea light inside and enjoy the mesmerizing patterns cast by your new handmade lantern
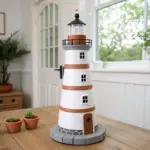
Arched Window Cottage Lantern
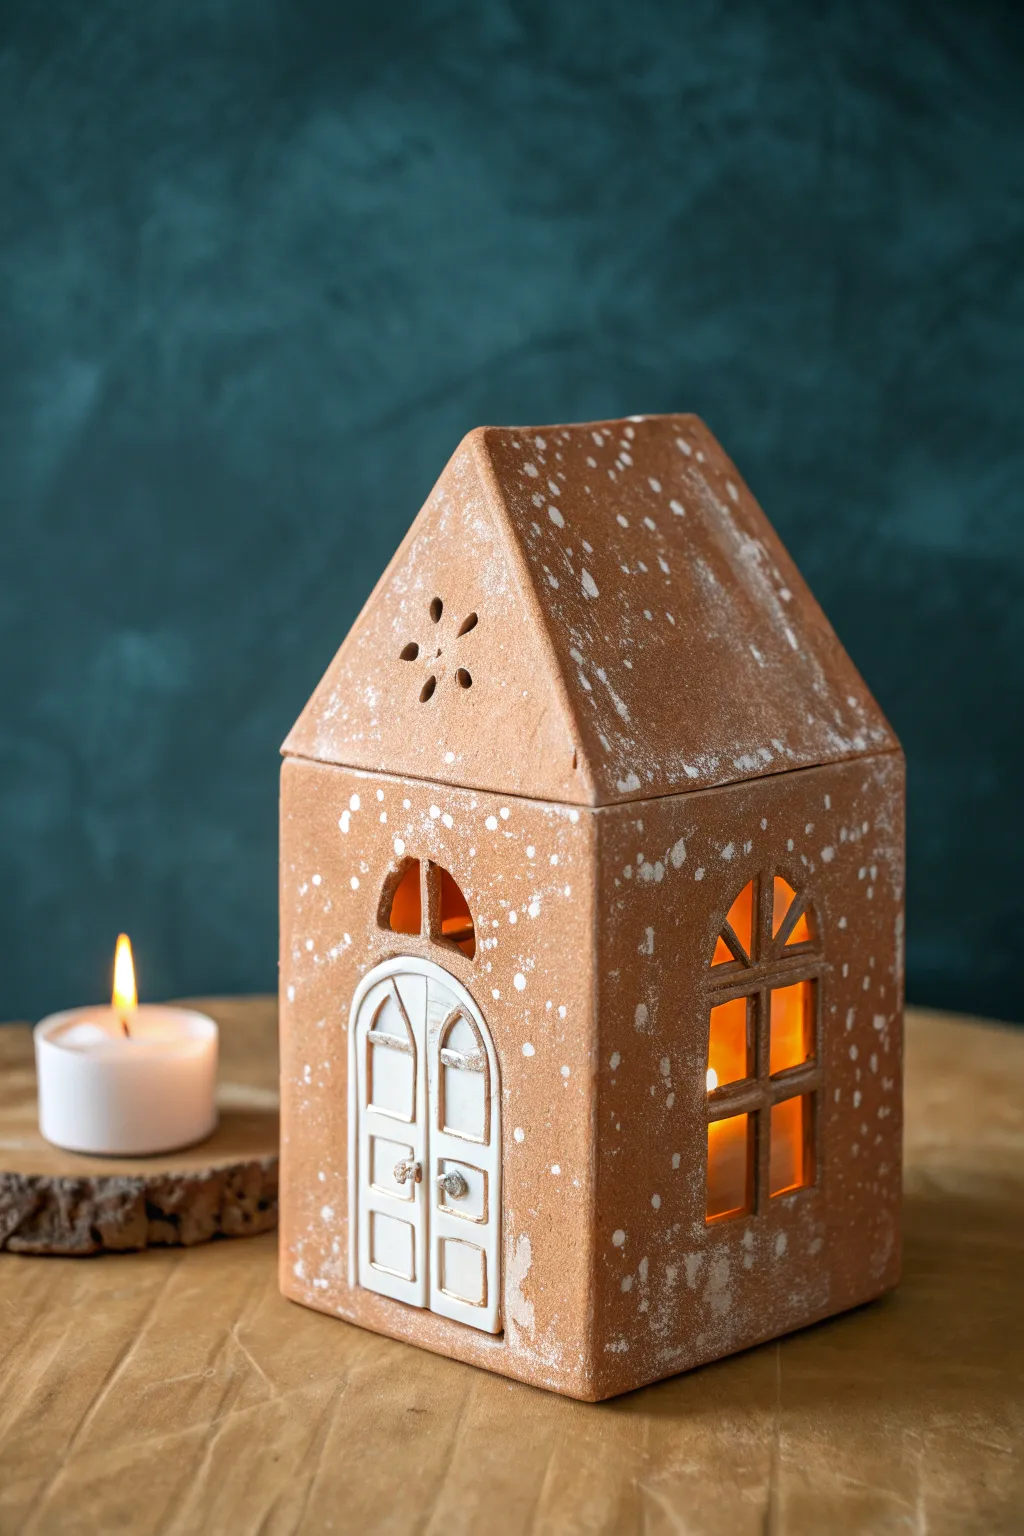
Bring a cozy warmth to your home with this charming terracotta-style lantern that looks like a miniature gingerbread house dusted with snow. The rustic arched windows and inviting glow make it a perfect centerpiece for winter evenings.
Step-by-Step
Materials
- Air-dry clay (terra cotta color) or polymer clay
- Rolling pin
- Clay knife or X-Acto blade
- Ruler
- Small circle cutter or straw (for roof vents)
- White acrylic paint
- Stiff bristle brush or old toothbrush
- Small detail brush
- Fine-grit sandpaper
- Slip (clay mixed with water) for joining
- Tea light candle (battery-operated recommended)
Step 1: Constructing the Structure
-
Roll the slabs:
Begin by rolling out your clay to a uniform thickness of about 1/4 inch. You will need four rectangular walls and two rectangular roof panels. Two of the wall panels should have triangular peaks at the top to support the roof. -
Measure and cut walls:
Using your ruler and knife, cut two side walls (rectangular) and two front/back walls (rectangular with a triangle peak). Ensure the height of the side walls matches the height of the front walls before the peak starts. -
Cut the windows:
On one side wall, sketch a large arched window. Carefully cut out the shape, leaving the center open. Save the scrap clay to create the window panes later. -
Create the door:
On the front peaked wall, cut an arched doorway shape. Instead of discarding the cutout, trim it slightly and set it aside—this will become the white double door attached later. -
Add roof details:
On the upper triangle of the front wall, use a small circle cutter or a straw to punch a flower pattern of five small holes for ventilation and decoration. -
Texture the walls:
Before assembling, lightly tap the surface with a crumpled ball of foil or a stiff brush to give the clay a rustic, slightly porous stone texture. -
Assemble the box:
Score the edges of your walls and apply slip. Stand the walls up and press the corners together firmly. Smooth the seams on the inside and outside with your finger or a modeling tool. -
Attach the roof:
Cut two roof rectangular slabs that are slightly longer than the house structure to create an overhang. Score, slip, and attach them to the peaked walls and the top edges of the side walls.
Wall Collapse?
If walls won’t stand, create temporary internal supports using cardboard or crumpled paper inside the house while the clay dries or bakes to hold the shape.
Step 2: Adding Details & Finish
-
Install window mullions:
Roll thin snakes of clay. Place them inside the cutout window arch in a cross shape to create panes. Use a dab of slip to secure them to the inside edges of the window frame. -
Detail the door:
Take the reserved door piece. Score a vertical line down the center to create double doors, and add small clay rectangles for panels. Attach tiny clay balls for doorknobs. -
Attach the door:
Score the back of the detailed door piece and press it firmly over the doorway cutout on the main house. It should sit slightly proud of the surface. -
Dry the lantern:
Allow the house to dry completely. If using air-dry clay, this may take 24-48 hours. If using polymer clay, bake according to the manufacturer’s package instructions. -
Sand imperfections:
Once fully cured, use fine-grit sandpaper to smooth any sharp edges on the corners or roof, but leave some texture to maintain the rustic look. -
Paint the door:
Using a small detail brush and white acrylic paint, carefully paint only the door and its frame. You may need two coats for opaque coverage against the dark clay. -
Create the snow effect:
Dip a stiff bristle brush or toothbrush into white acrylic paint. Remove most of the paint on a paper towel until the brush is almost dry. -
Splatter paint:
Flick the bristles to splatter tiny droplets of white paint across the roof and walls. Focus heavier application near the roofline and base to mimic accumulated snow.
Pro Tip: Glowing Light
For a warmer glow, paint the interior walls white or metallic gold. This reflects the candlelight better than the dark raw clay color.
Place a tea light inside and enjoy the warm, flickering atmosphere your handmade cottage creates
Hanging Lantern With Wire Handle
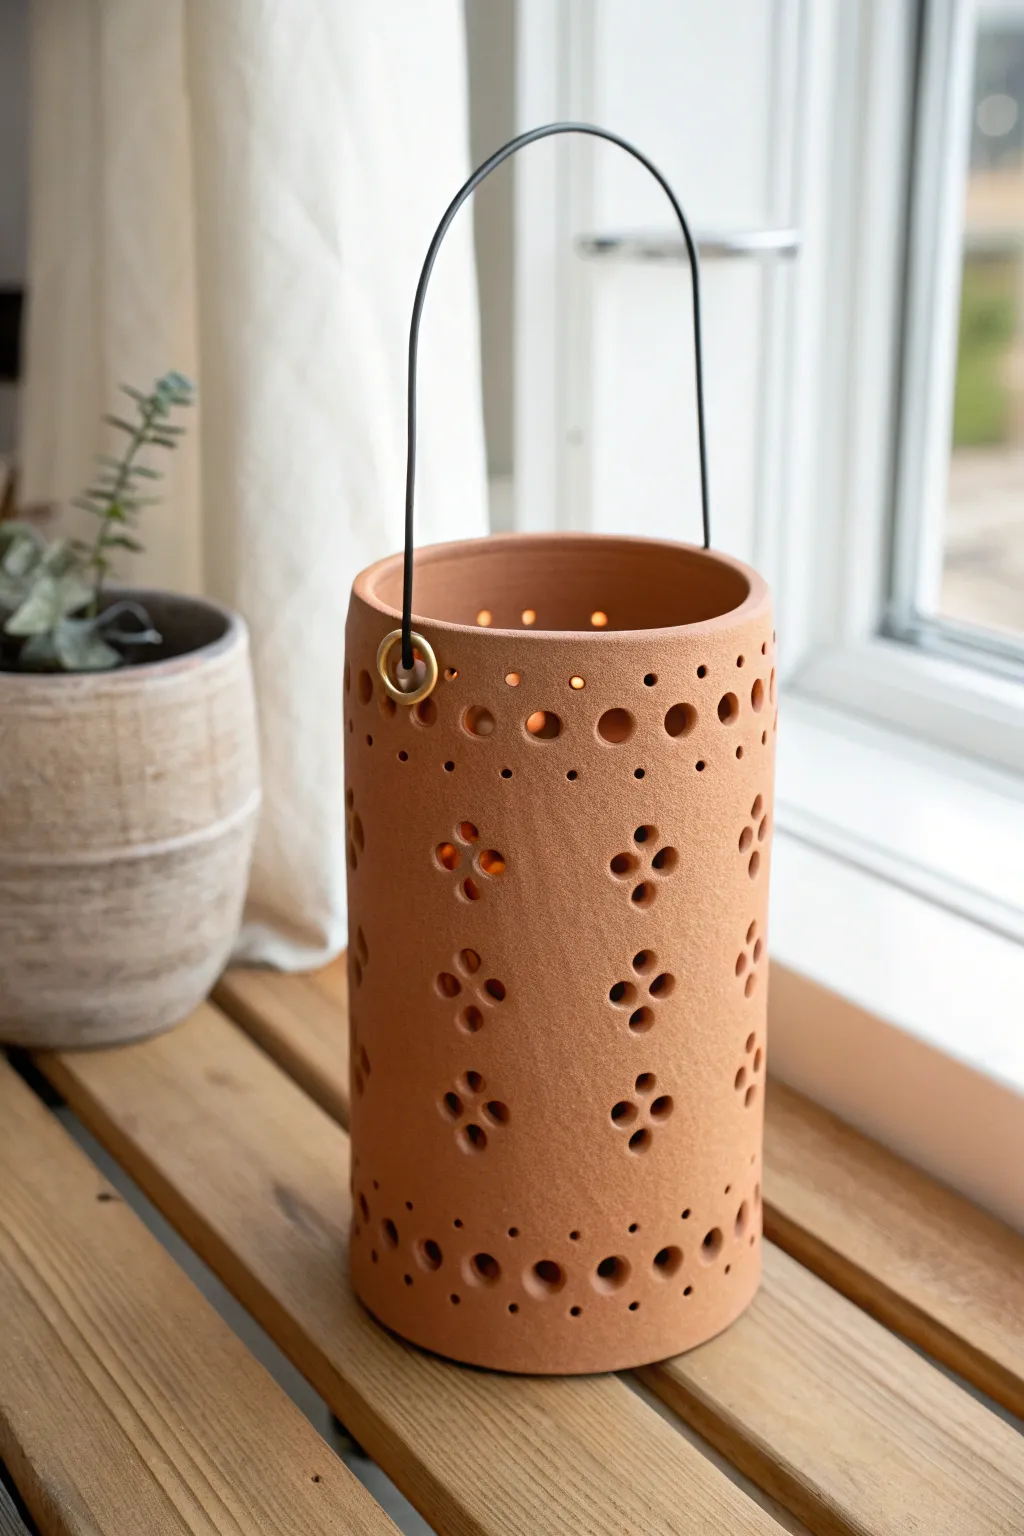
This rustic, unglazed lantern brings a warm, earthy charm to any windowsill or patio table. With its simple cylindrical form and delicate punched patterns, it creates a beautiful play of light when illuminated from within.
How-To Guide
Materials
- Terracotta-colored air-dry clay or polymer clay (approx. 500g)
- Non-stick rolling pin
- Large cylindrical form (like a sturdy bottle or tube) for shaping
- Various sizes of small round cutters (straws, punch tools, or pen caps)
- Sharp craft knife
- Ruler
- Parchment paper
- Black wire (16-18 gauge)
- Two brass eyelets or small brass jump rings
- Clay slip (or water for bonding)
- Sanding sponge
Step 1: Preparing the Clay Slab
-
Roll out the clay:
Begin by working your terracotta clay until it’s pliable but firm. Roll it out on parchment paper to an even thickness of about 1/4 inch. You want a long rectangular slab. -
Measure and cut:
Using your cylindrical form as a guide for circumference, measure a rectangle that will wrap all the way around with a slight overlap. Use a ruler and craft knife to cut clean, straight edges. -
Smooth the surface:
Run a slightly damp sponge or your finger over the surface to remove any texture form the rolling pin. A smooth canvas ensures your punch-outs look crisp later.
Collapsing Cylinder?
If the wall sags, the clay is too wet. Let the slab sit flat for 15-20 min to stiffen before wrapping it around the form.
Step 2: Design & Assembly
-
Form the cylinder:
Carefully wrap the clay rectangle around your chosen form (wrapped in parchment paper first so it doesn’t stick). Bring the two short ends together. -
Seal the seam:
Score the meeting edges with a needle tool and add a little slip or water. Press them firmly together and smooth the seam inside and out until it’s invisible. -
Plan the rim pattern:
Near the top rim, use a small round cutter or straw to create a horizontal row of small holes. Keep the spacing consistent for a polished look. -
Create the larger pattern:
About an inch below the rim, punch a row of larger circles. I find alternating sizes here adds visual interest similar to the original design. -
Punch the cross motifs:
For the main body, create ‘cross’ shapes using four small holes punched close together. Arrange these crosses in a diamond grid pattern around the cylinder. -
Add lower border:
Mirror the top design near the bottom edge, adding another row of large circles followed by a final row of tiny holes near the base. -
Clean up edges:
Once all holes are punched, gently smooth the cut edges with a finger to remove any sharp burrs of clay.
Glow Up
Paint the inside with gold acrylic paint. When lit, the candlelight will reflect off the gold for a significantly warmer glow.
Step 3: Handle Attachment & Finishing
-
Add eyelet holes:
Top center roughly an inch down from the rim, punch two holes on directly opposite sides of the cylinder to accommodate the handle. -
Insert brass rings:
While the clay is still wet, gently press brass eyelets or jump rings into these holes. The clay should shrink slightly around them as it dries, holding them tight. -
Allow to dry:
Let the lantern dry completely according to your clay package instructions. This usually takes 24-48 hours. Remove the inner form once the clay is leather-hard to assist drying. -
Draft the handle:
Cut a length of black wire, approximately 12-14 inches long. Bend it into a smooth arch shape. -
Attach the wire:
Feed the ends of the wire through the brass rings on the lantern. Curl the wire ends upward and twist them around themselves to secure the handle. -
Final sand:
Once fully dry, give the top and bottom rims a quick pass with a fine sanding sponge to ensure they sit perfectly flat.
Now you have a charming vessel perfect for holding an LED tea light to brighten up your evening
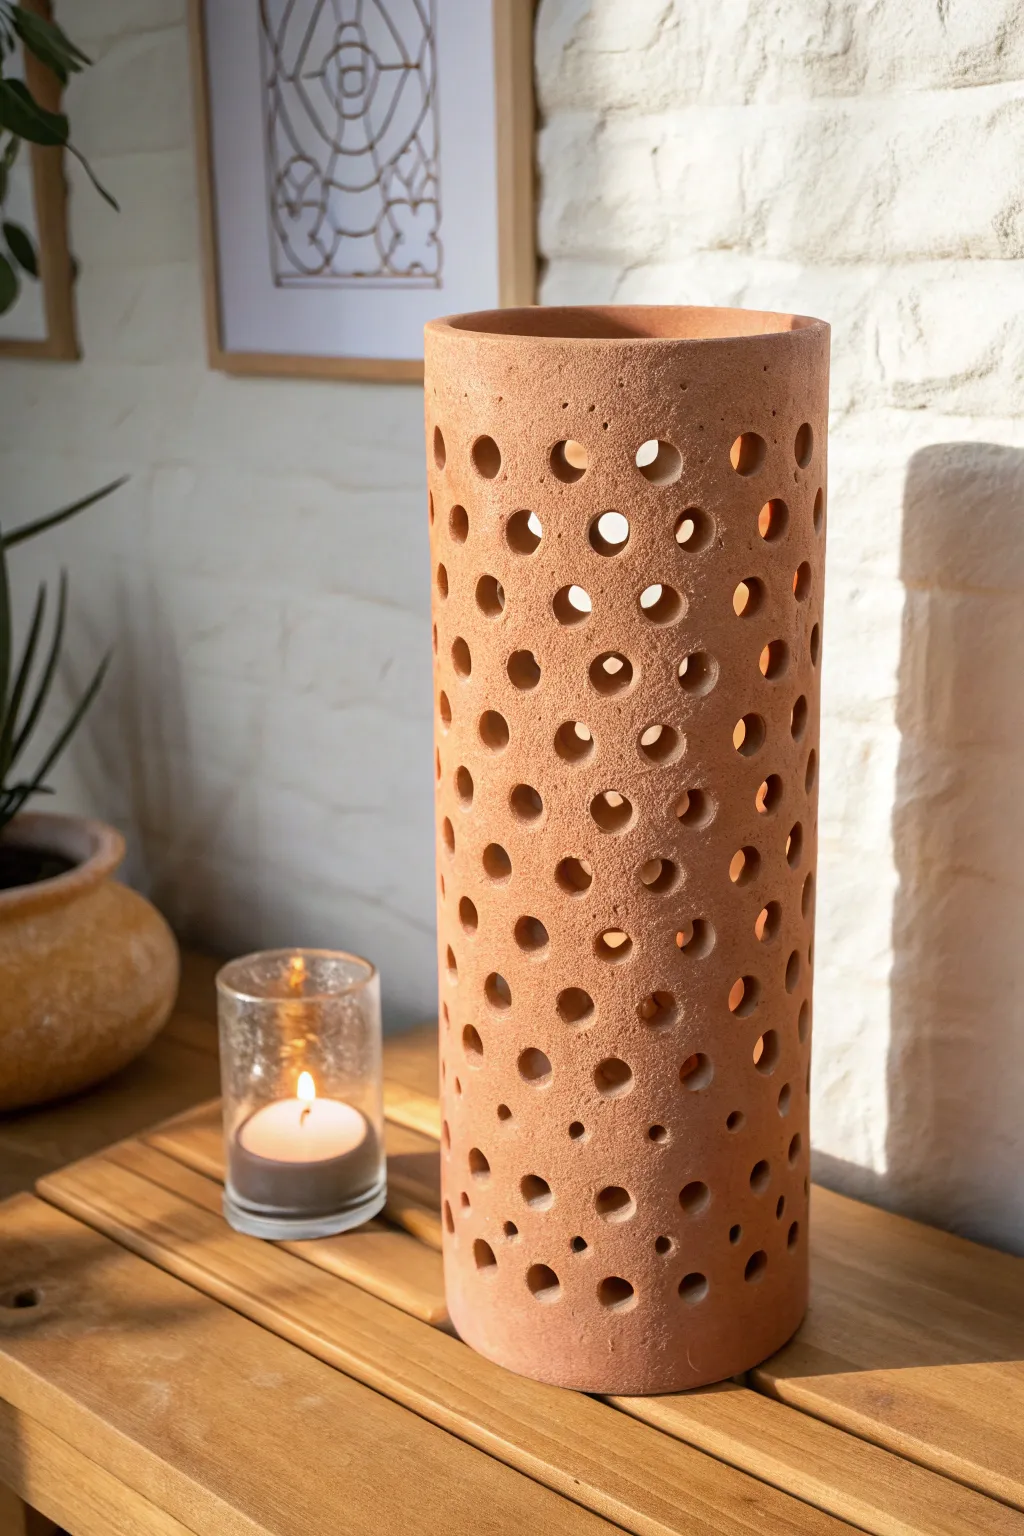
Lantern Sleeve Over a Glass Insert
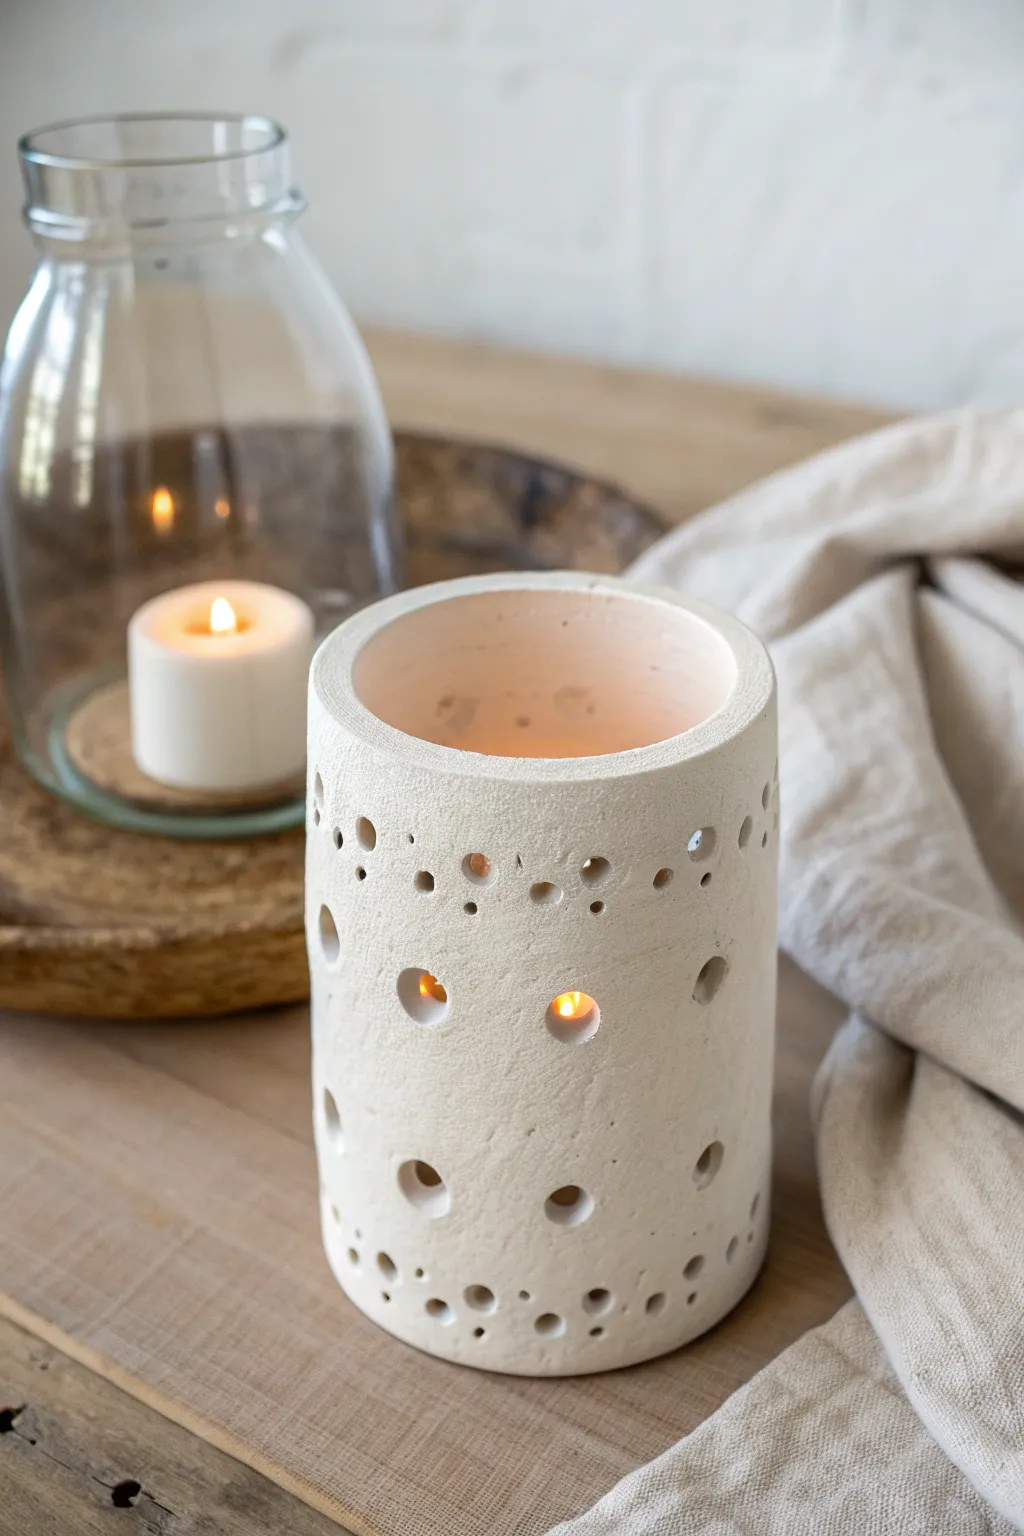
Bring a soft, warm glow to your living space with this minimalist cylindrical lantern sleeve. Its simple shape is elevated by a whimsical pattern of varying-sized holes that cast playful shadows when lit.
Step-by-Step
Materials
- White air-dry clay or polymer clay
- Rolling pin
- Parchment paper or canvas mat
- Glass cylinder vase (to use as a mold)
- Craft knife
- Various circle cutters (straws, piping tips, pen caps)
- Small bowl of water
- Sponge or smoothing tool
- Ruler
- Sandpaper (fine grit)
Step 1: Preparing the Slab
-
Prepare the workspace:
Lay down your parchment paper or canvas mat on a flat work surface to prevent the clay from sticking. This also makes it easier to lift the slab later. -
Roll the clay:
Take a generous amount of white clay and roll it out into a long rectangular slab. Aim for an even thickness of about 1/4 inch throughout to ensure structural stability. -
Measure the circumference:
Wrap a piece of paper or string around your glass cylinder mold to find the circumference, then add an extra half-inch for the seam overlap. -
Cut to size:
Using your measurements and a ruler, trim the clay slab into a neat rectangle. Make sure the height is slightly taller or equal to the glass insert you intend to cover.
Clean Cuts Hack
If your hole punches are dragging the clay and leaving messy edges, dip your straw or cutter into cornstarch or water before every single punch for a clean exit.
Step 2: Punching and Forming
-
Plan the pattern:
Before piercing, visualize your design. The lantern in the example features three distinct bands: intricate tiny holes at the top and bottom, with larger statement holes in the middle. -
Pierce the top border:
Using your smallest tool, like a cocktail straw or a small piping tip, punch a random scattering of small holes near the top long edge of the rectangle. -
Create the center feature:
Switch to a medium-sized cutter, such as a pen cap or large straw. Punch a sparse row of larger holes across the middle section of the slab. -
Finish the bottom border:
Repeat the scattering pattern from the top edge along the bottom edge, perhaps mixing in a few medium holes for variety. -
Clean the edges:
Gently smooth the edges of every punched hole with a damp fingertip to remove any sharp burrs or jagged bits of clay. -
Wrap the cylinder:
Carefully lift your clay slab and wrap it around your glass cylinder mold. I find it helpful to place a layer of parchment paper between the glass and clay to prevent sticking. -
Join the seam:
Bring the two short ends together. Score both edges with a craft knife (making cross-hatch marks) and dab a little water on them to create slippery slip. -
Seal and smooth:
Press the scored edges firmly together to close the cylinder. Use a modeling tool or your finger to smooth the seam inside and out until it is invisible.
Textured Glow
Before rolling the slab into a cylinder, gently press a piece of lace or burlap into the surface. The texture will catch the candlelight beautifully.
Step 3: Finishing Touches
-
Refine the shape:
While the clay is still on the mold, check that the top and bottom rims are perfectly circular. Gently tap the cylinder on the table to flatten the bottom rim for stability. -
Initial drying:
Let the clay sit on the mold for about an hour until it is leather-hard—firm enough to hold its shape but not fully dry. -
Remove the mold:
Carefully slide the glass cylinder out of the clay sleeve. Do this gently so you don’t warp the cylindrical shape. -
Final dry:
Allow the piece to dry completely according to your clay package instructions. This usually takes 24 to 48 hours for air-dry clay. -
Sand imperfections:
Once fully cured, use fine-grit sandpaper to buff away any fingerprints or rough spots, paying special attention to the top rim. -
Insert the light:
Place your glass candle holder inside the sleeve, add a tealight or pillar candle, and enjoy the cozy atmosphere.
Once lit, the dancing flame will illuminate your handiwork and create a calming ambiance in any room
Double-Layer Cutout Shadow Lantern
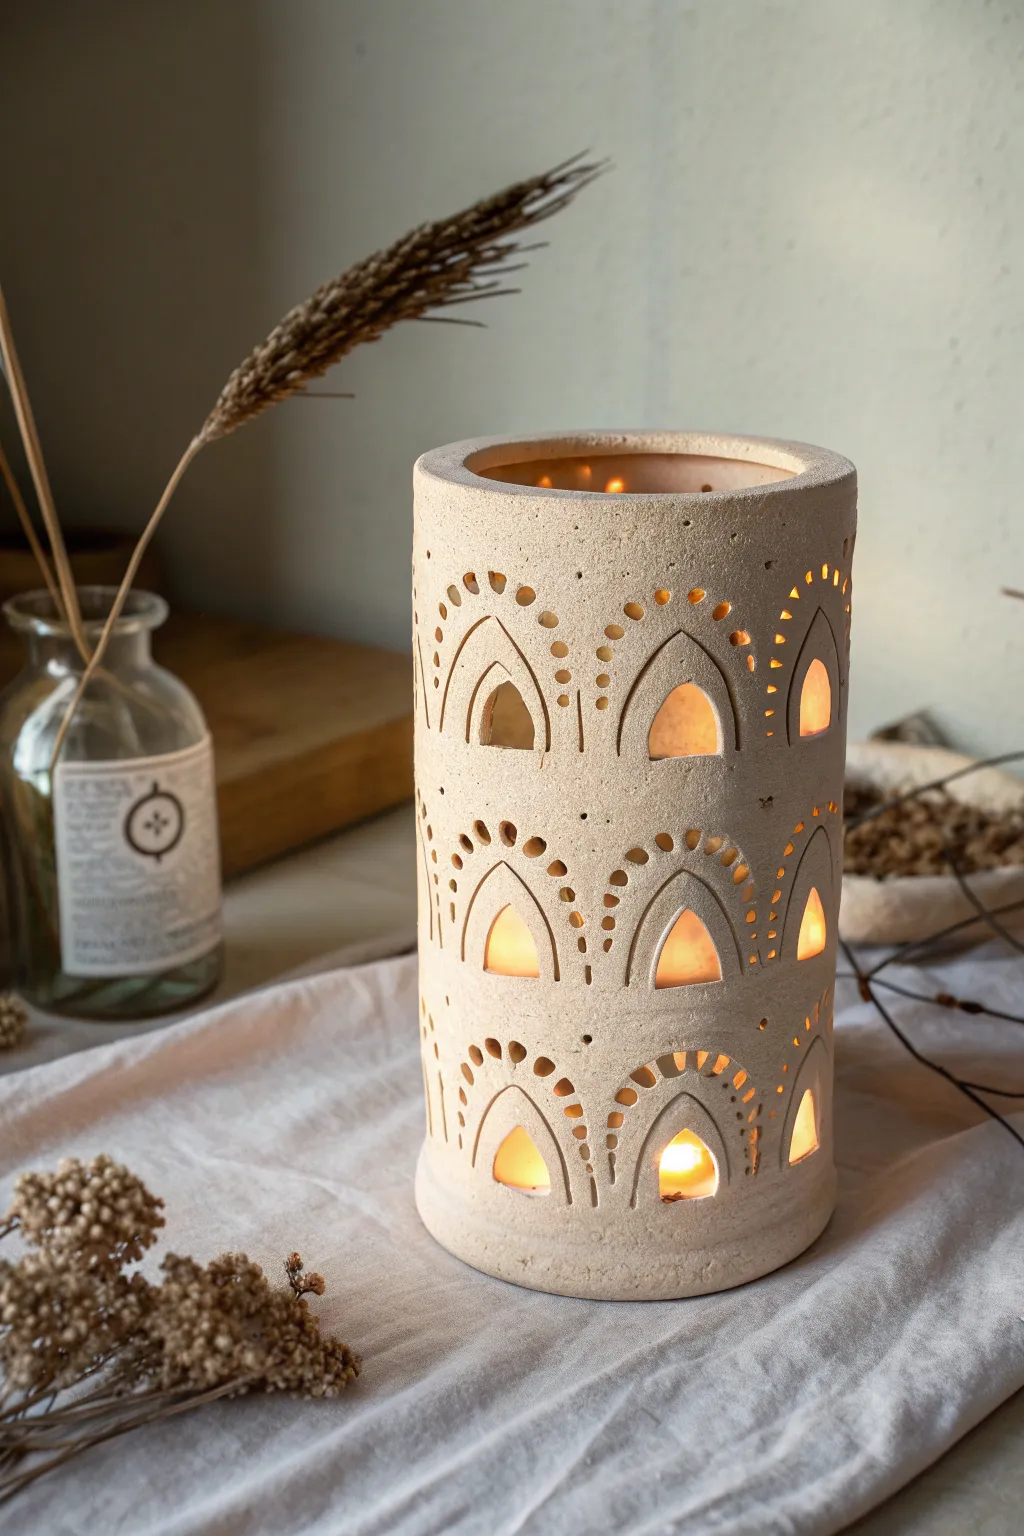
This stunning double-walled lantern creates a mesmerizing play of light with its repeating arch motifs and delicate pierced details. Using a clever slab-building technique, the inner and outer layers work together to frame the candle glow beautifully while hiding the light source directly.
Step-by-Step Guide
Materials
- Stoneware clay (speckled or sand-coloured)
- Rolling pin
- Canvas work surface or slab mat
- Cylindrical form or large rolling pin (for shaping)
- Fettling knife
- Needle tool
- Small teardrop or arch-shaped clay cutter
- Slip and scoring tool
- Wooden modeling tool
- Sponge
Step 1: Creating the Cylinder Base
-
Prepare the slab:
Begin by rolling out a medium-sized slab of stoneware clay to a consistent thickness of about 1/4 inch. If you want that lovely speckled look shown in the photo, choose a clay body with grog or iron speckles. -
Measure and cut:
Cut a large rectangle from your slab. The height should be about 8-10 inches, and the length must be enough to wrap around your chosen cylindrical form with a slight overlap. Save the excess clay for the base later. -
Smooth the surface:
Compress the clay on both sides with a rib tool to remove any canvas texture and prevent warping during firing. -
Plan the grid:
Lightly trace horizontal guidelines across your slab to mark where your three rows of arches will go. I find it helpful to use a ruler to ensure the spacing is perfectly even.
Step 2: Carving the Design
-
Cut the main arches:
Using a needle tool or a specialized arch cutter, cut out the repeating arch shapes along your guidelines. Space them out so there is solid clay between each cutout. -
Create the inner frame:
This is the trickiest part: carefully bevel the edges of your cutouts or use a modeling tool to compress the cut edge inward, giving it that finished, tailored look. -
Add pierced details:
Use a needle tool to poke a series of small, varying-sized holes around the top curve of each arch. Press the tool all the way through the slab to ensure the glaze doesn’t clog them later. -
Create the double-layer illusion (optional):
For a true double-layer shadow effect, you can adhere thin patches of clay behind the lower half of the cutouts, or simply rely on the thickness of the wall to create depth shadows.
Clean Cuts Every Time
Let the slab firm up to leather-hard before doing intricate piercing. If the clay is too soft, the holes will deform.
Step 3: Assembly and Finishing
-
Form the cylinder:
Once the clay is leather-hard (stiff but still flexible), carefully wrap the slab around your cylindrical form. -
Join the seam:
Score the overlapping edges thoroughly and apply slip. Press the seam firmly together. You can blend the seam entirely on the outside so it becomes invisible. -
Attach the base:
Roll out a small circle of clay slightly larger than your cylinder’s diameter. Score and slip the bottom edge of your cylinder and attach it to this base. -
Trim the excess:
Trim away any extra clay from the base plate so it is flush with the cylinder walls. -
Refine the rim:
Smooth the top rim with a damp sponge. To match the image, create a slightly inward-sloping rim, or add a separate ring of clay to the top to narrow the opening slightly. -
Final texture check:
Go over the exterior with a barely damp sponge to wipe away any sharp burrs from the piercing process without smoothing out the natural stone texture. -
Drying:
Let the lantern dry slowly under loose plastic for a few days to prevent the cutouts from cracking as the clay shrinks. -
Firing:
Bisque fire the piece, then glaze the interior if desired (leave the outside bare for that natural stone look) and glaze fire to the temperature appropriate for your clay body.
Warping Walls?
If your cylinder slumps while drying, place a tube of rolled cardboard inside to support the shape until bone dry.
Place a tea light inside your finished lantern and watch the architectural shadows dance across your table
Mini House Village Lantern Set
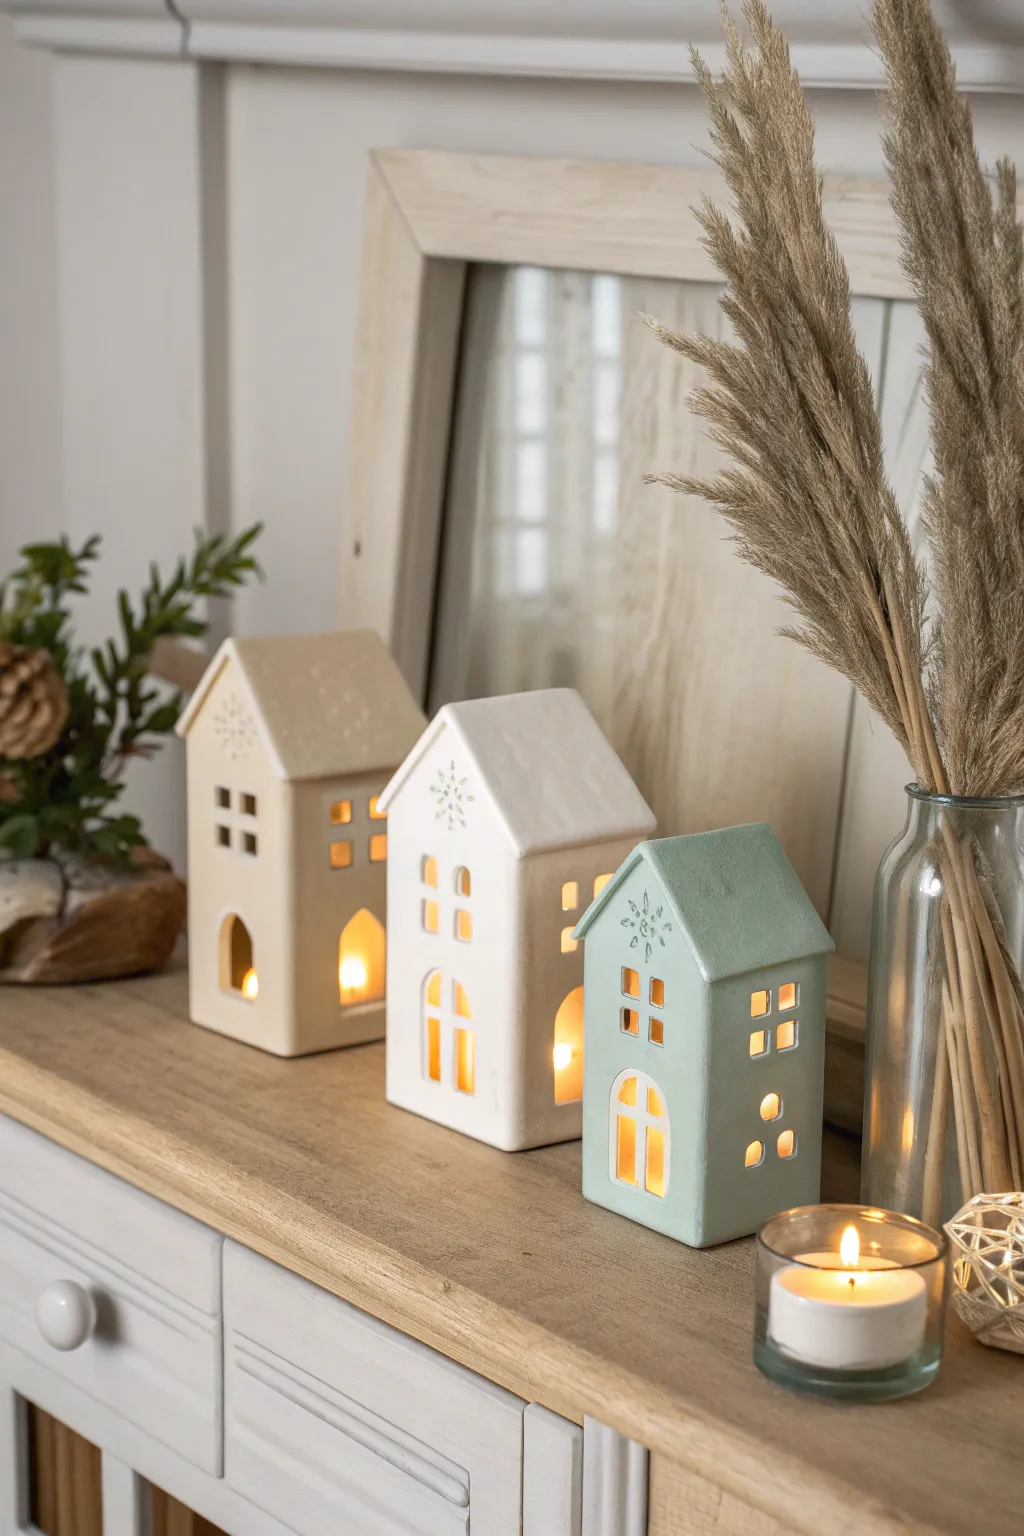
Create a cozy winter atmosphere with this set of three minimalist clay house lanterns. Featuring soft pastel tones and delicate cutout windows, they cast a warm, inviting glow perfect for a mantel or holiday centerpiece.
Detailed Instructions
Materials
- Air-dry clay (white or terracotta)
- Rolling pin
- Parchment paper or craft mat
- Craft knife or X-Acto knife
- Ruler or straight edge
- Modeling tools (or toothpicks)
- Small snowflake stamp or textured object
- Slip (clay mixed with water)
- Fine grit sandpaper
- Acrylic paints (cream, bright white, sage green)
- Paintbrushes
- Matte sealant or varnish
Step 1: Shaping the Slabs
-
Draft the templates:
Sketch your house dimensions on paper first to create templates. You will need a front wall (pointed top), a back wall (matching the front), two rectangular side walls, and two rectangular roof panels. Vary the heights for visual interest like the photo. -
Roll the clay:
Take a generous amount of air-dry clay and knead it until soft. Roll it out on parchment paper to an even thickness of about 1/4 inch (5-6mm). -
Cut the shapes:
Place your paper templates onto the clay slab. Using your ruler and craft knife, carefully cut out all four walls and two roof pieces for your first house. -
Add window details:
While the clay is flat, use the craft knife to cut out small square windows and arched doorways. For the larger arched window shown on the light houses, cut the main arch first, then leave thin strips of clay to form the window panes, or cut the panes out individually. -
Stamp the texture:
On the front wall piece, gently press a snowflake stamp near the peak of the roofline. Don’t press too hard; just enough to leave a subtle impression. -
Dry the slabs flat:
Let the cut pieces dry flat on the parchment paper for about hour until they are leather-hard. This makes them sturdy enough to stand up without sagging during assembly.
Step 2: Assembly
-
Score the edges:
Take your craft knife and gently scratch cross-hatch marks (scoring) along the vertical edges of all your wall pieces where they will connect. -
Apply slip:
Dab a small amount of clay slip (water and clay mixture) onto the scored edges to act as glue. -
Join the walls:
Stand the walls up and press the scored edges together to form a rectangular box. Use your finger or a modeling tool to smooth the seam on the outside so the joints disappear. -
Reinforce the inside:
I like to roll a very thin ‘snake’ of clay and press it into the interior corners to reinforce the structure. -
Attach the roof:
Score and slip the top edges of the walls and the underside of the roof panels. Press the roof panels onto the house, joining them at the center peak. Smooth the peak seam well.
Fixing Cracks
If cracks appear during drying, make a paste of clay and vinegar (‘magic water’). Fill the crack, smooth it over, and let it dry again
Step 3: Finishing Touches
-
Full dry time:
Allow the constructed houses to dry completely. This usually takes 24-48 hours depending on humidity. Rotate them occasionally to ensure even airflow. -
Sand imperfections:
Once bone dry, use fine-grit sandpaper to smooth out any rough edges, especially around the window cutouts and roof seams. -
Base coat:
Wipe away any dust, then paint the first house with a creamy beige acrylic. Paint the second house bright white, and the third a soft sage green. -
Detailing the snowflake:
To highlight the embossed snowflake, you can dilute a tiny drop of grey paint and brush it into the grooves, wiping the surface clean immediately after. -
Seal the project:
Apply a coat of matte spray varnish or sealant to protect the paint and give the clay a finished ceramic look. -
Light it up:
Place battery-operated tea lights inside each house to see your village glow.
Level Up
Before assembly, press real lace or linen into the wet clay walls to give the entire house a subtle fabric texture under the paint
Now you have a charming miniature village ready to brighten up your shelf
Faceted Hexagon Slab Lantern
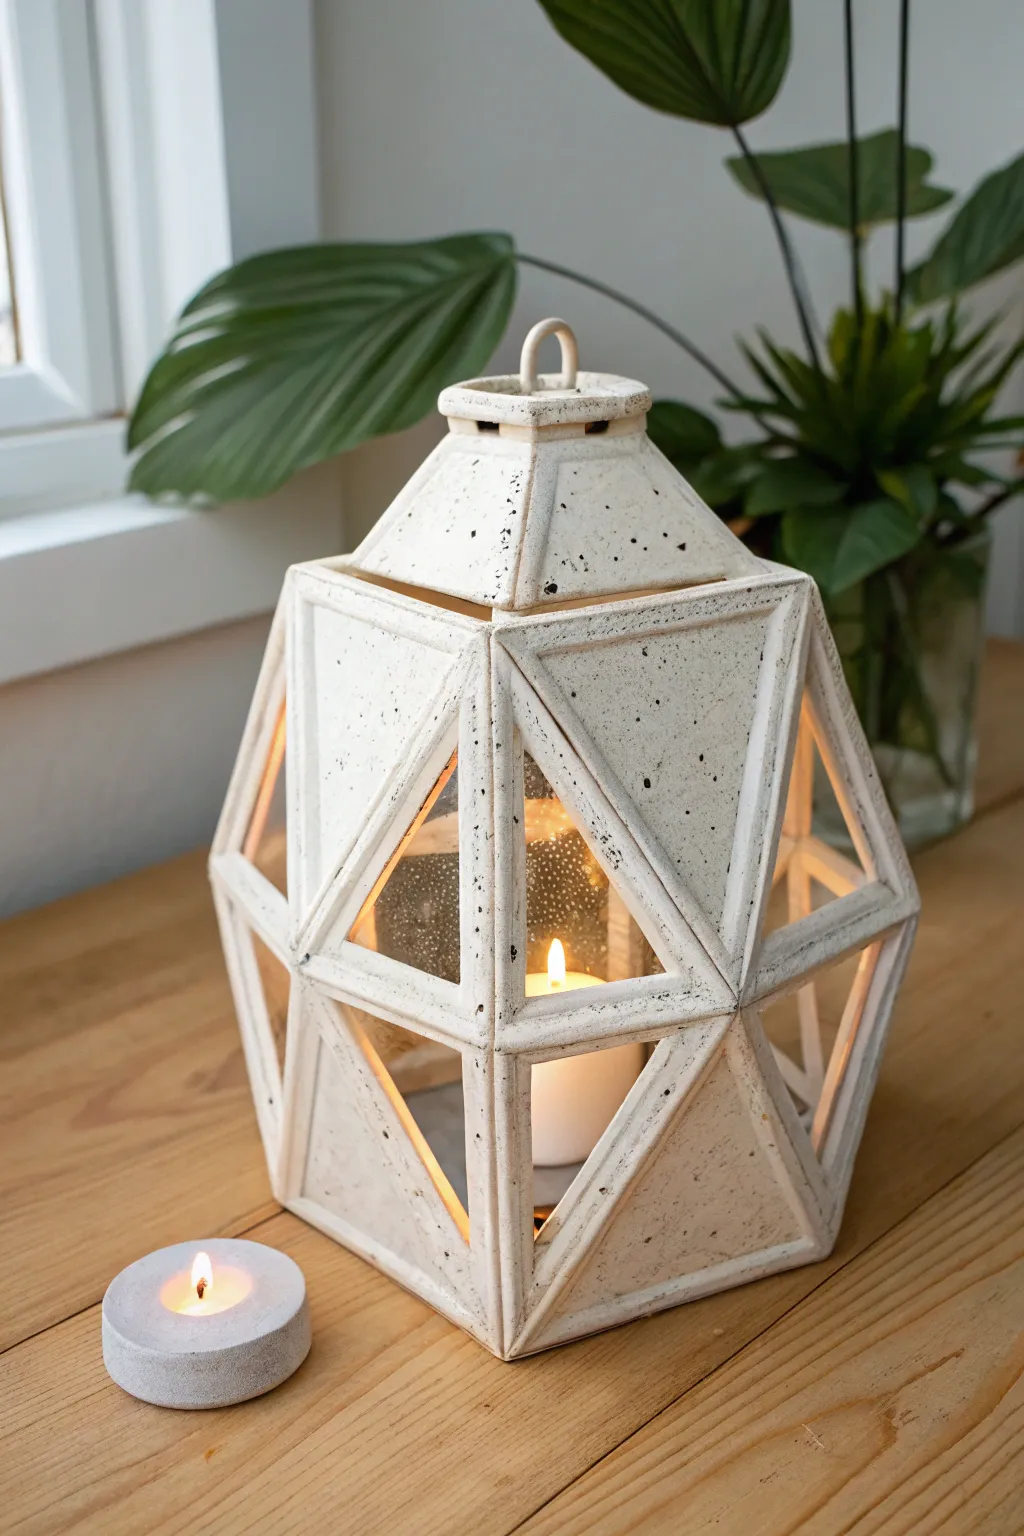
This stunning architectural lantern brings a modern, faceted aesthetic to your space with its crisp geometric lines and speckled finish. By assembling simple triangular slabs, you’ll build a sophisticated structure that casts beautiful, angular shadows when lit from within.
Step-by-Step Tutorial
Materials
- White stoneware clay with speckles (or plain white clay + black underglaze for speckling)
- Rolling pin
- Two wooden guide strips (1/4 inch thick)
- Fettling knife or X-Acto blade
- Ruler
- Cardstock or thick paper (for templates)
- Scoring tool (or fork)
- Slip (clay mixed with water)
- Sponge
- Small paintbrush
- Wooden sculpting tool (for smoothing seams)
- Clear matte glaze
Step 1: Preparation and Cutting Slabs
-
Create your templates:
You will need three triangle sizes. Create an equilateral triangle with 4-inch sides (for the base/top facets), a taller isosceles triangle (roughly 4 inches wide by 6 inches tall) for the main body sections, and a smaller triangle that fits inside the isosceles one to create the window frame. Cut these out of cardstock. -
Roll out the clay:
Wedging your clay first is crucial to remove air bubbles. Place your 1/4 inch wooden guide strips on either side of the clay ball and roll the slab out until it is perfectly even. -
Cut the shapes:
Using your cardstock templates and a sharp knife, cut out 6 of the tall isosceles triangles and 6 of the equilateral triangles. For the top cap, cut a small hexagon separate from the main triangles. -
Create the windows:
Take your 6 tall isosceles triangles. Gently place the smaller inner triangle template in the center of each one. Carefully cut out this center shape to create the window frames. Save the cutout clay for the handle later. -
Dry to leather hard:
This is the most critical step for geometric building. Let your cut slabs sit until they are ‘leather hard’—stiff enough to hold their shape without slumping but soft enough to score and join. I usually check them after about an hour.
Step 2: Assembling the Structure
-
Bevel the edges:
To make the geometric angles fit cleanly, gently bevel the long edges of your tall triangles at a 45-degree angle. This helps them join together into a hexagon shape without bulky seams. -
Score and slip the main body:
Score (scratch) the beveled edges of two tall window panels. Apply slip generously. Press them together, standing them upright. Continue adding panels one by one until you have a completed hexagon tube. -
Reinforce the seams:
Roll a very thin coil of soft clay. Press this into the interior corners where the panels meet to reinforce the join. Smooth it out with your finger or a wooden tool so it becomes invisible. -
Add the bottom triangular facets:
Now, take 6 of the equilateral triangles. Attach one to the bottom edge of each vertical window panel, angling them inward toward a center point to close the bottom. Support the structure with crumpled newspaper inside if it feels heavy. -
Construct the roof:
Repeat the process for the top. Attach the remaining equilateral triangles to the top edge of the window panels, angling them inward. Instead of meeting at a sharp point, leave a small opening for the heat to escape. -
Add the hexagonal cap:
Score and slip the small hexagon slab you cut earlier. Place it over the top opening, but ensure there are small vent holes or gaps underneath the rim (you can add tiny clay pellets as risers) to let candle smoke escape.
Pro Tip: Sharp Defines
After joining seams, run a slightly damp credit card or flexible rib along the flat surfaces to compress the clay and sharpen the geometric angles.
Step 3: Finishing Touches
-
Create the handle loop:
Roll a small coil about 2 inches long. Form it into a ‘U’ shape and attach it securely to the center of the top hexagonal cap using the score and slip method. -
Refine the surface:
Once constructed, use a slightly damp sponge to wipe down all edges. Smooth away any sharp burrs or rough texture, but keep the geometric lines crisp. -
Faux speckling (optional):
If you didn’t use speckled clay, mix a tiny bit of water with black underglaze and use a stiff brush to flick (splatter) small dots over the leather-hard surface. -
Bisque fire:
Allow the lantern to dry completely (slow drying under plastic for a day or two prevents cracking) before bisque firing it in the kiln. -
Glaze and final fire:
Apply a clear matte glaze to the entire piece (or just the exterior if you prefer). Fire it again according to your clay body’s temperature requirements.
Level Up: Glass Insert
Before firing, create shallow grooves on the inside of the window headers. After firing, you can slot in pieces of frosted acrylic or glass.
Place a pillar candle or LED light inside and watch the geometry come to life
Coil-Built Beehive Slit Lantern
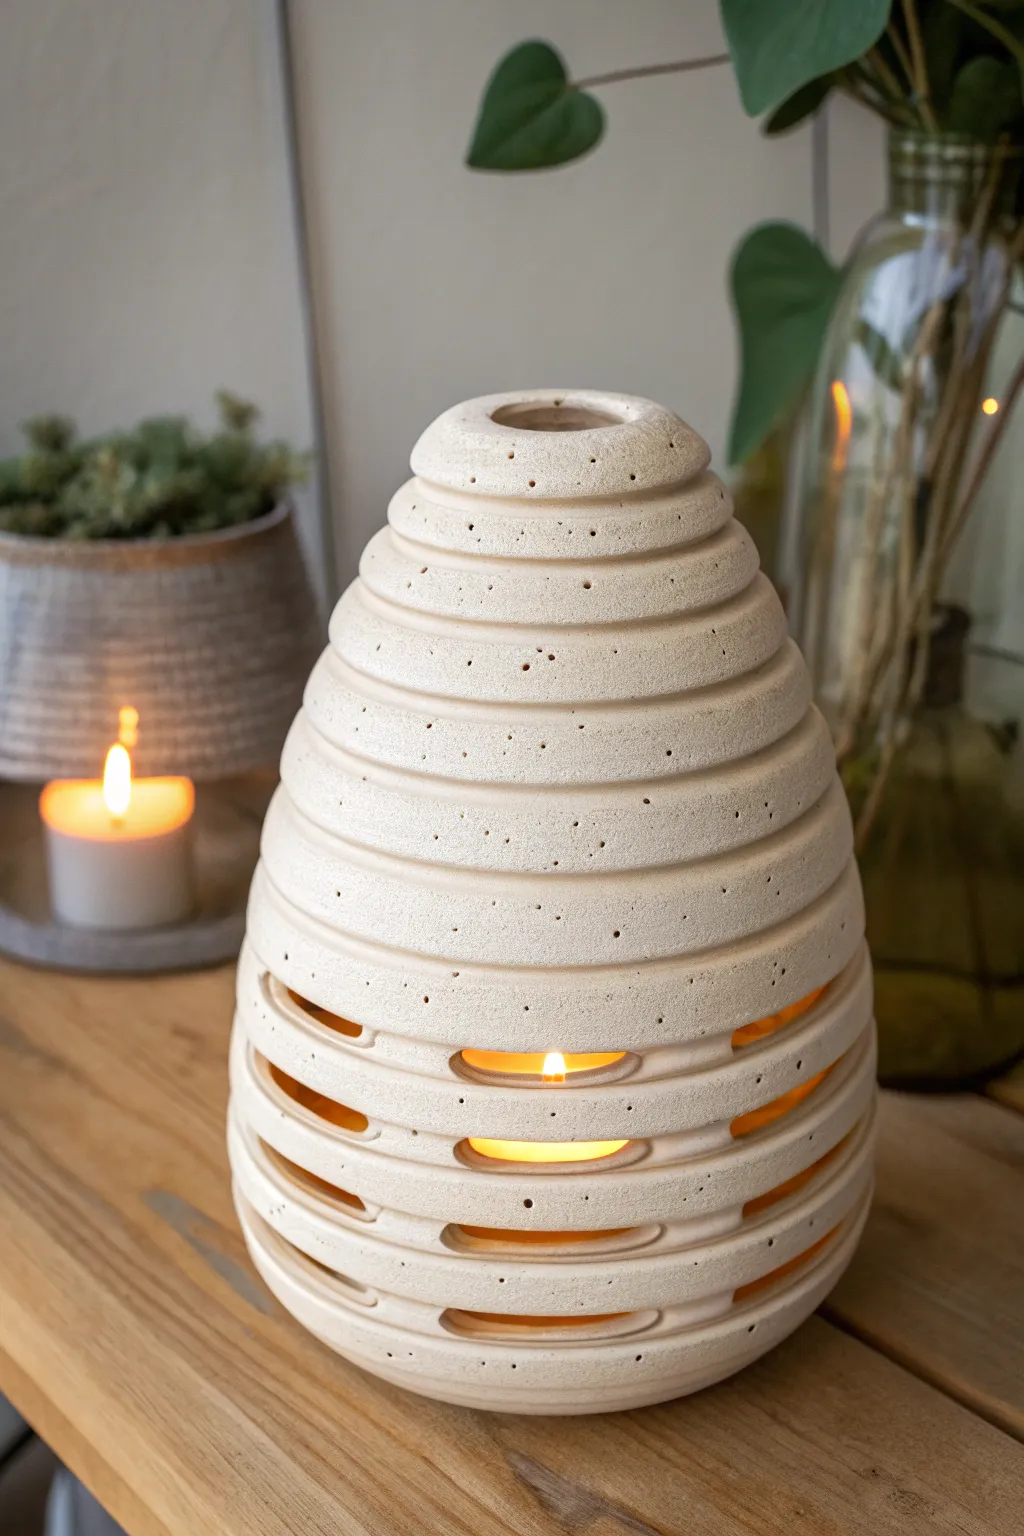
Mimic the organic structure of a beehive with this charming coil-built lantern. The distinctive horizontal slits create a warm, banded glow, while the speckled clay body adds a natural, rustic texture perfect for cozy corners.
Detailed Instructions
Materials
- Speckled buff stoneware clay (mid-fire)
- Rolling pin
- Canvas mat or slab roller
- Needle tool
- Fettling knife
- Scoring tool (serrated rib)
- Slip (clay mixed with water)
- Loop tool (small, rounded)
- Paddle (wooden)
- Sponge
- Kiln
Step 1: Forming the Base Structure
-
Roll the coils:
Begin by rolling out several long, even coils of speckled clay. Aim for a thickness of about 3/4 inch to ensure the walls are sturdy enough to support the height. -
Prepare the base:
Roll out a small slab for the floor of the lantern, cutting it into a circle approximately 4 inches in diameter. -
Score and slip:
Score the outer edge of the base and the bottom of your first coil. Apply a generous amount of slip to the scored areas. -
Begin coiling:
Attach the first coil to the base. Continue adding coils one on top of the other, scoring and slipping between each layer. -
Shape the belly:
As you build upwards, gradually offset each coil slightly outward to create the widening ‘belly’ of the beehive. Smooth the interior seams together with your thumb or a rib tool for structural integrity, but leave the exterior coils untouched to maintain that distinct ribbed look. -
Taper the top:
Once you pass the widest point (about halfway up), begin offsetting the coils slightly inward to taper the form back toward the center. -
Create the opening:
Finish the top with a small, circular opening. Smooth the rim of this final coil so it is pleasant to the touch.
Step 2: Refining and Carving
-
Let it stiffen:
Allow the piece to dry to a ‘leather-hard’ state. This is crucial; the clay needs to be firm enough to carve without warping, but soft enough to cut cleanly. -
Refine the shape:
Gently paddle the exterior if needed to correct any lopsided areas or to emphasize the beehive curve. -
Plan the slits:
Using a needle tool, lightly sketch where you want your light openings. Focus on the lower half of the lantern, placing the cuts between the coil ridges. -
Carve the openings:
Use a sharp fettling knife or a small loop tool to carefully cut horizontal slits following the gaps between the coils. I like to vary the lengths slightly for a more organic feel. -
Bevel the cuts:
Once the initial cuts are made, gently bevel or round the interior edges of the slits with a damp sponge or finger to remove sharp burrs.
Keep it clean
When smoothing the inside seams, support the outside wall with your other hand gently. This prevents you from accidentally flattening the beautiful coil texture on the exterior.
Step 3: Finishing Touches
-
Texture enhancement:
If your clay isn’t naturally speckled enough, you can gently lightly flick iron oxide or a speckled slip onto the surface with a stiff brush. -
Final smoothing:
Wipe down the rim and the base with a damp sponge to ensure there are no sharp bits before firing. -
Dry slowly:
Cover the lantern loosely with plastic to let it dry slowly and evenly, which prevents cracks from forming between the coils. -
Bisque fire:
Fire the piece to bisque temperature (usually cone 04) once completely bone dry. -
Glaze and fire:
Apply a clear matte glaze or leave the exterior raw if the clay body is fully vitrified at high fire, then fire to the final temperature suitable for your clay body.
Slumping walls?
If the hive starts sagging while building, stop adding height immediately. Use a heat gun gently to stiffen the lower section or let it rest for an hour before continuing.
Place a tea light inside and enjoy the warm, banded patterns of light this hive casts on your table