If you’ve been itching to make a ceramic clay birdhouse, this is the kind of project that feels both playful and genuinely useful. I love how a simple form can turn into something totally magical just by tweaking the roofline, texture, or entrance details.
Classic Slab-Built Cottage Birdhouse
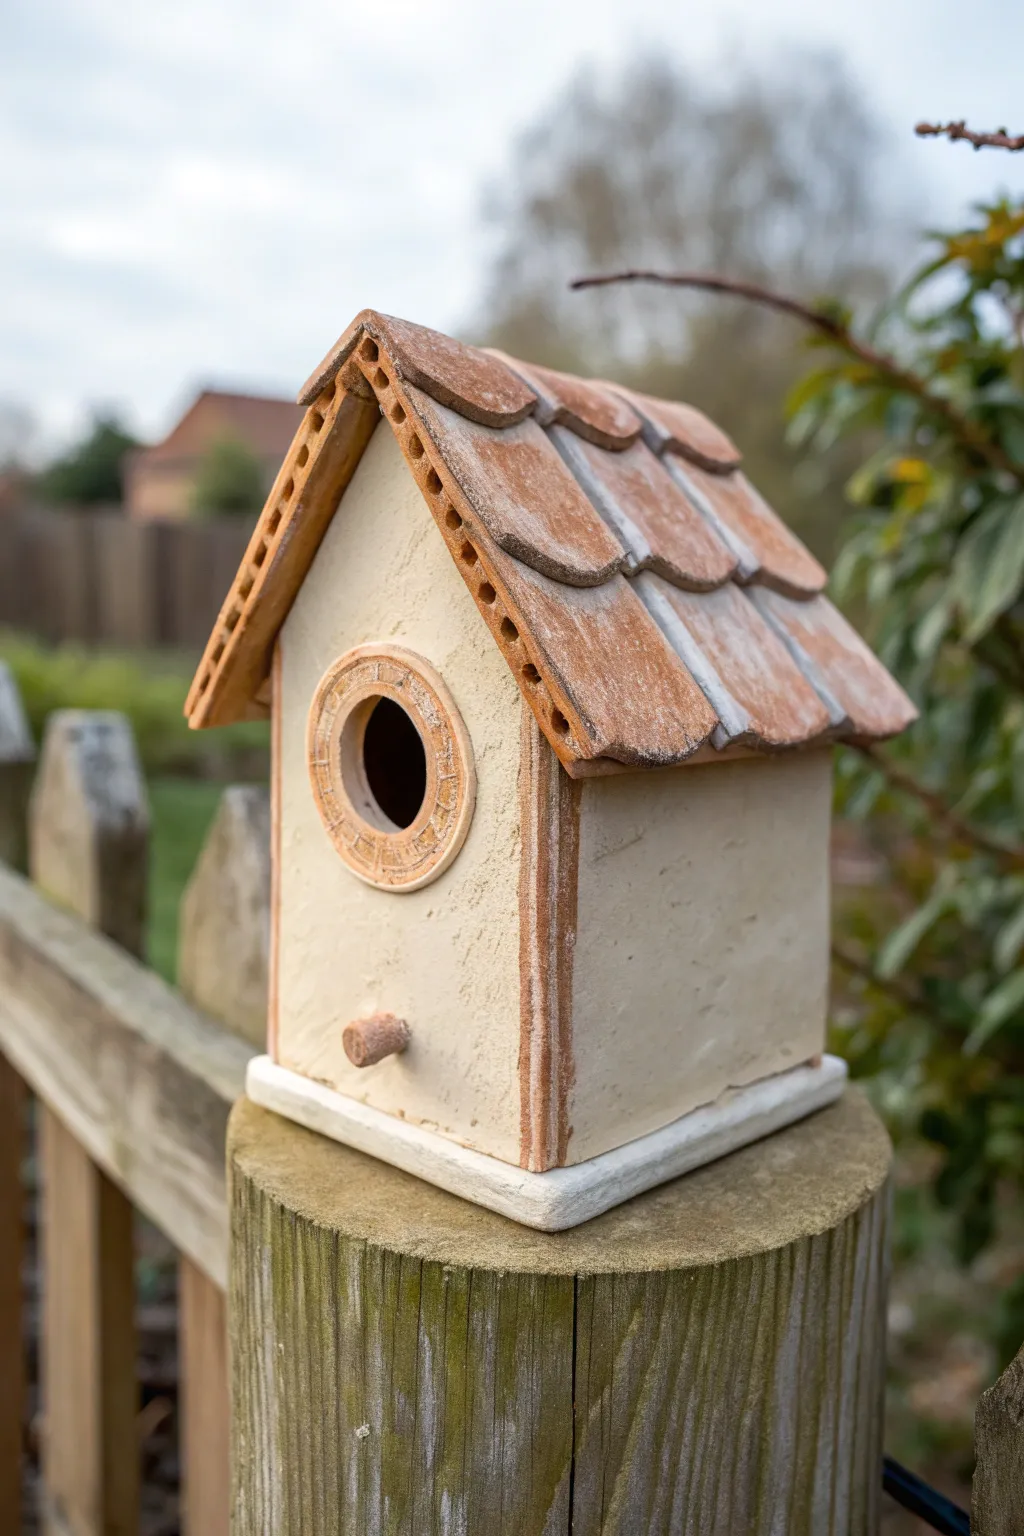
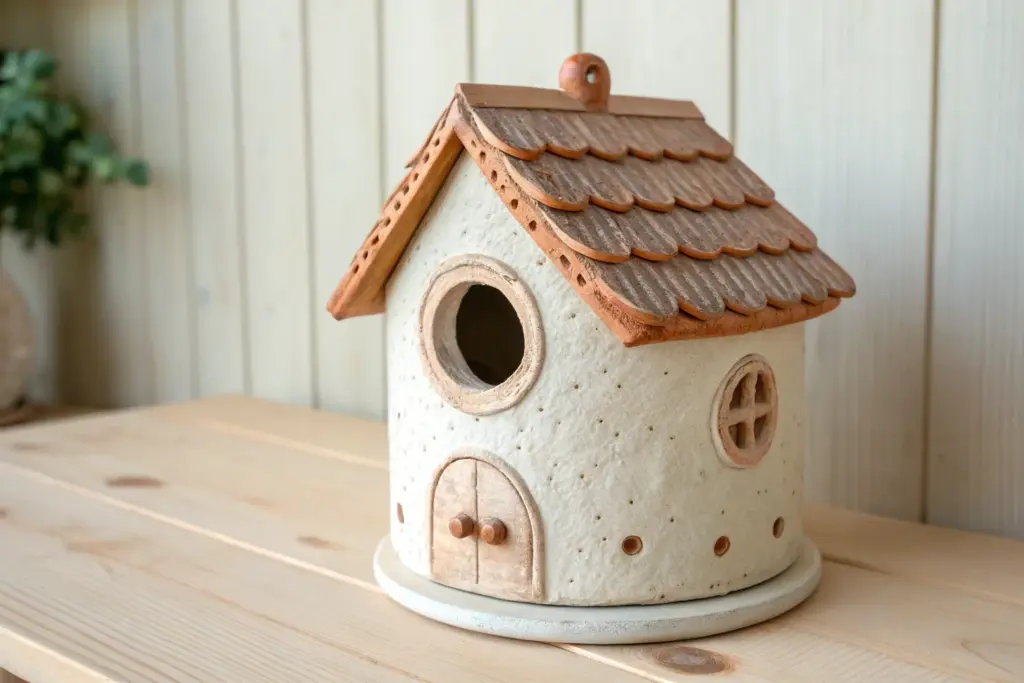
This charming ceramic birdhouse features a classic pitched roof adorned with individually layered clay tiles and distinct, earthy textures. Its sturdy slab construction and rustic finish make it a welcoming haven for garden visitors while adding a touch of artisanal warmth to your fence post.
Step-by-Step Guide
Materials
- Stoneware clay (cream/white body)
- Terracotta clay (or iron oxide wash)
- Rolling pin and guide sticks (approx. 1/4 inch)
- Fettling knife or craft knife
- Score and slip tool (needle tool or serrated rib)
- Clay slip (matching your clay body)
- Circle cutter or cookie cutter (approx. 1.5 inch)
- Small wooden dowel or specialized clay hole cutter
- Wooden texture paddle or canvas cloth
- Ruler/template for walls and roof
- Kiln and appropriate glazes (optional, or leave bare)
Step 1: Constructing the Base and Walls
-
Roll the Slabs:
Begin by rolling out your main cream-colored clay body into an even slab, about 1/4 inch thick. Use guide sticks to ensure consistent thickness, which is crucial for structural integrity during firing. Compress the clay on both sides with a rib to prevent warping. -
Cut the Wall Templates:
Using a ruler or paper templates, cut out your four walls. You will need two rectangular side panels and two pentagonal panels (rectangles with a triangle on top) for the front and back. Dimensions should be roughly 6 inches tall for the sides and 8 inches to the peak for the front. -
Add Texture:
Before assembling, you might want to gently press a canvas cloth or a wooden paddle against the exterior surfaces to give the walls that subtle, earthy texture seen in the photo. -
Cut the Entry Hole:
On the front pentagonal panel, use your circle cutter to create the entry hole. Position it centrally, ensuring there is enough space below it for the perch and nesting material. -
Create the Door Frame:
Roll a thin coil or a small flat ring of clay and attach it around the entry hole using the score and slip method. Gently press a pattern into this ring—simple radiating lines work well to mimic the photo’s decorative molding. -
Assemble the Box:
Score the edges of your wall panels and apply slip generously. Stand the walls up and join them together, reinforcing the interior corners with small clay coils. Smooth these coils down so the seams disappear. -
Add the Base:
Cut a square base slab slightly larger than the footprint of your house. Score and slip the bottom edges of the walls and attach the house to the base. I like to leave a small overhanging lip at the bottom, mimicking a foundation slab.
Prevent Cracking
Since the roof tiles are thinner than the walls, cover the roof with extra plastic strips during drying. This slows moisture loss so the roof doesn’t shrink faster than the body.
Step 2: Roofing and Details
-
Prepare the Roof Sub-structure:
Cut two rectangular slabs of the cream clay for the roof under-structure. These should be long enough to overhang the walls generously. Attach them to the peaks of the front and back walls, scoring and slipping securely. -
Create the Shingles:
Switch to your terracotta clay (or stain your cream clay with iron oxide). Roll out a thinner slab and cut distinct ‘U’ shaped shingles or scalloped strips. You want them to look like individual terra cotta tiles. -
Layer the Roof:
Starting at the bottom edge of the roof, attach your first row of shingles using a little slip. Overlap the next row slightly over the first, working your way up to the peak. Stagger the joints for a realistic tiled look. -
Cap the Peak:
Once both sides of the roof are tiled, roll a long strip of terracotta clay. Fold it gently over the very top ridge to seal the joint between the two roof sides, pressing down lightly to integrate it. -
Detail the Eaves:
The roof in the image features a distinct decorative edge on the front overhang. Use a tool to poke small indentations along the exposed edge of the roof slab, creating a dotted pattern for visual interest. -
Attach the Perch:
Form a small, sturdy cylinder of leftover terracotta or cream clay. deeply score the area below the entry hole and the end of the perch. Join them firmly; this part is fragile, so ensure the bond is strong. -
Dry Slowly:
Loosely cover the birdhouse with plastic to let it dry very slowly. Uneven drying between the thick walls and thin shingles can cause cracks. Check it daily for about a week. -
Bisque Fire:
Once bone dry, bisque fire the piece to the appropriate cone for your clay (usually Cone 04 or 06). -
Finishing Touches:
To achieve the rustic finish, apply a white or cream engobe or matte glaze wash to the walls if your clay isn’t naturally light. Wipe back any excess from the terracotta roof to keep the contrast sharp before the final glaze firing.
Rustic Wash Trick
A simple black iron oxide wash wiped back with a sponge highlights the textures on the door frame and roof tiles beautifully without needing heavy glazes.
Now you have a sturdy, handcrafted cottage ready to be the envy of the neighborhood birds

Simple Round Gourd-Shape Birdhouse
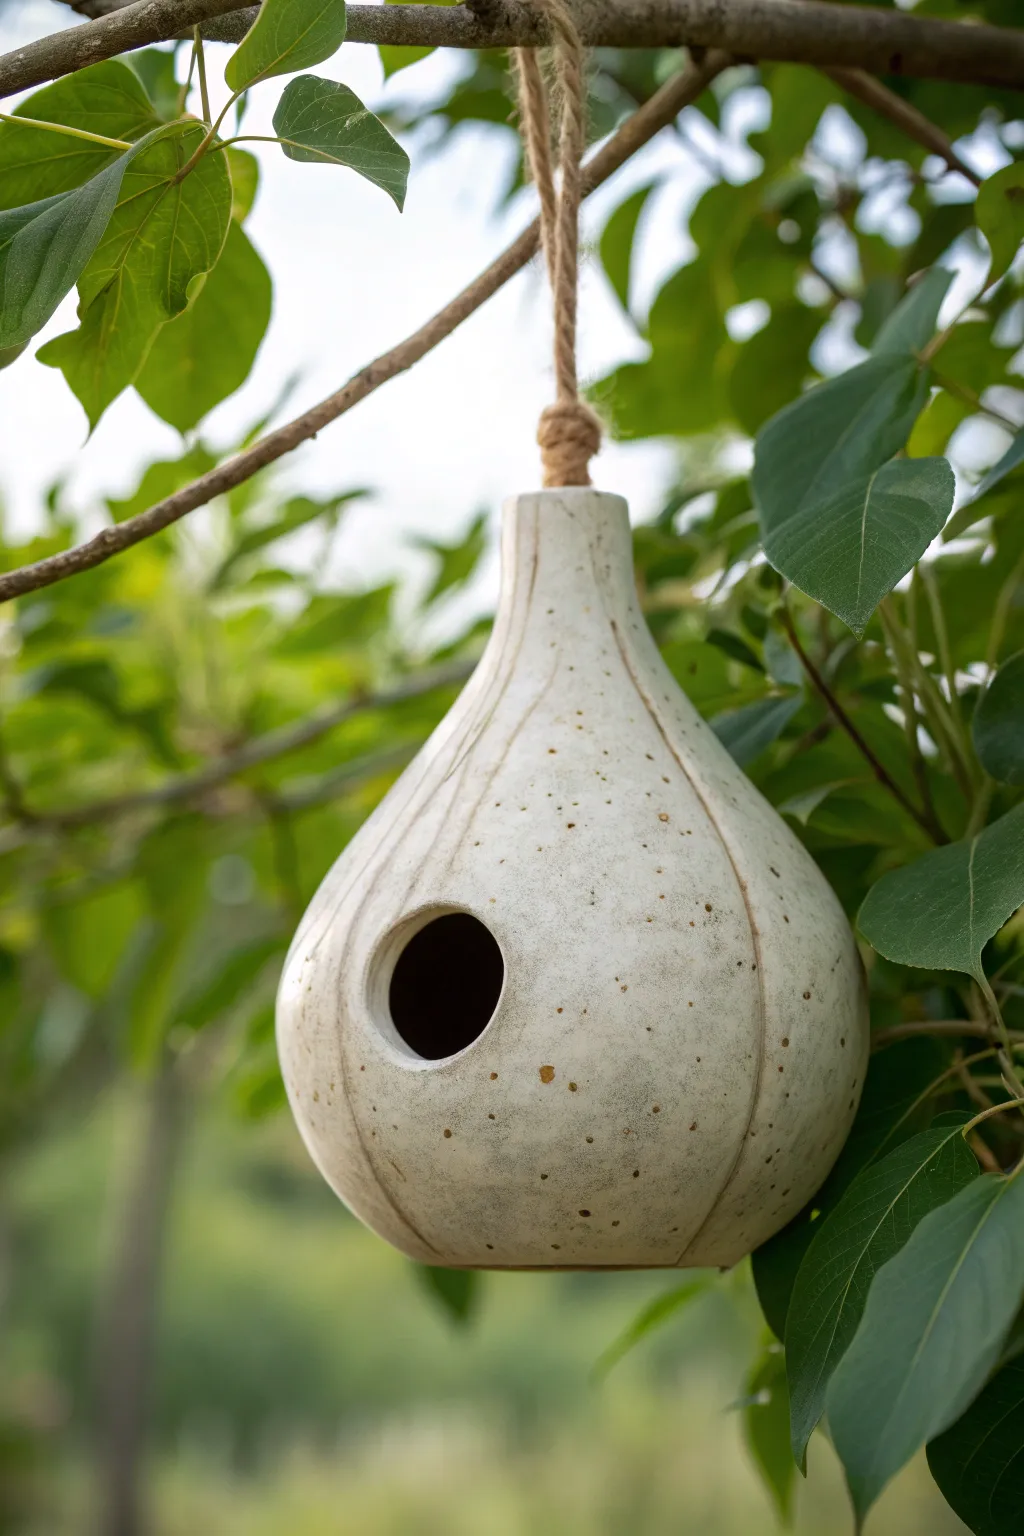
This elegant, gourd-shaped birdhouse combines organic lines with a speckled, matte finish for a natural aesthetic that blends beautifully outdoors. Using coil or pinch pot techniques, you’ll sculpt a seamless form that feels both modern and rustic.
Step-by-Step Tutorial
Materials
- Stoneware clay (speckled or white with added grog)
- Potter’s needle tool
- Metal or rubber rib
- Sponge
- Circular clay cutter (approx. 1.5 inch)
- Modeling tool or wooden skewer
- Matte white glaze (semi-opaque)
- Jute or hemp twine for hanging
- Kiln access
Step 1: Forming the Base
-
Create two large pinch pots:
Start with two equal balls of clay, roughly the size of large oranges. Press your thumb into the center and pinch the walls evenly as you rotate the clay, creating two deep, bowl shapes. -
Join the pots:
Score the rims of both bowls aggressively with your needle tool and apply slip. Press the rims together firmly to create a hollow sphere. This sphere forms the main body of the birdhouse. -
Seal the seam:
Using your thumb or a modeling tool, smudge the clay across the join line to seal the two halves completely. Smooth this area with a rib -
Shape the gourd:
Gently paddle or roll the sphere on your work surface to elongate the bottom slightly, giving it a heavier, more teardrop-like weight at the base.
Air Escape
Make a tiny pinhole in the bottom or hidden under the rim before closing your form. Trapped air inside a hollow sphere can expand and cause the piece to explode in the kiln.
Step 2: Building the Neck
-
Add a coil:
Roll a thick coil of clay and attach it to the top center of your sphere. Score and slip the attachment point thoroughly. -
Pull the neck:
Pinch and pull the added clay upward to form a tapered neck. It should narrow gradually as it goes up, similar to a bottle gourd. -
Refine the shape:
Use a metal rib to scrape and smooth the transition between the round body and the neck. You want a continuous curve with no lumps or visible seams. -
Create the hanging loop:
At the very top of the neck, form a thick, solid ring or loop of clay where the rope will eventually go. Ensure this area is reinforced, as it bears the weight of the house.
Warped Neck?
If the neck starts sagging while you build, stuff the hollow body with crumpled newspaper or paper towels. This provides internal support until the clay stiffens.
Step 3: texturing and Details
-
Carve the entry hole:
When the clay is leather-hard, use your circular cutter to punch a hole in the widest part of the belly. Smooth the raw edges with a damp sponge so they aren’t sharp for the birds. -
Add vertical ribs:
Take a loop tool or the rounded end of a wooden tool. Draw vertical lines from the neck down to the base, dividing the gourd into segments. Press deep enough to create a distinct groove but not enough to puncture the wall. -
Refine the surface:
Go over the entire surface with a soft, damp sponge to soften the edges of your carved lines and remove any burrs or rough spots. -
Final drying:
Cover the piece loosely with plastic for a day to equalize moisture, then uncover and let it dry completely until bone dry.
Step 4: Glazing and Finishing
-
Bisque fire:
Fire the piece in the kiln to cone 04 (or your clay body’s specifications) to harden it for glazing. -
Apply glaze:
Pour a matte white glaze inside quickly and pour it out to coat the interior. Then, dip or brush the exterior. I prefer a glaze that allows the clay’s natural speckles to show through slightly. -
Wipe the grooves:
Before firing, gently wipe the glaze out of the vertical carved lines with a damp sponge. This emphasizes the segmentation and adds depth to the final look. -
Glaze fire:
Fire the piece again to the maturation temperature of your glaze and clay (typically cone 5 or 6 for stoneware). -
Attach the rope:
Cut a long length of thick jute twine. Loop it through the clay ring at the top and create a secure knot technique, such as a hangman’s knot or simple overhand knot, leaving a long tail for the tree branch.
Hang your new ceramic home in a sturdy branch and wait for the first visitors to arrive


Hanging Orb Birdhouse With Top Loop
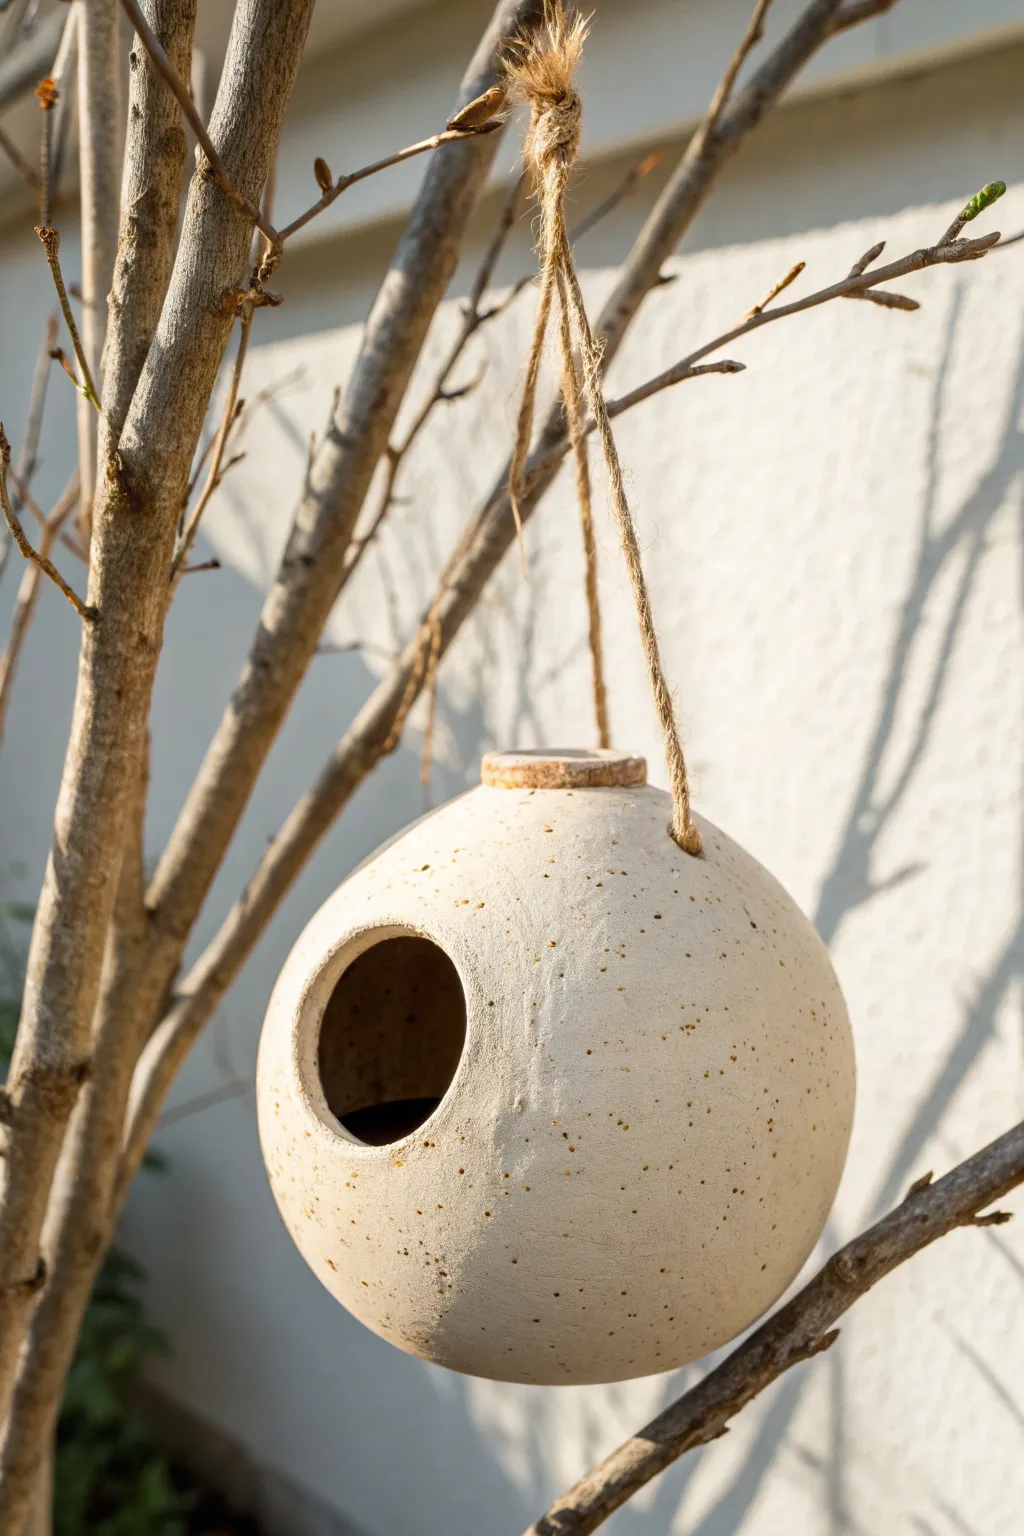
This minimalist hanging birdhouse combines natural textures with a modern spherical form, perfect for adding a touch of rustic elegance to your garden. The unglazed finish highlights the beautiful speckling of the clay, creating a seamless blend with outdoor surroundings.
How-To Guide
Materials
- Speckled stoneware clay (white or cream)
- Two pinch pot bowls (roughly equal size)
- Scoring tool (or fork)
- Slip (clay and water mixture)
- Wooden paddle or flat wooden spoon
- Circle cutter or sharp knife
- Small wooden rib or sculpting tool
- Drill bit or hole punch tool (for rope holes)
- Natural jute twine
- Sponge
- Plastic wrap
Step 1: Forming the Orb
-
Pinch Pot Basics:
Start by taking two balls of speckled clay, roughly the size of oranges. Use your thumbs to press into the center of each ball and gently pinch the walls while rotating to create two bowl shapes. -
Refine the Halves:
Continue thinning the walls of your bowls until they are about 1/4 inch thick. Aim for even thickness throughout to prevent cracking during firing. Tap the rims gently on a flat surface to level them. -
Score and Slip:
Take your scoring tool and scratch up the rims of both bowls aggressively. Apply a generous amount of slip to the roughened areas to act as glue. -
Joining the Halves:
Press the two bowl rims together firmly. Wiggle them slightly to lock the clay particles together, ensuring a tight seal. -
Sealing the Seam:
Use a wooden tool or your thumb to drag clay across the seam from one bowl to the other, smoothing it out completely. I like to do this in both directions to ensure the join is invisible. -
Paddle the Shape:
With the sphere closed, trap air inside helps hold its shape. Gently tap the exterior with a wooden paddle to round out any lumpy areas and perfect the spherical form.
Air Trapped?
If your sphere deforms while working, blow into the hole you just cut to re-inflate it slightly, then let it stiffen up before handling.
Step 2: Adding Features
-
Cutting the Entry:
Decide on the front of your birdhouse. Use a circular cookie cutter or a steady hand with a knife to cut a round entrance hole, roughly 1.5 to 2 inches in diameter. -
Smooth the Rim:
Use a damp sponge or your finger to round off the sharp edges of the cut hole. This protects the birds as they enter and exit. -
Create the Top Neck:
Roll a thick coil of clay and form it into a ring. Attach this ring to the very top of your sphere using the score and slip method to create a raised collar. -
Refining the Collar:
Flatten the top of the added coil so it looks like a distinct, flat cap or cork-like stopper shape, integrating the bottom of the coil smoothly into the sphere. -
Piercing Hanging Holes:
Carefully drill or punch two holes on opposite sides of the top collar/neck area. Ensure they are wide enough to accommodate your jute twine after shrinkage.
Texture Play
Before the clay dries, gently press a piece of coarse linen or burlap against the surface to add a woven texture that complements the jute rope.
Step 3: Drying and Finishing
-
Surface Texture:
If you want to emphasize the speckled look, wipe the surface gently with a damp sponge. This exposes the grog or speckles in the clay body. -
Slow Drying:
Loosely cover the orb with plastic wrap for the first day or two to let the moisture equalize. Then remove the plastic and let it dry completely until bone dry. -
Bisque Fire:
Fire the piece in a kiln to cone 04 (or your clay’s specific bisque temperature). This hardens the clay permanently. -
Final Fire:
Since we are leaving this unglazed to show off the raw clay texture, fire it again to its maturity temperature (e.g., cone 5 or 6 for stoneware) to make it vitreous and weather-resistant. -
Rigging the Twine:
Cut a long length of sturdy jute twine. Thread one end through one top hole, loop it to your desired hanging height, and pass it through the opposite hole. -
Secure the Knots:
Tie large, secure knots on the outside or inside of the holes (depending on your preference) to ensure the birdhouse hangs safely.
Hang your new ceramic creation on a sturdy branch and wait for the first feathered visitor to move in
Removable Roof A-Frame Birdhouse

This charming A-frame birdhouse combines a speckled cream body with a striking teal wood-grain textured roof. The removable roof design makes annual cleaning a breeze, while the rustic finish adds personality to any garden space.
Step-by-Step Tutorial
Materials
- Light-colored stoneware or earthenware clay (preferably with grog)
- Rolling pin and slab guides (approx. 1/4 inch thick)
- Fettling knife or needle tool
- Ruler and paper templates
- Slip and scoring tool
- Small wooden dowel (perch)
- Circular cookie cutter (approx. 1.5 inch diameter)
- Impressed textural mat or wood block (for roof texture)
- White matte glaze with speckles (or speckled clay body)
- Teal/Cyan underglaze or glaze
- Clear matte glaze (if using underglaze)
- Sponge and water
Step 1: Slab Building the Body
-
Prepare templates:
Cut cardstock templates for your house. You will need: two pentagon shapes for the front and back (a square bottom with a triangle top) and two rectangular side walls. -
Roll the slabs:
Roll out your clay into an even slab using guides to ensure a consistent thickness, around 1/4 inch. Smooth the surface with a rubber rib to compress the clay particles. -
Cut the shapes:
Place your templates on the clay and carefully cut around them using a fettling knife. Don’t discard the scraps yet; you’ll need them for the floor. -
Create the entrance:
On the front pentagon piece, center your circular cutter near the top of the “square” section and punch out the entry hole. Smooth the sharp edges with a damp sponge. -
Add the rim detail:
Roll a small coil of clay and flatten it slightly. Score and slip around the entrance hole, then attach the coil to create a raised rim. Blend the outside edge flush with the wall but leave the inner ring distinct. -
Assemble the walls:
Score the vertical edges of all your wall pieces and apply slip. Stand the walls up, joining the sides to the front and back pieces. Press components together firmly and reinforce the inside seams with thin coils of clay. -
Attach the perch:
Use a small tool to bore a hole beneath the entrance. Insert a small clay coil or a high-fire kiln-safe post (if you plan to use wood later, make the hole large enough to glue a dowel in after firing). The image shows a rustic brown perch, likely attached post-firing.
Step 2: Crafting the Roof
-
Texture the roof slab:
For the roof, roll a fresh slab. Before cutting, press a wood grain texture mat or a piece of rough wood into the clay to create the linear grain pattern seen in the teal glaze. -
Cut roof panels:
Cut two large rectangular panels for the roof. They need to be long enough to overhang the front and back, and wide enough to overhang the sides. -
Bevel the peak:
On the top long edge of each roof panel, cut a 45-degree bevel. This ensures they fit together snugly at the roof peak. -
Add ventilation holes:
Using a small drill bit or needle tool, poke several ventilation holes through the roof panels. This is crucial for bird health and adds the decorative dot detail seen in the photo. -
Desgin the removable mechanism:
Since this is a removable roof, do not attach it to the walls. Instead, add small clay “flanges” or strips on the underside of the roof pieces that will slot just inside the house walls to keep the roof from sliding off. -
Join the roof peak:
Score and slip the beveled edges of the two roof panels and join them together at the peak. Support the underside with crumpled newspaper while it dries to maintain the correct angle that matches your house’s pitch.
Clean Slates
To keep the removable roof from fusing to the body during the glaze firing, liberally apply wax resist to the top rim of the walls and the contact points on the underside of the roof.
Step 3: Glazing and Finishing
-
Bisque fire:
Allow the house and roof to dry slowly under plastic for several days to prevent warping. Once bone dry, bisque fire widely to cone 04. -
Apply the body glaze:
For the house walls, brush on 2-3 coats of a creamy white glaze. If your clay isn’t speckled, use a glaze that contains “speckles” or iron additives to achieve that spotted eggshell look. -
Glaze the roof:
Brush a teal or deep cyan underglaze onto the roof panels. I like to wipe it back slightly with a damp sponge so the color stays deep in the wood grain texture but highlights the ridges. -
Detail the rim:
Carefully wipe any glaze off the face of the entrance rim if you want a raw clay contrast, or lightly brush it with a diluted brown wash to define the circle. -
Glaze fire:
Fire the pieces separately (do not put the roof on the house) to your clay body’s maturation temperature (typically Cone 5 or 6). -
Final assembly:
Once cool, if you didn’t make a clay perch, glue a small wooden dowel into the hole beneath the entrance using epoxy.
Natural Texture
Instead of a commercial texture mat, find a piece of weathered cedar fence board. Pressing wet clay onto actual wood creates the most authentic, distinct grain patterns for the roof.
Now you have a durable, functional home that little garden visitors will love.

The Complete Guide to Pottery Troubleshooting
Uncover the most common ceramic mistakes—from cracking clay to failed glazes—and learn how to fix them fast.
Carved Woodgrain Log Cabin Birdhouse
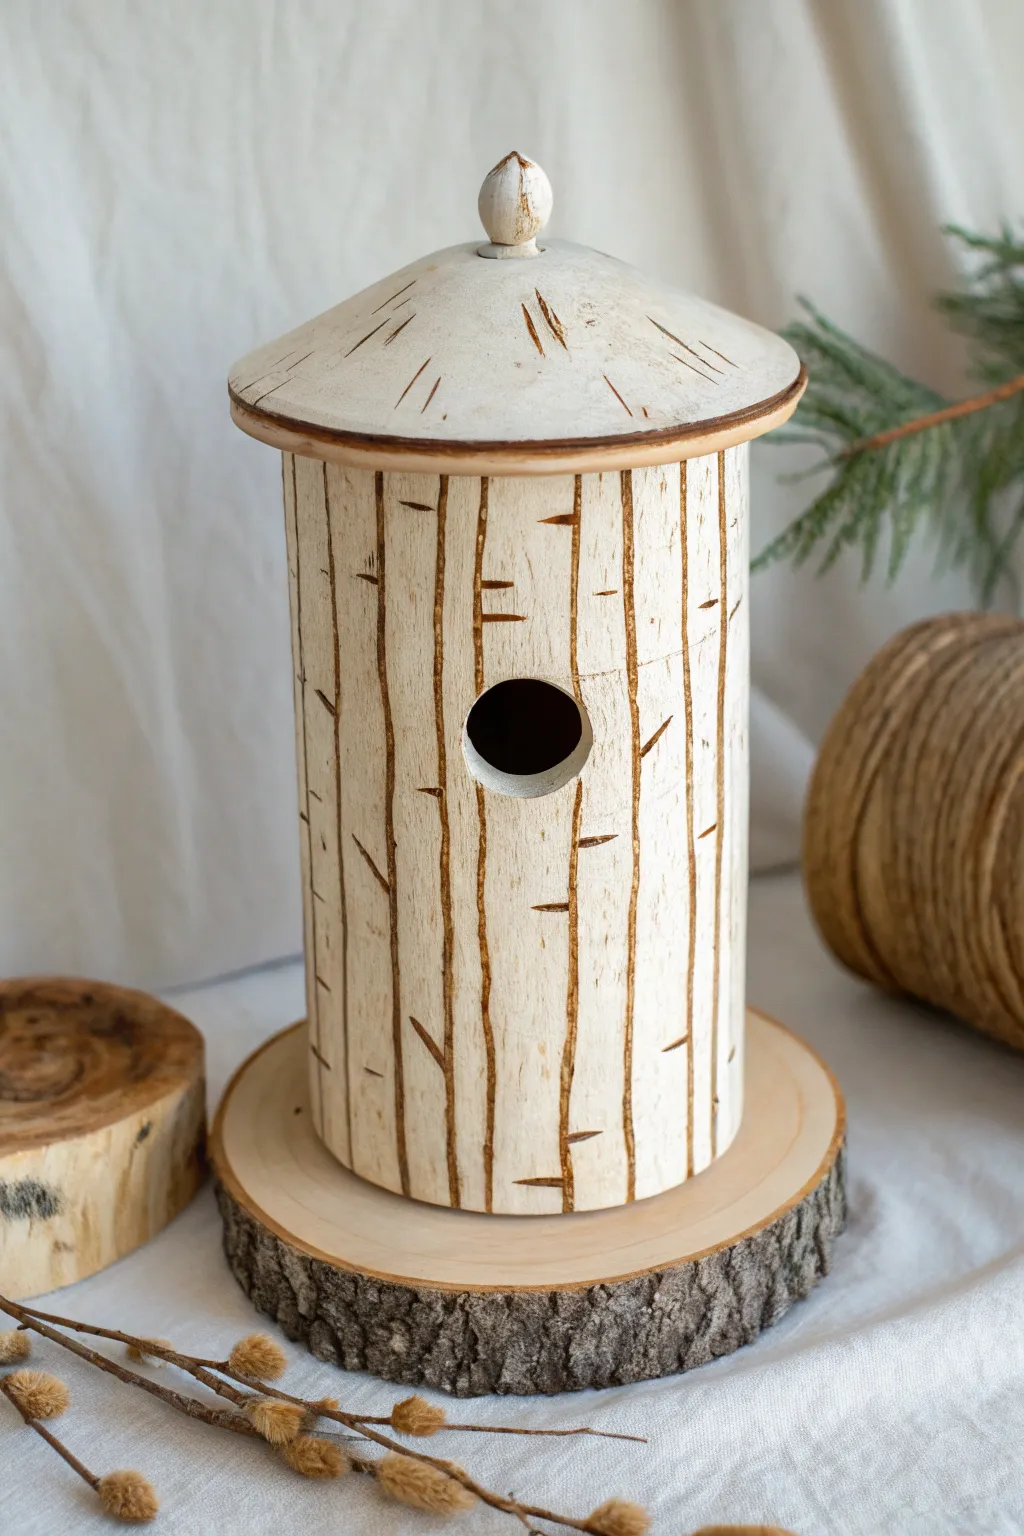
Capture the rustic charm of the forest with this hand-built ceramic birdhouse designed to mimic a white birch log. The vertical carved lines and dark underglaze accents create a convincing faux-wood grain that looks sturdy and natural.
How-To Guide
Materials
- Light-colored stoneware or porcelain clay (white firing)
- Slab roller or rolling pin with canvas
- 4-inch diameter cylinder mold (cardboard tube or PVC pipe)
- Newspaper
- Needle tool
- Scoring tool (serrated rib)
- Slip (clay mixed with water)
- Circle cutter (1-1.5 inch for the hole)
- Loop tool for carving
- Dark brown or black underglaze
- Small fine-point paintbrush
- Sponge
- Clear matte glaze (optional)
Step 1: Forming the Cylinder Body
-
Roll the slab:
Begin by rolling out a consistent slab of white clay to approximately 1/4 inch thickness. You want it sturdy enough to stand but not overly heavy. -
Cut the rectangle:
Measure your cylinder mold to determine the circumference. Cut a rectangle from your slab that is tall enough for your desired birdhouse height (about 8-10 inches) and wide enough to wrap around the mold with a slight overlap. -
Prepare the mold:
Wrap your cardboard or PVC cylinder form in a layer of newspaper. This critical step prevents the wet clay from sticking to the form and allows for easy removal later. -
Wrap the clay:
Gently lift the clay slab and wrap it around the paper-covered form. Bring the two straight edges together to meet. -
Join the seam:
Score both touching edges thoroughly with your serrated tool and apply slip. Press the edges firmly together. I like to use a wooden rib to smooth the seam completely so it disappears into the cylinder wall. -
Cut the entry hole:
While the clay is still supported by the form, use your circle cutter to create the entry hole about two-thirds of the way up the cylinder. Smooth the raw edges of the opening with a damp finger.
Rustic Texture Tip
Before carving, roll a crumpled ball of aluminum foil over the leather-hard surface. This adds a subtle, organic pore texture that makes the smooth clay look more like actual wood.
Step 2: Roof and Base Construction
-
Create the roof cone:
Roll a smaller slab and cut out a circle (approx. 6 inches diameter). Cut a wedge slice out of the circle—like a slice of pizza—and pull the cut edges together to form a shallow cone shape. Score, slip, and join this seam securely. -
Add the finial:
Roll a small ball of clay and shape it into an acorn or simple knob. Attach this to the very peak of your roof cone using the score-and-slip method. -
Form the base:
Cut a circle of clay slightly smaller than the interior diameter of your cylinder. This will be the floor. Insert it into the bottom of the cylinder and use a coil of clay on the inside to weld the floor to the walls. -
Assemble the roof:
Once the cylinder has stiffened slightly to leather-hard, remove the inner mold. Score the top rim of the cylinder and the underside of the roof. Attach the roof, ensuring the overhang is even all around.
Preventing Cracks
Make sure to poke a small, hidden hole in the base or back of the birdhouse, and another tiny hole into the roof finial if it is hollow. Trapped air pockets can cause explosions in the kiln.
Step 3: Carving and Decoration
-
Carve vertical lines:
With the piece leather-hard, use a needle tool or small loop tool to carve long, slightly wavering vertical lines down the cylinder. These represent the birch bark peeling and cracks. Make some lines deeper and some shallow for variety. -
Add horizontal accents:
Carve small horizontal dashes or ‘lentil’ shapes intersecting the vertical lines. This mimics the characteristic markings found on birch trees. -
Detail the roof:
Lightly scratch radiating lines or similar bark markings onto the roof surface to maintain continuity with the body. -
Apply underglaze:
Using a fine brush, paint dark brown or black underglaze directly into the carved crevices. You don’t need to be perfectly neat; getting some color on the surface edges helps the effect. -
Wipe back excess:
Take a slightly damp sponge and gently wipe the surface of the clay. This removes the underglaze from the high points, leaving the dark color trapped only in the carved texture lines to define the bark. -
Final drying and firing:
Allow the birdhouse to dry slowly under plastic to prevent warping. Bisque fire according to your clay body’s specifications. -
Glazing:
For a natural look, leave the outside unglazed (if the clay is vitrified) or apply a very thin coat of clear matte glaze. Glaze the interior if desired for extra durability.
Once fired, this durable ceramic house is ready to be mounted on a wooden base or hung in the garden using wire
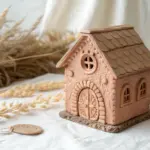
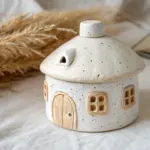
Impressed Stone Texture Cottage Birdhouse
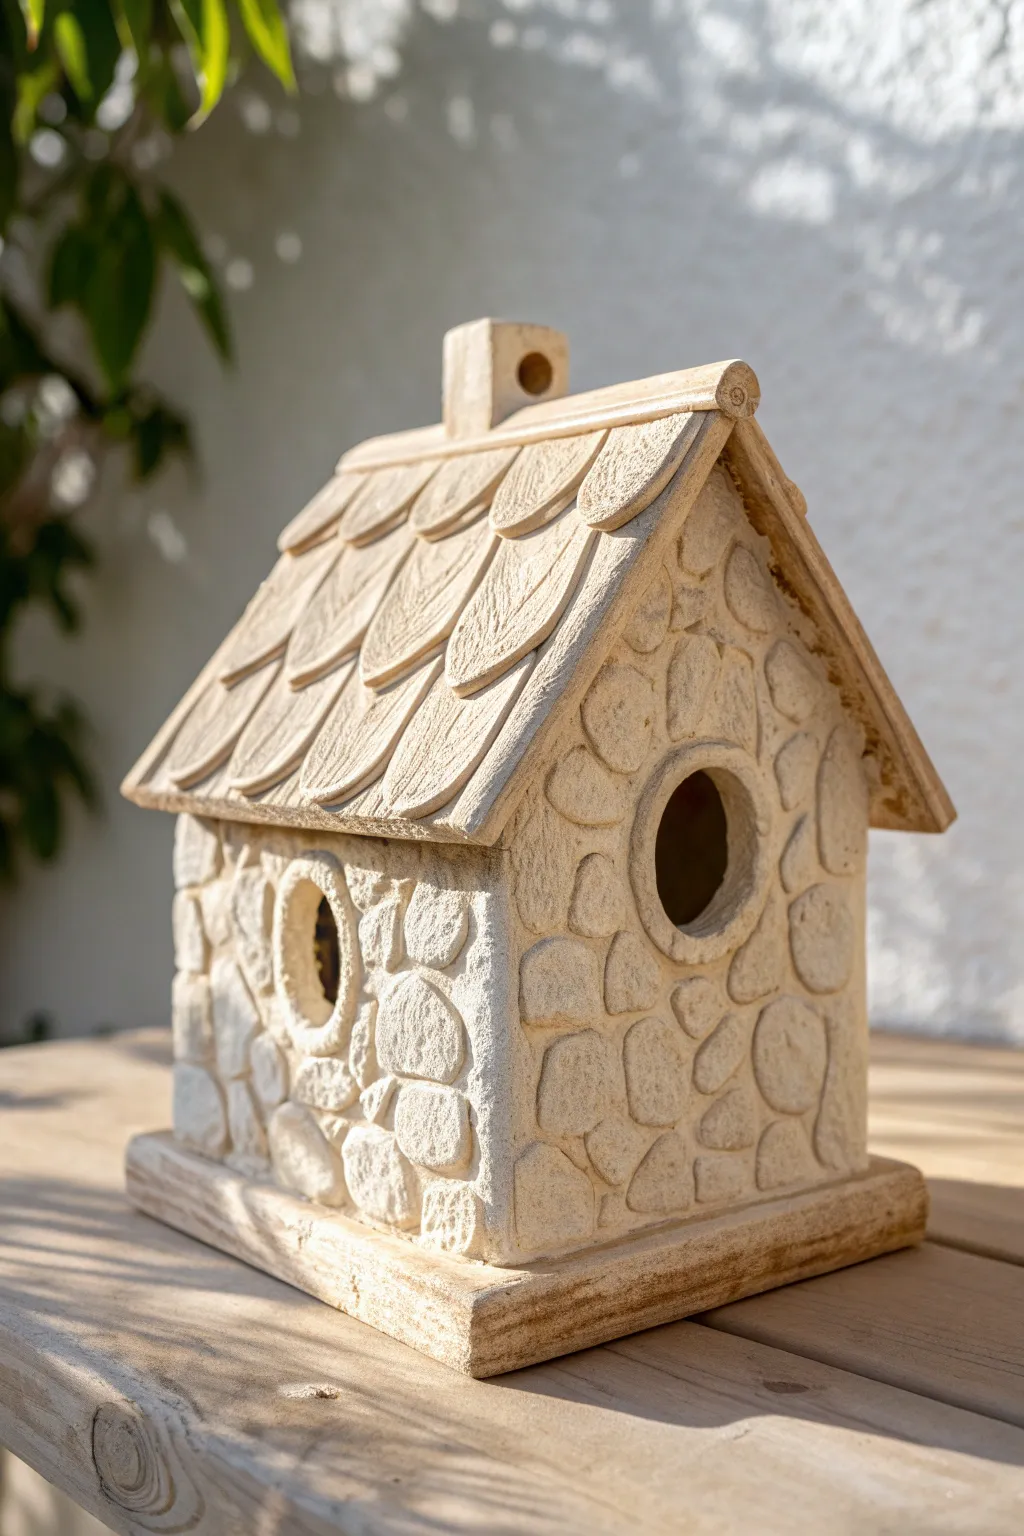
Bring a touch of whimsical masonry to your garden with this charming cottage-style birdhouse, featuring deeply embossed faux stonework and a classic shingled roof. The natural clay finish gives it a timeless, weathered look that blends beautifully with outdoor greenery.
Step-by-Step Guide
Materials
- Stoneware clay body (groggy or speckled clay recommended for texture)
- Rolling pin and guide strips (approx. 1/4 inch thickness)
- Fettling knife or craft knife
- Slip and scoring tool
- Various round cookie cutters (or jar lids)
- Small wooden modeling tools
- Smooth river stone or rounded sculpting tool (for embossing)
- Ruler
- Sponge and water
- Paper templates for walls and roof panels
Step 1: Preparation and Wall Construction
-
Roll the Slabs:
Begin by rolling out a substantial slab of clay to a uniform 1/4-inch thickness using your guide strips. You will need enough surface area for four walls, two roof panels, and a base. -
Cut the Shapes:
Using your paper templates, cut out two rectangular side walls, two pentagonal front/back walls with peaked gables, and a rectangular base that is slightly larger than the footprint of the house. -
Texture the Walls:
Before assembly, use a small, smooth river stone or a rounded wooden tool to press random, irregular shapes into the soft clay walls. Leave the edges of each shape slightly raised to mimic grout lines between stones. -
Create the Entry:
On the front wall panel, use a round cutter to create the main bird entry hole. Save the clay circle you removed for later detailing. -
Assemble the Box:
Score and slip the vertical edges of your four wall panels. Join them together to form the house structure, reinforcing the interior corners with small coils of clay for stability. -
Attach the Base:
Score the bottom edges of the assembled walls and the top surface of the base slab. Press the house firmly onto the base, smoothing the seam on the inside if possible, or blending the clay on the outside.
Step 2: Roofing and Architectural Details
-
Form the Roof Support:
Cut your two roof panels. Be sure they are long enough to create an overhang on the sides. Score and slip the peaked gables and attach the roof slabs. -
Cut Shingles:
Roll a thinner slab of clay and use a round cutter or knife to create numerous tongue-shaped shingles. I prefer to make them slightly irregular for a more rustic, hand-built aesthetic. -
Apply Shingles:
Starting at the bottom edge of the roof, slip and score rows of shingles, overlapping each row as you move upward toward the peak. Smooth the top edge of each shingle down so it lays flat. -
Cap the Roof:
Roll a long, thin strip of clay to serve as the ridge cap. Place this over the very peak of the roof where the two sides meet, covering the seam and the tops of the highest shingles. -
Add Window Frames:
Roll a coil of clay and flatten it slightly. Score around the circular entryway and attach the coil to create a raised stone frame. Repeat this for any side windows you choose to cut. -
Construct the Chimney:
Form a small rectangular block of clay. Hollow it out slightly if desired, or simply pierce a hole through the top horizontally for a decorative touch. Attach this to the roof ridge. -
Refine the Stonework:
Go back over the stone texture on the walls. Deepen the impressions if they were smudged during assembly, ensuring the ‘stones’ look distinct and rounded. -
Final Smoothing:
Use a barely damp sponge to wipe down sharp edges on the base, the roof overhangs, and the entry hole to ensure the finished piece is safe for birds. -
Drying and Firing:
Allow the birdhouse to dry slowly under loose plastic for several days to prevent warping. Once bone dry, bisque fire the piece. For the look in the photo, leave it unglazed or apply a matte iron oxide wash before the final firing.
Stone Effect Secret
To get that gritty texture on the ‘stones,’ gently dab the clay surface with a rough kitchen sponge or a piece of coral before pressing in your grout lines.
Make it Hangable
Before the roof hardens, pierce two holes near the ridge line and thread high-temp nichrome wire through them to create a permanent, sturdy hanging loop.
Place your finished cottage in a quiet corner of the yard and wait for your first feathered tenants to move in


What Really Happens Inside the Kiln
Learn how time and temperature work together inside the kiln to transform clay into durable ceramic.
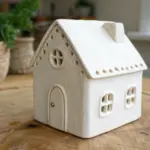
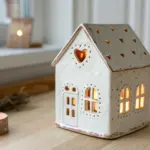
White-on-White Lace-Textured Roof
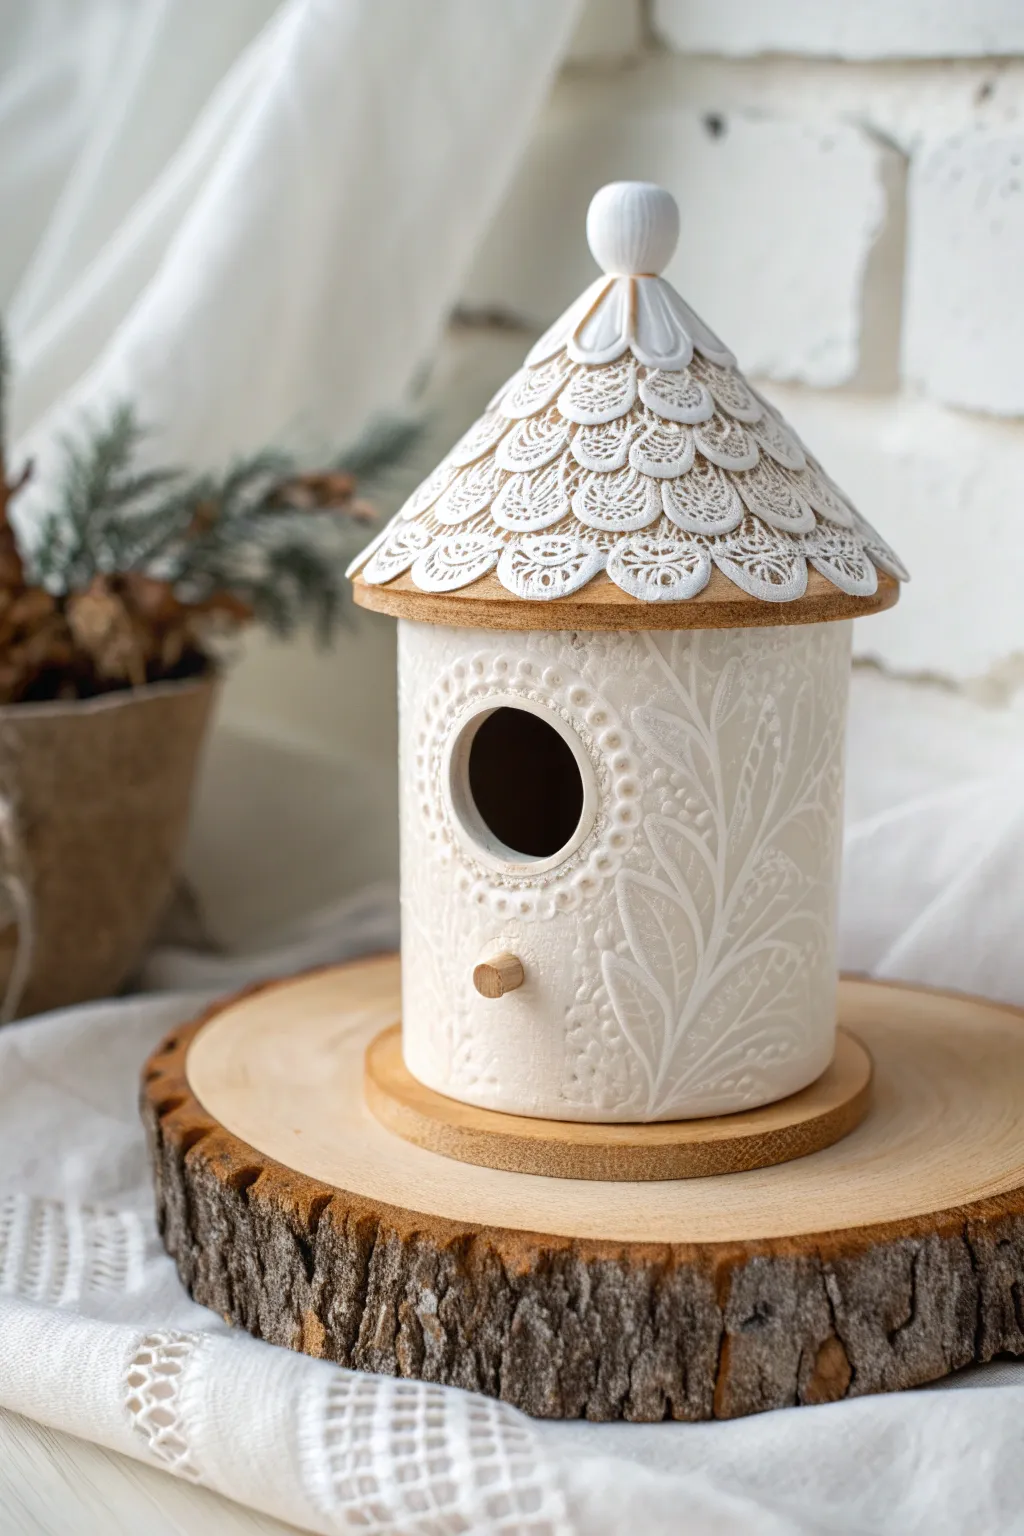
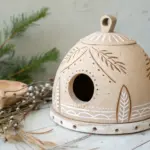
This elegant decorative birdhouse combines the rustic warmth of natural clay with the intricate beauty of lace textures. The finished piece features a leafy embossed body and a stunning scalloped roof that mimics the look of fine needlework, perfect for a cozy mantle display.
How-To Guide
Materials
- White polymer clay or air-dry potter’s clay
- Rolling pin or pasta machine
- Cylindrical form (like a sturdy cardboard tube or glass jar interior)
- Conical form (card stock or styrofoam cone)
- Textured rolling pin or stamps (leaf pattern)
- Cotton lace or doily (heavy texture)
- Round cookie cutters (various sizes)
- Craft knife or scalpel
- Slip (liquid clay) or scoring tool depending on clay type
- Small wooden dowel (for the perch)
- Wooden base disk (sized to birdhouse diameter)
- Acrylic paints (Titanium White, Raw Sienna)
- Clear matte varnish
- Strong craft glue (E6000 or similar)
Step 1: Forming the Textured Body
-
Prepare the Clay Slab:
Condition your white clay until soft and pliable. Roll it out into a uniform rectangular slab, roughly 1/4 inch thick. Aim for a length that will wrap around your chosen cylindrical form with a slight overlap. -
Apply the Leaf Texture:
Place your leaf-patterned texture sheet or rolling pin firmly onto the slab. Roll with consistent pressure to embed the design deeply into the clay. -
Cut the Shape:
Using a ruler and craft knife, trim the textured slab into a clean rectangle. Measure the height you want for your birdhouse walls. -
Create the Entryway:
Use a medium-sized round cutter to punch a circular hole in the upper third of the rectangle. This will be the bird’s entrance. -
Add Decorative Beading:
Roll a very thin snake of clay. Press it gently around the rim of the entryway hole. Use the tip of a stylus or bamboo skewer to create small dimples around this ring for a decorative border. -
Construct the Cylinder:
Wrap the clay rectangle around your form. Score and slip the edges (or use liquid clay) to join the seam at the back. Smooth the seam carefully so the texture isn’t disrupted too much. -
Insert the Perch:
Poke a small hole below the entrance using your wooden dowel to ensure a tight fit. Remove the dowel for now; we’ll glue it in after baking or drying.
Step 2: Crafting the Lace Roof
-
Make the Roof Base:
Roll a smooth semicircular slab of clay and form it into a cone shape that is slightly wider than your cylinder body. This acts as the structural support for the shingles. -
Create Lace Shingles:
Roll out a thin sheet of white clay. Place a piece of heavy-textured lace over it and roll firmly to imprint the pattern. Use a small round cutter to punch out numerous lace-textured circles. -
Layer the Scallops:
Starting at the bottom rim of the cone, attach the textured circles in a row, overlapping them slightly like fish scales. I prefer to trim the top of each circle straight to reduce bulk underneath the next layer. -
Continue Upward:
Add subsequent rows of lace circles, moving upward toward the peak. Stagger the placement so the center of a shingle sits above the seam of the two below it. -
Form the Top Detail:
For the very top, create vertical petal-like shapes from clay to cover the convergence of the shingles. Top this with a small hand-rolled clay sphere as a finial. -
Drying or Baking:
Follow manufacturer instructions to bake (polymer) or dry (air-dry) both the body and the roof. Ensure the roof is supported so it maintains its conical shape.
Clean Cuts Pro-Tip
Chill polymer clay in the fridge for 10 minutes before cutting the lace circles. This prevents the delicate intricate patterns from distorting when you lift them.
Step 3: Assembly and Finishing
-
Add a Warm Wash:
Once hardened, mix a tiny drop of Raw Sienna paint with a lot of water to create a translucent wash. Brush this over the roof and body, then immediately wipe it back with a damp cloth. This leaves color only in the deep textures, highlighting the lace and leaves. -
Dry Brush for Highlights:
Take a dry brush with a tiny amount of Titanium White paint. Lightly dust the raised surfaces of the lace and leaf patterns to make the texture pop against the wash. -
Assemble the Structure:
Glue the wooden base disk to the bottom of the cylinder. Then, glue the roof securely onto the top rim of the body. -
Attach the Perch:
Cut your wooden dowel to size (about 1 inch protruding). Put a drop of strong glue in the pre-made hole and insert the dowel. -
Sealing:
Coat the entire piece with a matte varnish to protect the surface and seal the paint without adding unnatural shine.
Visible Seams?
If the back seam of the house is messy, wet your finger (or use baby oil for polymer clay) and gently rub in circular motions to blur the join line before texturing.
Place your finished textural masterpiece on a wood slice for a charming rustic presentation
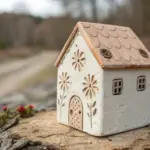
Sprigged Flowers and Vines Birdhouse
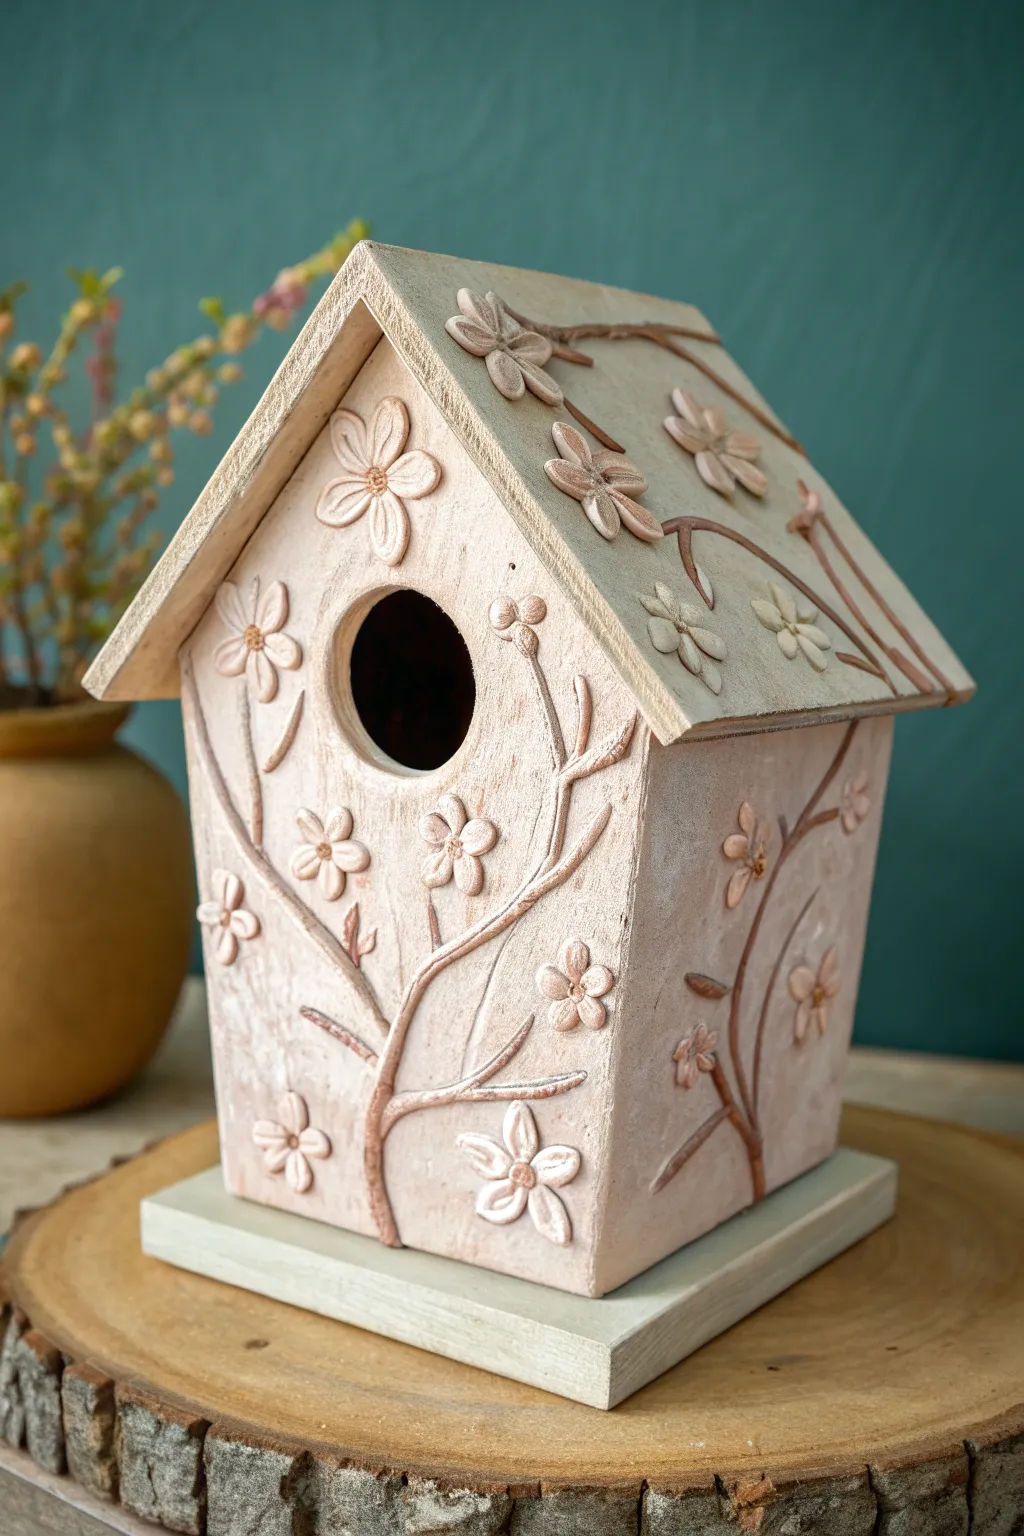
This charming ceramic birdhouse features a soft, textured finish adorned with raised floral sprigs and winding vines. The rustic, pale pinkish-beige glaze highlights the relief details, giving it an organic, garden-gathered feel perfect for spring decor.
Step-by-Step Guide
Materials
- Stoneware or earthenware clay (white or light buff recommended)
- Slab roller or rolling pin with guide sticks (1/4 inch thickness)
- Birdhouse paper templates (front/back, sides, roof, base)
- Clay knife or fettling knife
- Slip and scoring tool (serrated rib or needle tool)
- Small flower press molds or fondant cutters (various sizes)
- Circle cutter (approx. 1.5 inch for entrance)
- Modelling tools / wooden skewer
- Sponge and water
- Underglaze or oxide wash (brown/sepia)
- Matte or satin clear glaze (or a semi-opaque white glaze)
- Kiln
Step 1: Constructing the Base Structure
-
Roll the slabs:
Begin by rolling out your clay to a consistent 1/4-inch thickness. You want the walls sturdy enough to stand but not overly heavy. Smooth the surface with a rib to compress the clay particles. -
Cut the components:
Using your paper templates, cut out two pentagon shapes for the front and back, two rectangles for the sides, two larger rectangles for the roof, and a square base. Place them on a ware board to stiffen slightly to ‘soft leather hard’. -
Create the entrance:
On the front panel, use your circle cutter to remove the entrance hole. Position it in the upper third of the panel, centered under the peak. -
Bevel the edges:
To ensure strong 90-degree corners, bevel the vertical edges of your wall pieces at a 45-degree angle. This increases the surface area for joining. -
Assemble the walls:
Score the beveled edges aggressively and apply slip. Join the four walls together, pressing firmly. Reinforce the inside corners with tiny coils of clay, smoothing them out completely so they disappear. -
Attach the base:
Score and slip the bottom edge of your wall structure and the perimeter of the base slab. Press the walls onto the base. Trim any excess base clay flush with the walls for a clean look.
Step 2: Adding the Sprigged Decoration
-
Roll tiny coils for vines:
Roll out very thin, spaghetti-like coils of fresh clay. These will become the branches and vines. Keep them moist under plastic while you work. -
Apply the vines:
Score the path you want the vines to take on the birdhouse walls. Apply slip, then gently press the thin coils onto the surface. Use a modeling tool to flatten them slightly and create a wood-grain texture. -
Create floral sprigs:
I prefer using small push-molds for uniform flowers, but you can also hand-model small petals. If using cutters, ensure the clay is rolled thin before cutting. -
Attach the flowers:
Score small dots where the flowers will sit—some on the vines, some floating. Slip the back of each flower and press it firmly onto the leather-hard clay. Use a tool to press the center of the flower to lock it in place. -
Add texture to petals:
Using a needle tool or small knife, gently draw lines radiating from the center of each petal to mimic the look of real blossoms. -
Assemble the roof:
Attach the two roof panels to the peak of the house using the score and slip method. The roof should overhang the front slightly. Add vines and flowers to the roof panels as well, continuing the design upward.
Attachment Issues?
If sprigs pop off during drying, you didn’t score deeply enough. Use a little vinegar in your slip when re-attaching bone-dry pieces for a stronger bond.
Step 3: Finishing and Glazing
-
Slow drying:
Loosely cover the birdhouse with plastic to let it dry very slowly. This prevents the seams from cracking. Once bone dry, bisque fire the piece to cone 04. -
Apply oxide wash:
Mix a brown iron oxide or sepia underglaze with water to create a wash. Brush this over the entire piece, getting deep into the vine textures and flower crevices. -
Wipe back the wash:
With a damp sponge, wipe away most of the oxide from the high points (the wall surface and top of petals), leaving the dark color only in the recesses to accentuate the 3D details. -
Final glaze application:
Dip or brush a thin coat of a semi-opaque white or matte clear glaze over the entire piece. The oxide underneath will bleed through slightly, creating that rustic pinkish-sand hue. -
Glaze fire:
Fire the birdhouse to the maturity temperature of your clay and glaze (typically cone 5 or 6). Once cooled, glue a small wooden or ceramic base plate if extra stability is desired.
Texture Pro Tip
Before assembling walls, roll a subtle canvas or linen texture onto your clay slabs. This fabric weave adds depth beneath the floral sprigs.
Place your finished birdhouse on a mantle or shelf to bring a permanent touch of spring into your home.

TRACK YOUR CERAMIC JOURNEY
Capture glaze tests, firing details, and creative progress—all in one simple printable. Make your projects easier to repeat and improve.
Sgraffito Swirl Pattern Birdhouse
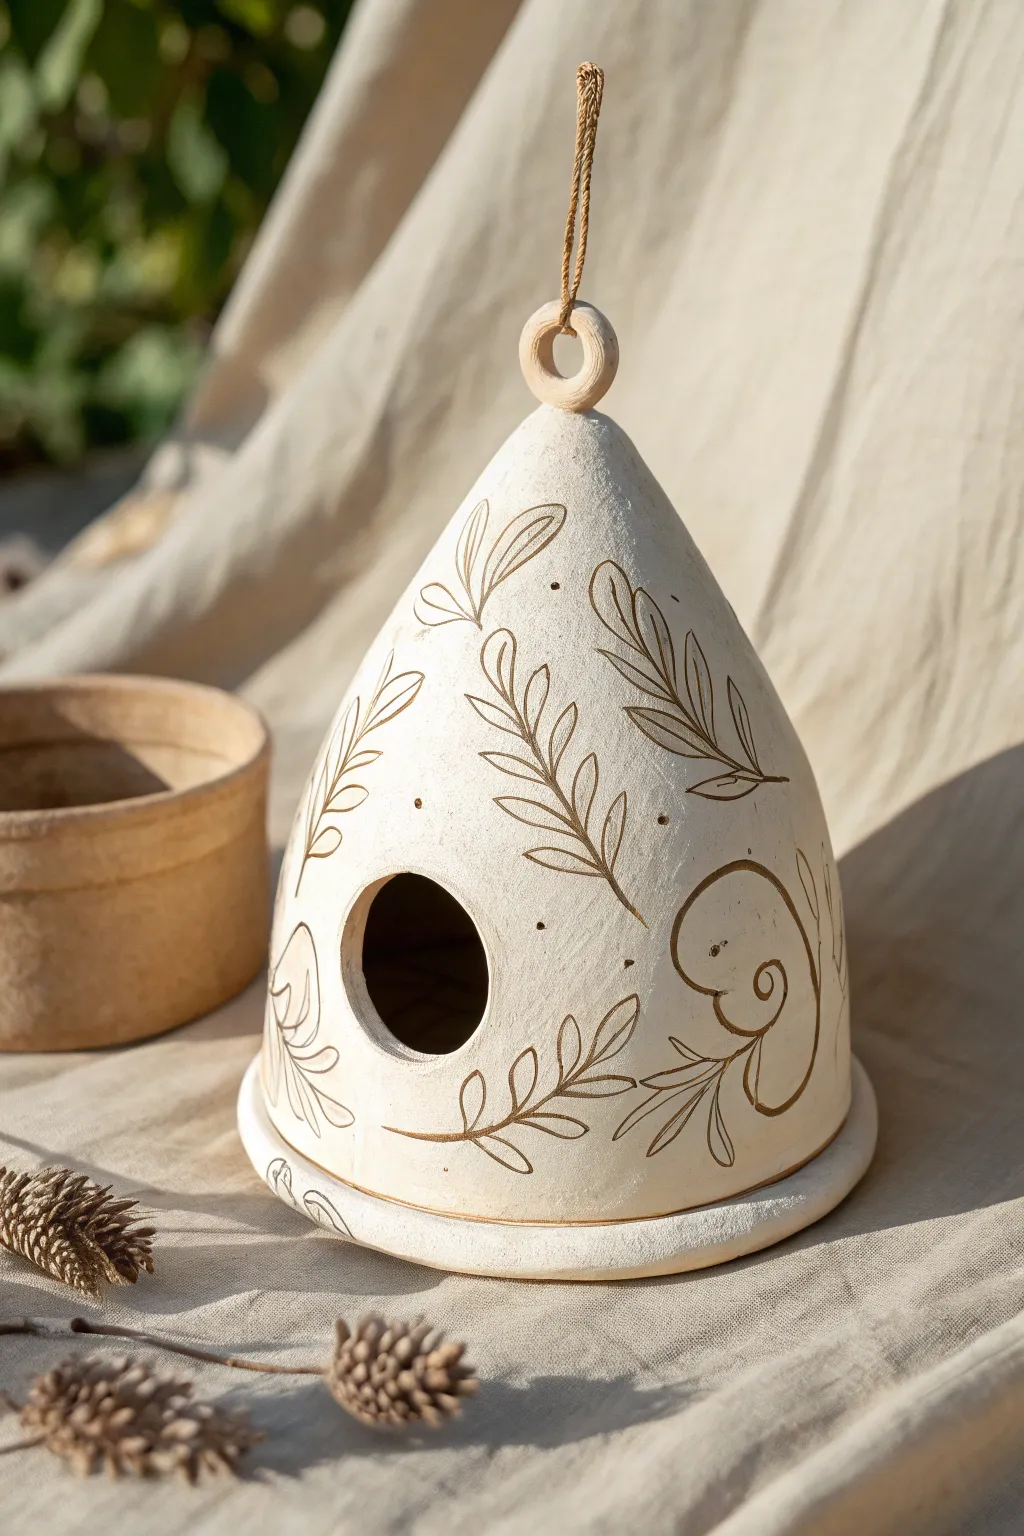
This charming, cone-shaped birdhouse brings a touch of nature indoors or out with its delicate, hand-carved botanical motifs. The clean white clay contrasting with warm, earthy inlaid lines creates a timeless piece that feels both rustic and modern.
Step-by-Step
Materials
- White tonal stoneware clay (smooth body)
- Rolling pin
- Slab roller (optional)
- Cone-shaped mold or sturdy paper/cardboard cone template
- Fettling knife
- Needle tool
- Score and slip tool (or fork)
- Round hole cutter (approx 1.5 inches)
- Small loop tool for carving (sgraffito or mishima tool)
- Brown underglaze or oxide wash (iron oxide)
- Sponge
- Clear matte glaze (optional)
- Twine or hemp cord for hanging
Step 1: Forming the Base Structure
-
Prepare the slabs:
Begin by rolling out your white stoneware clay into a smooth slab approximately 1/4 inch thick. Compress the clay on both sides with a rib tool to prevent warping later. -
Cut the cone shape:
Using a paper template or a guide, cut out a large wedge shape that will roll up to form your cone. You will also need to cut a circular base slab that is slightly larger than the bottom diameter of your cone. -
Form the cone body:
Carefully roll the wedge slab into a cone shape. Score the connecting edges, apply slip, and press them firmly together to create a seam. Smooth the seam inside and out so it becomes invisible. -
Attach the base:
Place your cone onto the circular base slab. Trace around the bottom of the cone, then score and slip both the cone’s bottom edge and the base. -
Secure the join:
Press the cone firmly onto the base. Use a modeling tool to meld the clay together at the seam, then run a damp sponge along the edge -
Create the entrance:
When the clay is leather-hard, use your round hole cutter to create the bird entrance about one-third of the way up the cone body. Smooth the sharp edges with a damp finger. -
Add the hanging loop:
Roll a small coil of clay into a ring. Attach this securely to the very peak of the cone using the score and slip method. This delicate donut shape will hold your twine later.
Step 2: Decreating the Mishima Pattern
-
Sketch the design:
Lightly trace your botanical pattern onto the leather-hard clay using a dull pencil or stylus. Draw swirling vines, large leaves, and spiral motifs that wrap organically around the form. -
Carve the lines:
Using a needle tool or a very fine v-gouging tool, carefully carve over your traced lines. You want a clean, shallow channel for the underglaze to sit in. -
Apply the color:
Paint a generous coat of brown underglaze or iron oxide wash over the entire carved area. Ensure the liquid flows down into every carved groove. -
Wipe back the excess:
Wait for the underglaze to dry slightly until it is no longer shiny. Take a clean, damp sponge and wipe across the surface of the clay, removing the color from the high points but leaving it trapped in the carved lines. -
Detail the dots:
Use a needle tool to poke small, random accent dots around the leaves. These don’t need to be filled with color; they add nice textural contrast.
Clean Lines
Change your sponge water frequently when wiping back underglaze. Dirty water will stain the white clay body and make the contrast muddy.
Step 3: Firing and Finishing
-
Bisque fire:
Allow the birdhouse to dry completely (bone dry) before loading it into the kiln for a bisque firing. -
Final glaze (optional):
For a waterproof finish suitable for outdoors, apply a thin coat of clear matte glaze over the exterior. Alternatively, you can leave the clay raw on the outside for a rustic texture seen in the photo, provided the clay is vitrified. -
Final firing:
Fire the piece to the maturity temperature of your clay body (likely Cone 5 or 6 for stoneware). -
Add the hardware:
Once cool, thread a sturdy piece of natural hemp or jute twine through the top loop and tie a secure knot.
Cracking Seams?
If the vertical seam splits during drying, your clay was likely too dry when joining. Wrap the spot in wet plastic for a day, fill with soft clay, and compress well.
Hang your new ceramic creation in a cozy garden nook or on a porch to welcome your feathered neighbors
Glossy Drip-Glaze Roof Birdhouse
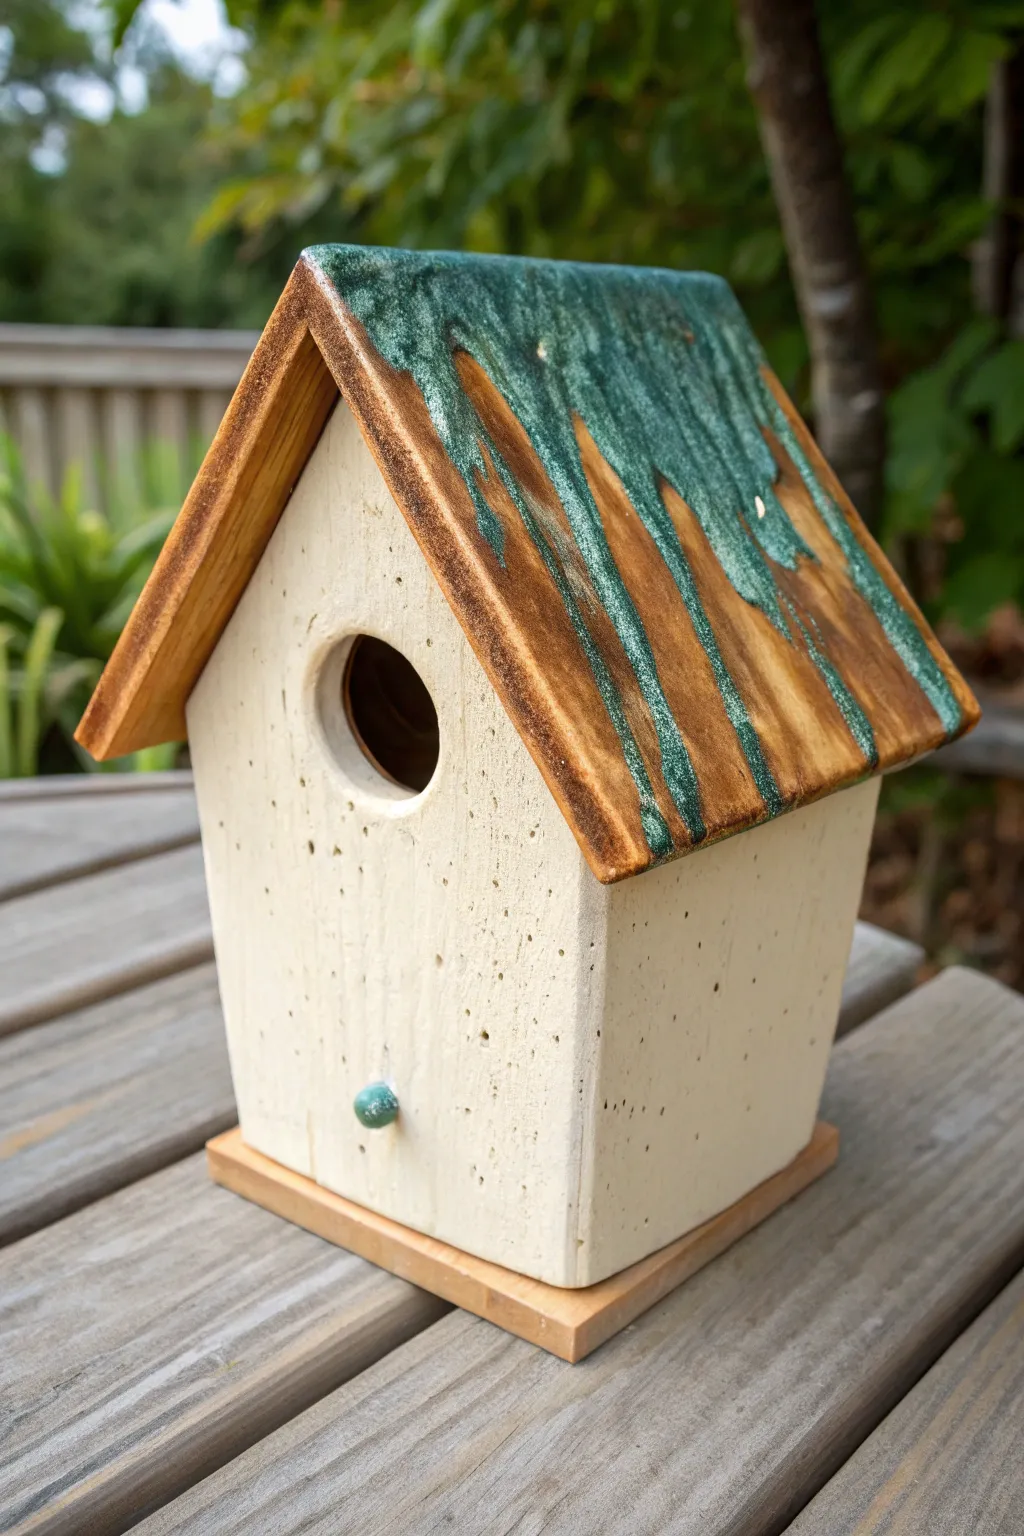
This charming ceramic birdhouse features a beautifully textured cream body contrasted by a dramatic roof design. The glossy green glaze dripping over matte wood-stained clay creates a stunning organic effect that looks right at home in any garden.
Step-by-Step Guide
Materials
- Stoneware clay (speckled or with grog)
- Rolling pin and guide sticks (for uniform slab thickness)
- Fettling knife or clay cutter
- Ruler/template for house walls and roof
- Slip and scoring tool
- Circle cutter (approx. 1.5 inches)
- Sponge
- Iron oxide wash (or dark brown underglaze)
- Deep green glossy glaze
- Clear matte glaze (optional)
- Small paintbrush
Step 1: Building the Structure
-
Roll your slabs:
Begin by rolling out your clay to an even thickness, roughly 1/4 inch thick. Use guide sticks on either side of your rolling pin to ensure the slabs are perfectly uniform, which is crucial for structural integrity. -
Cut the components:
Using a template or ruler, cut out your four walls (two rectangular sides, two pentagonal peaked pieces for front and back), two rectangular roof panels, and a square floor base. -
Create the entrance:
On the front peaked piece, locate the center and use your circle cutter to punch out the entry hole. Smooth the sharp edges of this opening with a damp sponge or your finger. -
Texture the walls:
Before assembly, lightly roll a texture tool or press a rough sponge against the exterior surfaces of your wall pieces if your clay isn’t naturally speckled enough, giving it that rustic, stone-like appearance. -
Assemble the walls:
Score the edges of your wall pieces and apply slip. Stand the walls up on your work surface and join them at the corners, pressing firmly but gently to seal the seams without warping the shape. -
Attach the floor:
Score and slip the bottom edges of your wall assembly and attach it to the floor slab. Trim any excess clay from the base so it sits flush with the walls, or leave a tiny lip if preferred. -
Install the roof:
Bevel the top edges of the front and back wall peaks to match the angle of your roof. Score, slip, and attach the two roof panels so they meet at a sharp peak. I find it helpful to support the overhang with small balls of paper towel while the clay stiffens. -
Add the perch:
Roll a very small ball or cylinder of clay. Score a spot below the entrance hole and attach this small nub to serve as a perch. -
Slow drying:
Let the birdhouse dry very slowly under loose plastic for several days to prevent warping, then bisque fire it to cone 04 (or your clay’s specification).
Step 2: Glazing and Finishing
-
Apply oxide wash:
Mix iron oxide with water (or use a watered-down brown underglaze). Brush this generously over the entire roof surface. -
Wipe back the oxide:
Using a damp sponge, wipe away the excess oxide from the roof. The dark color should remain in the texture and grain of the clay, creating a wood-like stained effect. -
Wax the body:
Apply wax resist to the main cream-colored body of the house if you want to keep it completely raw, or plan to use a clear matte glaze later. This protects it from the roof glaze dripping too far. -
Apply the drip glaze:
Load a brush with a thick, glossy green glaze. Apply a heavy coat along the very top ridge of the roof. -
Encourage the drips:
Dab extra blobs of green glaze at intervals along the roof peak and halfway down the slope. Gravity in the kiln will pull these down, creating those beautiful vertical streaks. -
Glaze the perch:
Add a small dab of the same green glaze to the tip of the perch to tie the design together. -
Final wipe:
Check the bottom of the birdhouse to ensure absolutely no glaze is on the foot, as this will fuse to your kiln shelf. -
Glaze firing:
Fire the piece to cone 5/6 (or your clay/glaze temperature). Ensure the piece is stilted if you are worried about the drips running off the roof edge.
Glaze Running Too Fast?
If your glaze is very fluid, don’t paint all the way to the roof edge. Stop 1 inch up; the heat will pull the drips down naturally without messy runoff.
Level Up: Texture Match
Before assembly, press real wood bark into the soft clay of the roof slabs. The oxide wash will settle into the bark impressions for hyper-realism.
Once cooled, your birdhouse is ready to add a touch of handcrafted whimsy to your patio or shelf
No-Dowel Step Ledge Perch Birdhouse
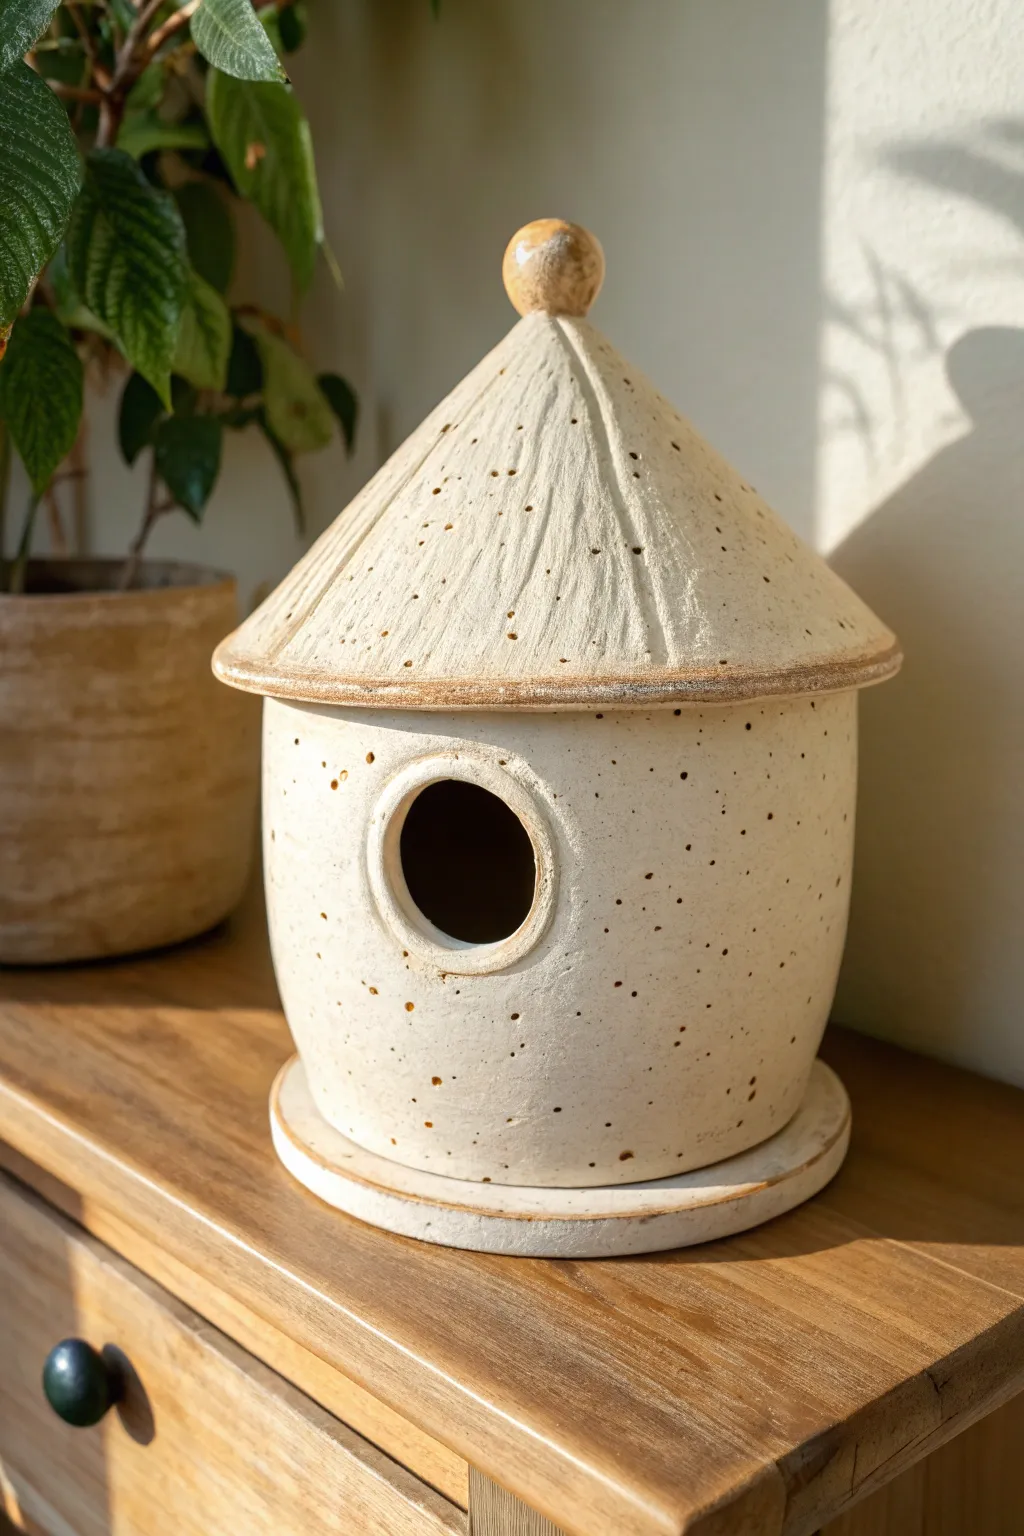
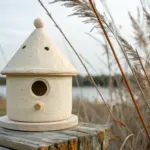
This charming ceramic birdhouse features a cozy conical roof and a unique base design that doubles as a landing ledge, eliminating the need for a traditional dowel. The speckled clay body and subtle vertical textures give it a rustic, organic feel that blends beautifully with indoor decor or outdoor gardens.
Detailed Instructions
Materials
- Speckled stoneware clay (approx. 3-4 lbs)
- Rolling pin
- Canvas working surface
- Circular templates (6-inch and 7-inch diameter)
- Fettling knife or needle tool
- Rib tool (wooden or rubber)
- High-grit sandpaper or sanding sponge
- Scoring tool (serrated rib or fork)
- Slip (clay and water slurry)
- Small wooden paddle or spoon
- Modeling tool for texture
- Sponge
Step 1: Forming the Base and Body
-
Roll the Slabs:
Begin by wedging your speckled stoneware clay thoroughly to remove air bubbles. Roll out a large slab regarding 1/4 to 3/8 inch thickness on your canvas. Compressed slabs are less likely to warp, so use a rib to smooth and compress both sides. -
Cut the Base Plate:
Using a 7-inch circular template, cut out the base of your birdhouse. This wider base acts as the ‘ledge’ perch. Smooth the cut edge with a damp sponge. -
Form the Body Cylinder:
Cut a rectangular strip from your slab, roughly 6 inches tall and long enough to form a cylinder with a 5.5-inch diameter. Bevel the short ends at 45-degree angles to create a seamless overlap join. -
Join the Cylinder:
Score the beveled edges aggressively and apply slip. Bring the ends together to form a cylinder, pressing the seam firmly. I like to use a wooden paddle here to ensure the join is tight and the cylinder is perfectly round. -
Attach Body to Base:
Score and slip the bottom edge of your cylinder and the center of your large base circle. Place the cylinder onto the base, ensuring there is an even rim of exposed base visible all around. Blend the clay from the inside of the cylinder down onto the base for a strong seal.
Slumping Roof?
If your roof cone sags while working, ball up some newspaper and stuff it inside the cone for support. Leave the paper in until the clay stiffens to leather-hard.
Step 2: Creating the Entry and Roof
-
Cut the Entrance:
Decide on the placement for your bird entrance, usually centered vertically on the cylinder. Use a small circular cutter or needle tool to remove a circle about 1.5 to 2 inches in diameter. -
Reinforce the Rim:
Roll a small coil of clay and attach it around the exterior of the entrance hole. Blend it smoothly into the wall on the outside, but leave it slightly raised to create that distinct, thick ‘donut’ rim effect shown in the image. -
Shape the Conical Roof:
Roll a new slab and cut a large circle (approx 8-9 inches). Cut a wedge slice (like a piece of pie) out of the circle—removing about 1/4 of the total shape. Score and slip the straight edges and join them to create a cone. -
Texture the Roof:
Before attaching, use a modeling tool or the edge of a credit card to drag vertical lines from the peak of the cone down to the rim. Create varying depths for a natural, bark-like texture. -
Add the Finial:
Roll a small ball of clay and attach it to the very peak of the roof cone. Smooth the connection point so it looks seamless and integrated. -
Attach the Roof:
Score the top rim of your cylinder and the underside of the roof cone. Place the roof on top. You want a distinct clear separation line like the photo, so don’t blend the exterior clay together; just press firmly to adhere the scored surfaces.
Level Up: Ventilation
Drill 2-3 tiny holes near the top of the back wall (under the roof overhang) and in the floor for drainage/airflow. This keeps birds healthier if used outdoors.
Step 3: Finishing Touches
-
Detail the Edges:
Use a damp sponge to slightly soften the rim of the roof and the base plate. You want a clean look, but not sharp enough to chip easily. -
Drying:
Cover the piece loosely with plastic for the first 24 hours to let the moisture equalize, then uncover and let it dry slowly to the bone-dry stage. This prevents cracking at the seams. -
Bisque Fire:
Fire the piece to cone 04 (or your clay’s specific bisque temperature). -
Glazing Strategy:
To achieve the look in the photo, wipe a very thin oxide wash (like iron oxide) or a diluted tan underglaze into the texture lines of the roof and around the rim of the base. Wipe away the excess with a sponge so color remains only in the recesses. -
Leave Bare:
Leave the main body unglazed to show off the speckled clay body, or use a clear matte glaze if you need it to be fully sealed for outdoor weatherproofing. -
Final Firing:
Fire to the maturity temperature of your clay body (likely cone 5 or 6 for stoneware). Ensure the base is wiped clean of any glaze or oxide before loading into the kiln.
Once fired, place this architectural little home on a shelf or in the garden and wait for your feathered tenants to arrive
Double-Entry Birdhouse With Two Doors
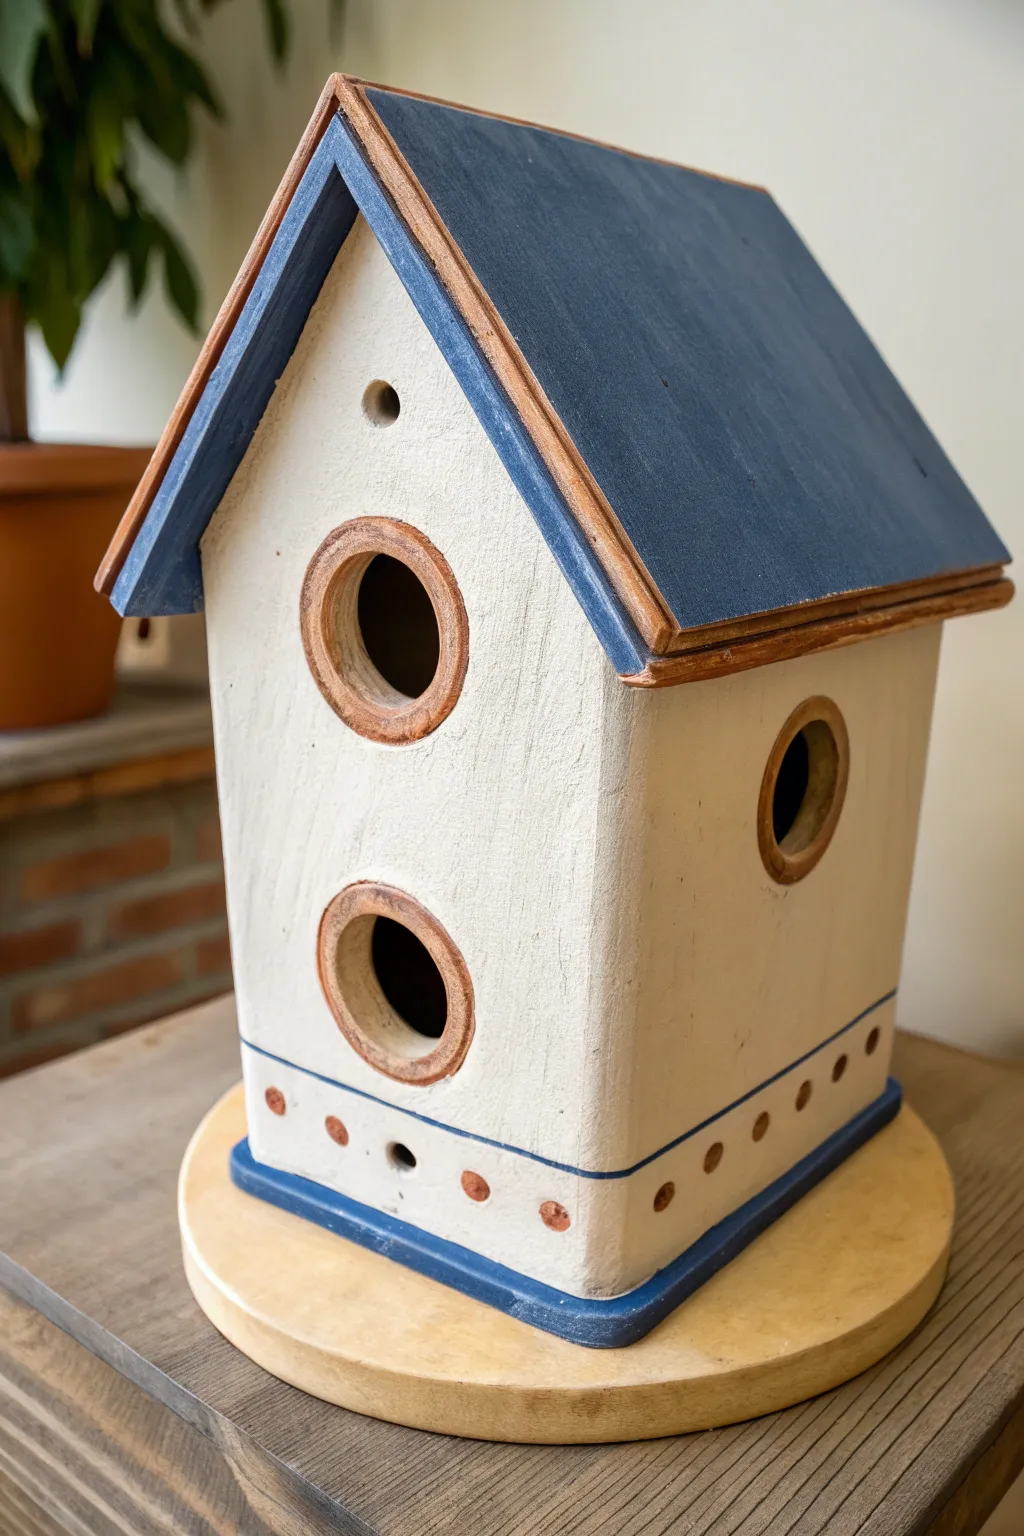
This charming ceramic birdhouse features a classic A-frame design with a textured white façade and distinct blue accents. Its unique multi-level entry points and quaint terracotta-style detailing give it a cozy, handmade feel perfect for any garden or shelf.
Step-by-Step Guide
Materials
- Slab-rolling clay (stoneware or earthenware)
- Clay slab roller or rolling pin with guide sticks
- Fettling knife
- Clay slip and scoring tool
- Circle cutters (various sizes)
- Loop tool for texturing
- Underglazes (Cobalt Blue, White, Terracotta/Brown)
- Clear matte glaze
- Kiln
- Round wooden base (optional for display)
Step 1: Construction
-
Prepare the slabs:
Roll out your clay to a consistent ¼-inch thickness. You will need enough clay for four walls and two roof panels. Let the slabs firm up to a ‘leather hard’ state before cutting so they hold their shape. -
Cut the walls:
Cut two rectangular side walls and two front/back walls with peaked tops for the roofline. Measure carefully to ensure the side walls match the height of the straight edges on the front and back pieces. -
Create the entry holes:
On the front panel, use circle cutters to remove clay for two vertical entry holes—one centered in the upper half and a larger one in the lower half. Add a smaller ventilation hole near the peak. Cut a similar large hole on at least one side panel. -
Form the trim rings:
Roll a small amount of extra clay slightly thinner. Cut rings that match the diameter of your entry holes and attach them around the openings using the score-and-slip method to create a raised border. -
Assemble the box:
Score and slip all vertical edges of your four wall panels. Join them together to form the main box structure. Use a coil of clay on the interior seams to reinforce the joints and smooth it down. -
Add the roof:
Cut two rectangular roof slabs that are slightly wider and longer than the house base to allow for an overhang. Bevel the top edges where they meet at the peak to ensure a tight fit. Attach them to the walls and each other. -
Create the roof trim:
Add a thin strip of clay along the front and back overhangs of the roof to create the layered, shingle-like thickness seen in the photo. Smooth the connection points. -
Add the base detail:
Attach a thin strip of clay around the very bottom perimeter of the house to define the foundation area. This strip will later be painted blue to ground the design.
Step 2: Texturing and Firing
-
Texture the walls:
Using a stiff brush or a serrated kidney tool, gently drag vertical lines down the white wall sections. This creates a wood-grain or stucco effect that adds character to the surface. -
Refine the edges:
Go over the roof edges and the circular trims with a damp sponge to smooth any sharpness, giving them a softened, weathered look. -
Bisque fire:
Once the piece is bone dry, load it into the kiln for the initial bisque firing. Check your clay’s specific temperature requirements.
Airflow is Key
Don’t forget to poke small drainage holes in the bottom slab if this will be used outdoors, so rainwater doesn’t pool inside.
Step 3: Glazing and Finishing
-
Apply base color:
Paint two to three coats of white underglaze on the main walls, being careful to work the color into the texture you created earlier. -
Paint the roof:
Apply a deep slate blue underglaze to the flat surfaces of the roof. Leave the edges and the front trim exposed or paint them with a terracotta/brown slip to mimic exposed clay or wood. -
Detail the trim:
Use a terracotta or warm brown underglaze on the circular window trims and the roof edges. I find that wiping this back slightly with a sponge can make it look more rustic. -
Add the bottom accents:
Paint the bottom foundation strip with the same blue used on the roof. Just above this blue strip, paint a row of small terracotta dots evenly spaced around the perimeter. -
Final glaze and fire:
Apply a clear matte glaze over the entire exterior to seal the piece without making it too shiny. Fire the piece again to the final glaze temperature. -
Mounting:
If displaying indoors, you can glue the finished ceramic house to a round wooden base for stability and a polished look.
Fixing Warp
If walls warp while drying, weigh them down gently with a wooden board or drywall piece to keep them flat before assembly.
You now have a delightful, architectural birdhouse ready to welcome feathered friends to your garden
Mini Birdhouse Village Set on a Base
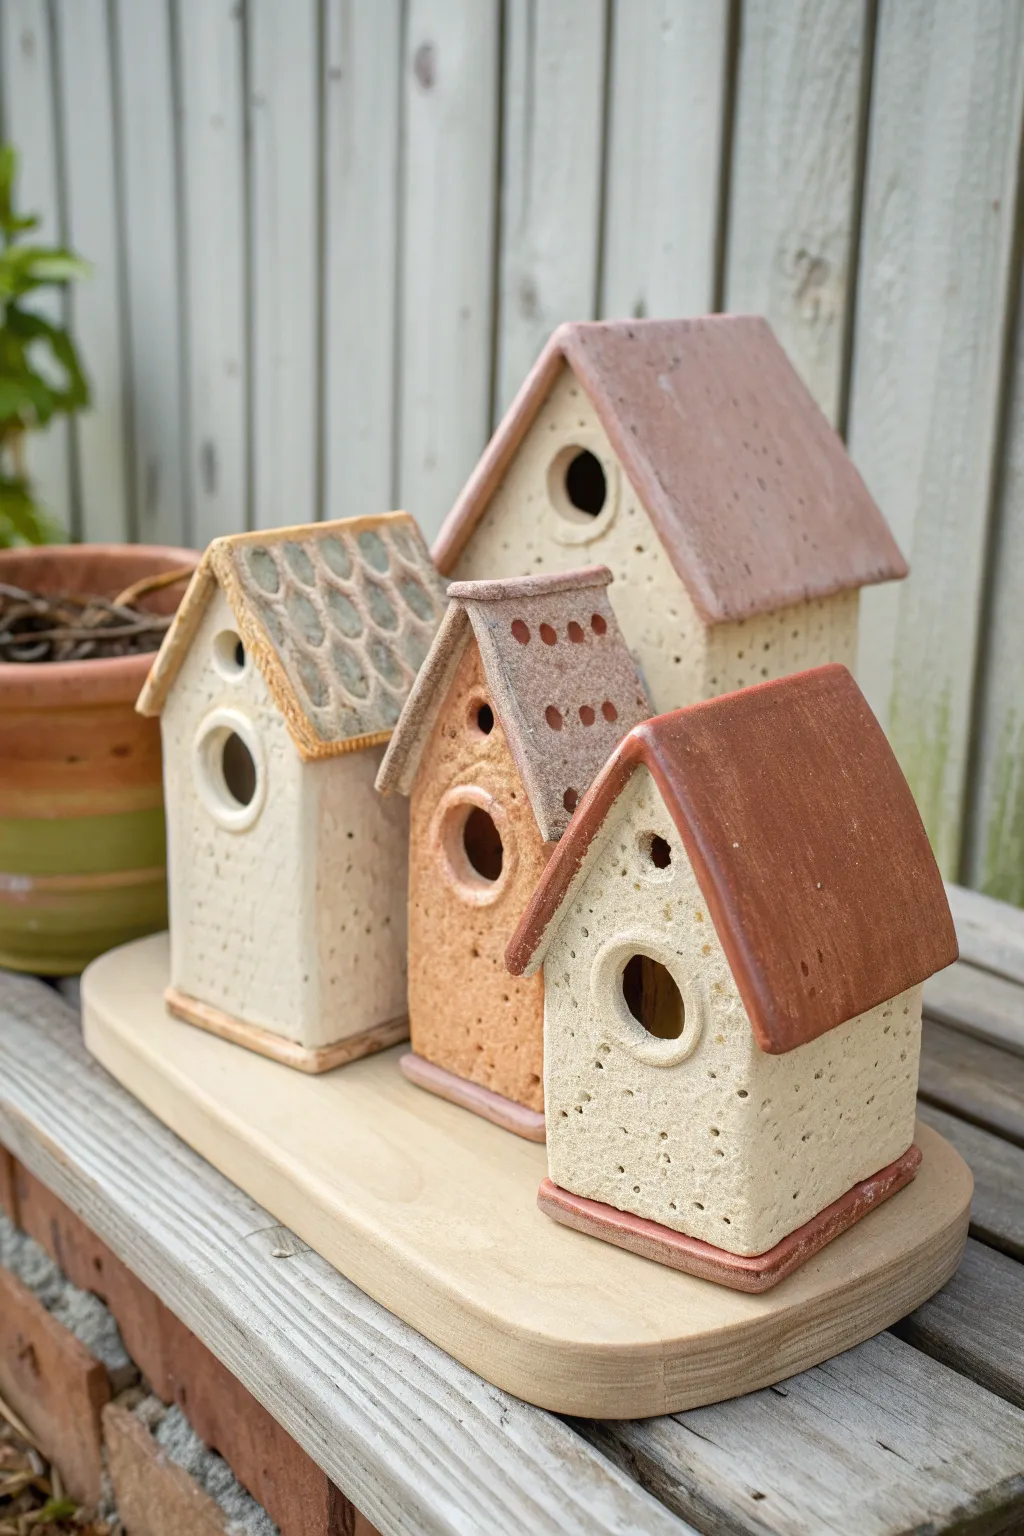
This charming project features a quartet of rustic, handcrafted ceramic birdhouses resting on a wooden display base. The textured walls and earthy glazed roofs create a cozy, organic village feel perfect for indoor decor or a sheltered garden spot.
How-To Guide
Materials
- Stoneware clay (grogged for texture)
- Rolling pin and guide sticks (approx. 1/4 inch thick)
- Fettling knife or clay cutter
- Paper templates (house facades and roofs)
- Slip and scoring tool
- Small circular cutters (for entry holes)
- Needle tool
- Underglazes or glazes (terracotta, slate blue, warm brown)
- Clear matte glaze (optional)
- Wooden display board
- Kiln access
Step 1: Crafting the House Structures
-
Roll your slabs:
Begin by wedging your clay thoroughly to remove air bubbles. Roll out a large slab of clay to a uniform 1/4-inch thickness using guide sticks to ensure even walls. -
Cut the shapes:
Using your paper templates, cut out the components for four houses. You will need two pentagonal distinct front/back pieces and two rectangular side wall pieces for each house. Vary the sizes: make one large master house, one medium narrow house, and two smaller cottages. -
Texture the walls:
Before assembling, create the rustic stucco texture shown in the image. Gently press a coarse sponge, a crumpled ball of aluminum foil, or a piece of coral into the soft clay surfaces to create random pitting and roughness. -
Cut the entry holes:
Use a small circular cutter to remove a hole from the front piece of each house. Place them high up near the peak. For the smallest house, add a tiny ventilation hole above the main entrance. -
Refine the portals:
Roll a very thin coil of clay and attach it around the rim of the entry hole using slip and scoring. Smooth the outer edge to create a raised, finished doorframe look that mimics traditional birdhouse construction. -
Assemble the walls:
Score the edges of your wall pieces and apply slip. Stand the walls up and press them together firmly. Reach inside to smooth the seams with a modeling tool or your finger to ensure structural integrity. -
Add the base slab:
Cut a square base slightly larger than the footprint of the house walls. Attach the walls to this base. This adds stability and mimics the wooden bottom piece seen in the photo on the smallest house.
Clean Seams
When joining walls, roll a tiny ‘snake’ of clay and press it into the interior corners. Smudge it smooth to reinforce the joint without adding invisible bulk.
Step 2: Roofing and Drying
-
Prepare the roofs:
Roll out new slabs for your roofs. These should be rectangular pieces that are slightly wider than the house width to allow for an overhang. Measure them against your assembled boxes before cutting. -
Decorate the roofs:
For the medium house, press rows of thumbprints or use a loop tool to carve scallop shapes resembling shingles. For the other houses, keep the texture smoother or lightly sanded to contrast with the rough walls. -
Attach the roofs:
Score the top edges of the house walls and the underside of the roof pieces. Attach the roof slabs, ensuring a good connection at the peak. You may need to prop up the overhangs with crumpled newspaper while the clay stiffens. -
Create air vents:
In the side of the medium-sized house roof, use a small straw or hole punch tool to create a decorative grid of dots. This adds visual interest and prevents air pockets during firing. -
Initial drying:
Loosely cover your village with plastic and let it dry slowly for several days to the leather-hard stage. This slow drying prevents the roofs from warping or cracking at the seams.
Step 3: Glazing and Finishing
-
Bisque fire:
Once bone dry, fire the pieces in the kiln to bisque temperature (usually cone 04). Clean off any dust with a damp sponge after they cool. -
Apply roof color:
Use a terracotta-colored glaze for the largest and smallest house roofs to mimic clay tiles. For the shingled roof, wash a slate-grey or diluted brown glaze over the texture, wiping back the high points to highlight the scallop pattern. -
Stain the walls:
Instead of a heavy glaze on the walls, I prefer using a wash of iron oxide or a very diluted tan underglaze. Brush it into the textured pits and wipe the surface clean with a sponge, leaving color only in the recesses to emphasize the ‘stone’ look. -
Glaze fire:
Fire the pieces again to your clay body’s maturity temperature. Ensure the bottoms are wiped clean of glaze so they don’t stick to the kiln shelf. -
Final assembly:
Arrange your finished ceramic houses on the wooden board. You can secure them with a dab of museum wax or epoxy if you want them permanently fixed, or leave them loose to rearrange later.
Seasonal Village
Make the roofs removable lids instead of scoring them permanently. This turns the birdhouses into secret jars for hiding keys or LED tealights.
Now you have a timeless little village that brings architectural charm to your shelf without ever needing a building permit
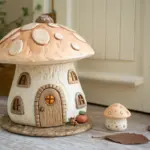
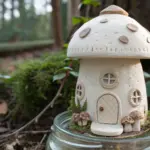
Mushroom Roof Fairy-Garden Birdhouse
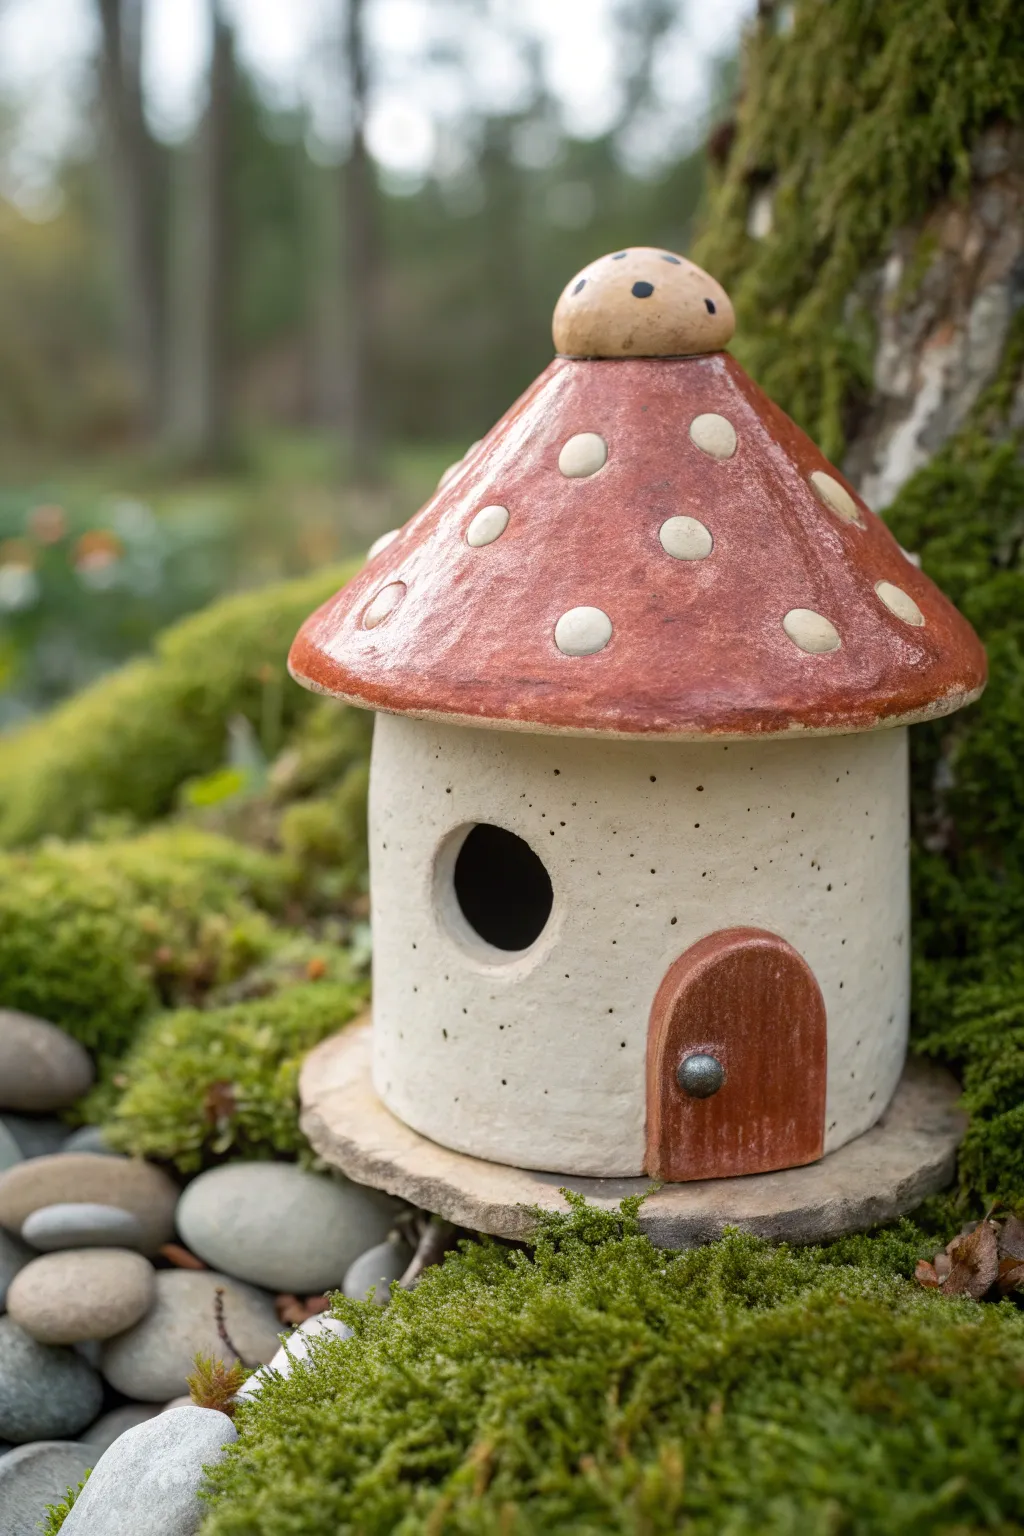
Add a touch of storybook charm to your garden with this hand-built ceramic birdhouse shaped like a classic toadstool. Its textured white base and glossy, spotted red roof create an inviting home for wrens or chickadees while doubling as enchanting decor.
Step-by-Step Guide
Materials
- Stoneware clay (white or buff with grog)
- Rolling pin and canvas mat
- Circular templates (approx. 4″ and 7″ diameter)
- Needle tool and fettling knife
- Scoring tool (or serrated kidney)
- Slip (clay mixed with water)
- Hole cutter (1.5″ diameter)
- Wooden modeling tools
- Underglazes: Red/Terracotta, Brown, White
- Clear transparent glaze
- Kiln
Step 1: Building the Cylinder Base
-
Roll the Slab:
Begin by wedging your clay thoroughly to remove air bubbles. Roll out a slab of clay to an even thickness of about 1/4 inch on your canvas mat. -
Cut the Wall:
Cut a rectangular strip from the slab, approximately 4.5 inches high and 13 inches long. This will form the walls of the birdhouse. -
Form the Cylinder:
Stand the strip up and curl it into a cylinder, overlapping the ends slightly. Score both overlapping surfaces aggressively and apply slip. -
Secure the Seam:
Press the scored ends together firmly. Use a wooden tool or your thumb to blend the clay across the seam on both the inside and outside until the join is invisible. -
Add the Floor:
Cut a circle slightly larger than your cylinder’s diameter from the remaining slab. Score and slip the bottom edge of the cylinder and attach it to this base, trimming away any excess clay. -
Create the Entrance:
Once the clay is leather-hard, use your hole cutter to remove a neat circle about two-thirds of the way up the wall for the bird entrance. Smooth the cut edges with a damp sponge.
Clean Seams
When blending the roof seam, support the clay from the inside with your other hand. This prevents the cone shape from collapsing or warping while you work.
Step 2: Sculpting the Mushroom Roof
-
Form the Cone:
Roll a new slab and cut a large circle (approx. 7 inches). Cut a wedge/slice out of the circle (like a slice of pie) to allow it to form a cone shape. -
Join the Roof:
Pull the cut edges together to create a shallow cone shape. Score, slip, and blend the seam just like you did for the base. Test the fit on your cylinder—it should have a nice overhang. -
Attach the Topper:
Roll a small ball of clay, slightly flatten it, and attach it to the very peak of the cone to create the mushroom’s ‘button’ top. -
Add the Spots:
Roll tiny balls of clay and flatten them into discs of varying sizes. Score and slip the roof surface, then press these discs on randomly to create the mushroom spots. -
Refine the Form:
Smooth the edges of the roof with a damp sponge so they are rounded and organic, not sharp. -
Install the Roof:
Score the top rim of the cylinder and the underside of the roof where they will touch. Apply slip and press the roof firmly onto the base. I like to reinforce this inner connection with a small coil of clay for extra durability.
Step 3: Adding Details and Finishing
-
Sculpt the Door:
Roll a small, arched piece of clay for the faux door. Score the cylinder wall near the bottom and attach the door. Add a tiny ball of clay for the doorknob. -
Add Texture:
Gently gently press a toothbrush or stiff brush onto the white walls to give it a speckled, stone-like texture. -
Slow Dry and Bisque:
Let the piece dry very slowly under plastic to prevent the roof from cracking. Once bone dry, bisque fire the piece to the appropriate cone (usually Cone 04). -
Underglazing:
Apply 3 coats of reddish-brown underglaze to the roof (avoiding the white spots) and a wood-brown color to the door. Use a black or dark grey wash inside the entrance hole for depth. -
Glazing:
Once the underglaze is dry, apply a clear transparent glaze over the entire roof to make it shine. Leave the walls unglazed matte or use a matte white crawling glaze for texture. -
Glaze Fire:
Fire the piece again to the final temperature required for your clay body and glaze.
Texture Twist
Instead of painting the walls white, use a speckled clay body. When fired, the iron specs will bleed through, creating a natural, organic look without extra painting.
Place your finished toadstool cottage in a mossy corner of the garden and wait for your first tenant to move in
Crooked Witch-Hat Roof Storybook Birdhouse
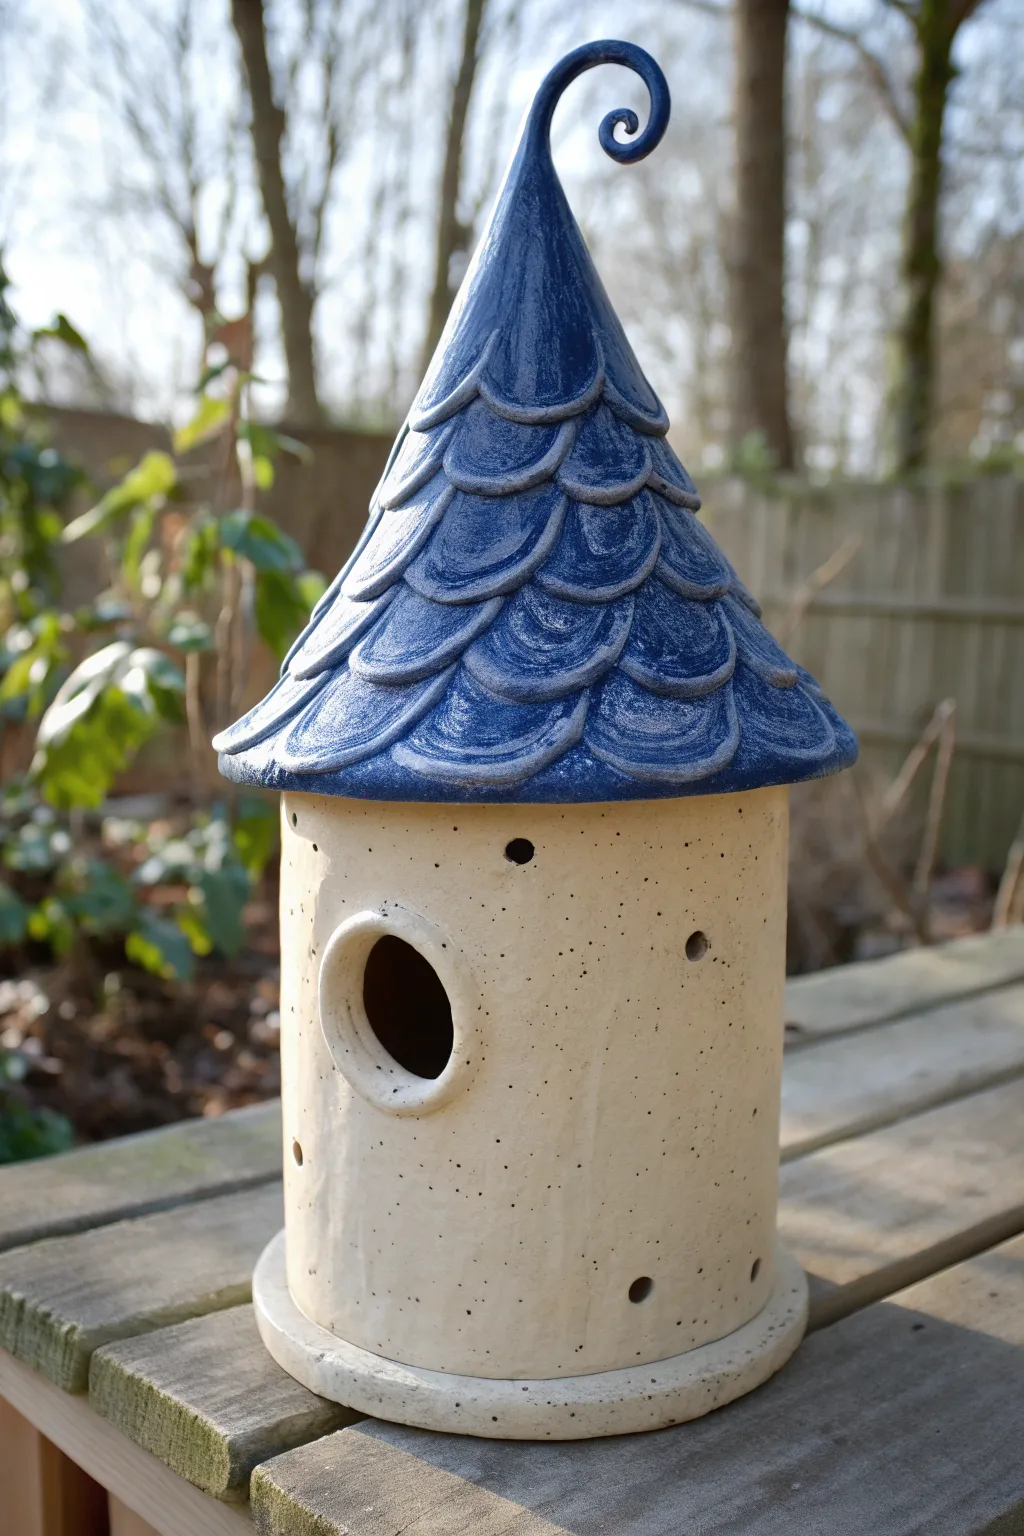
Bring a touch of fairytale magic to your garden with this hand-built ceramic birdhouse featuring a distinctively curled roof. The speckled cream body contrasts beautifully with the deep blue, scalloped shingles, creating a cozy cottage vibe for your feathered friends.
Step-by-Step
Materials
- Stoneware clay (speckled or buff)
- Rolling pin and guide sticks (1/4 inch)
- Clay texture tools or needle tool
- Slip and scoring tool
- Cylindrical form (PVC pipe or large can) for shaping
- Circle cutter or knife
- Blue underglaze or glaze
- Clear glaze (matte or glossy)
- Sponge and bucket of water
- Kiln access
Step 1: Forming the Body
-
Roll the slab:
Start by wedging your clay to remove air bubbles. Roll out a large slab of clay to an even 1/4-inch thickness using guide sticks to ensure uniformity. -
Cut the walls:
Measure and cut a rectangle that will form the cylinder of the house. For a standard birdhouse, a rectangle about 12 inches long and 6-7 inches tall works well. -
Shape the cylinder:
Wrap your clay rectangle around a PVC pipe or shipping tube lined with newspaper. Score the connecting edges, apply slip, and press firmly to join the seam. Smooth the seam inside and out so it disappears. -
Add the base:
Cut a circle slightly larger than the cylinder’s diameter (about 1/2 inch wider all around) from your remaining slab. Score and slip the bottom of the cylinder and attach it to this base. -
Cut the entrance:
Use a circle cutter or a steady hand with a needle tool to cut the main entrance hole about two-thirds of the way up the wall. Smooth the edges with a damp sponge. -
Create the entrance rim:
Roll a small coil of clay and attach it around the exterior of the entrance hole. Smooth it onto the wall to create a raised, finished lip which adds visual weight and durability. -
Ventilation and drainage:
Using a smaller hole punch or drill tool, create several small ventilation holes near the top rim and drainage holes in the floor. You can also add decorative holes randomly around the body as shown in the photo.
Step 2: Sculpting the Enchanted Roof
-
Form the cone:
Roll a slab into a large semi-circle. Join the straight edges to create a cone shape. Test the fit on your cylinder body; it should overlap the walls generously as eaves. -
Create the curl:
Gently pull and elongate the very tip of the cone. Roll it between your fingers to thin it out, then curl it downwards or into a spiral to create that signature ‘witch hat’ look. -
Apply shingle texture:
You can either cut individual scale shapes and layer them (starting from the bottom up) or, for a simpler method, press a U-shaped loop tool or spoon tip into the clay to impress the scalework pattern directly onto the cone. -
Refine the surface:
Go over your impressed lines or attached shingles to ensure they are distinct. I prefer to smooth the very edges of the shingles slightly so they don’t become sharp after firing. -
Dry fit and clean:
Place the roof on the body to ensure it sits flat. Do not permanently attach it if you want the birdhouse to be cleanable, but create a flange on the underside of the roof so it doesn’t slide off.
Clean Lines Pro-Tip
When glazing the roof, wipe a damp sponge lightly over the dried glaze before firing. This thins the color on the raised ridges, creating a weathered, dimensional antique look.
Step 3: Glazing and Finishing
-
Bisque fire:
Allow both pieces to dry slowly under plastic to prevent warping. Once bone dry, bisque fire them according to your clay body’s specifications. -
Apply roof color:
Brush 2-3 coats of deep blue underglaze or glaze onto the roof. If using underglaze, you can wipe it back slightly with a sponge to let the clay texture peek through the high points, accentuating the shingles. -
Glaze the body:
For the body, apply a clear matte glaze to show off the natural speckles of the clay. If you used plain clay, use a ‘speckled vanilla’ glaze instead. -
Final fire:
Stilt the pieces in the kiln to ensure no glaze touches the shelf. Glaze fire to the appropriate cone (likely Cone 5 or 6 for stoneware).
Level Up: Texture
Instead of painted shingles, overlap small, individual clay discs starting from the bottom rim. Use a different colored clay slip on the edges for a two-tone effect.
Hang your finished masterpiece securely and wait for your first magical tenant to move in
Tree-Face Birdhouse With Woodland Vibes
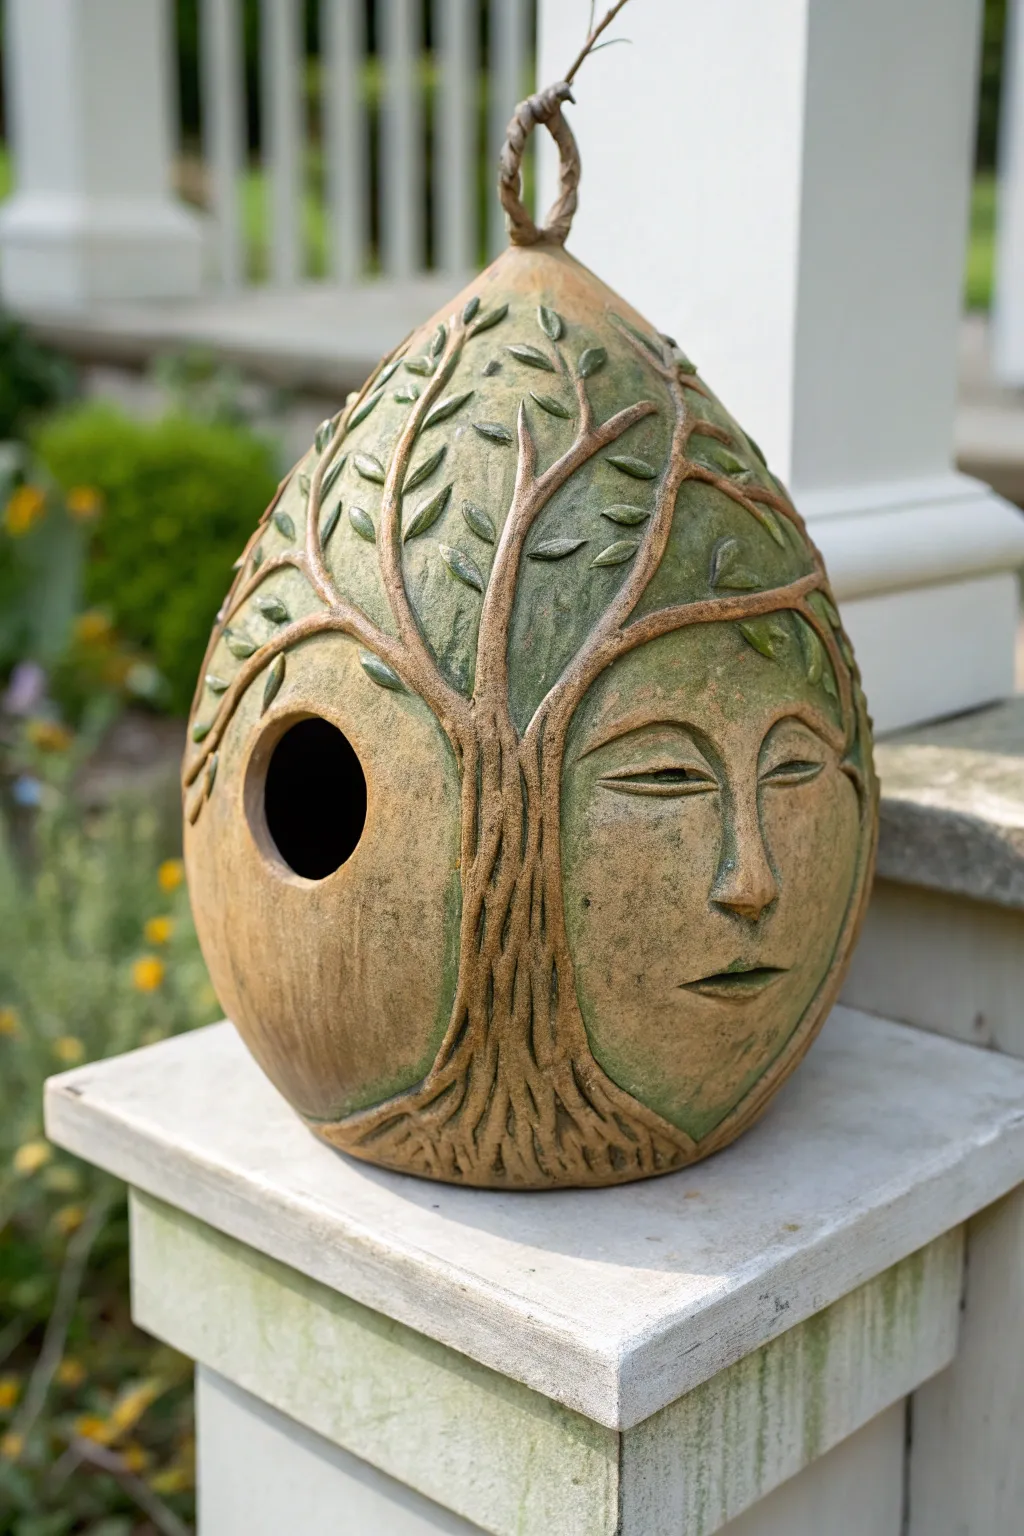
Embrace the magic of the woods with this handcrafted ceramic birdhouse, featuring a serene face emerging from tree branches. The teardrop form and earthy green and brown glazes give it an ancient, organic feel perfect for any garden sanctuary.
Detailed Instructions
Materials
- Stoneware clay (smooth or fine grog)
- Pottery wheel (optional, can be hand-built)
- Basic pottery tools (needle tool, rib, sponge)
- Modeling tools (wooden and metal)
- Hole cutter or fettling knife
- Slip and scoring tool
- Iron oxide wash
- Green celadon or transparent green glaze
- Wax resist
- Kiln
Step 1: Forming the Base
-
Create the Vessel Body:
Begin by throwing a closed form on the wheel, aiming for a teardrop or egg shape about 8-10 inches tall. Alternatively, build this using coils, smoothing the interior and exterior thoroughly as you go. -
Shape the Top Loop:
Pull a small, distinct knob at the very top of the form while throwing. Once leather hard, carve or pierce this knob to create a sturdy loop for hanging. -
Open the Form:
If you threw a completely closed form, wait until the clay is leather hard to cut a small hole in the bottom for air circulation during firing, or ensure your entry hole is cut before the piece gets too dry. -
Refining the Surface:
Use a metal rib to smooth the entire exterior surface. The canvas needs to be clean for the detailed carving work ahead.
Cracking Coils?
If the tree branches crack away during drying, your base was likely too dry when attaching. Wrap the piece in plastic for 24 hours to re-homogenize the moisture levels.
Step 2: Sculpting the Features
-
Sketch the Design:
Lightly trace the outline of a tree trunk branching out with a needle tool. Position the face area on one wide side and the bird entry hole on the adjacent or opposite side. -
Cut the Bird Entry:
Use a hole cutter or a sharp knife to create a circular entrance, sized appropriately for the birds you wish to attract (usually 1.25 to 1.5 inches). Smooth the edges with a damp sponge. -
Build Up the Tree:
Roll thin coils of clay to represent the tree trunk and branches. Score and slip these onto your traced lines, creating a network that wraps around the vessel. -
Integrate the Roots:
At the base, splay the coils out to look like roots gripping the earth. Use a modeling tool to blend the edges of the coils onto the main body so they look attached but raised. -
Add Texture to Bark:
Use a serrated rib or a needle tool to scratch vertical lines into the added coils, mimicking the rough texture of tree bark. -
Sculpt the Face:
In the negative space created by the branches, add small pads of clay to build up the nose, brow ridge, and lips. Keep the relief low-profile so it feels like it’s part of the vessel wall. -
Refine Facial Details:
Carve the eyes with a peaceful, hooded expression. Smooth the cheeks and forehead into the surrounding ‘bark’ border. I like to use a soft brush here to soften any harsh tool marks. -
Add Leaves:
Form small, flattened teardrop shapes from clay. Score and slip these onto the branches, pressing a vein into each one with your needle tool.
Step 3: Glazing and Finishing
-
Bisque Fire:
Allow the piece to dry slowly to prevent cracking, especially around the added coils. Bisque fire to your clay body’s specifications (usually Cone 04 or 06). -
Apply Oxide Wash:
Brush a red iron oxide wash over the entire piece, getting into every crevice of the bark and face. Wipe it back with a damp sponge, leaving the dark color only in the textures and recesses to highlight the carving. -
Wax Resist:
Apply wax resist carefully over the face, the tree bark, and the rim of the bird hole. This will keep the matte, earthy oxide look on these features while allowing glaze elsewhere. -
Touch Up Leaves:
If you want the leaves to remain unglazed like the bark, wax them too. Otherwise, leave them unwaxed to pick up the green glaze. -
Apply Shadow Green Glaze:
Dip or brush a translucent green or celadon glaze over the negative spaces (the smooth parts of the vessel). The glaze will pool slightly around the raised features, adding depth. -
Final Fire:
Glaze fire the piece to maturity (often Cone 5 or 6 for stoneware). Ensure the hanging loop is clear of glaze so it doesn’t fuse to the kiln post.
Pro Tip: Depth
When wiping back the oxide wash, use a fairly wet sponge and light pressure. This keeps the deep recesses very dark, making the face and bark pop.
Adding a sturdy natural twine rope through the top loop completes this woodland spirit’s transformation into a functional home.
Moon-and-Stars Cutout Lantern Birdhouse
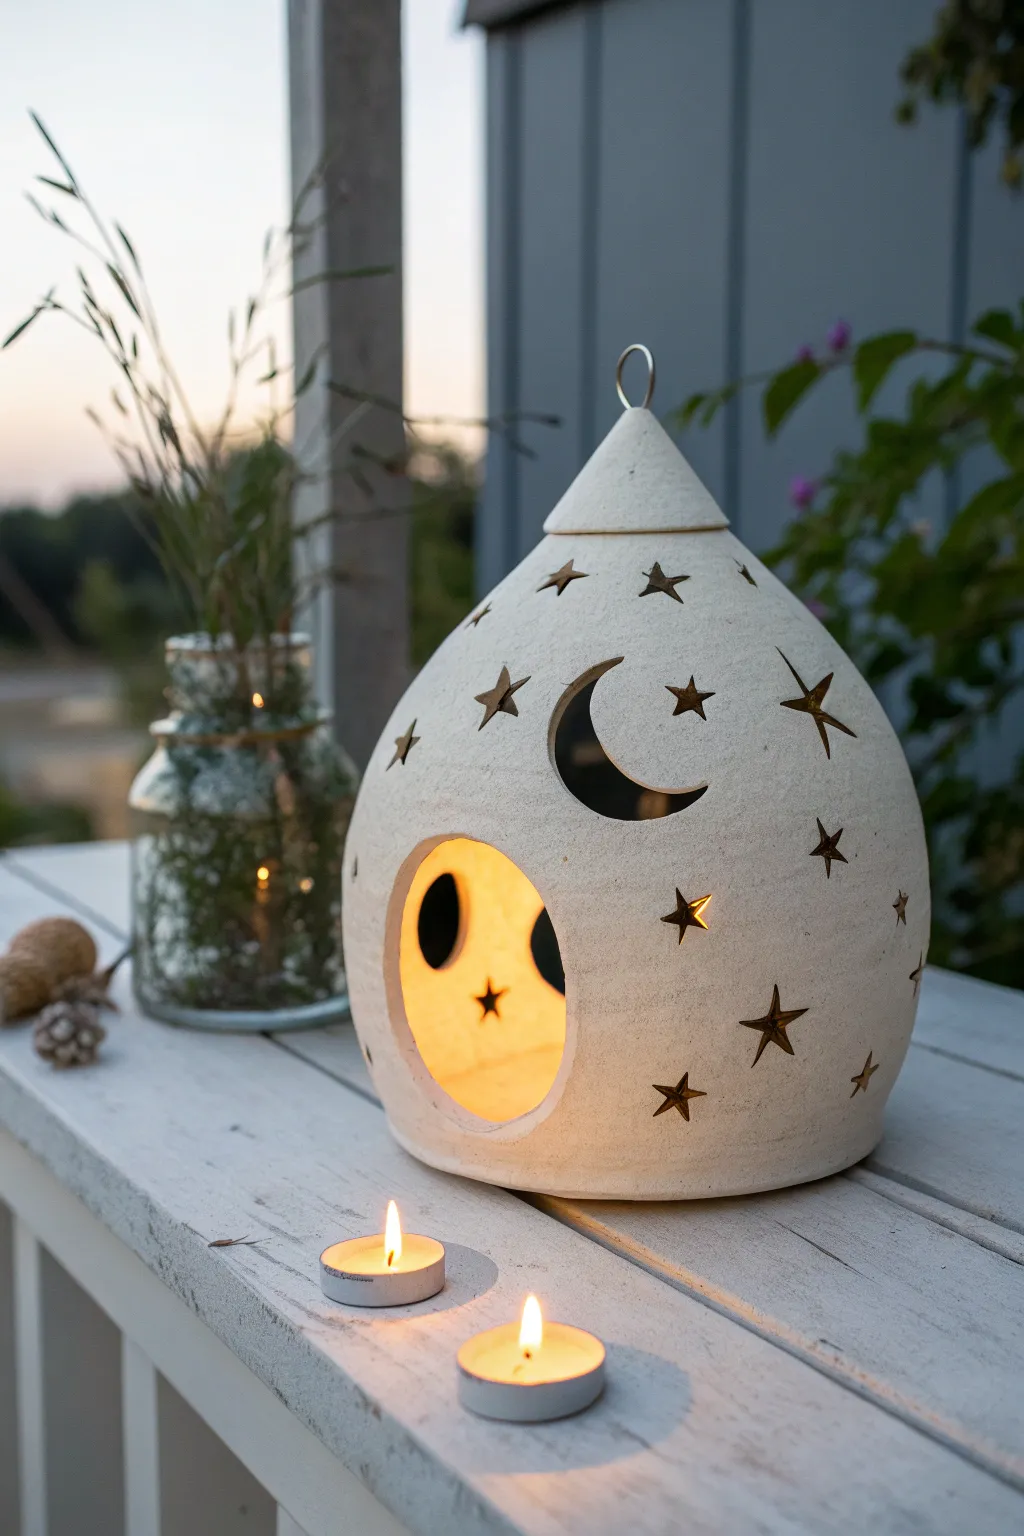
Transform humble clay into a magical garden accent with this moon-and-stars lantern birdhouse. The speckled stoneware body features hand-carved celestial cutouts that cast a warm, inviting glow when lit from within, doubling as a cozy shelter for feathered friends during the day.
Step-by-Step
Materials
- White or speckled stoneware clay (about 3-4 lbs)
- Pottery wheel (or materials for coil building)
- Wooden modeling tools
- Metal kidney scraper
- Pin tool or needle tool
- Small star-shaped cookie cutters (varying sizes)
- Fettling knife
- Sponge
- Wire clay cutter
- Kiln (or access to a firing service)
Step 1: Throwing the Form
-
Center and open:
Begin by wedging your clay thoroughly to remove air bubbles. Center the mound on the wheel head and open it up, leaving a floor about half an inch thick to support the structure. -
Pull the cylinder:
Pull the walls up into a tall, wide cylinder. Aim for a height of about 8-10 inches, keeping the walls relatively thick (about 1/4 inch) to support the cutouts later. -
Belly the form:
Using a rib tool on the outside and your hand on the inside, gently push the clay outward from the inside to create a rounded, bulbous belly shape. Be careful not to stretch the clay too thin near the widest point. -
Collar the neck:
Slowly collar the top inward to close the form. Compress the clay frequently to prevent buckling. Bring it to a narrow opening at the very top, creating a teardrop silhouette. -
Create the lid gallery:
Instead of closing it completely, refine the top rim to create a gallery (a small ledge) if you want a removable lid, or simply smooth the rim if you are making the lid separately. -
Throw the cap:
Throw a small, separate cone shape to serve as the cap or roof peak. Add a small clay loop to the top of this cap for hanging or lifting.
Clean Bevels
When cutting stars, let the clay firm up slightly more than usual. This prevents the tiny points of the stars from dragging or tearing as you pull the cutter out.
Step 2: Carving & Refining
-
Leather hard drying:
Allow the main body and the cap to dry to a leather-hard state. The clay should be firm enough to handle without warping but soft enough to carve easily. -
Trim the base:
Flip the main form over (using a chuck or foam bat) and trim the excess clay from the bottom to create a clean, defined foot. -
Mark the door:
Decide on the ‘front’ of your birdhouse. Use a needle tool to lightly sketch a large, rounded archway or circular opening. This will be the main entrance (and where the light spills out). -
Cut the entrance:
Carefully cut out the main entrance using a fettling knife. Smooth the raw edges immediately with a damp sponge or your finger to prevent sharpness. -
Position the celestial shapes:
Plan your design by lightly sketching a crescent moon and scattered stars around the upper portion of the dome. I find it helpful to vary the star sizes for a more natural night-sky look. -
Punch out stars:
For clean, uniform stars, press small star-shaped cookie cutters into the clay and gently pop out the shapes. If you don’t have cutters, use a sharp detail knife to cut them by hand. -
Carve the moon:
Use your knife to carefully excise the crescent moon shape. Support the wall from the inside with your other hand to prevent the clay from collapsing under pressure. -
Bevel the cuts:
For a refined look, gently angle your knife or a clean-up tool to bevel the interior edges of the cutouts. This allows light to pass through more effectively.
Slumping Walls?
If the dome starts to sag while throwing, use a heat gun or hair dryer on the lower walls for a few minutes to stiffen them before adding more height or narrowing the neck.
Step 3: Finishing & Firing
-
Attach the cap:
Score and slip the contact points to attach the conical cap permanently to the body, or check that it fits snugly if leaving it removable for candle access. Blend the seam invisibly. -
Final smooth:
Wipe down the entire piece with a slightly damp sponge to remove any burrs, fingerprints, or clay crumbs. Ensure the loop at the top is secure. -
Bisque fire:
Let the birdhouse dry completely—this may take up to a week depending on humidity. Bisque fire the bone-dry piece to Cone 04 (or your clay’s specific bisque temperature). -
Glaze application:
Keep the exterior unglazed (raw clay) for that rustic, matte texture shown in the photo, or apply a matte white wash. If you want better light reflection, pour a glossy white glaze inside and swirl to coat the interior. -
Glaze fire:
Fire the piece again to the final maturity temperature of your clay (typically Cone 5 or 6 for stoneware). Once cool, place a tea light or LED candle inside to test the glow.
Place your finished lantern on a porch railing or garden table and watch the starlight dance as evening falls