There’s just something magical about turning a little lump of clay into a crisp, pretty bow that looks like it could be tied in real ribbon. Here are my favorite bow clay ideas—from classic, beginner-friendly shapes to creative statement pieces you can really make your own.
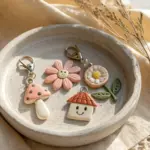
Mini Bow Charms
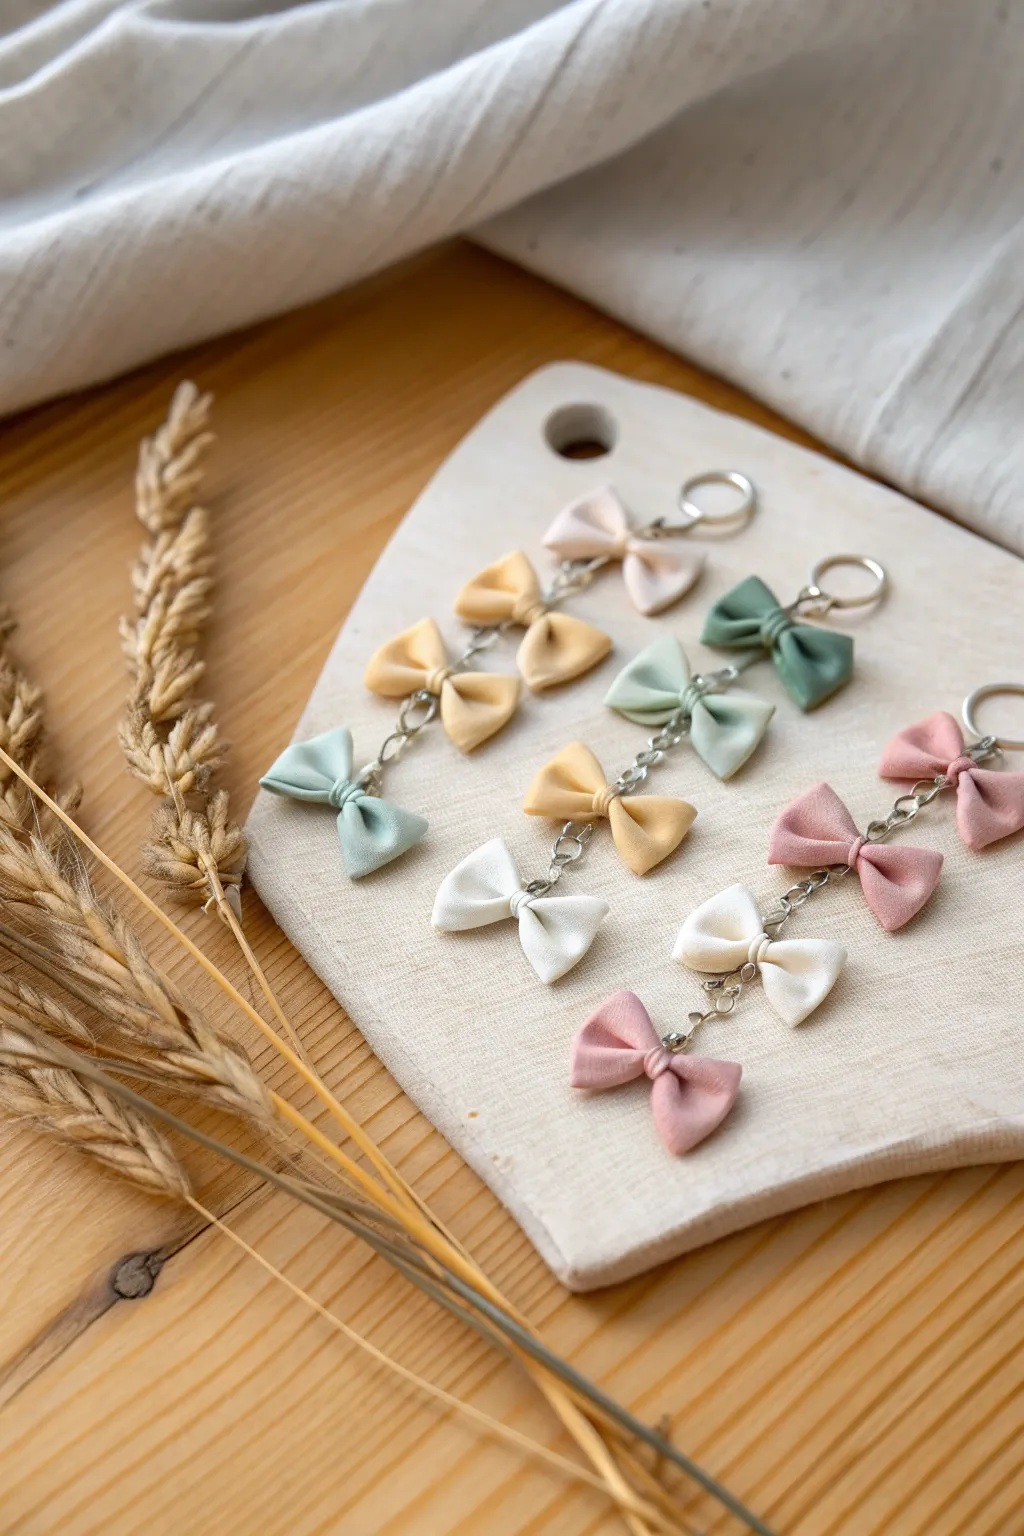
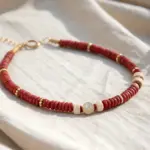
These delicate chained bow charms make for sweet keychains or elegant bag accessories, featuring soft pastel tones and a soft matte finish. The design links multiple miniature clay bows together with silver hardware for a delightful dangling effect.
How-To Guide
Materials
- Polymer clay in pastel shades (mint, cream, blush pink, light yellow, beige)
- Eye pins (silver)
- Small jump rings (silver)
- Chain links
- Keychain clasps or lobster clasps
- Rolling pin or pasta machine
- X-Acto knife or clay blade
- Needle tool or toothpick
- Superglue (gel type recommended)
- Round nose pliers
- Chain nose pliers
Step 1: Shaping the Bows
-
Condition the clay:
Start by warming small amounts of your chose pastel polymer clay in your hands until it becomes soft and pliable. If the clay is too hard, you can mix in a tiny drop of clay softener or baby oil. -
Create thin sheets:
Roll your conditioned clay out into a thin sheet, approximately 2mm thick. Aim for a consistent thickness so all your bows look uniform. -
Cut rectangles:
Using your clay blade, cut small rectangles. For the size shown in the image, aim for rectangles about 1 inch wide and 0.5 inches tall. You will need three rectangles per finished charm. -
Pinch the center:
Take one rectangle and gently pinch it directly in the center to create an accordion fold. This forms the basic bow shape. -
Refine the folds:
Use your needle tool to neaten the folds on either side of the pinch, ensuring the fabric-like draped effect looks natural and soft. -
Make the center band:
Cut a very thin, narrow strip of the same color clay to wrap around the pinched center. This hides the pinch point and mimics a knotted ribbon. -
Secure the band:
Wrap the thin strip around the center, trimming any excess at the back. Press gently to blend the seam so it won’t come apart during baking. -
Insert eye pins:
This is a critical step. Carefully insert an eye pin vertically through the center knot of the bow. The loop should stick out the top. If the pin is too long, trim it first. -
Add bottom connector:
For the top and middle bows of the chain, you need a connection point at the bottom too. Insert a second trimmed eye pin (or a cut piece of wire formed into a U-shape) into the bottom of the knot.
Keep it Clean
White and pastel clays pick up dust easily. Keep baby wipes nearby to clean your hands and tools often, or wear latex finger cots.
Step 2: Baking and Assembly
-
Bake the pieces:
Place your bows on a ceramic tile or baking sheet lined with parchment paper. Bake according to your clay manufacturer’s instructions (usually around 275°F/130°C for 15-30 minutes). -
Cool down:
Let the bows interact with the air and cool completely before handling. Polymer clay is slightly fragile when warm. -
Secure the pins:
Gently pull the eye pins out. Add a tiny dot of superglue to the shaft of the pin and reinsert it immediately. This ensures the hardware will never slip out of the baked clay. -
Prepare the chain:
Cut short lengths of silver chain, about 0.5 to 1 cm long depending on how much spacing you want between bows. -
Connect the bows:
Using your pliers, open the loop of the eye pin on the bottom of the top bow. Slide on a chain link, then close the loop securely. -
Link vertically:
Attach the other end of that small chain to the top loop of the middle bow. Repeat this process until you have a vertical stack of three bows. -
Add the clasp:
For the final step, open a jump ring and attach the top loop of the very first bow to your keychain clasp. -
Final inspection:
Check all jump rings and eye pin loops to make sure they are fully closed so the chain doesn’t break during use.
Floppy Bows?
If the bow loops are drooping before baking, prop them up with small bits of cornstarch-dusted tissue paper to hold the shape in the oven.
Now you have a charming accessory to add a touch of sweetness to your daily routine

Bow Stud Earrings
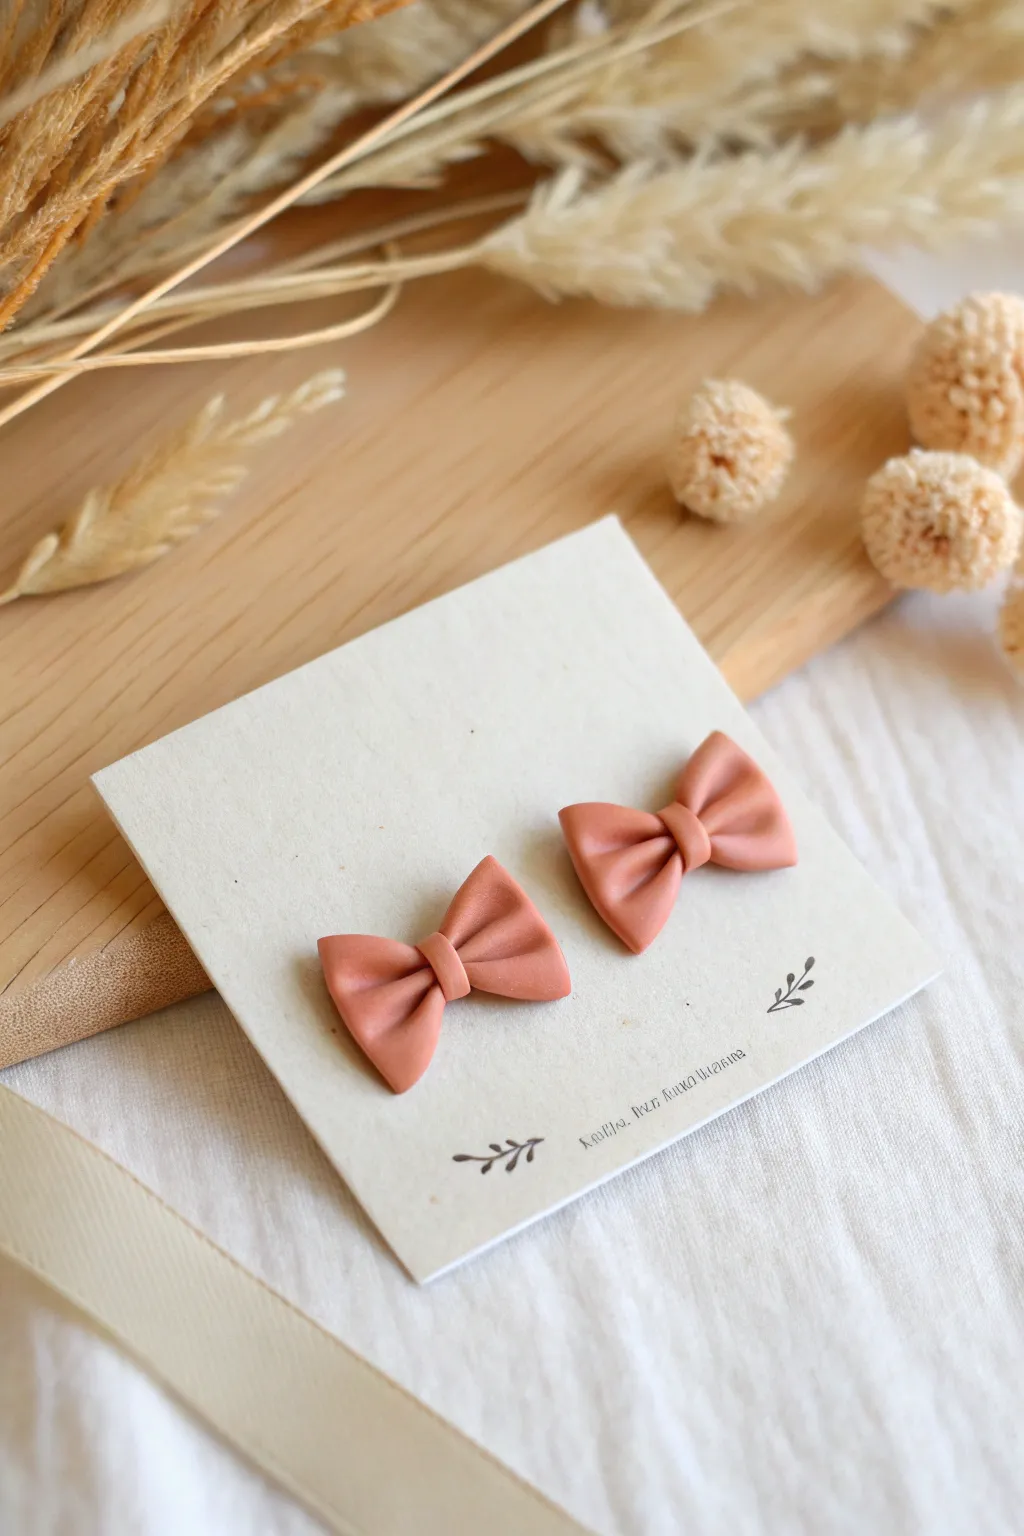
These sweet bow studs capture a soft, romantic vibe with their muted salmon-pink hue and realistic fabric-like folds. They make a perfect everyday accessory that adds just a touch of whimsy to any outfit without being overpowering.
Step-by-Step Guide
Materials
- Polymer clay (soft salmon or muted pink color)
- Small clay roller or acrylic rolling pin
- Sharp tissue blade or craft knife
- Needle tool or toothpick
- Small circle cutter (approx. 1 cm)
- Stainless steel earring posts
- Strong jewelry glue (E6000 or similar)
- Ceramic tile or glass sheet (for baking)
- Cornstarch (optional, for non-sticking)
- Oven thermometer
Step 1: Clay Preparation
-
Condition the Clay:
Begin by warming a small amount of clay in your hands, kneading it until it is completely pliable and soft. This prevents cracking later. -
Roll the Sheet:
Using your acrylic roller, roll the conditioned clay out onto your work surface. Aim for a thickness of about 2mm – you want it thin enough to fold delicately but sturdy enough to hold its shape. -
Cut the Base Strips:
With your tissue blade, cut two identical thin strips of clay. These should be approximately 4cm long and 1cm wide. -
Cut the Center Pieces:
Cut two much smaller, narrower strips for the center knots of the bows. These should be about 3mm wide and 1cm long.
Fingerprint Fix
If you see fingerprints on your raw clay, dip a soft brush in a tiny bit of acetone or baby oil and gently brush over the surface.
Step 2: Forming the Bows
-
Create the Loop:
Take one of the larger strips and gently fold the ends toward the center until they meet. Do not press them flat; you want to maintain the puffy loop shape on both sides. -
Pinch the Center:
Gently pinch the exact center where the ends meet. This creates the ‘cinched’ waste of the bow. I find that pressing slightly harder at the very center helps create those realistic fabric ripples. -
Add the Knot:
Pick up one of the small, narrow strips. Wrap it vertically around the pinched center of your bow loop to create the knot. -
Secure the Back:
Trim any excess length from the center strip on the backside of the bow and gently blend the clay seam with your needle tool so it doesn’t unravel. -
Shape the Folds:
Using your fingers or the side of a needle tool, gently indent the loops near the center knot to accentuate the ‘fabric’ drape. The loops should look like they are pulling toward the knot. -
Repeat the Process:
Repeat these shaping steps with your second set of clay strips to create the matching earring. Place them side-by-side to ensure they are symmetrical in size.
Step 3: Baking and Assembly
-
Prepare for Baking:
Place your finished bows on a ceramic tile or a baking sheet lined with parchment paper. Check one last time for any unwanted fingerprints and smooth them away. -
Bake the Clay:
Bake according to your specific brand’s temperature instructions. Usually, this is around 275°F (130°C) for 15-30 minutes. Use an oven thermometer to ensure accuracy. -
Cool Down:
Once baked, turn off the oven and let the clay cool completely inside the oven or on the counter before handling. Warm clay is fragile. -
Apply Glue:
Flip the cooled bows over. Apply a small dot of strong jewelry glue to the flat pad of your earring post. -
Attach Posts:
Press the glued post firmly onto the back center of the bow. Ensure the post is centered behind the knot area for the best balance when worn. -
Final Cure:
Allow the glue to cure fully (often 24 hours) for maximum durability before wearing or packaging your new earrings.
Texture Twist
Before folding the clay strip, gently press a piece of rough linen or canvas onto the clay sheet to give the ‘fabric’ a realistic textile weave pattern.
Enjoy styling these versatile little bows with your favorite casual outfits or giving them as handmade gifts

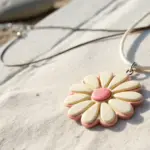
Bow Pendant Necklace
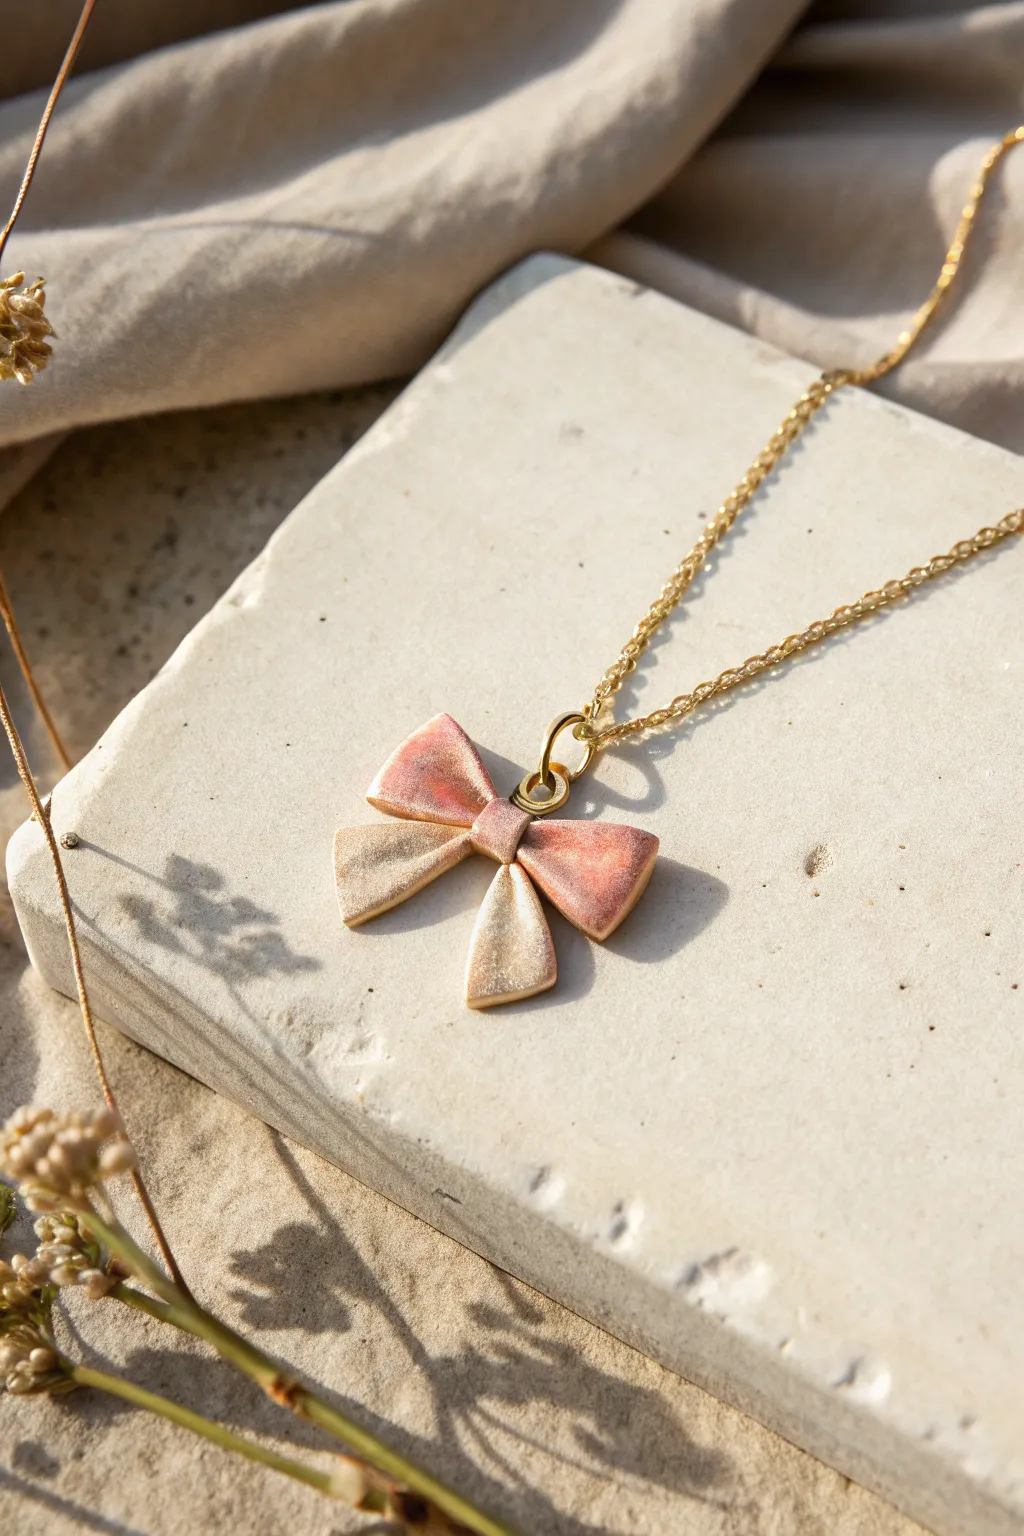
Capture the elegance of soft ribbons in durable form with this polymer clay bow pendant. Featuring a shimmering blend of dusty rose and gold metallic finishes, this dainty accessory adds a touch of handmade sophistication to any outfit.
How-To Guide
Materials
- Polymer clay (white or translucent base)
- Gold mica powder
- Rose/pink mica powder
- Acrylic roller or pasta machine
- Flexible tissue blade
- Small jump ring (gold)
- Medium jump ring (gold)
- Gold necklace chain
- Dotting tool or small ball stylus
- Liquid polymer clay or bake-and-bond
- Glossy varnish or UV resin (optional for shine)
- Soft paintbrush
- Jewelry pliers
Step 1: Preparing the Clay
-
Condition the Clay:
Begin by conditioning your polymer clay until it is soft and pliable. If you are using white clay, this will be your blank canvas; if using translucent, the mica effects will be deeper and more gem-like. -
Roll a Sheet:
Roll the clay out into a thin, even sheet, approximately 2mm to 3mm thick. You want it sturdy enough to hold its shape but delicate enough to look like fabric. -
Apply the Mica Powder:
Dip a soft paintbrush into the gold mica powder and brush it onto the bottom half of your clay sheet. It doesn’t need to be perfect; organic edges look beautiful. -
Add the Rose Accent:
Brush the rose or pink mica powder onto the top half of the sheet, blending the middle area slightly where it meets the gold to create a soft, ombre gradient.
Step 2: Forming the Bow
-
Cut the Strips:
Using your flexible blade, cut two rectangular strips approximately 1 inch long and 0.5 inches wide for the loops, and two slightly shorter strips for the tails. -
Form the Loops:
Take one long rectangle and gently fold the ends toward the center back to create a loop. Repeat with the second long rectangle. Don’t flatten them; keep the loops open and airy. -
Shape the Tails:
Take the two shorter strips and cut a ‘V’ notch or a slant at one end of each to resemble ribbon ends. Pinch the top of each tail slightly to give it a draped fabric look. -
Assemble the Base:
Place the two tails together at an angle on your work surface. Place the two loops on top of the tails so they meet in the center. Press gently to adhere them together. -
Create the Center Knot:
Cut a very small, narrow strip of clay. Wrap this vertically around the center point where all the pieces meet, covering the seams. I like to tuck the ends of this center strip behind the bow for a clean finish. -
Add Texture:
Use a dotting tool or a dull needle tool to gently impress soft creases radiating from the center knot into the loops and tails, mimicking the tension of gathered fabric.
Loose Powders?
To prevent mica powder from rubbing off after baking without using glossy glaze, spray a very light coat of matte fixative or aerosol varnish over the cooled piece.
Step 3: Hardware and Finishing
-
Insert the Hanging Loop:
Press a small jump ring directly into the top of the clay behind the center knot before baking. Secure it with a tiny drop of liquid polymer clay to ensure it bonds permanently. -
Bake the Pendant:
Bake the piece according to your specific clay manufacturer’s instructions (usually 275°F/130°C for 15-30 minutes). Use an oven thermometer to ensure accuracy. -
Cool Down:
Allow the pendant to cool completely inside the oven or on the baking tile. Moving it while hot can cause warping or cracks. -
Seal (Optional):
If you want extra durability or high shine, apply a thin coat of polyurethane varnish or UV resin. If you prefer the matte metallic look shown in the image, you can skip this step. -
Attach the Chain:
Using two pairs of jewelry pliers, open a medium-sized jump ring. Thread it through the small baked-in ring on the pendant and the necklace chain. -
Close the Ring:
Twist the jump ring closed securely, ensuring there is no gap for the chain to slip through.
Gem Setting
Before baking, press a tiny crystal or rhinestone into the center ‘knot’ of the bow for a sparkling focal point that elevates the jewelry look.
Now you have a charming, custom-made pendant ready to wear or gift to a friend


Wall-Hanging Clay Bow
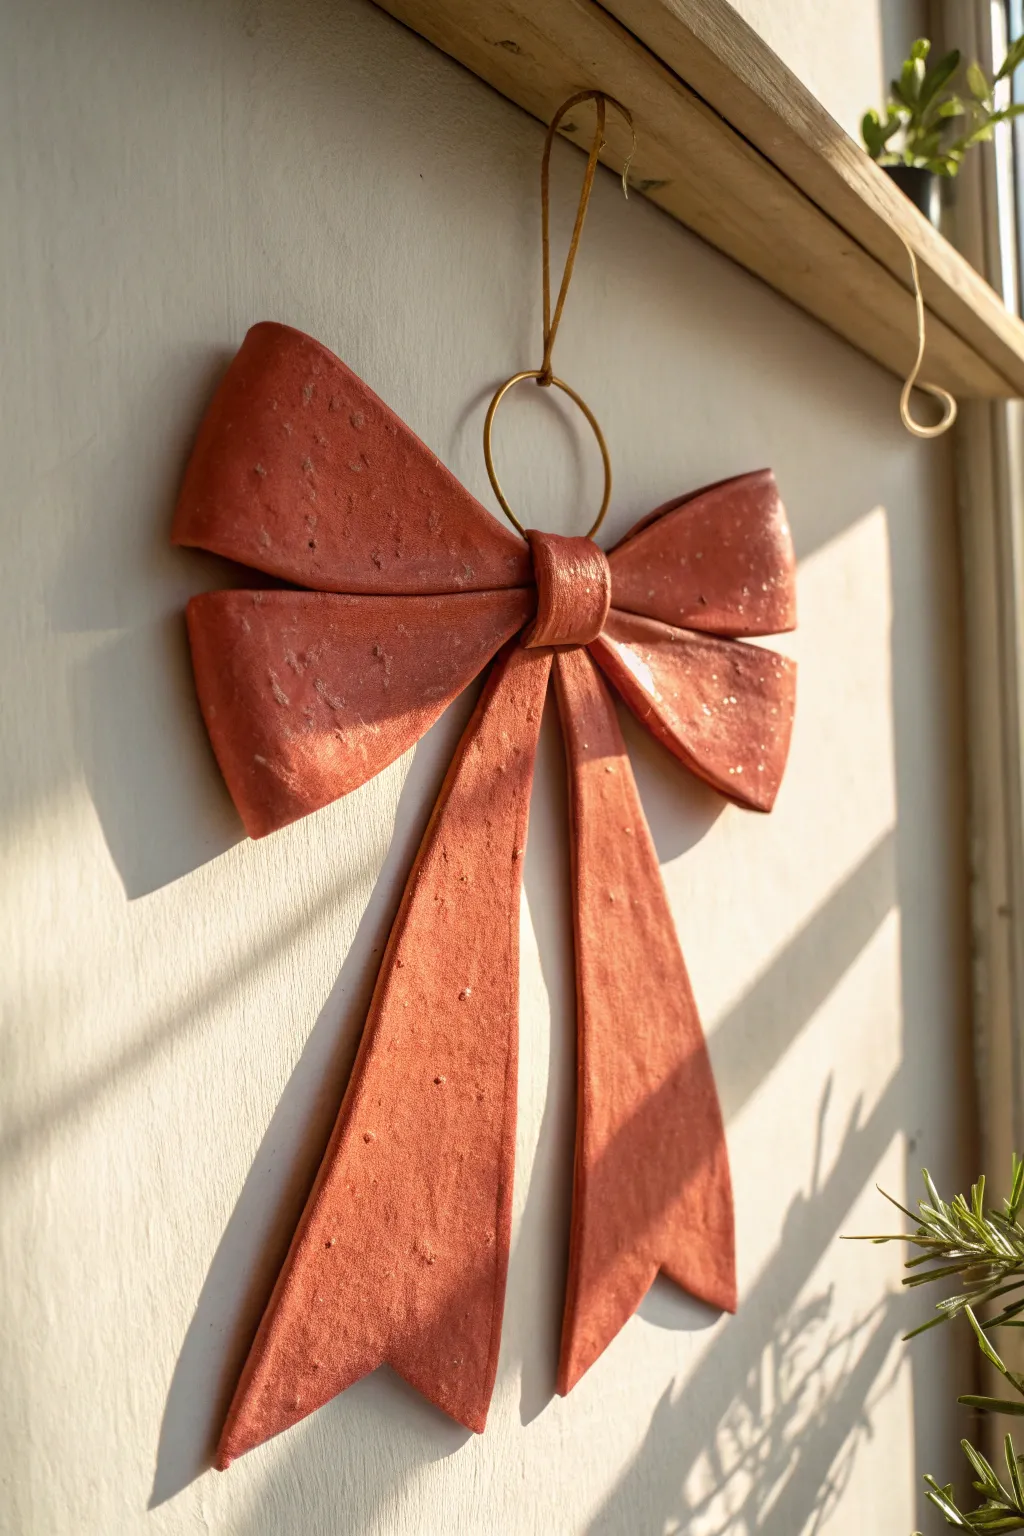
This charming, rustic wall hanging mimics the look of a fabric bow but is crafted from textured clay. Its gentle curves and warm terracotta hue make it a timeless piece of decor that catches the light beautifully when hung near a window.
Step-by-Step Tutorial
Materials
- Sienna or Terracotta colored polymer clay (or air-dry clay)
- Granite or speckle-effect clay (to mix in)
- Rolling pin or pasta machine
- Sharp craft knife or clay blade
- Gold armature wire (18-20 gauge)
- Ruler
- Parchment paper
- Liquid clay or oven-bake adhesive
- Two pieces of twisted paper or dowels (for support)
- Needle tool
- Sandpaper (optional)
- Twine or gold cord for hanging
Step 1: Preparation & Clay Mixing
-
Prepare your clay mix:
Begin by conditioning your main terracotta-colored clay until it is soft and pliable. If you want that realistic stone-like texture shown in the image, mix in a small amount (about 10%) of granite or speckled clay. -
Roll out the slab:
Roll the clay out onto parchment paper into a long, even slab. Aim for a thickness of about 3-4mm. A pasta machine is great for consistency, but a rolling pin works perfectly fine too. -
Create the texture:
If your clay is too smooth, gently press a piece of coarse sandpaper or a stiff bristle brush onto the surface to create a subtle, organic texture.
Smoother Surfaces
Before baking, brush a tiny amount of baby oil or clay softener over the surface with your finger. This removes fingerprints related to handling.
Step 2: Shaping the Bow
-
Cut the main strip:
Use a ruler and craft knife to cut a long, rectangular strip for the bow loops. A good size is approximately 1.5 inches wide by 8-10 inches long. -
Cut the tail pieces:
Cut two additional strips of the same width but slightly longer length (about 6 inches each) for the ribbons that hang down. -
Detail the tails:
At the bottom of each tail strip, cut an inverted ‘V’ shape to mimic a classic ribbon finish. Smooth the cut edges with your finger. -
Form the loops:
Take your long main strip and fold both ends toward the center to create two loops. Pinch the center where the ends meet the middle section. -
Add support:
Create tubes using parchment paper or use small dowels and insert them inside the loops. This is crucial—it prevents the heavy clay loops from collapsing flat while baking. -
Attach the tails:
Position the two tail pieces behind the pinched center of your loops. Angle them slightly outward. Press gently to adhere them to the back of the bow loops.
Level Up: Painted Patterns
After baking, dry brush lighter acrylic paint (like cream or pale pink) on the raised edges of the bow to exaggerate the texture and dimension.
Step 3: The Center Knot & Hanger
-
Prepare the center strip:
Cut a smaller, shorter strip of clay (about 0.75 inches wide and 2.5 inches long) to act as the central knot. -
Wrap the center:
Wrap this small strip vertically over the pinched center of the bow, covering the join where the loops and tails meet. Apply a drop of liquid clay to secure the overlap at the back. -
Create the wire loop:
Bend a piece of gold wire into a circle (about 1.5 inches in diameter). Twist the ends together to close the loop. -
Embed the hardware:
Press the twisted ends of the wire loop into the back of your wet clay bow, directly behind the center knot. Cover the wire connection with a small scrap of clay and blend the edges to lock it in place. -
Refine the shape:
Before baking, give your bow a final check. Gently push the tail ribbons so they have a slight wave or curve, rather than hanging perfectly flat against the wall.
Step 4: Baking & Finishing
-
Bake carefully:
Place the parchment paper with your bow onto a baking sheet. Bake according to your clay manufacturer’s instructions. I prefer to tent foil over the top to prevent scorching the terracotta color. -
Cool down:
Let the piece cool completely in the oven with the door slightly ajar. Sudden temperature changes can sometimes cause cracking in thicker pieces. -
Remove supports:
Once fully cool and hardened, gently slide out the paper or dowel supports from inside the bow loops. -
Add hanging cord:
Loop a piece of golden cord, leather, or twine through the metal wire circle at the top and tie it off at your desired length.
Hang your finished clay bow in a sunny spot to enjoy the warm shadows it casts

The Complete Guide to Pottery Troubleshooting
Uncover the most common ceramic mistakes—from cracking clay to failed glazes—and learn how to fix them fast.
Bow-Decorated Mug Wrap
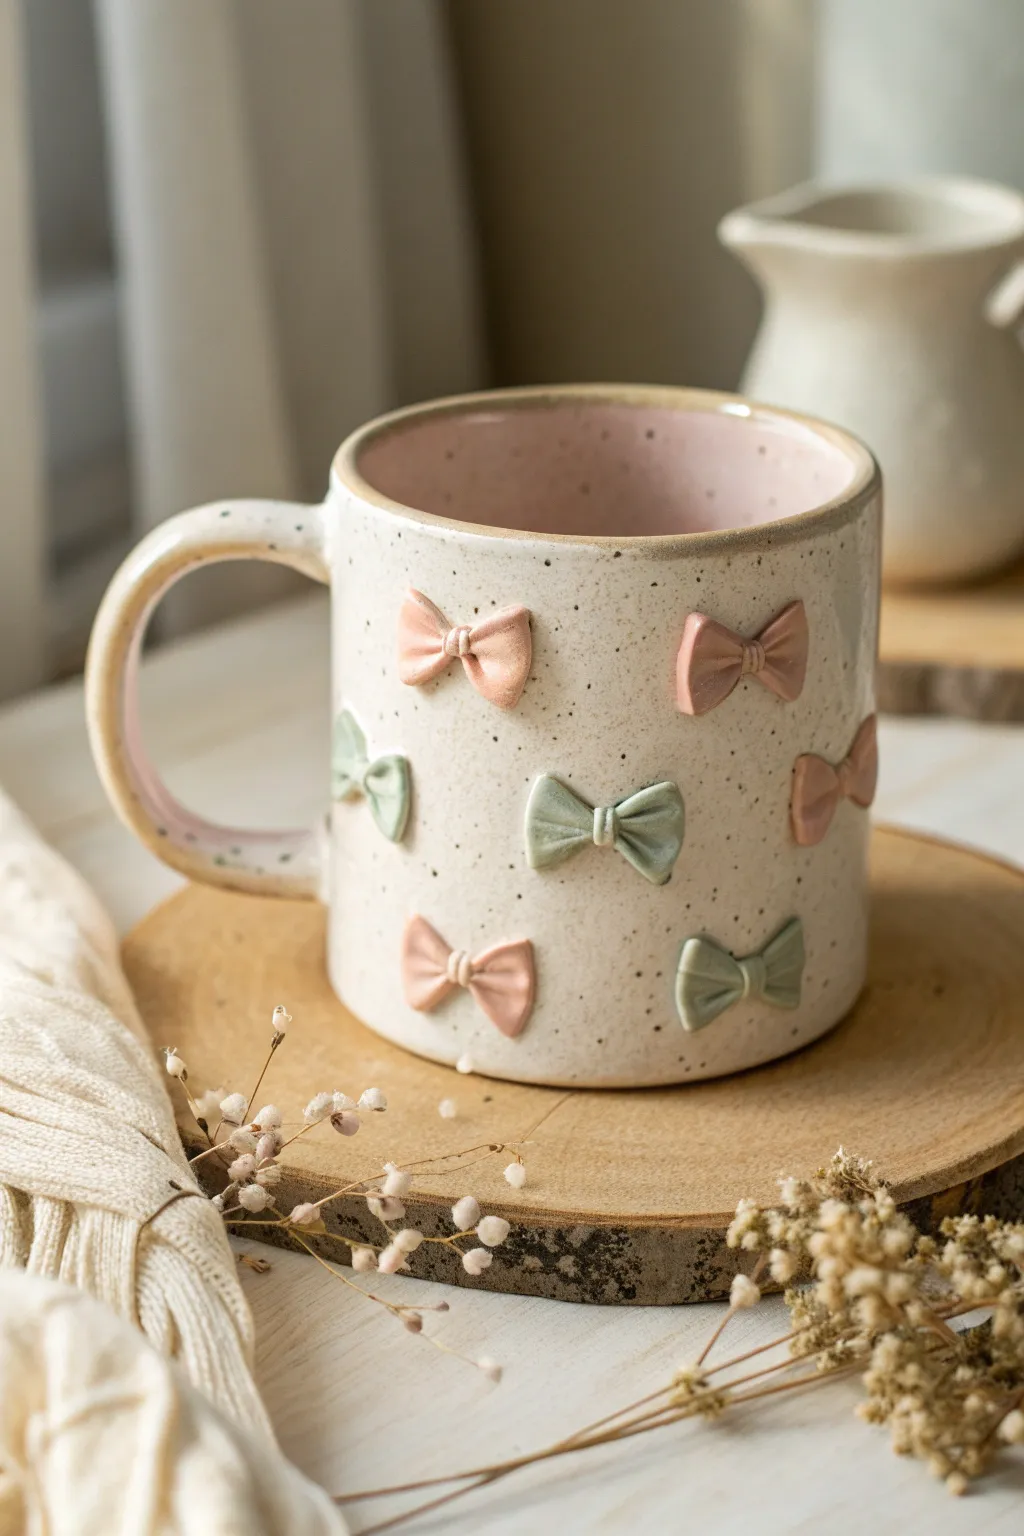
Transform a plain mug into a cottagecore dream with this delightful bow-embellished project. Using polymer clay and a speckled finish technique, you’ll create a durable, sweet piece of drinkware that looks like it came straight from a boutique pottery studio.
Detailed Instructions
Materials
- Plain ceramic mug (cream or off-white)
- Polymer clay (soft pink and sage green)
- Baking sheet
- Parchment paper
- Oven (for baking clay)
- Strong epoxy adhesive (E6000 or similar)
- Acrylic paint (dark brown or black)
- Old toothbrush
- High-gloss varnish or dishwasher-safe decoupage medium (like Mod Podge Dishwasher Safe)
- Clay sculpting tool or toothpick
- Rubbing alcohol
- Lint-free cloth
Step 1: Prepping the Canvas
-
Clean the surface:
Before adding anything, ensure your mug is completely free of oils and dirt. Wipe the entire exterior surface down thoroughly with rubbing alcohol and a lint-free cloth. -
Condition the clay:
Start with your soft pink polymer clay. Knead it in your hands for several minutes until it becomes warm, pliable, and easy to shape without cracking. -
Roll tiny logs:
Pinch off small pieces of the pink clay, roughly the size of a pea. Roll these into small, even logs about 3/4 of an inch long.
Curve Check
If bows deform while moving them from mug to baking sheet, bake them directly on an oven-safe glass jar or round pyrex dish to keep that perfect curve.
Step 2: Sculpting the Bows
-
Form the loops:
Take one clay log and gently press the ends inward toward the center to create two loops, leaving a small gap in the middle where the knot will go. -
Create the knot:
Roll a tiny, separate ball of clay and flatten it slightly. Press this over the center join of your loops to form the bow’s knot. -
Add texture:
Using a clay sculpting tool or a toothpick, press gentle indentations into the center knot and the loops to mimic the folds of fabric. This realistic detailing really elevates the look. -
Repeat for green bows:
Repeat the conditioning and sculpting process with your sage green clay. Aim for a mix of about 6-8 pink bows and 4-6 green bows, keeping them consistent in size. -
Shape to the curve:
Before baking, carefully press the back of each raw clay bow against the side of your mug. This curves the clay so it will sit flush against the rounded surface later.
Glazed Donut Effect
Mix a tiny drop of translucent liquid clay into your polymer clay before sculpting. It gives the bows a semi-transparent, porcelain-like quality after baking.
Step 3: Baking & Speckling
-
Bake the clay:
Place your curved bows onto a parchment-lined baking sheet. Bake them according to the specific temperature and time instructions on your package of polymer clay. -
Prepare the speckle paint:
While the bows cool, dilute a small amount of dark brown or black acrylic paint with water. You want a very fluid, inky consistency. -
Apply the speckles:
Dip an old toothbrush into the diluted paint. Hold it near the mug (and the cooled clay bows) and run your thumb across the bristles to flick tiny splatters of paint onto the surfaces. I prefer to practice on a piece of paper first to control the spray. -
Let paint dry:
Allow the speckled paint to dry completely on both the mug and the clay pieces. This usually takes about 15-20 minutes.
Step 4: Assembly & Sealing
-
Planning the layout:
Lay your mug on its side (supported by a towel so it doesn’t roll). Dry-fit the bows to plan your pattern, ensuring they are spaced evenly around the circumference. -
Glue the bows:
Apply a small dab of strong epoxy adhesive to the back of a bow. Press it firmly onto the mug in your desired spot and hold for at least 30 seconds to ensure initial adhesion. -
Continue placement:
Work your way around the mug, alternating colors and angles slightly for a playful, organic feel. Wipe away any excess glue immediately. -
Cure the glue:
Let the adhesive cure fully according to the manufacturer’s instructions. This is crucial for durability, often requiring 24 hours. -
Seal the work:
Apply 2-3 coats of a dishwasher-safe gloss varnish or decoupage medium over the entire outside of the mug (avoiding the lip area where you drink). Let each coat dry before adding the next. -
Final cure:
Allow the sealant to cure for the full recommended time (often several weeks for dishwasher-safe formulas) before washing or using.
Enjoy sipping your morning coffee from this charming, custom-made creation
Clay Bow Gift Toppers
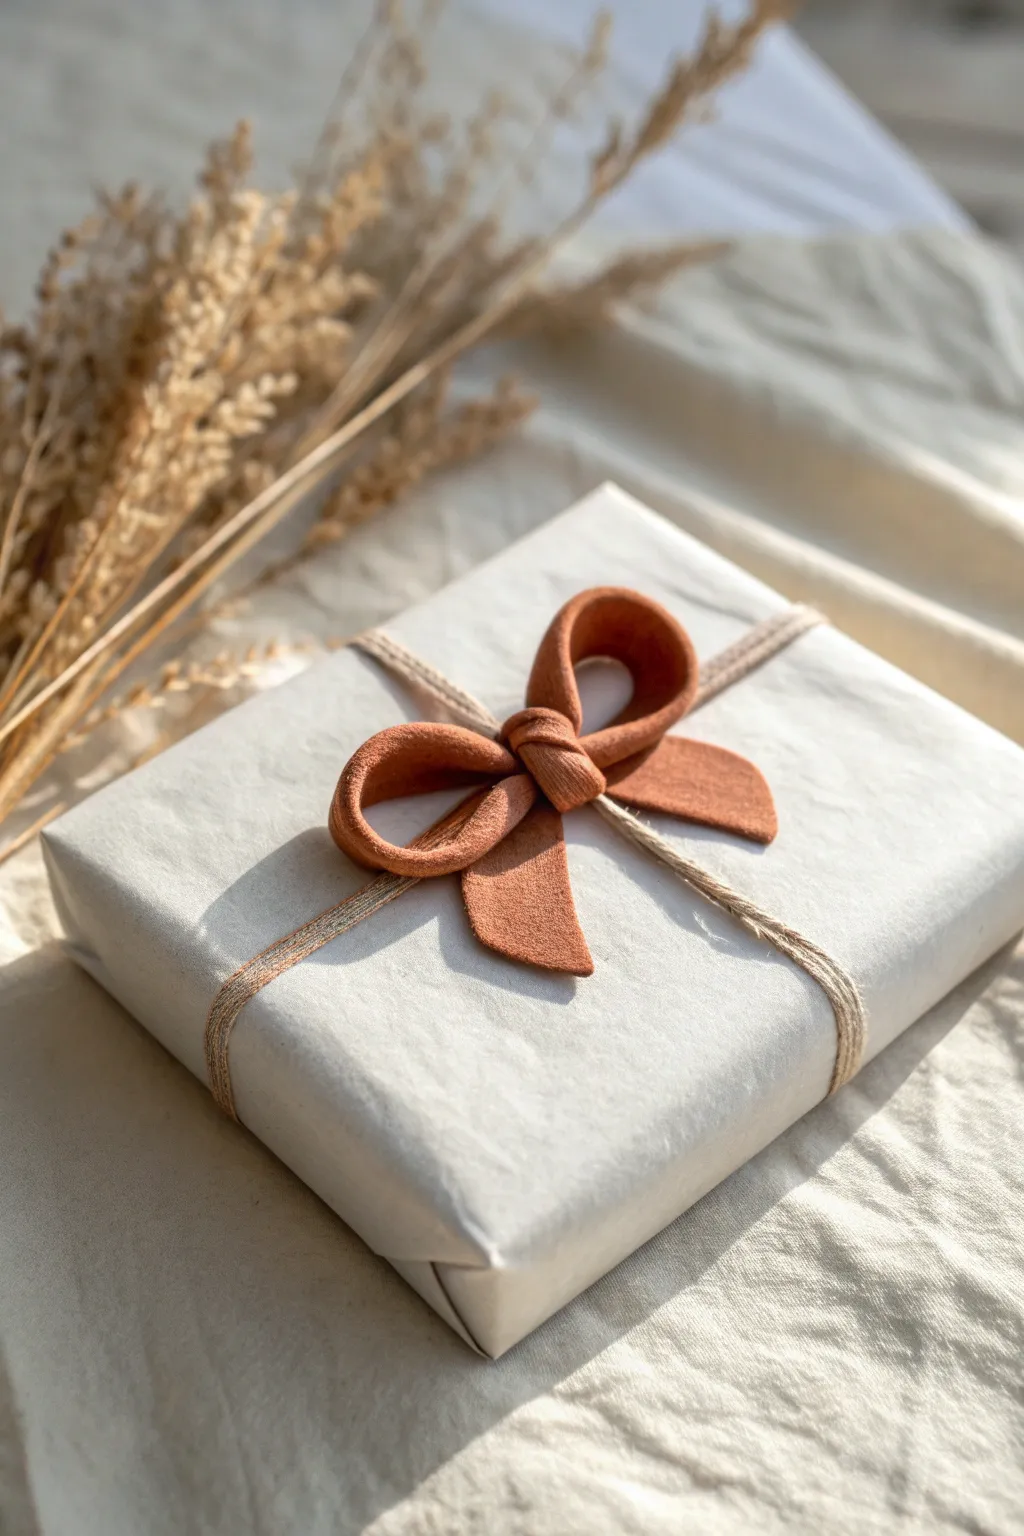
Elevate your gift wrapping with this sophisticated, handmade clay bow that adds a permanent keepsake to any package. The warm terra cotta tone and soft, rounded loops give it a modern yet timeless appeal that pairs beautifully with simple kraft or white paper.
Detailed Instructions
Materials
- Terra cotta colored polymer clay (or air-dry clay)
- Acrylic rolling pin
- Sharp crafting knife or clay blade
- Ruler
- Parchment paper or baking tile
- Oven (if using polymer clay)
- Super glue or strong craft adhesive
- Natural twine, jute, or thin cord
- Fine-grit sandpaper (optional)
Step 1: Preparing the Clay Strip
-
Condition the Clay:
Begin by warming the terra cotta clay in your hands. Knead it thoroughly until it is soft, pliable, and free of any crumbly texture. This is crucial for preventing cracks when you bend the loops. -
Roll It Out:
Place the clay on your parchment paper or work surface. Use the acrylic roller to flatten the clay into an even sheet, aiming for a thickness of about 3mm (1/8 inch). You want it sturdy but not bulky. -
Measure the Width:
Decide on the width of your bow ‘ribbon.’ For the look in the photo, aim for a strip about 1.5 to 2 cm wide. Mark this width lightly with your blade. -
Cut the Main Strip:
Using your ruler as a guide, cut a long, straight strip of clay. You will need a length of approximately 15-20 cm just for the loops and tails, depending on how large you want the final bow. -
Smooth the Edges:
Run your finger gently along the cut edges of the fresh clay strip to soften any sharpness left by the blade. This gives the finished piece a more organic, fabric-like appearance.
Step 2: Forming the Bow Shape
-
Create the First Loop:
Take one end of your strip and fold it inward towards the center point to create a loop. Press the end gently down in the center. Don’t crease the fold; keep the loop rounded and open. -
Form the Second Loop:
Repeat the process with the other end, bringing it to meet the first end in the center. Adjust the loops so they are symmetrical in size. -
Cut the Tails:
Cut a separate, shorter strip of clay (about 6-8 cm) for the tails. Place this strip horizontally underneath the joined center of your two loops. -
Notch the Tails:
If desired, cut a small inward ‘V’ or a slanted angle at the ends of the tail strip to mimic a real ribbon cut. -
Make the Center Knot:
Cut a small rectangle of clay, roughly 3 cm long. Wrap this piece over the top center seam (covering where the loops meet) and tuck the ends underneath the bow stack. This creates the ‘knot’ effect. -
Secure the Knot:
Gently press the knot piece from the back to fuse all the layers—loops, tails, and knot—together. Be careful not to flatten the nice fluffy loops you created.
Fixing Breaks
If a dried clay bow snaps, don’t panic. A tiny drop of gel super glue bonds clay instantly. Sand the seam lightly after gluing to hide the repair.
Step 3: Finishing and Attachment
-
Check the Shape:
Do a final inspection before curing. Ensure the loops align nicely and there are no fingerprints. If needed, lightly brush the surface with a tiny bit of cornstarch or water to smooth it out. -
Cure the Clay:
Bake the clay bow according to the specific temperature and time instructions on your package. I usually place a small piece of folded parchment paper inside the loops to support them while baking so they don’t slump. -
Cool Down:
Once baked, turn off the oven and let the clay cool completely before moving it. This prevents the clay from becoming brittle. -
Wrap the Gift:
While the bow cools, wrap your gift box in white or neutral paper. Wrap your chosen twine or cord around the box twice, securing it tightly with a knot on top. -
Attach the Clay Bow:
Apply a dab of super glue or strong adhesive to the back of the hardened clay bow. -
Final Placement:
Press the clay bow firmly directly onto the knot of the twine on your gift. Hold it in place for 30-60 seconds until the glue sets securely.
Textured Touch
Before baking, gently press a piece of canvas or linen fabric into the raw clay. This imitates a real ribbon texture and adds amazing detail.
This simple yet elegant touch turns your gift into a piece of art that the recipient can display long after opening.


What Really Happens Inside the Kiln
Learn how time and temperature work together inside the kiln to transform clay into durable ceramic.
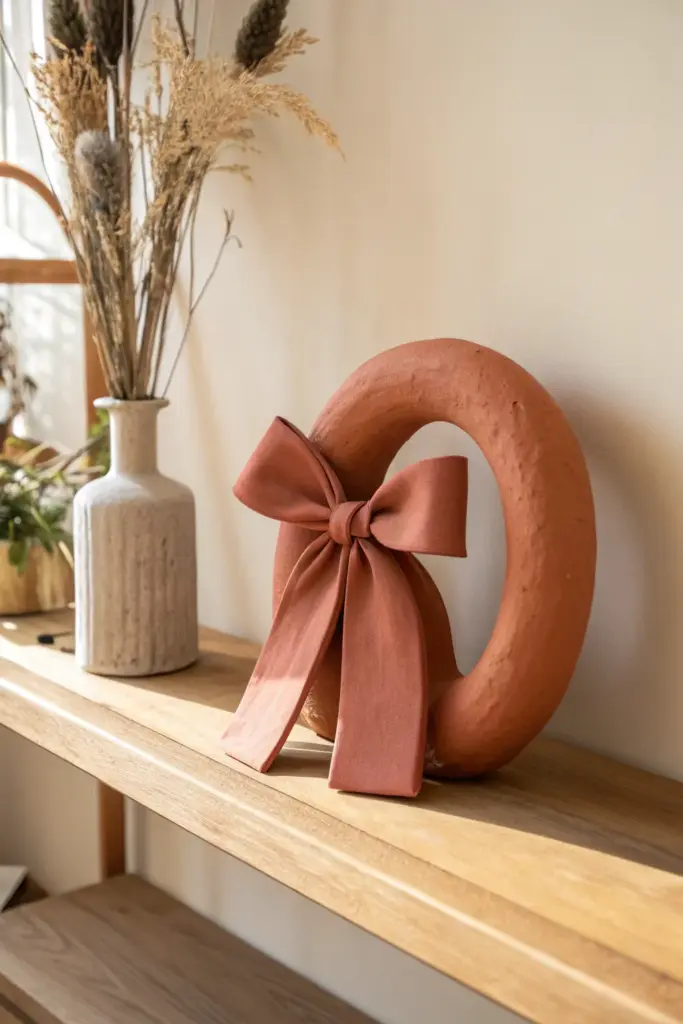
Oversized Statement Bow Sculpture
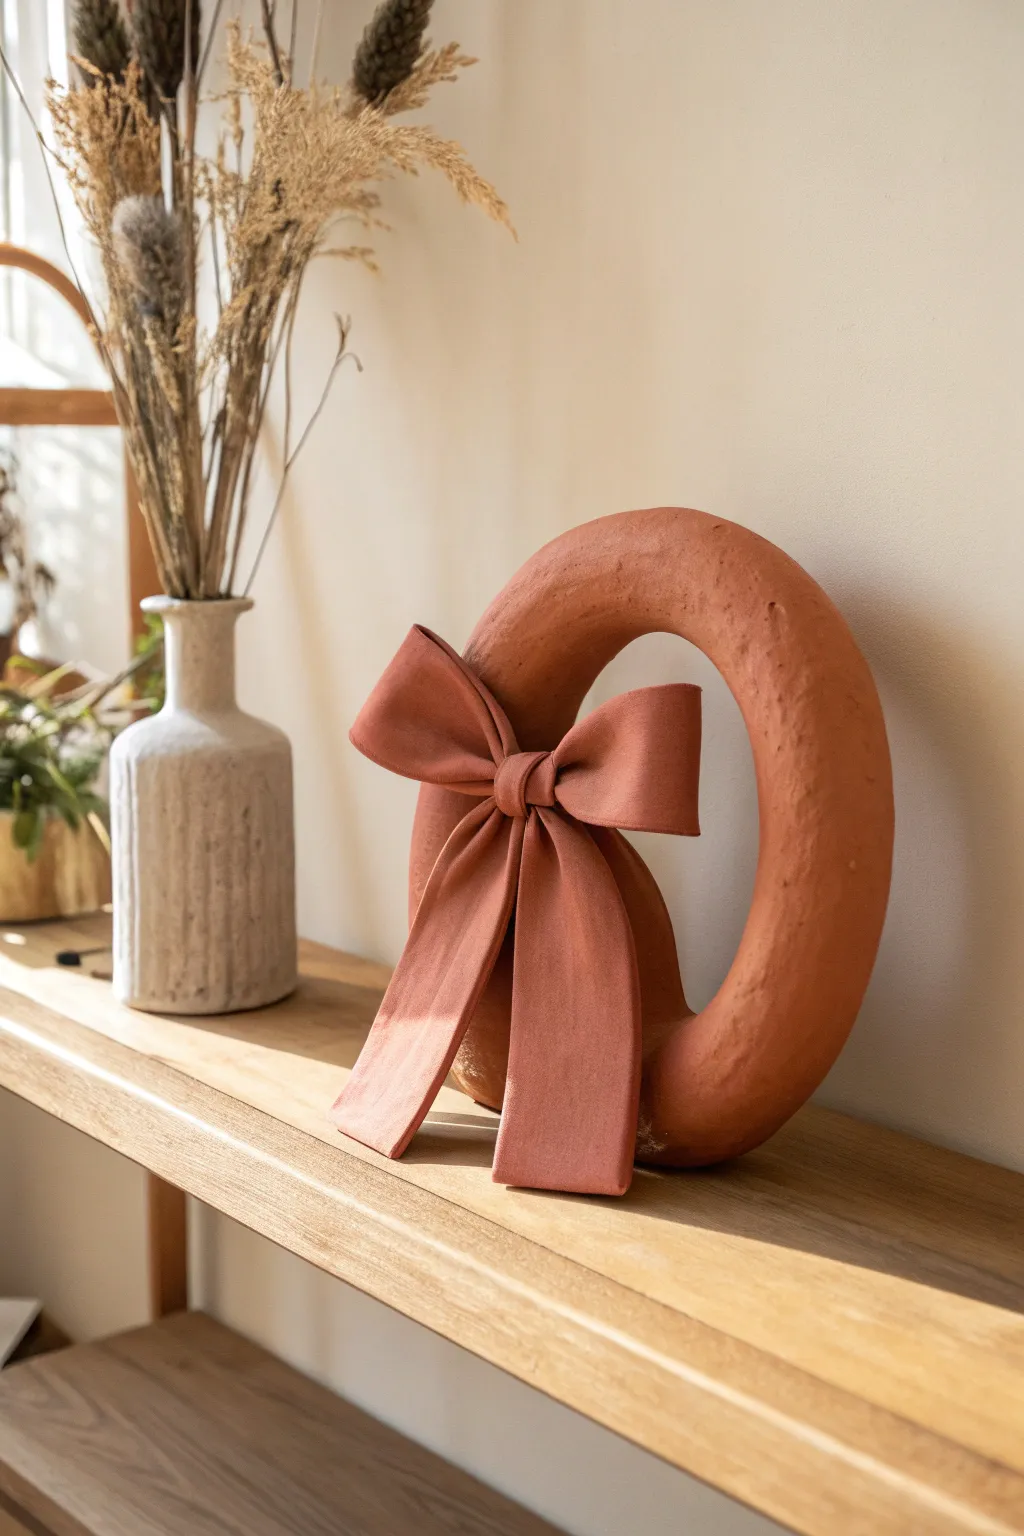
This striking sculptural piece combines modern minimalism with organic warmth, featuring a chunky ring form adorned with a permanently tied clay bow. Its earthy terracotta finish and generous proportions make it a sophisticated focal point for consoles or bookshelves.
How-To Guide
Materials
- Air-dry clay (terracotta color preferred, or white to be painted)
- Aluminum foil (large roll)
- Masking tape
- Rolling pin
- Clay sculpting tools (knife, smoothing rib)
- Water and sponge
- Fine-grit sandpaper
- Acrylic paint (terracotta or burnt sienna shade if using white clay)
- Matte sealant spray
Step 1: Building the Armature
-
Shape the core ring:
Begin by crumpling aluminum foil into a long, thick snake. Join the ends together to form a sturdy ring shape, aiming for an overall diameter of about 10-12 inches depending on your desired scale. -
Thicken the form:
Add more layers of foil to the ring to build up bulk. You want a thick, donut-like appearance, roughly 3-4 inches in thickness. Squeeze the foil tightly to ensure it’s dense and holds its shape. -
Secure with tape:
Wrap the entire foil ring completely in masking tape. This smooths out the crinkly foil texture and provides a better surface for the clay to adhere to. -
Construct the bow armature:
Using smaller pieces of foil, shape two flattened loops and two long tails for your bow. Also create a small nugget for the center knot. Scale these to look generous and oversized against your ring. -
Tape the bow parts:
Cover these bow components with masking tape just like the ring. Don’t attach them to the ring yet; it’s easier to cover everything in clay separately first.
Clay Consistency
If your clay feels too stiff to drape naturally, knead in a tiny amount of water or wrap it in a damp cloth for 10 minutes before rolling.
Step 2: Applying the Clay
-
Roll out clay sheets:
Roll out your air-dry clay into large, even slabs, approximately 1/4 inch thick. Keep a spray bottle or damp sponge nearby to prevent the clay from drying out while you work. -
Cover the ring:
Drape clay sheets over your taped ring armature. Smooth the seams together using a little water on your fingers or a sculpting tool until the foil is completely hidden and the surface is uniform. -
Cover the bow components:
Wrap each foil bow piece (loops, tails, and knot) in clay. Pay attention to the edges, smoothing them to look like folded fabric rather than sharp cuts. -
Texture the surface:
I like to use a slightly damp sponge to buff the clay surface. This removes fingerprints and imparts a subtle, organic texture similar to raw ceramic.
Step 3: Assembly and Finishing
-
Score and slip:
Before attaching, score (scratch rough lines into) the contact points on the ring and the back of the bow pieces. Apply a clay slip (clay mixed with water to a paste consistency) to act as glue. -
Attach the tails:
Press the two tail pieces onto the front of the ring first, angling them slightly outward for a relaxed look. Smooth the clay at the connection points so they merge seamlessly. -
Add the loops:
Place the two loop pieces on top of the tails. Press firmly but gently to avoid crushing the shape. Use extra coils of clay to reinforce the underside of the attachment if needed. -
Place the center knot:
Add the final center knot piece over the junction of the loops and tails. Sculpt creases into the knot to mimic the tension of fabric being pulled tight. -
Dry slowly:
Place the sculpture in a cool, dry area away from direct heat. Let it dry slowly for 2-3 days, turning it occasionally to ensure even drying and prevent cracking. -
Sand imperfections:
Once fully dry, gently sand any rough patches or sharp ridges with fine-grit sandpaper. Wipe away the dust with a dry cloth. -
Paint (if necessary):
If you didn’t use pre-colored terracotta clay, mix burnt sienna, orange, and a touch of white acrylic paint. Apply two coats for an opaque, rich finish. -
Seal carefully:
Finish with a matte spray sealant to protect your work while maintaining that chalky, unglazed ceramic aesthetic.
Faux Stone Texture
Mix baking soda into your acrylic paint before applying the final coat. It creates a gritty, tactile finish that mimics real terracotta pottery perfectly.
Now you have a stunning, oversized sculpture ready to bring warmth to your favorite shelf display