
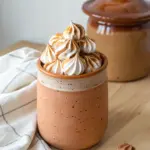
If you’ve got an ordinary glass jar, you’ve already got the perfect base for something magical. I love using polymer clay or air-dry clay to wrap, sculpt, and totally disguise that simple shape into a little world you can hold.
Woodland Cottage Bark Wrap
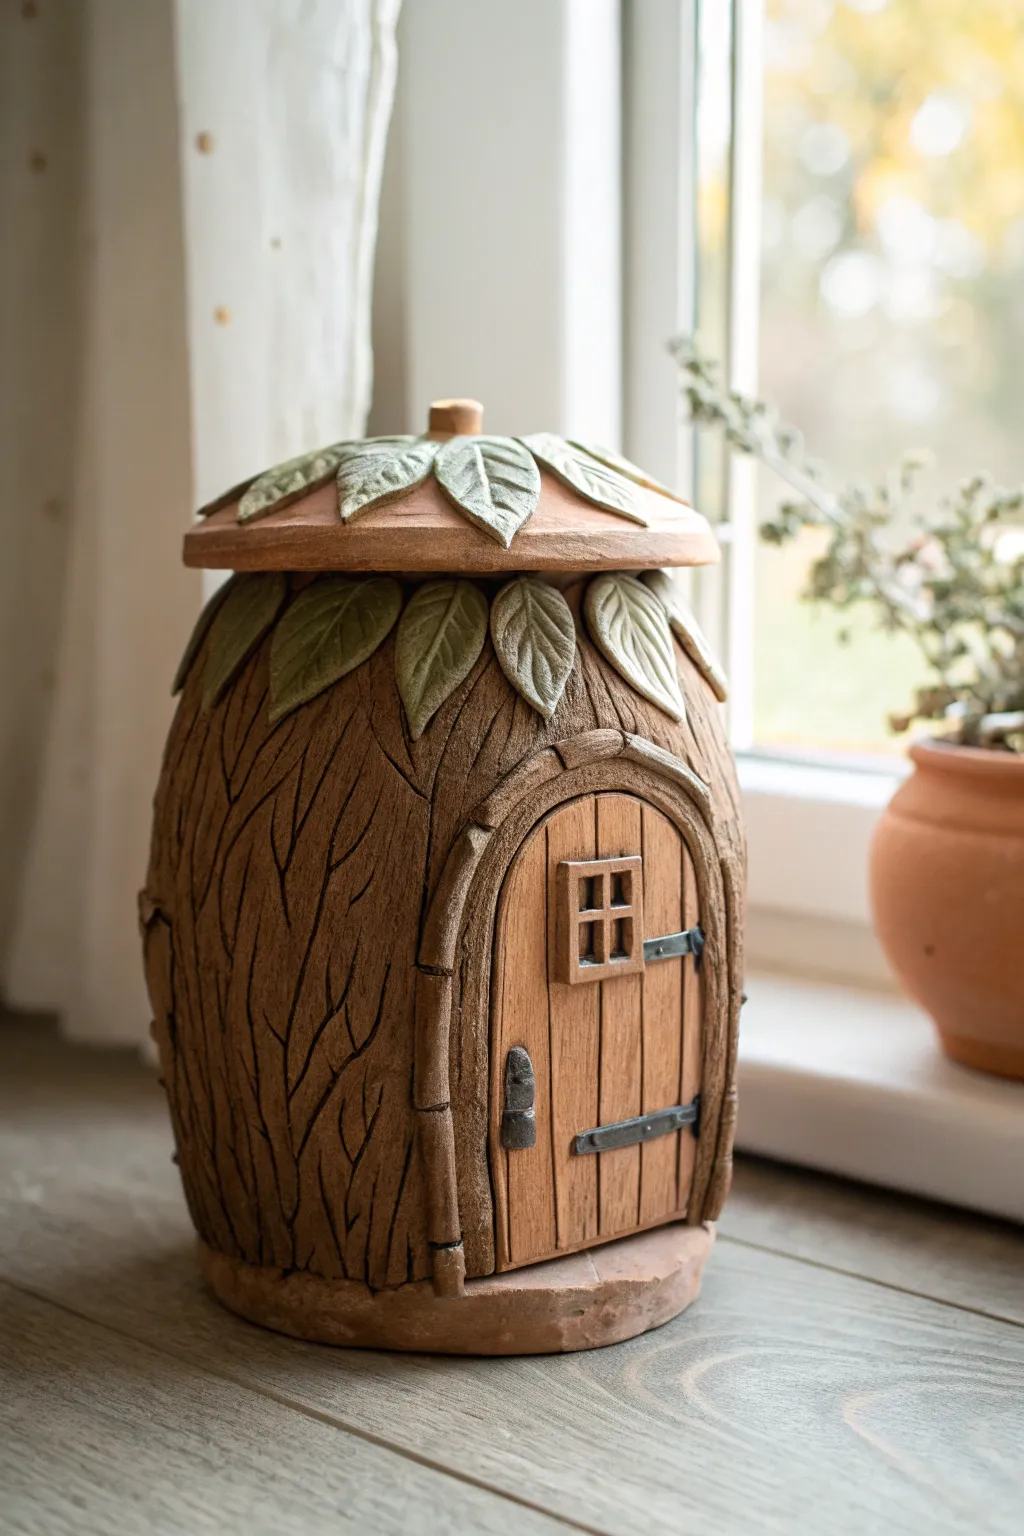
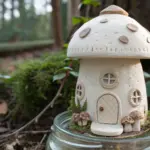
Transform a simple glass jar into a whimsical woodland dwelling perfect for storing little treasures. This project combines deep bark textures with delicate leafy details to create a cozy cottage vibe that feels straight out of a fairy tale.
Step-by-Step
Materials
- Clean glass jar with lid (straight-sided works best)
- Air-dry clay or polymer clay (terracotta or brown base)
- Rolling pin
- Clay sculpting tools (needle tool, ball stylus)
- Craft knife
- Texture tools (real bark, crumpled foil, or wire brush)
- Acrylic paints (dark brown, ochre, moss green, black)
- Matte sealant or varnish
- Water and sponge for smoothing
- Strong craft glue (PVA or tacky glue)
Step 1: Setting the Foundation
-
Prepare the jar:
Begin by thoroughly cleaning and drying your glass jar. If you are using a very smooth jar, scuffing the surface lightly with sandpaper can help the clay adhere better. -
Wrap the base:
Roll out a slab of clay approximately 1/4 inch thick. Apply a thin layer of glue to the glass jar, then wrap the clay slab around the cylinder, pressing firmly to remove air bubbles. Trim the excess at the seam and blend the edges together until invisible. -
Define the shape:
While the clay is soft, slightly curve the bottom edge outwards to create a rooted base, and round the top shoulder of the jar so it tapers gently toward the rim.
Cracks happen!
If the clay shrinks and cracks while drying, fill the gaps with a ‘slip’ made of clay mixed with water (repair paste) and sand it smooth once dry.
Step 2: Bark & Door Details
-
Texture the bark:
Using a needle tool or a wire brush, carve deep vertical grooves into the clay body. Wiggle your tool to create irregular, organic lines that mimic oak or elm bark, varying the depth for realism. -
Construct the door frame:
Roll two thin coils of clay and arch them on the front to create a door frame. Flatten them slightly and use a knife to press in wood grain textures. I like to make the top arch slightly pointed for a gothic cottage look. -
Create the door planks:
Inside the frame, score vertical lines to represent wooden planks. Add a small square of clay for the window frame, dividing it into four panes with tiny clay strips. -
Hardware details:
Fashion tiny metallic-looking hinges and a handle from small bits of clay. Press these onto the door and frame, using a dab of water to secure them.
Step 3: The Leafy Roof
-
Cover the lid:
Roll a flat circle of clay and press it over the jar lid, smoothing it over the edges. Create a slight dome shape in the center if your lid is flat. -
Sculpt the leaves:
Hand-mold several tear-drop shaped leaves. Press a central vein into each with a knife and add smaller diagonal veins for texture. -
Layer the roof:
Arrange the leaves in a radiating pattern on top of the lid, starting from the outer edge and overlapping as you move toward the center. Add a small clay knob or stem at the very top center. -
Add the overhang:
Mold a few more curved leaves and attach them to the upper shoulder of the jar body (just below where the lid sits), so they look like foliage draping down over the bark. -
Final drying:
Allow the entire piece to dry completely according to your clay’s instructions. Shrinkage may occur, so keep it away from direct heat sources to prevent cracking.
Add an interior glow
Use a clear glass jar and keep the door unpainted/translucent so you can place a battery-operated tea light inside for a warm window glow.
Step 4: Painting & Finishing
-
Base coat:
Paint the bark area with a dark brown acrylic to get into all the deep crevices. Wipe away the excess on the raised areas with a damp sponge while wet to accentuate the texture. -
Dry brushing bark:
Lightly dry brush a lighter ochre or tan color over the raised bark ridges. This highlights the texture we painstakingly carved earlier. -
Painting the leaves:
Paint the roof and overhang leaves with a muted sage green. Once dry, wash them with a watered-down brown paint to age them, then highlight the veins with a pale mint green. -
Door details:
Paint the door a warm honey wood color, and use metallic silver or black for the hinges and handle. -
Seal the work:
Protect your masterpiece with a coat of matte varnish to seal the paint and clay, giving it a durable finish.
Place your charming jar by a sunny window and enjoy the magical touch it adds to your room


Faux Stone Masonry Jar House
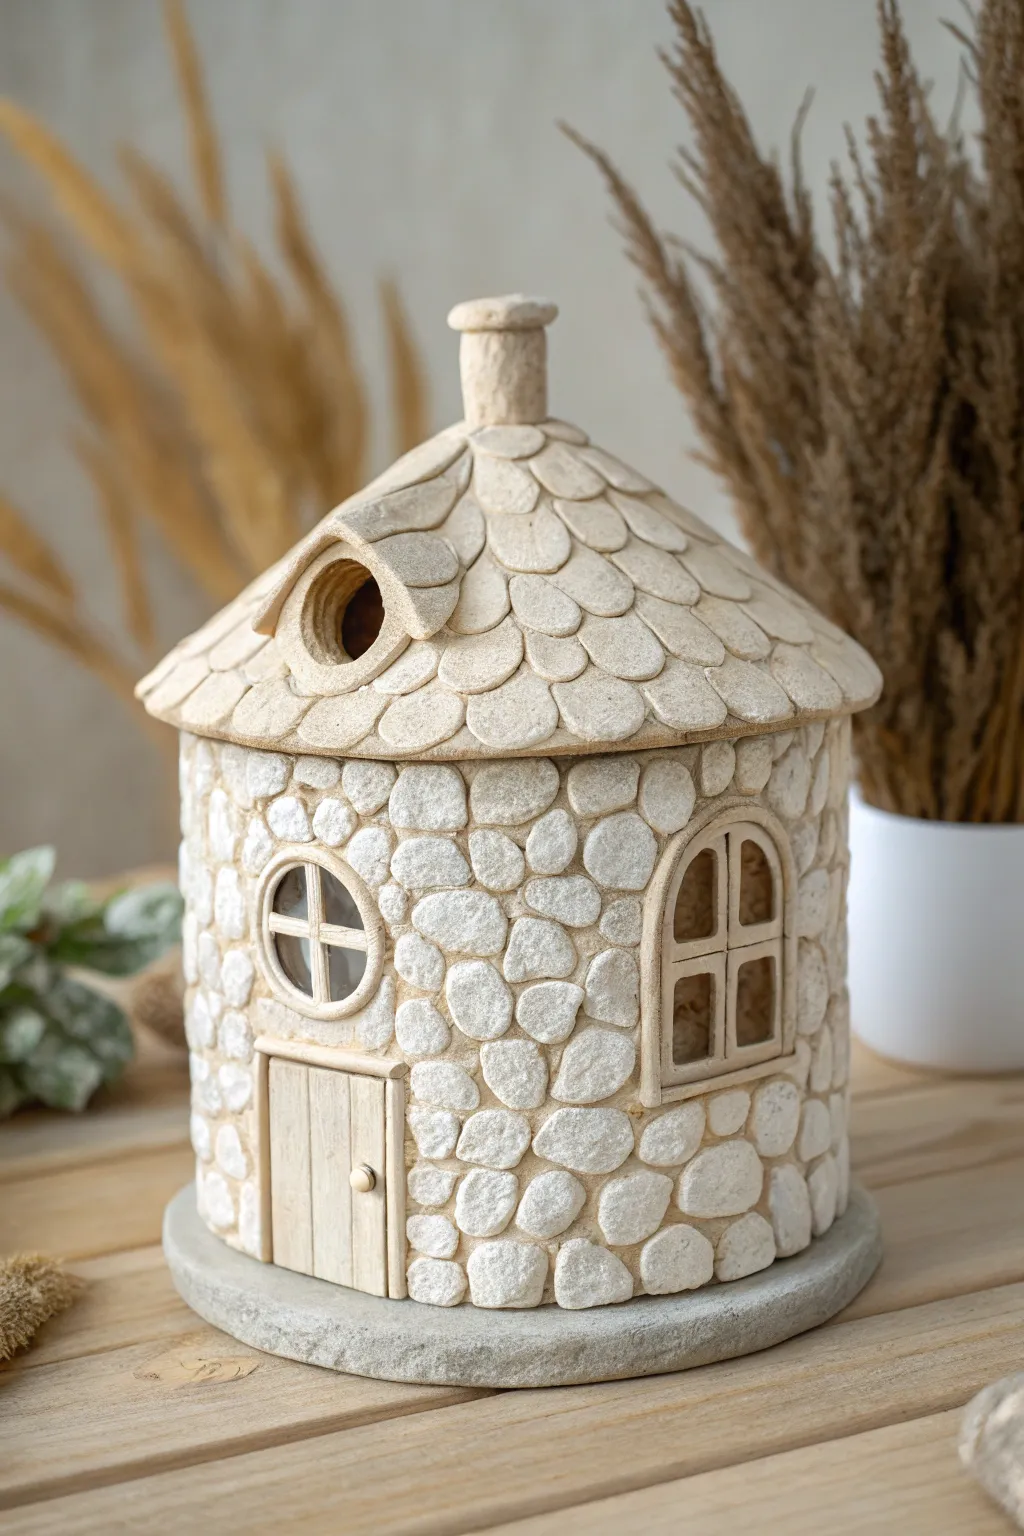
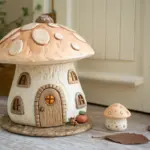
Transform a simple glass jar into an enchanting fairy dwelling complete with faux stone walls and a shingled roof. This project combines sculpting techniques with texture work to create a cozy, rustic piece perfect for home decor or as a magical nightlight.
Step-by-Step Tutorial
Materials
- Clean glass jar with a wide mouth and metal lid
- Air-dry clay (white or light grey)
- Texture tools (or crumpled aluminum foil)
- Clay sculpting tools (knife, needle tool)
- Acrylic paints (warm grey, cream, brown)
- Matte varnish or sealant
- Rolling pin
- Water and sponge for smoothing
- Strong craft glue (e.g., PVA or tacky glue)
- Cardboard or sturdy base (optional for the plinth)
Step 1: Base Structure & Walls
-
Prepare the Jar:
Begin by cleaning your glass jar thoroughly with rubbing alcohol to remove oils; this ensures the clay adheres properly. If you want the jar to be a lantern, keep the glass clear, but for this full-coverage look, apply a thin layer of PVA glue to the glass surface and let it become tacky. -
Apply the Base Layer:
Roll out a thin sheet of air-dry clay, roughly 3-4mm thick. Wrap this sheet around the cylindrical body of the jar, trimming off any excess at the seam and smoothing it together with a wet finger. -
Create the Stones:
Roll dozens of small balls of clay in varying sizes. Flatten them slightly into irregular oval and round shapes to mimic river stones. -
Building the Masonry:
Start pressing these flattened ‘stones’ onto the clay-covered jar, starting from the bottom and working your way up. Fit them close together like a jigsaw puzzle, leaving very narrow gaps for the ‘grout’ lines. -
Texturing the Stones:
To make the stones look realistic rather than smooth, gently tap the surface of each stone with a crumpled ball of aluminum foil or a stiff bristle brush. This adds an organic, pitted texture.
Shrinkage Issues?
If gaps appear between the clay and jar after drying, don’t panic. Fill cracks with a mix of white glue and fresh clay, smooth over, and let dry again.
Step 2: Windows & Door
-
Sculpt the Door Frame:
Roll a rectangular slab for the door. Use a knife tool to score deep vertical lines to resemble wood planks and add a tiny clay sphere for a doorknob. -
Attach the Door:
Clear a small space in your stonework (or attach directly over the base layer) and use a little water or slip to secure the door. Add a thin strip of clay around it as a frame. -
Create the Windows:
Fashion a round window frame and an arched window frame using coils of clay. If you want light to shine through later, cut holes in the base clay layer before attaching these frames. Add crossbars to the windows for a classic pane look. -
Positioning:
Place the arched window on the side and the round porthole window slightly higher or towards the front, nesting them snugly among your stone cladding.
Step 3: Roof & Details
-
Form the Roof Base:
Take the metal jar lid. Create a cone shape from aluminum foil or cardboard and glue it firmly to the top of the lid to form the pitch of the roof. -
Cover the Roof:
Cover the cone and lid structure with a smooth sheet of rolled clay. Trim the edges so there is a slight overhang. -
Apply Shingles:
Create many small, flat tear-drop or U-shaped clay pieces. I prefer to start at the bottom edge of the roof and overlap them row by row, working upward towards the peak. -
Add the Dormer Window:
Sculpt a small dormer window (a mini roof extension) and attach it to the slope of the main roof. Blend the clay seams carefully and continue the shingle pattern over it. -
The Chimney:
Form a small cylinder for the chimney. Texture it slightly to match the rough aesthetic and attach it near the apex of the roof. Top the roof point with a final clay cap or finial.
Make it Glow
Use a translucent clay for the window panes or leave the glass exposed. Place a battery-operated LED tea light inside to turn your cottage into a lantern.
Step 4: Base & Finishing
-
Create the Plinth:
Roll out a circle of clay slightly larger than the jar’s diameter to act as a stone foundation. Press the jar into it gently to create an indent, then texture the edge to look like a single large slab of stone. -
Dry Completely:
Allow the entire project to dry. Air-dry clay needs patience; let it sit for at least 24-48 hours away from direct heat to prevent cracking. -
Color Wash:
Mix a very watery wash of warm grey or diluted brown acrylic paint. Brush it over the stones and roof, letting the liquid settle into the crevices. -
Dry Brushing:
Dip a dry brush into white or cream paint, wipe most of it off, and lightly whisk it over the raised surfaces of the stones and shingles. This highlights the texture and gives that sun-bleached stone look. -
Seal:
Finish with a coat of matte varnish to protect your work and give the ‘stone’ a natural, non-glossy finish.
Now you have a charming little hideaway that looks as though it was built stone by stone
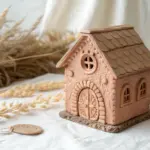
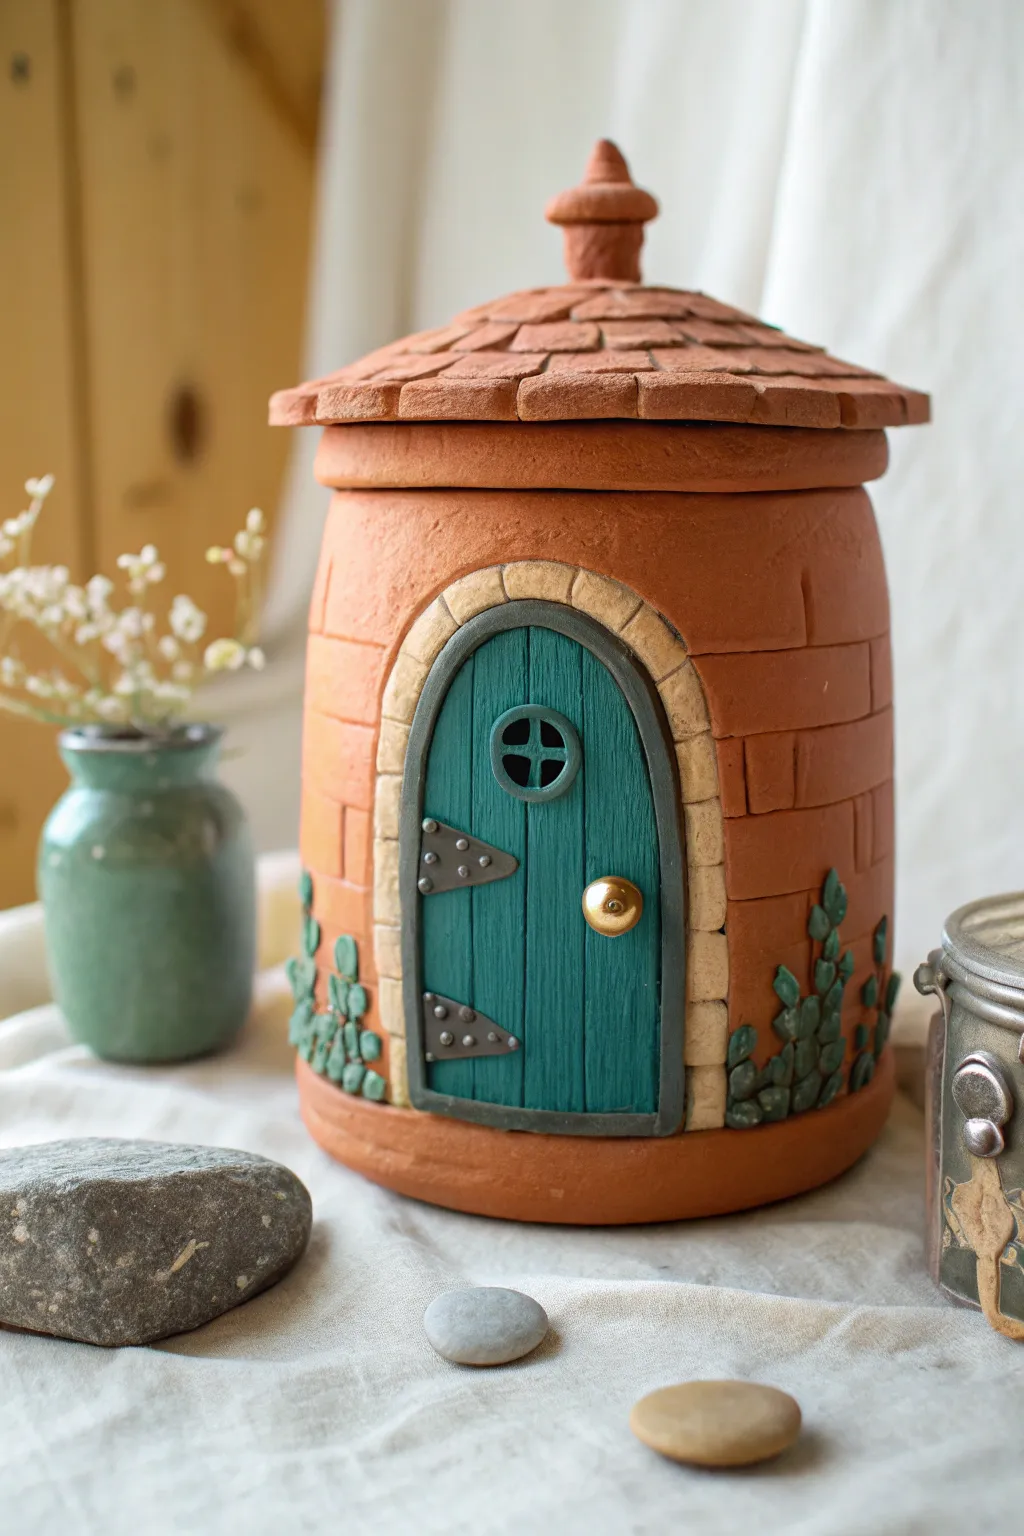
Brick Cottage With Arched Door
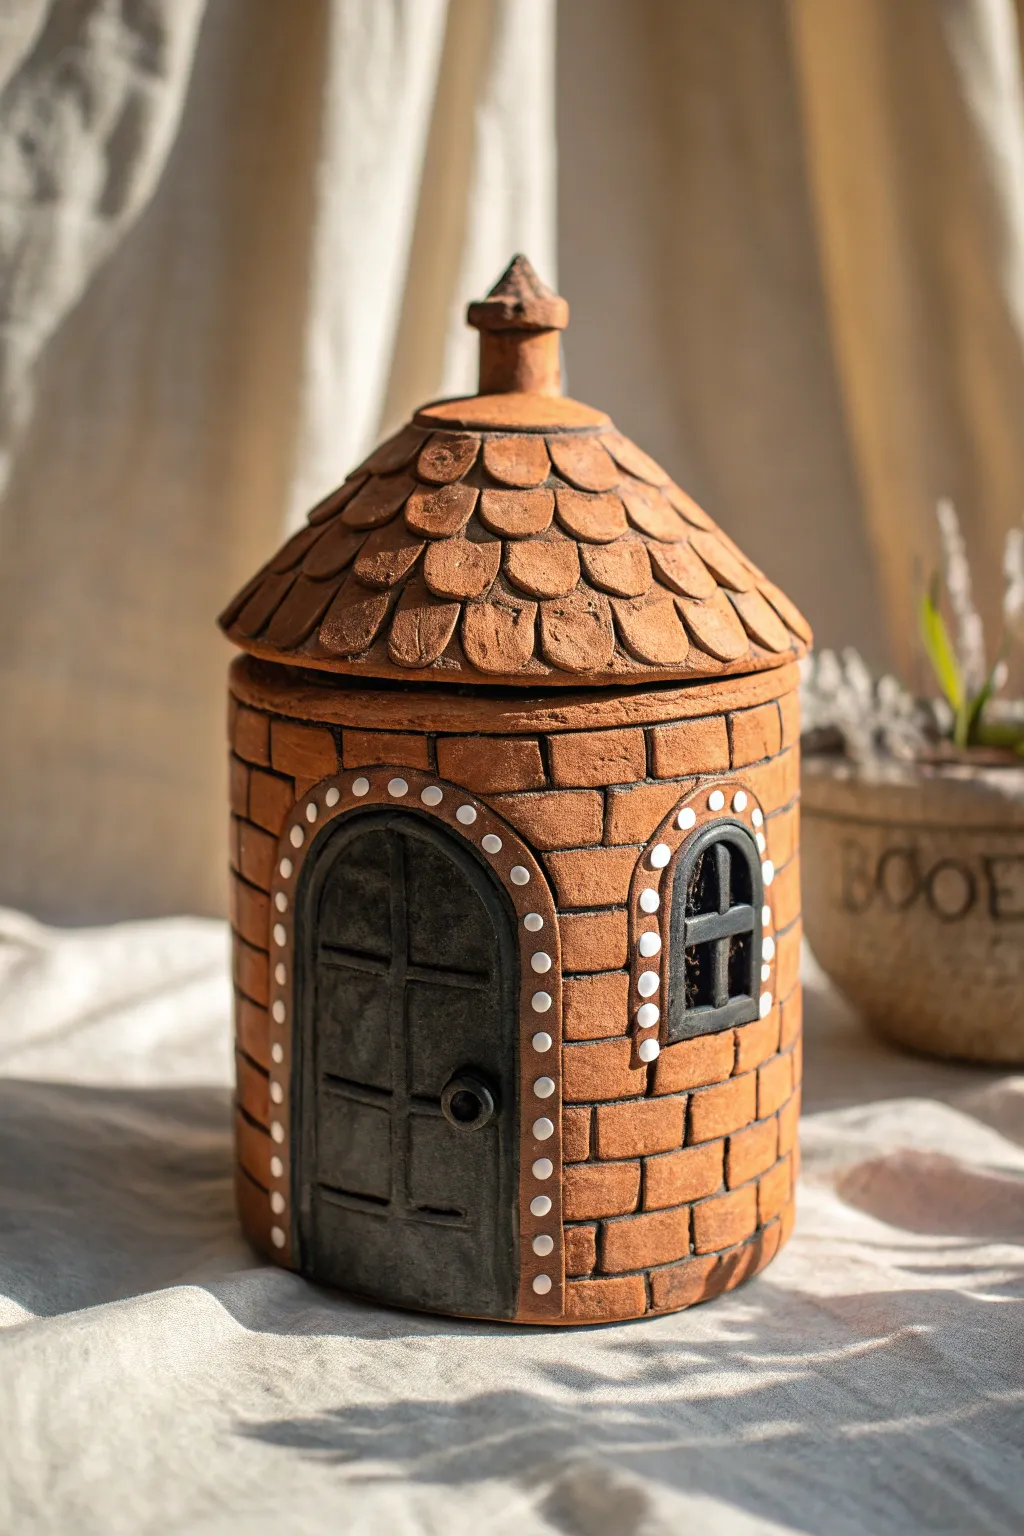
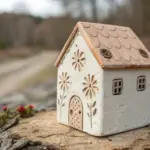
Transform a simple slab of clay into this enchanting storage vessel that looks straight out of a fairy tale. With its textured brick walls, scalloped roof tiles, and charming arched details, this functional art piece brings warm, rustic character to any shelf.
How-To Guide
Materials
- Red earthenware or terracotta clay
- Rolling pin
- Clay knife or needle tool
- Slip and score tool
- Cylindrical form (like a sturdy cardboard tube or PVC pipe)
- Small round cutter (or bottle cap)
- Black underglaze or acrylic paint
- White underglaze or acrylic paint
- Small detail brush
- Clear matte glaze (optional)
- Canvas work surface
Step 1: Building the House Base
-
Roll the slab:
Begin by rolling out a substantial slab of your red clay to an even thickness of about 1/4 inch. You want it sturdy enough to stand but not overly heavy. -
Cut the walls:
Measure the circumference of your cylindrical mold and cut a rectangle from your slab to match those dimensions, adding a slight overlap for the seam. -
Form the cylinder:
Wrap the clay rectangle around your form. Score and slip the edges where they meet, pressing them firmly together to create a seamless cylinder. Smooth the seam inside and out. -
Add the floor:
Cut a circle of clay slightly larger than your cylinder’s diameter. Score and slip the bottom edge of your cylinder and attach it to this base circle. Trim away any excess clay flush with the walls. -
Carve the bricks:
Using a needle tool or a dull knife, gently carve horizontal lines around the entire jar. Then, add vertical lines in an alternating pattern to create the look of varying brick sizes. Don’t worry about perfect straightness; wobble adds charm.
Warped Lid Woes?
Dry the lid ON the jar base. This ensures they shrink together and maintain a perfect fit. If drying separately, the lid may warp and no longer sit flat.
Step 2: Creating the Roof Lid
-
Form the cone base:
Roll a new slab and cut out a large circle. Cut a wedge slice (like a piece of pie) out of the circle, then pull the cut edges together to form a shallow cone shape. Join the seam securely. -
Check the fit:
Test the cone on top of your base cylinder. It should overhang slightly like eaves. To keep it secure, add a small ring or flange of clay on the *underside* of the lid that fits just inside the jar rim. -
Make the chimney:
Fashion a small cylinder of clay and attach it to the peak of the cone. Add a tiny conical cap on top of the chimney for extra detail. -
Apply roof tiles:
Roll a thin sheet of clay and use a small round cutter to make many circles. Cut these circles in half to make semi-circles. -
Layer the shingles:
Starting at the bottom edge of the roof, attach the semi-circles using a little slip, overlapping them as you move upward toward the chimney until the entire roof is covered.
Make It Glow
Cut the windows all the way through the clay wall before firing. Once finished, you can place a battery-operated tea light inside to turn your jar into a lantern.
Step 3: Sculpting Details
-
Outline the door and window:
Roll thin coils of clay and attach them to the cylinder wall to form the outlines of a large arched door and a smaller arched window. -
Fill the frames:
Inside the door frame, gently press a flat piece of clay to slightly raise the surface, then carve deep grooves to simulate wooden planks. Add a tiny ball of clay for the doorknob. -
Add window panes:
Inside the window frame, add a cross shape using small strips of clay to create the window panes. -
Add the decorative dots:
Roll tiny spheres of clay—about the size of peppercorns—and press them into the clay coils surrounding the door and window arches to create the white decorative border shown in the image.
Step 4: Finishing and Coloring
-
Dry partially:
Allow the piece to dry to a leather-hard state. This is when I usually do a final check to smooth any sharp burrs on the brick carvings. -
Paint the woodwork:
Carefully paint the door and the window interior with black underglaze. Use a steady hand to avoid getting black on the brick texture. -
Highlight the dots:
Paint the small decorative spheres around the arches with a bright white underglaze. This contrast makes the details pop against the terracotta. -
Fire the piece:
Bisque fire the jar according to your clay body’s instructions. -
Optional antique wash:
If you want to accentuate the bricks, you can apply a very watered-down dark wash over the bricks and wipe it back, leaving darkness in the crevices, before the final clear glaze firing.
Now you have a cozy, handmade dwelling ready to hide your trinkets or simply admire on your shelf
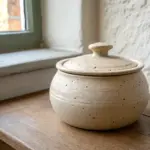
Layered Roof Tile Jar Topper
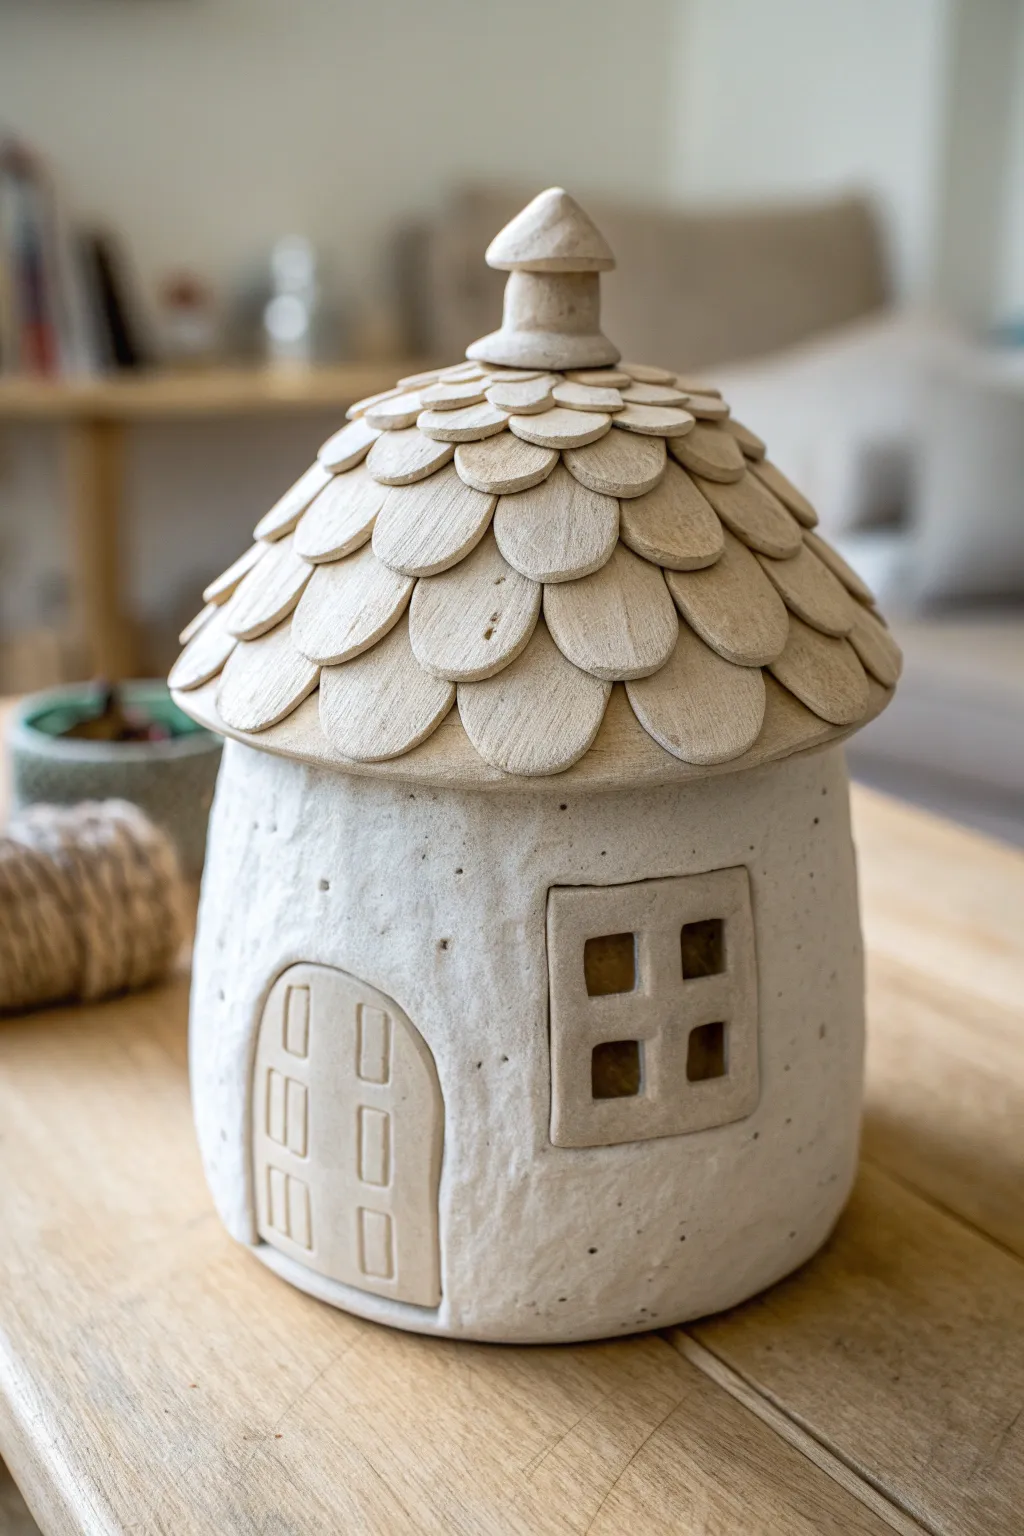
Transform a simple lump of clay into a charming countryside abode that doubles as hidden storage. This jar features a deeply textured body, a distinct paneled door, and a removable roof lid layered with individual clay shingles for a stunning, tactile finish.
Step-by-Step Tutorial
Materials
- White or cream stoneware clay (fine grog)
- Rolling pin
- Canvas work surface
- Pottery knife or needle tool
- Circular cookie cutter (approx. 1 inch)
- Slip (clay and water slurry)
- Scoring tool or serrated kidney
- Sponge
- A round jar mold (or balled newspaper)
- Wooden sculpting tools
Step 1: Forming the Base Structure
-
Prepare the slab foundation:
Begin by wedging your clay to remove air bubbles. Roll out a large, even slab approximately 1/4 inch thick. Cut a circular base for the bottom of the jar and set it aside on a small wooden board. -
Build the walls:
Measure the circumference of your base circle. Cut a long rectangular strip from your slab to match this length. Score and slip the edge of the circular base and one long edge of the rectangle. -
Join the cylinder:
Wrap the rectangular strip around the base to form a cylinder. Join the vertical seam by scoring, slipping, and smoothing the clay together both inside and out. Then, firmly attach the wall to the base circle. -
Shape the cottage belly:
With one hand inside the cylinder for support, use a rounded wooden rib or your fingers on the outside to gently push the clay outward, giving the jar a slightly bulbous, organic shape. Tap the top rim gently to ensure it is level.
Step 2: Creating the Roof Lid
-
Form the roof cone:
Roll a new slab and cut a circle slightly wider than your jar’s opening. Cut a wedge out of the circle (like a slice of pie) and bring the cut edges together to form a shallow cone. Check the fit on the jar body. -
Add a flange:
To keep the lid secure, attach a small coil of clay to the underside of the roof cone, inset slightly so it sits inside the jar rim. Smooth this coil thoroughly so it doesn’t snag. -
Cut the shingles:
Roll a thin sheet of clay and use your small circular cutter to punch out many small circles. I find it helpful to gently squish each circle into an oval or teardrop shape for a more rustic look. -
Layer the tiles:
Start at the bottom edge of the roof cone. Score and slip the first row of tiles, letting them overhang slightly. Work your way up the roof in overlapping concentric circles, staggering the seams like real shingles. -
Finish with the chimney:
Roll a small cylinder of clay and flare the bottom. Attach this to the peak of the roof to hide the final tile joins. Add a tiny conical cap to the chimney for a fairy-tale silhouette.
Crack Prevention
If the roof lid cracks during drying, lightly mist it and patch with “paper clay” (a mix of slip and toilet paper pulp). It bonds better to dry clay than plain slip.
Step 3: Adding Details and Texture
-
Carve the window:
On the jar body, cut out a small square opening. Roll a small square slab slightly larger than the hole to act as a frame and attach it over the opening. Add thin coils inside to create the window crossbars. -
Construct the door:
Cut an arched shape from a clay slab. Attach it securely to the jar body using the score and slip method. Use a dull pencil or tool to press vertical lines and small rectangles into the door to mimic wood panels. -
Texture the walls:
Using a stiff bristled brush or a textured sponge, dab the surface of the jar’s white walls (avoiding the door and window) to create a stucco-like, pitted texture. -
Refine the tiles:
Go back to the roof and gently lift the edges of a few shingles with a tool to give them dimension, ensuring they don’t look too flat or uniform. -
Dry slowly:
Loosely cover the entire piece with plastic. Let it dry very slowly over several days to prevent the roof from warping or the seams from cracking. -
Fire:
Bisque fire the piece according to your clay’s specifications. Since the raw clay is white and textured, you might choose to leave the outside unglazed or use a clear matte glaze to seal it.
Illuminating Idea
Before firing, create a small hole in the back of the base. This allows you to insert a battery-operated tea light or fairy lights, turning the jar into a glowing luminary.
Now you have a delightful little hideaway perfect for storing treasures or simply brightening a shelf

The Complete Guide to Pottery Troubleshooting
Uncover the most common ceramic mistakes—from cracking clay to failed glazes—and learn how to fix them fast.
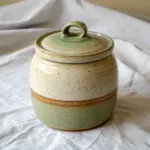
Leafy Canopy Roof Jar
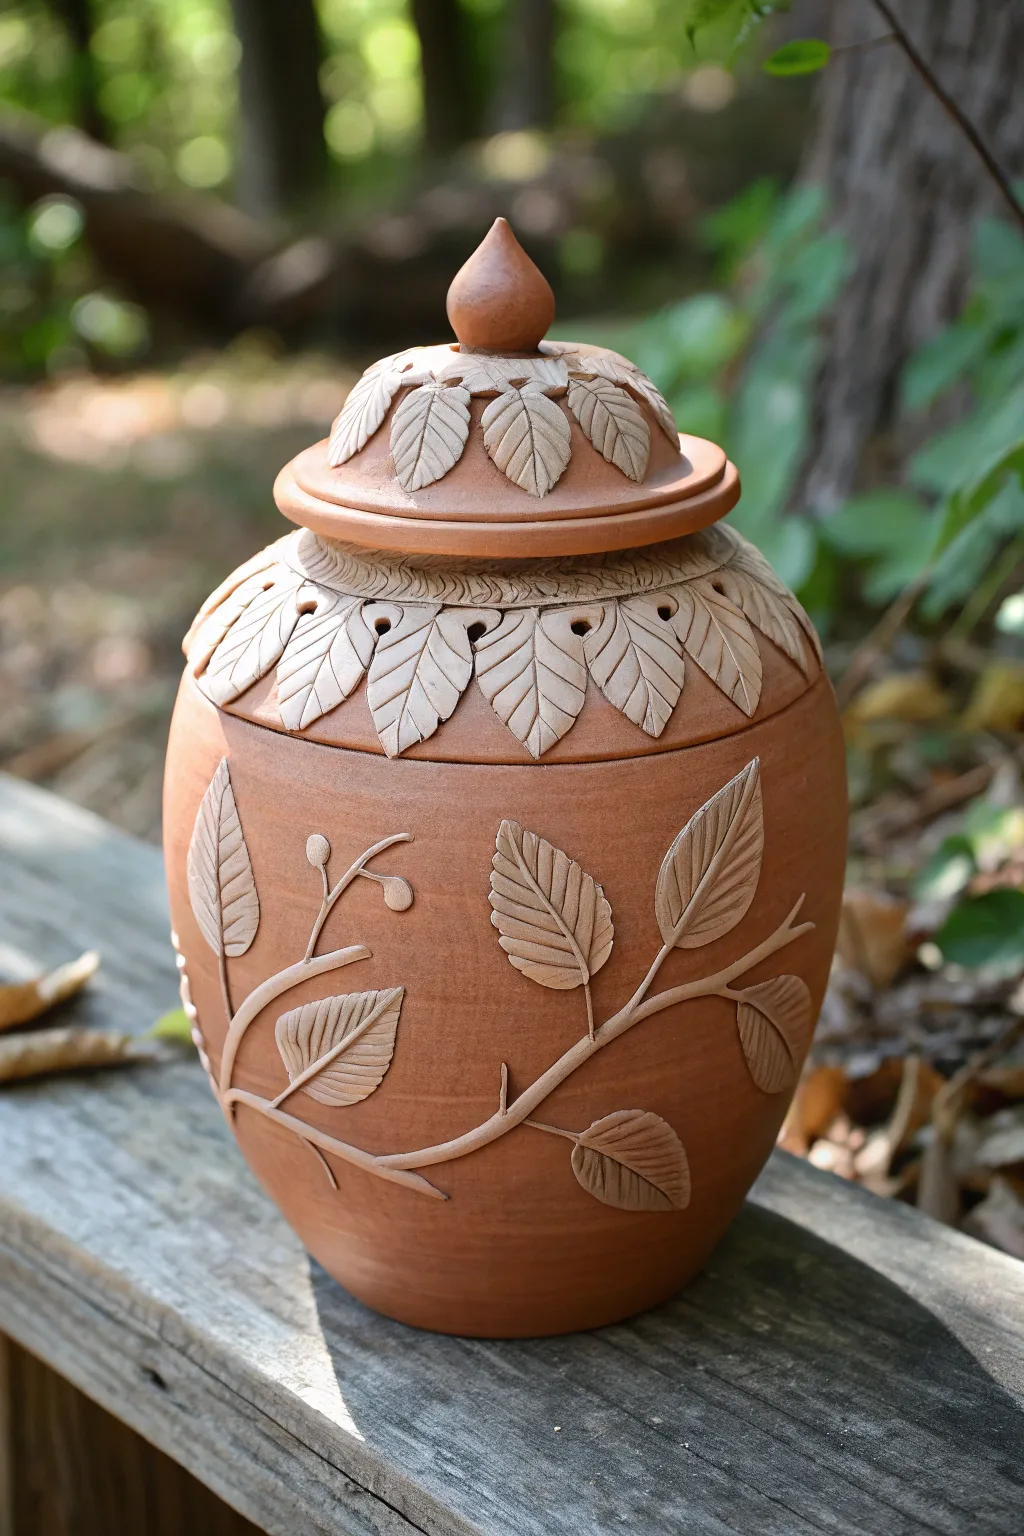
Bring the serene beauty of the woods into your home with this nature-inspired terracotta vessel, featuring intricate leaf reliefs and a matching sculptural lid. The warm, unglazed finish highlights every vein and curve of the foliage, creating an organic piece perfect for storing keepsakes.
Step-by-Step Guide
Materials
- Terracotta colored stoneware clay (smooth body)
- Pottery wheel (or slab roller/coils for handbuilding)
- Needle tool
- Fettling knife or X-Acto knife
- Loop tools for trimming
- Leaf-shaped cutter (optional but helpful)
- Modeling tool or wooden skewer
- Slip and scoring tool (serrated rib)
- Small sponge
- Plastic bat for wheel work
Step 1: Forming the Base Vessel
-
Throw the body:
Begin by centering about 3-4 pounds of clay on your wheel. Open the center and pull up the walls to create a bulbous, rounded belly shape that tapers in slightly at the neck. Aim for an even thickness of about 1/4 inch. -
Refine the rim:
Create a distinct gallery inside the rim where the lid will eventually sit. Ensure the rim is slightly thickened to support the weight of the decorative leaves later. -
Throw the lid:
Using a separate 1-pound ball of clay, throw a lid that fits your vessel’s gallery measurements. Instead of a flat lid, shape it into a gentle dome. Pull a small amount of clay at the very top into a pointed, teardrop-shaped finial. -
Trim and clear:
Once both pieces are leather hard, trim away excess weight from the bottom of the jar and the underside of the lid. Smooth the surfaces with a damp sponge to remove any grog or rough spots.
Leaves Popping Off?
Prepare a “magic water” mix (water + sodium silicate + soda ash) or use vinegar slip. This creates a much stronger bond for delicate appliques than plain water.
Step 2: Sculpting the Foliage Details
-
Prepare leaf slabs:
Roll out a thin sheet of clay (approx. 1/8 inch thick). Use a leaf cutter or freehand cut about 20-30 individual pointed leaf shapes with your needle tool. -
Texture the leaves:
On each clay leaf, use a needle tool or the edge of a small wooden modeling tool to gently press in a central vein and delicate side veins. Don’t cut all the way through; just create surface impressions. -
Lid decoration:
Score and slip a ring around the base of the lid’s finial. Attach a circle of small leaves, overlapping them slightly so the tips point outward and downward over the curved dome. -
Shoulder canopy:
Moving to the main jar, score a band around the upper shoulder, just below the neck. Attach a row of larger leaves pointing downwards. I find it helps to gently curl the very tips of these leaves upward for a more dynamic, wind-blown look. -
Piercing accents:
Using a small hole punch or the back of a drill bit, press small circular holes in the negative spaces between the shoulder leaves. This adds depth and shadow to the leafy canopy.
Step 3: Creating the Branch Relief
-
Roll coils for branches:
Roll out several very thin, worm-like coils of clay. These will serve as the stems and branches for the main body decoration. -
Layout the design:
Lightly trace a winding, organic path on the belly of the jar with a needle tool. Score along this line, apply slip, and press your thin coils onto the surface to create the main branch structure. -
Attach body leaves:
Cut out medium-sized leaves from your slabs. Score and attach them to the ends of your branch coils, varying the angles so they look like they are growing naturally from the stem. -
Add texture and berries:
Use your modeling tool to blend the stems into the jar surface slightly, making them look integrated rather than just stuck on. Roll tiny balls of clay and attach them near branch intersections to mimic berries or buds. -
Detail the main leaves:
Once attached, go back over the body leaves with your needle tool to deepen the vein textures, as handling might have smoothed them out.
Level Up: Autumn Vibes
Instead of a uniform finish, use different colored slips (red iron oxide, rutile, manganese) on individual leaves before firing to create a multicolored fall foliage effect.
Step 4: Finishing Touches
-
Texture the collar:
Just above the shoulder leaves, use a small carving tool to add a band of diagonal hatching or texture to the neck of the jar, creating a visual separation between the lid and body. -
Slow drying:
Cover the piece loosely with plastic. Because added clay (leaves) dries at a different rate than the thrown body, slow drying is crucial to prevent cracking. -
Bisque fire:
Once bone dry, bisque fire the piece to Cone 04. This prepares it for glazing or stains. -
Staining (optional):
To achieve the look in the photo, apply an iron oxide wash or a terracotta-colored under glaze, then wipe it back with a sponge. This leaves darker color in the recesses of the veins and textures. -
Final firing:
Fire the piece to maturity (Cone 5/6 for stoneware). Leave the exterior unglazed to maintain the natural, earthy texture, but consider a clear liner glaze for the inside if you plan to hold water.
Place your finished jar near a window where natural light can play across the textured surface
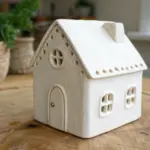
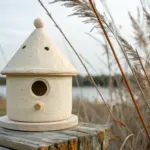
Mini Windows That Let Light Through
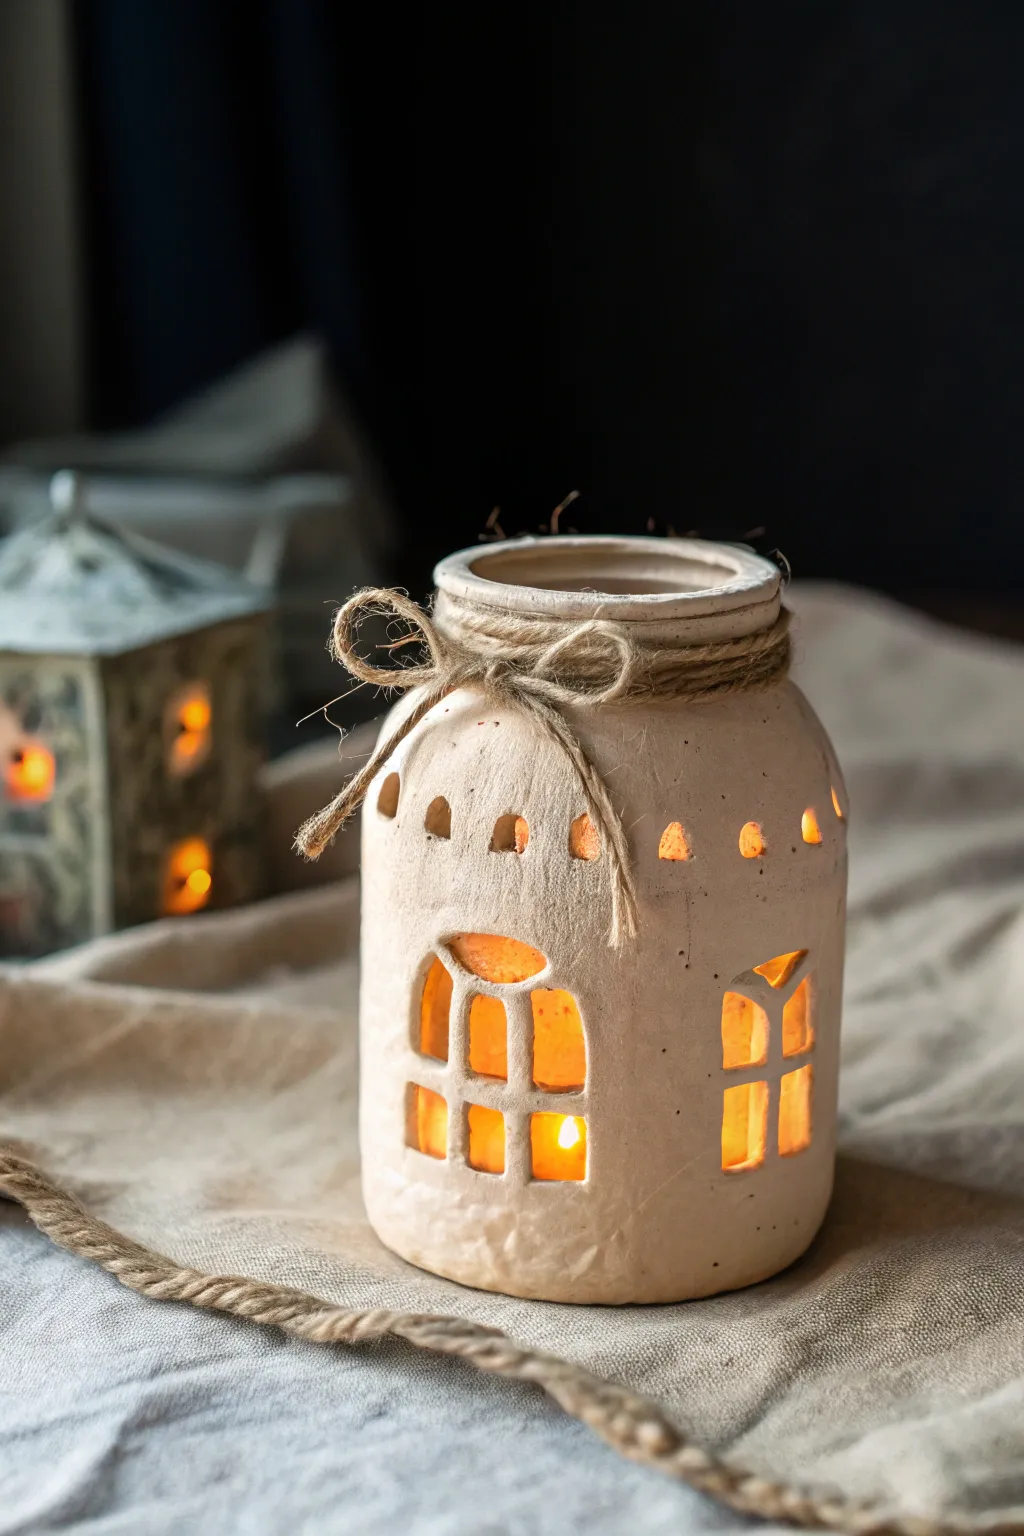
Transform a simple glass jar into an enchanting, glowing cottage that feels like it was plucked from a fairy tale. With its textured, stone-like surface and warm little window panes, this project creates the perfect cozy ambiance for any corner of your home.
How-To Guide
Materials
- Clean glass jar (mason jar or similar)
- Air-dry clay (white or light beige)
- Rolling pin
- Craft knife or scalpel
- Small bowl of water
- Sponge or textured limestone paint (optional)
- Jute twine
- Scissors
- Tea light candle (battery-operated recommended)
- Fine-grit sandpaper
- Acrylic paint (warm cream or pale beige)
- Clear matte varnish (spray or brush-on)
Step 1: Preparation and Base Layer
-
Prep the jar:
Begin by thoroughly cleaning and drying your glass jar to ensure the clay adheres properly. Remove any labels or sticky residue. -
Condition the clay:
Take a large chunk of air-dry clay and knead it in your hands until it becomes soft, pliable, and free of cracks. -
Roll out a slab:
On a clean, flat surface, roll the clay out into a long rectangle approximately 1/4 inch thick. It should be long enough to wrap around the circumference of your jar. -
Wrap the jar:
Carefully lift your clay sheet and wrap it around the glass jar. Press it firmly against the glass, smoothing out any air bubbles as you go. -
Seal the seam:
Where the two ends of the clay meet, overlap them slightly. Dip your finger in water and blend the seam together until it vanishes, creating a continuous surface. -
Cover the rim:
Mold the excess clay at the top over the rim of the jar. I like to keep this slightly uneven to add to the rustic, handmade charm.
Step 2: Sculpting the Details
-
Mark the windows:
Using a needle tool or a toothpick, lightly trace the outline of your windows. Sketch two larger arched windows near the bottom and smaller semi-circle vents near the top neck. -
Cut the panes:
With a sharp craft knife, carefully cut out the negative space in the windows. For the main windows, cut out four quadrants, leaving a cross of clay in the center to form the window panes. -
Refine the edges:
Creating sharp corners can be tricky, so dip a small brush or your finger in water and smooth the raw cut edges of the clay to remove any jagged bits. -
Create the upper vents:
Carve out the small, semi-circle vents around the upper curve of the jar. Spacing doesn’t need to be mathematically perfect; irregularity looks more natural. -
Add texture:
To achieve that weathered stone look, gently dab the surface of the damp clay with a crumpled ball of foil or a stiff-bristled brush. Avoid flattening your window frames while doing this.
Sticky Situation
If the clay slides down the glass while wet, apply a thin layer of PVA glue to the glass surface before wrapping the clay slab around it.
Step 3: Finishing Touches
-
Allow to dry:
Let the jar sit in a cool, dry place for at least 24-48 hours. The clay will turn opaque and white as it dries fully. -
Sand imperfections:
Once fully hard, use fine-grit sandpaper to gently knock back any overly sharp peaks or rough spots on the rim, but keep the overall texture rough. -
Apply a wash:
Mix a warm cream acrylic paint with a little water. Brush this wash over the entire jar to give it a uniform, warm tone, wiping away excess so the texture catches the pigment. -
Seal the piece:
Protect your work with a coat of clear matte varnish. This prevents the clay from absorbing moisture later on. -
Add the twine:
Take a length of jute twine and wrap it three or four times around the neck of the jar. Tie it off in a simple, floppy bow at the front. -
Light it up:
Place a battery-operated tea light inside the jar to see your cozy cottage windows glow with warmth.
Cracks Happens
Minor cracks during drying are normal. Mix a small amount of fresh clay with water to make a paste (slip) and fill the cracks, then smooth over.
Enjoy the gentle, flickering ambiance of your new handcrafted clay cottage luminary


What Really Happens Inside the Kiln
Learn how time and temperature work together inside the kiln to transform clay into durable ceramic.
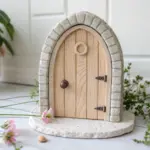
Fairy Door With Tiny Hardware Details
Transform an ordinary glass jar into a magical terracotta-style fairy cottage with intricate door details and a shingled roof. This charming storage vessel features faux brickwork, climbing vines, and a delightful arched door complete with tiny hardware.
Detailed Instructions
Materials
- Glass jar with lid (straight-sided works best)
- Terracotta-colored polymer clay (approx. 3-4 blocks)
- Beige or light stone-colored polymer clay
- Teal or deep green polymer clay
- Dark grey or silver polymer clay
- Gold polymer clay or a gold stud/bead
- Translucent liquid clay (Bake and Bond)
- Clay roller or pasta machine
- Needle tool
- Craft knife
- Ball stylus tool
- Texture sponge or sandpaper
- Hobby glue (E6000)
- Green acrylic paint (optional for vines)
Step 1: Base Construction
-
Prepare the jar:
Begin by cleaning your glass jar thoroughly with rubbing alcohol to remove any oils. This ensures the clay adheres properly during the baking process. -
Cover the body:
Roll out a large sheet of terracotta clay to about 3mm thickness. Wrap this around the glass jar, trimming the excess and smoothing the seam with your fingers until invisible. -
Texture the surface:
Before adding details, gently press a coarse sponge or crumpled aluminum foil over the entire surface to give it a realistic, earthenware texture. -
Create brickwork:
Using a needle tool, lightly score horizontal lines around the jar. Then, add vertical lines in alternating patterns to create a brick effect, keeping the lines slightly uneven for a rustic look.
Secret Texture Tip
For ultra-realistic weathered stone, press a real rock or piece of coarse sandpaper against the raw clay before baking. It creates organic imperfections.
Step 2: Door & Details
-
Form the door shape:
Roll out a slab of teal clay and cut an arched door shape. Place this onto the front of the jar, pressing gently to secure it. -
Add wood grain:
With a needle tool, draw vertical lines into the teal clay to simulate wooden planks. Add tiny texture marks for wood grain detail. -
Create the stone arch:
Roll a snake of beige clay and flatten it slightly. Wrap this around the arched door to create a frame. Use a craft knife to press indentations, separating the frame into individual ‘stones’. -
Texture the stones:
Tap the beige stones with an old toothbrush or stiff brush to give them a pitted, rocky texture. -
Install the window:
Cut a small circle from the teal door near the top. Create a tiny cross-frame using teal clay strips and place it inside the circular opening. -
Add hardware hinges:
Cut two small triangles from dark grey clay. Press them onto the left side of the door as hinges. Use a small ball tool to indent tiny dots on them, mimicking rivets. -
Attach the doorknob:
Roll a tiny ball of gold clay (or use a gold bead) and press it onto the right side of the door. If using clay, bake it right along with the piece.
Step 3: Roof & Foliage
-
Prepare the lid:
Cover the jar’s original lid with a dome of terracotta clay or aluminum foil bulking to create a peaked shape, then cover that with a sheet of terracotta clay. -
Make shingles:
Flatten small pieces of terracotta clay into rough rectangles. Starting at the bottom rim of the lid, overlap these pieces row by row until you reach the peak. -
Top the roof:
Create a decorative finial by rolling a small cone and a flattened disc of terracotta clay, stacking them on the very top point of the roof. -
Grow the vines:
Roll very thin snakes of green clay (or mix teal with a bit of brown) and press them onto the sides of the jar, climbing up from the base. -
Add leaves:
Flatten tiny teardrops of green clay and attach them along the vine stems. Use a needle tool to press a central vein into each leaf. -
Bake the project:
Bake the detailed jar and lid according to your polymer clay package instructions (usually 275°F/135°C for 15-30 minutes). Let it cool completely inside the oven to prevent cracking. -
Finishing touches:
If needed, secure any loose parts with E6000 glue. You can also brush a light wash of brown acrylic paint into the brick crevices and wipe it off to enhance the depth.
Make it Glow
Use a battery-operated tea light inside the finished jar. If you cut out the window hole completely before baking, the light will shine through warmly.
Now you have a charming hiding spot for treats or trinkets that looks straight out of a storybook
Climbing Vines and Mini Flowers
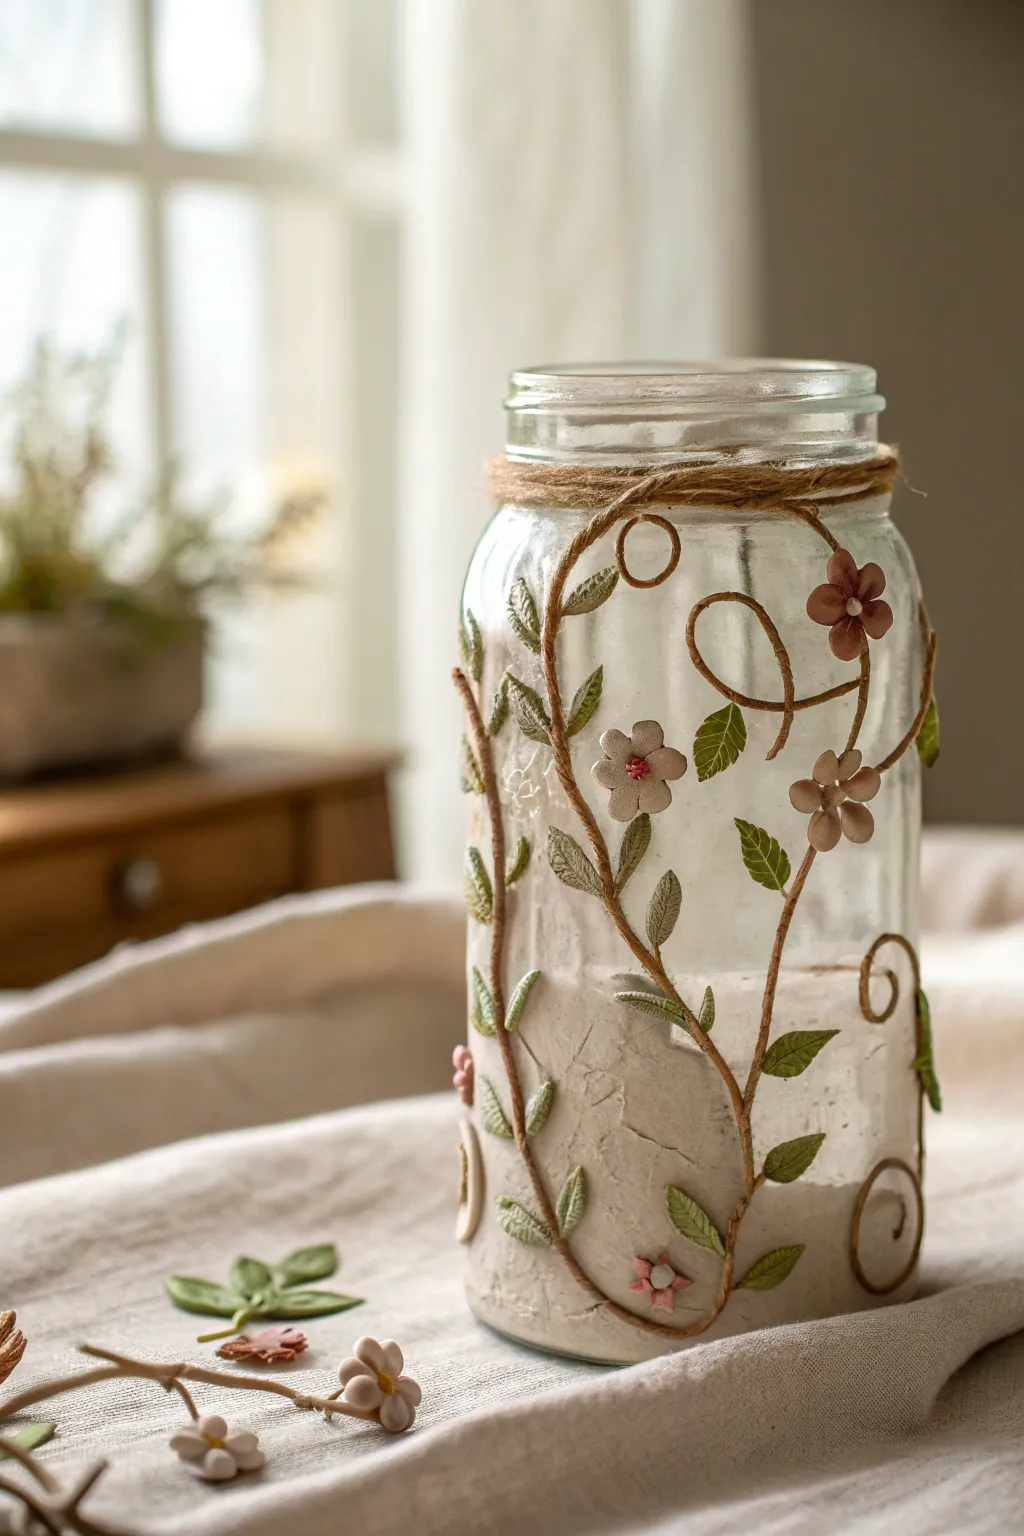
Transform a plain glass jar into an enchanted forest relic featuring delicate climbing vines and petite blossoms. This project combines textures by layering a sandy clay base with intricate raised details for a stunning, tactile finish.
Step-by-Step
Materials
- Clean glass Mason jar (16oz or 32oz)
- Air-dry modeling clay (white or light grey)
- Brown craft wire or hemp twine (thin gauge)
- Jute twine (for the rim)
- Acrylic paints (olive green, muted pink, beige, brown)
- Fine-grit sandpaper
- Clay sculpting tools (needle tool, small ball stylus)
- Strong craft glue (E6000 or clear tacky glue)
- Rolling pin
- Water spray bottle
- Matte sealant spray
Step 1: Creating the Textured Base
-
Prepare the jar:
Begin by washing the glass jar thoroughly with soap and water, then wipe it down with rubbing alcohol to remove any oils. This ensures the clay adheres properly to the smooth glass surface. -
Mix the texture base:
Take a handful of air-dry clay and mix a small amount of water into it until it becomes a thick slip or paste. If you have some fine sand or dried coffee grounds, I like to mix a pinch in here to create that earthy, gritty texture seen on the bottom half. -
Apply the uneven coat:
Spread this clay mixture onto the lower two-thirds of the jar using your fingers or a palette knife. Don’t try to make it smooth; aim for a rough, organic look with varying thickness to mimic stone or earth. -
Create the vine structures:
While the base layer is drying, take thin brown wire or hemp twine. Twist and bend it into meandering S-curves and loose loops that will serve as the main stems of your climbing plant. -
Attach the vines:
Glue these wire or twine stems onto the glass jar, letting them rise up from the clay base. Allow some tendrils to spiral freely into empty glass spaces for a light, airy feel.
Natural Texture
For realistic leaf texture without tools, press your small clay leaf shapes onto real leaves from your garden to imprint their vein patterns before gluing them.
Step 2: Sculpting Leaves and Blooms
-
Roll out the clay sheet:
Roll a portion of fresh white clay into a very thin sheet, roughly 2mm thick. This will be used to cut out your leaves and flower petals. -
Cut leaf shapes:
Using a craft knife or a small leaf cutter, create dozens of small, almond-shaped leaves. Keep them varied in size—some tiny for the tips of vines, and others slightly larger for the base. -
Add leaf veins:
Gently press a needle tool into the center of each clay leaf to create a central vein. Add tiny diagonal tick marks for realistic texture. -
Form the flowers:
Cut five tiny teardrop shapes for each flower. Arrange them in a circle, pressing the pointed ends together in the center. Use a ball tool to cup the petals slightly so they look dimensional, not flat. -
Make the flower centers:
Roll a minuscule ball of clay and press it into the center of each flower. Poke a hole in the middle of this ball using your needle tool for extra detail. -
Attach foliage to vines:
Using a dab of glue, attach the clay leaves along the wire or twine vines you adhered earlier. Place them in opposing pairs or alternate them for a natural growth pattern. -
Place the blooms:
Glue the clay flowers sporadically along the vines, focusing on the upper sections or where the vines cross over each other.
Step 3: Painting and Finishing
-
Dry completely:
Let the entire jar sit undisturbed for at least 24 hours until the clay details are fully hardened and turn chalky white. -
Paint the leaves:
Dilute olive green acrylic paint with a little water to make a wash. Carefully paint the leaves, wiping away excess with a paper towel so the paint settles into the vein impressions. -
Paint the flowers:
Paint the flower petals a soft, muted pink or beige. Use a darker pink or reddish-brown for the tiny centers to make them pop. -
Shade the vines:
If you used clay for the vines instead of wire/twine, paint them brown now. If you used twine, you can dry-brush a little clay slip over them to blend them into the leaves. -
Wrap the rim:
Cut a length of thick jute twine. Apply a line of glue around the threaded neck of the jar and wrap the twine tightly around it three or four times to conceal the threads. -
Seal the work:
Once all paint is dry, take the jar outside or to a ventilated area and spray a light cost of matte sealant over the clay areas to protect your delicate sculpting work from moisture.
Clay Shrinkage
If clay leaves pop off the glass as they shrink while drying, don’t panic. Just add a drop of superglue to the back of the dried piece and reattach it to the glass.
Place a tea light or fairy lights inside to see the shadows of your beautiful vines dance against the frosted clay base

TRACK YOUR CERAMIC JOURNEY
Capture glaze tests, firing details, and creative progress—all in one simple printable. Make your projects easier to repeat and improve.
Snail or Ladybug Jar Companion
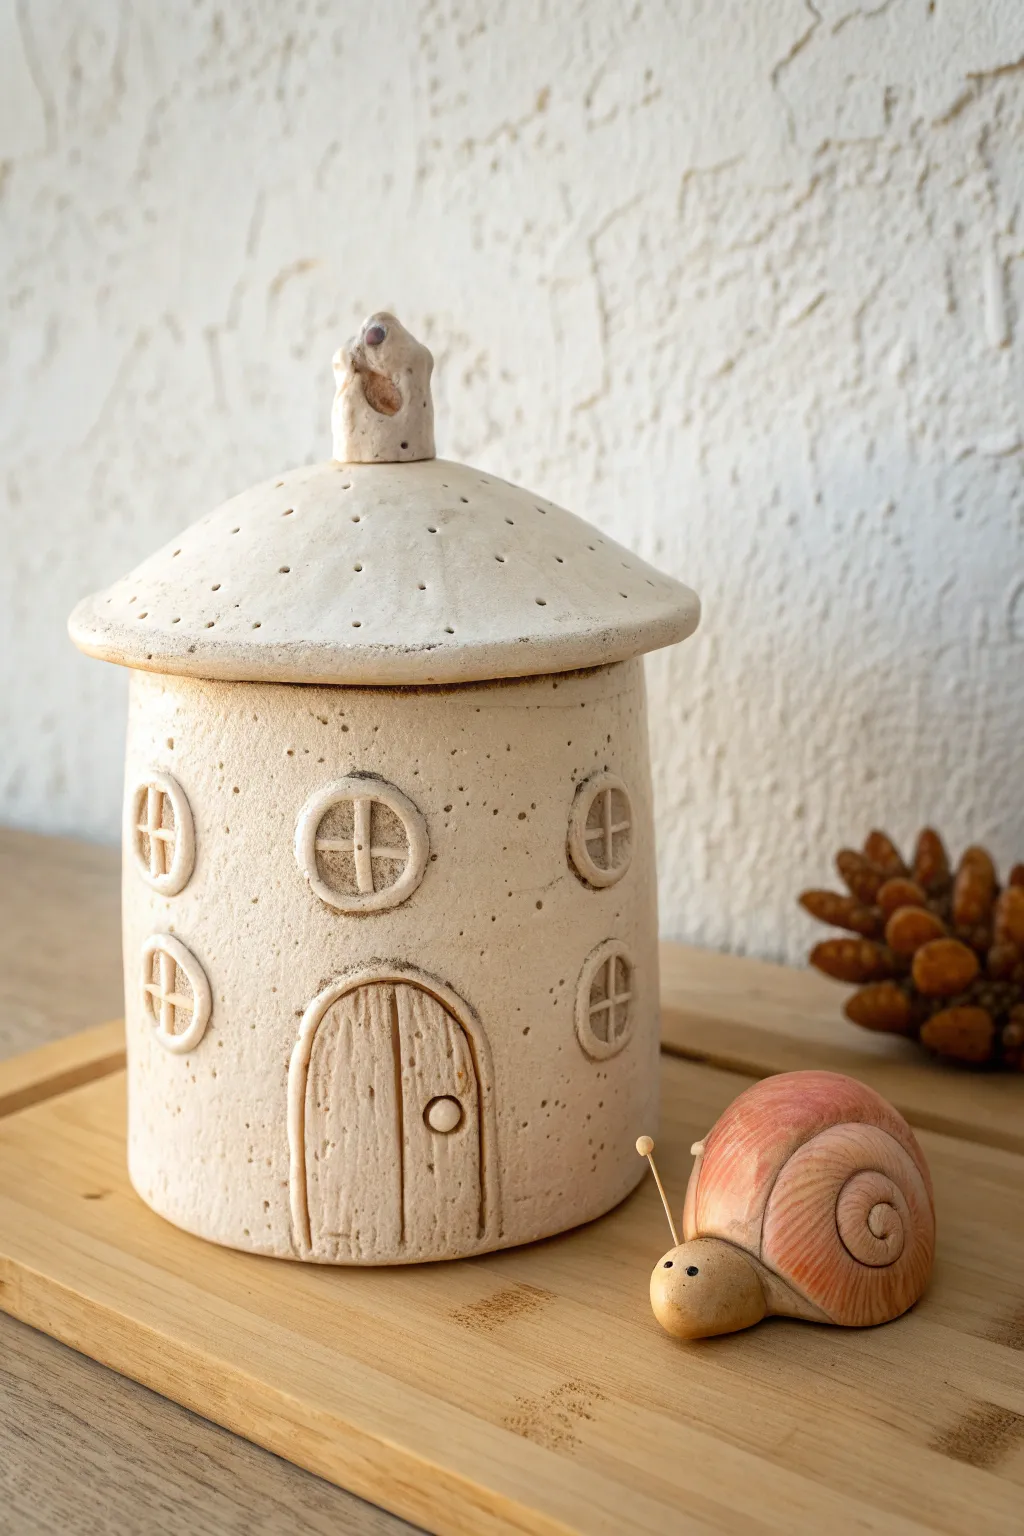
This charming ceramic jar mimics a cozy cottage with a textured stone finish and a delightful snail companion. It features a removable conical roof lid and intricate relief details like windows and a wooden door, perfect for storing small treasures.
How-To Guide
Materials
- White or beige stoneware clay (speckled clay recommended)
- Clay rolling pin
- Fettling knife or clay cutting tool
- Sponge
- Slip and scoring tool (or serrated rib)
- Circle cutters (small size for windows)
- Small wooden modeling tools
- Needle tool
- Underglazes (light pink, orange, brown)
- Clear matte glaze
- Small paintbrushes
- Wire for snail antennae
Step 1: The House Structure
-
Roll the Slabs:
Begin by rolling out a medium-sized slab of speckled stoneware clay to about a 1/4-inch thickness. You’ll need enough length to create the cylinder of the house and extra for the roof and base. -
Cut the Cylinder Wall:
Cut a rectangular strip from your slab. The height determines your jar’s height, and the length determines its circumference. Bevel the short edges at a 45-degree angle to create a seamless joint. -
Form the Cylinder:
Curve the rectangular slab into a cylinder. Score and slip the beveled edges, then press them firmly together. Smooth the seam inside and out with a rib or your finger until it disappears. -
Attach the Base:
Place your cylinder on the remaining slab and trace around it. Cut out this circle, score and slip the bottom edge of the cylinder and the circle, and attach them. Smooth the connection point.
Step 2: Adding Details
-
Create the Door:
Roll a small coil and flatten it slightly to form an arch shape on the front of the jar. Inside the arch, scribe vertical lines to mimic wood planks and attach a tiny ball of clay for the doorknob. -
Add Windows:
Use a small circle cutter or shape small disks of clay by hand. Attach these to the walls using slip. Roll tiny, thin coils of clay to create the cross-mullions on top of the disks. -
Create Window Frames:
Roll slightly thicker coils and wrap them around the window disks to form the frames, blending the outer edges into the main wall for a cohesive look. -
Texture the Surface:
Use a stiff-bristled brush or a sponge to gently tap the entire exterior surface. This creates a weathered, stone-like texture that enhances the rustic aesthetic.
Warping Walls?
If the house walls slump while building, the clay is too wet. Let the slab stiffen to a ‘leather hard’ state before forming the cylinder.
Step 3: The Roof Lid
-
Form the Cone:
Cut a circle from your slab that is slightly wider than your jar’s opening. Cut a slice out of the circle (like a pie slice) and pull the edges together to form a shallow cone. -
Fit the Flange:
Flip the roof over. Roll a coil of clay and attach it to the underside, measuring against the jar opening to ensure it fits snugly inside the rim so the lid won’t slide off. -
Sculpt the Chimney Handle:
Shape a small, irregular chunk of clay to look like a chimney or rock formation. Score and slip it onto the peak of the roof to serve as a handle. -
Poke Roof Holes:
Using a needle tool, poke random small holes all over the roof surface. This adds texture and can turn the jar into a potpourri holder or luminary if desired.
Detailed Texture
Add sand or grog to your clay body before rolling to achieve an even more speckled, organic stone texture without manual stippling.
Step 4: The Snail Companion
-
Shape the Shell:
Roll a tapered coil of clay and spiral it up to create the snail shell. Smooth the coils together slightly on the outside while maintaining the spiral definition. -
Form the Body:
Create a separate oblong shape for the snail’s body. Attach the shell to the back of this body using slip. Gently lift the head area. -
Color the Snail:
Apply a wash of diluted pink and orange underglaze to the shell to highlight the spirals. Paint the body a soft beige or brown. Let everything dry completely. -
Firing and Finishing:
Bisque fire all pieces. Apply a clear matte glaze to the house and snail (or leave the house raw if the clay is fully vitrified and you prefer the texture). Glaze fire to the clay’s temperature. Finally, glue two small wire pieces into pre-poked holes for antennae.
Now you have a whimsical little dwelling to keep your desk organized or to gift to a friend who loves fairy gardens
Hanging Lantern and Signpost Charms
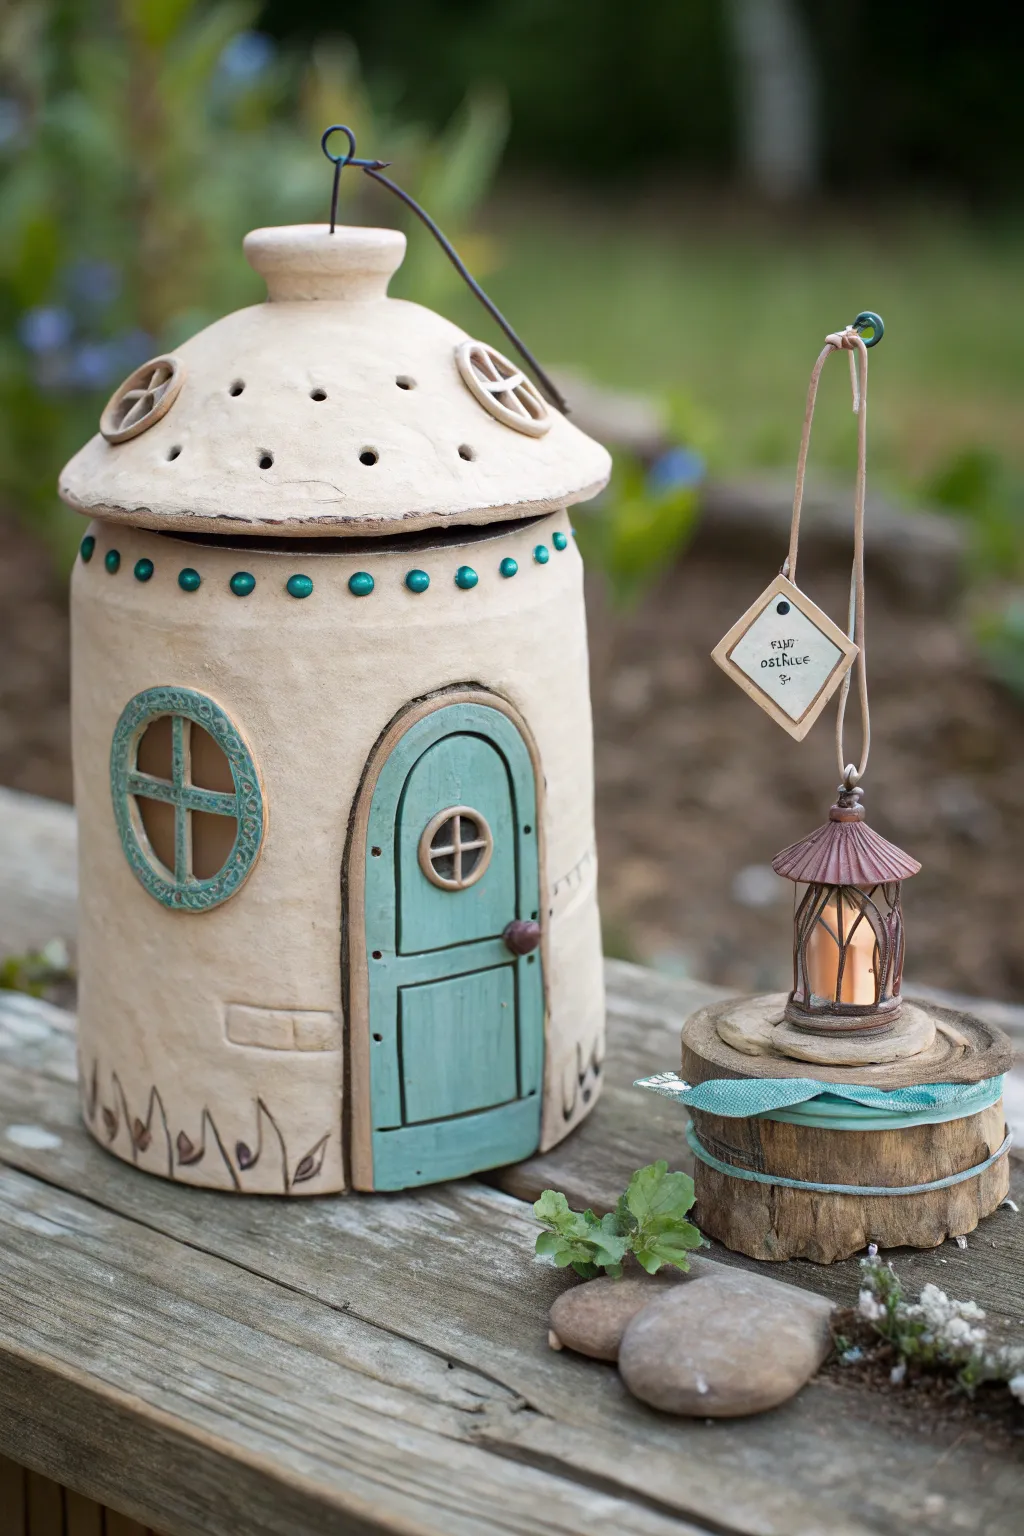
Transform simple stoneware clay into an enchanting garden dwelling with this rustic fairy house jar and miniature lantern set. The piece features a removable dome lid, teal accents, and handcrafted textures that evoke the charm of a woodland cottage.
Step-by-Step Tutorial
Materials
- Speckled stoneware clay (or polymer clay for non-kiln use)
- Rolling pin and canvas mat
- Cylindrical form (like a cardboard tube or PVC pipe)
- Clay carving tools (needle tool, loop tool)
- Slip and scoring tool (if using ceramic clay)
- Underglaze in teal/turquoise and dark brown
- Wire for handle
- Small wooden round (for the lantern base)
- Miniature metal lantern charm or finding
- Ribbon or twine
- Small diamond-shaped cardstock or wood for the sign tag
Step 1: Constructing the Fairy House Body
-
Prepare the slab:
Begin by rolling out a medium-thick slab of your speckled clay, aiming for about 1/4 inch thickness. Use a rolling pin on a canvas mat to prevent sticking and ensure an even surface. -
Form the cylinder:
Cut a rectangular strip long enough to wrap around your cylindrical mold. Wrap the clay around the form, score and slip the connecting edges generously, and smooth the seam inside and out until it is invisible. -
Create the base:
Cut a circle slightly larger than your cylinder’s diameter. Attach the cylinder to this base using the score-and-slip method, pressing firmly to create a seal, then trim any excess clay from the bottom edge. -
Sculpt the door frame:
There’s no need to cut a hole; simply roll a thin coil of clay and attach it in an arch shape on the front to outline the door. Flatten it slightly against the wall for a sturdy frame. -
Detail the door:
Inside the arched frame, use a needle tool to scribe a deep vertical line for the door opening and horizontal lines for panels. Add a tiny ball of clay for the doorknob and a small circular window frame near the top. -
Add the main window:
To the left of the door, create a larger circular window frame using a flattened coil. Apply a texture to the frame with a stamp or tool tip pattern, then add a ‘plus’ sign crossbar in the center. -
Decorative accents:
Roll tiny balls of clay and attach a row of rivets along the top rim of the jar. At the bottom, carve stylized grass or vine motifs using a loop tool to ground the house.
Cracking Up?
If small cracks appear while the clay is drying, score the crack, add a tiny bit of vinegar or slip, and compress the clay back together with a smooth tool.
Step 2: Making the Roof Lid
-
Shape the dome:
Fashion a pinch pot or bowl shape that matches the diameter of your jar’s opening. Smooth the curve so it resembles a mushroom cap or gentle dome. -
Add the handle and windows:
Form a sturdy loop or knob at the very top for lifting. Create two or three small ‘dormer windows’ by attaching small circles of clay and pressing a cross shape into them, mimicking the main window style. -
Ventilation holes:
Use a straw or small hole punch tool to create a pattern of holes around the dome. These add character and are essential if you plan to put a candle inside later.
Light It Up
Cut a large hole in the bottom of the jar before firing. This lets you place the finished house over an LED tea light for a safe, glowing window effect.
Step 3: Finishing and Assembly
-
Bisque fire:
Allow your clay pieces to dry slowly to the bone-dry stage. Once dry, bisque fire them according to your clay body’s specifications. -
Apply color:
Paint the door, window frames, and ‘rivets’ with a vibrant teal or turquoise underglaze. For an antique look, I prefer to wash a diluted dark brown underglaze over the textured areas and wipe it back to highlight the crevices. -
Glaze fire:
Apply a clear matte glaze to seal the piece, or leave the raw clay unglazed if it is fully vitrified and you prefer a rough texture. Fire the kiln a second time to finish the ceramic process. -
Wire handle:
Once cool, attach a rustic wire handle through the top loop of the lid if desired, twisting it securely for a hanging look.
Step 4: Creating the Lantern Charm
-
Prepare the base:
Take a small slice of a wooden branch. Wrap a piece of teal ribbon or fabric strip around the middle of the wood slice and secure it with a thin wire twisted tight. -
Assemble the sign:
Cut a small diamond shape from cardstock or thin wood. Write a tiny message like ‘Fairy Office’ and punch a hole at the top. Tie a loop of string through it. -
Hang the lantern:
Using a miniature metal lantern charm, thread a string through its top loop. Attach both the sign and the lantern to a simple wire hook or stand next to your ceramic house.
Now you have a charming, durable fairy home that looks lovely in a garden nook or on a windowsill
Wizard Hat Lid for a Spell Jar House
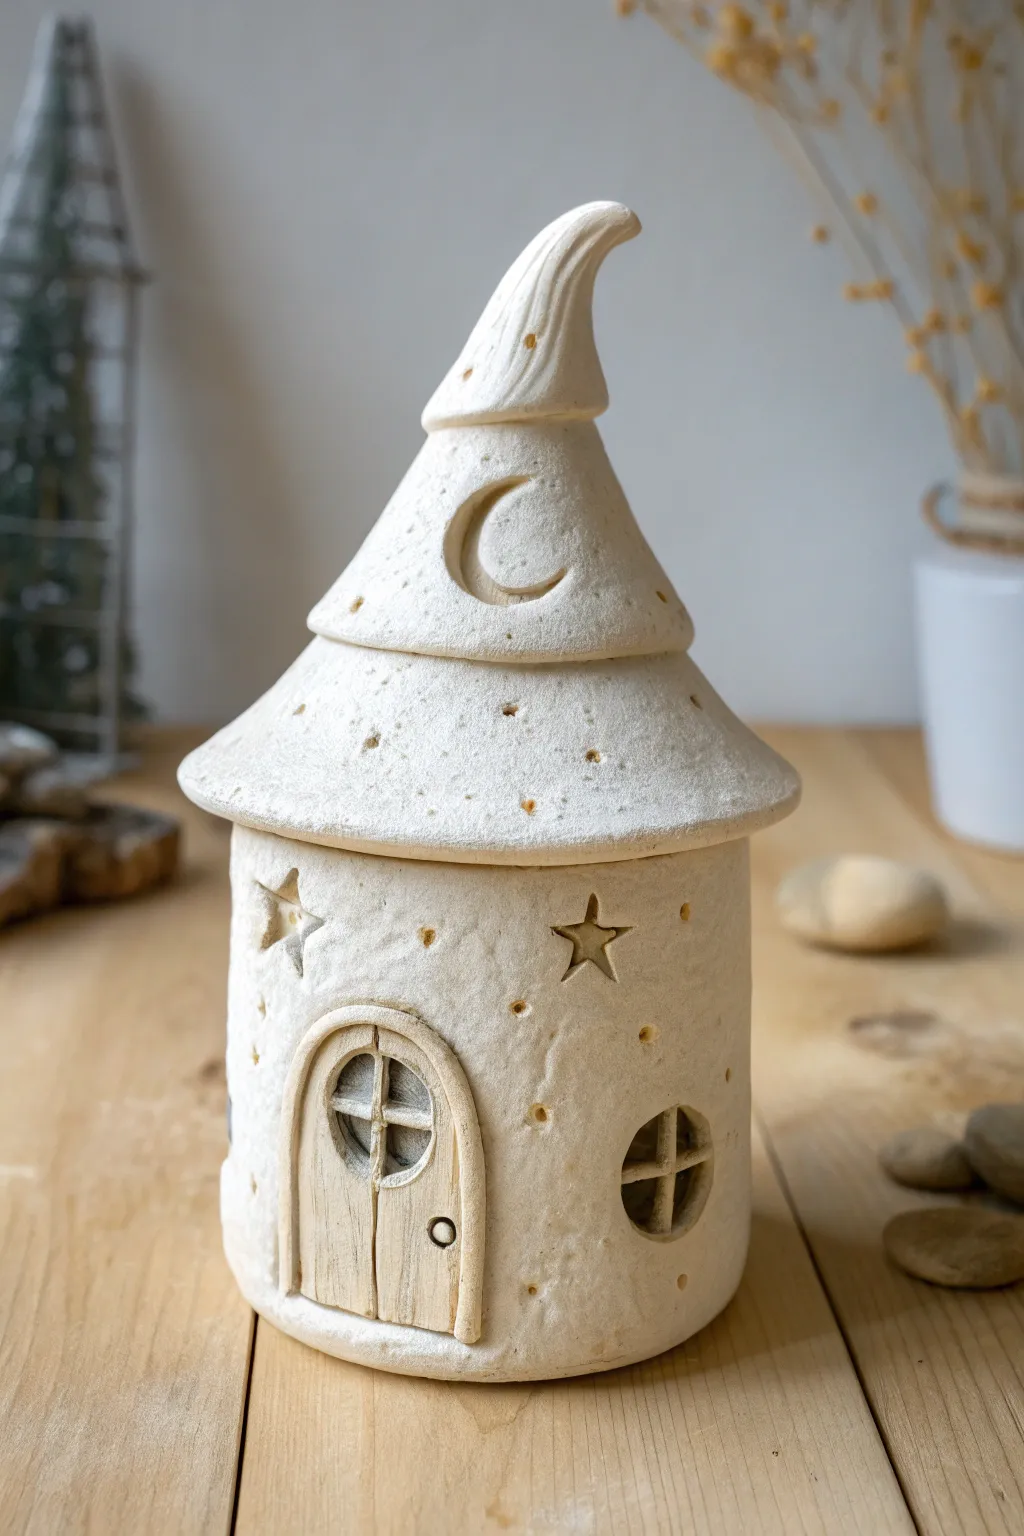
Transform a simple lump of clay into this enchanting spell jar, featuring a crooked wizard hat lid and charming rustic details. With its speckled stone texture and tiny peek-a-boo windows, it’s the perfect hiding spot for small treasures or LED tea lights.
Step-by-Step Guide
Materials
- White creative paper clay or air-dry clay
- Empty glass jar (straight-sided jam jar works best)
- Rolling pin
- Clay sculpting tools (knife tool, needle tool)
- Texturing sponge or stiff-bristled brush
- Small star-shaped cookie cutter (optional)
- Water in a small bowl
- Sandpaper (fine grit)
- Acrylic paints (cream/bone white, light brown, dark grey)
- Matte sealant or varnish
Step 1: Constructing the Base
-
Prep the Jar:
Clean and dry your glass jar thoroughly. Roll out a slab of clay to about 1/4 inch thickness, ensuring it’s long enough to wrap completely around the jar’s circumference. -
Wrap the Form:
Gently lift the clay slab and wrap it around the glass jar. Press the seam together firmly, smoothing it with a wet finger until the join is invisible. Slice off any excess clay at the top so it sits flush with the jar’s rim. -
Create Texture:
Before the clay hardens, tap the entire surface with a texturing sponge or a stiff brush. This stippling effect mimics the look of aged stone or plaster found in fairy cottages. -
Carve the Doorway:
Use a needle tool or knife to outline an arched doorway. Gently press in the lines to define the door frame, but don’t cut all the way through to the glass yet. Add vertical lines to clean up the wood plank effect. -
Add Windows:
Choose a spot for a window and cut a circle out of the clay. Roll two very thin snakes of clay and cross them inside the opening to create window panes, securing them with a dab of water.
Cracks Appearing?
If small cracks appear while drying, mix a small amount of clay with water to make a paste (slip) and fill them in. Smooth over with a damp finger and let dry again.
Step 2: Sculpting the Wizard Hat Lid
-
Form the Cone:
Roll a new ball of clay into a thick cone shape. This will be the roof. Hollow out the base of the cone so it fits snugly over the jar opening, creating an internal lip to keep it stable. -
Add the Brim:
Roll a snake of clay and flatten it slightly. Attach this around the bottom edge of your cone to create the overhanging eaves of the roof. -
Shape the Peak:
Gently pull and twist the tip of the cone to give it that playful, curved ‘wizard hat’ droop. I like to smoothen the curve with a wet finger so it doesn’t crack as it dries. -
Define the Tiers:
Use a sculpting tool to carve a deep horizontal groove halfway up the cone, making it look like the hat has a fold or a second tier. -
Embellish the Roof:
Carve a crescent moon shape into the upper tier of the hat. Use the tip of a needle tool to poke tiny holes randomly across the roof surface for texture.
Step 3: Details & Finishing
-
Starry Decoration:
On the main jar body, press a small star cutter gently into the clay or freehand carve star shapes. You want indented reliefs, not holes acting as windows. -
Refining the Door:
Add a tiny ball of clay for the doorknob. Create a separate, slightly raised border around the door arch to act as a frame. -
Drying Time:
Allow the piece to dry completely for 24-48 hours. Keep it away from direct heat to prevent cracking. -
Sanding:
Once bone dry, lightly sand any rough edges, particularly around the rim where the lid meets the jar. -
Painting the Stone:
Paint the entire exterior with a cream or bone-white acrylic paint. Let it dry completely. -
The Wash Technique:
Mix a tiny amount of light brown paint with lots of water. Brush this wash over the piece and immediately wipe it back with a cloth. The brown will settle into the texture pits and star carvings. -
Painting Wood Details:
Use a fine brush to paint the door and window crosses with a diluted brown paint to resemble unvarnished wood. -
Sealing:
Finish with a coat of matte spray varnish to protect the clay and give it a soft, non-glossy finish.
Magical Glow
Make the stars actual cut-outs instead of indentations. Place a battery-operated tea light inside the finished jar to cast magical star-shaped shadows on your walls.
Your mystical spell jar is now ready to guard your favorite curiosities or simply add a touch of magic to your shelf
Dragon Scale Treasure Jar Overlay
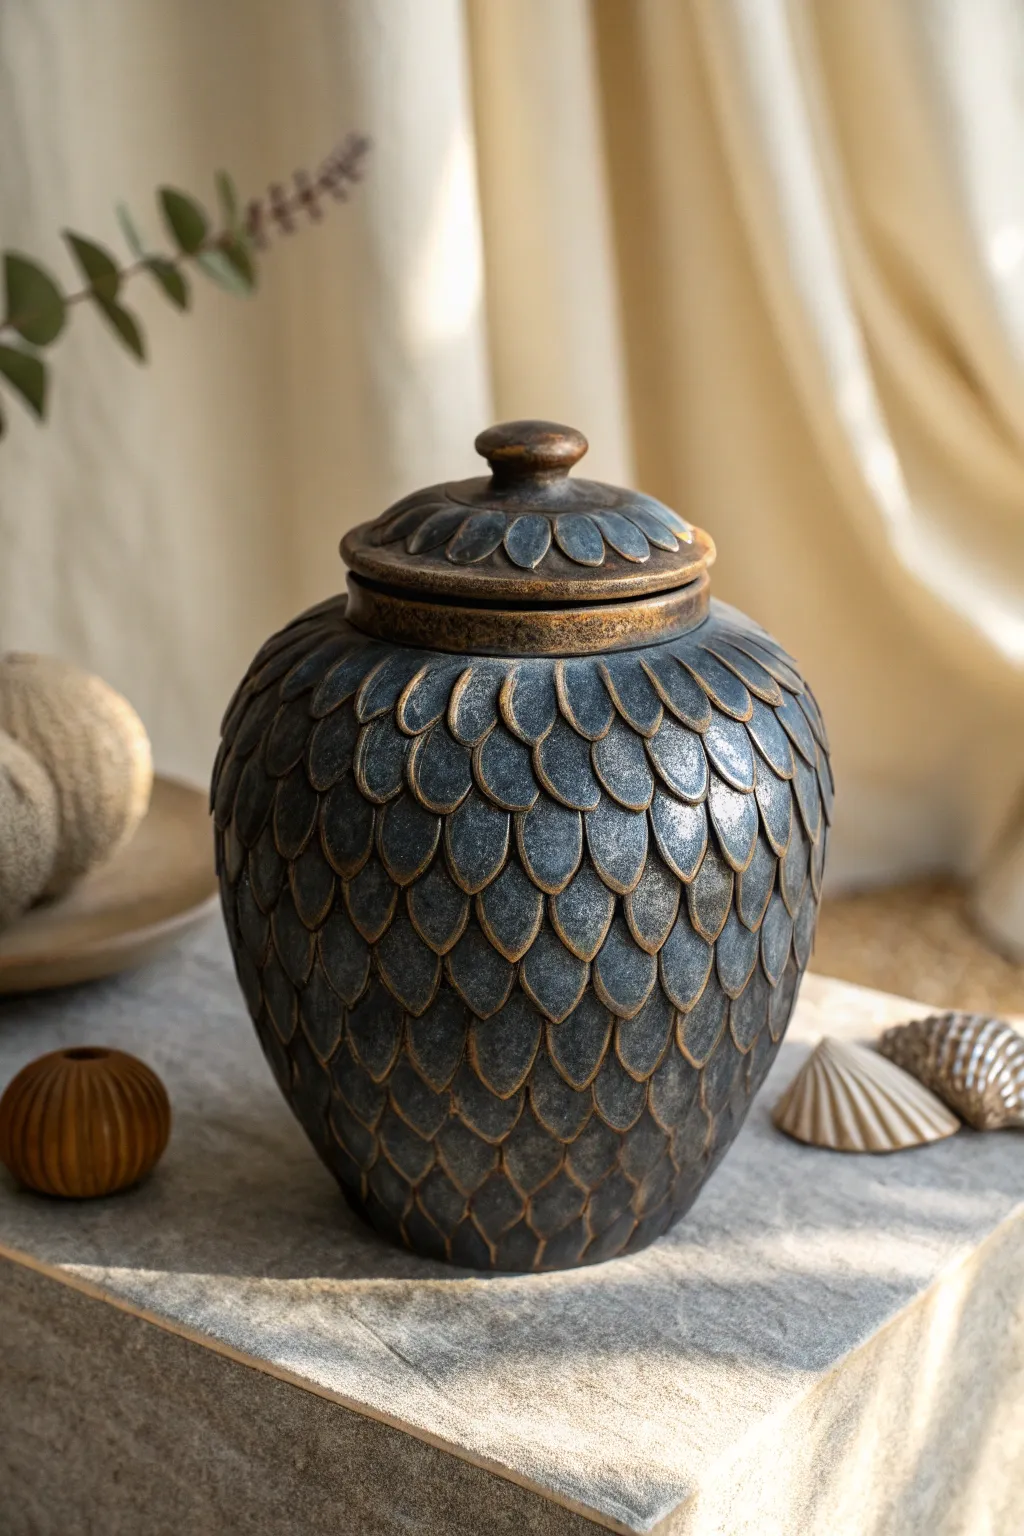
Transform a plain ceramic vessel into a mythical artifact with this highly textured overlay technique. The finished piece features overlapping scales that shimmer with a dark, antique bronze finish, perfect for storing your most guarded treasures.
Step-by-Step Tutorial
Materials
- Smooth ceramic or glass jar with lid (base)
- Air-dry clay (black or grey preferred)
- Sculpting tools (specifically a small loop tool and a slightly curved spatula)
- Leaf-shaped clay cutter (optional but helpful)
- Rolling pin
- Water and a small slip brush
- Texture sponge
- Acrylic paints: Black, Dark Blue-Grey, Metallic Bronze, Metallic Gold
- Matte varnish
- Soft detail brushes and a dry-brushing bristle brush
Step 1: Preparing the Base
-
Prime the Surface:
Clean your base jar thoroughly with alcohol to remove oils. If the surface is very slick, lightly sand it with fine-grit sandpaper to give the clay something to grip. -
Apply the Base Layer:
Roll out a thin sheet of clay, about 3mm thick. Wrap this sheet around the main body of the jar, pressing firmness to remove air bubbles. Trim the excess at the rim and base. -
Smooth the Seams:
Use a little water on your finger to smooth out the vertical seam where the clay creates a join. The surface doesn’t need to be perfectly smooth since it will be covered, but it should be even.
Step 2: Sculpting the Scales
-
Create Scale Blanks:
Roll out another sheet of clay. Use a small leaf-shaped cutter to punch out dozens of uniform scale shapes. If you don’t have a cutter, I find hand-rolling small teardrops and flattening them works just as well, though it takes longer. -
Begin at the Bottom:
Apply a tiny dab of water or slip to the back of a scale. Press the first row of scales around the very bottom edge of the jar, pointed end facing down. -
Layer Upwards:
Start the second row. Place these scales so they overlap the seams of the first row (brick-lay pattern). Continue this process, working your way up the jar towards the neck. -
Adjusting the Neck:
As the jar curves inward near the top, you may need to make your scales slightly smaller or overlap them more tightly to accommodate the shrinking circumference. -
Texturing the Scales:
Once all scales are placed, gently press a texture sponge against the clay to intricate a rough, organic surface. Then, run a modeling tool down the center of each scale to create a subtle ridge or spine. -
Lid Construction:
Repeat the overlay process on the lid. Cover it with a clay sheet, then apply a radial pattern of scales pointing outward from the center knob. Sculpt a simple rounded knob if your lid doesn’t have one.
Keep it workable
Cover your unused clay with plastic wrap or a damp cloth while working. If the scales dry out before you apply them, they won’t adhere properly to the base layer.
Step 3: The Antique Finish
-
Base Coat:
Allow the clay to dry completely (24-48 hours). Apply a solid coat of black acrylic paint, ensuring you get the brush into every deep recess between the scales. -
Main Color Application:
Mix a dark blue-grey paint. roughly paint over the scales, leaving the deepest crevices black to create artificial shadow. -
First Metallic Pass:
Load a dry bristle brush with metallic bronze paint. Wipe almost all the paint off on a paper towel until the brush seems dry. Lightly sweep this over the textured surfaces. -
Highlighting Edges:
Using the same dry-brush technique, switch to metallic gold. Focus only on the raised spines and the very edges of the scales to make them pop. -
Defining the Rim:
Paint the rim of the lid and the neck of the jar with a mix of bronze and gold to simulate a worn metal band. -
Sealing:
Once the paint is fully cured, apply a layer of matte varnish to protect the finish without making it look plasticky.
Mix it up
For a more organic creature look, vary the size of your scales. Use larger scales on the belly of the jar and tiny, delicate ones near the neck and lid knob.
Now you have a mythical vessel ready to guard your coffee beans or trinkets
Mini Diorama Jar Village Set
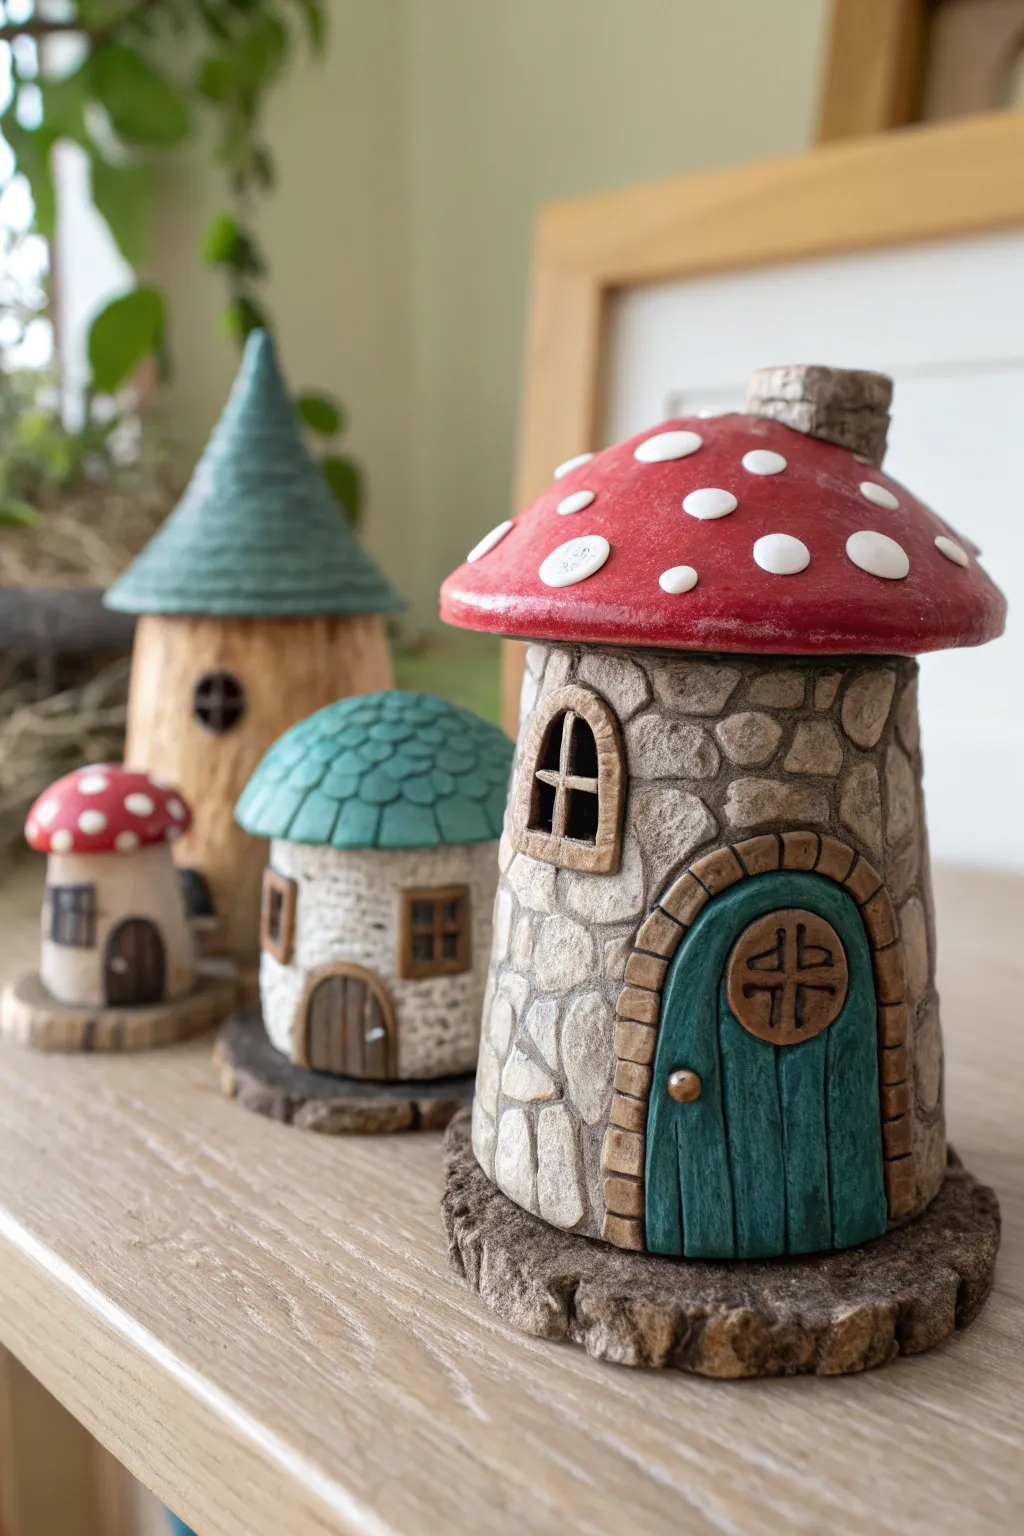
Transform ordinary glass jars into an enchanting miniature village fit for woodland sprites. By sculpting polymer or air-dry clay over glass bases, you can create rustic stone textures, playful mushroom caps, and charming little architectural details.
Detailed Instructions
Materials
- Clean glass jars (various sizes, e.g., baby food jars, mason jars)
- Aluminum foil
- Air-dry clay or Polymer clay (white or grey base)
- Sculpting tools (needle tool, ball stylus, knife)
- Acrylic paints (red, white, slate grey, stone grey, brown, teal, black)
- Paintbrushes (fine detail and flat shader)
- Texture tools (real stones, crumpled foil, or toothbrush)
- Rolling pin
- Strong craft glue or E6000
- Matte varnish or sealant
Step 1: Preparing the Base Structure
-
Prep the jars:
Begin by removing all labels and thoroughly cleaning your glass jars with alcohol to ensure the clay adheres properly. The jar will serve as the rigid core of your house. -
Bulk out the shape:
For the taller tower shapes or the conical roofs, crumple aluminum foil into a cone or dome shape and glue it securely to the jar lid. This reduces the weight and amount of clay needed. -
Cover with clay:
Roll out a sheet of clay to about 1/4 inch thickness. Wrap this around the glass jar body, smoothing the seam where the clay meets. Ensure there’s a tight seal against the glass but leave the lid area accessible if you want the jar to open.
Step 2: Sculpting the Stone Facade
-
Outline the stones:
Using a needle tool or a dull knife, gently carve irregular oval and round shapes into the wet clay body to mimic a stacked stone wall. Vary the sizes—mix large anchor stones with smaller pebbles. -
Refine the texture:
Press a real rock or a ball of crumpled foil against the individual clay ‘stones’ to give them a rough, pitted surface. Smooth the ‘mortar’ lines between stones with a small ball tool to deepen the separation. -
Create the door frame:
Roll a thin snake of clay and form an arch shape on the front of the jar. Flatten it slightly and use a knife to mark horizontal lines, creating a brick or wooden beam archway. -
Sculpt the door and windows:
Fill the arch with a flat piece of clay. Use a blade to score vertical wood grain lines. For windows, cut out small squares of clay, frame them with tiny clay coils, and add a cross shape for the pane dividers.
Jar Adhesion Tip
If using air-dry clay, wrap the glass jar in masking tape first. The textured tape surface gives the wet clay something to grip onto, preventing sliding or cracking as it dries.
Step 3: Crafting the Roofs
-
Forming the mushroom cap:
For the mushroom house, roll a large ball of clay and flatten it into a dome over your foil form on the lid. Smooth the edges so they overhang slightly like a real mushroom cap. -
Adding roof shingles:
For non-mushroom roofs, create tiny teardrop or scale shapes from clay. Start at the bottom rim of the roof cone and layer them upwards, overlapping slightly, until you reach the peak. -
Adding the chimney:
Form a small rectangle of clay and attach it to the side of the roof. Texture it to match the stone base or give it a brick pattern. I find poking a small hole in the top adds a nice realistic touch. -
Final assembly and drying:
Attach the roofs to the jar lids (if they aren’t already integral). Let the clay dry completely according to package instructions—this usually takes 24-48 hours for air-dry clay.
Preventing Cracks
Small cracks are common as clay shrinks. Fix them by mixing a tiny bit of fresh clay with water to make a paste (slip) and filling the crack. Smooth over with a damp finger.
Step 4: Painting and Finishing
-
Base coat:
Paint the stone walls with a medium grey and the door with a dark brown or teal base. Paint the mushroom cap a vibrant red. -
The stone wash technique:
Mix a very watery black or dark brown paint. Brush this over the stone walls, getting into all the crevices, then immediately wipe the surface with a paper towel. The dark paint stays in the cracks, highlighting the stonework. -
Dry styling stones:
Dip a dry brush into white or light grey paint, wipe most of it off, and lightly brush over the raised surfaces of the stones to make the texture pop. -
Mushroom details:
Using the handle end of a paintbrush or a dotting tool, stamp white circles of varying sizes onto the dry red mushroom roof. -
Painting the wood:
Highlight the raised wood grain on the door with a lighter shade of teal or brown. Paint the door handle gold or brass. -
Adding a base:
Glue the finished jar onto a small wood slice or a coaster made of textured clay to stabilize it and complete the diorama look. -
Sealing:
Apply a coat of matte varnish to protect the paint and clay, ensuring your village stays weatherproof if moved towards a window.
Now you have a delightful set of fairytale dwellings ready to display on a shelf or brighten up a plant corner